It’s not uncommon for motorcycle riders to store their bikes away during the cold-weather months, until the snow melts for a new season of riding. A one-two punch of frigid temperatures and hazardous road conditions compounds the risks of motorcycling—and that’s particularly true when you already have to deal with plenty of inattentive drivers nowadays.
We’re still big fans of cold-weather riding though. If that’s your jam too, you may enjoy this article: Tips for Riding Your Motorcycle During the Fall and Winter
But storing your motorcycle for a few months isn’t a simple matter of pushing it into a corner of your garage behind you kids’ hockey gear. There are a handful of important steps to take to make sure it’s ready to fire back up when the weather gets warmer.
So we’ll walk you through the seven key things to do to prepare your motorcycle for winter storage.
***
Story Summary Overview
- Proper storage is essential to making sure it fires up in the spring
- Wash your bike
- Check your tire PSI
- Clean and lubricate the chain
- Change the oil
- Drain or stabilize the fuel
- Keep the battery on a trickle charger
- Cover it
***
5 Winter Storage Tips for Your Motorcycle
***
1. Wash & Detail Your Bike
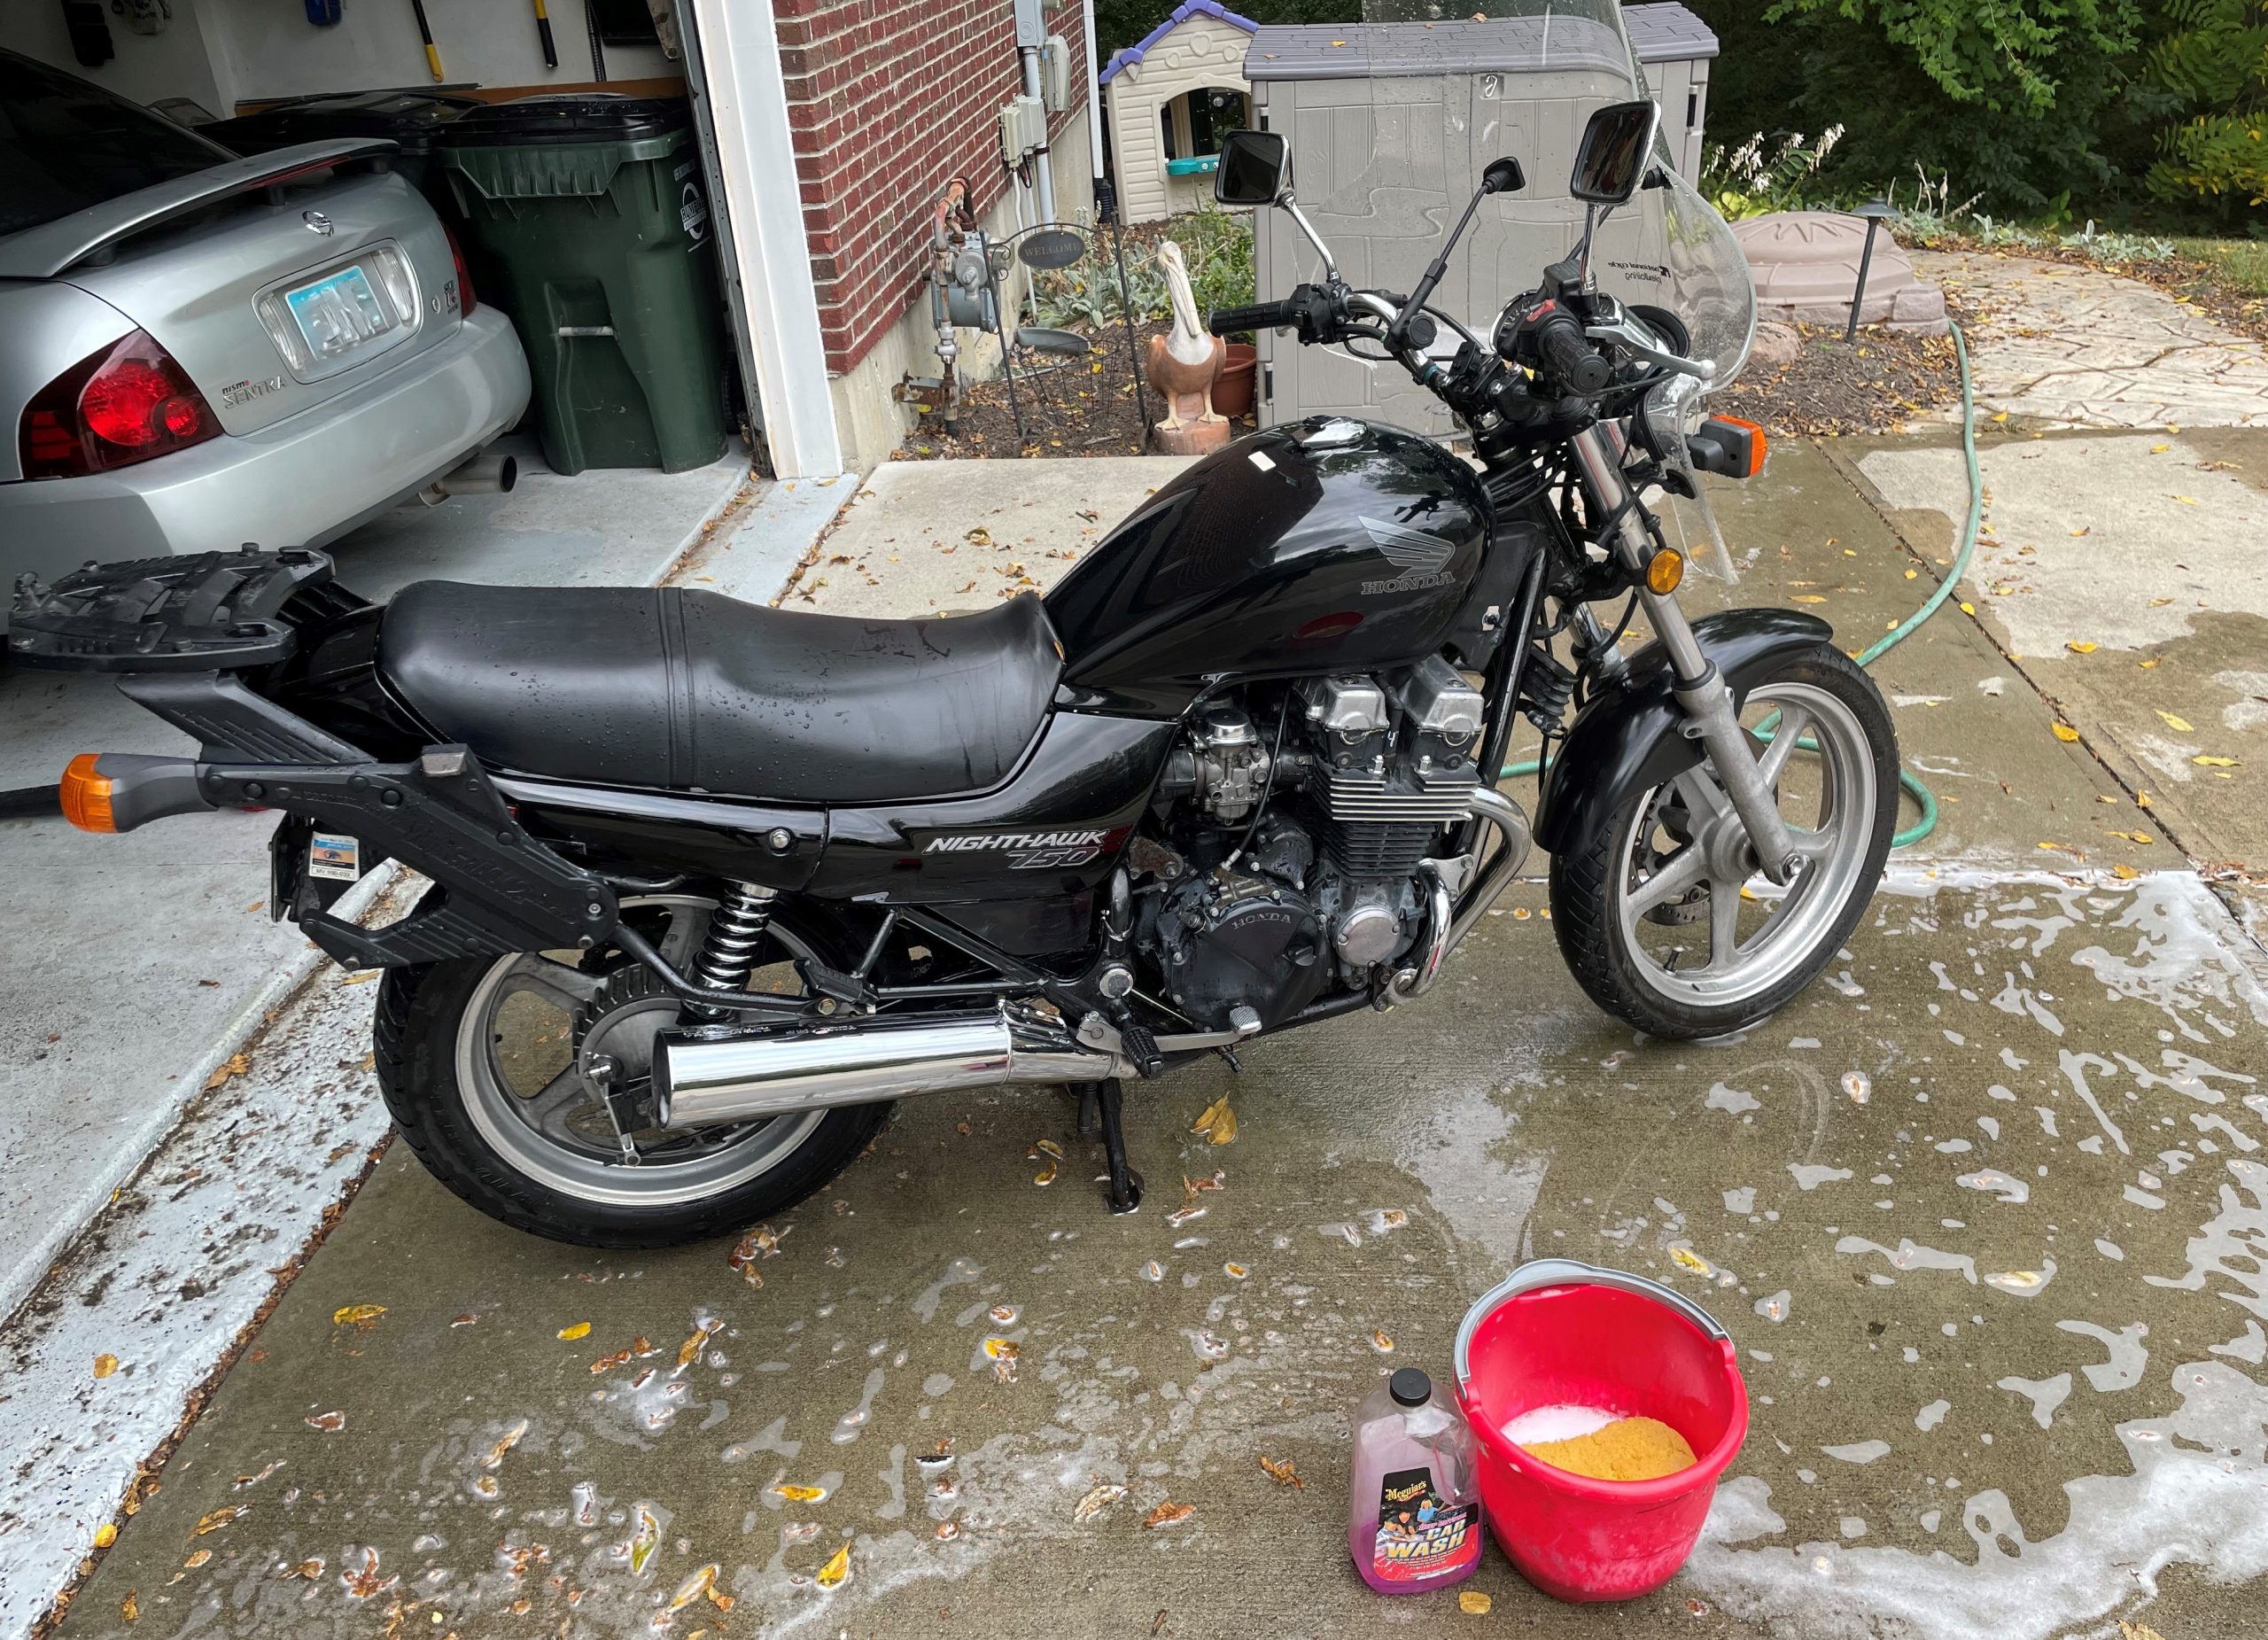
This isn’t just about making your ride look pretty—though that’s certainly a plus. A deep-clean of your motorcycle helps scrub away any corrosive deposits that could permanently damage its finish. From baked-on road tar to fuel residue on the tank, getting that gunk off can prevent etched paint and stained chrome.
Perhaps more importantly, getting up-close-and-personal here gives you an intimate look at your bike, so you can potentially spot issues before they become bigger problems. This is the time to poke around for frayed throttle cables, weeping gaskets, and grooved rotors. If anything looks awry, you have the entire winter to get it resolved before riding season returns.
2. Inspect & Inflate Your Tires
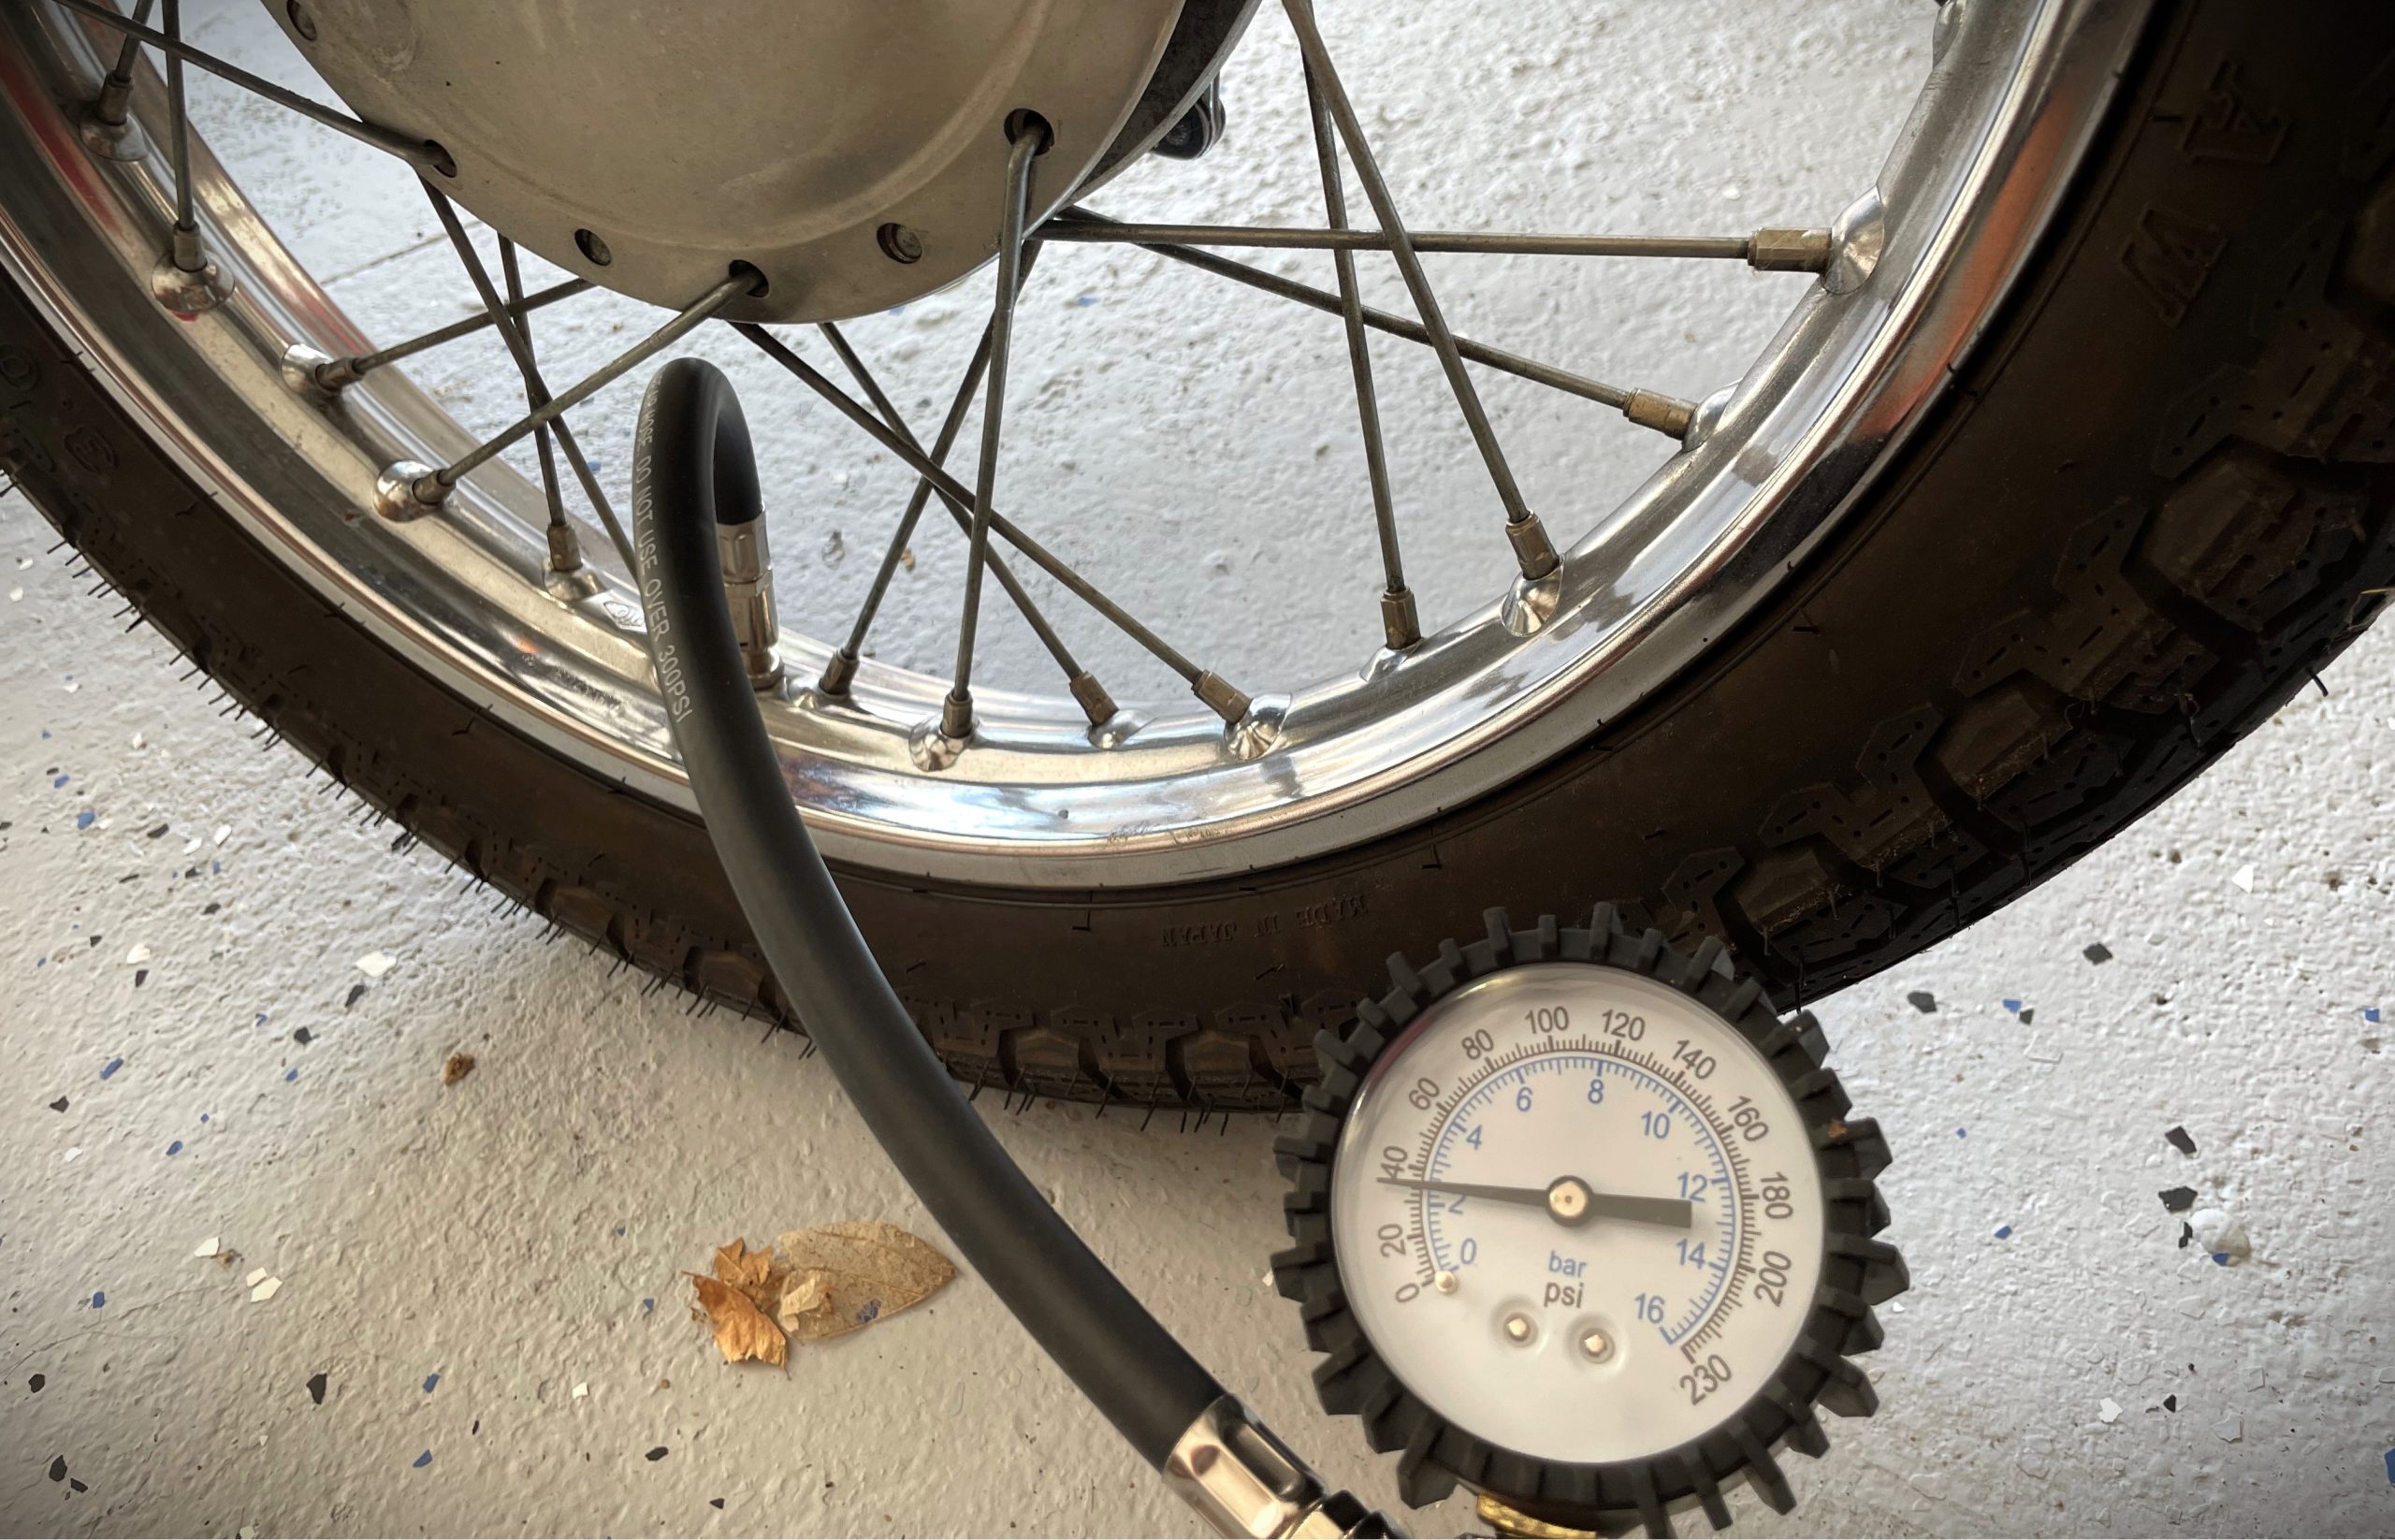
While you should be regularly checking your tires’ PSI throughout the riding season, don’t forget to do it one last time before you put the bike up for the year. Your tires will gradually lose air over time, and a drop in PSI can be accelerated by the colder, denser air in winter. Airing-up prior to storage helps mitigate the risk of your tires deforming or cracking while in storage.
Depending on your type of motorcycle, you might be running bias-ply tires, which are particularly susceptible to this sort of thing. And its even more important if you’ve got a tire that uses inner tubes, like you’d find on a vintage motorcycle or a bike that has spoked wheels.
And just like we mentioned in point one, getting up close with your tires lets you spot any nicks and damage that you may have picked up over the summer riding season. So don’t just inflate your tires, roll your bike around so you can get a 360 degree view of the entire…tire. Look for bulges, missing chunks, or any odd discoloration that could point to damage within the compound too.
3. Tension, Clean & Re-Lubricate Your Chain (Or Service Your Belt)
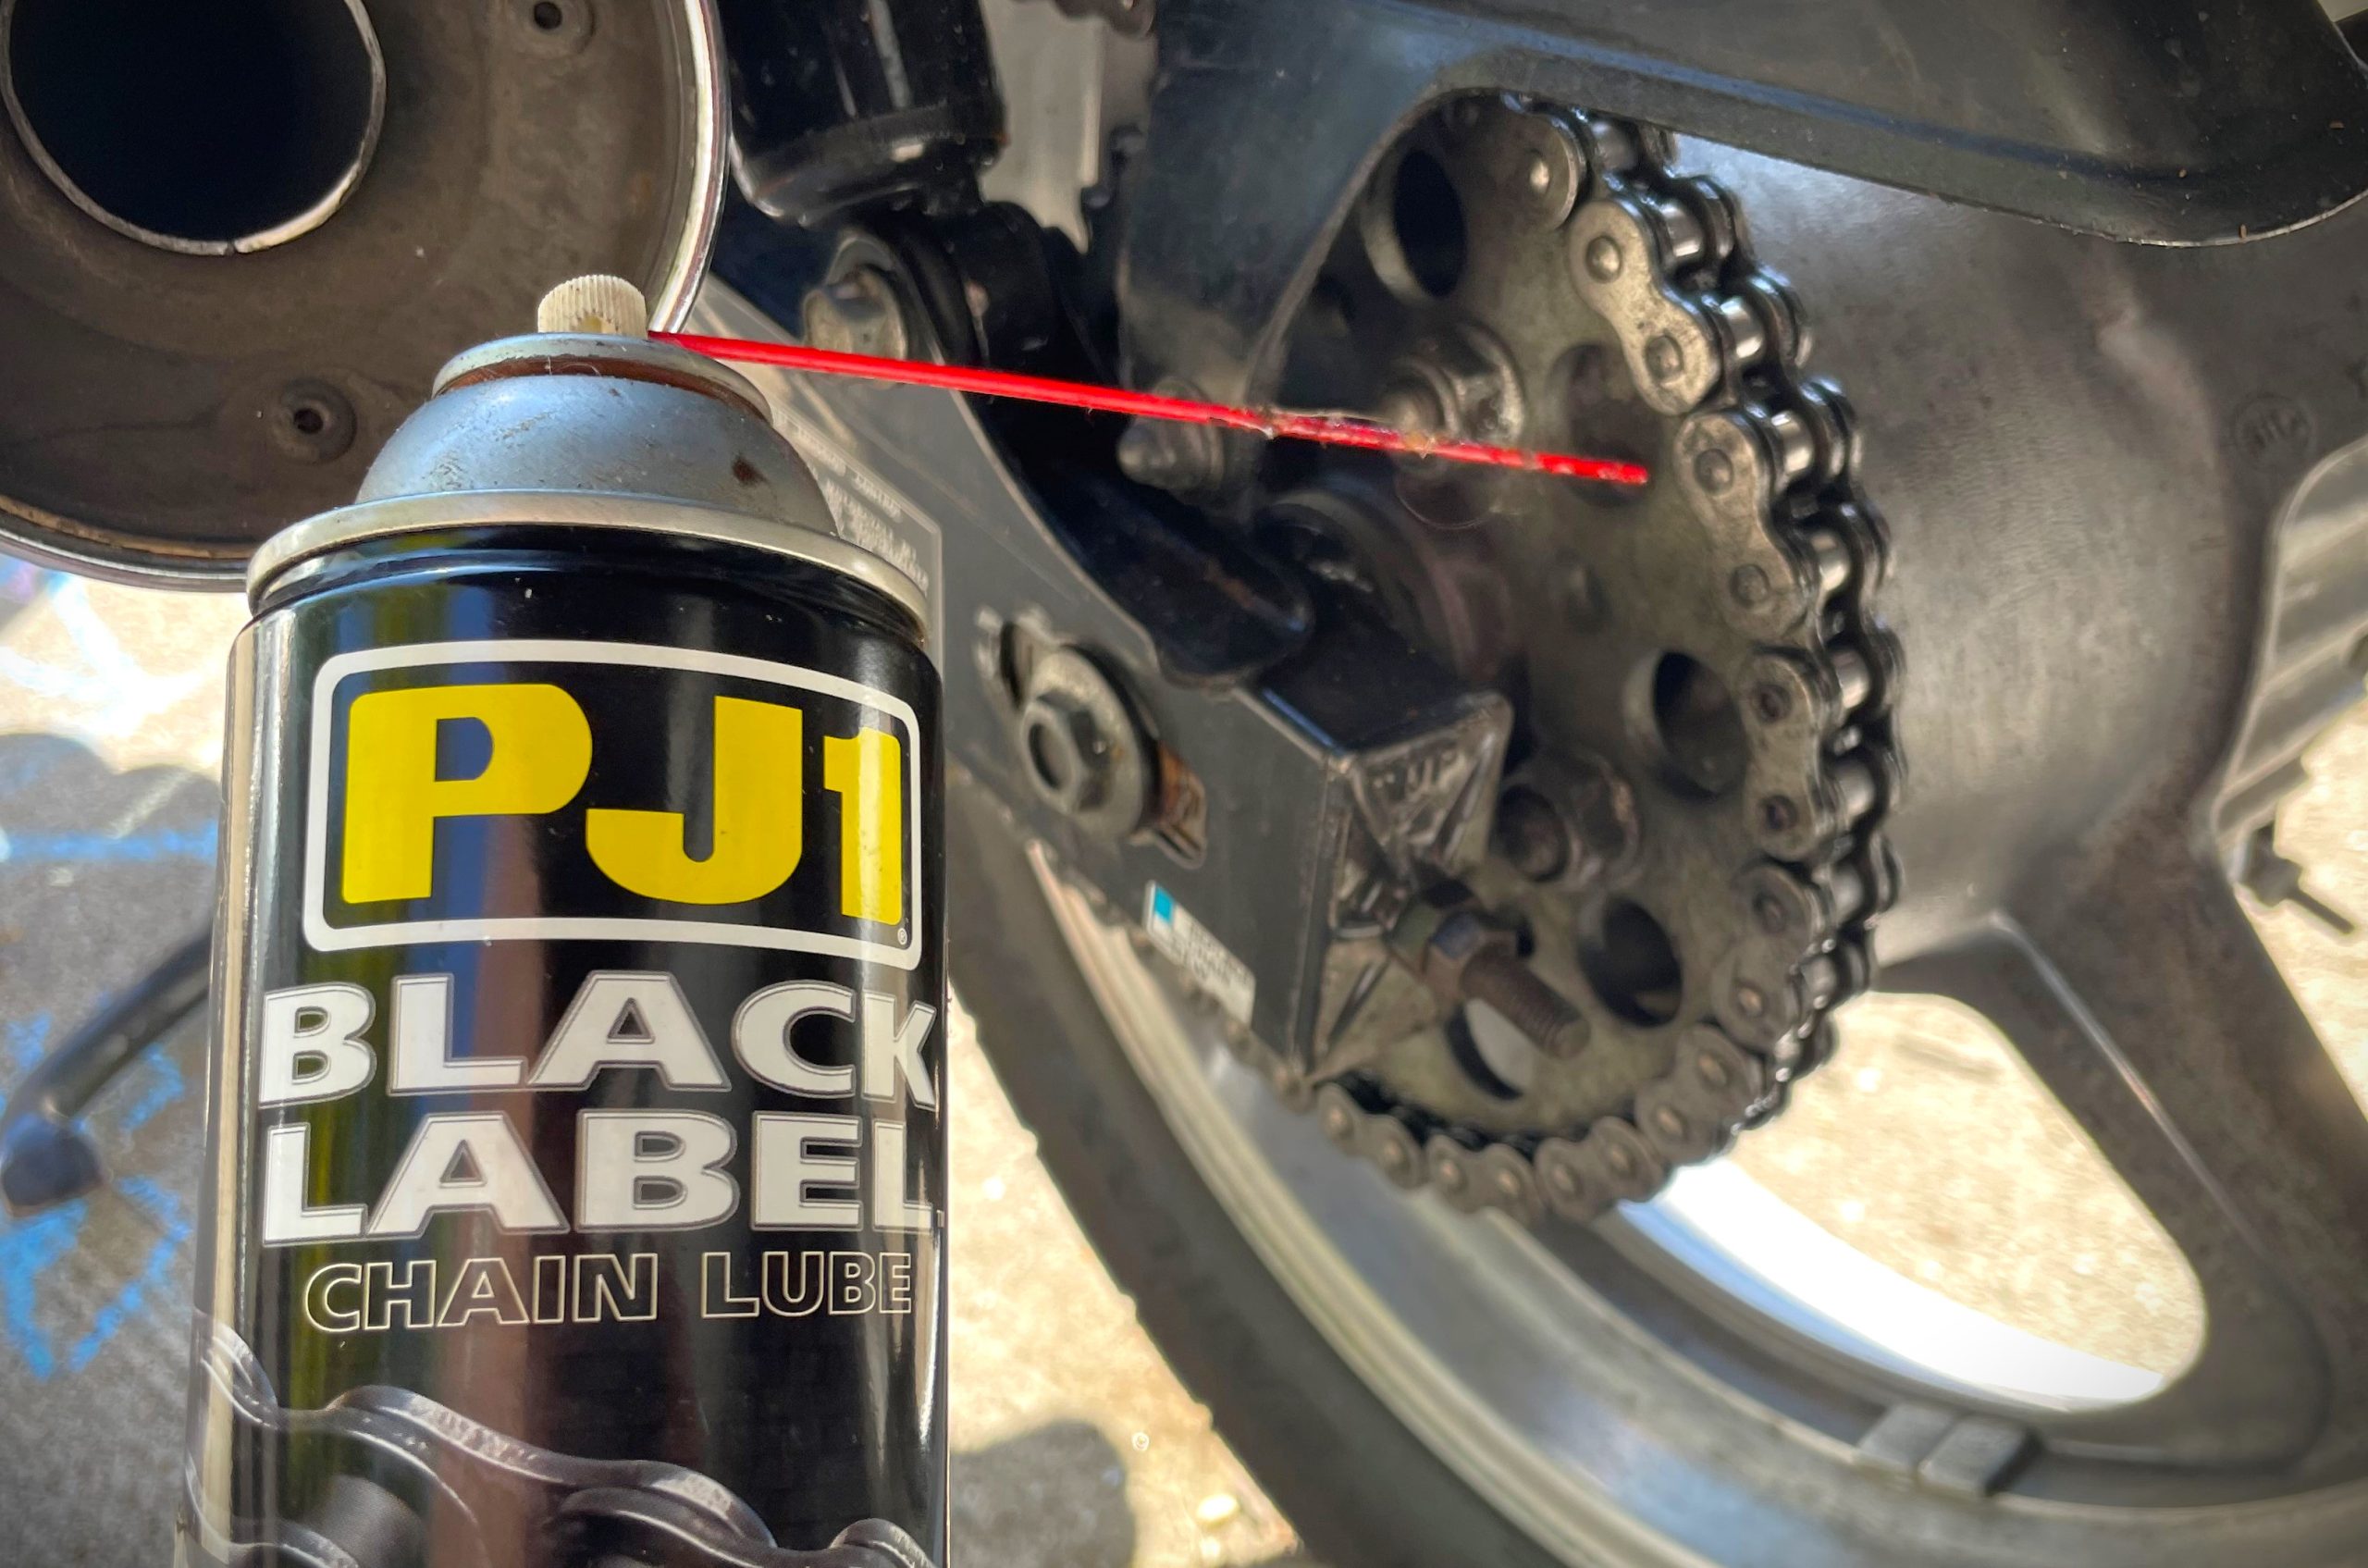
Winter storage is the perfect time for you to adjust your belt or chain slack. After that, wipe down the entire drive chain with a recommended solvent or chain cleaner (or clean your drive belt per the manufacturer’s recommendations). This will help remove any grit or muck that’s accumulated over the season. Once the chain is clean, re-lubricate the entire thing—poorly lubed chains have a tendency to pick up surface rust during long-term storage.
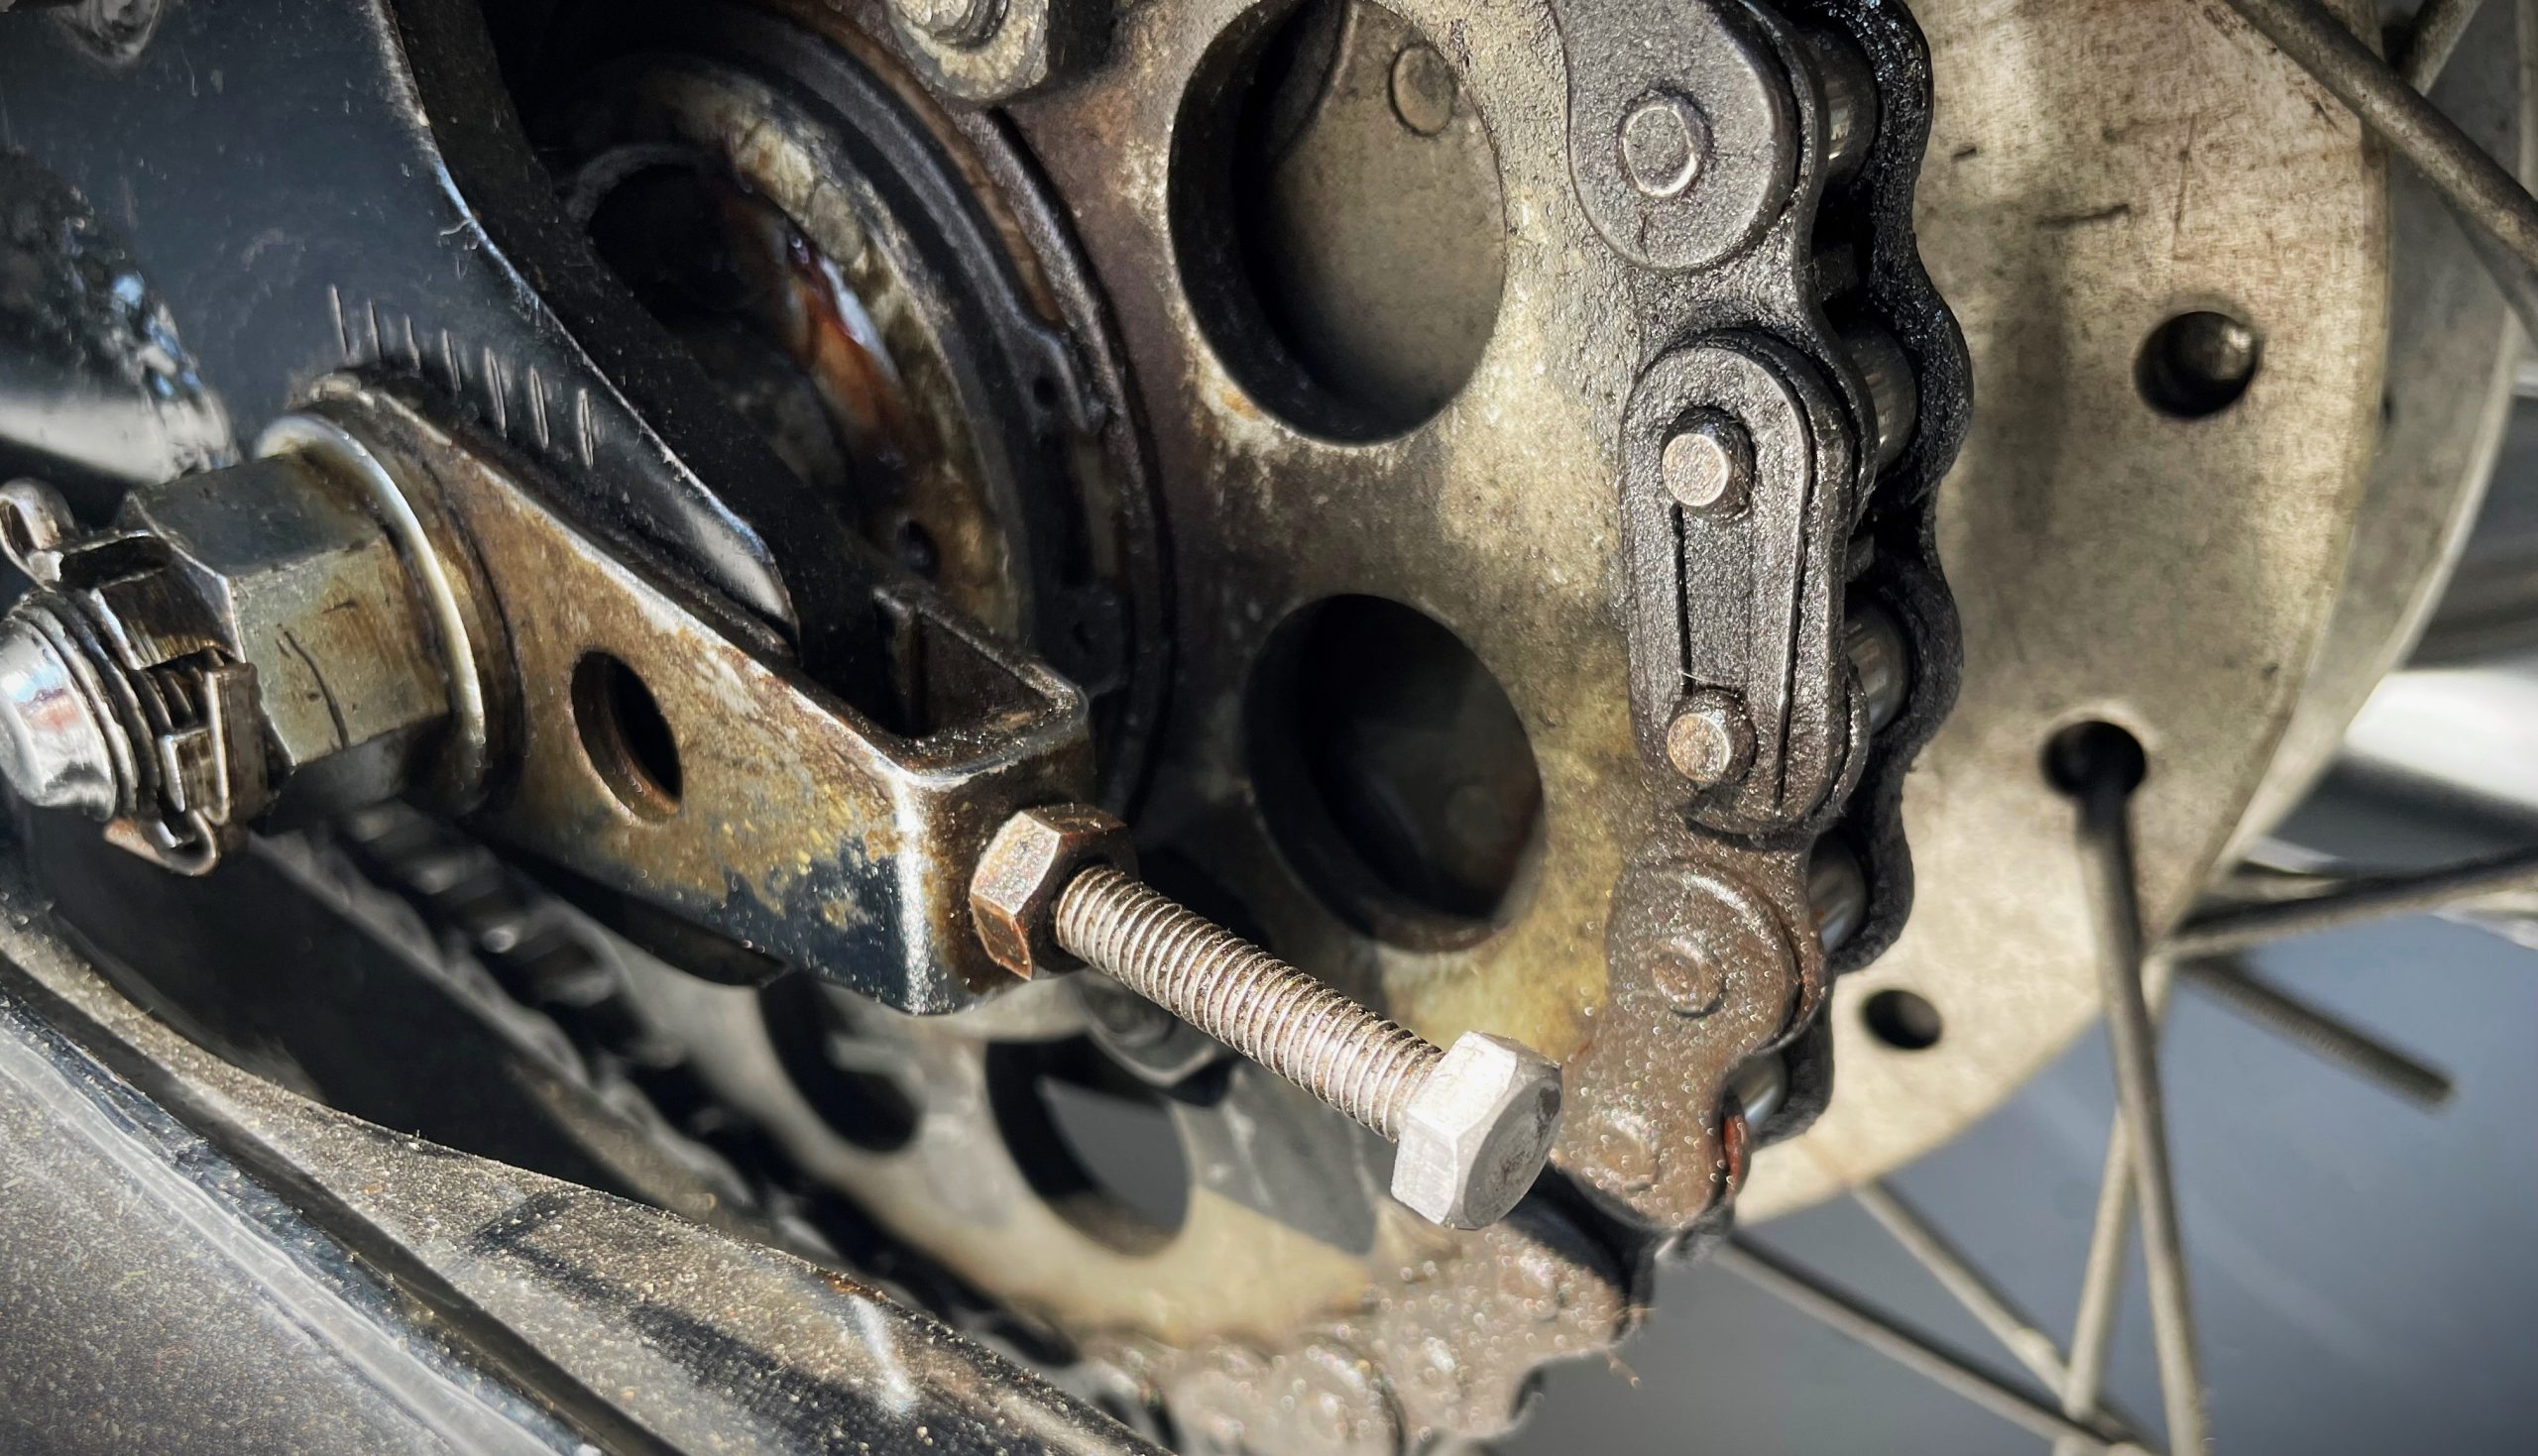
And again, this is the perfect opportunity to inspect your belt or chain for any damage. If so-equipped, find your chain’s master link and make sure the rivets are still in good shape and properly peened or flared over, or if you’ve got an older chain that uses a master link clip, make sure that’s intact.
Got a shaft drive? Depending on your bike’s manufacturer, the service (in our experience) usually means a top-off of gear oil and/or a complete oil change, and a general inspection of the shaft splines and pivot bearings—but check your owner’s manual to be sure.
4. Change the Oil & Filter
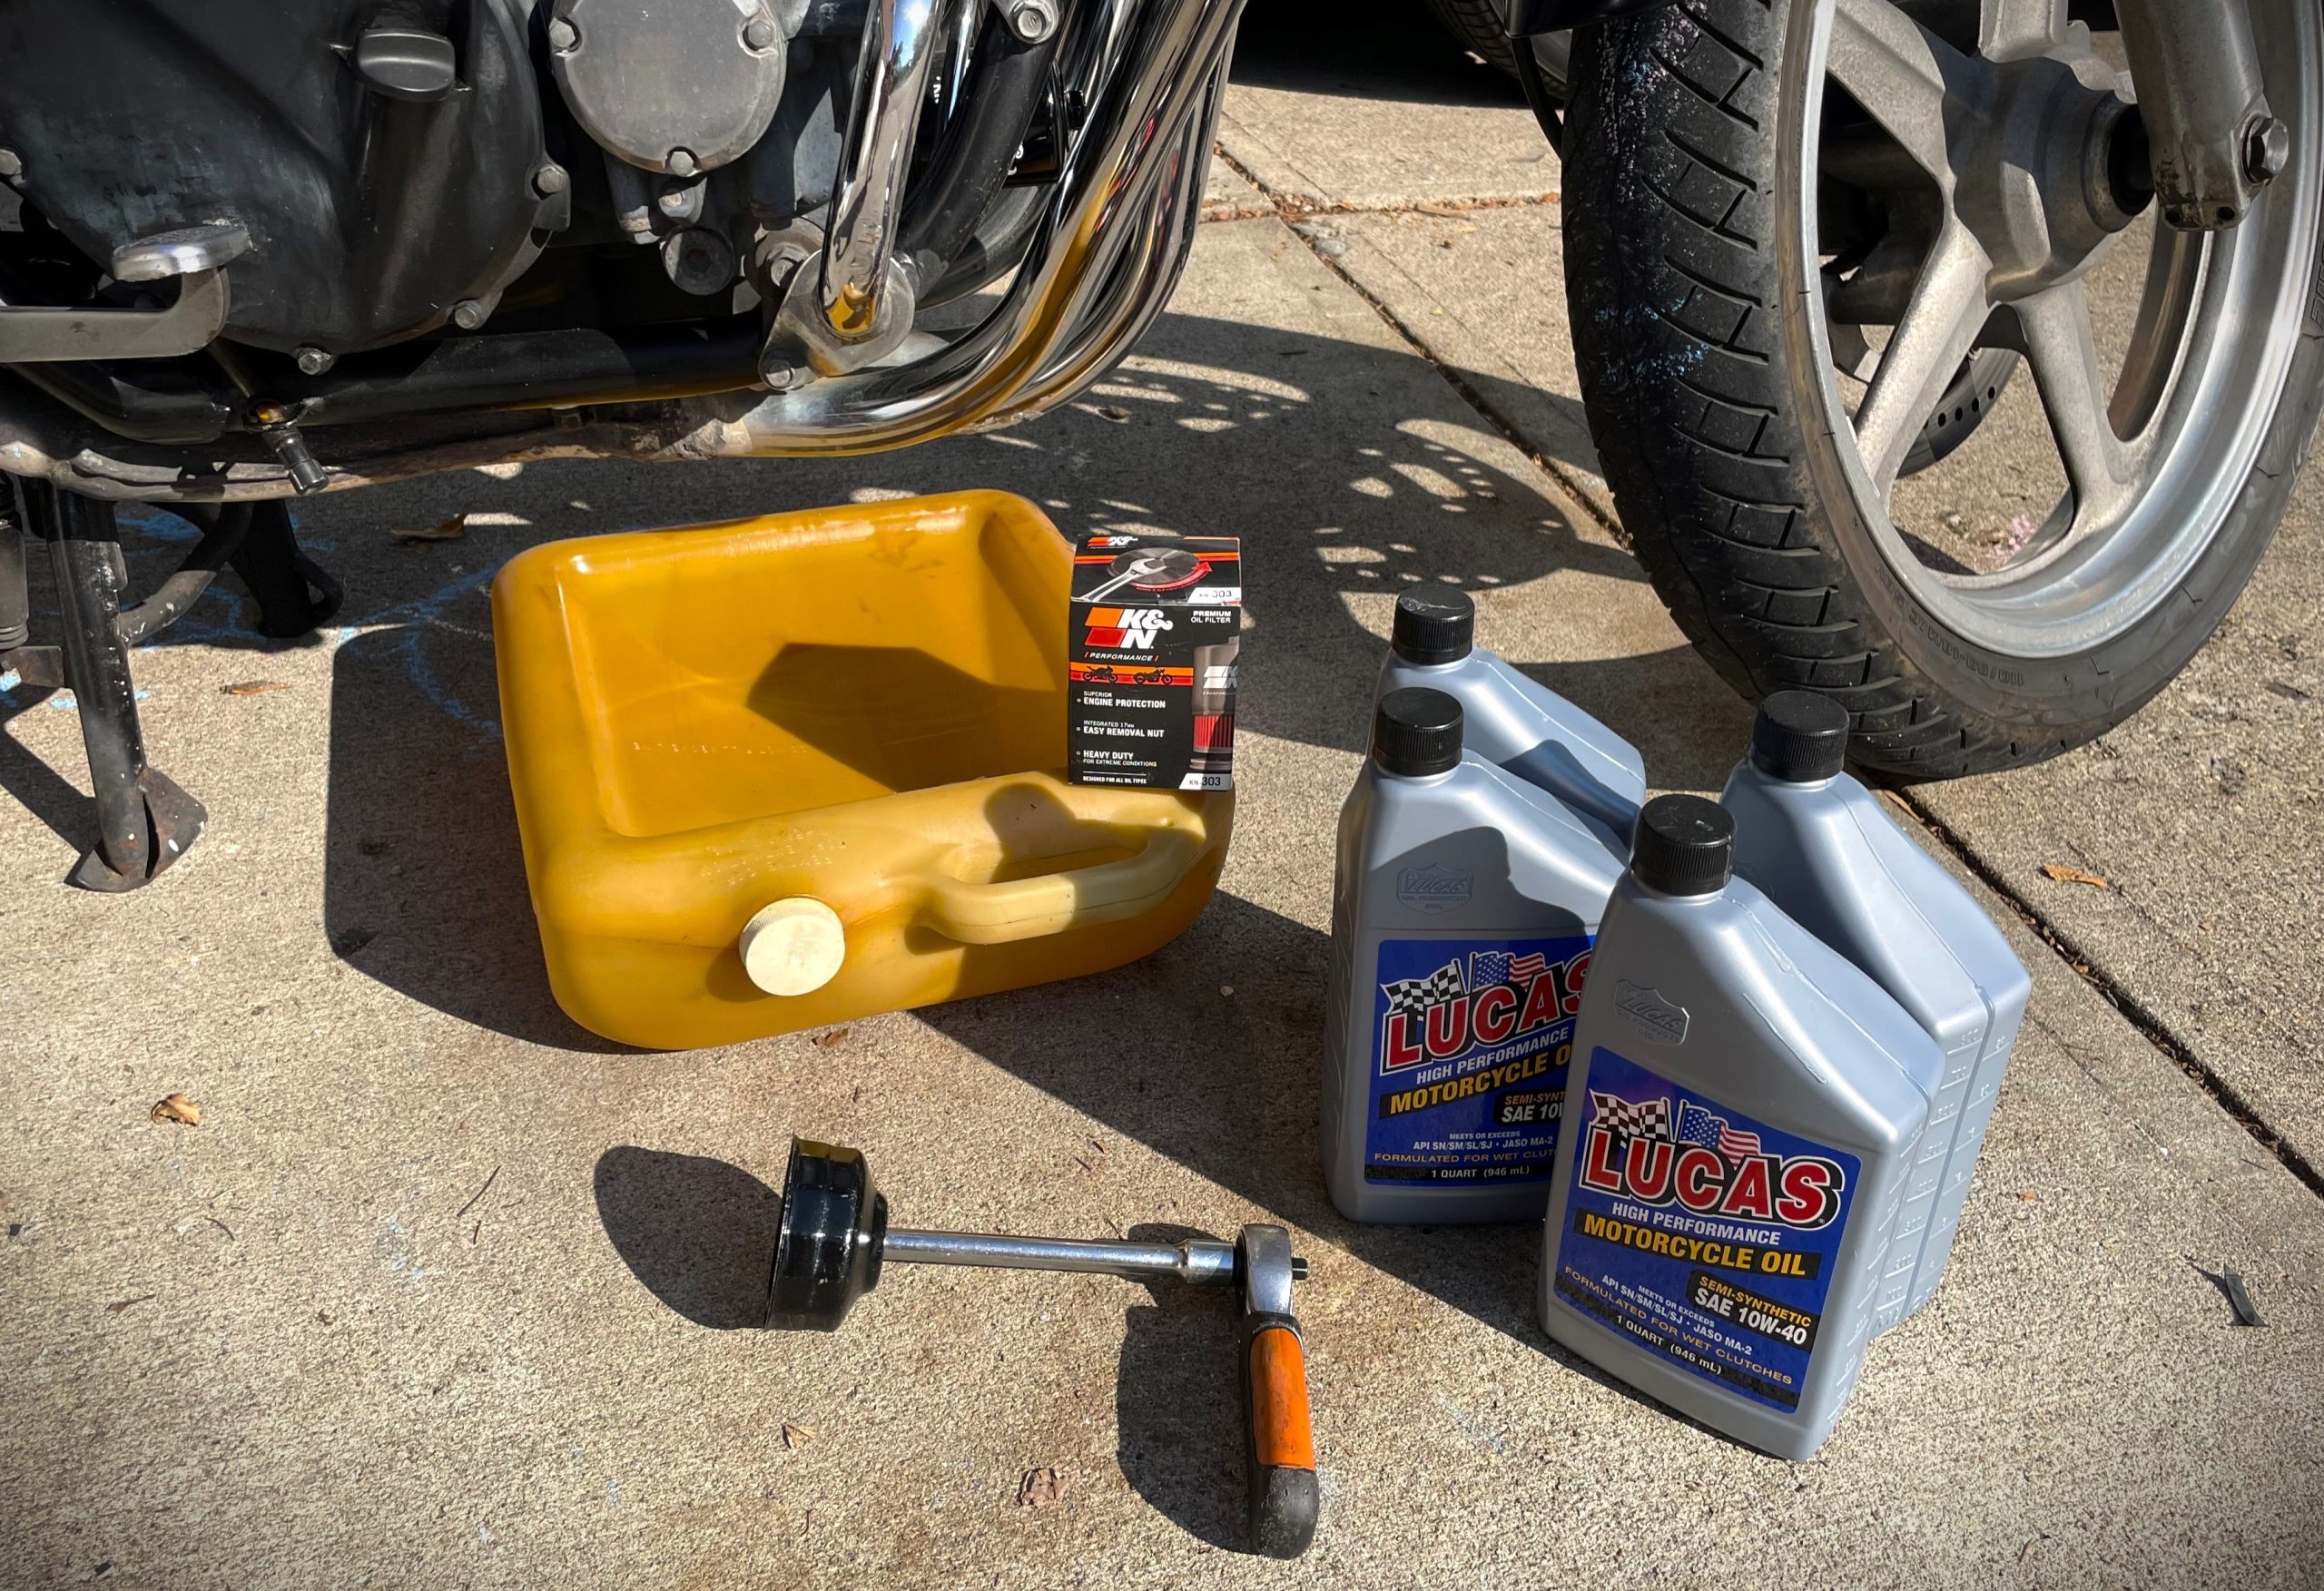
Many bikes use a single source of oil to lubricate both the engine and transmission, so it’s extra, extra important that you change the oil regularly. Even if you weren’t lucky enough to cover enough distance this season to warrant a change based on mileage alone, your oil still gets gradually contaminated every time you fire it up. And you don’t want your transmission and valvetrain soaking in old oil for a few months over the winter.
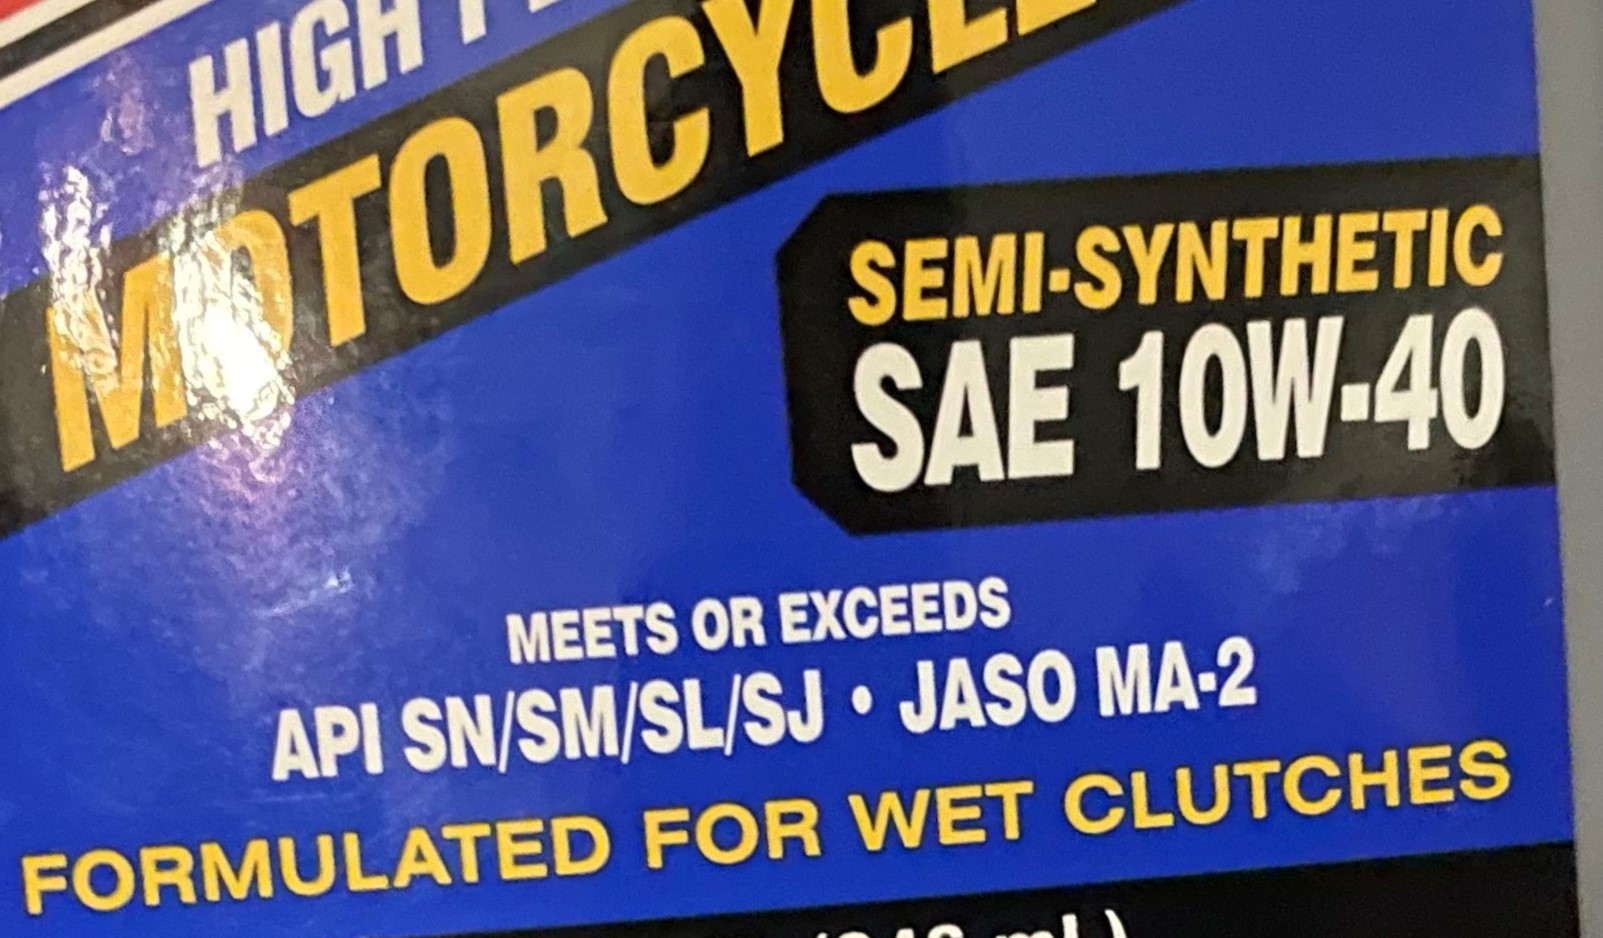
Given the unique demands of the engine and transmission, always use a motor oil formulated for motorcycle use. Same goes for the oil filter too.
5. Drain or Stabilize the Fuel
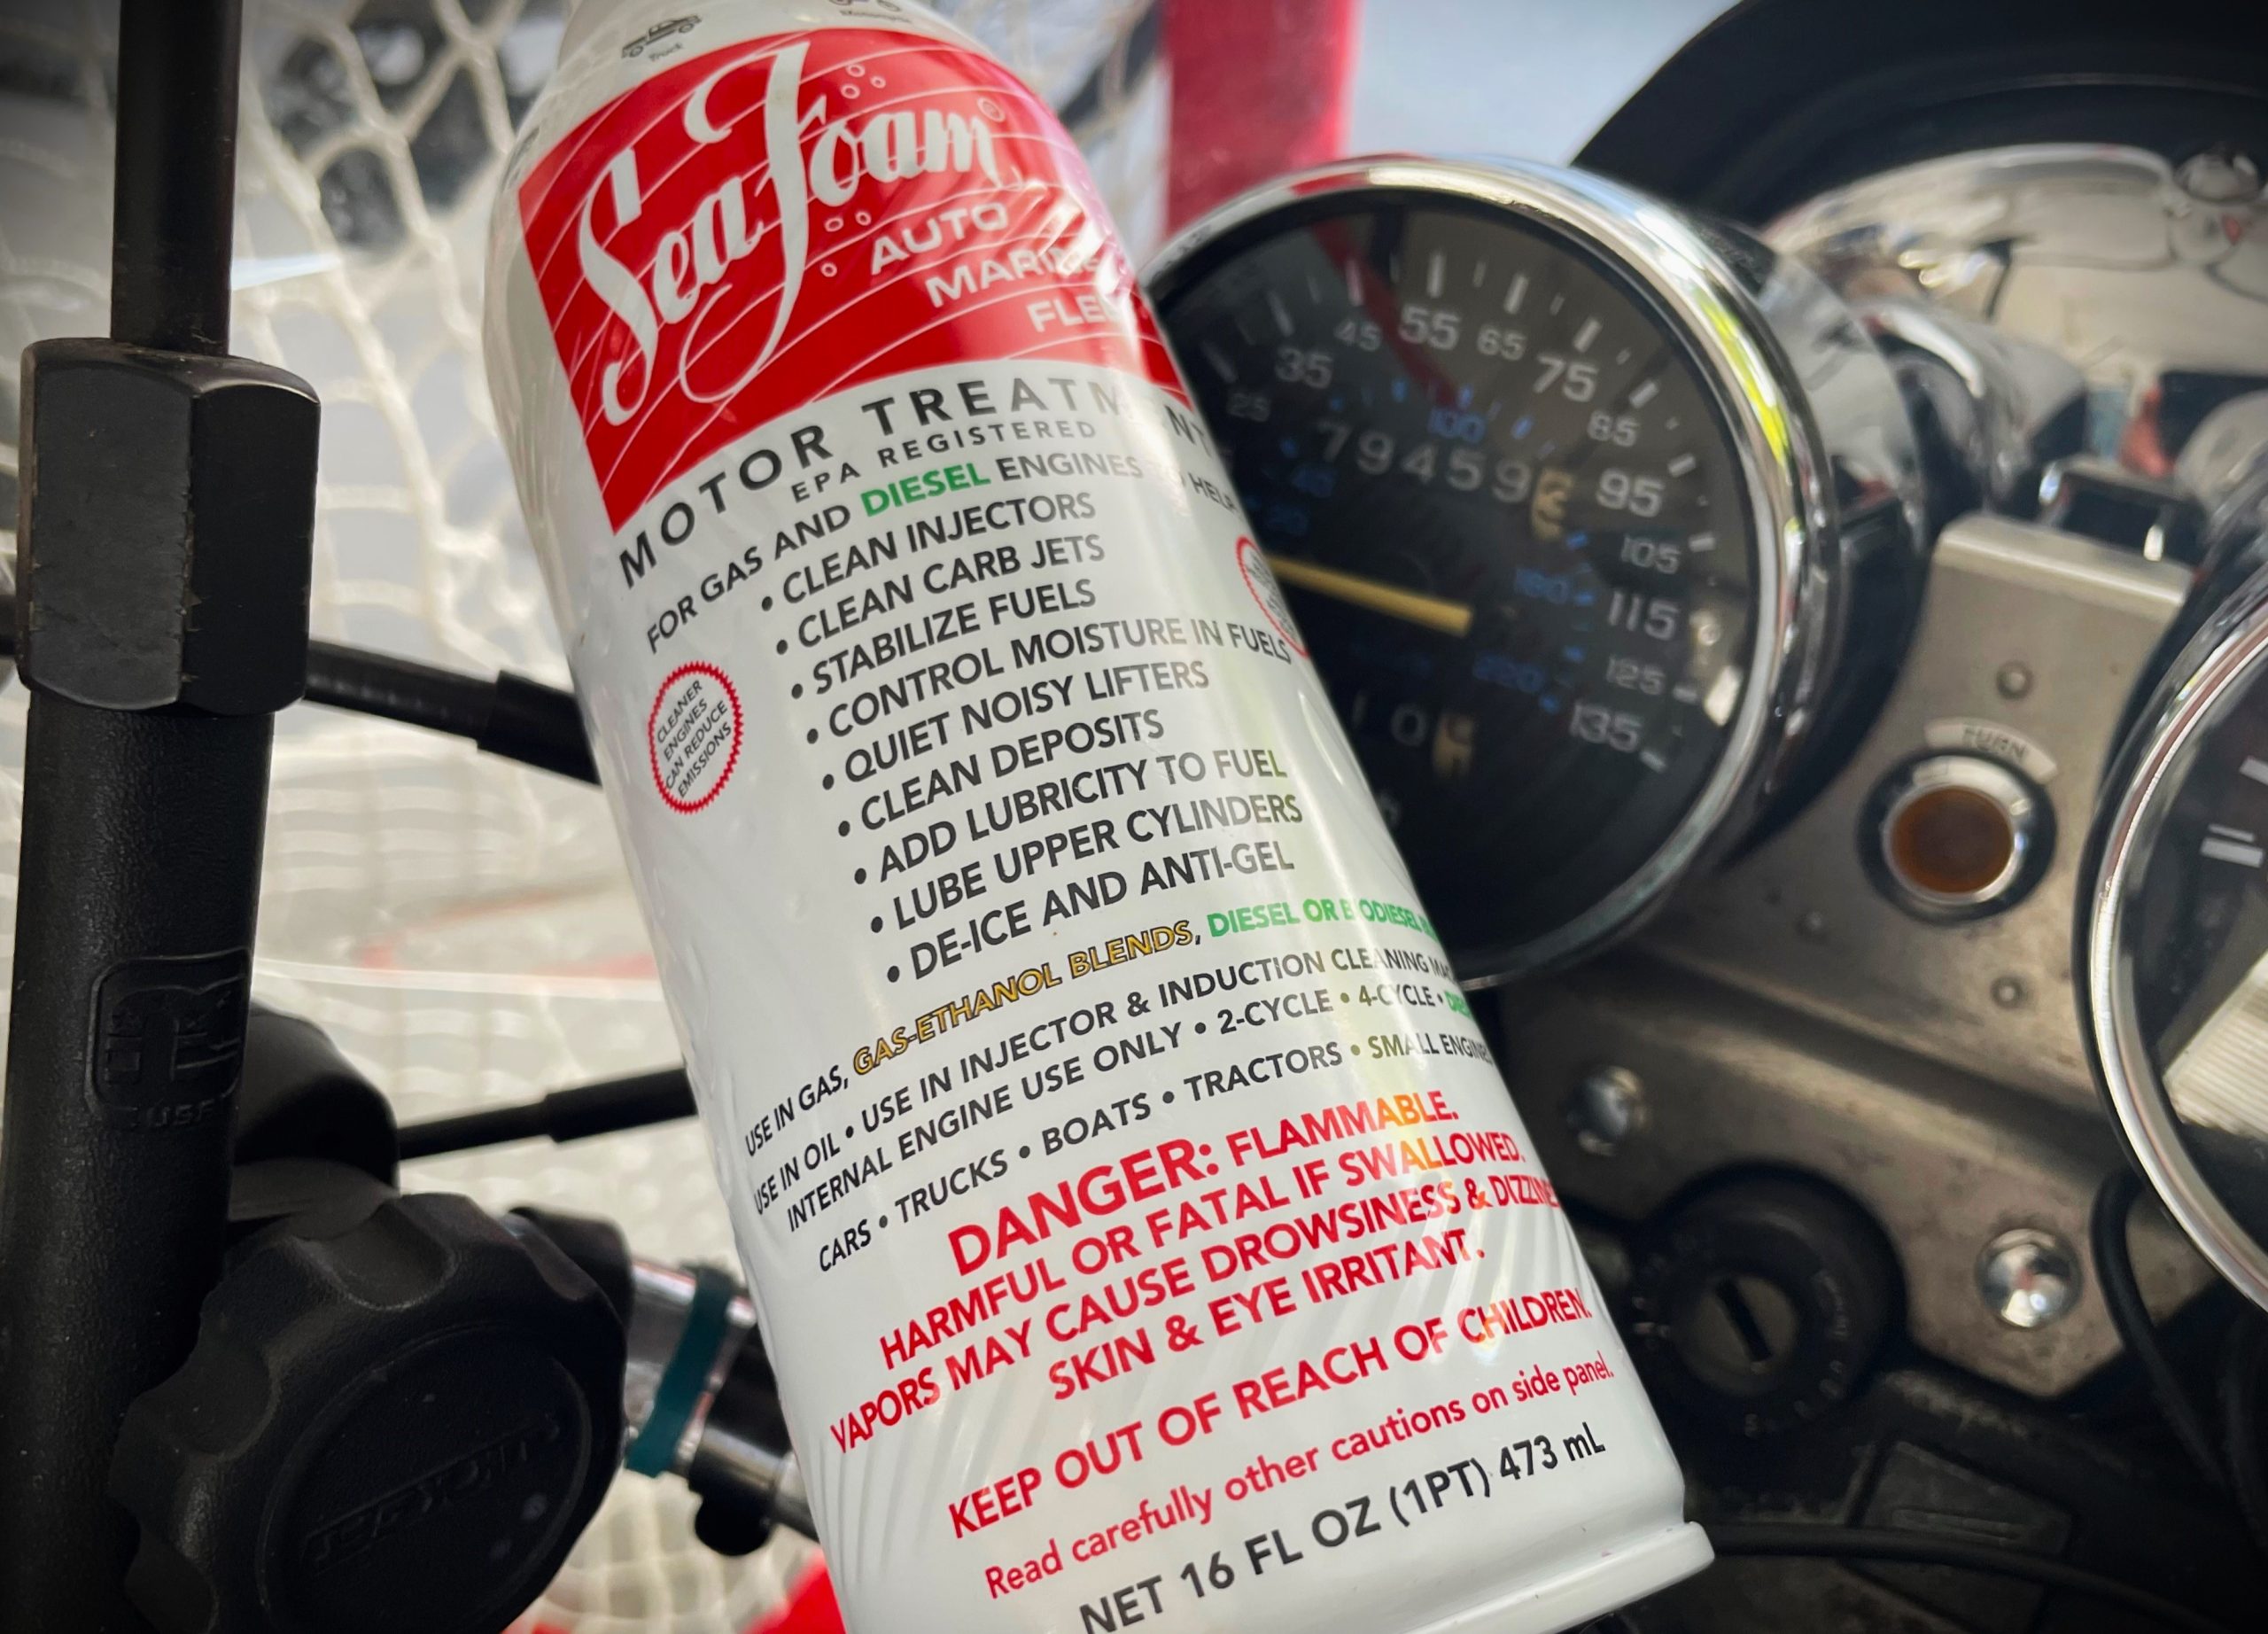
There’s a raging debate on whether it’s better to totally drain your fuel system or simply use a fuel system stabilizer. We won’t wade into that discussion here, but we will recommend doing one or the other. (That said, we will stabilize our fuel if the storage will only last a few months, but for long-term storage lasting a year or more, we definitely drain the fuel.)
It’s a proven fact that gasoline doesn’t like to sit still for long durations. Give it enough time, and gas will essentially seperate into water and varnish—and neither is good for your bike. Worse yet, these issues can be exacerbated when using heavily ethanol-enriched fuels. (In our experience, a good fuel system stabilizer from VP Racing, Seafoam, or Lucas does the trick.)
6. Put the Battery On a Trickle Charger
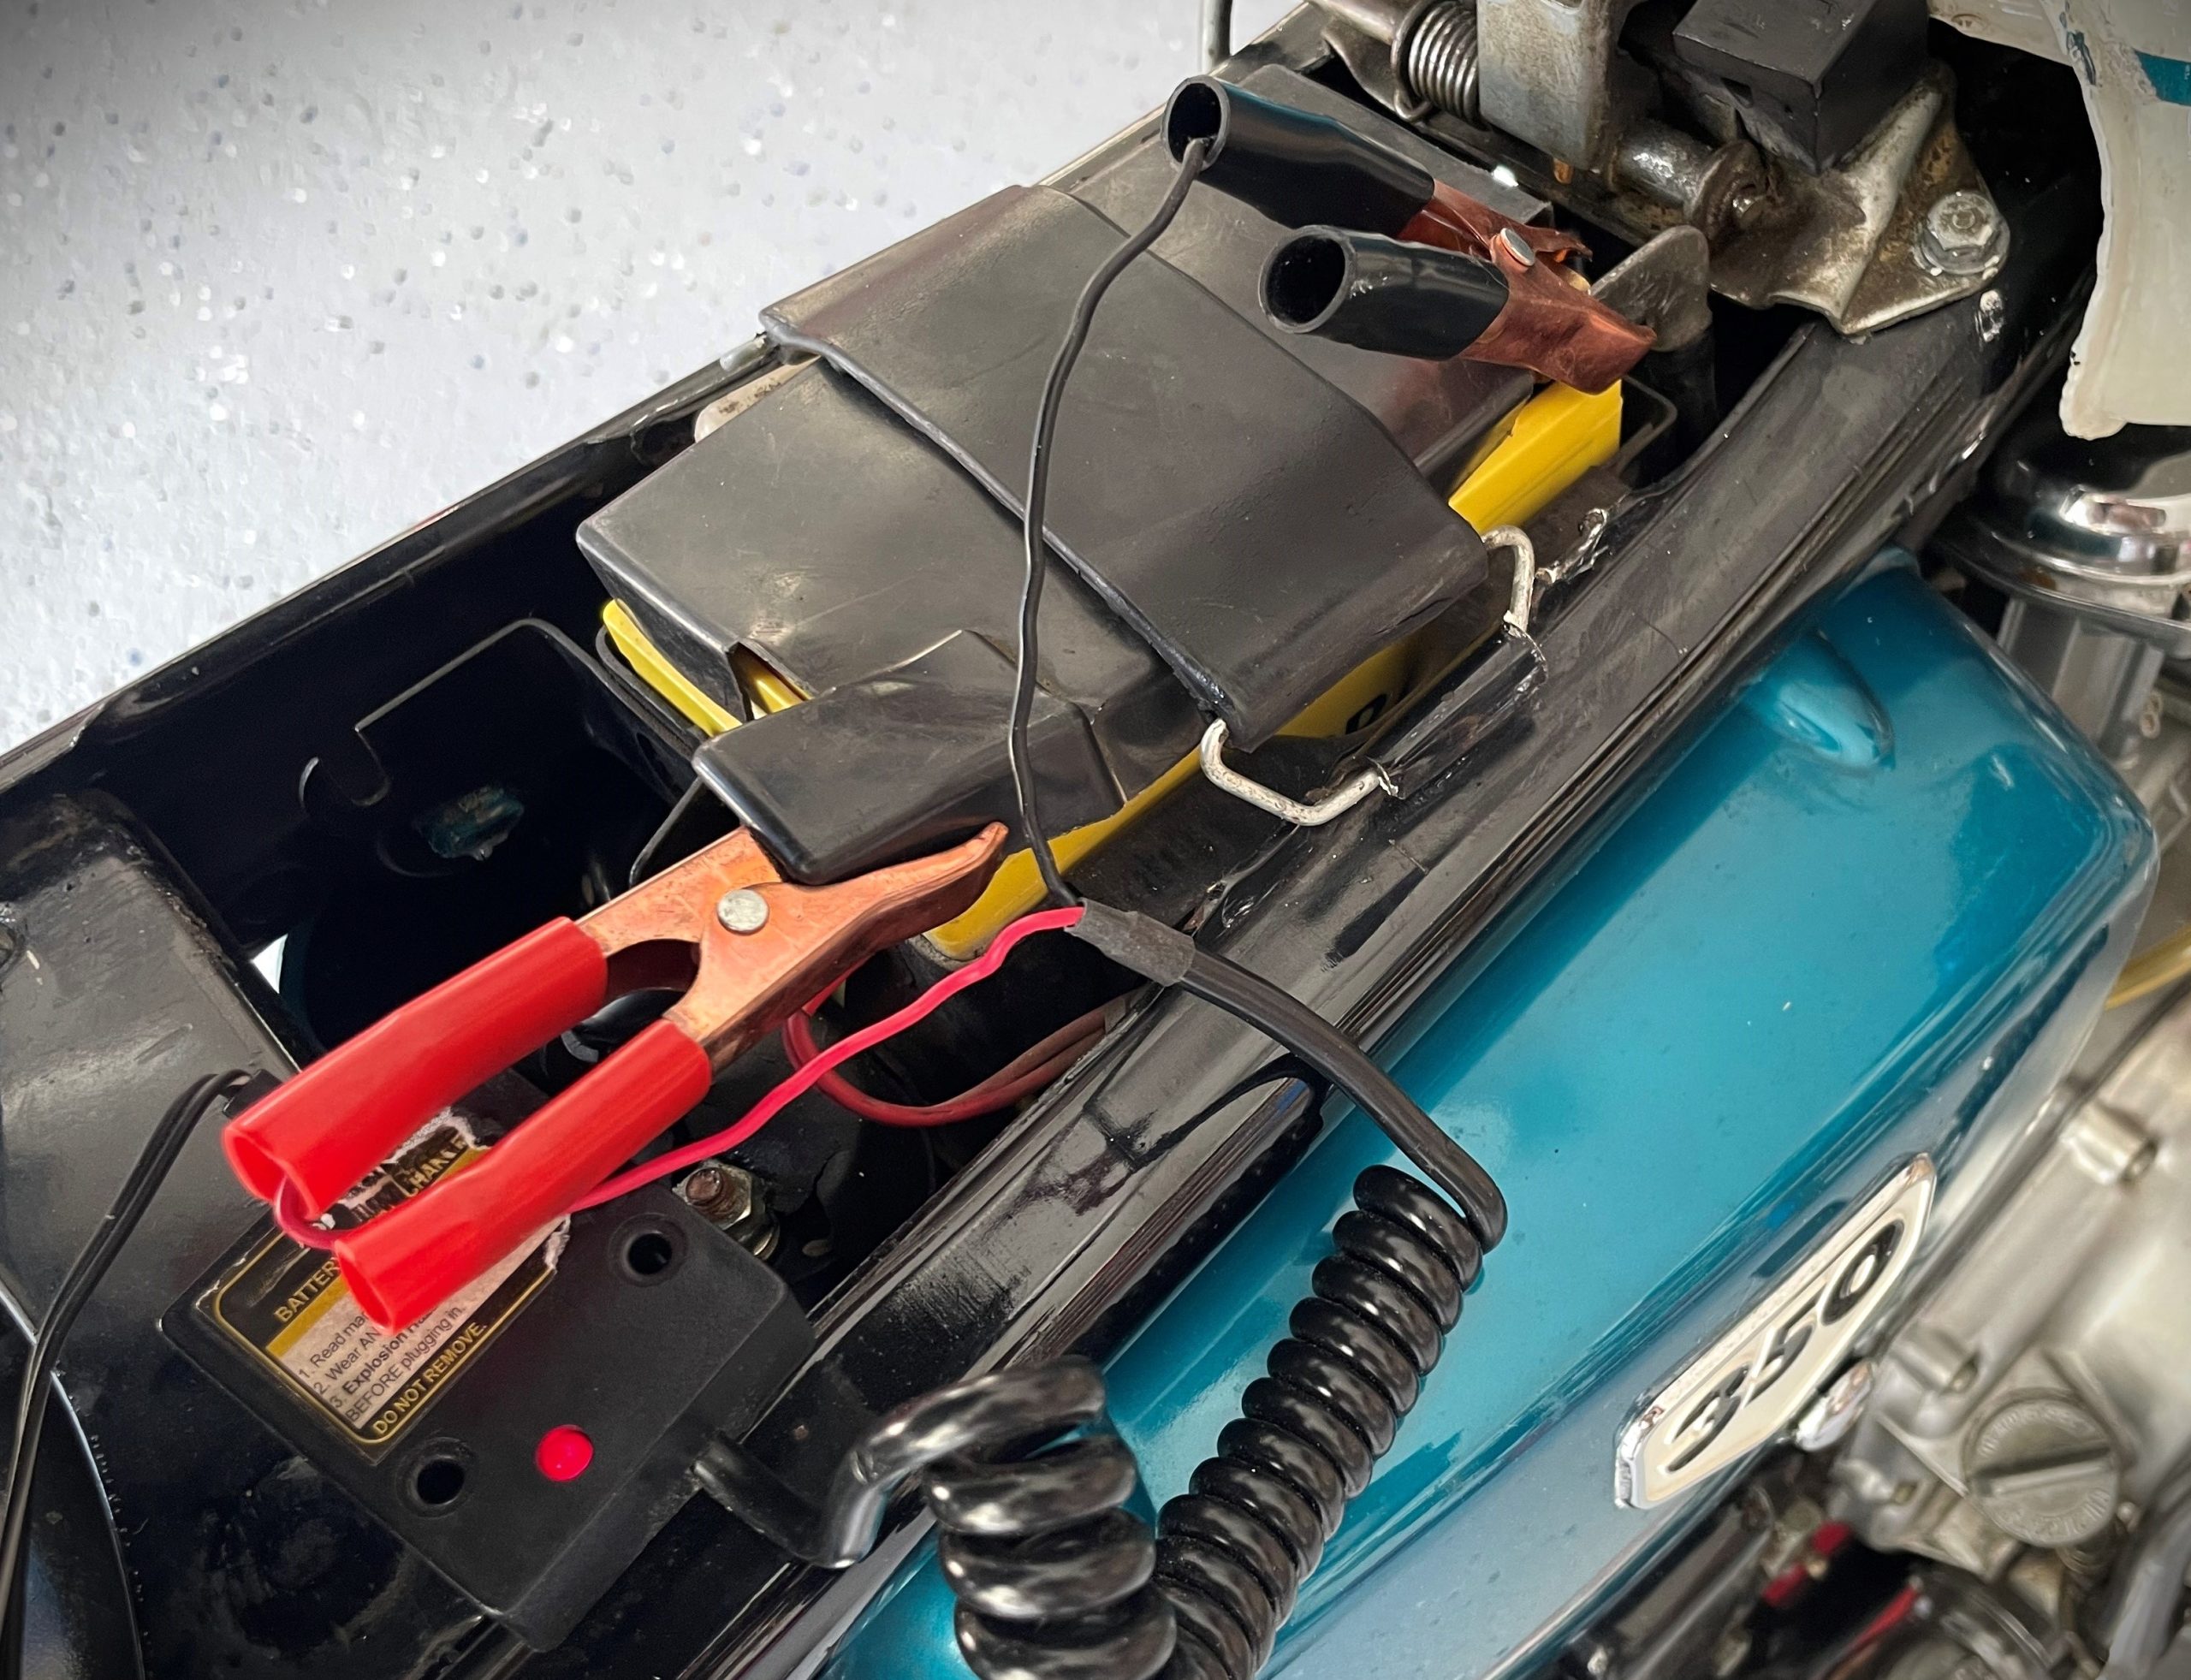
You battery will naturally lose charge during long-term storage, which is why gearheads invented the trickle charger. All a trickle charger does is feed you battery with a small amount of current (amps) to ensure it stays fully charged. This is really important because if a battery loses charge, and stays that way, it could damage the battery and shorten its lifespan.
For that reason, we recommend making sure your battery is fully charged to begin with (either by normal driving or a few hours hooked up to a traditional battery charger) before tossing on your trickle charger.
If your storage spot doesn’t have access to household AC, it might be a smart idea to remove the battery and locate it closer to an outlet in your garage. (You could always check out solar charging options too.)
7. Cover the Bike
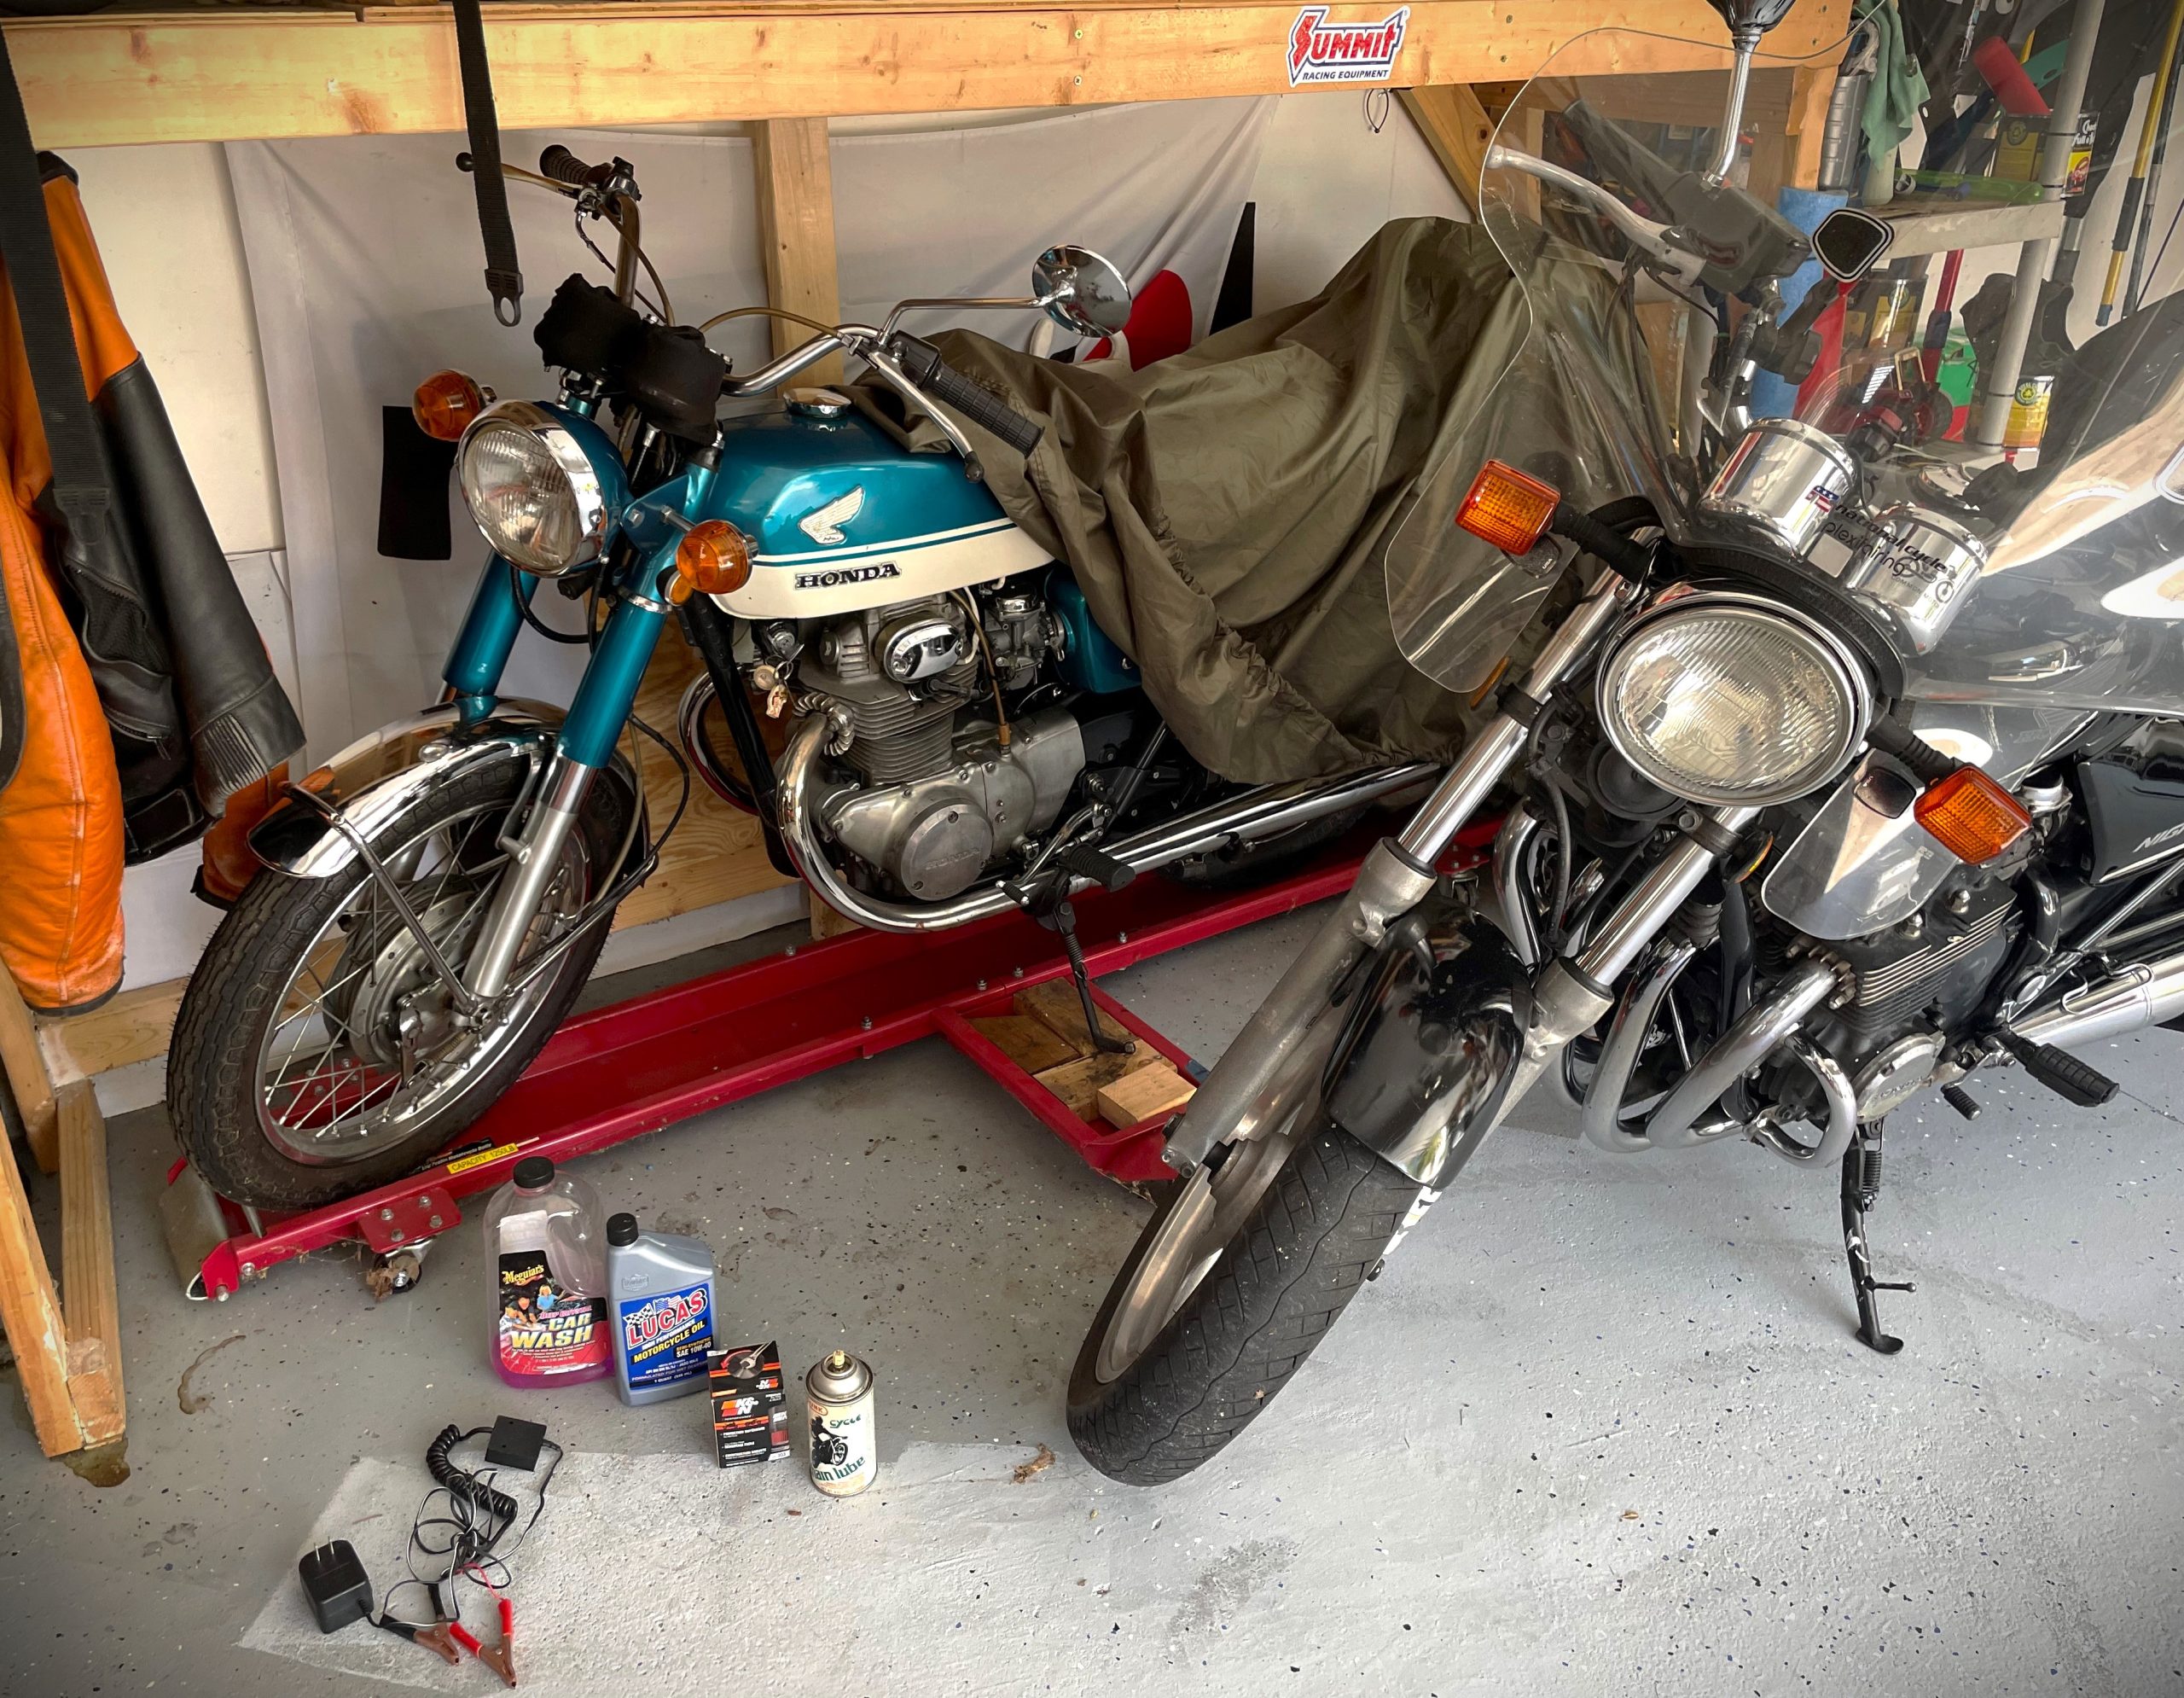
After you’ve done all this prep work, don’t forget to cover your motorcycle! From dust and grit to errant blasts of brake cleaner, you never know what’s flying around your garage or storage area.
If you’re lucky enough to have indoor storage, then you might be able to get by with a simple dust cover—though you may want to supplement it with a soft blanket or moving pad, in case your bike gets whacked by a falling rake or a hastily-retrieved hockey stick.
But for outdoor storage, look into a purpose-made outdoor motorcycle cover. Don’t be tempted to go with a cheap box-store tarp here, as the non-permeable material will actually prevent moisture from escaping, leaving your bike trapped in the perpetual humidity of a rain forest.
***
Now this isn’t necessarily a complete list, but these seven jobs are often the core components a bike winterization routine. For individual motorcycle models, always consult your owner’s manual, and it often helps to poke around on bike-specific forums for additional insight.
While all these steps sound like a lot of work, they’re an essential part of caring for your motorcycle. And more importantly, they can potentially eliminate a ton of hassle when it’s time to get the bike fired up in the spring. So follow these steps in the winter, and you’ll be ready to ride again soon.
You may enjoy these articles too:
Well done! I appreciate the good advice. I’m envious of those with indoor storage! I have a shed (and cover) with a over-hang that keeps my bike dry.. It’s the moisture we’ll have to live with.
Q. Would you suggest a routine of engine starts through out the winter months or wait for the spring temps to arrive? Cheers!
Thank you!
Hey thanks Gary, and that’s a great question. No, I would not recommend you periodically starting the bike throughout the storage period. Just let it sit until spring.
…
I could write a lengthy explanation why here, but we’ve already got an excellent article on this subject. If you’d like a good explanation, you can read this story here: Should I Start My Vehicle’s Engine Periodically During Winter Storage?
…
Thanks for reading, hope this helps!