If you’re into old, vintage bikes, rebuilding carburetors is a rite of passage.
Regardless of the motorcycle make, if it’s got a carb, then you’ll inevitably find yourself with leaky O-rings, rusted floats, stuck needles, and clogged jets.
And while there are plenty of professional shops that’ll gleefully dig into a QuardraJet or Holley 4150, there are far fewer places to take an old bike carburetor—which means you’ll probably have to tackle the rebuild job yourself.
This is another in a series of motorcycle fuel & carb articles. Read more here:
* How (& Why) To Synchronize Your Motorcycle Carburetors
* How a Stuck Carburetor Fuel Shutoff Float Valve Led to a Poor-Running Motorcycle
* How Transparent Fuel Lines Helped Solve a Decades-Old Motorcycle Idle Problem

The good news is, motorcycle carburetor rebuild kits are available for many of the common models you’ll come across. And the better news is that, in most cases, a rebuild job isn’t too difficult—provided you do some homework and use the right tools.
That said, here are 10 motorcycle carburetor rebuild tips that’ll help your next carb job go well.
***
10 Motorcycle Carburetor Rebuild Tips
***
1. Do the Job on a Big Rubber Work Mat
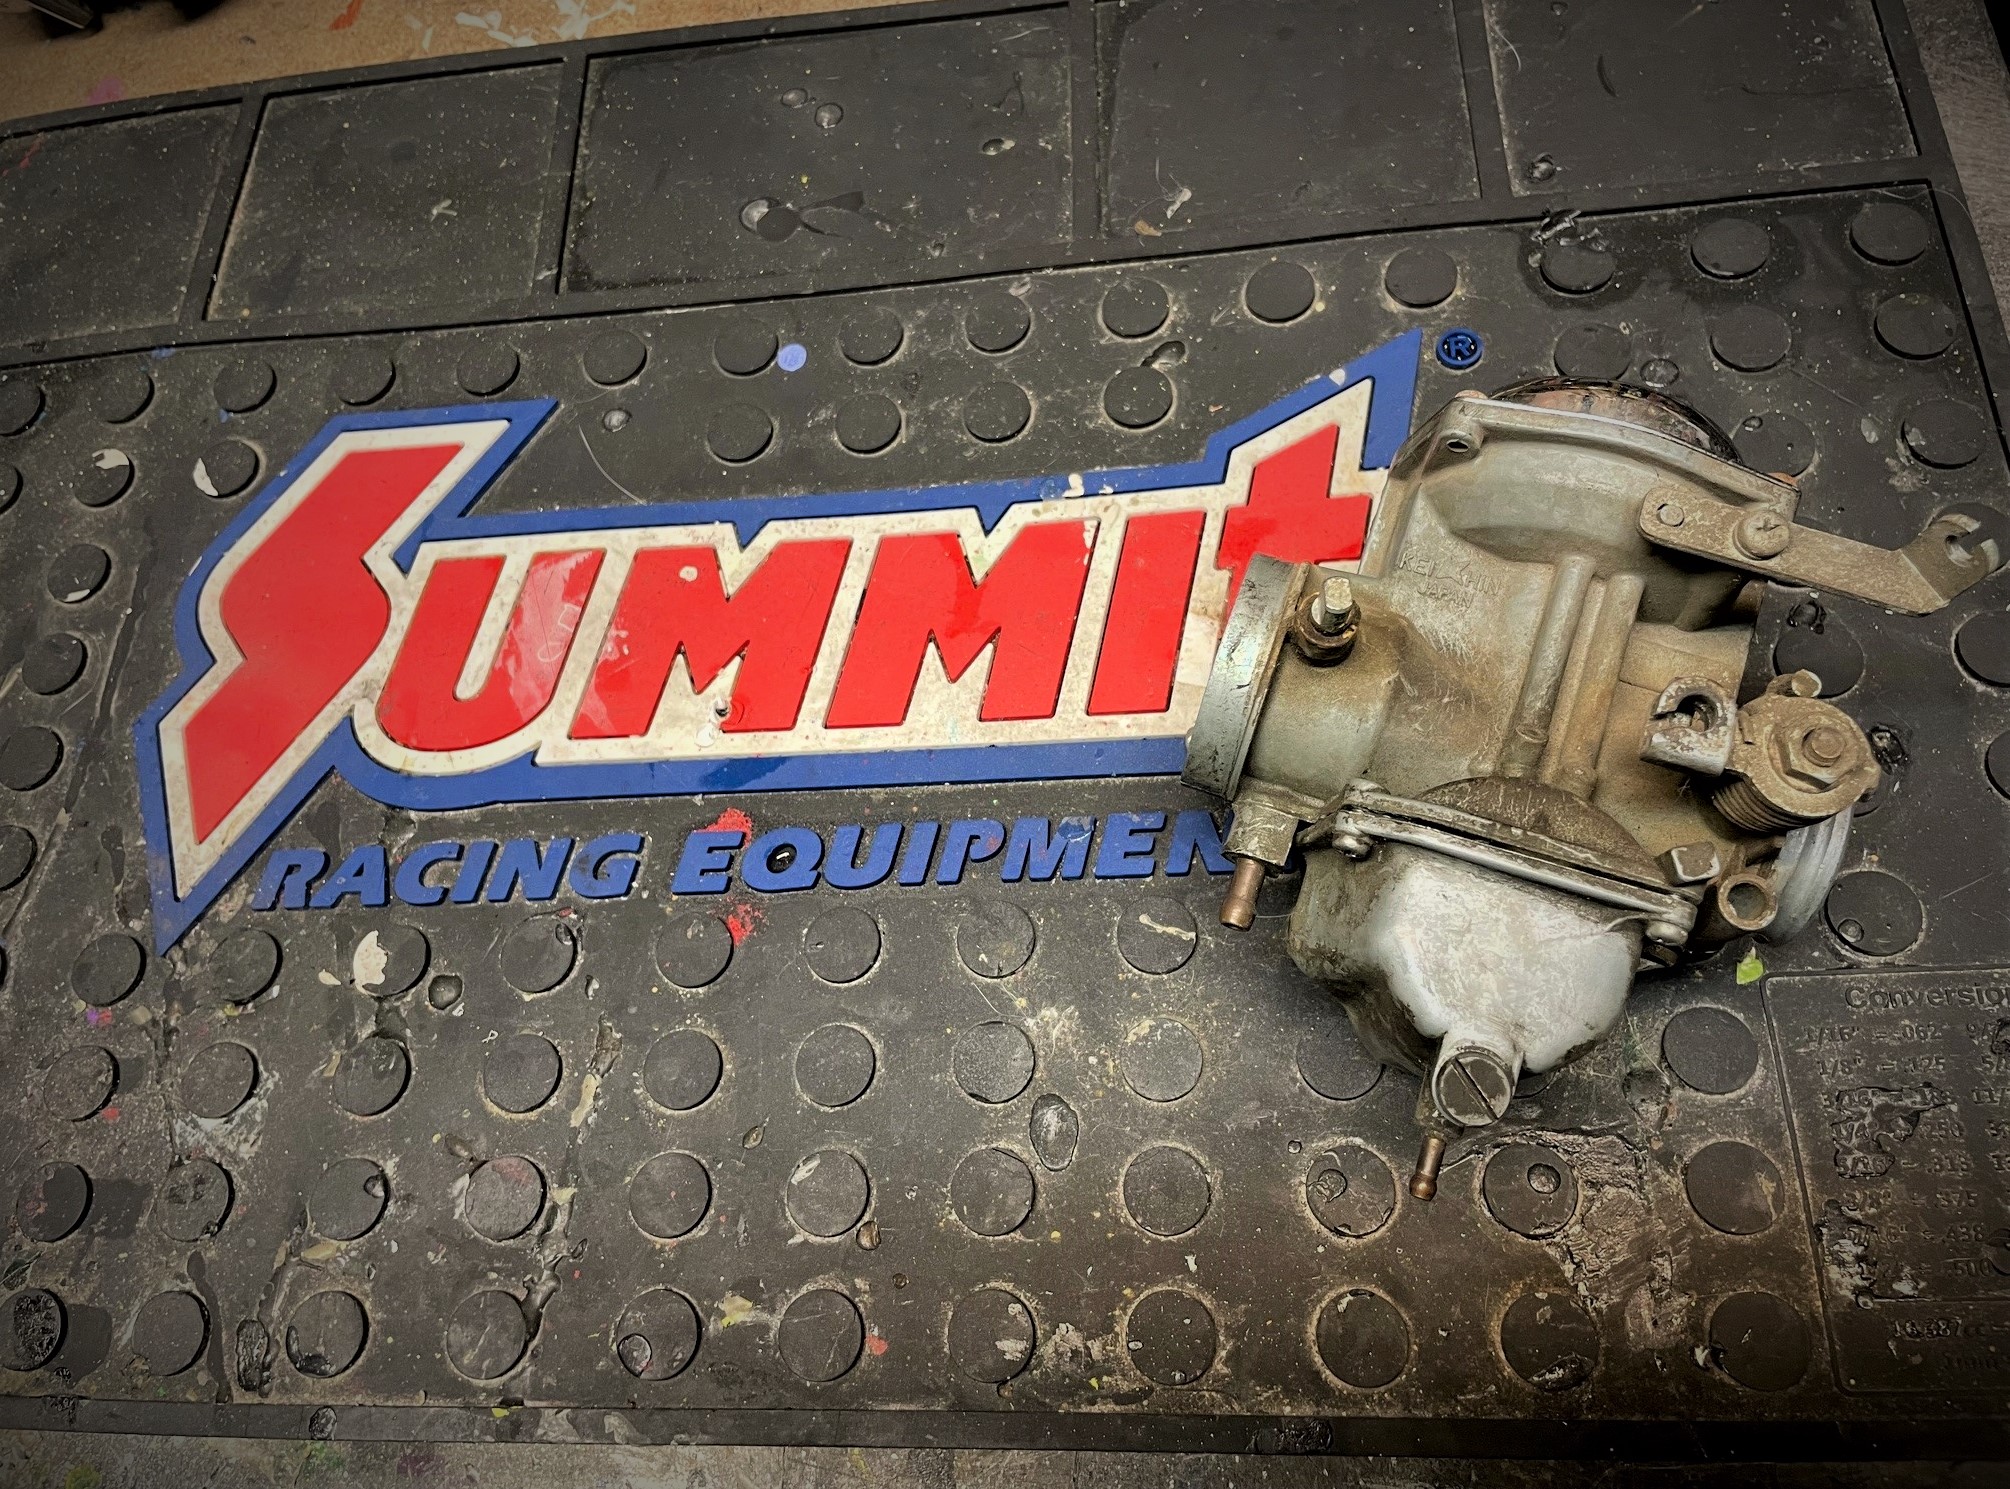
Whether you’re rebuilding in your garage or a basement workshop, make sure you’ve got a big rubber workbench mat to set your carburetor(s) on.
A quality rubber mat serves a few purposes here. For starters, it’s a forgiving surface which can potentially prevent you from nicking, cracking, or distorting a soft aluminum carb body or a fragile brass part. Secondly, find a mat with a lip around the outside to keep small spills and leaks contained, and prevent tiny screws, needles, and jets from rolling off onto the floor.
***
2. Get Some Small Bottles & Bags for Organizing Parts

No doubt about it, if you’re rebuilding a carburetor, you’re going to be handling a ton of small parts. From springs and screws to tubes and jets, if you don’t have a way to keep track of it all, you’re probably going to get into trouble. And you don’t have to be très fancy here either, a few sandwich bags and pill bottles are all you need.
***
3. Have Extra Rags & Spill Containers
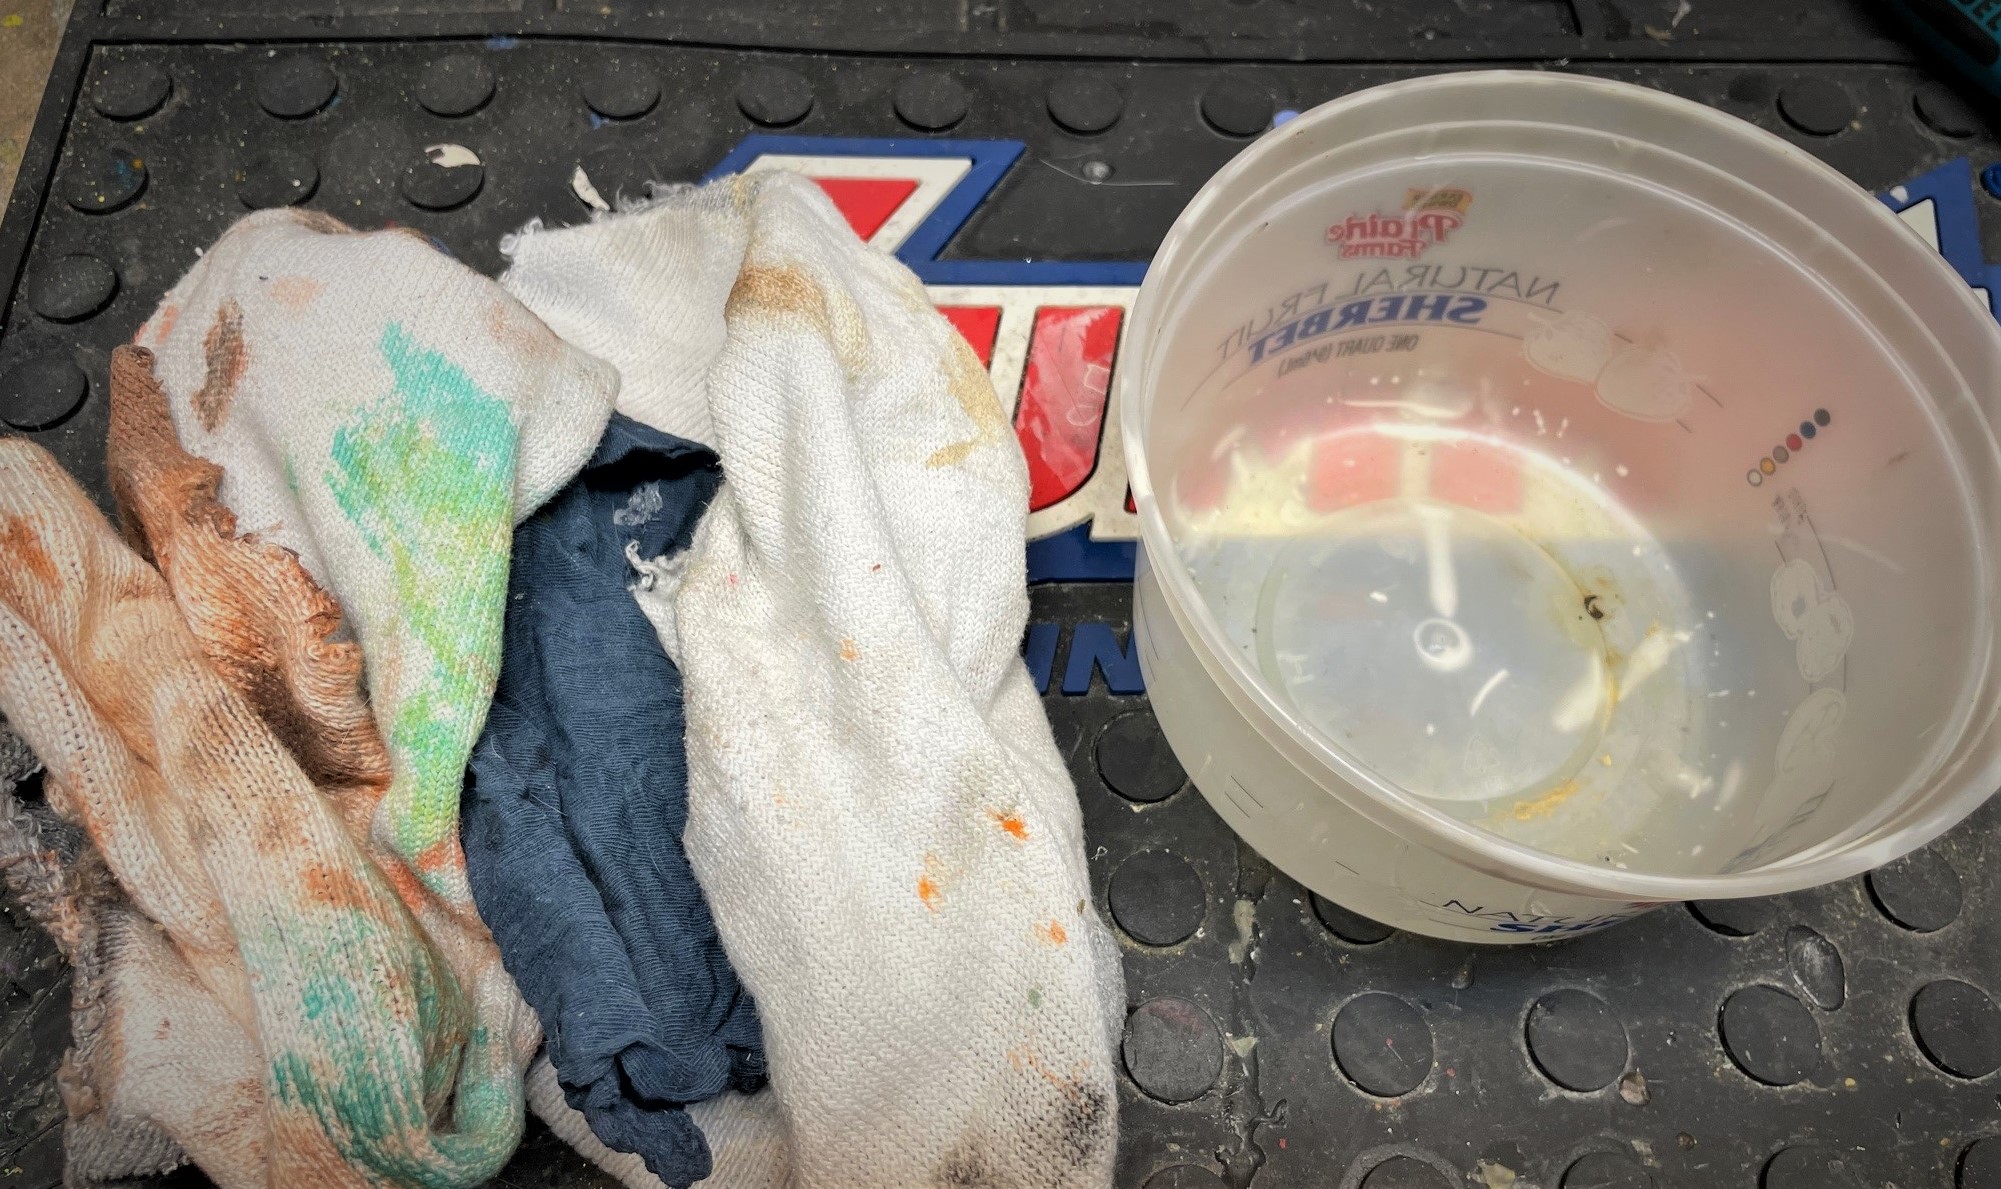
Unless your carburetor is really ancient, it’s likely that you’ll find some passage or compartment still filled with fluid when you begin taking it apart, so anticipate fuel or cleaner spilling out at random times during disassembly. Having a small container to plunk the whole carb into when that happens can save you some clean-up time. That same container can also be handy for collecting carb cleaner when you’re spraying gummy parts.
Also, you’ll need lots of coarse throwaway rags to soak up varnish and scrub away deposits—check your dresser drawer for some worn-out socks.
***
4. Print Out Carburetor Rebuild Instructions & Diagrams Separately
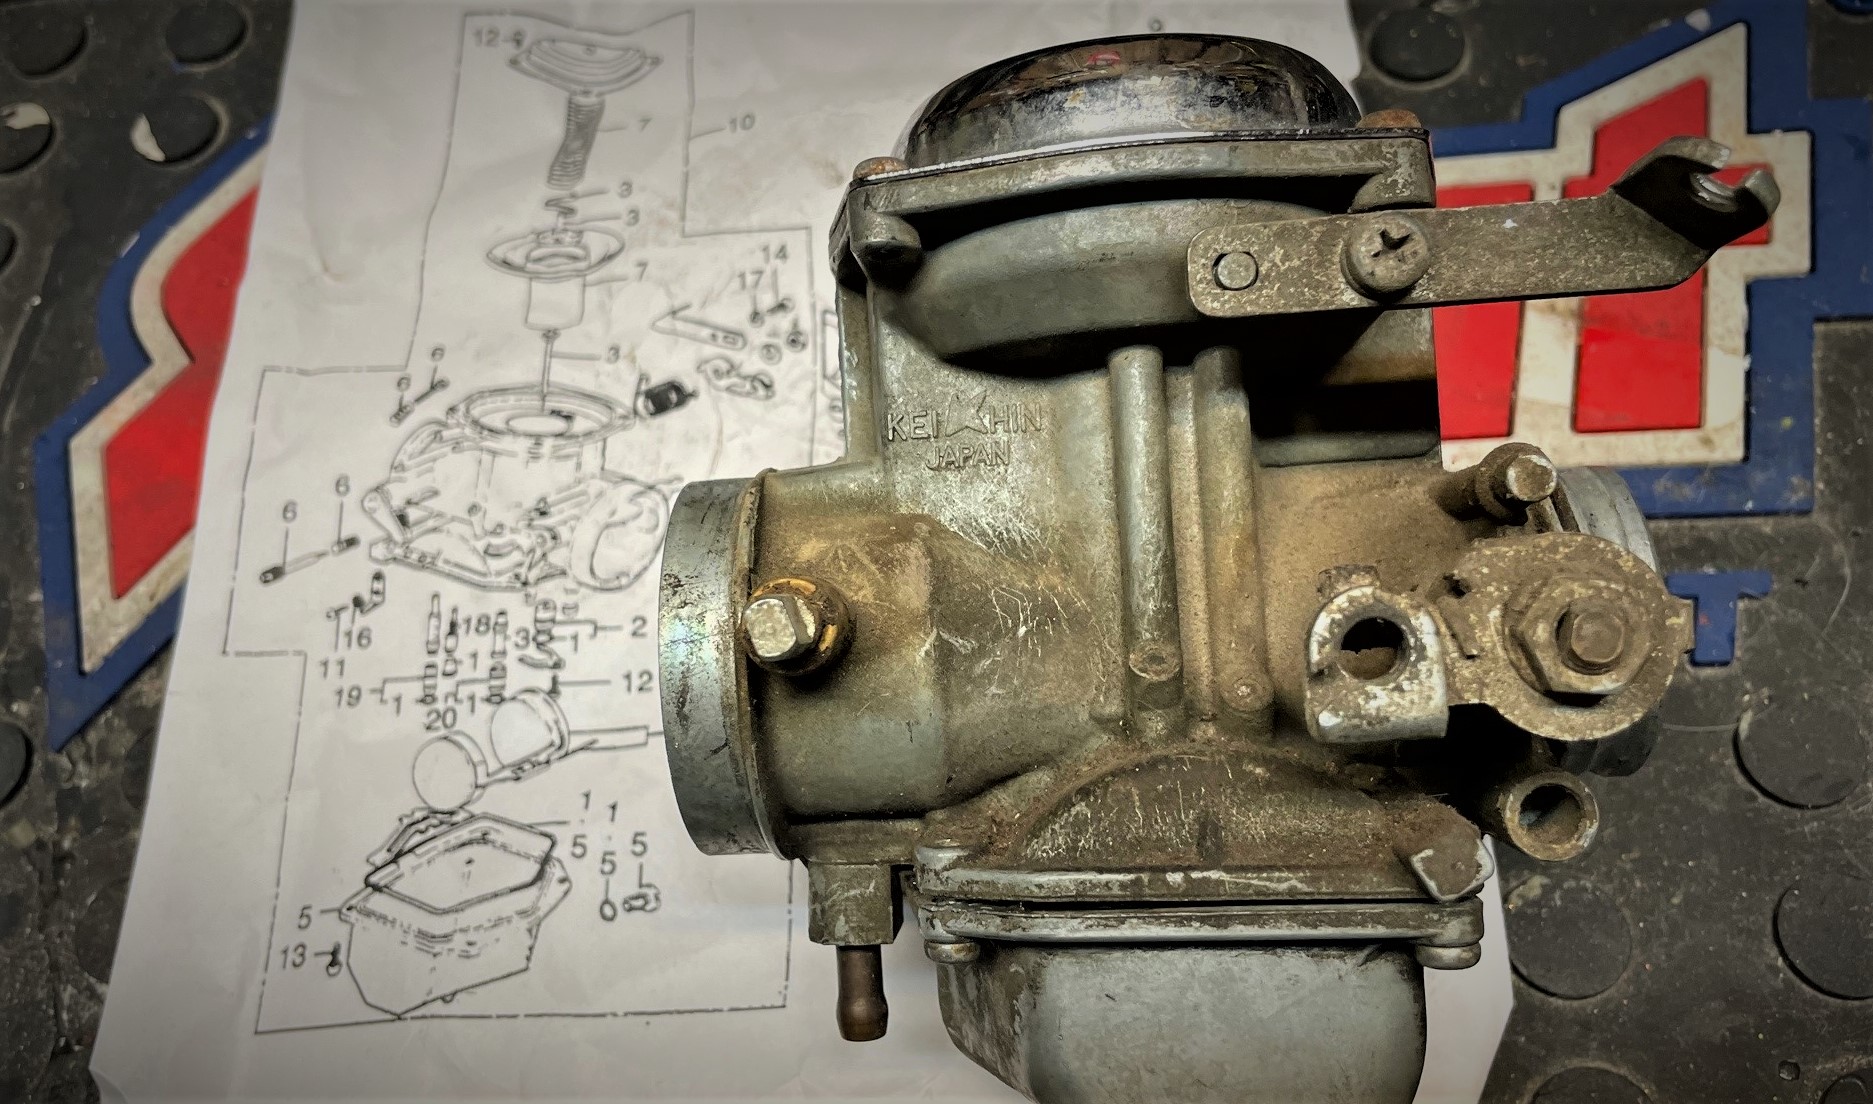
Again, rebuilding a carburetor will get messy. And if you’re working from a shop manual or a smartphone, there’s a good chance you’ll get grimy, fuel soaked fingerprints all over them. Take stock of what rebuild diagrams, illustrations, and instructions you’ll need, then print them all out separately—so you don’t ruin the originals or brick your phone. Print multiple copies too, so you can grab new sheets as the old ones get mucked up.
***
5. Spray Things Down With Carb Cleaner & Penetrant Before Disassembly
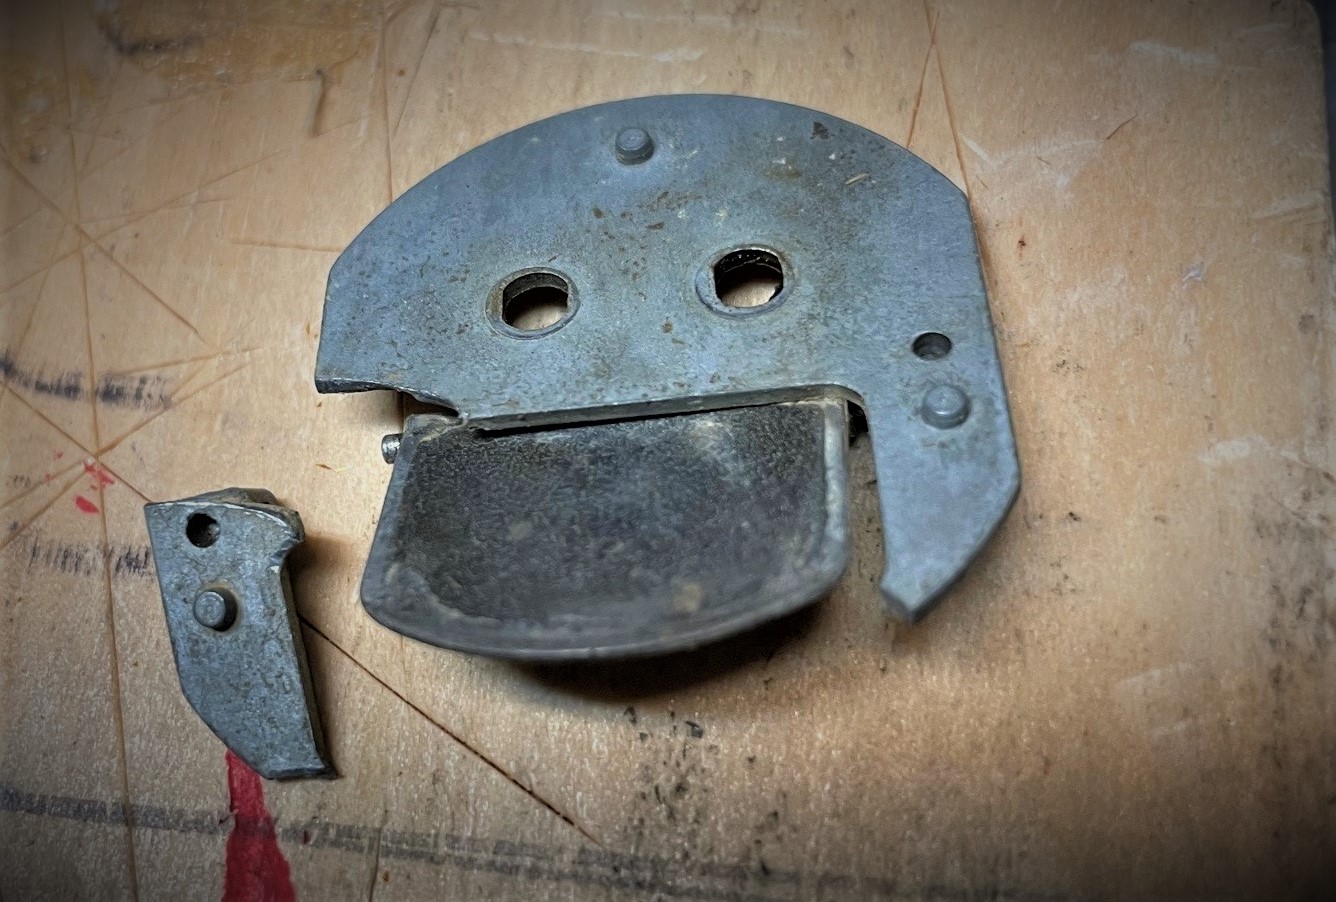
This may seem obvious, but we recently overlooked this step and it cost us dearly: Instead of giving an old carburetor a quick penetrant soak, we hastily began fiddling with its choke lever. A terrifying snap later, and we broke the choke blade—which was seized tight to the carb throat. (Or at least, it used to be.)
Make sure that any moving part, along with any jet, needle, and fastener, is hit with some carburetor cleaner and penetrating oil before you get to work. A follow-up splash with WD-40 can help get things moving too.
This is also perhaps a good time to remember not to use too much force on delicate carburetor parts.
***
6. Use Soft, Forgiving Tools When Force is Needed
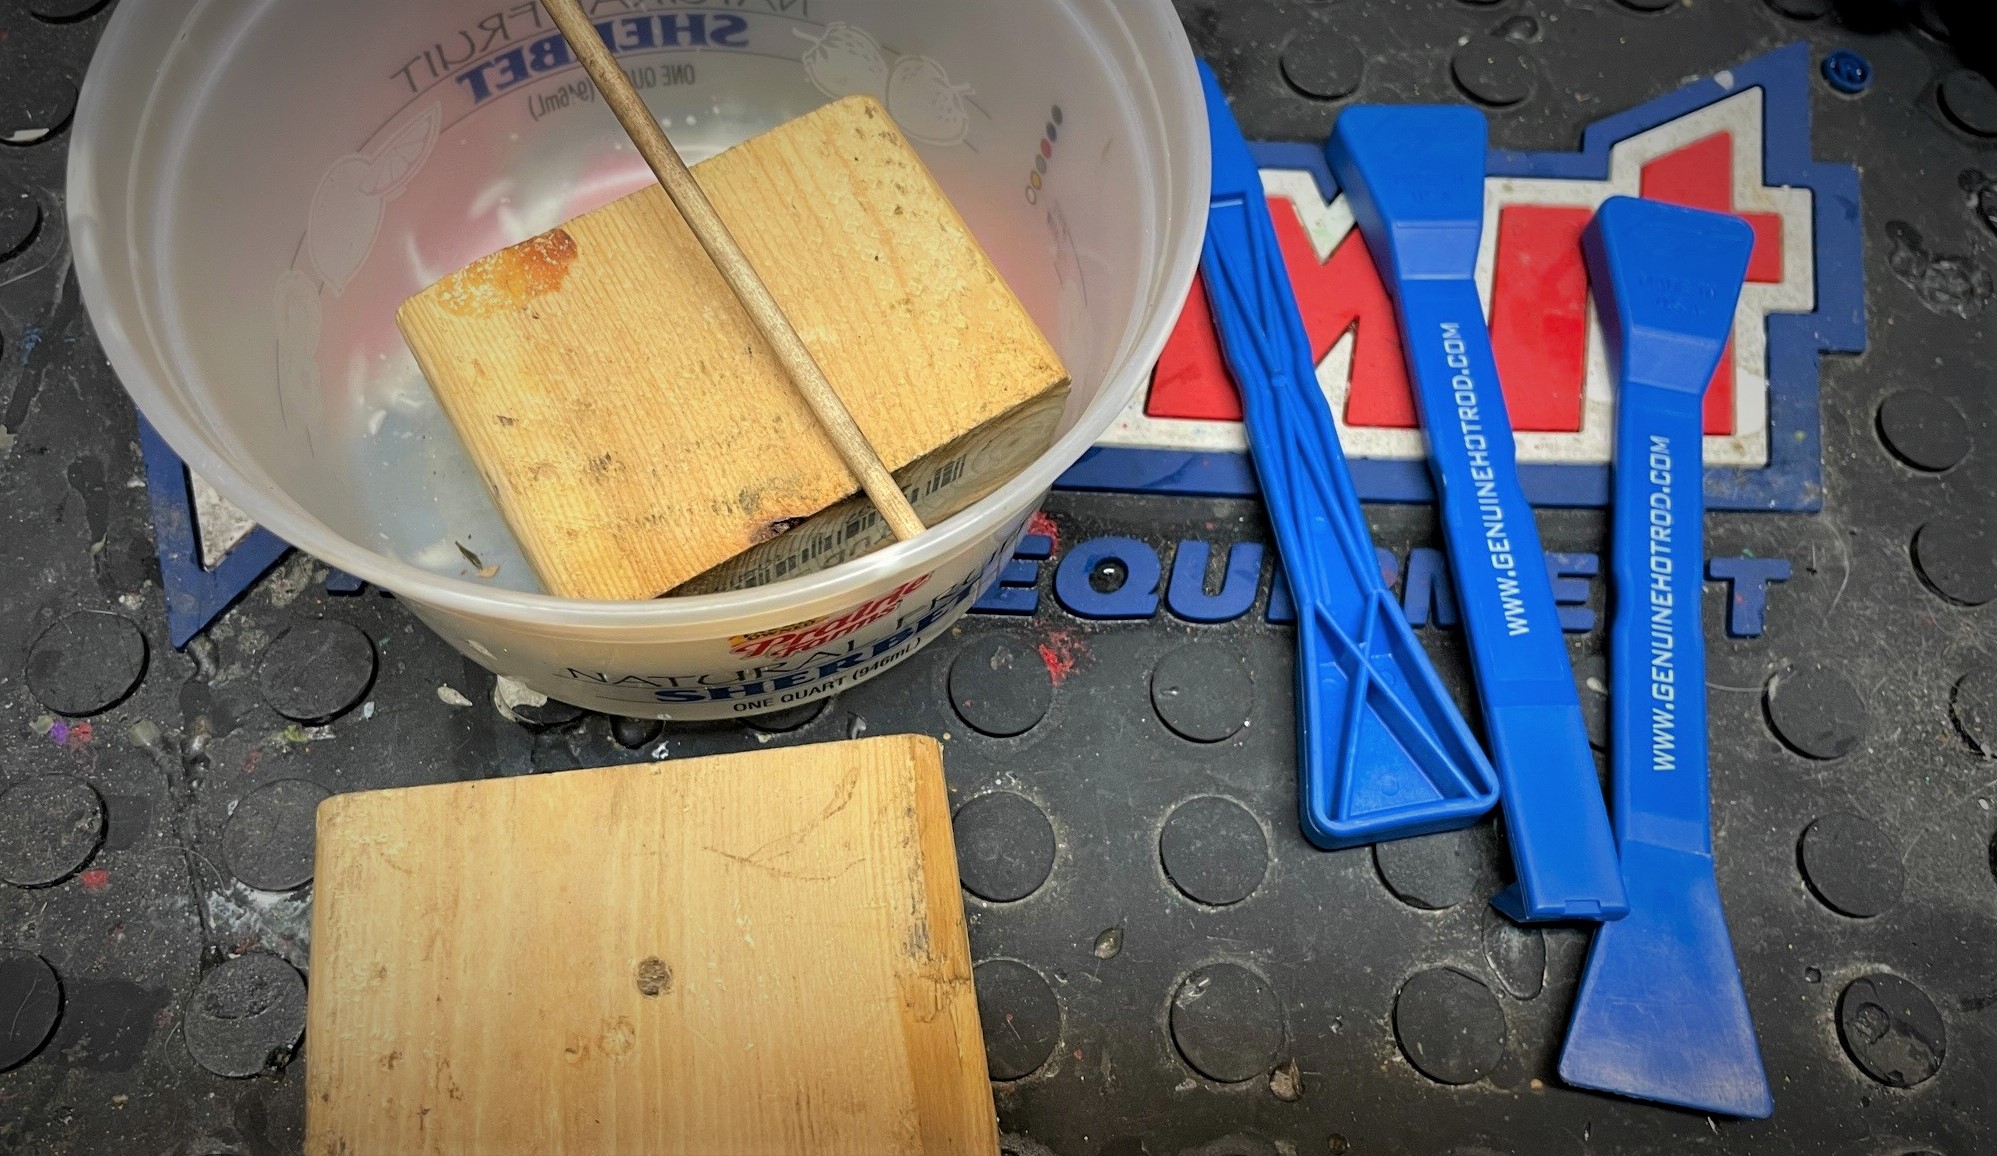
On a related note, you may find yourself needing to pry-off stuck parts or punch out a seized emulsion tube.
Problem is, many carburetors are made from cast aluminum which, after a few decades, means they become as fragile as a Fabergé Egg. Suffice it to say, you’ve got to be careful or you risk nicking or cracking the carb body—which could result in a fuel or vacuum leak.
A set of Gentle Pry Tools and some wooden dowels can save the day.
***
7. Work With an Array of Hooks & Picks

Yet in contrast to Point Six above, sometimes carburetor disassembly demands a more precise, rigid instrument. In these instances, having the right size (or angle) hook or pick is critical. A robust hook and pick set isn’t that expensive and can save you from making a catastrophic mistake—once you wallow out a hole or snap something off of cast aluminum, there’s no CTRL-Z to undo it.
***
8. Be Aware of JIS Screws
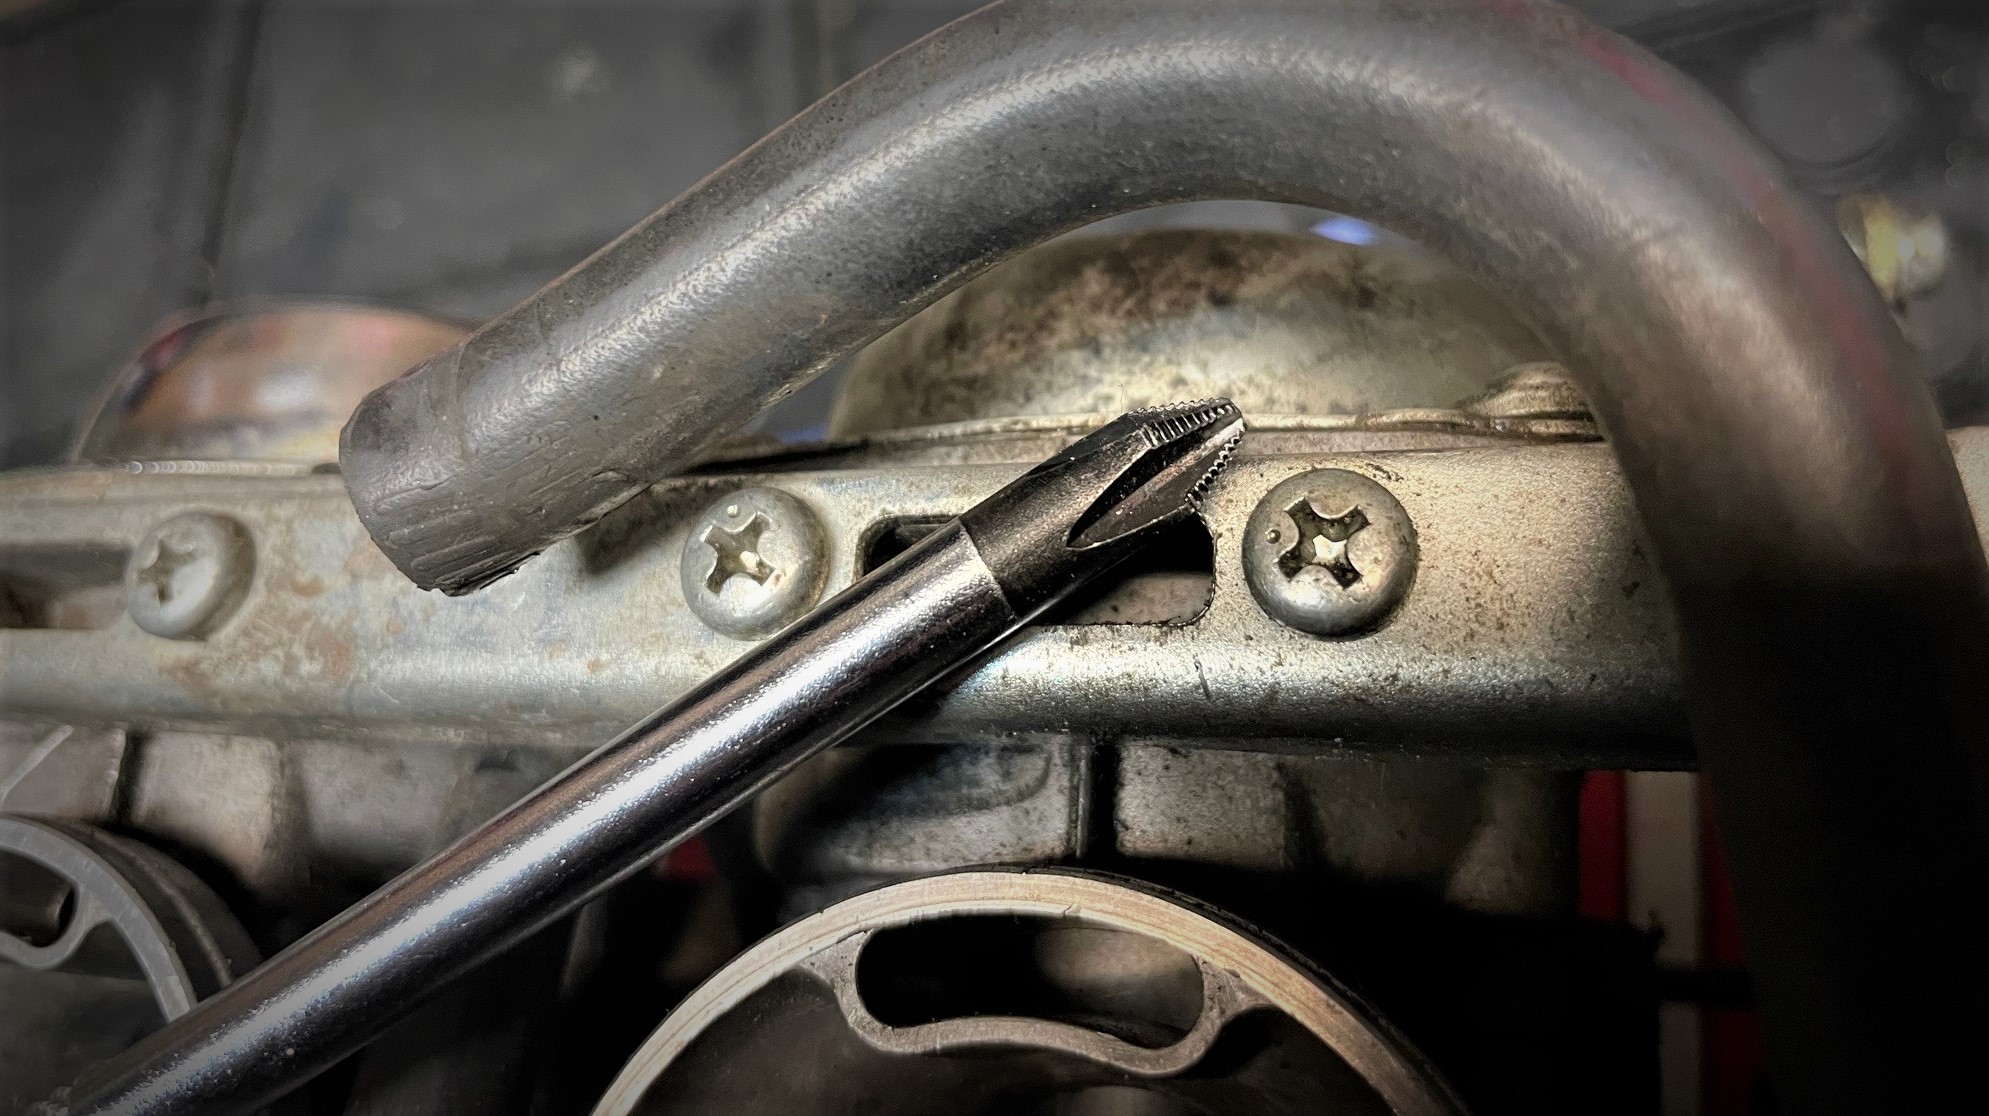
Many Japanese motorcycles use “Japanese Industrial Standard” or “JIS” fasteners, which resemble a traditional Phillips head screw.
But if you jam an ordinary old Phillips screwdriver in there and twist, it’ll often result in a stripped head. And as you’d imagine, old Honda, Yamaha, Suzuki, and Kawasaki carburetors are usually assembled with dozens of tiny JIS screws. Using a purpose-made JIS screwdriver is the only way to get those little buggers removed without profanity.
***
9. Keep Some Tacky Grease Handy
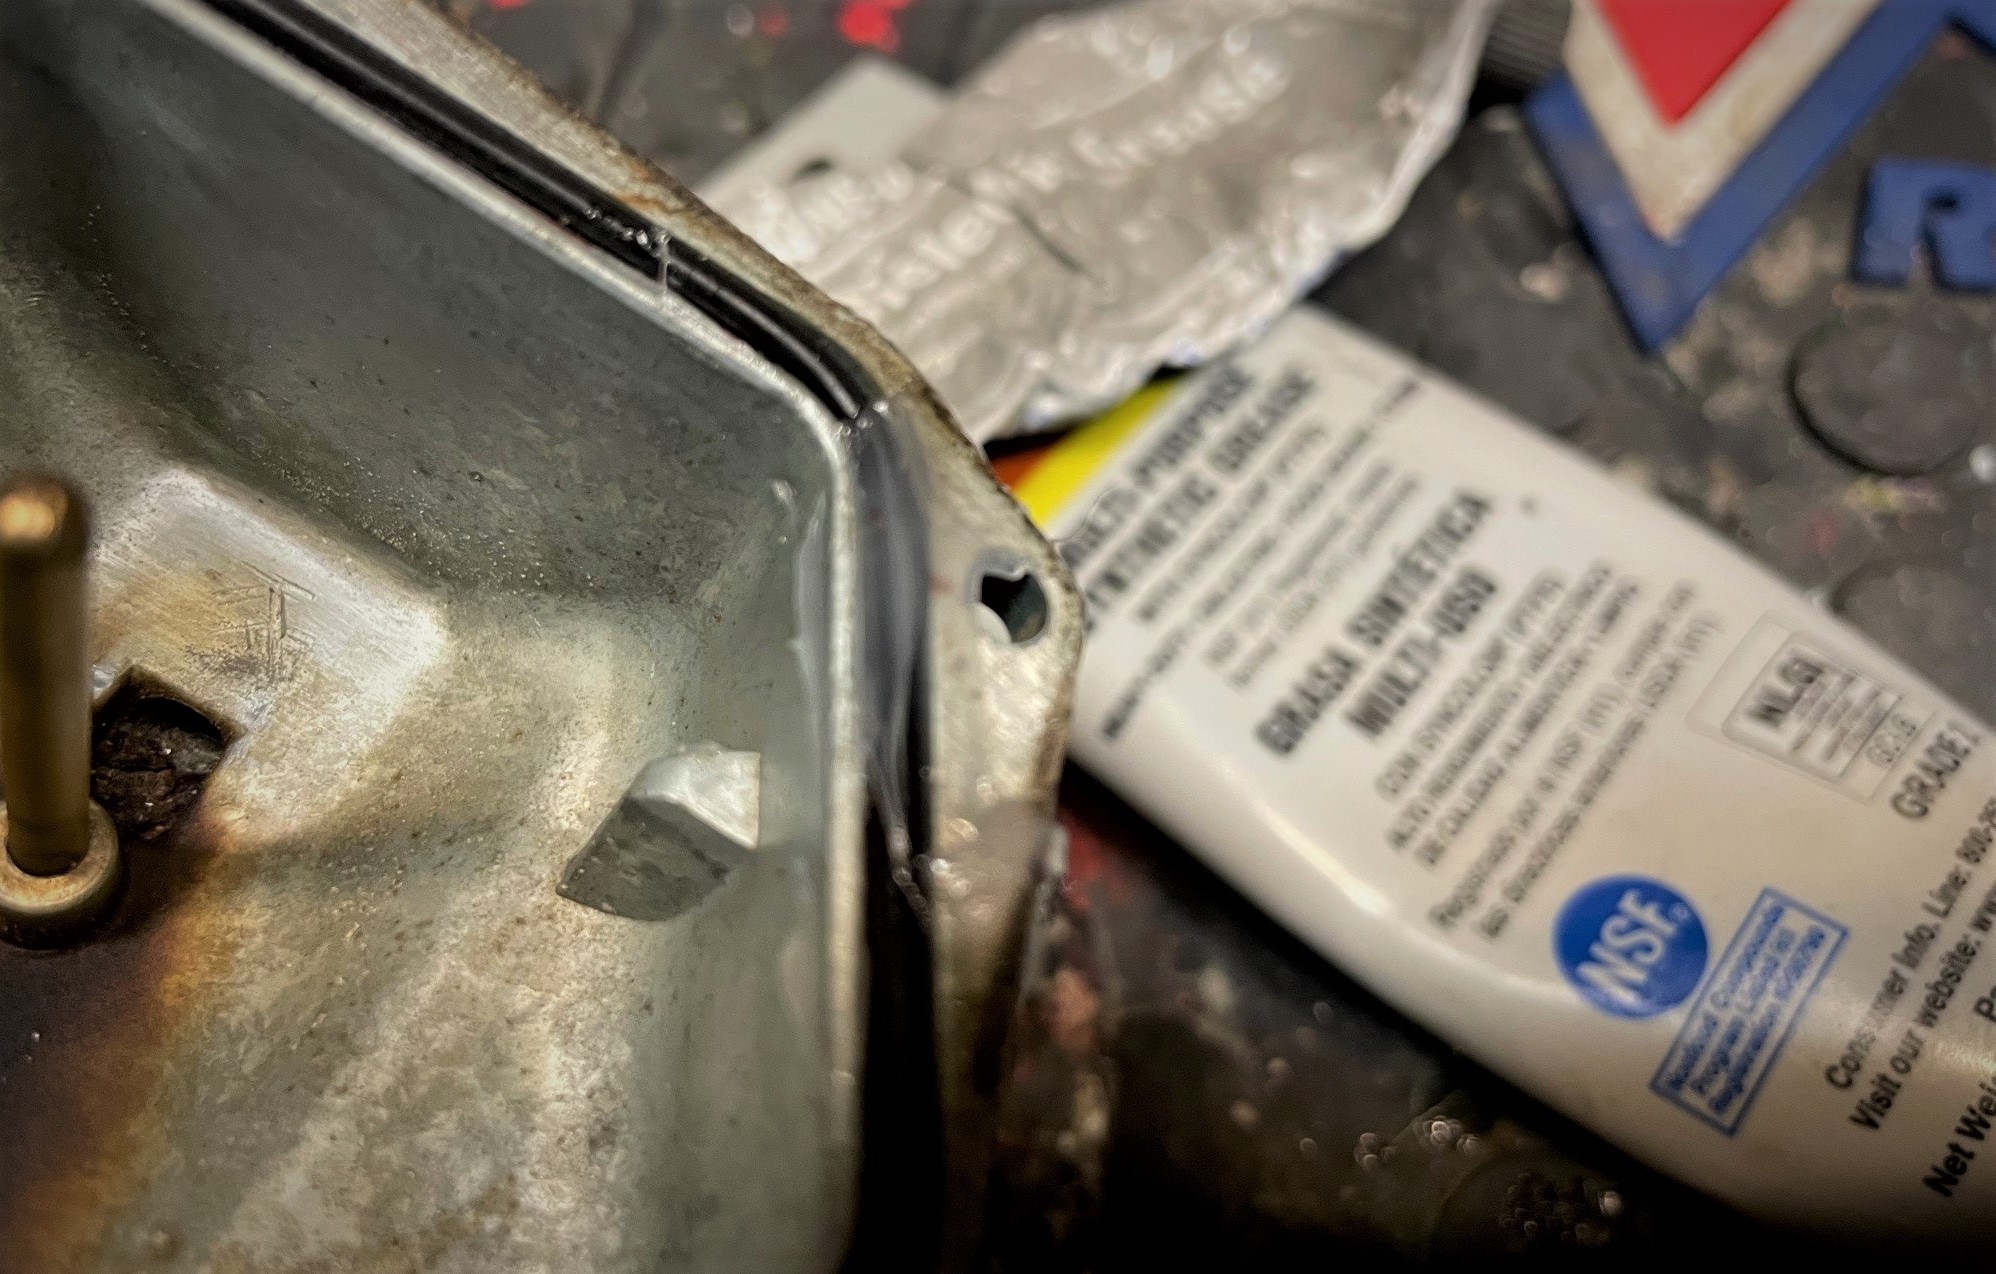
Many tiny internal carburetor parts like brackets, gaskets, and jets are held in place by nothing more than friction, and are fully secured only when the carburetor is completely assembled—requiring some degree of wizardry to keep them stationary until you’re finished. Dark magic aside, a small(!) dab of grease can be a huge help during assembly. Just make sure to use it sparingly, as too much can clog up fuel passages.
For pesky O-ring gaskets that need to be held in specific shapes, a more stout option like Lucas Red & Tacky Grease or Gasgacinch can do wonders.
***
10. Save Your Old Parts
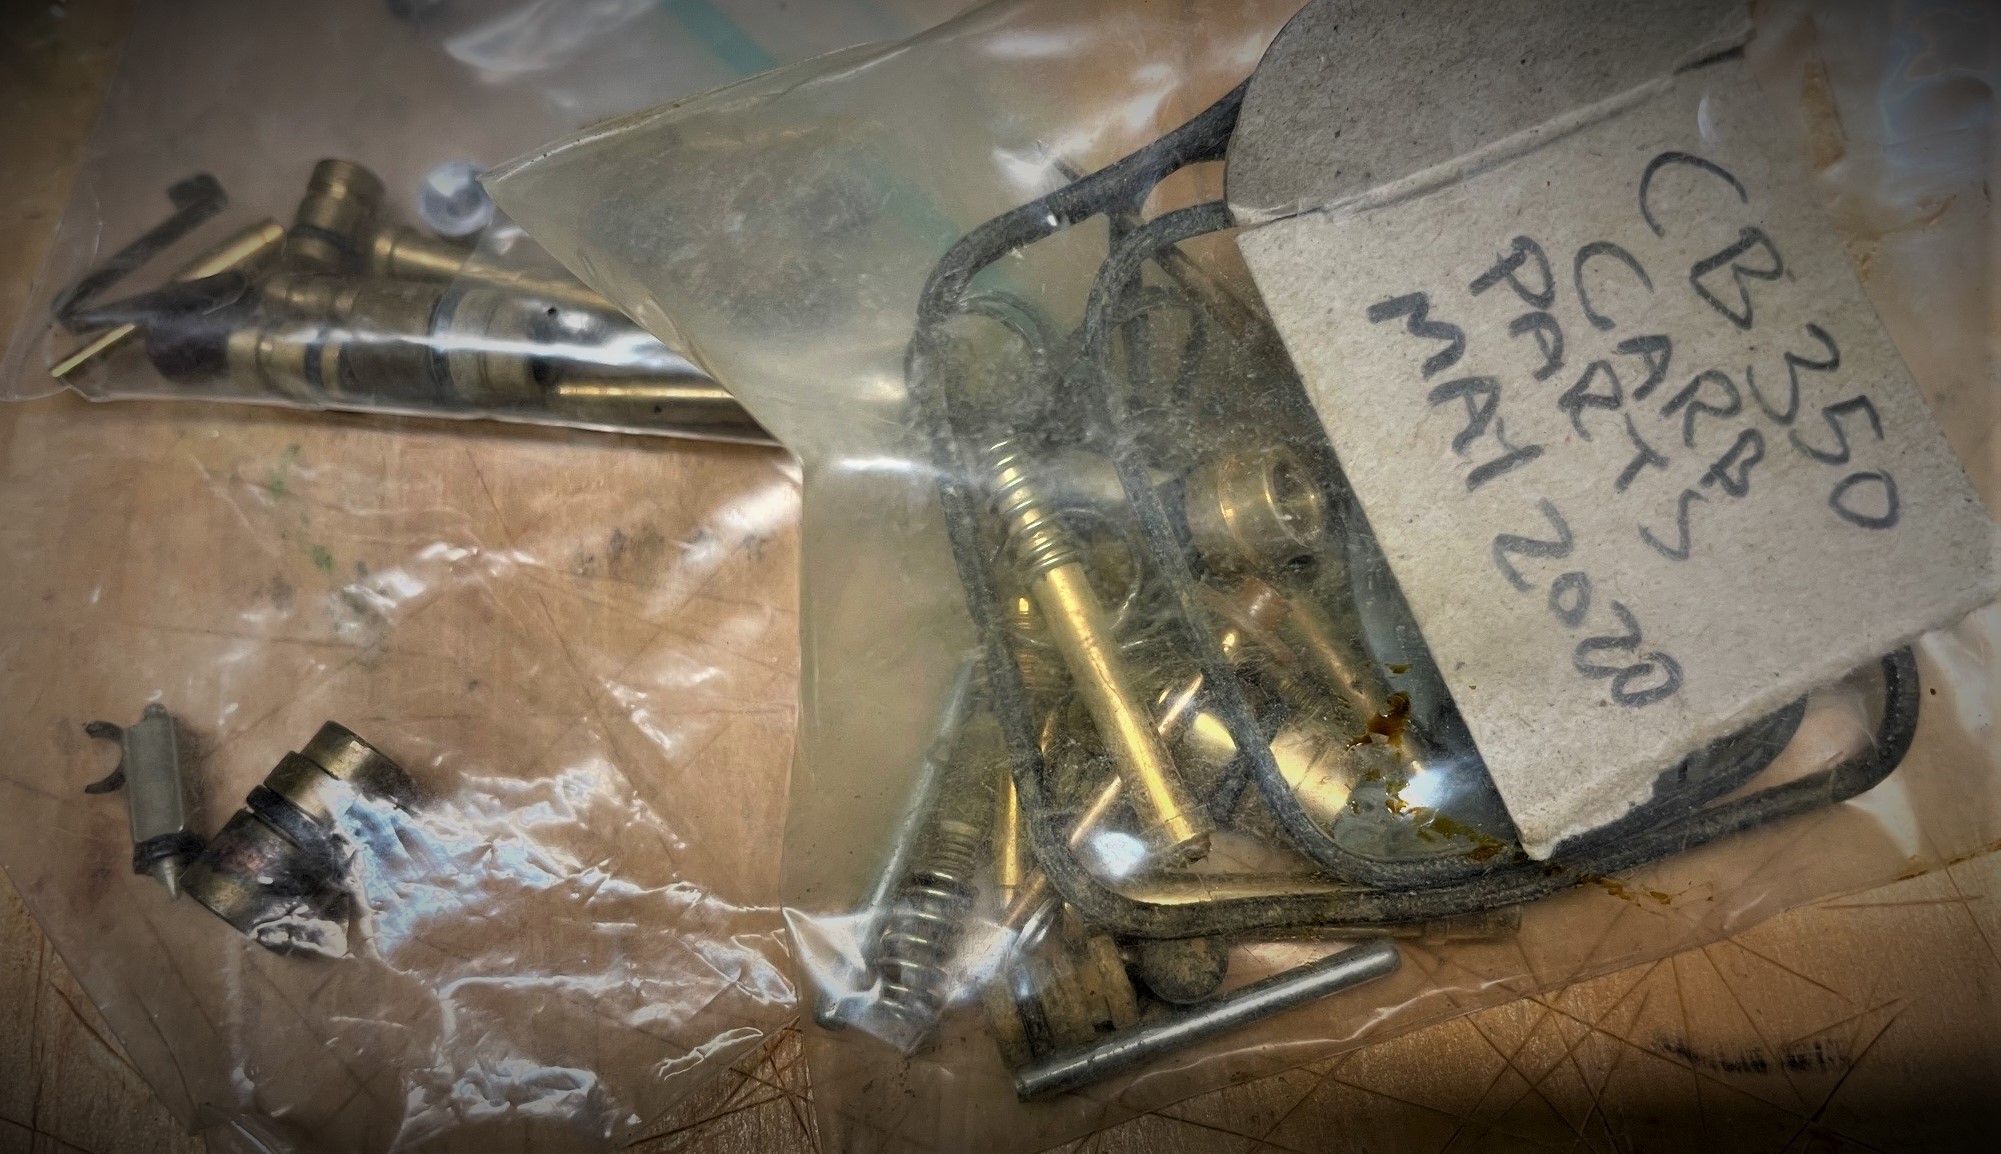
Don’t fling your old jets, screws, and needles in the trash. Instead, put them in a small baggie when you’re done. While the rubber bits may be toast, often times the hard parts (including springs, clips, and pins) are still OK. With a little bit of cleanup and a new O-ring or two, these pieces can be re-used in a pinch—particularly if you’ve got a rare carburetor model where off-the-shelf repair parts are scarce (or of questionable quality).
These parts are tiny enough to be stowed away in an unobtrusive spot in your shop too, just make sure you label the parts so you remember where they came from.
***
Bonus! Carburetor Bench Sync/Idle Speed Tip
After a successful rebuild, it’s a good idea to set the base idle speed and, for multi-carb bikes, do a bench sync.
Bench synchronization is a fancy way of saying that you’re setting a uniform idle throttle blade position for each carburetor so they function in unison when you twist the throttle. For an advanced carburetor vacuum synchronizing walkthrough, read this.
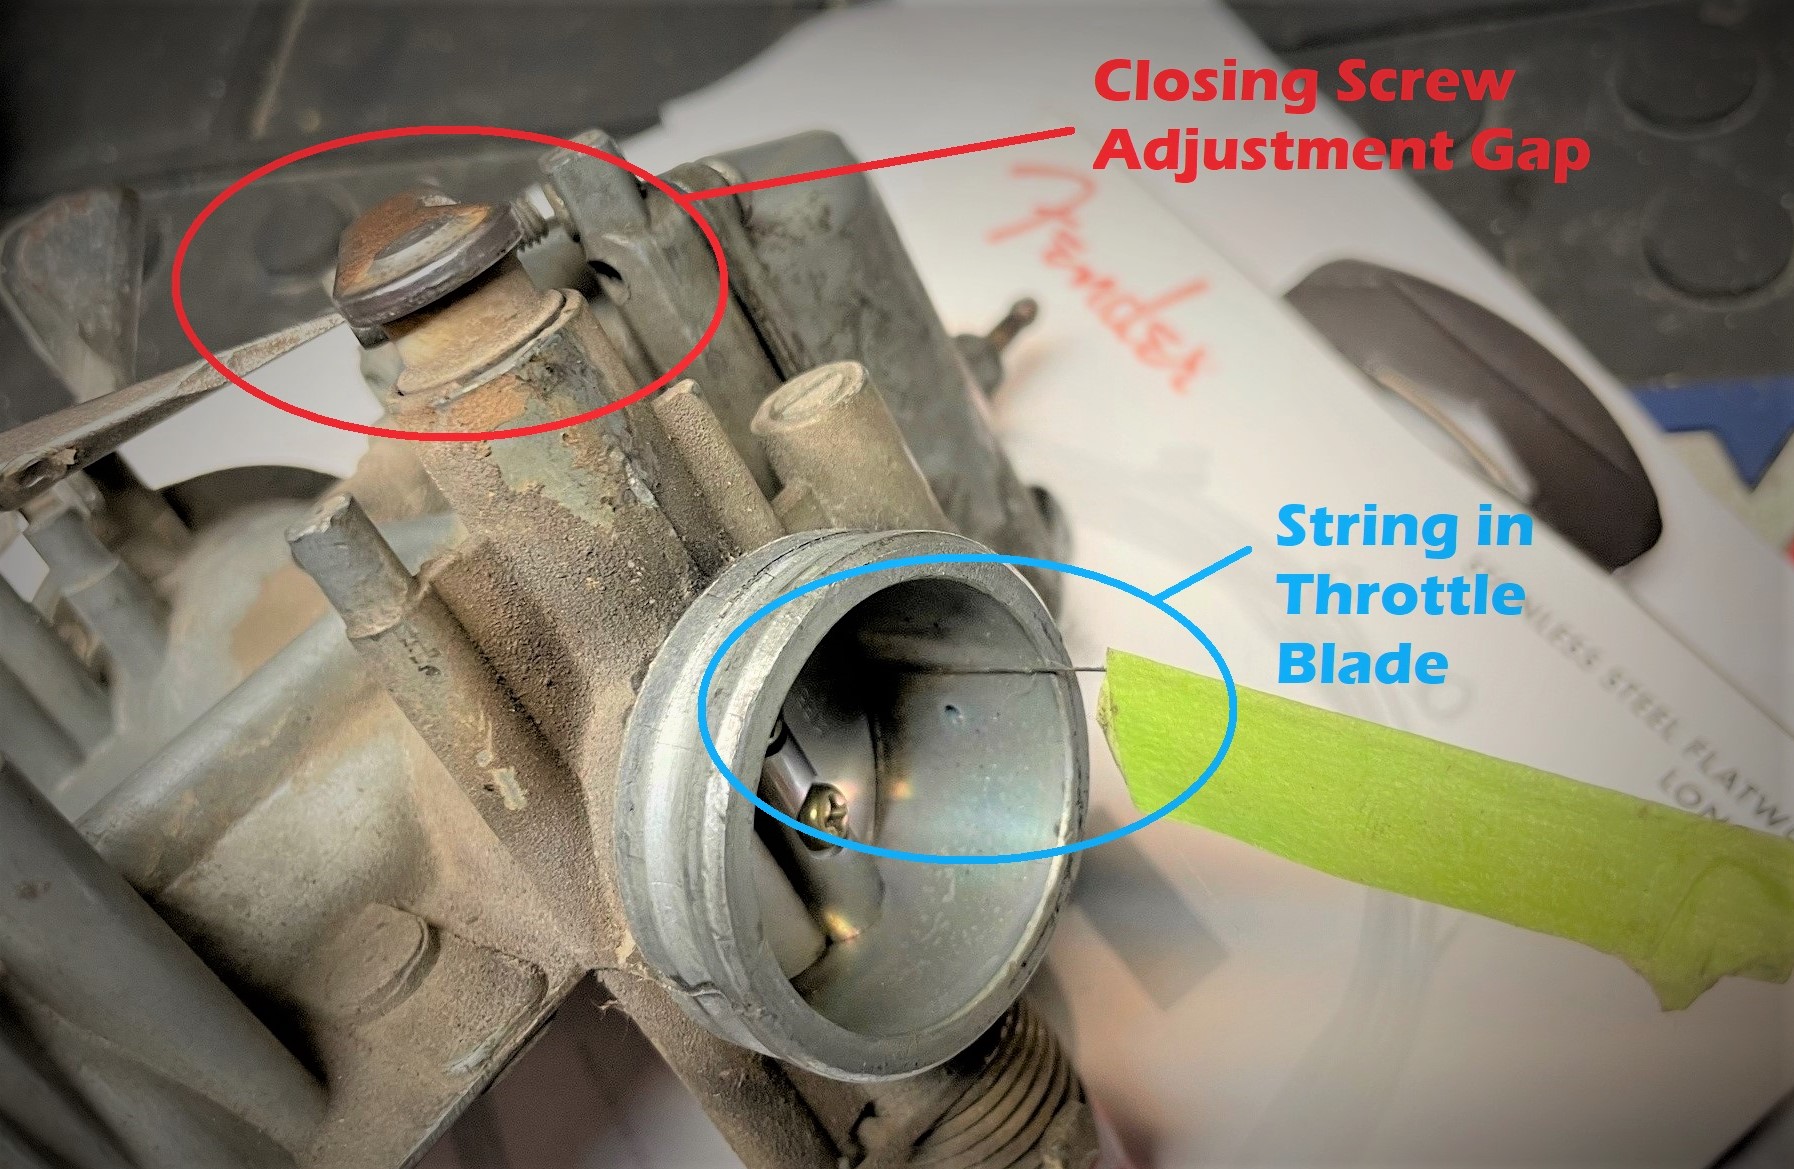
While this is not an exact science, we’ve found that using a fine solid core wire, or better yet a guitar string, between the throttle blade and carb throat is a good starting point for a bench sync. (You may find out which gauge wire works best for your bike with a little internet sleuthing.)
You simply insert the wire into the carb mouth (use the same spot for each carburetor), and gently close the throttle so that the valve blade rests on the wire. Then, adjust the throttle screw to close the gap, making sure the wire/string pulls out with just a little bit of resistance. Do that for your other carbs and you’ve got a standardized baseline for your idle position.
***
OK, so we didn’t want to get too granular with our advice in this list, but did we miss anything big? Is there another tip or “hack” you’d like to add?
We’re all about learning new tricks here, so drop some knowledge on us in the comments section below!
Thanks for the post on line. I have a number of older bikes that in some cases just replace the old carb with a new makuni. Did that an a 1972 cb 350. The new find is a 75 XL 125 that seems stuck. My 69 Yamaha at1 125 was in good shape so simply adding fuel and the basics, she started right up. All these have been free finds and I have 3 more in eastern wa to bring home since I moved to the coast a year ago. A 1972 175 scrambler and a 1972 350 scrambler, finally a Suzuki 800 intruder. All bikes were free.