In contrast to a series of misadventures with other bikes, my 2000 CB 750 Nighthawk has been the epitome of motorcycle reliability. Yup, save for some leaky gaskets and typical maintenance, the humble Honda has performed amazingly well for 20+ years and 80,000+ all-season miles.
Until about a month ago, that is.
The Set Up
One morning, instead of firing up instantly and settling into a nice, happy idle, the 750cc powerplant cranked over for what seemed like an eternity before begrudgingly burbling to life. There was a noticeable miss in the engine too, though I attributed that to a cold, choke-less start.
Once underway though, something was clearly awry. After sputtering around the block, I did a U-turn and pulled back into my driveway to investigate.
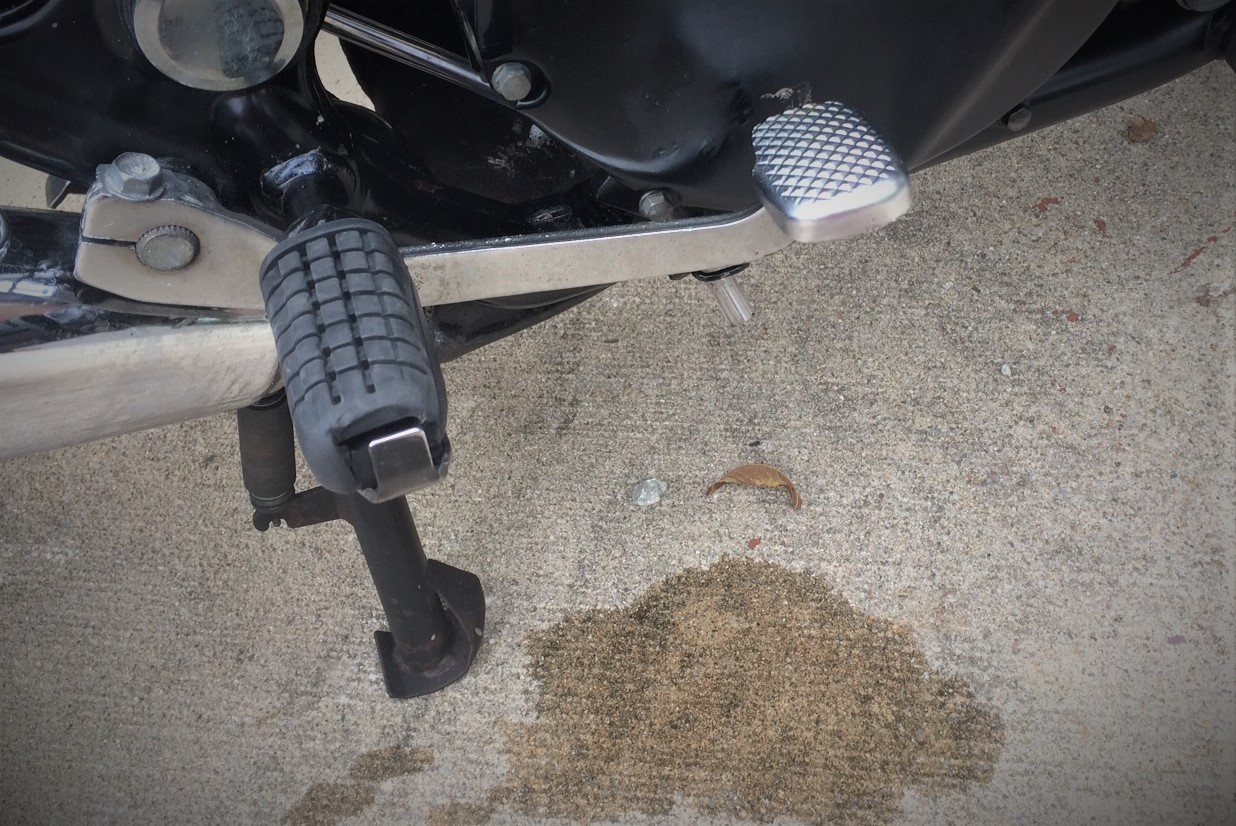
Repeatedly twisting the throttle led to choppy, inconsistent races up and down the tachometer. Then I began to notice the unmistakable stench of unburned fuel and, when I uncorked the vent breather tube, a stream of gas spilled out onto the concrete.
Yup…this Honda’s engine wasn’t firing…
<David Caruso Glasses>
</David Caruso Glasses>
Finding the Suspect Cylinder
Since the CB 750 has an individual carburetor for each of its four cylinders, I suspected (read: hoped) that the problem was isolated to just one cylinder. To confirm that, I popped off the gas tank and began removing the spark plugs to figure out which cylinder wasn’t enjoying itself.
Plugs one, two, and three looked fine—darn near perfect, actually.
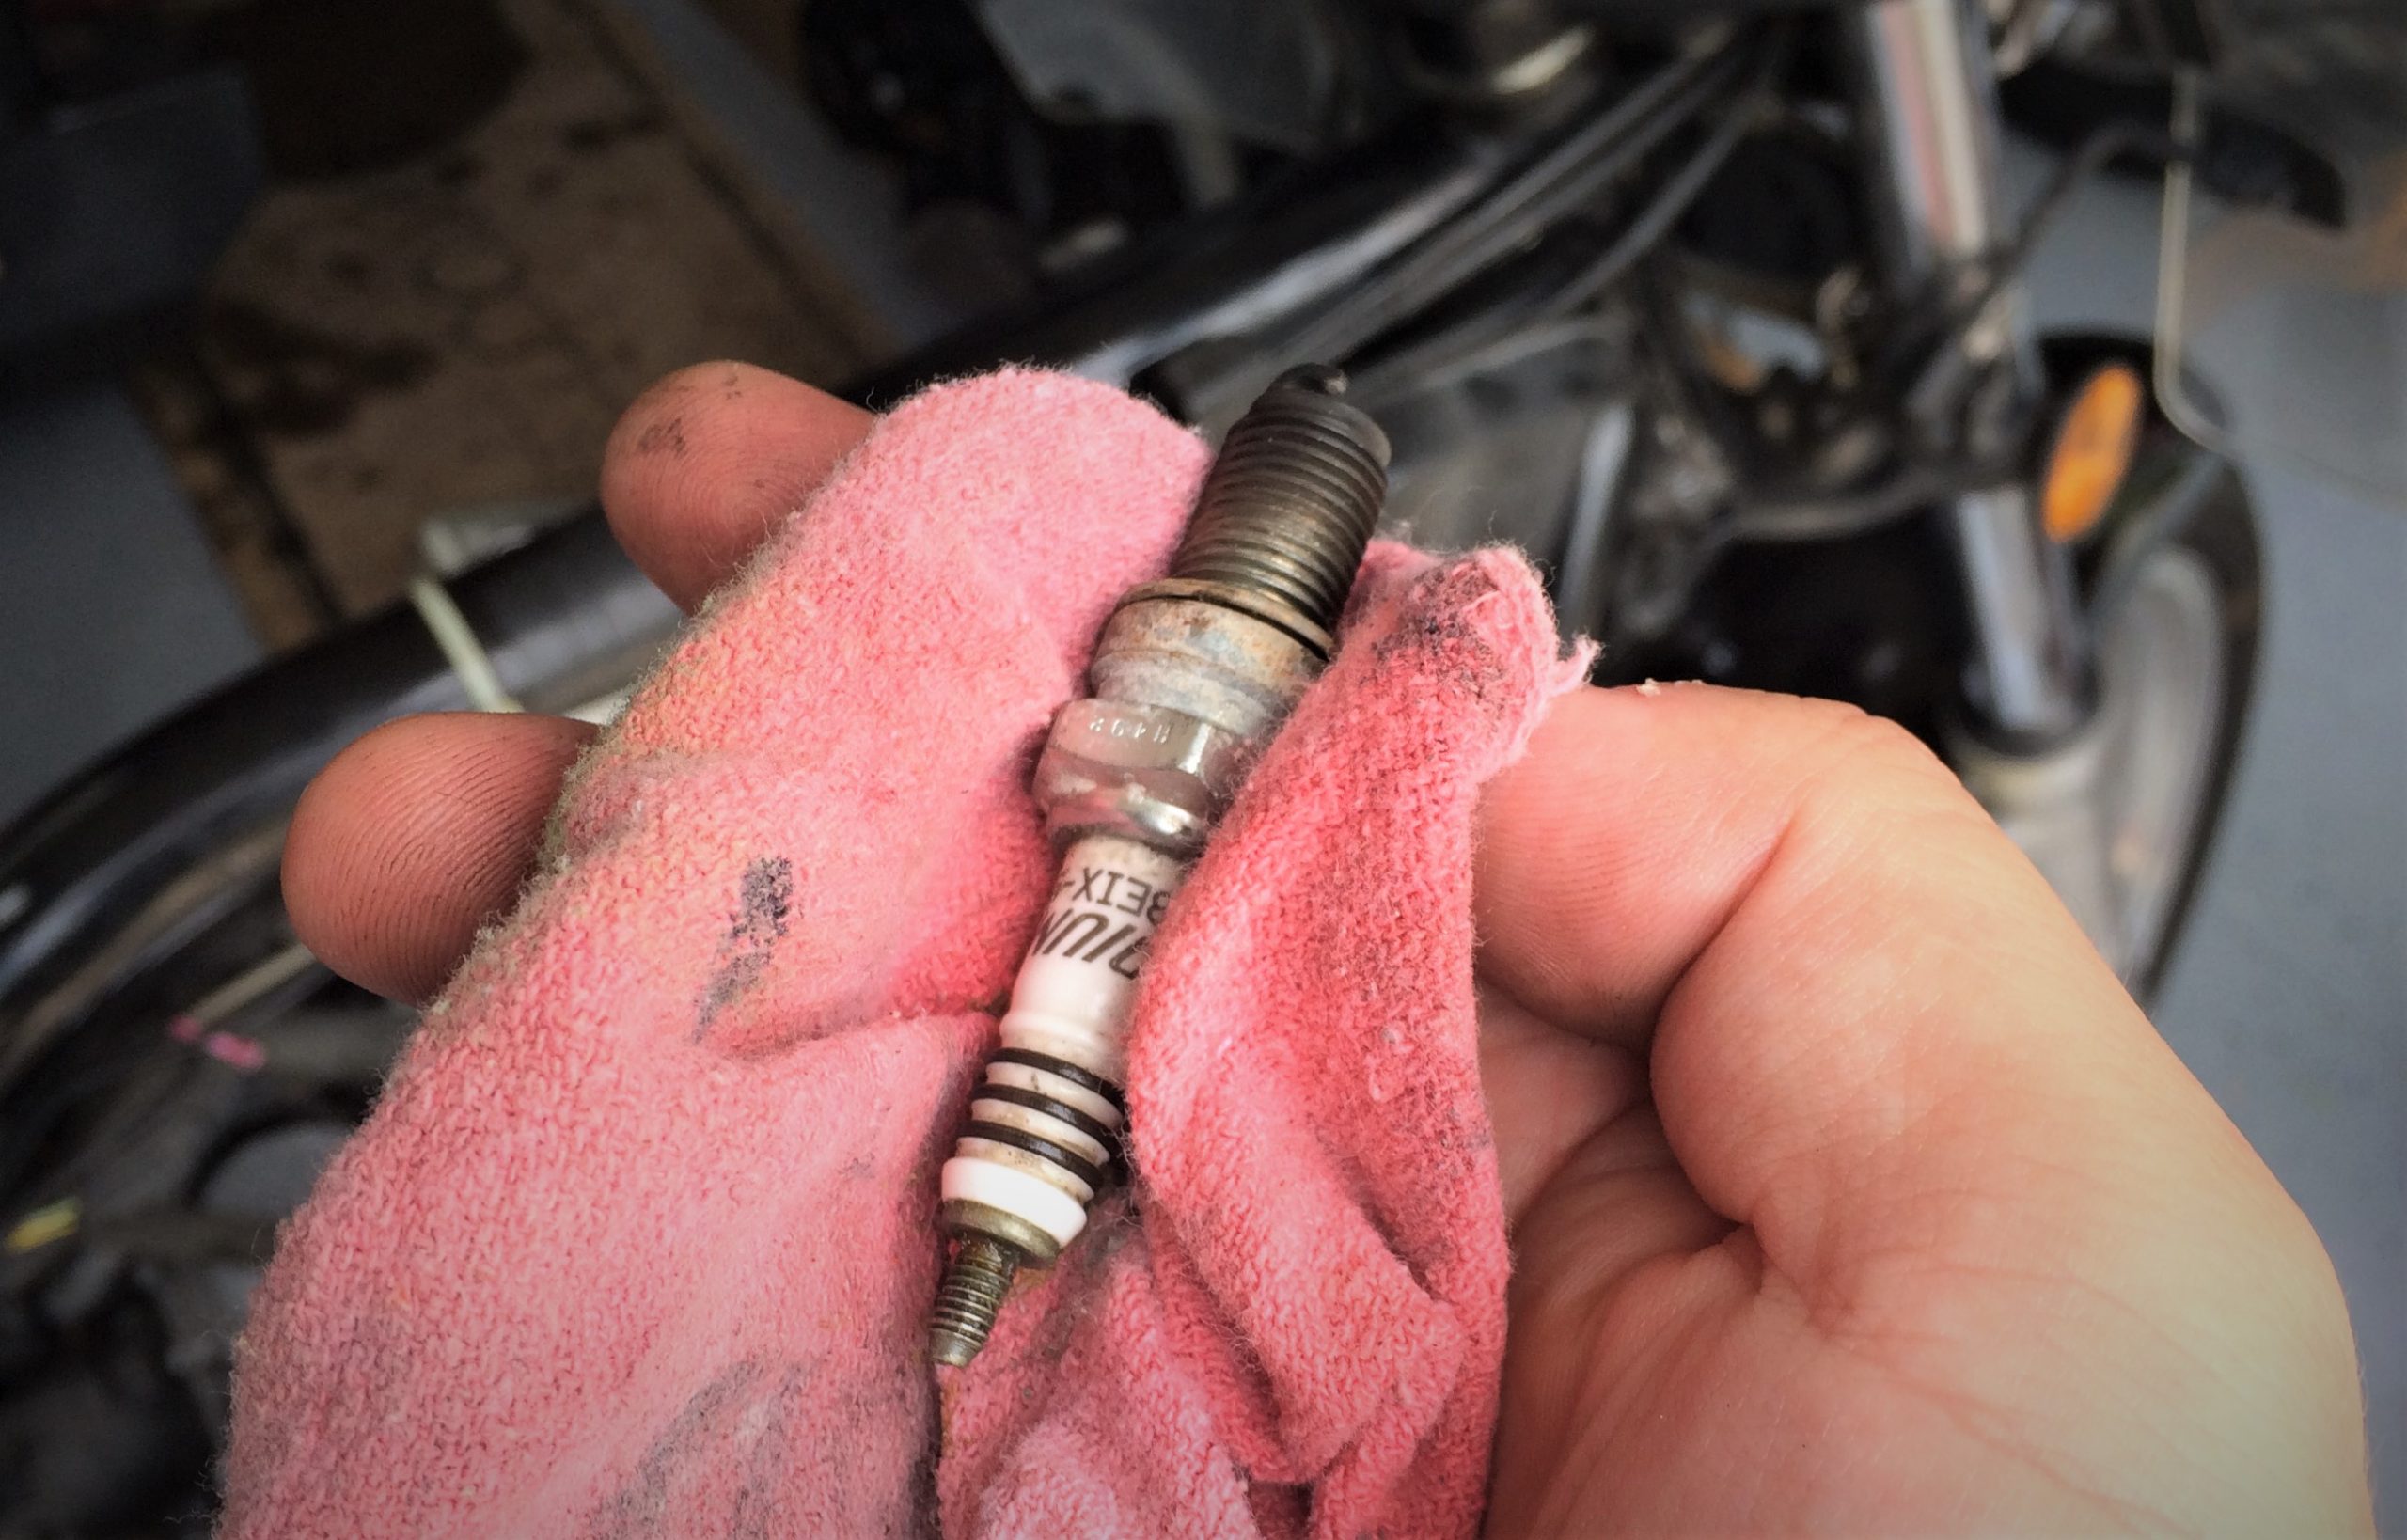
But number four? Whoa nelly, it was dramatically different than the other three, covered in a black, sooty residue. If you know how to read spark plugs, that immediately hints at an air/fuel mix that’s way too rich.
Engine Diagnostics 101
At this point, it looked like there was something amiss with cylinder number four. And if you remember your basics, you essentially need spark, compression, and fuel for an engine to work.
I used a basic in-line ignition tester to make sure that the cylinder was getting spark. And since the bike had been running perfectly up until this point, I assumed (read: hoped, again) that compression was good.
So, the only other obvious culprit was fuel.
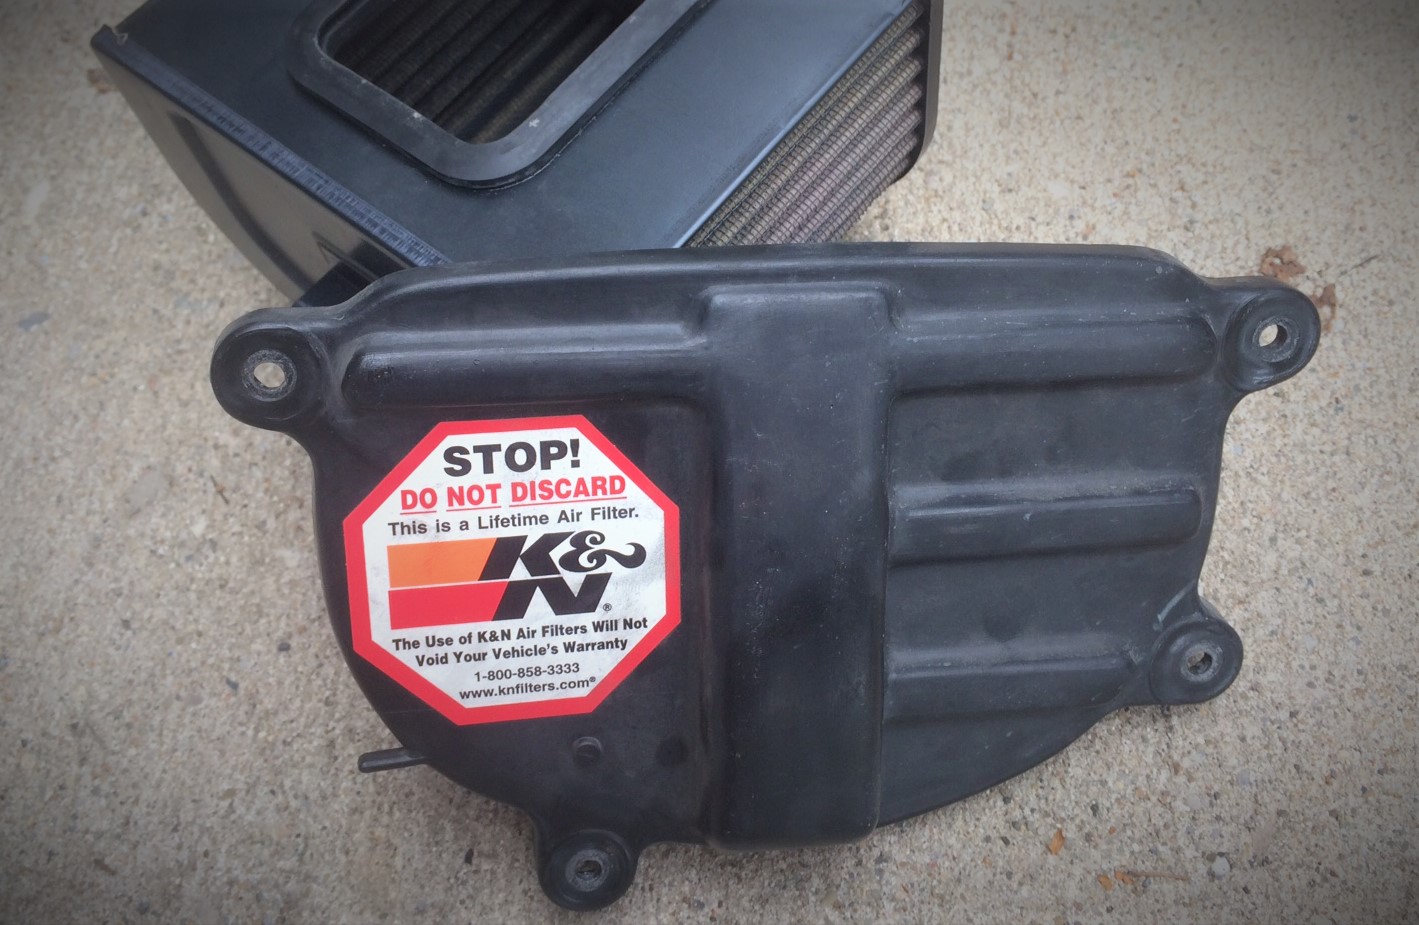
But before blaming the carburetor, I checked the air filter. A clogged, dirty air cleaner can really mess with your air/fuel ratio and they’re a heck of a lot easier to replace than a carburetor. Popping the airbox lid off gave me another big whiff of gas, and revealed a puddle of fuel trapped in the bottom of the airbox—which was promptly wiped up to ensure that everything was spic-n-span.
The air filter itself? Well, it looked pretty good, yet I cleaned it too, just to make sure.
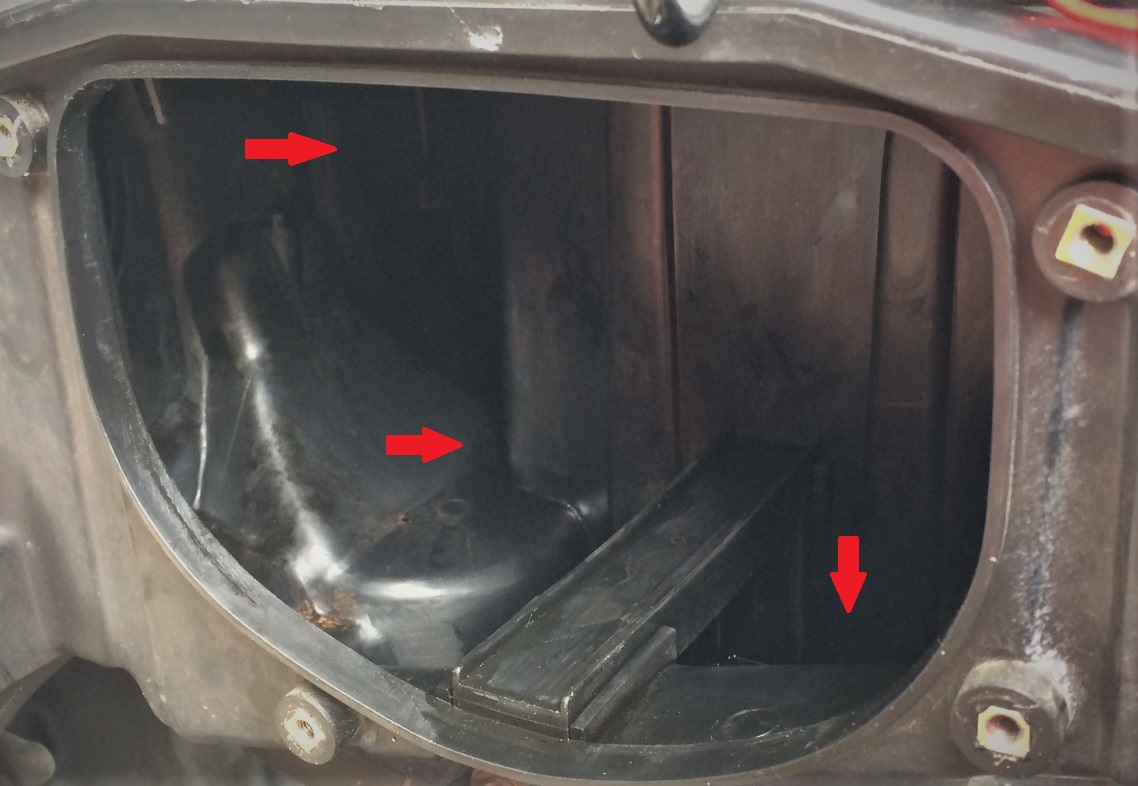
After waiting a few hours for the air cleaner to dry, I went to reinstall it into the bike. And then I noticed a new puddle of gasoline collecting again on the bottom of the airbox.
That little clue lead me almost directly to the problem: an open carburetor fuel shutoff valve, perhaps caused by a stuck float.
So let me explain how I figured that out.
How a Typical Motorcycle Carburetor Works
Before EFI showed up, many motorcycles used a Constant Velocity carburetor (Or CV carb, if you’re in a hurry). We won’t go in-depth on how they work in this article, but you can catch a very practical explanation here.
What is important, however, is knowing that a CV carb like this typically keeps a fuel reservoir in a bowl at the bottom of the carb body. That bowl is gravity fed by the tank located above the carburetor. Inside the bowl is a float/pontoon system that, when the fuel level reaches a specific point, the float rises and activates a shutoff valve to stop the gas delivery from the fuel tank, ensuring a consistent amount of fuel in the bowl while preventing the carb from overfilling.
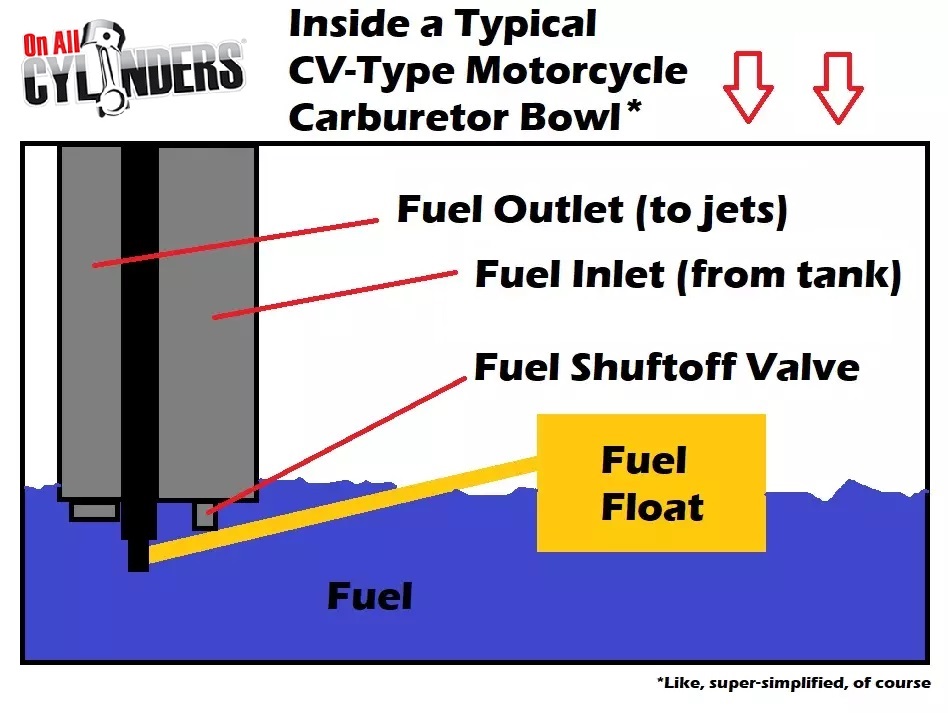
The Problem with a Stuck Carburetor Fuel Shutoff Float Valve
But what happens if that little float or valve gets stuck?
Well, since the carb is gravity fed, it means there’s a constant push of fuel down the line into the carburetor. When the shutoff valve is stuck open, it means that fuel will fill beyond its maximum point and push through the jets, resulting in a super-rich air/fuel mixture—particularly at idle, when there’s not a lot of air moving in to lean it out.
Worse yet, since gravity doesn’t stop, it’ll keep forcing that gas through the carburetor even when the bike’s not running. The fuel will keep flowing and inevitably back up into the airbox and pour into the cylinder(s) until the gas tank runs dry.
And even closing the main fuel petcock at the tank when you’re done riding won’t help here, because it’ll still drain a fuel line’s worth of gas into your cylinder whenever you park. Beyond the poor fuel economy, you could be dumping a shot glass full of gasoline into your oil each time you lower the kickstand.
When fuel mixes with your motor oil, you’re going to have a bad time. The gas will significantly dilute the oil—thinning it out and reducing its viscosity. In other words, it won’t lubricate as well, which can cause serious friction-related problems. And that’s doubly true in a motorcycle, where the engine and transmission often share the same oil. So if you suspect your gas is mixing with oil, change your oil immediately.
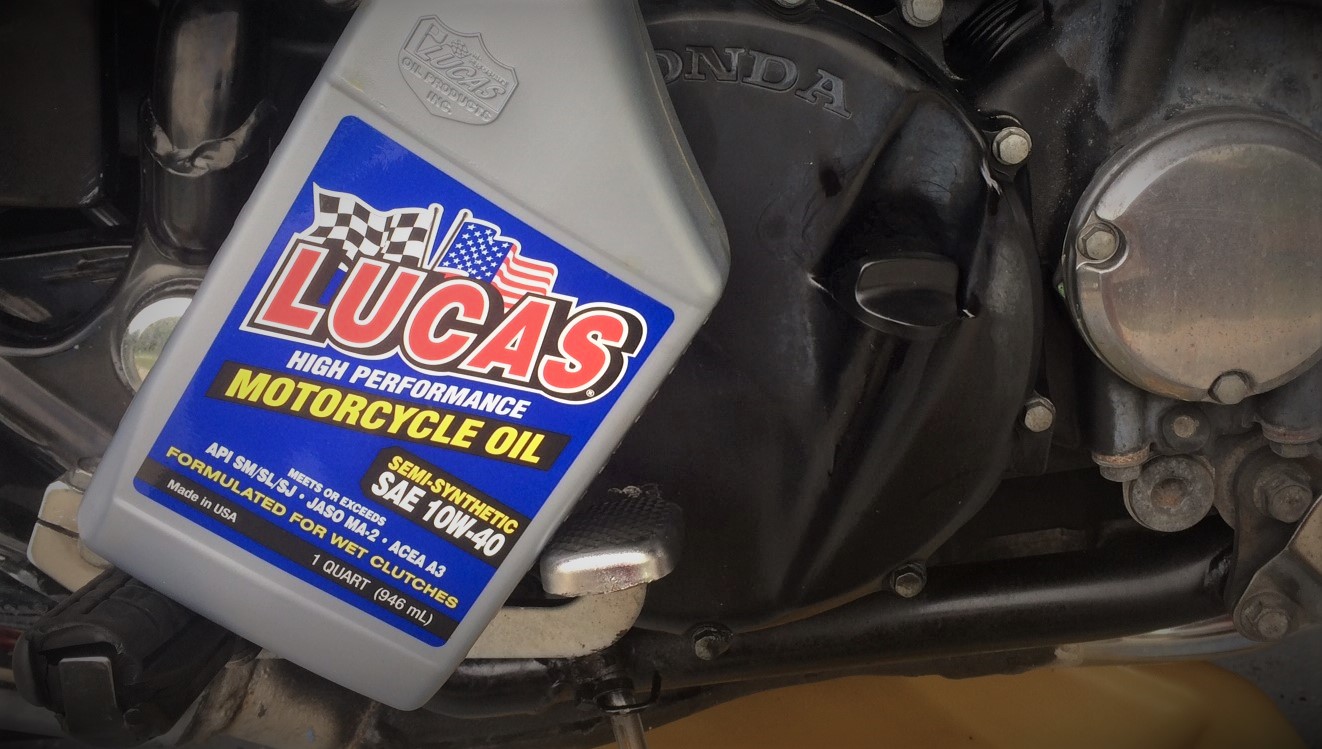
Since I already spotted a new puddle of fuel forming in the airbox after its initial cleaning, I immediately unscrewed the engine’s oil cap and, sure enough, it reeked of gasoline. Pulling the dipstick out, I could see that the oil level was well above the full line, and the fast drips of diluted oil off the dipstick told me that the oil was considerably thinner than normal.
Yup—with the stuck shutoff valve, the fuel kept flowing through the carb, pouring directly into the cylinder, where it was creeping past the piston rings and dripping down into the crankcase. Thankfully, I had caught it before putting much stress on the engine.
Another cause of a rich mixture/fuel excess is a damaged float pontoon. Specifically on older bikes, which often use a brazed brass float, the pontoon can develop pinhole leaks and gradually fill up with gas. In those cases, the pontoon will permanently sink to the bottom of the bowl, so the shutoff valve will never close, resulting in the same over-fuel issue as a stuck shutoff valve. (Newer carbureted bikes often use a plastic pontoon, which gave me hope that I simply had a stuck valve here.)
The Fix
Of course, the best way to fix a stuck fuel shutoff float valve is to remove the carburetor, disassemble the bottom bowl and clean/inspect/replace the fuel shutoff needle and check the float for proper operation.
Problem is, removing the Nighthawk’s quartet of carburetors is laughably cumbersome. In fact, the factory shop manual says you have to remove the rear wheel, to remove the rear fender, to remove the battery tray, to remove the airbox, to remove the intake plenum, before removing the carbs.
Suffice it to say, I wanted an easier path.
I’ve had good luck with a product called Seafoam Motor Treatment in the past. The folks at Seafoam say it can lubricate internal components and remove deposits from your engine and fuel system. I figured it was worth seeing if it could work some magic on a stuck fuel valve.
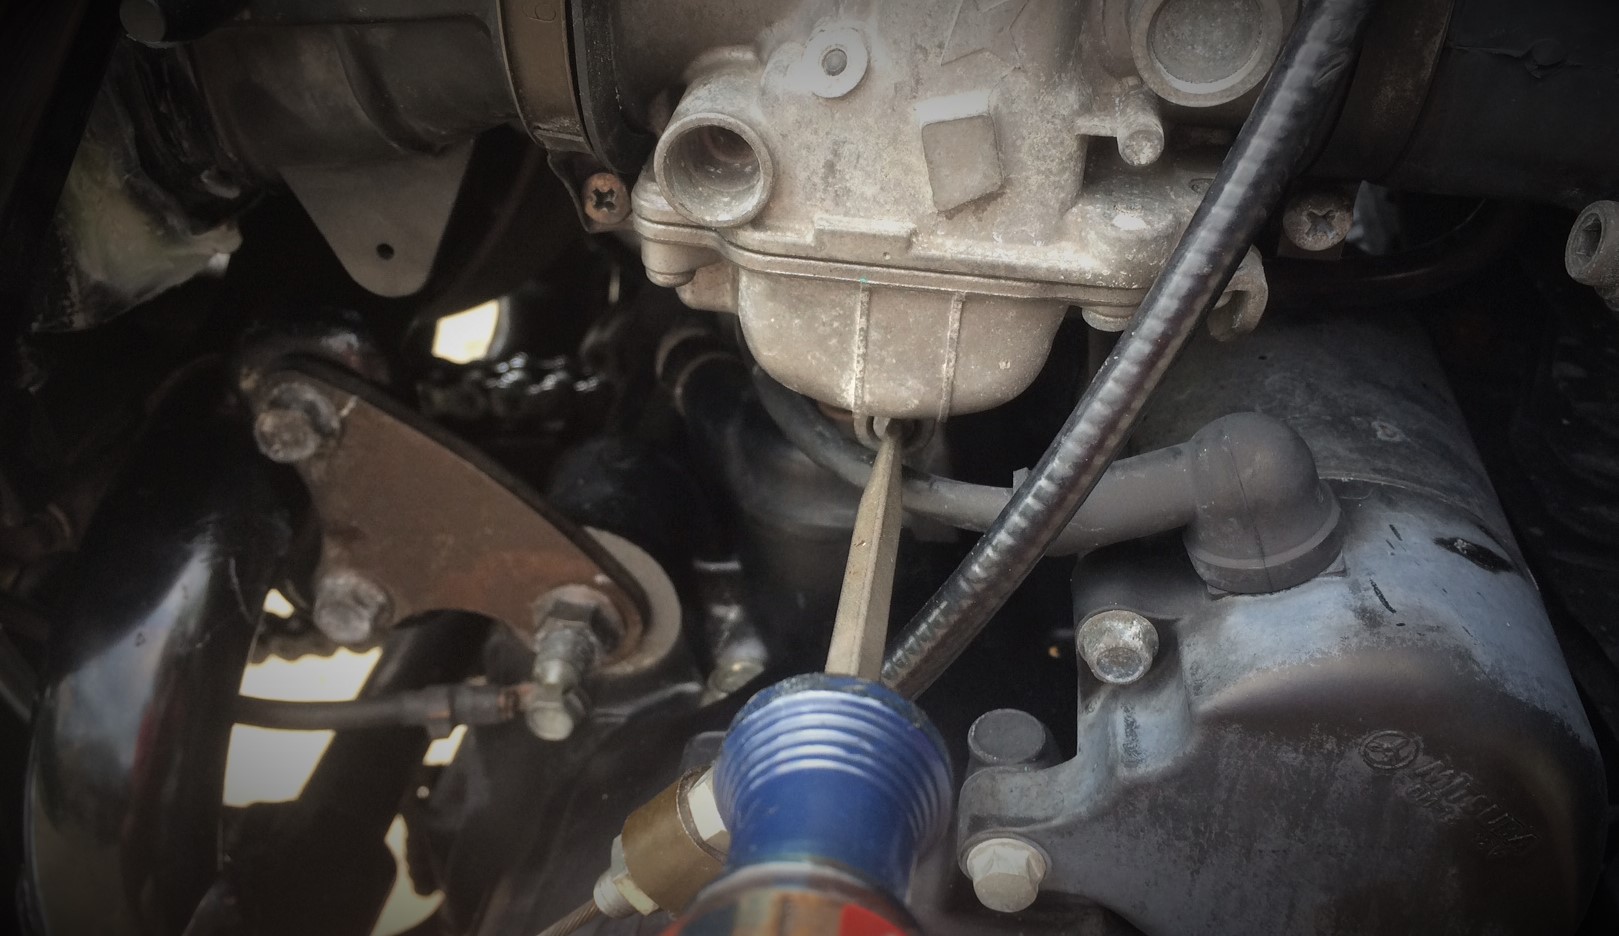
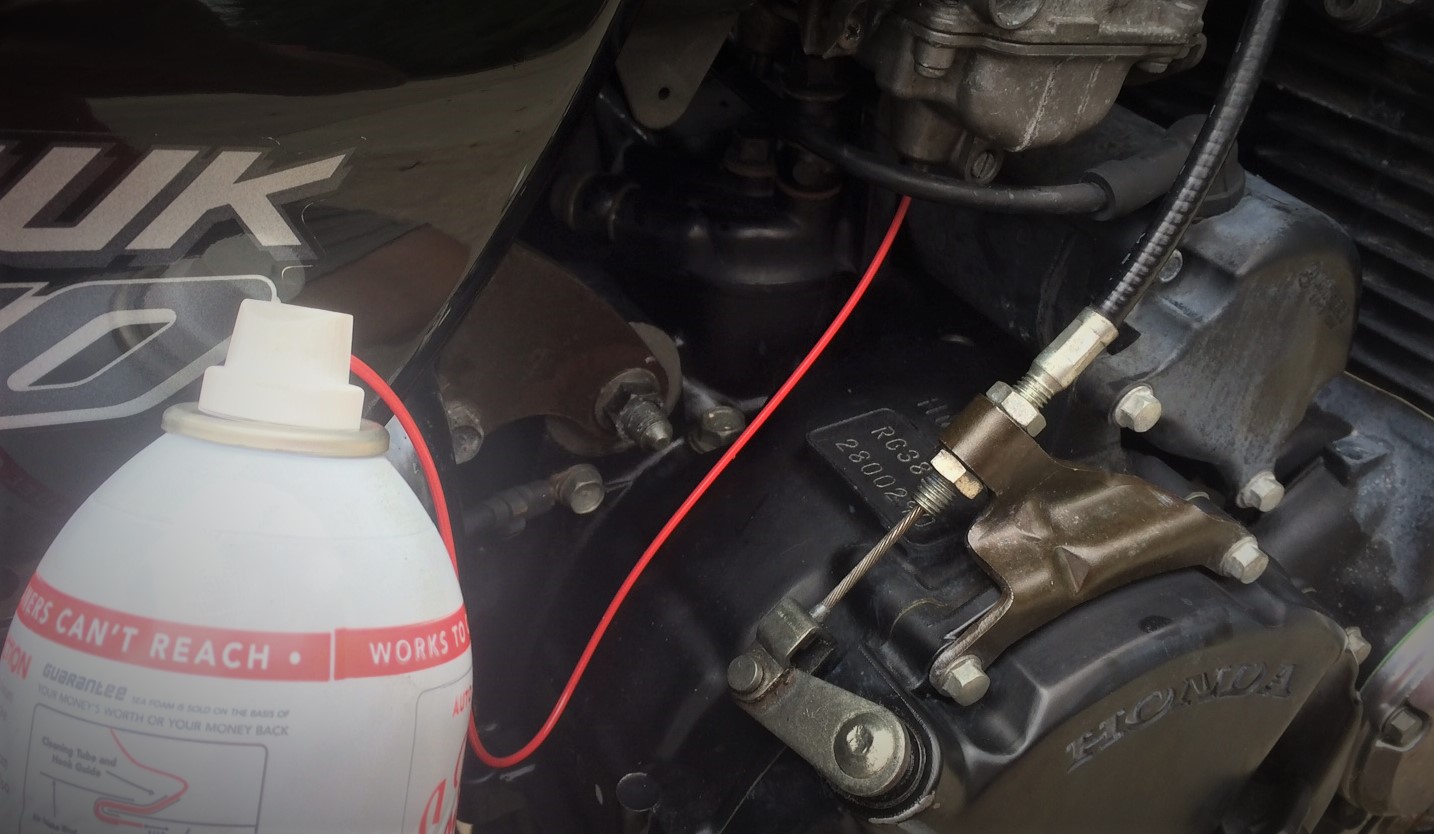
The good news is that the wonky valve was in Carb #4, which is the easiest one to get to, right on the outside of the cylinder bank.
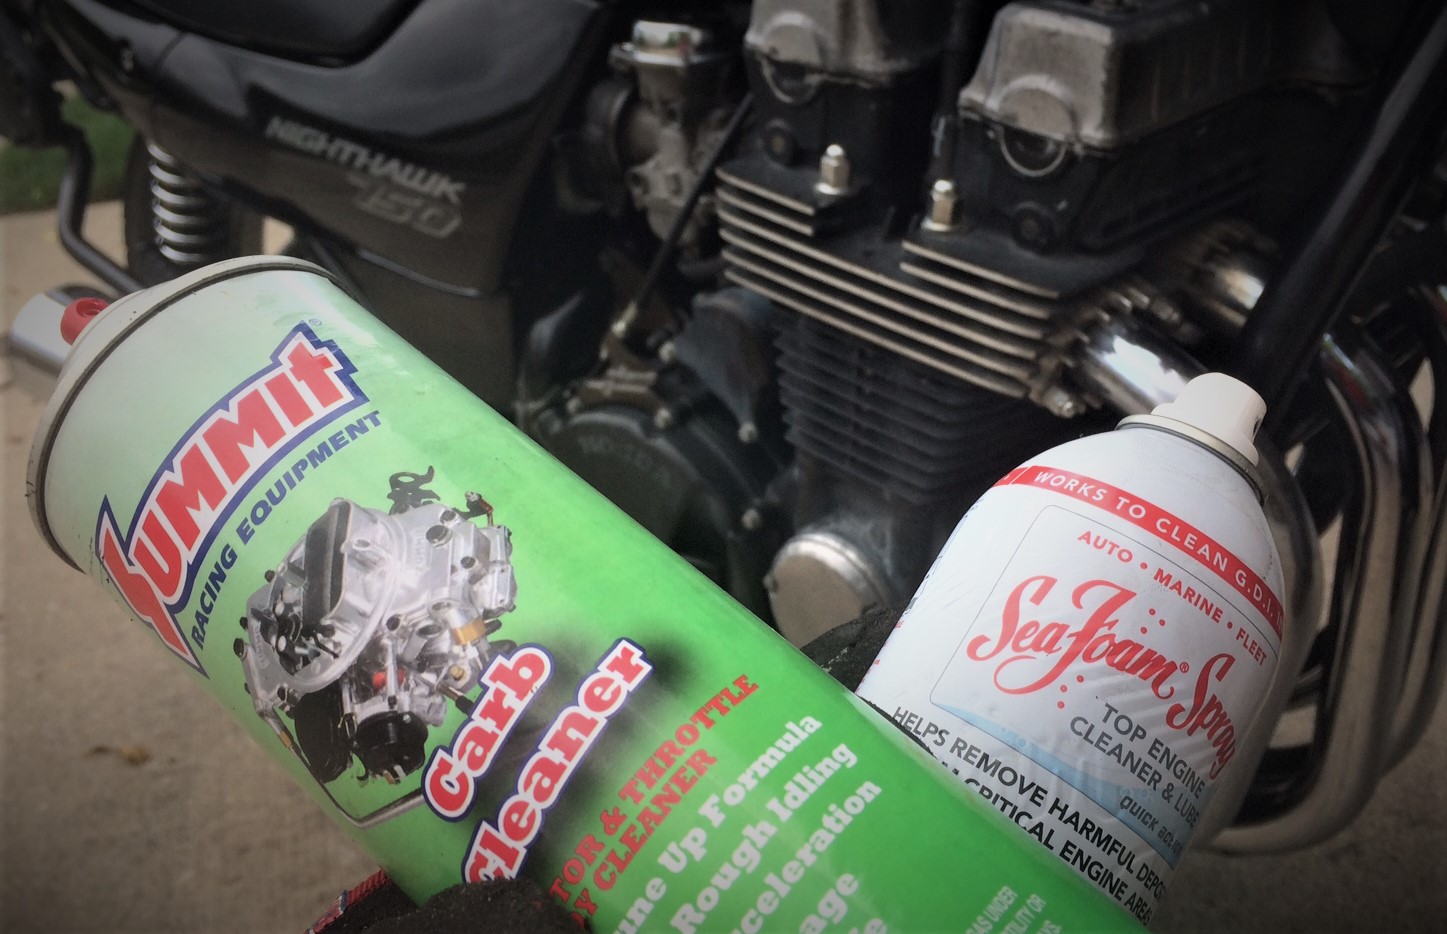
So I started by draining the carb’s fuel bowl by simply opening up its drain valve, then I flushed out the bowl by spraying some carb cleaner up the drain valve for a moment, before letting it run back out of the carburetor.
Carburetor cleaner can damage paint and etch metal, so be sure to dilute/wash away any excess drips/puddles with water!
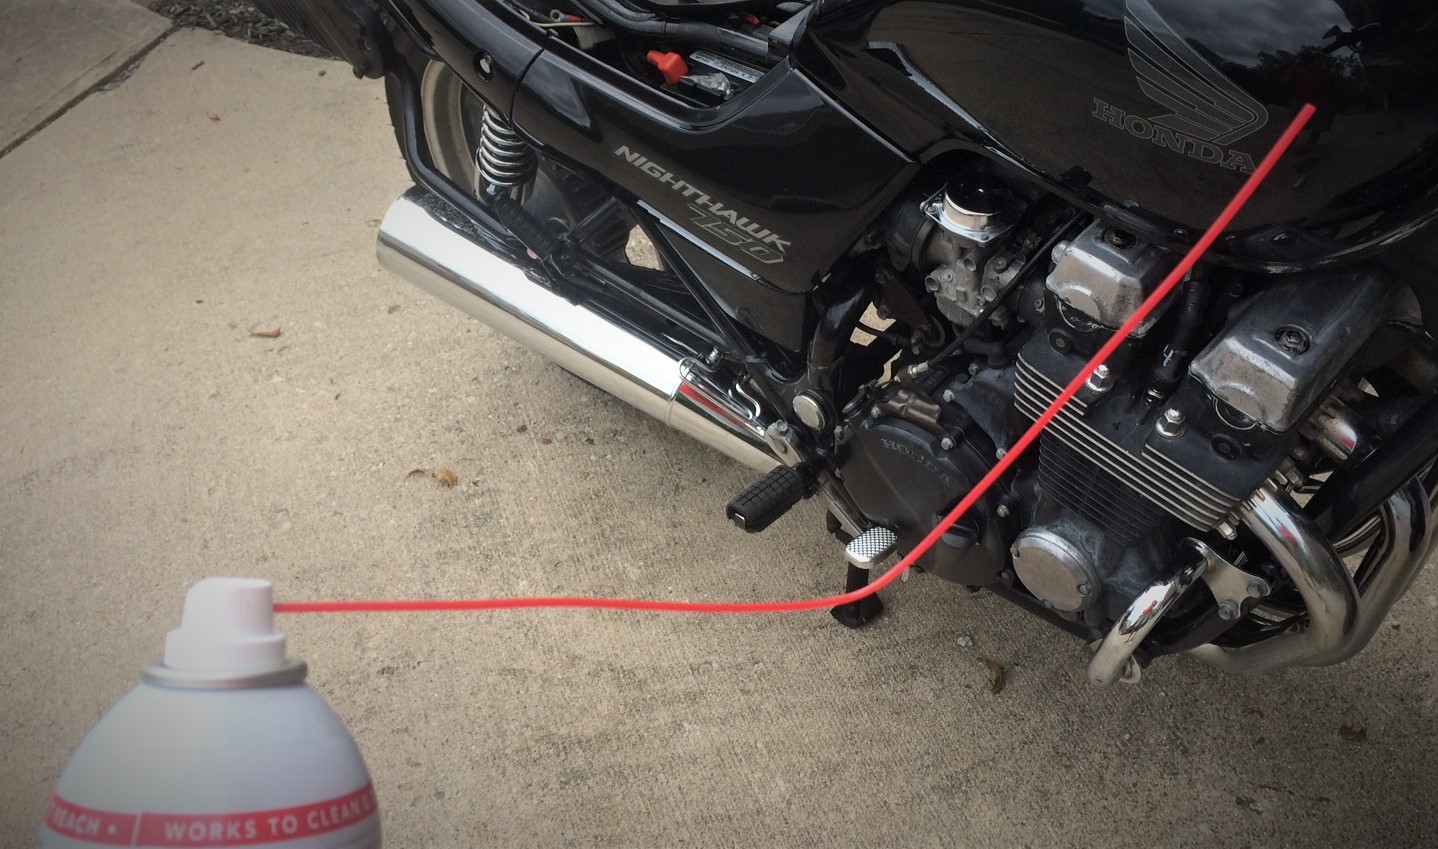
Next, I reached for a can of Seafoam Spray, which is the same as the regular stuff only in an aerosol can. And Seafoam’s nice enough to supply you with a super-long, flexible hose, practically tailor-made for what we’re about to do.
With the carburetor’s bottom drain valve still open, I threaded the long tube up through the drain port, and then mashed the button on the can. The Seafoam began filling the carb bowl and when I saw foam begin to bubble out of the top carb vent hole, I quickly pulled the Seafoam tube out and closed the carb’s drain screw, trapping the Seafoam in the lower carb bowl.
Now, we wait.
After about 24 hours, I went back and drained the Seafoam out and closed the drain valve. Then I rapped the bowl gently with the handle of a wooden mallet a few times to free-up any potentially stuck parts.
Next, I opened the petcock, and waited a moment for some fuel to refill the #4 bowl.
Finally, I started the engine.
After a few nerve-racking sputters, the Nighthawk’s familiar, rock-solid idle returned. I threw a leg over the bike and rolled into the street. Admittedly there were a handful of early stumbles at speed, as the fuel bowl refilled entirely and the rest of the Seafoam worked its way through, but soon the bike was running like the day it was made.
Subsequent jaunts through town over the next three weeks confirmed that whatever was causing the stuck valve had been worked out.
Epilogue
All told, what could’ve been a time-consuming and costly repair was solved with a few minutes of work and a day’s wait. While this fix isn’t a silver bullet for every carb-related problem, hopefully this article gave you some options to explore as an alternative to a full-blown carburetor rebuild.
Am I on borrowed time? Perhaps. These carbs are 20+ years old and will inevitably need a rebuild in the future, but if a few bucks and a little bit of effort can stave off that job for another year, I’ll happily oblige.
Comments