Before modern EFI showed up, many older multi-cylinder motorcycles often used a separate carburetor to feed each individual cylinder—so for a parallel twin engine, it may have two carburetors, an inline four-cylinder would have four, and so on.
This multi-carb setup is in contrast to a typical car engine, where a single carb would feed all cylinders (obviously excluding dual-quads, tri-power, and similar layouts).
While a multi-carburetor configuration is quite common and reliable, it does present another wrinkle in your carburetor tuning regimen: keeping them synchronized.
In this context, carb synchronization is a fancy way of saying that you’re making sure all of the carburetors act in unison to deliver balanced amounts of fuel into their respective cylinders, so your motorcycle’s power output is smooth and predictable. And since vacuum directly relates to fuel delivery for a typical carbureted motorcycle engine, it means you can use vacuum as your guide to making sure the carbs are balanced properly.
So, syncing motorcycle carburetors usually isn’t that tough, provided you’ve got the right tools and a little bit of know-how.
How to Tell if Your Motorcycle Carburetors Are Out-of-Sync
Before we dive into the carb synchronization process though, let’s talk about a few symptoms of out-of-sync motorcycle carbs.
Though the carb sync is set at the factory, it will drift as miles accumulate. While all bikes have different service regimens, it’s probably a good idea to check your sync every few years/few thousand miles or so. Beyond the regular service intervals, there are a few signs that your carburetors may be out-of-sync too:
- Erratic, inconsistent idle
- Difficult to adjust idle speed (rpm)
- Surging on deceleration
- Slow to settle back into an idle
- Poor fuel economy
- Sputtering, backfires
- Hesitation
- Strong gas odor, particularly at idle
While all these symptoms could also indicate other engine issues, if you’re experiencing a few of these together, improper carb sync might be a culprit.
Check These Things Before Adjusting Your Carburetor Synchronization! Make no mistake: A good carb sync does NOT cure underlying engine issues. If you’ve got clogged filters, improper jetting, vacuum leaks, and low compression, there’s no chance that you’ll be able to get your carbs synced correctly. That said, make sure your carbs are clean and functioning properly, check for vacuum leaks, inspect your air filter(s), and confirm adequate fuel delivery from your gas tank.
Motorcycle Vacuum Carb Sync Tools
Again, since vacuum directly correlates with fuel delivery in this situation, a typical motorcycle carburetor synchronization job requires a vacuum synchronizer tool. In essence, all you’re really doing is comparing the vacuum levels from each carburetor and adjusting the carbs so the readings match.
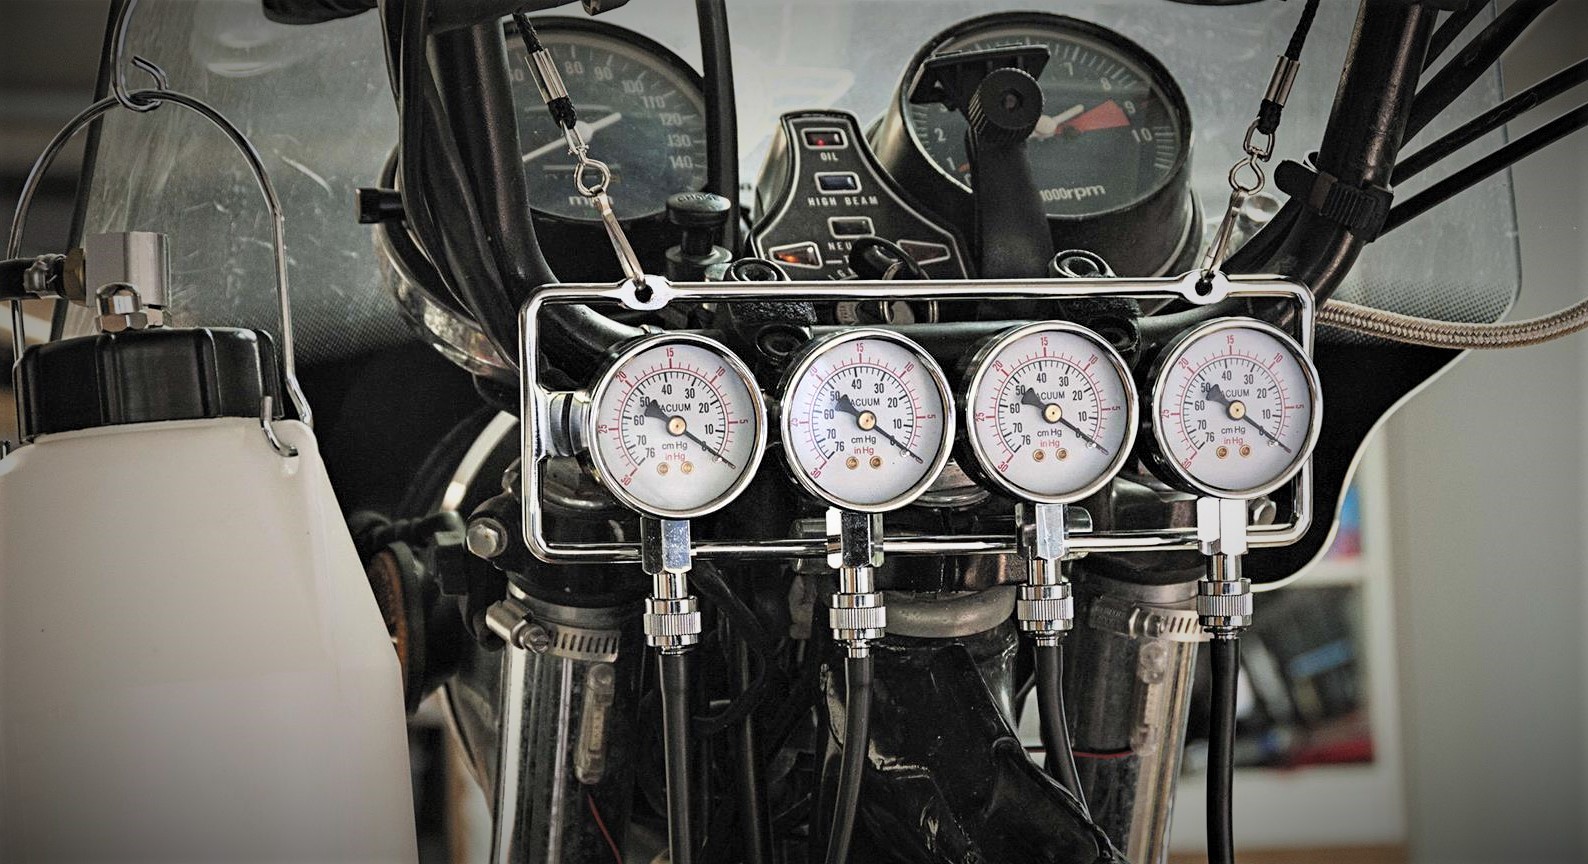
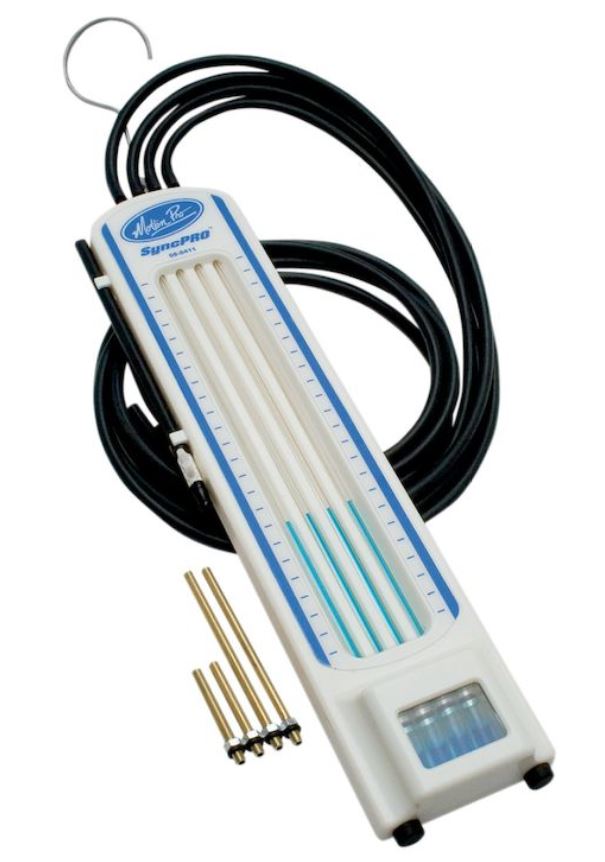
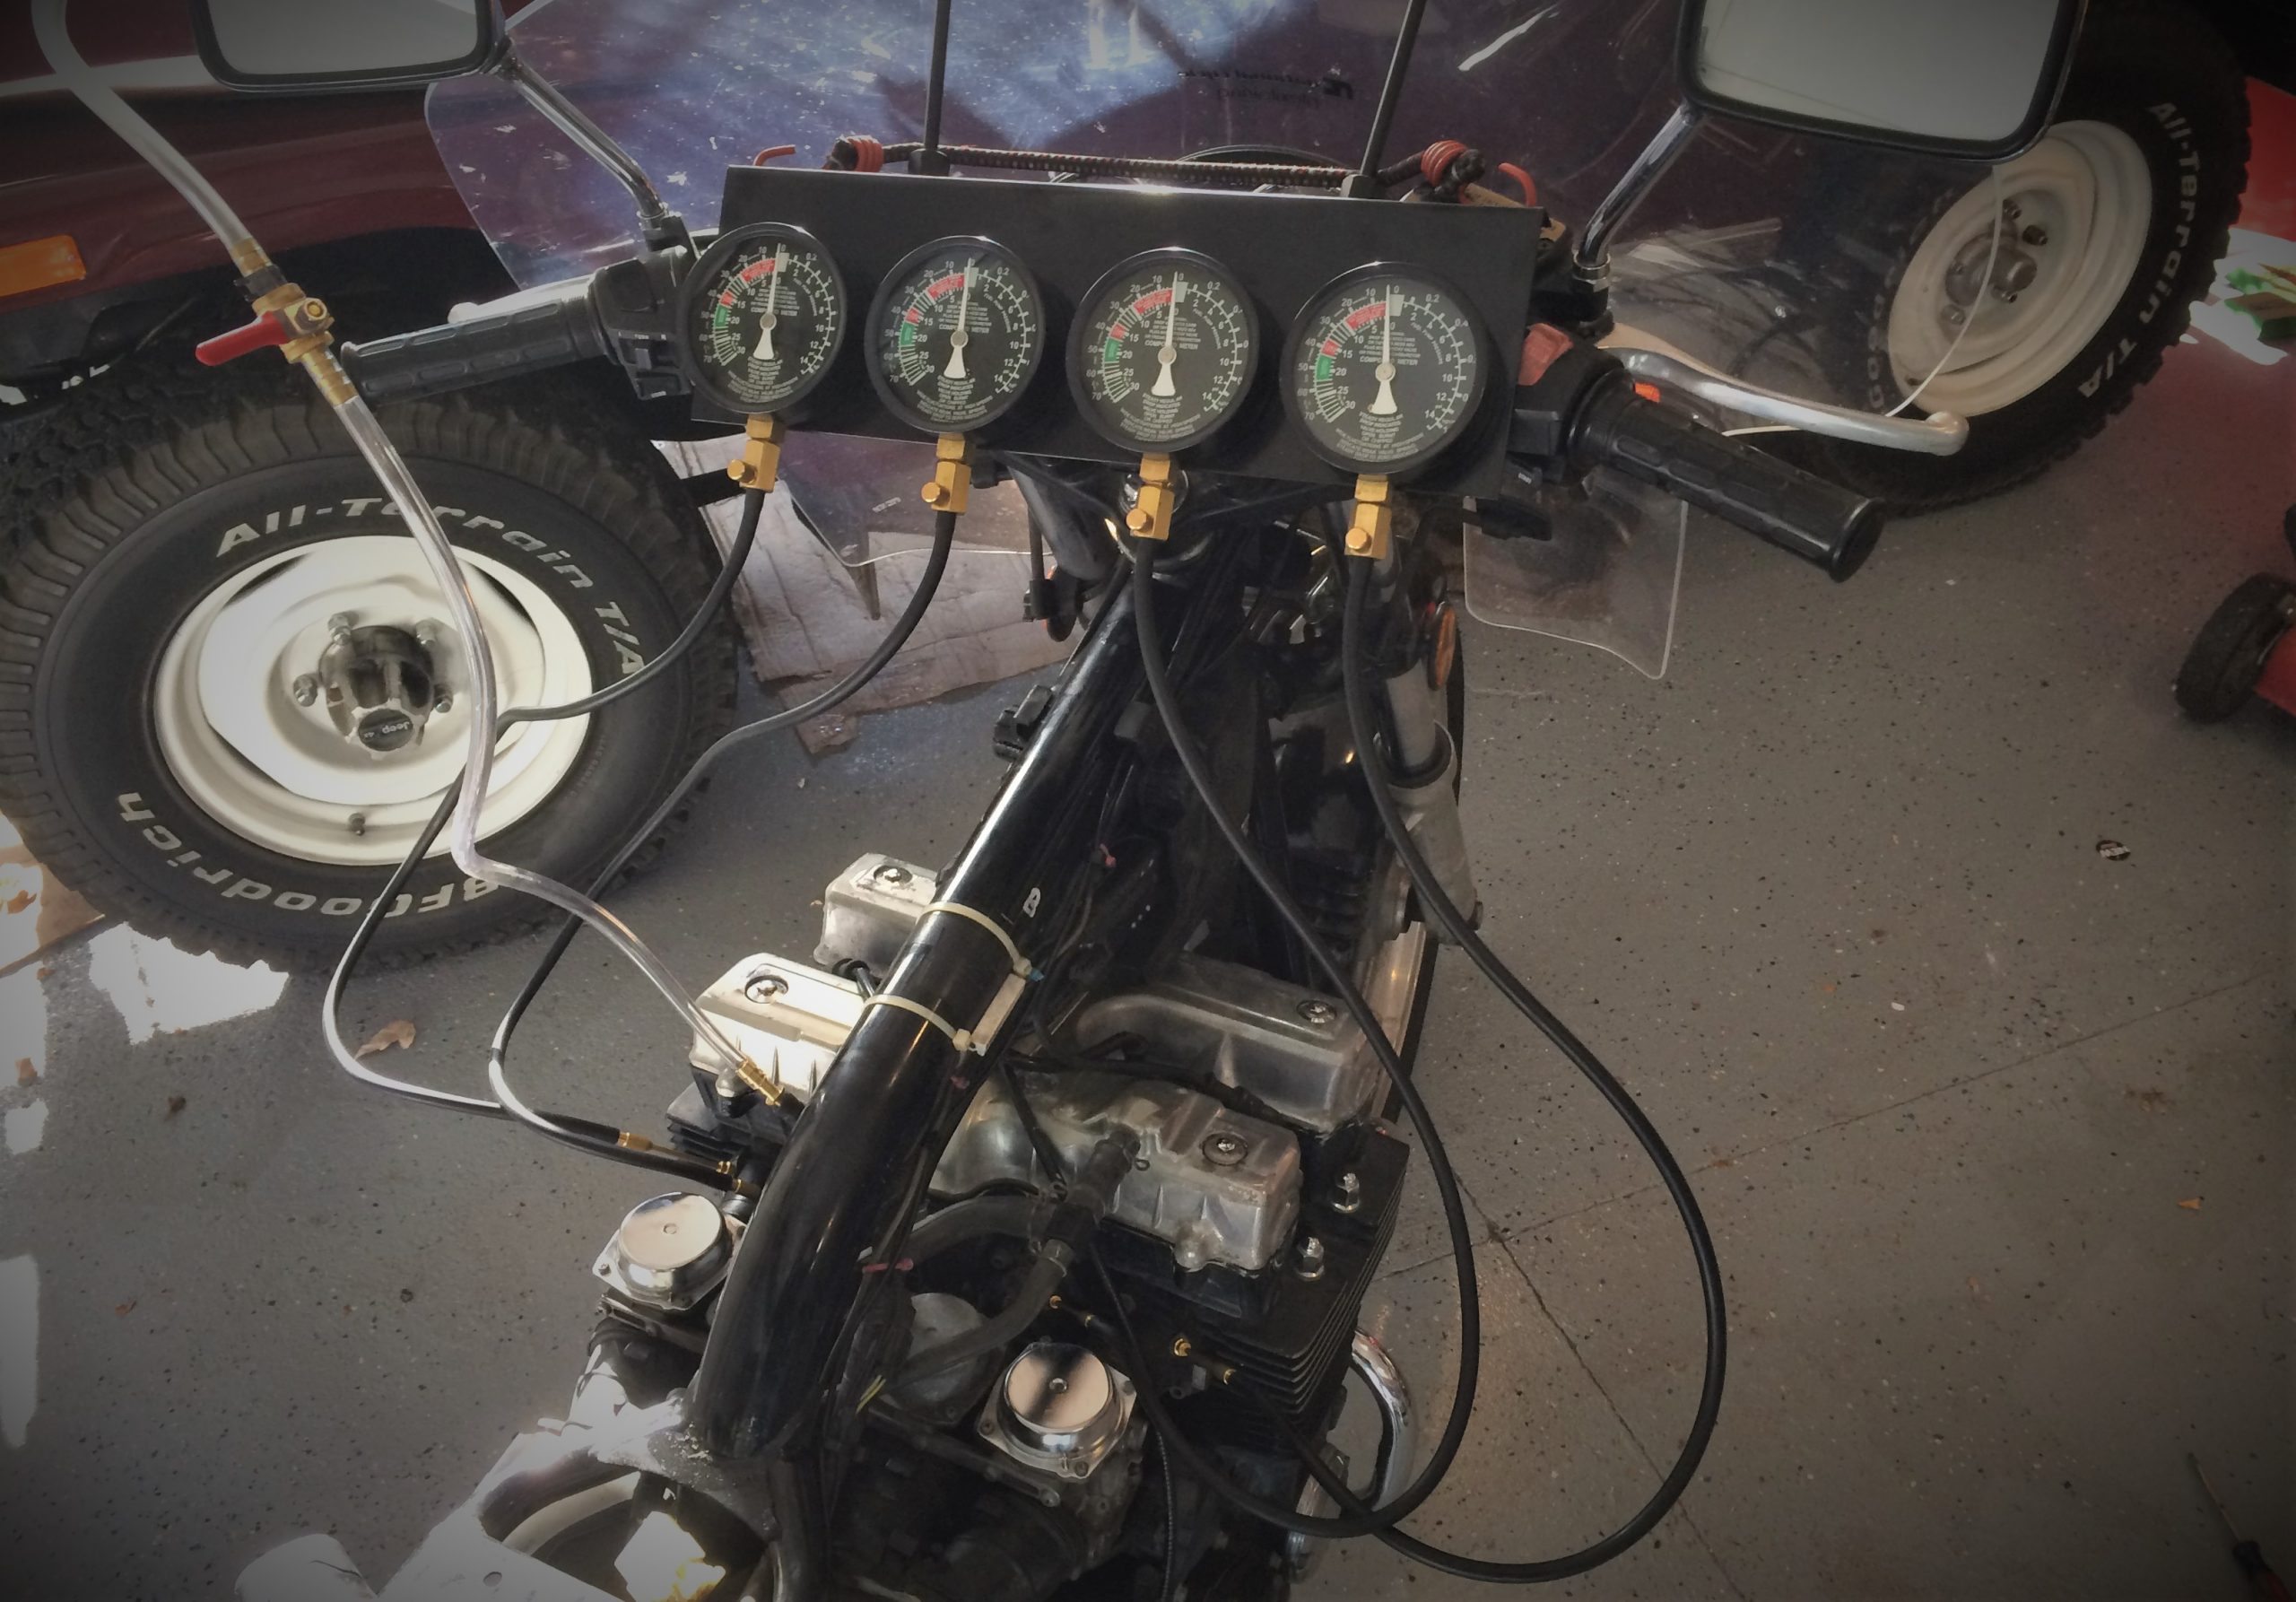
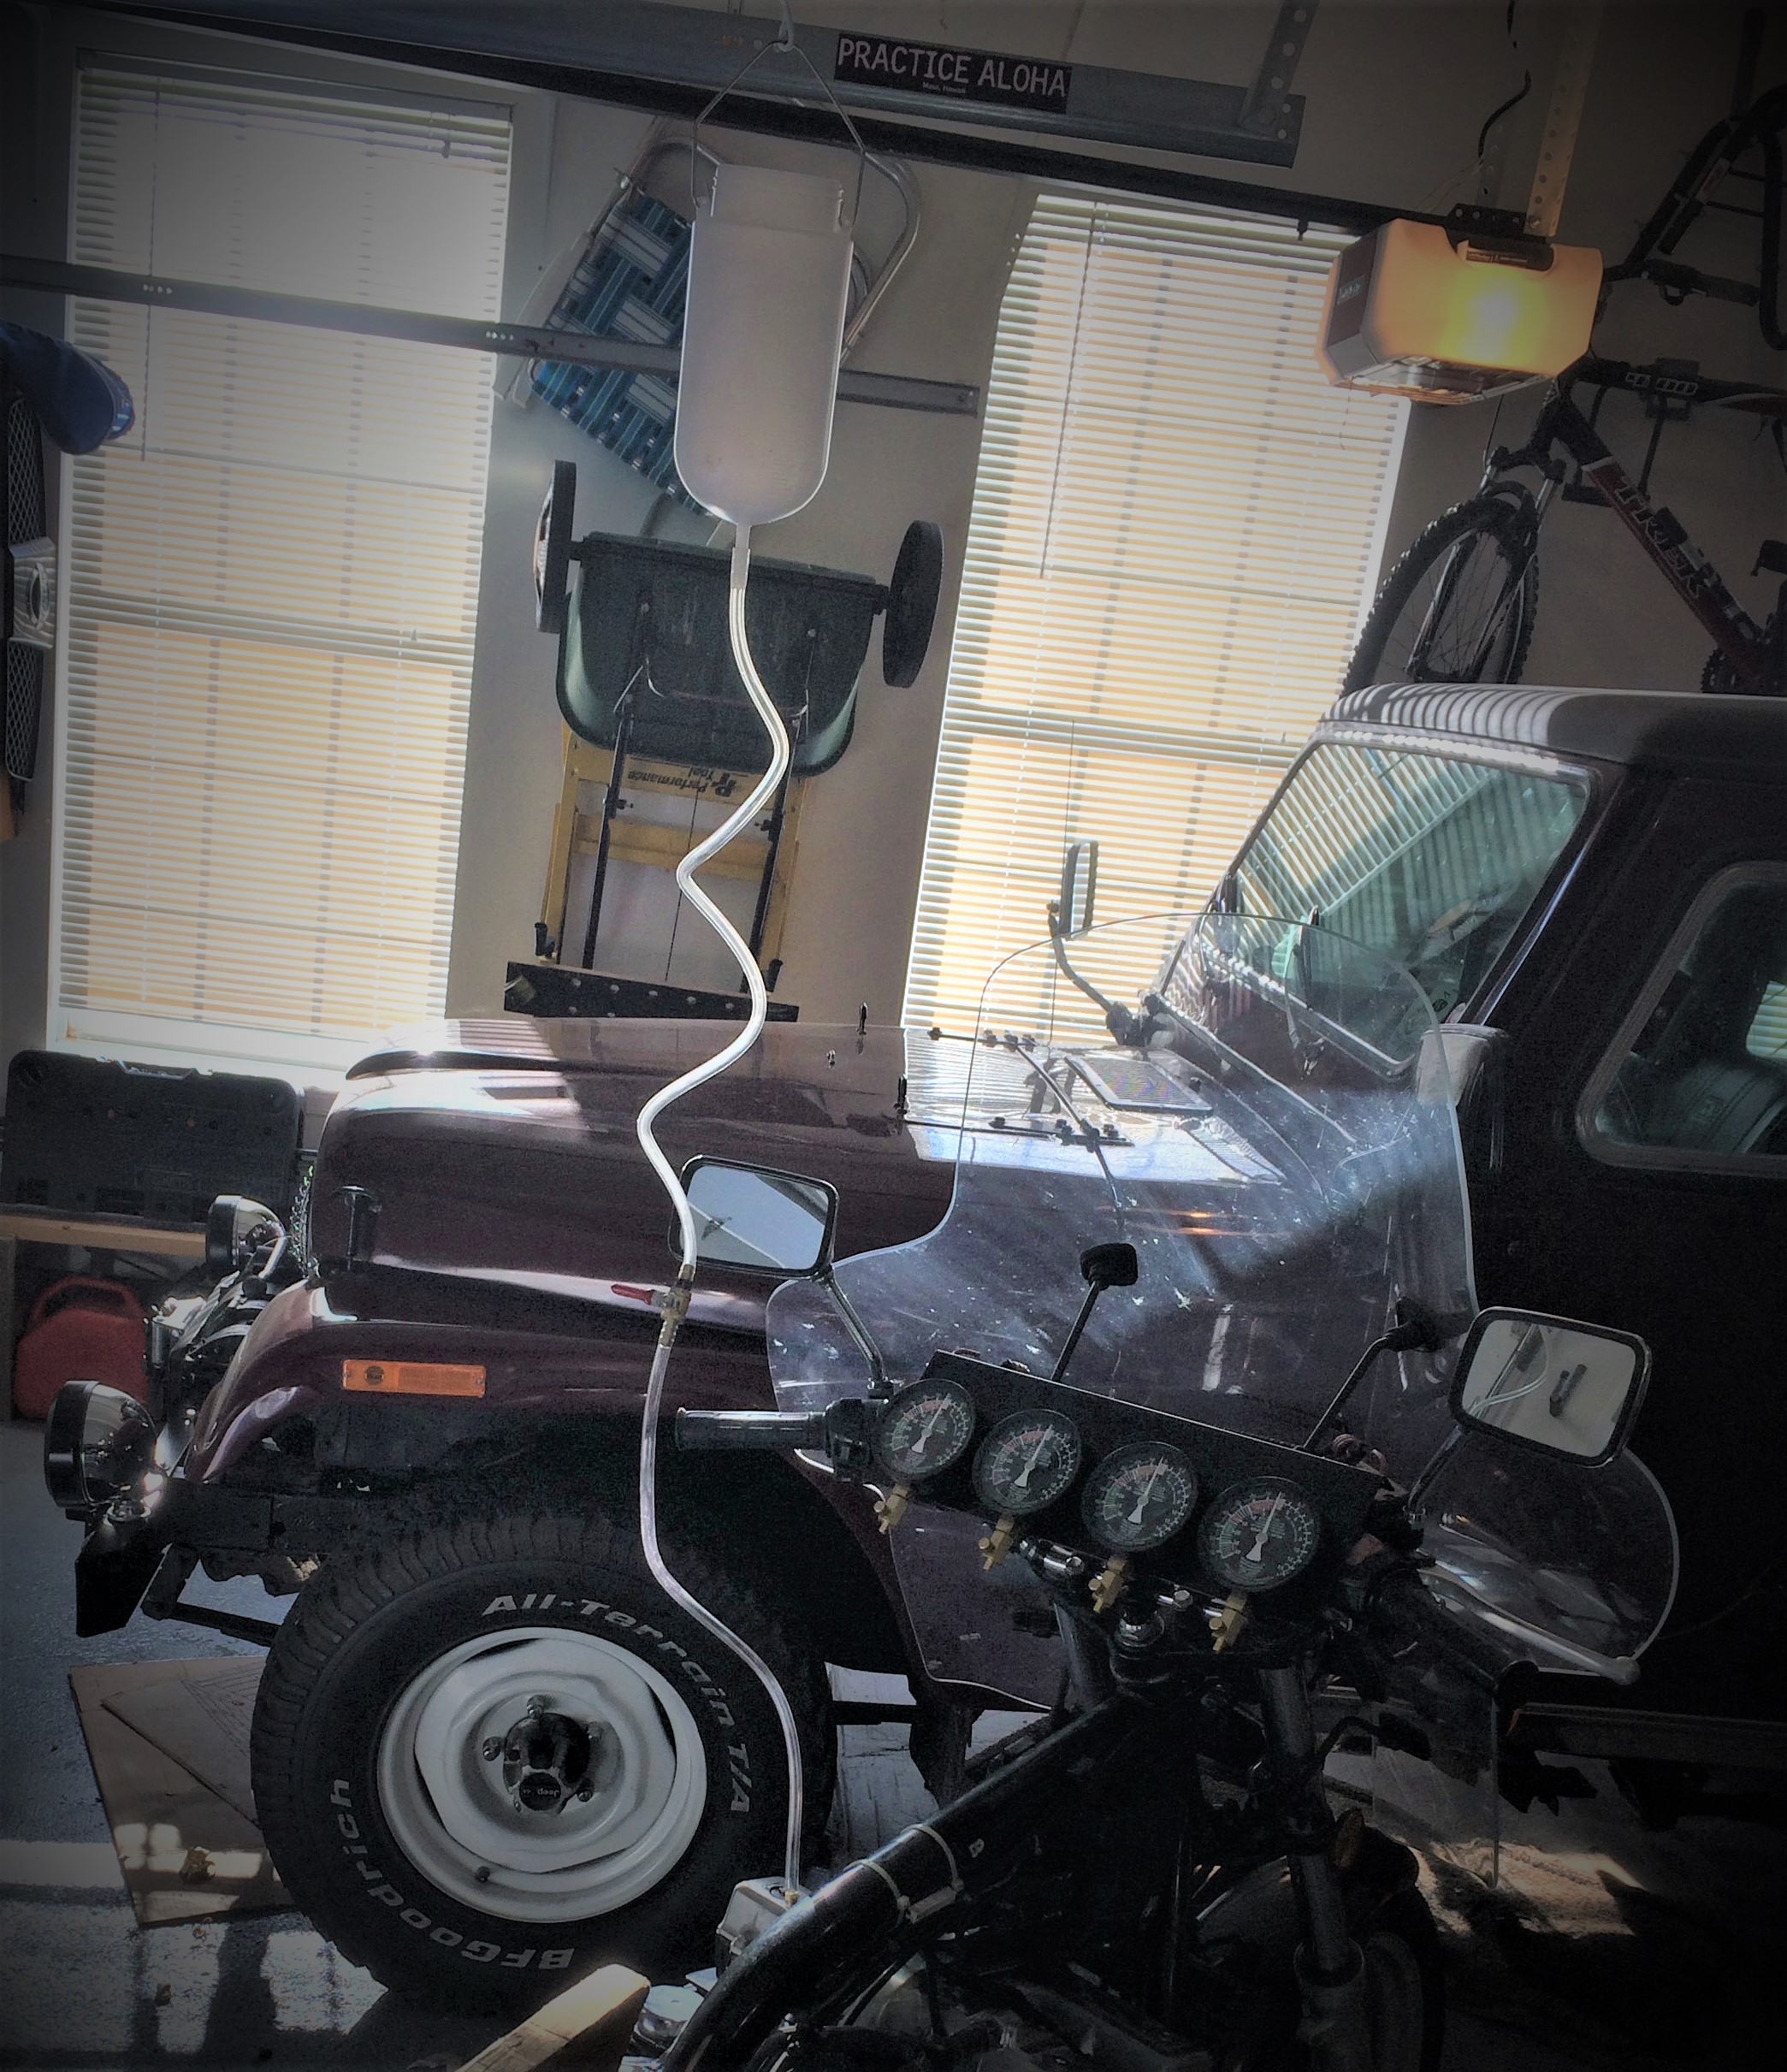
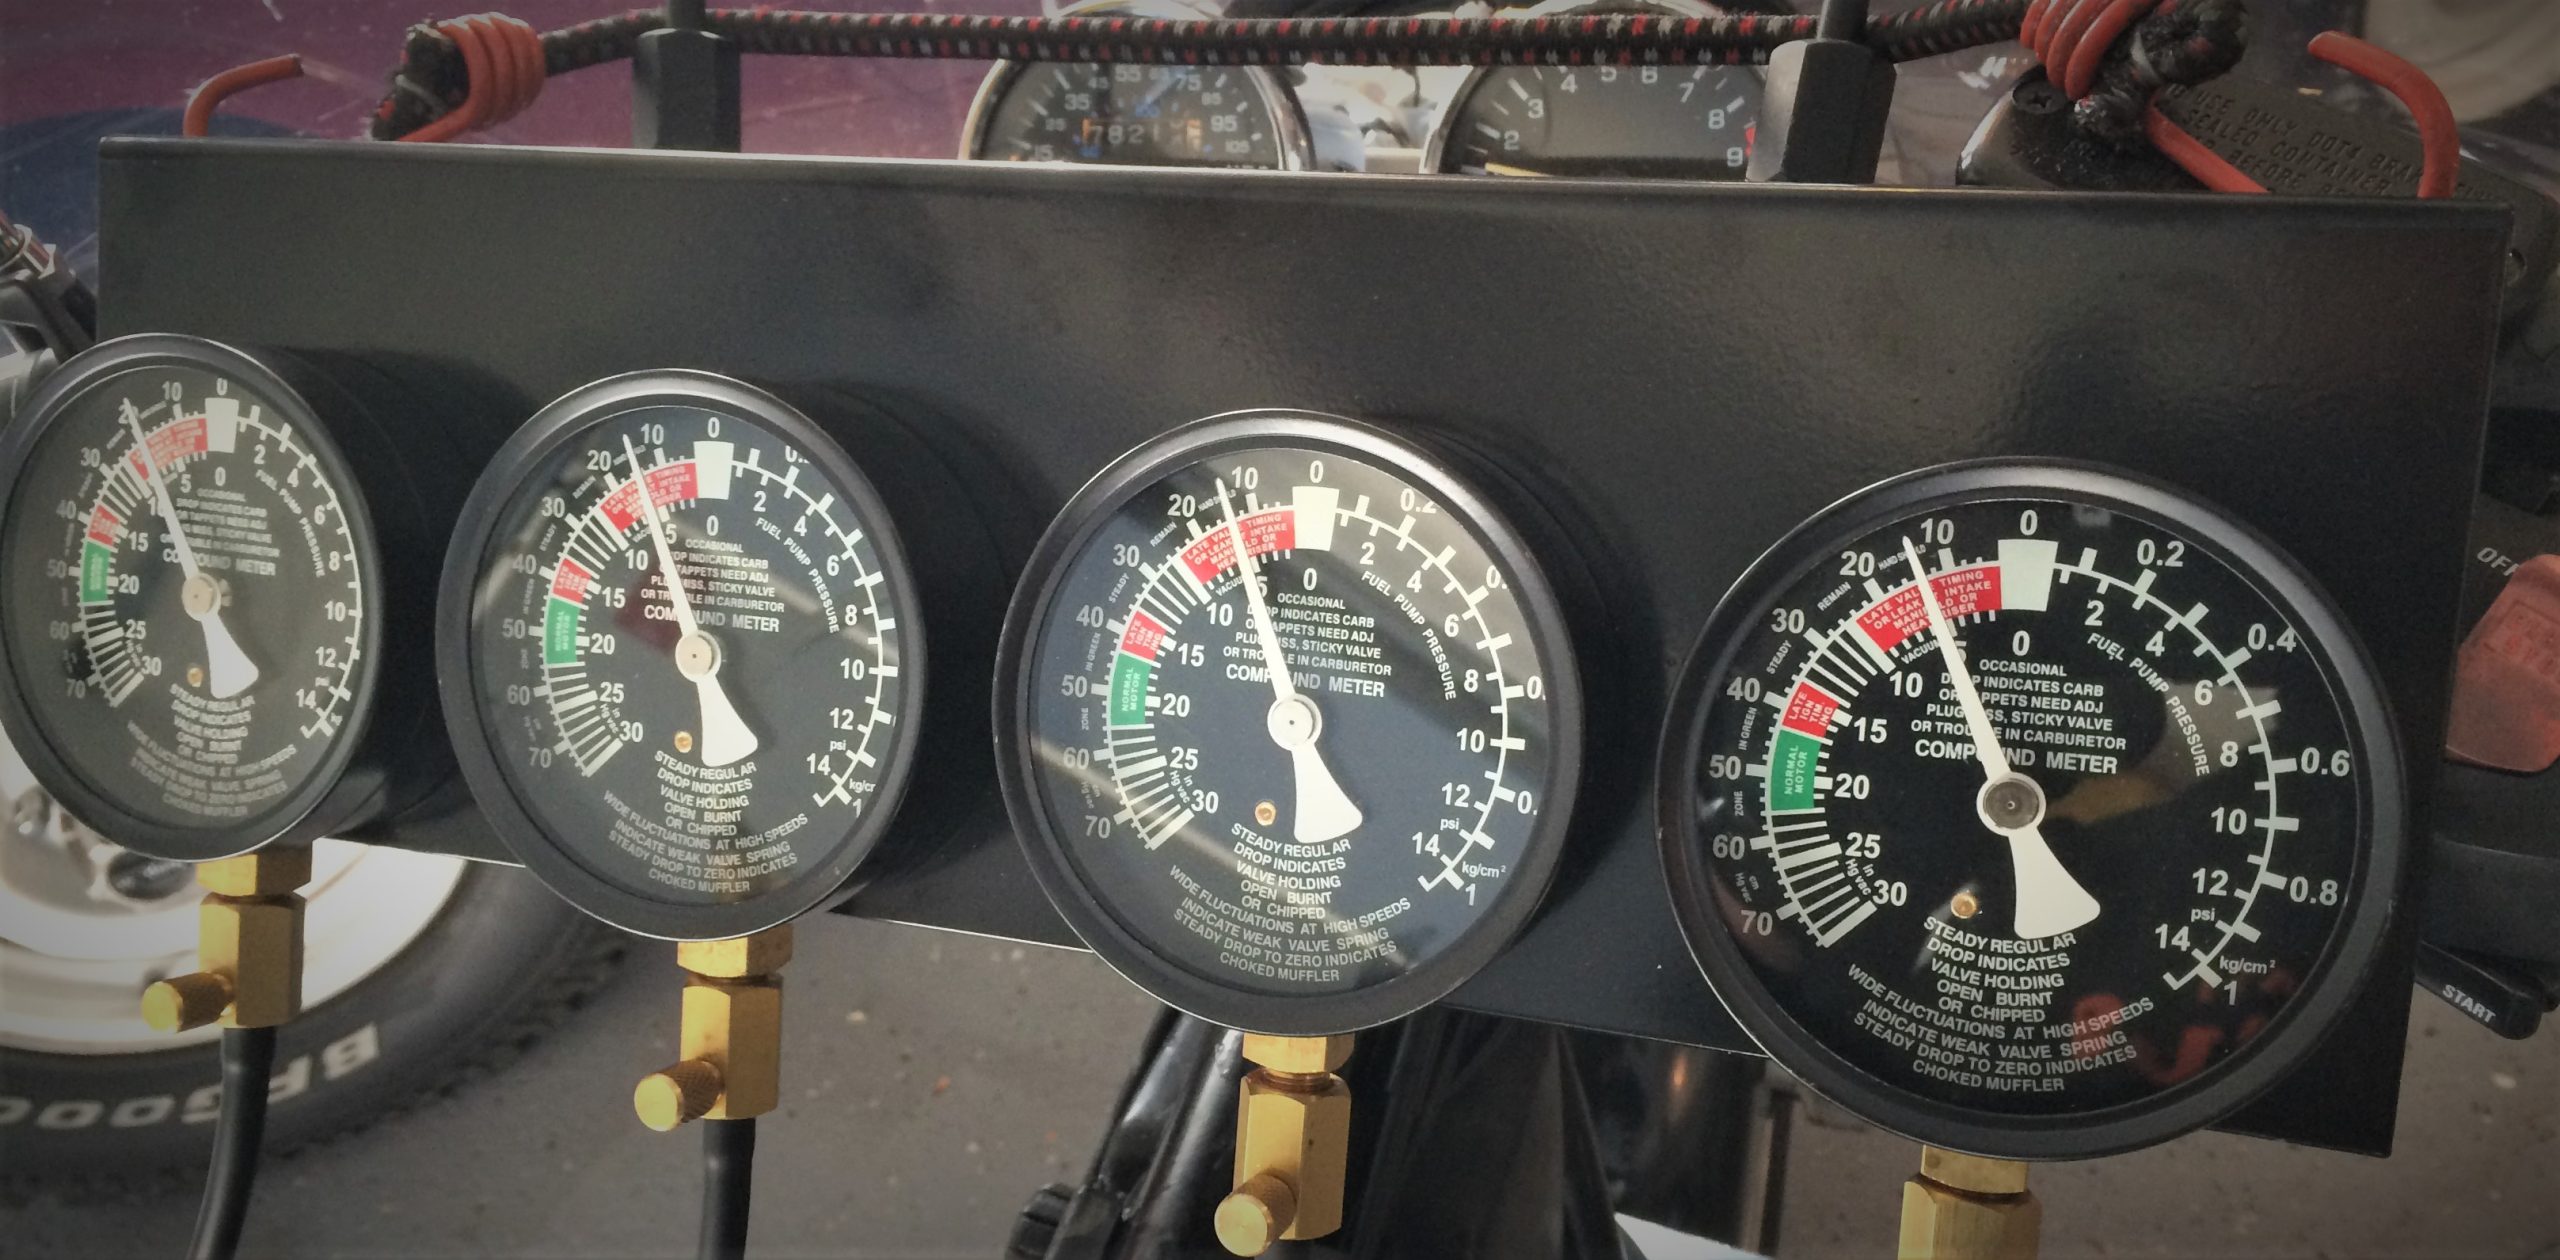
These tools come in two basic flavors—and you can see both types of carb synchronizing tools here.
One features vertical transparent tubes filled with fluid. You connect each tube to a separate cylinder’s vacuum port on the bike. The other style of carb sync tool uses large dial vacuum gauges. As before, you connect each gauge to a distinct vacuum port.
Both tools operate the same way: Once they’re connected, you start the bike and visually compare each reading.
Find Your Master Carburetor
This is important: For many multi-cylinder motorcycle engines, the manufacturer establishes a “Master” carburetor. Consider that the baseline, and you balance all of the remaining carburetors off of that Master Carb.
Ergo, it’s important to figure out which one that is. For the 2000 Honda Nighthawk 750 used in this walkthrough, the service manual told us the Master Carb was carburetor Number Two.
The only other specialized tool you’ll probably need is an auxiliary gas tank, because there’s a good chance you’ll have to remove the stock gas tank to reach the carbs’ adjustment screws. (It might be a good idea to pick up some spare fuel and vacuum line too.)
How to Vacuum Sync Multiple Motorcycle Carburetors
For this article, the carburetors will stay installed on the bike. There is a process for “bench-syncing” your carbs as a starting point*, but as a routine maintenance process we’ll assume your carbs are in relatively good shape and don’t need to be removed or rebuilt.
* Often, bench-syncing is as easy as using a small wire or guitar string to set a uniform gap between the carb throat and the throttle blade of each carburetor.
Before you begin, take the bike around your neighborhood for a while to get it up to running temperature. Once the engine is nice and hot, it’s time to go to work.
As alluded to above, there’s a good chance this job begins with removing your bike’s fuel tank so you can access your carburetor adjustment screws. And since the adjustment happens with the bike running, you’ll probably need to hang up an auxiliary gas tank.
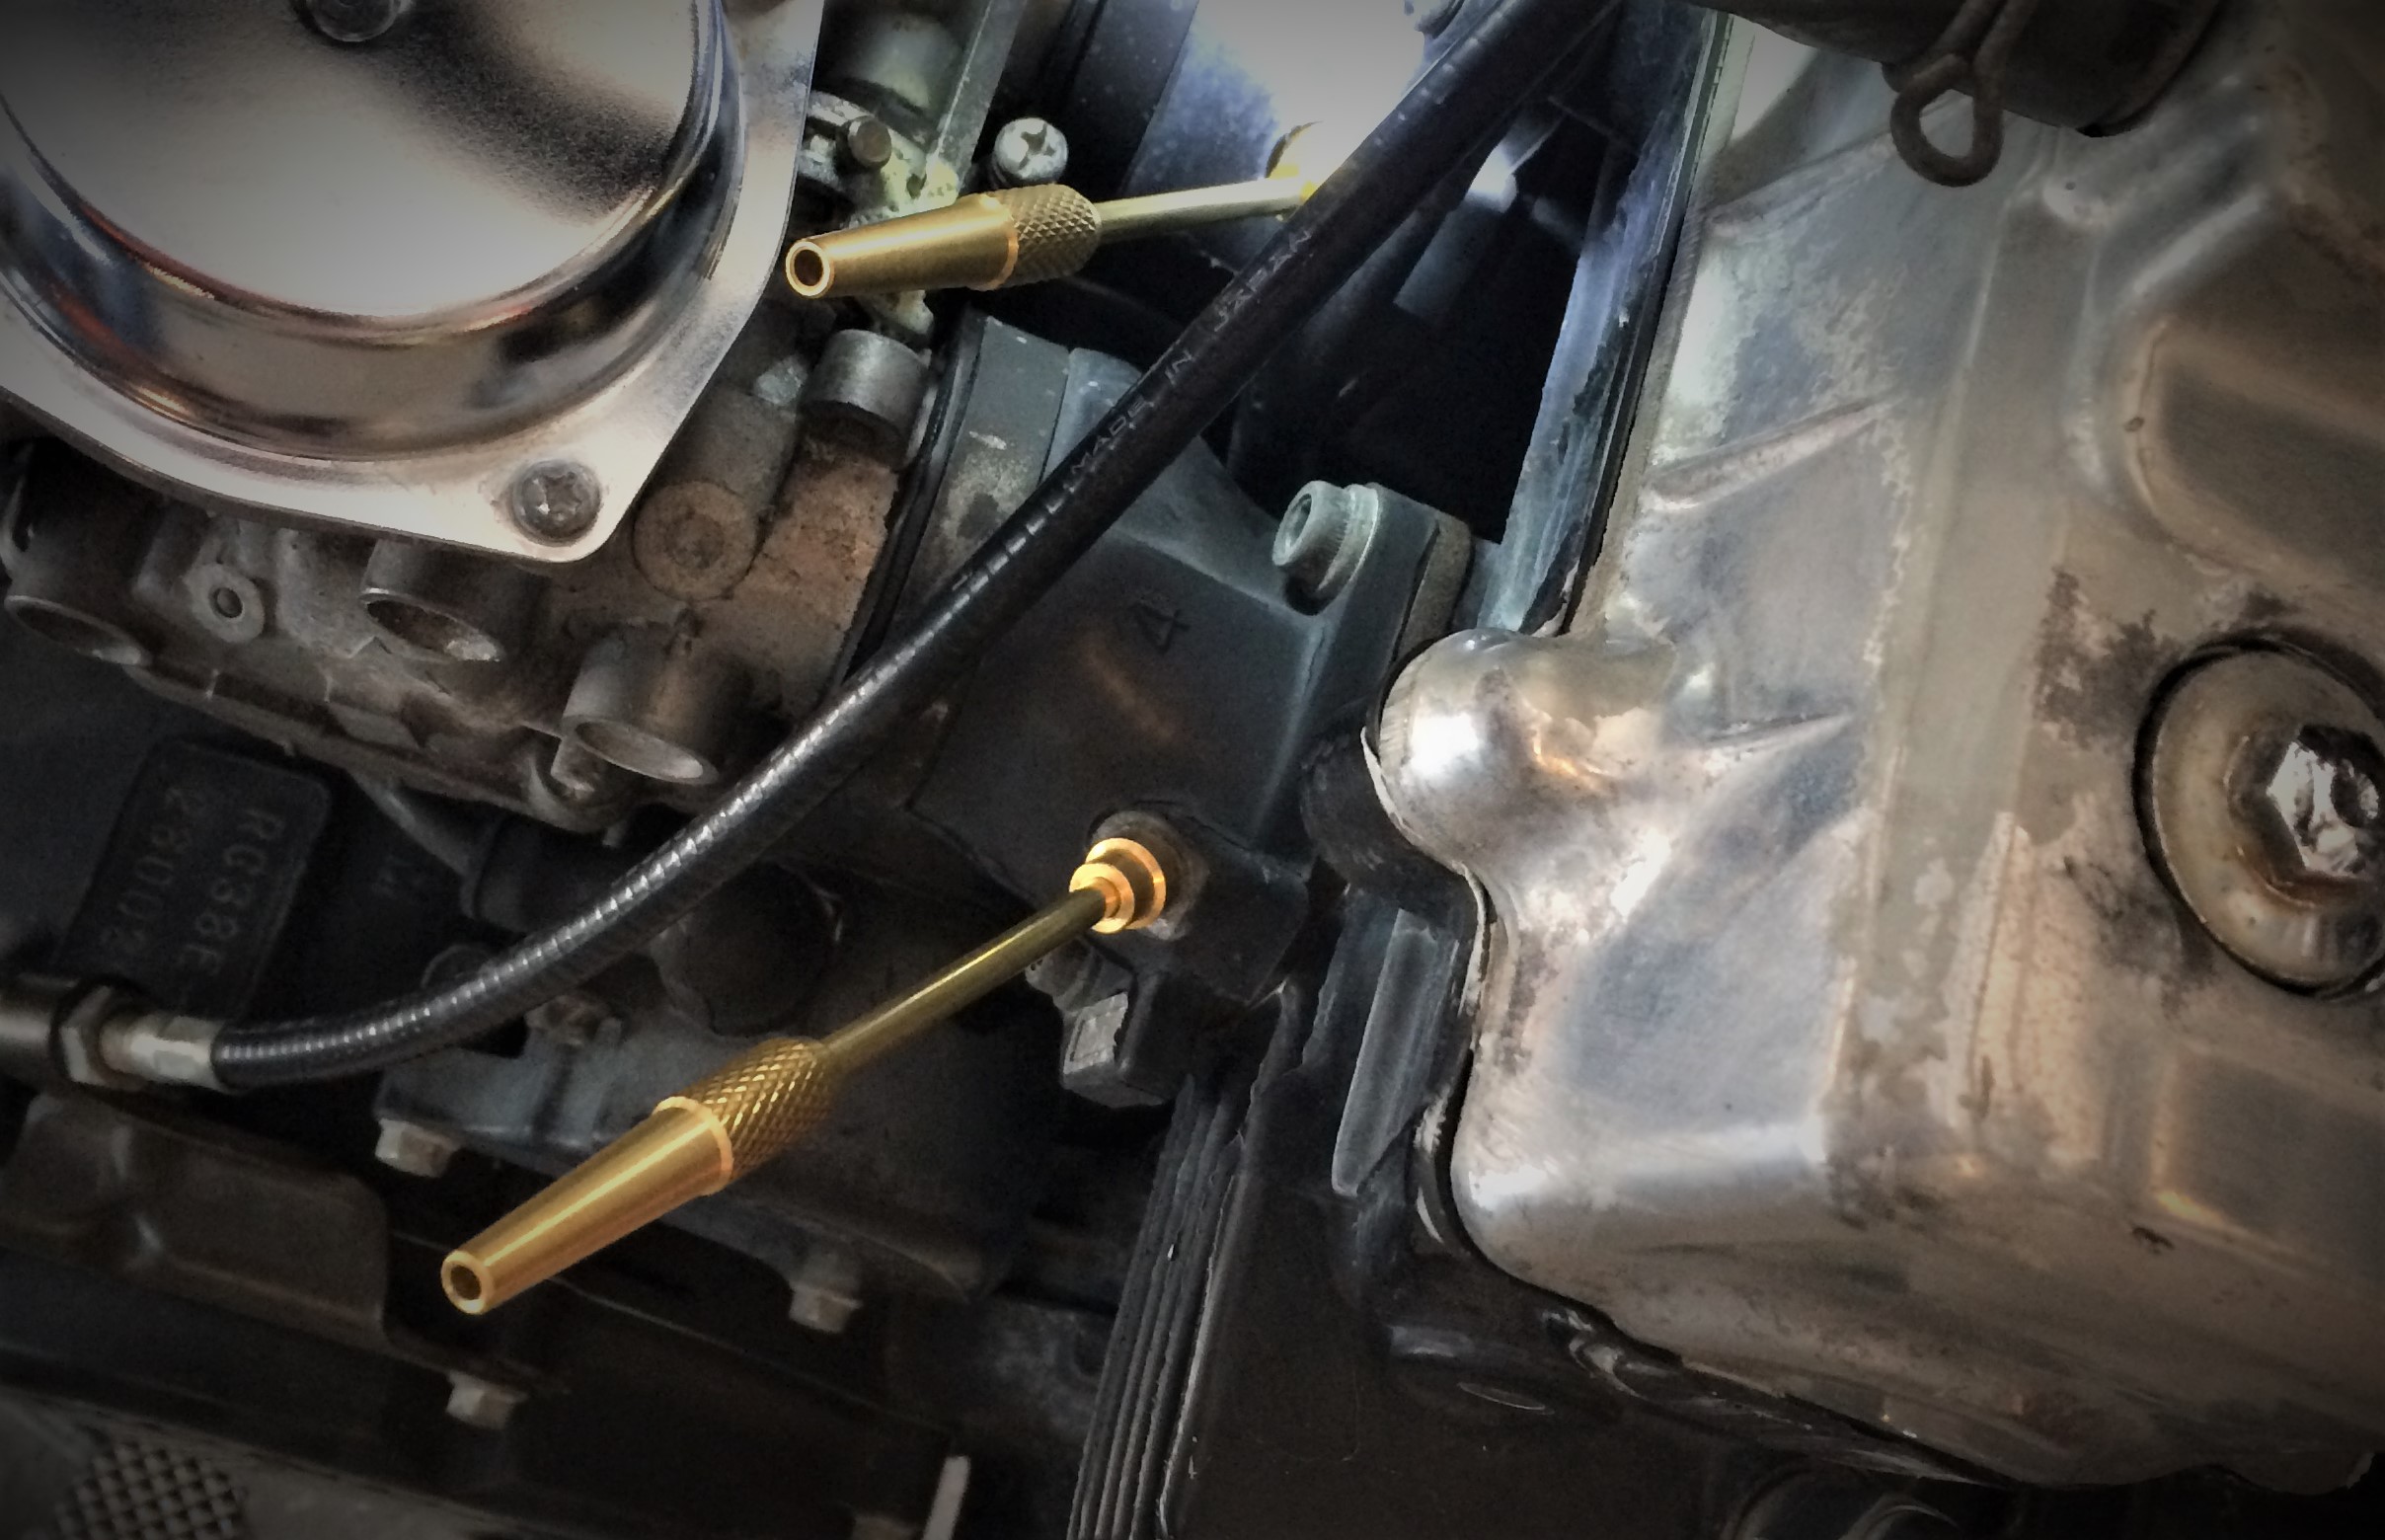
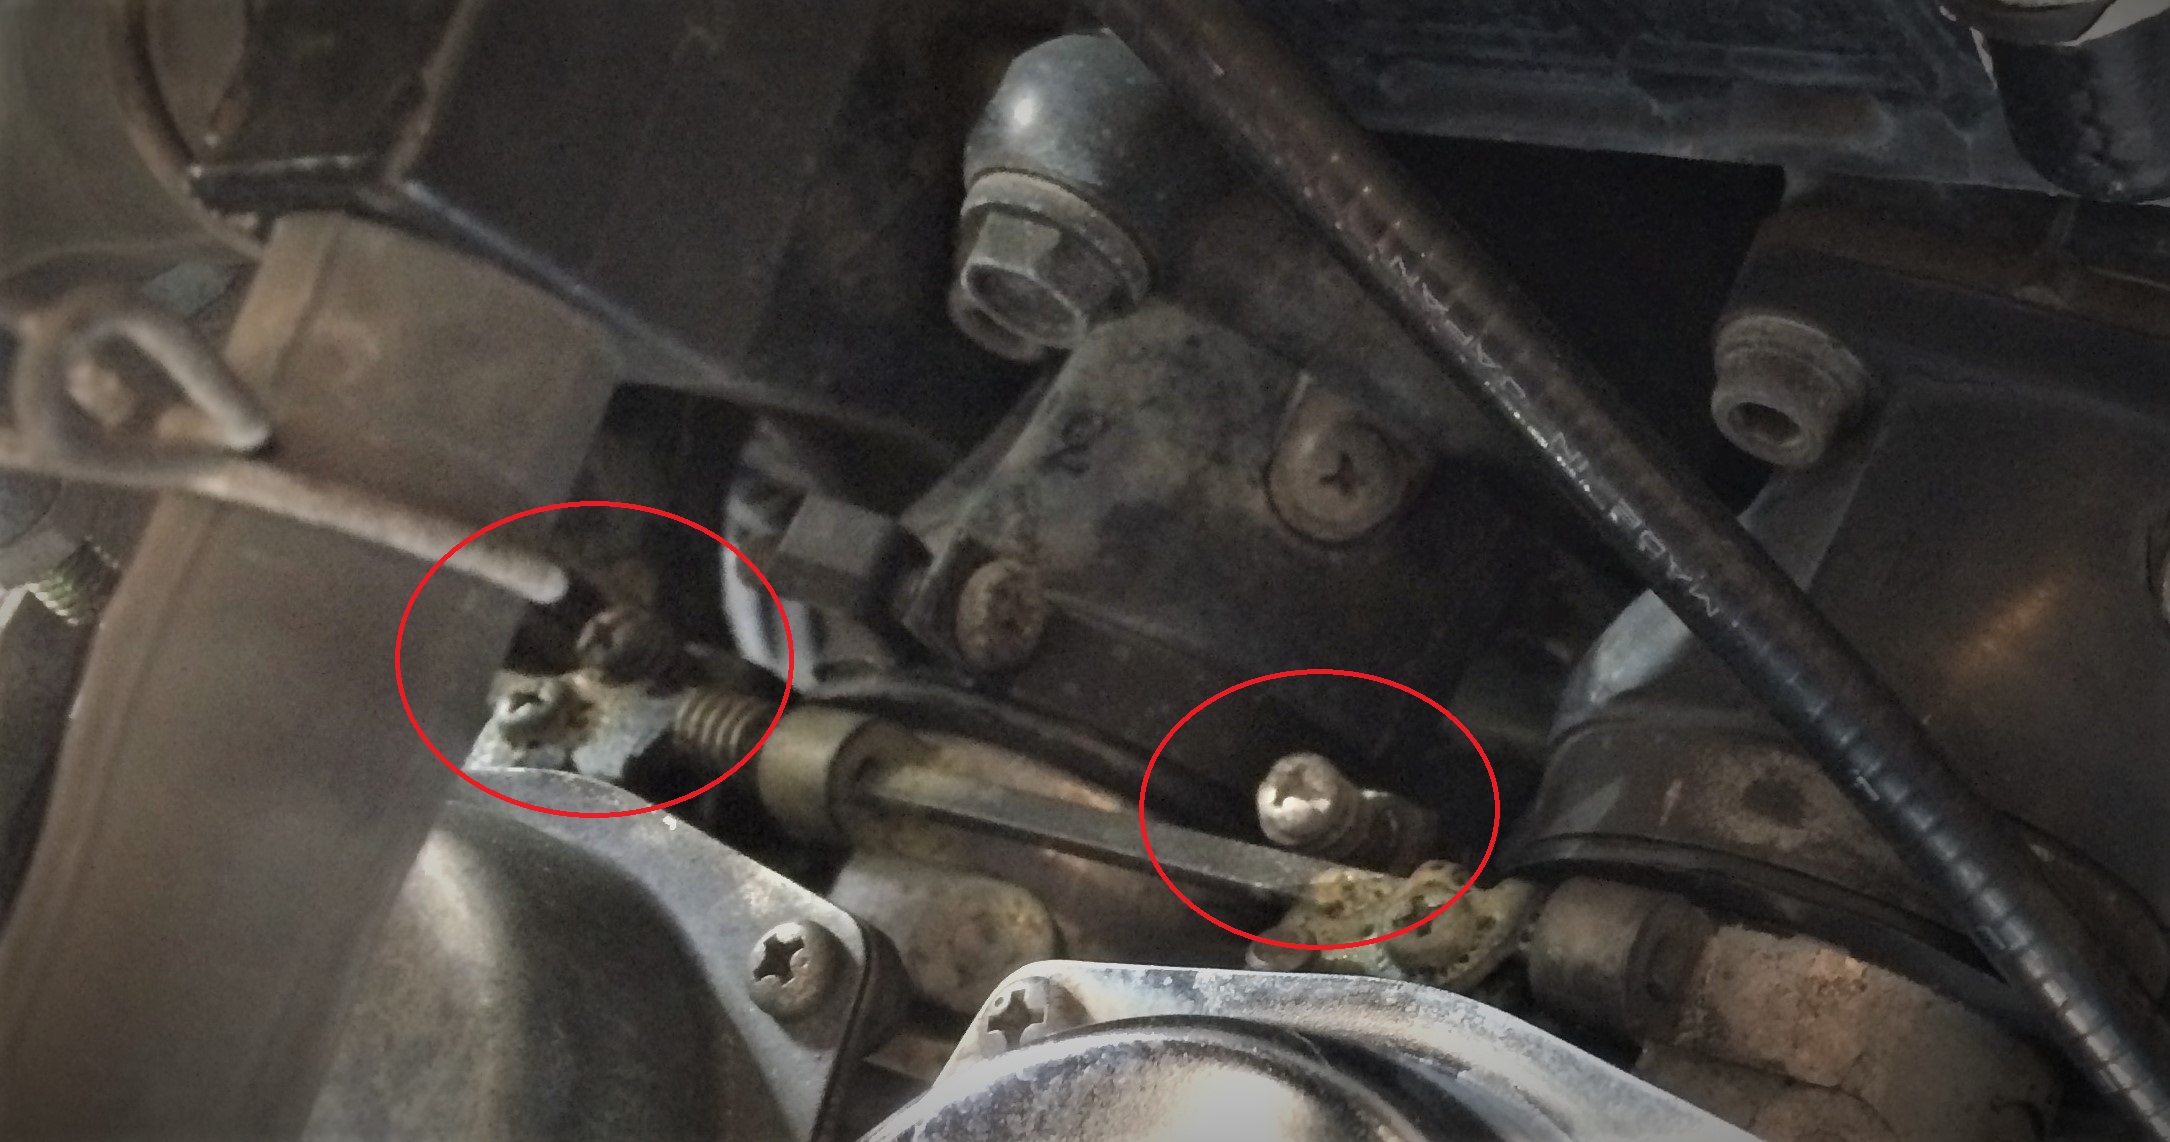
Again, the carb synchronization process discussed here uses engine vacuum as the test variable. As a result, many multi-carb motorcycles have vacuum ports on the intake boot between the carburetor and engine just for that purpose.
But that’s not always the case, older twins typically won’t have these ports, which means you’ll need an entirely different carb sync process—the good news is, syncing carbs on a vintage twin is often something you can do by watching your tachometer and listening to the engine.
So take a look at the boot or tube between your engine and carburetor, many three-, four-, and (GASP!) six-cylinder motorcycles, have handy vacuum ports to access.

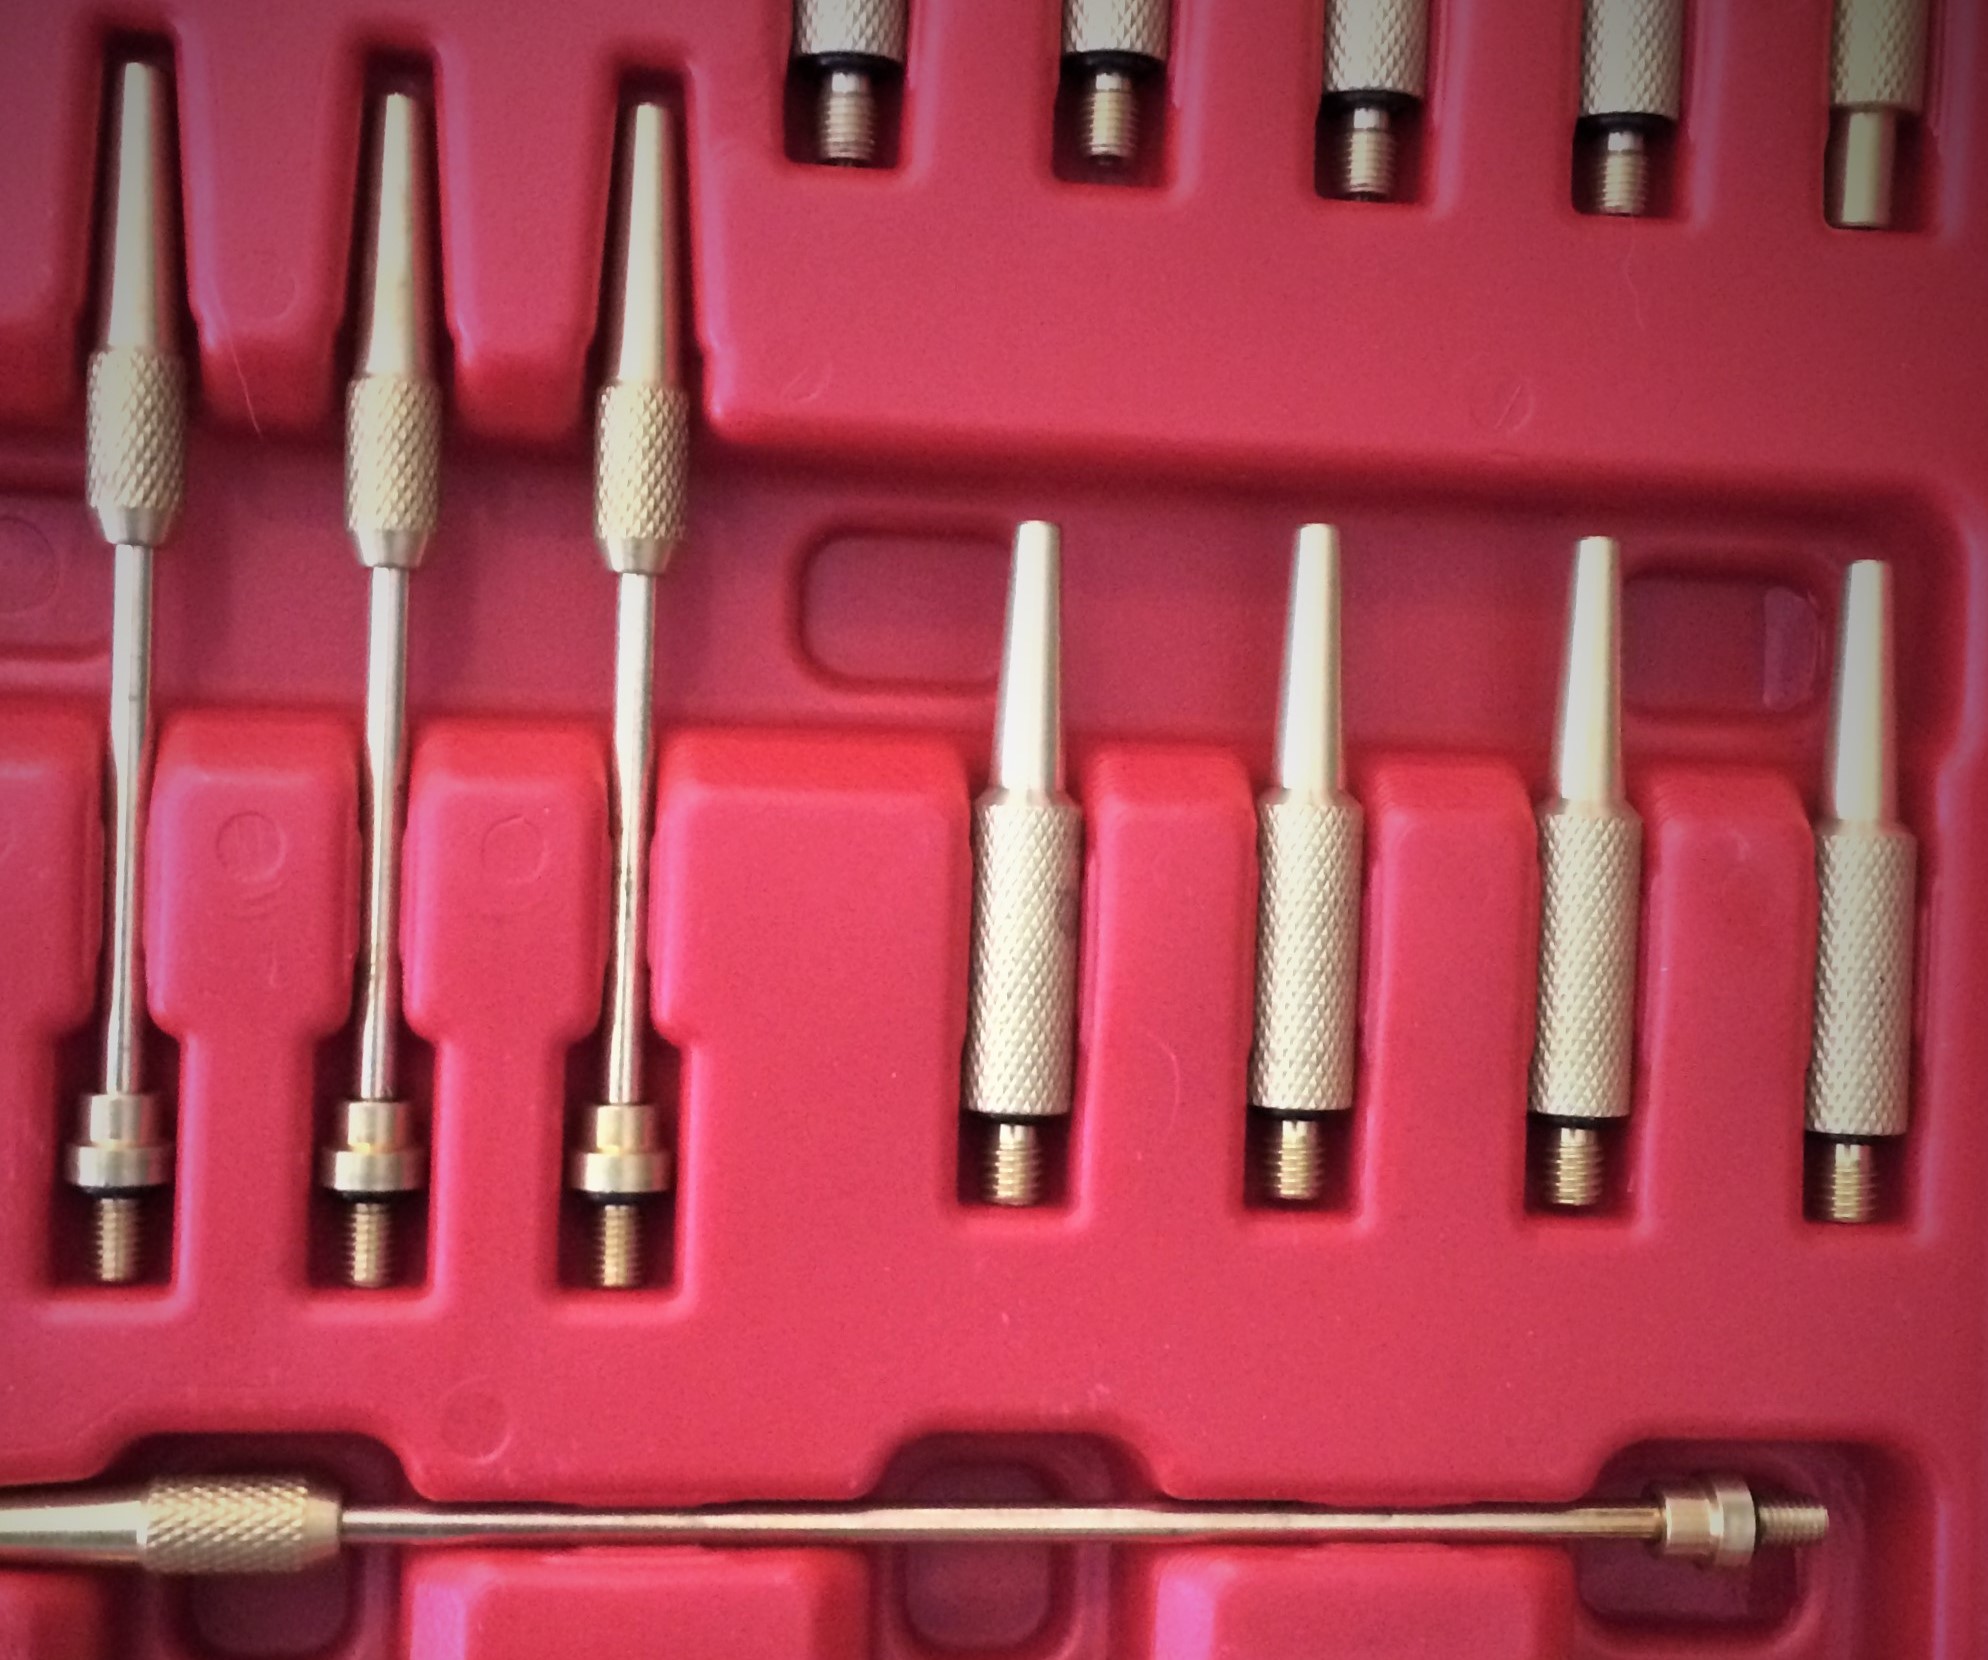
With the tank off and fuel line plumbed into an auxiliary tank, locate the vacuum ports on the carb boots, remove the plugs, and thread-in the adapters that came with the tool.
Then find a good spot to put the gauges for the test. For our dial gauges, they were already mounted on a stout metal bracket and simply hung onto the handlebars, but for the vertical fluid-filled gauge type, it might be smart to drag over a sturdy ladder and hang it nearby.
Next, connect your vacuum hoses from the gauges into each adapter fitting. Obviously, you’ll want to do this sequentially to mirror the layout of your sync tool (IE, plug gauge one into the first cylinder, and so on).
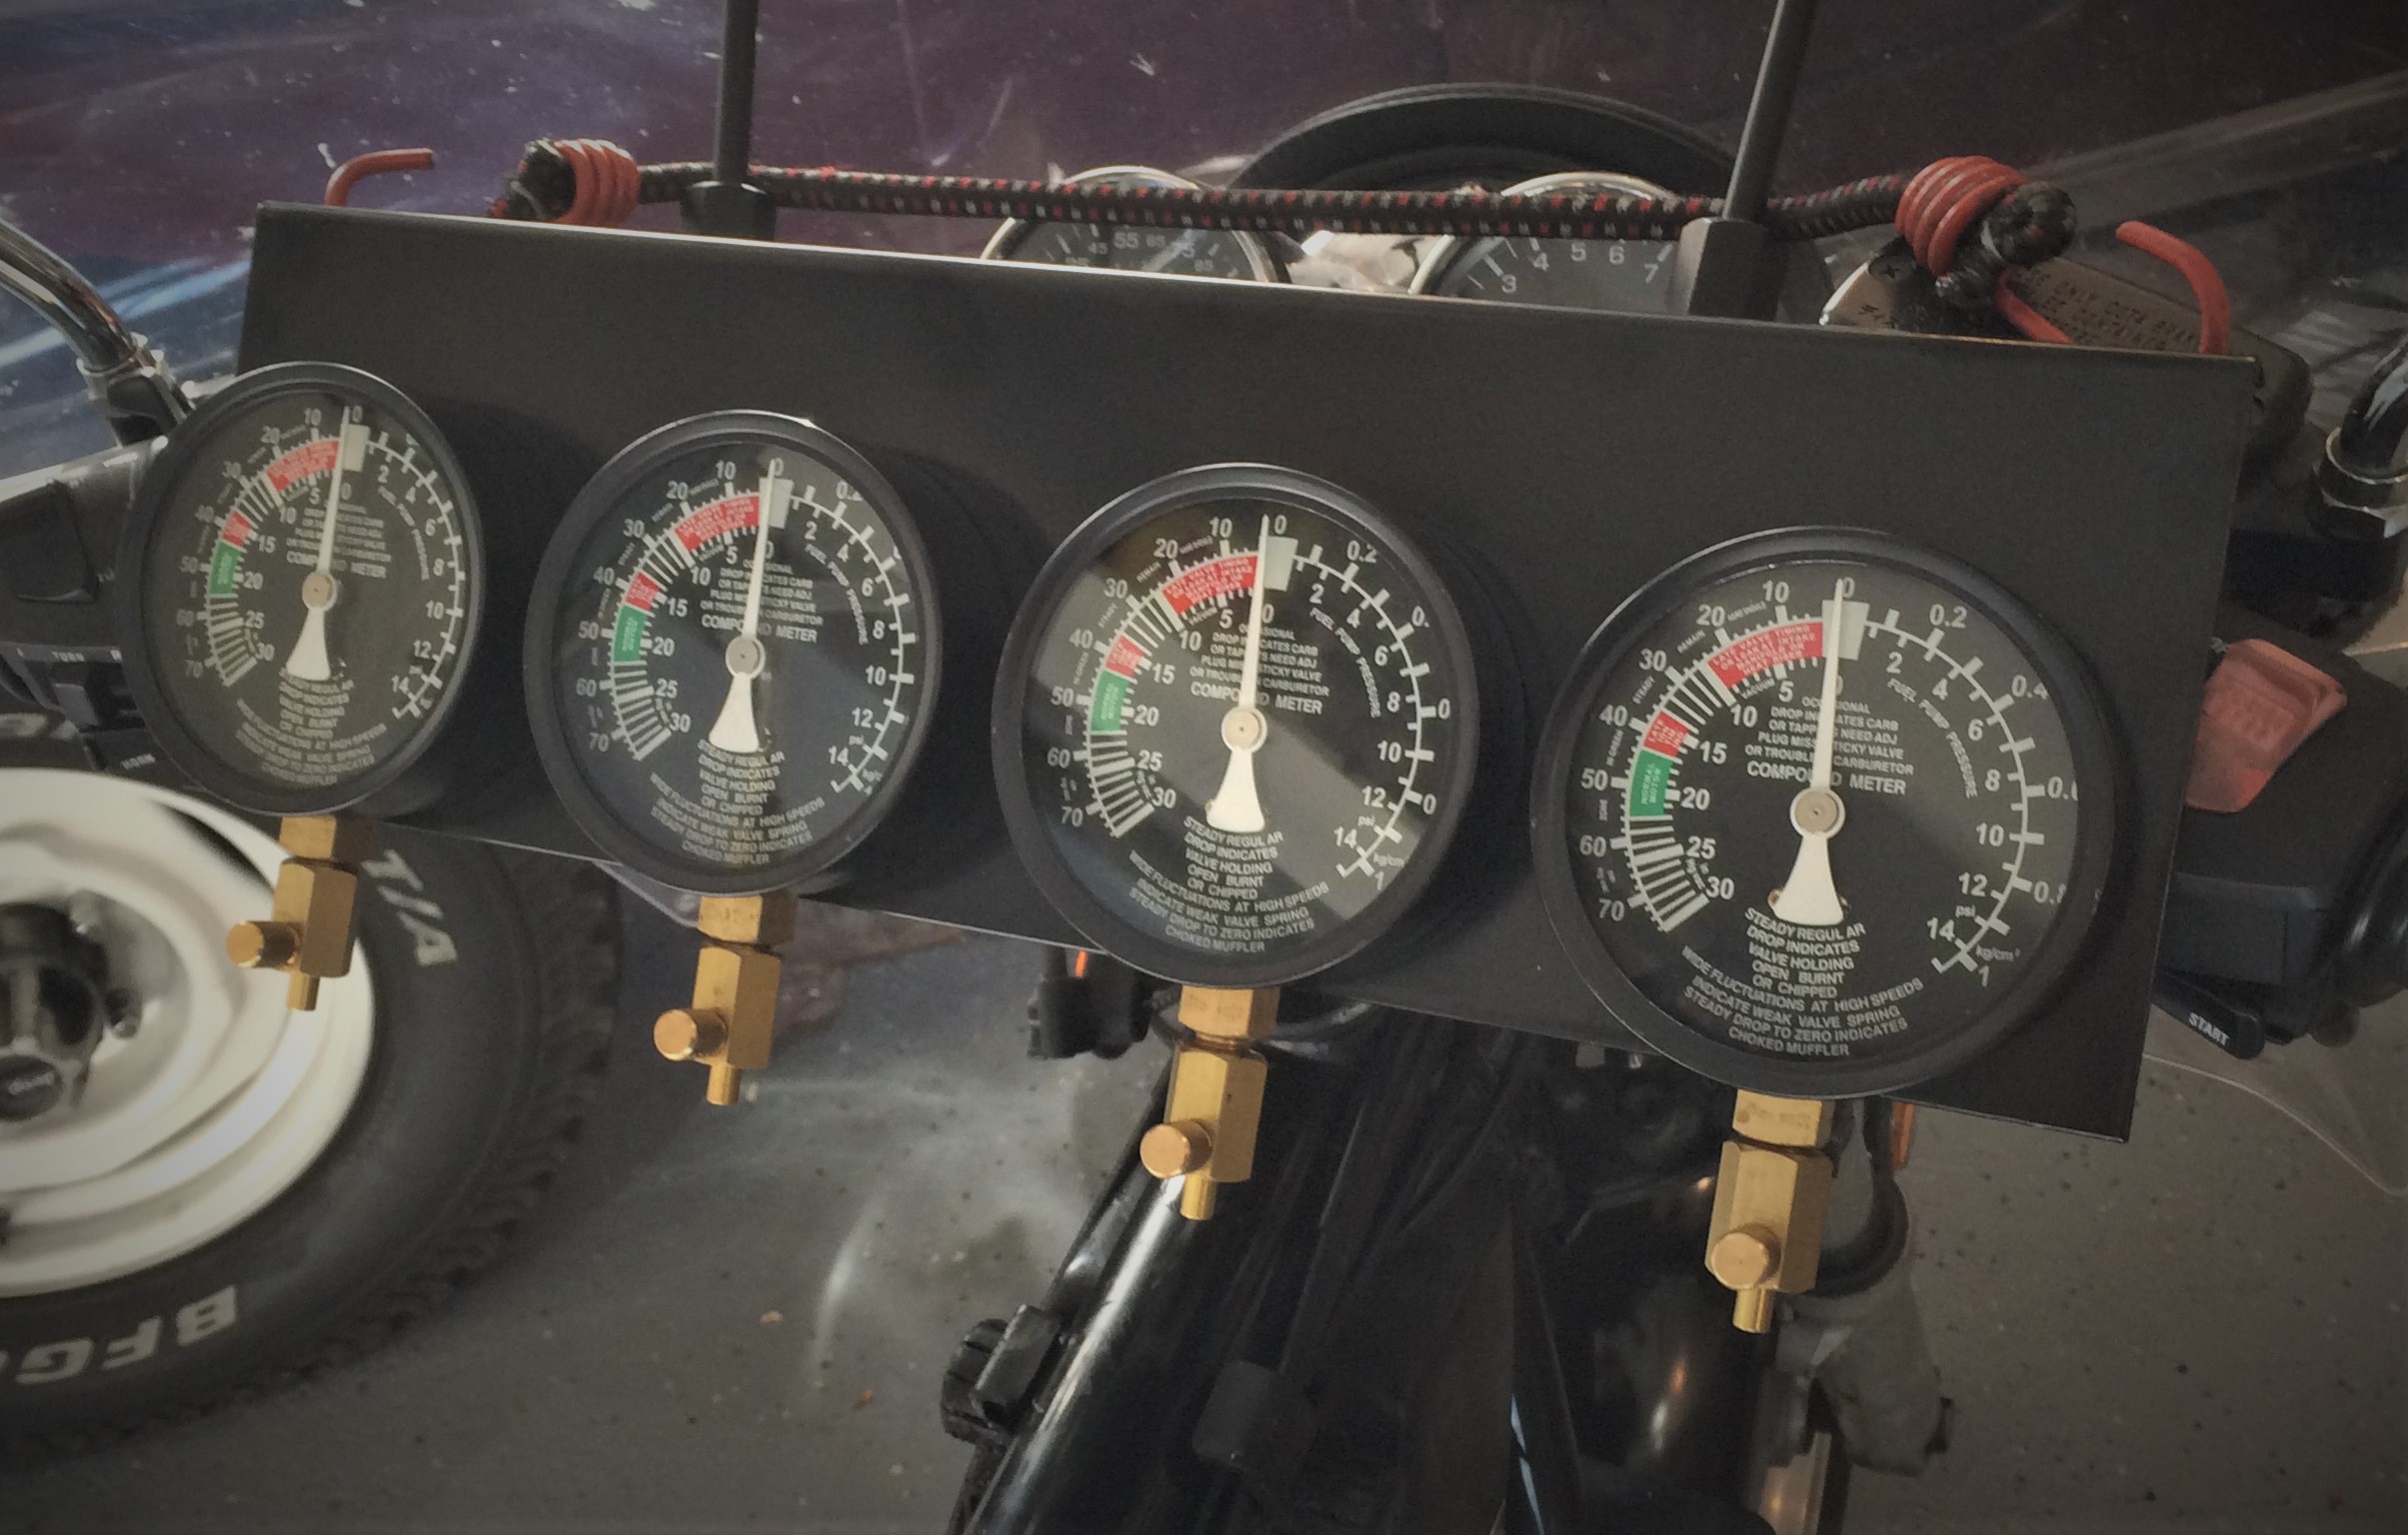
Now it’s time to fire up the engine. When it starts, the gauge needles (and fluid in the vials) will be jumping all over the place, as vacuum spikes and falls with each piston stroke. A good synchronizer tool will include a way to close-off vacuum slightly on each line to make the gauges/fluid easier to read. For ours, it was a small thumbwheel on the gauges’ main fittings.
After some adjustment with the thumbwheels, the gauge needles will settle into a much more controlled bounce.
Using your bike’s “Master Carb” mentioned earlier as reference, you turn the throttle adjustment screws on your other carburetors to match its vacuum level. As you’d imagine, make small adjustments at a time, with the bike running. Typically, turning the adjustment screw clockwise will open the throttle to reduce vacuum (and vice versa).
There’s a good chance that the engine will begin to sound happier as you bring any offending carbs back into spec. Often, only a single carburetor causes the issue and even a small tweak can make a big improvement.
Don’t panic if the bike’s idle drops or raises. Once you get all the vacuum readings to match, go back and adjust your overall idle speed level to spec, then re-check your vacuum gauges.
Once your vacuum levels are all in-line (or close enough to the manufacturer’s acceptable tolerances), shut the bike off and twist-n-snap the handlebar throttle grip a few times to re-seat the carbs’ throttle blades.
Then, restart the bike and check the vacuum levels, and adjust as necessary. Lather, rinse, repeat until the vacuum levels are consistent—it shouldn’t take more than one or two restart cycles.
If everything looks good after a few restarts, stop the engine, put the vacuum plugs back into the intake boots, reinstall the fuel tank, reconnect the fuel lines, and you’re good to go.
This walkthrough was for a four-cylinder engine. If you’ve got a six-cylinder, then you simply set the vacuum levels on the first four carbs, then move the lines to the final two (keeping one on your Master Carb, of course).
The Importance of Proper Motorcycle Carburetor Synchronization
Carburetor synchronization is an essential part of any multi-carburetor motorcycle’s maintenance routine—check yours per the manufacturer’s recommended service interval. And if you’re experiencing any of the symptoms above, it’s likely a smart process to confirm your sync is in-spec before jumping into any costly or cumbersome repairs.
All told, the carb synchronization job on this particular bike took less than an hour and the reward was a significant improvement in idle quality and throttle response.
Paul,
This is a superb piece of work! I have a mint 2003 Honda CB750 Nighthawk for which I’m going synch the carbs this spring. I pondered the choice of tools, & I’ll be using a Digi-Sync electronic device. Much easier & more precise than other options.
Thanks for a great article!
Hey, Thanks for reading Ellis–good luck with your sync job too!
Great article! I 2nd The Digi Sync suggestion by Ellis. I’ve used both of these traditional tools (needle and fluid gauges) and can tell you hands down that The Digi Sync makes this job so much easier.
I have a 1997 Honda vfr 750, all symptoms mentioned to why we would need to sync carbs is showing in my case. I believe this is something I can do myself but defiantly need to best sync gauge tool.
Good luck! It’s been a while since I’ve been around a VFR (awesome bike, by the way), but I’m pretty sure you’ll need to pull the tank to do the job, so make sure to pick up an auxiliary fuel tank too.
Need to buy
Hey Ronnie, you can purchase both types of carb sync tools (fluid & gauge) here at SummitRacing.com.