Confound it the befuddling nature of vintage headlight switches.
In classic cars, you pull the knob straight out and you get parking lamps at the first detent, then, headlights with the knob all the way out. Headlight switches are great when they work properly. One summer evening, you’re out cruising with a friend and the road goes dark—which is a very intimidating and dangerous experience especially in total darkness.
I will cite you an example.
Long ago in my youth during a visit to New York City, it was raining and I was on the GW Bridge headed to New Jersey in a classic Mustang. The headlights began flashing off and on. They were never off long enough to be dangerous—but very unsettling when you’re trying to find a motel in the dark in the rain.
How Vintage Headlight Switches Work
Automotive headlight switches are all quite similar in function whether you drive a Ford, Chevy, or Dodge. They are circuit breaker protected, which was why my headlights were flashing off and on. (There was an obvious reason why mine were flashing off and on—either a short circuit or a defective switch.) The reason headlights were no longer fuse protected beginning in the 1960s was a blown fuse would leave you in the dark without a prayer. The circuit breaker protection system prevents a fire by cycling the lights off and on due to a potential short circuit or high resistance and heat, yet keeps the road lit briefly until you can stop and get help.
Learn more on the importance of electrical breakers and fuses here: All About Vehicle Electrical Fuses
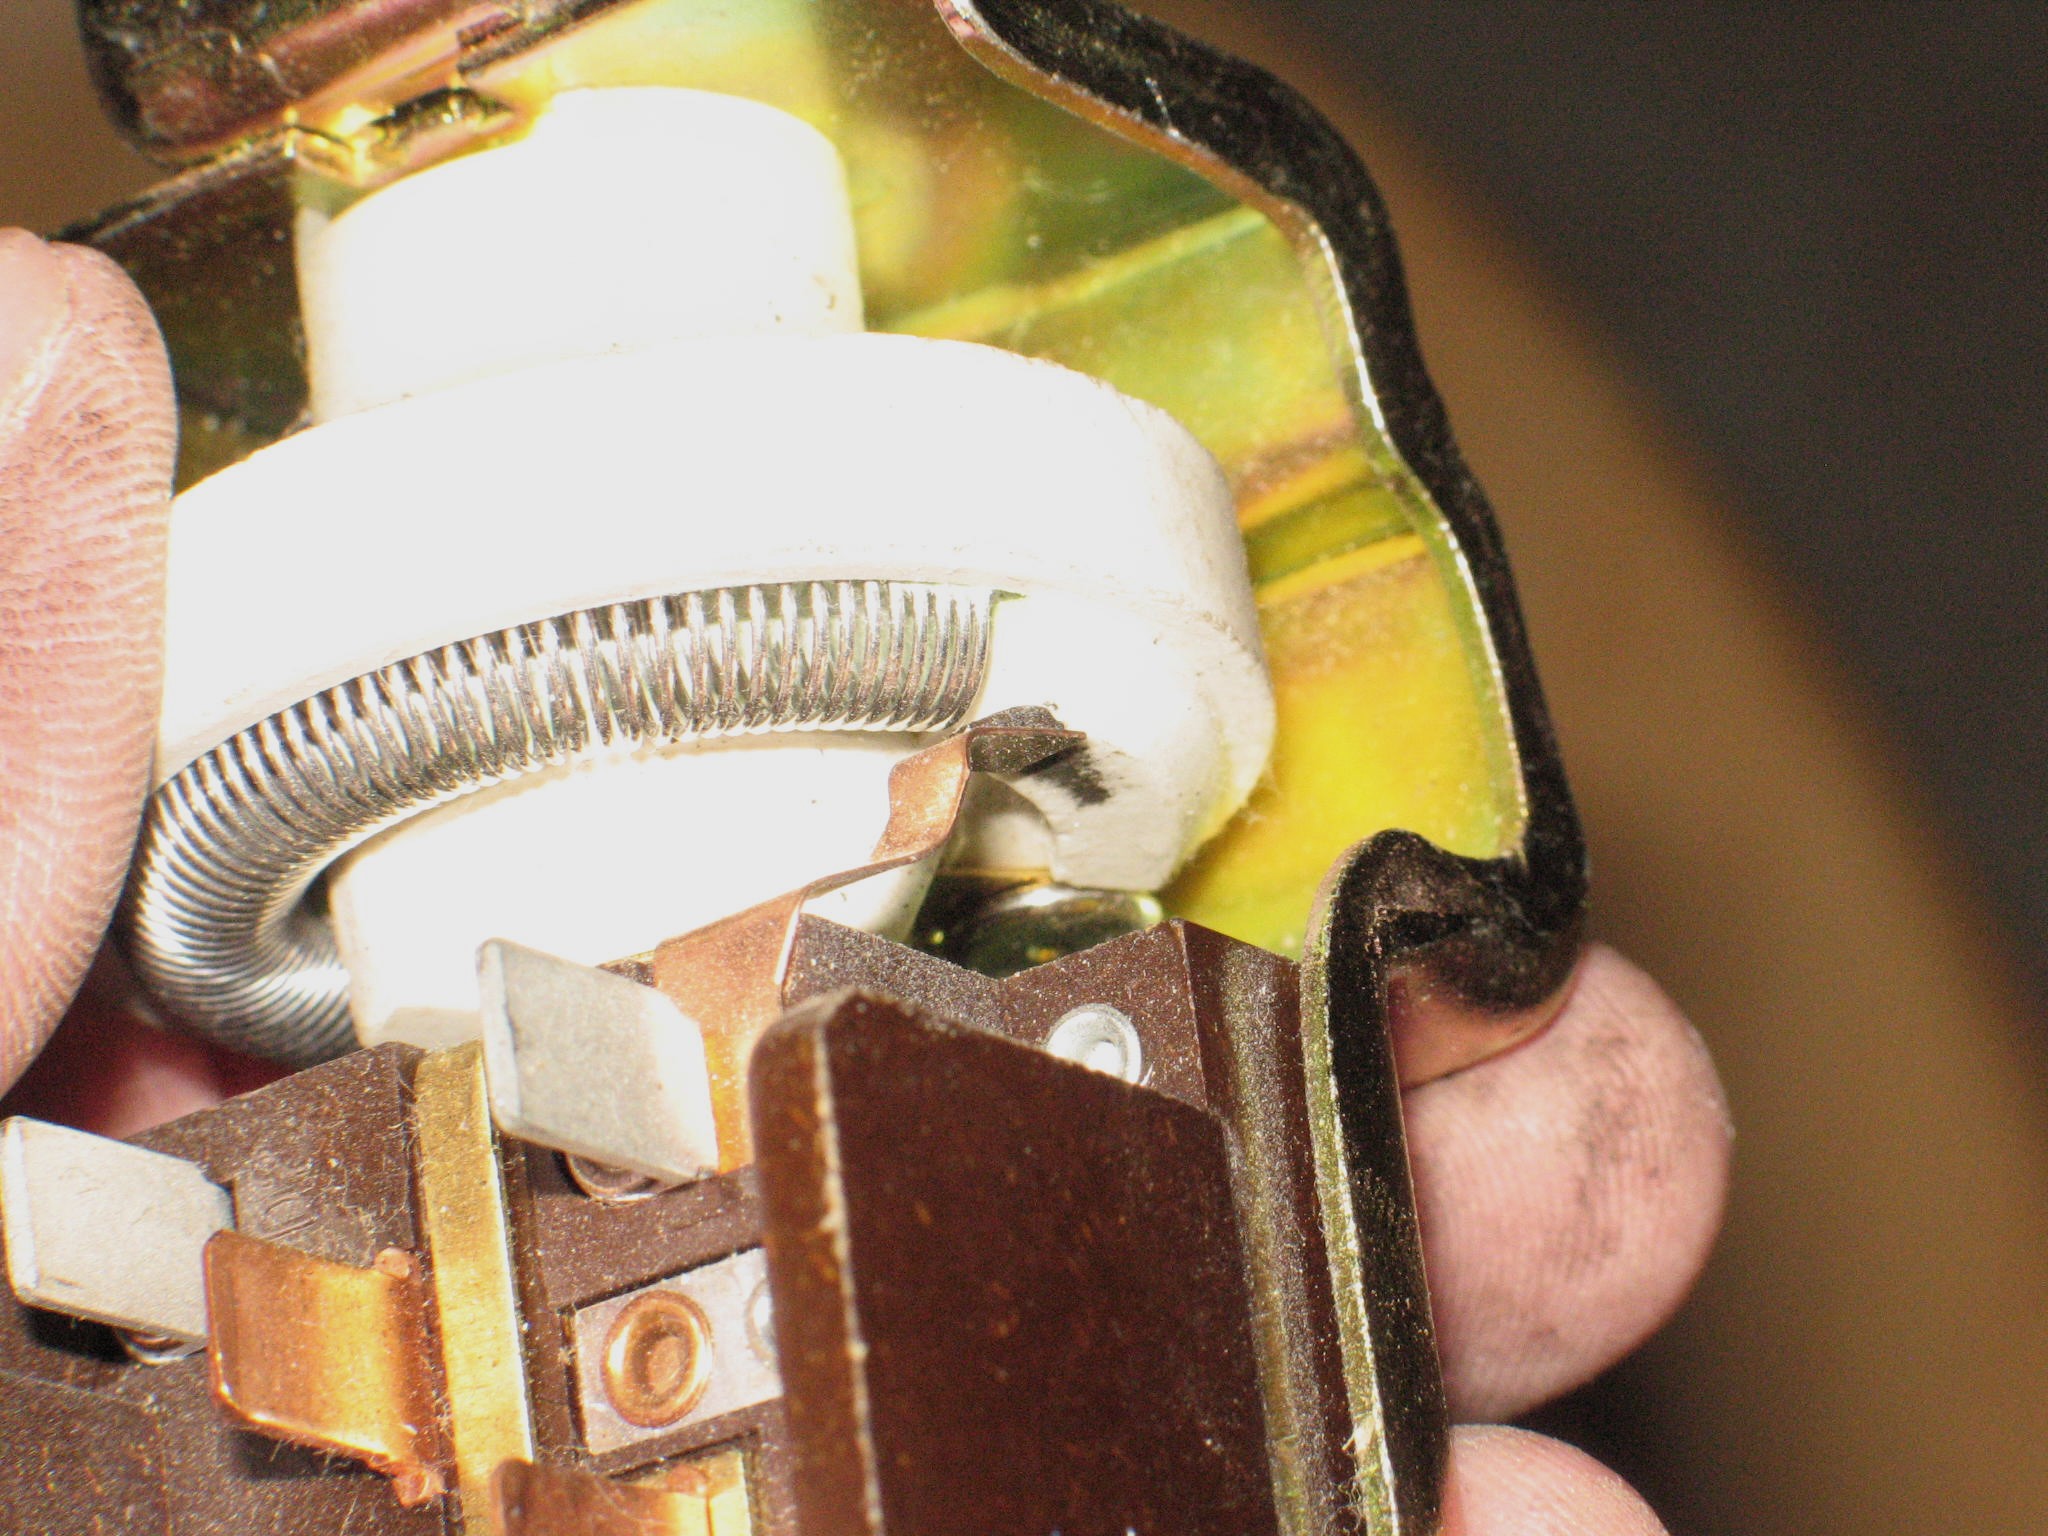
Headlight switches are a high-amp load device because headlights consume a lot of electricity and the switch can get quite warm. However, as switch contacts become corroded and dirty, resistance increases and contacts get hotter. The built-in circuit breaker’s contacts also suffer from corrosion and dirt. Resistance increases, contacts get hot, and the circuit breaker cycles lights off and on.
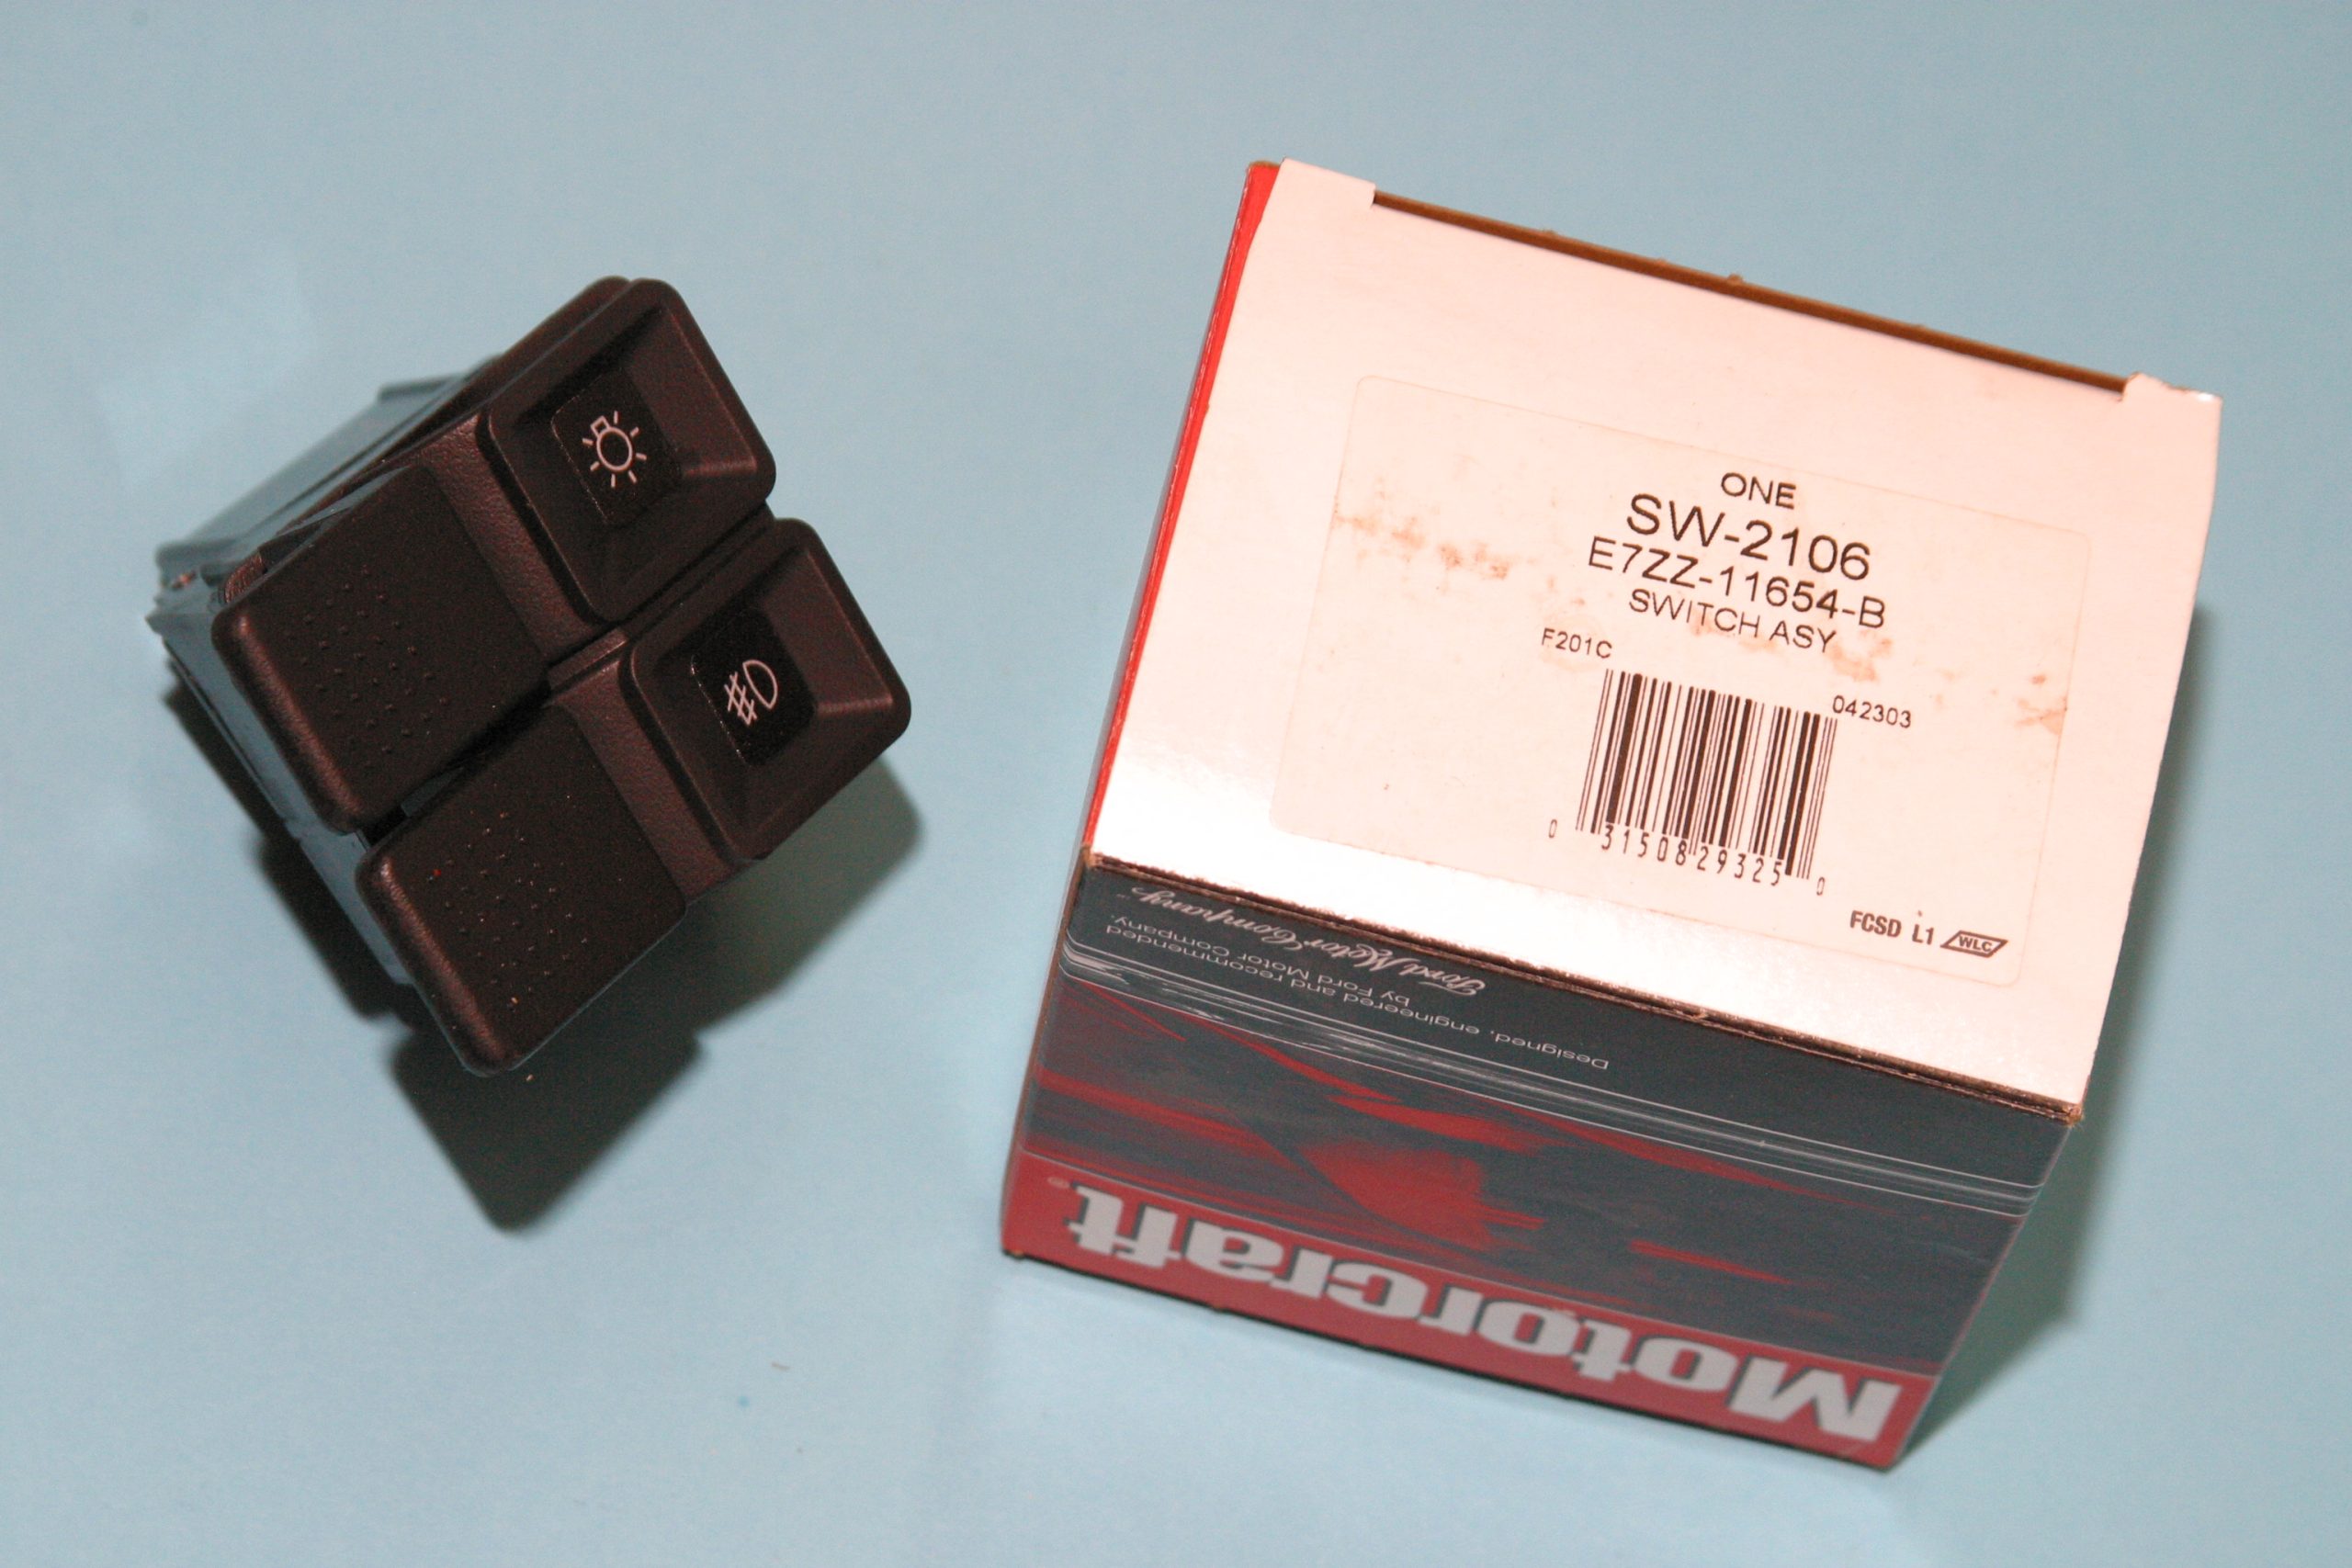
Most of the time when you experience cycling headlights, it isn’t a short circuit, but instead corroded circuit breaker or headlight switch contacts. There’s little point in disassembling the switch to clean contacts when you can order a new headlight switch. However, if you own a classic car where replacement or reproduction parts are not available, you are then faced with finding a good new old stock switch or carefully opening up your headlight switch and cleaning the contacts.
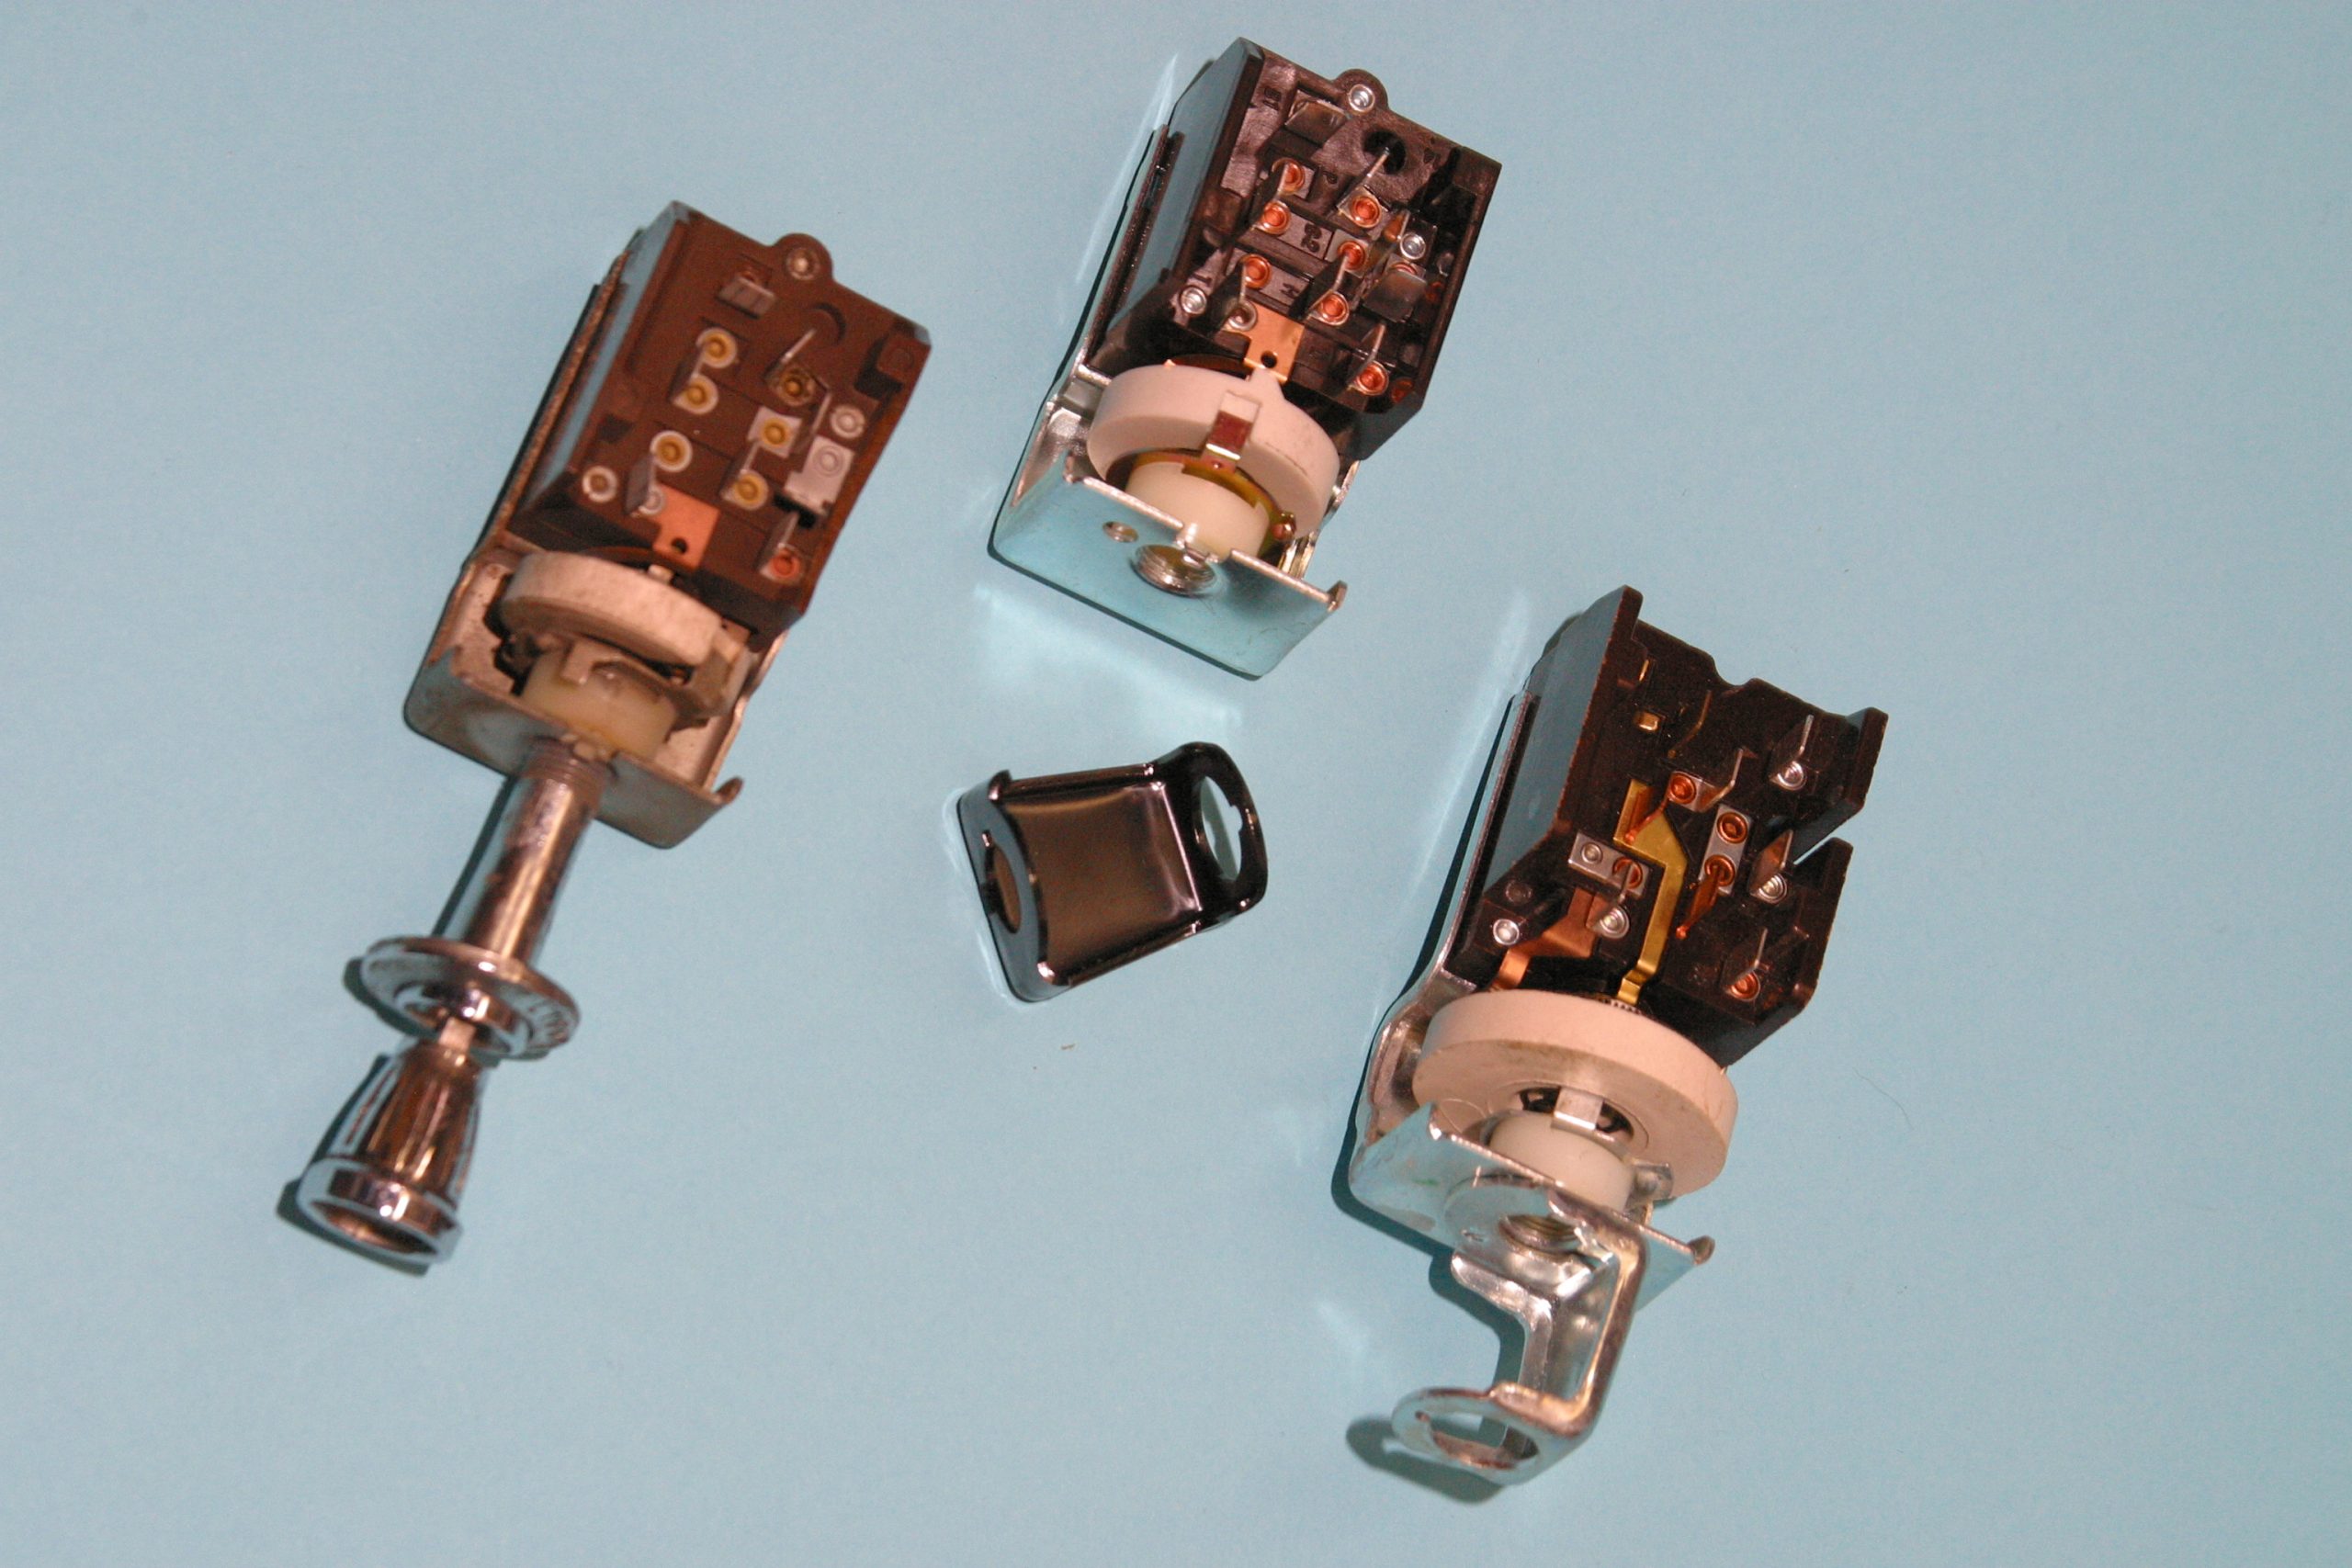
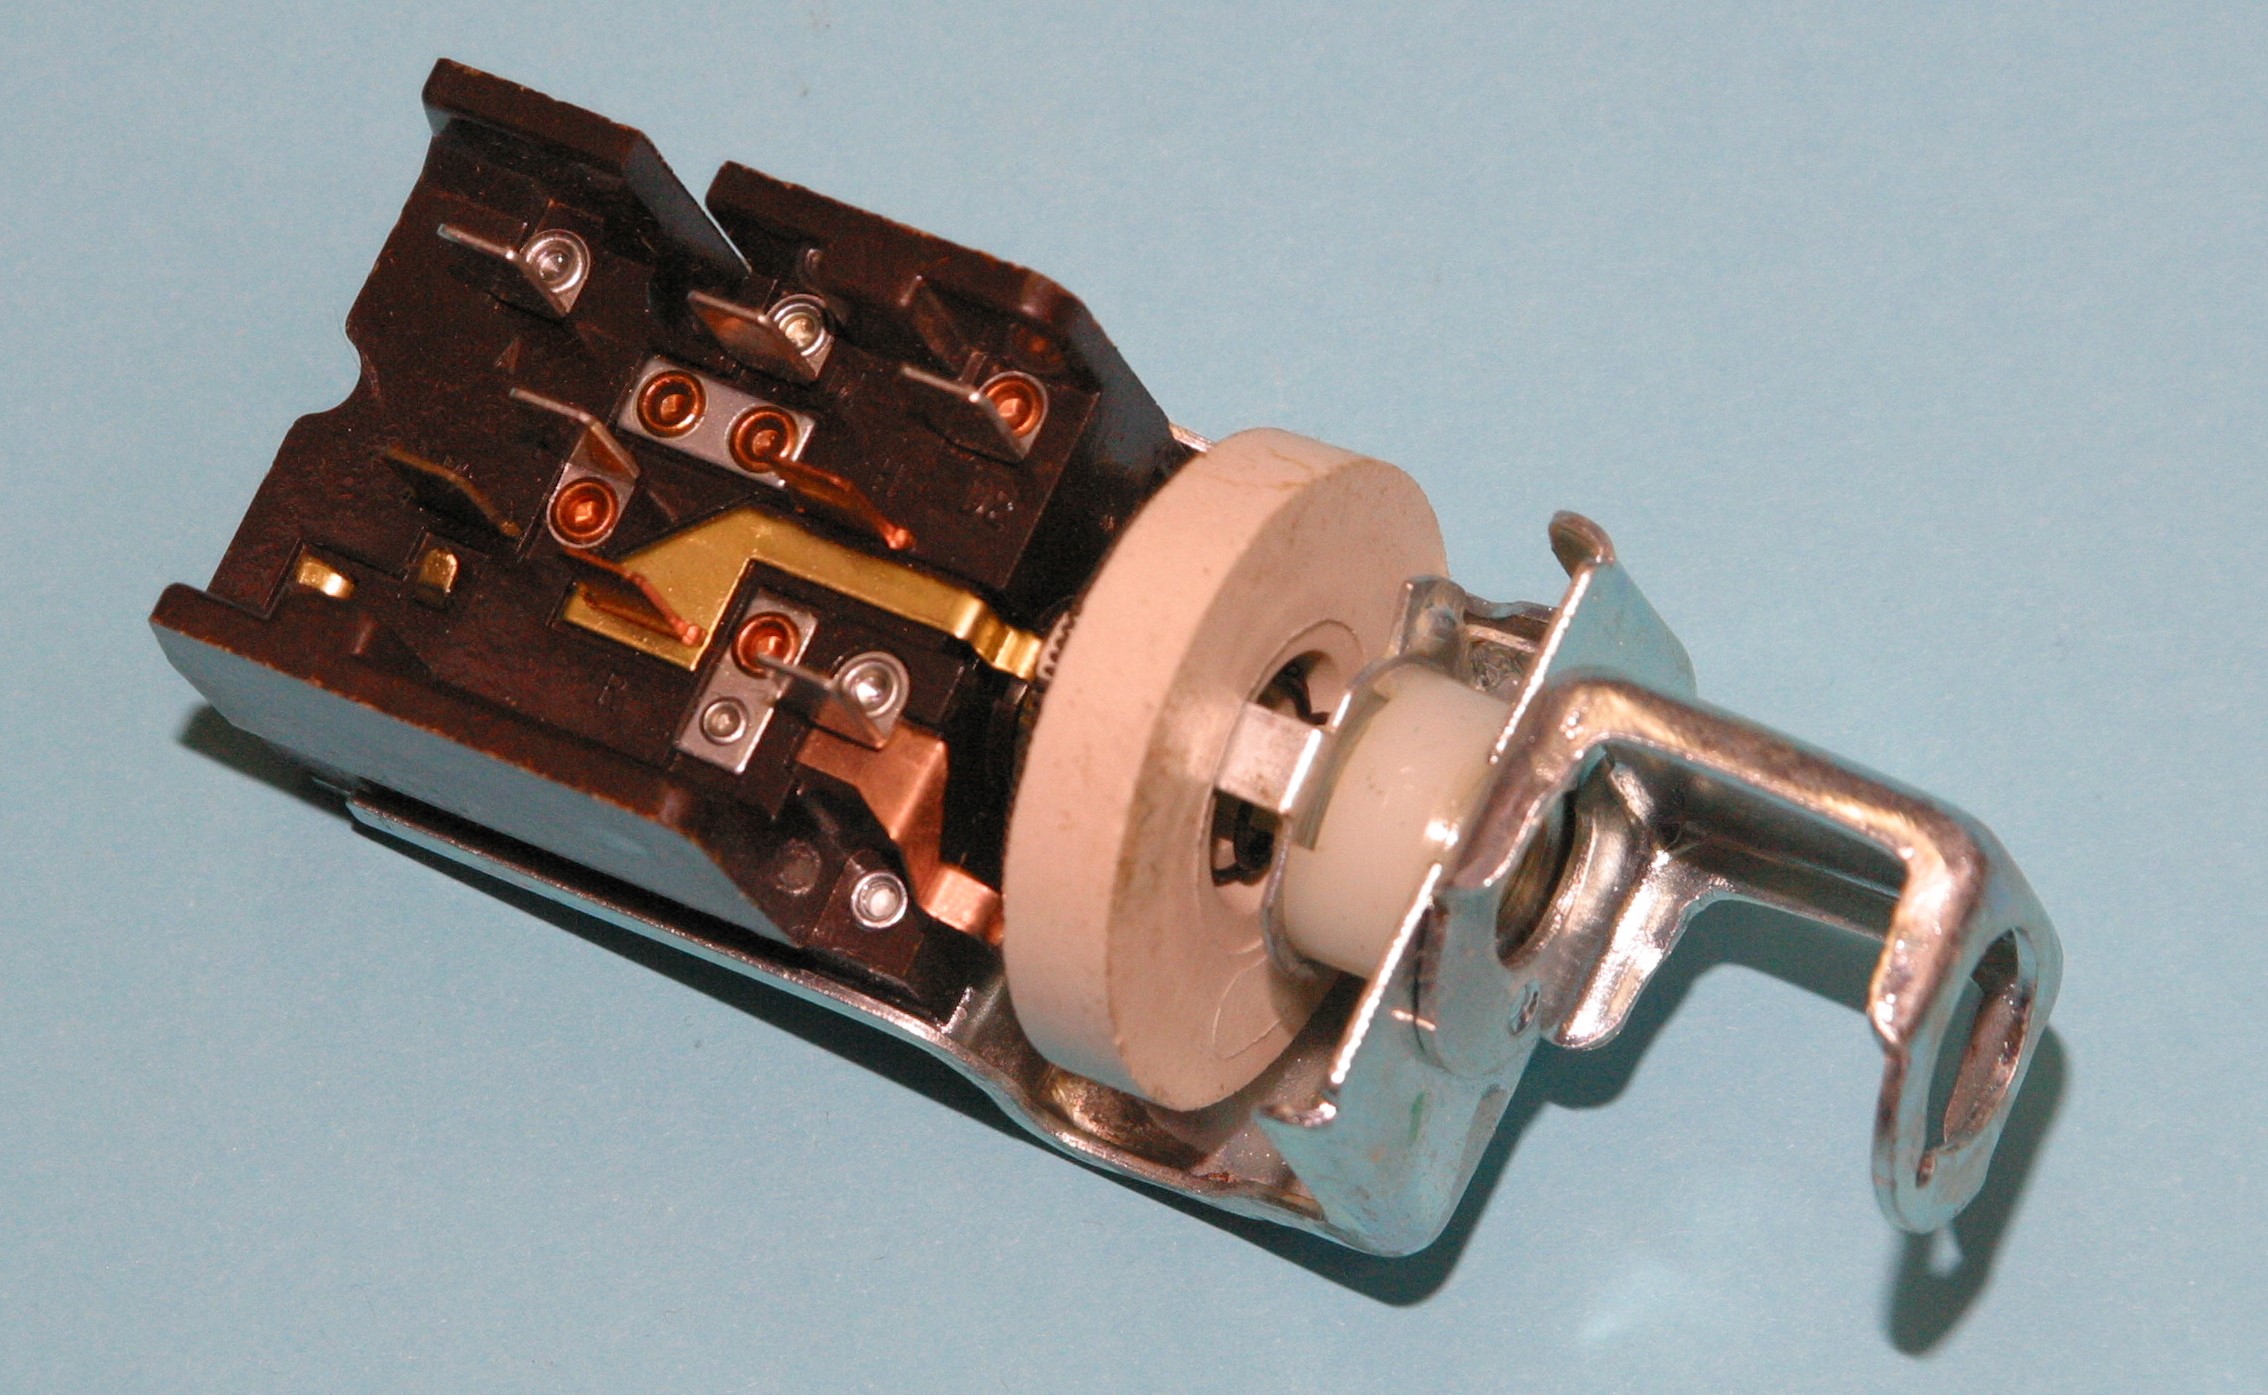
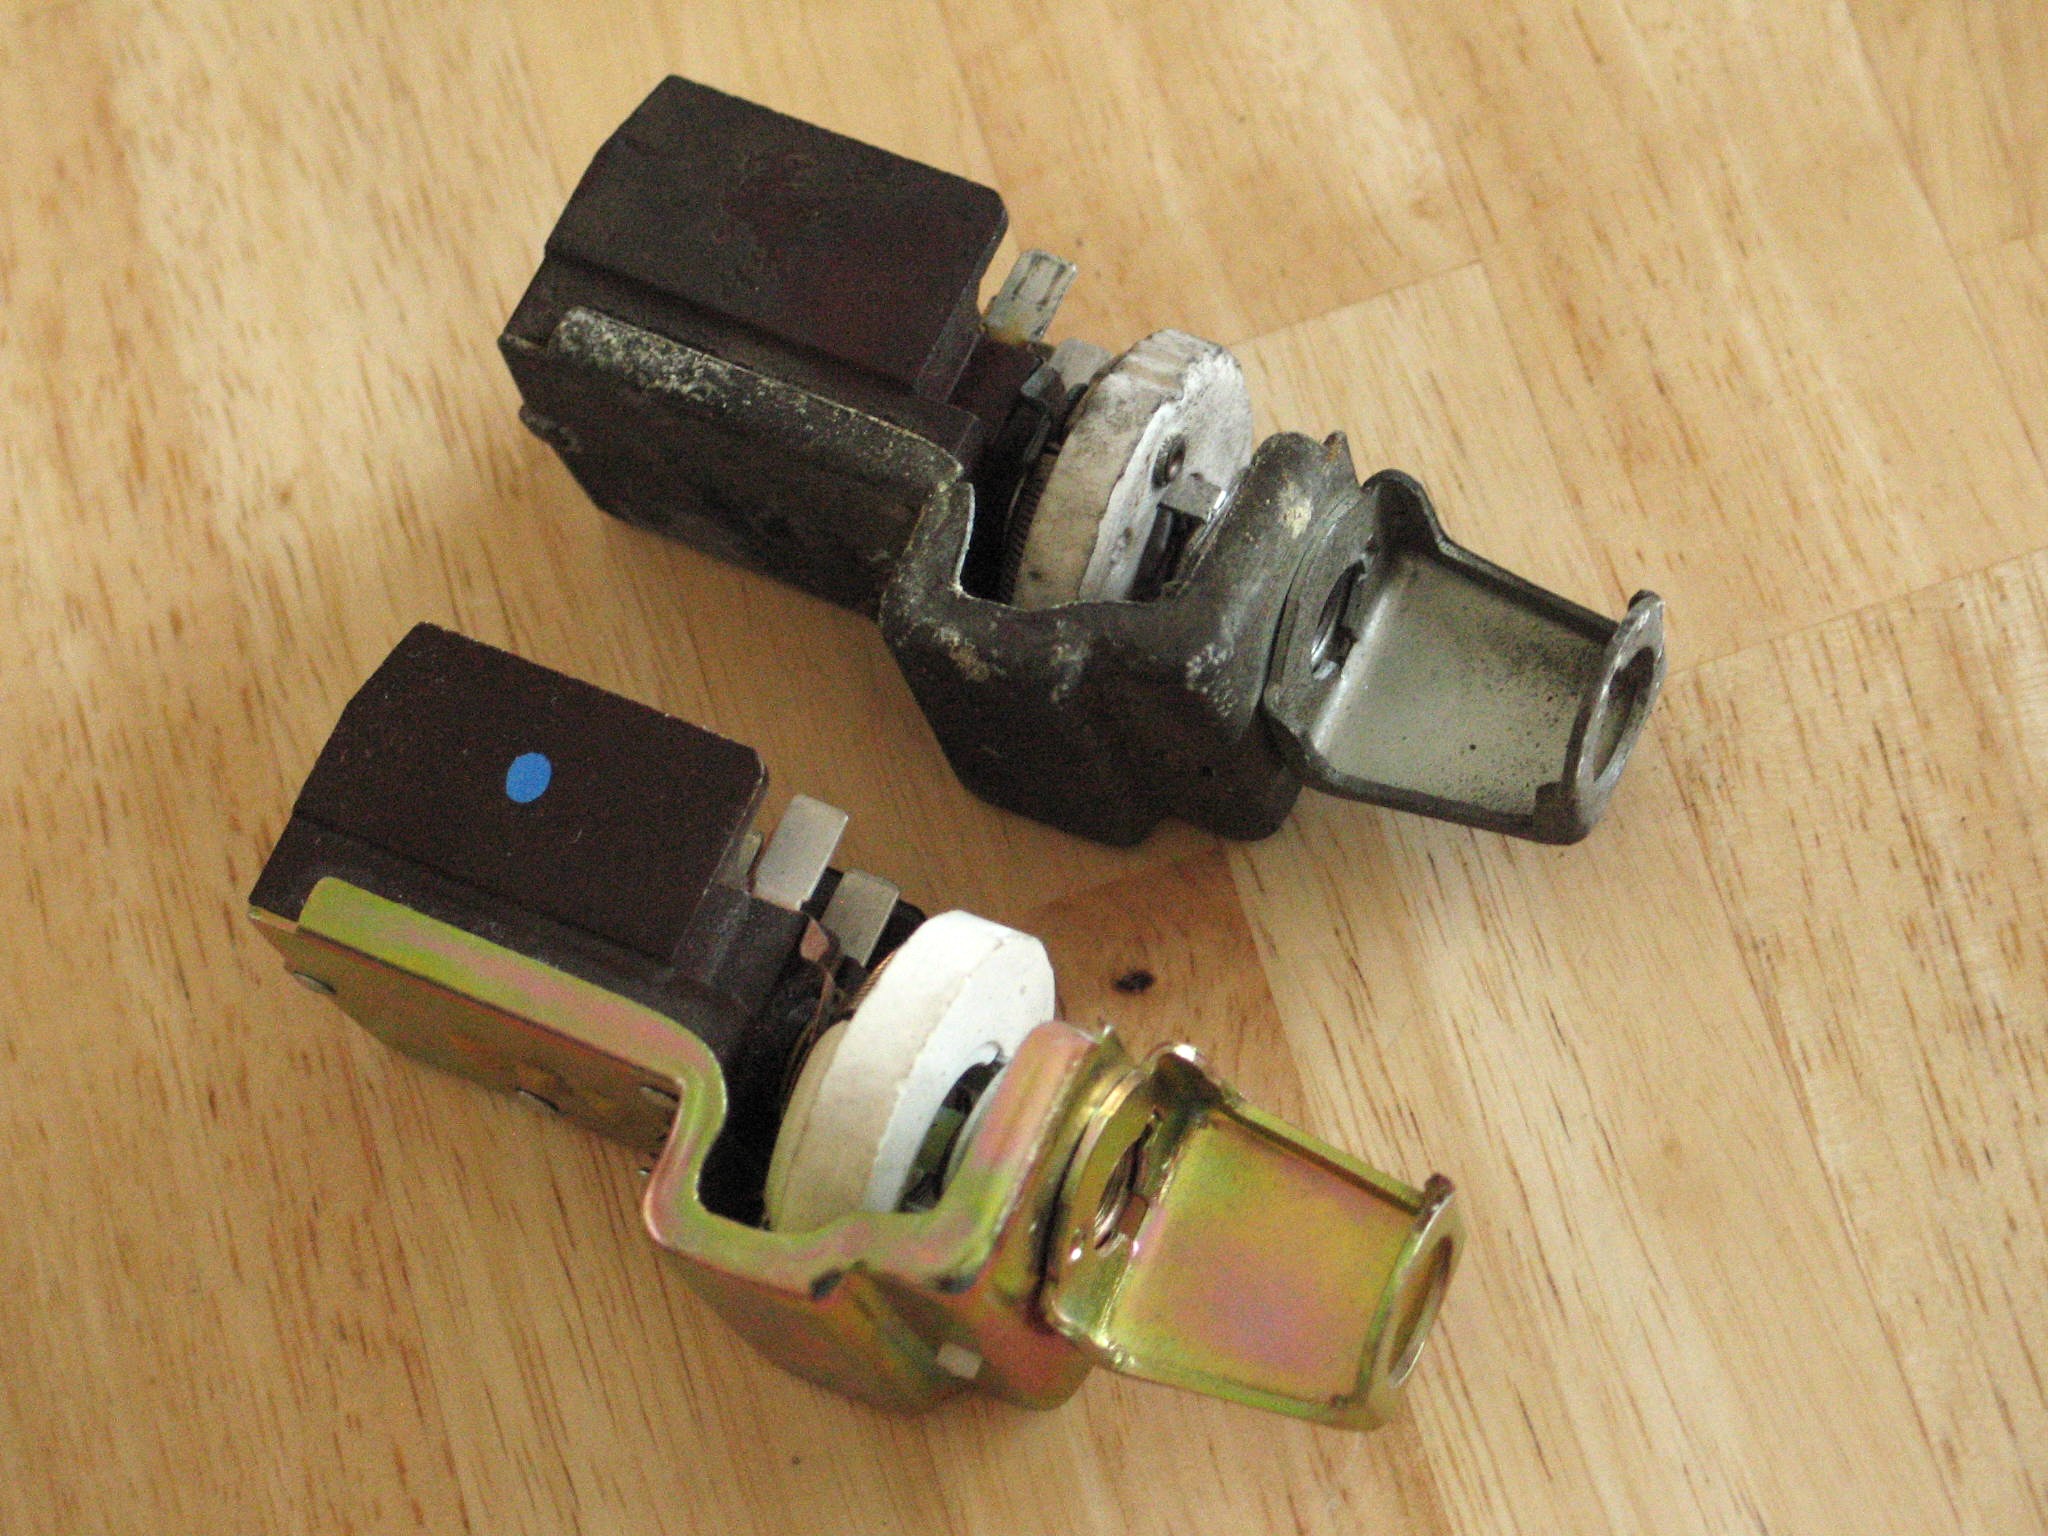
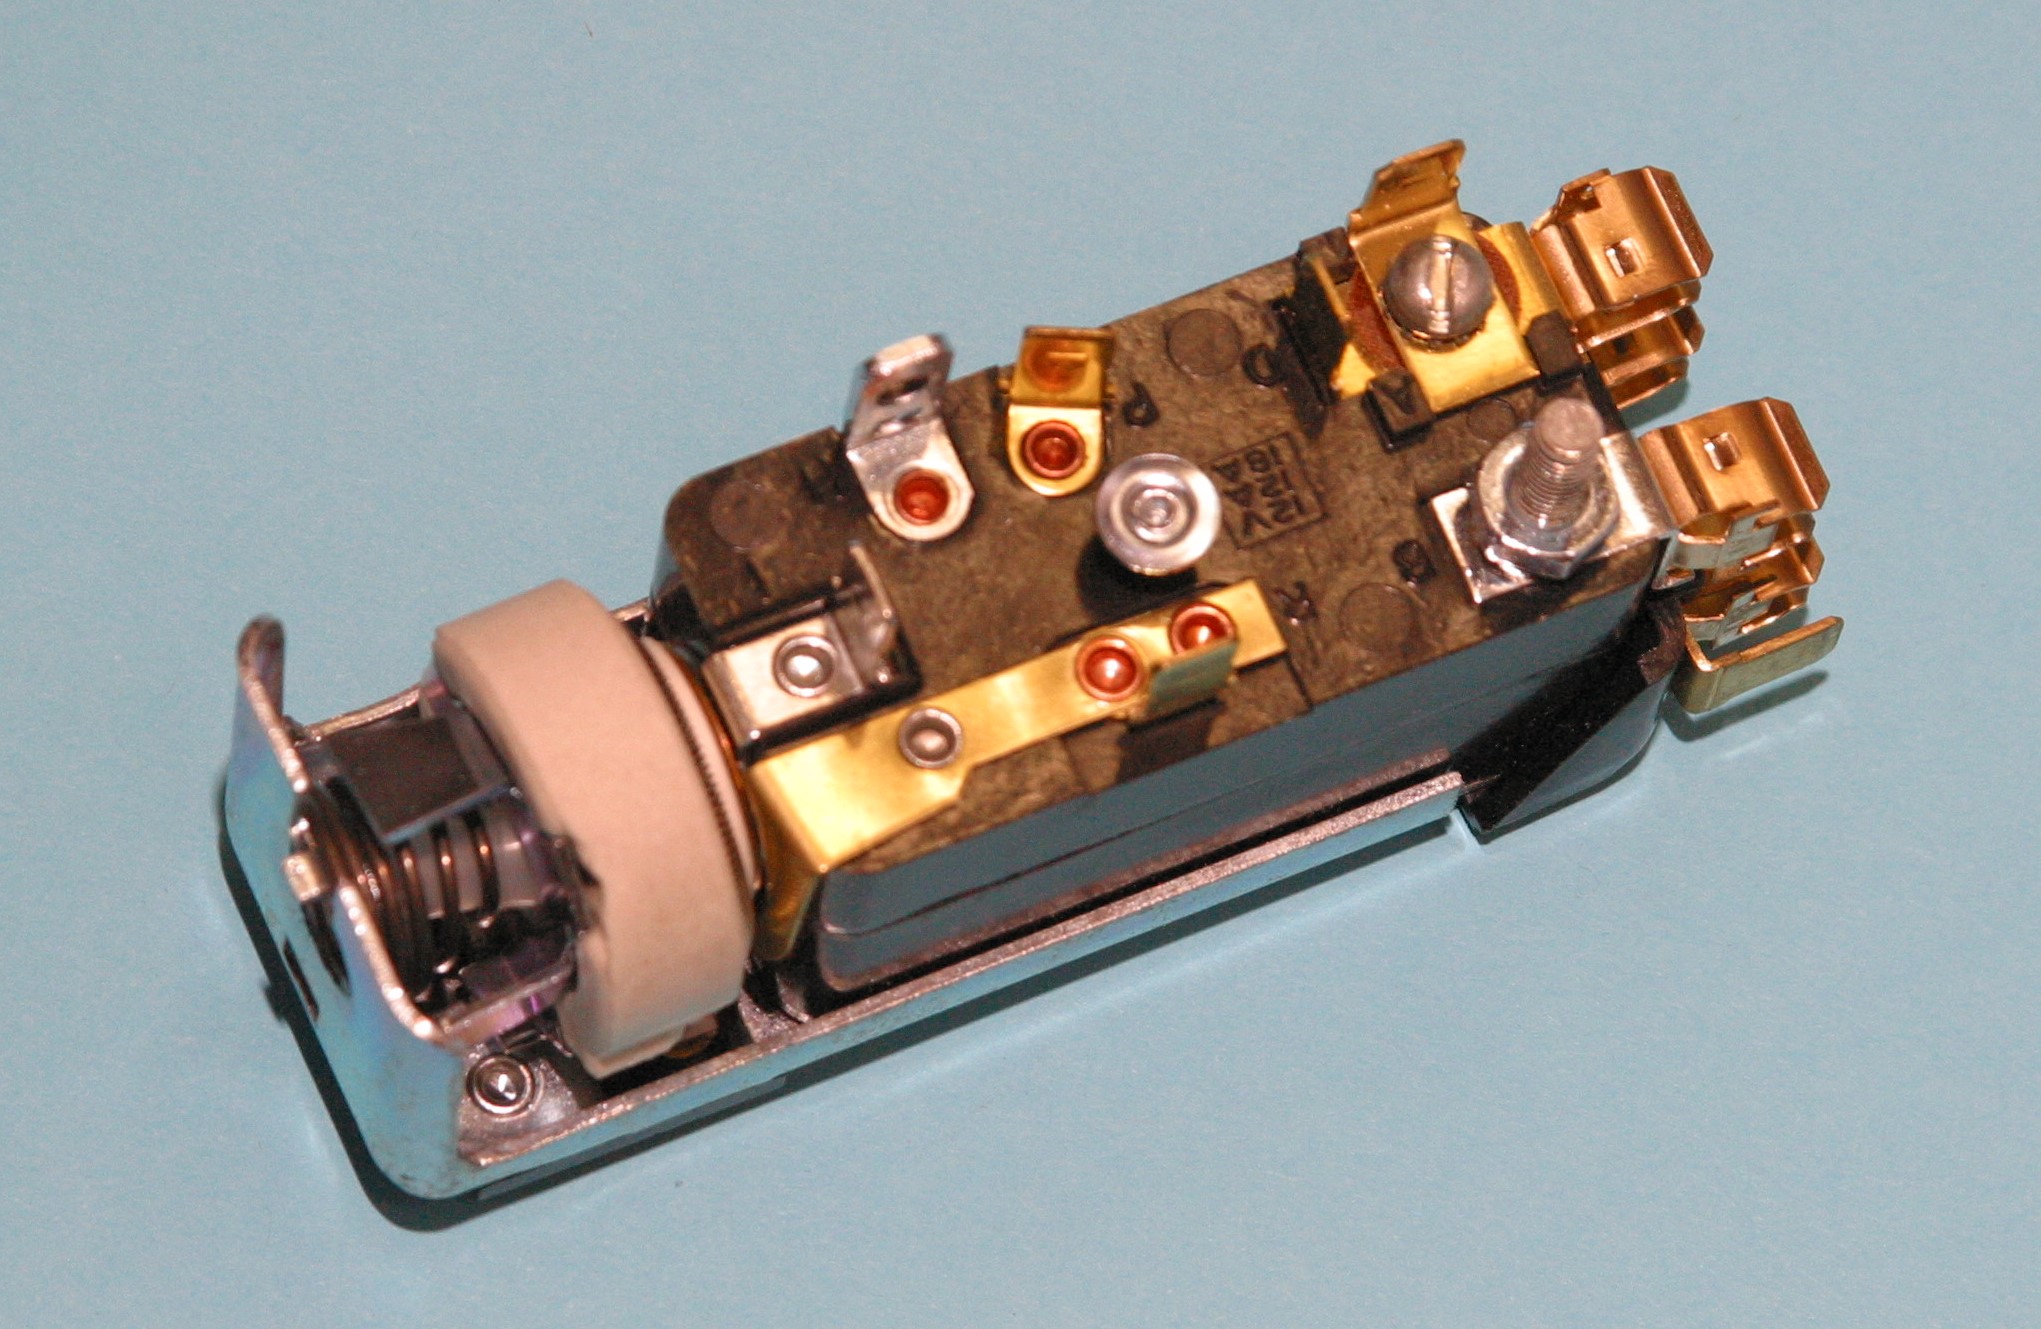
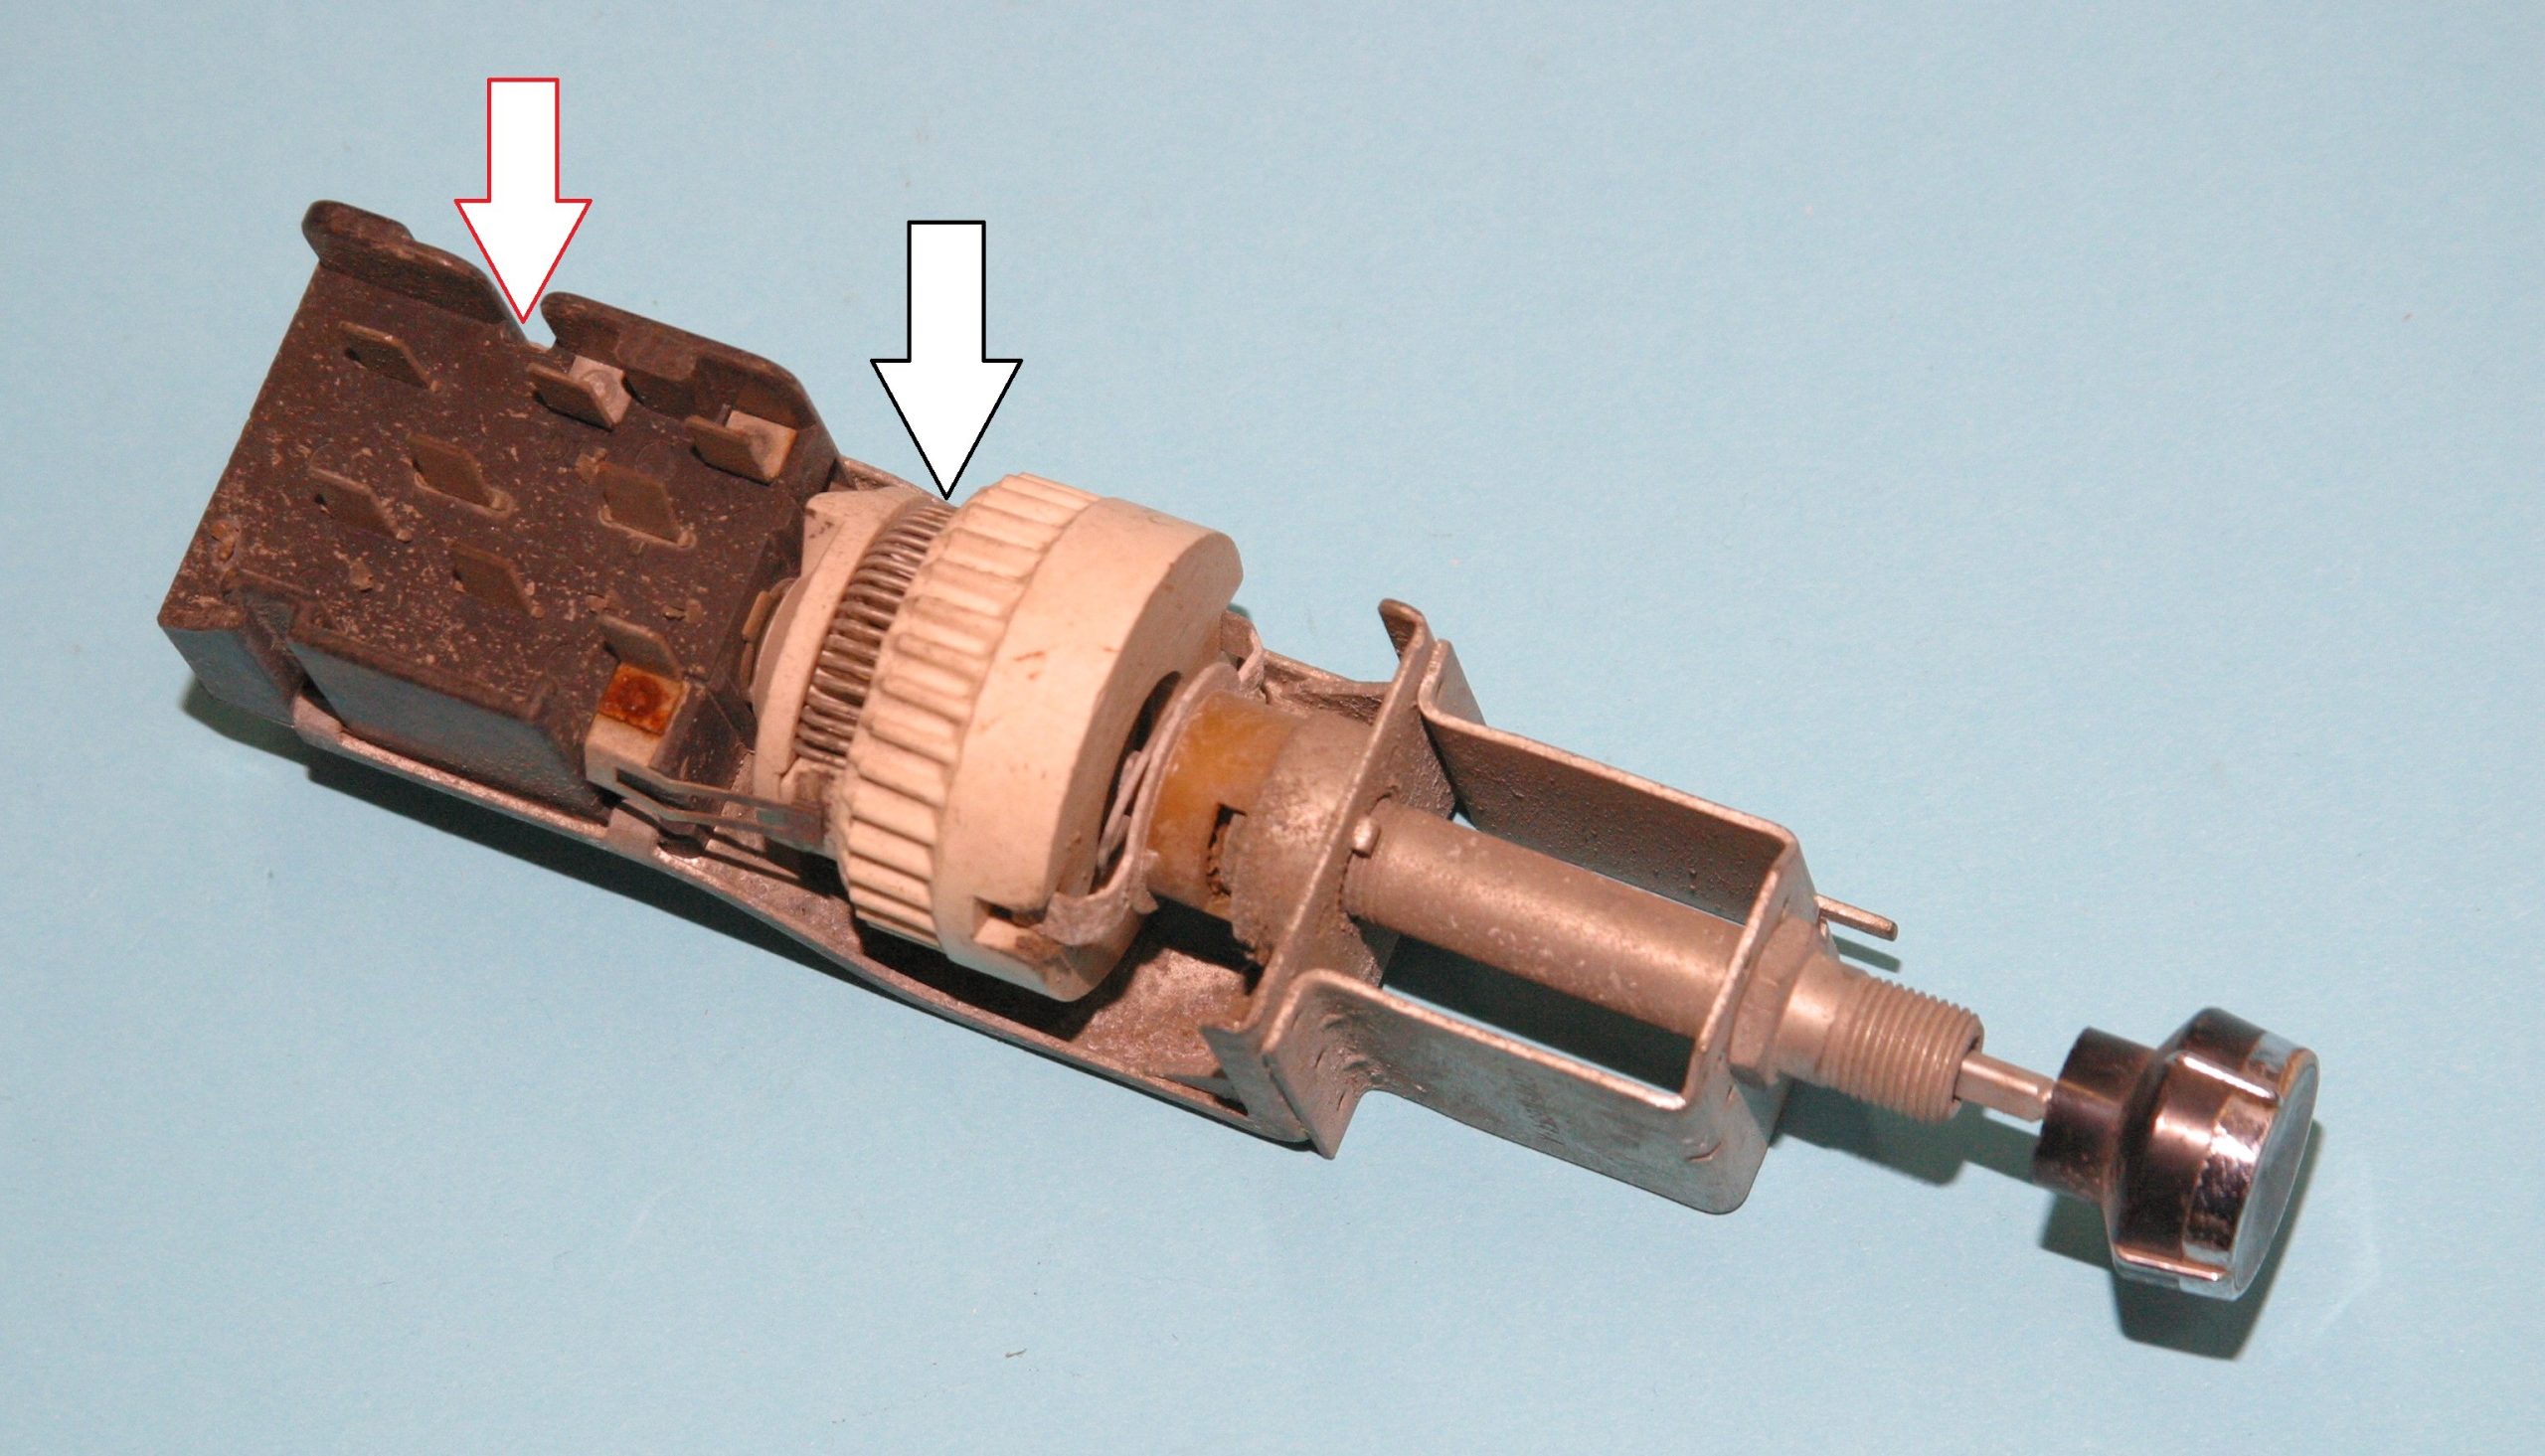
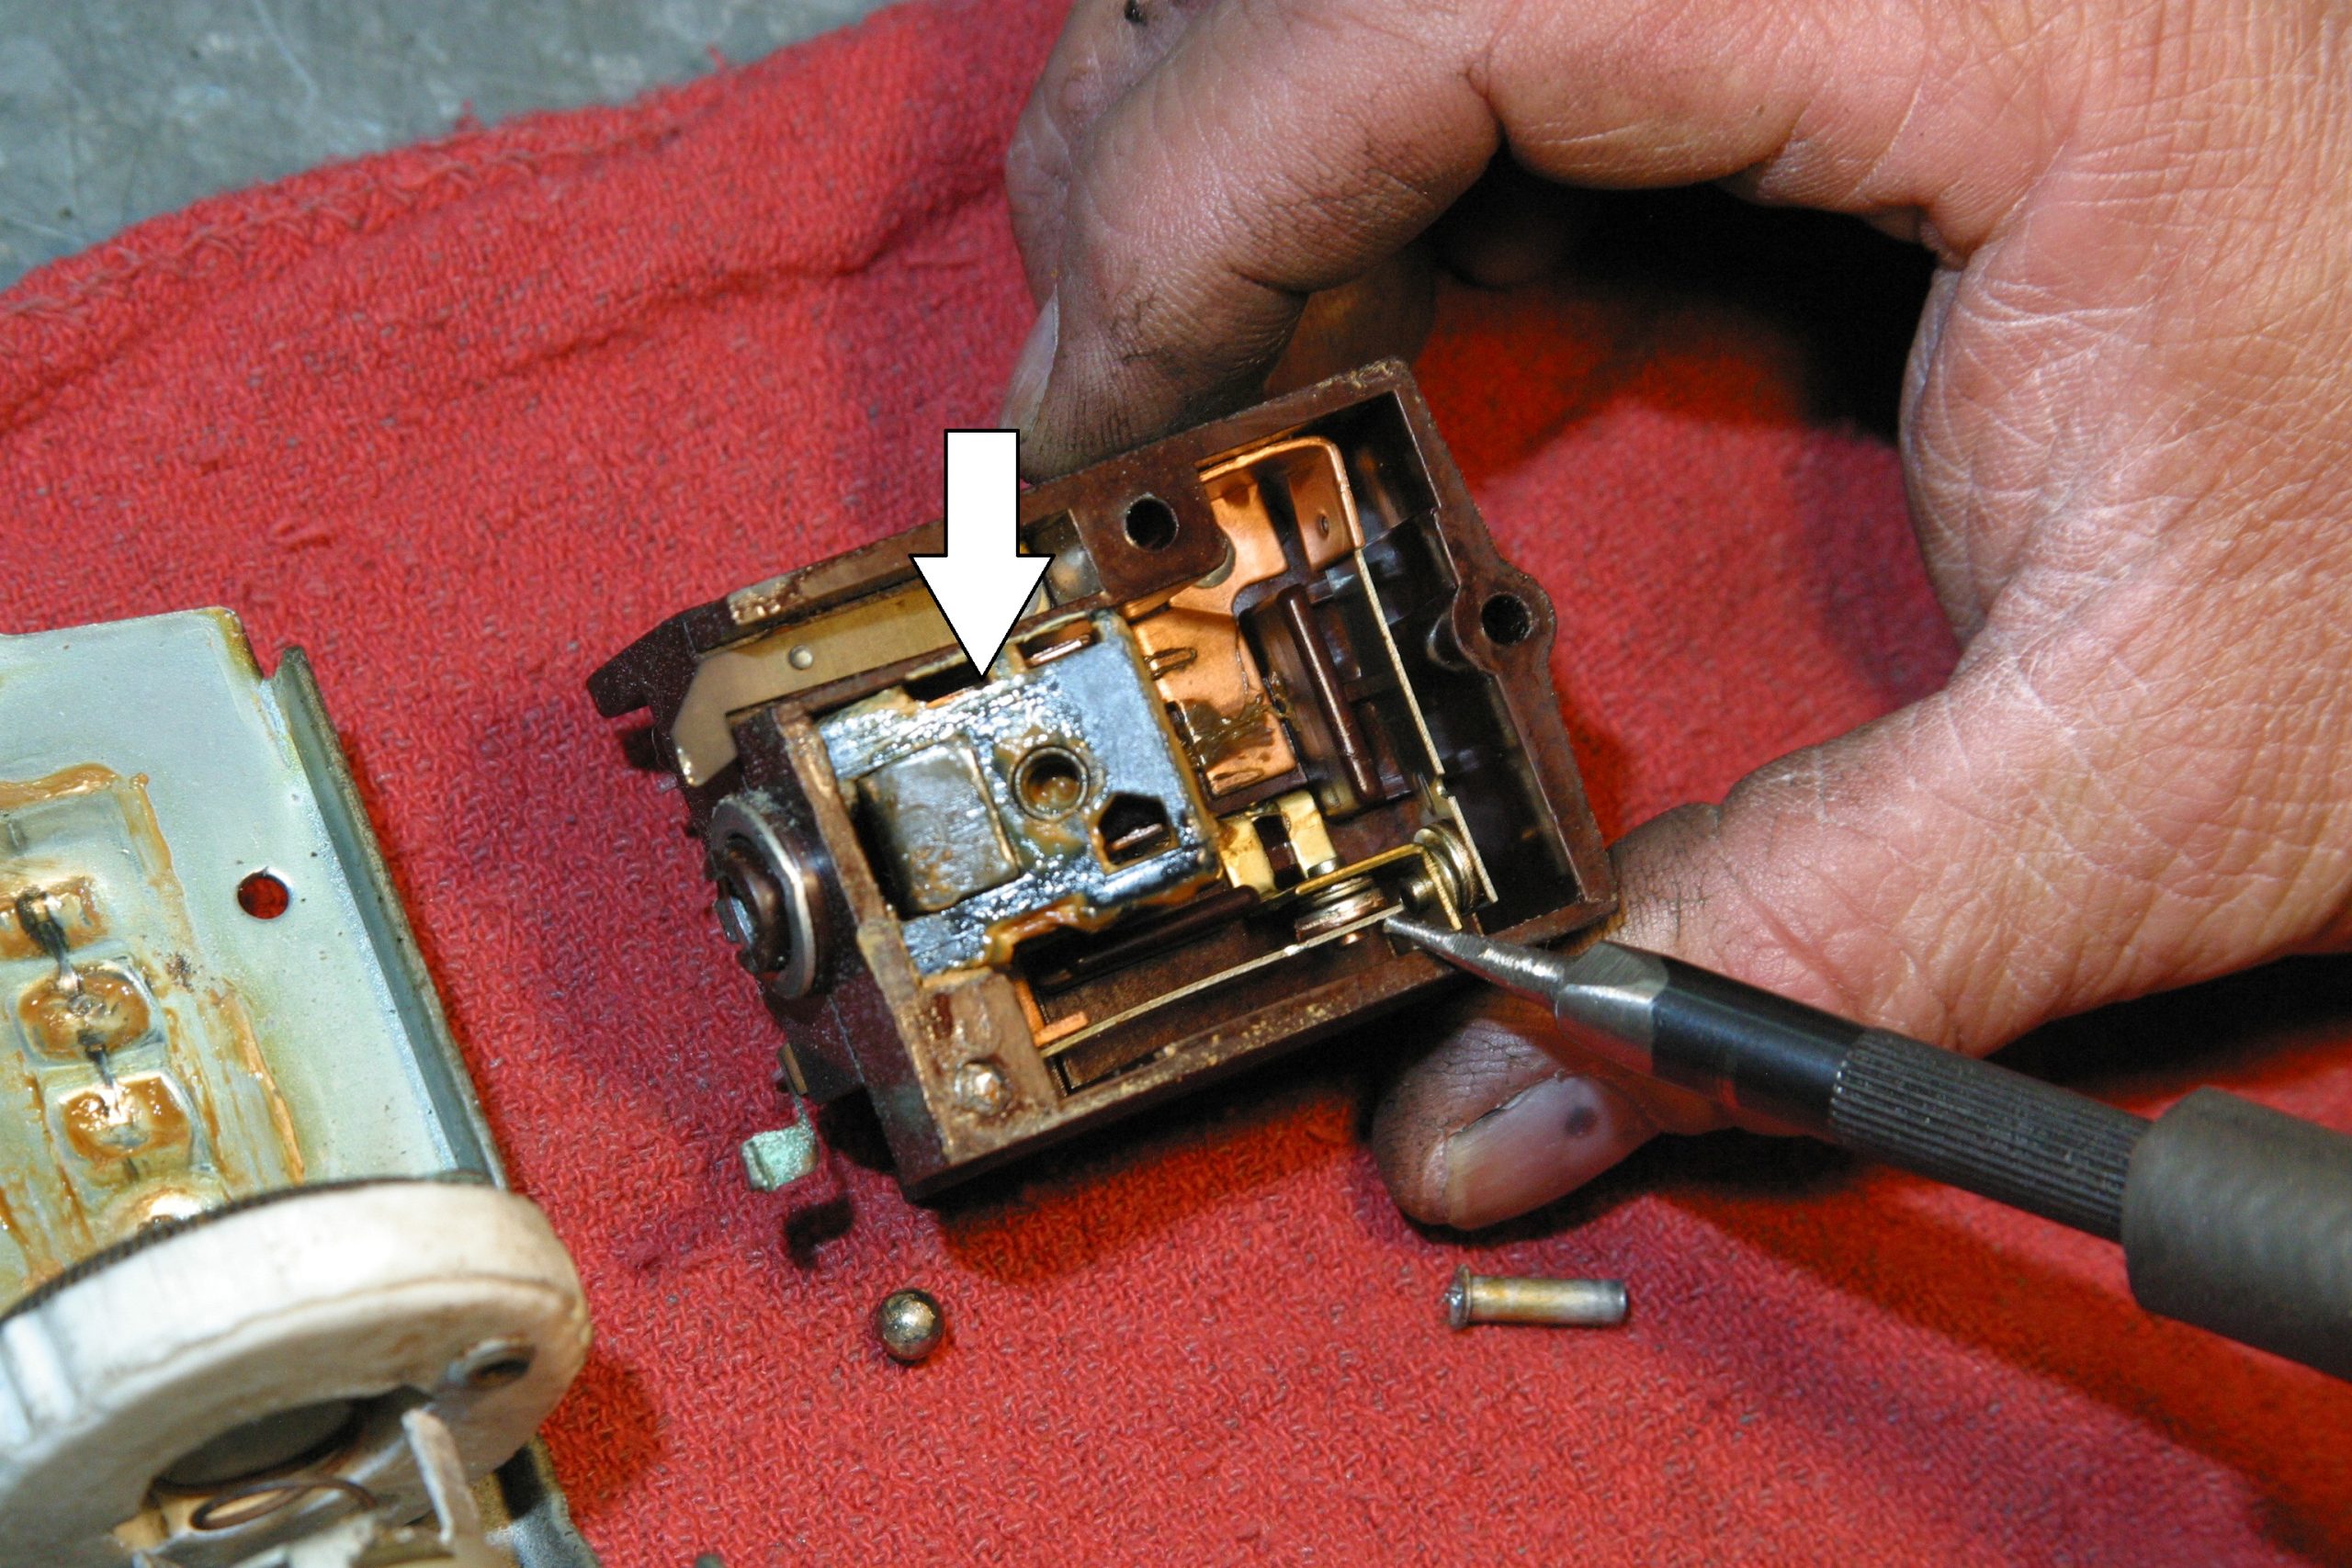
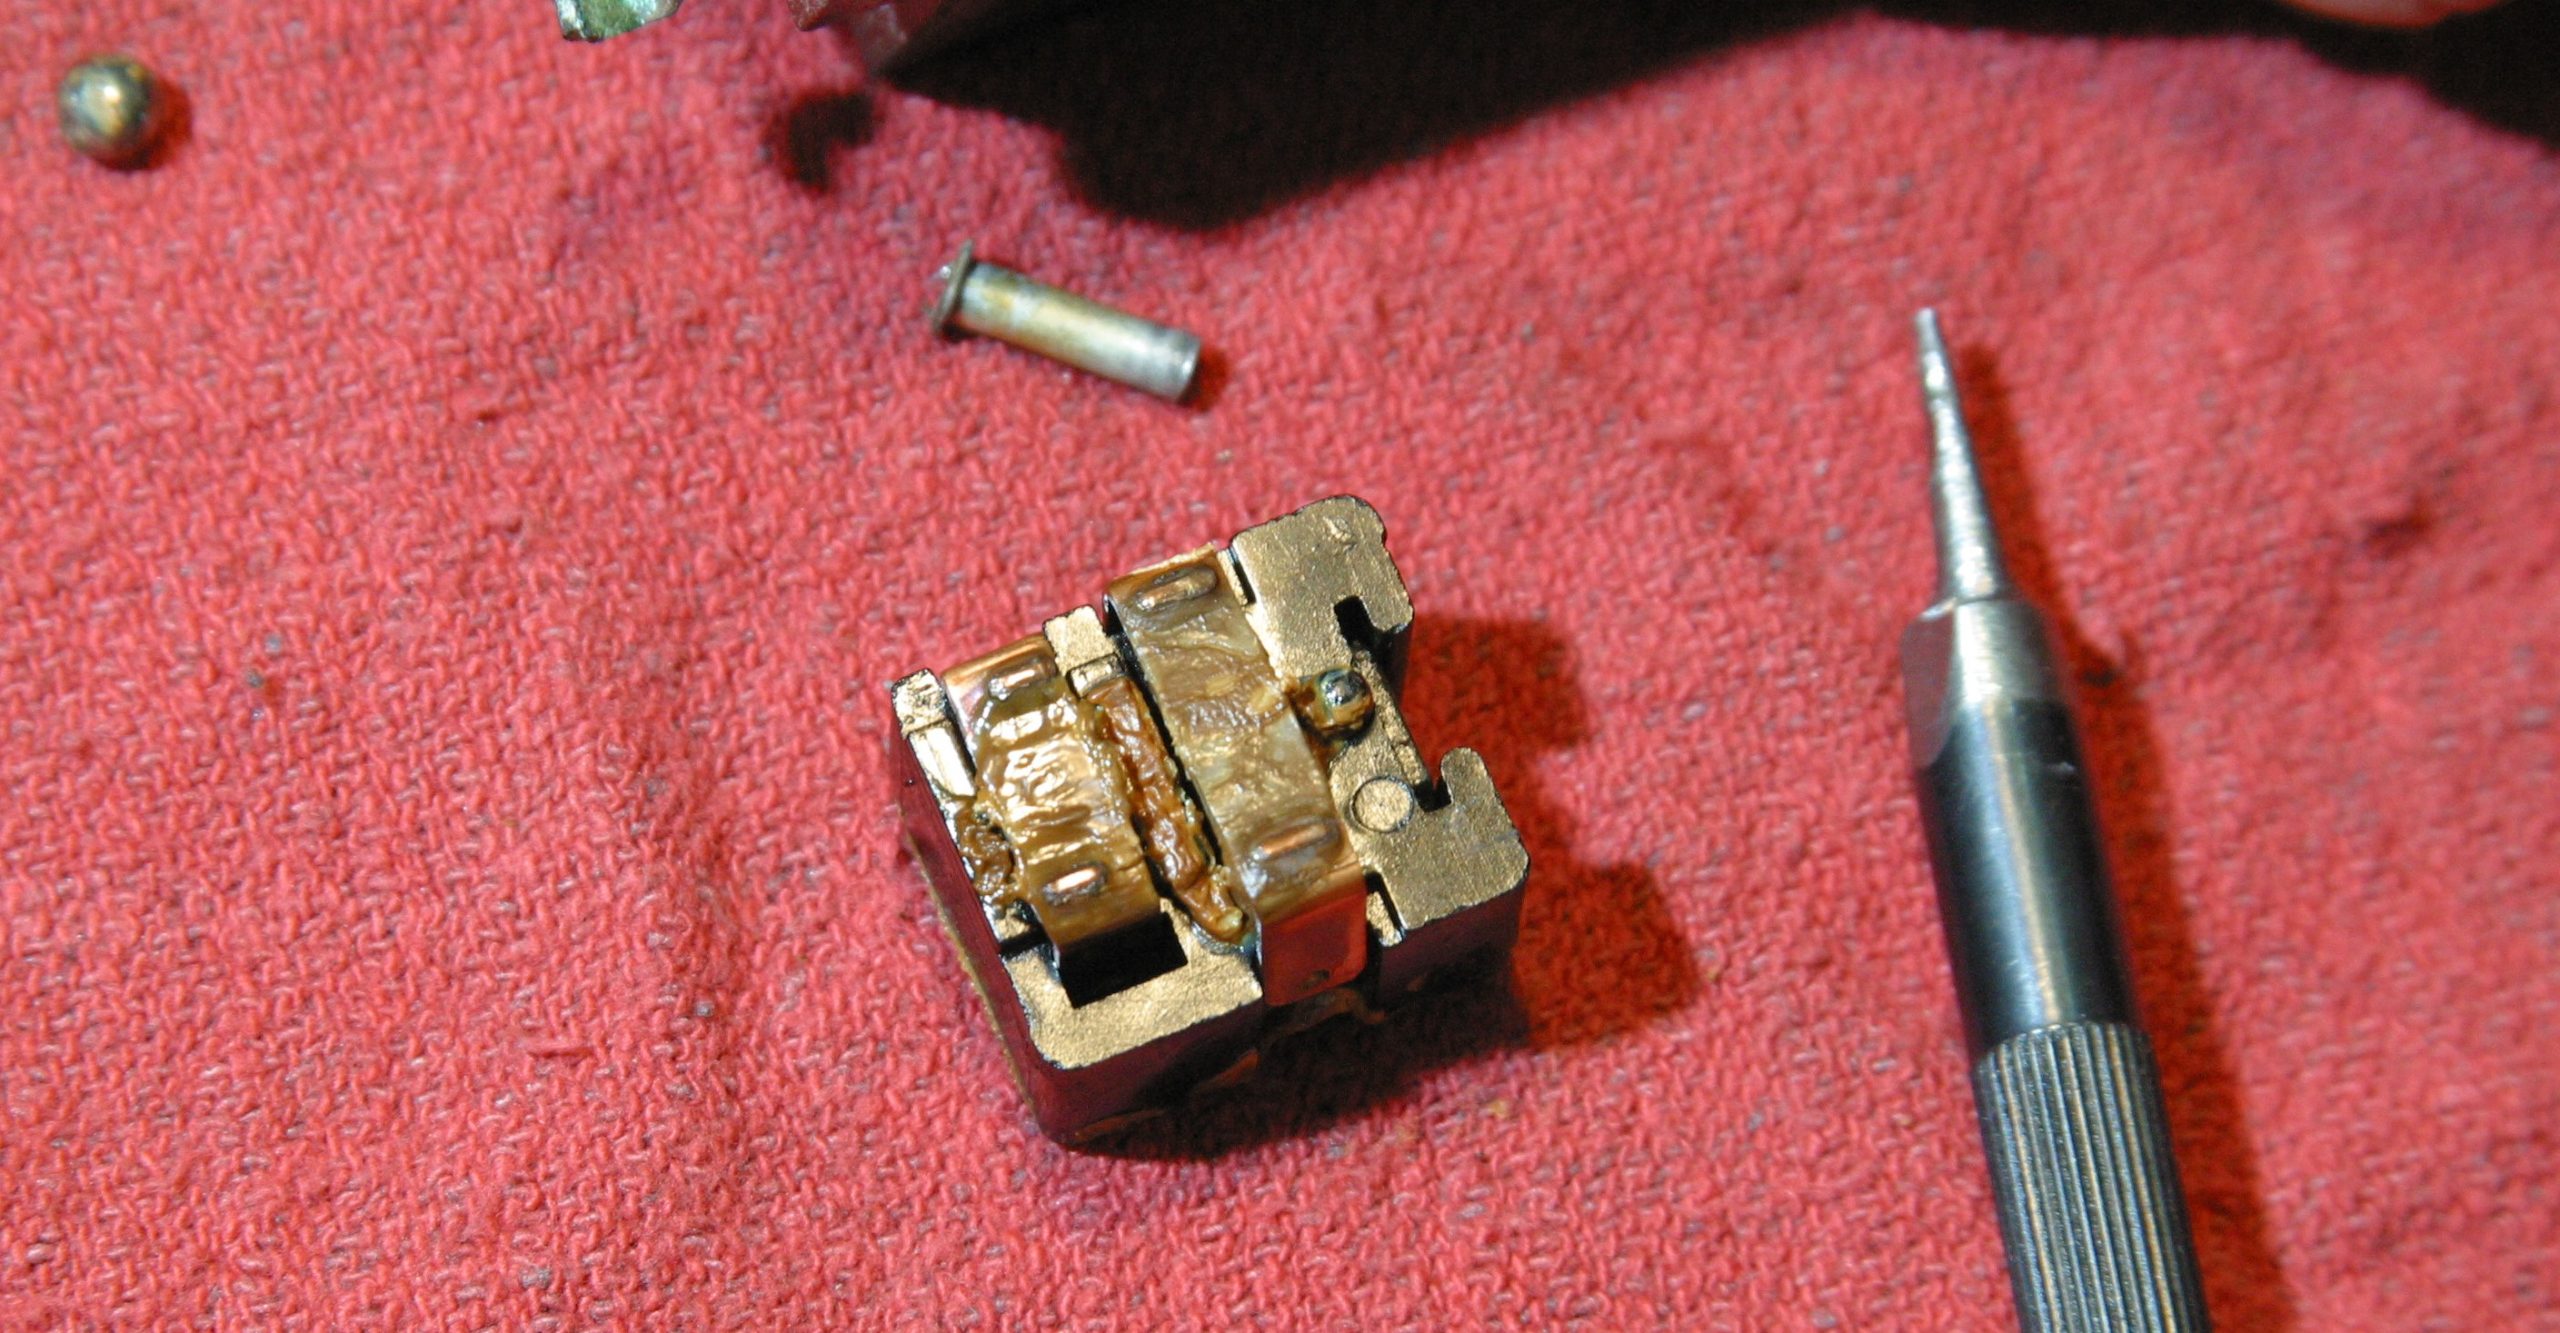
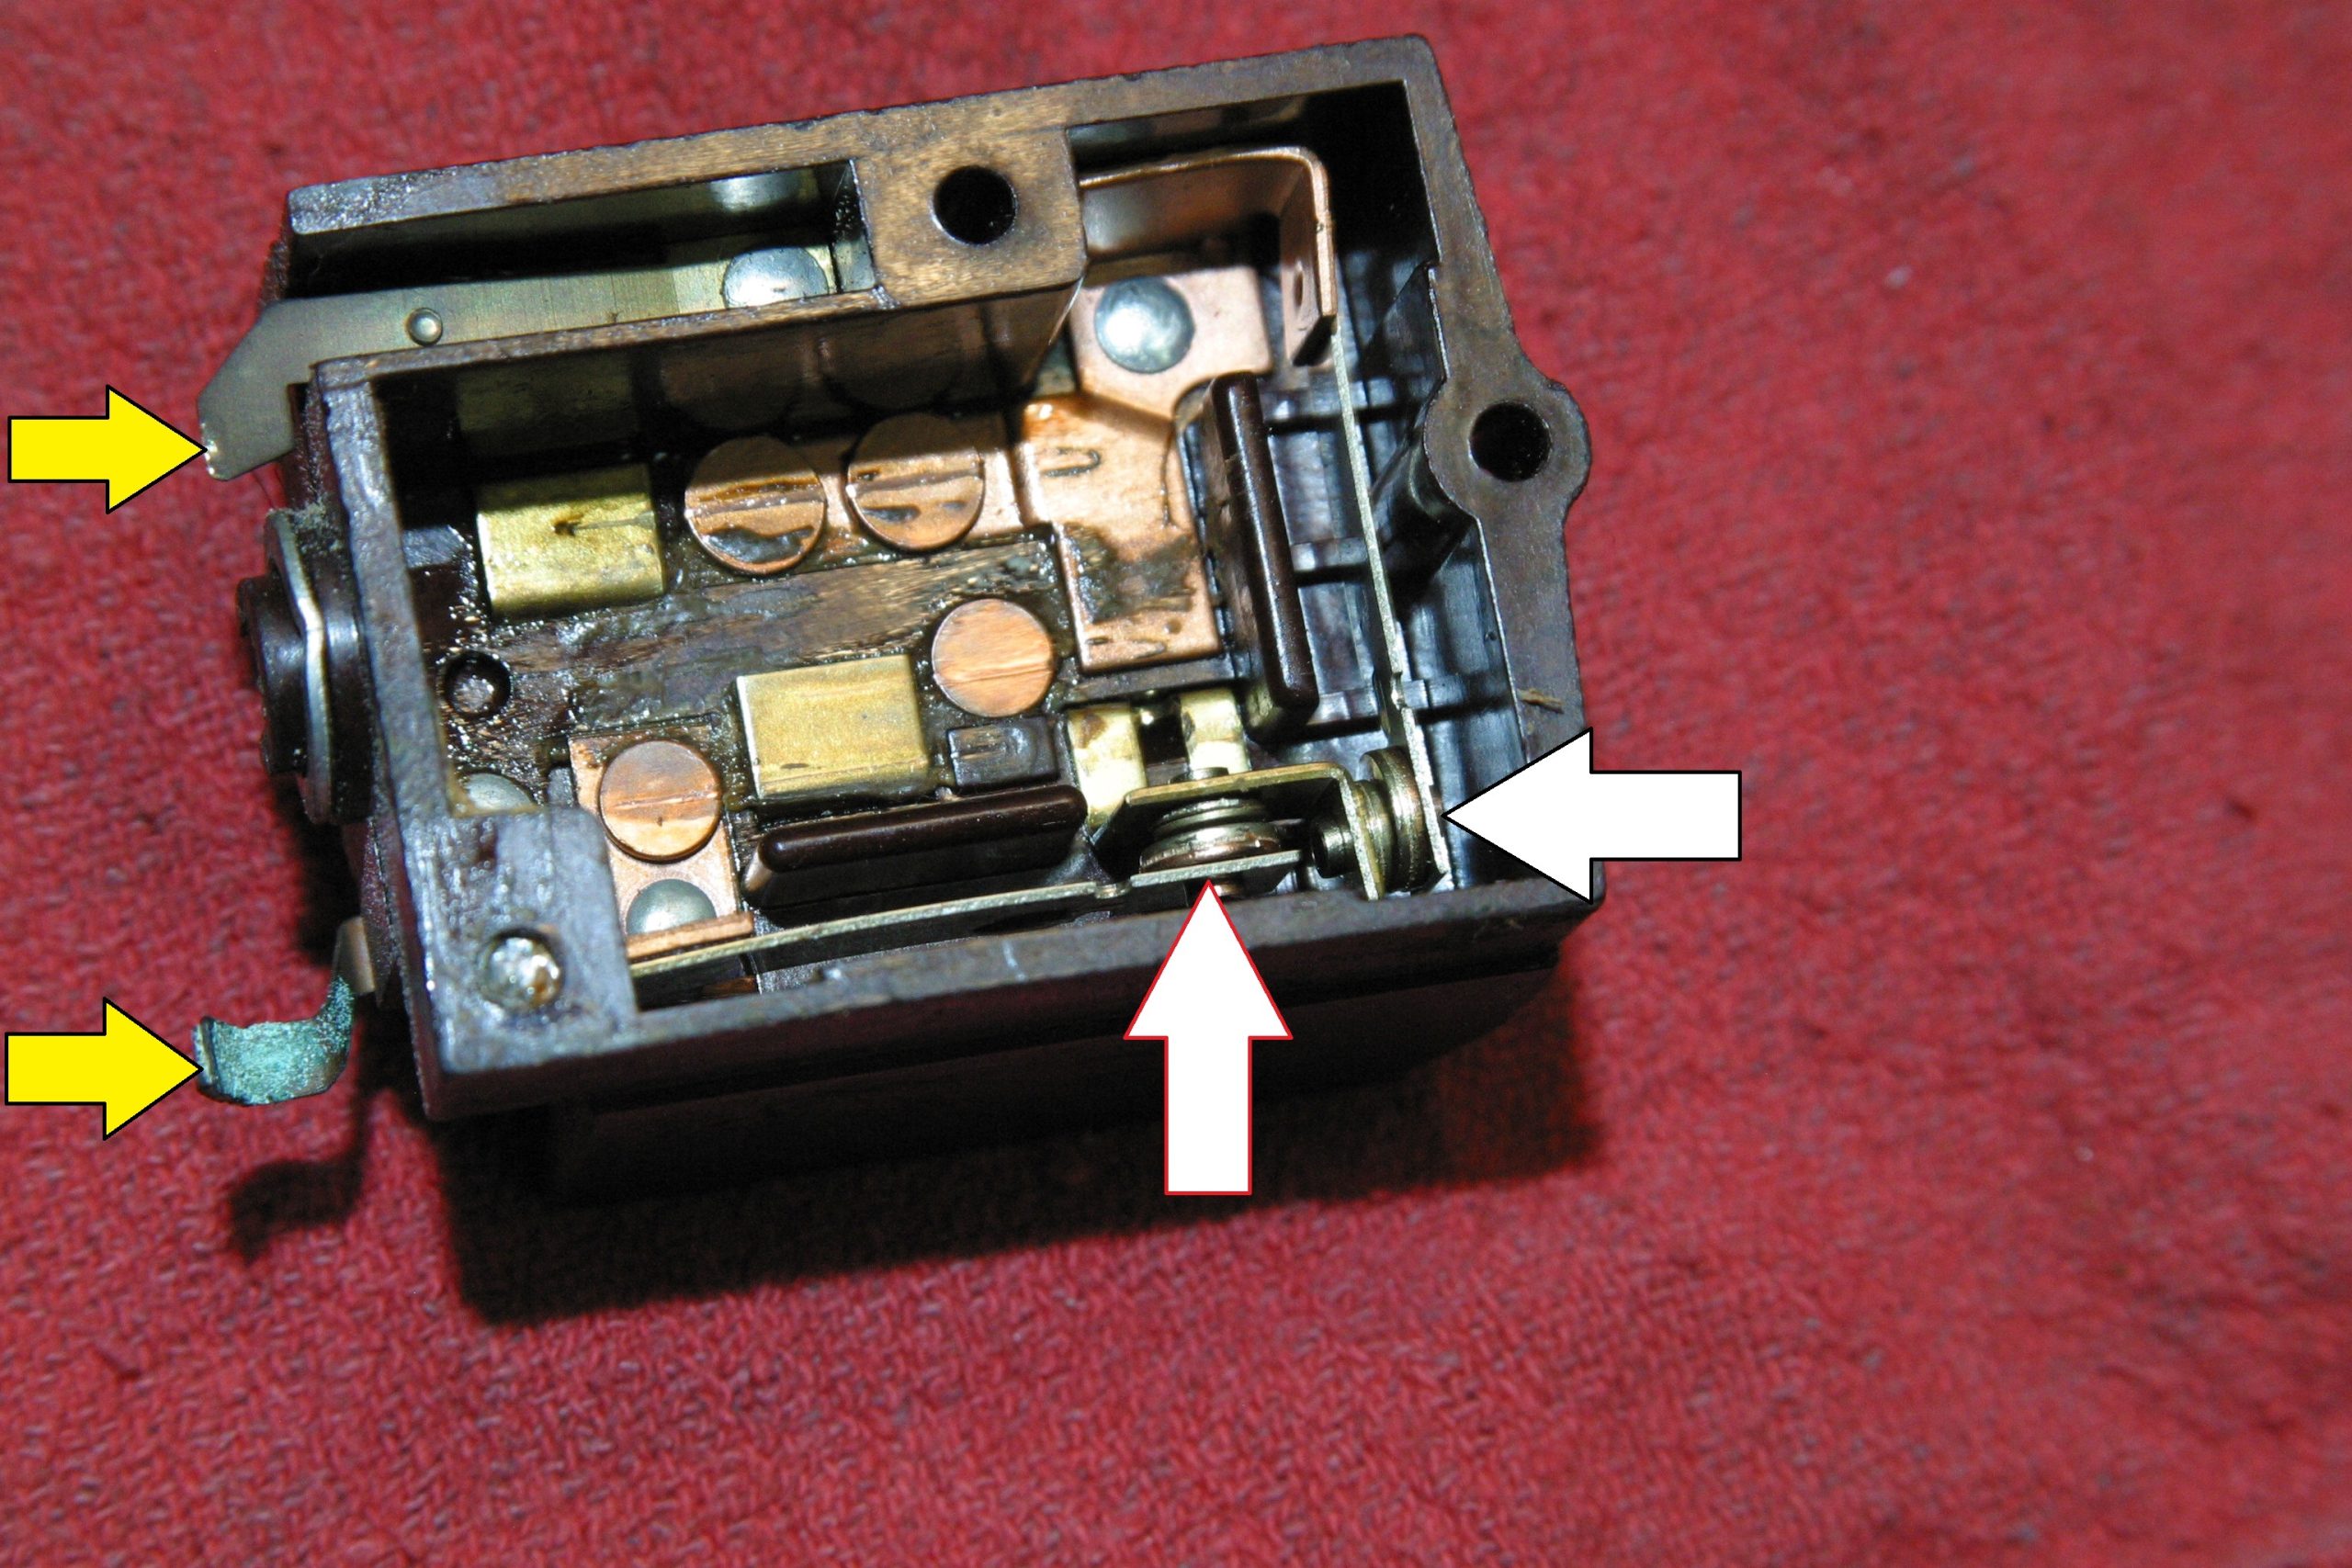
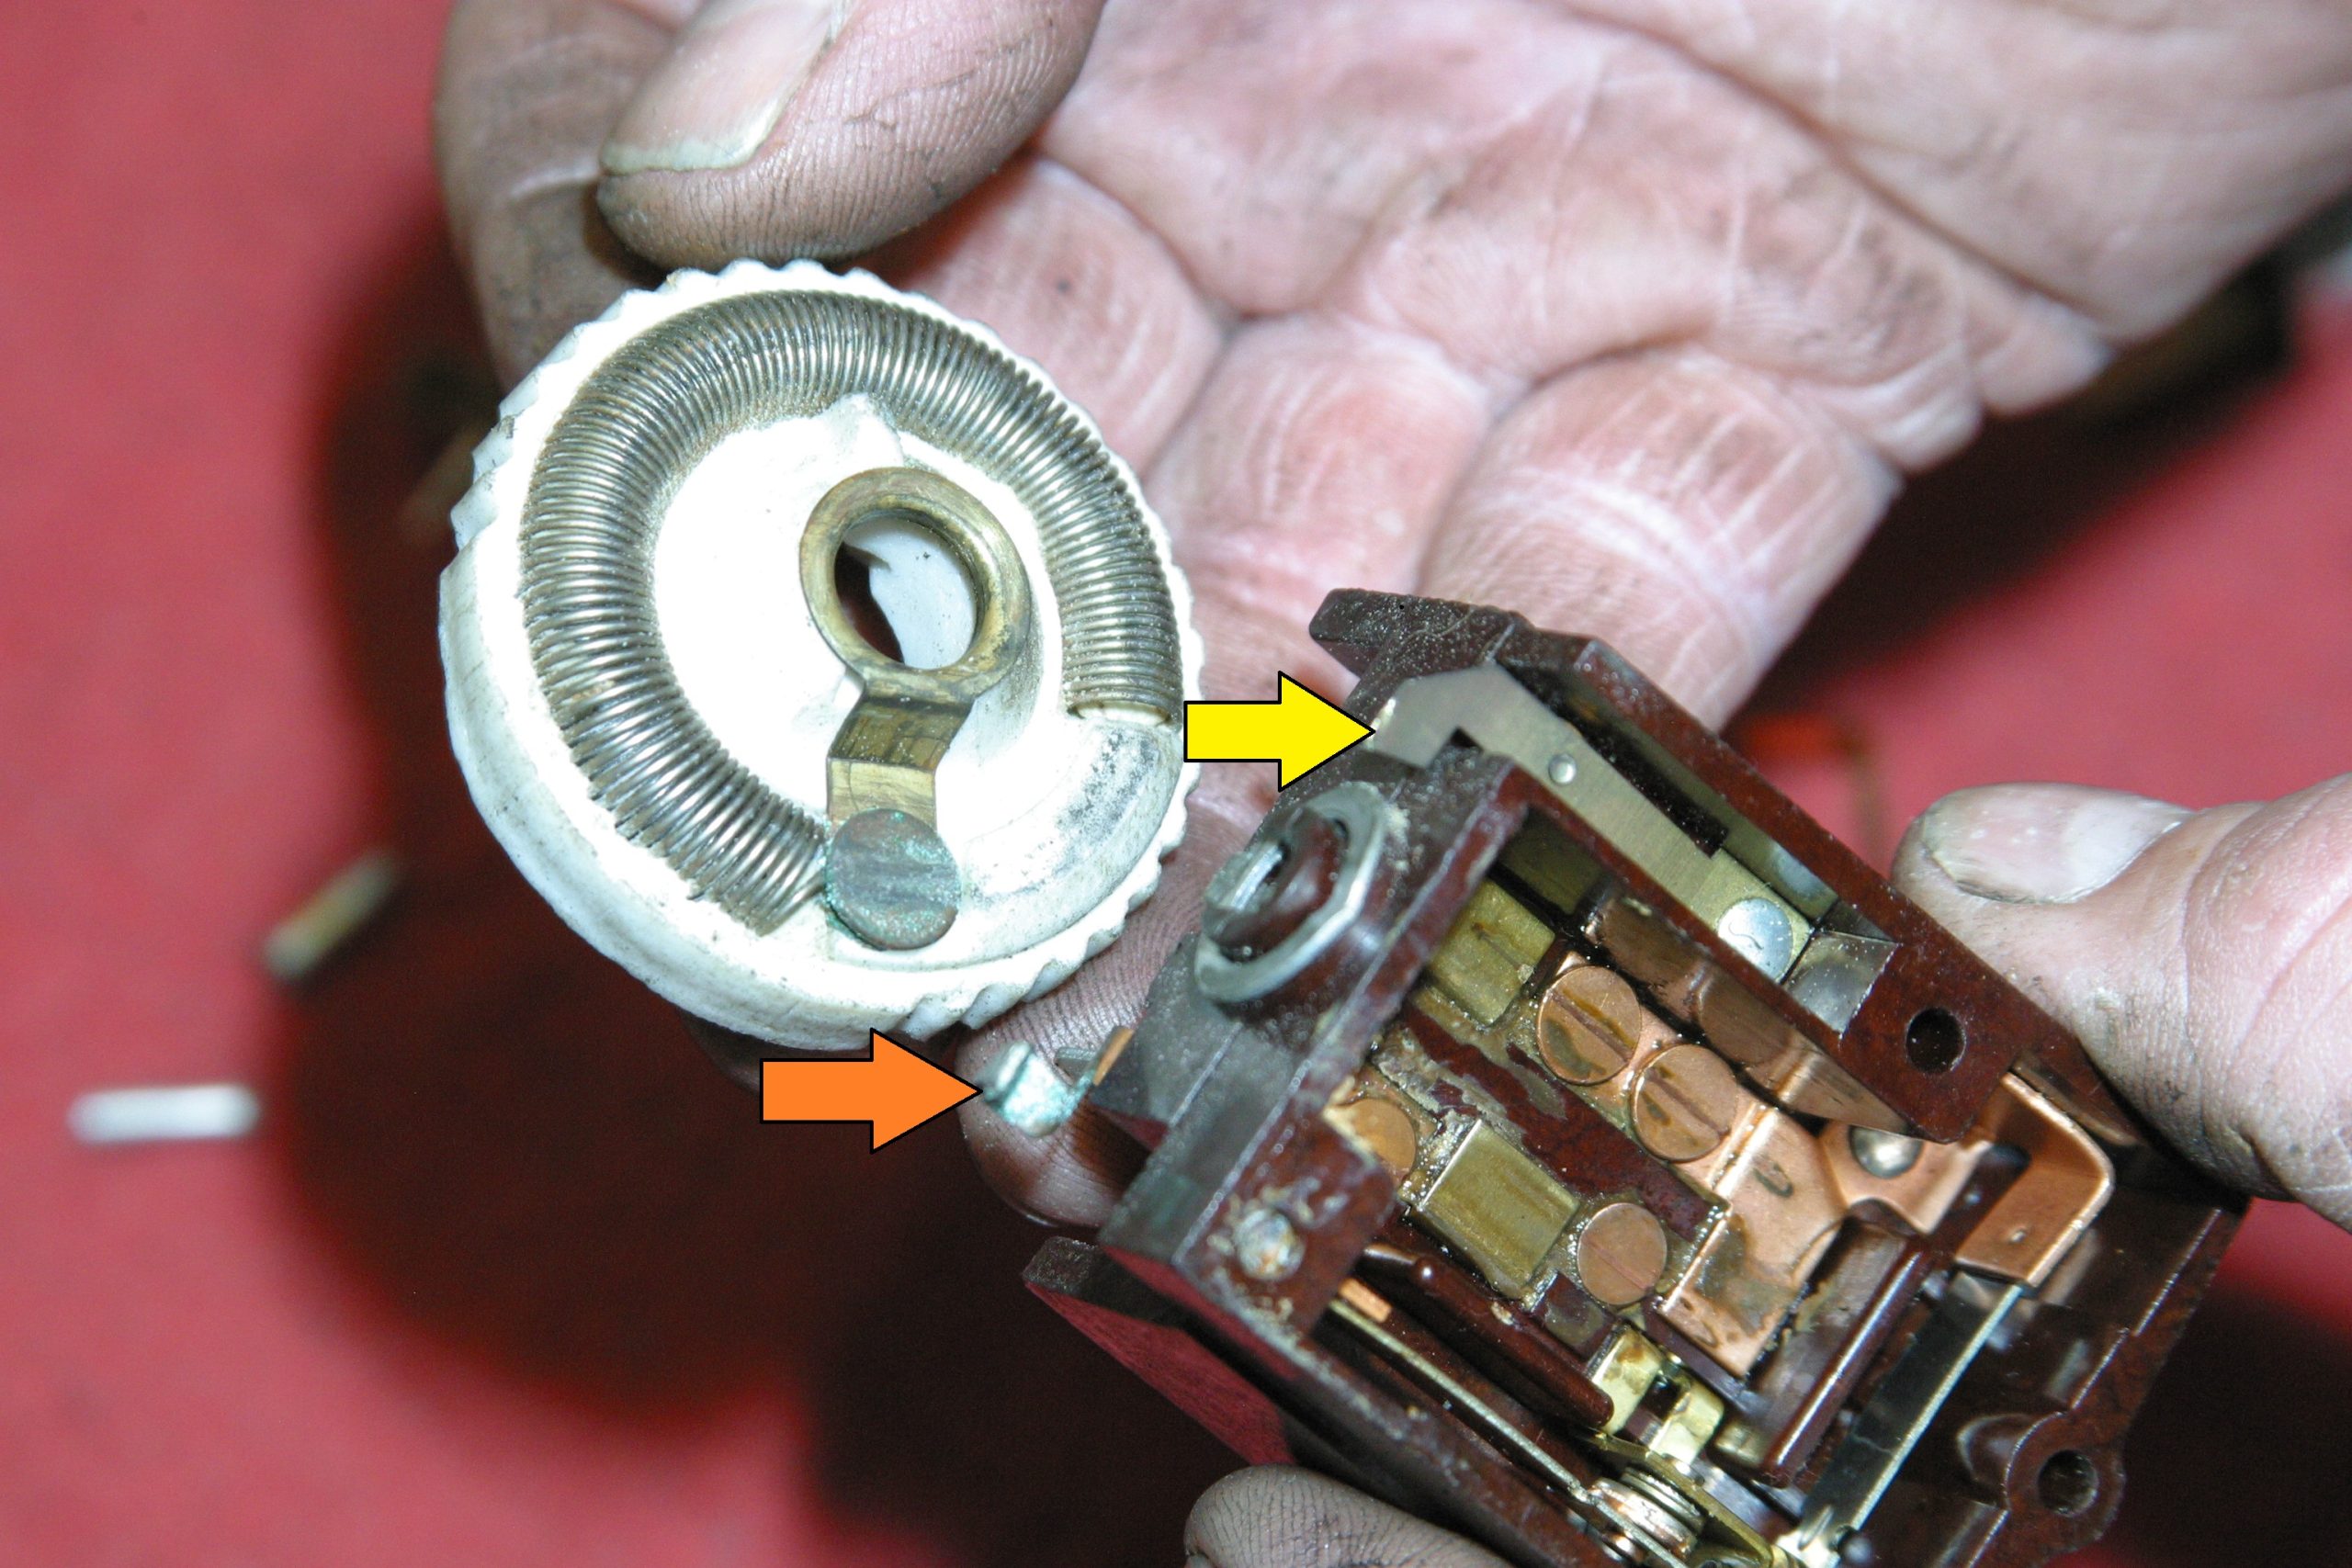
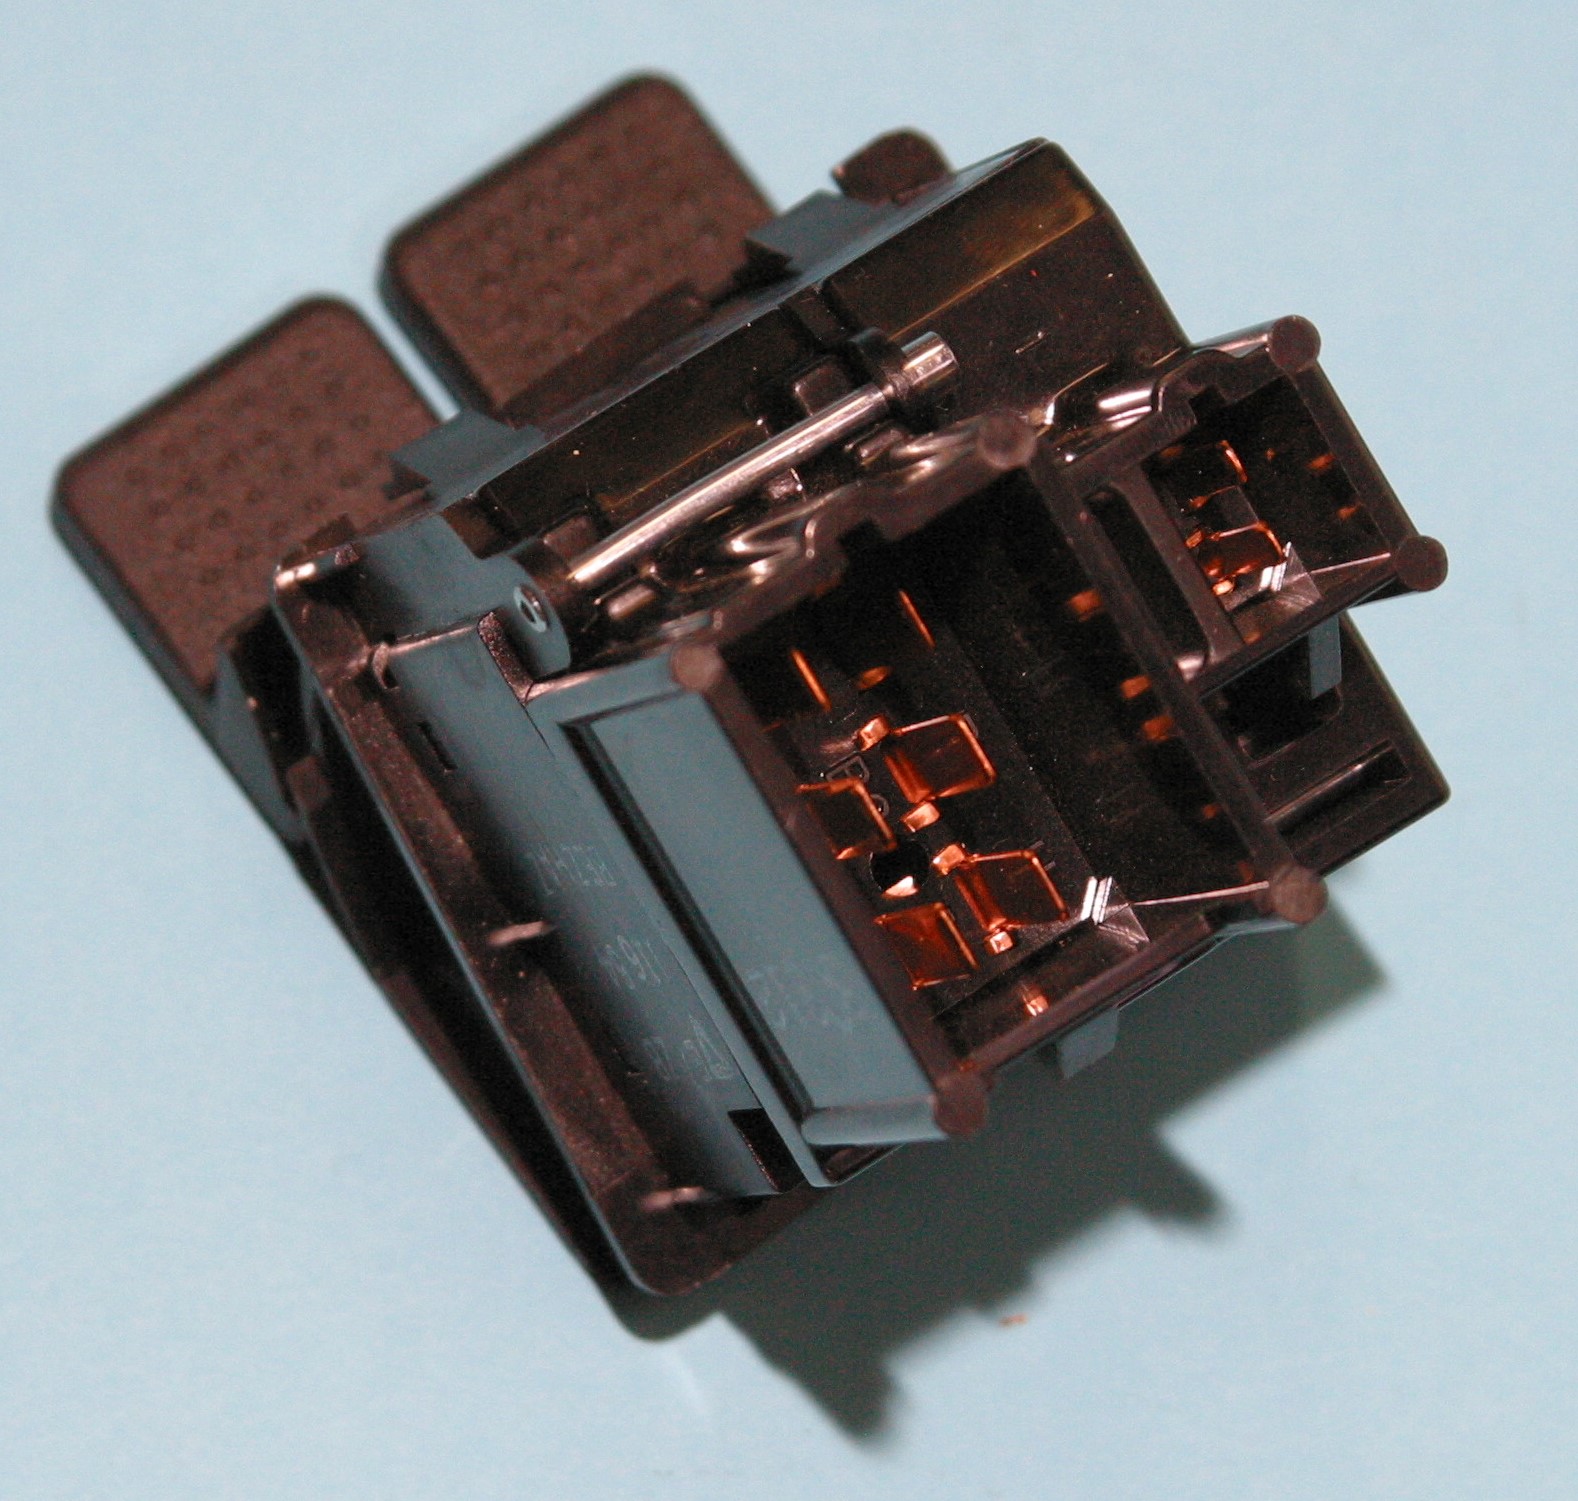
When you open up a vintage headlight switch, you will find both headlights and parking lamps are protected by separate circuit breakers. Headlights are have a higher amp rating than parking/driving lamps. Your task is to carefully open the switch as a fact-finding mission to learn what went wrong and how to correct the problem.
Adding a separate electrical relay system can help reduce the amount of electrical current entering your headlight switch (and give you brighter headlights too). Read more about the popular “headlight relay mod” in this article.
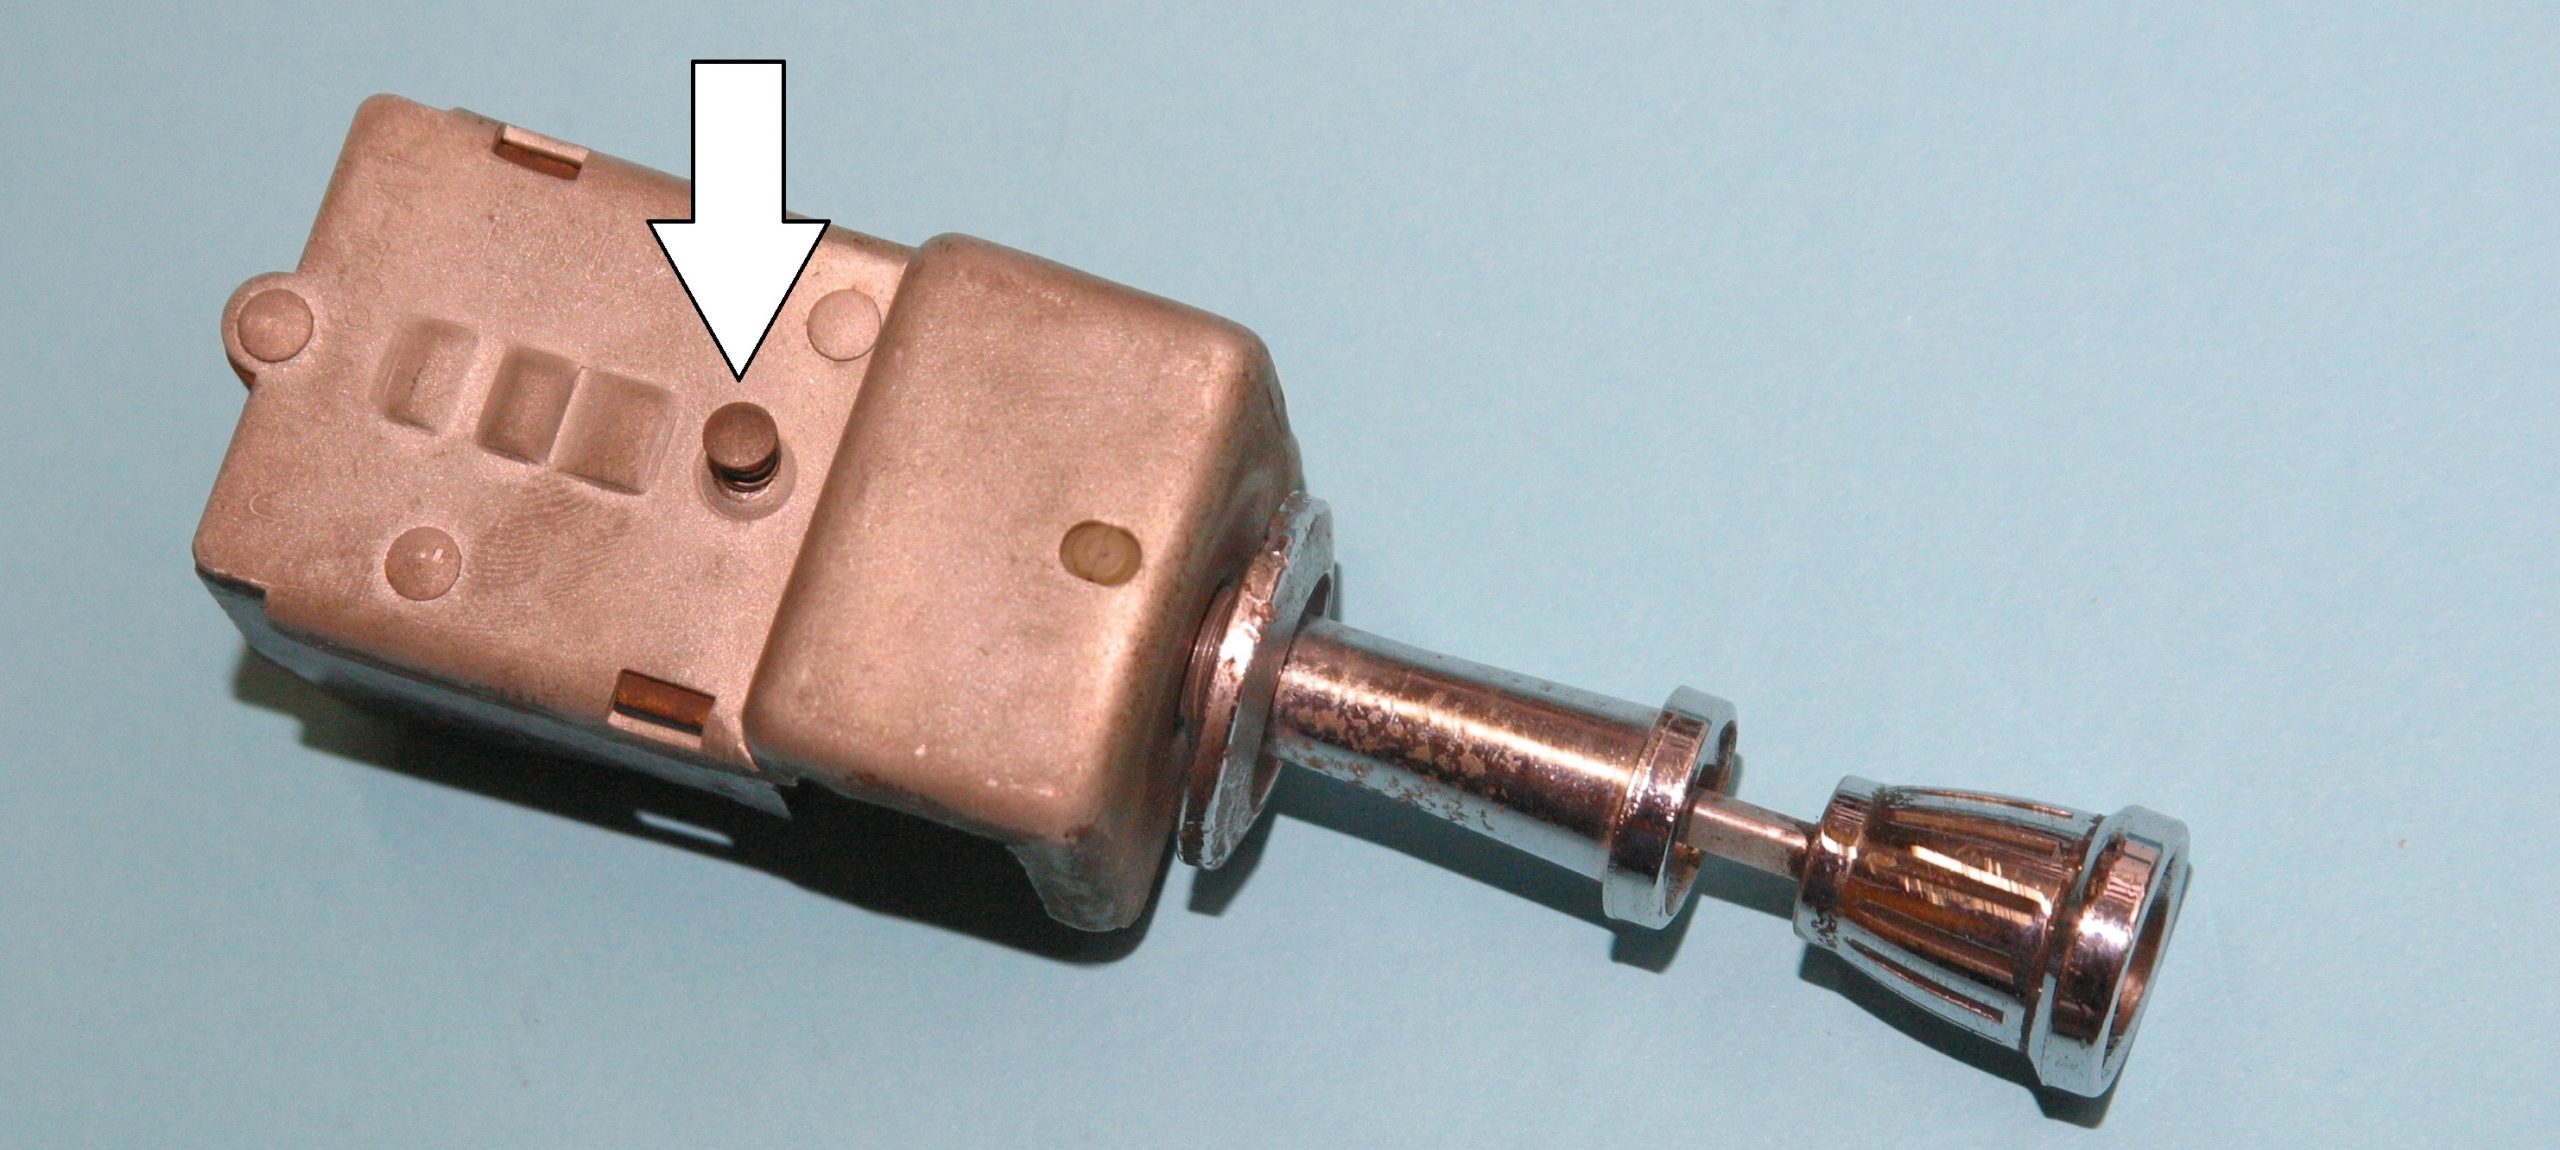
We’re going to look inside a Ford headlight switch, which is very similar to Chrysler’s (same supplier) and quite similar to GM and AMC headlight switches. All are sliding contactor block style where power travels through the contactor to carry power to head, parking, and instrument lights. To get your switch healthy again, clean out the factory lubricant and dress each contact with fine emery paper to remove any corrosion or contaminants. Once you have clean contacts, you can apply the appropriate lubricant to the contactor and contacts and be ready for reassembly.

Variable resistance isn’t just handy for interior lights, that same principle is what controls your vehicle’s HVAC fan speed too. Read more about it here: What is a Blower Motor Resistor? (Image/Jim Smart)
I have a 1984 Chevy truck redoing my lights. Put in new light switch and now when I turn the dimmer on my fuel gauge and temp gauge move back and forth as I turn the knob..
Are you noticing this while the engine’s running, or solely off battery power? That can help you determine if you’ve got a battery and/or alternator issue.
When you re-did your lights, did you use stock/equivalent lamps? It could be your new lights are drawing more current than the original ones, which is impacting the other devices (gauges, lights, etc.) in the circuit–or the overall voltage in your system. Remember, on older headlight switches, the power to the headlights goes through the switch, which can draw some considerable current, so if you’ve got higher-draw headlights now, it’ll likely affect ancillary components. (If that sounds familiar, you might want to check out the popular headlight relay mod described here.)
…
Thanks for reading–hope this helps.