
In the past, we’ve taken a look at the forces at work when a vehicle is accelerating.
To recap:
“…as each cylinder in the engine fires, the pistons (and consequently the connecting rods) apply a force to the crankshaft. The crank rotates and obviously applies a clockwise twisting force (when you view it from the front). Fair enough, but then our pal Mr. Newton’s Third Law of Motion enters the equation. As the crank spins, an equal amount of torque is applied in the opposite direction. That occurs within the cylinder block. It rotates counter clockwise in response to the crank rotating clockwise.
“What this all means is the chassis of the car eventually has to absorb what can turn out to be considerable counter clockwise rotation. Racers tend to call that clockwise force ‘chassis roll’ or ‘roll rotation.’ Jerry Bickel notes that there are only three methods you can use to control roll rotation, and those are: ‘proper suspension geometry, chassis pre-load adjustment and the use of a rear stabilizer bar.’ Keep in mind that you need all three of these methods in order to control roll rotation.”
You can read the entirety of that article here.
If you’ve ever watched an out-of-shape, high-horsepower GM A- or G-body (Chevelle, Cutlass, GTO, Grand National, etc.) attempting to hook up at the strip, you know exactly what we’re talking about.
Unchecked, the driver’s side front fender will be jacked toward the stratosphere while on the passenger side, the rear quarter panel will be drilling itself right into the pavement. The same thing actually happens to leaf spring cars too, but they’re just a bit more resistant to all of the flexing (because the spring is actually taking the abuse).
What’s really occurring is the body is being rolled over by one set of forces and the rear axle is being twisted by at least one more.
Factor in inertia mixed in with a few other variables and you have a pretty big problem – one that can actually bend tweak or crack parts of the car. Don’t believe it? Take a look at the quarter panels on an unfettered, big-powered Buick GN. There’s a chance they are tweaked or cracked.
Ponder the quick band-aid fixes used in the past to resolve roll rotation issues: One way was to install extremely stiff springs — with a different bias for each side of the car.
Another common approach, and still common today, is to install a set of (or just one) air bags. Then you pump the bag(s) up with different levels of air to counteract the roll.
Both of these approaches, which place a huge emphasis on chassis preload may limit roll, but both create a very rigid suspension system that cannot comply with racetrack irregularities. That means it’s easy to unload the chassis down track. ET suffers or the driver contends with a squirrely car. The car is also “lop-sided” when static (typically due to a lot of preload on the passenger rear). They’re not much fun to drive, rubber wears poorly, and honestly — they look goofy (been there, done that).
The good news is that a downright scary car is easy enough to tame without any (or at the least much) of the above.
The ultimate solution is some form of anti-roll bar or sway bar.
The truth is that the piece of hardware initially thought necessary for burning corners [only] works pretty darn well down the straight and narrow too. That’s why an ARB or an independent sway bar setup on the rear is the real answer.
Here’s the inside story:
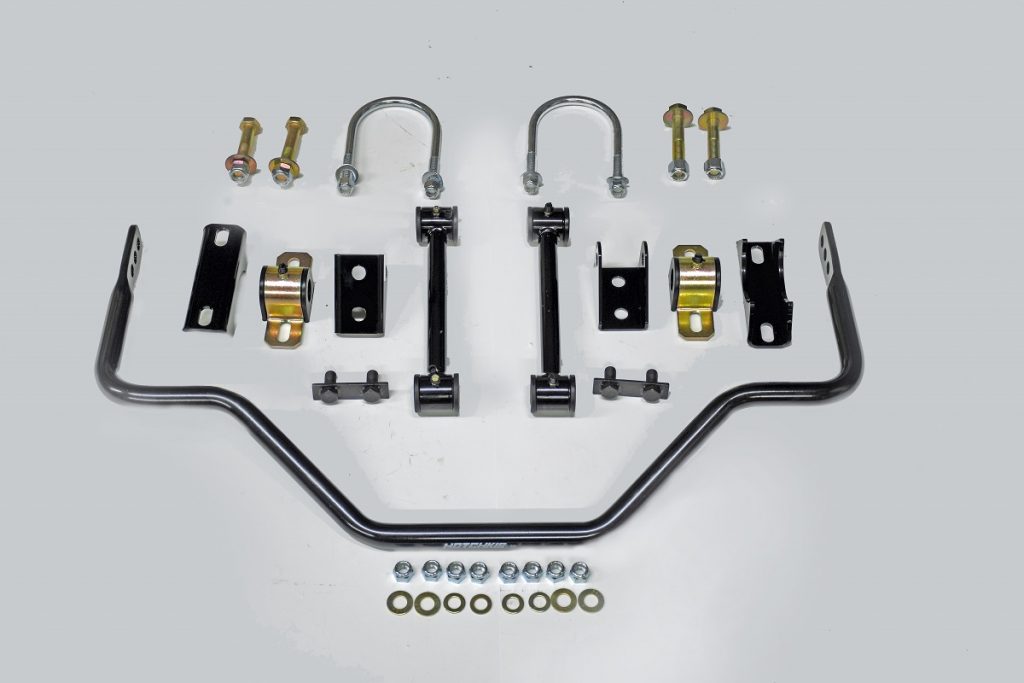
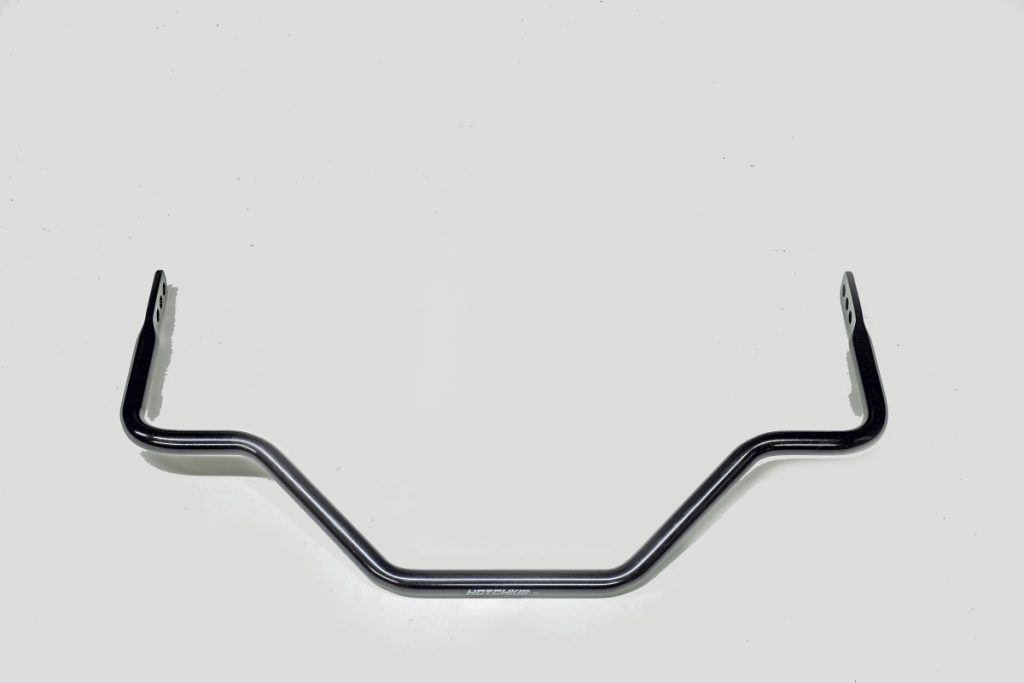
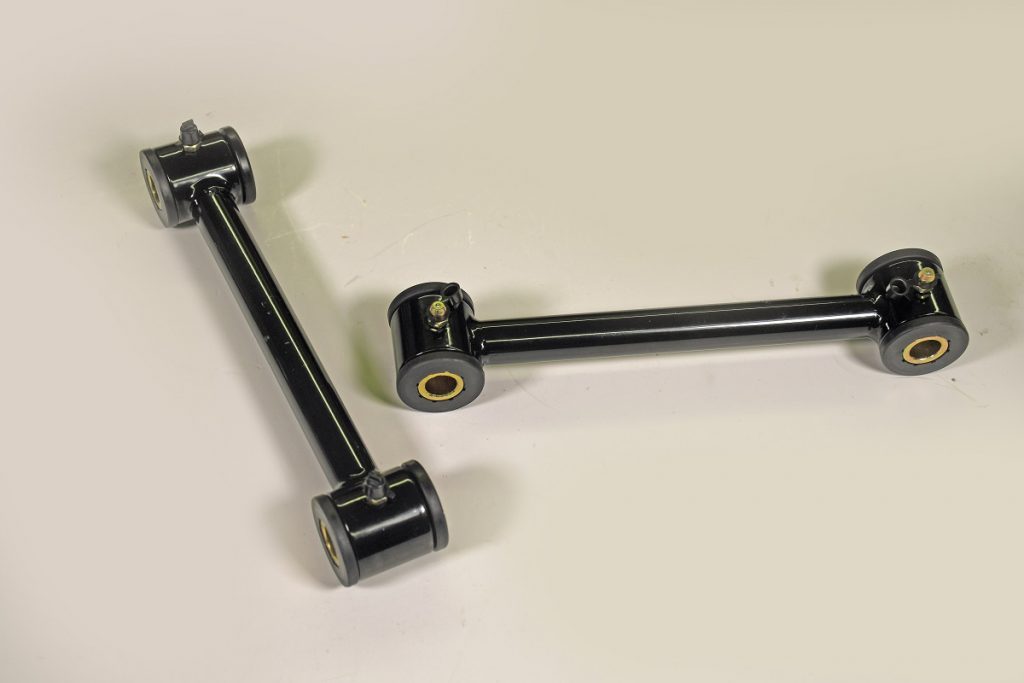
There are many types of weld-on ARB’s on the market today, but for little guys or street-strip applications, you might want to take a close look at some of the bolt-on sway bars available.
For drag duty, what you want to look for is a rear bar that is “independent” from the rear trailing arms or the springs. Typically, you’ll find production line sway bars are mounted on the lower trailing arms or in some leaf spring cases, hooked directly to the lower shock absorber mounts.
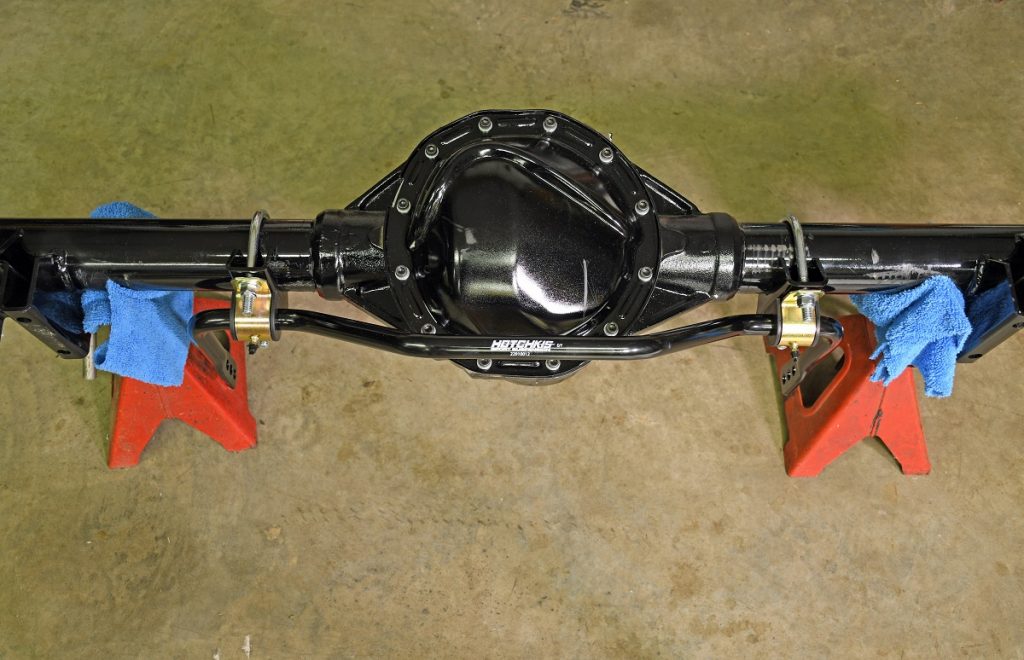
A drag race ARB is different. It mounts to the rear end housing — either by a mount directly under it, or between the frame rails. A set of links connect the ARB and the frame or the rear end housing (depending upon where the ARB is installed). This setup acts independently from the springs or trailing arms.
Certain bolt-on sway bars such the Hotchkis example shown here attach to the rear end housing, and work exactly like a dedicated drag race ARB. What this does is allow the springs, shocks, and trailing arms or traction bars to do their job.
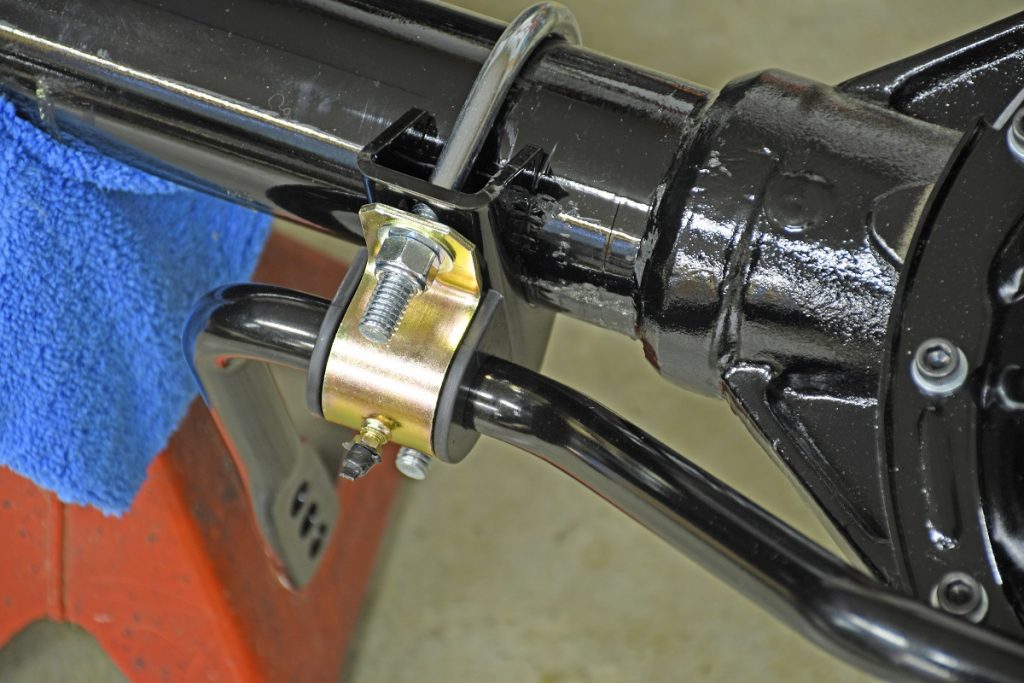
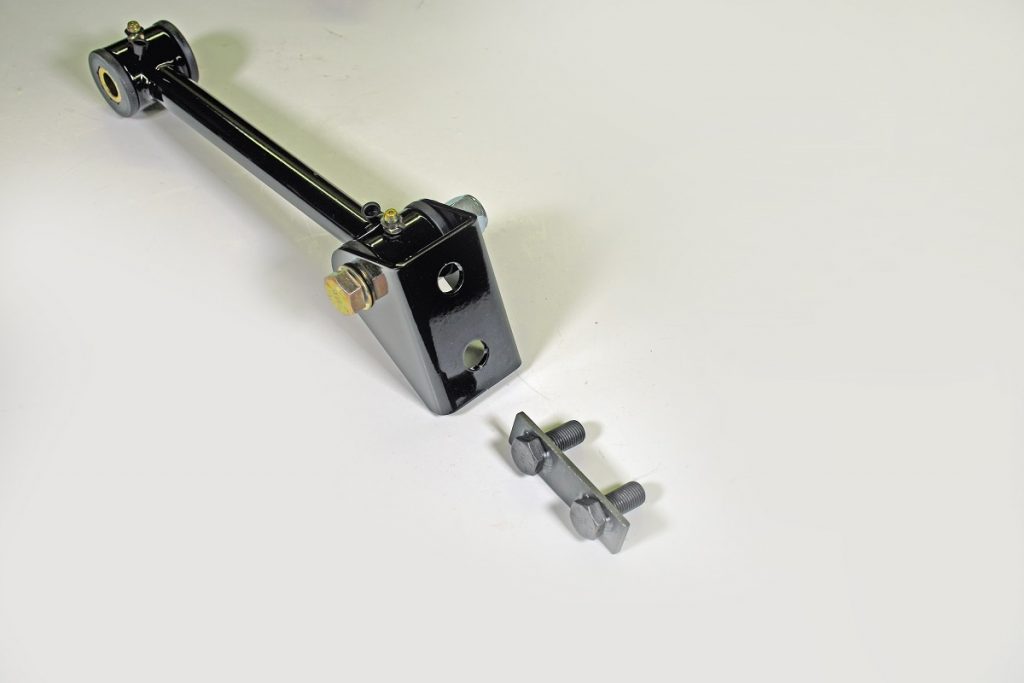
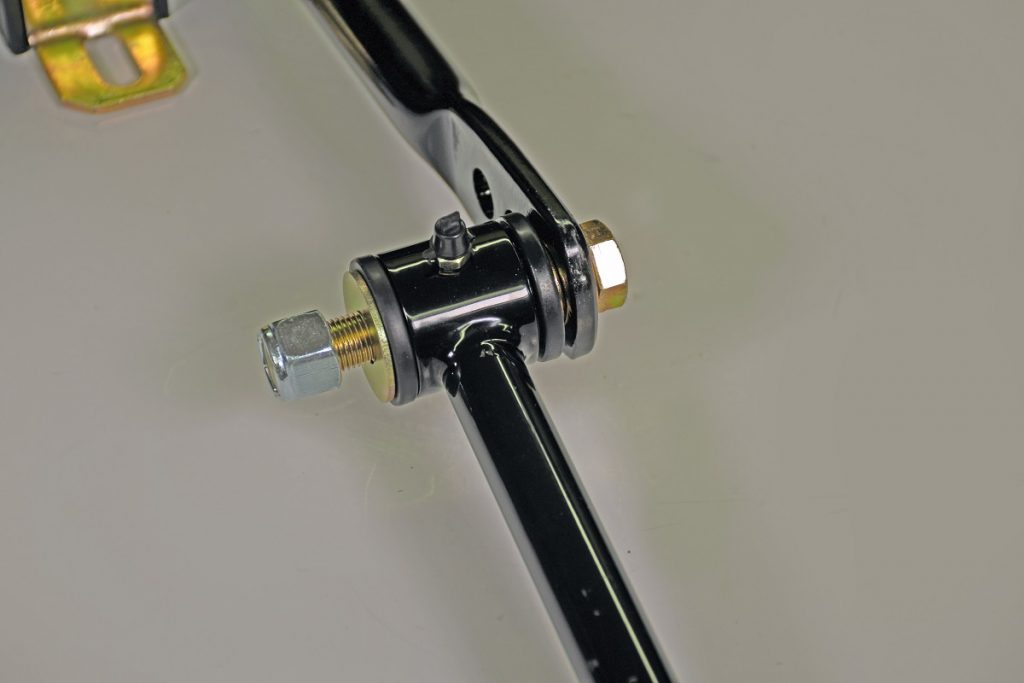
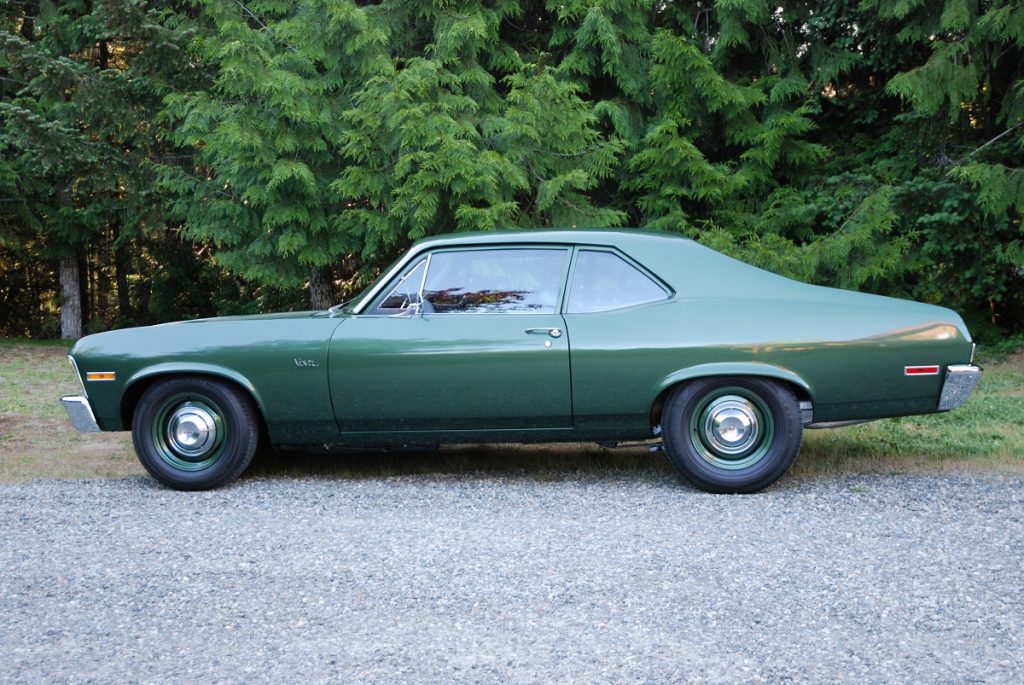
With the Hotchkis setup, the bar is fastened to the bottom of the rear-end housing (pretty standard). But the end links go directly to a reinforced point on the chassis (in the case of the Nova setup shown here, they bolt to the reinforced area of the floor pan near the rear seat belt mounts).
When you get on the throttle hard, the car will start to roll rotate (as noted earlier where the body twists in relation to the rear-axle housing). This causes the links to pull the attaching levers into different angles, which, in effect, attempts to twist the stabilizer bar.
The stabilizer bar resists that twisting motion and keeps the body and rear end under control. When the car experiences straight up and down suspension travel (with zero chassis roll), the attaching levers move together. This typically occurs as the chassis stabilizes down track. Here, the stabilizer bar simply rotates cleanly on the bushings and suspension movement is unaffected. A ton of preload isn’t required and the down track handling also improves — sometimes significantly.
If you’re still skeptical that something like this that’s built for carving corners can actually fix the scary hook found on many cars, ponder this: When you question pro drag race chassis builders, you’ll find virtually every high-horsepower car to which they’ve added a rear stabilizer bar has shown lower 60-foot times and decidedly enhanced launch characteristics.
Most will also tell you that all rear axles (stock or modified) can benefit from the installation of a simple performance type anti-sway or stabilizer bar.
The bottom line here is the traditional Detroit-style of sway bar helps to spread and transmit the torque loads more equally. The end result is a rear suspension-rear axle assembly that isn’t bending, twisting, or breaking. That works for us.
For a closer look at the really slick Hotchkis Performance setup, check out the accompanying photos:
Good article, just need to know how to apply this to my 86 vette. When he light turns last yellow and I nail it, that rear end acts like its in snow. Darn thing goes left to right to left. great for show but not good for launches.
So did the early, old school racers not yet figure all this out? So many of the oldest racers seemed to blazing there tires the full length of the track? Especially the Top Fuelers? And then you had the “gassers” etc?
Great tech.