If ever there was a versatile power steering system, it is the old school Bendix power-assist steering system employed on more vintage automobiles and farm implements than we could ever list here. Most common are Ford compacts and intermediates as well as the Corvette prior to 1984.
The reason we call the Bendix system “power assist” is due to its design. Most power steering systems are self-supporting within the steering gear itself where hydraulic pressure is served via a control valve and actuator inside the steering gear. Steer left or right and the control valve applies pressure to a servo piston, which applies pressure to the sector shaft to help you steer.
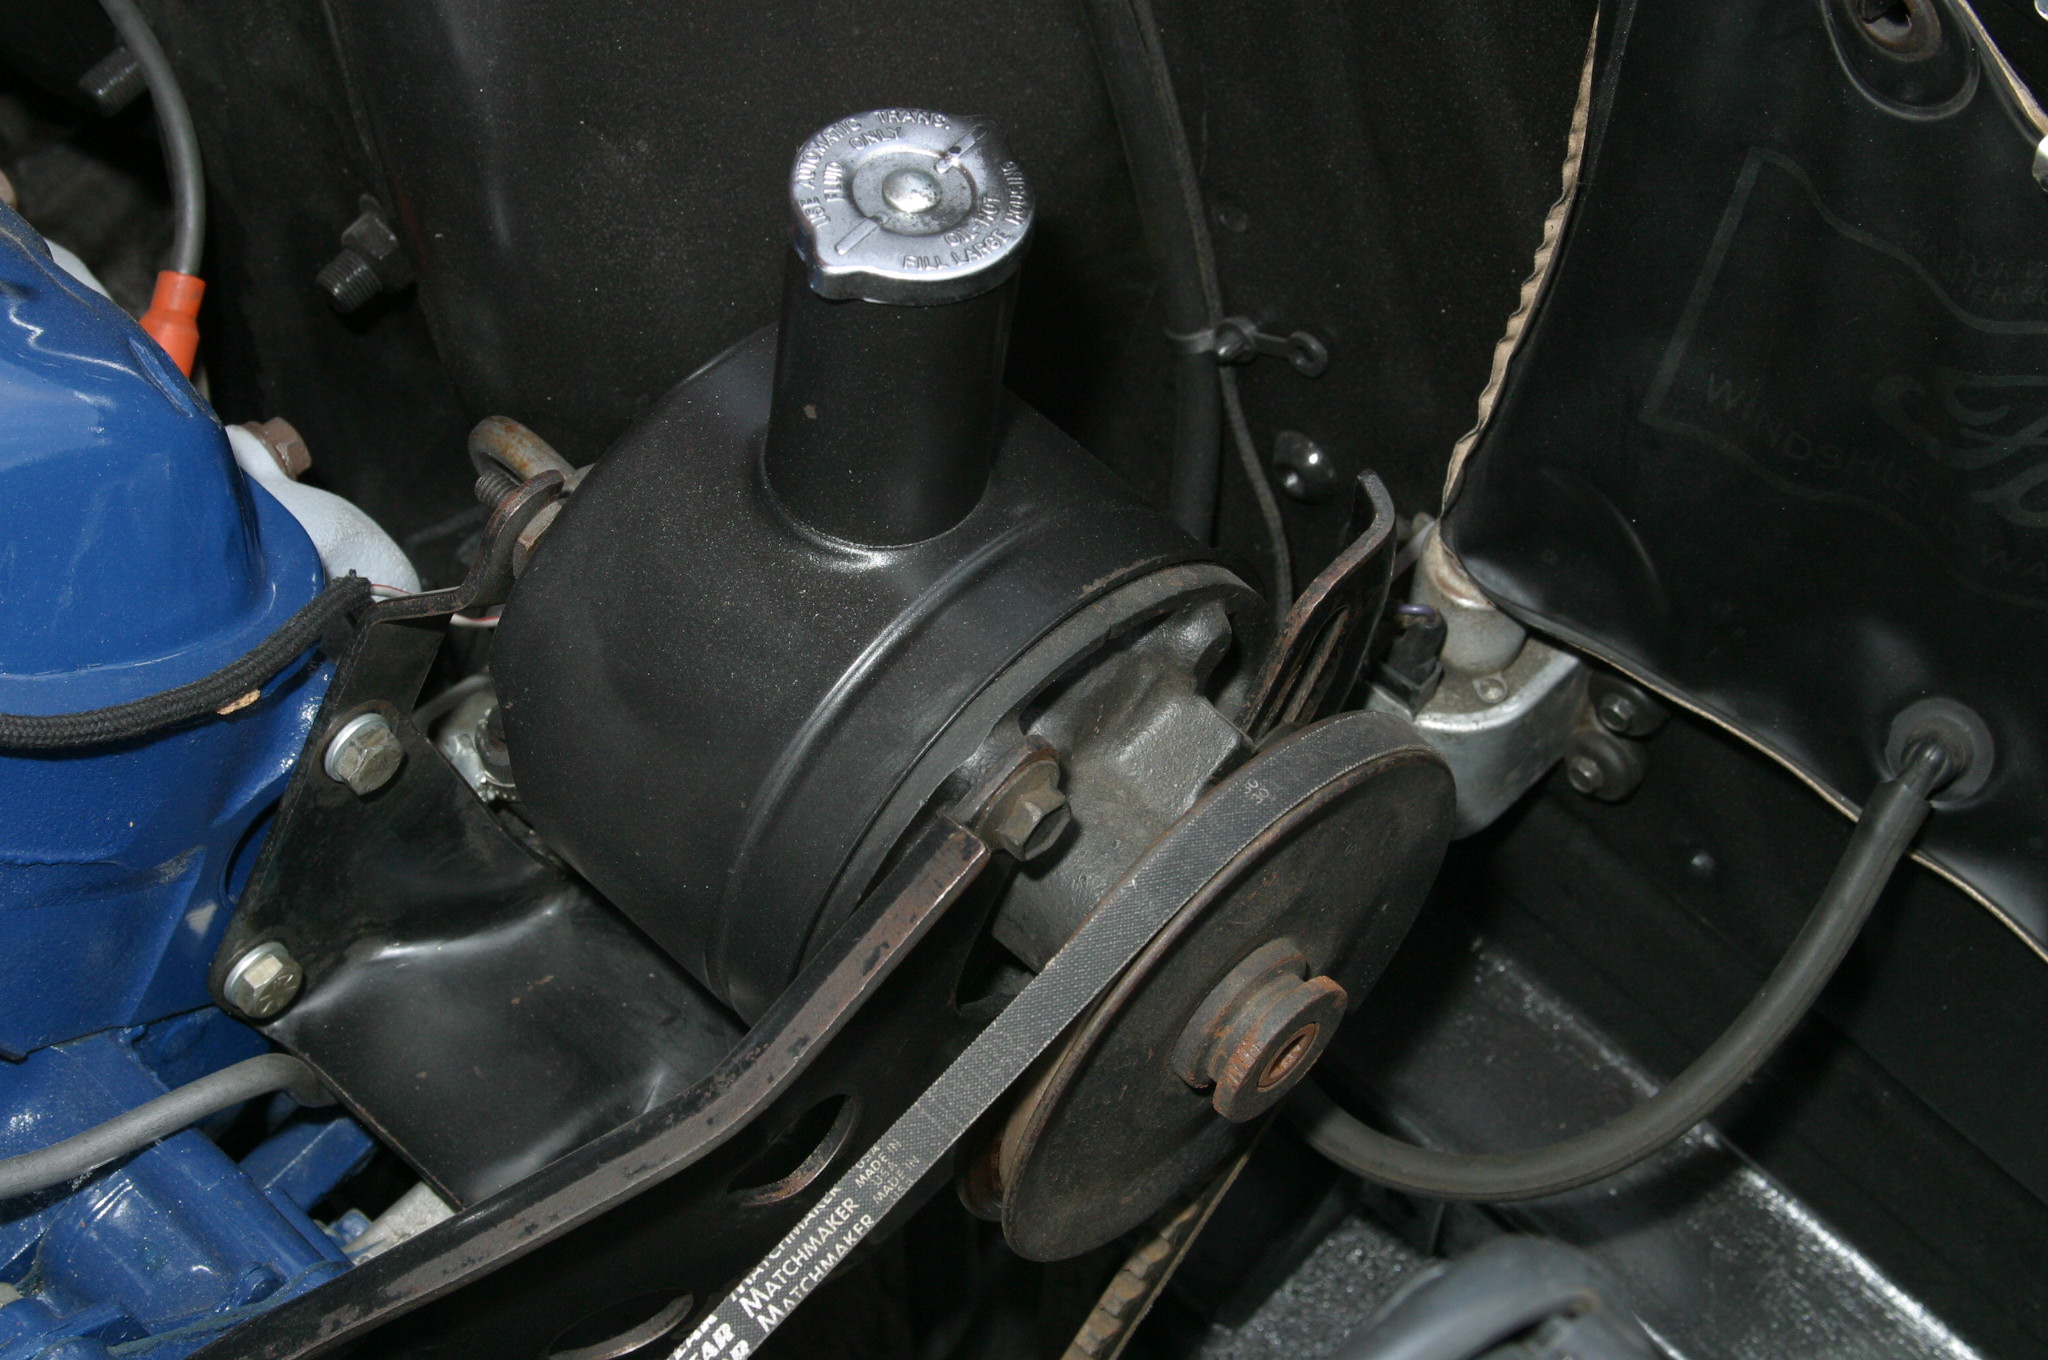
The Bendix “power assist” steering system sports a control valve bolted to the Pitman steering arm, which responds to left or right steering inputs. This external control valve channels hydraulic pressure to the power cylinder bolted to the steering linkage, which applies left or right pressure in order to steer. The Bendix power steering system is a monkey motion looking affair bolted to the center link. It works quite well when properly installed and adjusted.
The biggest issue with the Bendix system is leakage and poor control valve adjustment—otherwise, the Bendix system works flawlessly. When the control valve and/or power ram develops a leak, it leaves a puddle of power steering fluid on the driveway or garage floor. Another leak issue is the hoses connected to the control valve and ram. They can leak at the connections, typically due to poor installation or wear and tear.
When you’re rebuilding the Bendix power steering system, you want to be cognizant of host routing and proper installation. I’ve witnessed too many vintage Fords and ‘Mercs at car shows with power steering hoses hanging down into the slipstream where they look unsightly and run the risk of being tagged by road debris. This is not a good look. Consult your Ford Shop Manual to get a look at proper hose routing and security.
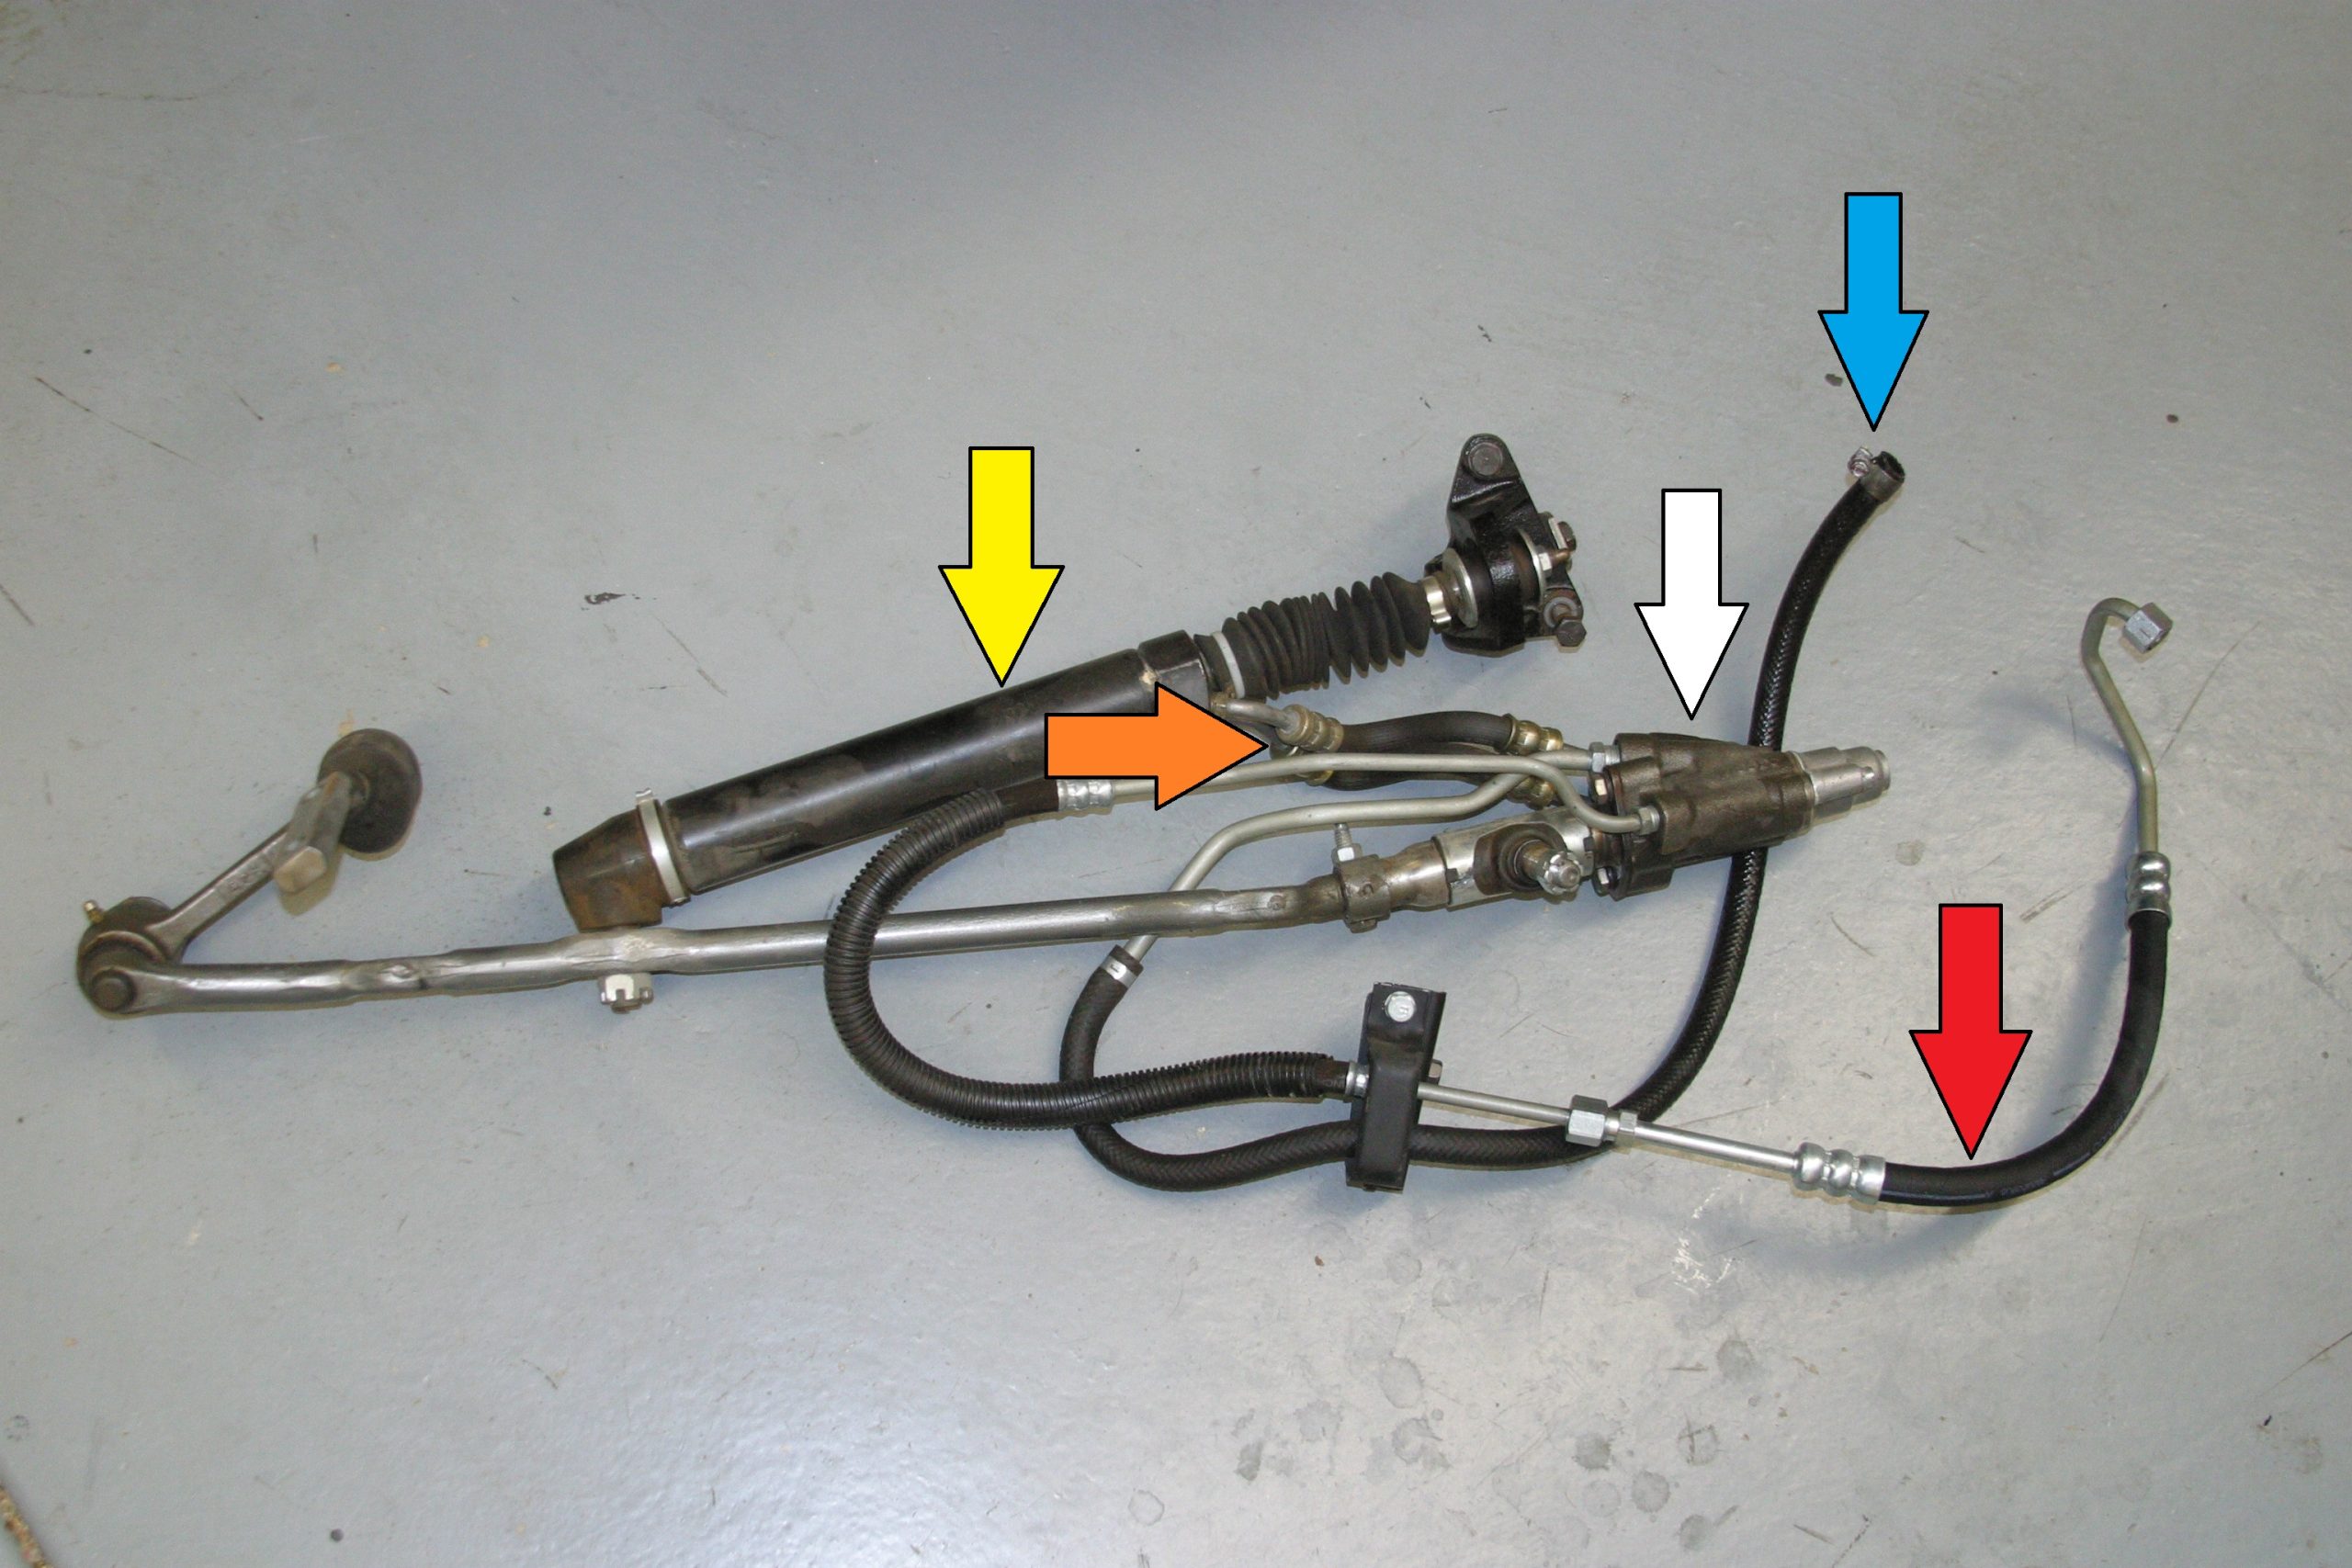
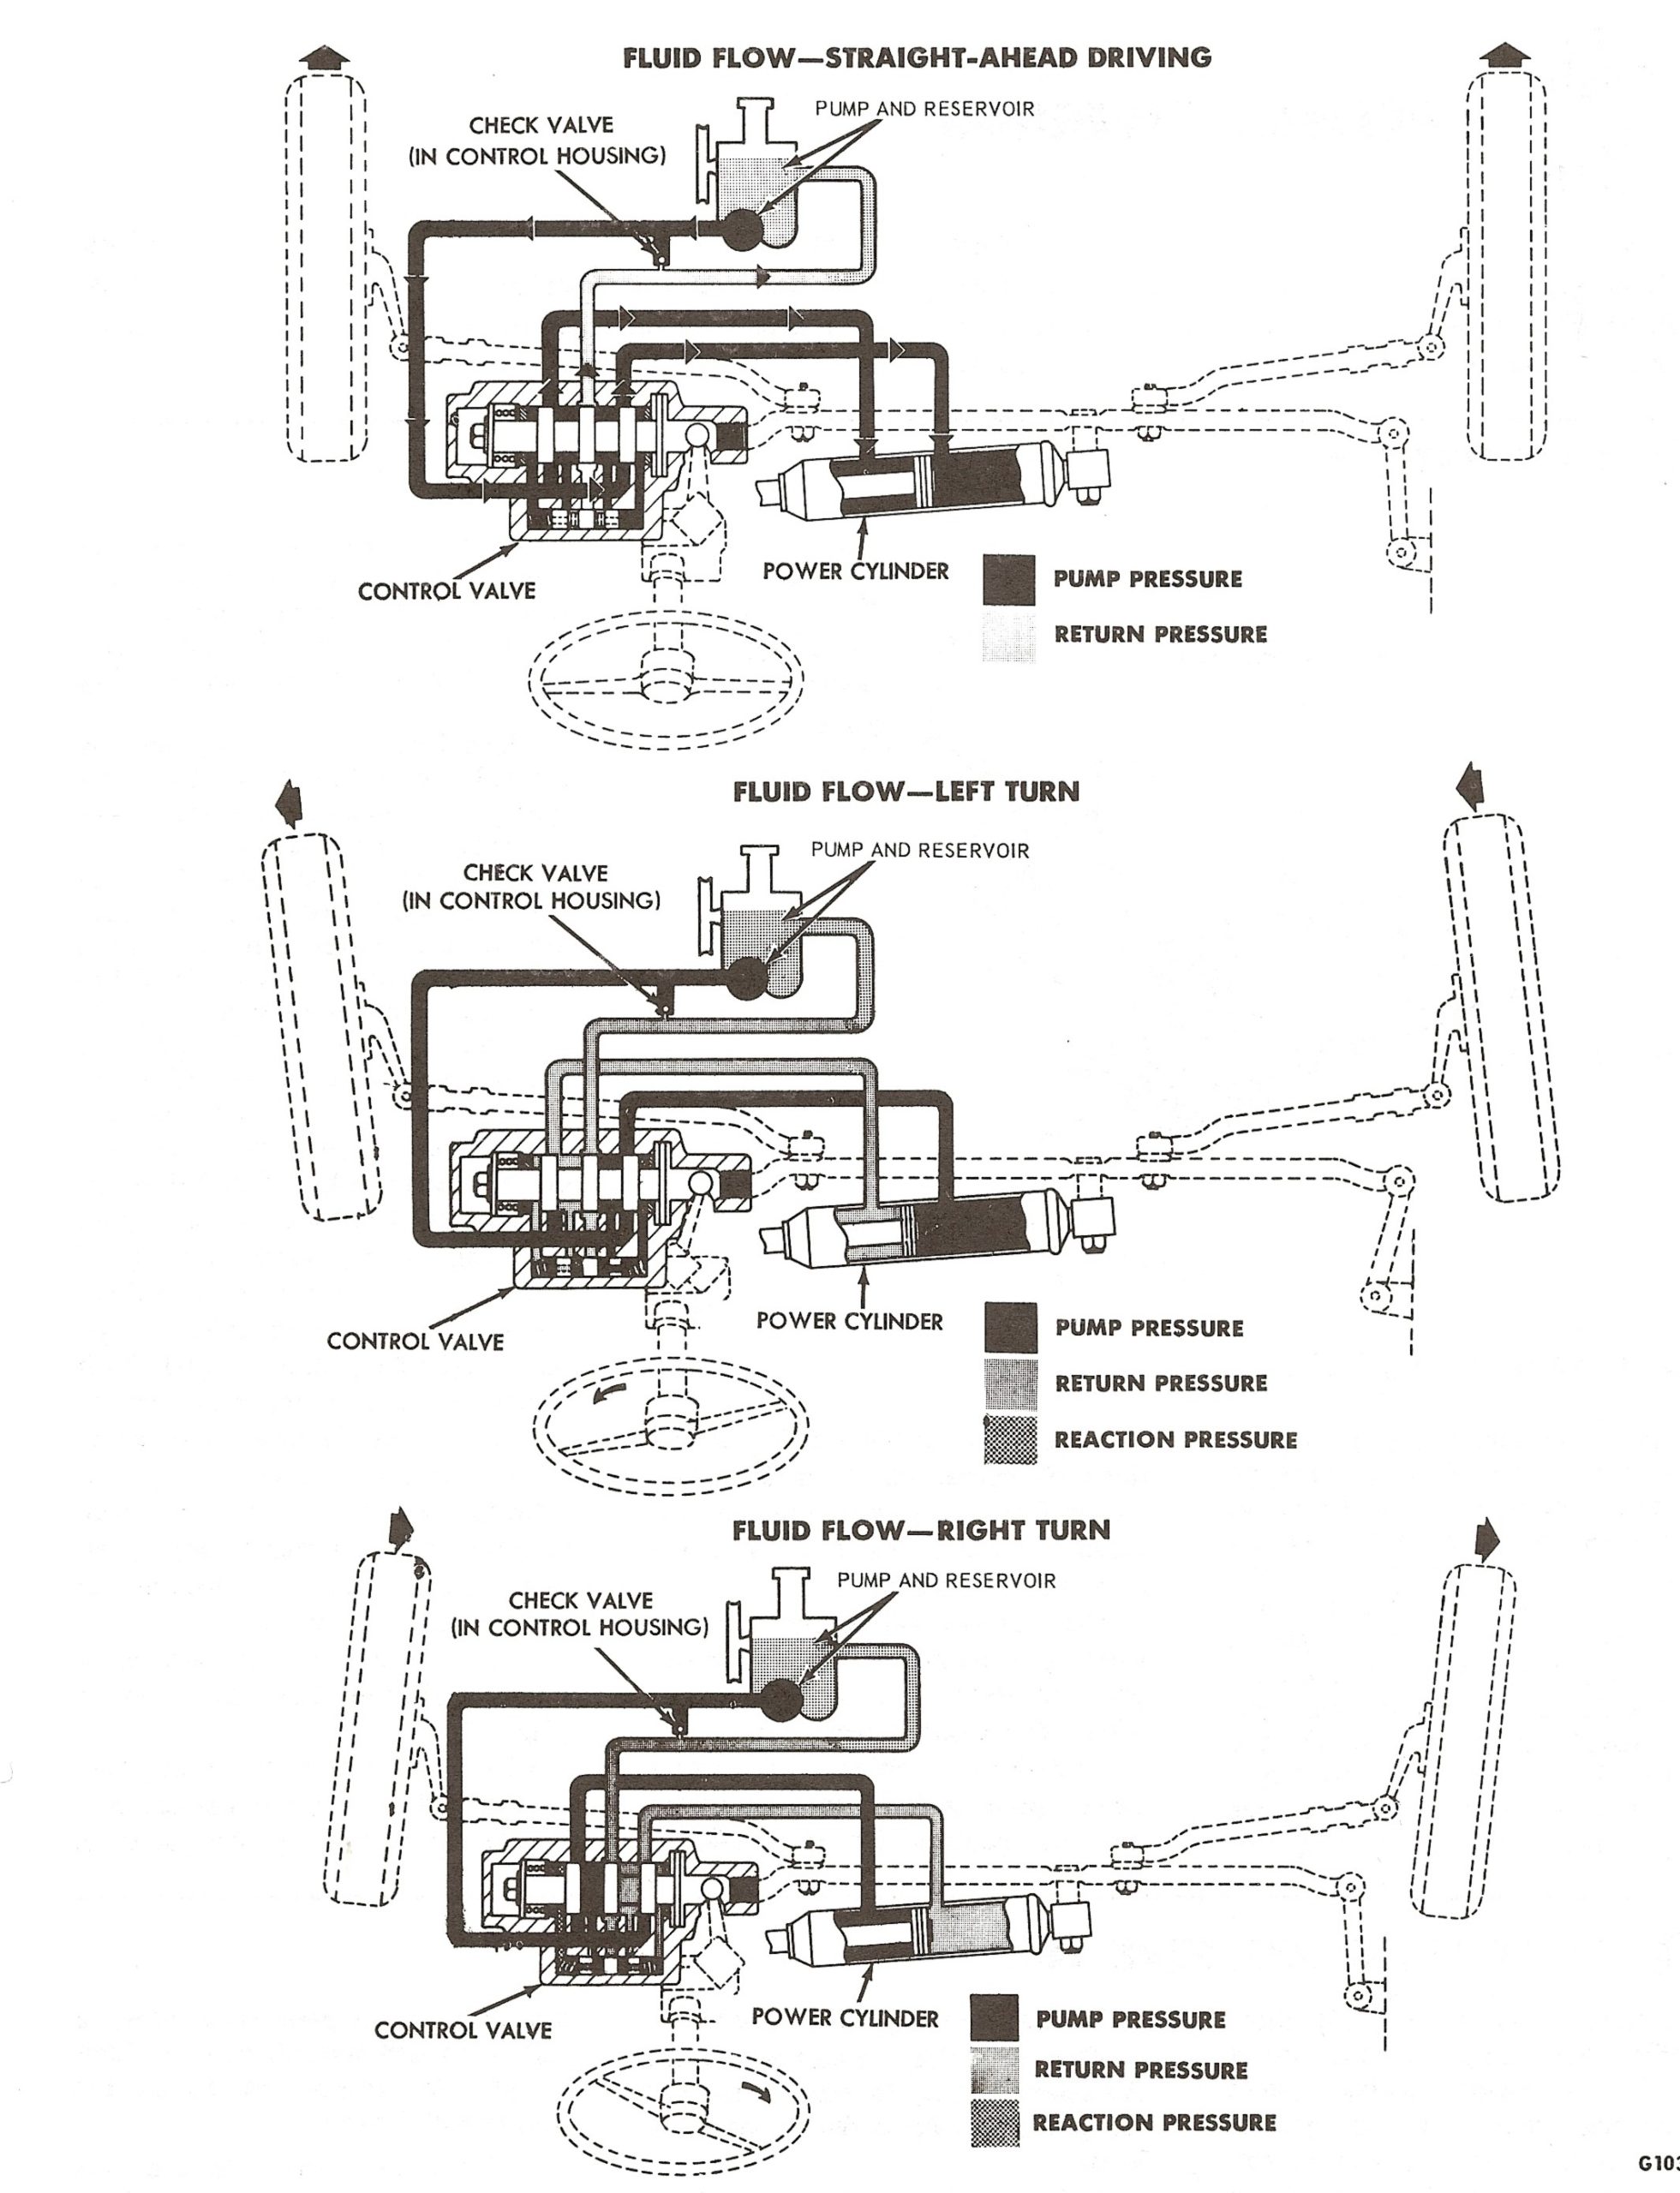
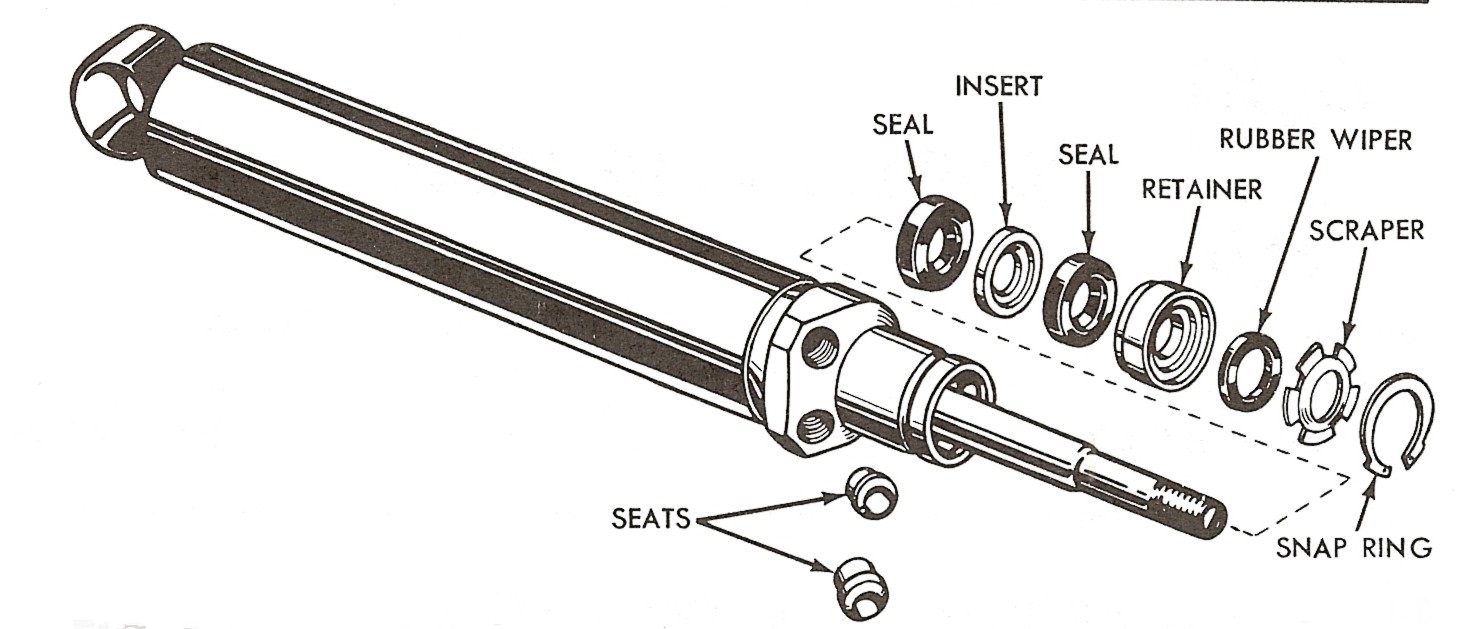
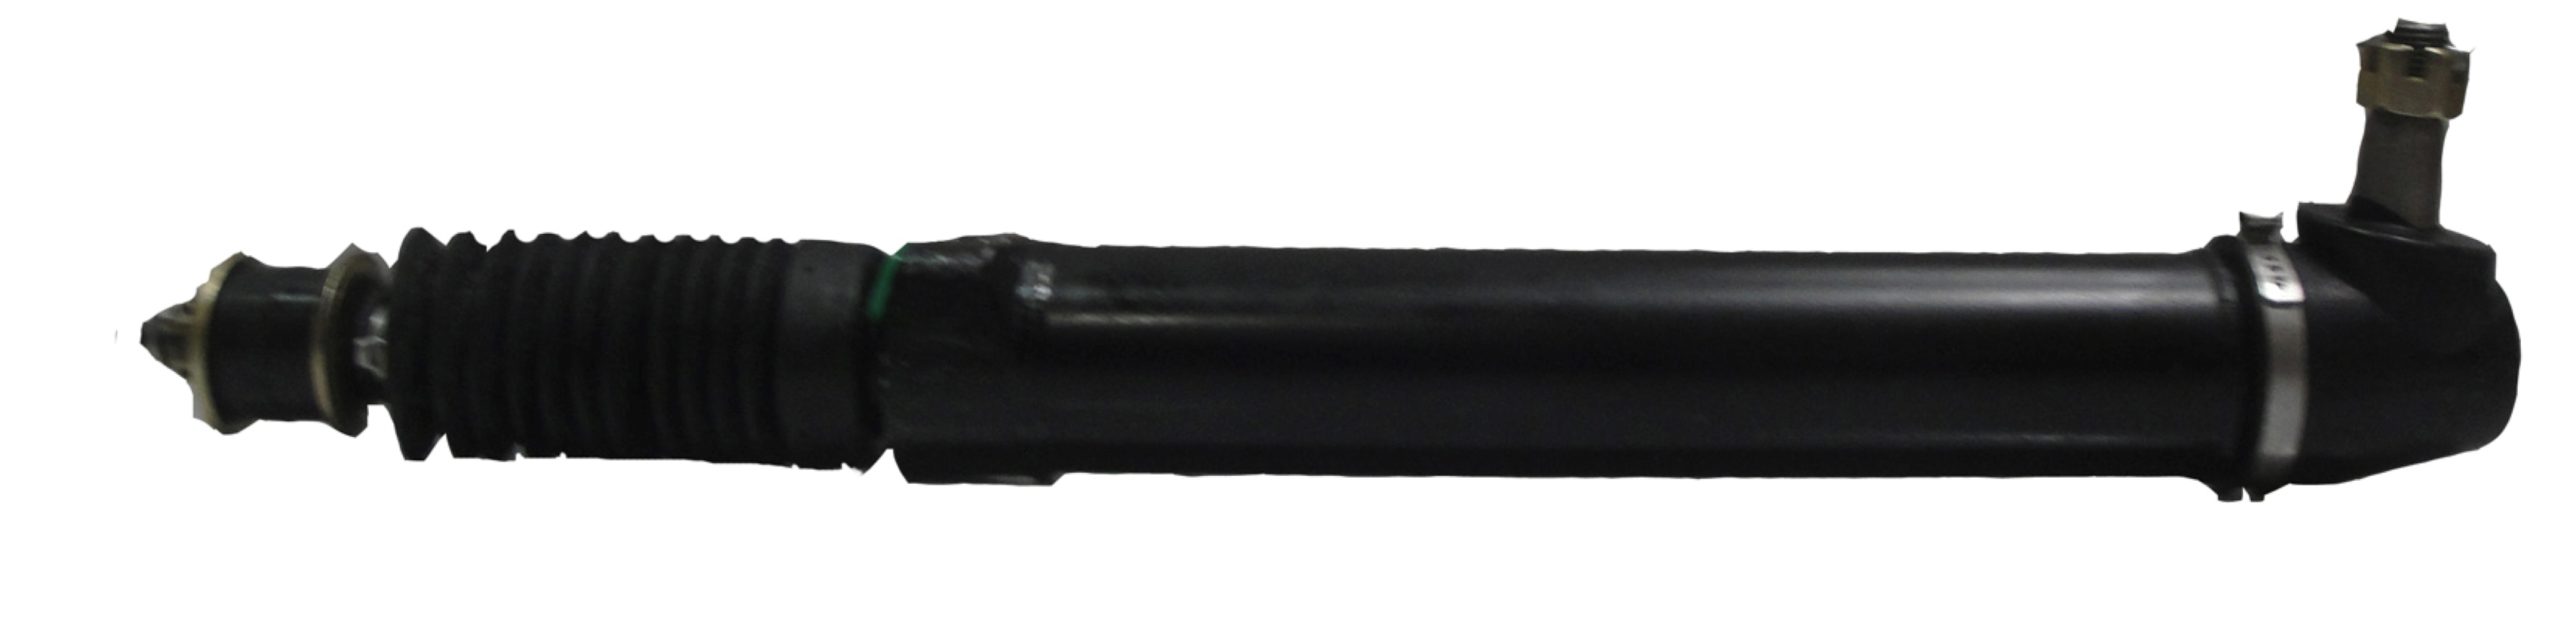
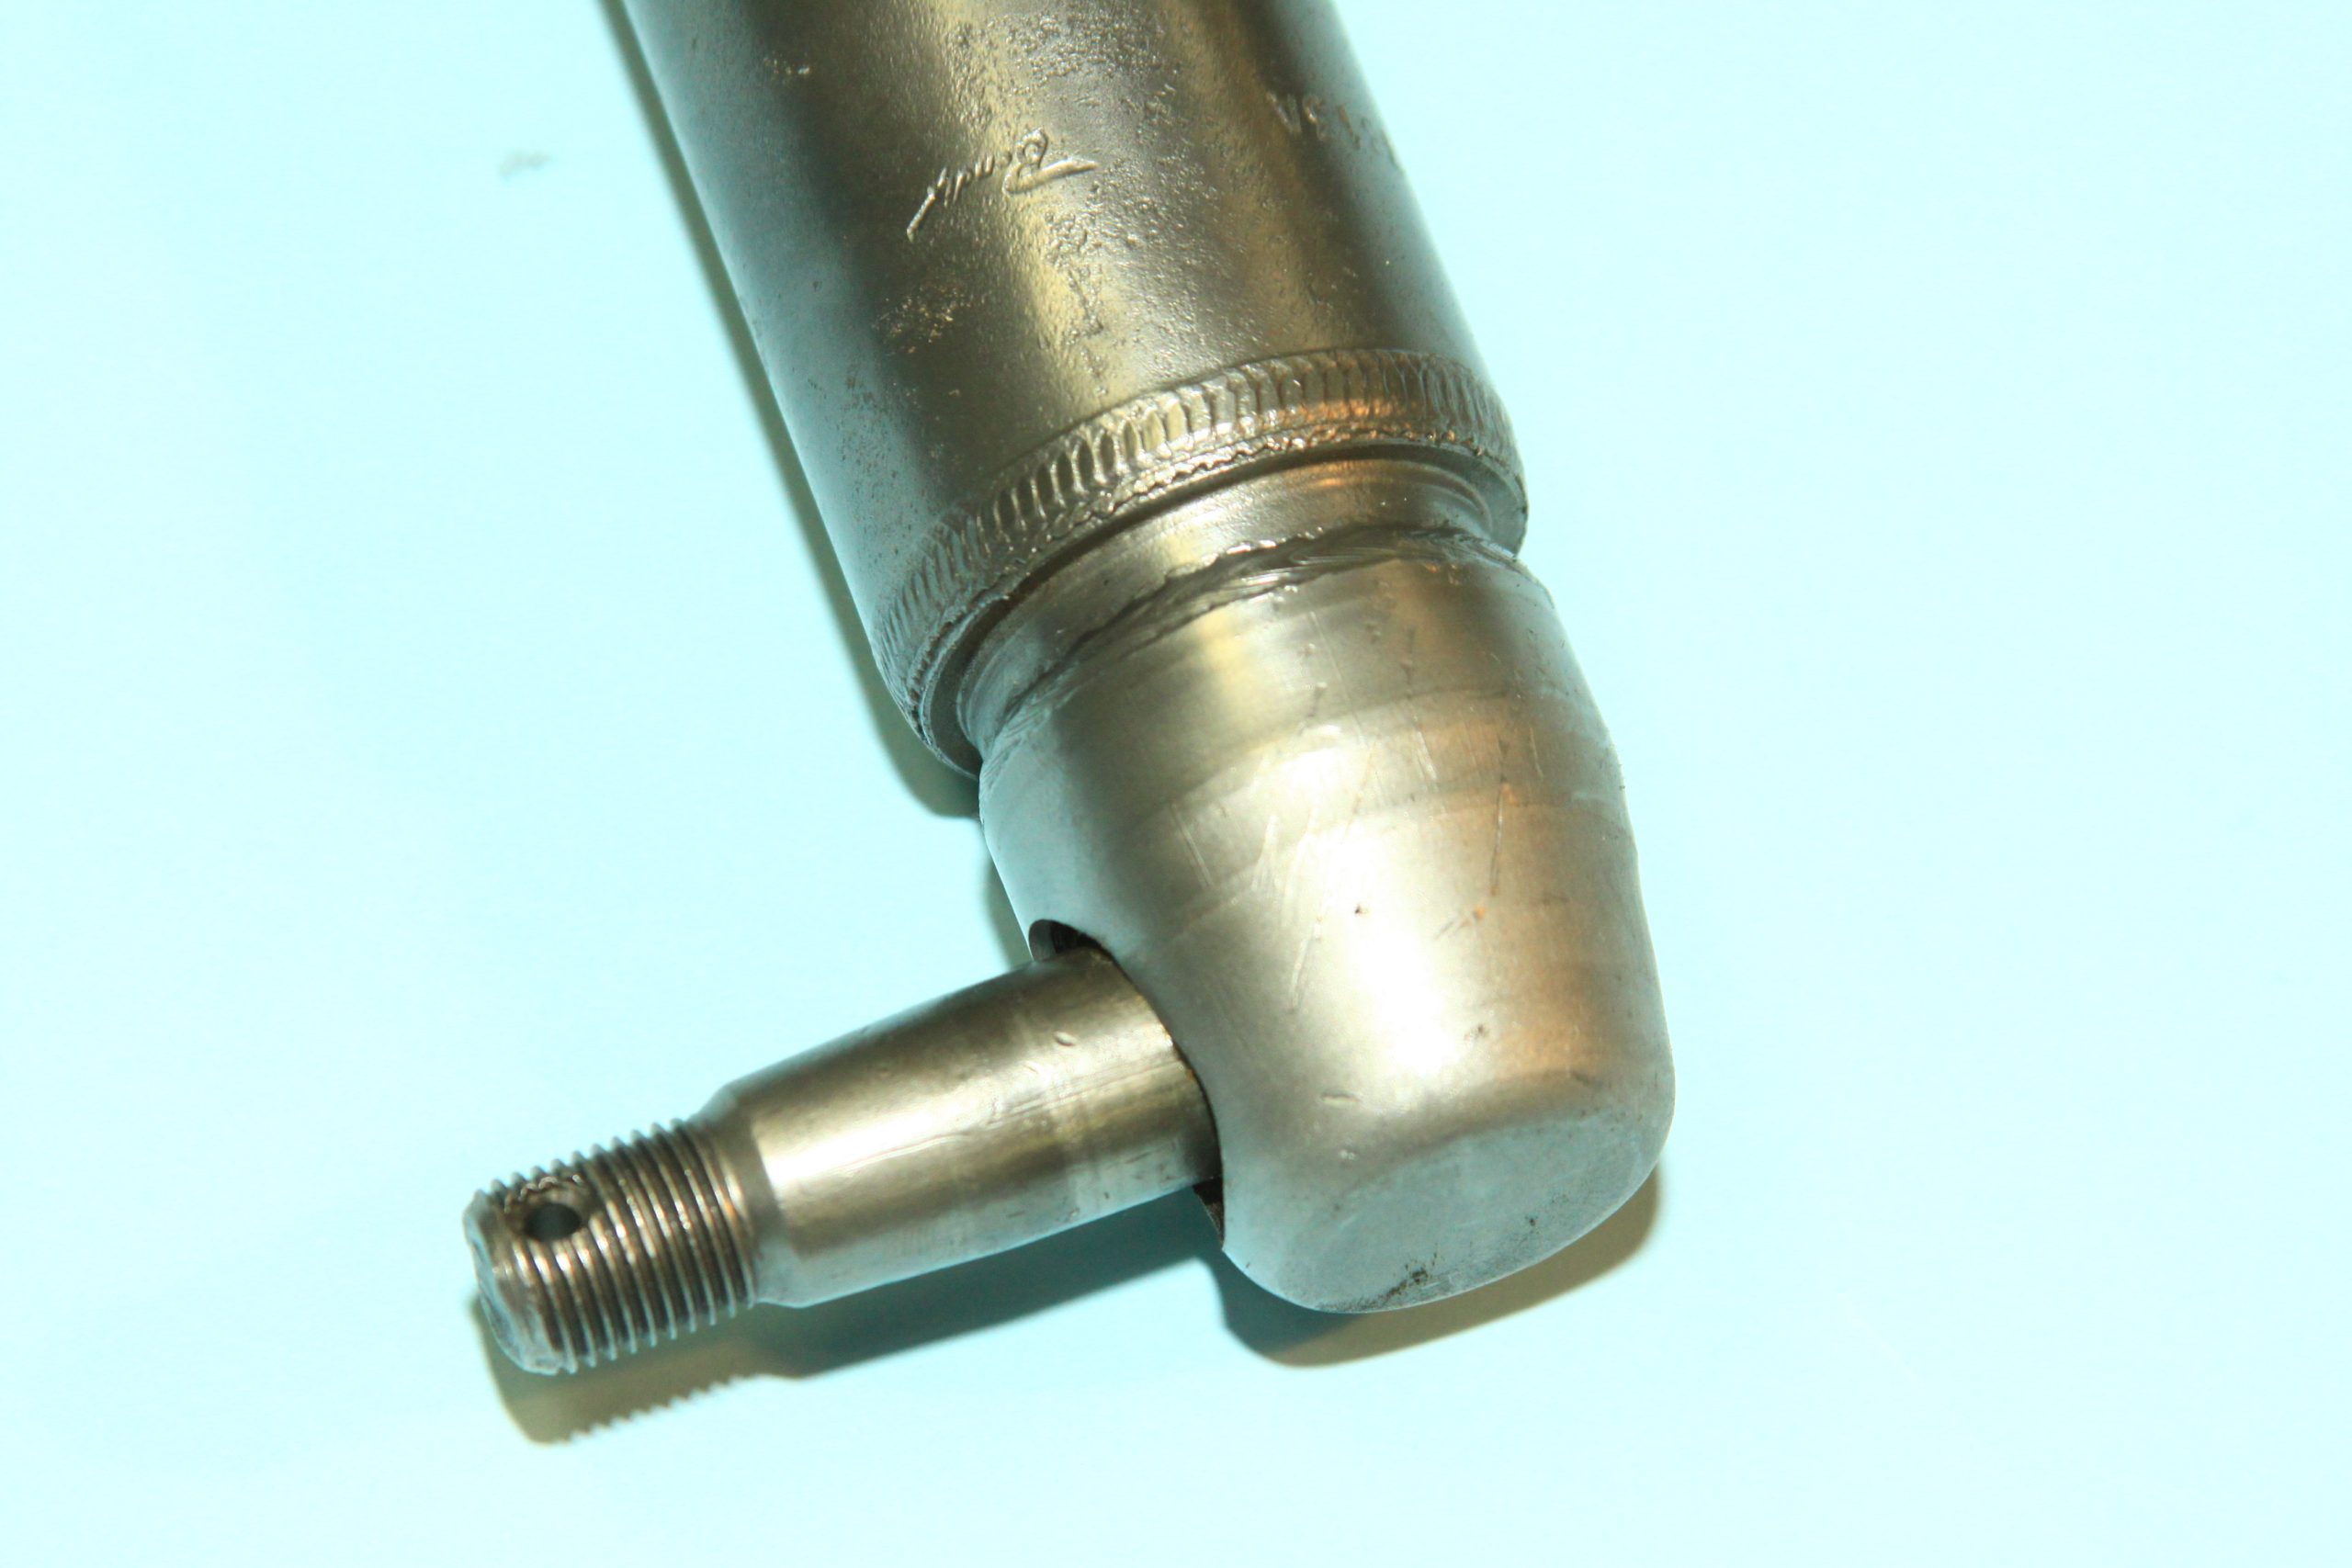
Before you is the complete Bendix power-assisted steering system with control valve and power cylinder, which was commonplace back in the day on a wide variety of vehicle types. The control valve, which is connected to the steering gear Pitman arm (White), directs hydraulic pressure to the ram (Yellow) via two pressure hoses (Orange) for right or left steering assistance. The pressure hose from the pump (Red) directs pressure to the control valve. The return hose (Blue) routes low pressure fluid back to the power steering pump. (Image/Jim Smart)This illustration demonstrates how hydraulic fluid is managed throughout the Bendix power steering system. When you are driving straight ahead, fluid under pressure is routed from the pump to the control valve where it is routed back to the pump. When you steer right or left, fluid is directed under pressure to one side of the ram piston or the other for steering assistance.The power cylinder, which is connected to the center link, is a simple hydraulic actuator. These are the serviceable parts of a power cylinder—including seven parts to the sealing and two replaceable aluminum seats where the hydraulic lines are connected. The power cylinder is not generally serviceable except by a rebuilder. However, replace the ram’s seven seal parts and line seats and you’re back in business.
***
Reseal, Here’s The Deal…
Before you disassemble your steering system, you’re going to need parts to do the job. You can either rebuild what you have or order a new control valve, power cylinder and all of the hoses, and have it all new again. If having original components is important to you, Summit Racing offers plenty of options so you can grab all the parts in one stop. We’ll list those parts below.
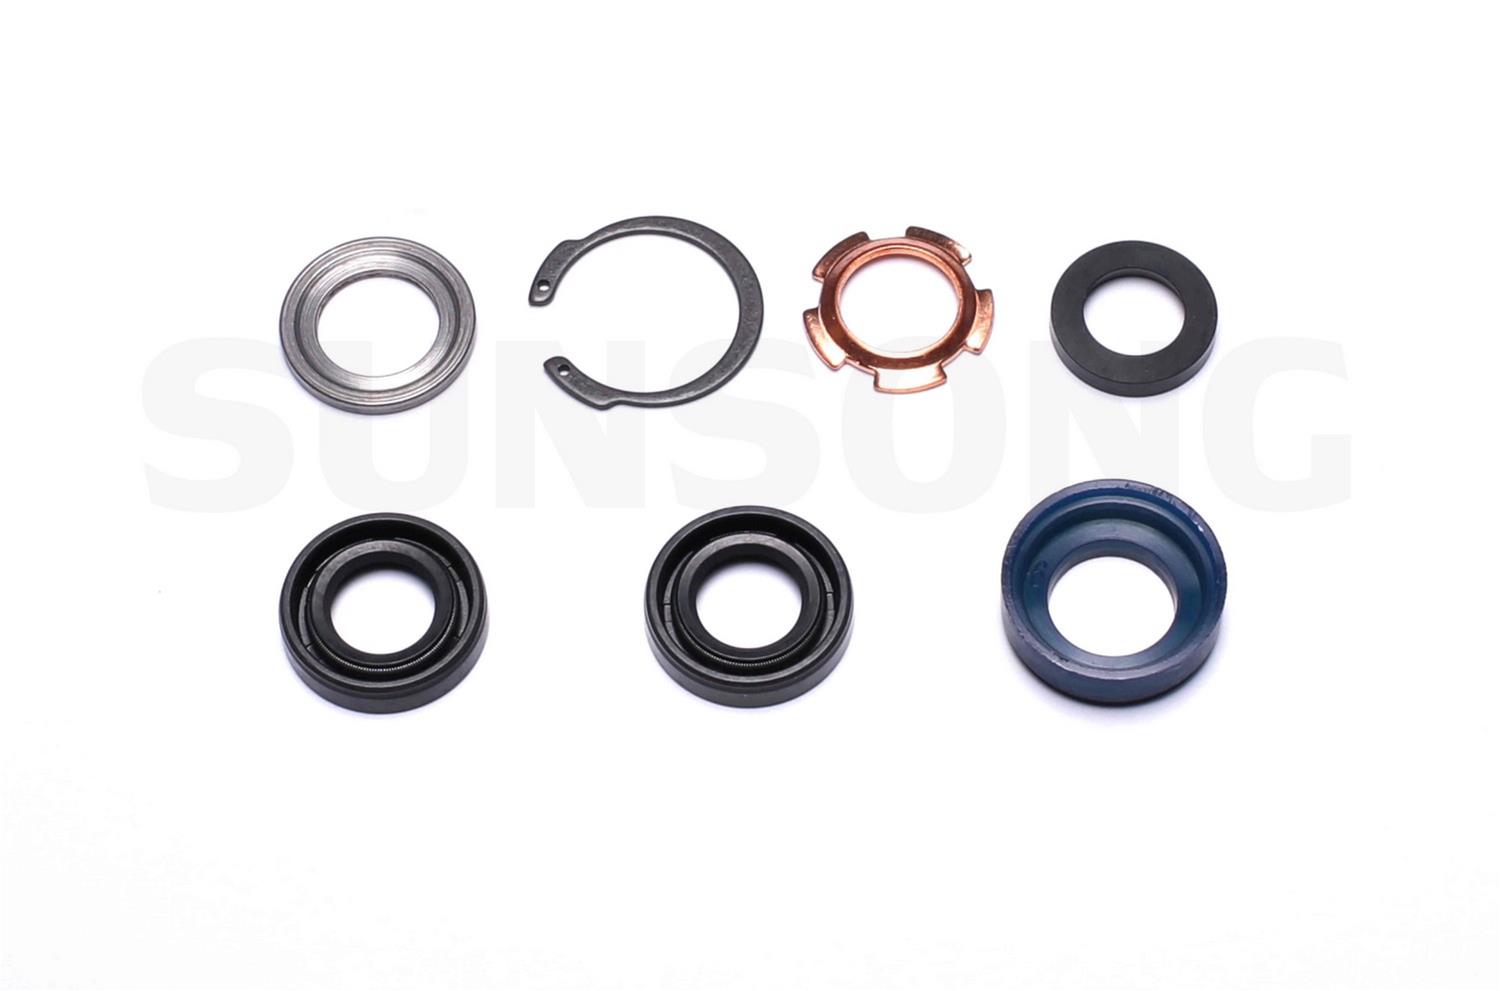
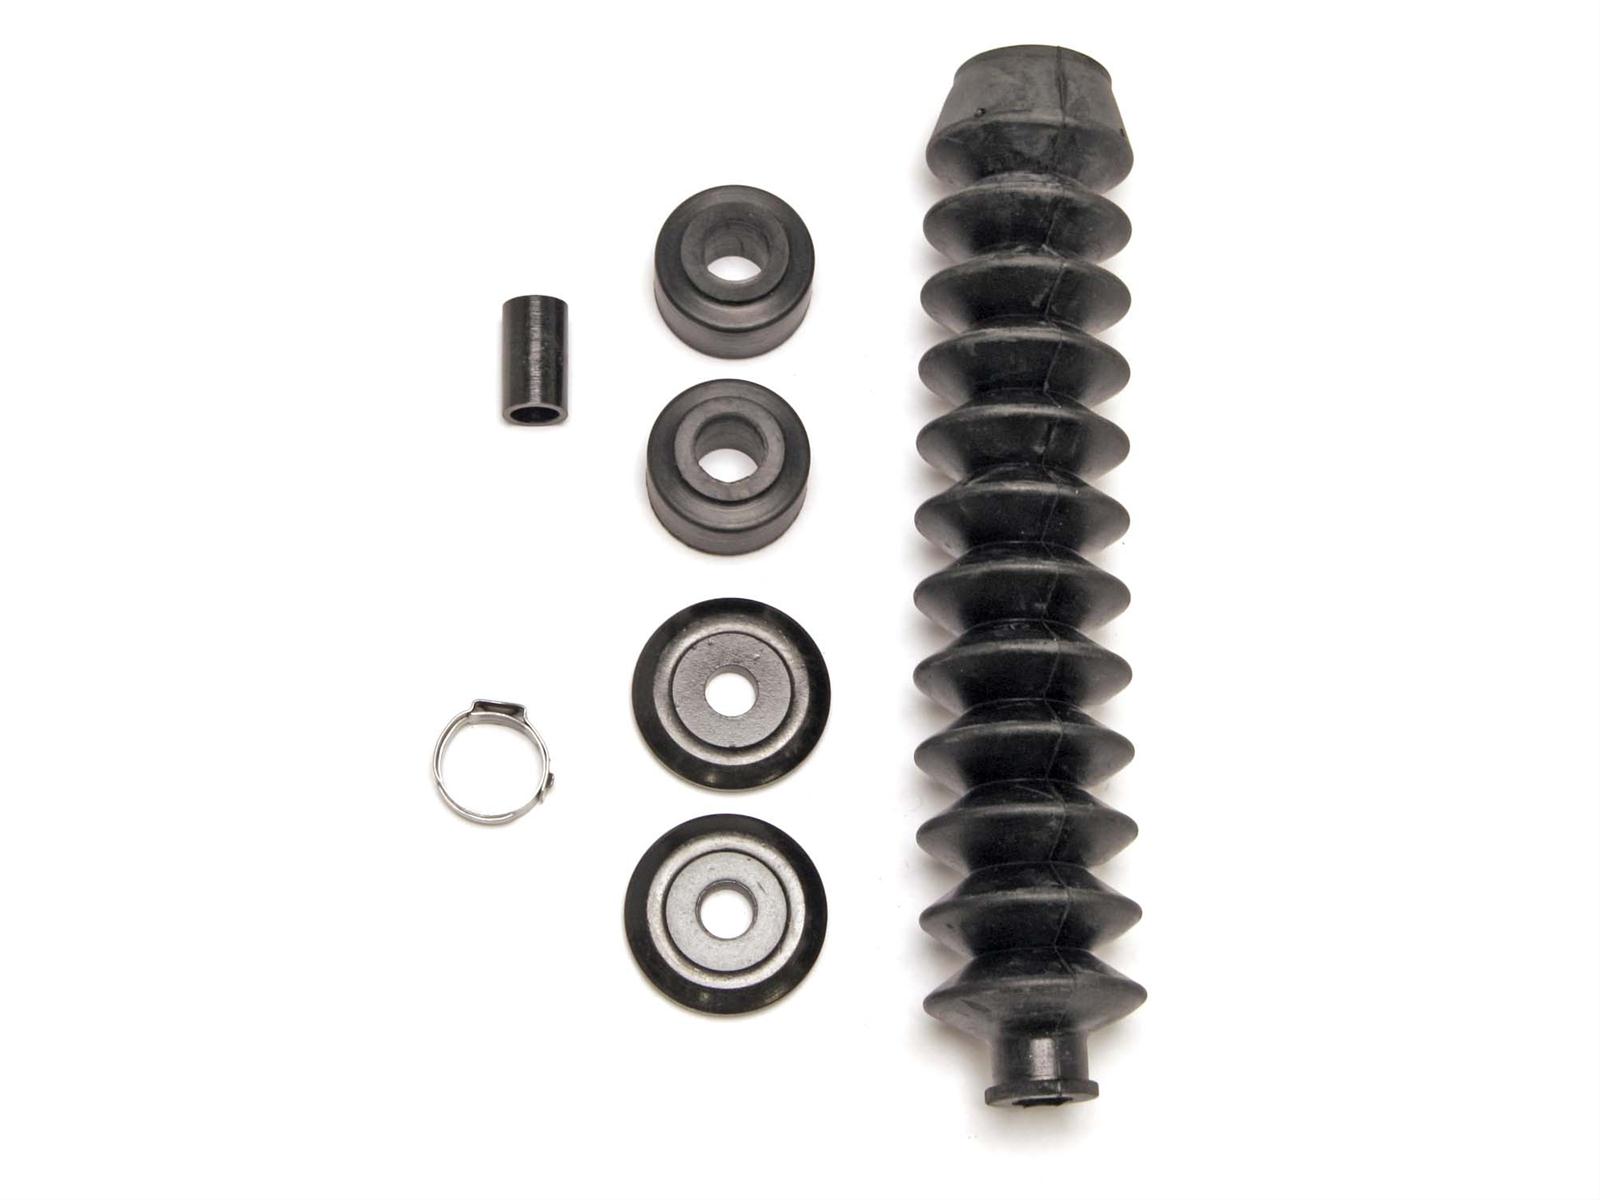
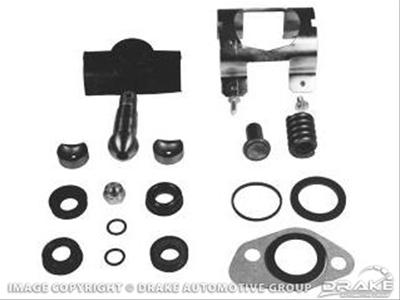
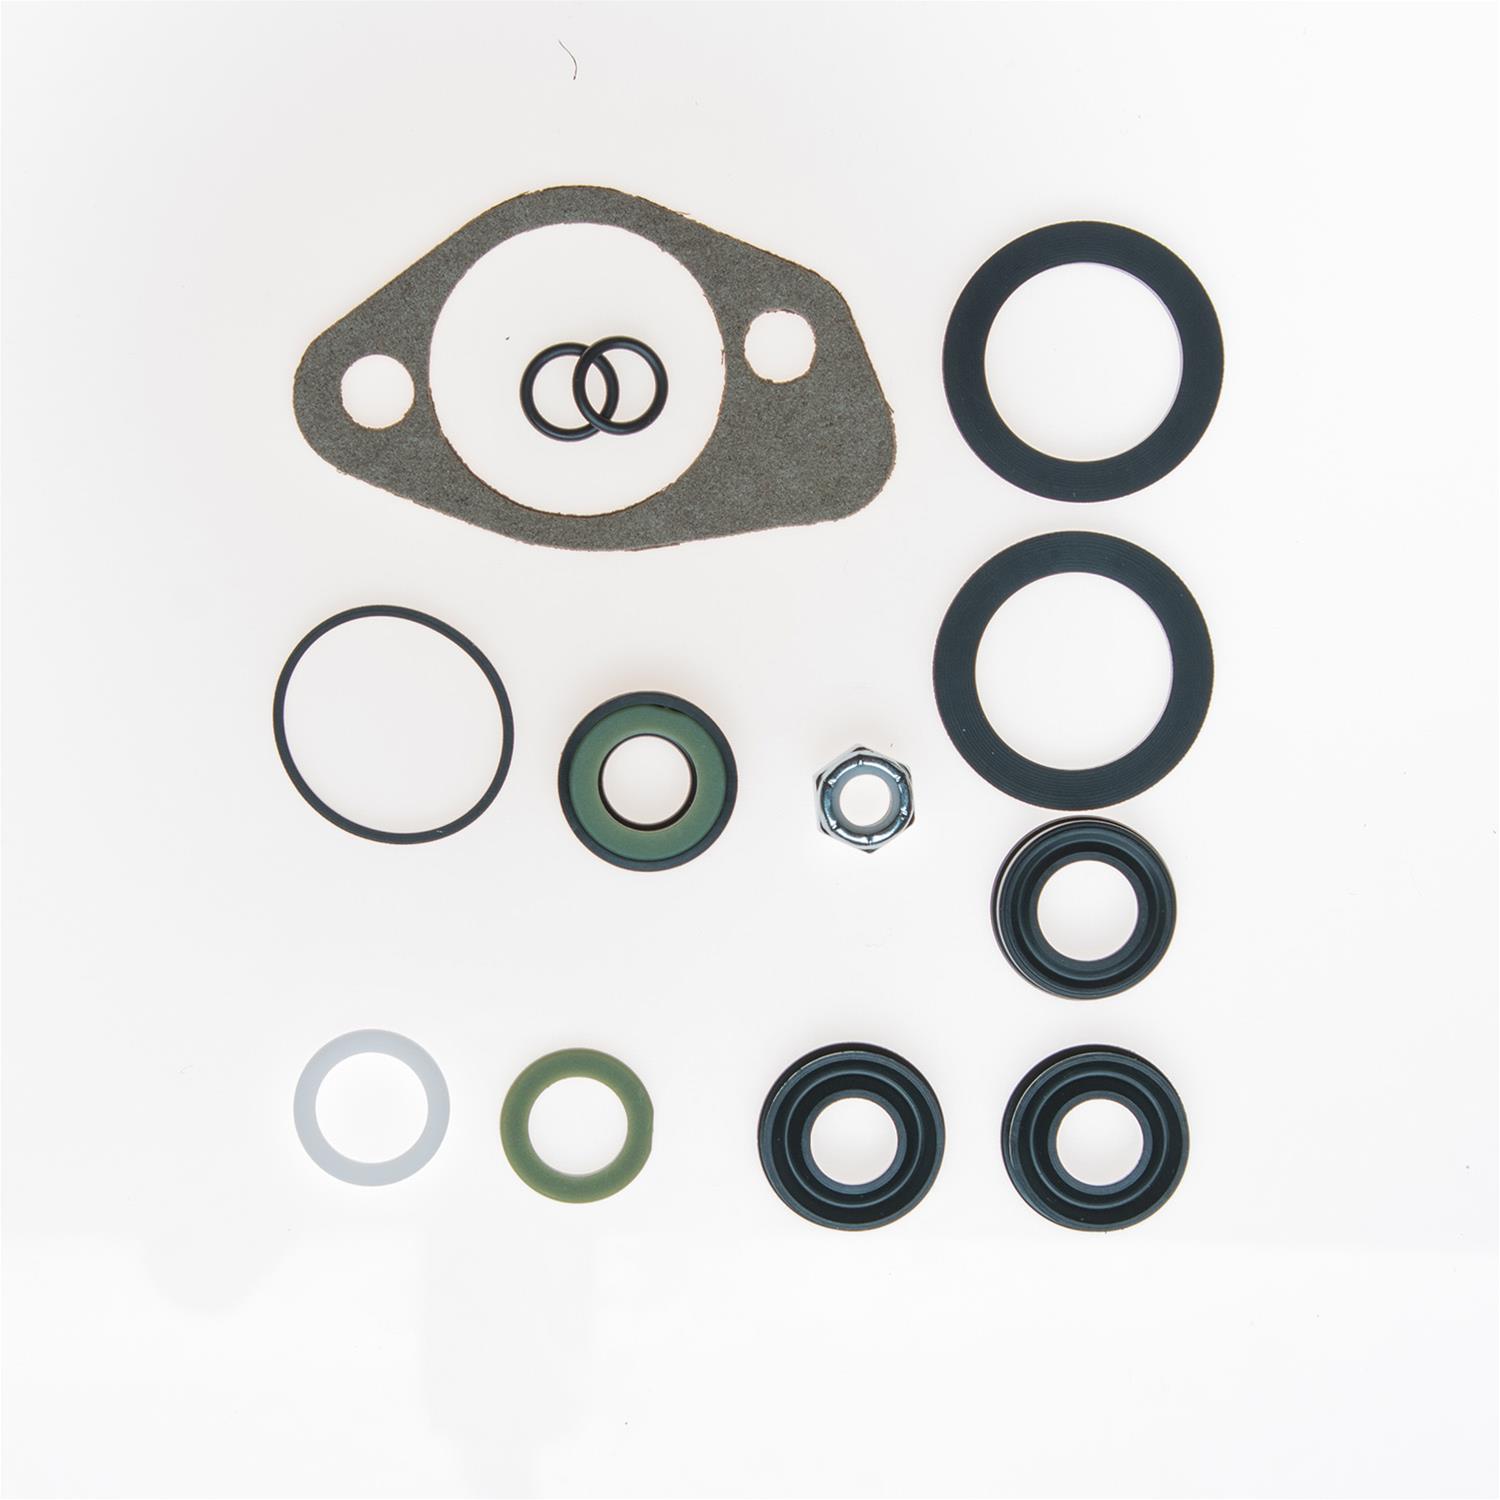
You’re going to need the Sunsong Power Cylinder Seal Kit (P/N 8401041) to get the ram back up and running again. For just a few bucks, all of the seals and hardware are included to rebuild the ram (AKA the power cylinder). (Image/Summit Racing)When you’re finished with the power cylinder reseal, you’re going to need the Scott Drake PN C6OZ-3C651-A Steering Cylinder Boot Kit, which protects the ram actuator rod from dust and road debris. (Image/Summit Racing)If you don’t have the time or the facilities to reseal the ram, Summit Racing has solutions for getting you back on the road quickly. The Lares Power Slave Cylinder PN 10022 is a quick and easy swap without the hassle of a reseal. (Image/Summit Racing)Once you’ve repacked the ball and socket with chassis lube, you’re going to need this guy to wrap up the reseal. The Scott Drake Power Steering Cylinder Boot Kit (PN C5ZZ-3A540-B) keeps road debris away from critical steering components, which means additional ram life. (Image/Summit Racing)
***
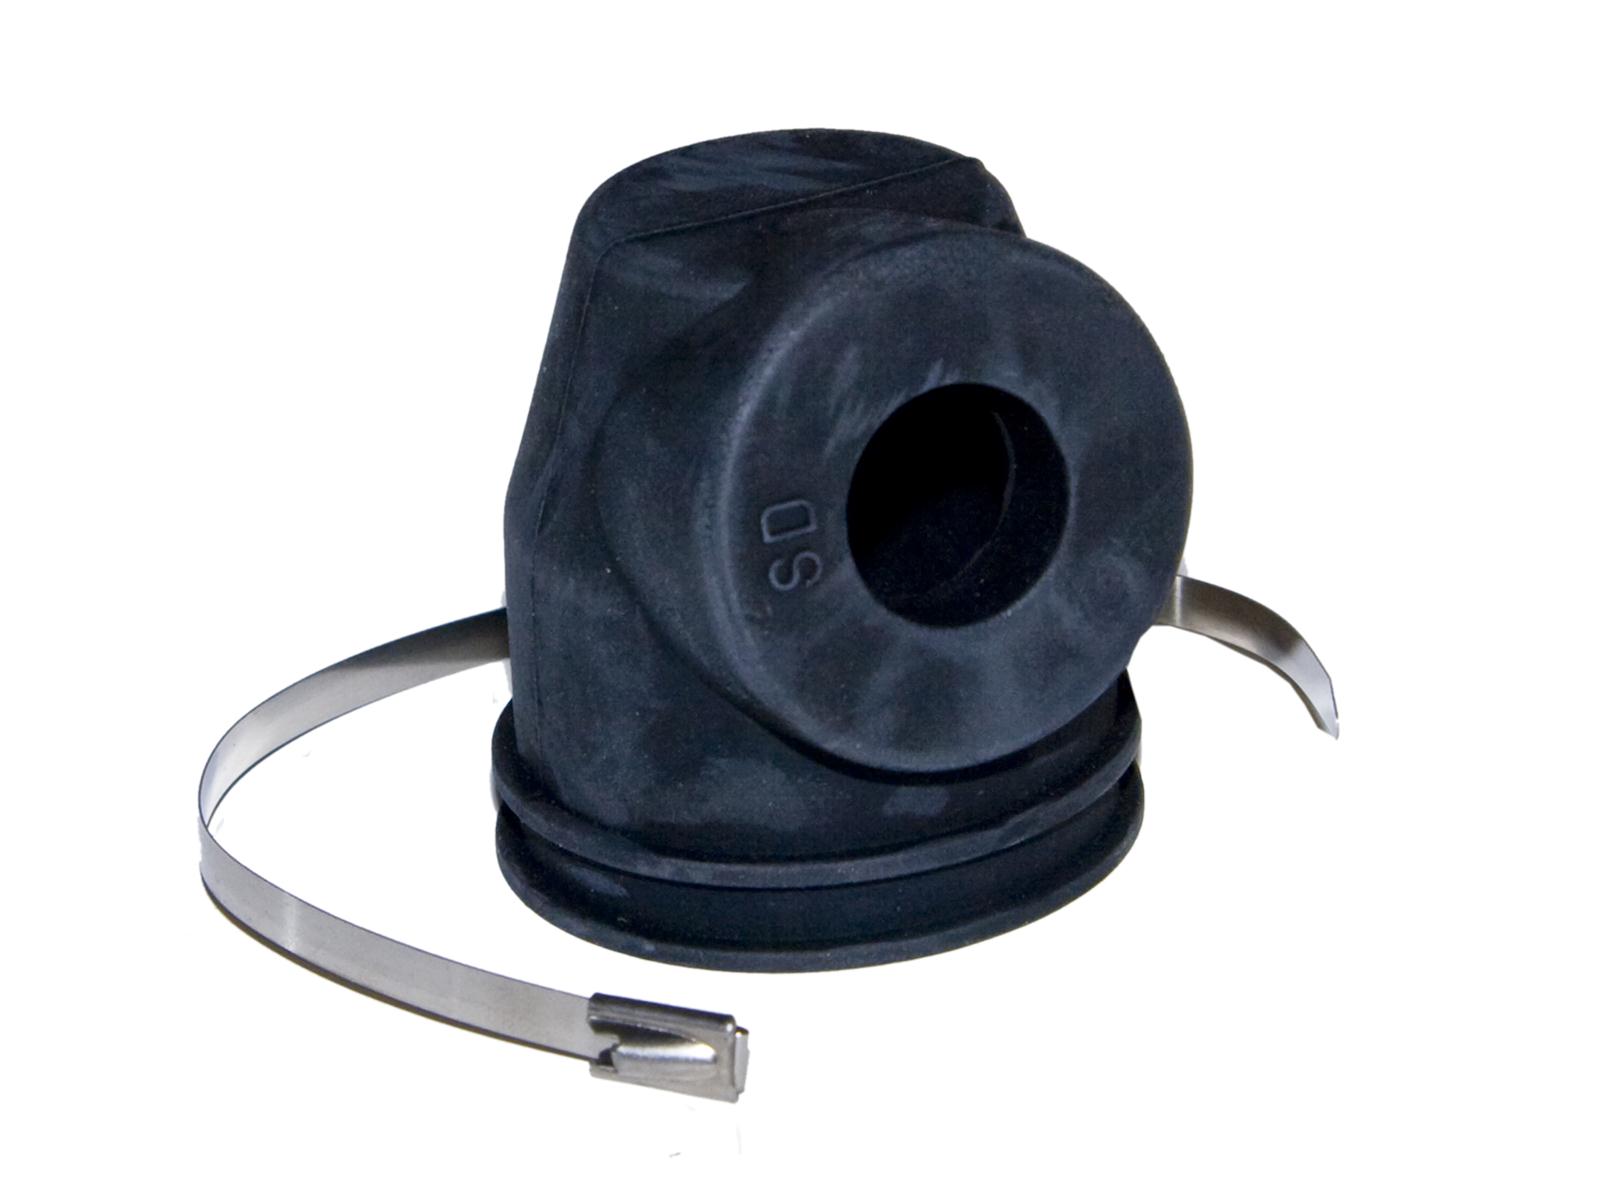
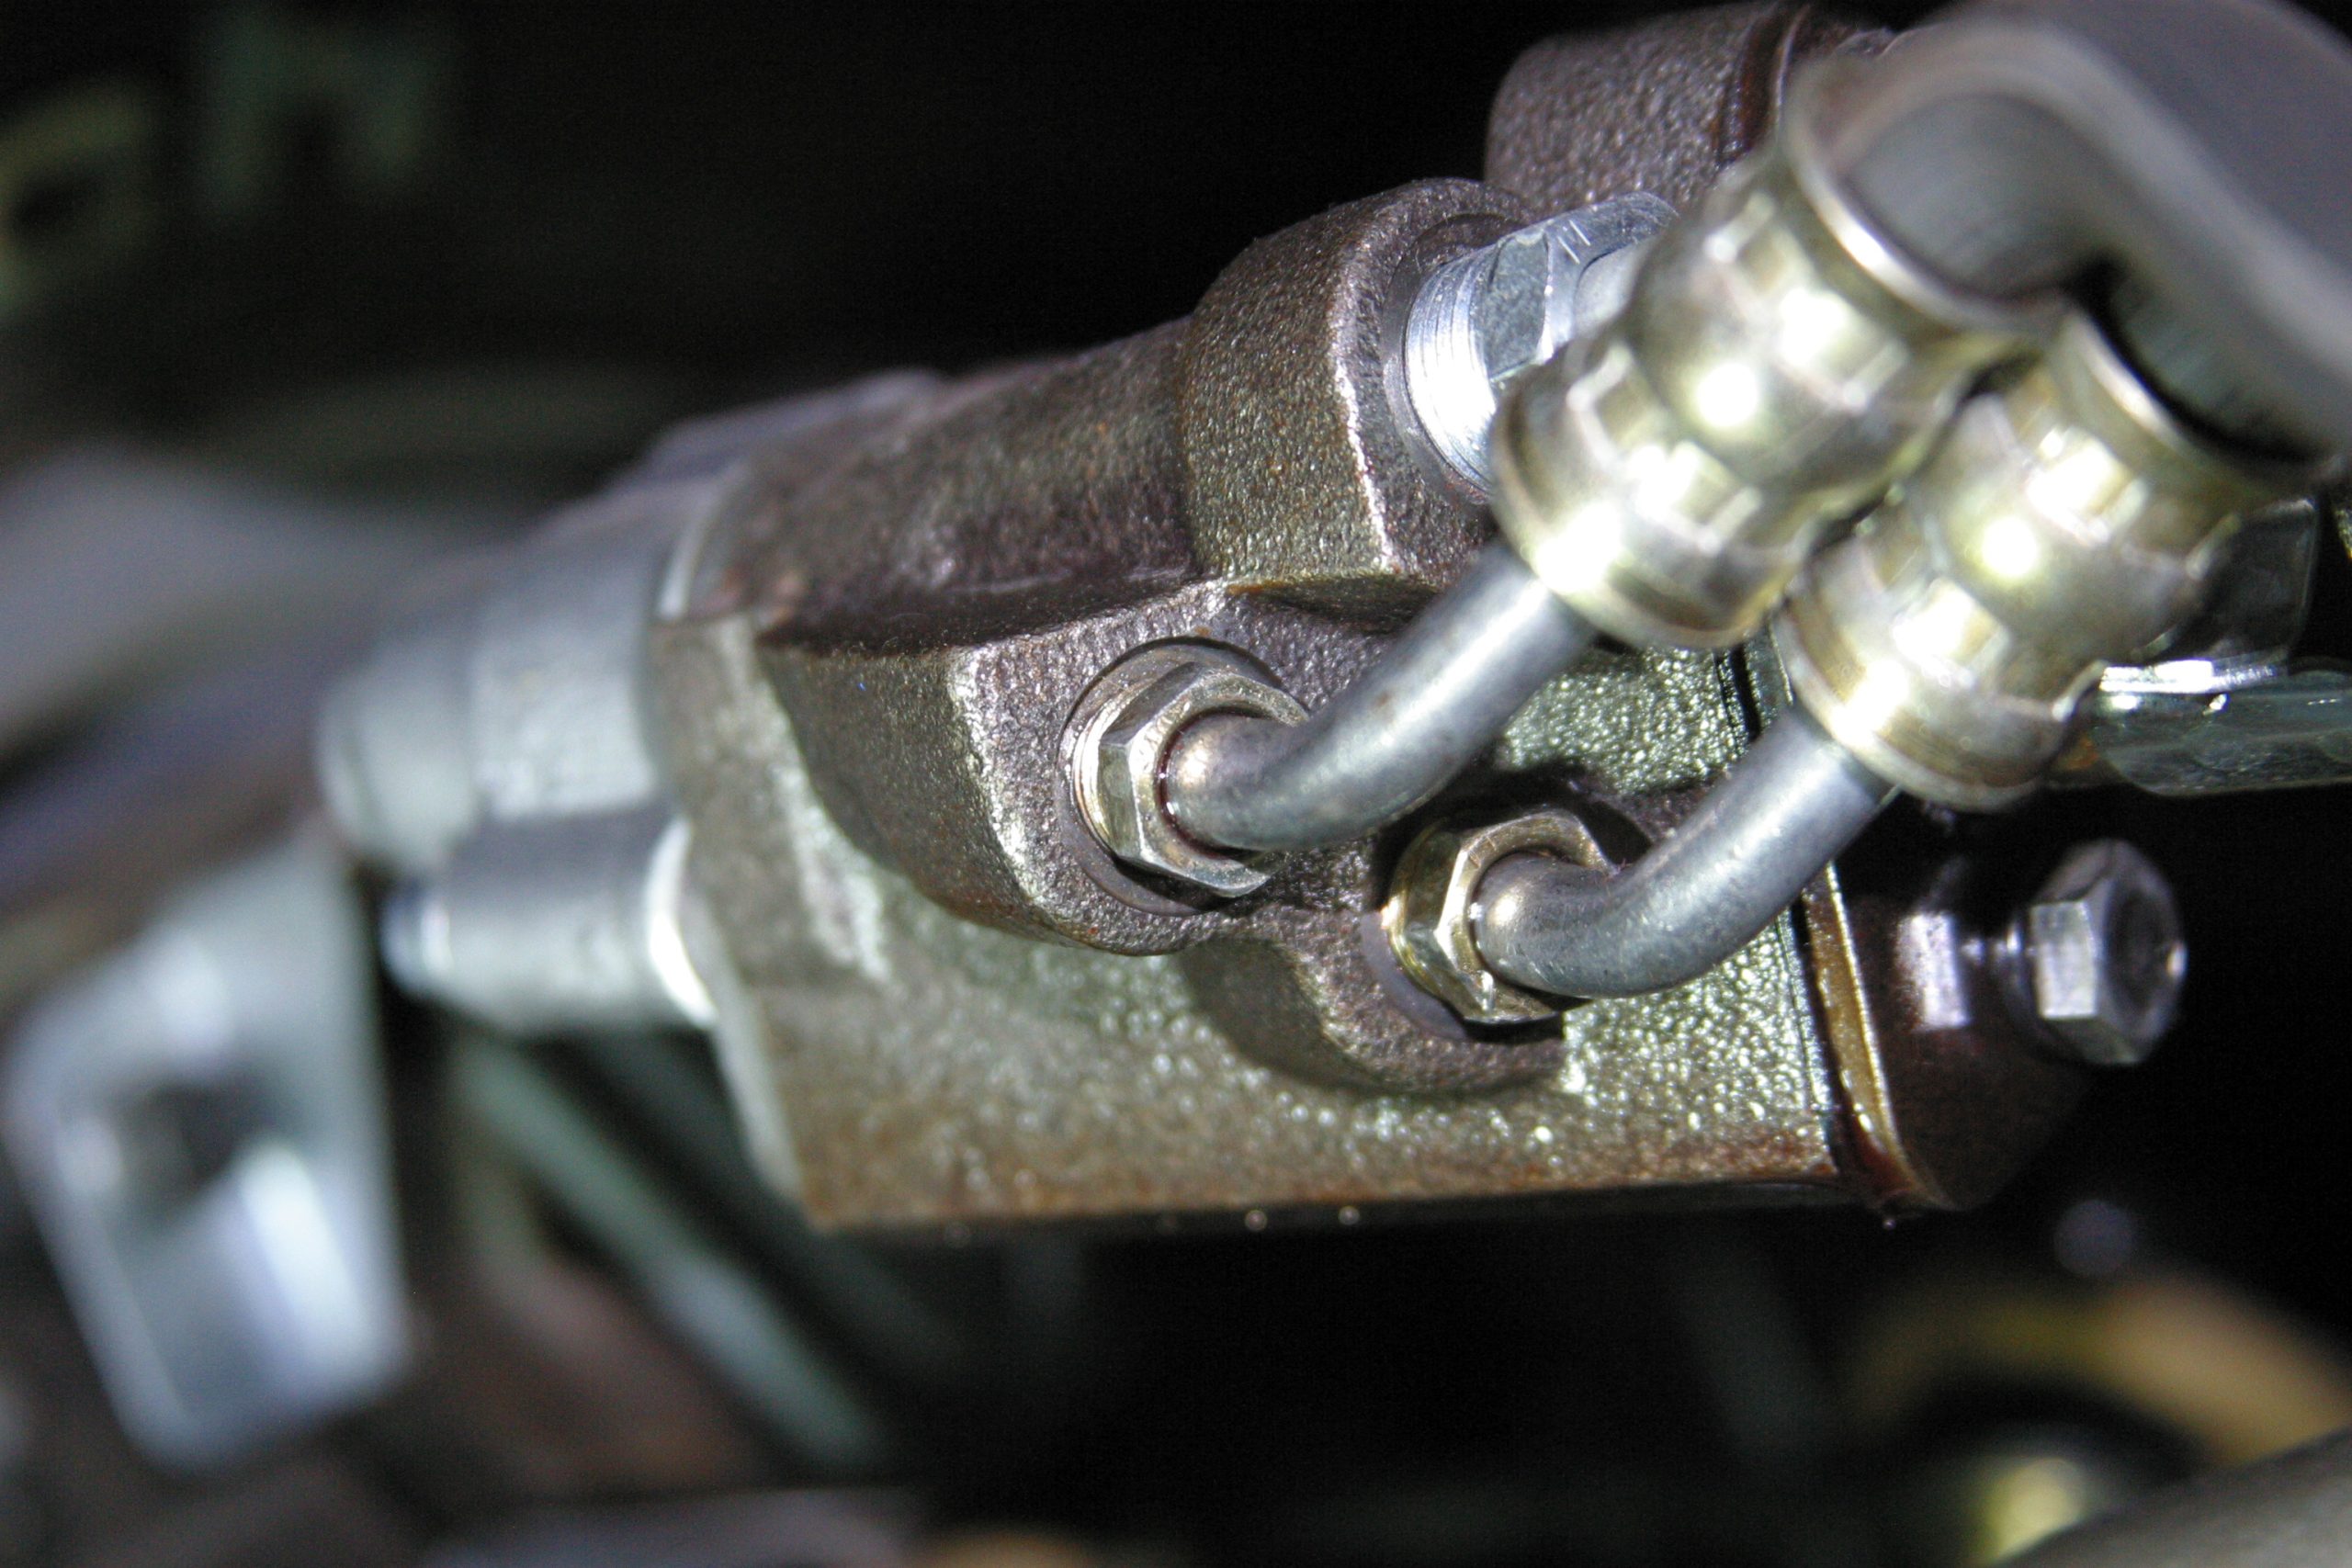
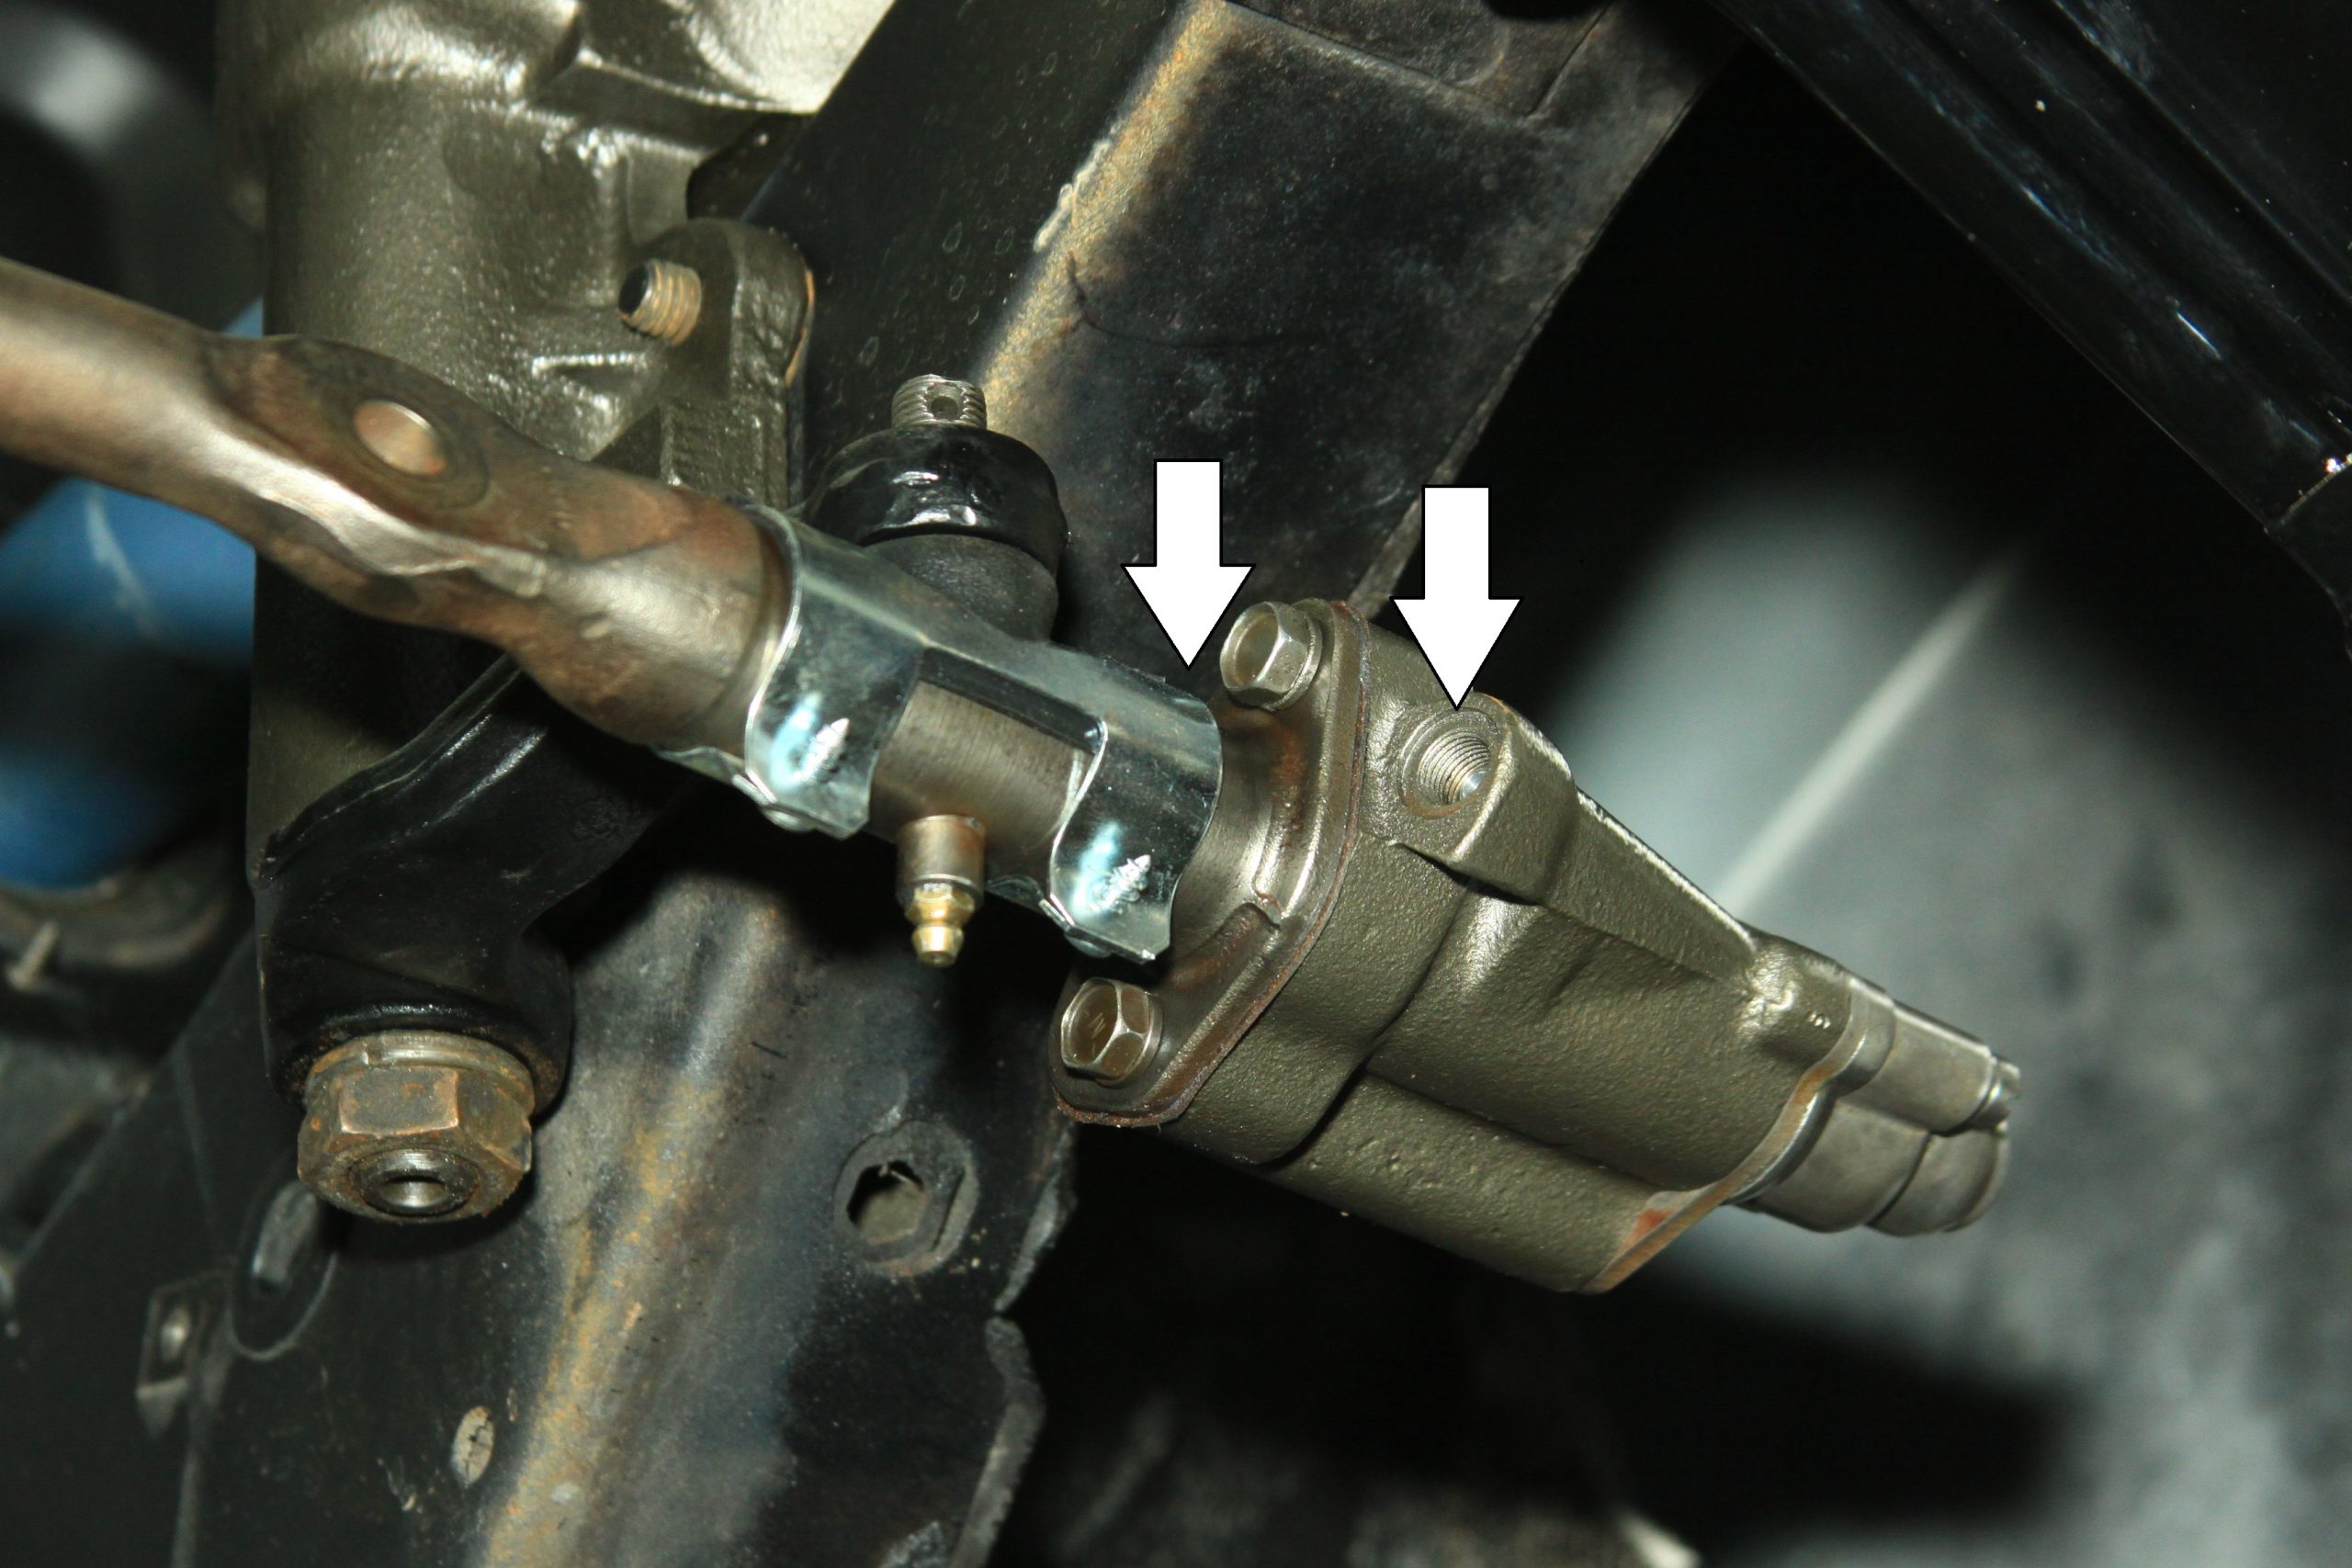
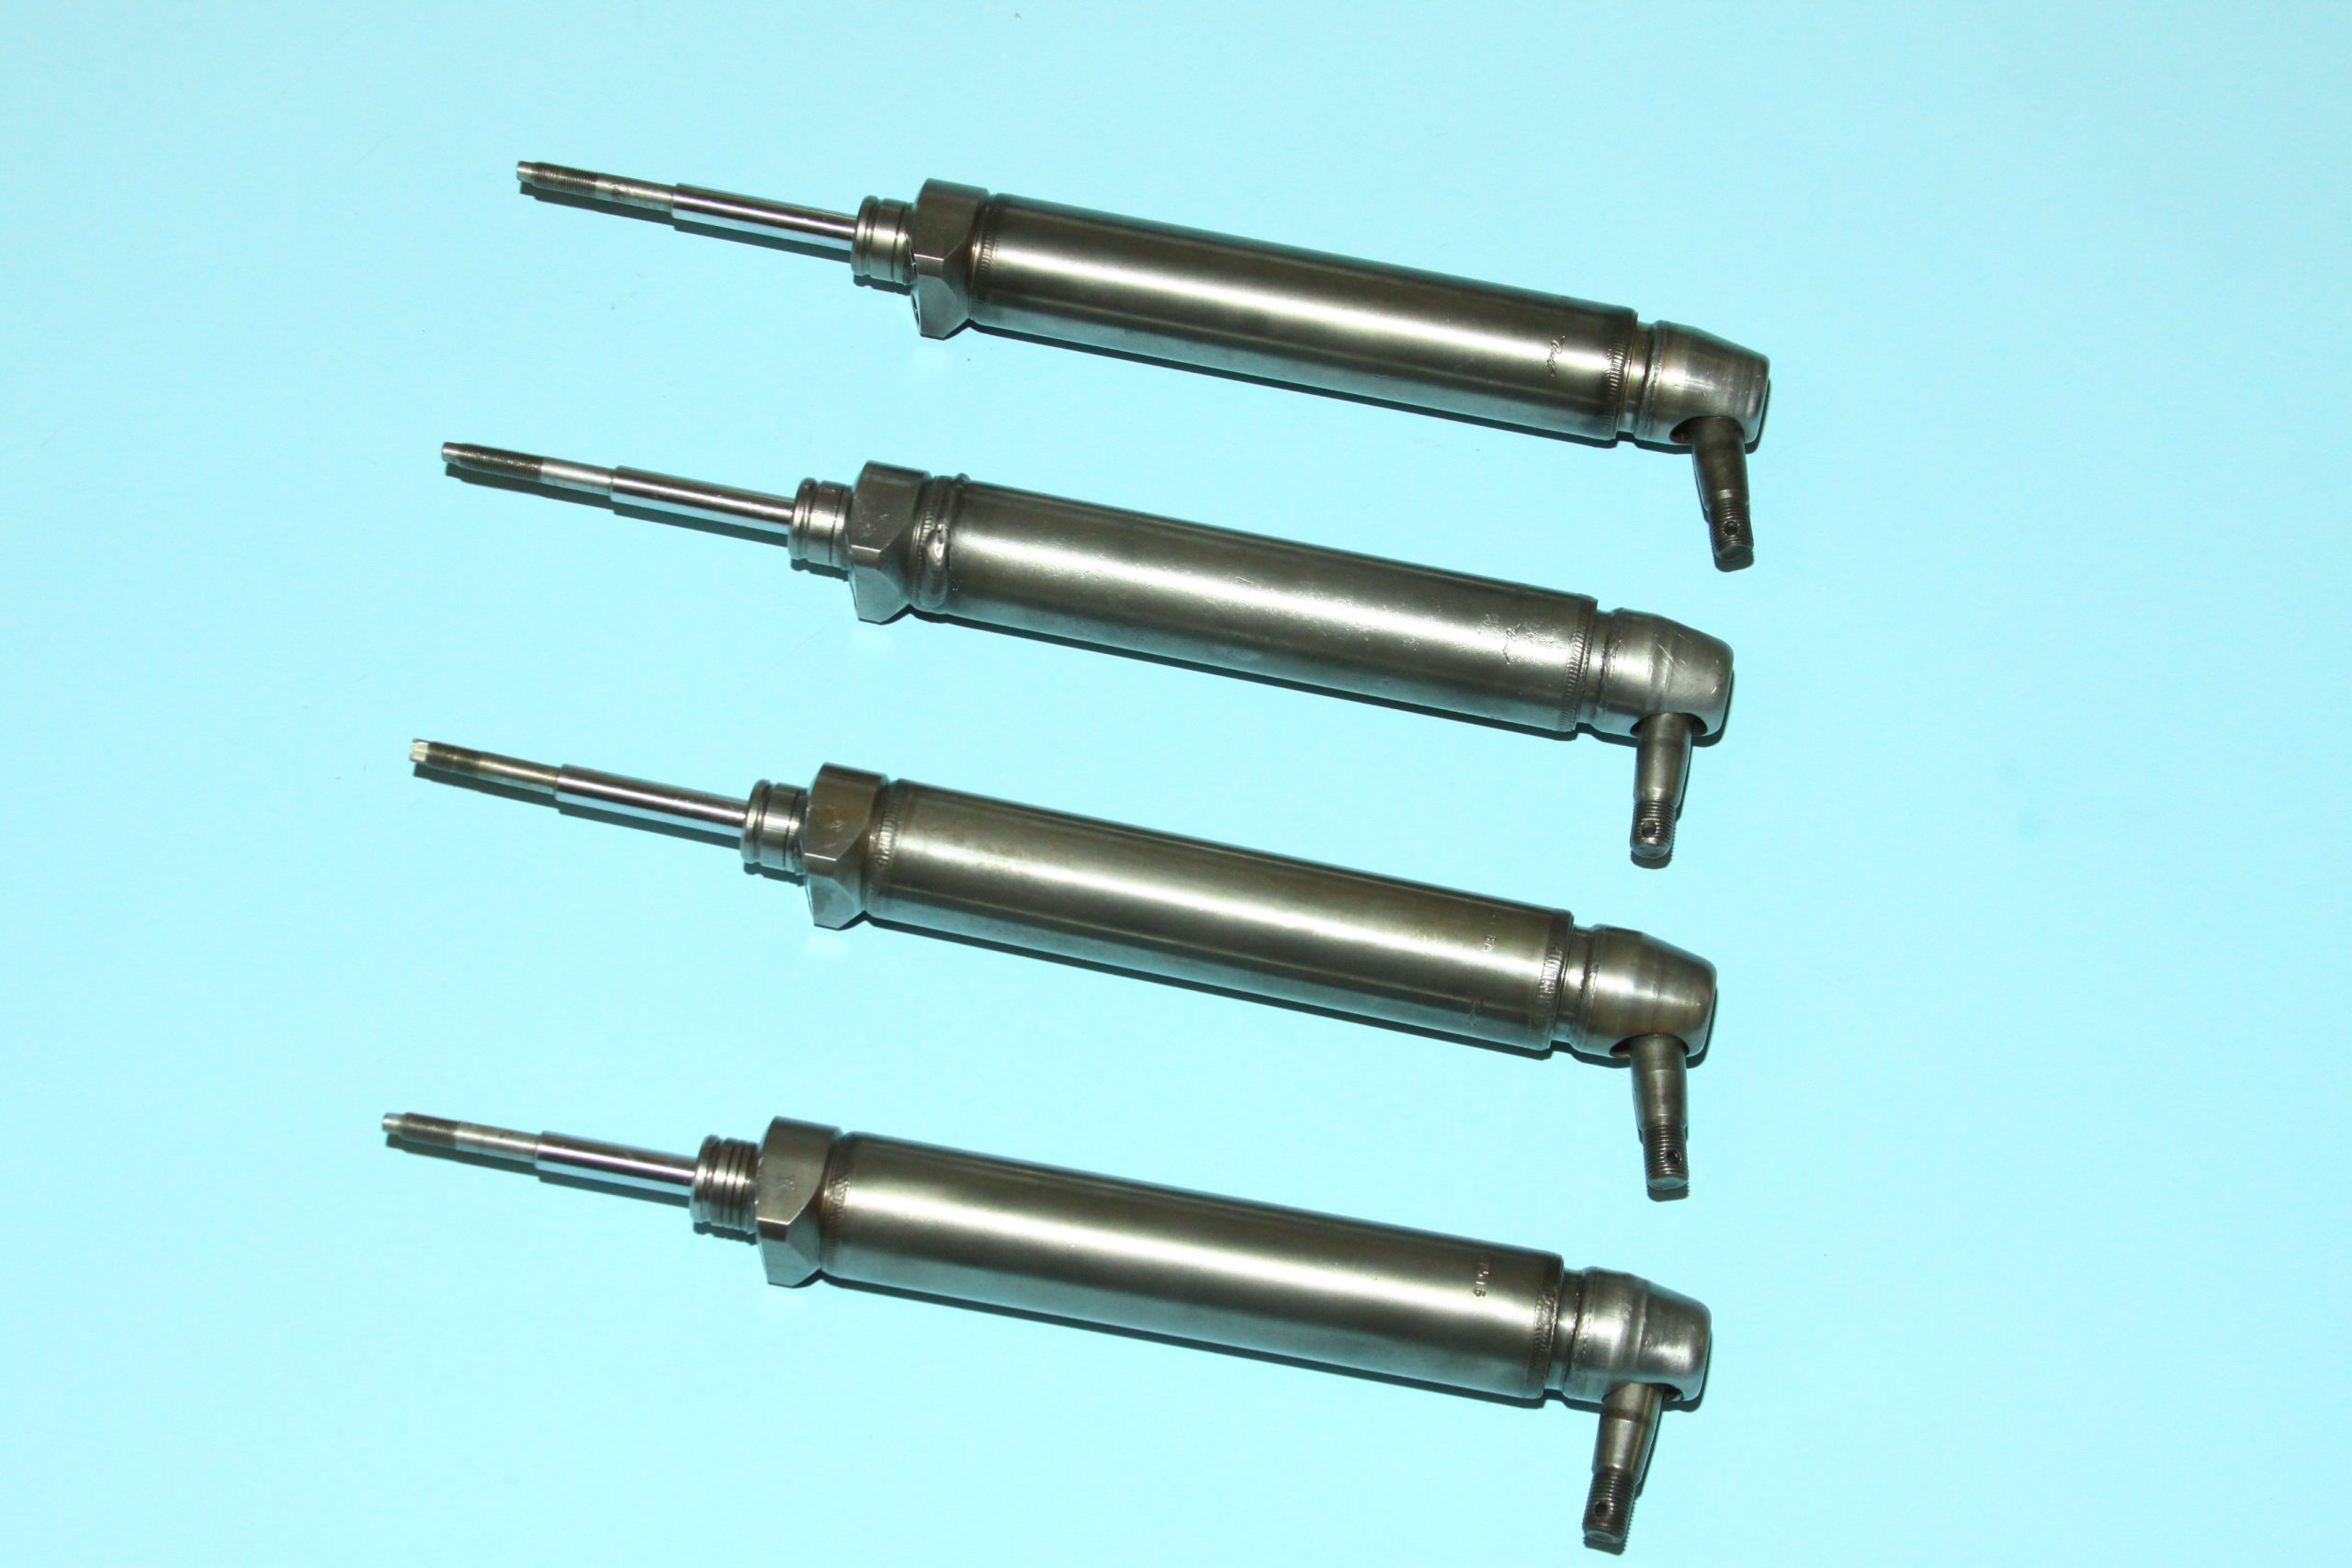
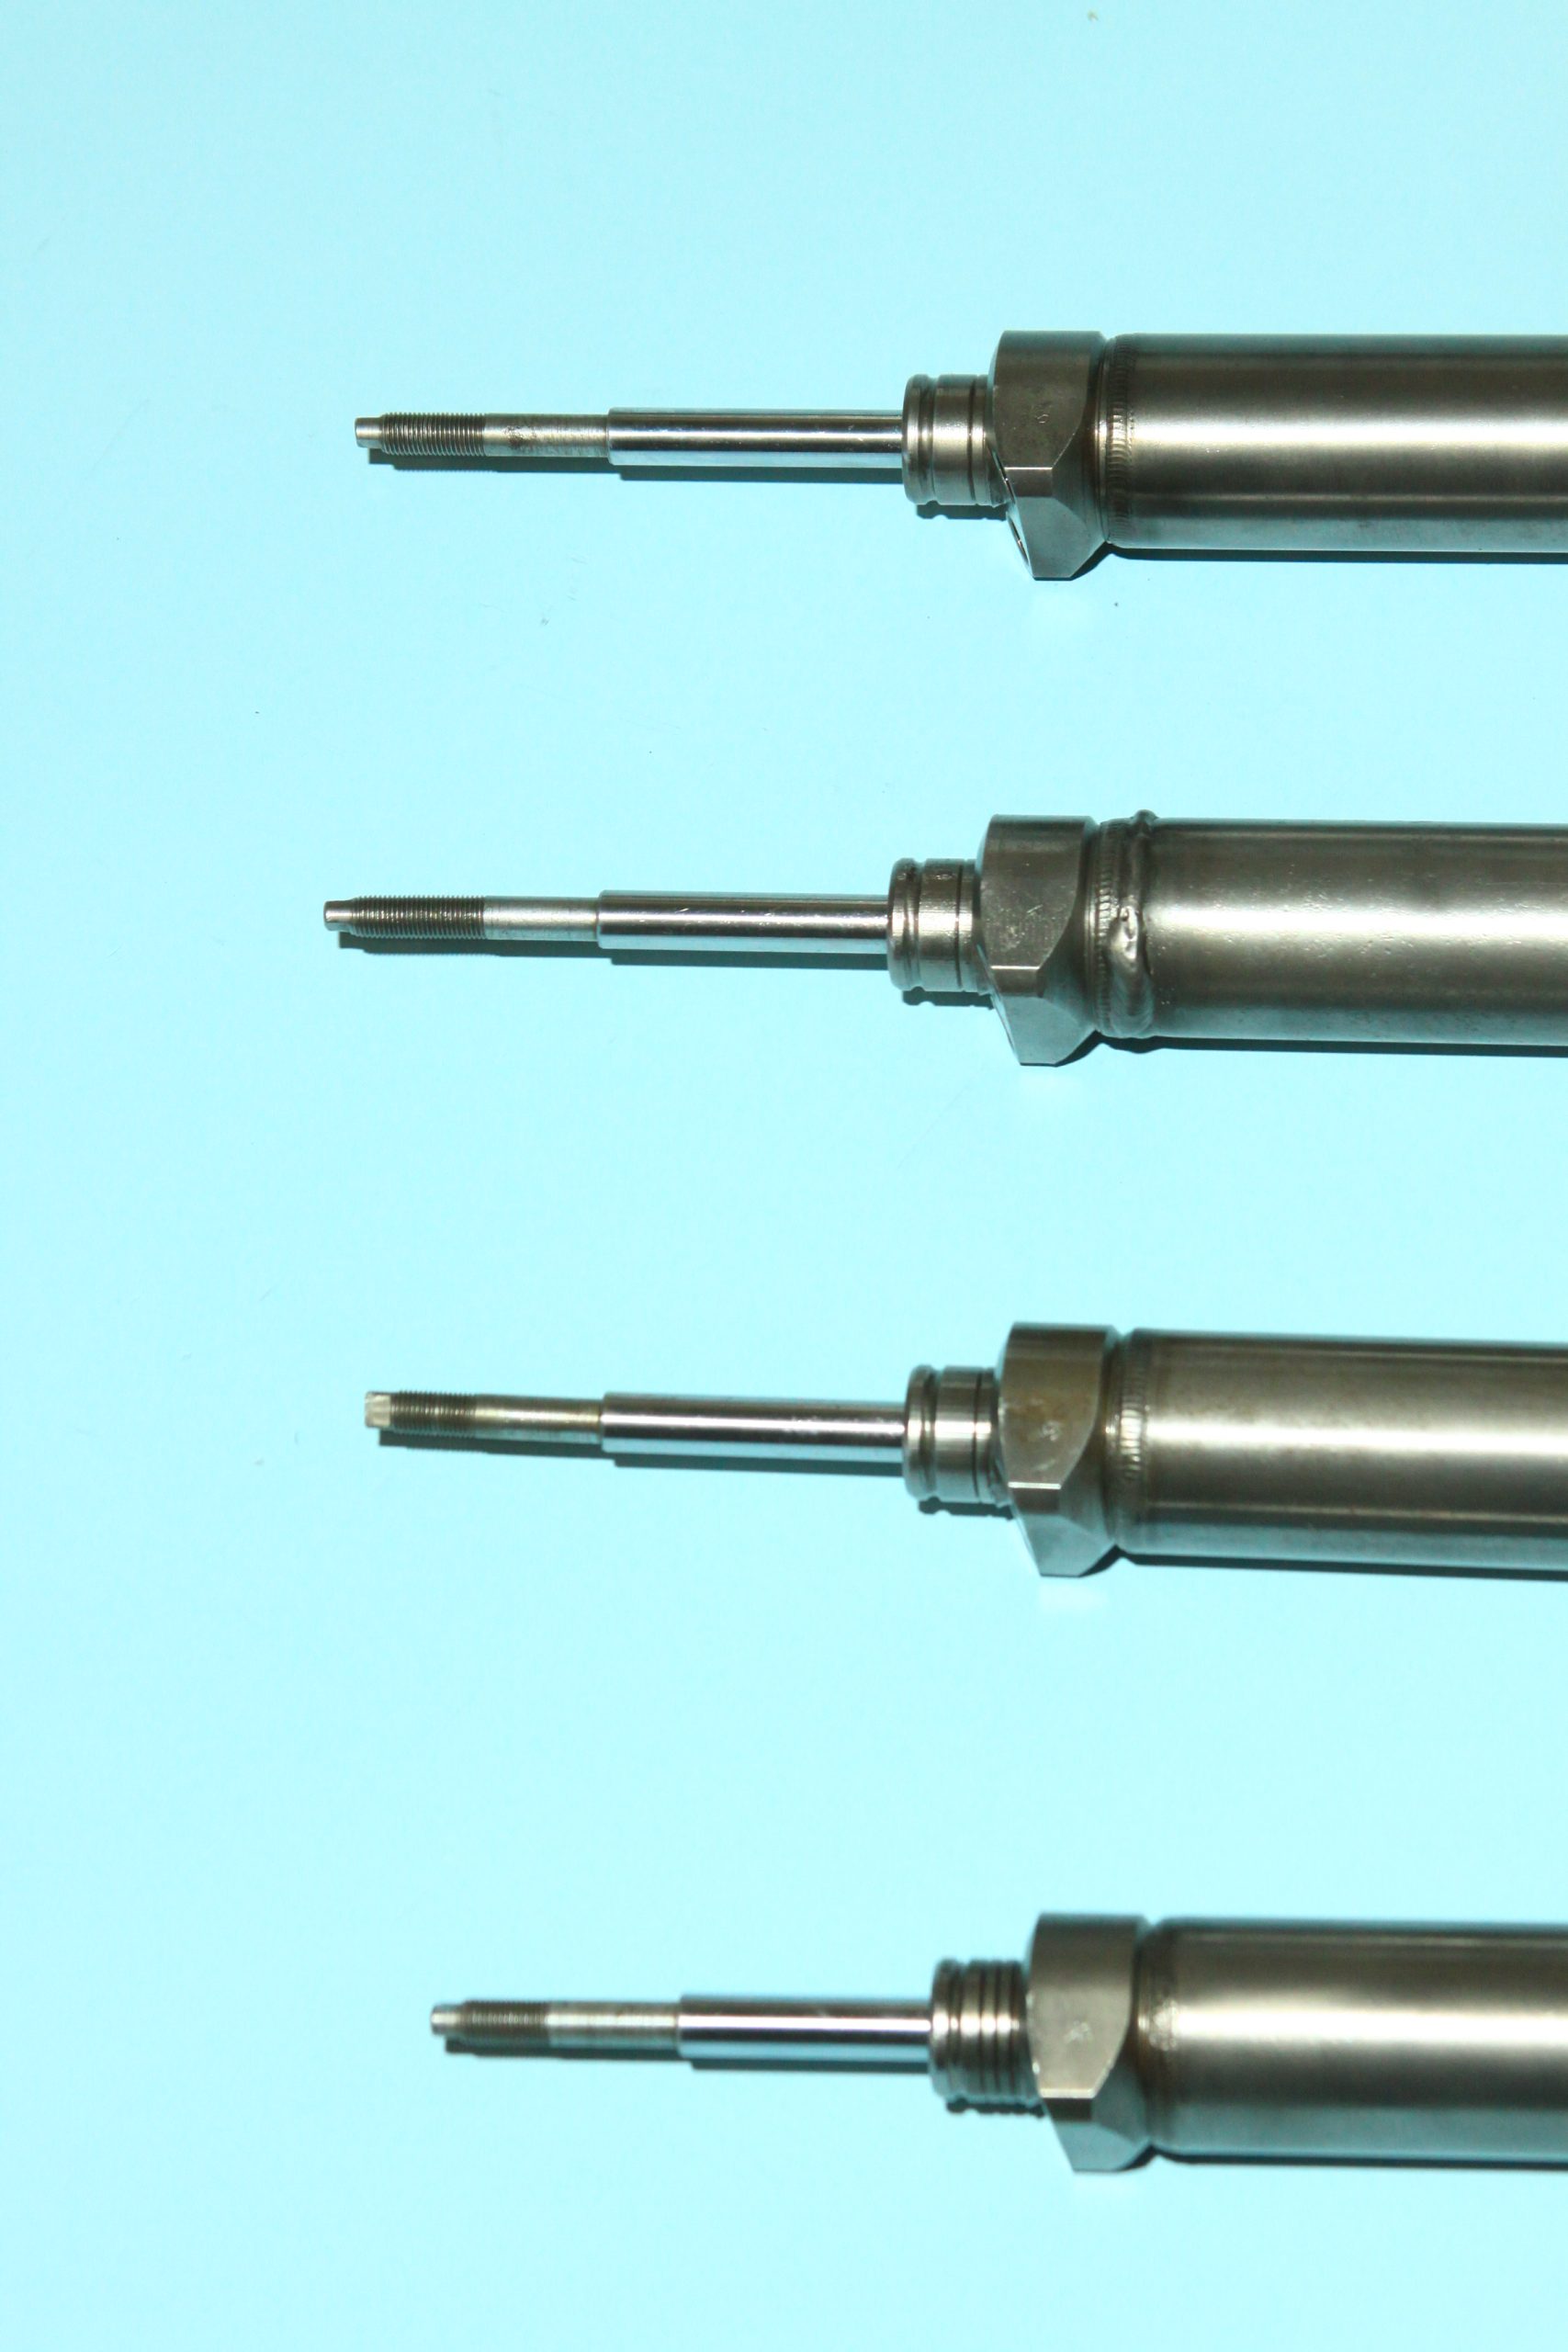
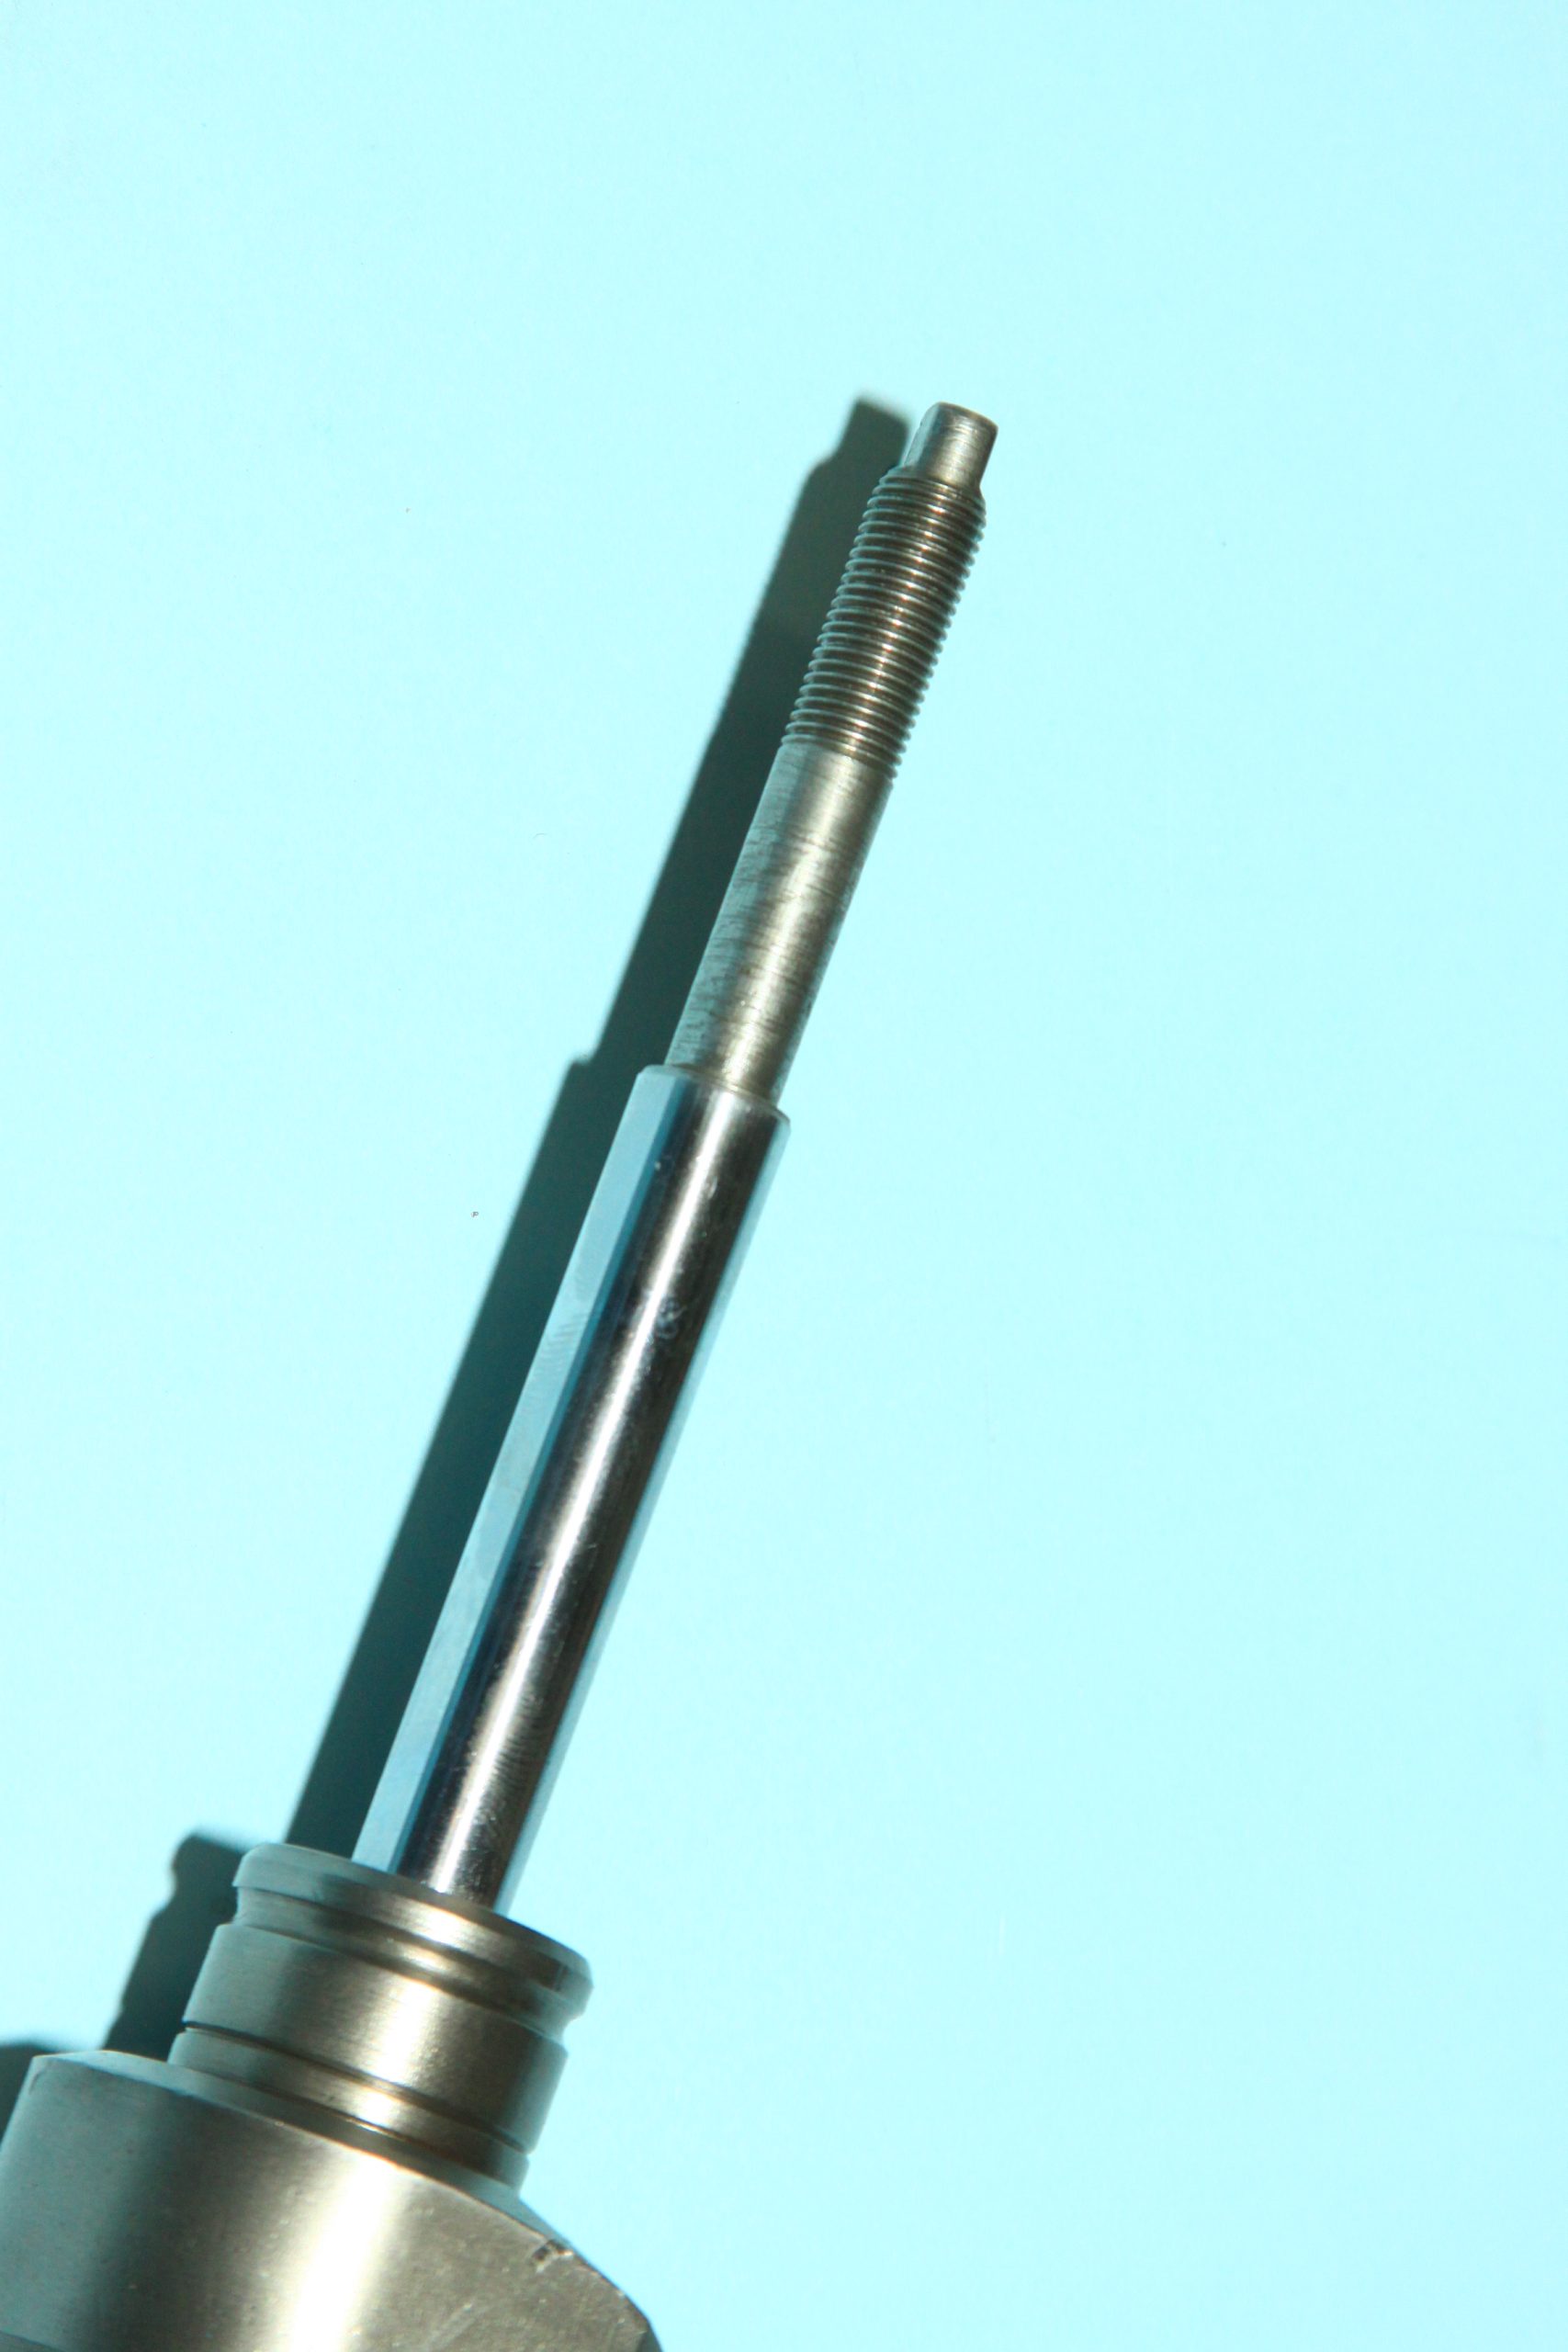
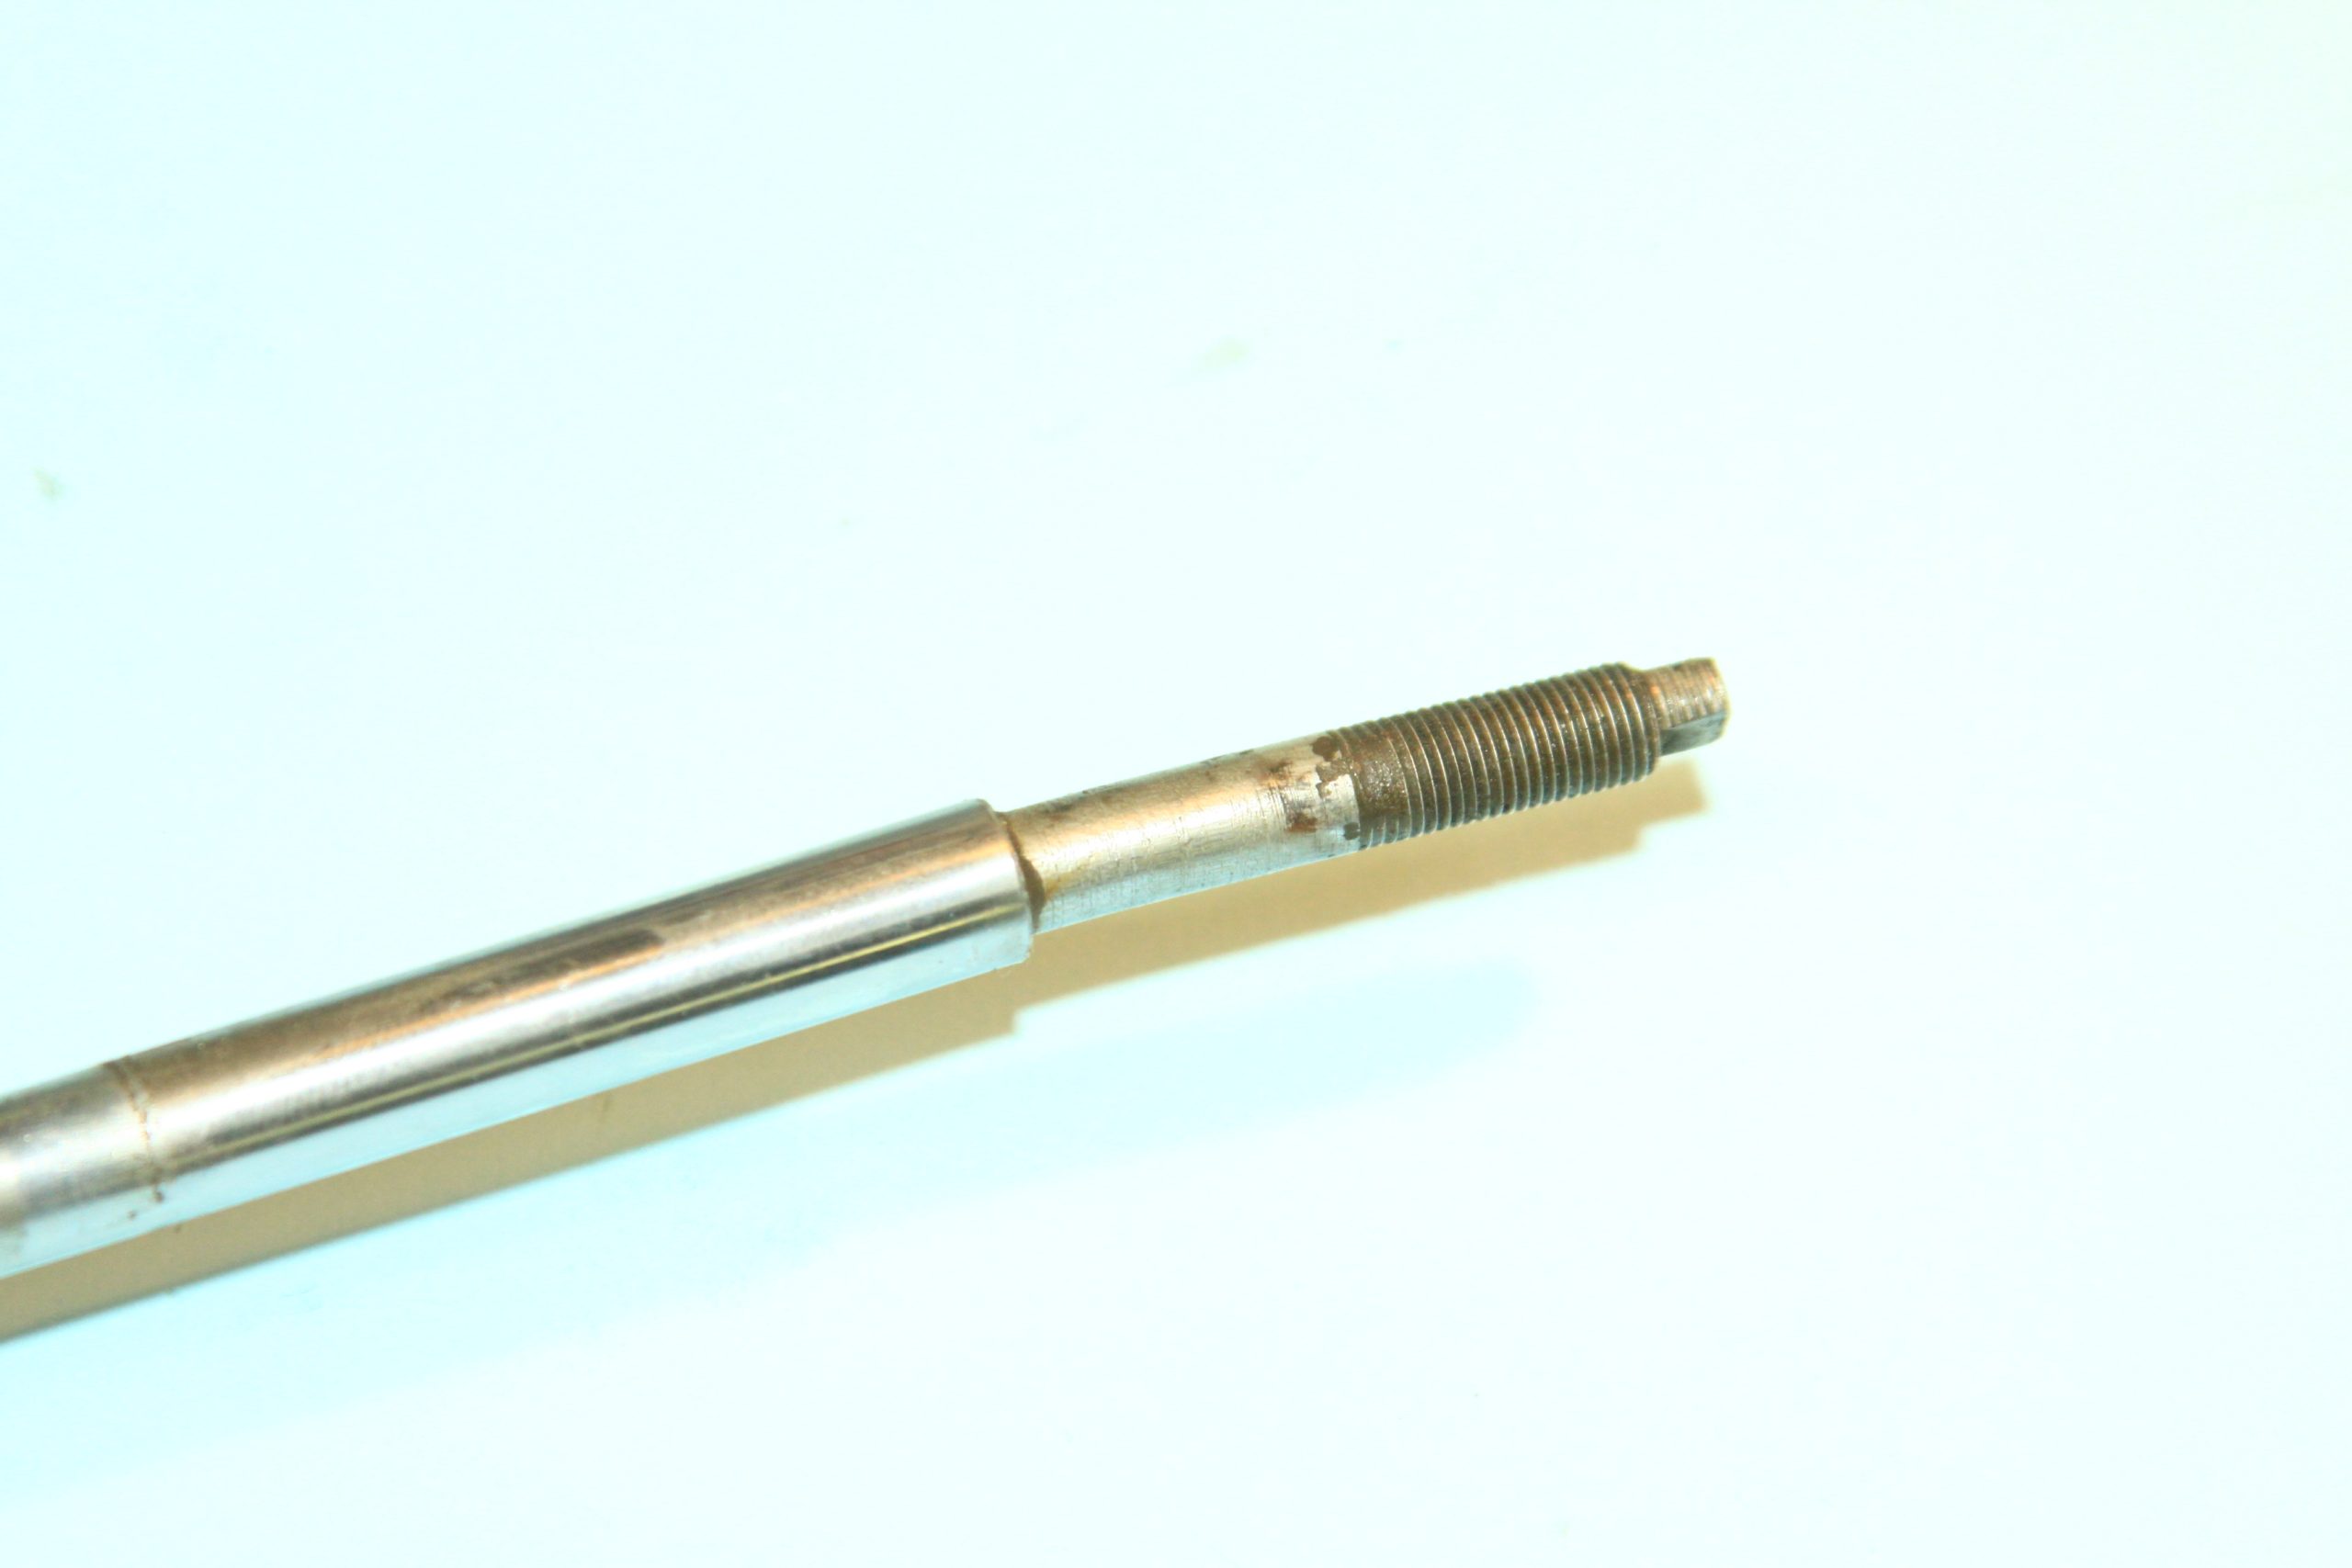
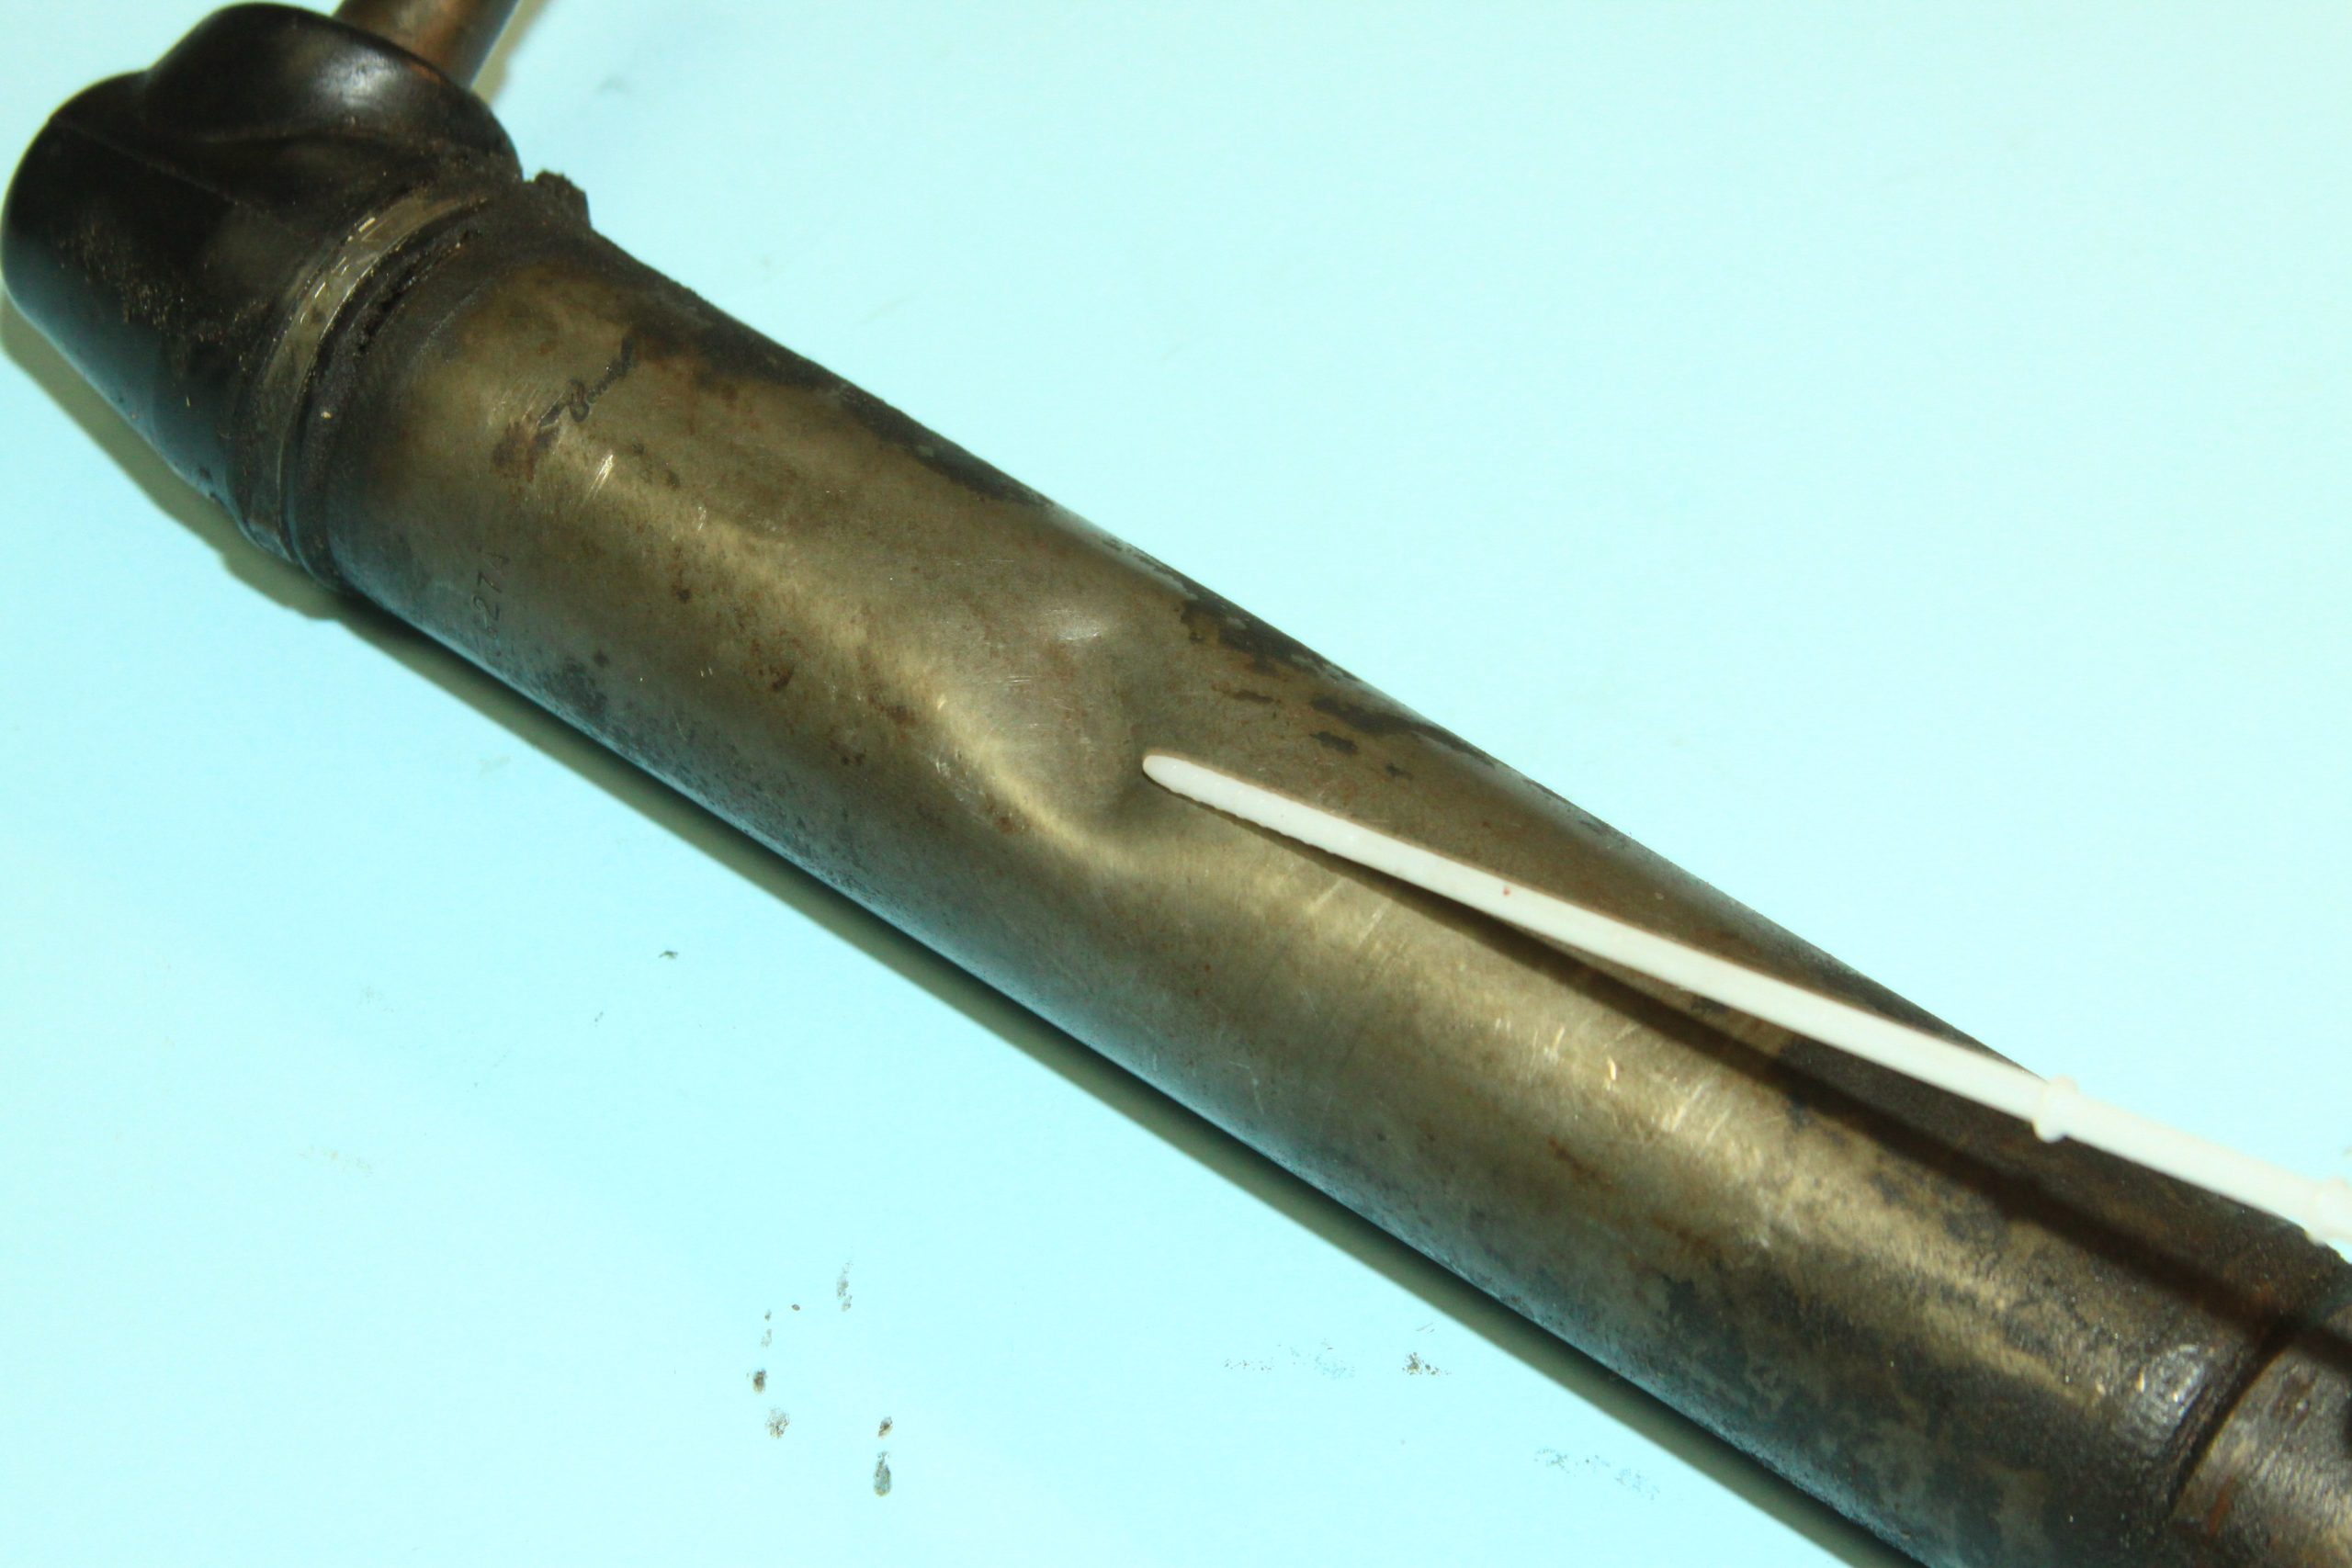
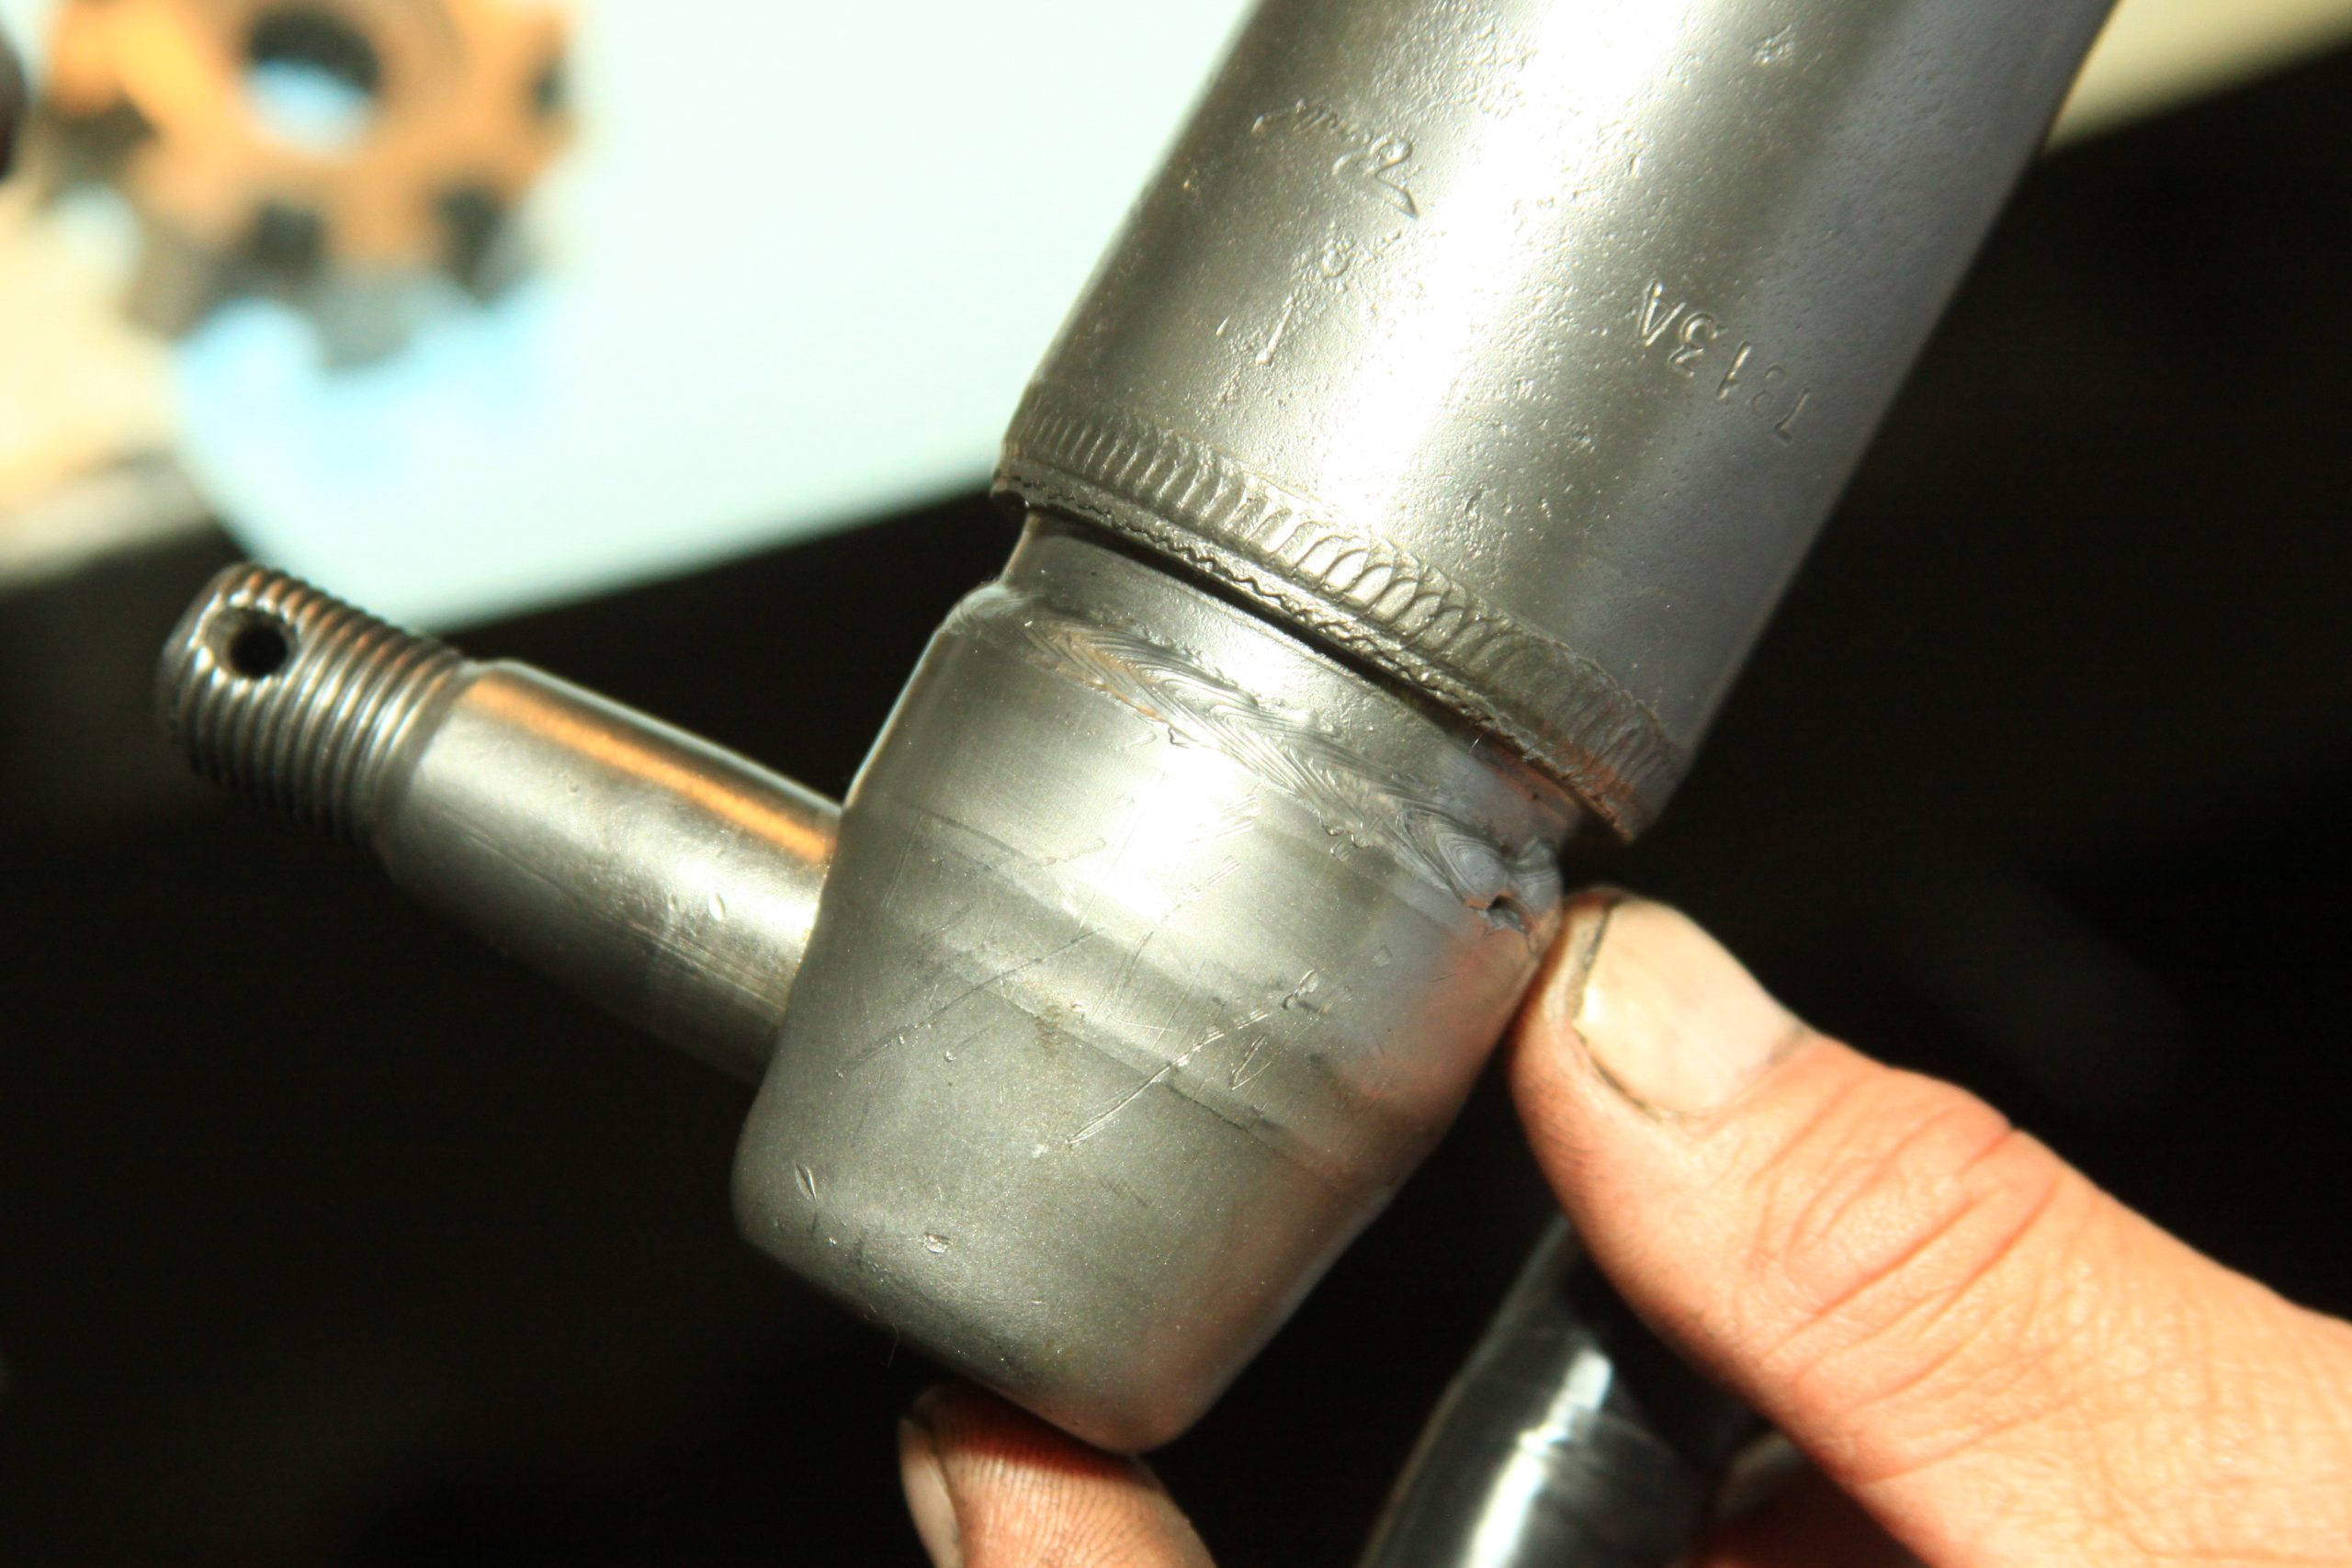
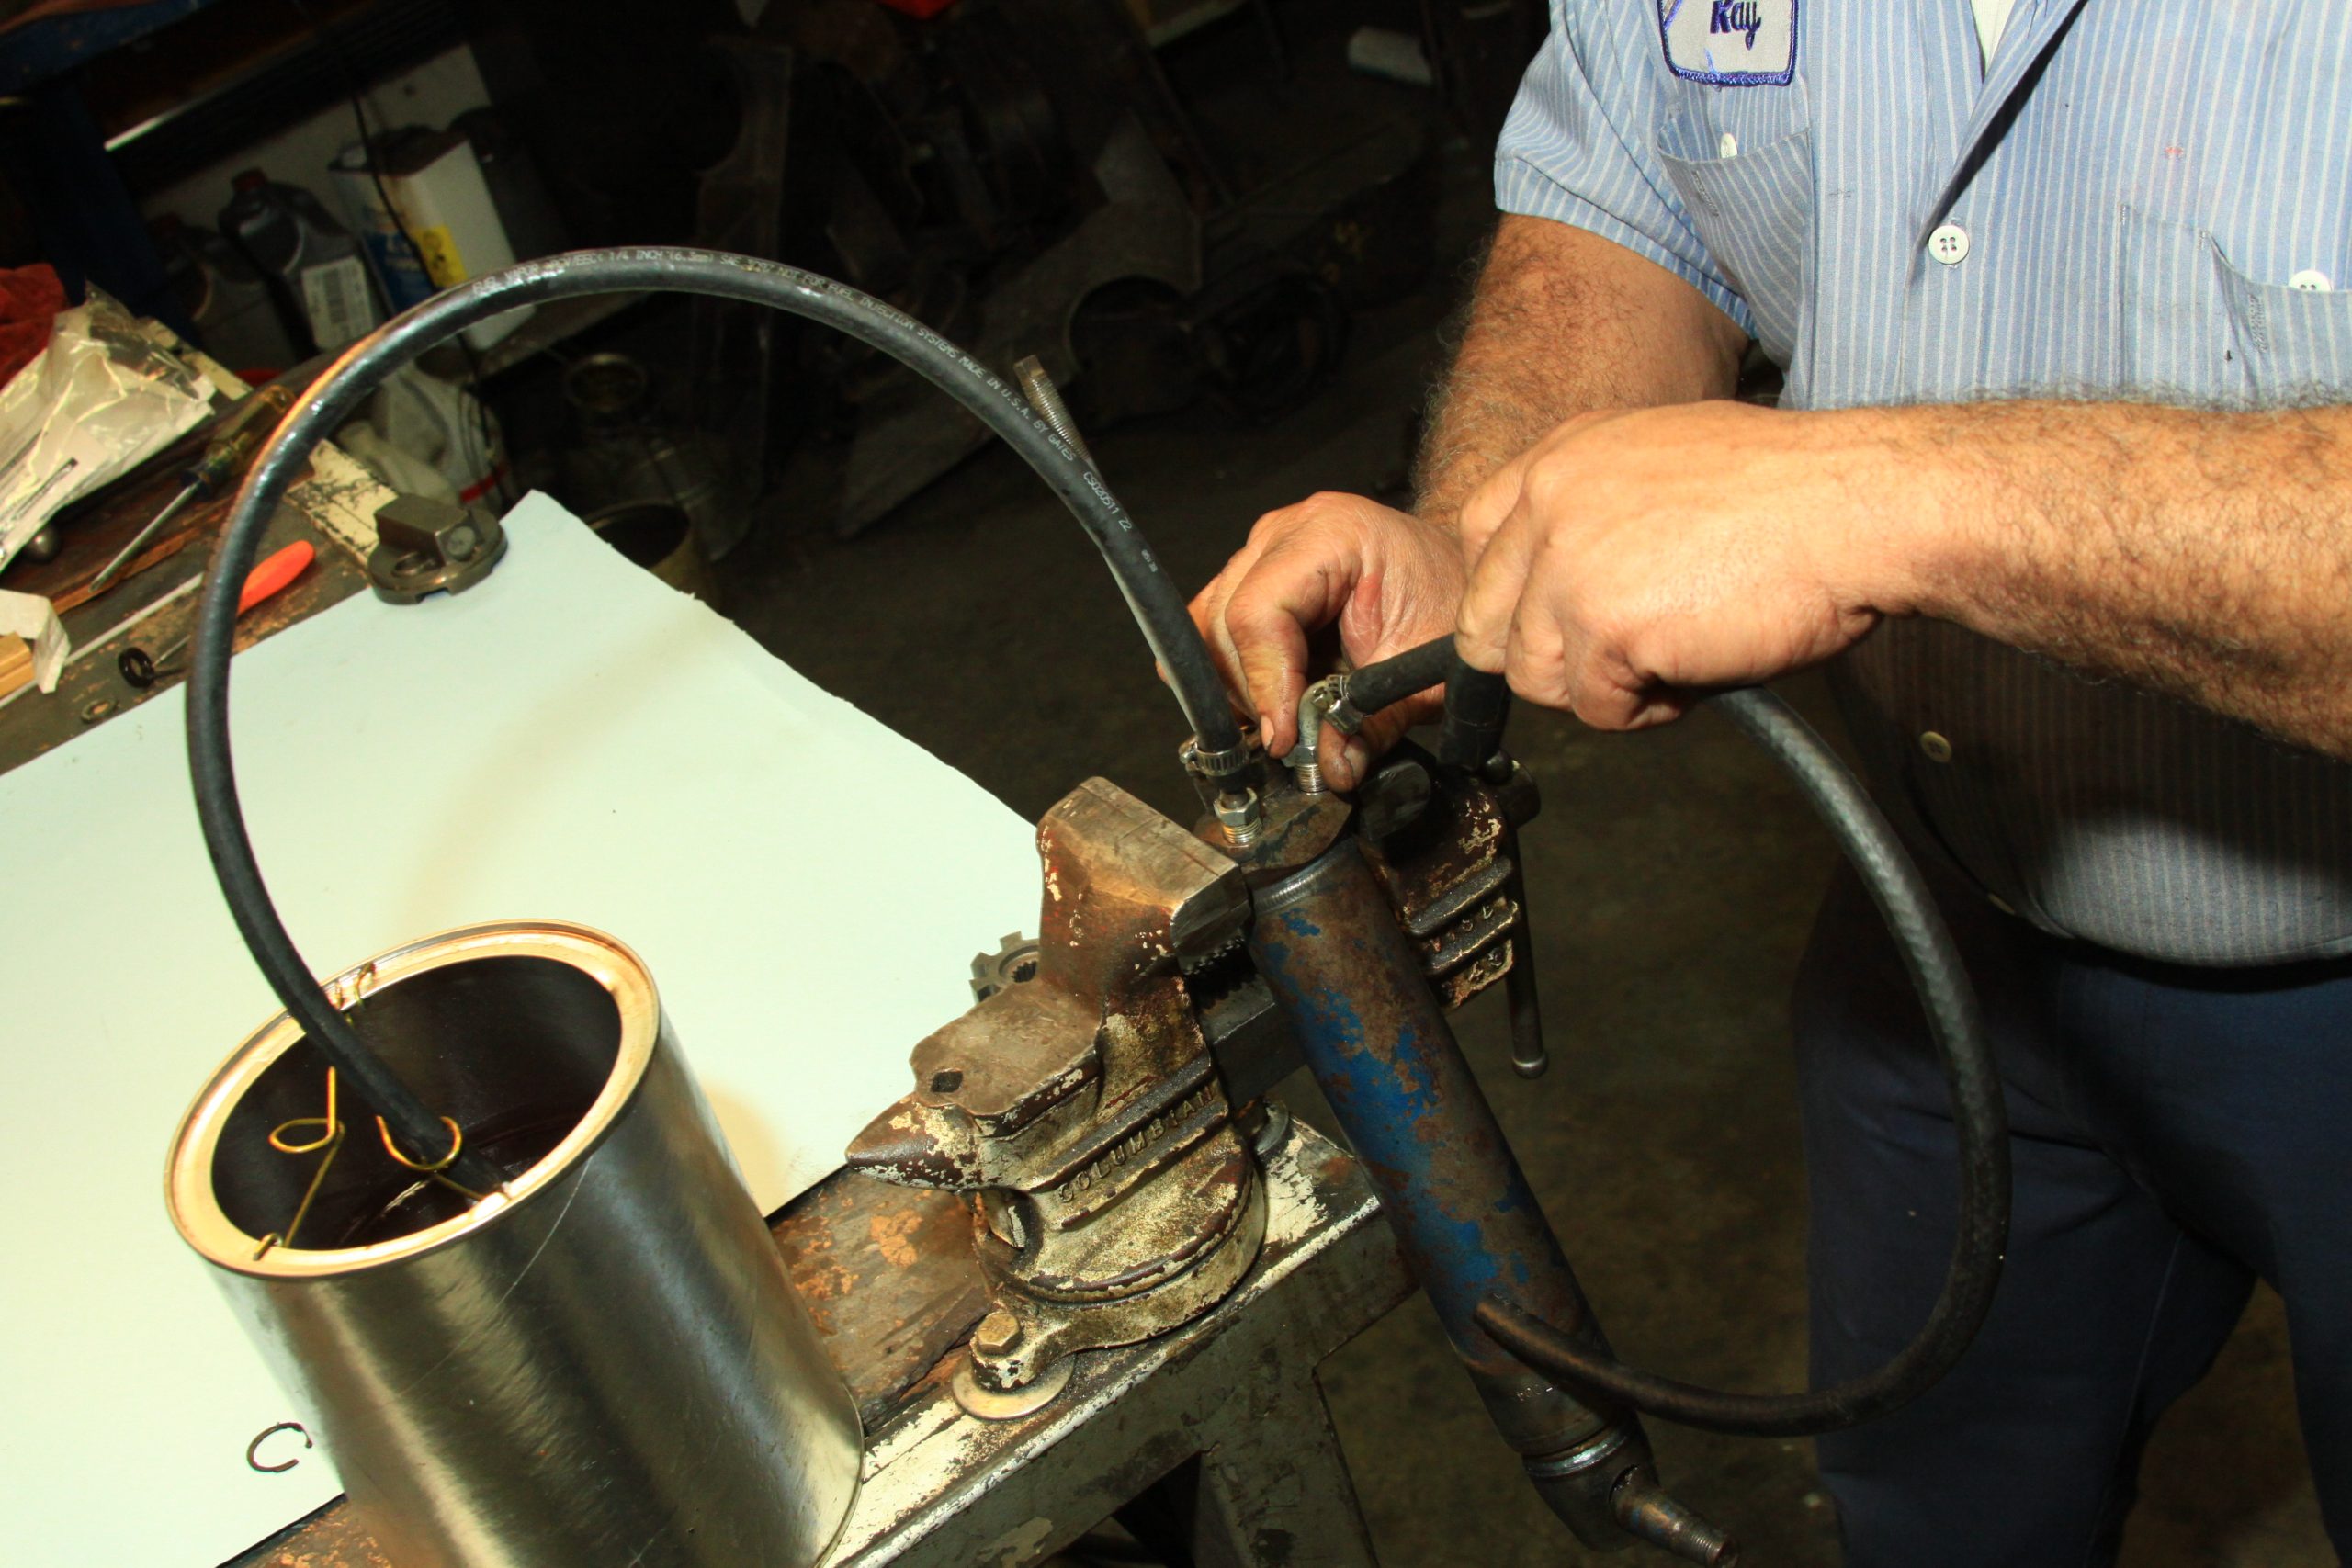
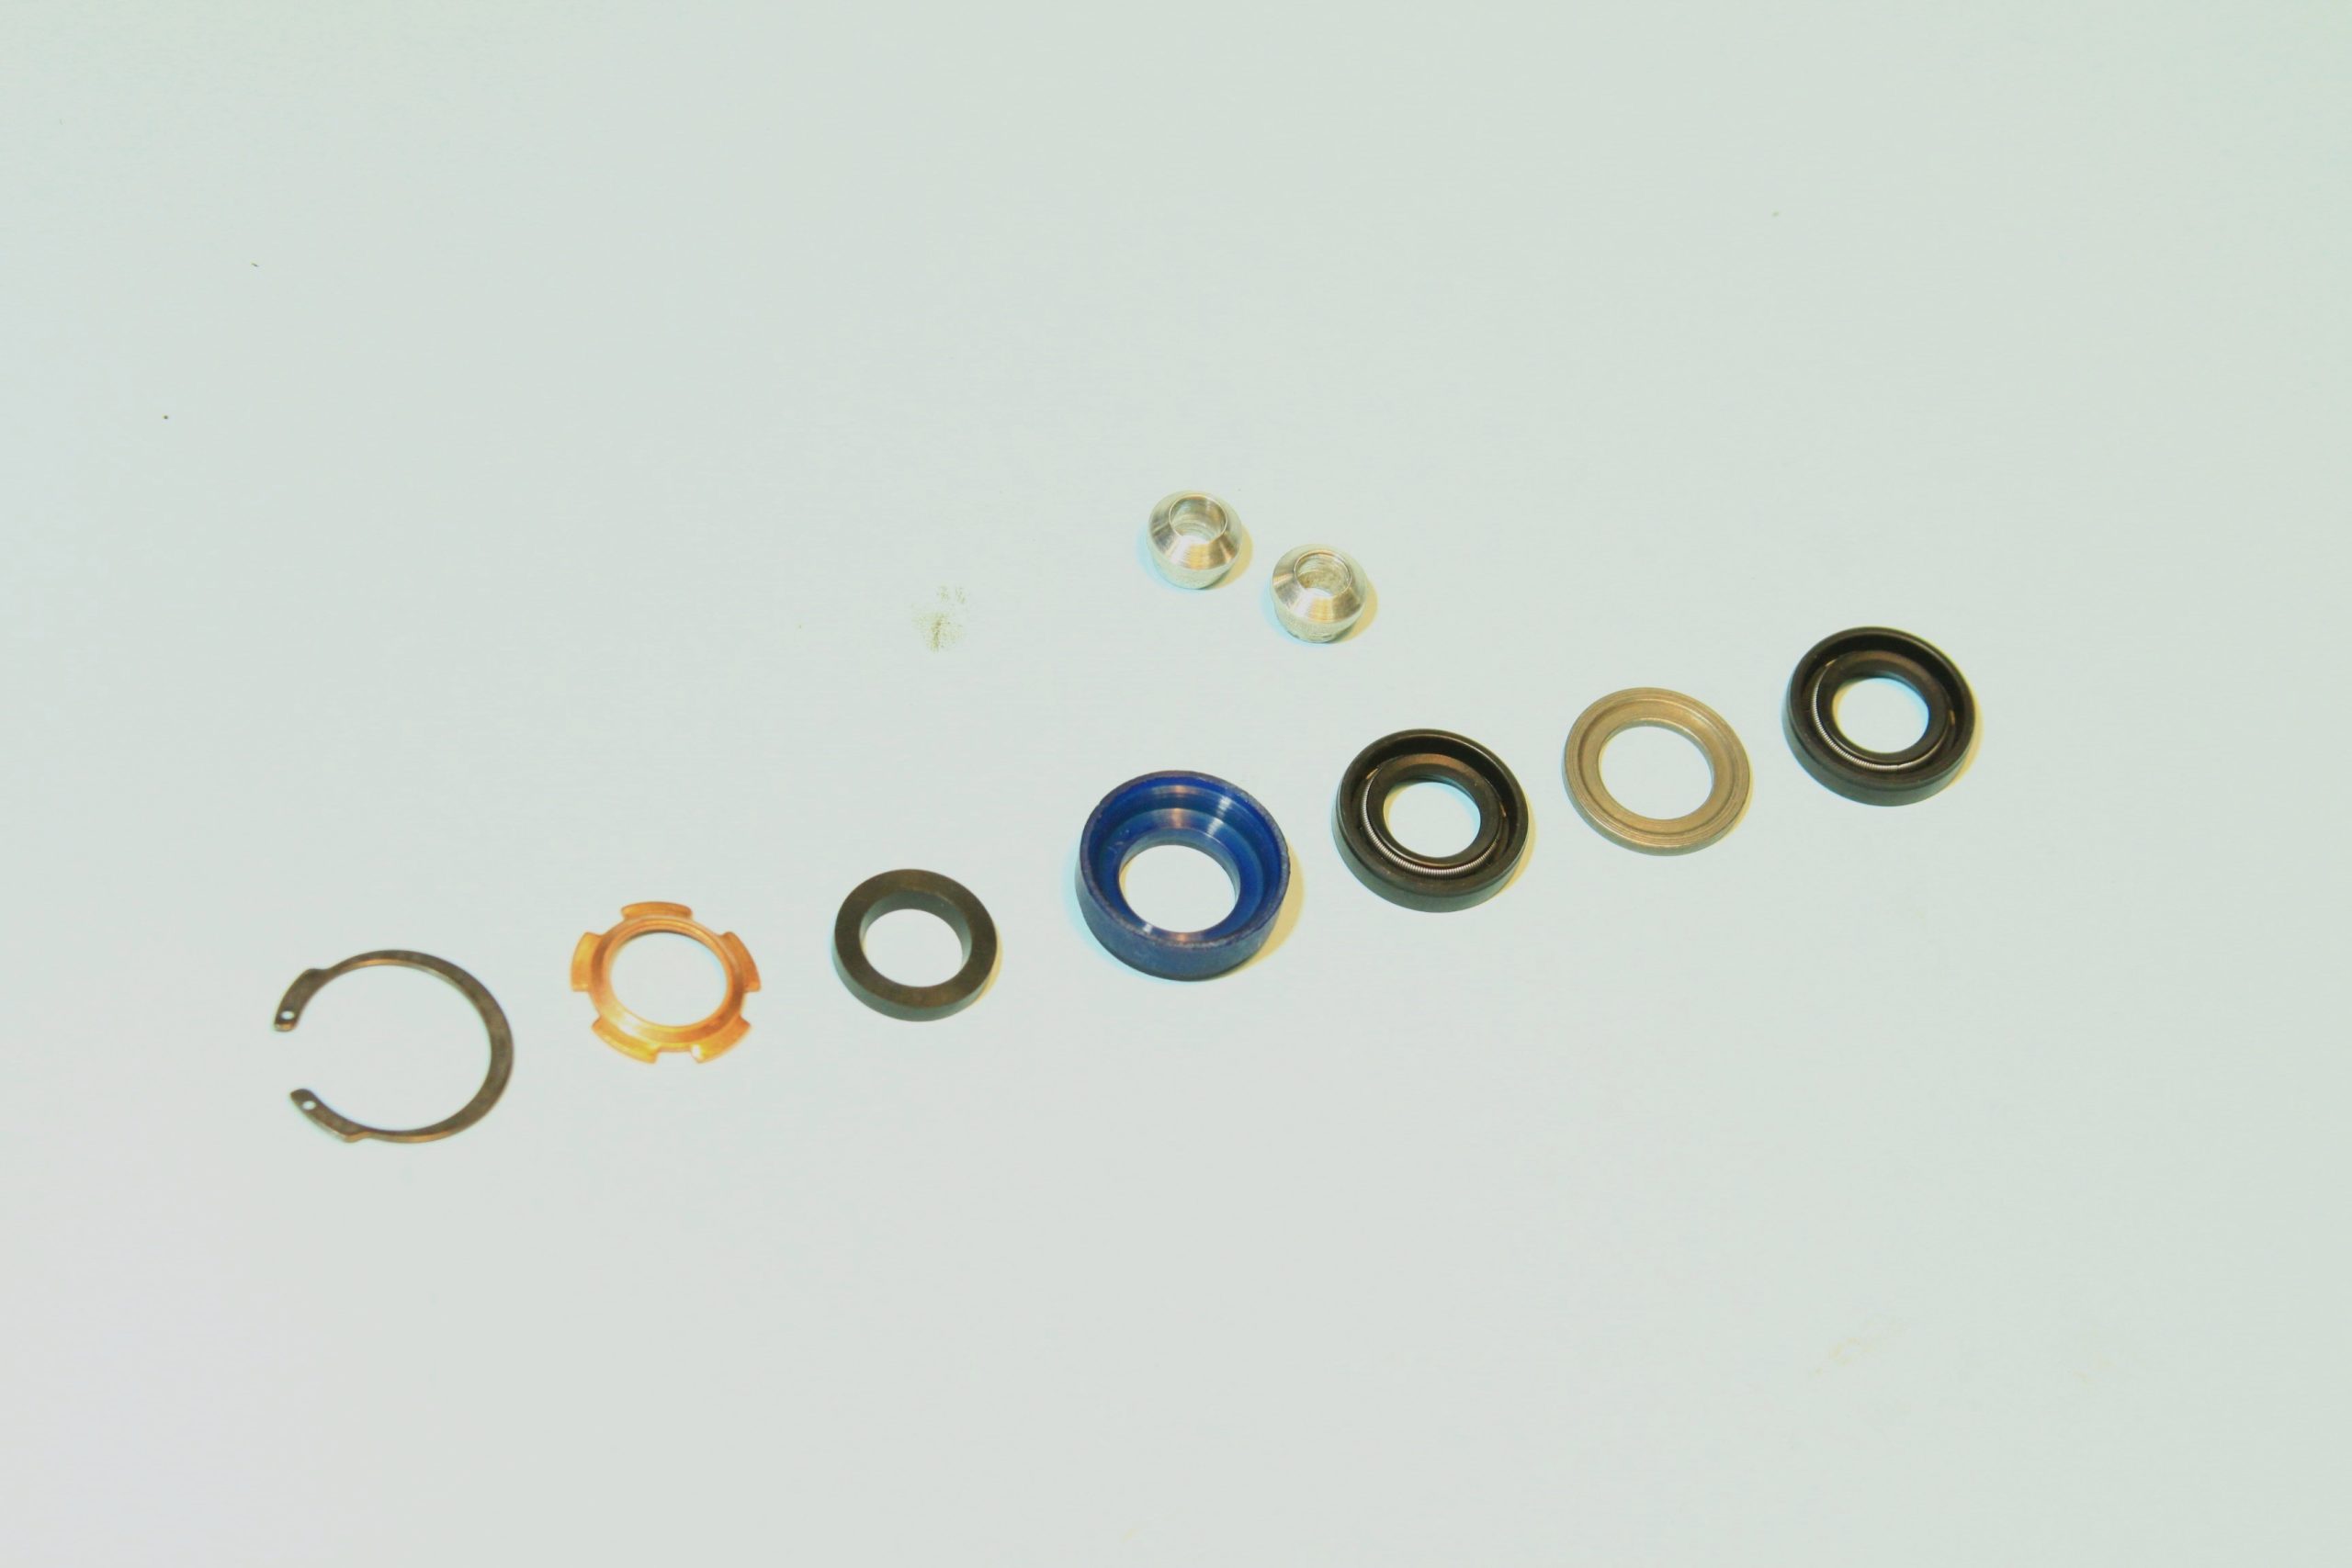
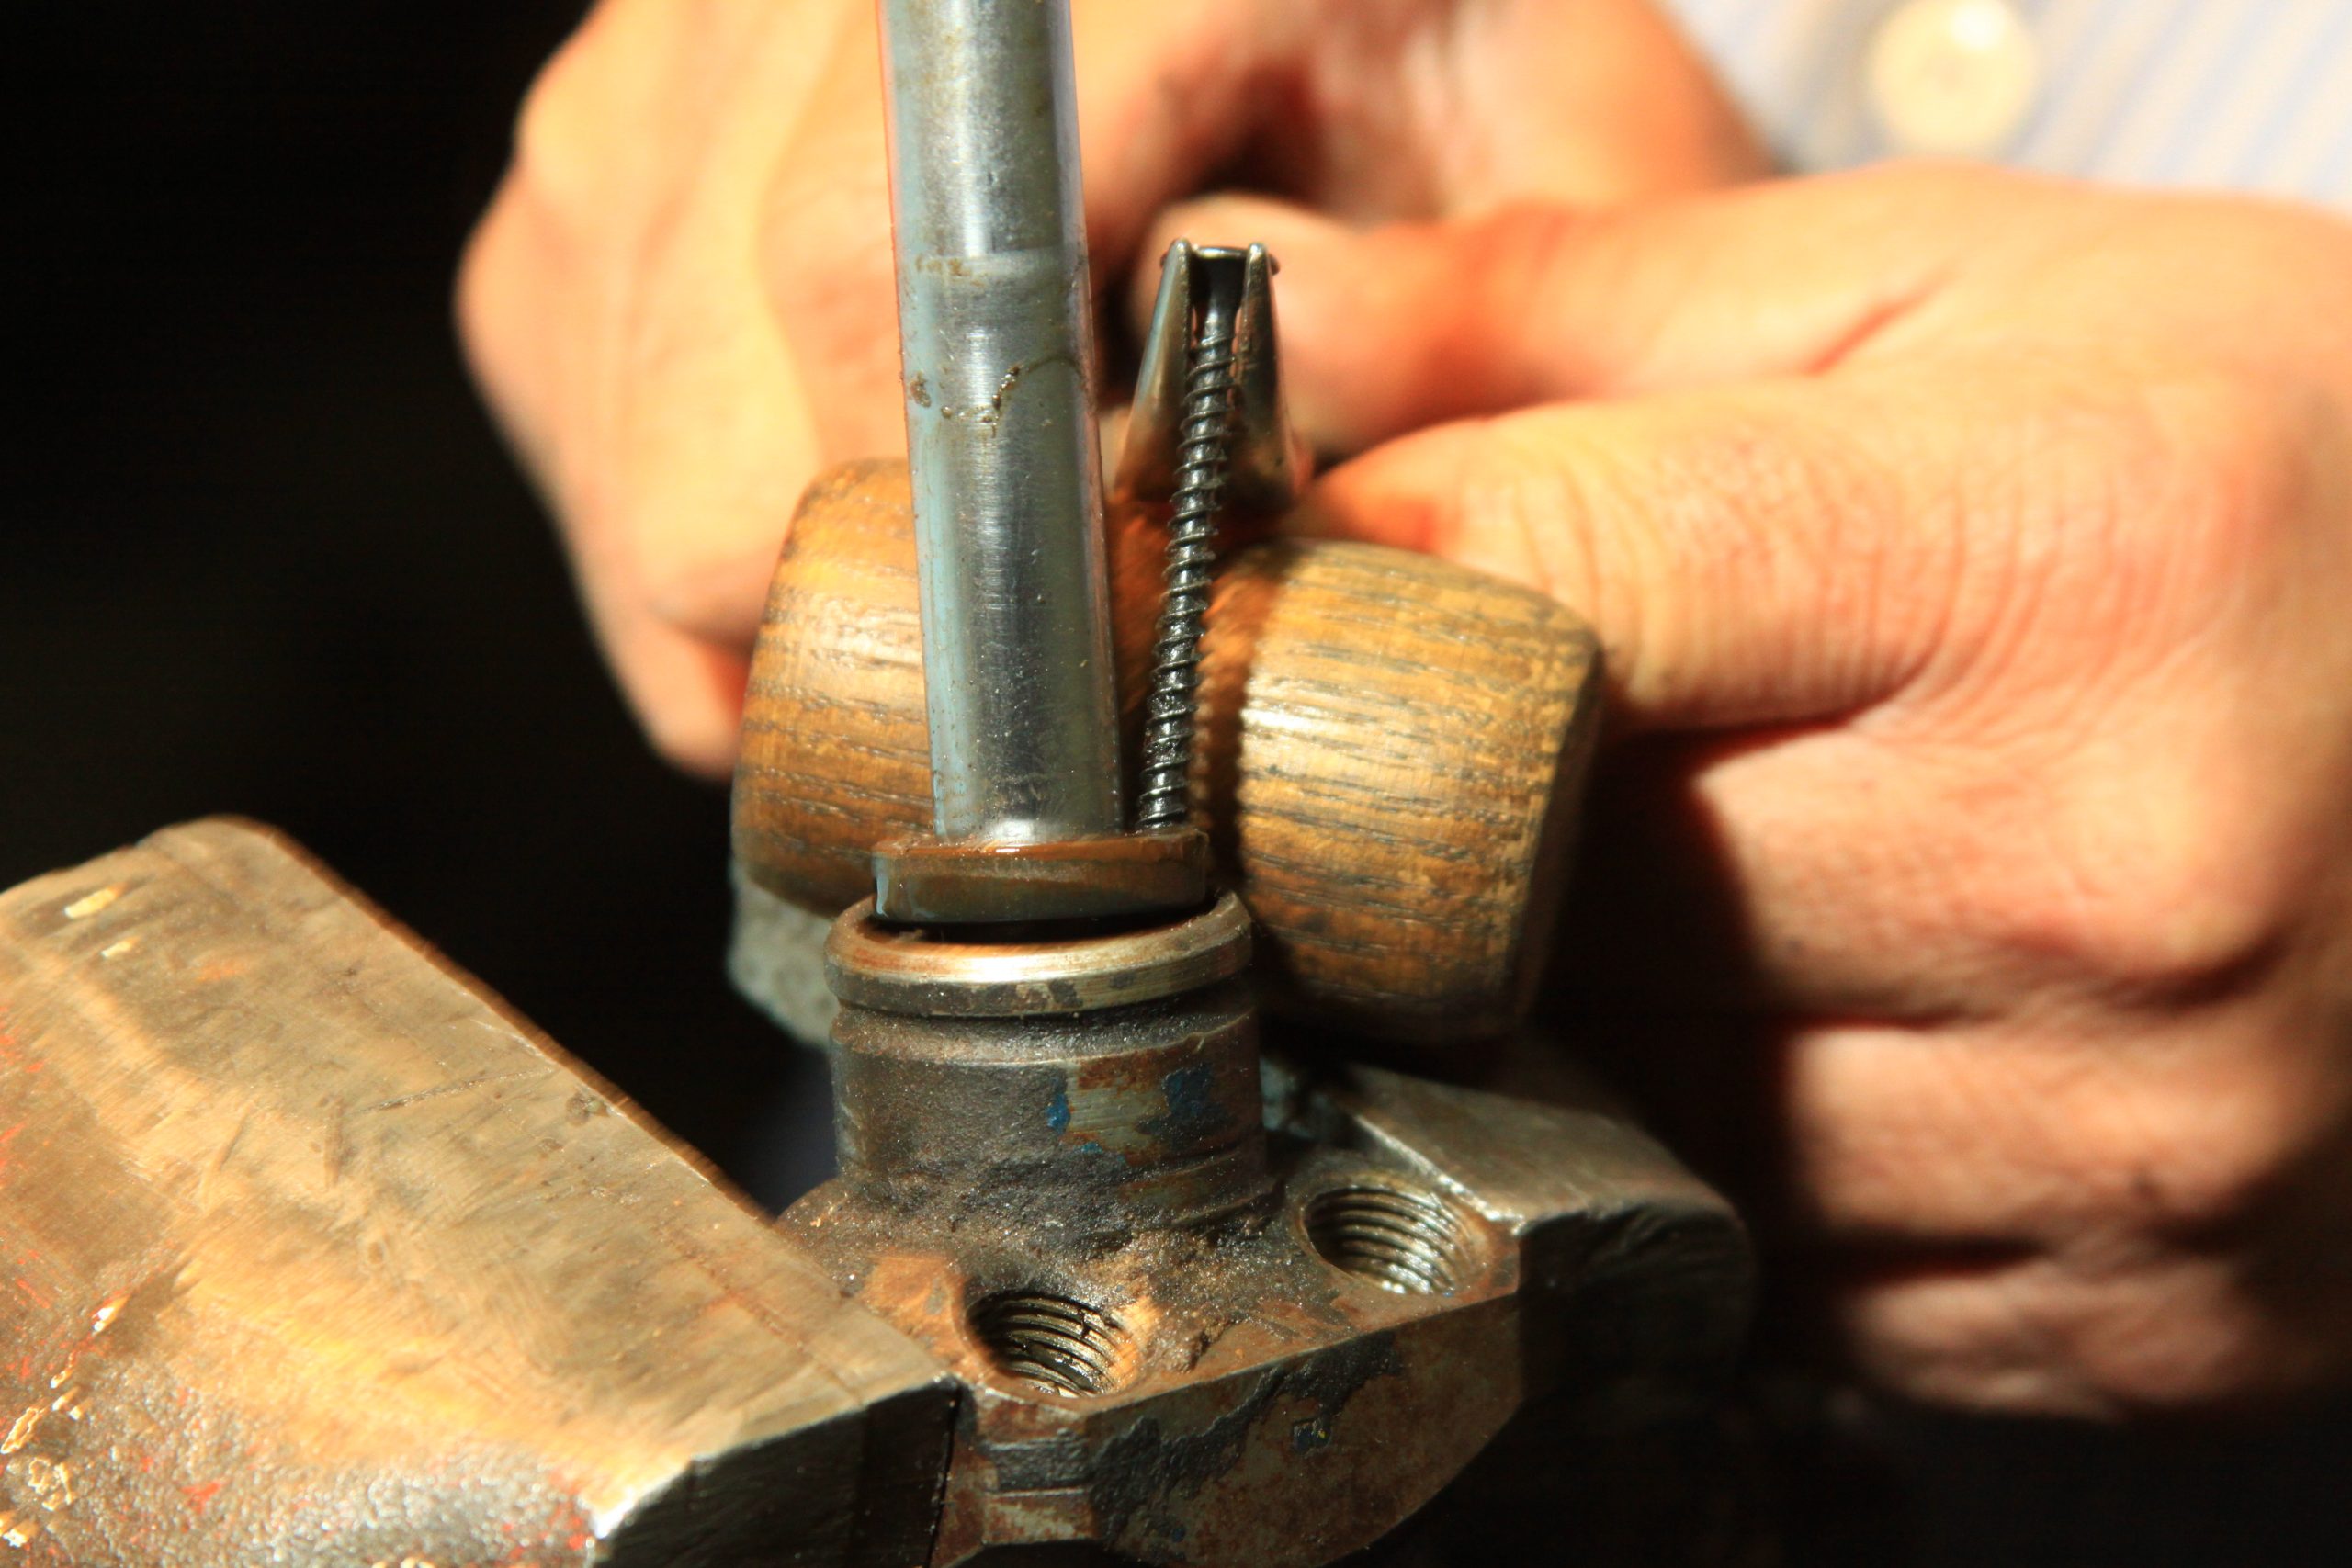
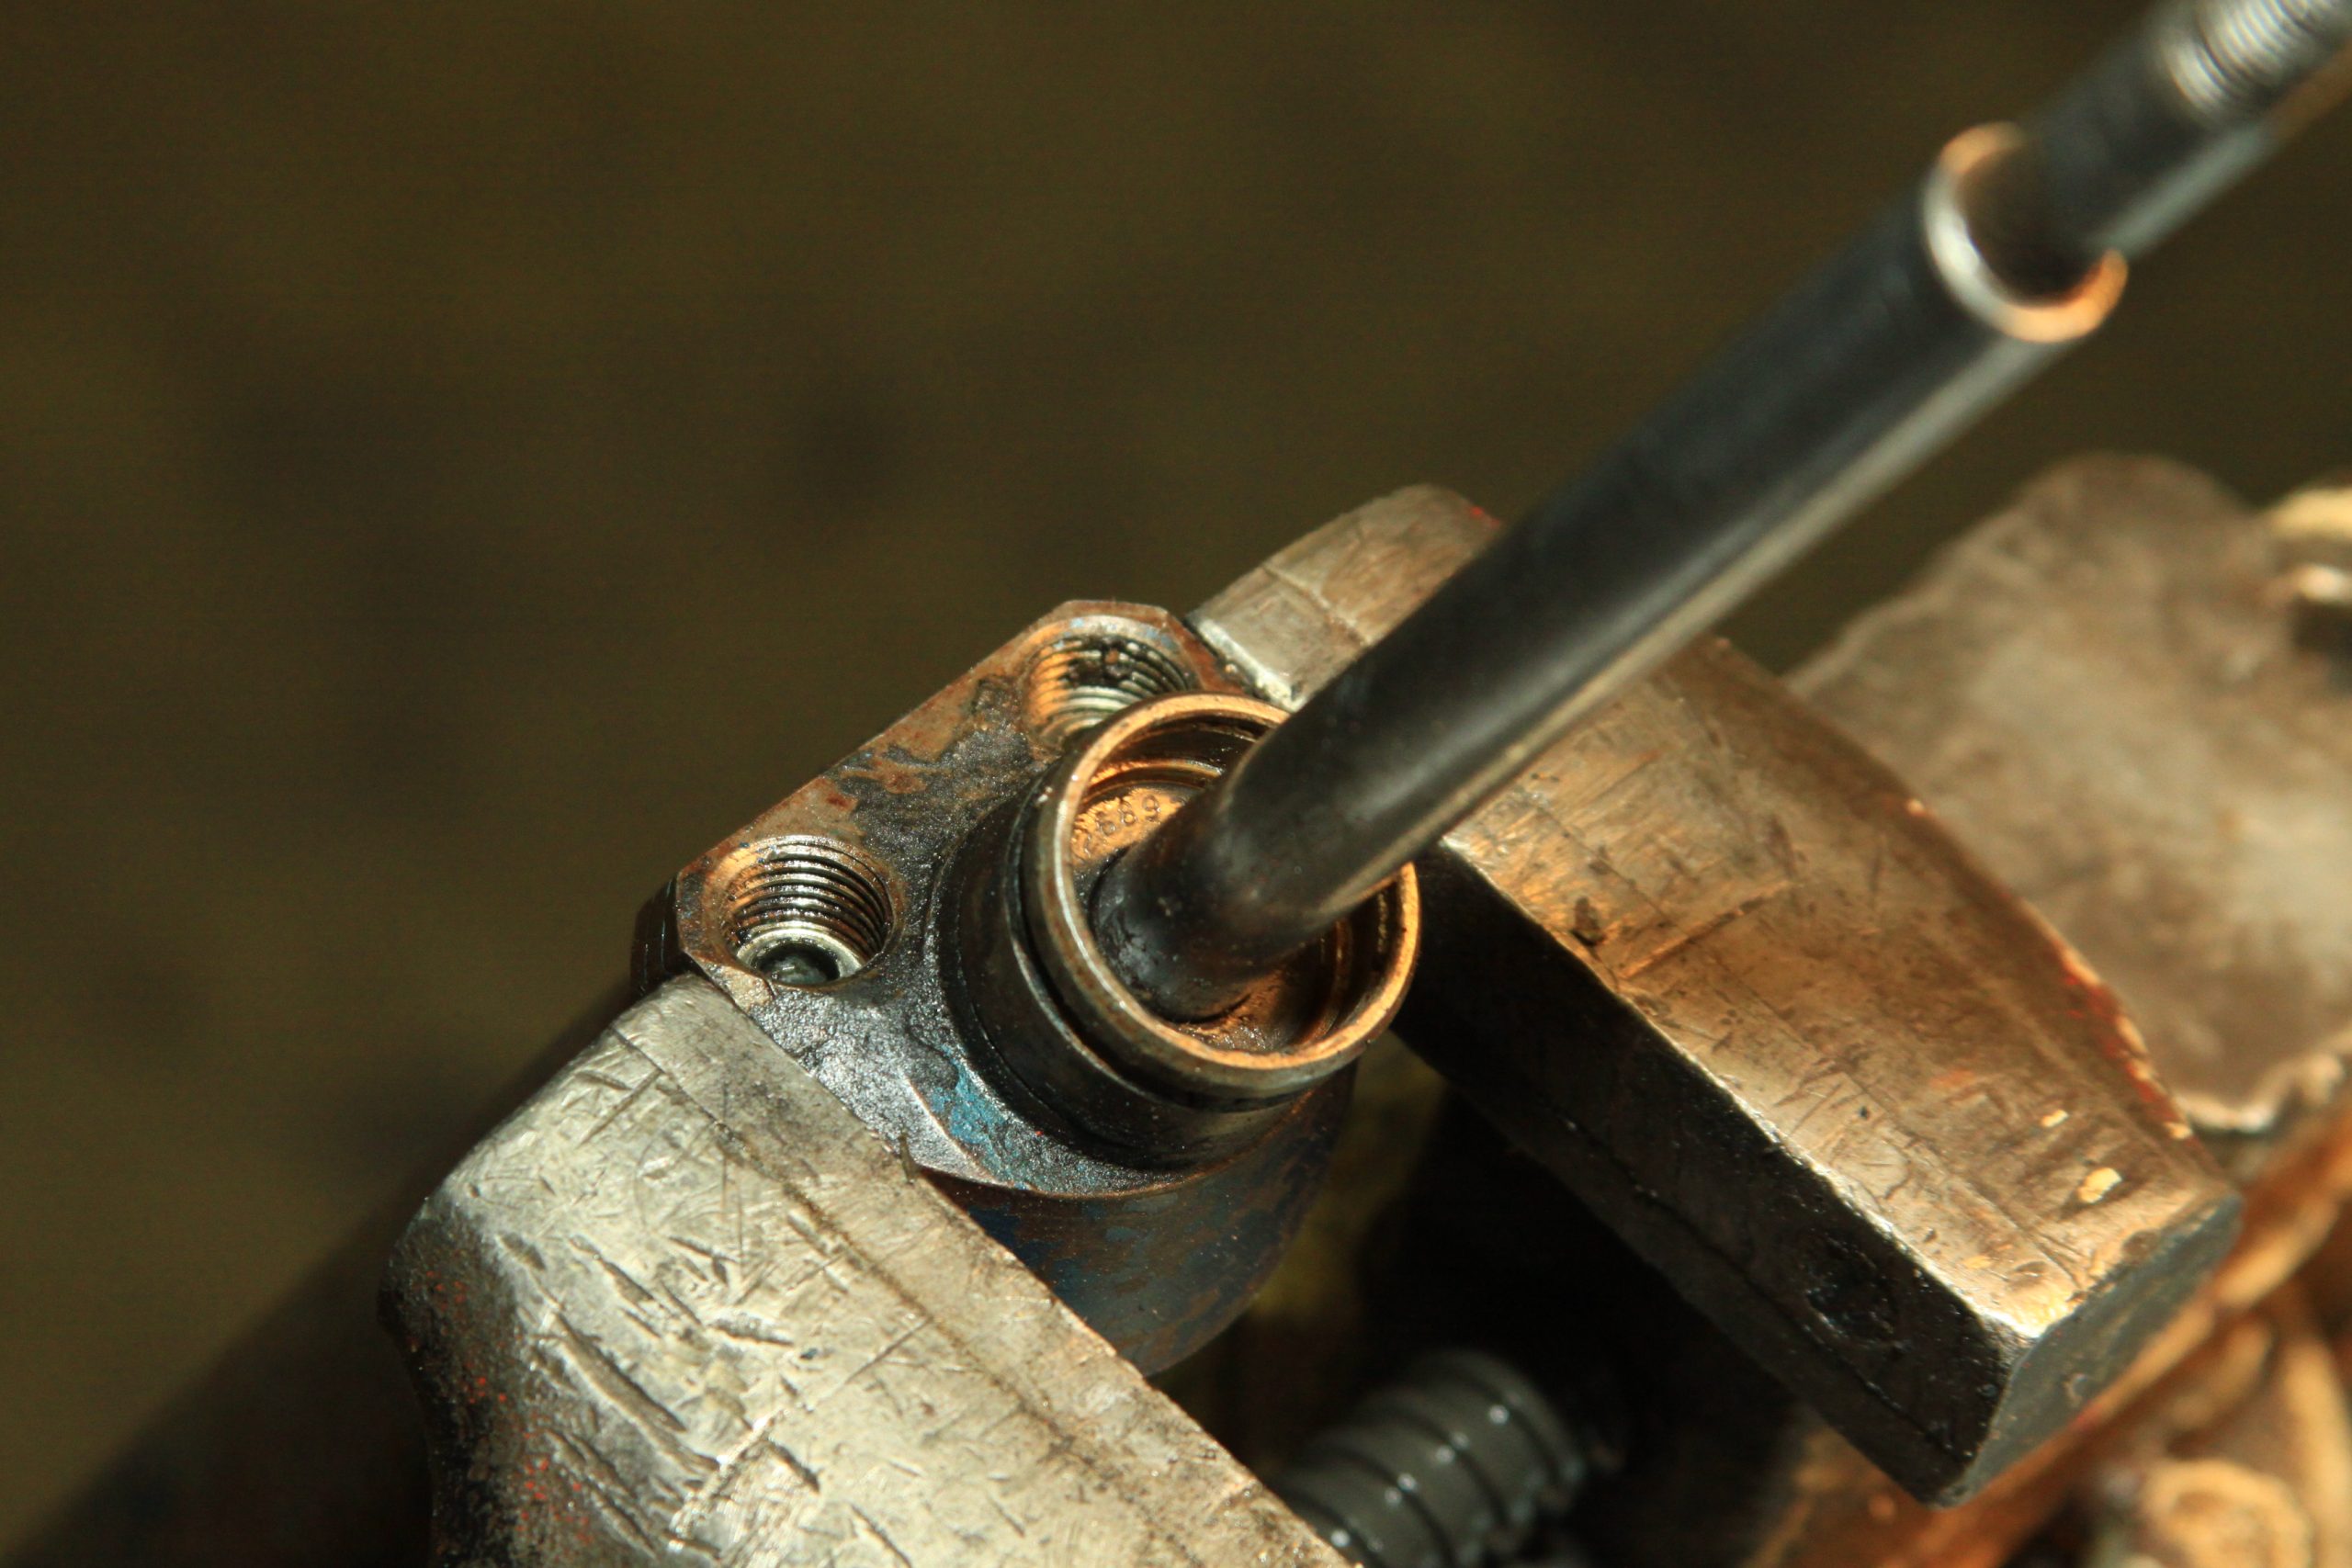
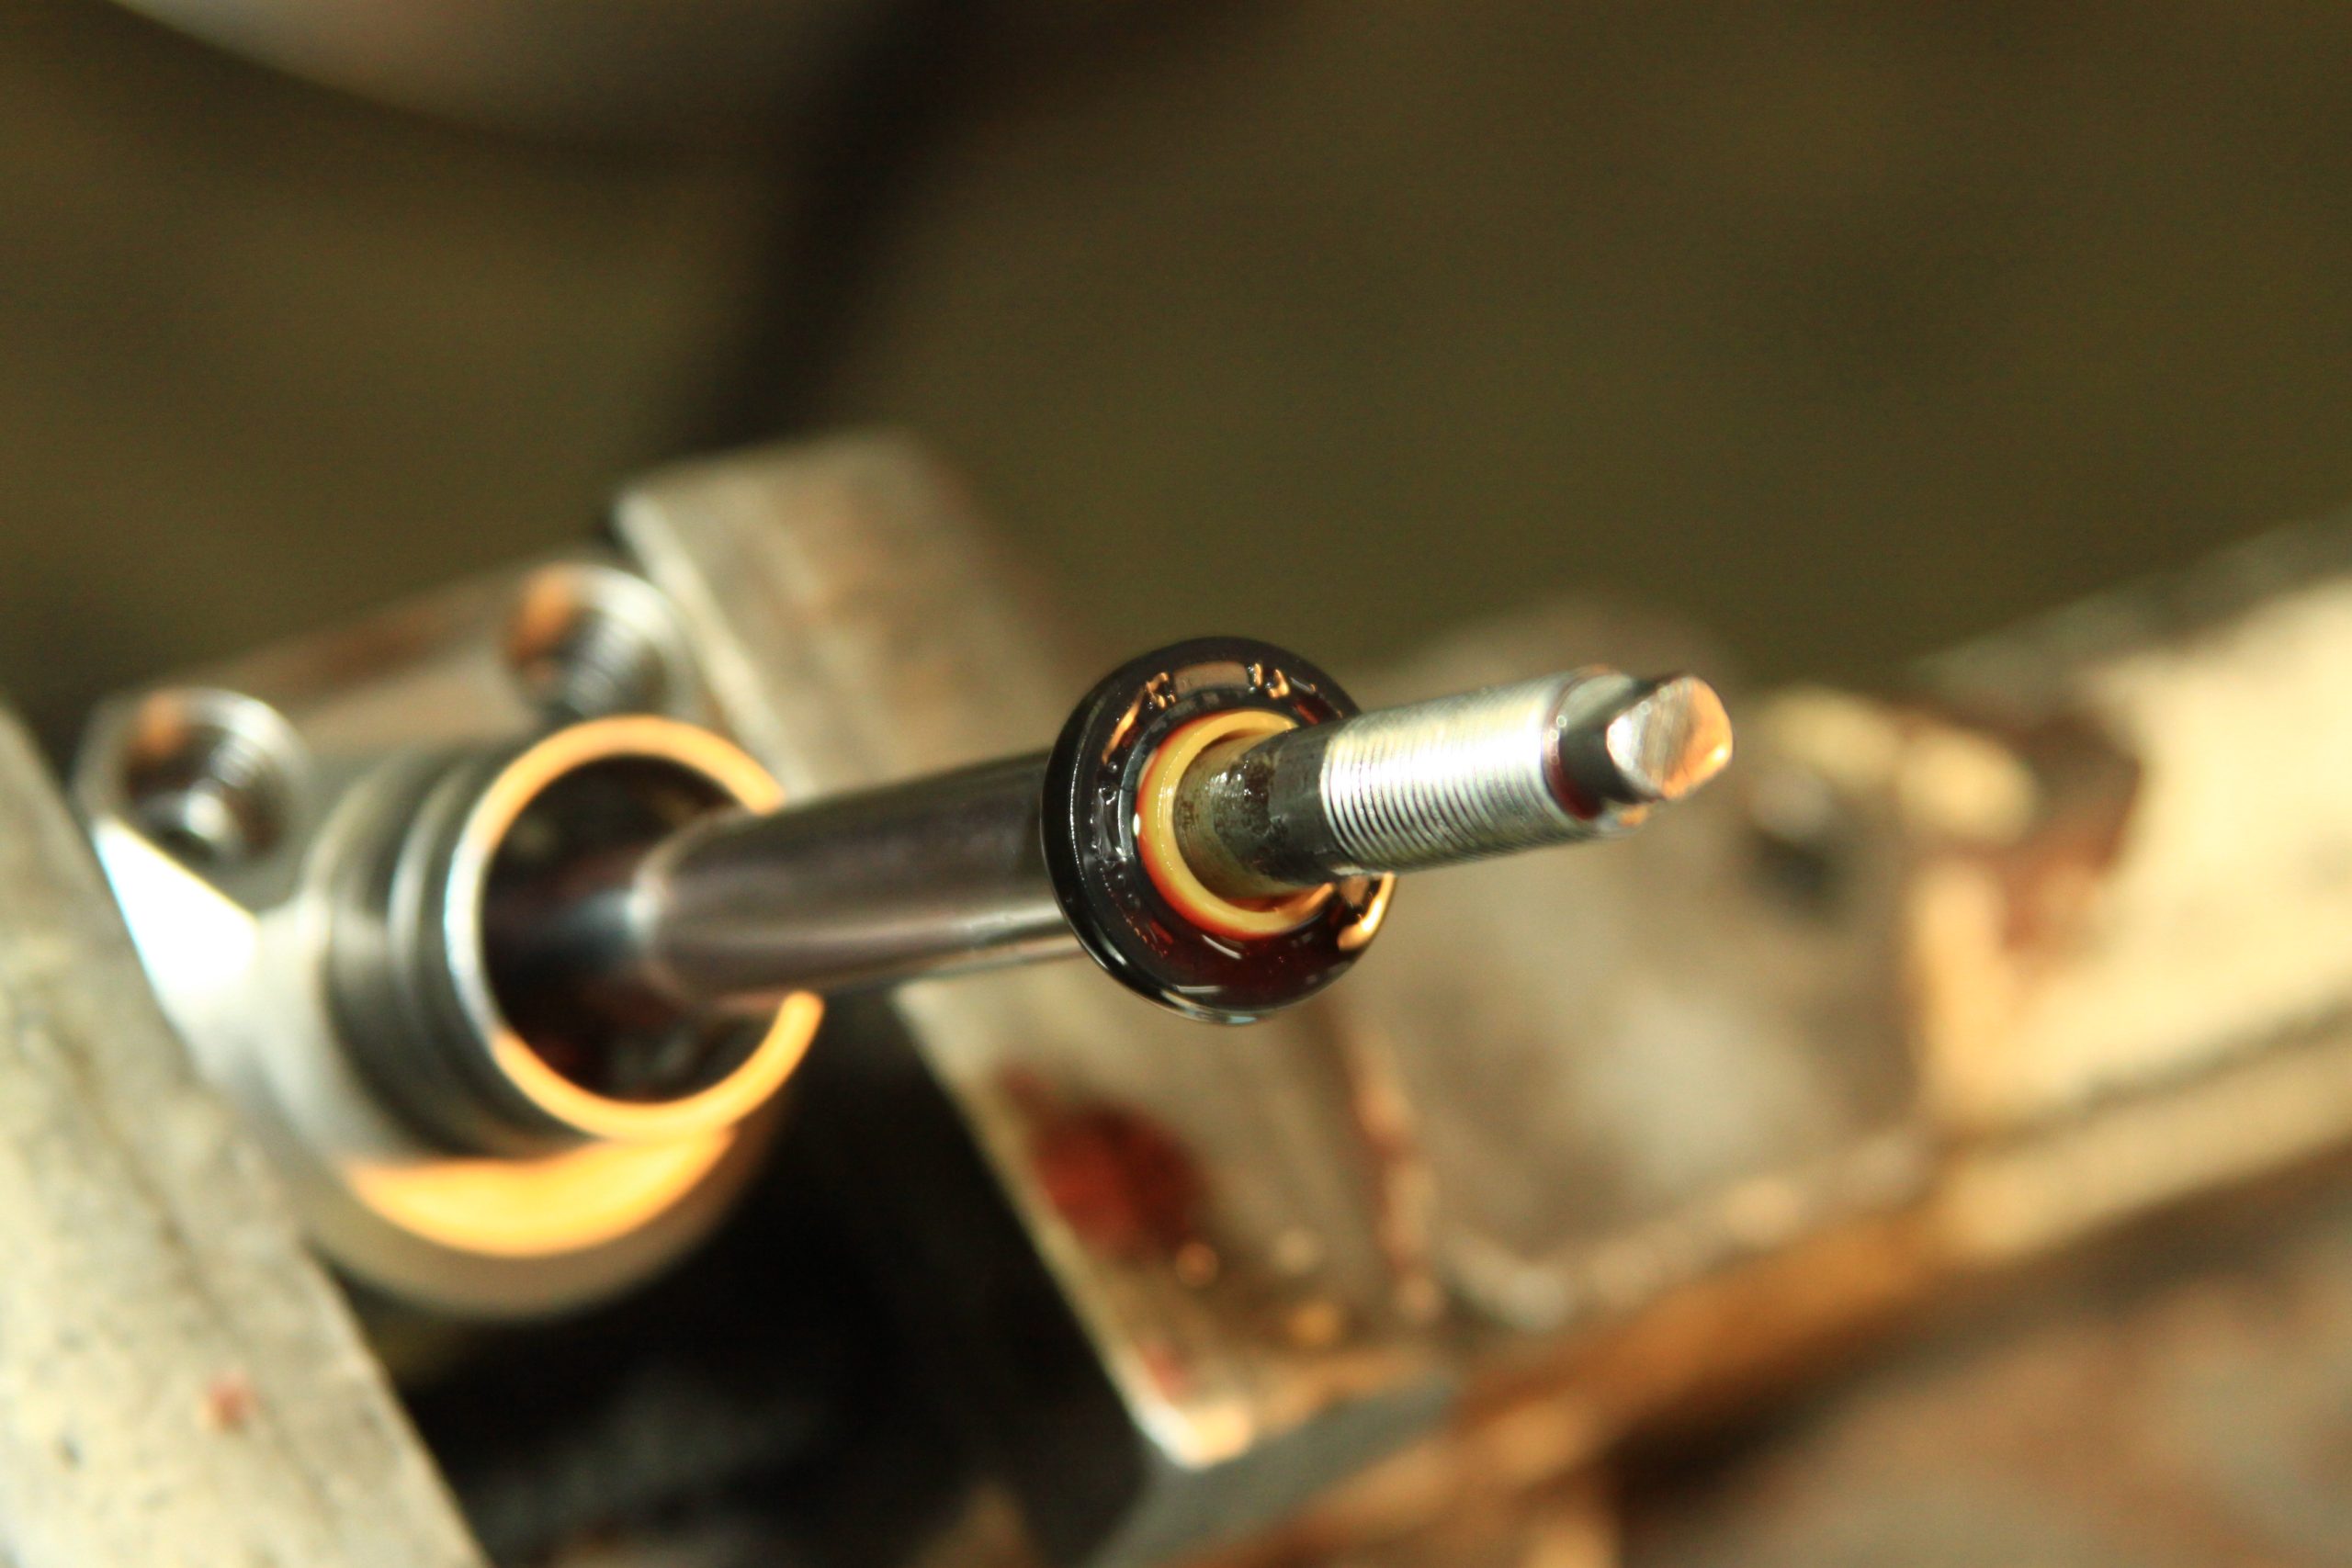
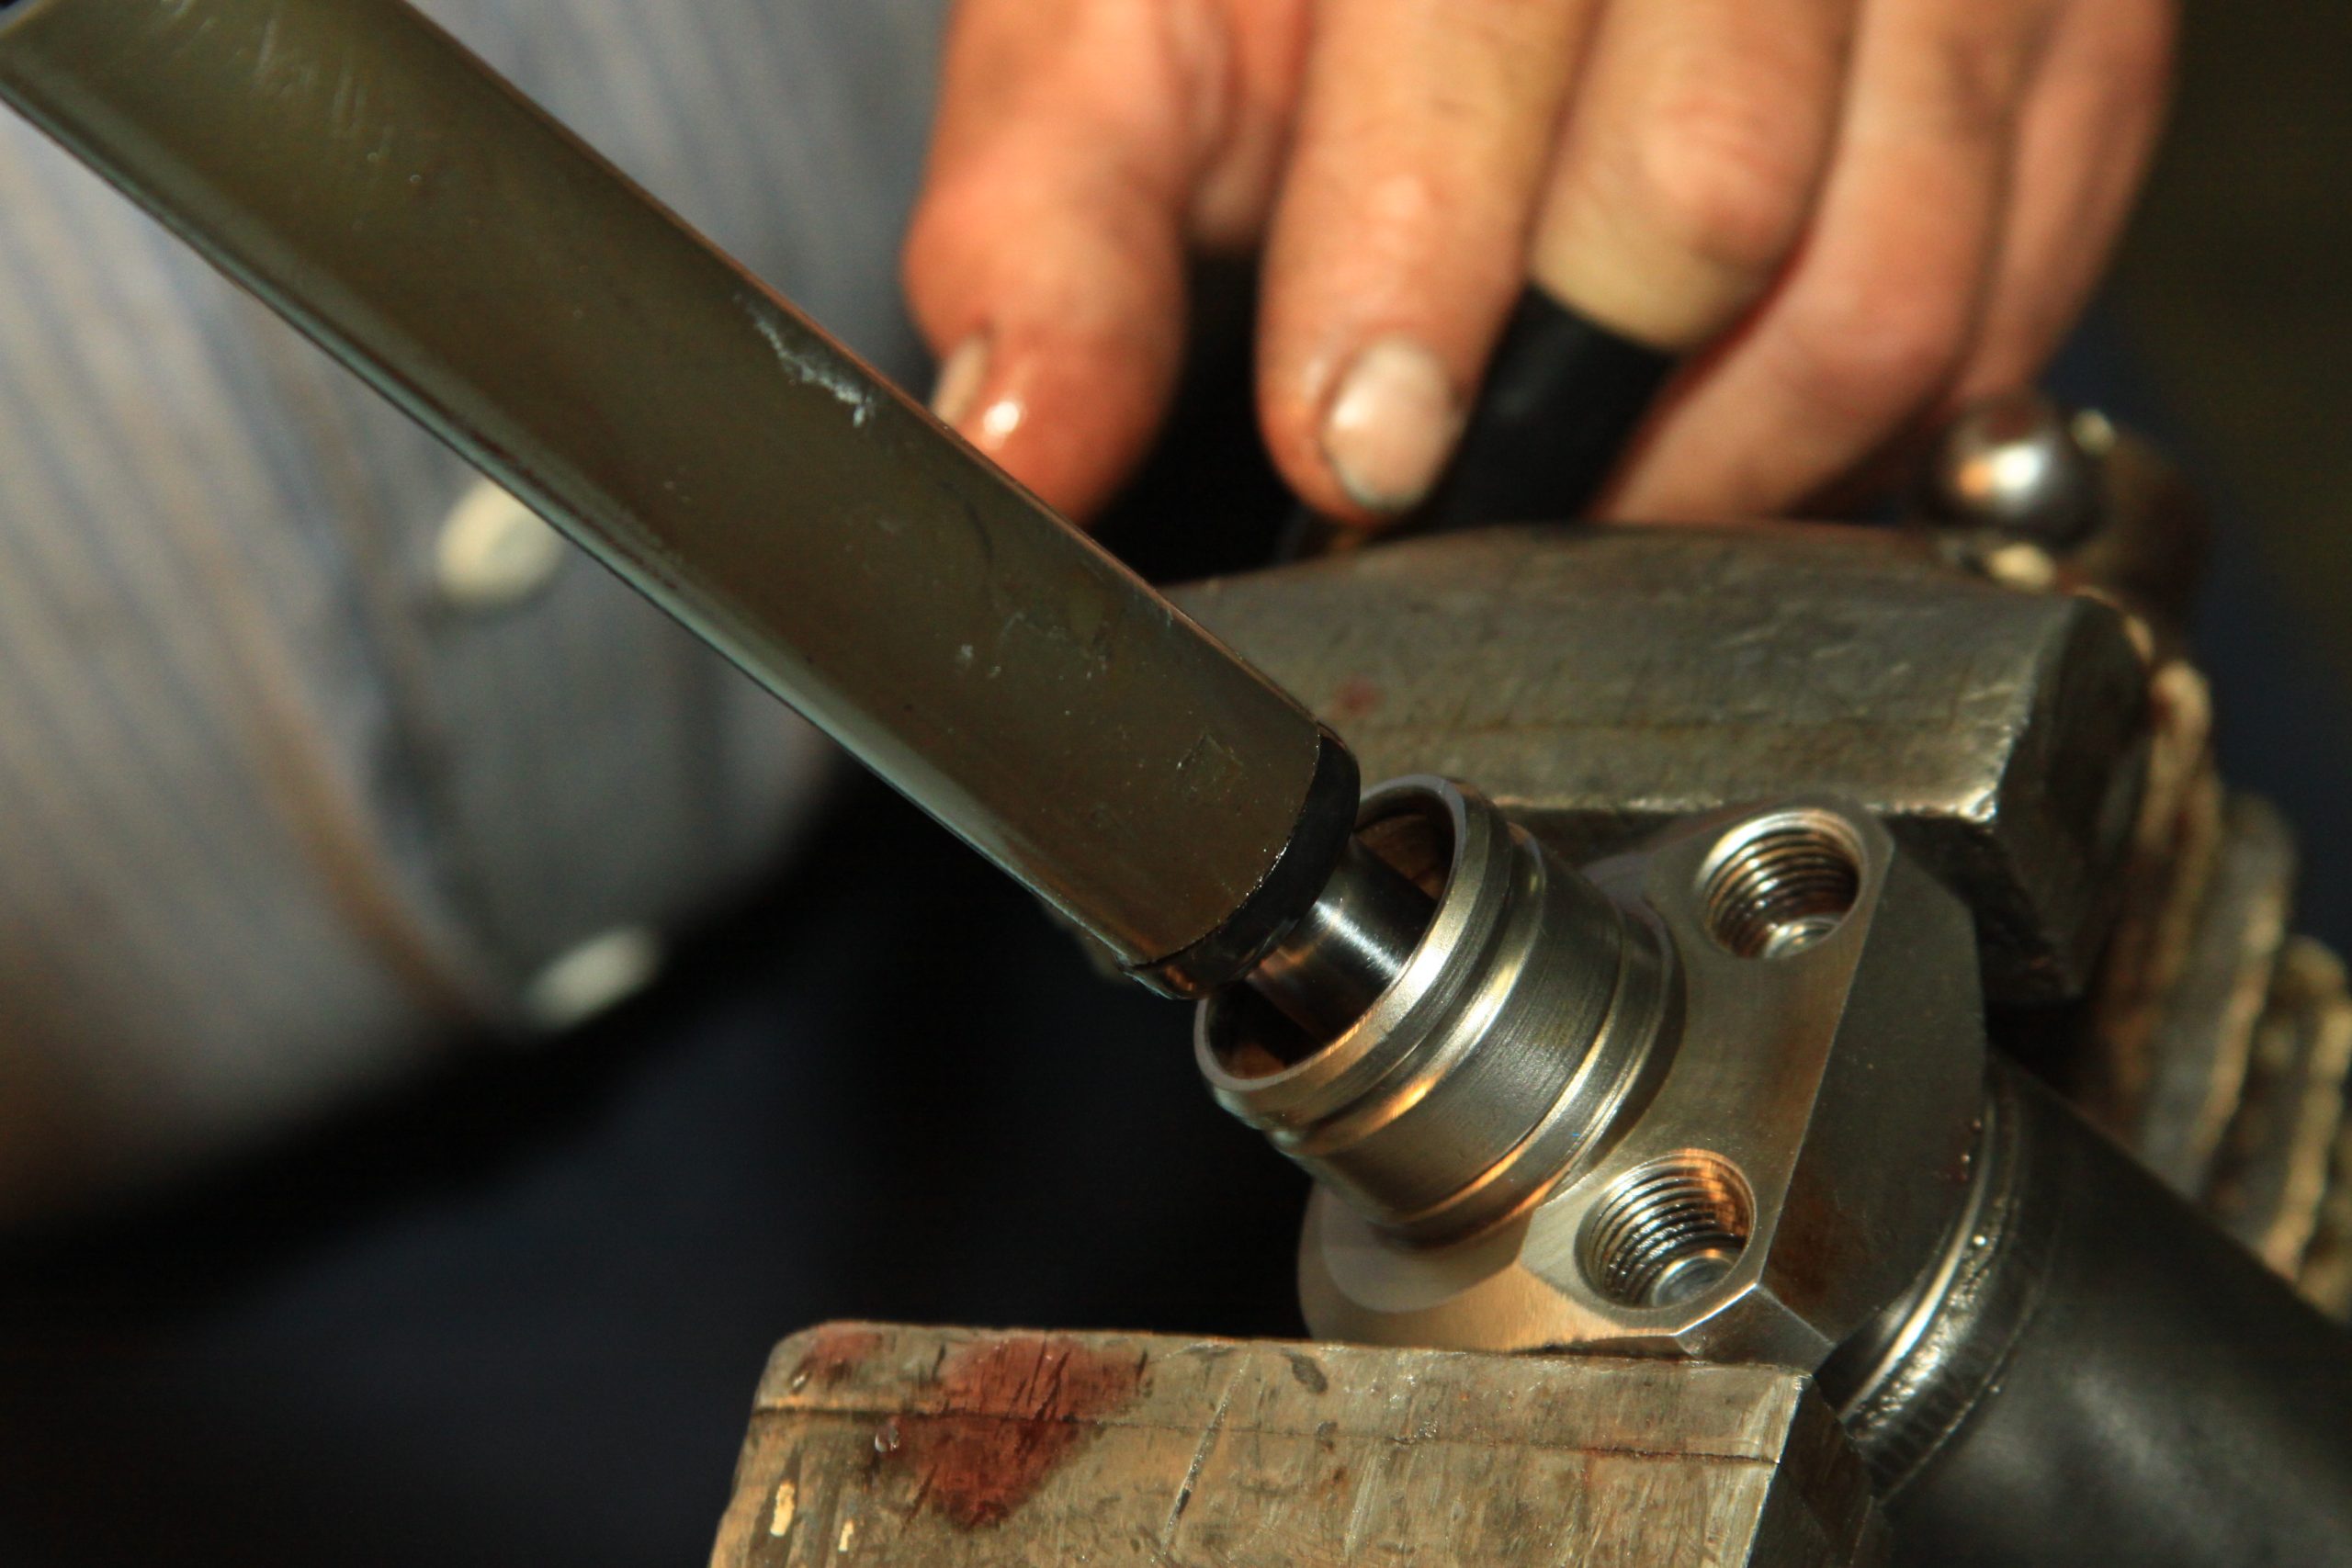
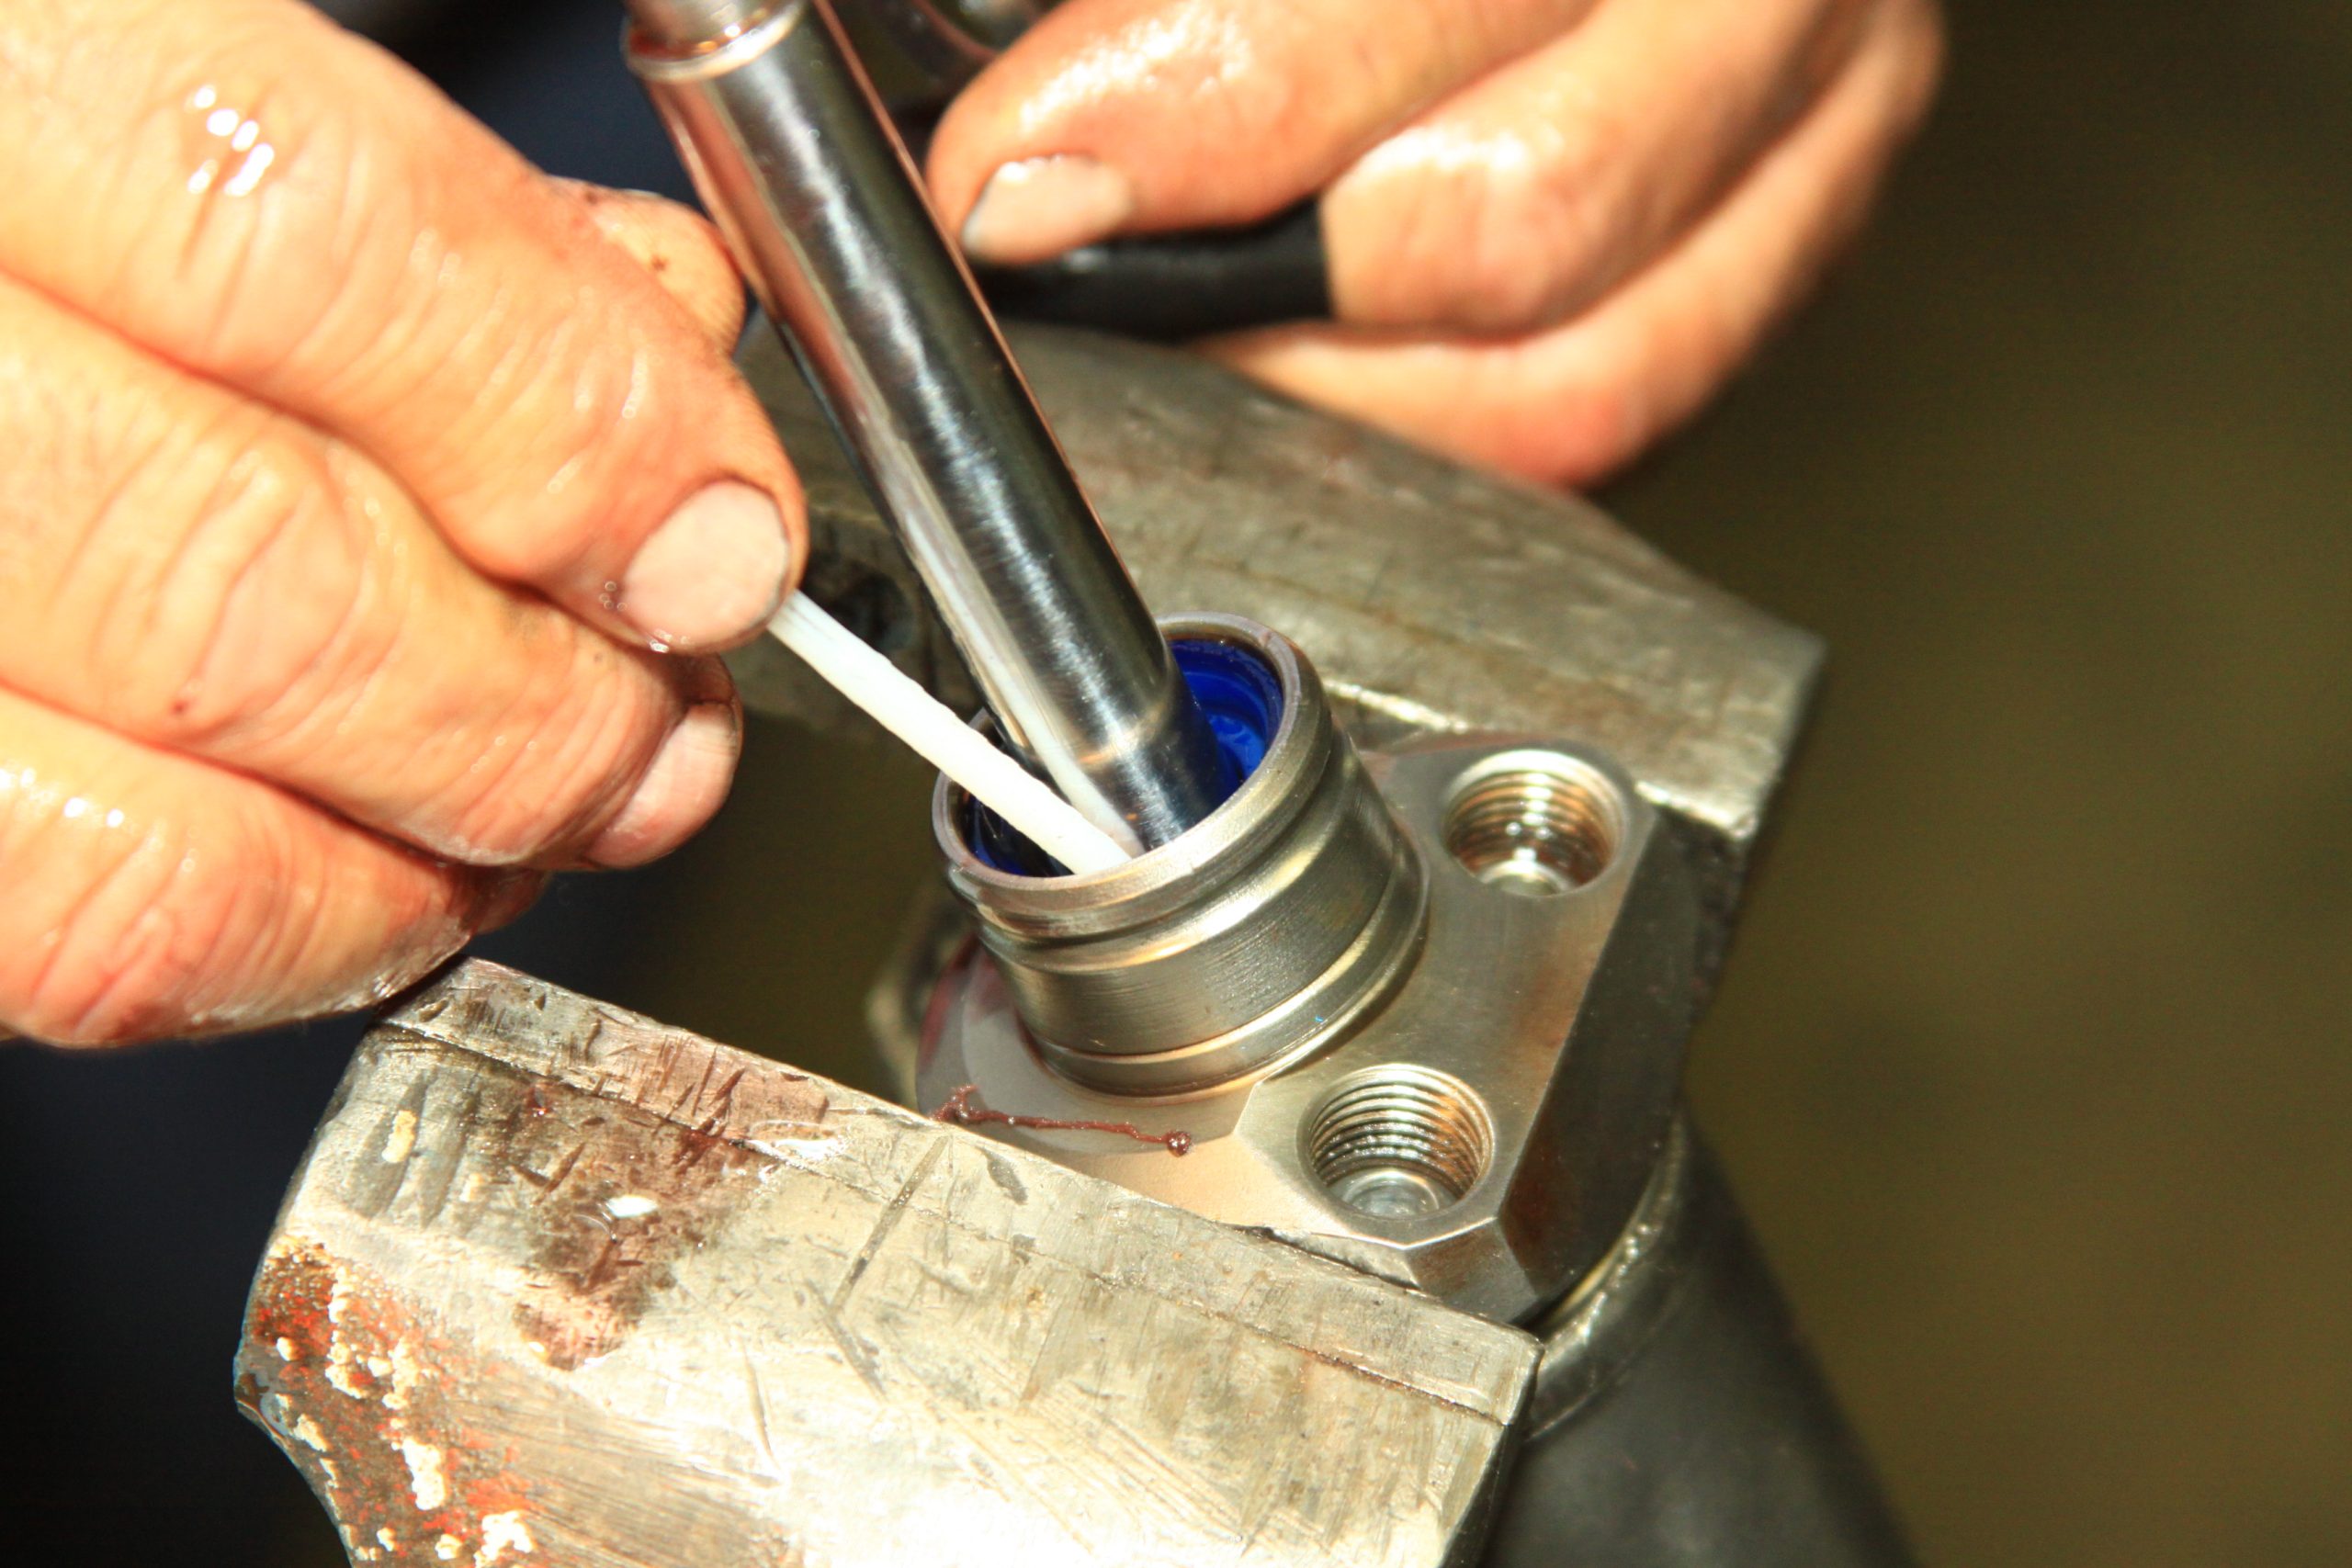
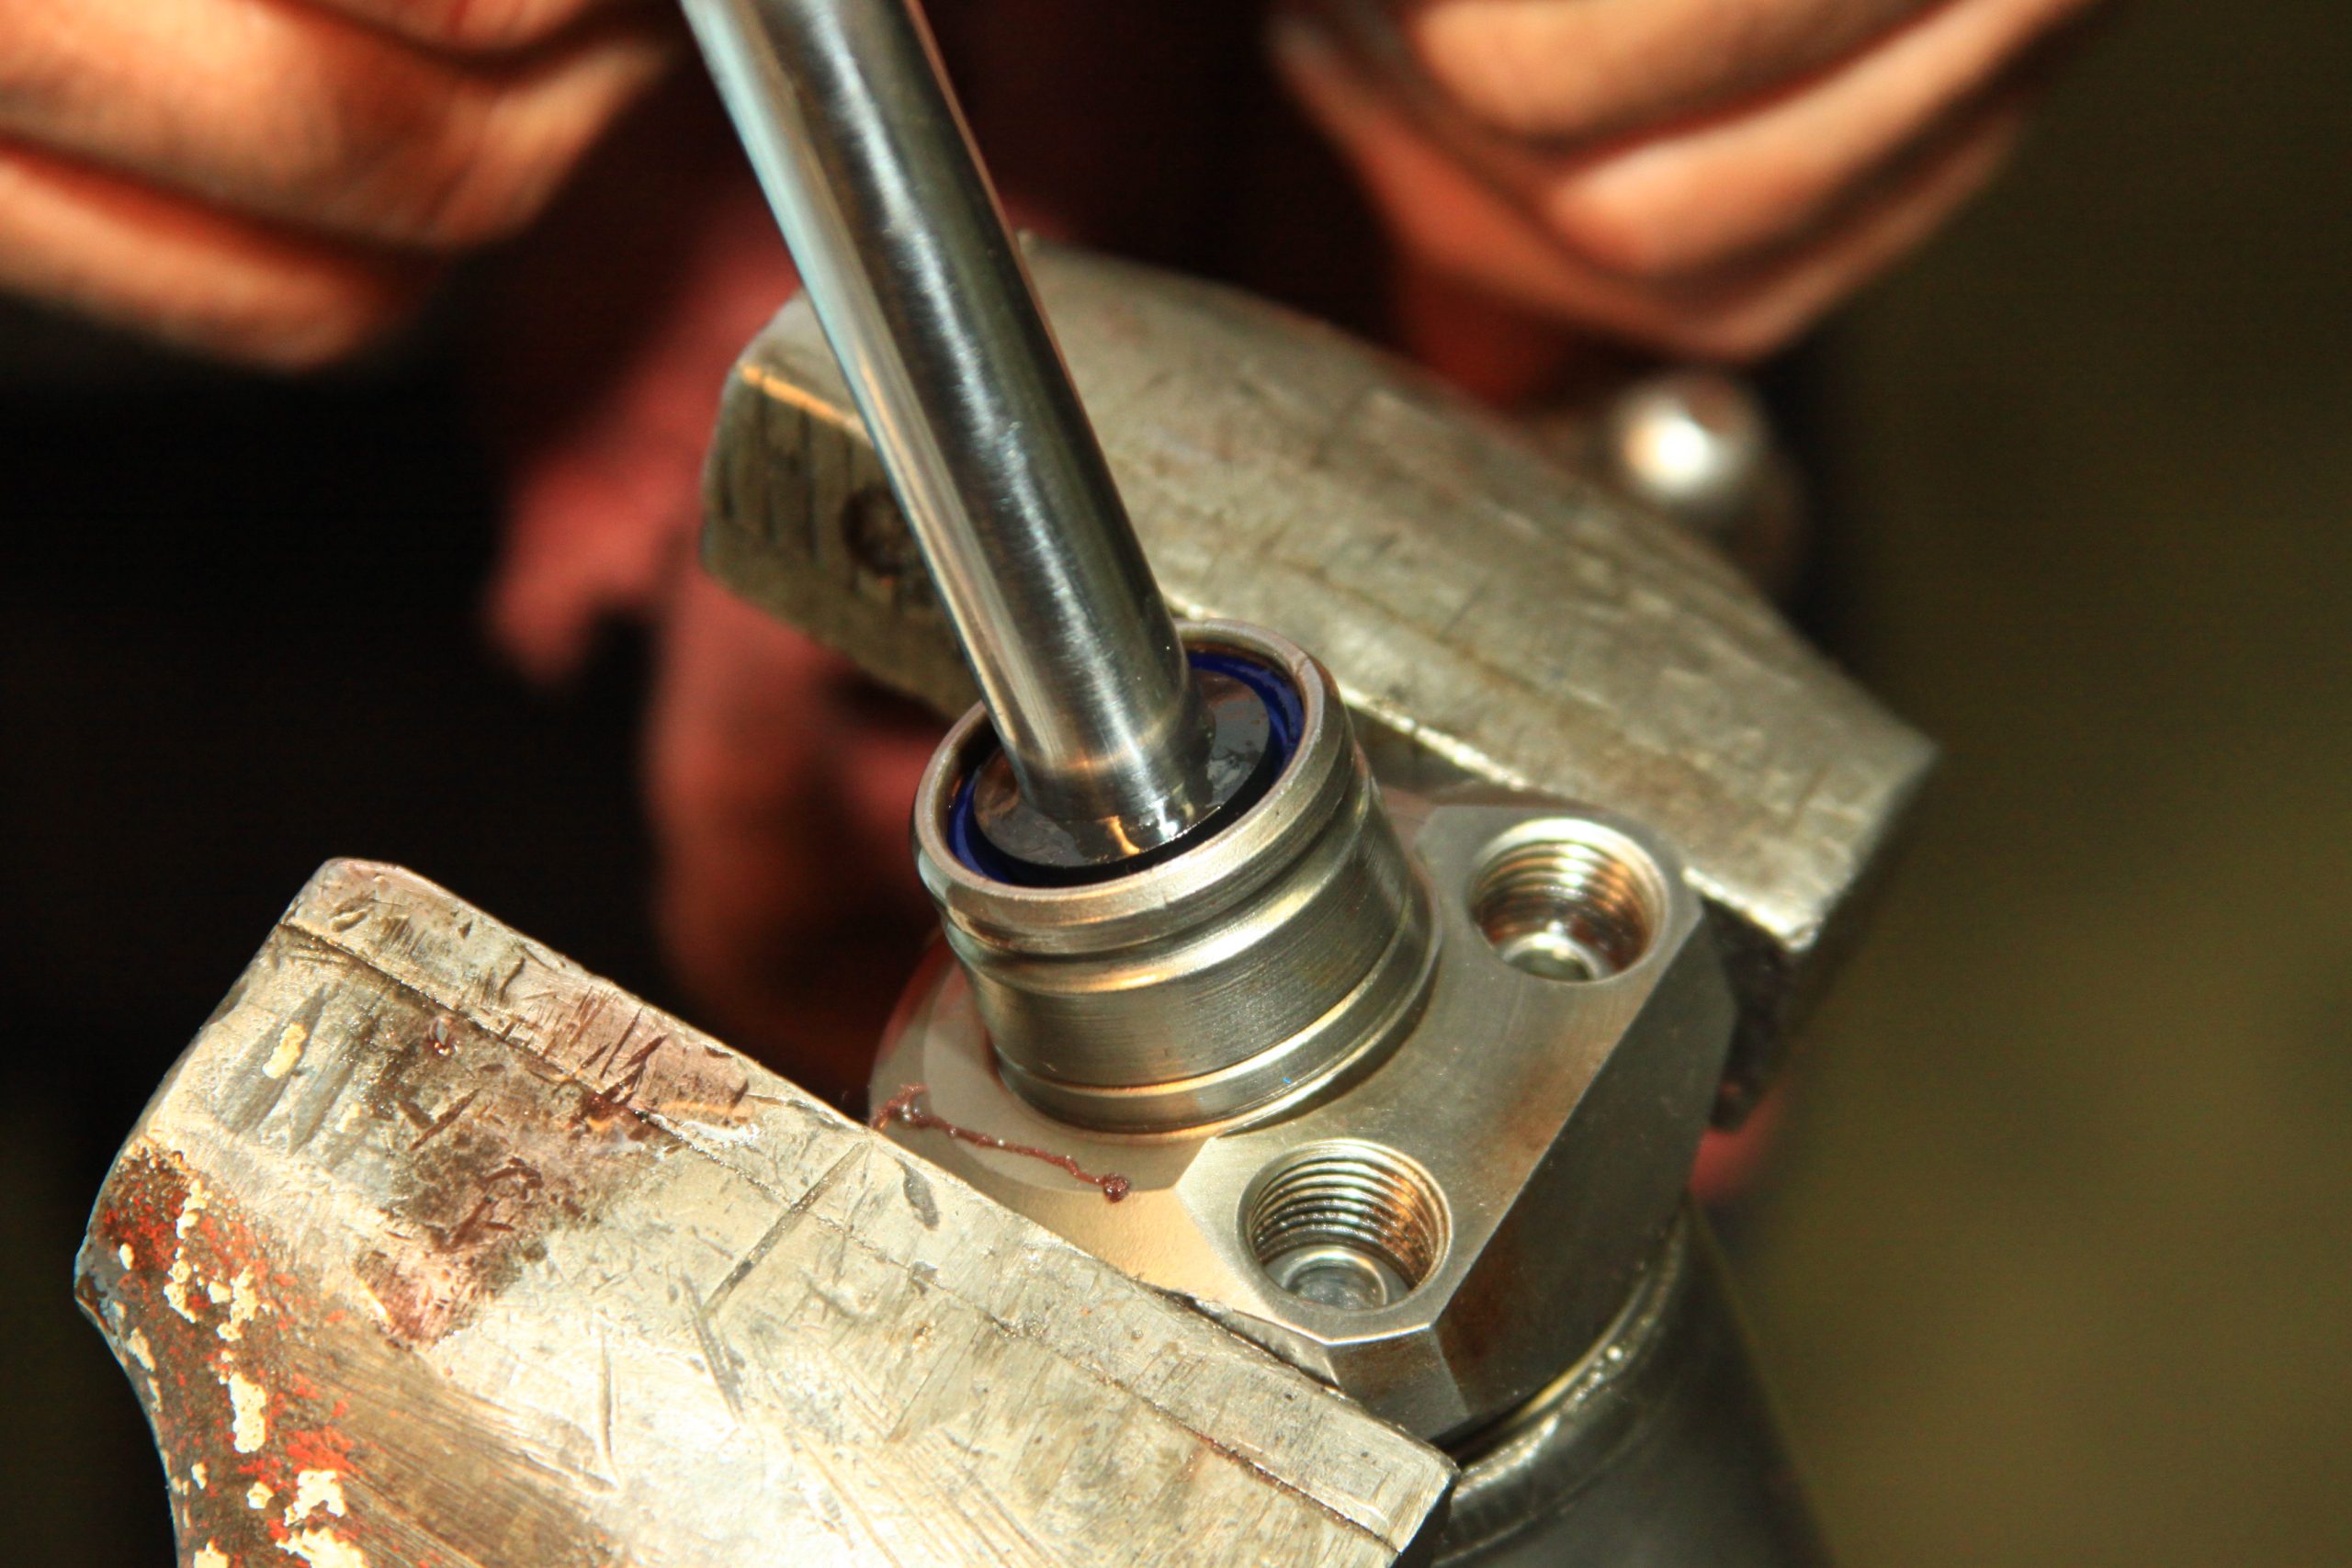
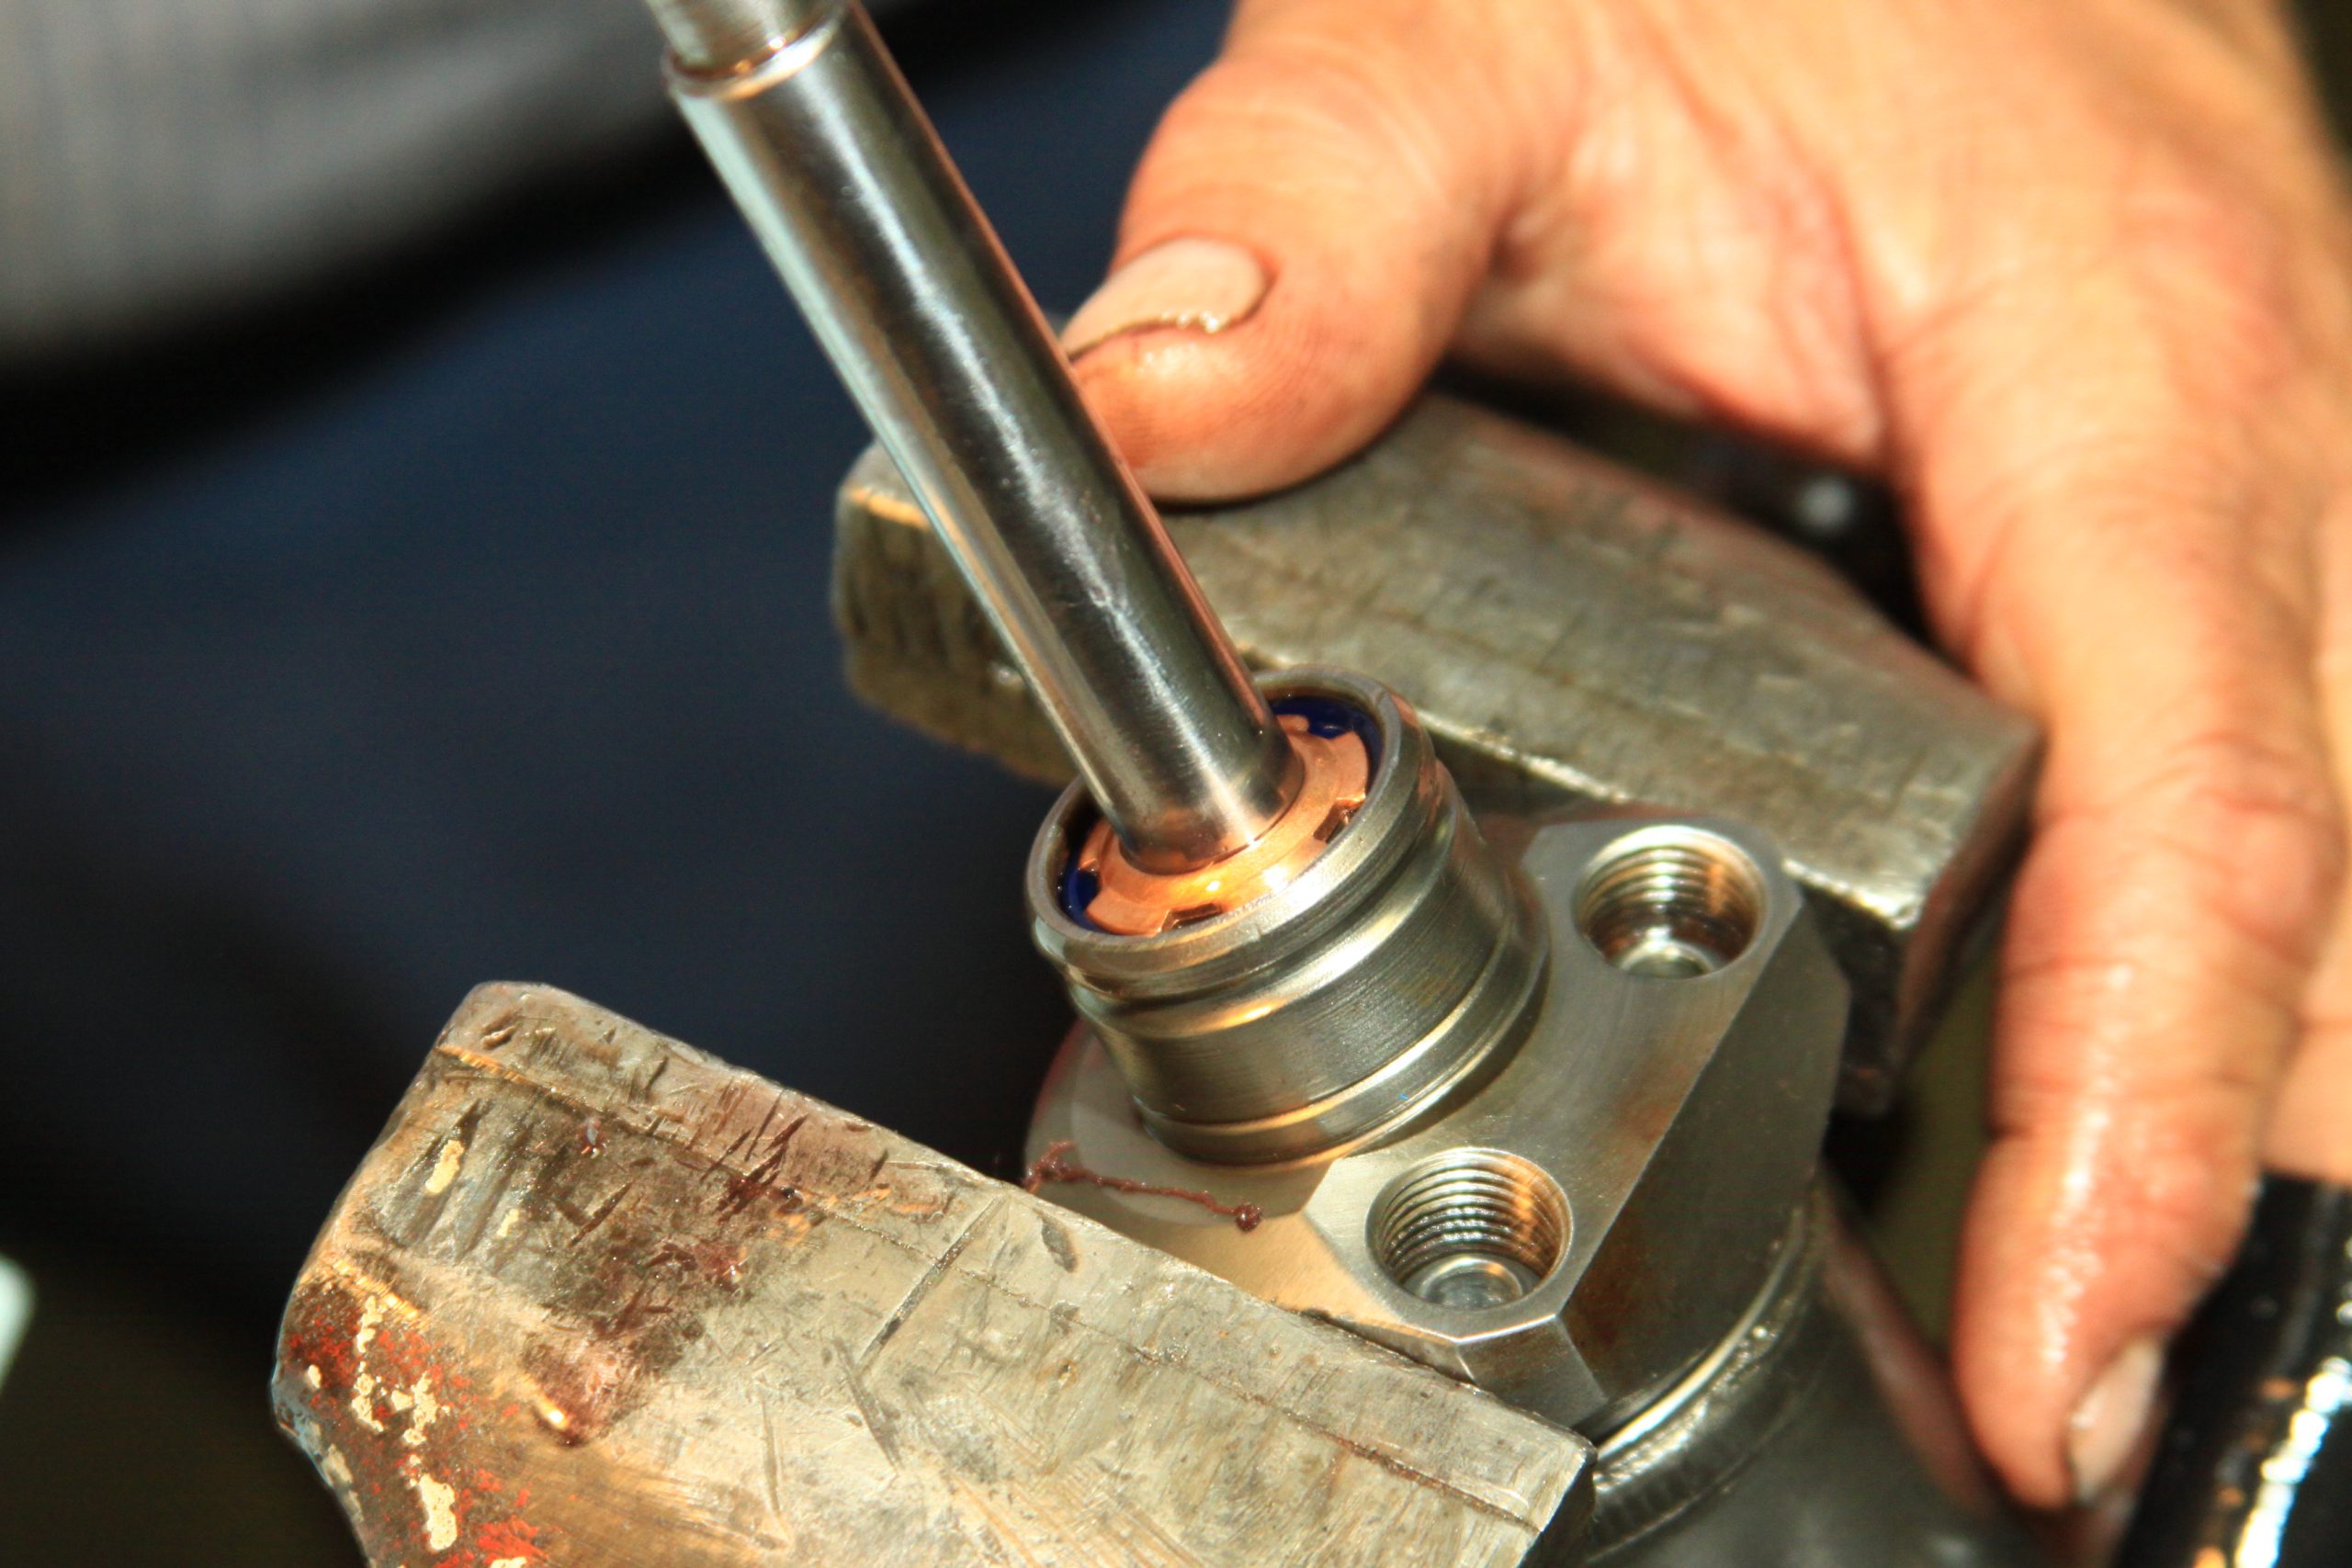
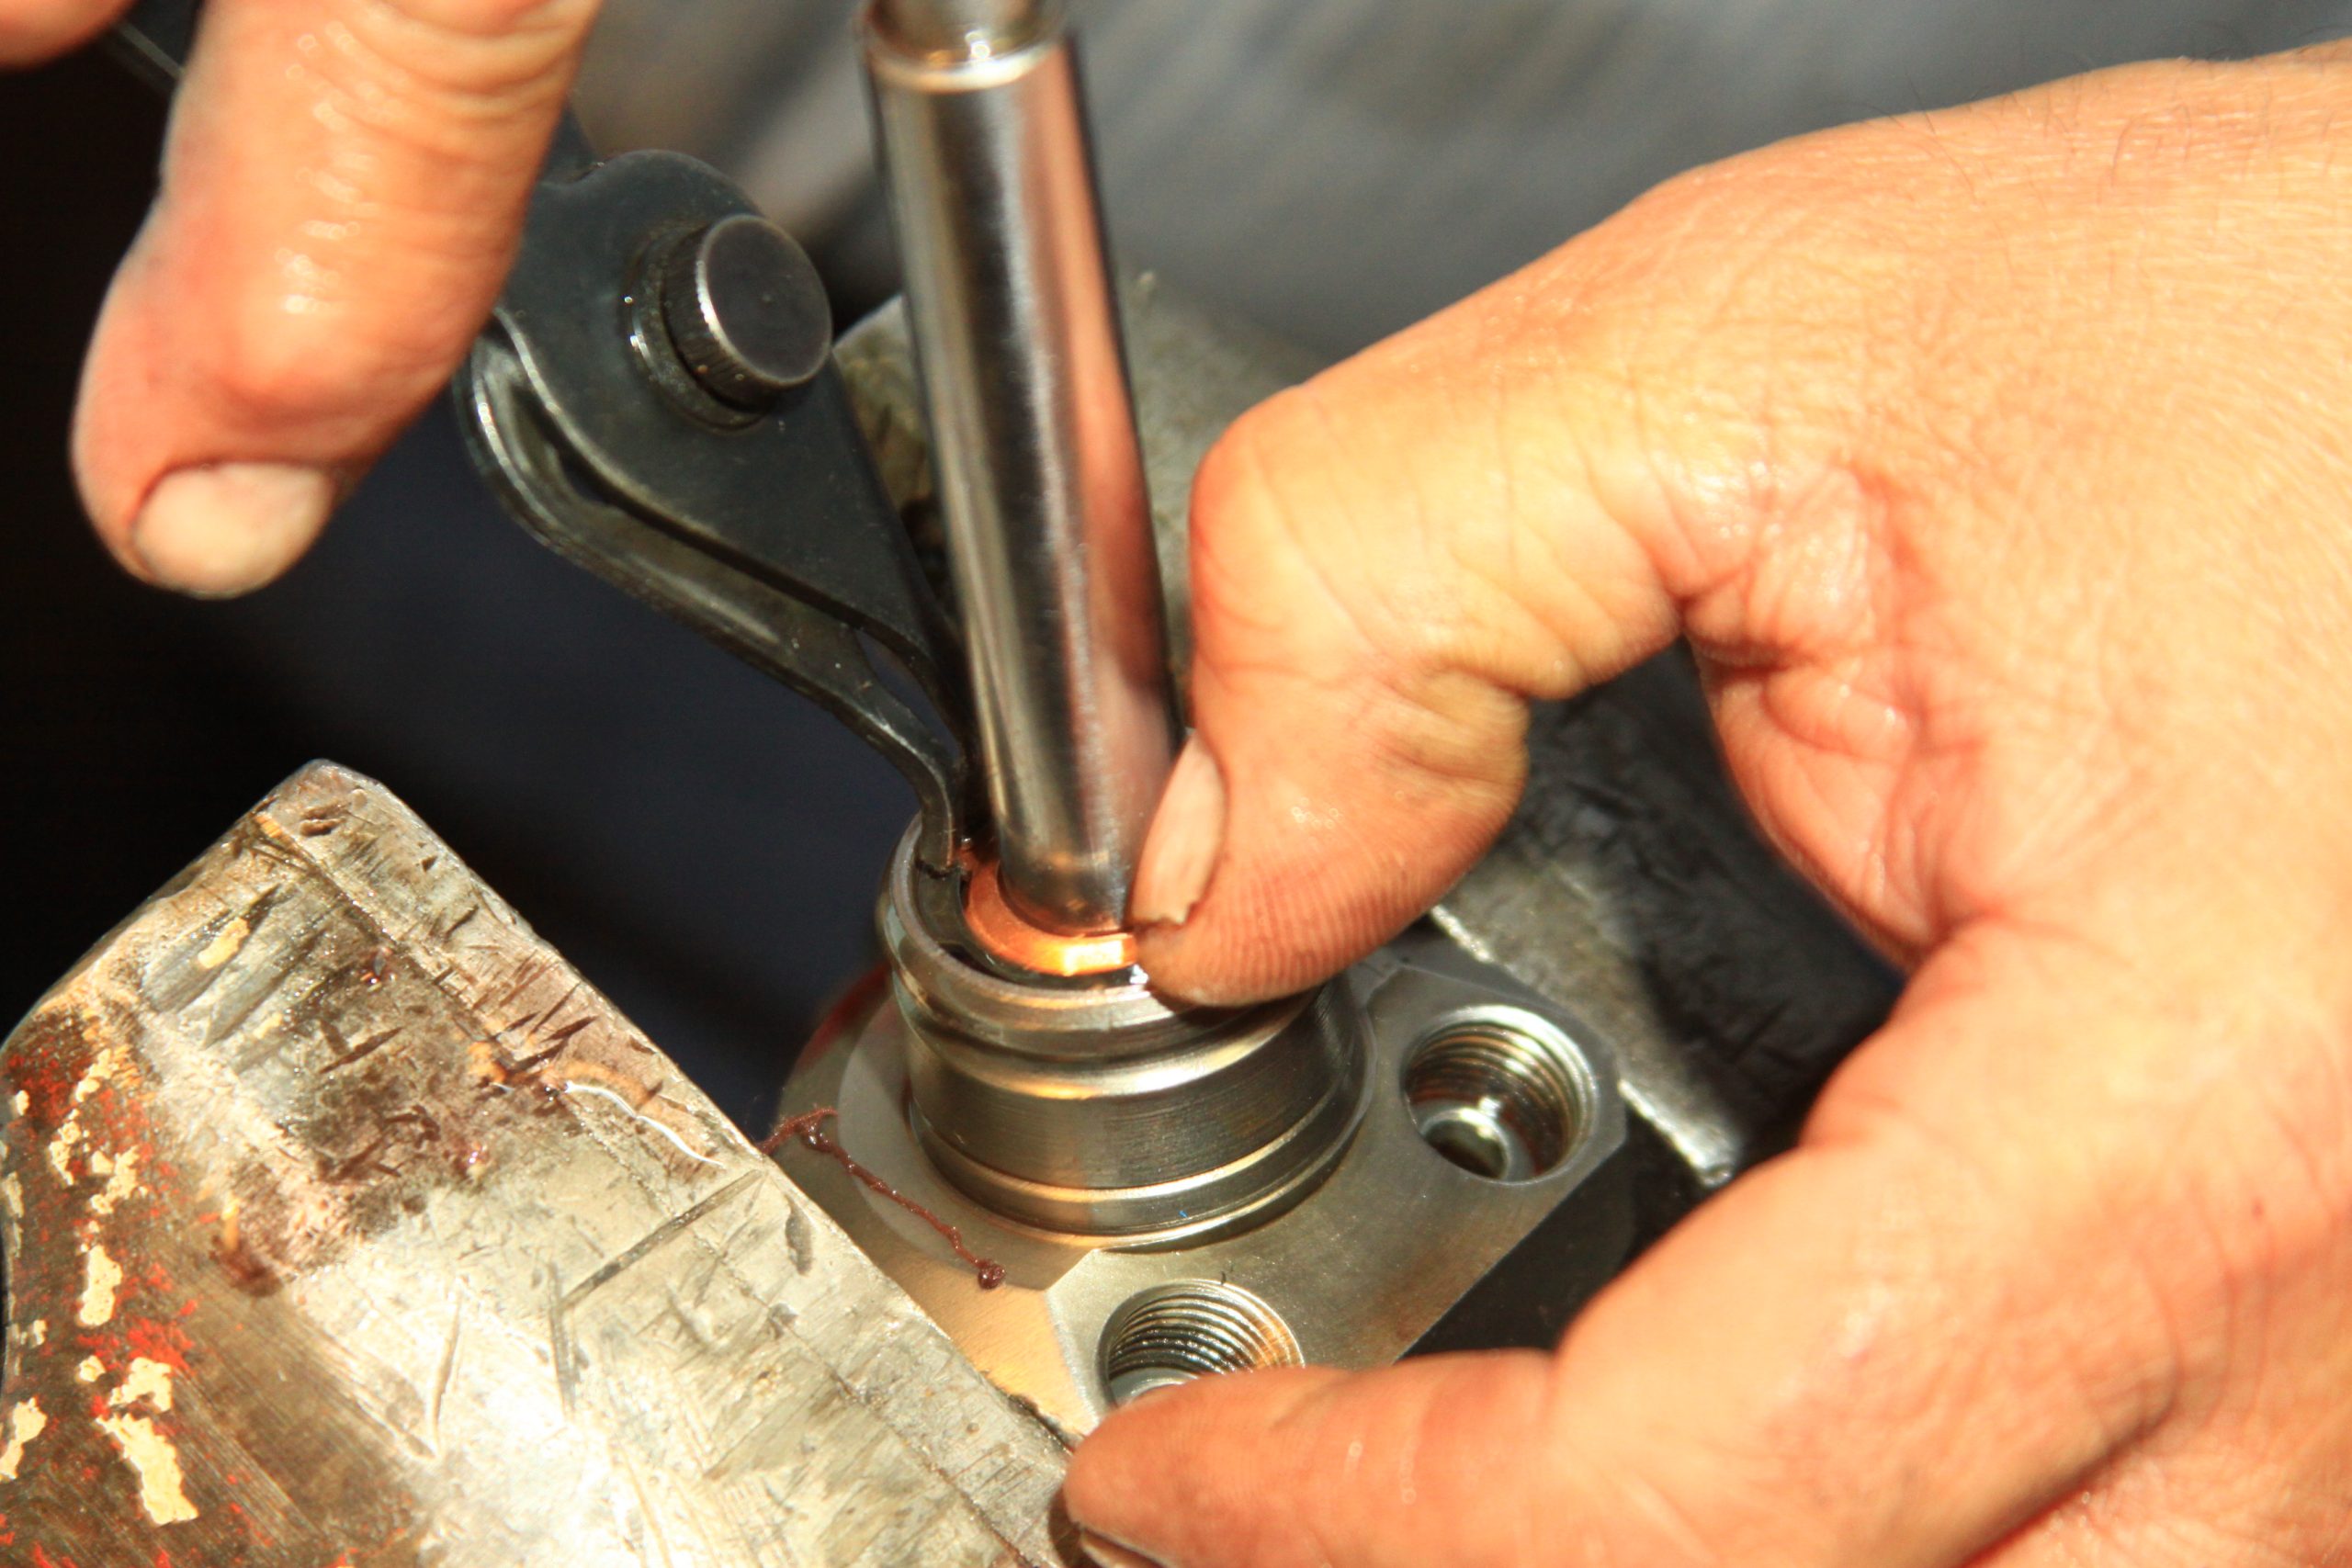
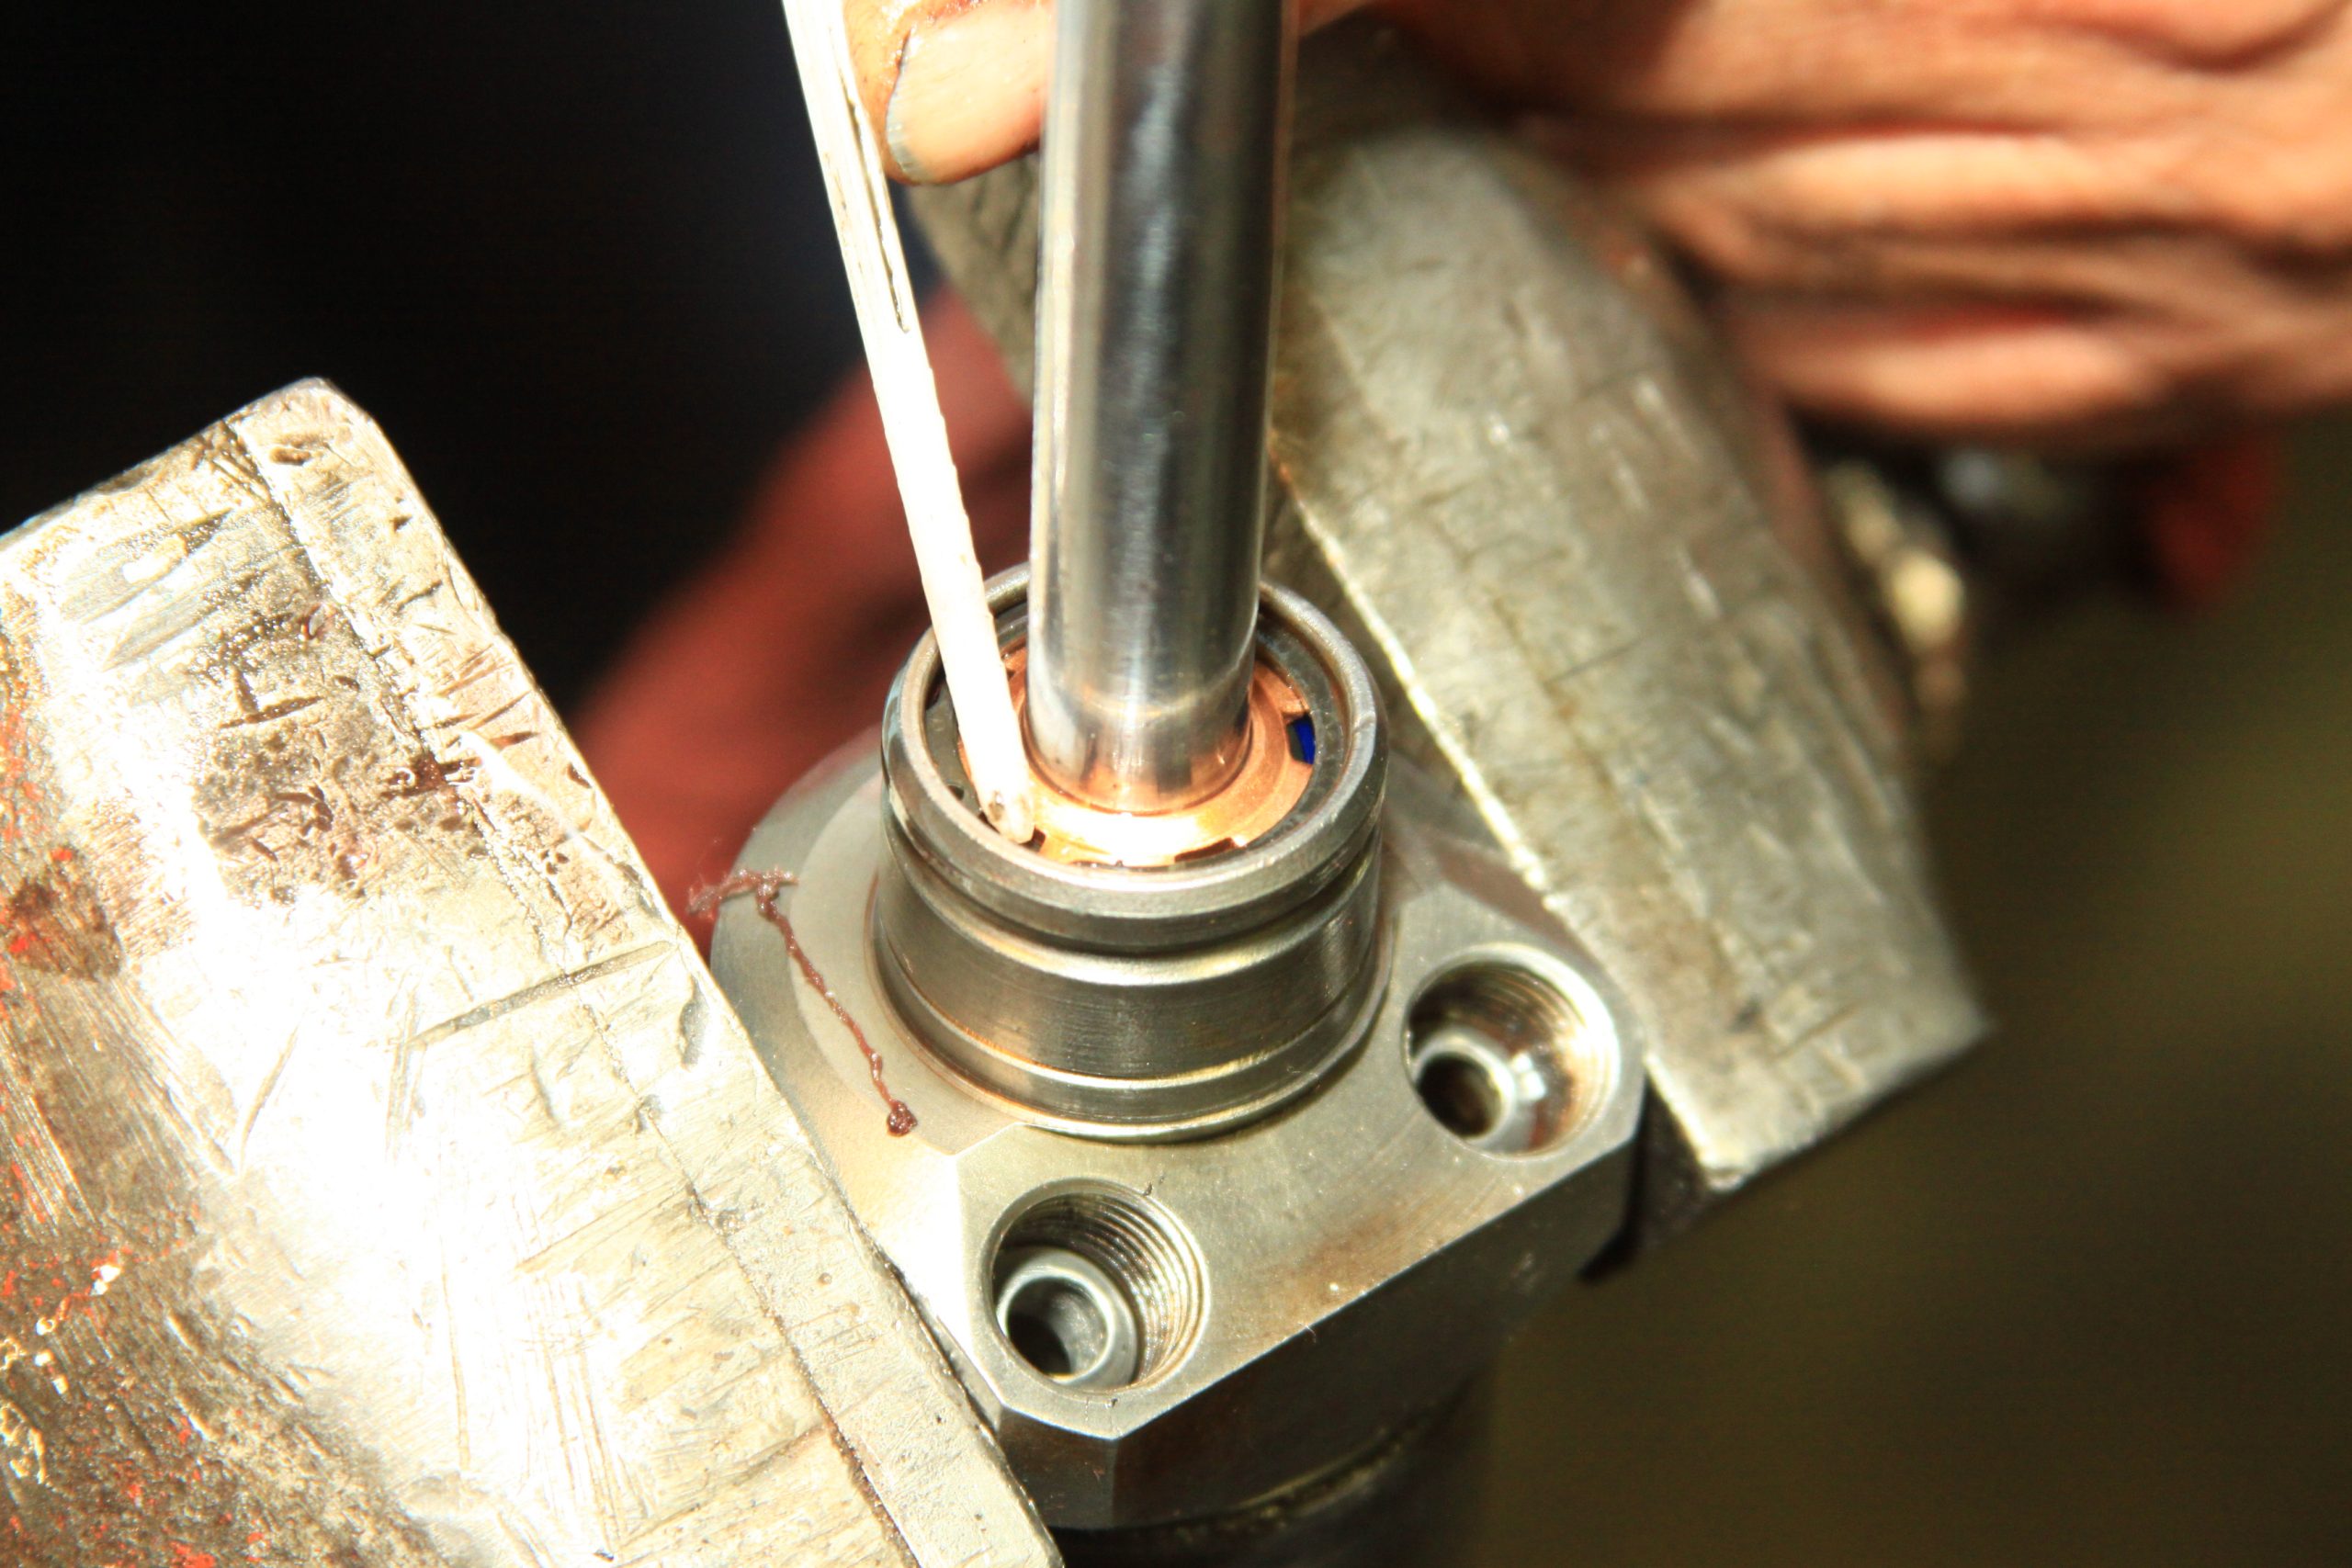
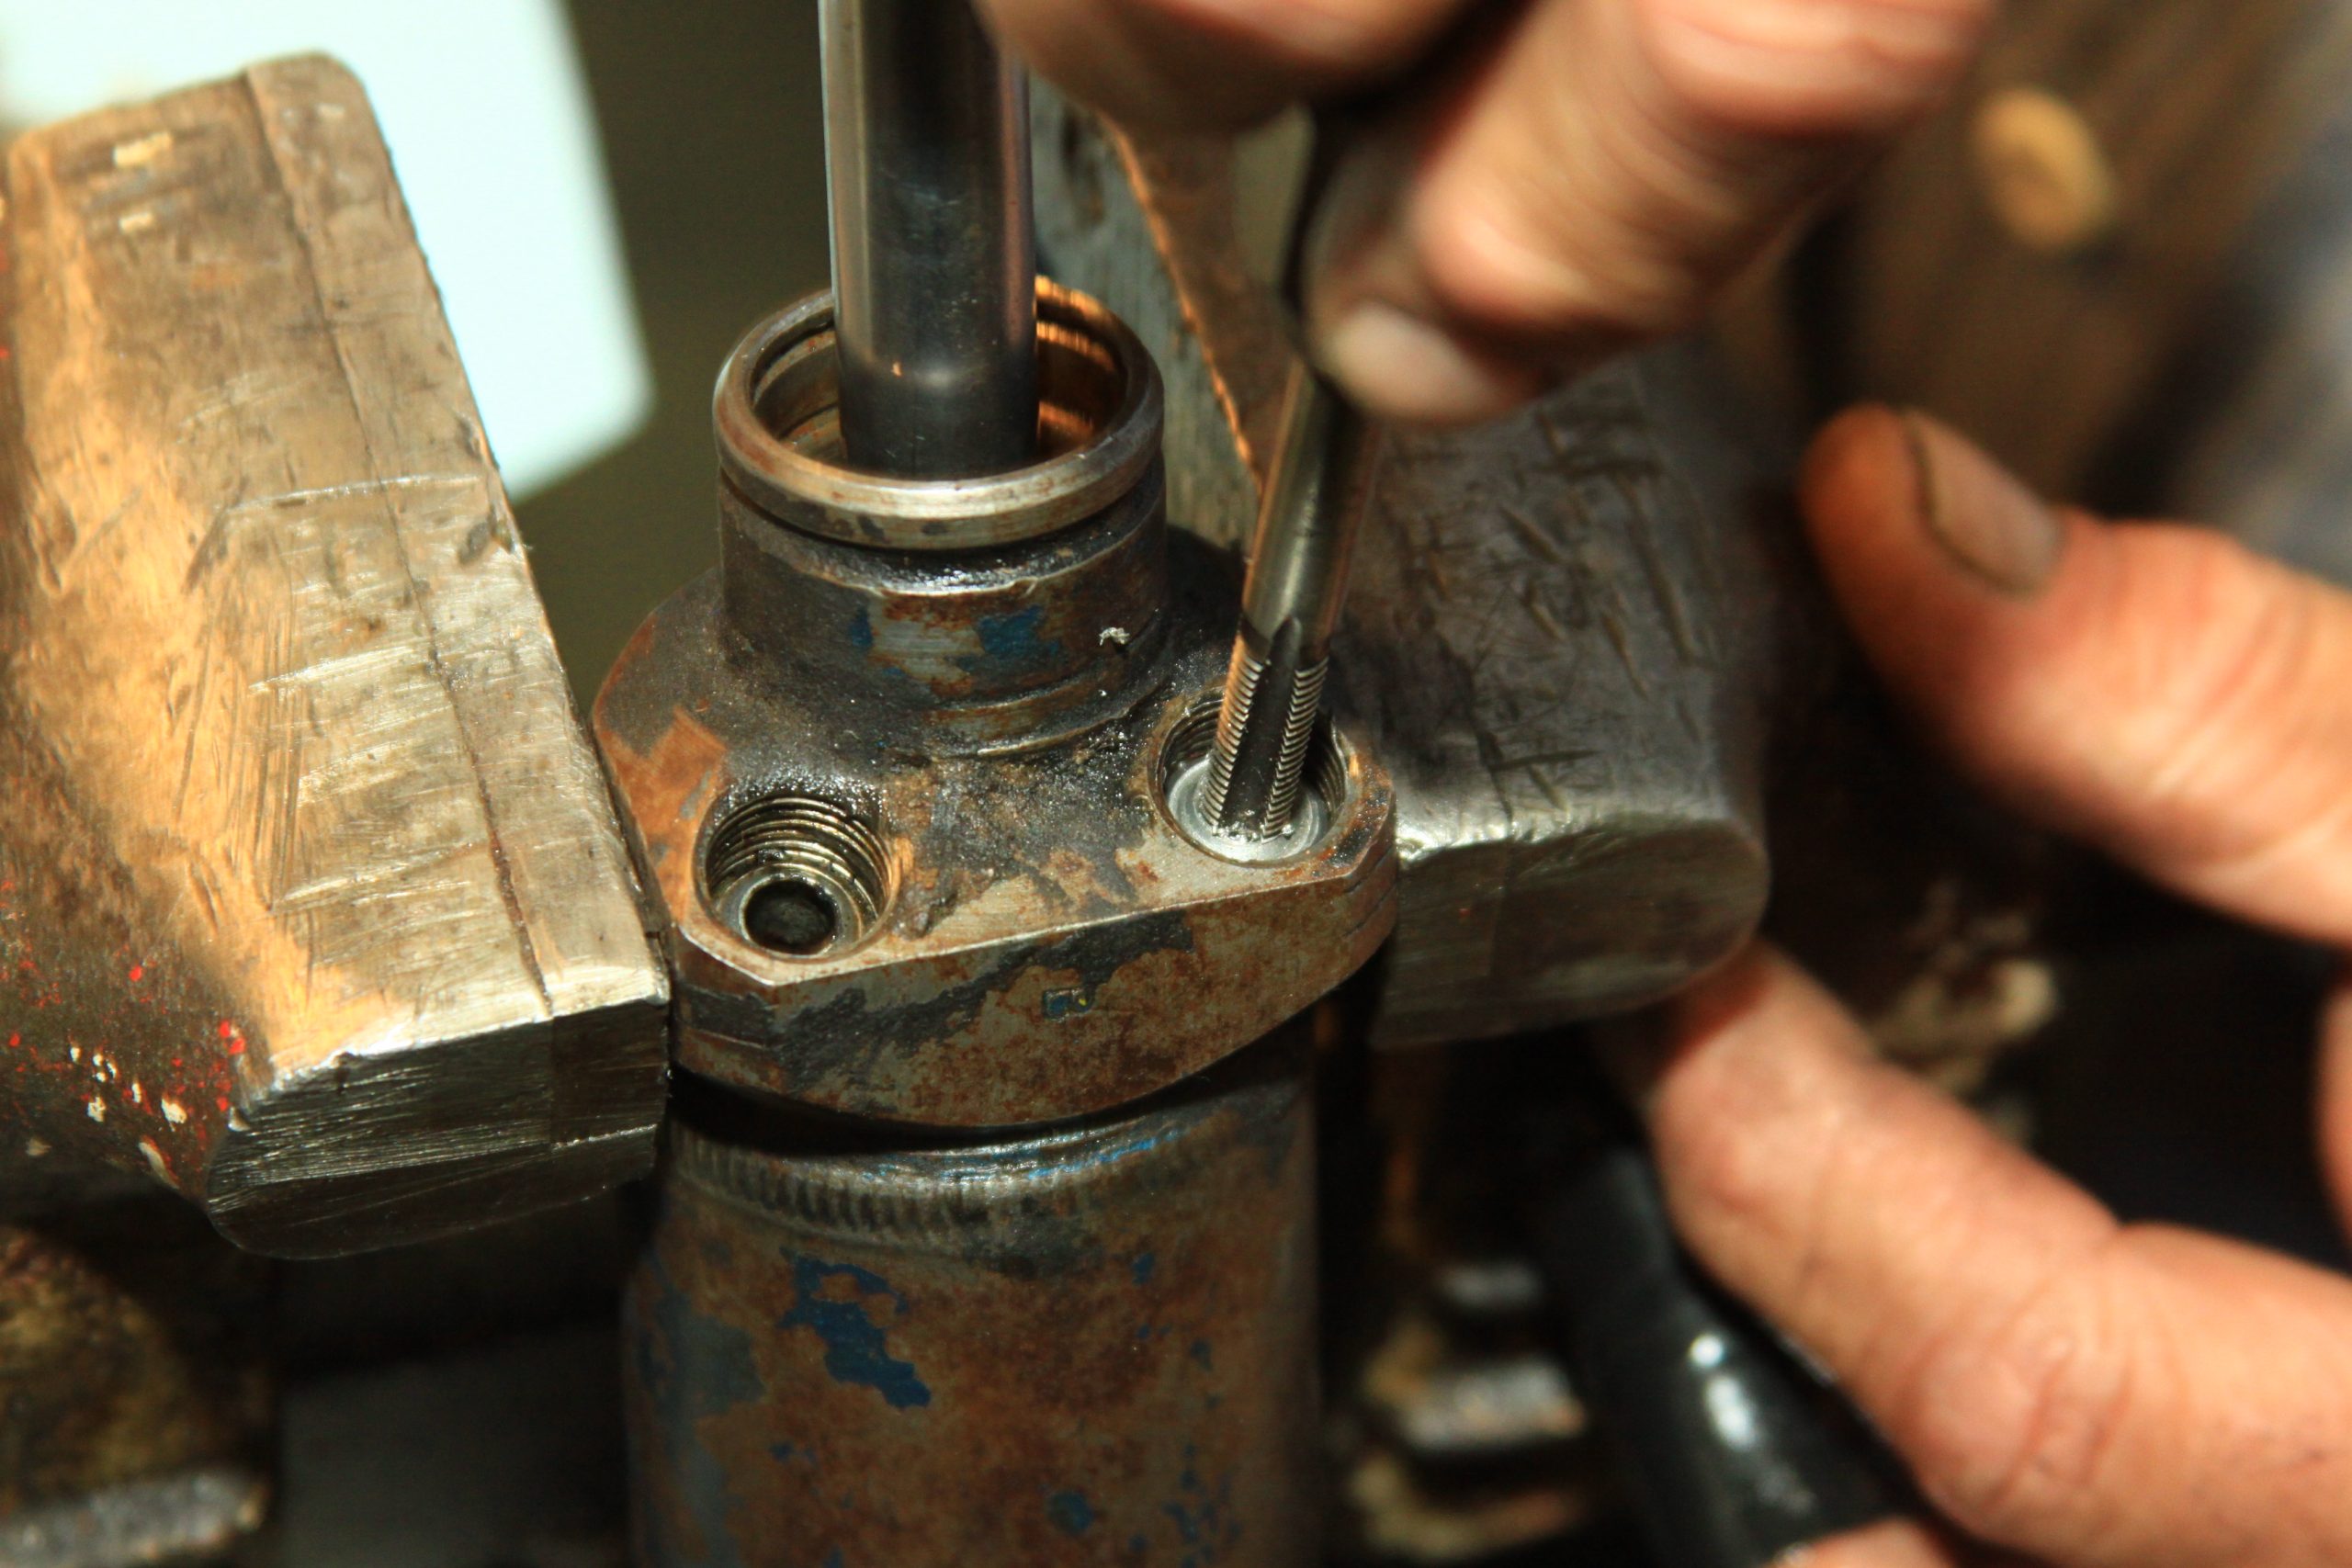
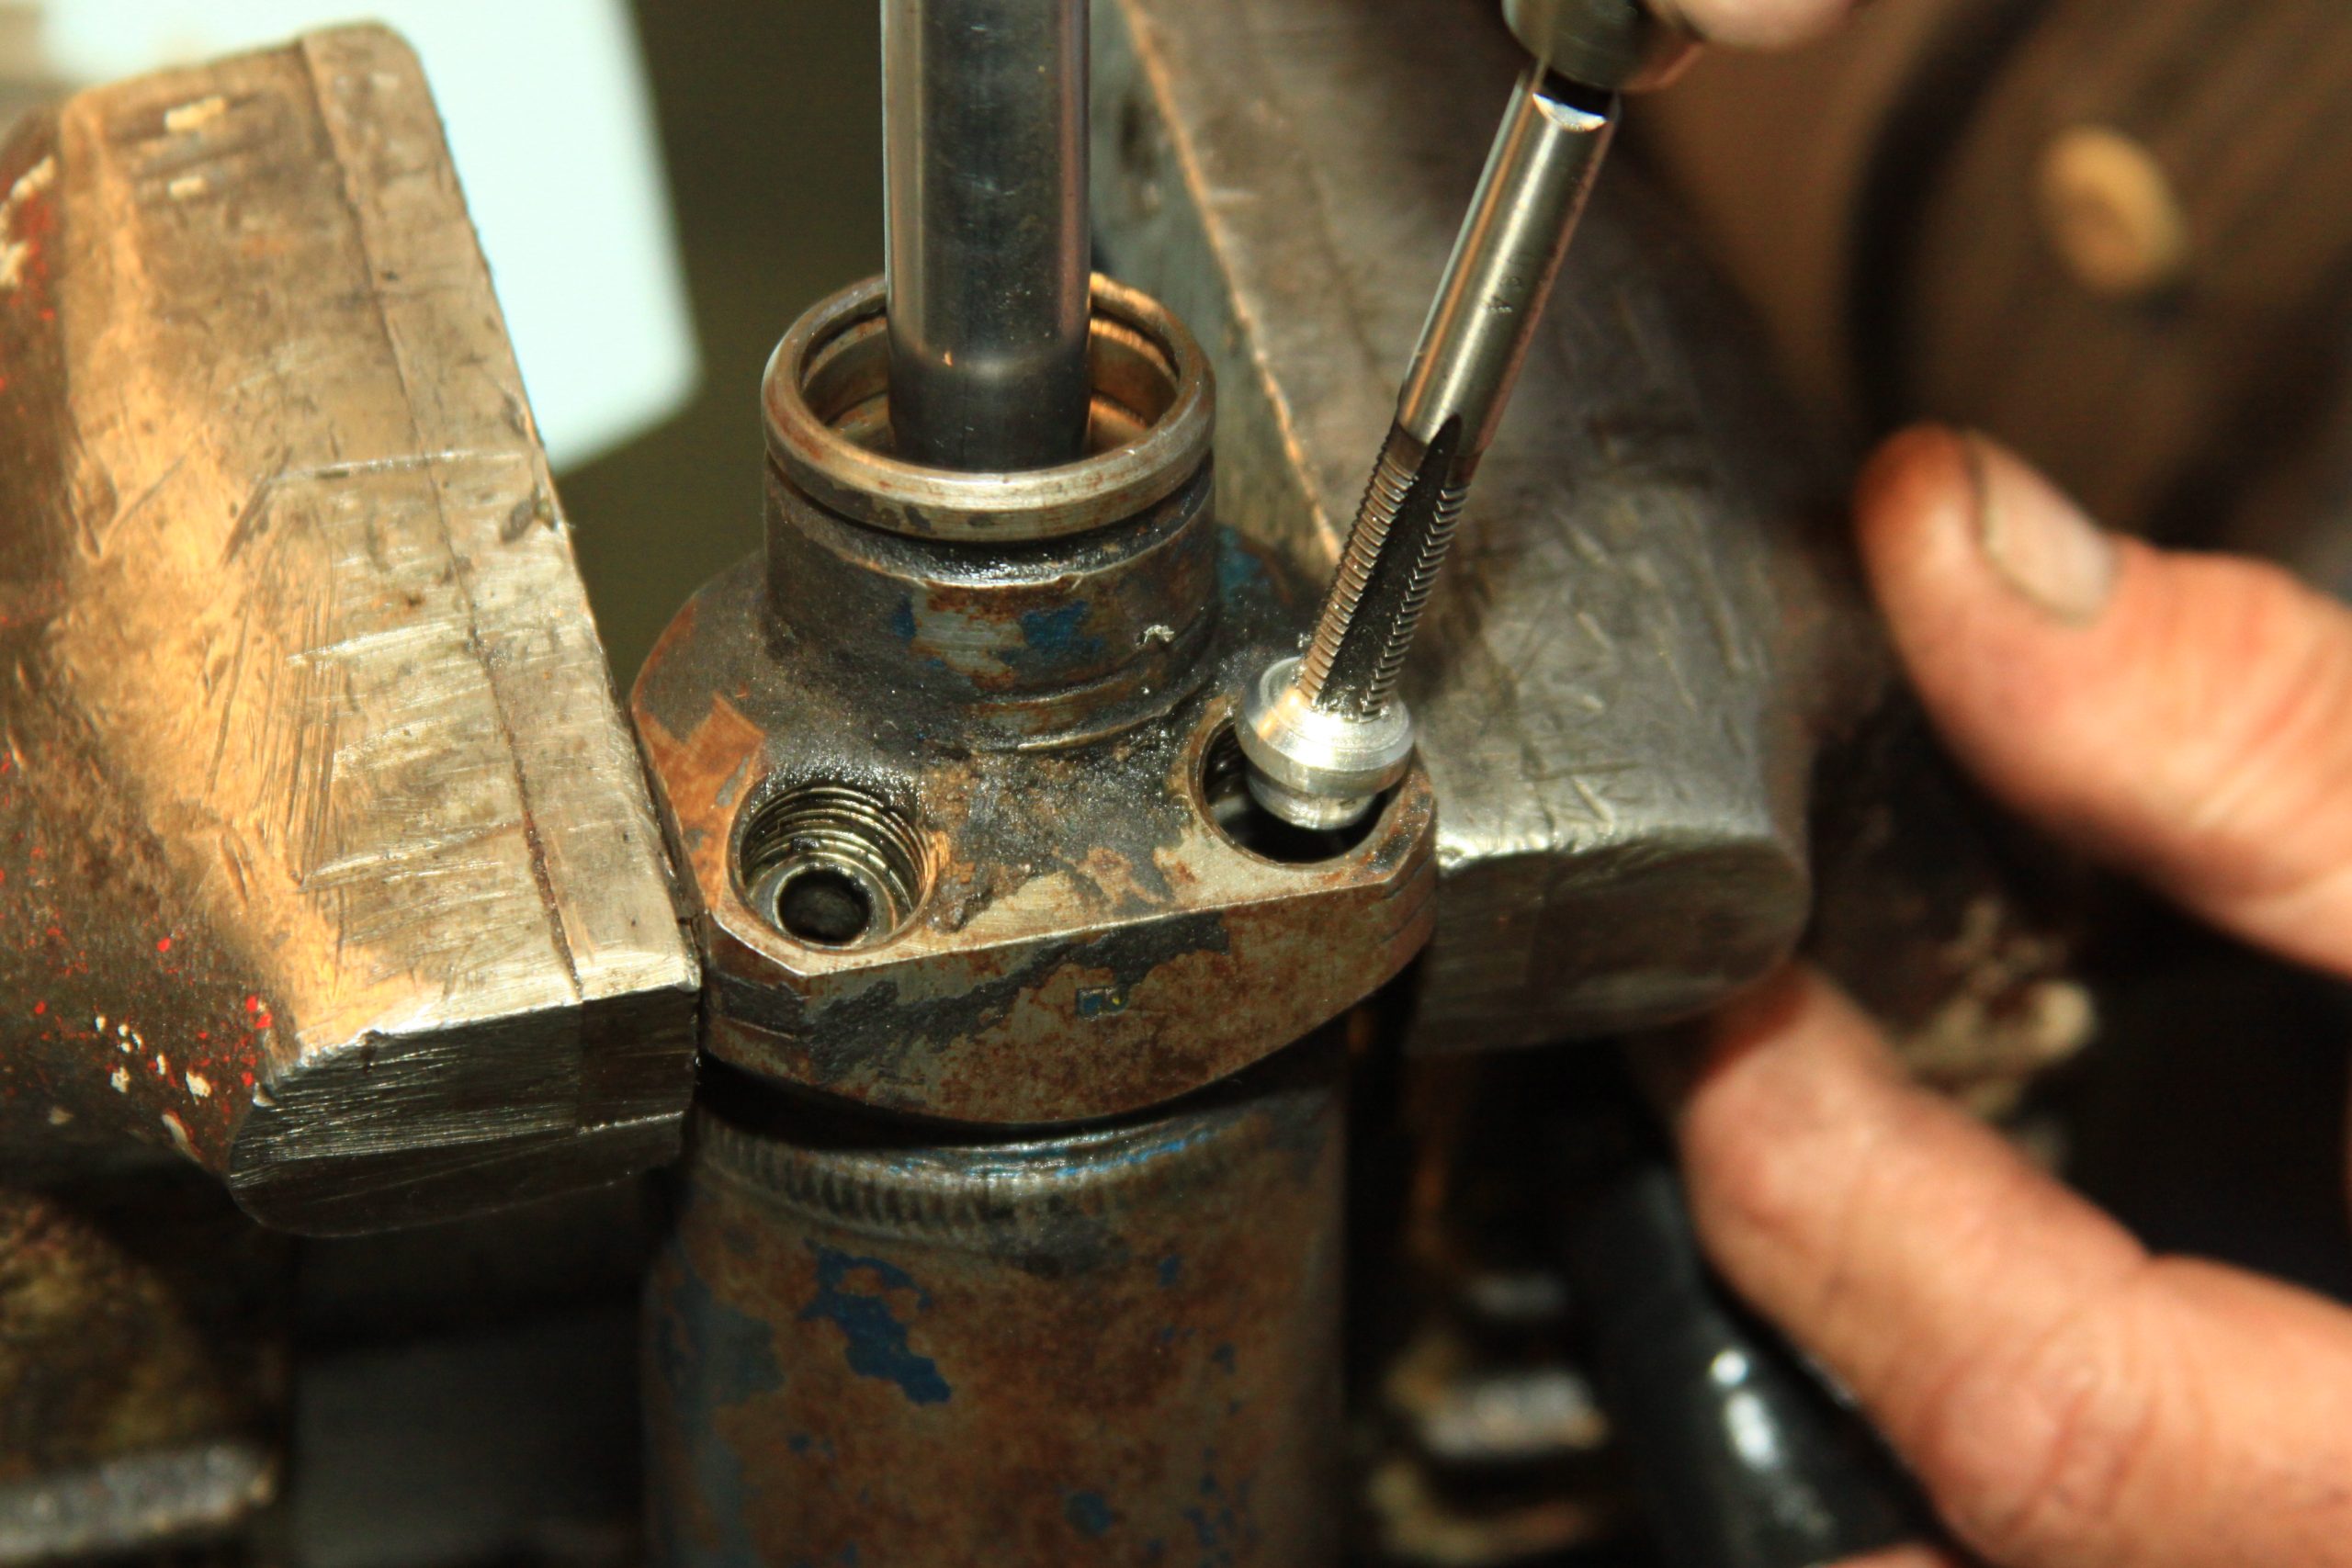
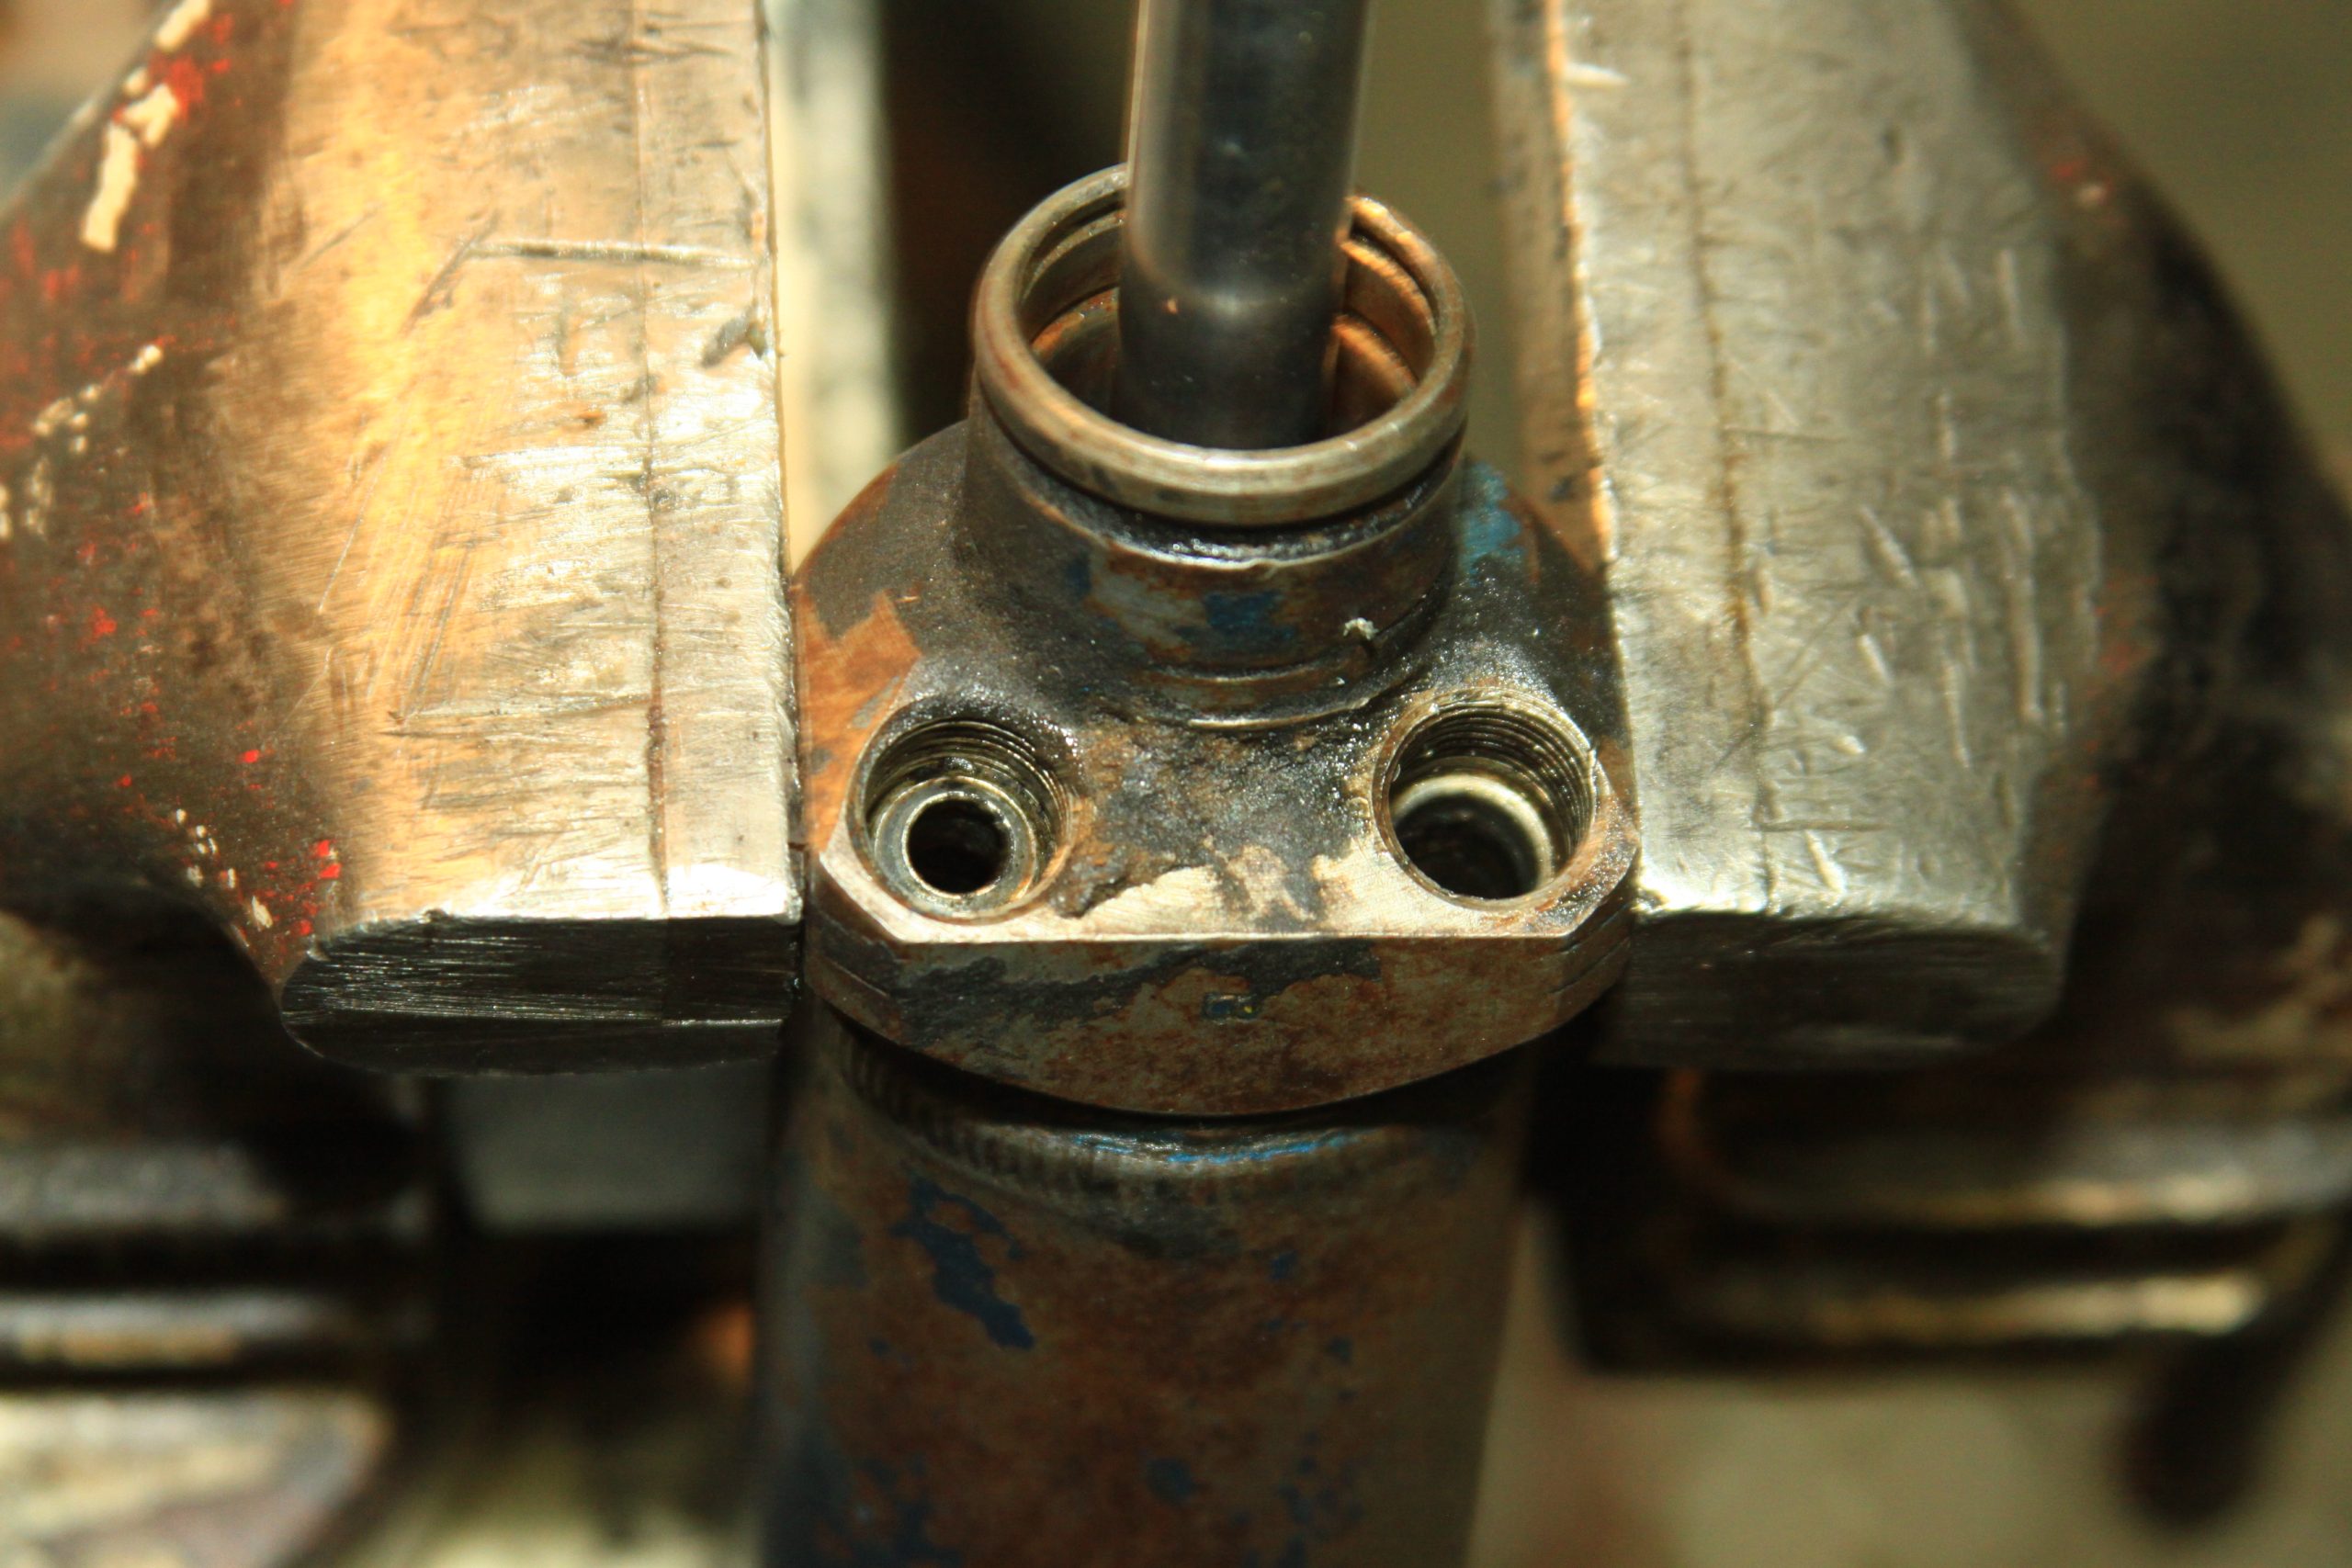
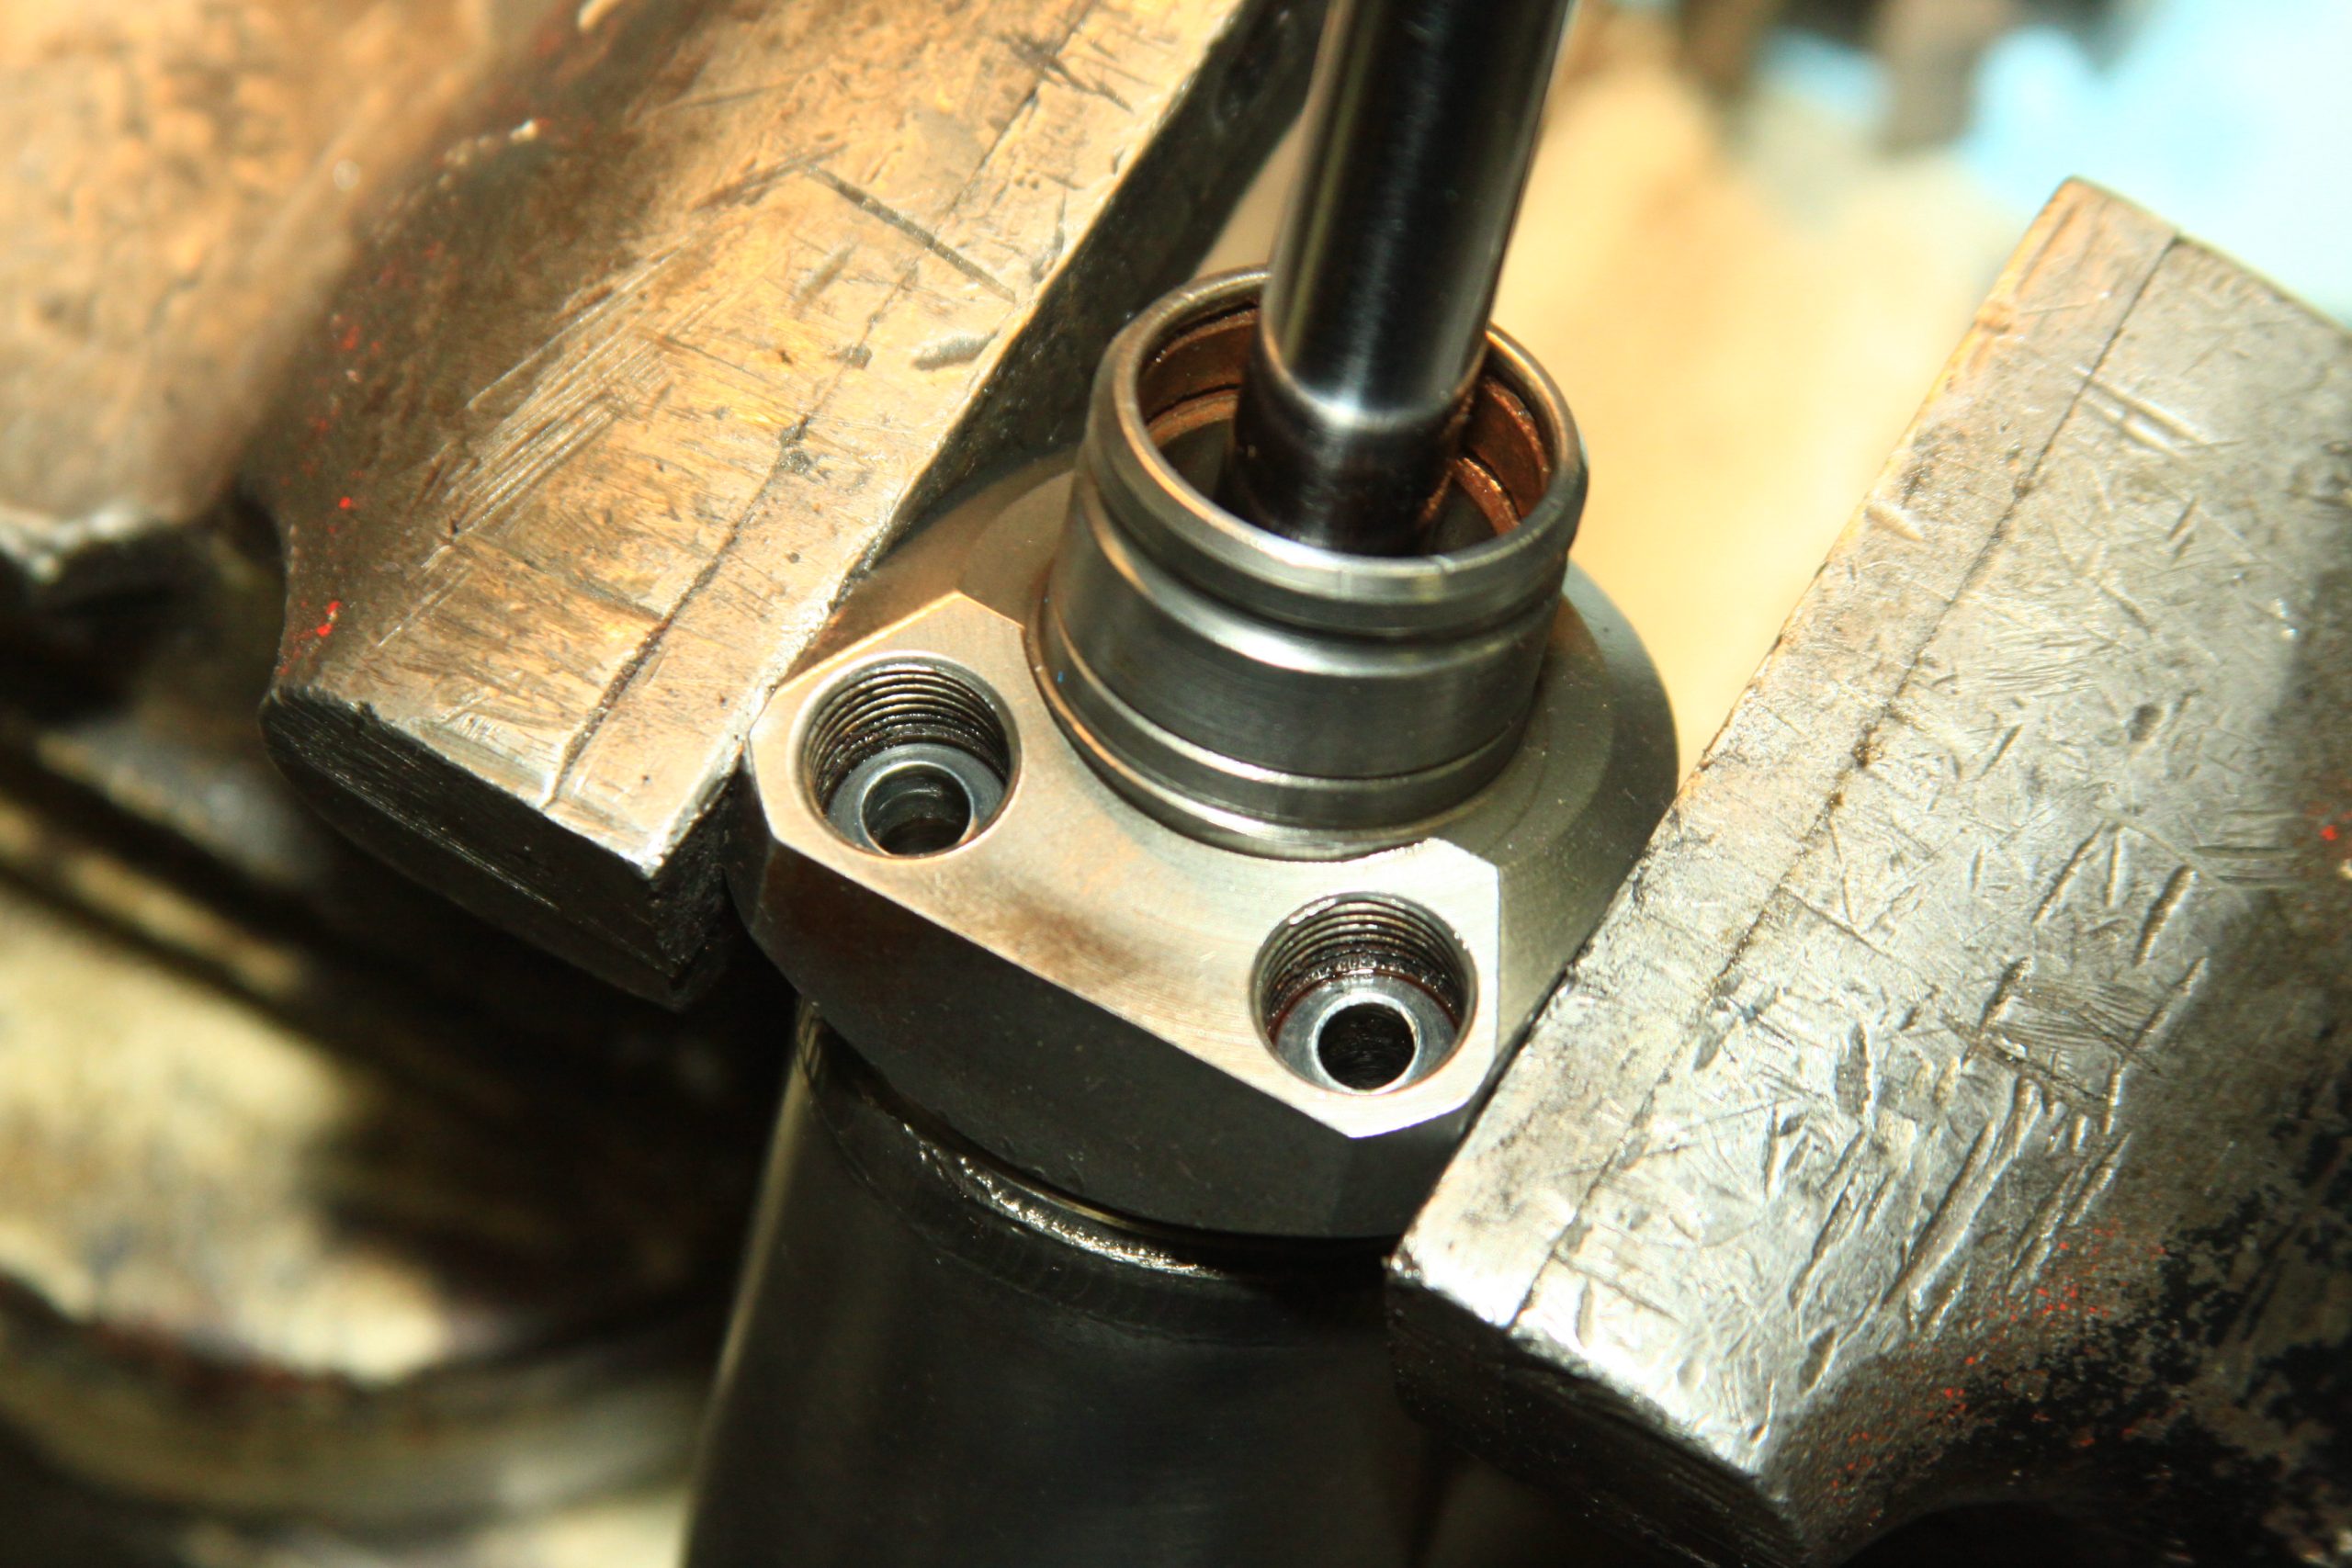
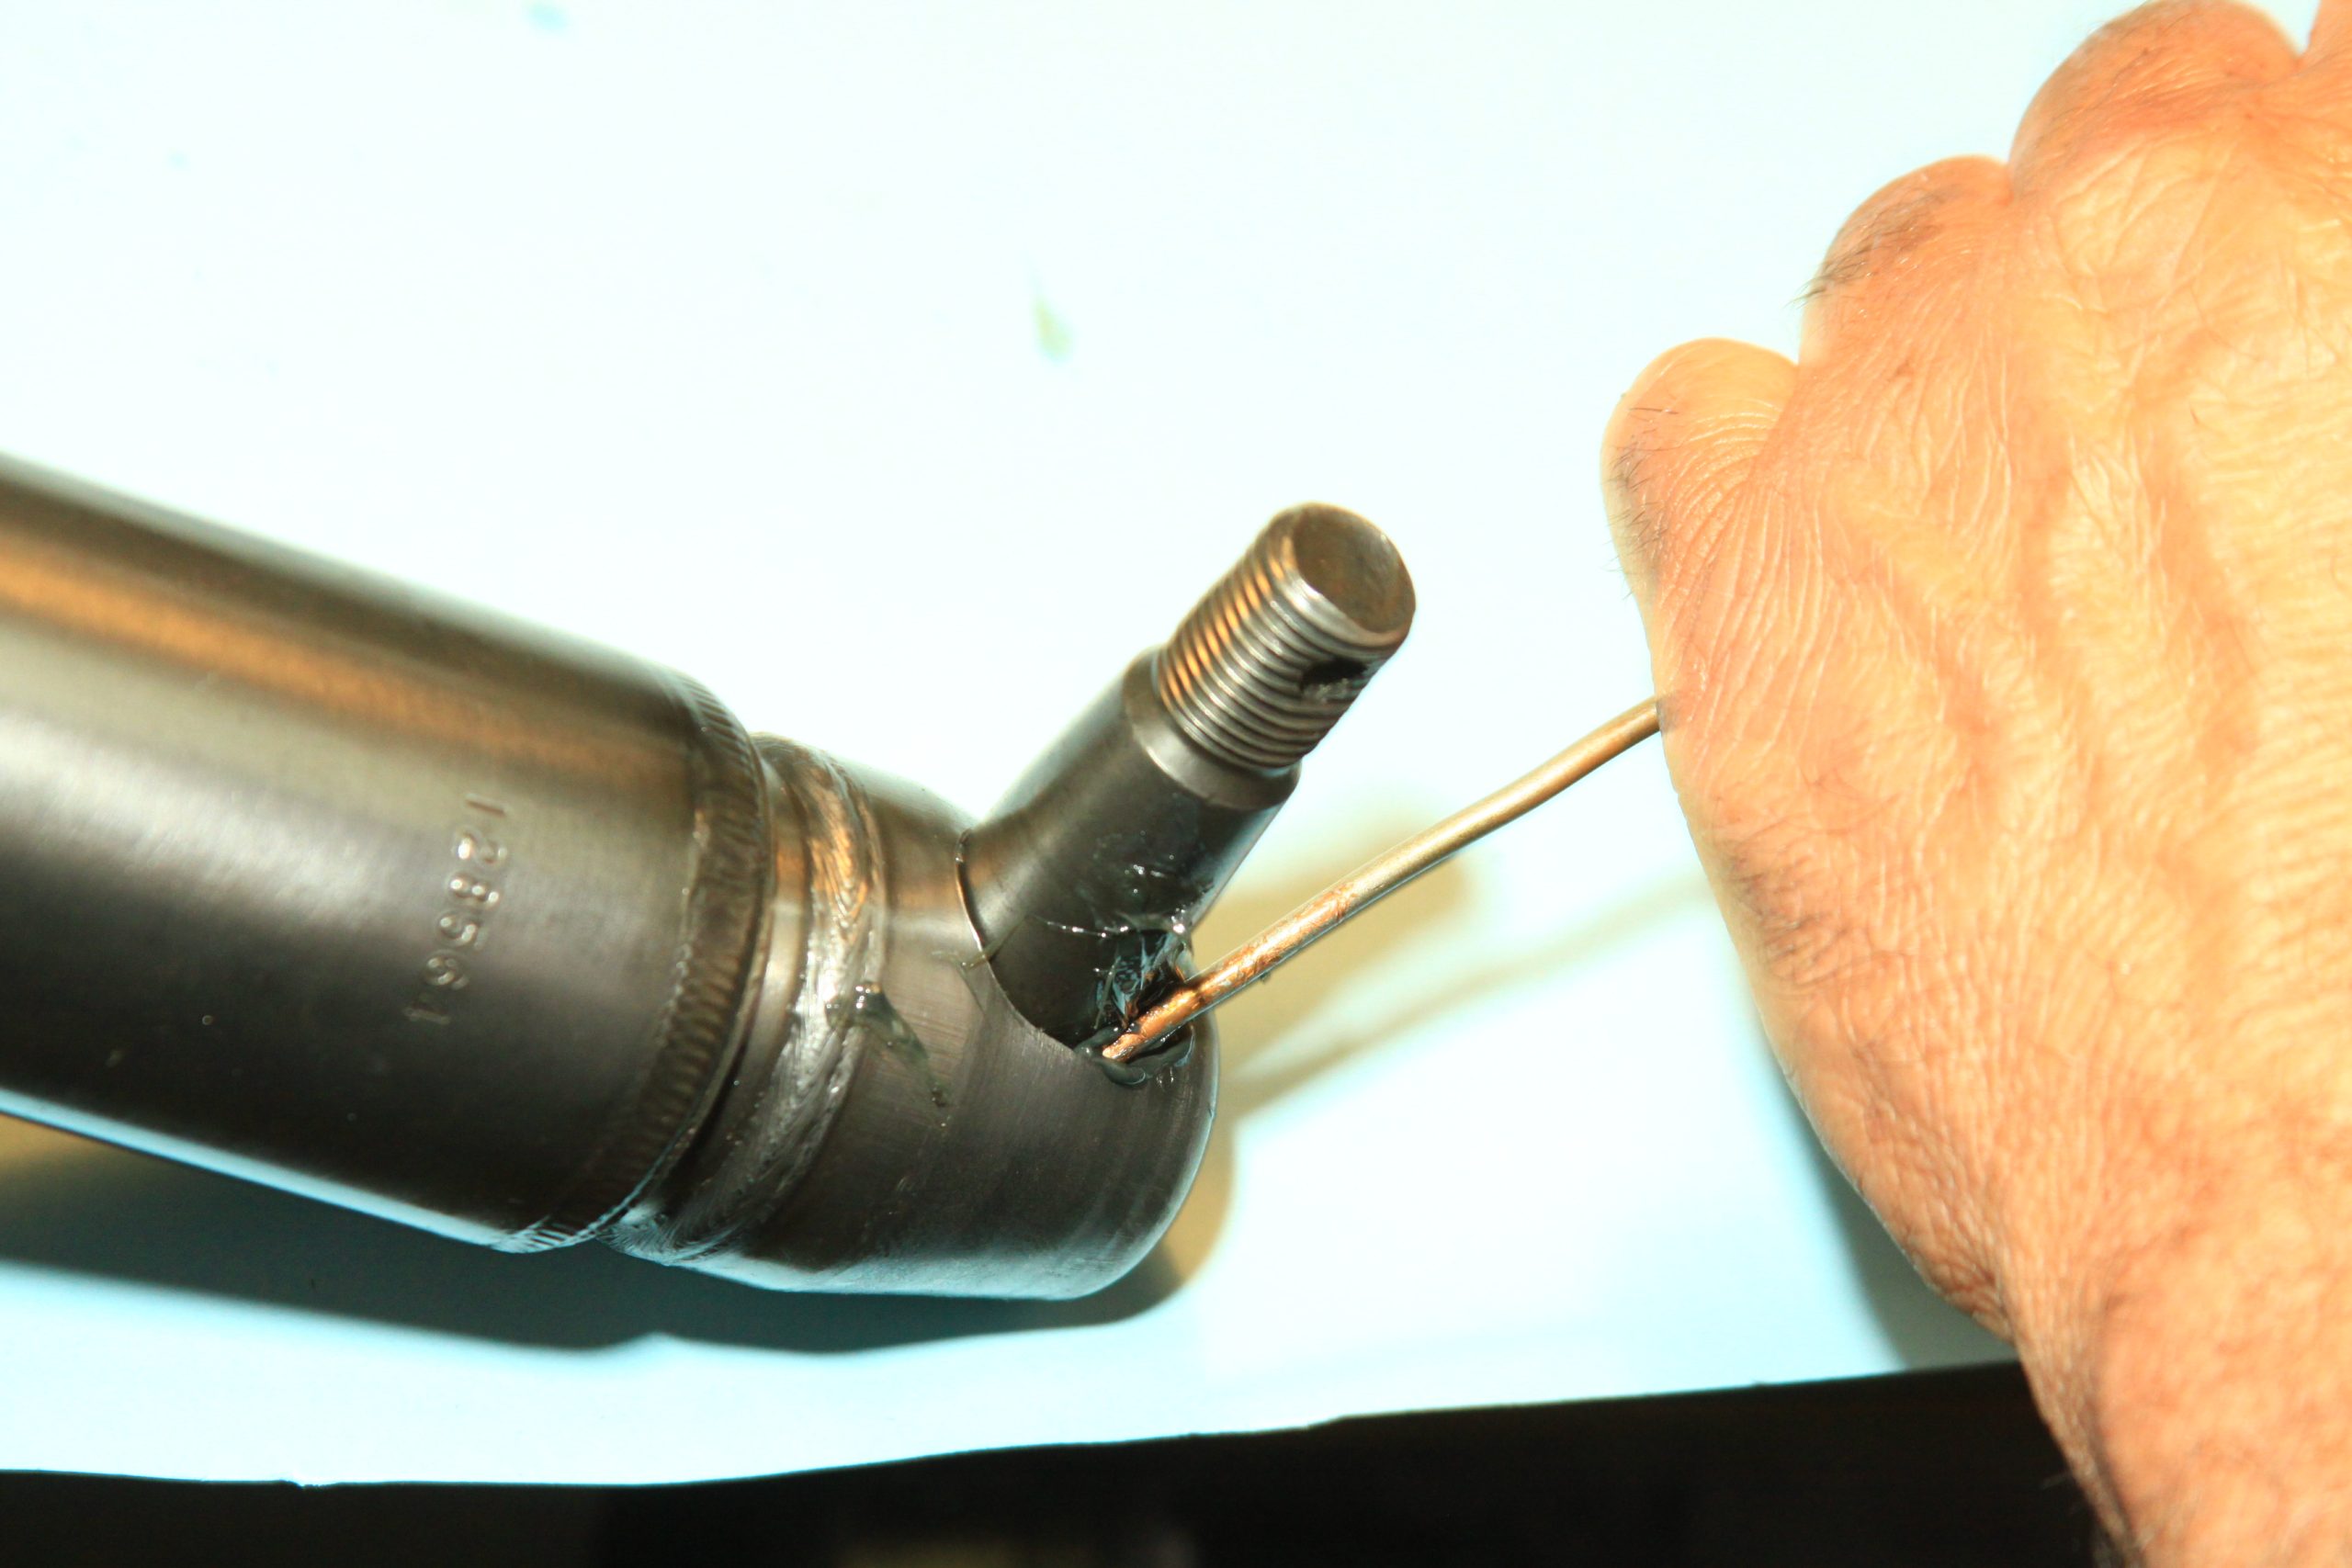
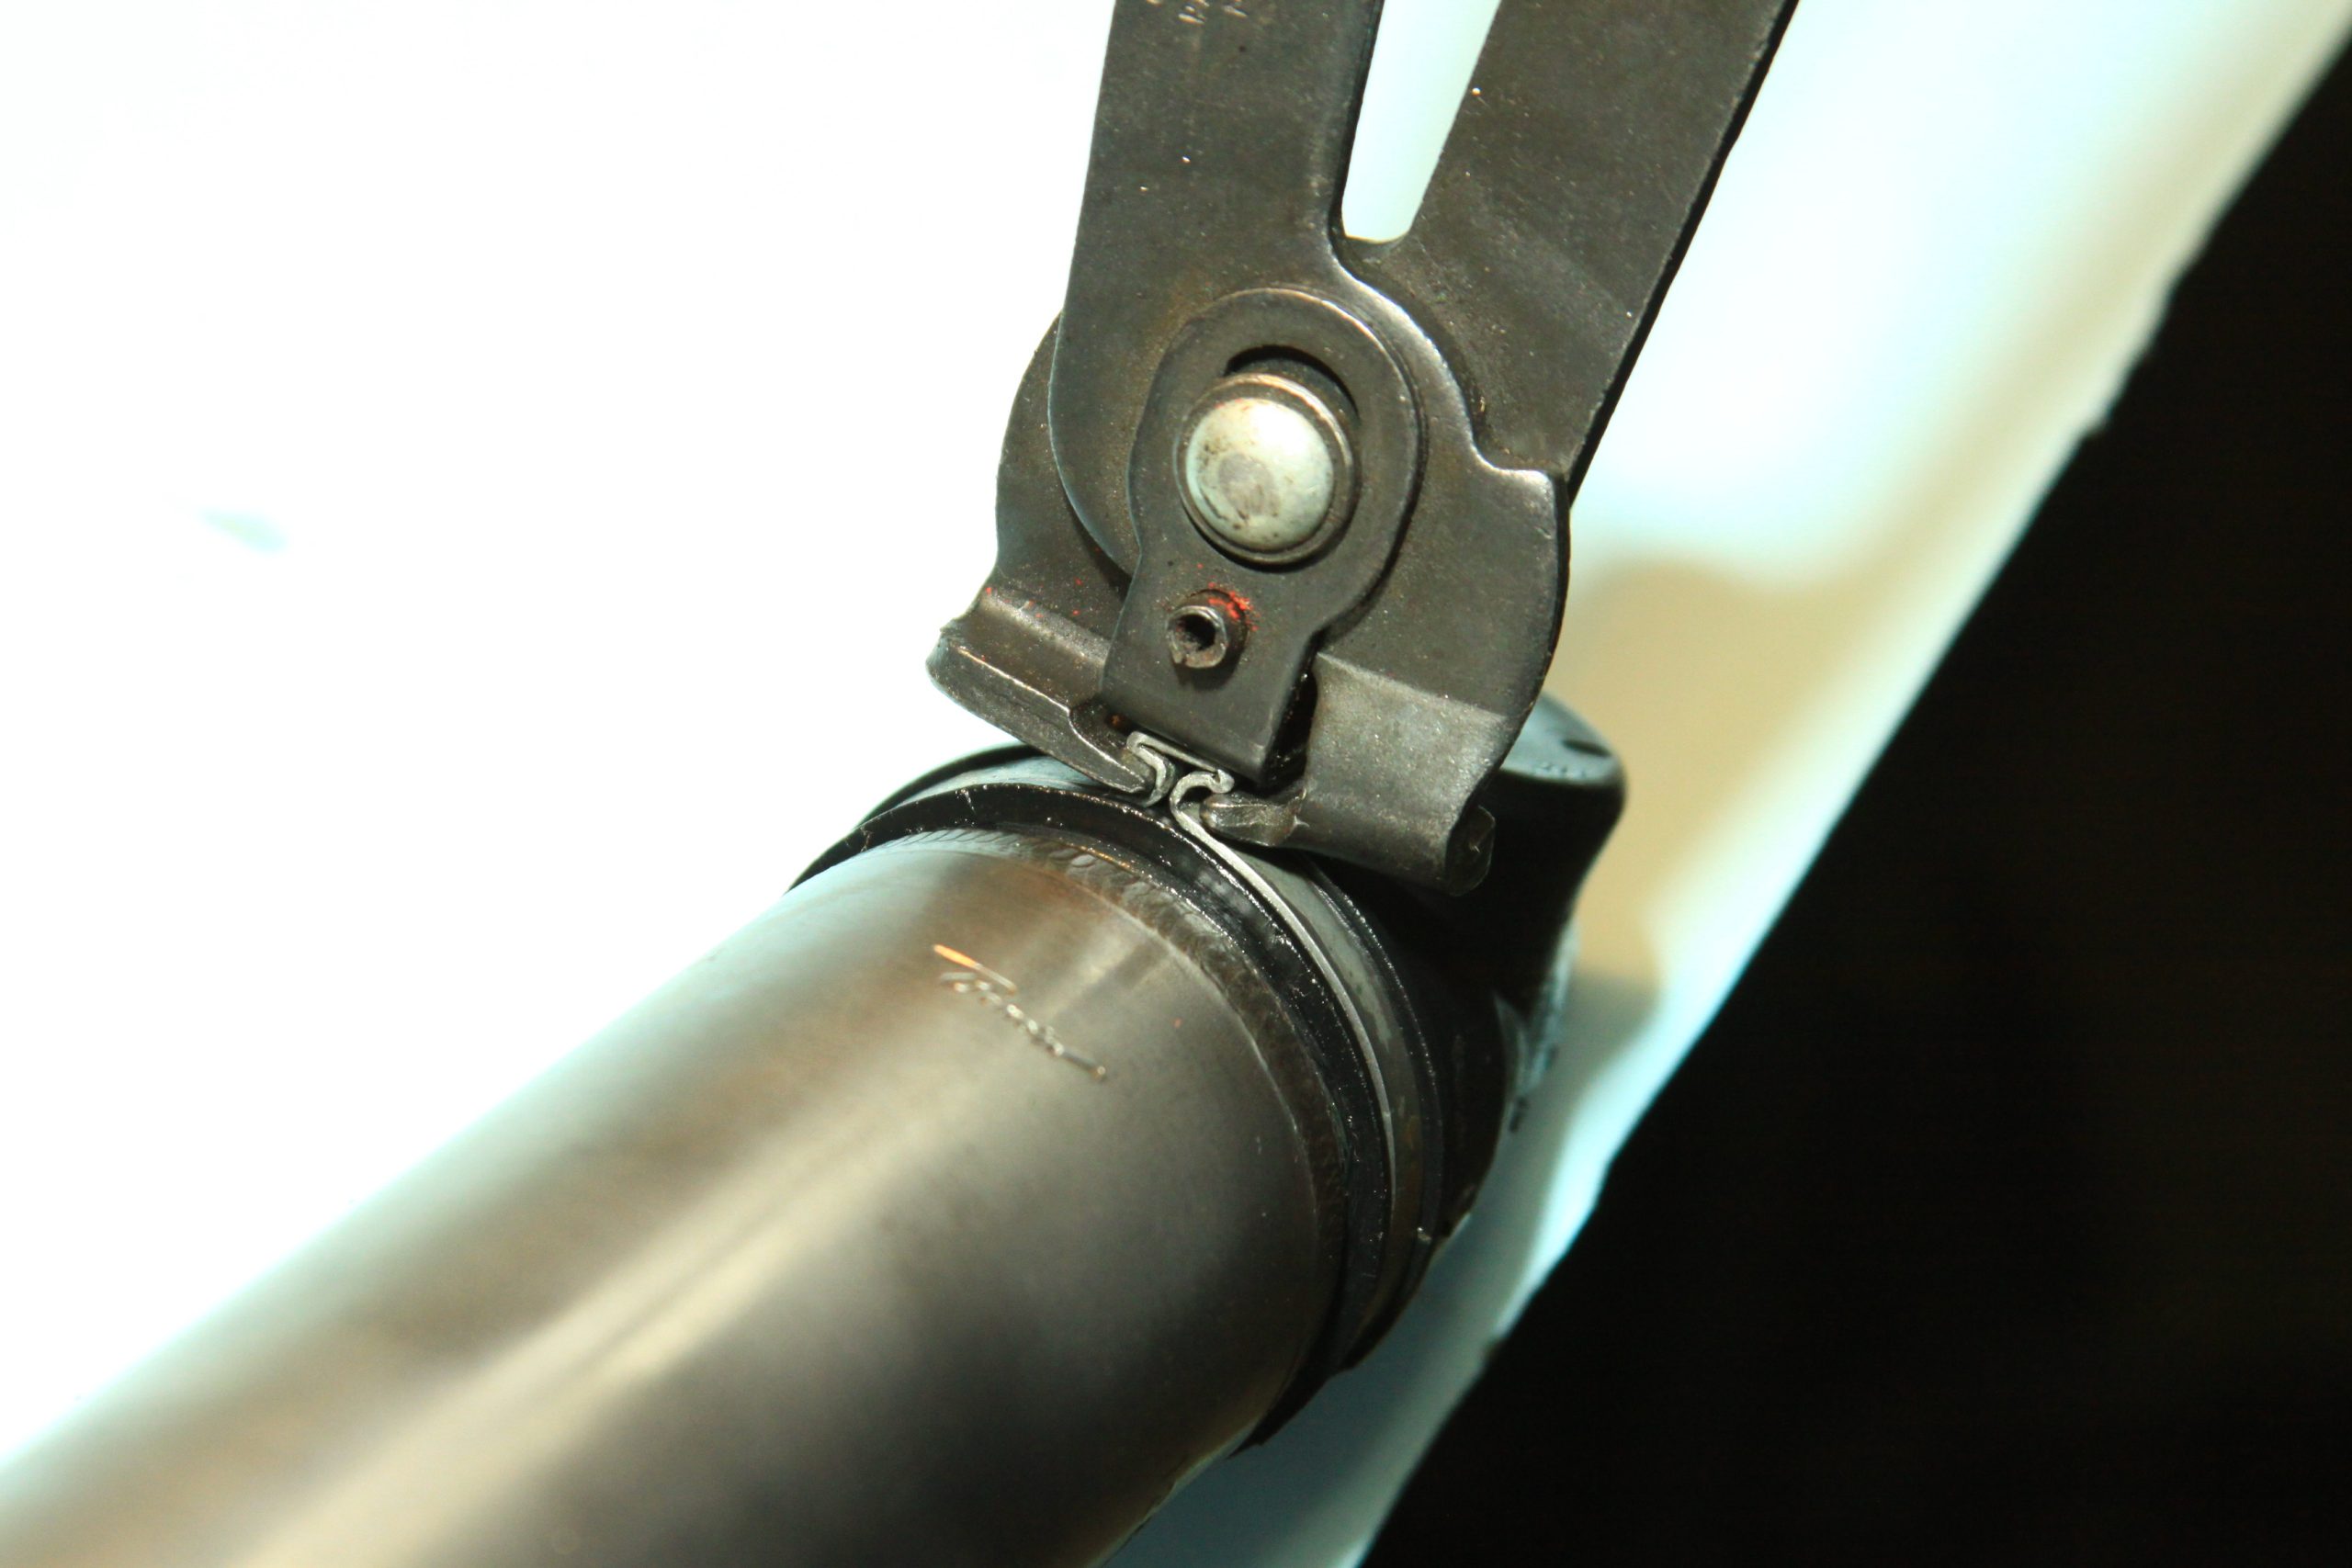
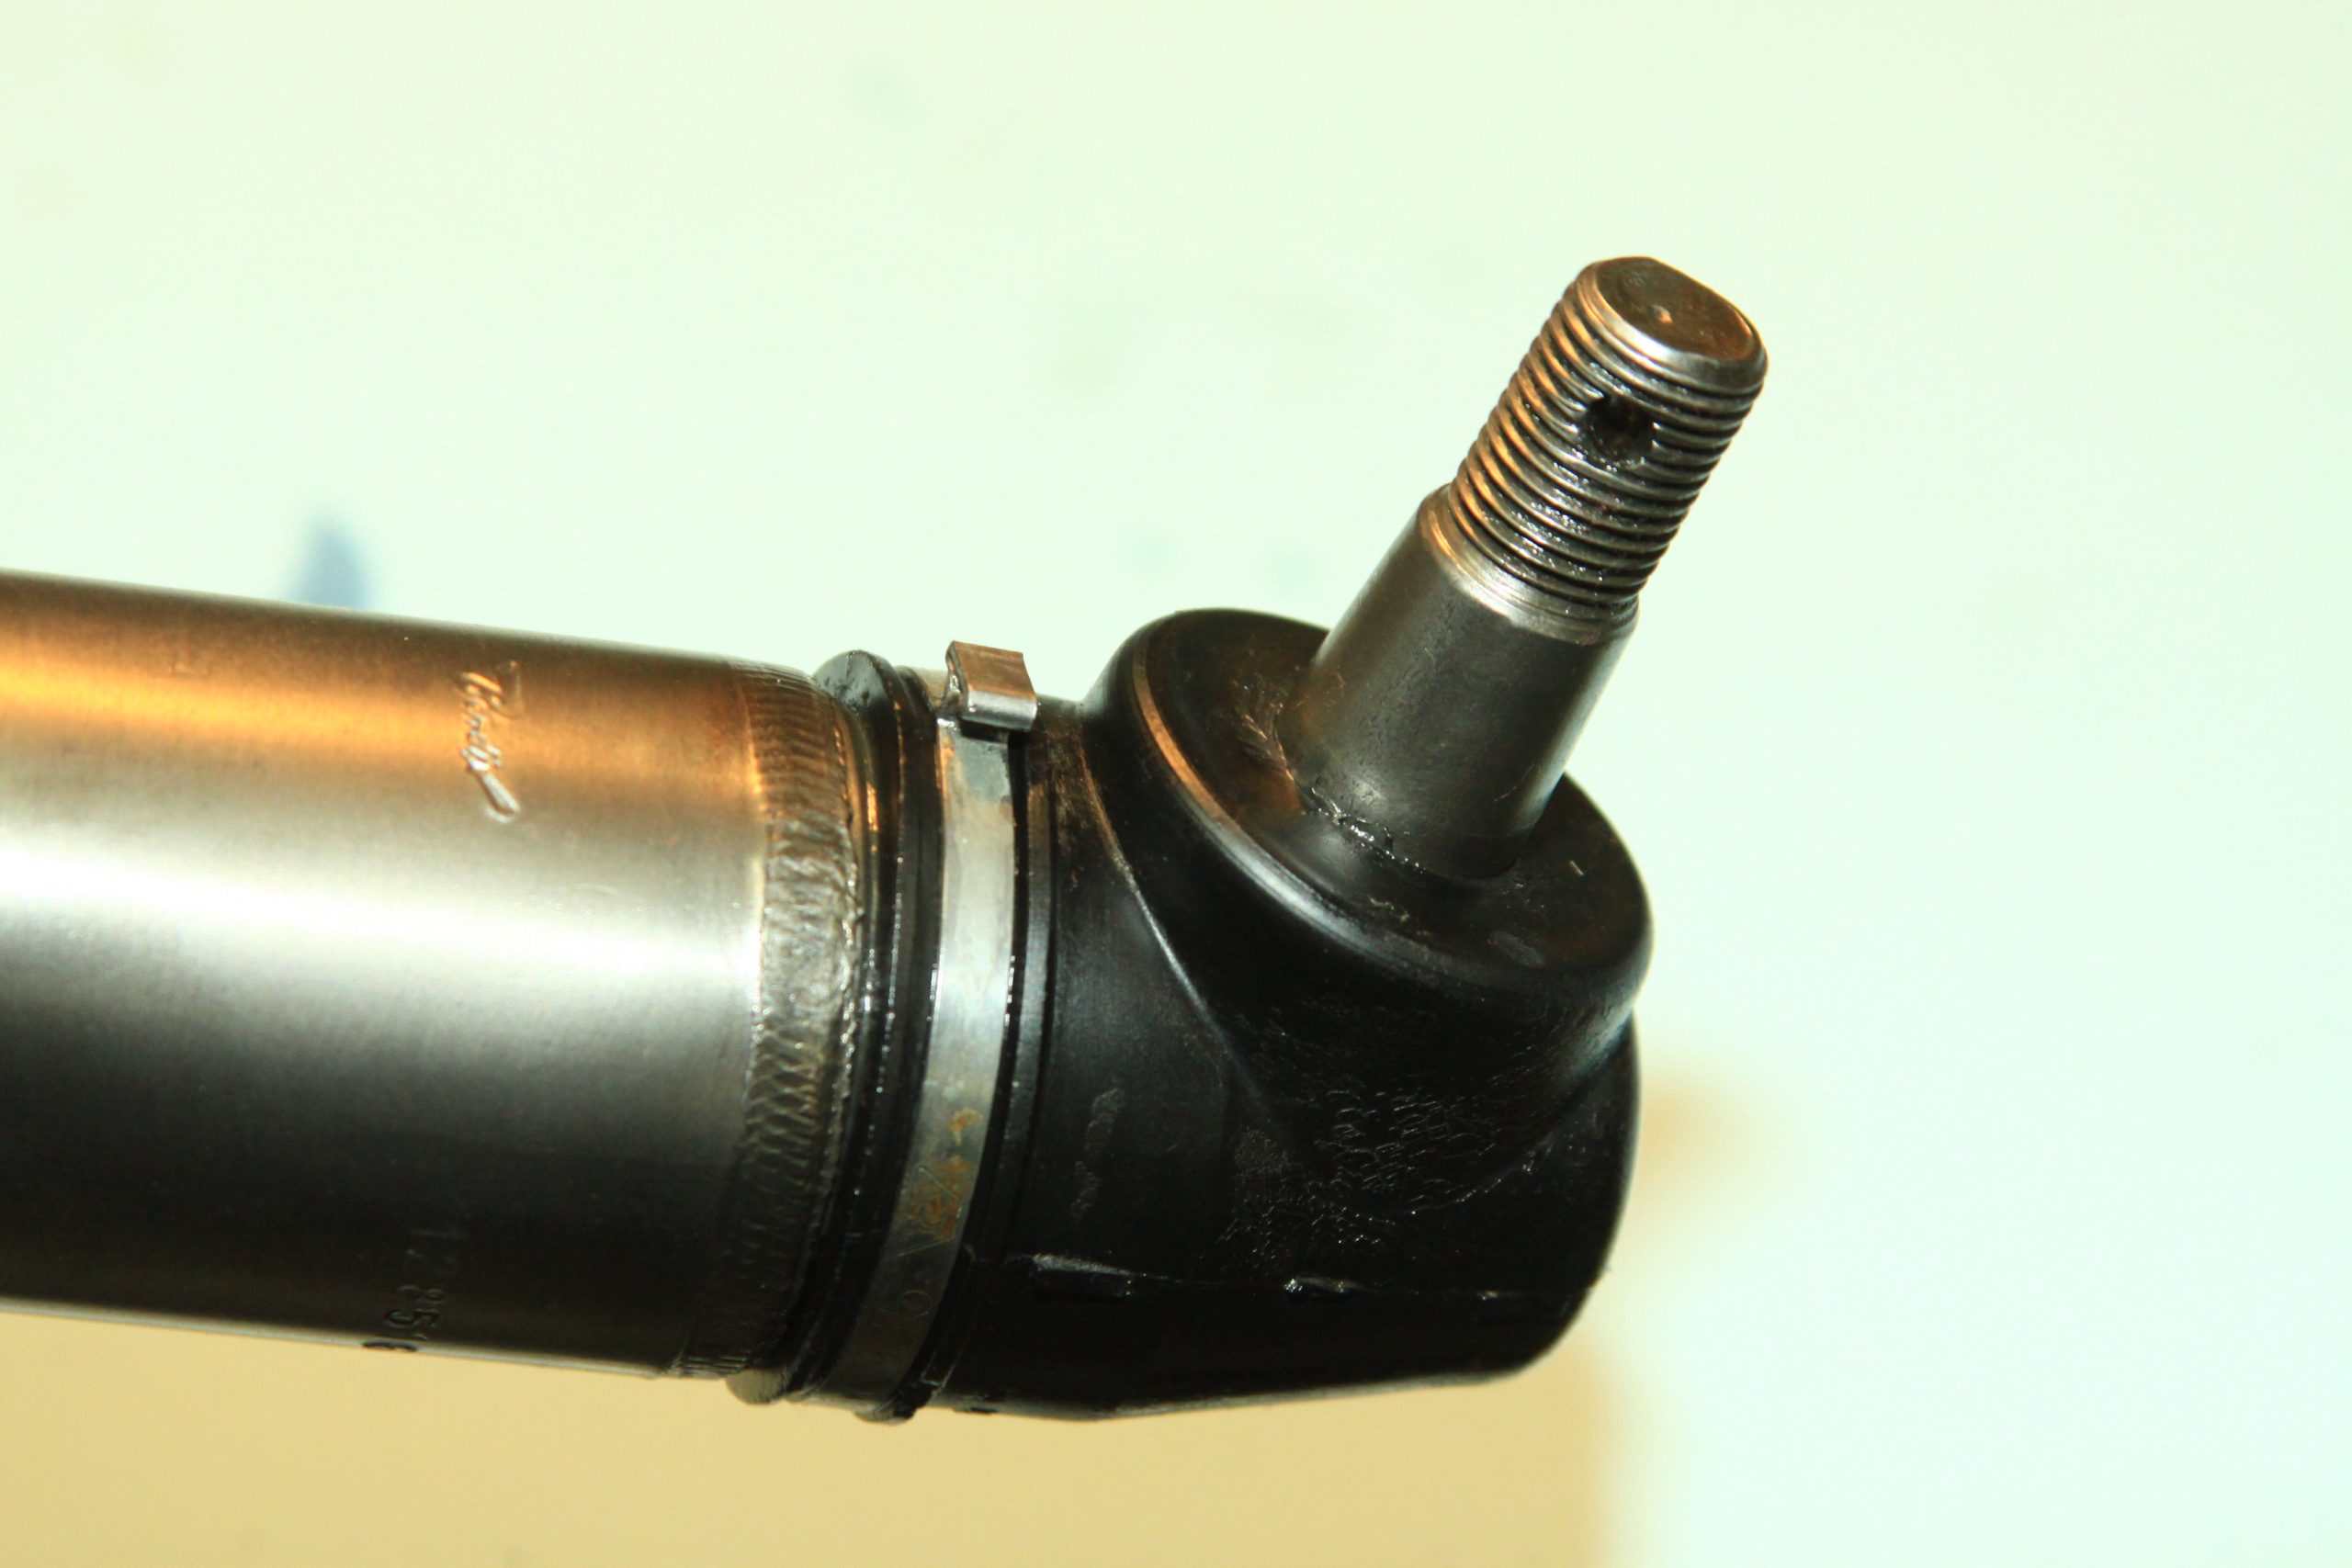
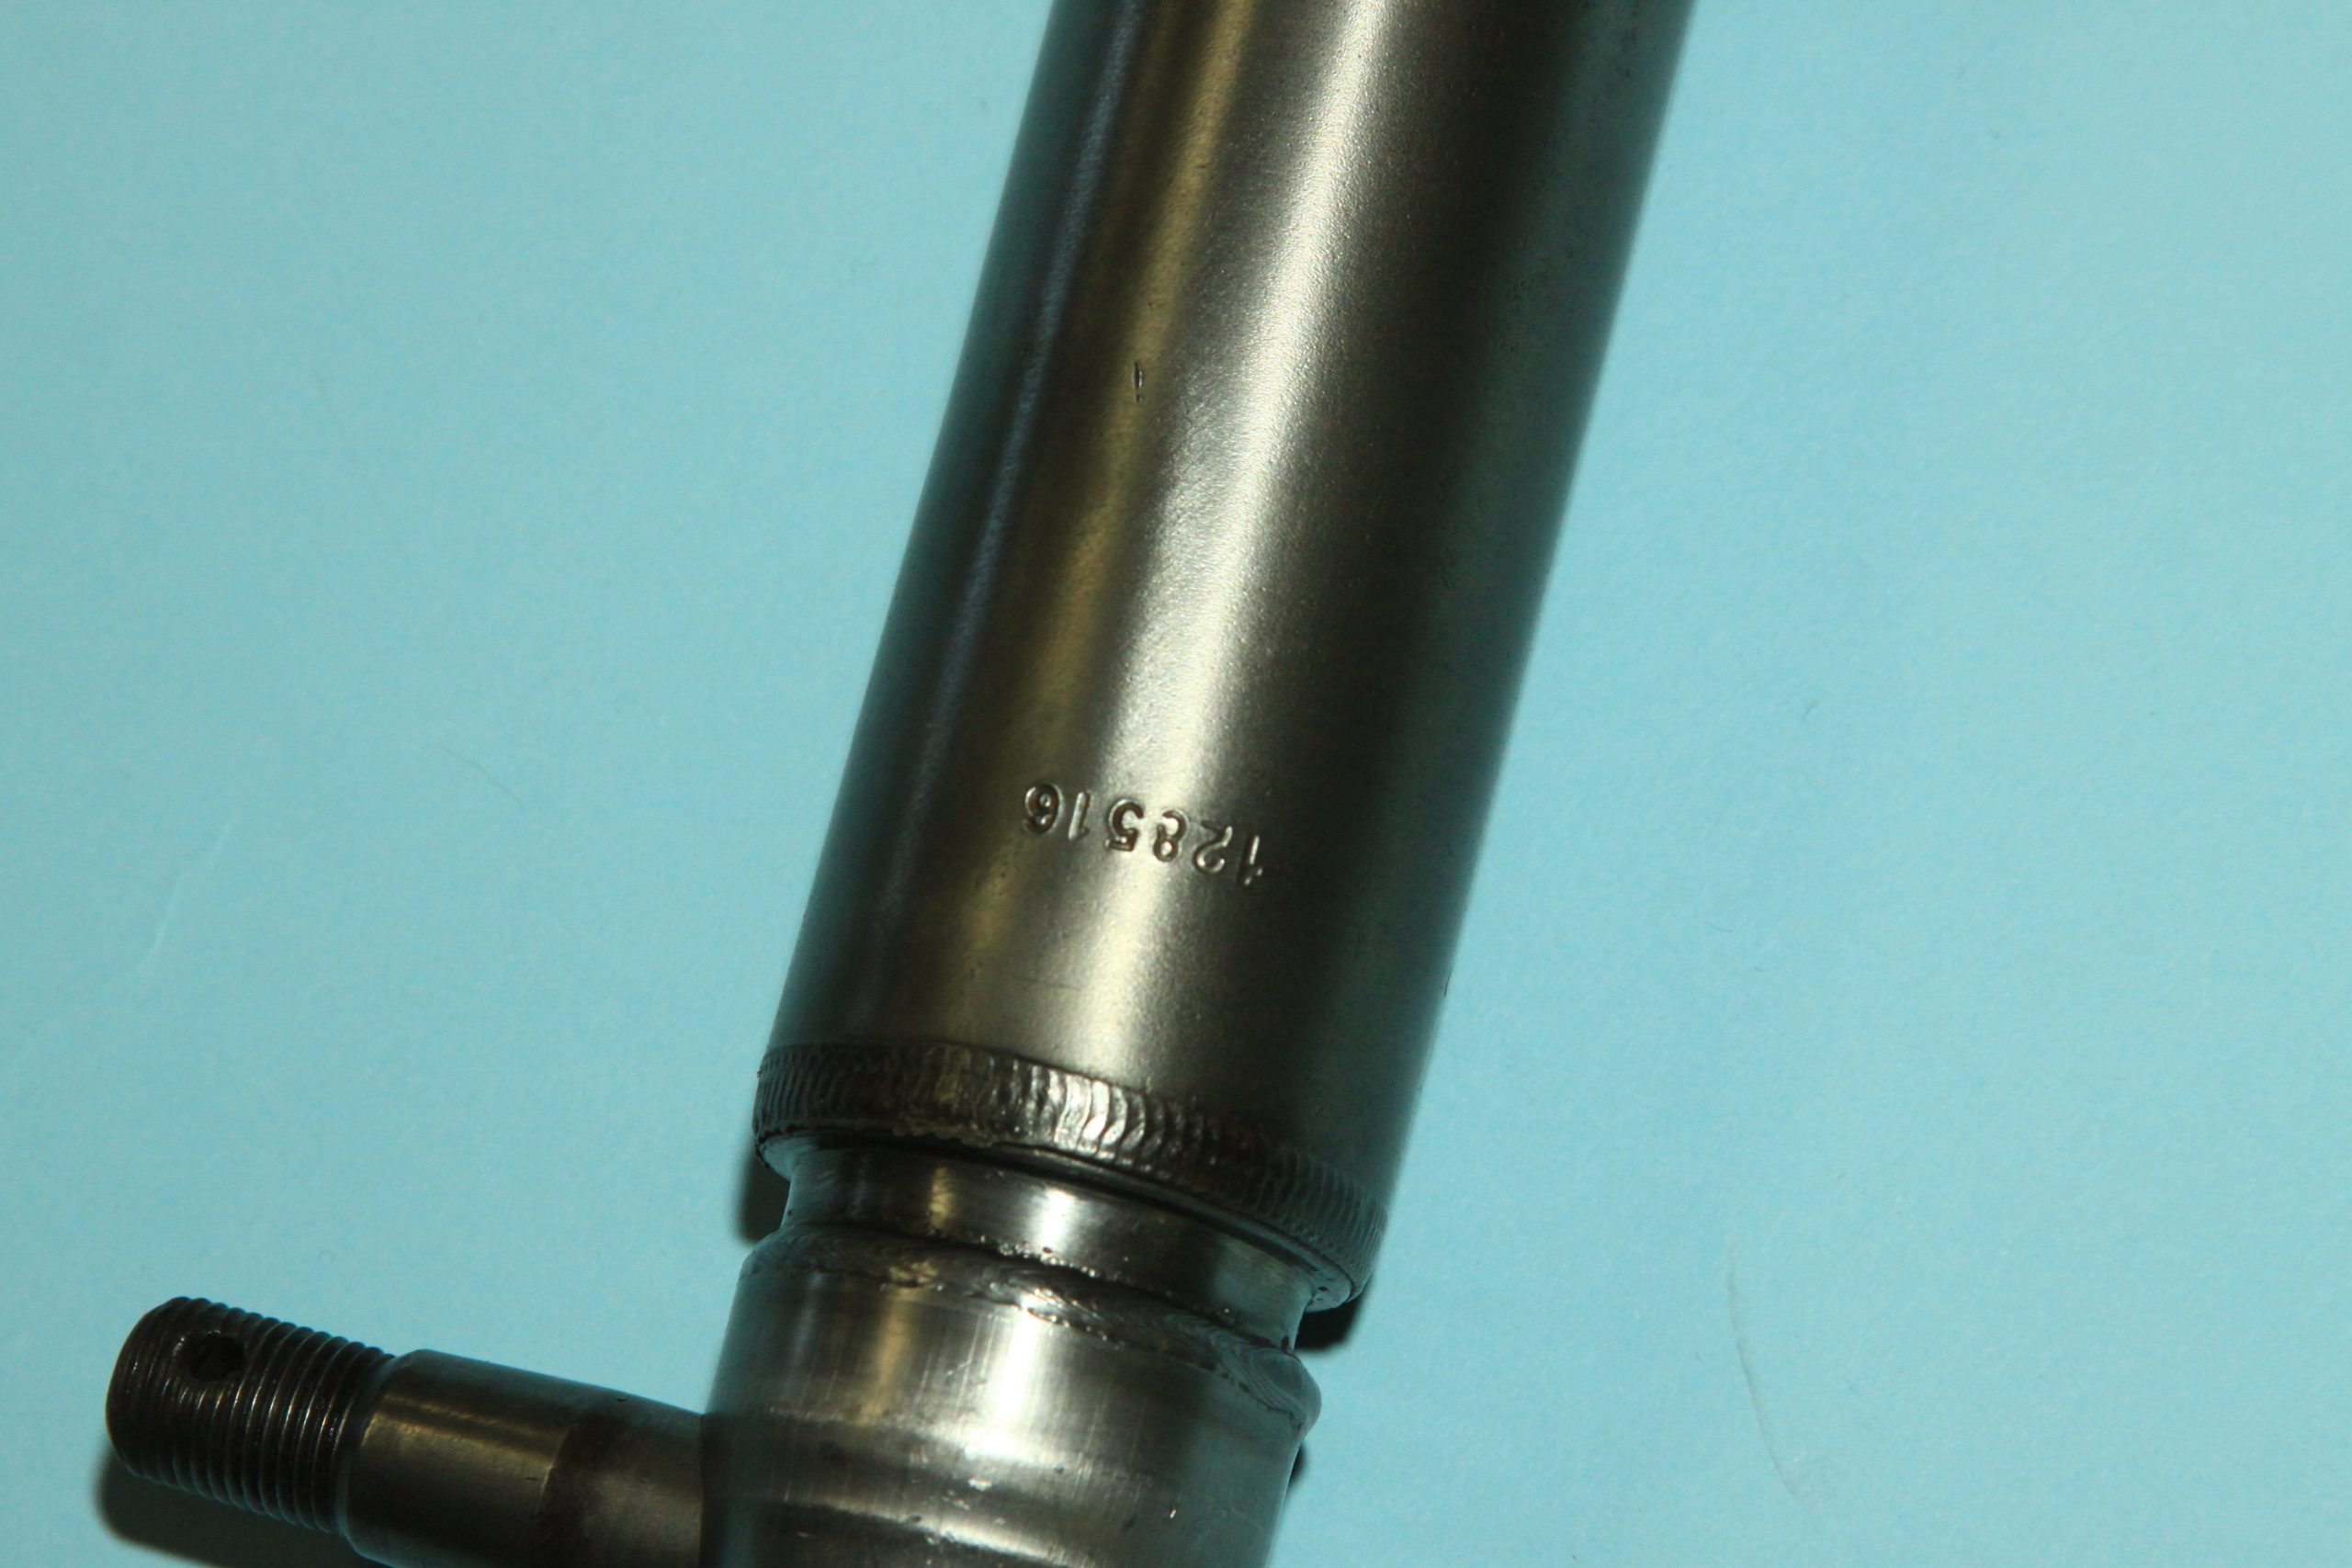
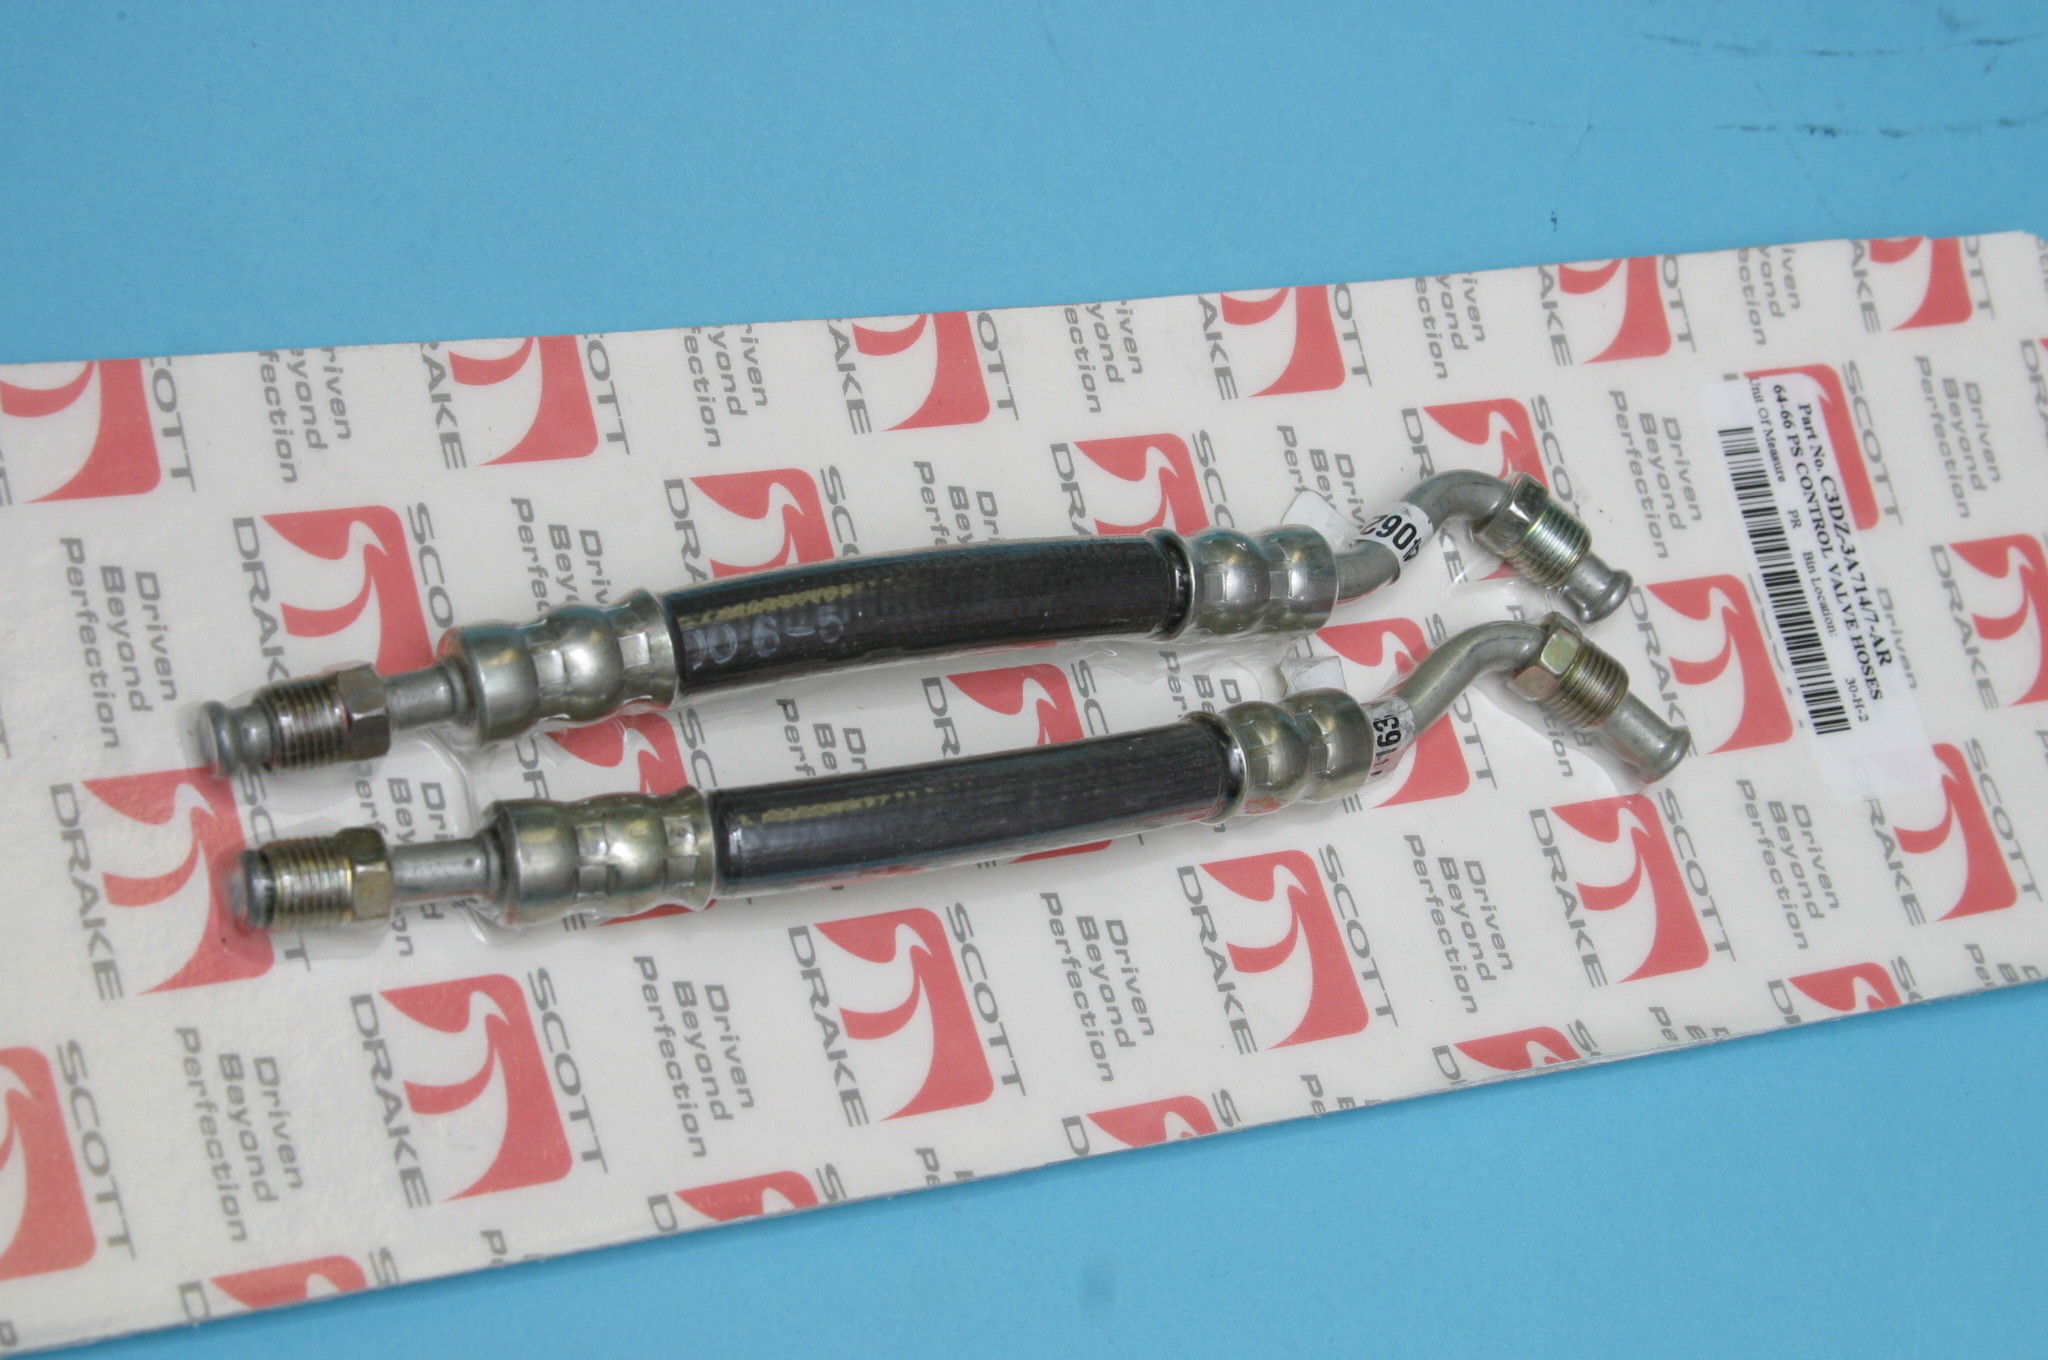
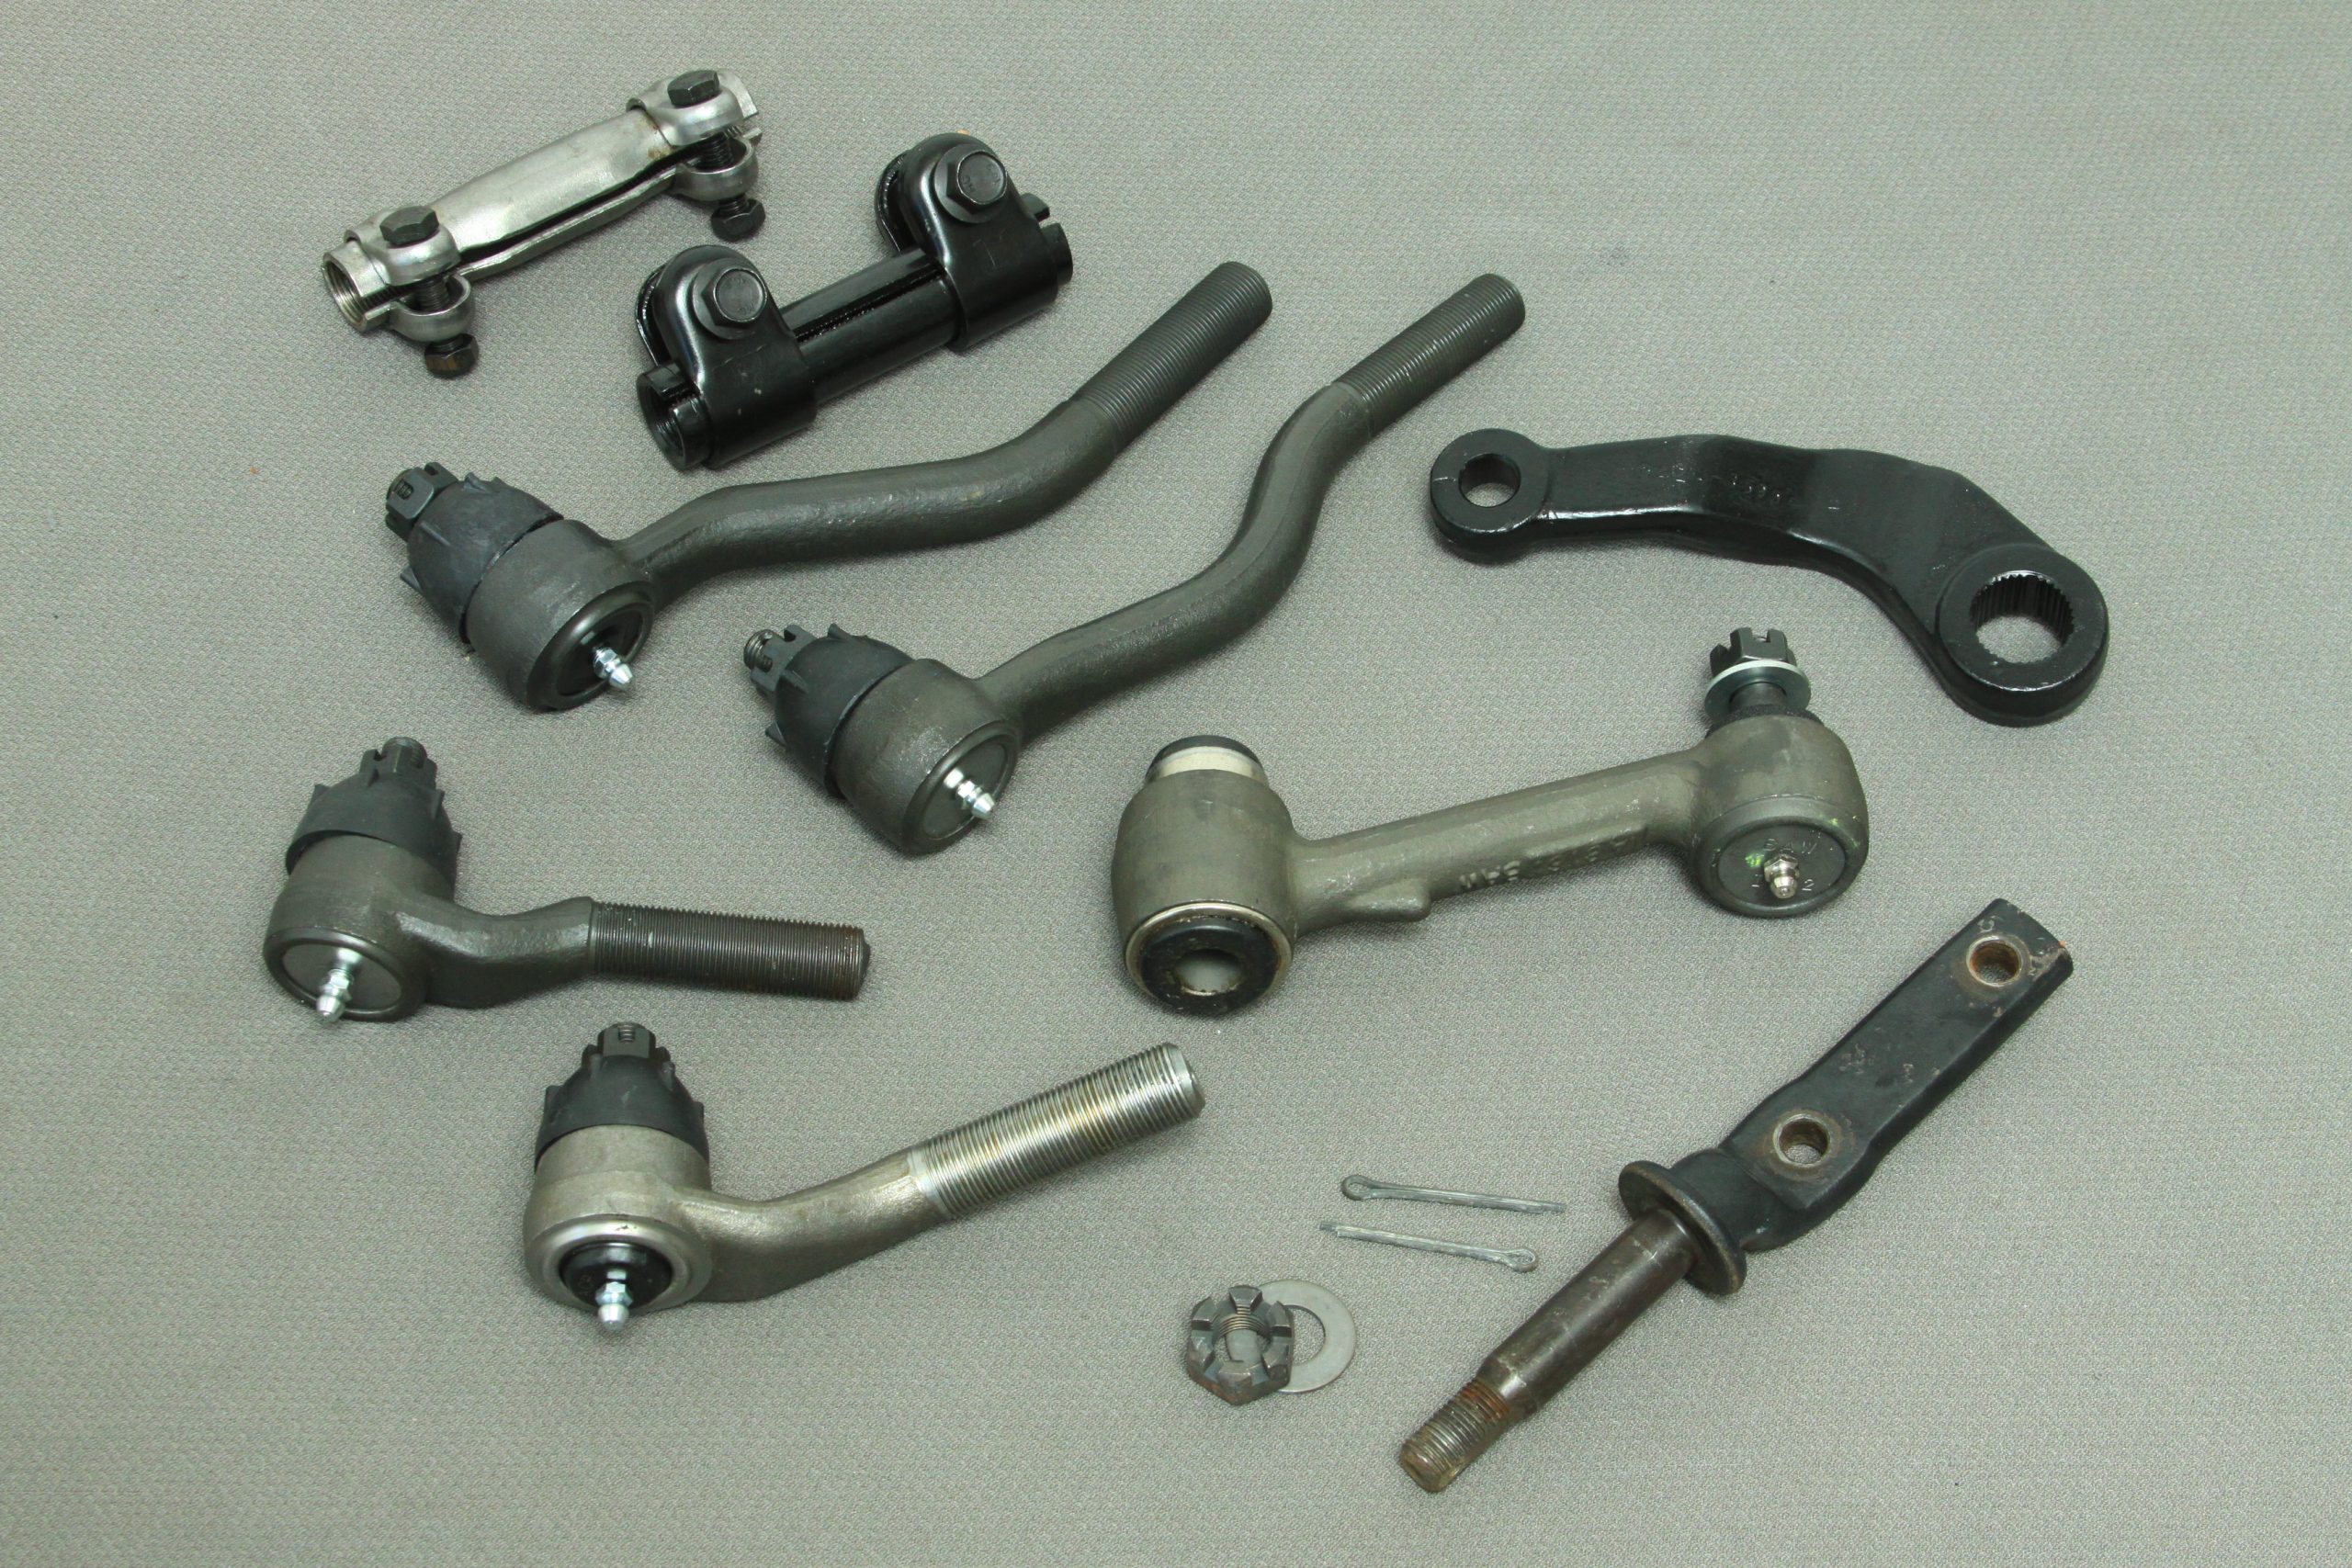
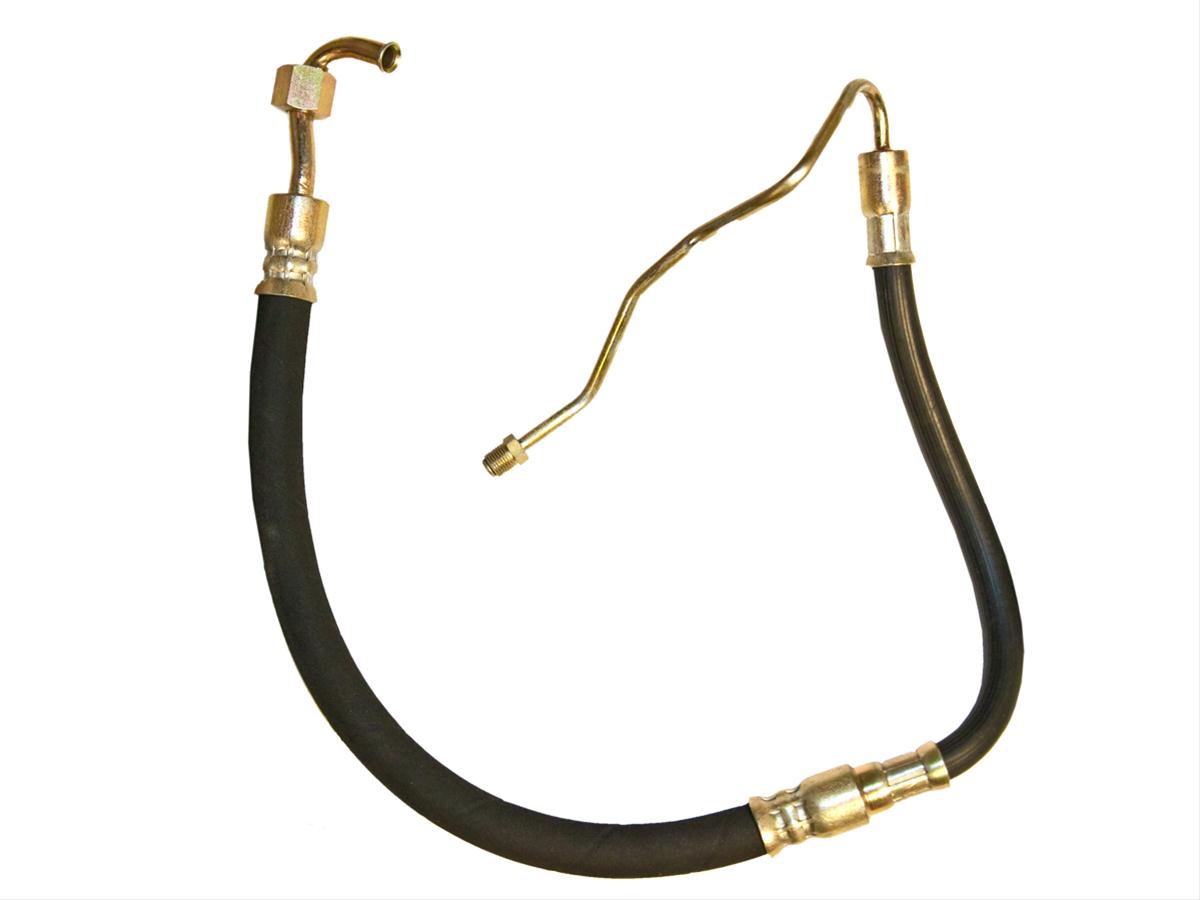
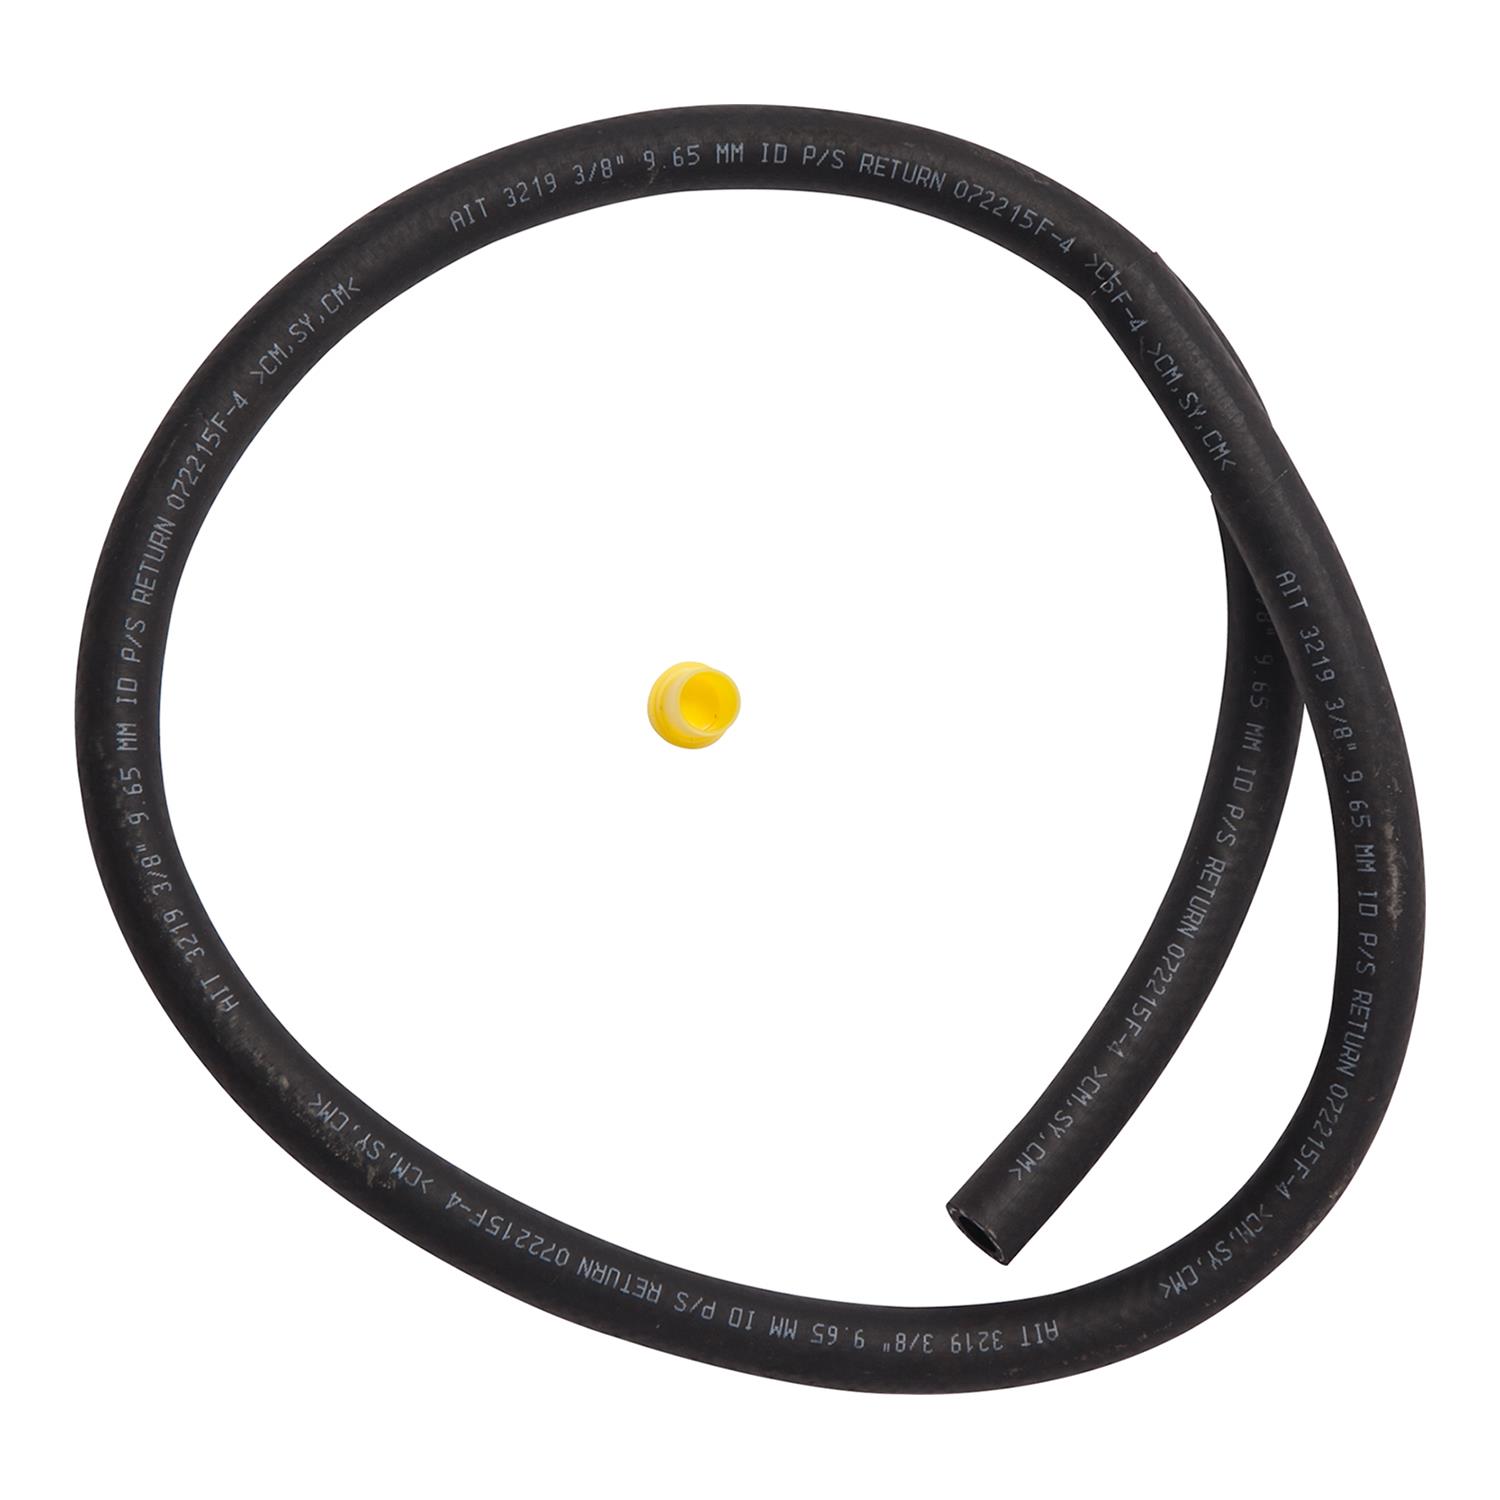
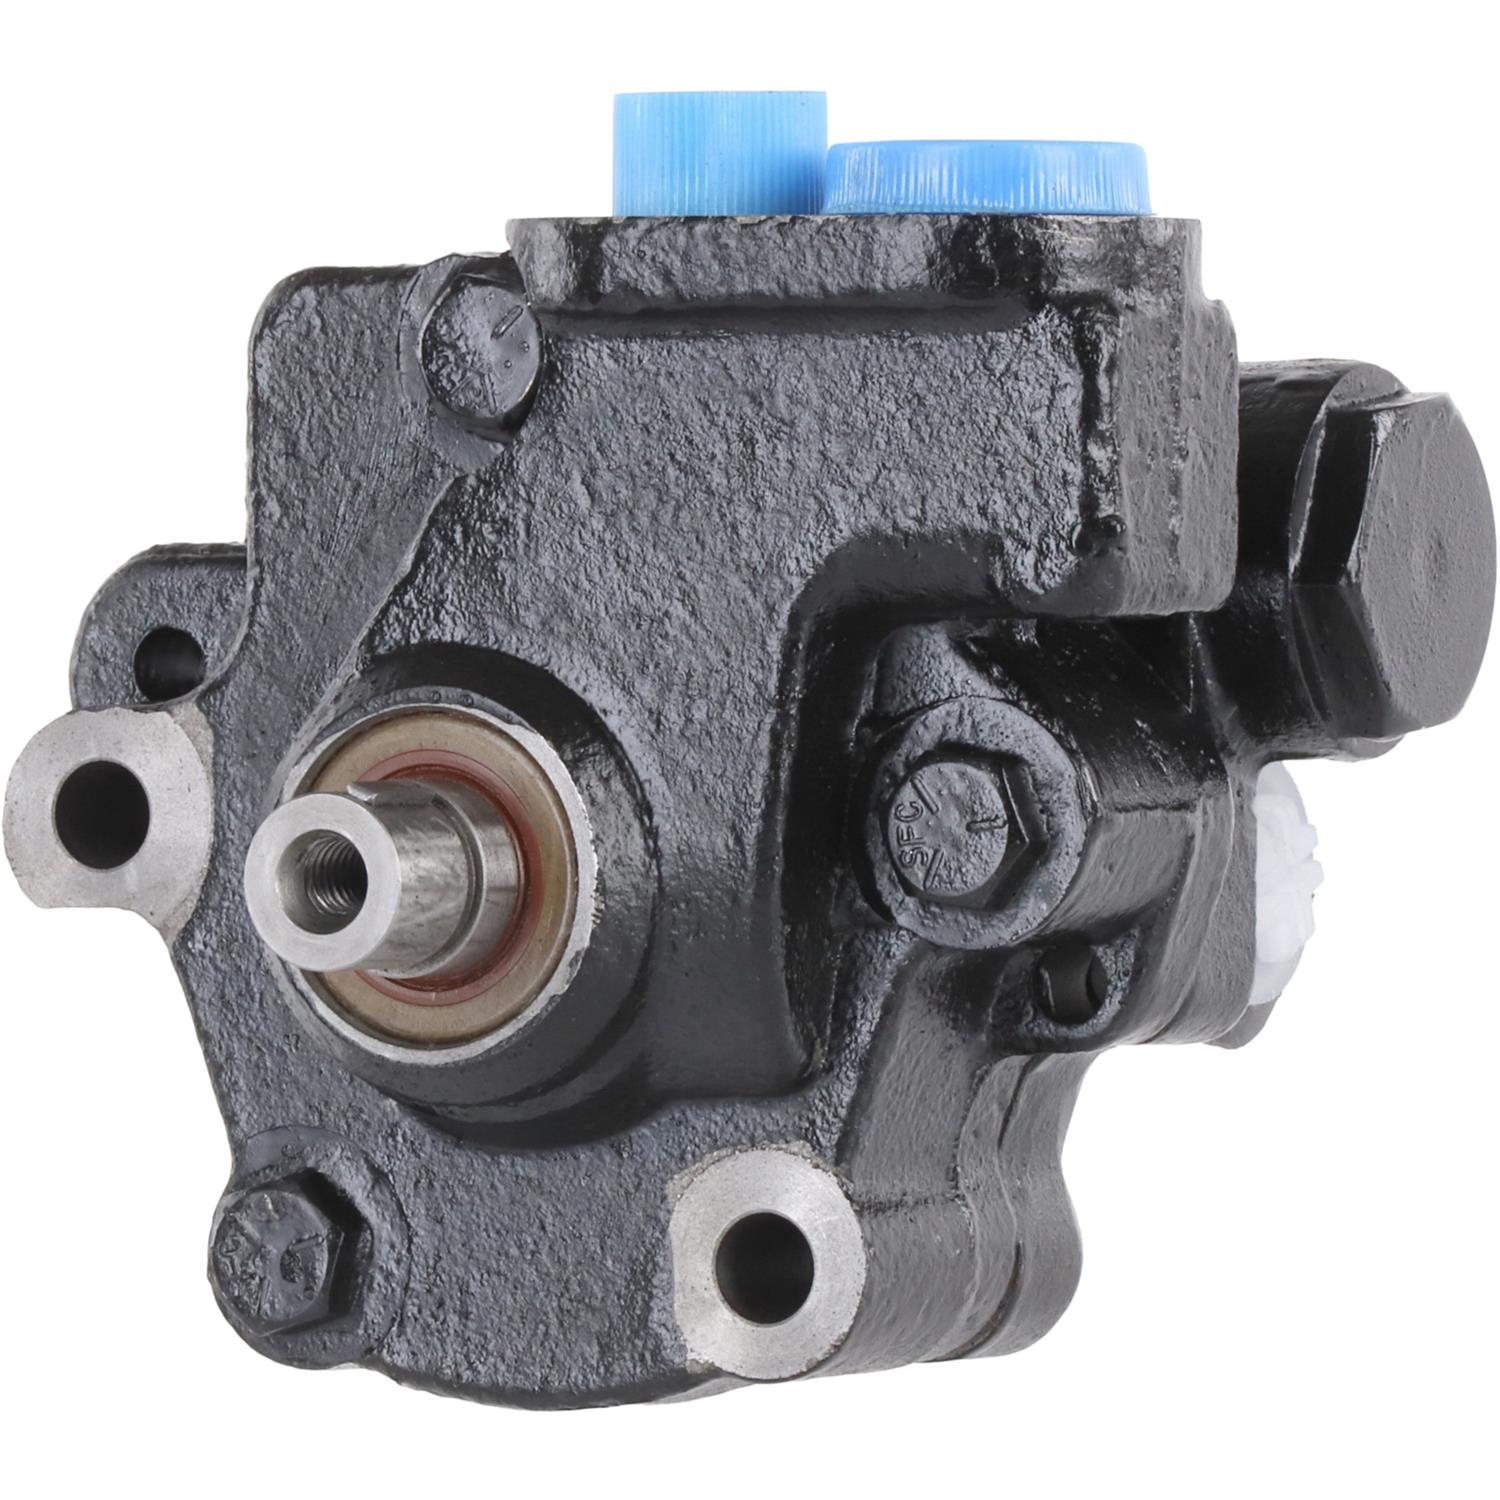
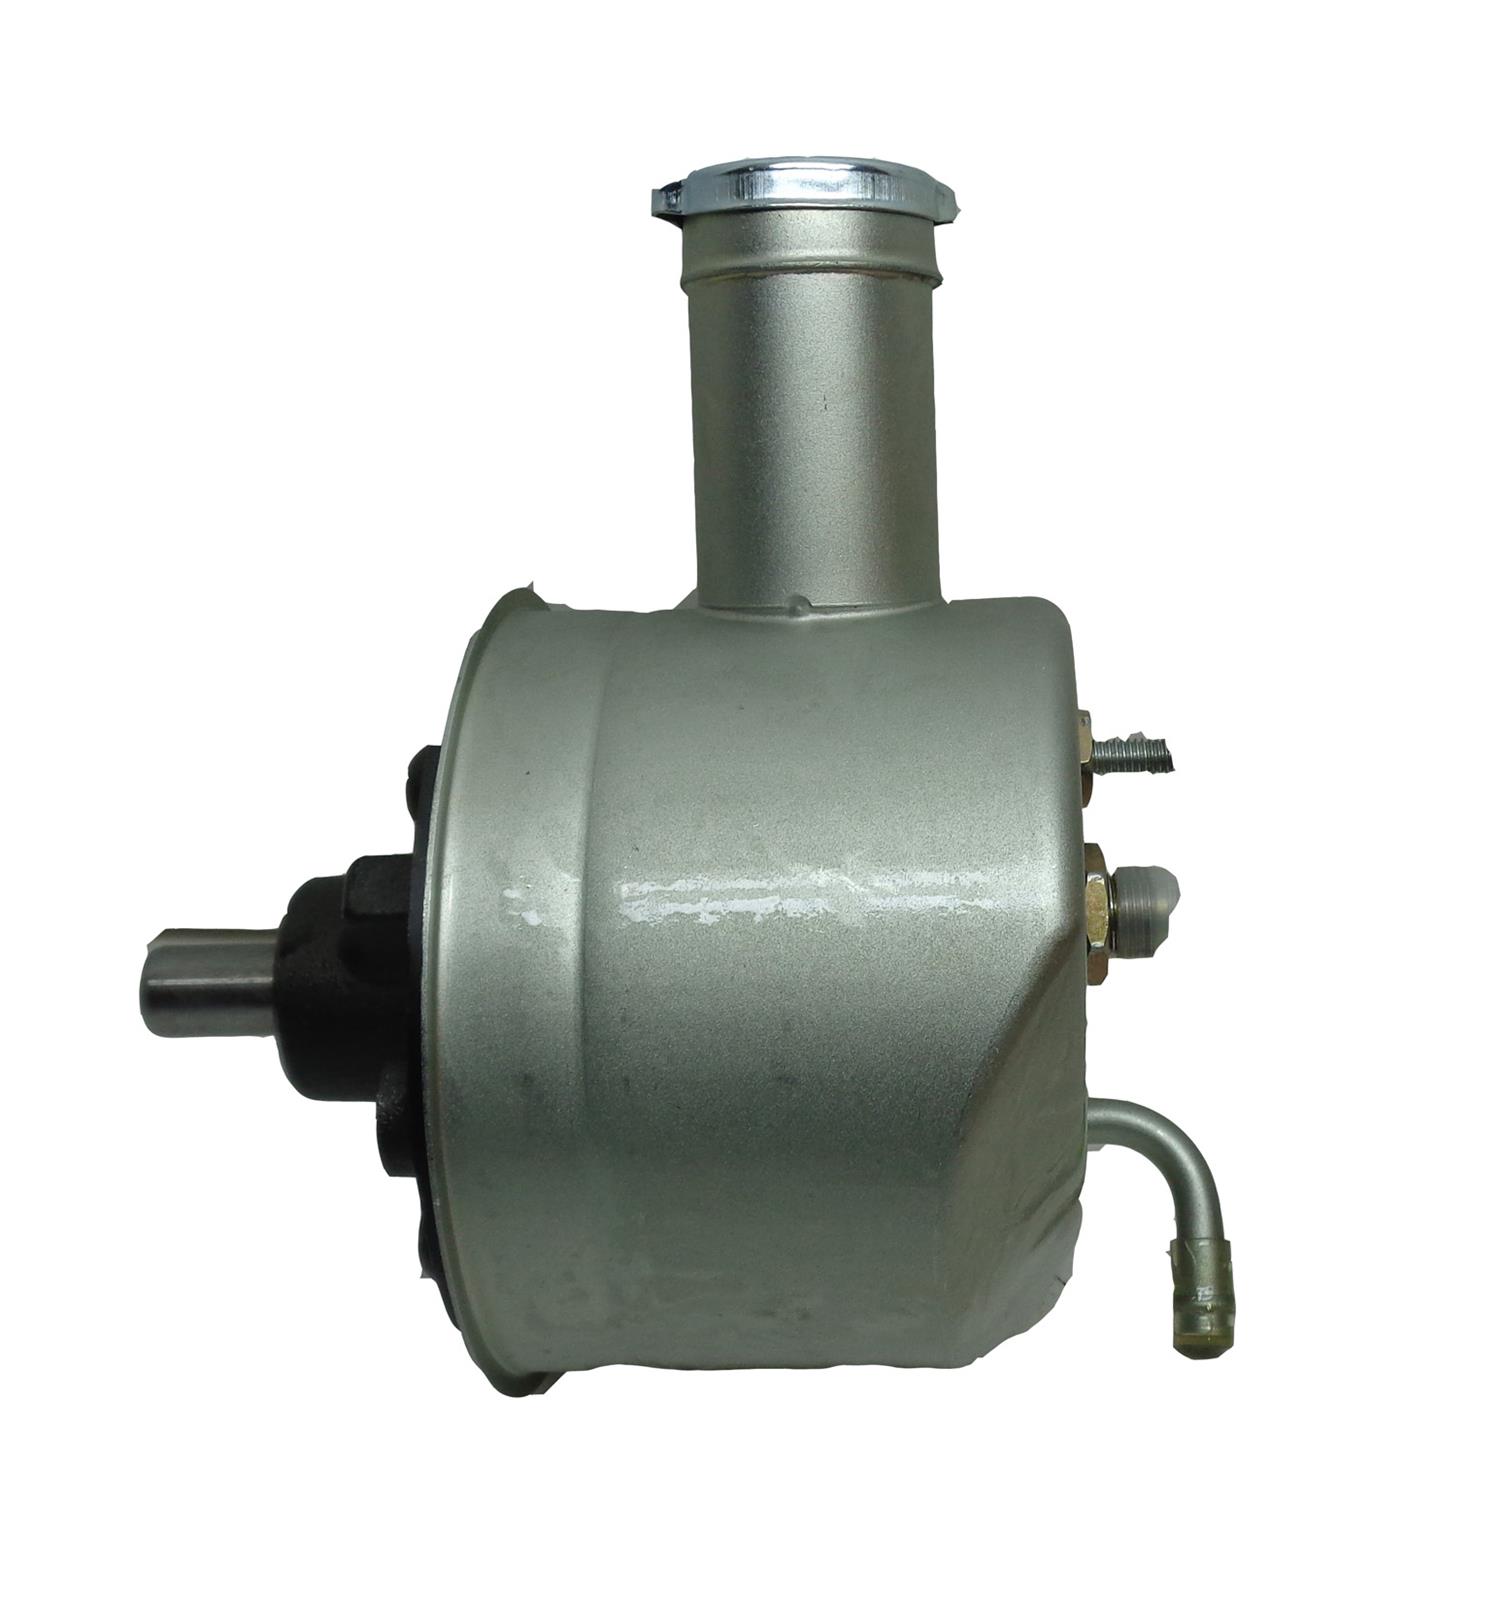
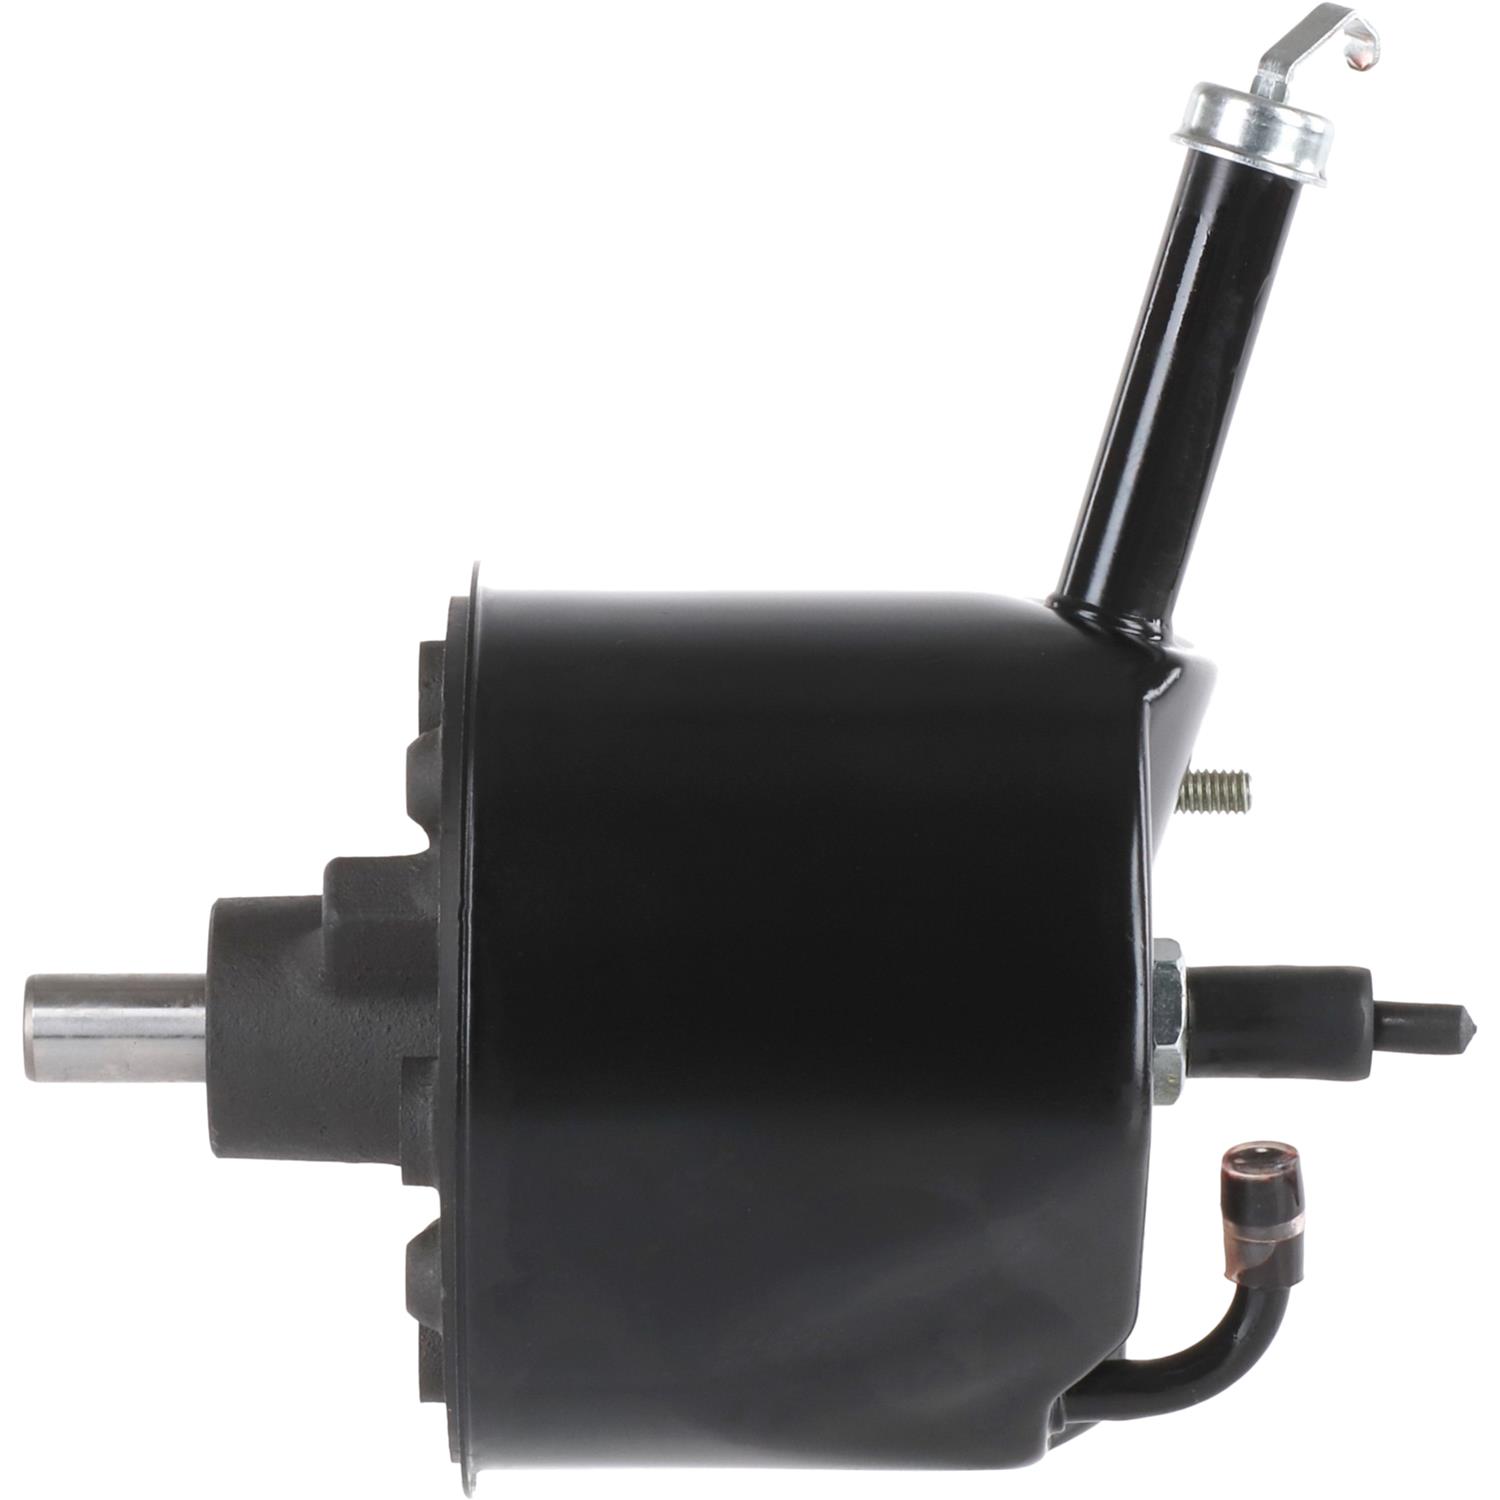
This is the installed power steering control valve, which is bolted to the Pitman arm and center link. (Image/Jim Smart)The two hydraulic lines direct fluid under pressure to the power cylinder. Two other lines, not visible here, direct hydraulic pressure to the control valve along with return fluid flow back to the power steering pump. The biggest source of leakage is line fittings and the control valve seal at the Pitman arm. (Image/Jim Smart)When you are servicing the power ram, inspect the line seats at both the ram and the control valve (arrows). If they are nicked or damaged, they will leak. The same can be said for lines with distorted flares. When you install lines, make sure fittings are centered on the seat and lubricated with power steering fluid. (Image/Jim Smart)(Image/Jim Smart)There are at least four different types of power rams in Ford vehicles alone. (Image/Jim Smart)Inspect the ram cylinder and rod for any scoring and nicks, which can damage the seals and leak. The Bendix steering ram is unforgiving of neglect. (Image/Jim Smart)This end of the power ram is welded together making the ram piston unserviceable. Unless you have the equipment to cut the weld and access to replacement ram parts, the ram is not serviceable. It makes more sense to replace the ram. (Image/Jim Smart)This power cylinder rod is bent and beyond repair. Replace the cylinder. (Image/Jim Smart)These rams are vulnerable to damage issues. Damage like this dent makes the ram unserviceable. (Image/Jim Smart)This is the ram piston and rod, which are only accessible by cutting the weld and removing the rod. (Image/Jim Smart)Hydraulic pressure is applied to one side of the piston or the other from steering input. Because replacement parts are not generally available, it is pointless to cut the ram open to service the piston. (Image/Jim Smart)Any remaining fluid inside the ram cylinder is purged and properly disposed of. (Image/Jim Smart)This is the complete seal kit, with seals and hardware laid out in proper order. Note the two aluminum line fitting inserts, which mate with pressure lines. Because these line inserts do get damaged, they are replaceable. (Image/Jim Smart)Old worn-out seals are extracted from the ram as shown here. A hole is drilled in the seal and a sheet metal screw used via leverage to extract the seal. This is a good way extract the seal on any component (Image/Jim Smart)Seals should be soaked in power steering fluid prior to installation. This makes them pliable and easy to install. (Image/Jim Smart)This is the ram cavity where the seals are installed. It must be clean and free of any debris that could adversely affect sealing. (Image/Jim Smart)This is the first seal to be carefully pressed in place. It has the toughest job of all the seals because it meets pressure head on. (Image/Jim Smart)This support washer (insert) is installed next on top of the seal with the groove pointed toward the end of the shaft. A secondary seal is installed on top of this insert. (Image/Jim Smart)The secondary seal is pressed into place on top of the support washer. (Image/Jim Smart)This is the seal retainer in blue, which supports the seals, with this side pointed toward the shaft end. (Image/Jim Smart)Make sure this retainer is fully seated against the secondary seal. (Image/Jim Smart)This rubber wiper, which keeps the ram clean, is next. (Image/Jim Smart)The scraper is next, which provides additional support and keeps debris off the ram. (Image/Jim Smart)(Image/Jim Smart)And finally, the snap ring is installed, which keeps the stack of seals secured. (Image/Jim Smart)These aluminum line flare seats get nicked and damaged. They should be replaced or you can expect leaks. These inserts work on the same principle as copper washers with brake lines. They conform to the shape of the line fitting for a leak-tight seal. (Image/Jim Smart)(Image/Jim Smart)Although these inserts look challenging to remove, they can be extracted with a tap as shown, which draws the seats out. (Image/Jim Smart)These seat pockets should be cleaned with brake cleaner with this end of the ram pointed down to prevent debris from getting inside the ram. Flush these pockets thoroughly and allow them to drain. (Image/Jim Smart)These inserts must be gently pressed into the pockets with a driver. Steel and brass drivers can distort the seat hence us suggesting the use of an alternative “softer” material driver. A plastic dowel rod can work and without damage. If you must use a steel or brass driver, take it very slow and gently work these seats into place. Soak these seats in power steering fluid and press them into place. (Image/Jim Smart)This articulating ball joint gets a lot of wear and tear. If it sports excessive play, do not use the ram. This should be one of the first things you check during disassembly. The ball and socket cavity should be filled with chassis lube. (Image/Jim Smart)The boot is installed and secured using this strap clamp. (Image/Jim Smart)(Image/Jim Smart)Each of these OEM steering rams is embossed with a part number, which identifies the application in which it applies to. This is easy information to find on the internet. (Image/Jim Smart)Opt for all new hoses to complement your ram rebuild. You’re going to need these pressure hoses as well as the return hoses. (Image/Jim Smart)There are two types of power steering pumps in Ford applications—early style Eaton pumps, some with remote reservoirs, and this Thompson pump used from 1965-up. From 1967-up, the Thompson pump employs a narrow dipstick tube. (Image/Jim Smart)While you’re underneath looking around, inspect the integrity of tie-rod ends, idler arm and Pitman arm. If these parts are long in the tooth, replace them in the interest of safety. You’re going to want a heavy-duty idler arm and tie-rod ends you can lube with a grease gun. (Image/Jim Smart)Whenever you’re rebuilding the steering system, replace all of the high and low pressure hoses to keep unnecessary debris out of the system and to begin with fresh hydraulics. This is the Scott Drake SDK-C5ZZ-3A719-D pressure hose from the pump to the control valve. These pressure hoses vary from model year to model year. Because the pump makes in excess of 1,800 psi, you don’t want to cut corners here. (Image/Summit Racing)Know the difference between a pressure hose and a return hose. The return hose routes return flow back to the power steering pump. This is the Edelman EDD-71236 hose, which is appropriate for power steering fluid under mild pressure. Use industrial grade high-quality worm gear hose clamps. (Image/Summit Racing)Prior to August of 1964, Ford used the Eaton power steering pump with a bolt-on or remote reservoir. You will need to transfer the pulley from your old pump to the new one. This is the Cardone/Eaton power steering pump, PN AAZ-96-6052. (Image/Summit Racing)Beginning with the 1965 model year, Ford went to the integral reservoir Thompson power steering pump. Shown here is the Lares 1965-66 with the large neck, PN LSC-12035. (Image/Summit Racing)Beginning 1967, the Thompson pump was changed to a narrow dipstick tube to clear accessories. This is the Cardone/Thompson pump, PN AAZ-96-6092. It does not include the pulley, which must be transferred from your old pump. Start fresh with new hydraulics for the best performance. (Image/Summit Racing)
***
Control Valve Solutions
The power steering control valve is important to stability and safe steering. You can rebuild your existing control valve following the instructions in your Ford Shop Manual or you may replace it will a new Flaming River control valve from Summit. All replacement parts for the Bendix control valves are available ranging from a basic seal kit to a complete Scott Drake Power Steering Control Valve Repair Kit.
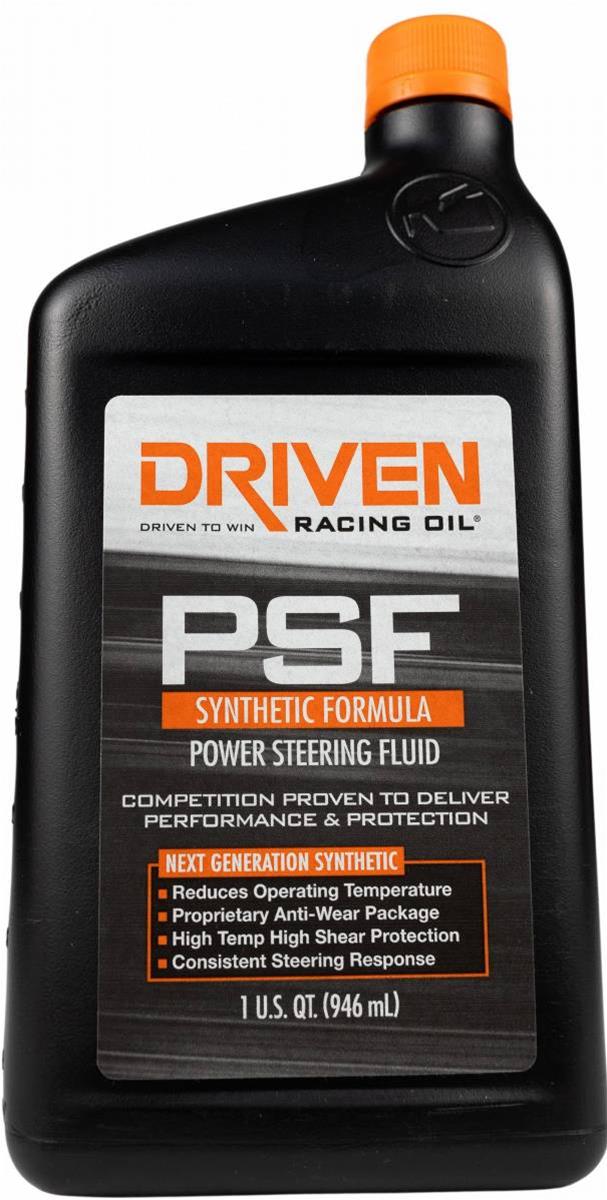
The Scott Drake complete Power Steering Control Valve Repair Kit PN C2AZ-3A533-A sports everything you’re going to need to knock down the control valve and make it new inside. (Image/Summit Racing)The Edelman Seal Kit, PN EDD-7889, works if you’re not doing a complete control valve parts replacement. This kit will fix the leaks. (Image/Summit Racing)If rebuilding the power steering control valve doesn’t fit your agenda, Flaming River has a fast-quick solution in its FLA-FR1497-VLV package for vintage Fords and ‘Mercs. Some applications have the control valve and center link as one integral unit. This is a nice full-replacement kit you can install in an afternoon. (Image/Summit Racing)Power Steering systems are not very effective without fluid. Driven Racing synthetic power steering fluid will stand up to the extreme temperatures and constant abuse of the power steering system. The beauty of synthetic lubricants is durability and extreme temperature resistance. This is what you want in a power steering system. Whether you are rebuilding an existing system or installing a new one, clean fluid is everything to longevity. (Image/Summit Racing)
Jim Smart is a veteran automotive journalist, technical editor, and historian with hundreds of how-to and feature articles to his credit. Jim's also an enthusiast, and has owned and restored many classic vehicles, including an impressive mix of vintage Ford Mustangs.


Comments