
Recently, we ran a story on 24 Overlooked Engine Building Tips.
And before that, we put together a list of 12 Things to Make Your Vehicle Easier to Work On.
Now, we’ve got a list of a dozen high performance tech tips many of you can use. While a few of these are Chevy-specific, the rest can be used on plenty of other vehicles and engines, whether it’s for the street, track, or off-road.
***
12 Performance Tech Tips
***
1. Double-Check Your Head Bolt & Stud Length
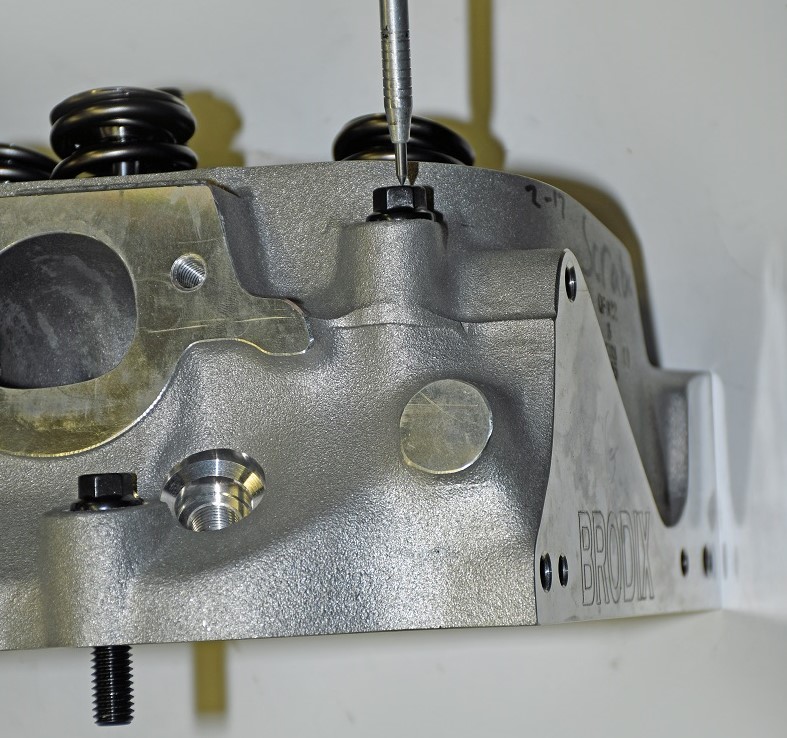
When you purchase a new set of cylinder heads, watch for the small print detailing head bolts. Case in point are the BBC Brodix -3 345 Xtra heads shown in the pics. The exhaust port is raised on this head and it’s been rolled over. That means a set of standard head bolts (or head studs if you prefer) isn’t going to cut it. The last row of bolts from a “stock” set is way (Way!) too short.
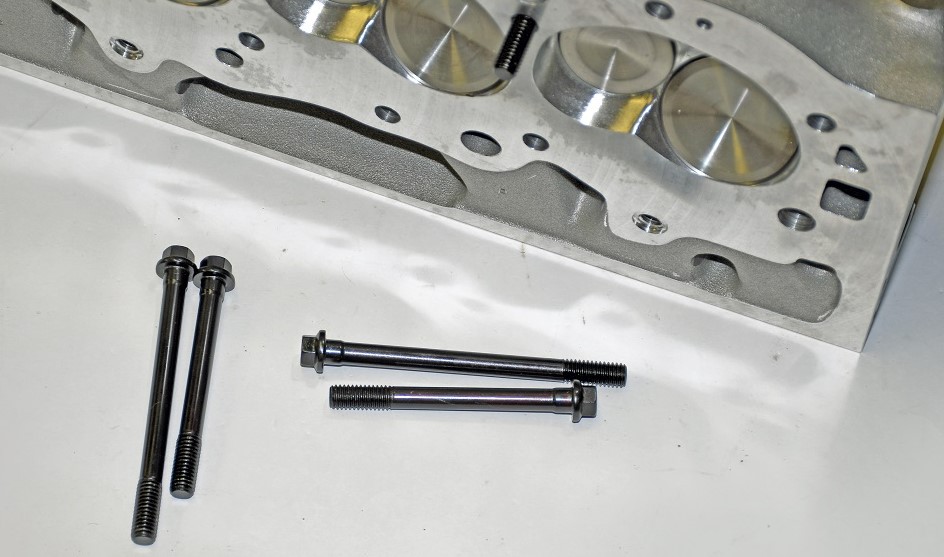
Not only does this apply to Brodix heads and big block heads, it applies to just about everything out there. Bottom line here is, when you’re buying new cylinder heads, be sure to check on the manufacturer recommended cylinder head bolts (or studs).
***
2. Put Caps on Your Exposed Bolts & Screws
I have an aversion to getting my skin sliced while working on a car. Facing the facts, my skin isn’t as resilient or tough as it used to be and boy, do I hate having to stop everything to disinfect a wound and grab a bandage. The worst offenders are sheet metal screws. Detroit used them with regularity (some with zero thought to the mechanic who actually had to work on the car). My fix is dirt simple. I use rubber hose caps on all of the offending screws. I find most of the trouble spots are in the engine compartment, but there are sometimes a few found under the dash. Both Holley and Moroso make handy hose cap kits.
***
3. Fitting Adapters Can Solve a Ton of Problems

In quite a few instances when you’re working on plumbing a car with -AN hose, you’ll find there are places where conventional fittings just do not work. You need a special fitting. Cases in point are male fittings such as “T’s on a run” or male bulkhead fittings or female swivel couplers or big bore carburetor fittings or barb adapters. And this is simply the tip of the iceberg.
Basically, if you’re faced with a plumbing dilemma, there’s a really good chance a solution is available in the form of a hose fitting or adapter. And they’re available from a wide range of manufacturers (keeping in mind, with AN hose, there’s plenty of mix and match between manufacturers).
***
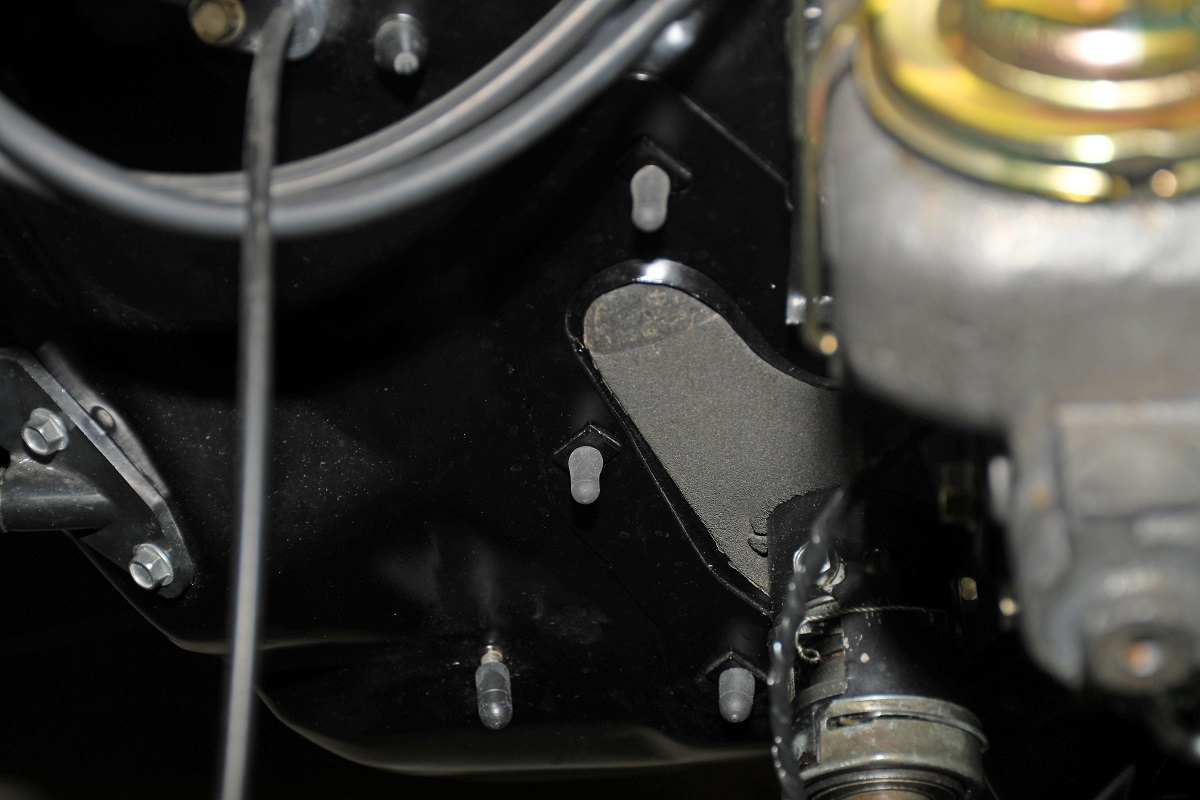
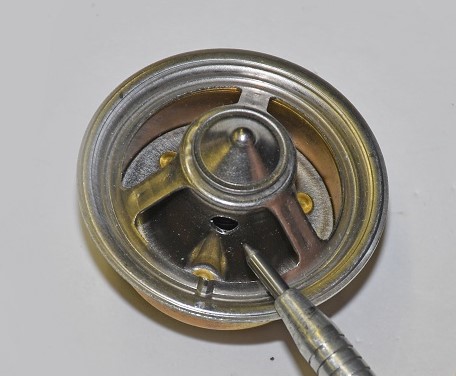
4. Install a Bump Switch for Easy Valve Lash Adjustments
Lashing the valves on a car with solid lifters can be a royal pain. Since it’s frustrating to hook up loose wires for a temporary bump switch, a lot of racers usually have one (and often two) switches permanently installed on their cars. With a hard wired switch or two, you can go right into lashing the valves on the engine without searing your skin on hot headers. On the Chevy example shown in the photo, the switch (on the radiator support) is wired to the S terminal on the starter solenoid. The other end is wired to a hot terminal next to the battery. When you have two switches (such as you’ll see on many race cars), it just makes it easier to reach the switch and watch the harmonic damper from either side of the engine.
***
5. Not All Thermostats are Created Equal
There is a difference in thermostats and a good example is the EMP/Stewart lineup. They’re actually manufactured by Robert Shaw and then modified by Stewart. They make use of a balanced sleeve design and they’re intended for use in high flow, high RPM water pump applications. These thermostats include three internal 0.187 inch holes. The purpose is to help bypass the thermostat under load, but this also allows air to escape on initial system fill which in turn, makes bleeding the cooling system much easier. By the way, many folks find their cars actually run cooler with this setup. They’re available in 160, 180 and 195 degree ranges.
***
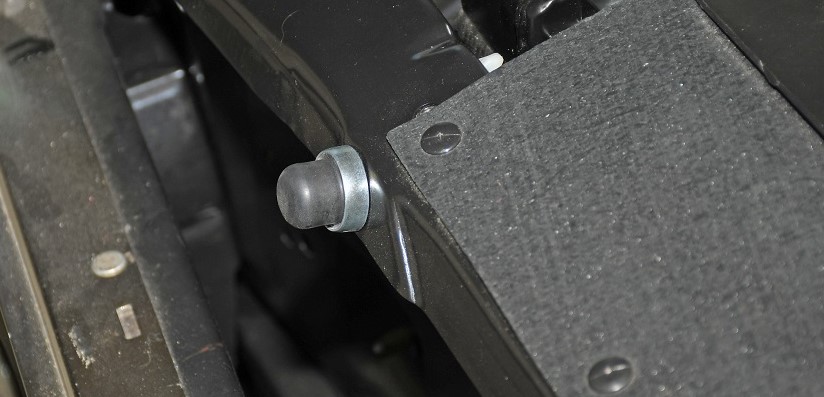
6. Mix Rubber & Solid Motor Mounts
Remember the old trick about using a chain or turnbuckle to keep your engine from rolling over excessively on the mounts? Some folks scoffed at the idea and went to full solid mounts on a street driven car. Most soon found the vibrations were considerably more than they had bargained for—especially on longer trips. And if you went all solid (including transmission mounts), you’d often run into fractured transmission tail shaft housings or even cracked transmission cases. Now what?
An easy fix is to take a semi-solid approach. What you do is run a standard rubber cushioned mount on the passenger side and a solid mount on the driver’s side. Keep the transmission mount rubber. This provides for a good amount of vibration isolation, but it still keeps the engine from rocking dramatically on the mounts. FYI, the solid mount setup shown above is from Moroso.
***
7. Pre-Made Kits Simplify Holley Carb Tuning
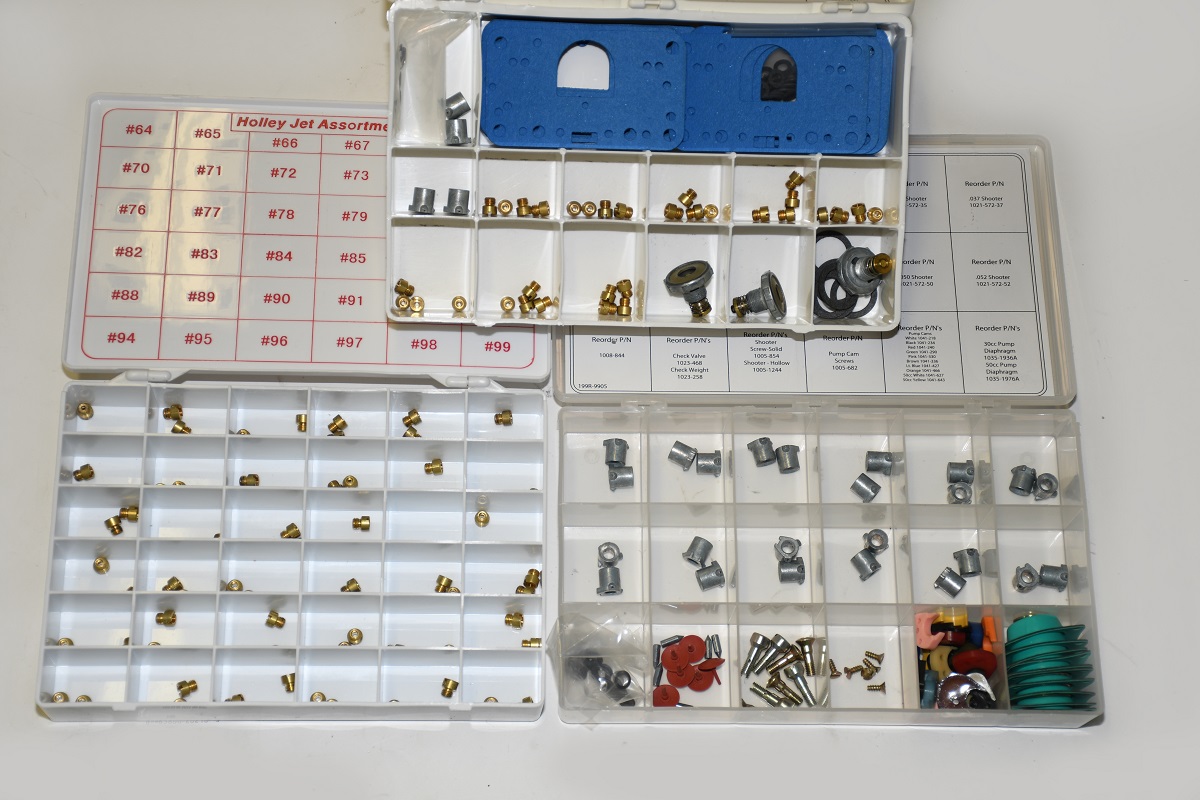
Tuning a Holley carburetor is pretty simple. The adjustments aren’t difficult and Holley has huge array of tuning items such as jets, power valves, shooters, and so on. While you can purchase these pieces individually, that tends to be a lot of part numbers (and a lot of packaging).
There’s a good solution however: Holley offers a series of pre-packaged tuning “kits.”
But don’t confuse these with carb Trick Kits—tuning kits are racer friendly and packaged in plastic boxes. Included are the small parts you’ll need to tune the carb. This includes a Jet Assortment Kit (part number 36-181), a Pump & Needle Kit (part number 36-184), and a Jet, Shooter & Power Valve kit (part number 36-182), along with two small parts assortments (part number 36-117 and part number 36-118).
***
8. Secure Your Pedal Pads
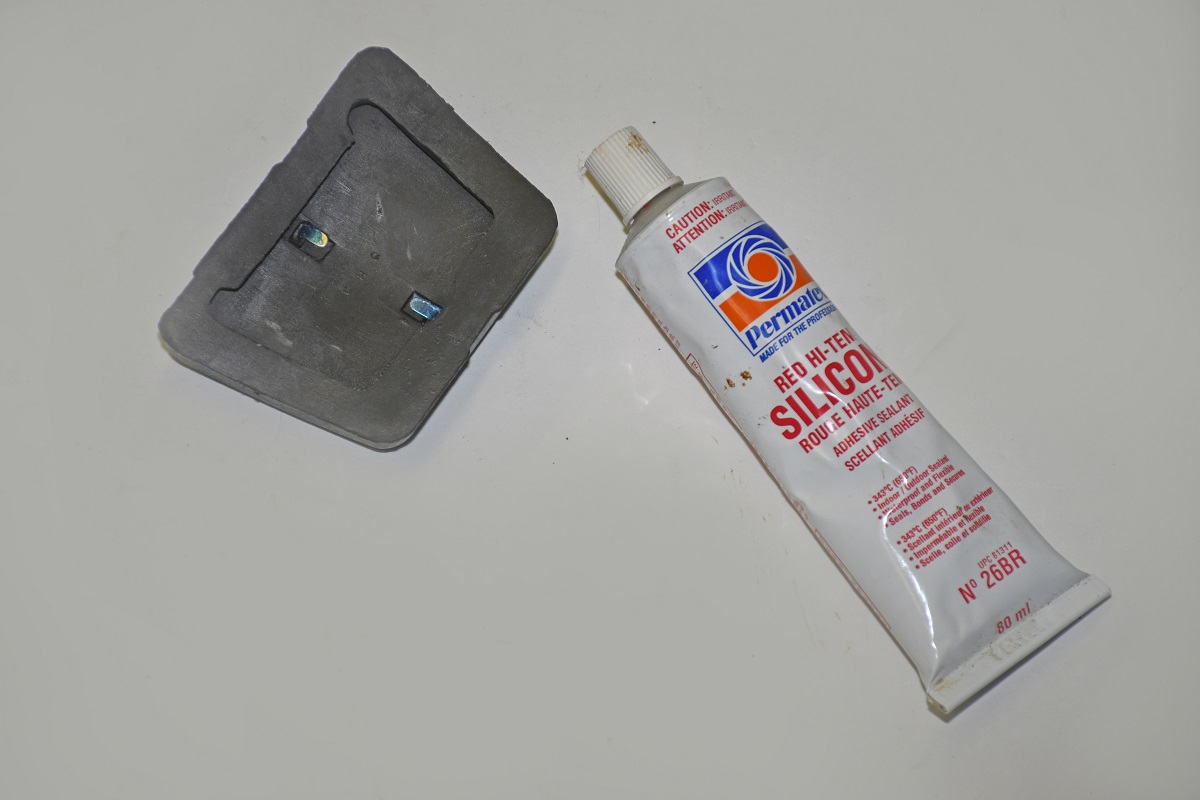
If you’ve ever had a rubber pedal pad work loose on a gear change or when you’re hard on the brakes (or even pumping the pedal to perform a burnout), you’ll know it can be distracting at the least and dangerous at the worst. Compounding the problem is the fact many of us mess with old cars. The rubber pads get brittle and hard. The fix is simple. I usually put a dab of silicone or contact cement on the back of the pedal pads. That locks them in place and you don’t have to worry about it.
***
9. A Stud Swap Eases Hood Removal
My wife is a little lady and unfortunately for her, she’s also my go-to helper. When the time comes to ask for assistance to install or remove a hood on a car, she absolutely cringes. Sure, we take precautions to protect the paint, but as most of you know, a hood can prove to be an unwieldy piece (even for a couple of big boys). You can make the task a little easier by swapping out the hood-to-hinge bolts with studs. I typically use a 3/8 inch header stud for the job. I use Loctite to secure the studs in the hood and then it’s pretty simple to cap it off with a lock washer and nut. Works for me and if the hood is fiberglass, I can often remove and install it myself.
***
10. Heat Shrink Sleeves Can Dress Up Your Clamps
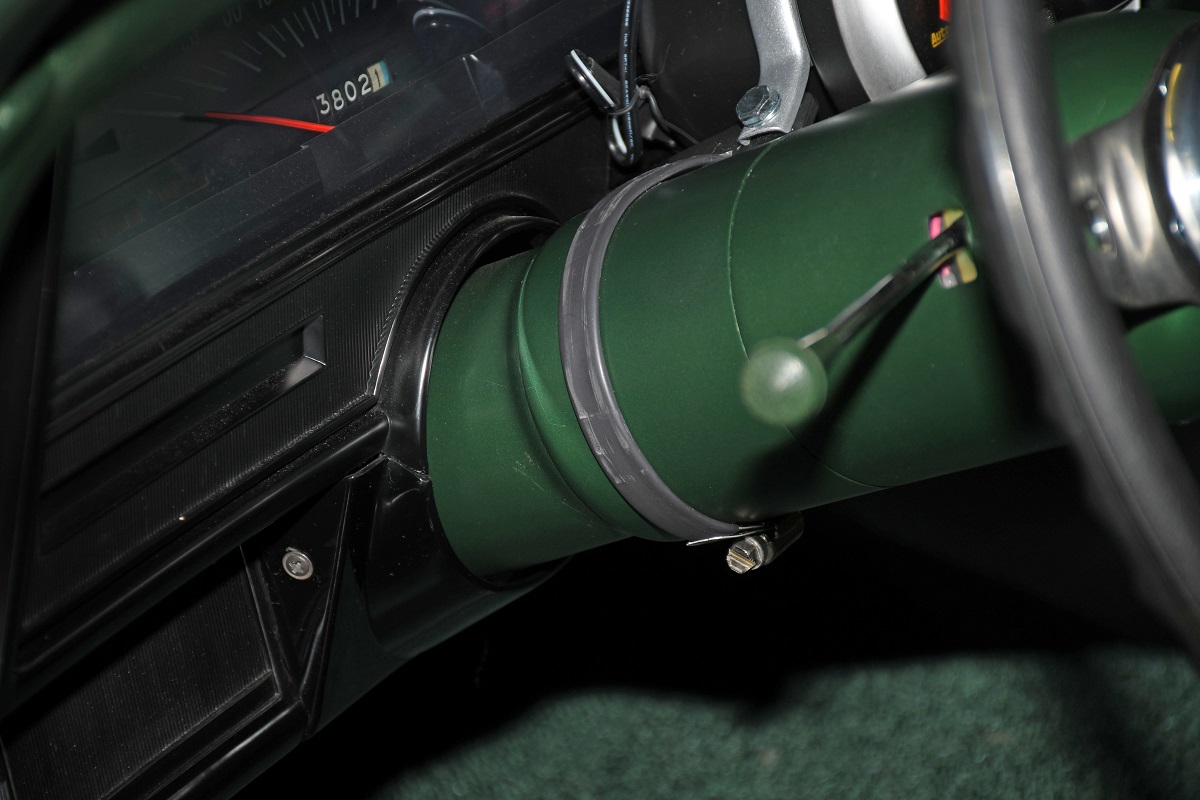
Most aftermarket tachometers installed on a steering column are usually held in place by way of a hose clamp. That works but it’s usually pretty ugly. A solution is to trim the clamp “tail” as short as possible and then cover the hose clamp with heat shrink tubing. Not only does it clean everything up in the looks department, it also provides a non-slip surface for the clamp. By the way, I use 3/8 inch shrink tubing for this particular job.
***
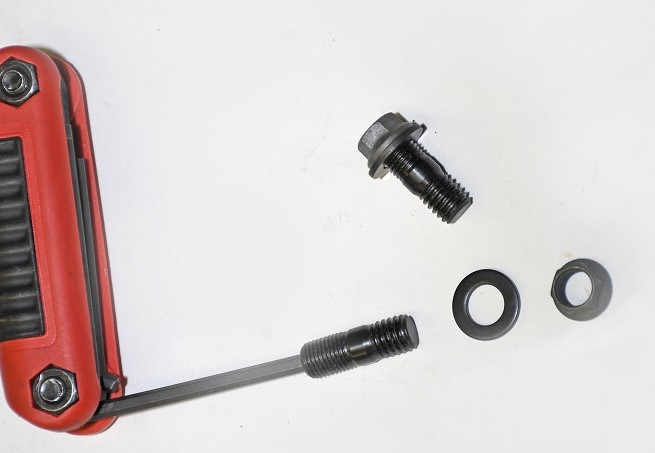
11. Longer Bolts Speed Up Crossmember Removal
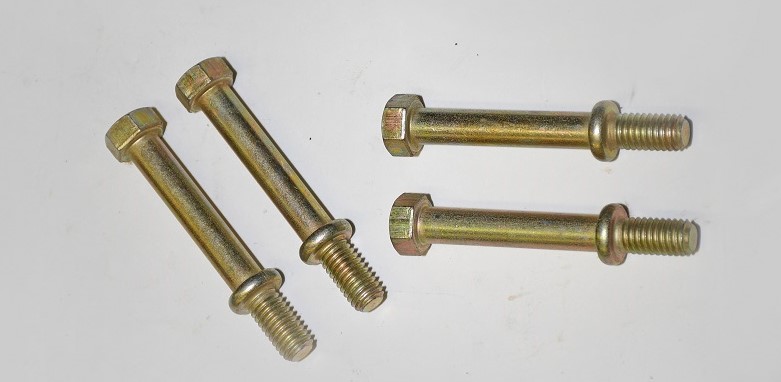
First-gen Camaros and their sister Nova and Firebird models all came with transmission crossmember fasteners that are buried deep inside the subframe. If you race one of these cars, and you need to remove the crossmember quickly, you know removing and replacing the four bolts can prove fidgety. The fix is simple though: Summit Racing sells special extended length bolts designed for this job. B&B Performance/Stefs manufactures them and the part number is STF-59600.
***
12. Swap Clutch Forks for More Reliable Shifts
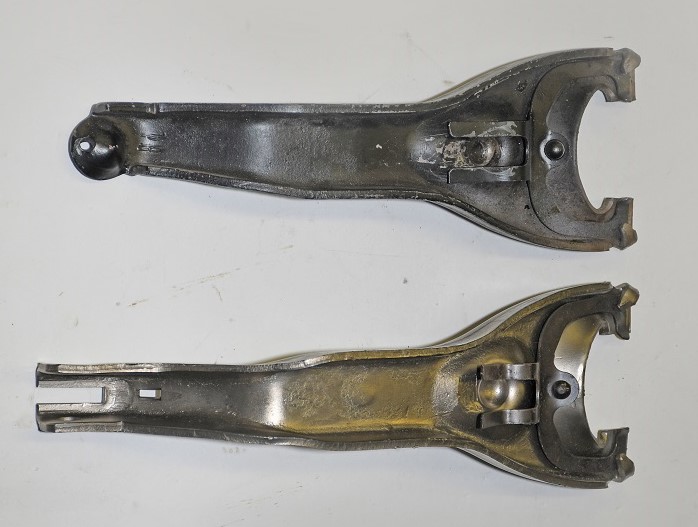
For the Chevy guys out there with early (pre-hydraulic) stick shift combinations, you know that the clutch fork can sometimes prove problematic. Basically, the only thing that keeps the pushrod from migrating out of the fork ball is a spring. Tri Fives used a solid hookup and so did Corvettes. The C2 and C3 Corvette fork (part number NAL-3887177) has similar overall dimensions as a first gen Camaro fork, but instead of a loose pushrod, you can use a clevis and pin or rod end to hook up the linkage. It’s 100% secure and there’s zero chance the pushrod can fall out.
Easy fix for Chevy broken motor mounts open hood put two phone books on air cleaner close hood