We’ve arrived at the final installment of our 422 cubic inch small block Chevy build. You know what that means—dyno results!
You can cheat and scroll down to find out how well the engine performed, but then you won’t learn about the ignition system or accessories like the vacuum pump. The story’s not that long, so why not read the whole thing?
Here are the links to the first two articles in case you missed or need to reference them:
Now, on with the story…
Crank Trigger & Distributor
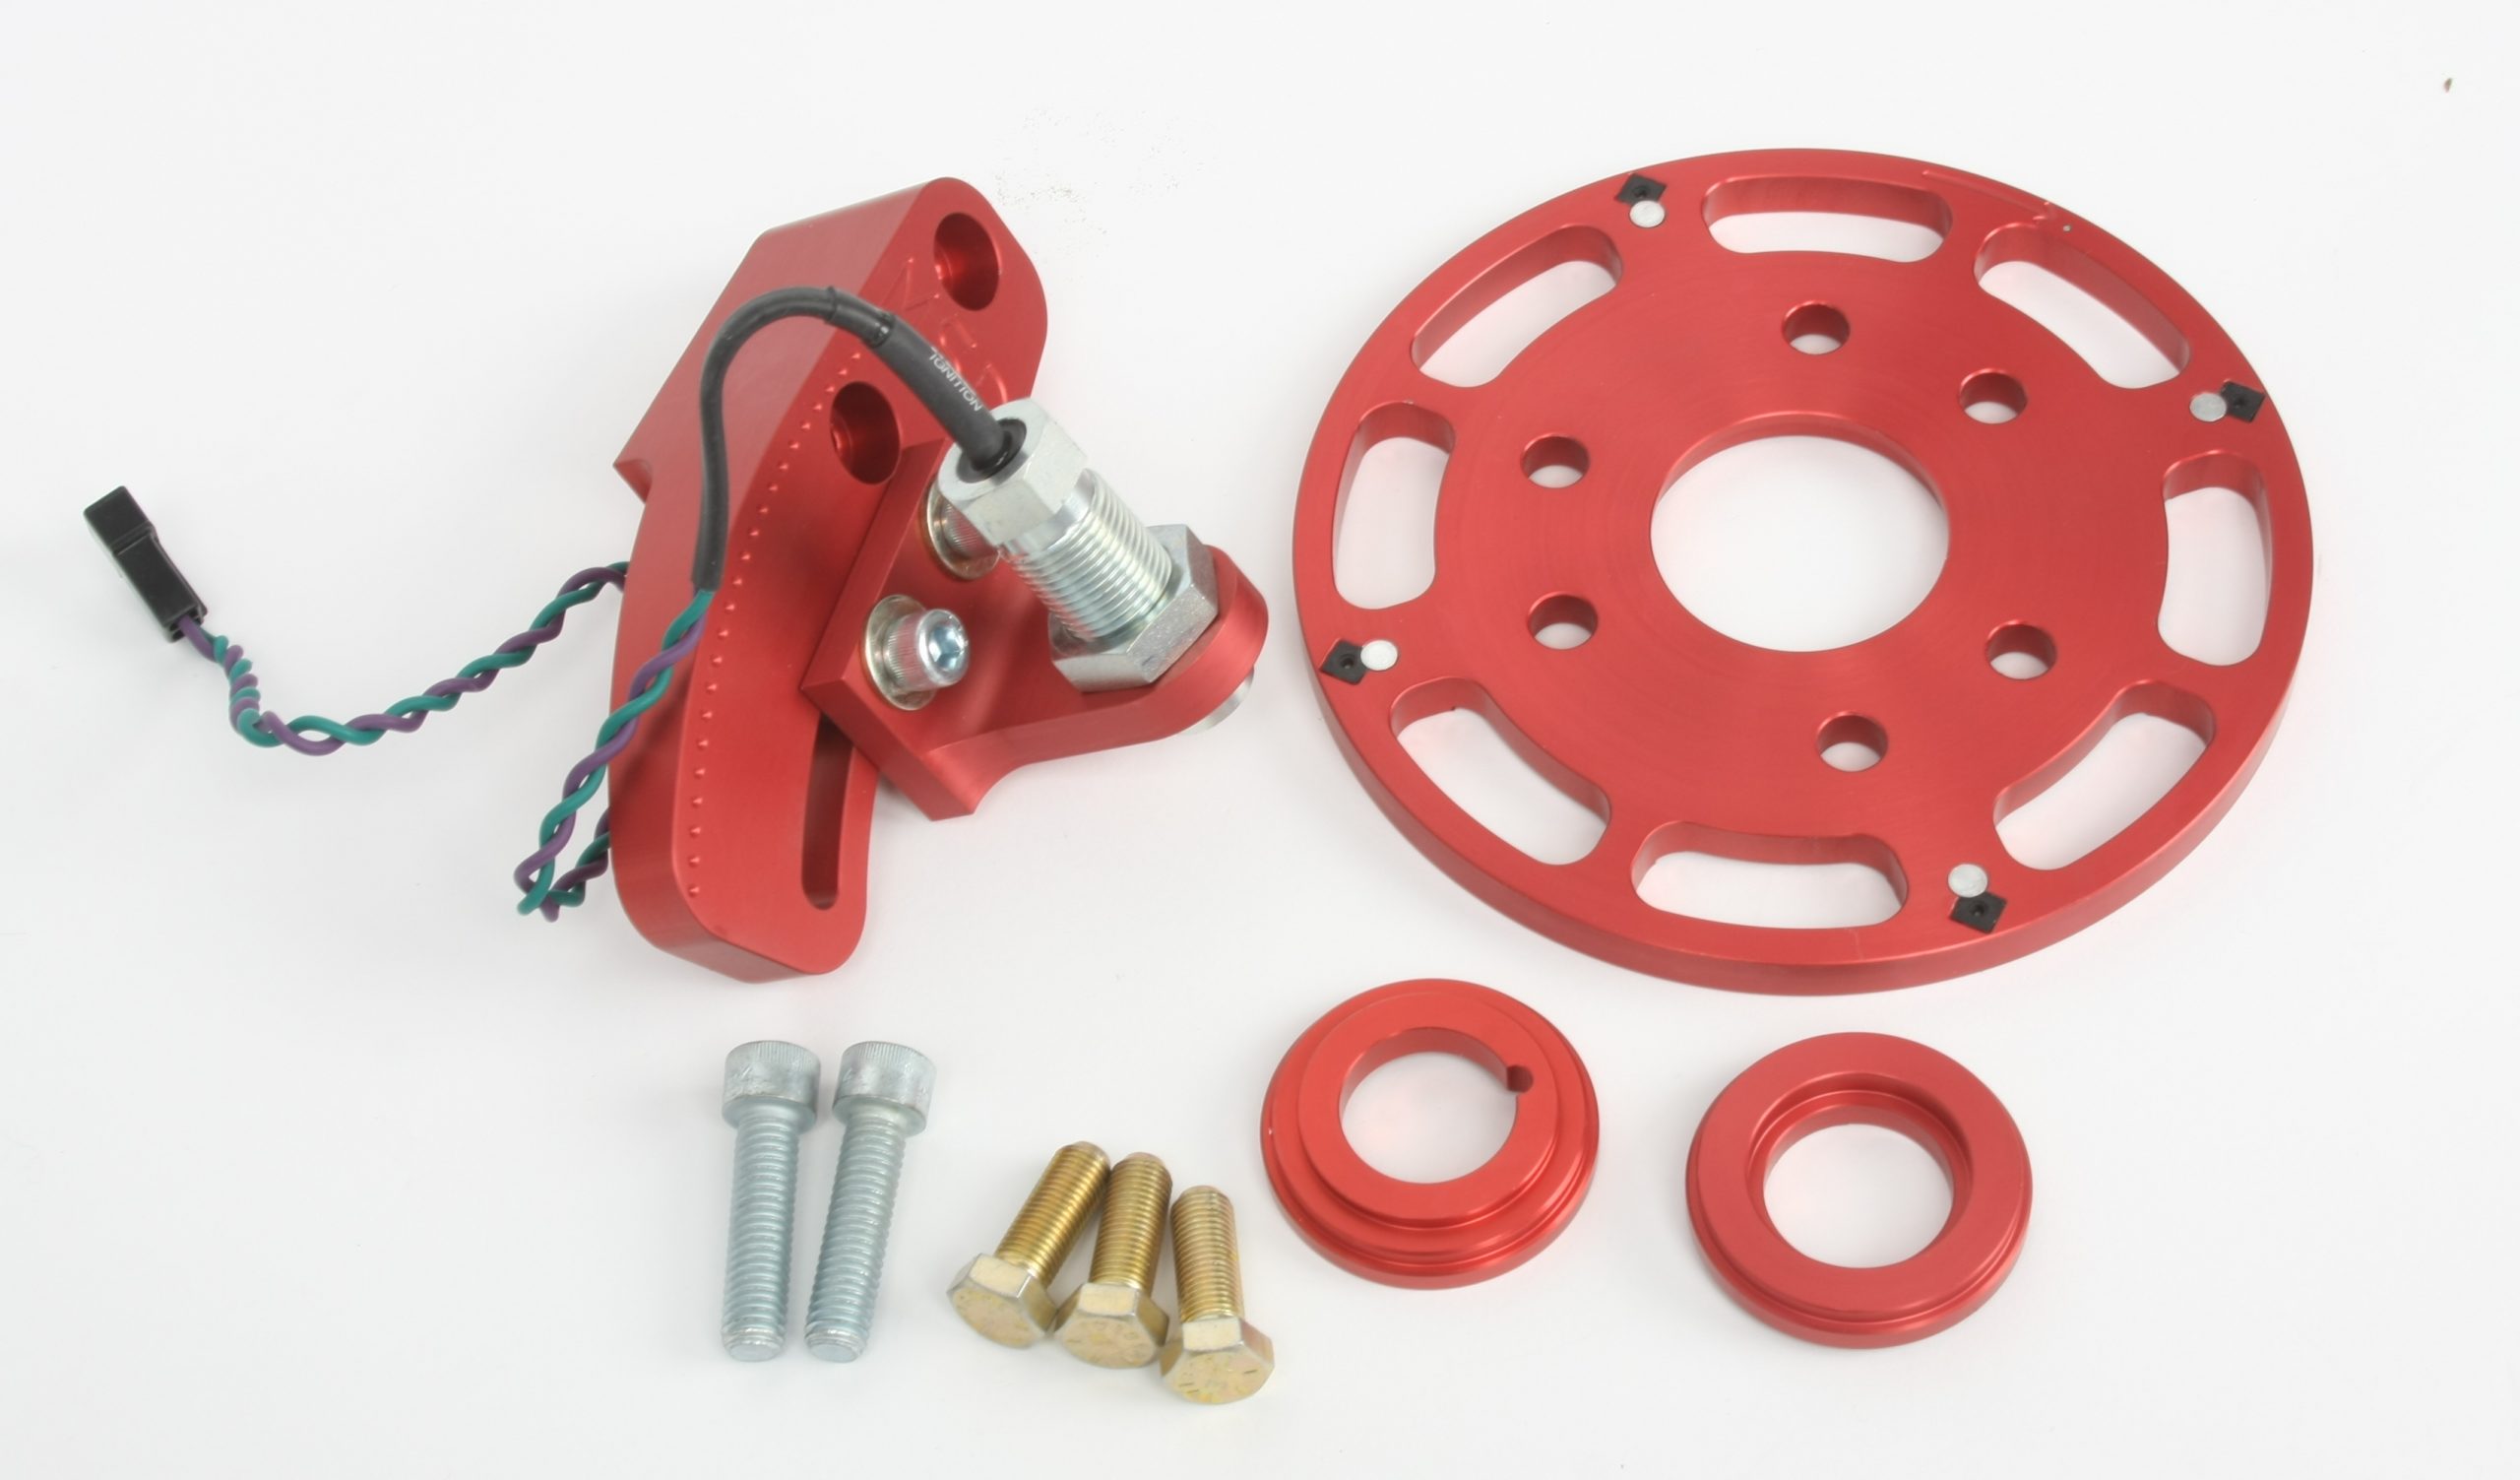
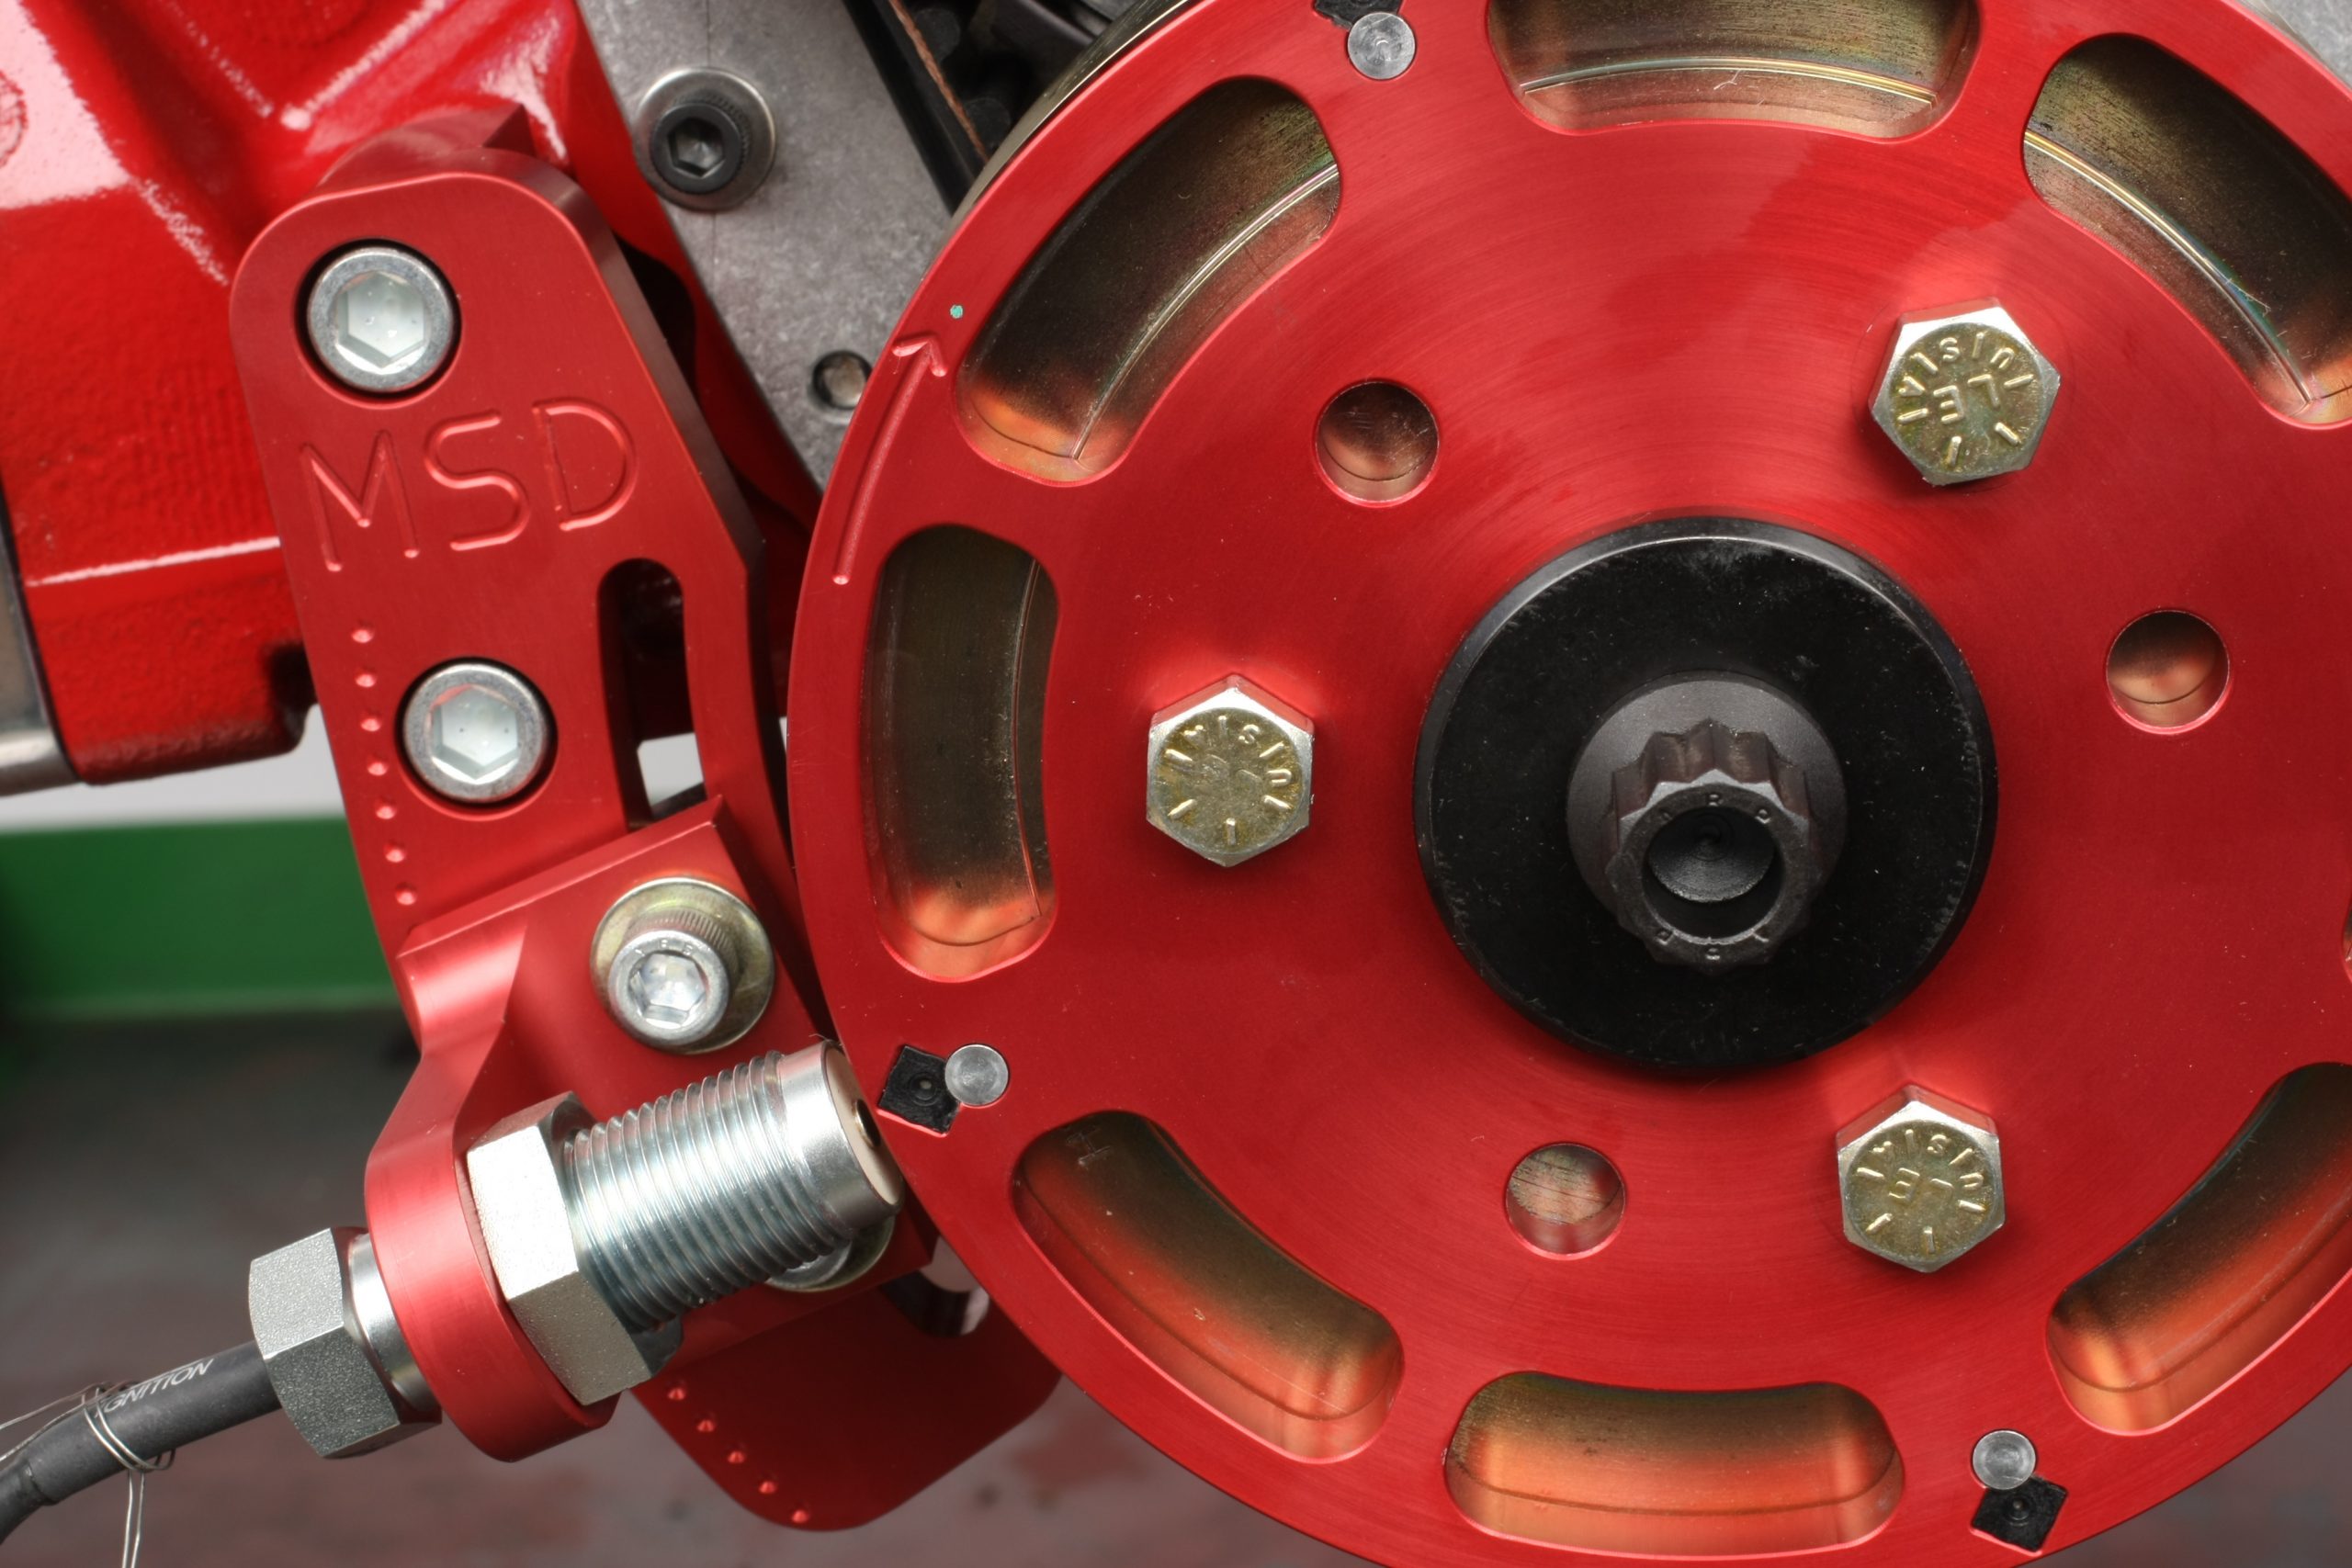
I installed an MSD Flying Magnet crank trigger kit for increased timing accuracy. An aluminum trigger wheel with four imbedded rare earth magnets mounts to the face of the crank balancer. A pickup sensor mounts to the block; the pickup receives crank position signals as the crank rotates. Picking up the timing signal directly from the crankshaft eliminates the potential variables such as distributor gear backlash, wiggle, camshaft end play, etc.
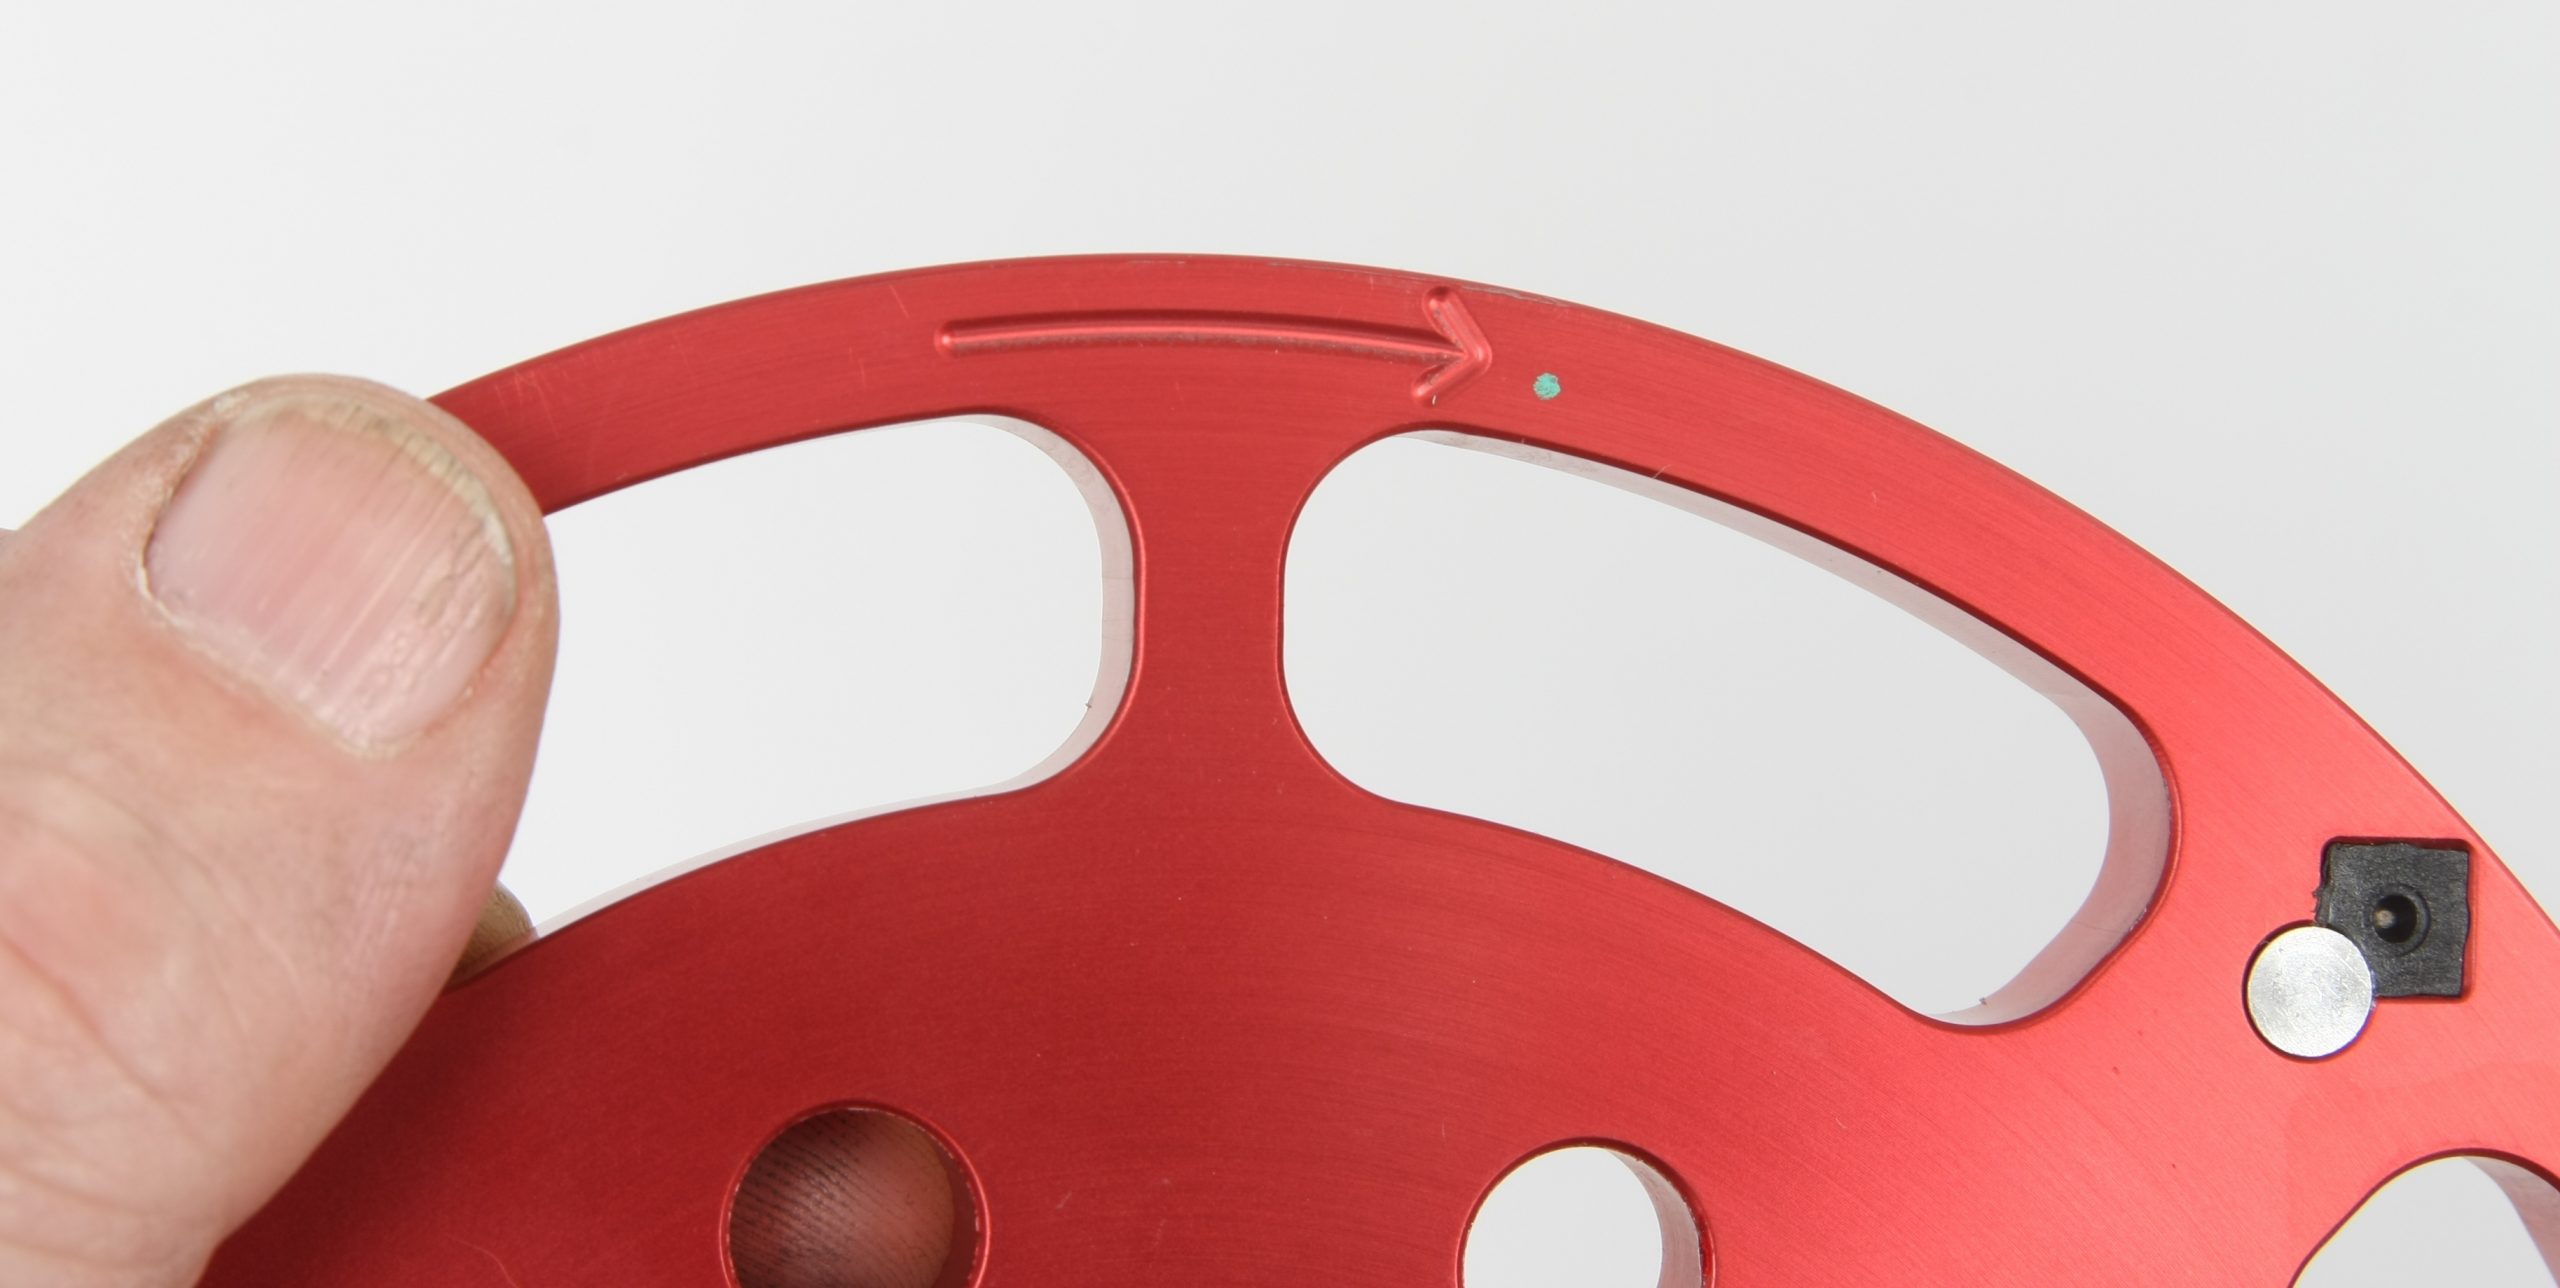
The pickup has an adjustable bracket that offers about 20 degrees of timing adjustment. Place the pickup in about the center of its adjustment range, mount the wheel so that a magnet is as close as possible to the pickup, and adjust the pickup so it aligns exactly with magnet. Make sure that the arrow engraved on the face of the trigger wheel faces outboard. Installing the wheel backwards will allow the engine to fire but will cause false triggering at high rpm.
Once everything is installed properly, ignition timing is easily adjusted by moving the pickup in its slot to fine tune ignition advance. Adjust the air gap between the tip of the pickup and the edge of the trigger wheel to 0.050-0.080 inch; I set ours at 0.065 inch.
Since the MSD Flying Magnet crank trigger does not use the distributor for timing adjustment, I used an MSD Pro Billet distributor with the mechanical advance locked out. I also used an MSD bronze distributor gear that is compatible with the gear on the COMP Cams solid roller camshaft. A set of MSD Super Conductor 8.5mm ignition wires cut to length finish the ignition system.
Vacuum Pump
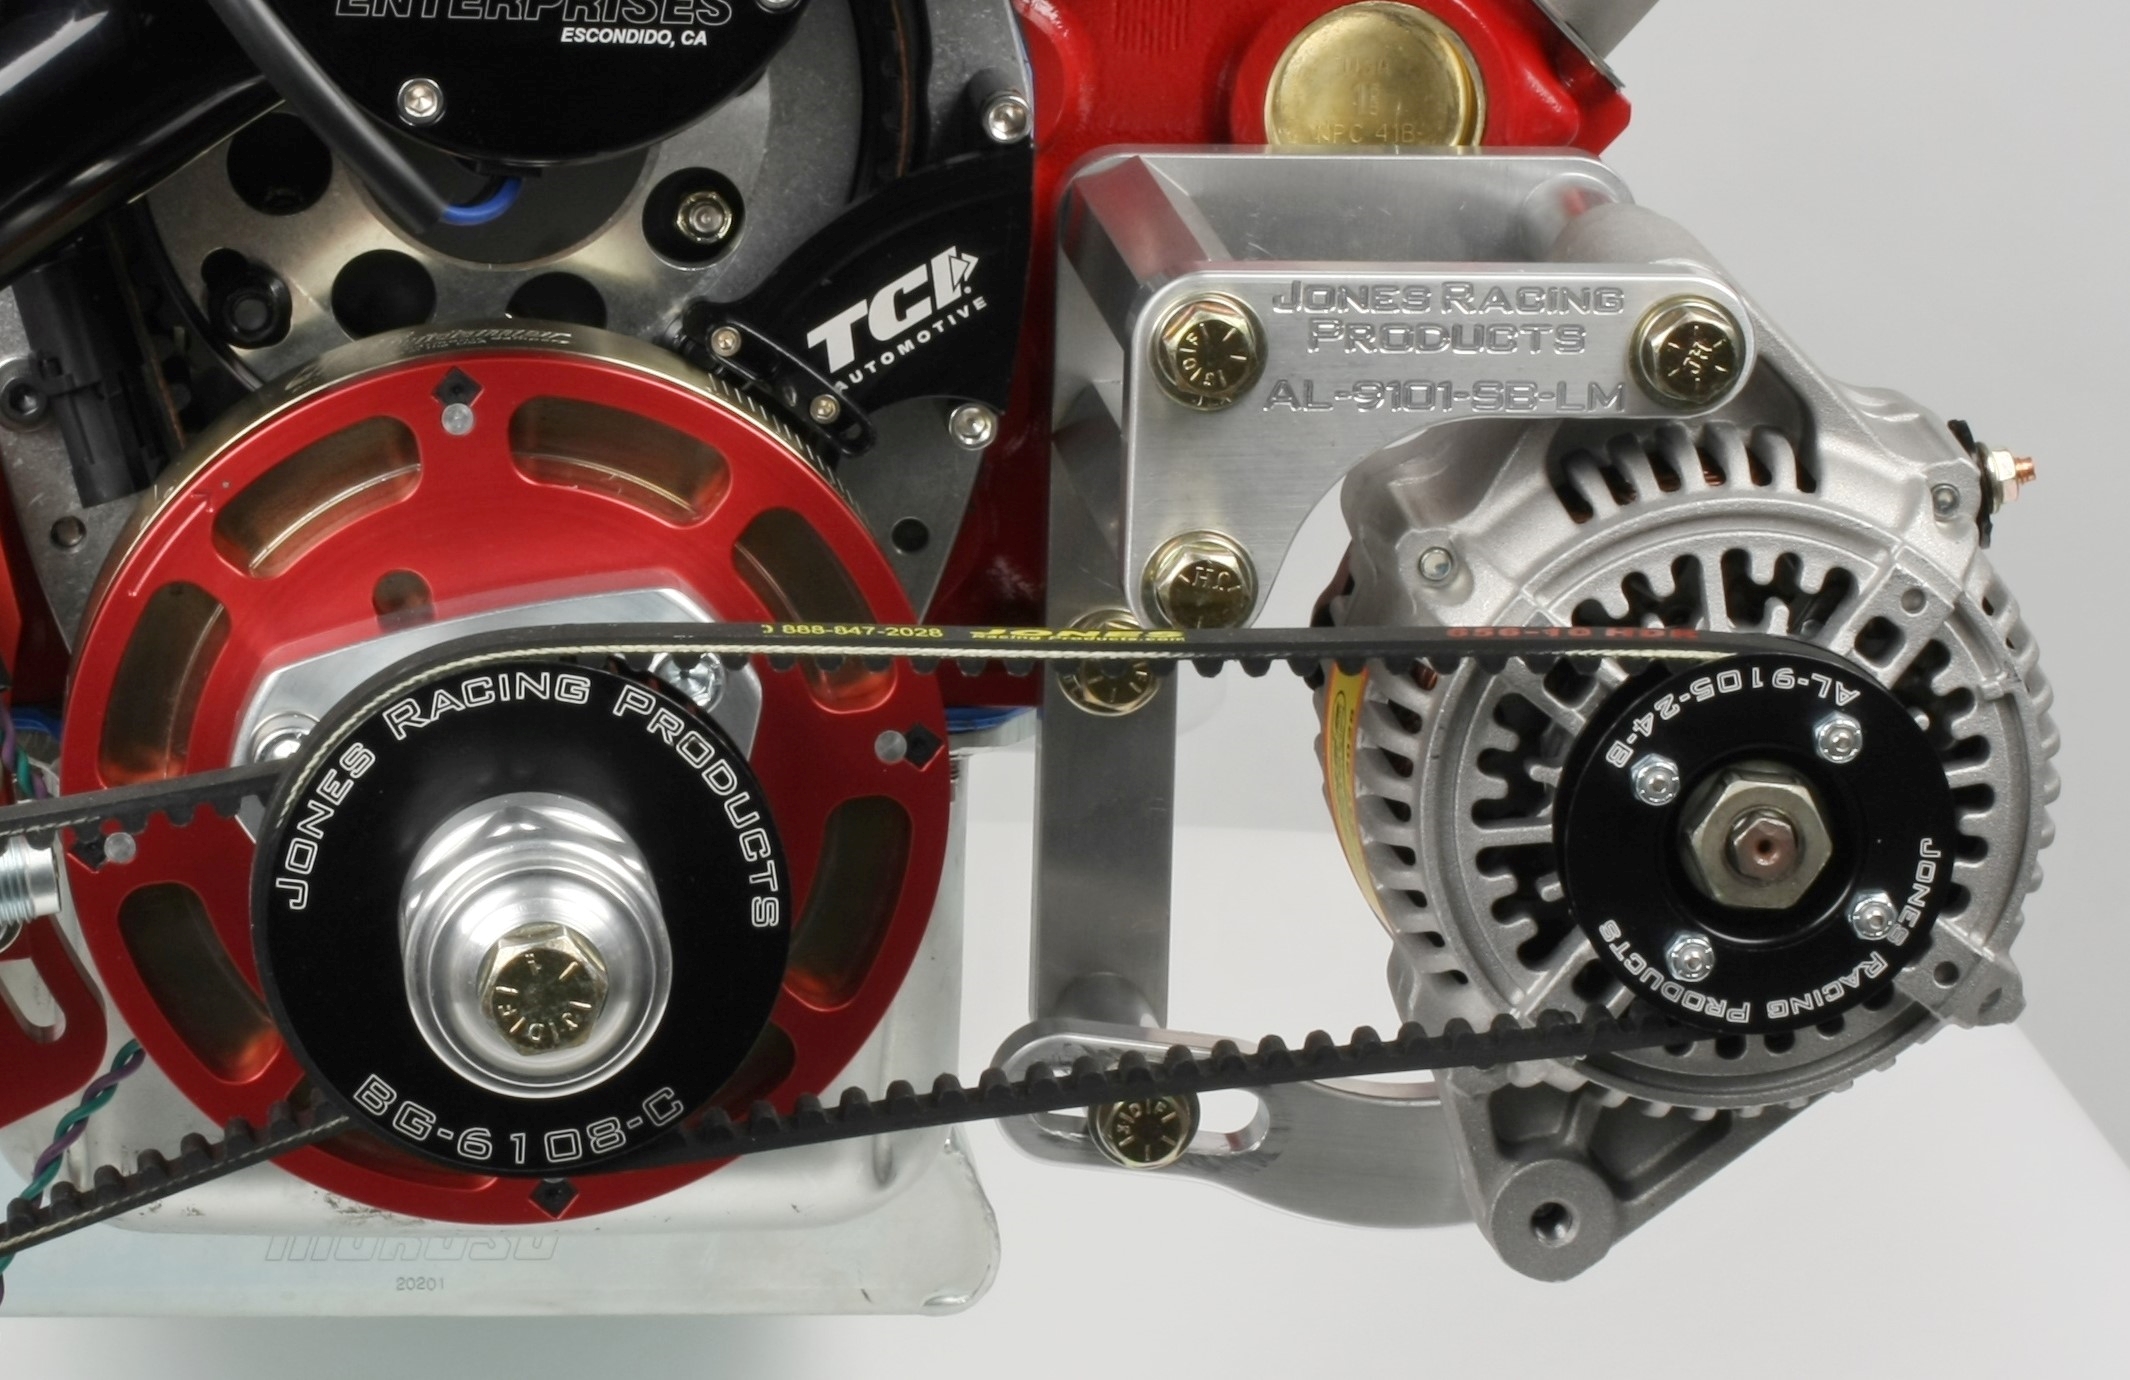
Rather than installing crankcase breathers in the valve covers and relying on passive evacuation of crankcase pressure, we installed a Jones Racing belt-driven vacuum pump. An external vacuum pump provides a number of benefits including reduced friction; improved piston ring sealing by relieving crankcase pressure under the rings; reduced windage around the rotating assembly; improved oil scavenging; and reduced oil contamination. Using an external vacuum pump can also provide power gains of 10 to 35 horsepower.
The Jones two-stage, gear-style vacuum pump has built-in heat sinks that allow the passage of oil, fuel or moisture without damaging the pump. The two -12 AN inlets connect to the front of each valve cover via 90 degree hose ends and braided hose. The -12 AN exhaust port routes to a remote vacuum pump breather tank.
A multi-part drive hub assembly attaches to the crank balancer and registers on the MSD trigger wheel to provide a center register for the drive hub. The pump’s 0.500 inch thick mounting bracket sandwiches between the block and the MSD crank trigger pickup bracket. It caused the pickup to move 0.500 inch forward of the trigger wheel, so it was necessary to mill that much material from the rear of the MSD bracket in order to maintain the pickup sensor alignment with the trigger wheel.
Valve Covers
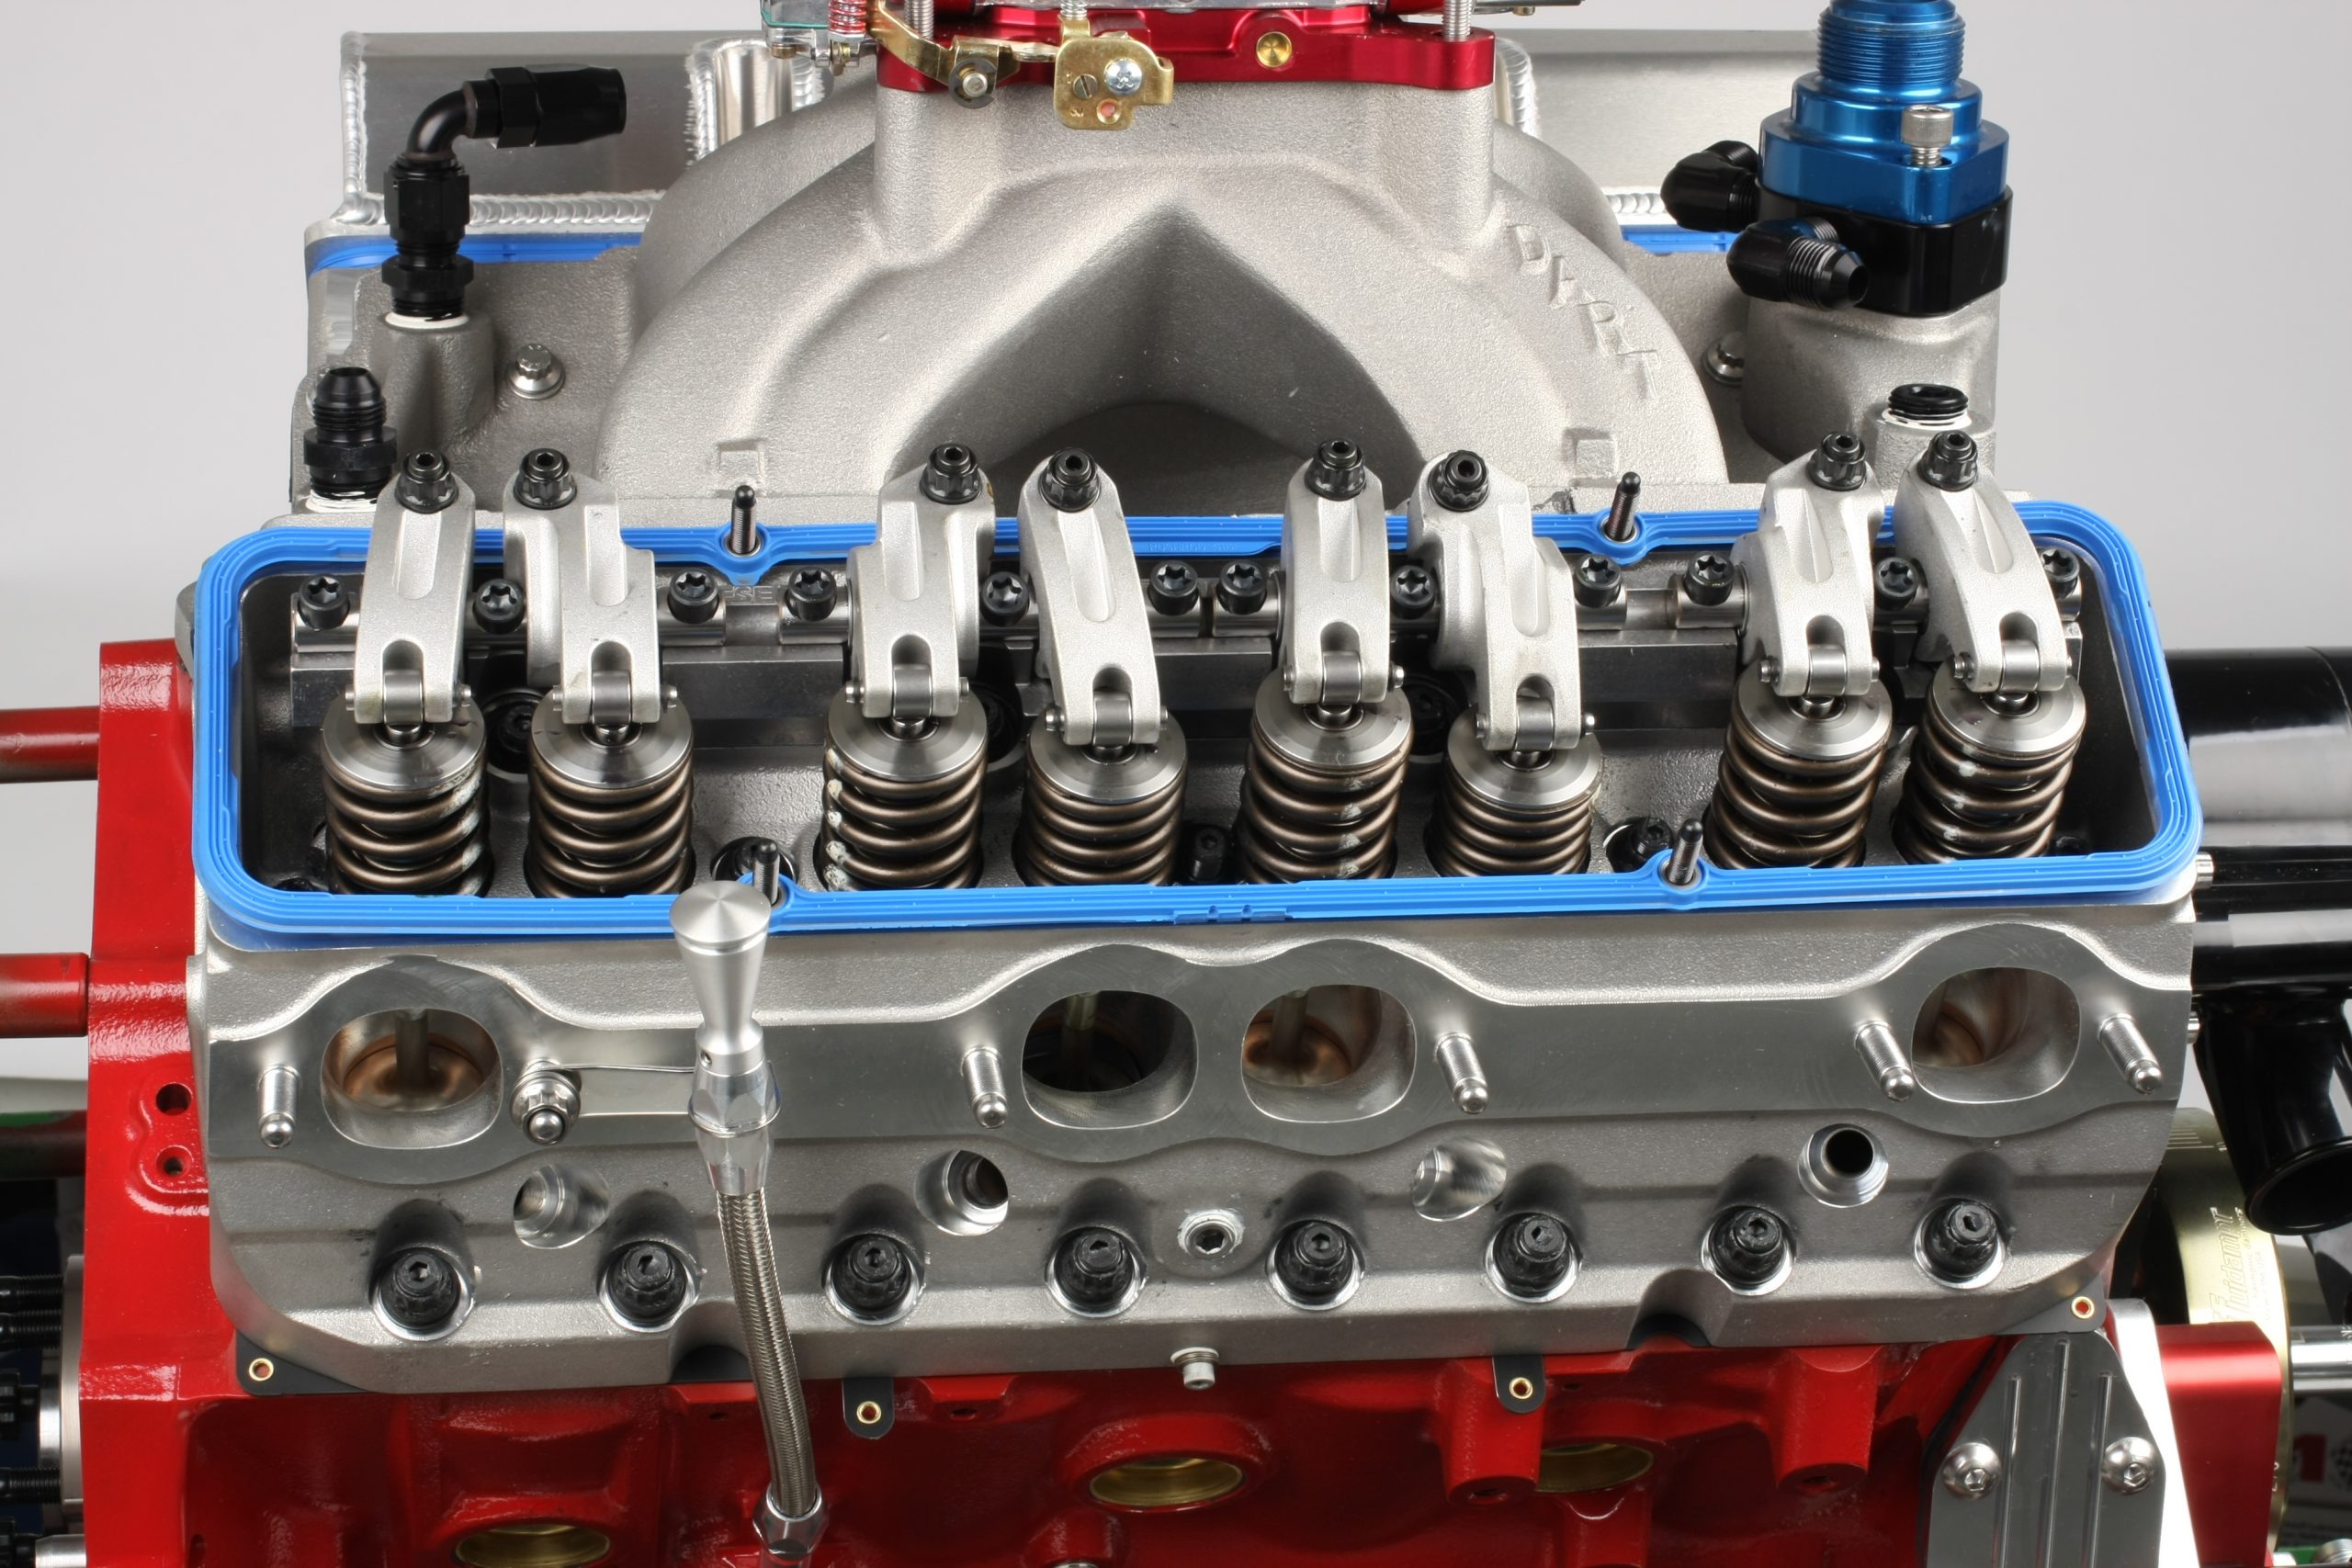
18 degree cylinder heads require special valve covers with rails that provide wider inboard-to-outboard wall dimensions to clear the rocker arms. The mounting bolts pass through the valve cover roof instead of the outer flange. I chose Moroso fabricated aluminum valve covers and installed them with Fel-Pro reinforced silicone gaskets and 1/4 inch studs.
The valve covers have no breather holes so you can modify them to suit your requirements.
Since I’m running a Jones Racing vacuum pump and sealing the crankcase, I outfitted the valve covers accordingly. I created an oil filler on the left cover by drilling a 1.800 inch hole and TIG welding a female threaded bung topped with Earls threaded fill cap. The front wall of each valve cover was drilled and fitted with Earl’s -12 AN weld-in fittings so I could plumb the covers to the vacuum pump.
Alternator
I used a Jones Racing one-wire alternator rated at 80 idle/140+ max amps and driven by the crank hub that also drives the vacuum pump. The unit mounts to the left side of the block with a Jones two-piece bracket assembly and a rear support.
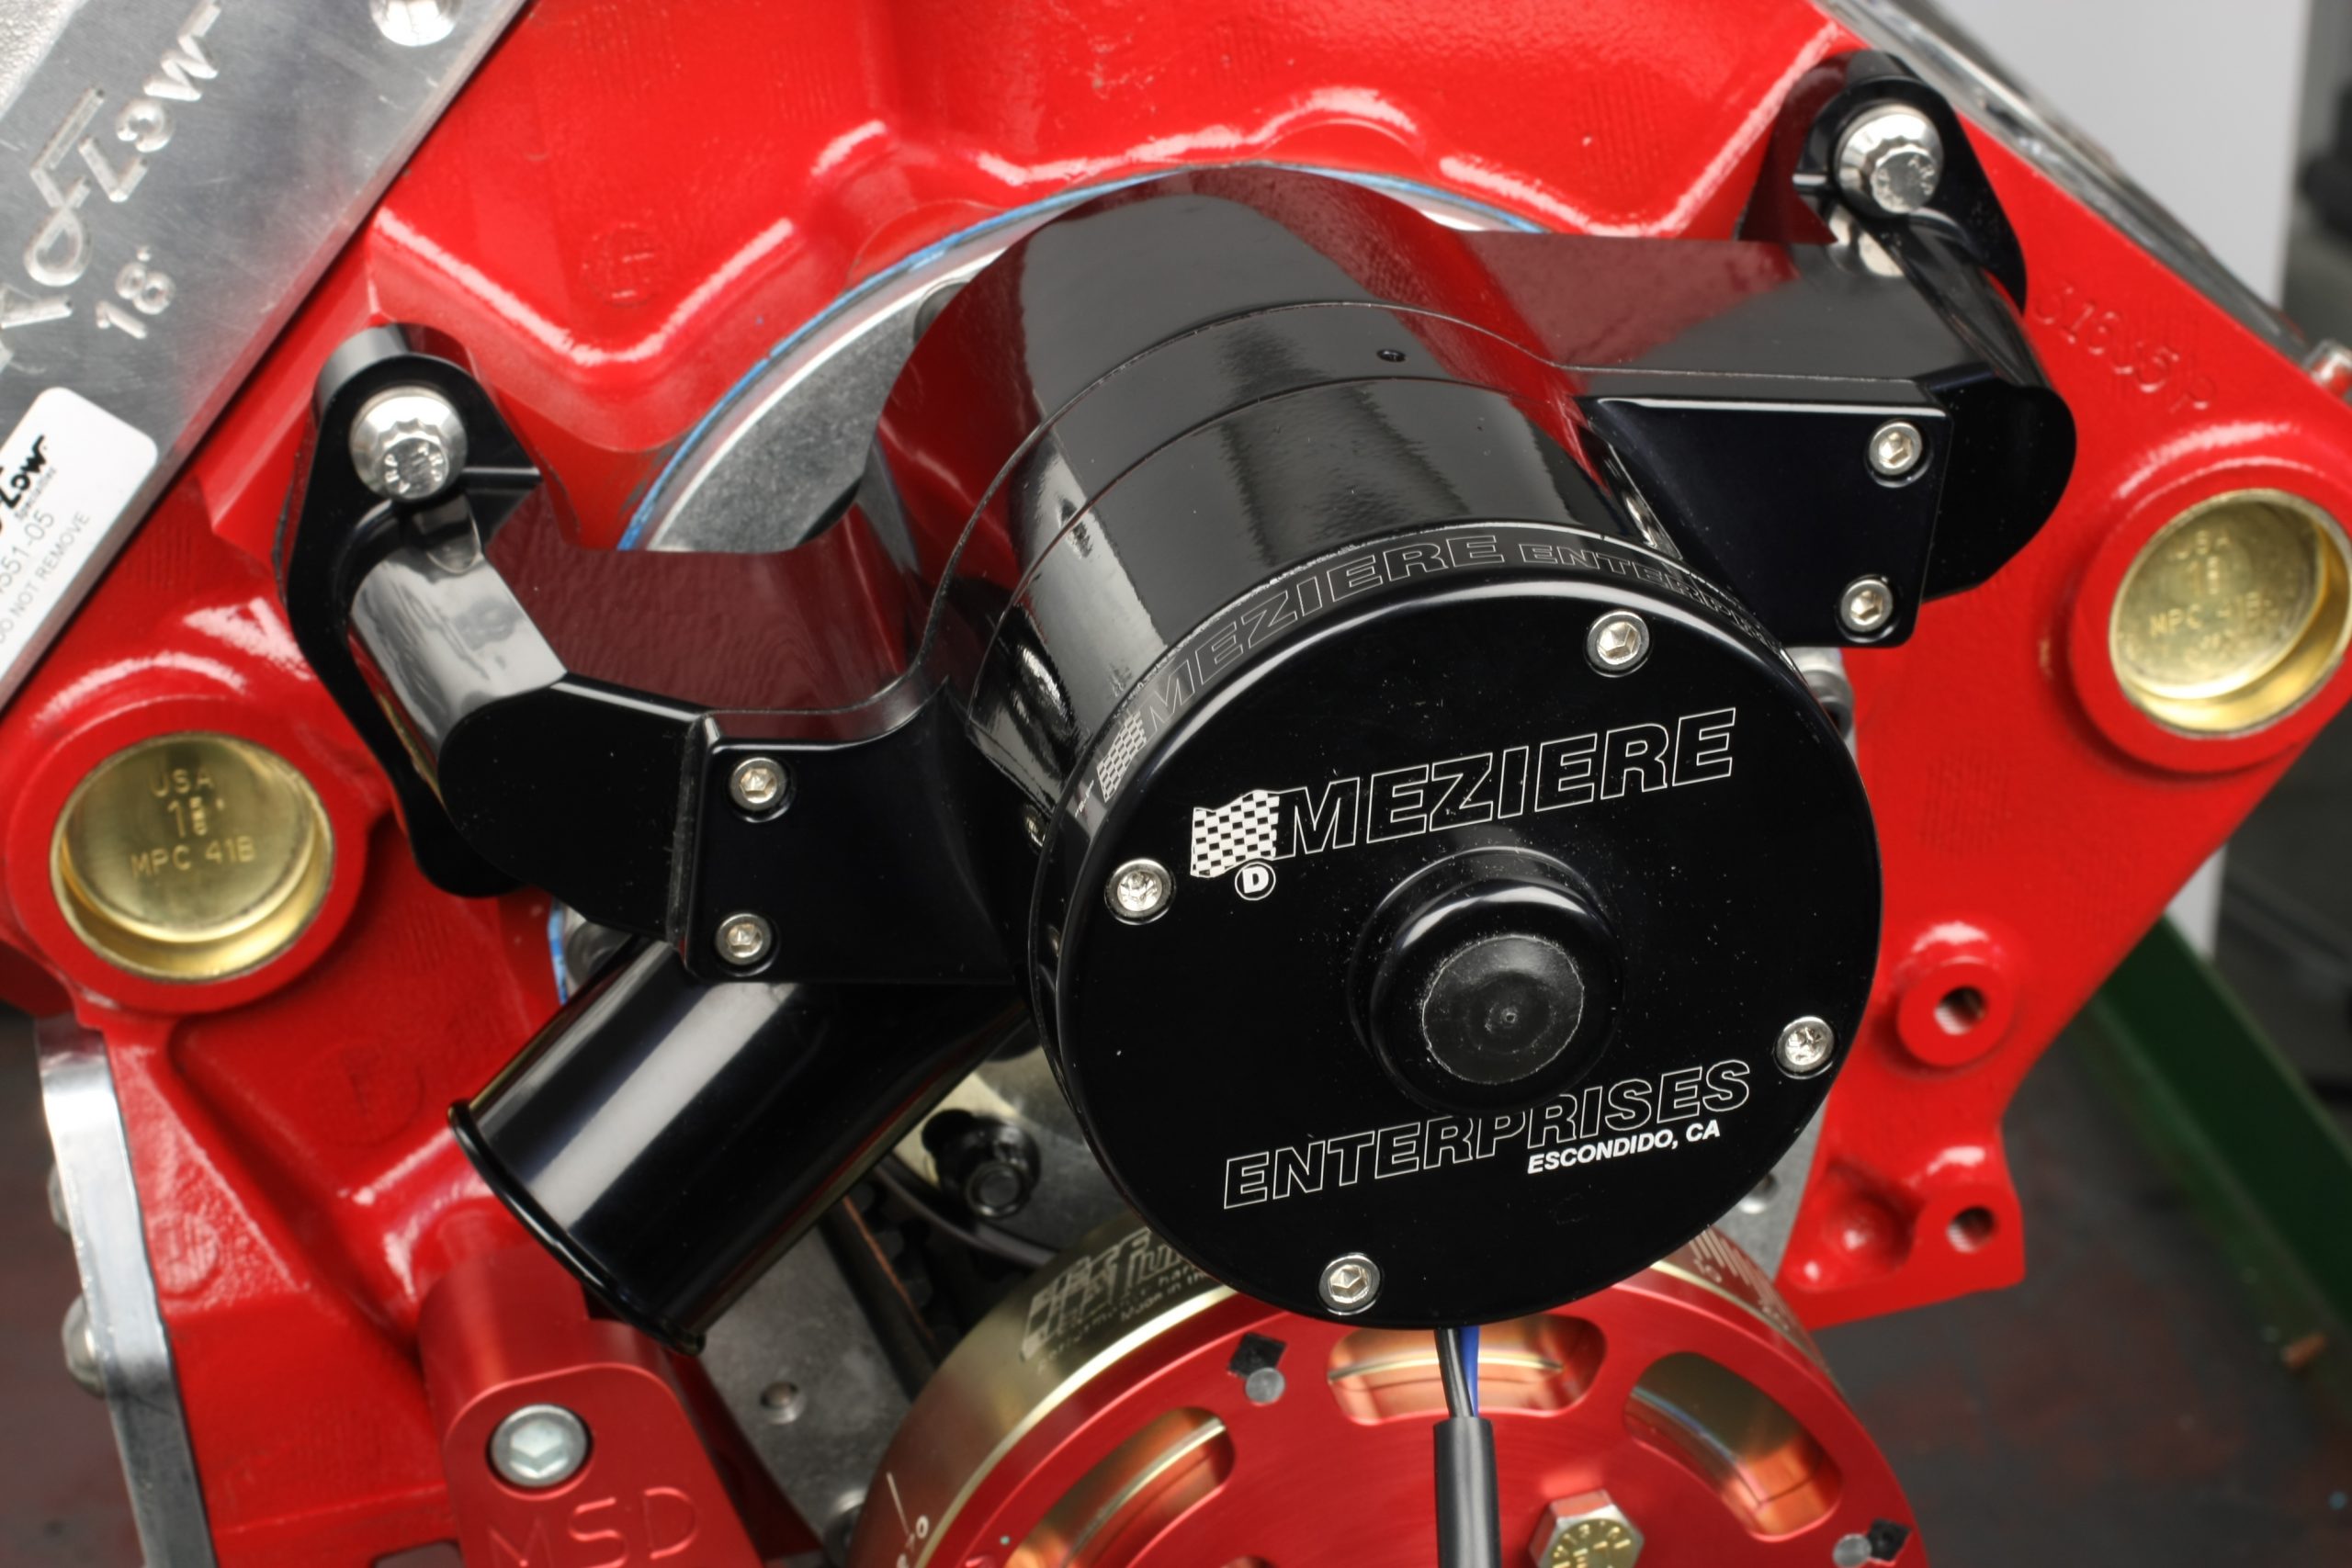
Water Pump
I always use an aluminum electric water pump on my engine builds. This eliminates the need for a pump belt and the resulting parasitic drag on the crank while providing consistent high coolant flow. For this build, we chose a Meziere 300 Series pump rated at 55 gallons per minute of flow, The pump mounts to the block using Fel-Pro gaskets and four 3/8-16 x 1-1/2-inch bolts
Dyno Run
We only had one session on the dyno, and the engine made 735 peak horsepower at 7,100 RPM and 575 lbs.-ft. of peak torque at 6,250 RPM. I’m confident that further tweaking would likely gain another 10-15 horsepower. Check out the chart below.
Birchwood Automotive 422 Chevy Dyno Numbers
| RPM | Corrected Torque (Lbs.-Ft.) | Corrected Horsepower | Oil Pressure (PSI) |
|---|---|---|---|
| 4,024 | 499 | 511.7 | 70.3 |
| 4,193 | 526 | 524 | 70.4 |
| 4,661 | 537.5 | 534.2 | 72.2 |
| 4,706 | 542 | 542.8 | 70.4 |
| 4,900 | 544.6 | 598.8 | 70.1 |
| 5,300 | 546.3 | 615.2 | 70.3 |
| 5,700 | 552.8 | 643.5 | 70.1 |
| 6,100 | 572.1 | 660.9 | 70.1 |
| 6,250 | 575 | 676.3 | 70.2 |
| 6,340 | 574.5 | 698.2 | 70.2 |
| 6,500 | 566.8 | 703.8 | 70.1 |
| 6,832 | 549.4 | 717.1 | 70.0 |
| 6,993 | 518.3 | 729.4 | 70.1 |
| 7,100 | 512.1 | 735 | 70.2 |


What an awesome engine build/combination. I have been studying all the engine buiding gurus and noting their tricks and advice on a good engine build and your 422 combination has alot of the components i wish to use . What was the final static and Dynamic compression ratio acheived ? I have a 1955 chev sedan that had a staunch 358 stroker [solid roller ] that was originally in a circuit race car here in Australia running methanol it made 580hp from a 6.0 litre restricted capacity which i had to eventually change compression ratio to control detonation on our 98 octane rated fuel and 6 point octane booster.The engine is now due for a freshen up again and have considerable wear in valve train and cam lobes. Does your engine run on pump fuel? .What sort of spring pressures are you running and your estimated longevity of the valve train components ? I dont drive my 55 daily but i also drive 500km round trips to rod runs and nostalgia drags and i am trying to factor in some reliability and wear and tear estimates .Do you know the overall height of the engine so i can see if it will fit under my bonnett without a reverse cowell! Do you have a approx cost estimate of the 422 components ?. Prehaps we could talk about building me an engine and sending it to Australia ! Thanks for your time and again well done Mike i love the combination . yours in hot rodding Barnesy.