There are all sorts of different electrical and electronic connectors available in today’s marketplace. They’re all used for the same thing: Providing cable (or harness) to cable (harness) connections. Some like weatherpacks are common and easy to use. We covered them in a previous article.
While weatherpacks work great (and are quite common), there are other options. One of the good ones is the Deutsch connector. They’re physically smaller than a weatherpack and some might say they’re a better design, and folks may also argue they’re easier to assemble.
Understanding Deutsch Connectors
Before we get into the nitty gritty of assembly, consider the following:
Deutsch connectors are designed for use in harsh environments, particularly in locations where you need to positively maintain the electrical connection. The respective housings are made from a thermoplastic material that functions in a wide temperature range. Silicone gaskets are used at both rear wire interface as well as the front of the housings. This ensures high levels of moisture resistance.
The meat of the Deutsch connector system is what the company calls “commonality.” The idea here is that all of the wires are terminated by way of a single contact system. The only deviation in connectors is the different gauge of wire required.
Confused about automotive wiring in general? This article can help clear things up: Automotive Wiring 101: Basic Tips, Tricks & Tools for Wiring Your Vehicle
There are two different varieties of Deutsch contacts: stamped and formed as well as solid. According to Deutsch, the stamped and formed contacts are manufactured by way of a series of progressive dies. Meanwhile, the solid contacts are manufactured by way of a cold heading process of solid copper alloys. Both of the contact varieties are interchangeable within the connector. The type of contact you select is based on crimp preference along with the application. In either case, the termination is identical.
According to Deutsch, there are five different (common) connector termination sizes: 4, 8, 12, 16, and 20. These sizes mate with their own size no matter the gauge of wire used. The Deutsch DT–series connectors offered by Summit Racing work with 16-18 gauge wire and 14-16 gauge wire. FYI, you can locate DTM series connectors. They’re designed for small gauge wire. DTP series connectors are for larger gauge wire.
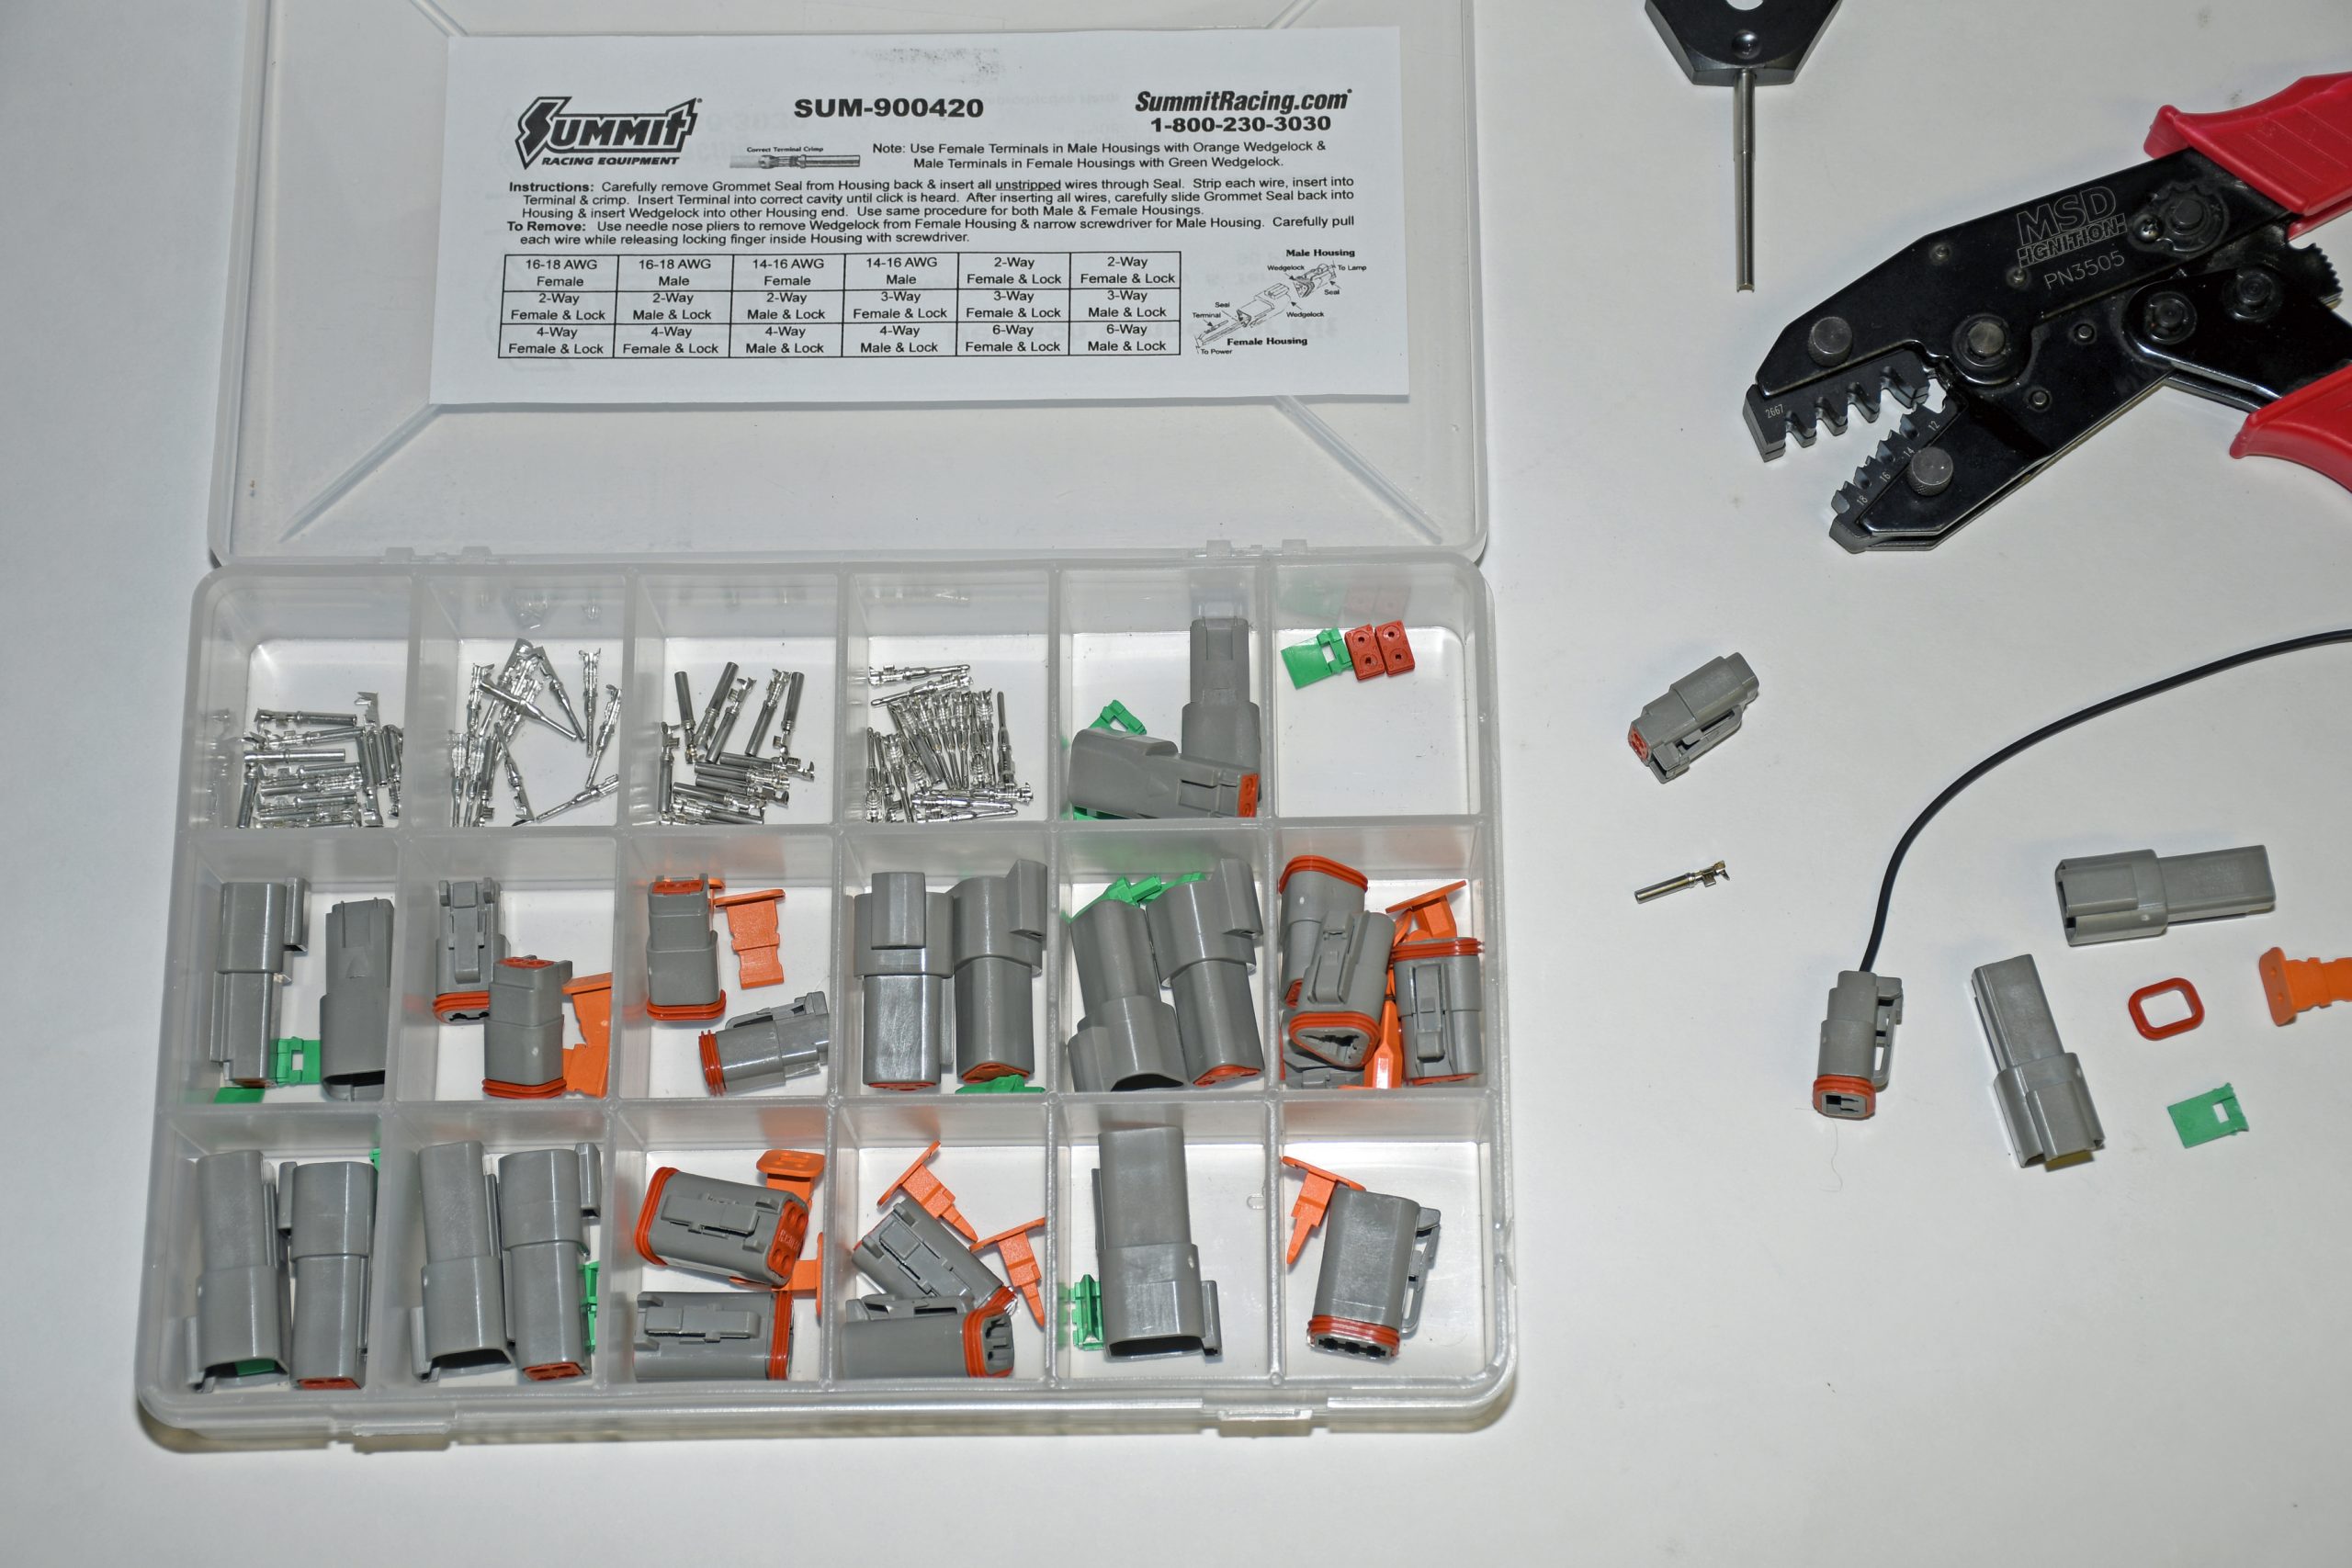
The Summit Racing DT–Series Deutsch Connector Kit includes:
- (15) male & (15) female pins for 16-18 AWG wire
- (15) male & (15) female pins for 14-16 AWG wire
- (6) 2-way female/lock and male/lock plastic plugs
- (4) 3-way female/lock and male/lock plastic plugs
- (4) 4-way female/lock and male/lock plastic plugs
- (1) 6-way female/lock and male/lock plastic plug
In order to assemble stamped and formed Deutsch connectors, we used a set of MSD Deutsch connector crimping dies in an older MSD crimping tool, but the jaws also fit the MSD crimping tool that’s available now.
Before we go any further, a key to assembling Deutsch connectors is to remember the female terminals (sockets) go into plugs (or male housings). Meanwhile the male terminals (pins) go into receptacles (or female housings).
Assembling Deutsch Connectors
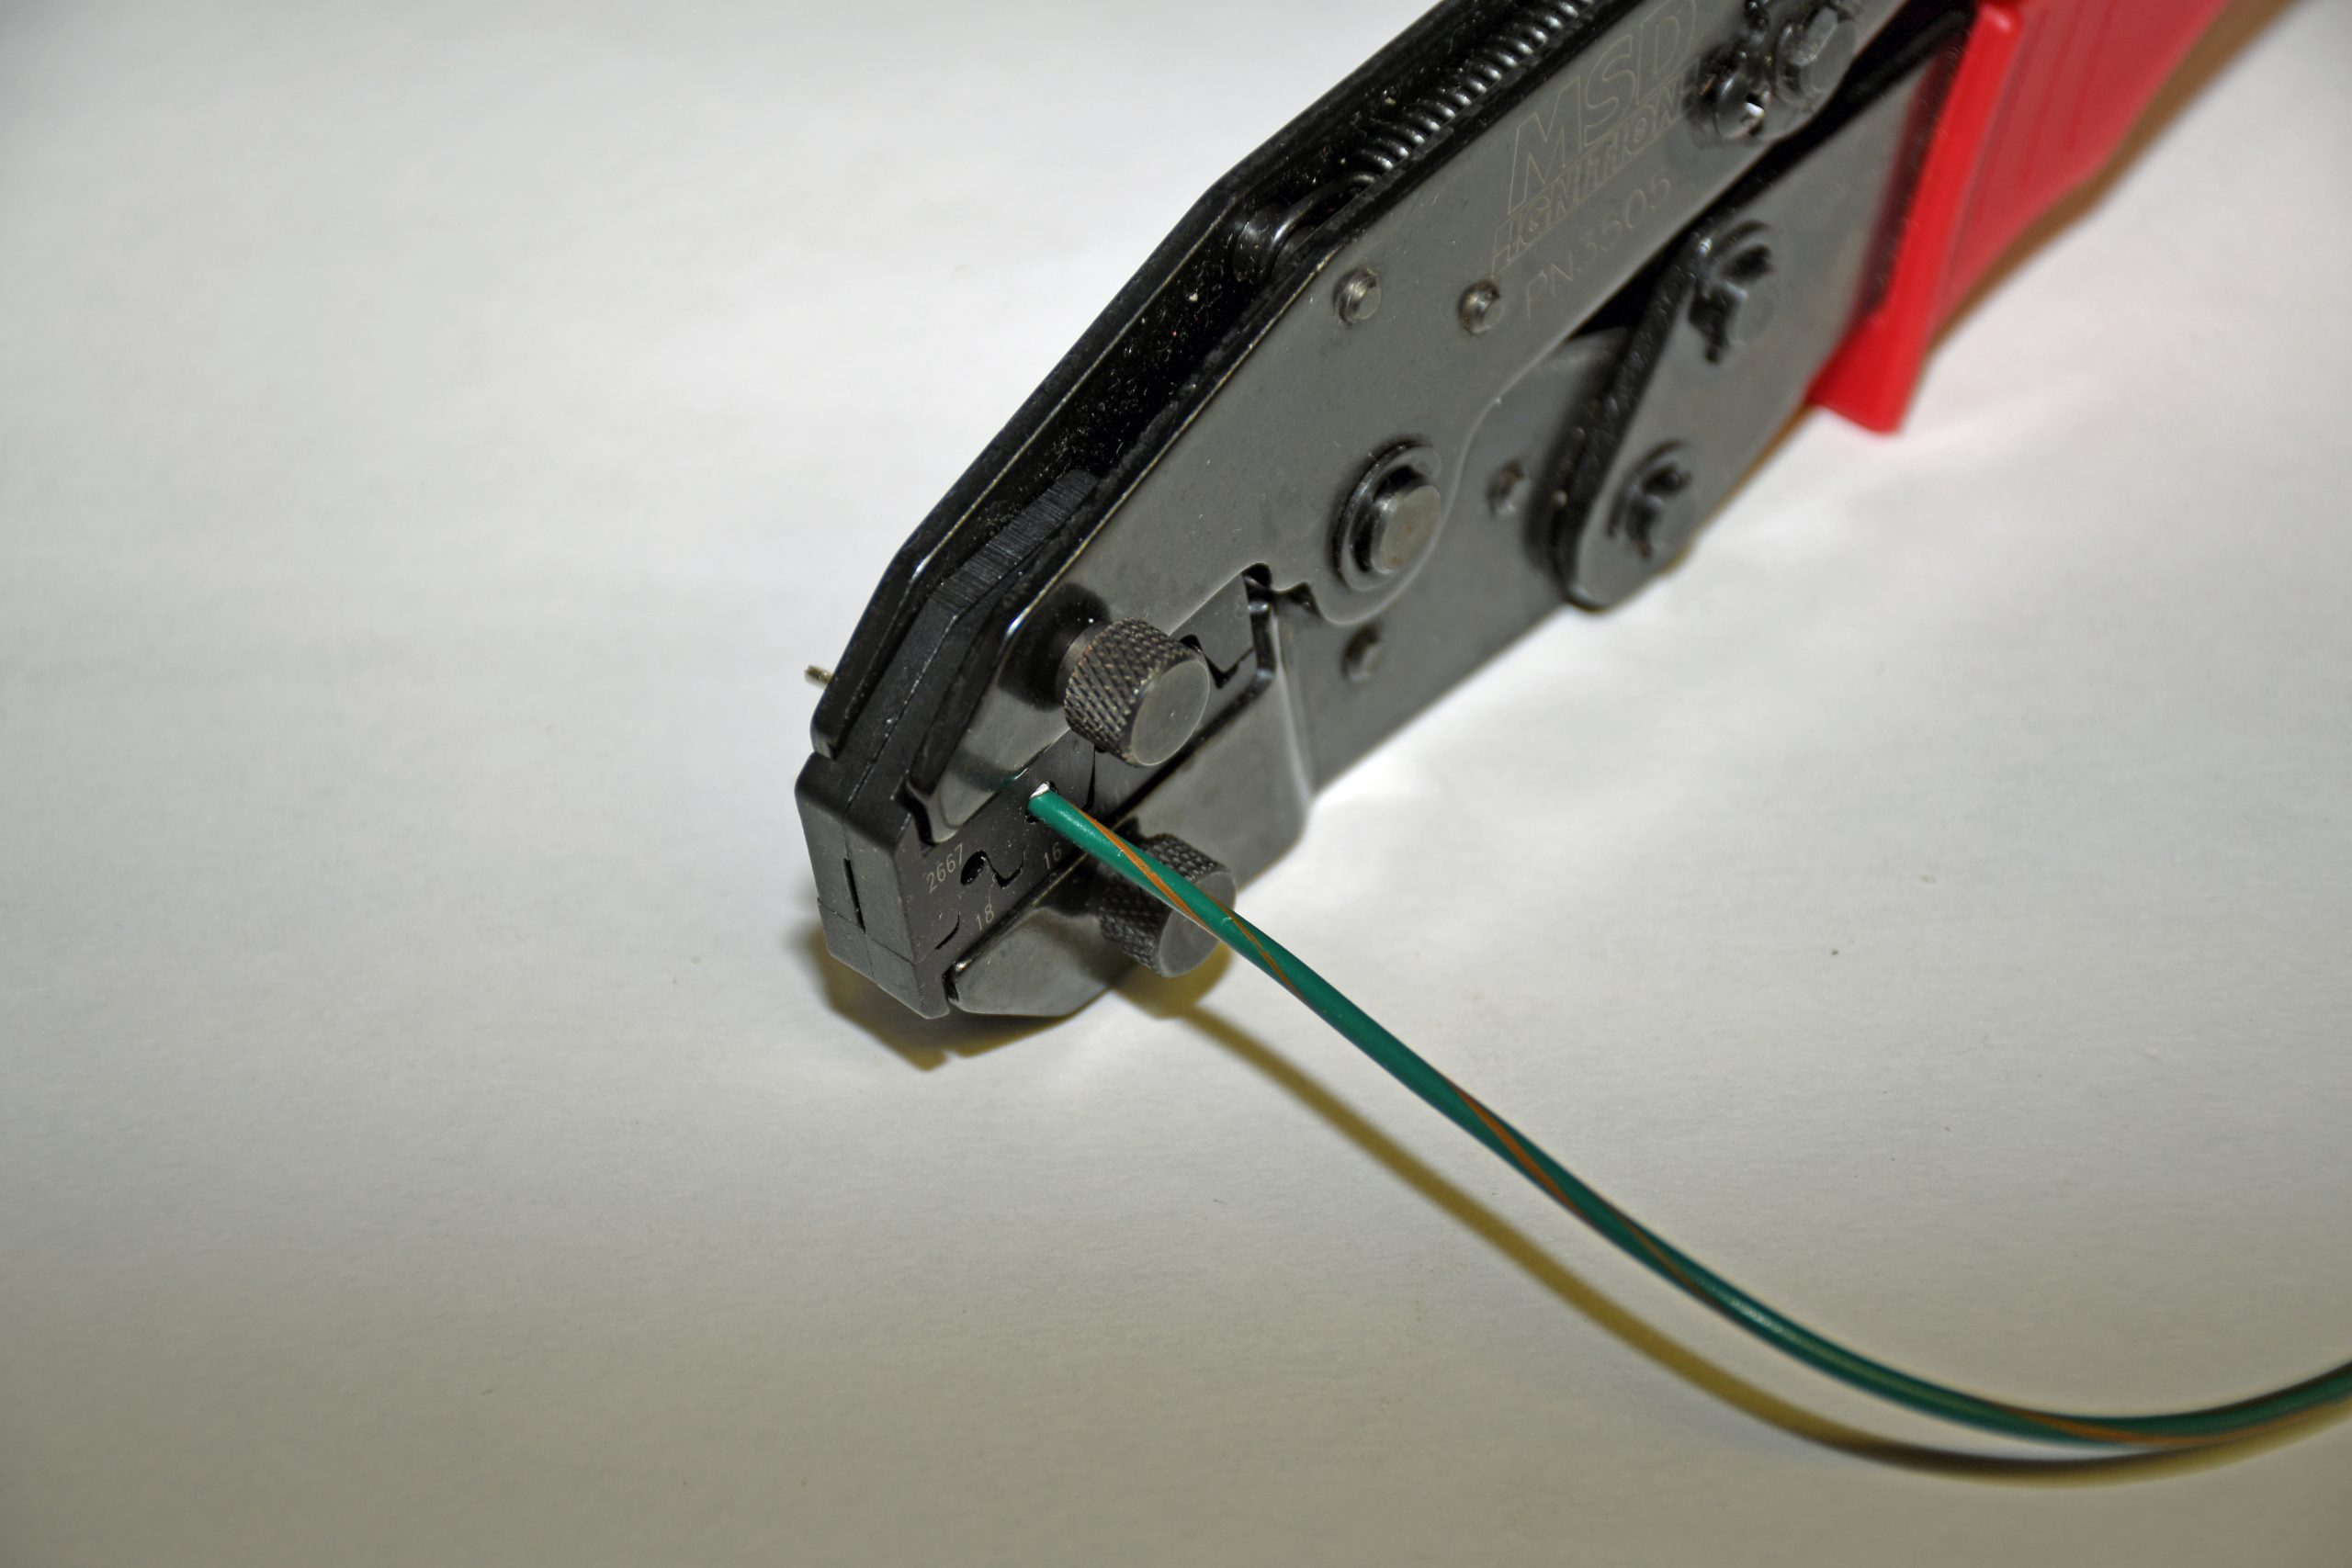
Back to crimping: The jaws of the MSD tool dies are numbered 18, 16, 14, and 12 for the respective wire gauge/pin size. The wire end of the terminal (pin) faces the numbered side of the tool. Note the jaws are stepped. This allows the terminal (pin) to bed into the tool jaws. With the terminal or pin installed (open end of the terminal faces up), insert a section of stripped wire into the pin. Then you simply close the handles and the wire/terminal combination is crimped.
By the way, the MSD tool handles must be closed all the way before they release. It’s all rather easy.
At this point, the pin can be installed in the housing. Push the wire through the back of the housing, through the orange silicone seal, until you hear (or feel) a snap or a click. The wire snaps right into place. If you tug it, the wire should be snug. With the wire(s) in place, you’re set to lock it in place. Using a pair of needle nose pliers, grasp the green wedge lock with the flat portion facing down.
Insert the wedge lock into place beneath the terminals. You’ll note the wedge lock forces the terminals upward into a set of grooves in the top of the housing. Next, use a small flat screwdriver and push the wedge lock into place until it locks. The contacts are locked into place and this half of the connector is assembled.
The plug side (with female terminals) assembles in a slightly different way. Terminal crimping is identical. So is setting the terminal into the housing. What differs is the wedge lock. The orange color wedge lock simply slides into the groove and snap it into place with your hands.
That’s it. You’re ready to use the connector.
Disassembling Deutsch Connectors
If you need to disassemble them, it’s relatively easy too. The orange wedge locks on the plug side are disassembled by simply inserting a small flat blade screwdriver into the side of the assembly. Give the screwdriver a twist and the wedge lock will pop out. Inside the housing, you’ll notice a couple of tabs. Depress the tabs with the screwdriver, tug the back of the wire and the wire/contact assembly will release.
Removing the green wedgelocks is different. A Lisle Deutsch Terminal Tool makes short work of the process. In operation, first select the appropriate wire gauge on the tool and then insert it from the backside (wire side) of the socket. Push forward and you’ll feel the wedgelock release. The wire can then be cleanly removed.
As you can see, Deutsch connectors are high quality, easy to use, and equally easy to assemble. For a closer look, check out the pics below:


Deutsch®️ connectors are superb‼️ They are Among the best available.
[…] as we found out in our recent article How to Assemble Weatherproof Deutsch DT Connectors, Deutsch connectors are no […]
[…] you’ve got a weatherproof connector with a rubber boot or grommet (like you’d see in a Deutsch or Weather Pack connector), coating the rubber with a thin film of grease can prevent it from […]
I use Motorcraft brand electrical grease instead of dielectric grease when assembling these connectors. They will unplug and come apart easily.
The orange wedge lock for my 12 pin connector won’t go in. It’s hitting something very solid, but I don’t want to file anything until i get instructions.
Hi folks, Doug Scott best set of instructions I have ever come across, all photos and very easy to understand and follow. Thanks
Which side is positive and negative on the connection