The automotive world has totally embraced the notion of hydraulic roller lifers. Yes, rollers reduce friction and present the opportunity to employ a more aggressive lift profile compared to a flat tappet cam. But there’s still room in this world for performance flat tappet camshafts.
There’s still a strong demand for a flat tappet cam and lifter package—whether it be mechanical or hydraulic. While you can save some coin by choosing a flat tappet cam, there are a couple of important technical details that must be checked off the list before you spin that flat tappet-cammed engine for the first time.
Ironically, the cause for all the problems for flat tappet cams had nothing to do with camshafts and lifters. Instead the tipping point was a significant change in engine oil.
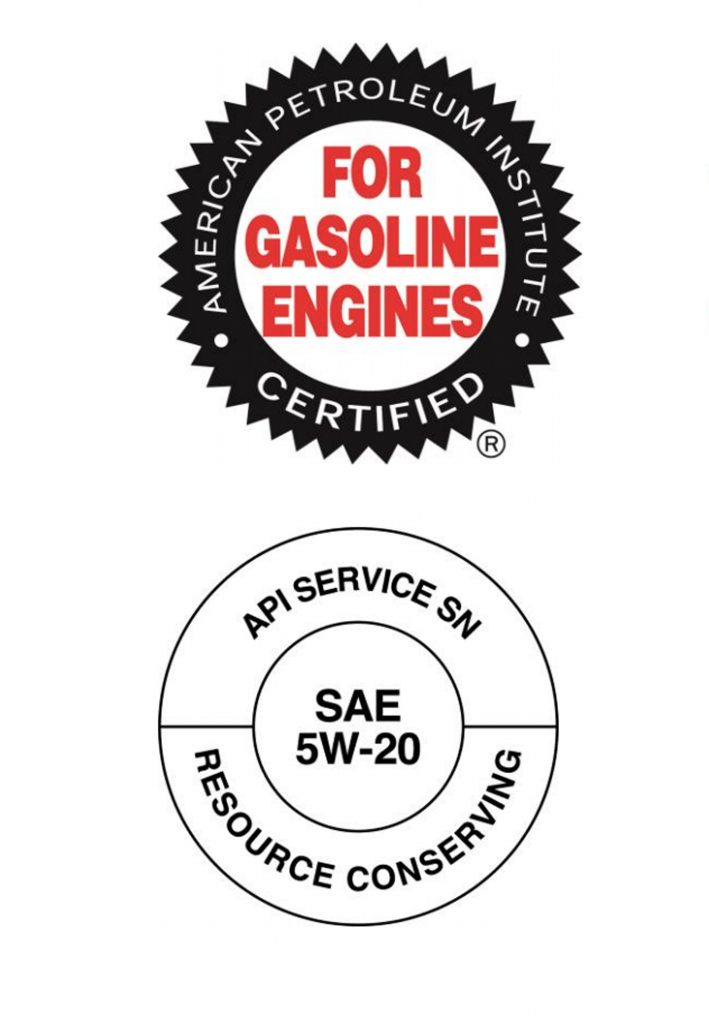
In 2005, the American Petroleum Institute introduced API SM category oil, which radically lowered the zinc and phosphorous levels from 1,500 to roughly 800 parts-per-million (ppm). You’ve probably seen the abbreviation for zinc and phosphorous as ZDDP. This acronym stands for zinc dialkyl dithiophosphate. This is a high-pressure lubricant that, until 2005, was found in generally high concentrations in all off-the-shelf oils. But in that year with API SM oil, ZDDP levels plummeted by almost 50 percent—and that’s when flat tappet camshaft-equipped engines began suffering failures.
ZDDP is an anti-wear additive that drastically improves oil’s ability to reduce wear in extreme pressure situations (like the interface between the camshaft lobe and the lifter). This is important because there are two main contributors to failed flat tappet cam lobes during new camshaft break-in: low ZDDP concentrations in oil and/or excessive valve spring pressure.
This story will reveal a proven procedure for breaking-in your flat tappet camshaft when combined with the right components that include quality break-in oil along with the proper selection of valve springs. There are no shortcuts in this procedure. Ignoring or failing to follow through with these recommendations may lead to a failed cam lobe.
If that happens, the engine really should be completely disassembled so that all the oil passages can be thoroughly cleaned. Otherwise, some of that metal may end up right back in the oil the next time the engine is started. Considering how much effort it is to perform the job, its time well spent to perform this procedure correctly the first time.
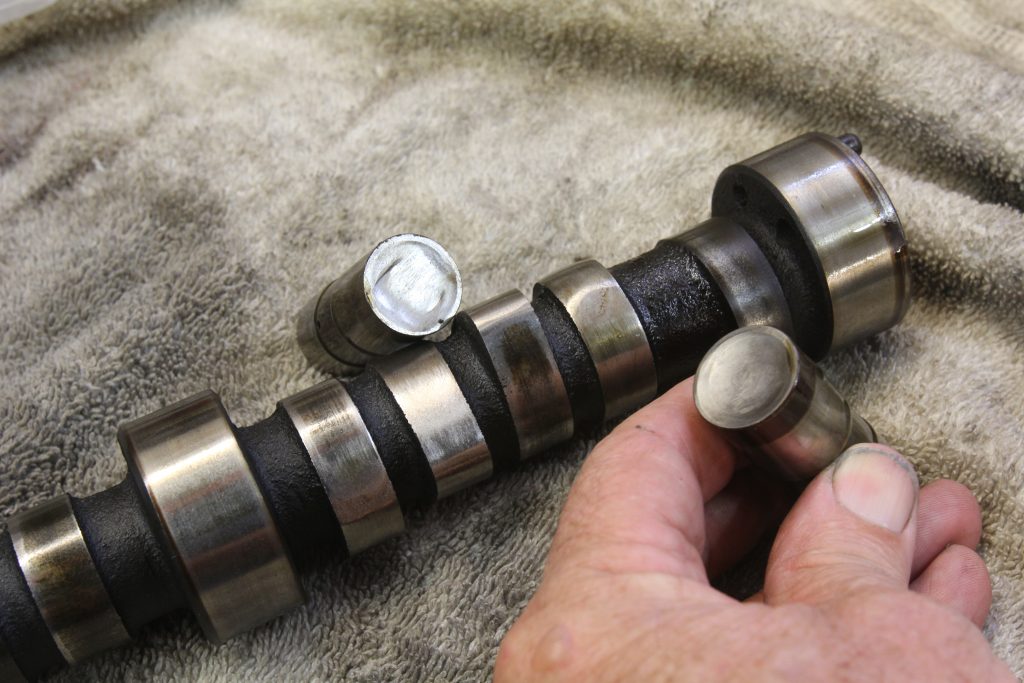
We’ll use a small-block Chevy as our test subject, but these same steps apply to any four-stroke, pushrod internal combustion engine. For this story, our small block Chevy was equipped with a new Summit Racing flat tappet hydraulic camshaft pushing on a set of Melling hydraulic lifters. Once everything is clean and ready for assembly, the first step is to ensure that each lifter can easily travel inside its lifter bore. Carefully inspect each lifter bore for burrs or perhaps a light ridge on the bore that might prevent the lifter from moving freely within the bore. Flat tappet cam lobes are designed with a slight taper that induces the lifter to spin. This improves lifter wear characteristics and also offsets forward cam movement.
Next you can fully coat all the lobes with the break-in lube supplied with the camshaft. A full but light coating is all that’s necessary on each lobe and should be followed with that same lube on the face of each lifter. There’s no need to coat the sides of the lifters with the moly paste, break-in oil will perform that task.
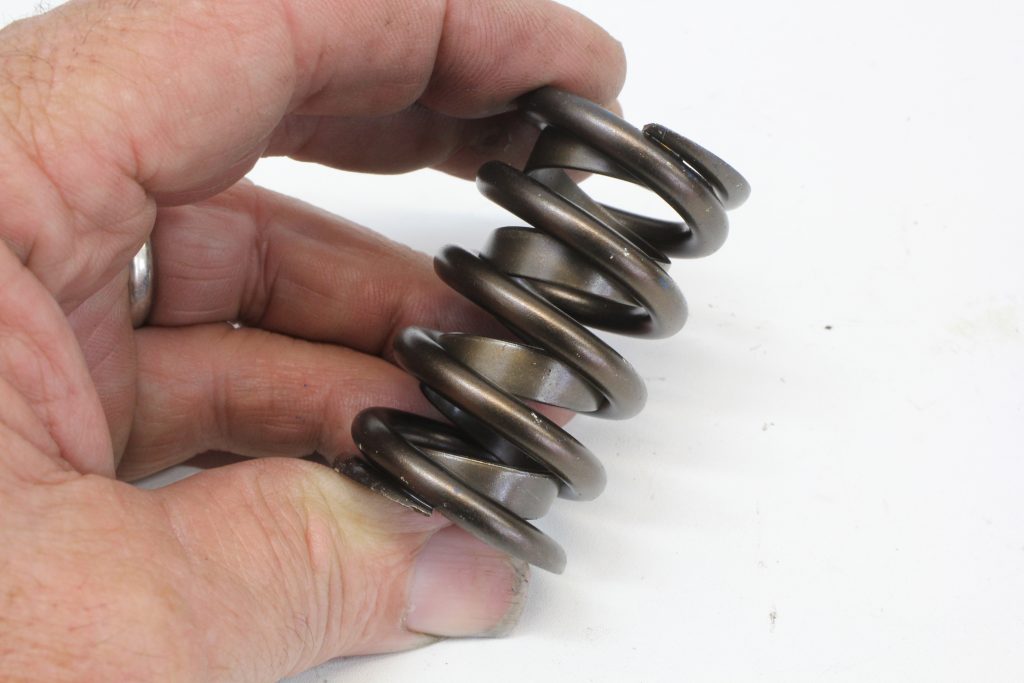
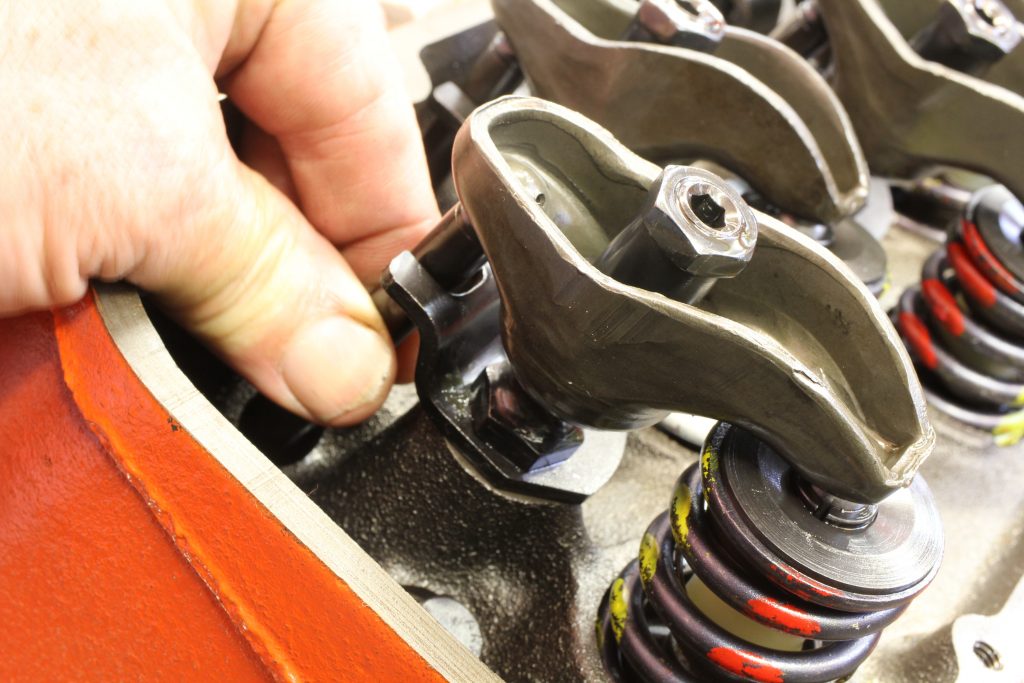
With the camshaft and lifters in place and the timing chain and gears properly installed, the rest of the valvetrain can be reassembled. This leads us to valve spring selection. The best way to ensure the lifters and cam survive the initial wearing in process is to reduce the valve spring load. For this small-block, we chose a set of standard 1.25-inch diameter single springs with a damper. Our springs came from Trick Flow and we’ve listed the specs in the chart at the bottom of this story, along with Comp specs for their recommended springs for big-block Chevy, and small- and big-block Fords.
The key is to avoid high spring pressure that increase load on the lifter and cam during the break-in procedure. We know of an engine builder who recently lost a flat tappet cam in a big-block Chevy during the break-in process. He was using quality break-in oil but two lobes failed because they were working against a stiff spring. His chose a high quality spring, but its specs placed the seat load (valve closed) at 155 pounds and an open (full valve lift) load of 340 pounds at 0.500-inch valve lift. The failure of several lobes points out that this was likely too much spring pressure during break-in. Once the cam has achieved its proper break-in, this spring would probably work. But for the break-in procedure, it was just too much.
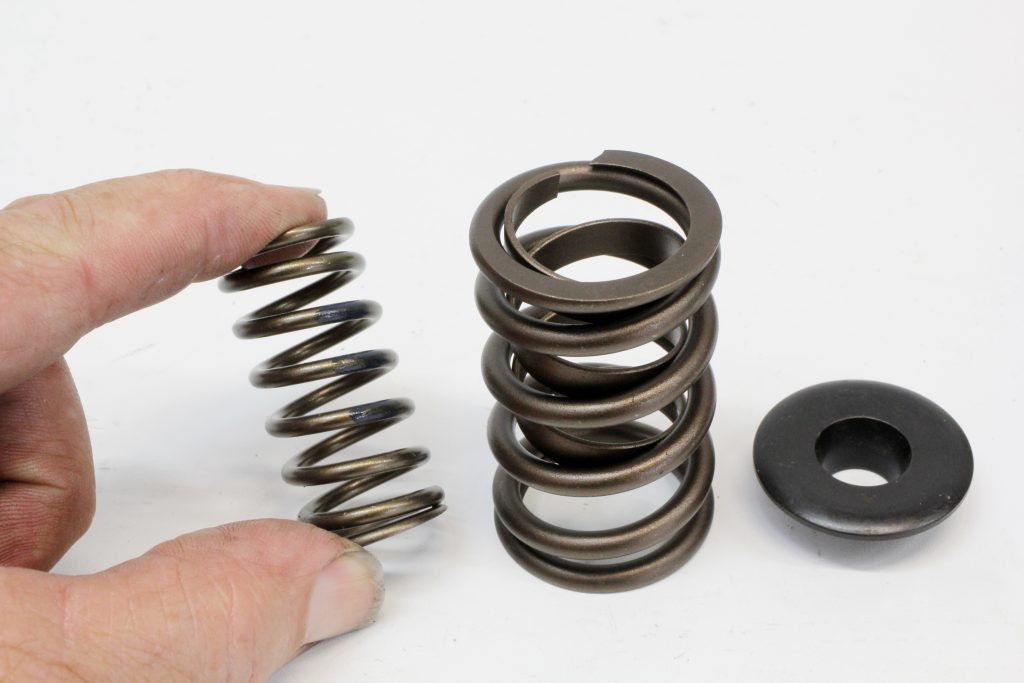
One way to avoid this for a big-block Chevy would be to choose a light spring for the initial break-in and then switch to the final spring after break-in. If using a dual valve spring, its common practice to remove the inner spring to reduce the load and then re-install the inner spring after the cam is fully broken in. Yes, this is extra work, but still less effort than having to completely disassemble and clean the engine, then purchase and install a new cam and lifters.
Another option is to create a taller installed height. It’s not uncommon for heads to require as much as 0.060-inch shim under the valve spring to reduce the installed height, which is the distance from the spring seat to the underside of the valve spring retainer. Omitting this shim can reduce the seat load by as much as 20 pounds. Once the cam is broken in, the spring could then be removed and the appropriate shims added to bring the installed height to its recommended spec.
Another option would be to go with a stock replacement spring such as the Sealed Power spring for a small-block Chevy we’ve listed in the chart at the bottom of this article. This spring barely has 75 pounds of load at the installed height and at 0.450-inch valve lift is well below 200 pounds of open load. This would allow the cam to break in easily. Then you could change to a more performance-oriented spring. Be sure to check that the lighter spring can handle the total valve lift your cam generates. This particular spring can handle 0.500-inch valve lift with sufficient clearance to coil bind. Another good point is that these stock springs are very inexpensive. For our engine, we decided on the Trick Flow-style springs with a slightly taller installed height.
Here is the place where choosing the correct break-in oil is critical. Our experience has revealed several companies offering quality break-in oil including Comp, Driven Racing, Edelbrock, Lucas, and a few others including a recent Break-In oil from Summit Racing.
The key to choosing quality break-in oil involves more than just finding higher ZDDP levels. The best break-in oil will generally be either a low- or non-detergent oil. This may appear to be counter-intuitive, but there’s a reason why this works. Detergents are used in normal engine oil to help carry away contaminants. But chemically, these detergents also strip away the layer of zinc and phosphorous placed in the high-load areas. So the best break-in oil will have both a higher concentration of ZDDP as well as minimal detergents (such as calcium).
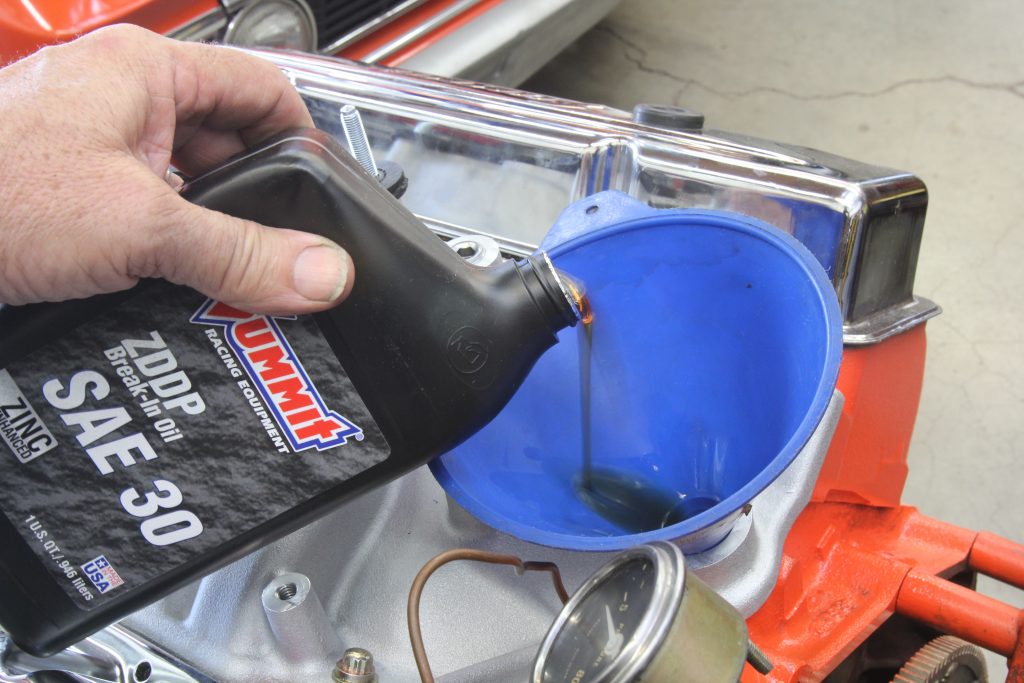
We decided to use Summit Racing’s new break-in oil for this small block Chevy engine. We added five quarts of the SAE 30 oil and will use this for the first 50 to 100 miles of engine operation. After that point, we plan to drain the break-in oil and replace it with Summit Racing’s 10w30 high performance oil that also contains higher ZDDP numbers that are more in line with older engine oils.
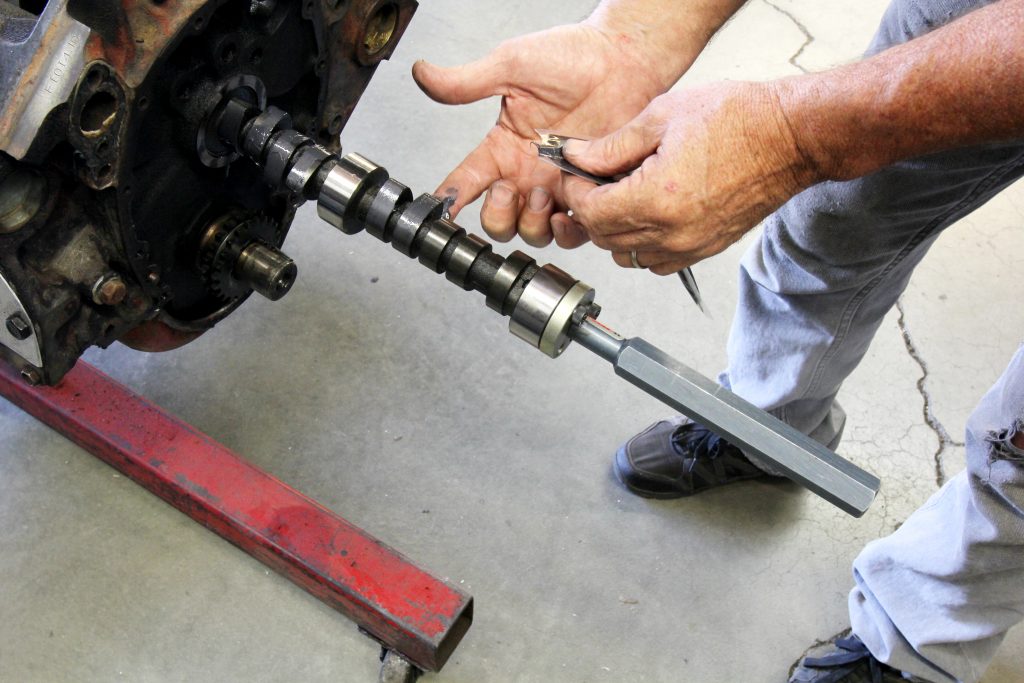
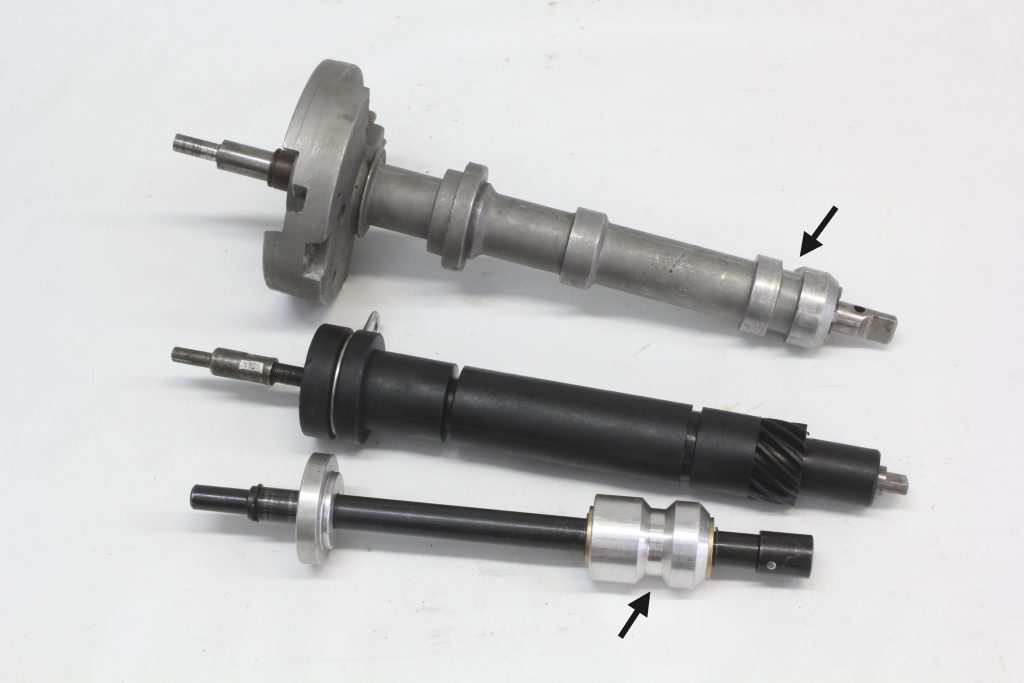
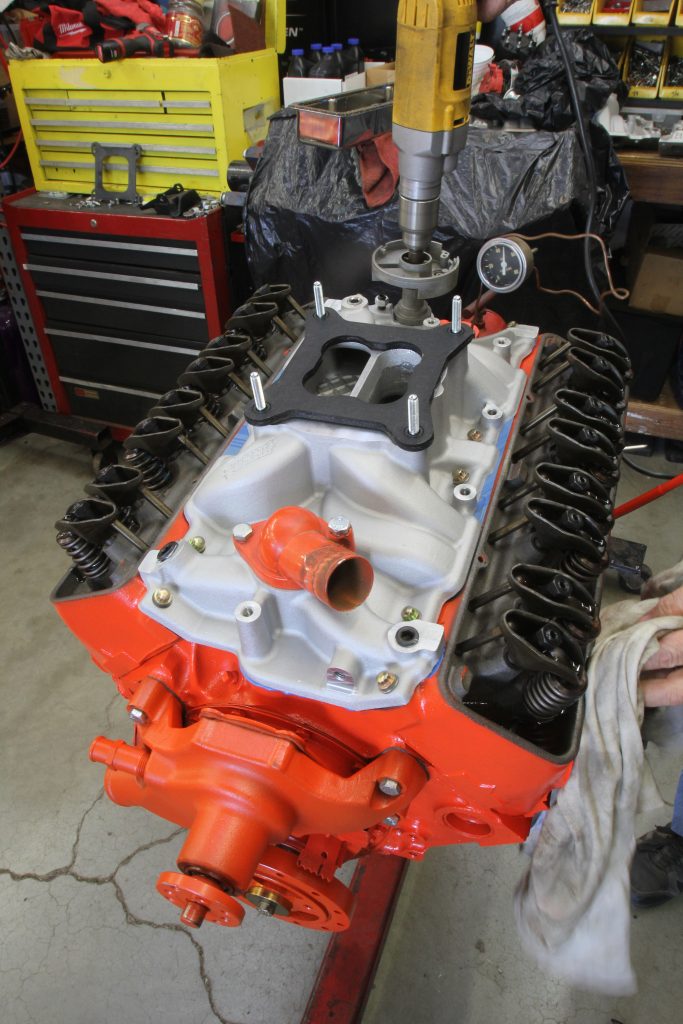
With the new cam in place, we were ready to pressure lube the engine. There are several tools available through Summit Racing that can accomplish this task. Here’s another example where choosing the right tool can make a difference. The Summit Racing pressure lube tool includes a channel or cutout that connects the left and right side lifter galleries in both the small- and big-block Chevys.
If you merely use a shaft to drive the oil pump or a tool that does not include this crossover channel, turning the oil pump (clockwise for the Chevys) will only push oil through the left (driver) side oil gallery and up to the rockers but not the right side. This is because all Chevy V8 engines use a cross-over channel in the distributor body to direct oil to the right side lifter gallery. If the pressure lube tool does not include this channel (or the channel is too narrow) then only half the lifters will receive oil. This is not necessarily a deal-breaker since the rest of the engine will receive oil including the mains and rods. But excluding the entire right side lifter gallery is certainly not ideal. The Summit Racing pre-oiler tool includes this cross-over channel and produces the desired results.
We used a similar tool when we assembled this small block but you could also just use an old small block distributor and shaft. We connected our pre-oiler to a 1/2-inch electric drill motor as the load can often be excessive for smaller 3/8-inch drive drill motors. We prefer to remove the valve covers and spin the oil pump to make sure oil is pumped to all 16 rocker arms.
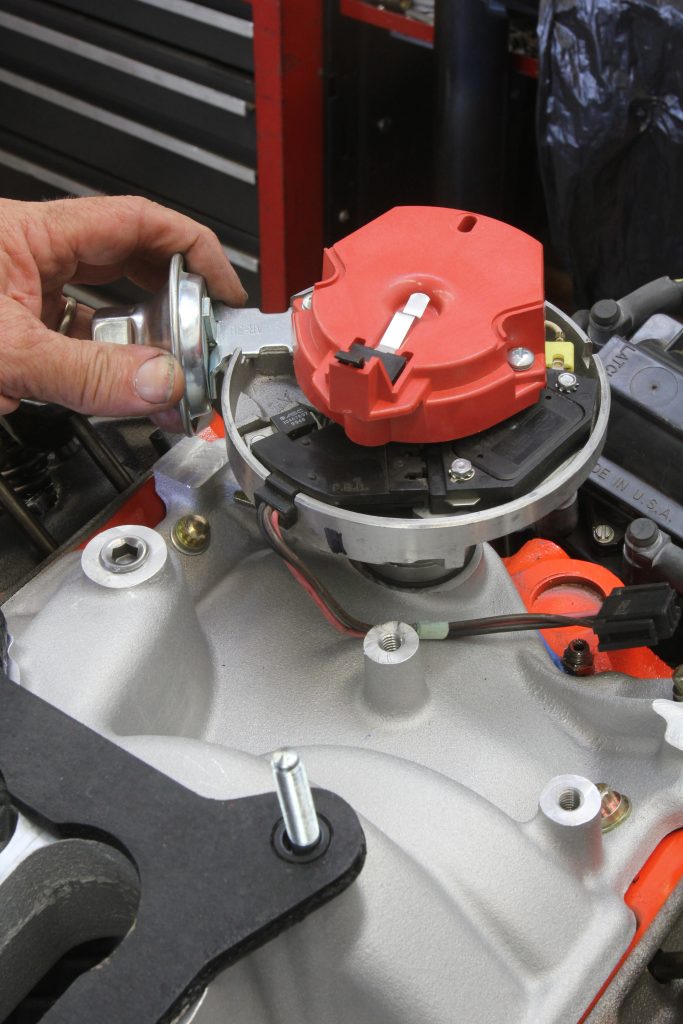
Next, it’s important to install the distributor accurately to ensure that the engine will start on the first couple of rotations. We’ve written a story that details how to install the distributor correctly the first time. The emphasis here is to avoid long cranking sessions on the starter motor that tends to wipe the lube off the cam lobes.
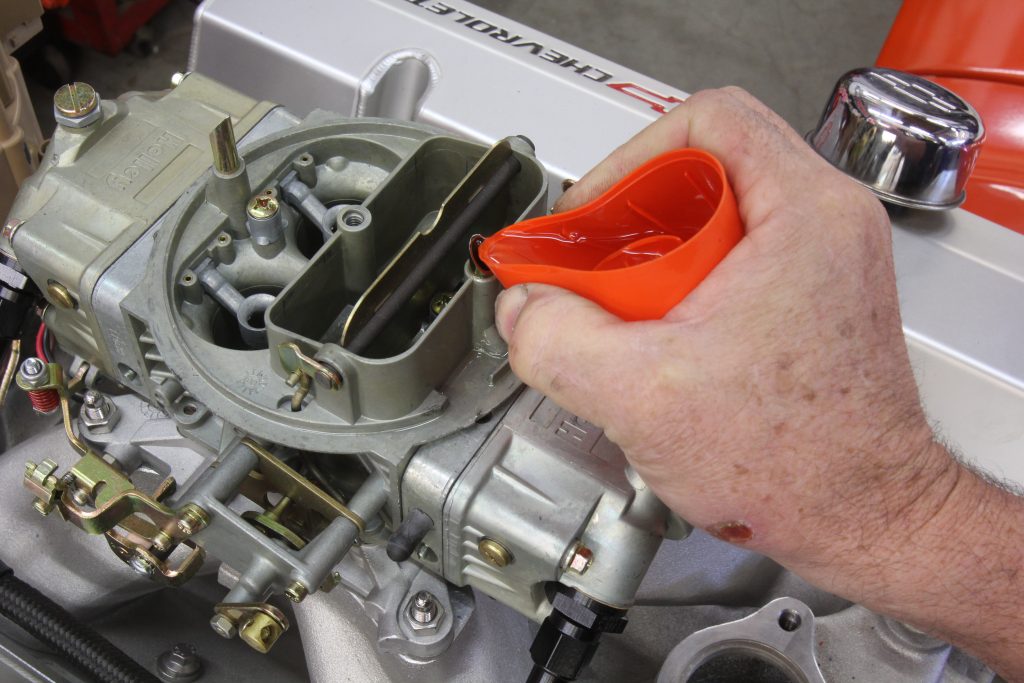
The ideal procedure is to accurately place the distributor with 12 to 15 degrees of initial timing Before Top Dead Center (BTDC) so the engine fires quickly and will run properly. The other portion of this plan is to pre-fill the carburetor float bowls with fuel and make sure the accelerator pump squirts fuel into the intake manifold. If your car is equipped with an electric fuel pump, this is a simple process. If your engine has a mechanical pump, don’t crank the engine to pump the fuel. Instead, use a small funnel to pour some fuel down the vent tube. This will place fuel in the float bowl and allow the accelerator pump to shoot some fuel into the engine. Combined with the pre-set initial timing, this ensures the engine will start immediately.
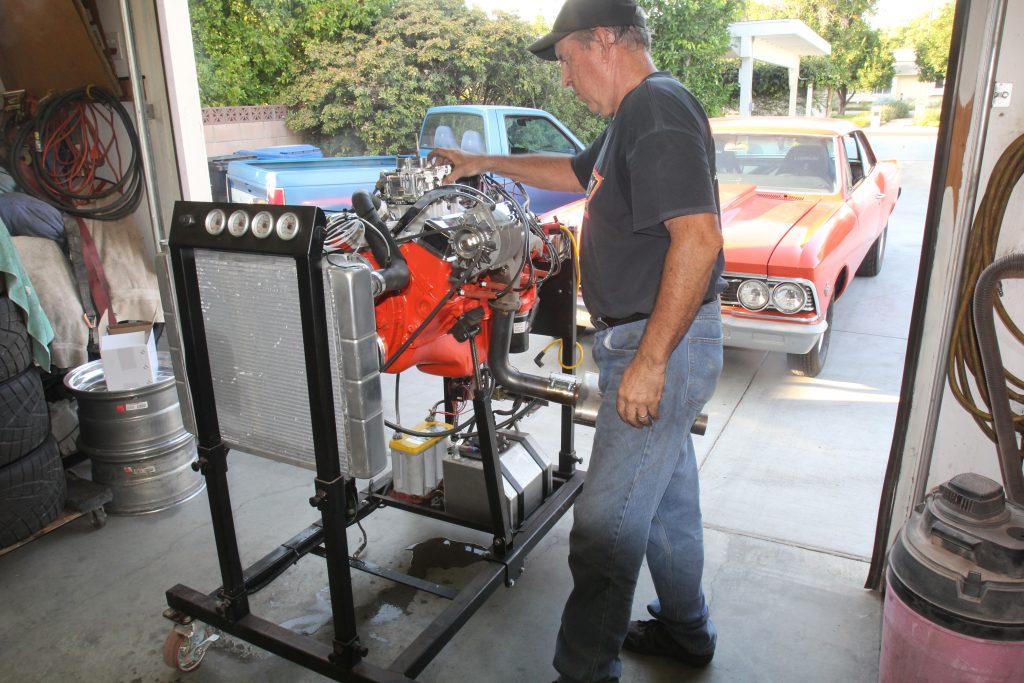
With all those parameters set, the engine should start on the first or second revolution. Once the engine starts, immediately bring the engine speed up to a minimum of 1,500 rpm. It’s best to double-check the oil pressure and monitor the engine for any leaks. Assuming there are no gushers, constantly vary the engine speed between 1,500 and 1,900 rpm. This is important because all V8 domestic pushrod engines lube the cam and lifter interface with splash oiling from the crankshaft. It’s also important to vary the engine speed as much as possible to alter the splash pattern to ensure all 16 lobes and lifters receive adequate lubrication.
If the engine is a complete rebuild with fresh rings, keep the cam break-in time to no more than 10 minutes. Assuming the engine is in the vehicle and the initial break-in procedure has progressed with no issues, drive the car immediately and mildly load the engine multiple times. This places cylinder pressure behind the rings which will ensure a proper break-in. This cannot be accomplished with the engine merely running at 1,500 rpm with no load as on a test stand. However, if the engine has time on it (as ours did), then the cam break-in can be accomplished in the driveway or on a test stand with no load.
To ensure proper piston ring break-in, we prefer to drive the engine as soon as possible with light load while monitoring oil pressure and water temperature. It’s best to put 100 or so miles on the engine and then drain the break-in oil and filter and replace it with high-zinc performance oil from the same companies mentioned earlier. Be sure to use a high-zinc performance oil (but not a break-in oil) for the rest of this engine’s life as these performance oils use a higher level of ZDDP which will ensure the camshaft will live a long happy life.
Now armed with the proper procedure, you’re ready to dive into that flat tappet camshaft upgrade you’ve been considering. Don’t be intimidated by all the negative talk you may have heard. This procedure will offer the best chance of making your flat tappet performance cam live a long and happy life.
Valve Spring Specs for Eccentric Ways: Camshaft Break-In
| Engine | Part Number | Spring Diameter | Seal Load | Open Load | Spring Rate |
|---|---|---|---|---|---|
| Small Block Chevy | Sealed Power VS677 | 1.238" | 76 lbs. at 1.700" | 194 lbs. at 0.450" lift | 262 lbs./in. |
| Small Block Chevy | Trick Flow 16324-16 | 1.250" | 110 lbs. at 1.78" | 279 lbs. at 0.445" lift | 380 lbs./in. |
| Big Block Chevy | Comp 911-16 | 1.524" | 122 lbs. at 1.900" | 309 lbs. at 0.500" lift | 373 lbs./in. |
| Small Block Ford | Comp 942-16 | 1.350" | 110 lbs. at 1.78" | 284 lbs. at 0.500" lift | 380 lbs./in. |
| Big Block Ford | Comp 940-16 | 1.464" | 93 lbs. at 1.900" | 237 lbs. at 0.600" lift | 241 lbs./in. |
Parts List for Eccentric Ways: Camshaft Break-In
| Description | Part Number | Quantity |
|---|---|---|
| Summit Racing ZDDP Performance Motor Oil, SAE 30 | SUM-1-SAE30 | 5 Quarts |
| Summit Racing ZDDP Performance Motor Oil, 10w30 | SUM-1-10W30 | 5 Quarts |
| Summit Racing Oil Pump Primer | SUM-901015 | 1 |
| Trick Flow Valve Springs for Small Block Chevy | TFS- 16324-16 | 1 (Set of 16) |
| COMP Cams Valve Springs for Big Block Chevy | CCA-911-16 | 1 (Set of 16) |
| COMP Cams Valve Springs for Small Block Ford | CCA-942-16 | 1 (Set of 16) |
| COMP Cams Valve Springs for Big Block Ford | CCA-940-16 | 1 (Set of 16) |

[…] The automotive world has totally embraced the notion of hydraulic roller lifers. Yes, rollers reduce friction and present the opportunity to employ a more aggressive lift profile compared to a […] Read full article at http://www.onallcylinders.com […]
[…] engine was dyno’d for camshaft break-in with Driven BR30 oil, then, changed with Valvoline VR1 10w30 weight High Zinc oil, which is […]
If you pick up a plastic squirt bottle like the type used for mustard or ketchup you can put fuel right into the fuel bowls of you carb.
[…] (Image/Jim Smart) For break-in and dyno pulls, we’re running SAE 30 weight with a zinc additive. Whenever you’re running a flat tappet cam, always use a zinc additive or a diesel grade oil with zinc. Fire the engine and let it run at 2,500 rpm for 30 minutes before […]
With the cam being oiled by splash from the crank and the reason for the 1500 rpm at break in. with this in mind I have thought about adding an extra quart of oil at break in, to maintain good coverage and a little cooler oil temp.
Great information. I did everything wrong and know have the courage to replace third brand new cam and get this ten year project off the jack stands. I used wrong oil,wrong springs twice. Now I’ll follow these principles and hopefully have a great running 355.