It’s the classic rhetorical question: “How high is up?”
Luckily, finding Top Dead Center (TDC) in an engine is far less taxing from a theoretical standpoint. TDC refers to the position of the Number One piston relative to the deck surface of the cylinder block. This is used as an indicator for at least two of the more critical aspects in an engine: ignition and cam timing.
It seems pretty easy to find at first glance. With the cylinder head off, all you have to do is look at the piston; once it stops moving you’re at TDC. But it’s not quite that simple and nowhere near “close enough.” We’re talking about building horsepower, not tossing horseshoes!
The reciprocating assembly—crankshaft, connecting rod, and piston—creates an interesting situation when it comes to rotating geometry. Once the piston reaches its peak upward travel, it “dwells” or resides at this location for several degrees of crankshaft rotation. This dwell time will change based on crankshaft stroke, connecting rod length, block deck height, and the vagaries of geometry.
It’s important that we establish exactly where TDC resides in order to establish an accurate position for both cam and ignition timing. Taking all these factors into account appears complex, but it really isn’t.
Long ago, a smart engine builder decided to make this task easy by constructing a Piston Stop to help determine TDC. A piston stop is a simple device that prevents the piston from achieving total travel to the top of its stroke. By using a piston stop and measuring how much travel occurs on either side of our TDC mark, we can quickly determine if our timing mark is accurate.
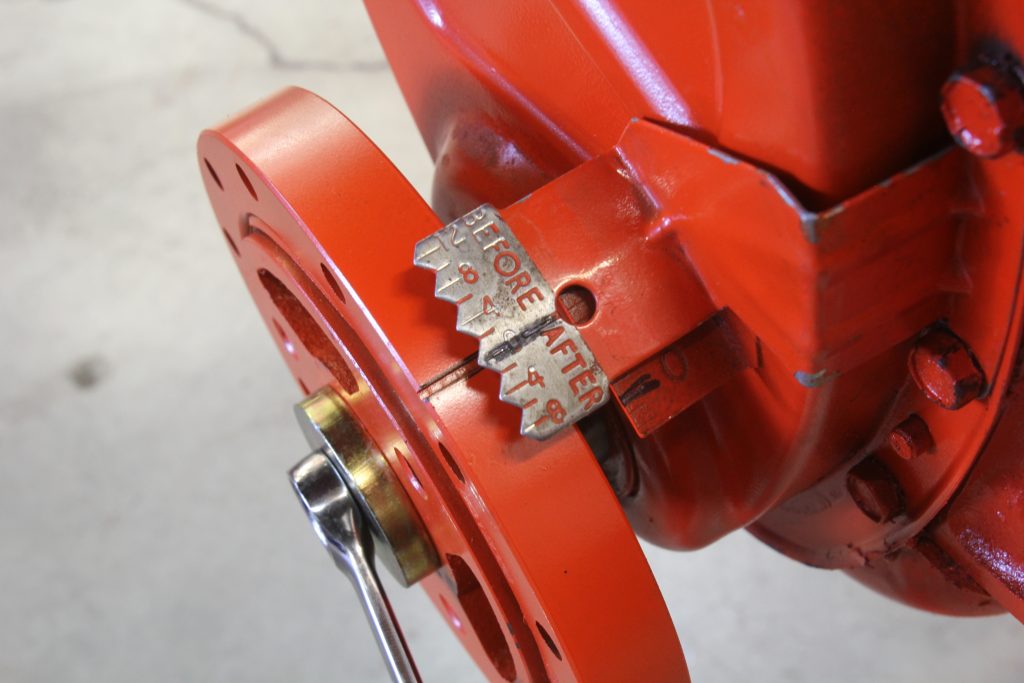
On most modern V8 engines (made after 1950), the factory will place a single line or hash mark on the harmonic balancer that corresponds with a fixed timing tab placed on the front timing chain cover. We can use the reference to establish ignition timing as related in a previous Ignition Basics story.
The marks on the timing tab can get confusing. For example, there will be a zero mark with hash marks above and below it. On Chevrolet V8 engines, the tab will be located on the left (driver) side of the balancer and the tab will have several hash marks above the zero line reading “Advanced” and one below the zero line reading “Retarded.” If there are five hash marks between zero and 10 degrees on the tab, then each of the marks is worth 2 degrees.
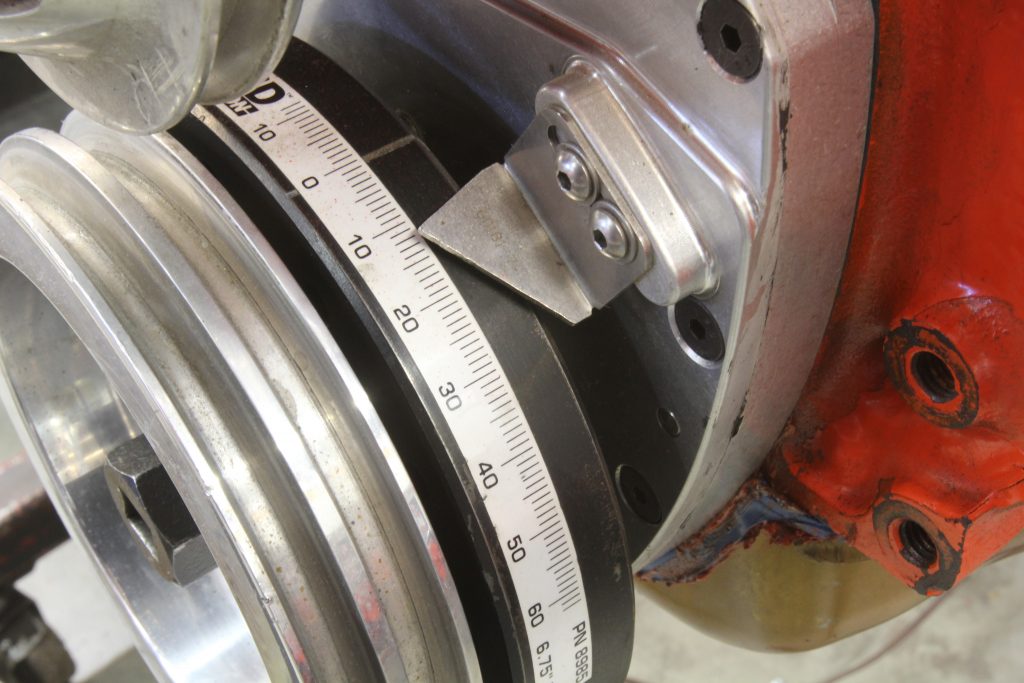
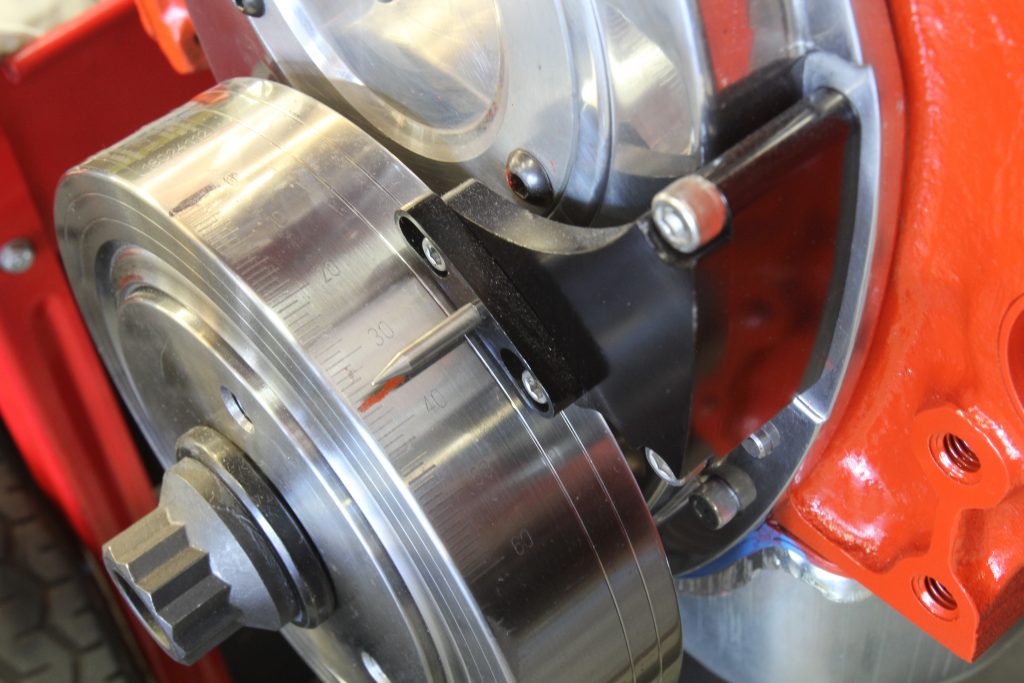
You may have also seen engines with a single fixed pointer that references a series of timing marks on the balancer. This is called a degreed balancer where the timing advance is read off the balancer instead of the timing tab. This operates the same way as the hash marks on the timing tab but requires the pointer (which is often adjustable) to be positioned accurately, especially with performance engines where ignition timing is extremely critical.
The reason this is all so important relates both to new engines as well as older engines where mixing parts can often create errors when it comes to accurately establishing TDC. A classic example is the small block Ford Windsor engine. Over its long production career, Ford has moved the TDC location to three different locations. If all you have is a bag of parts with no knowledge of the engine’s history or which pointer is correct for the balancer, it becomes a frustrating guessing game.
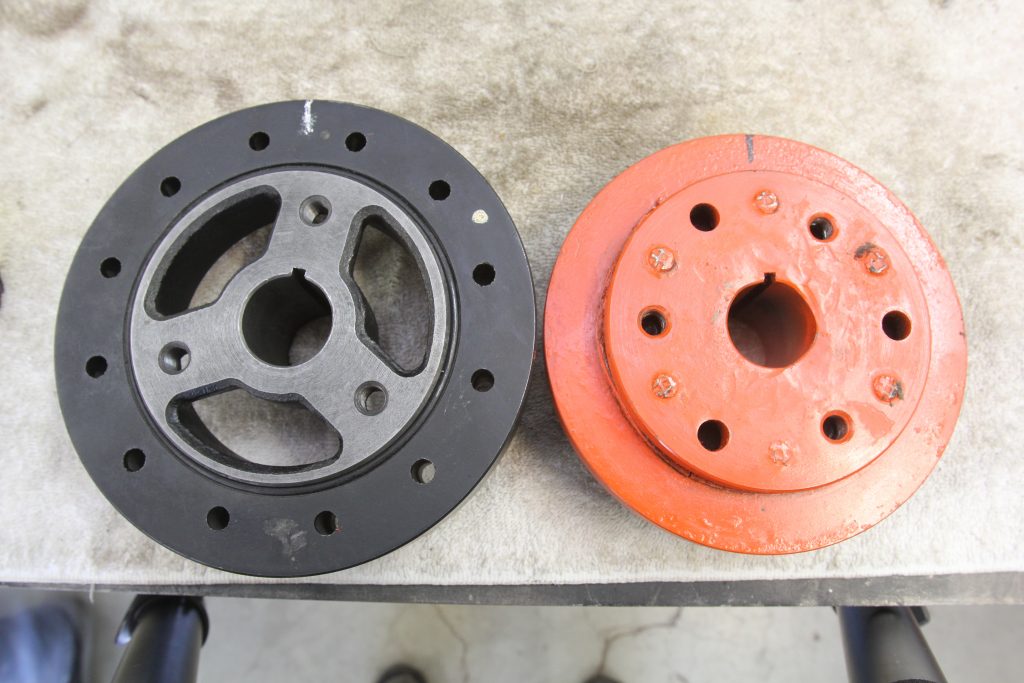
The small block Chevy did not escape this shift in TDC location. In 1969 Chevy changed the location of the TDC mark by roughly 12 degrees. Since all small block balancers are interchangeable, there is potential for a significant timing error. We will be using an early (pre ’69) 283 cubic small block as our example for checking TDC so you can see why establishing an accurate TDC is so important.
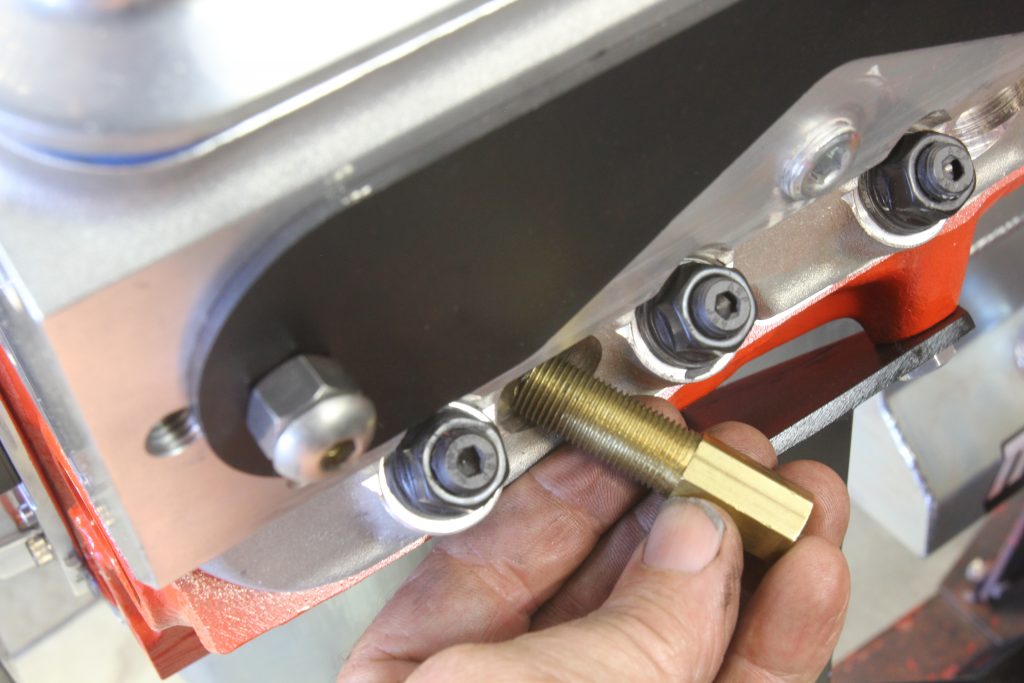
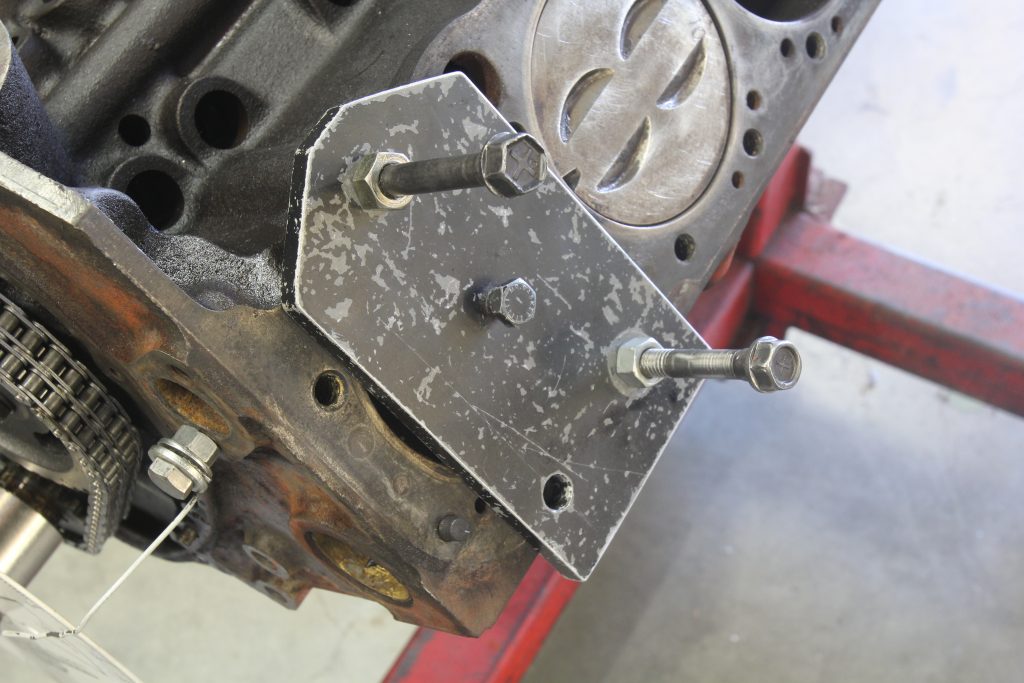
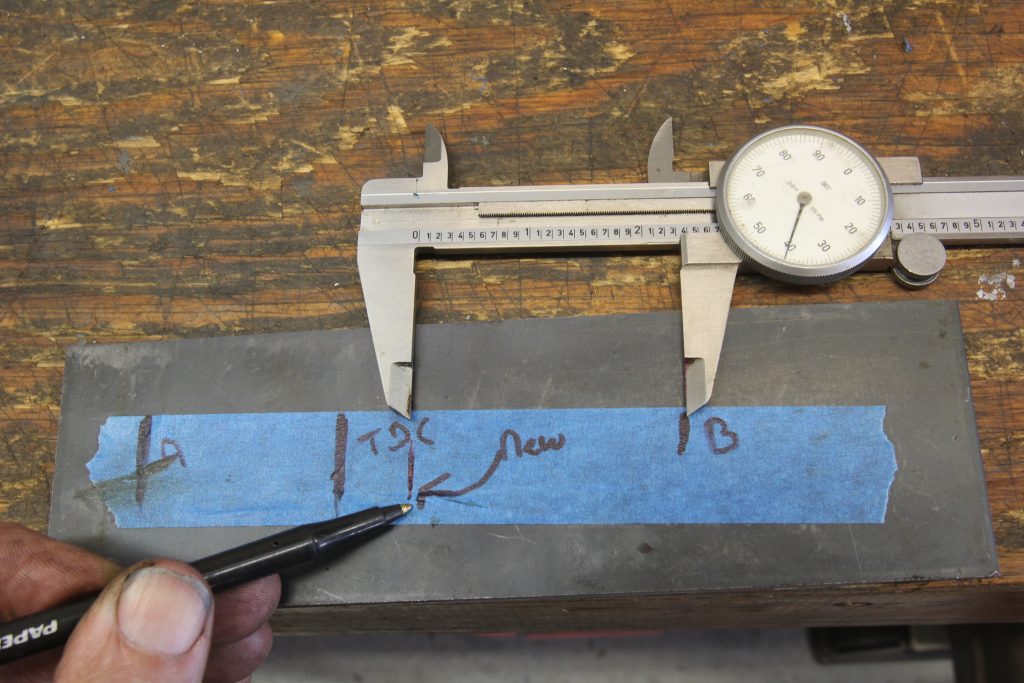
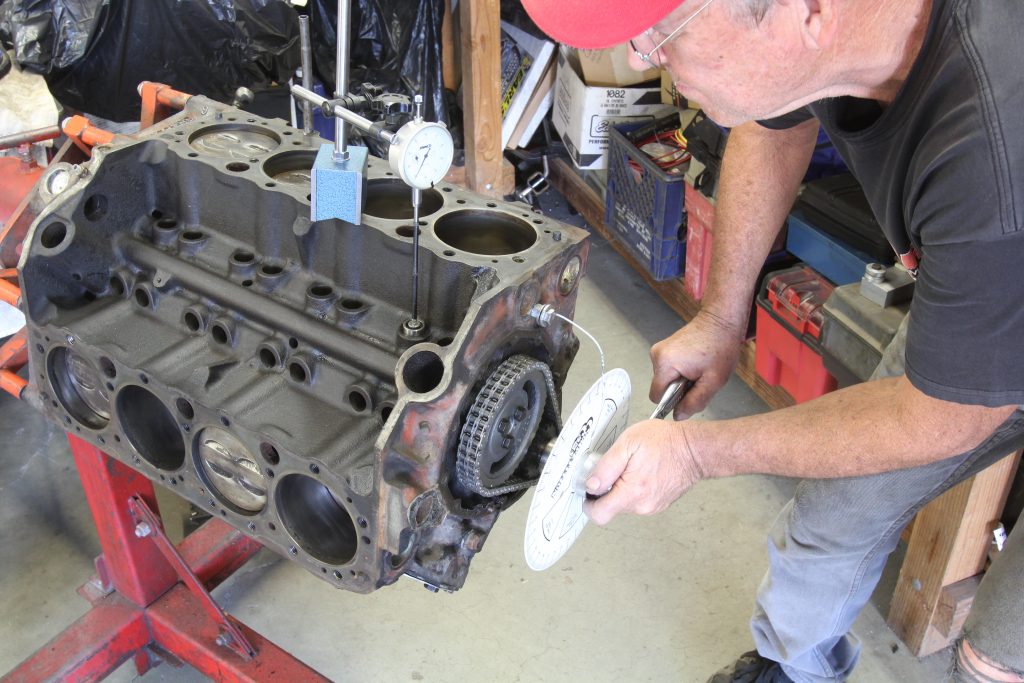
The heads were removed on our particular engine, which makes this operation a little bit easier. We used a homemade piston stop with an adjustable bolt that contacts the piston in the center. There are plenty of aftermarket piston stops if you would rather purchase one rather than make one. To begin, we placed a length of painter’s tape on the balancer with a mark at TDC. We then slowly turned the engine over by hand in both directions and marked the tape across from the zero mark on the tab where the piston stopped on each side of the TDC mark.
In our case, we were using a replacement 6-1/8 inch diameter balancer we thought was for an early engine. As we discovered, this balancer uses the later keyway position for TDC. This placed the balancer 12 degrees off from indicated TDC using the original welded-on timing tab. If we had not bothered to check the accuracy of our combination of balancer and timing tab, it would have made the timing appear 12 degrees more advanced than it really was. An indicated 12 degrees BTDC of ignition timing would really be zero timing advance—which is a huge difference!
To resolve our problem, we simply removed the early welded-on timing tab and replaced it with a bolt-on timing tab designed to be used with the 1969 and later TDC mark.
If the engine in question has the heads installed, there is another way to perform this test. Summit Racing offers several thread-in piston stops that install in place of the Number One spark plug. The procedure for finding TDC is the same as the piston stop in our first example.
The best way to use a thread-in piston stop is to remove all the spark plugs to make turning the engine over easier. Always turn the engine by hand when using this tool as the starter motor could easily damage the piston or break the tool off inside the cylinder. In fact, never use the starter motor to bump the engine around to find TDC when using a piston stop of any configuration. Always turn the engine by hand with a breaker bar on the crankshaft bolt.
We’ve discovered that some aftermarket heads reposition the spark plug location so a thread-in piston stop does not contact the piston. This is actually a very common occurrence with later model aftermarket heads. In this situation, we’ve used a Moroso on-head valve spring compressor tool. Instead of compressing the valve spring, we use a flat 1/8 or 3/16 inch of piece of steel plate that straddles the fingers of the tool to push down on the valve tip instead of the spring retainer. We adjust the tool to push either an intake or exhaust valve down to roughly half-travel.
The Moroso tool is designed to over-center, which holds the valve in a fixed position. If you are careful, the valve can be used as a piston stop. We emphasize being careful here because clearly you want to contact the valve with the lightest touch possible. This prevents the potential for bending the valve with the piston, which would ruin your whole day. The TDC procedure is still the same using a valve as the piston stop.
Now that we’ve offered several ideas on how to check TDC, you have both the knowledge and the process to check it. Most engines you check will probably be very close, which is good. The idea is to check all your engines so that the one that’s off by 12 degrees won’t go into service with an erroneous TDC mark.


Thank you for an interesting and informative article.
This is something I’ve often thought about because like your article says there’s a lot of dwell when the engine is at tdc.
The next time I find tdc should be much more accurate now!
Thanks again
[…] It’s the classic rhetorical question: “How high is up?” Luckily, finding Top Dead Center (TDC) in an engine is far less taxing from a theoretical standpoint. TDC refers to the […] Read full article at http://www.onallcylinders.com […]
[…] is actually high by 10 percent since we could hold the crank in place with a breaker bar just past top dead center (TDC) and the percentage improved by 10 percent or more. All the leakage appeared to be coming past […]
[…] ideal procedure is to accurately place the distributor with 12 to 15 degrees of initial timing Before Top Dead Center (BTDC) so the engine fires quickly and will run properly. The other portion of this plan is to […]
[…] you can degree the cam, Jeff stresses you must first ascertain true top-dead-center (TDC) at #1 cylinder. He adds if this isn’t right, nothing else will be right in terms of cam […]
[…] two columns on the 0.006-inch duration specs indicate an intake lobe opening point of 30 degrees Before Top Dead Center (BTDC) and 68 degrees After Bottom Dead Center […]
[…] installed so their clamp load is greater than the load caused by the rotating assembly reaching Top Dead Center during each revolution. The best method is to use a stretch gauge to measure bolt length before […]
[…] clear the block and piston skirts. (Image/Jim Smart) Before the cam can be degreed and confirmed, true top-dead-center must be checked. This is done with a dial indicator, which is zeroed at the block deck first. The piston is brought […]
[…] Rarely is a camshaft per the cam card. Before degreeing a cam, check #1 piston for true top-dead-center. If true top-dead-center isn’t correct, nothing else is going to be right. (Image/Jim Smart) […]