I have a Chevy 350 Indmar boat engine with a 600 cfm Holley four-barrel carb. It has a marine electronic choke and vacuum secondaries. When opening the throttle, it will cut out real bad around half throttle under medium load. I think the secondary doesn’t open on its own. If I open the throttle and manually open the secondary, it runs perfect! How do I get the secondaries to work? — L.Y
…
Jeff Smith: Clearly the vacuum secondary is not opening. There are a couple of explanations.
First, remove the external choke assembly. You have to do this to remove the vacuum secondary housing. There are three screws holding the vacuum secondary housing in place. Remove them and the small clip that retains the rod on the secondary throttle shaft.
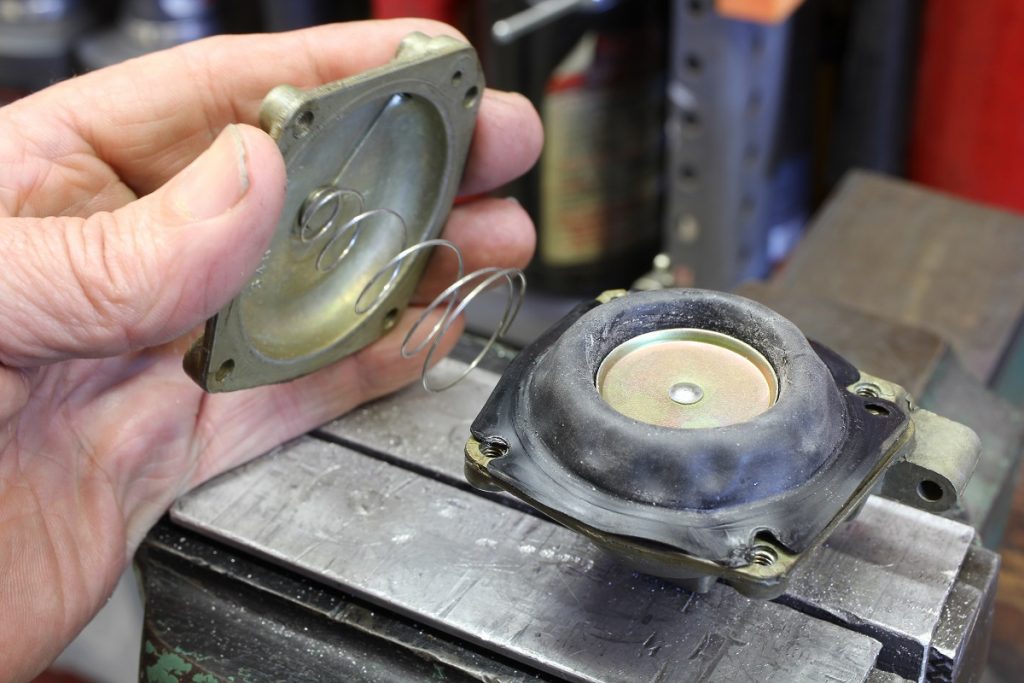
With the vacuum secondary housing in your hand, compress the rod up into the housing. This will compress the spring inside of the housing against the diaphragm. Hold your finger over the small cork seal on the face of the housing where it bolts to the carb body.
The diaphragm rod will partially come out, but if it remains compressed inside the housing then you have a good seal at the diaphragm and either the cork gasket is bad or the passage from the primary throttle bore on the passenger side of the carb is blocked. Passage blockage is rare.
Most likely, when you compress the diaphragm and hold your finger over the cork, the shaft will push all of the way back out, which usually means there is a leak in the diaphragm. This is fairly common.
Buy a new diaphragm. But be forewarned, replacing this is a tricky procedure. It’s not difficult once you know the little trick that we’ll show you. When you disassemble the housing, make sure to not lose the little check ball mounted in the main body of the housing.
Place the new diaphragm in the lower housing so that the mounting holes line up and the vacuum hole is also aligned. There will be a small check ball in this hole and make sure this ball is in place.
Allow the bottom portion of the diaphragm to sit flat on the lower housing as shown in the above photo.
Now place the steel shaft in the jaws of a bench vise with the housing sitting on the top of the jaws. Lightly tighten the jaws to clamp the shaft. This positions the diaphragm.
Now place a lube liked WD-40 on the threads of all four screws and insert the secondary spring in the lid. That small center nub in the lid will hold the spring in place. Make sure the diaphragm holes are lined up and carefully position the lid to line up the screws and compress the spring.
Next, very carefully start all four screws with light finger pressure. The lube should prevent the screws from catching the thin rubber diaphragm. If you feel tension, back off and readjust the diaphragm so the holes are open. Once all four screws are in place, lightly tighten.
Now check the diaphragm housing and see if it holds vacuum. If it does— you’ve successfully installed the new diaphragm and it should work fine.
If with the initial test the vacuum pod holds vacuum, then the signal is not getting to the housing. The cork gasket seals a passage between the passenger side primary venturi and the housing. Shoot some carb cleaner through this passage and see if it exits into the passenger-side venturi. If it doesn’t, then the passage is plugged. Shoot some compressed air through it (with the vacuum secondary housing removed, of course) until this passage is open and air freely moves.
Once this is clear, reinstall the vacuum housing and then shoot compressed air with a nozzle through the primary passenger-side venturi with the throttle blades fully open. You will see the secondaries open if everything is working properly. You will need 100-130 psi shop air to do this with a small air nozzle.
Vacuum secondary Holleys are really simple and are generally very reliable. This should resolve your problem.
[…] I have a Chevy 350 Indmar boat engine with a 600 cfm Holley four-barrel carb. It has a marine electronic choke and vacuum secondaries. When opening the throttle, it will […] Read full article at http://www.onallcylinders.com […]
For a Marine application with a 4160 Holley and a 454 Chev in a ski boat, what spring would give a good throttle response when pulling up a skier. Boat is at 6000 feet above sea level.
Thank You
Jim
891-597-7000