Many articles I’ve written about tools revolve around some more complicated, some might say exotic, items.
Today, we’re going to deviate and talk about something that is seemingly simple—a specialty drill bit.
Maybe it can help some of you with what may seem on the surface like a simple dilemma:
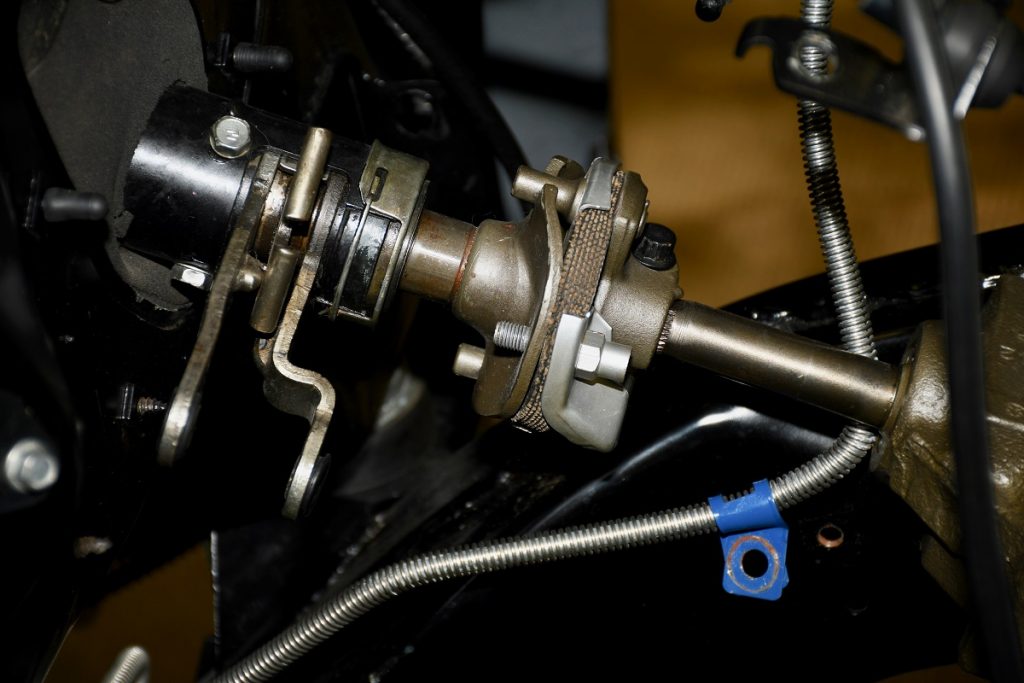
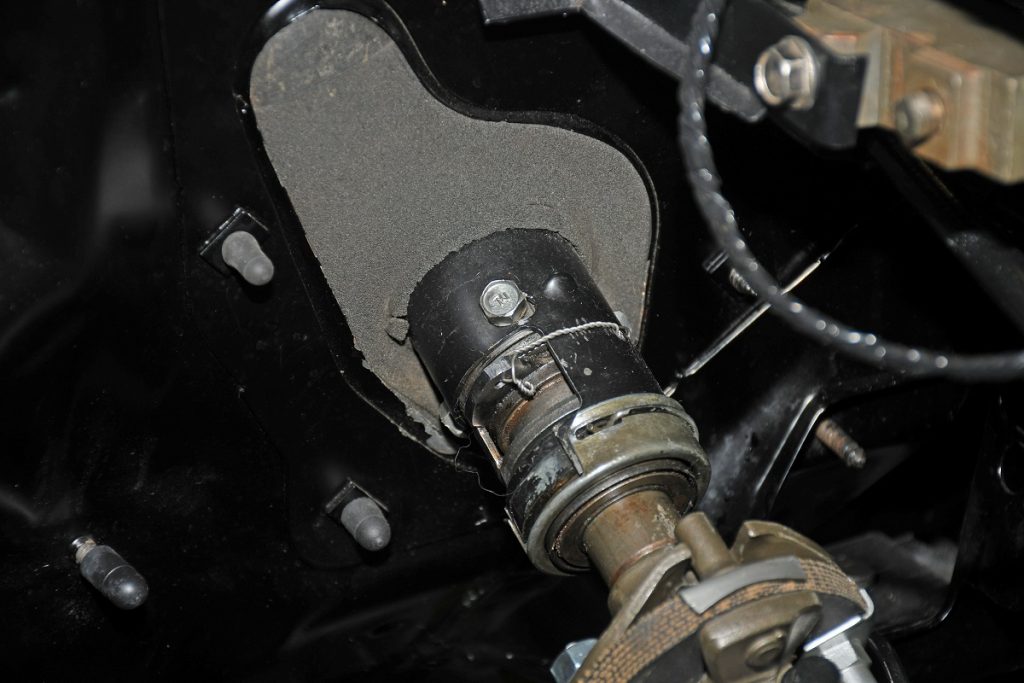
I needed to drill a hole through hardened steel—in this case, the piece of steel was what was left of the lower shift lever on a steering column.
The steering column was a three-on-the-tree assembly converted to a floor shift application with a new bowl, but parts of the shifter linkage remained. The idea here was to trim the remnants off and then drill a hole in what was left so that it could be safety-wired shut.
I knew going in that by cutting (with a cut-off wheel) and grinding the linkage it would work harden. That didn’t seem to be too big of a problem because I could anneal it after trimming it to shape.
After annealing the piece, I tried to drill a 1/8-inch hole in the linkage with a conventional high-speed drill bit.
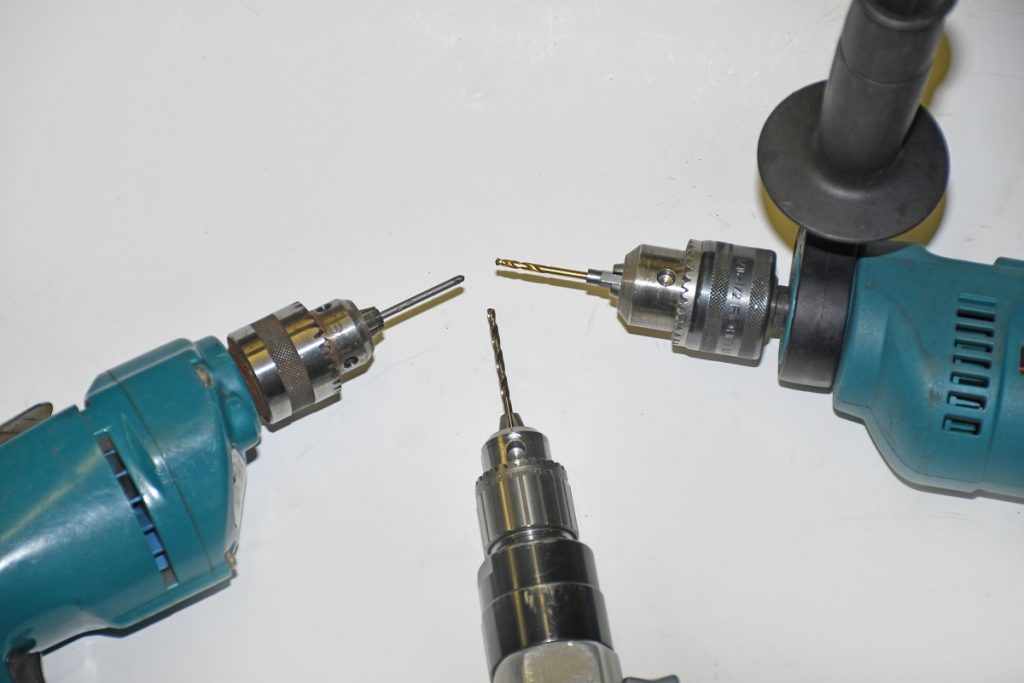
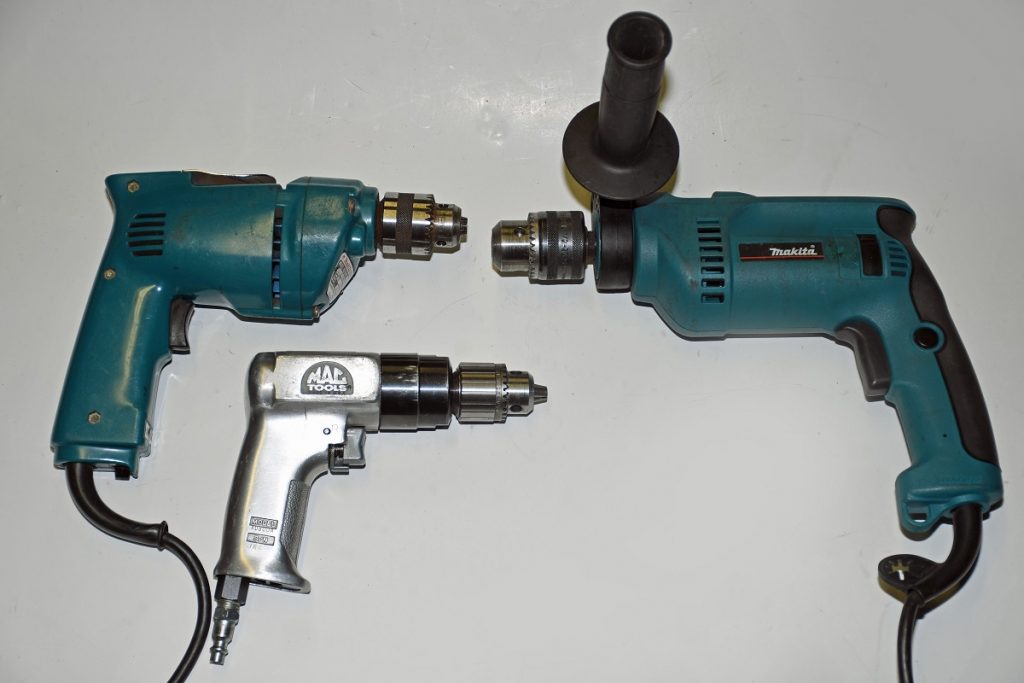
In the process, I tried pretty much everything in my tool chests. I tried to drill the hole with three different drills—a conventional 3/8-inch Makita variable-speed electric, a Mac Tools air-powered drill, and a ½-inch Makita hammer drill.
I spent at least two hours on it. Nothing worked.
So I went to a local machinist.
He dragged a file across the linkage and quickly came to the conclusion that the steel was actually hardened (and not so much by me). Next, he annealed it with a TIG welder.
Once cooled, the column shaft was clamped into the vise of a Bridgeport mill. The end result (following several attempts—all with more annealing) was a small dent in the hardened shift lever using a 1/8-inch bit. That ‘dent’ measured approximately 0.010-inch deep. It wasn’t looking good.
I checked with a couple of other machine shops and after hearing the story, no one wanted to touch it.
After that, my options were to package the part and send it to a specialty shop for EDM (Electrical Discharge Machining) to accurately arc-machine the hole for $200, or to buy different 1/8-inch drill bits and try again myself (using each of the three drills used before).
After thinking about it, I figured I didn’t have much to lose by trying different drill bits.
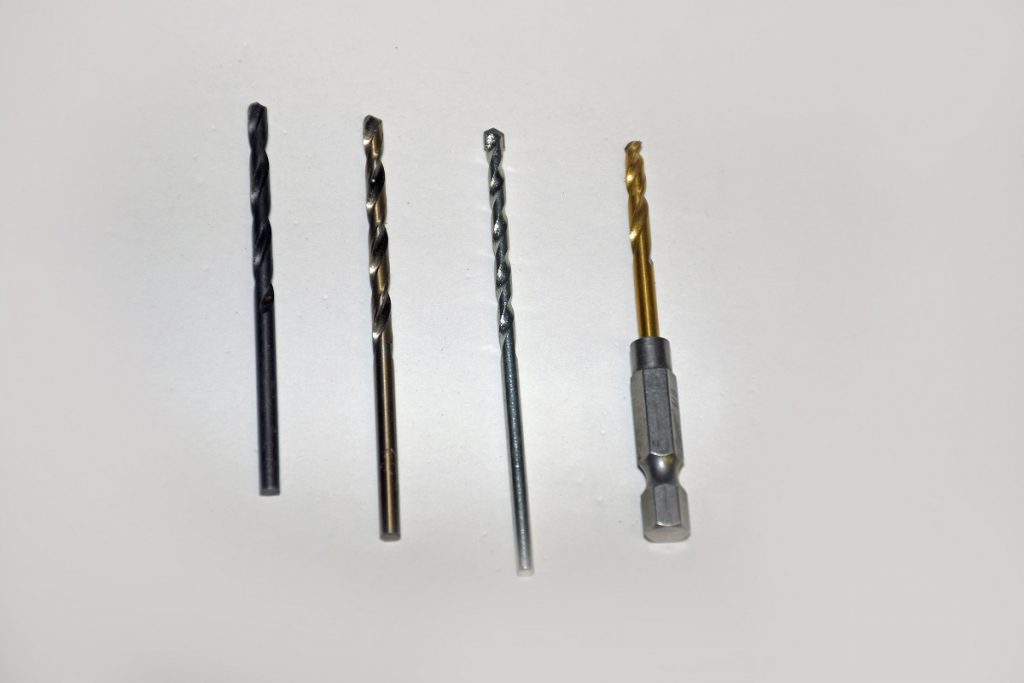
The first bit I tried was a fresh, sharp high-speed steel drill bit. It didn’t even scratch the surface.
The second bit I tried was titanium-coated. The guy at the tool supply shop said it would absolutely, positively, 100-percent drill through hardened steel. It even said so on the package. Both the tool guy and the package were wrong. It didn’t work.
I searched the internet for answers. I found a bulletin board post where someone said a masonry drill bit would work perfectly for my dilemma. I bought a masonry bit. Unfortunately, that didn’t work either.
Back to the internet.
I found another bulletin board post where someone suggested I use a drill bit designed to work on a hammer drill.
Since I had a hammer drill, I figured I had nothing to lose. I was certain this would work. The guy at the tool supply shop agreed. After all, a hammer drill provides plenty of grunt. I bought and tried the fancy hammer drill bit. And it didn’t do any better than the others. Obviously, brute force wasn’t going to work either.
I was frustrated and it looked like the EDM job was my only option.
Stumbling on the Solution
Finally, while rummaging through various drill bits at Home Depot, I spied a goofy-looking one with no flutes that is designed to drill through granite tile.
I didn’t think it had any chance of ever going through hardened steel, but I didn’t have anything to lose.
I tried it with the 3/8-inch drive variable speed drill (on low).
And guess what? That strang-looking drill bit went through hardened steel like butter. It cost me about $13.
I highly recommend you try one if you have to drill through hardened steel. For a closer look at the drill bit selection I went through in the process, check out the accompanying photos.
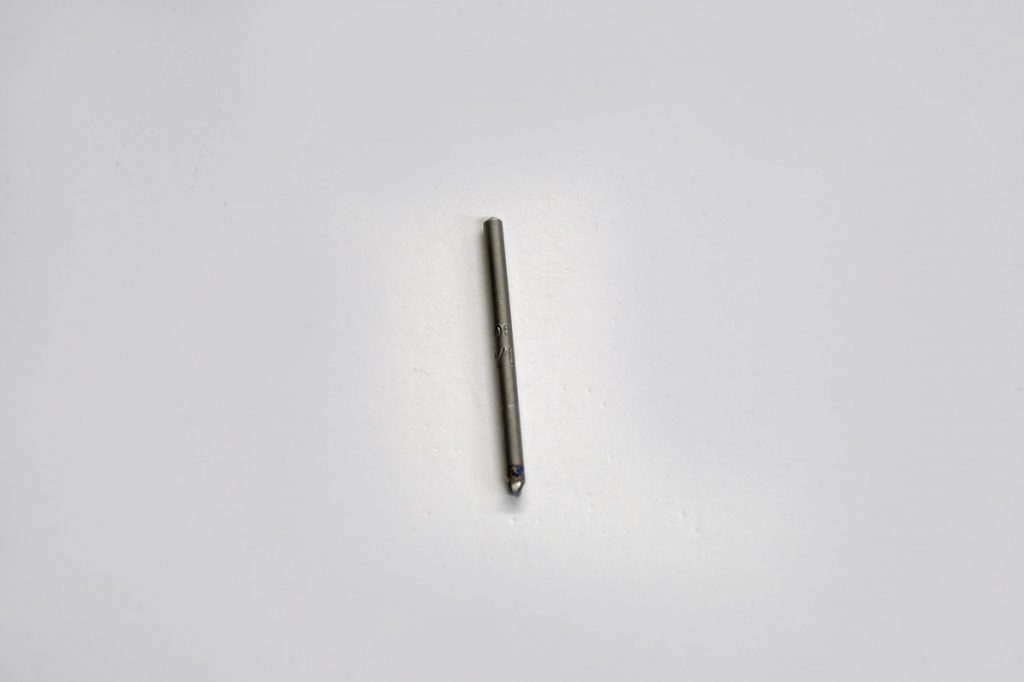
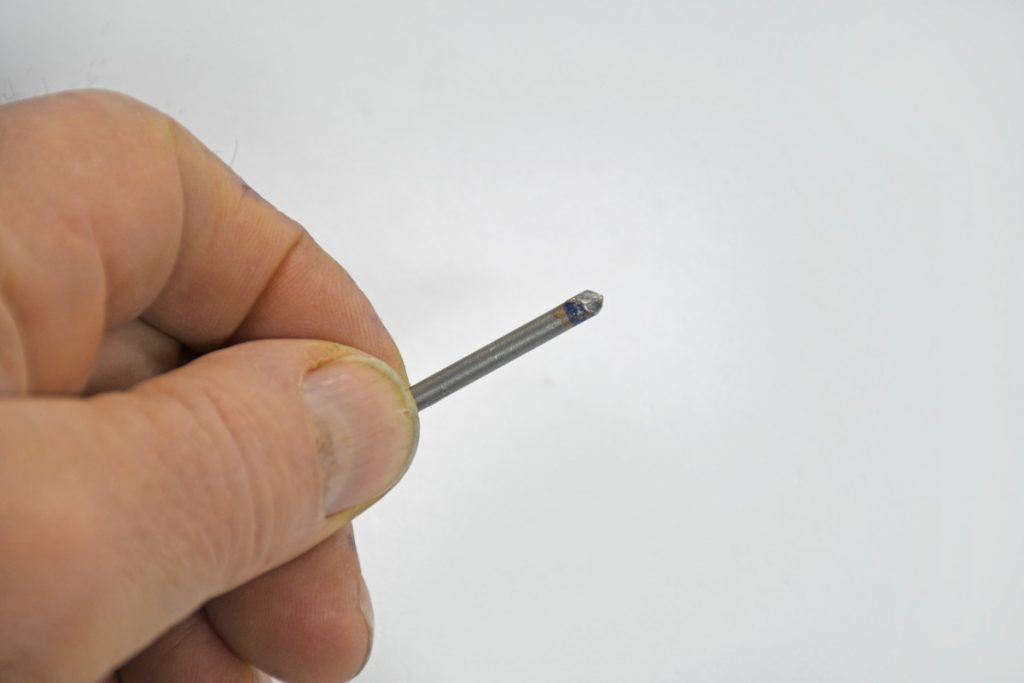
It is the carbide in tip of the tile-drill that makes the magic happen.
That specific magic is being harder then the material to be cut.
There are some made for metalworking regular high-speed steel drill with carbide tips soldered to the tip of them.
There are also expensive solid carbide drill available.
Would recommend using a drill-press or mill rather than a portable tool if at all possible.
Awesome info. I’ve been a heavy equipment mechanic for 40 years. Always great to learn more to make a job (and life) more easy !
Thanks for sharing.
Thanks for the post iam a dyi guy and hobbyists and I love when I can learn something new
I would’ve thought of cobalt bits and a drill press first. Never thought about how hard tile is though. I’ll have to keep this in mind.
Ever drill through porcelain tile? Decades ago I ruined a few bits doing that until using a diamond bit from Grainger.
All I know is
1) LOW-MODERATE RPM on the drill of choice with Moderate to Heavy Force.
2) Did I mention LOW RPM (“feel out” your drill, bit and material and make adjustments)
3) Cup of WATER to dip the bit in every 5-10 seconds of drilling. Don’t wait for the smoke, Steam from the bit is ideal, just re-dip.
I only use oil/lubricant in certain applications.
4) Keep debris out of the Hole with a small pick or canned air.
5) Start with a center punch to index the hole then ALWAYS make a Starter/Pilot Hole.
6) 5/16″ Hardened Steel Center Punch then 1/8″ Cobalt 135° pilot point bit, progress up 1/4″ etc…
Mayhew Center Punch
DeWalt Cobalt Alloy Steel Bit Pilot Point 135° (I also use High Carbide or Solid Carbide)
DeWalt 3/8″ or 1/2″ Variable Speed Drill
Get’s you through 95% of Hardened Steel 🙂
You never tried the M42 8% cobalt drill bits ? This is the industrial standard for drilling hard steel.
https://drillsandcutters.com/1-60-cobalt-steel-jobber-drill-set-60-pieces/?gclid=Cj0KCQiA4NTxBRDxARIsAHyp6gAVLrm4xT-K5i72Yj6M1rDntyFbCPrCl_pk-LA5LepPAb_2X7wN3JAaAtGIEALw_wcB
[…] Drill bit hunt for hardened steel work: https://www.onallcylinders.com/2020/01/31/hunting-for-a-drill-bit-to-drill-through-hardened-steel/ […]
All of the screws on my ar15 are hardened steel and the torque screws wont come out I’m gonna try this and hopefully it works. Thankyou
Found this post while researching drill bits that will go through metal. I had an experience like this yesterday. Tried every bit I had to no avail. Then I found this bit we used to drill through ceramic tile. It was really beat up and looked horrible but I tried anyway and it did the trick. Went where no bit had gone before. I need a new one because I have a lot more holes to drill and I messed that bit up drilling through the tile.
What is the name of the bit?
where did you get the successful drill bit from. Do you have a link or location where I can purchase one ?
Hey Richard, Wayne used a bit designed for granite tile and he found it at his local big box hardware store.
Worked as described.
How about that! This worked for me. I had a sprocket I needed to open the rollpin size up to 3/16. None of my carbide or titanium bits would touch it.
I even took it to the local speed shop and they said they couldn’t do it.
In the end it’s the $4.99 “Glass & Ceramic Tile Bit” that did the job. Like butter.
Thanks!
Deep bow to this advice. Unfortunately, I went through the same struggles as this gentlemen, trying to drill a broken tap into a hole. The granite drill bit mounted on a Dremel went through the tap like butter.
This saved my sanity. And I spent years in aerospace & military.
Wondering how do professionals do it there has to be bits out there works for professionals like tools and die makers .
Thanks a lot for this post, I couldn’t drill through some plates I bought until I tried the bit you recommended
Thank you sir for your effort to make this blog. I went to HD and got some carbide tip masonry bits for stone and glass and though they don’t last more than four cuts each, if you get the four pack of 1/8″- 5/16″ you can stretch the life of each bit to get around four full 5/16″ holes in 1/4″ hardened steel ‘T’ Rails . Four 5/8″ holes makes one full corner of a Deer Fence. This was a prayer come true for me, literally. God bless.
Worked like a charm. Nothing made a dent in the hardened galvanised steel. I had to drill 22 holes and still going strong.
Seems some granite tile bit are with diamonds, others not…
Does it have to be diamonds on the drill bit or would any granite tile drill bit do the job?
Thank you! This is the info I was looking for after having unsuccessfully tried to cut through hardened carbon steel in every possible way. I also tried a plasma cutter on very low current in order to punch that damn hole, or at least the beginning of it, but no way – even a slightest steel residual in the hole basically makes it impossible to drill through it with every bit I own. I will try the granite bit for sure.
Thanks for sharing your journey in finding the right drill bit for hardened steel. It’s surprising that the solution was a bit designed for granite tile! Do you think the success of this drill bit is due to its specific design or the material it’s made from? And do you foresee any long-term wear issues with using it for hardened steel repeatedly?
Worked great on my cast iron piece. Had no luck w titanium or conventional carbide tipped bits that I tried and broke or dulled. Even tried Dremel with diamond cutting tips to no avail. The stone/tile worked great, following the drill bit mfr instructions to use hammer drill at high, not low, speed- which was totally different than what I’ve read widely. Thank you so much for this valuable tip.
cheers this worked great , as originally said like cutting through butter .