(Image/Wayne Scraba)
Electrical connections that come loose, break, and short-out can become a major headache—especially on a car that relies heavily upon electricity to function. If the electrical connections aren’t right, they can cause intermittent problems that are next to impossible to diagnose.
A good example is an open or high resistance connection between wires, which can keep your car from getting down the track.
There is a solution though, and it’s a good one offered by Summit Racing (among others—they were originally used in GM OEM passenger car and light truck applications). Called “Weather-Tite” or “Weather-Pack” connectors, these electrical component connectors withstand temperatures from -40 to +257 degrees Fahrenheit and are unaffected by water, chemicals, vibration, or dirt.
They can’t come apart accidentally either. An external positive locking system let you know when the respective ends of the connectors are joined. An audible “click” is heard when the connector is joined. If there’s no click, then there’s no connection. Simple as that.
Disassembling the respective halves of the Weather-Tite connector is easy too. You can either separate them by hand or with a screwdriver in a special slot formed in the connector body. This is particularly useful if the connector is situated in a hard-to-reach location. Each terminal has its own tower (compare that to a multi-pin trailer connector that many of us use for multiple connections). That means that there is no chance of shorting between the wires. Finally, each connector half has a secondary lock that snaps over the terminals and prevents them from backing out.
The part of the connector that actually transfers the electrical current is the terminal pin. These terminals are non-orienting. This means that they don’t have to be turned when they’re plugged together. Each of the terminal pins has double lock tangs that secure the pin inside the connector. The terminal also incorporates an extra-long spring member that’s designed so that the terminal can’t loosen once installed.
Another important feature of Weather-Tite connectors is the fact that they incorporate self-lubricating silicone seals for protection against water, dust, oil, brake fluid, and other fluids or chemicals. Each terminal has a silicone seal crimped on it to prevent contamination from entering next to the wire. The seal uses multiple sealing ribs to keep the terminal pins clean and dry. The male connector half includes another similar silicone seal with multiple sealing ribs to keep the actual connection dry.
At one time, the only real way to terminate the wires and assemble Weather-Tite connectors was with a very expensive GM tool. Summit Racing now offers easy-to-use, inexpensive tools for the job.
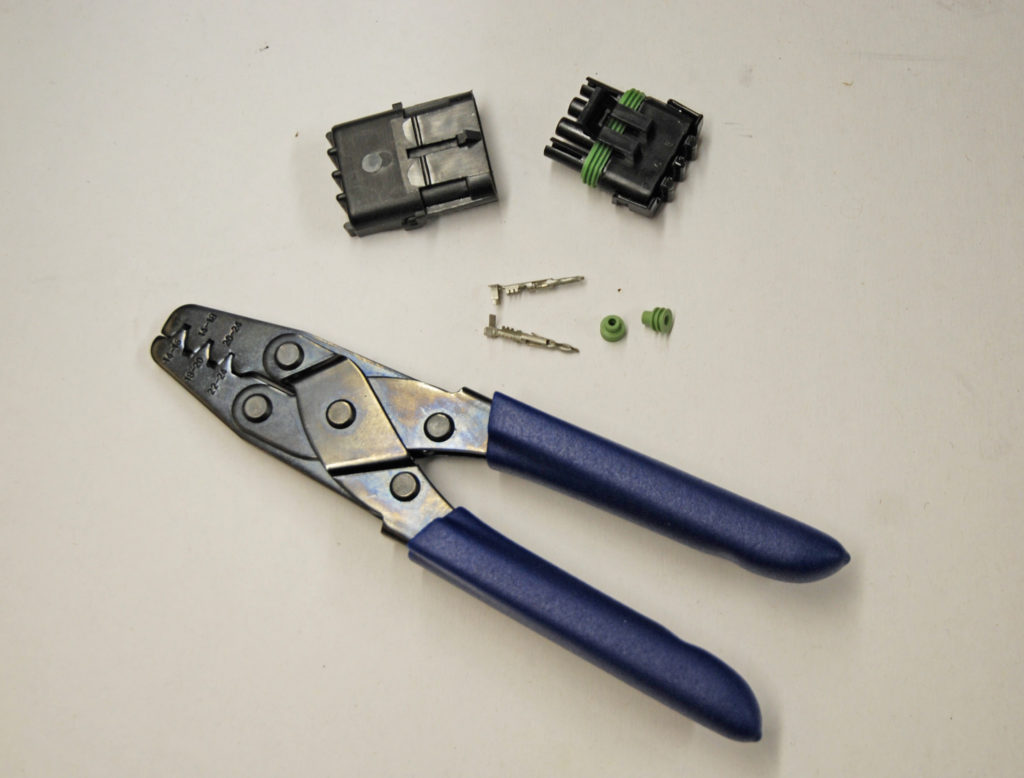
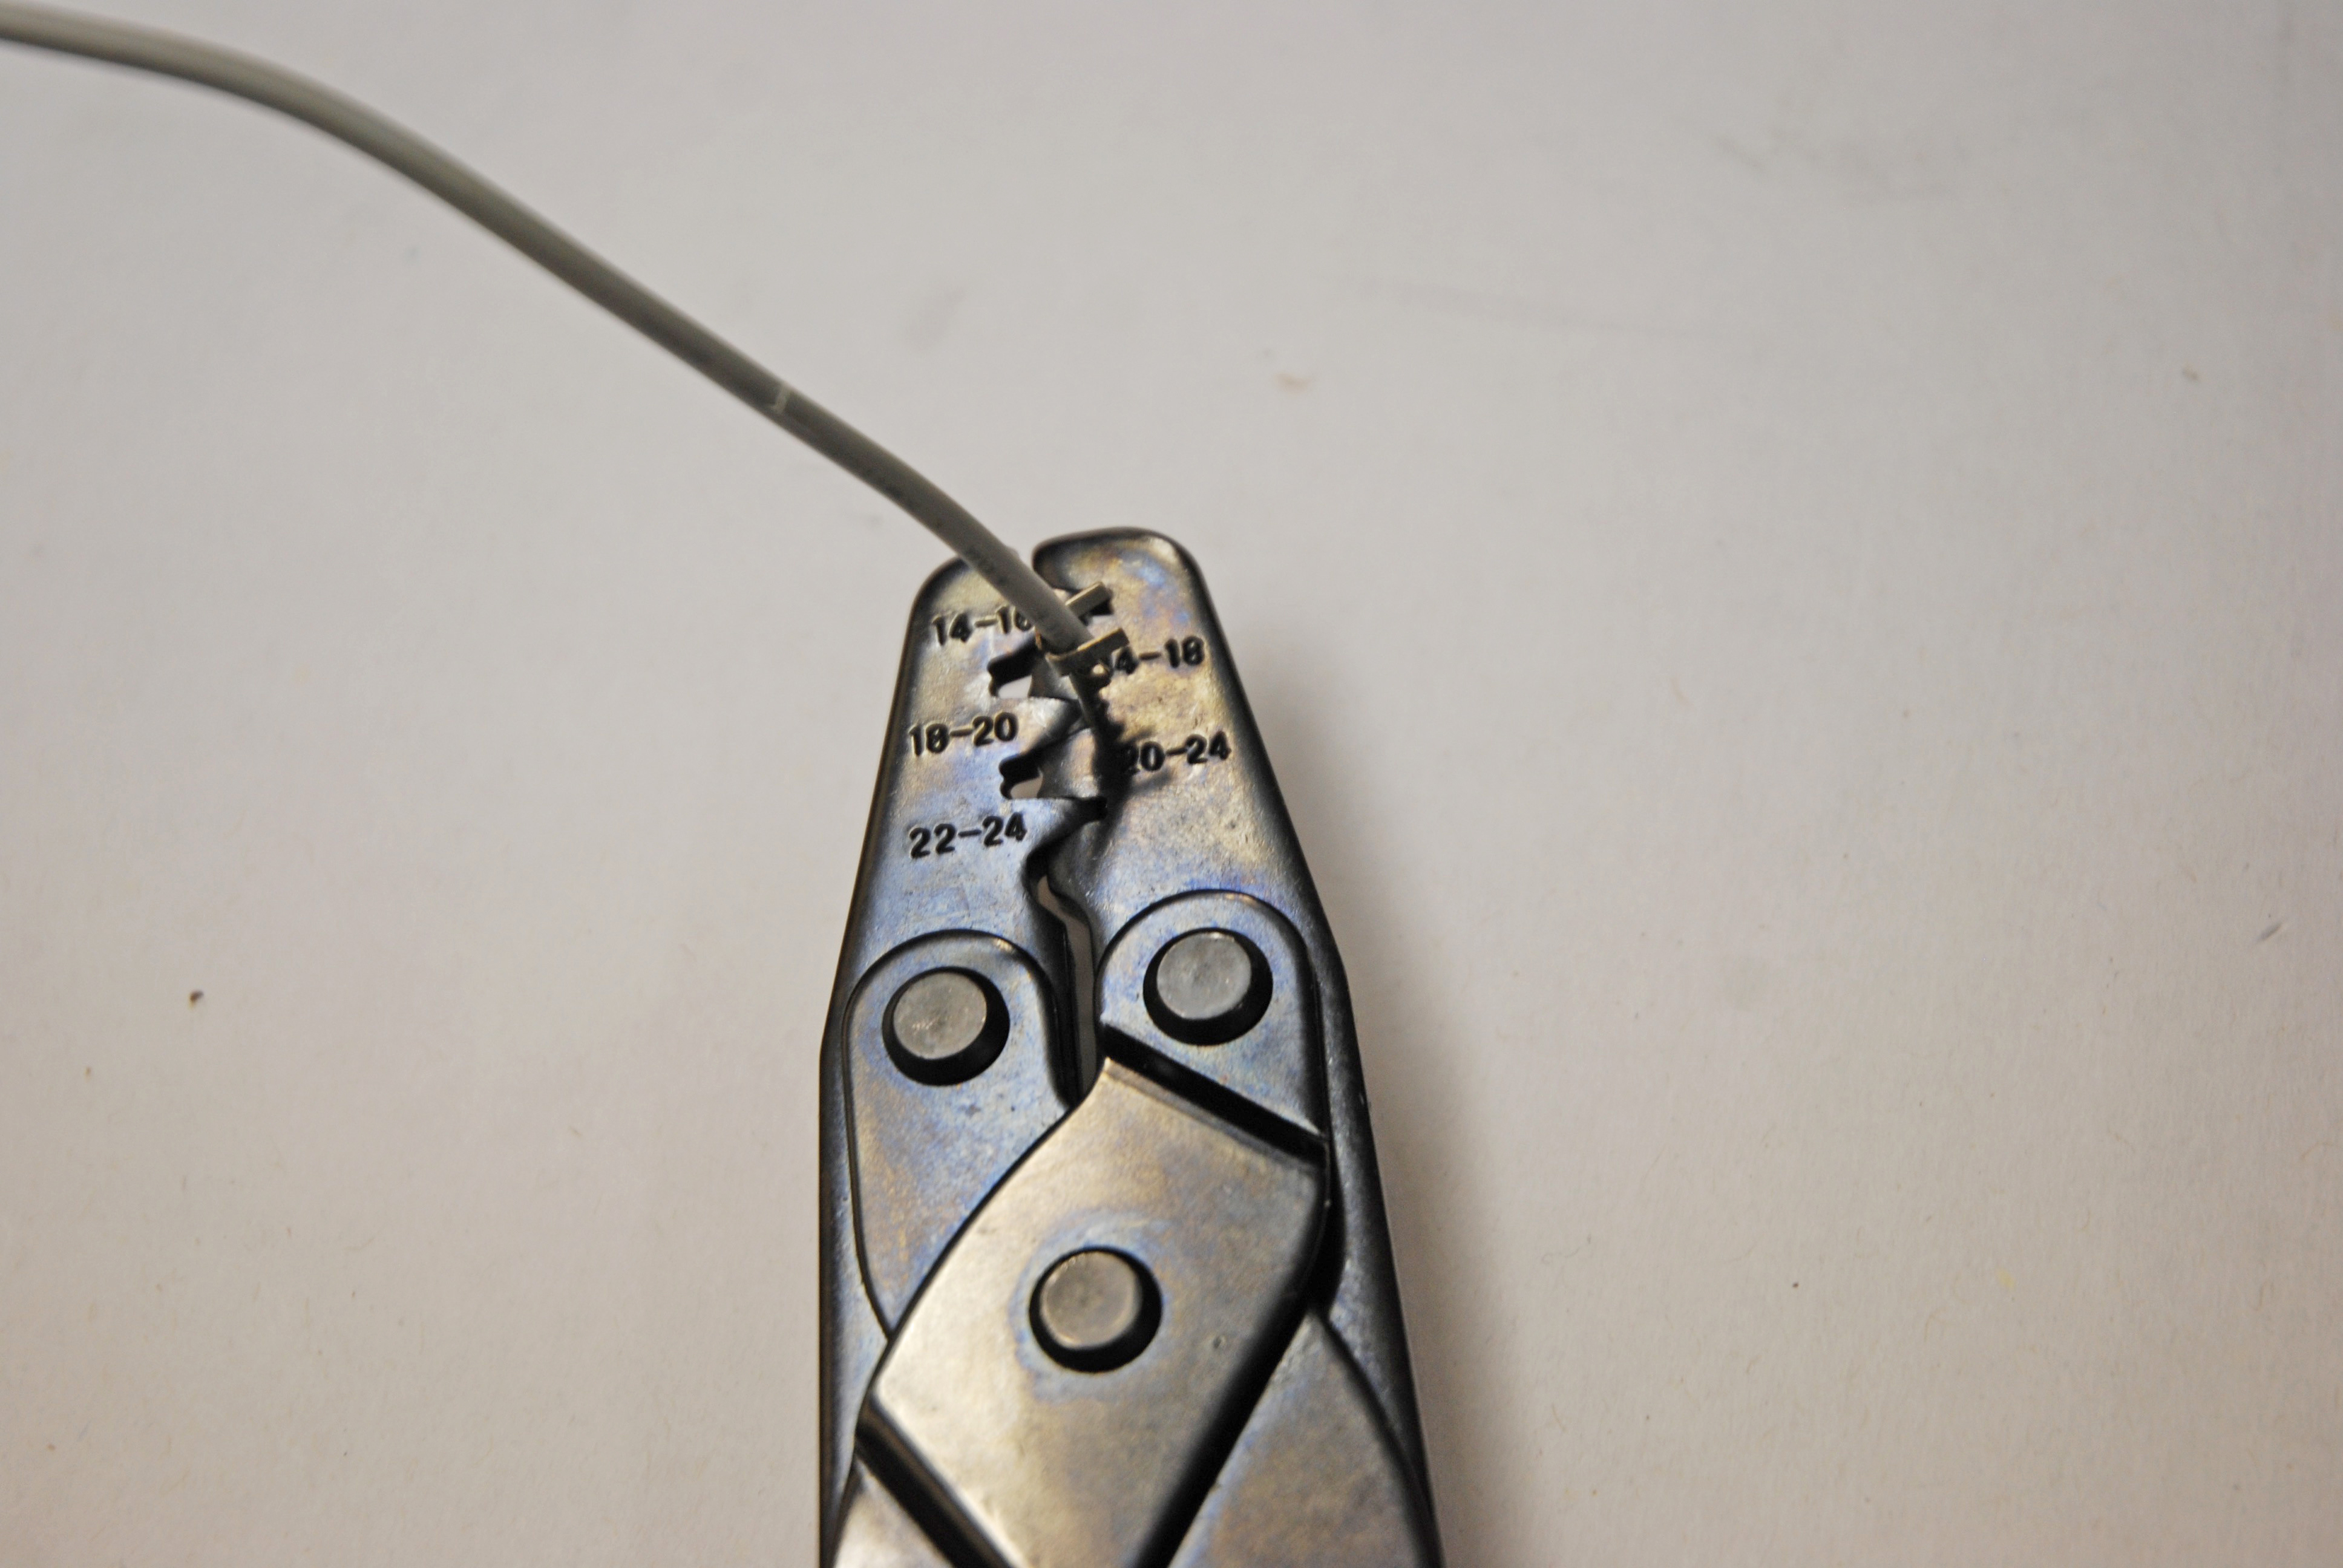
For this discussion we’re using a Summit Racing Weather-Tite crimping tool, which will crimp 14-16 gauge wire, 18-20 gauge wire, and 22-24 gauge wire (left hand side of the jaws). It will also crimp seals for 14-18 gauge wire and along with 20-24 gauge wire (right hand side of the jaws). The jaws of the anvil are engraved with the respective wire gauge.
Just how difficult are the connectors to assemble with this tool? For the answer, check out the following photos and captions.
(All Images/Wayne Scraba)
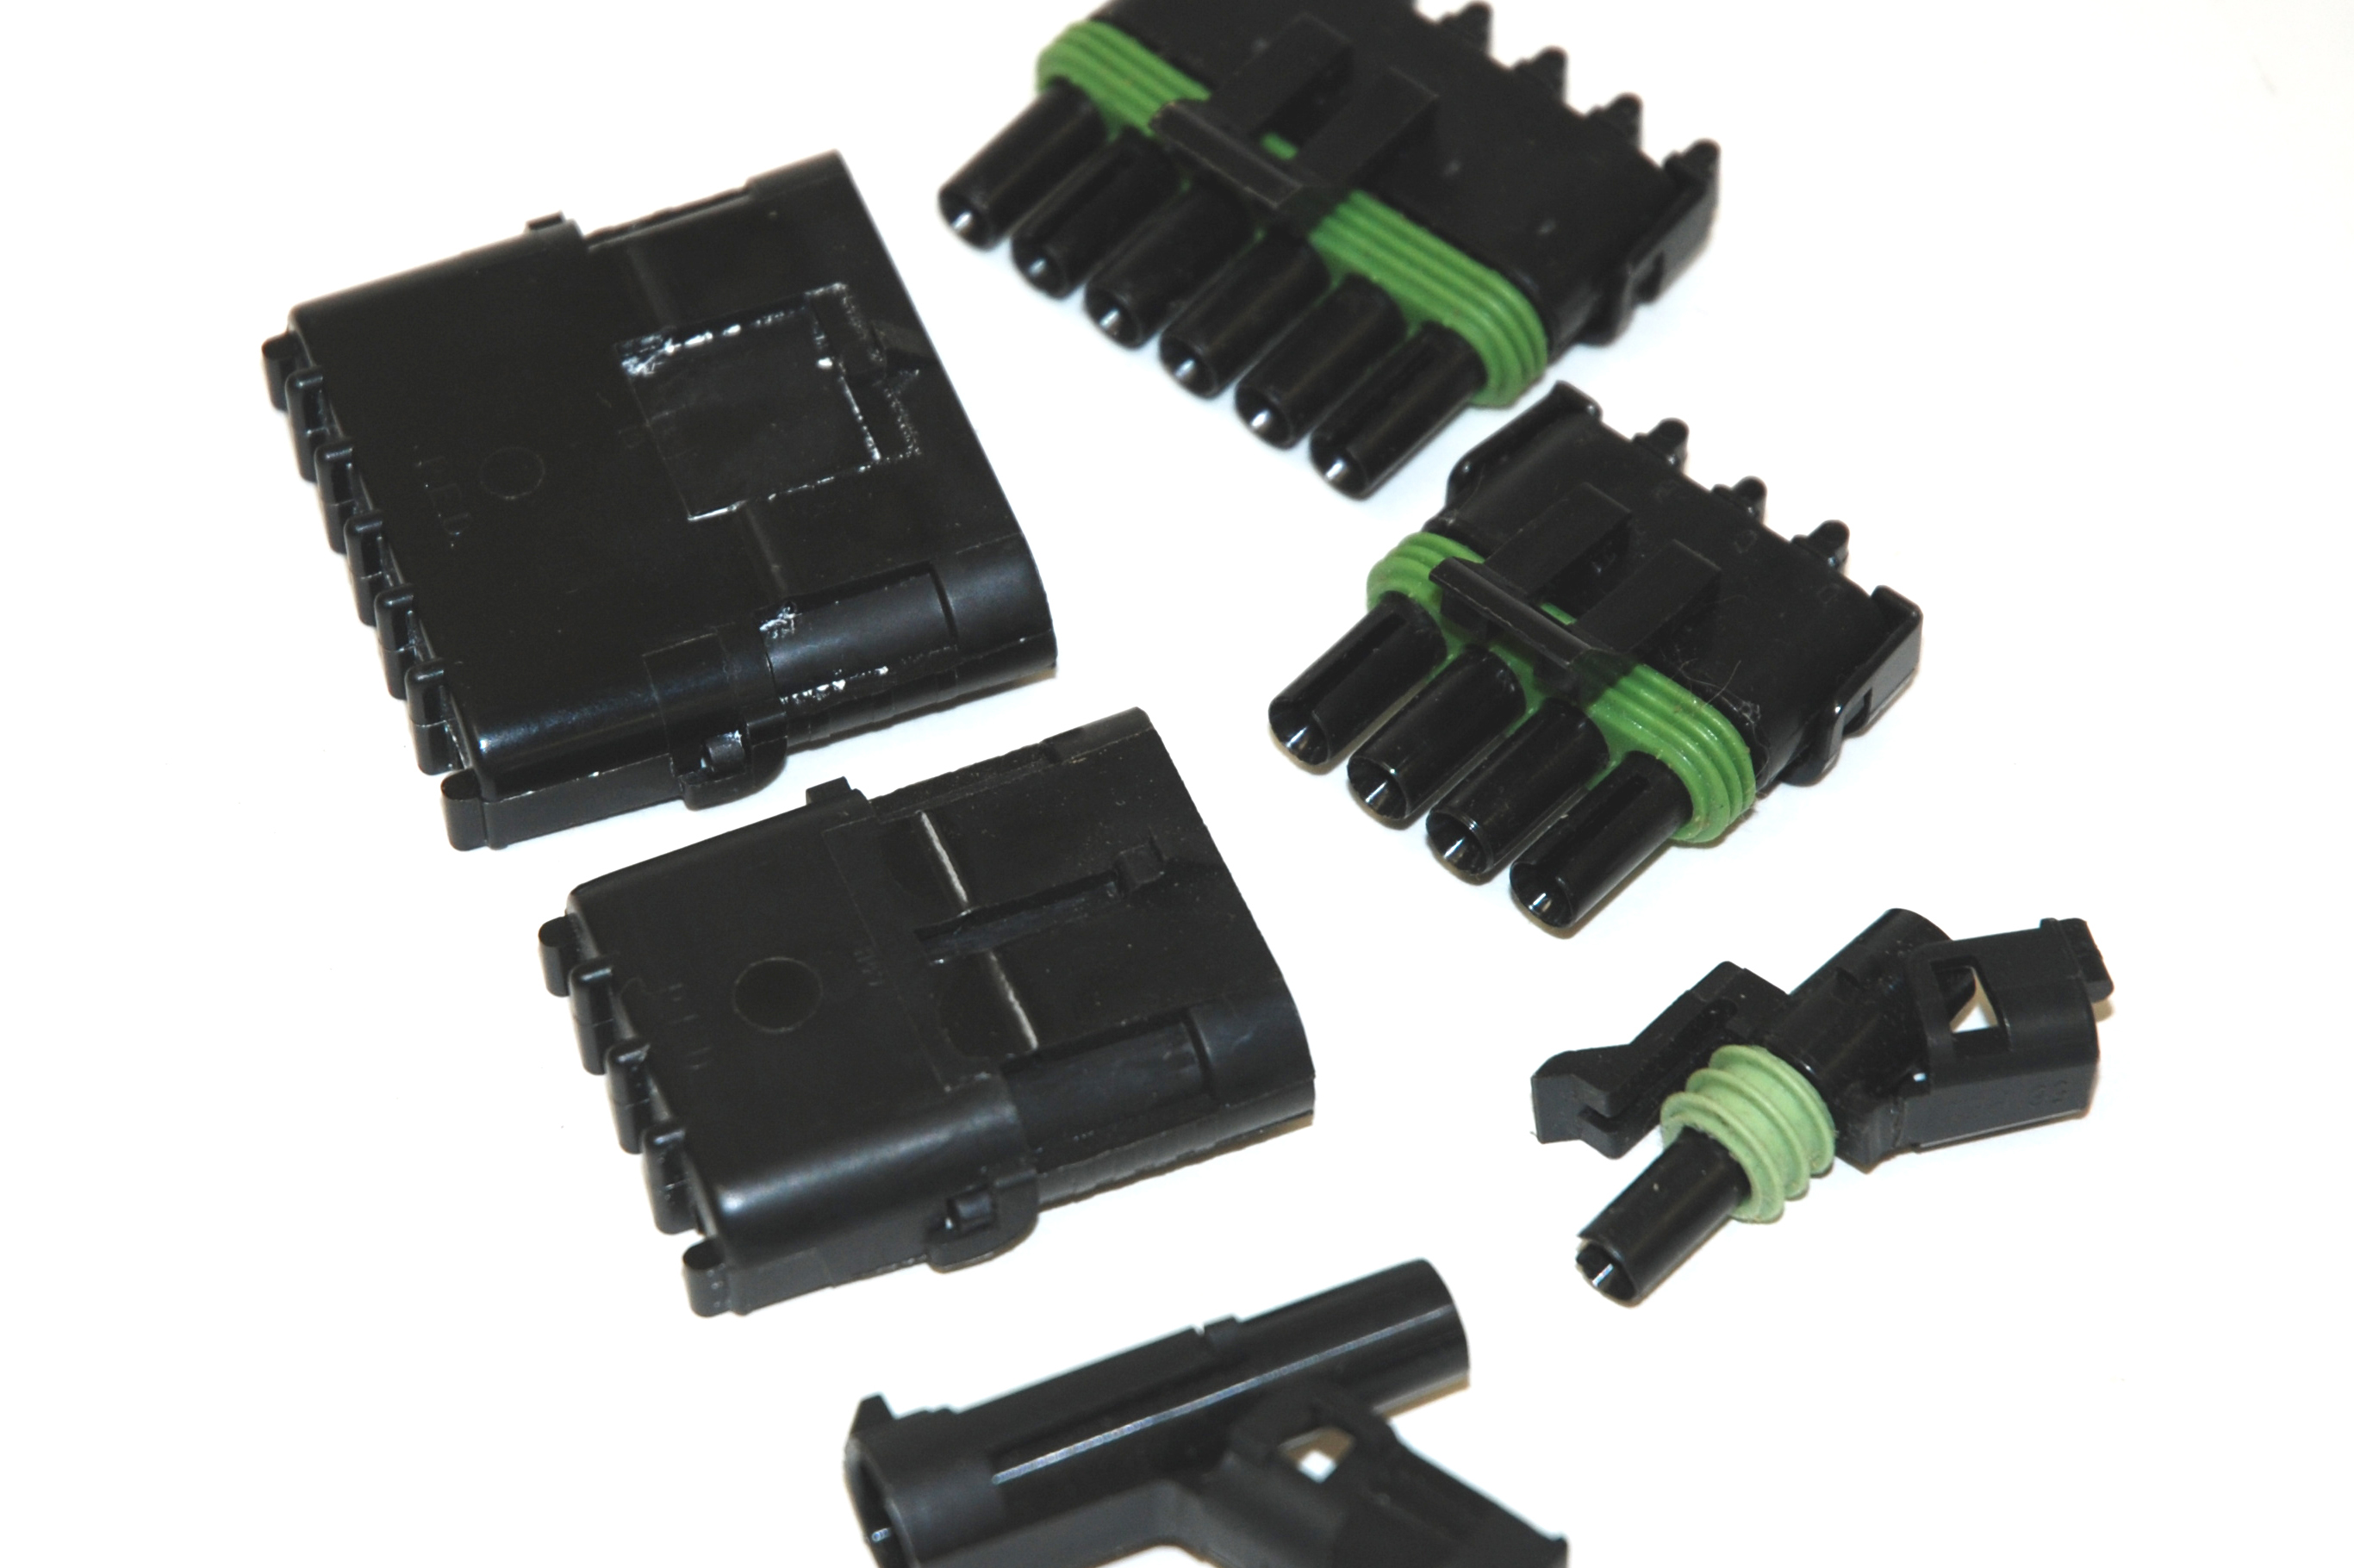
There are a number of different Weather-Tite connectors available from Summit Racing. Included in the bunch are six-pin, 4-pin, 3-pin, 2-pin, and single-pin options. All have the same internal pin-seal arrangement and all operate in the same fashion. All of the connectors use similar double lock-tab mechanisms. These connectors are easily unsnapped by hand, or if they’re in a tough to reach sport, you can use a screwdriver. (Image/Wayne Scraba)
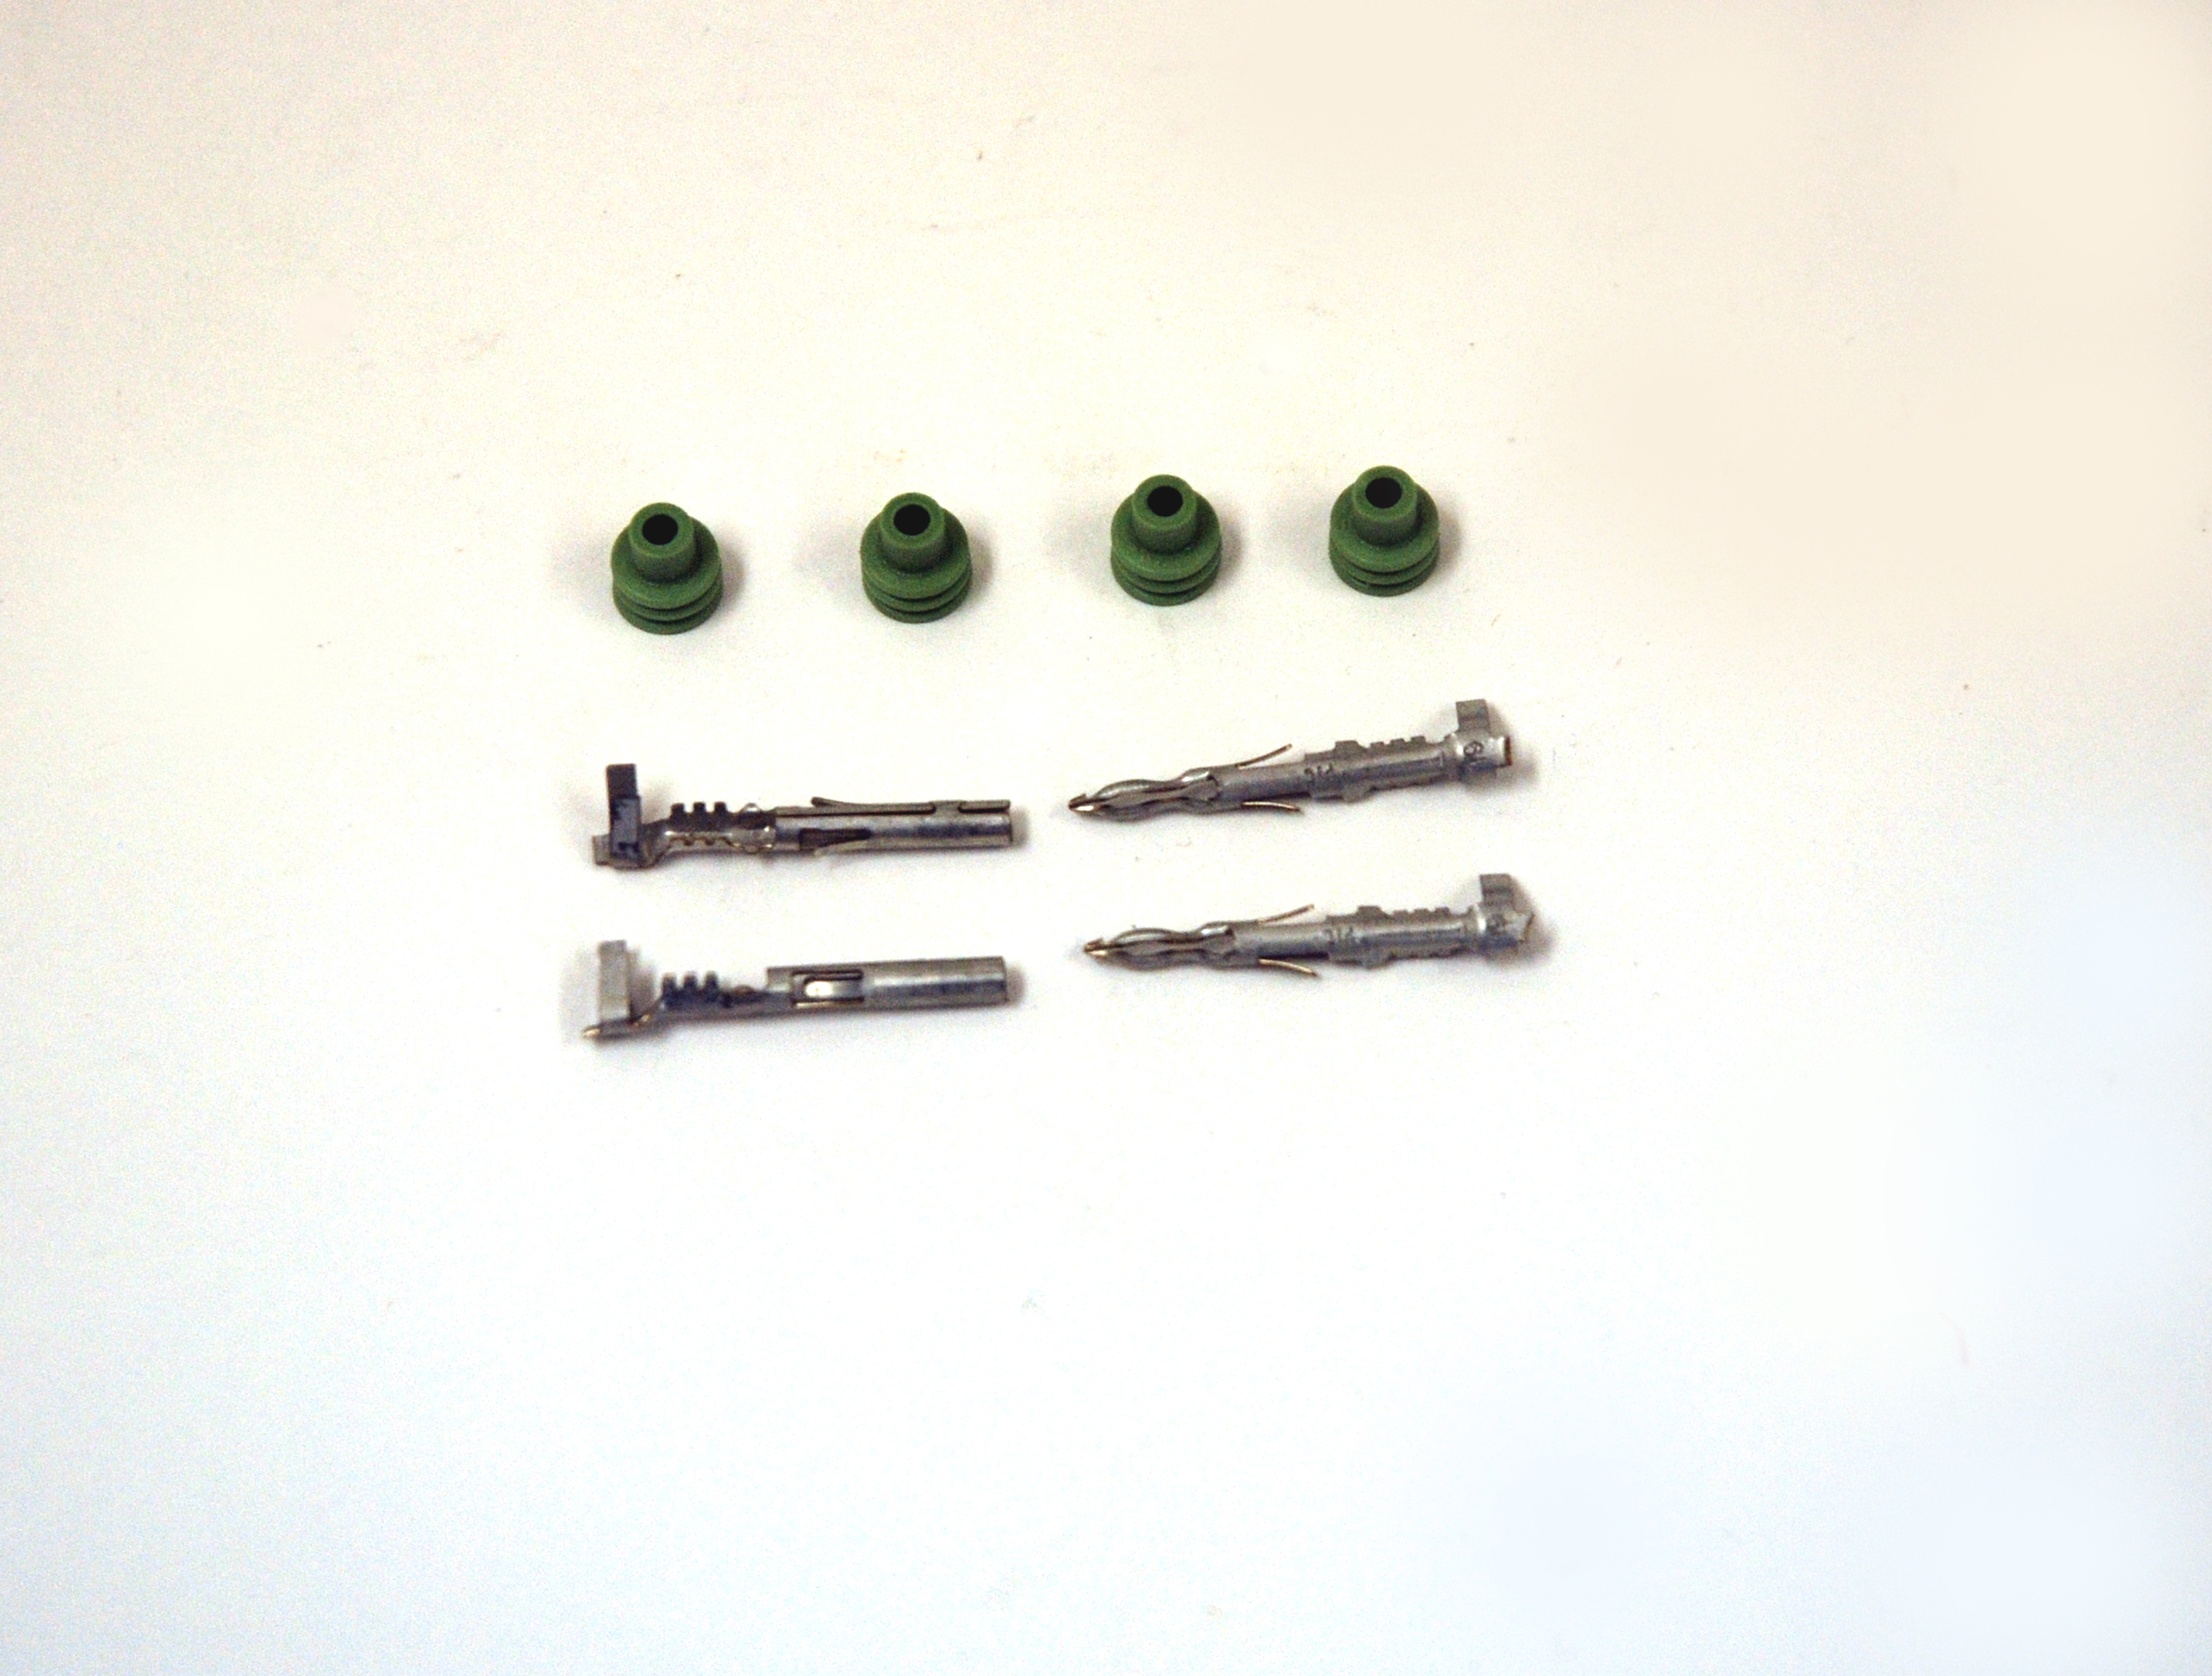
Each of the Weather-Tite connectors includes an appropriate number of terminal pins (male and female) along with a selection of end seals, but they are available separately (obviously this is convenient, especially if you make a mistake during the assembly process). Summit Racing sells these pieces in male and female 10-packs. (Image/Wayne Scraba)
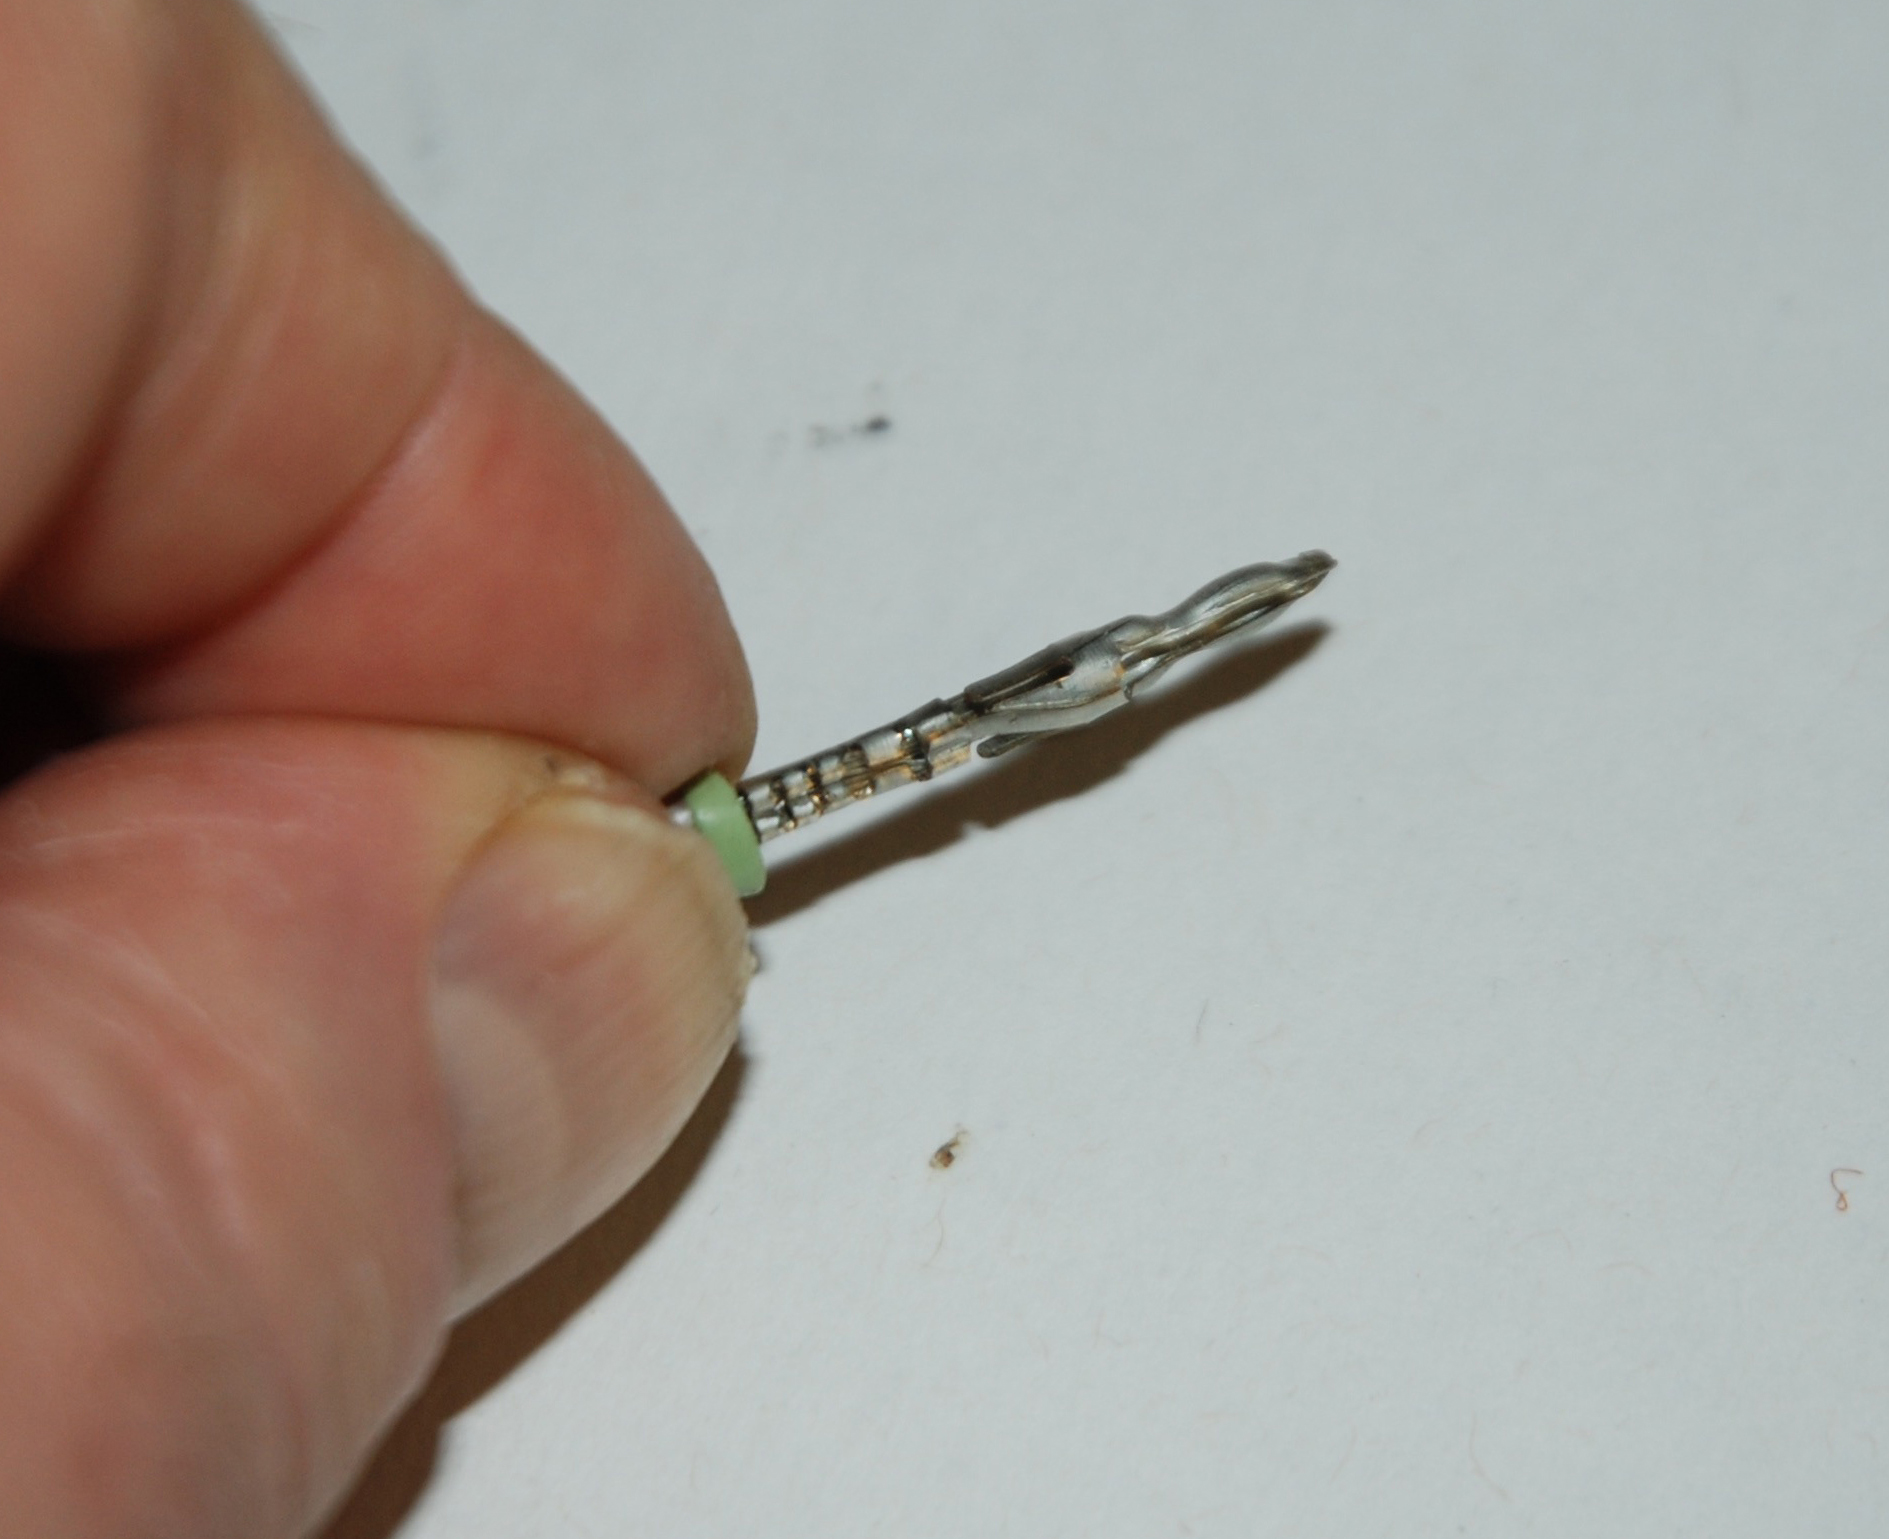
This is what the terminals and seals look like up close. Protection from the elements is provided by these special silicone seals. The terminal pins are the pieces that actually transfer the electrical current. The pins consist of a male and female terminal. These terminals are non-orienting. What that means is they don’t have to be turned when they’re plugged together (some other waterproof connectors mandate a twist every time you plug them together). The terminal pins have double lock tangs that secure the pin inside the connector. They also incorporate an extra-long spring member that’s designed so that the terminal can’t loosen once you’ve installed it. (Image/Wayne Scraba)
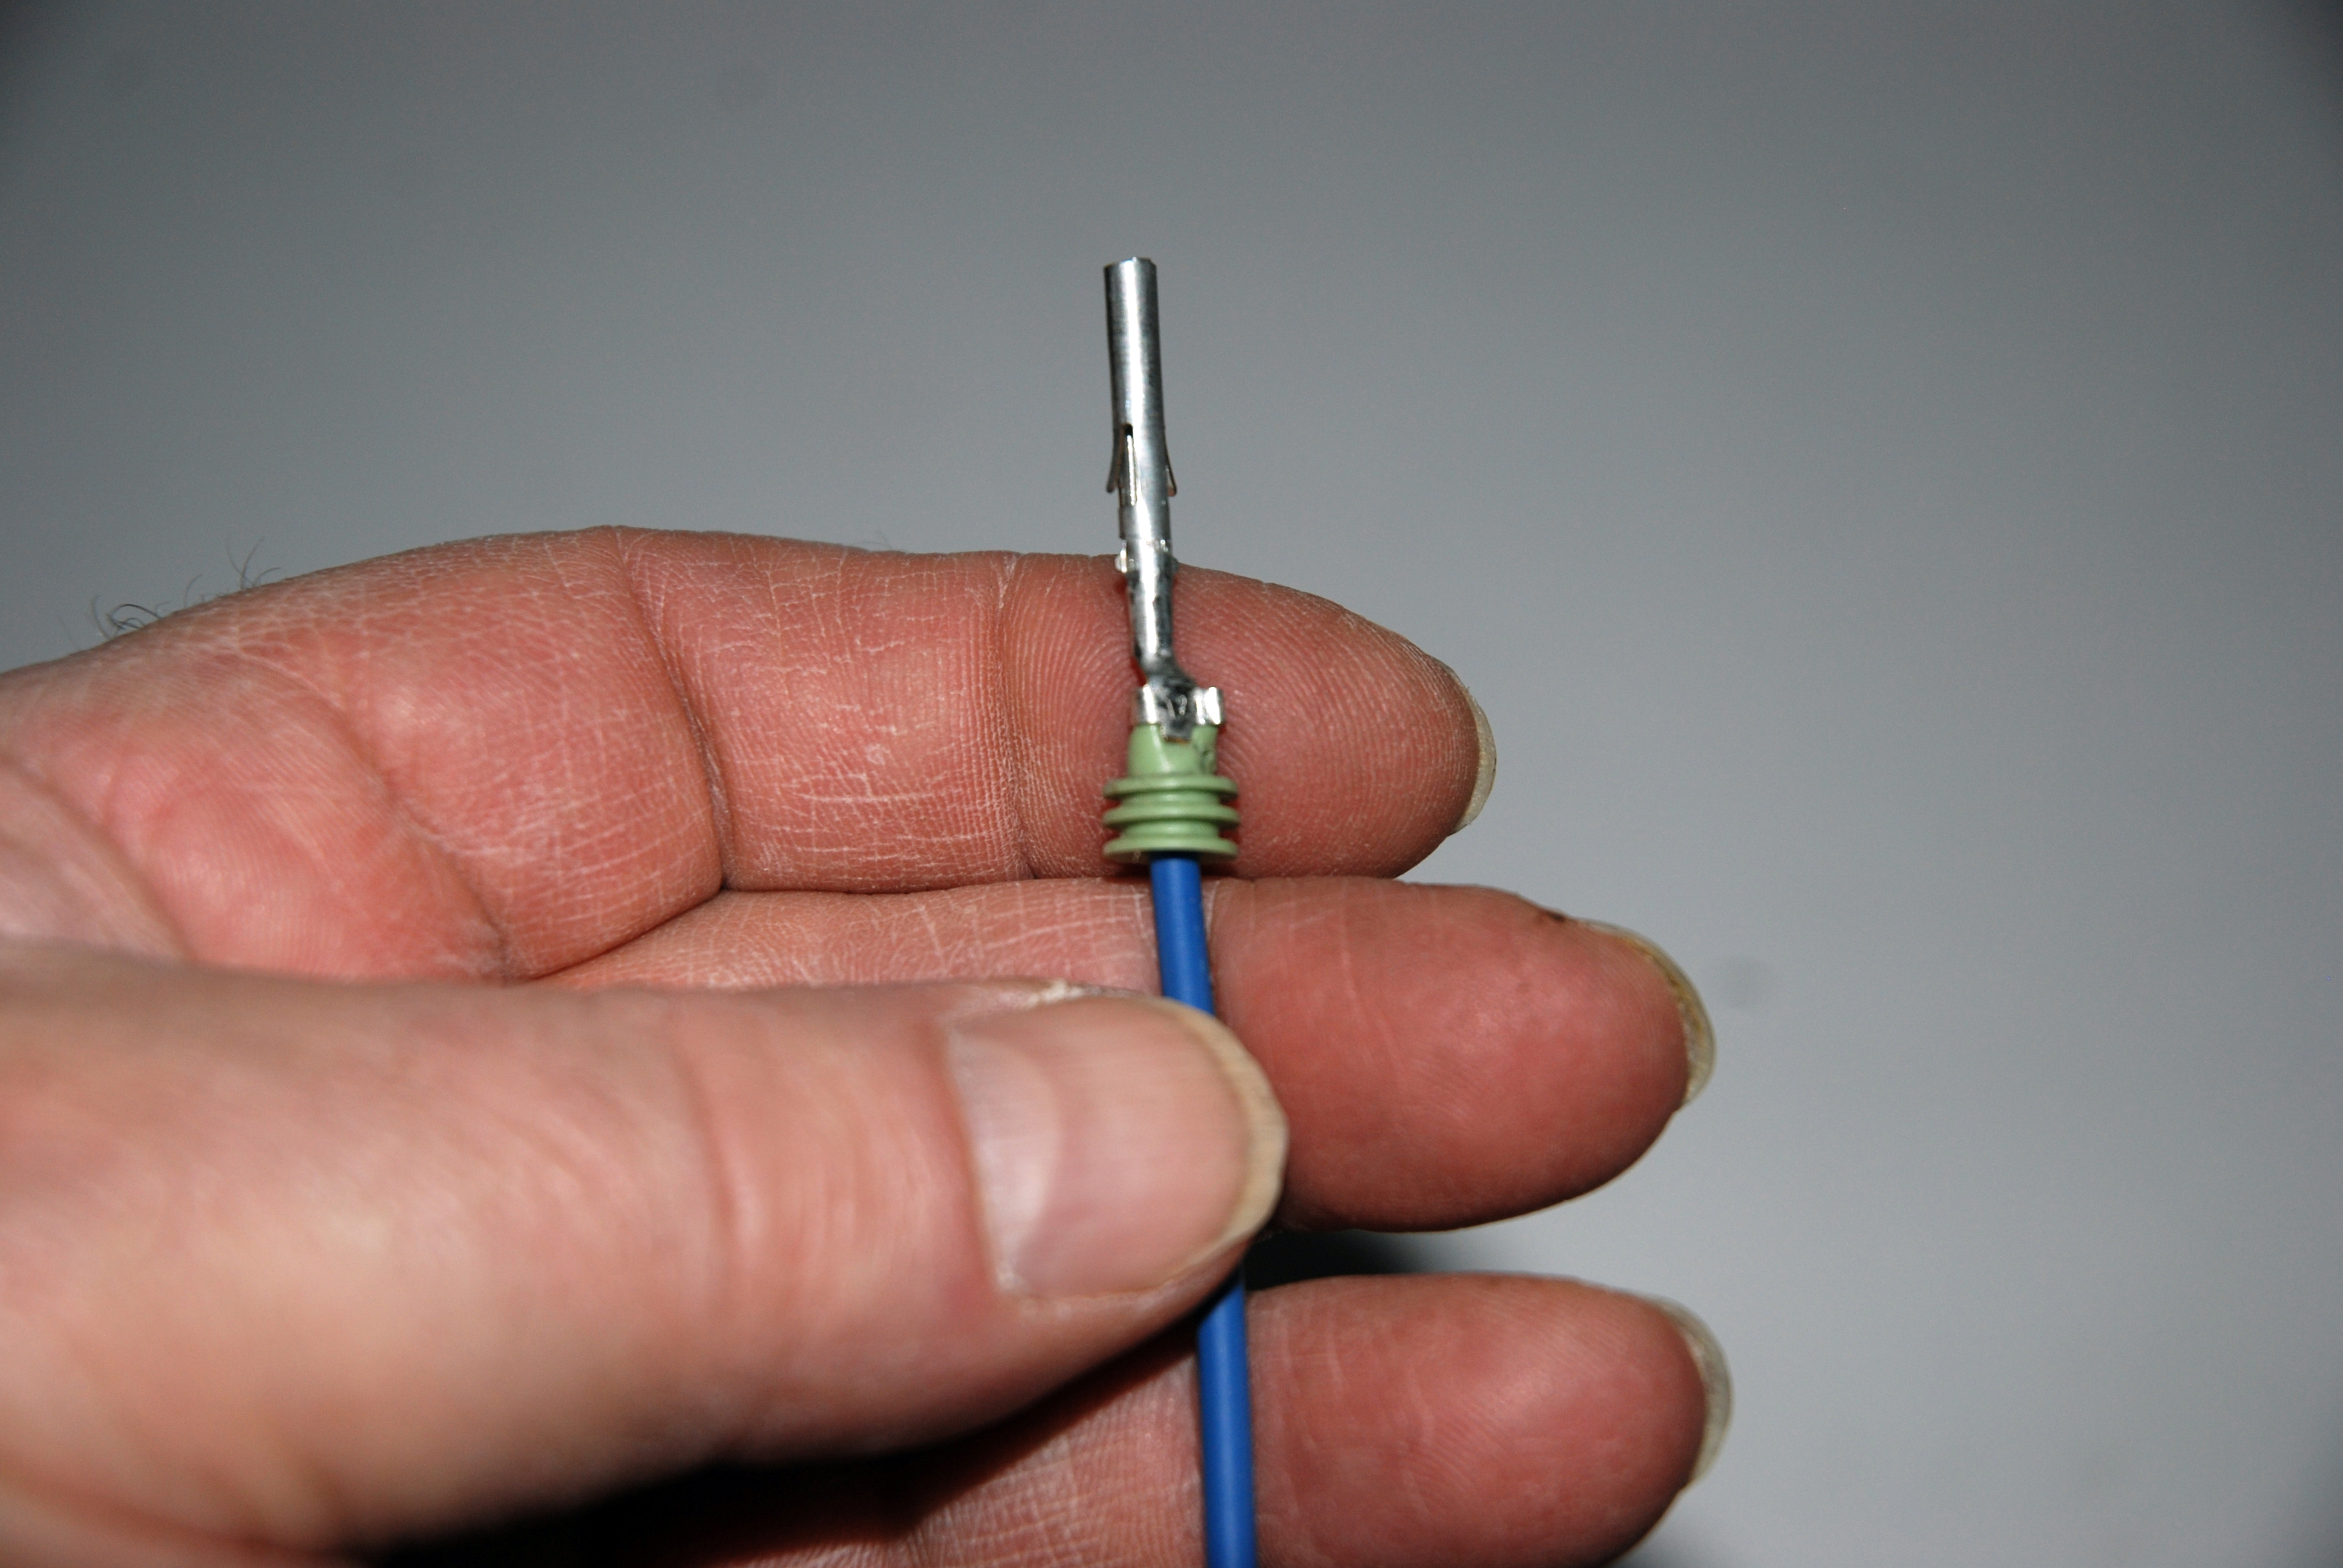
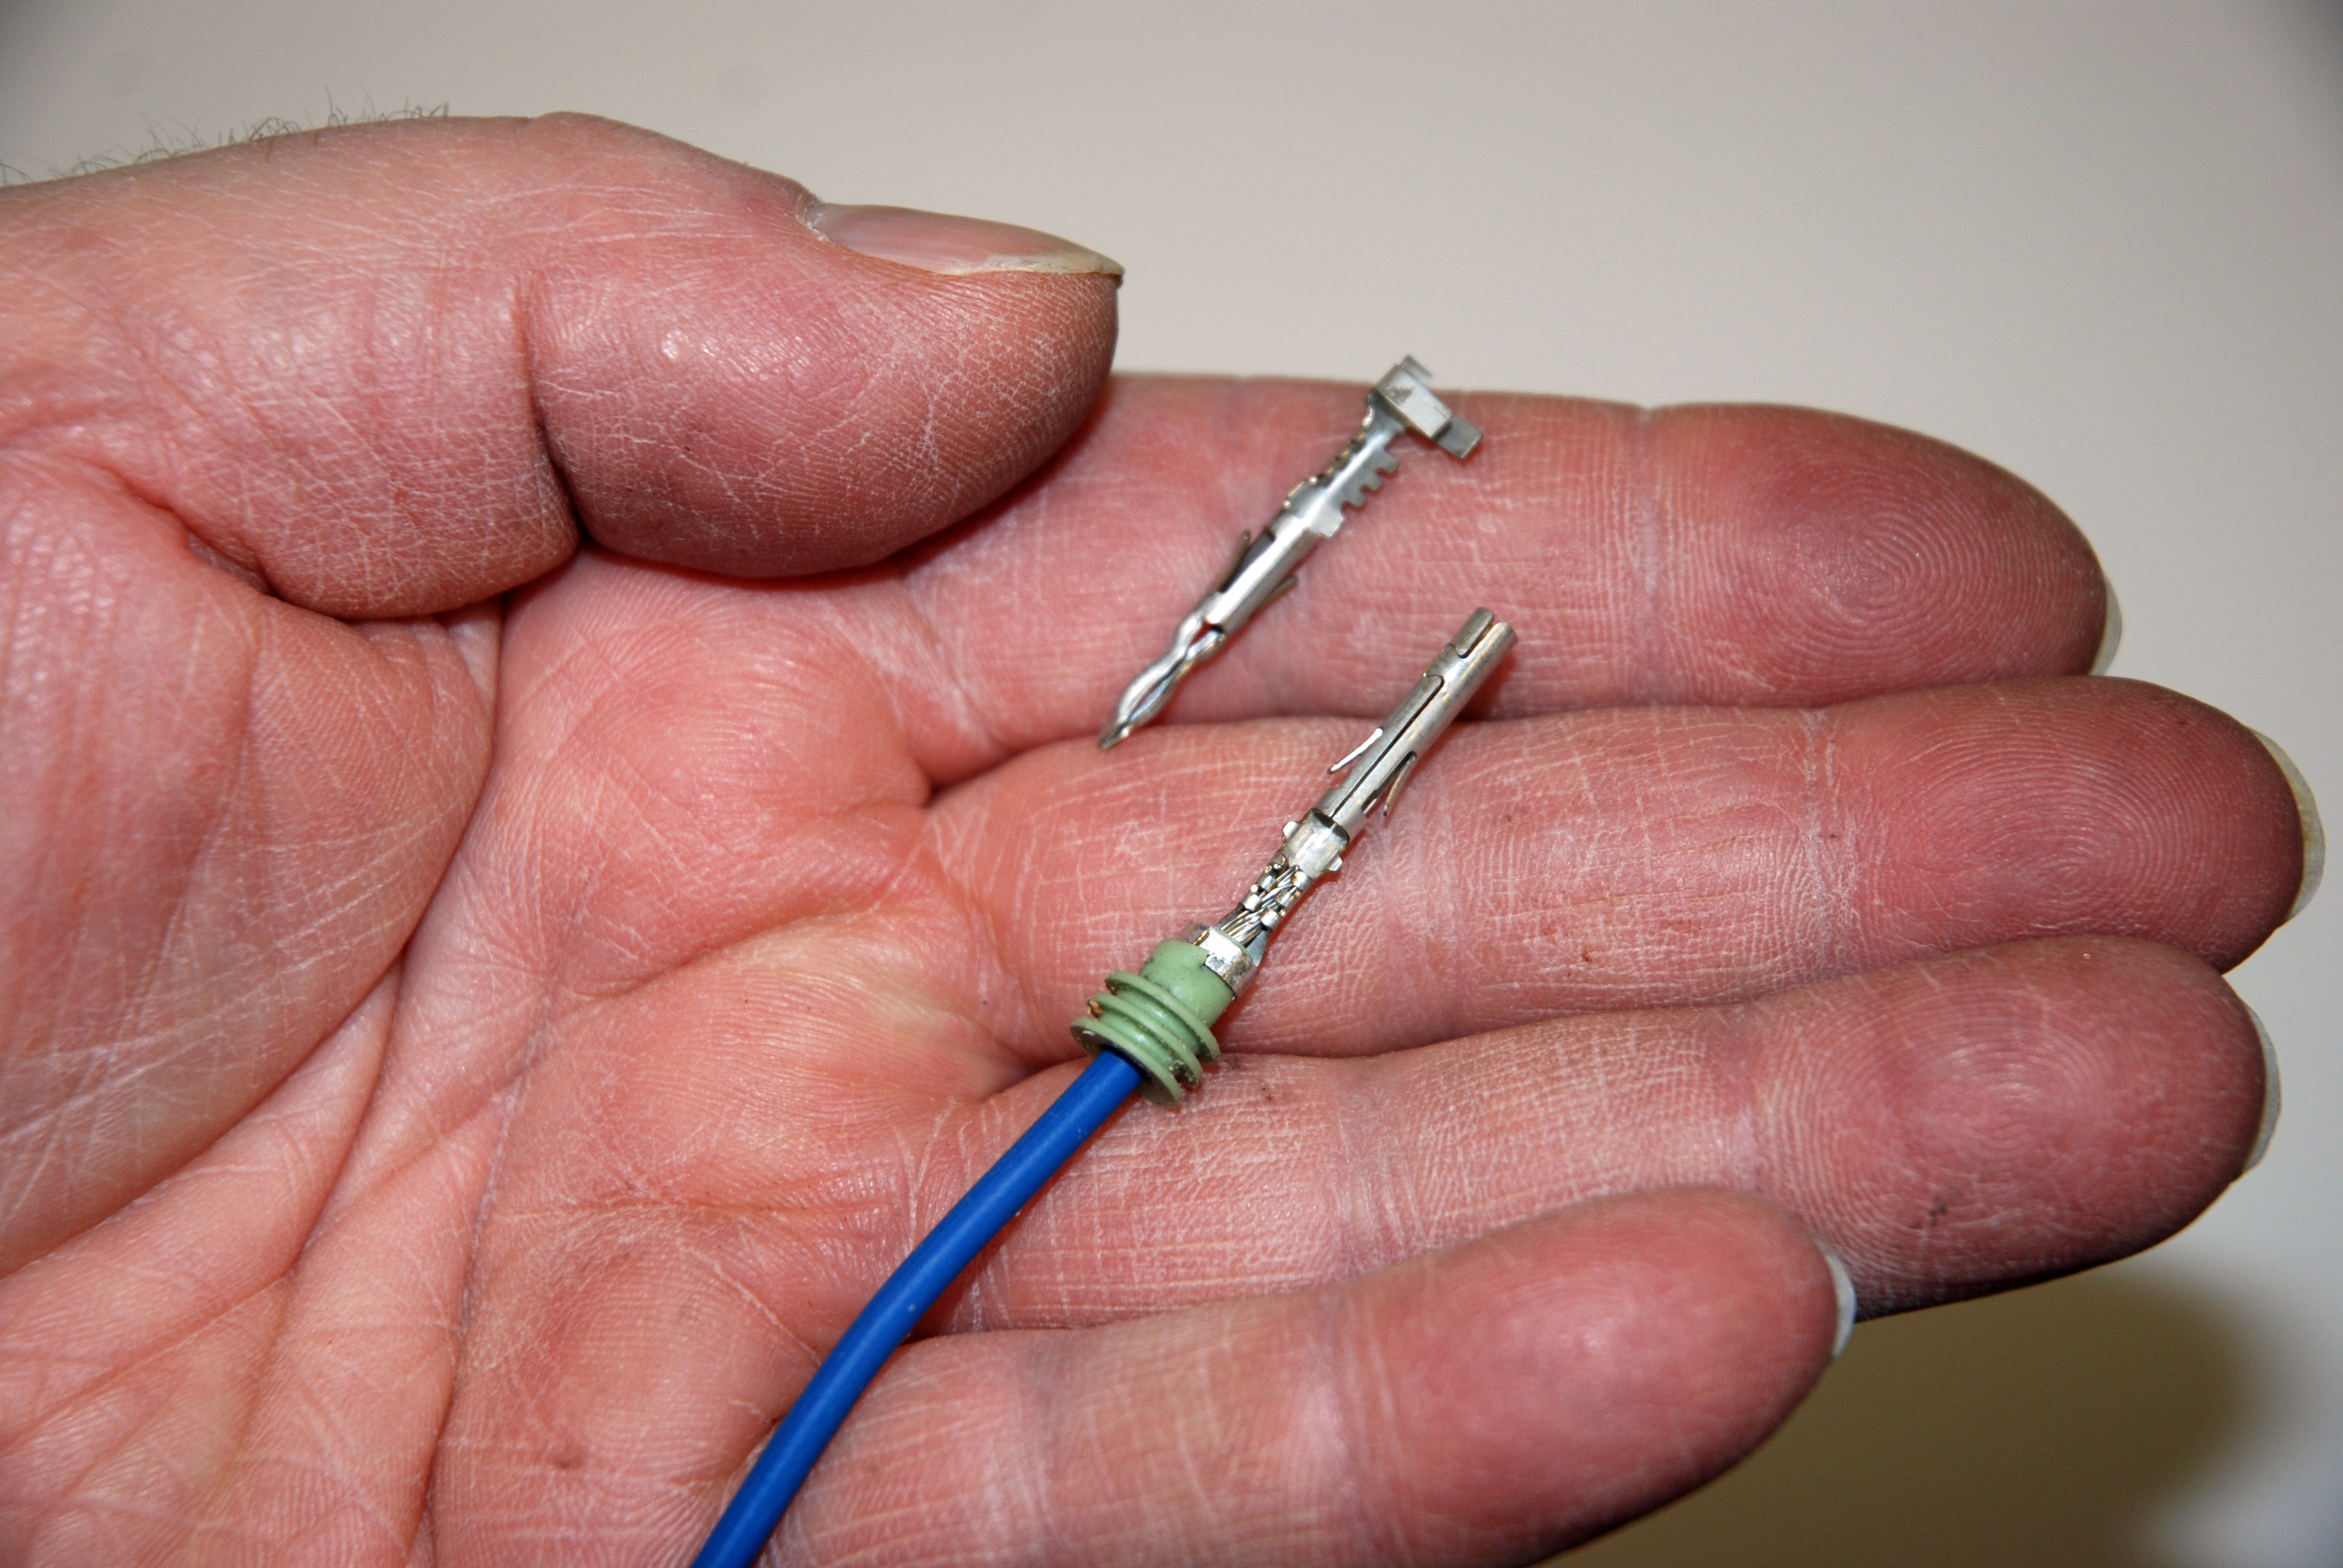
Each of the terminals is designed with a silicone seal crimped to it. This prevents contamination from entering next to the wire. The seal uses multiple sealing ribs to keep the terminal pins clean and dry (each wire is individually sealed to the connector). Then the connector itself is sealed. (Image/Wayne Scraba)

When assembling the Weather-Tite connectors, you’ll need the right tool. They simply cannot be assembled or disassembled without them. Summit Racing offers this set of crimping pliers that are designed for the task. (Image/Wayne Scraba)
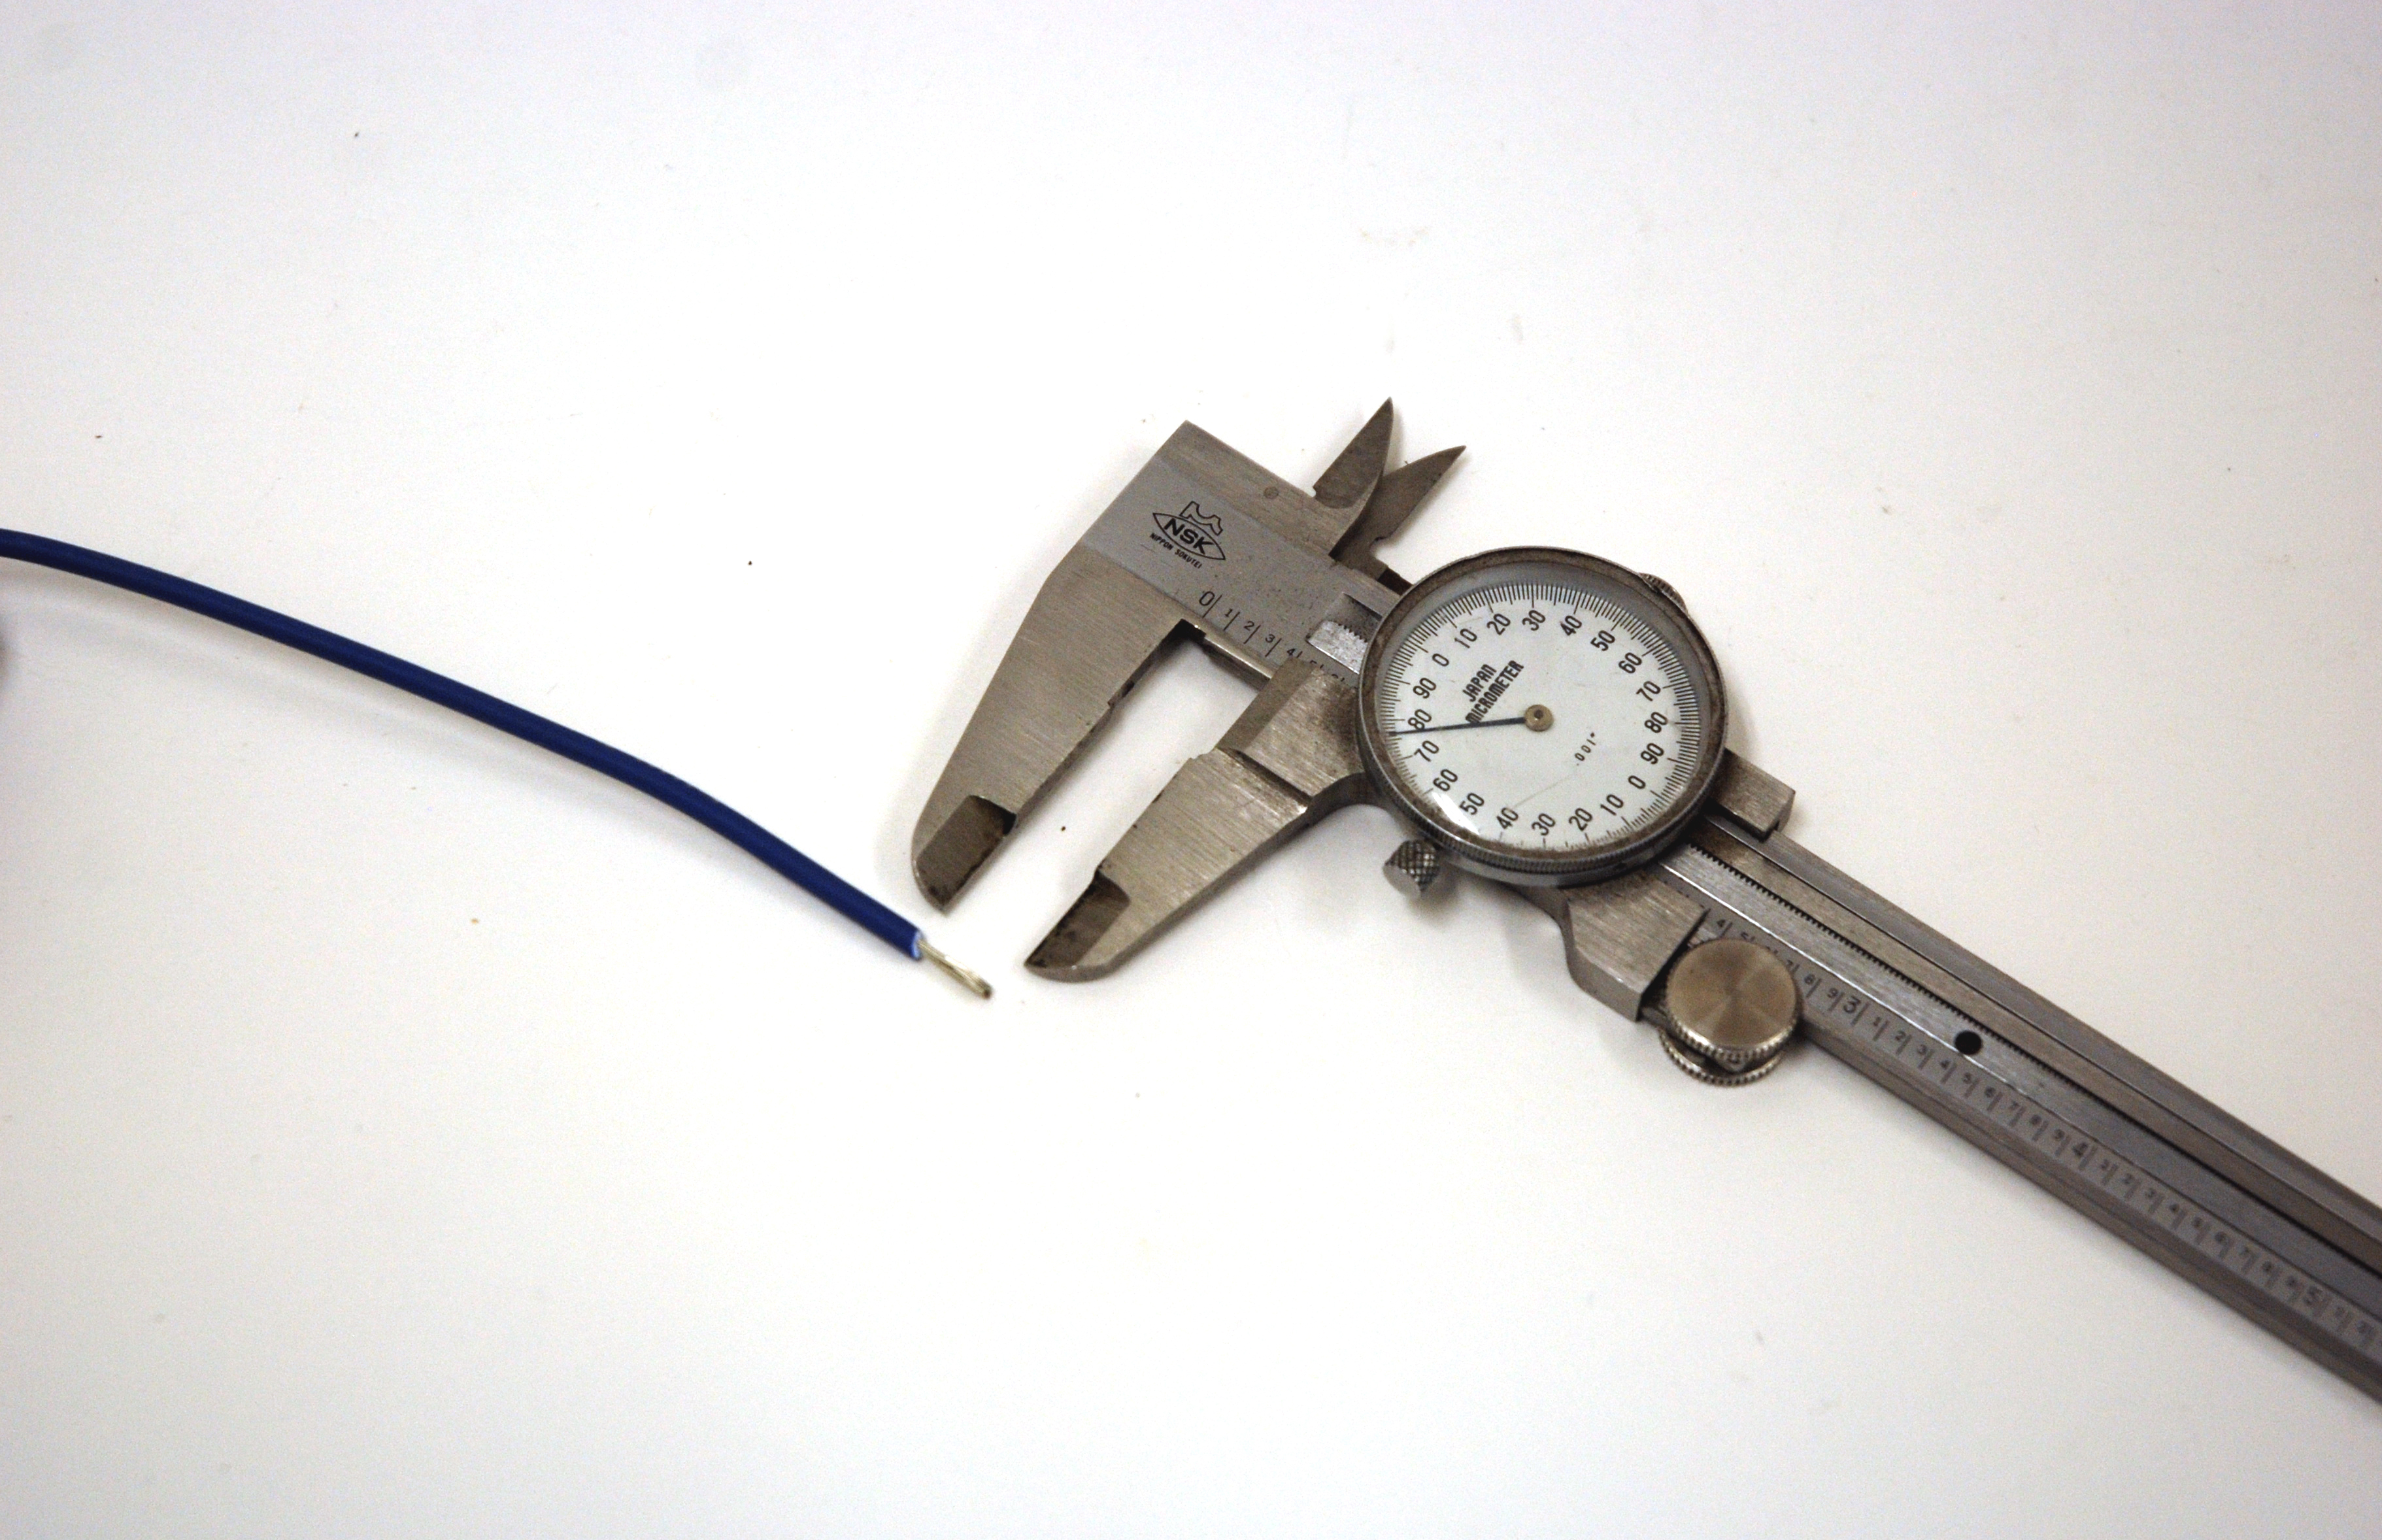
When assembling the connector, strip the wire first. Remove approximately 1/4- to 3/8-inch of insulation away. In this case, we simply used a set of dial calipers locked onto 3/8-inch to measure the stripping job. (Image/Wayne Scraba)
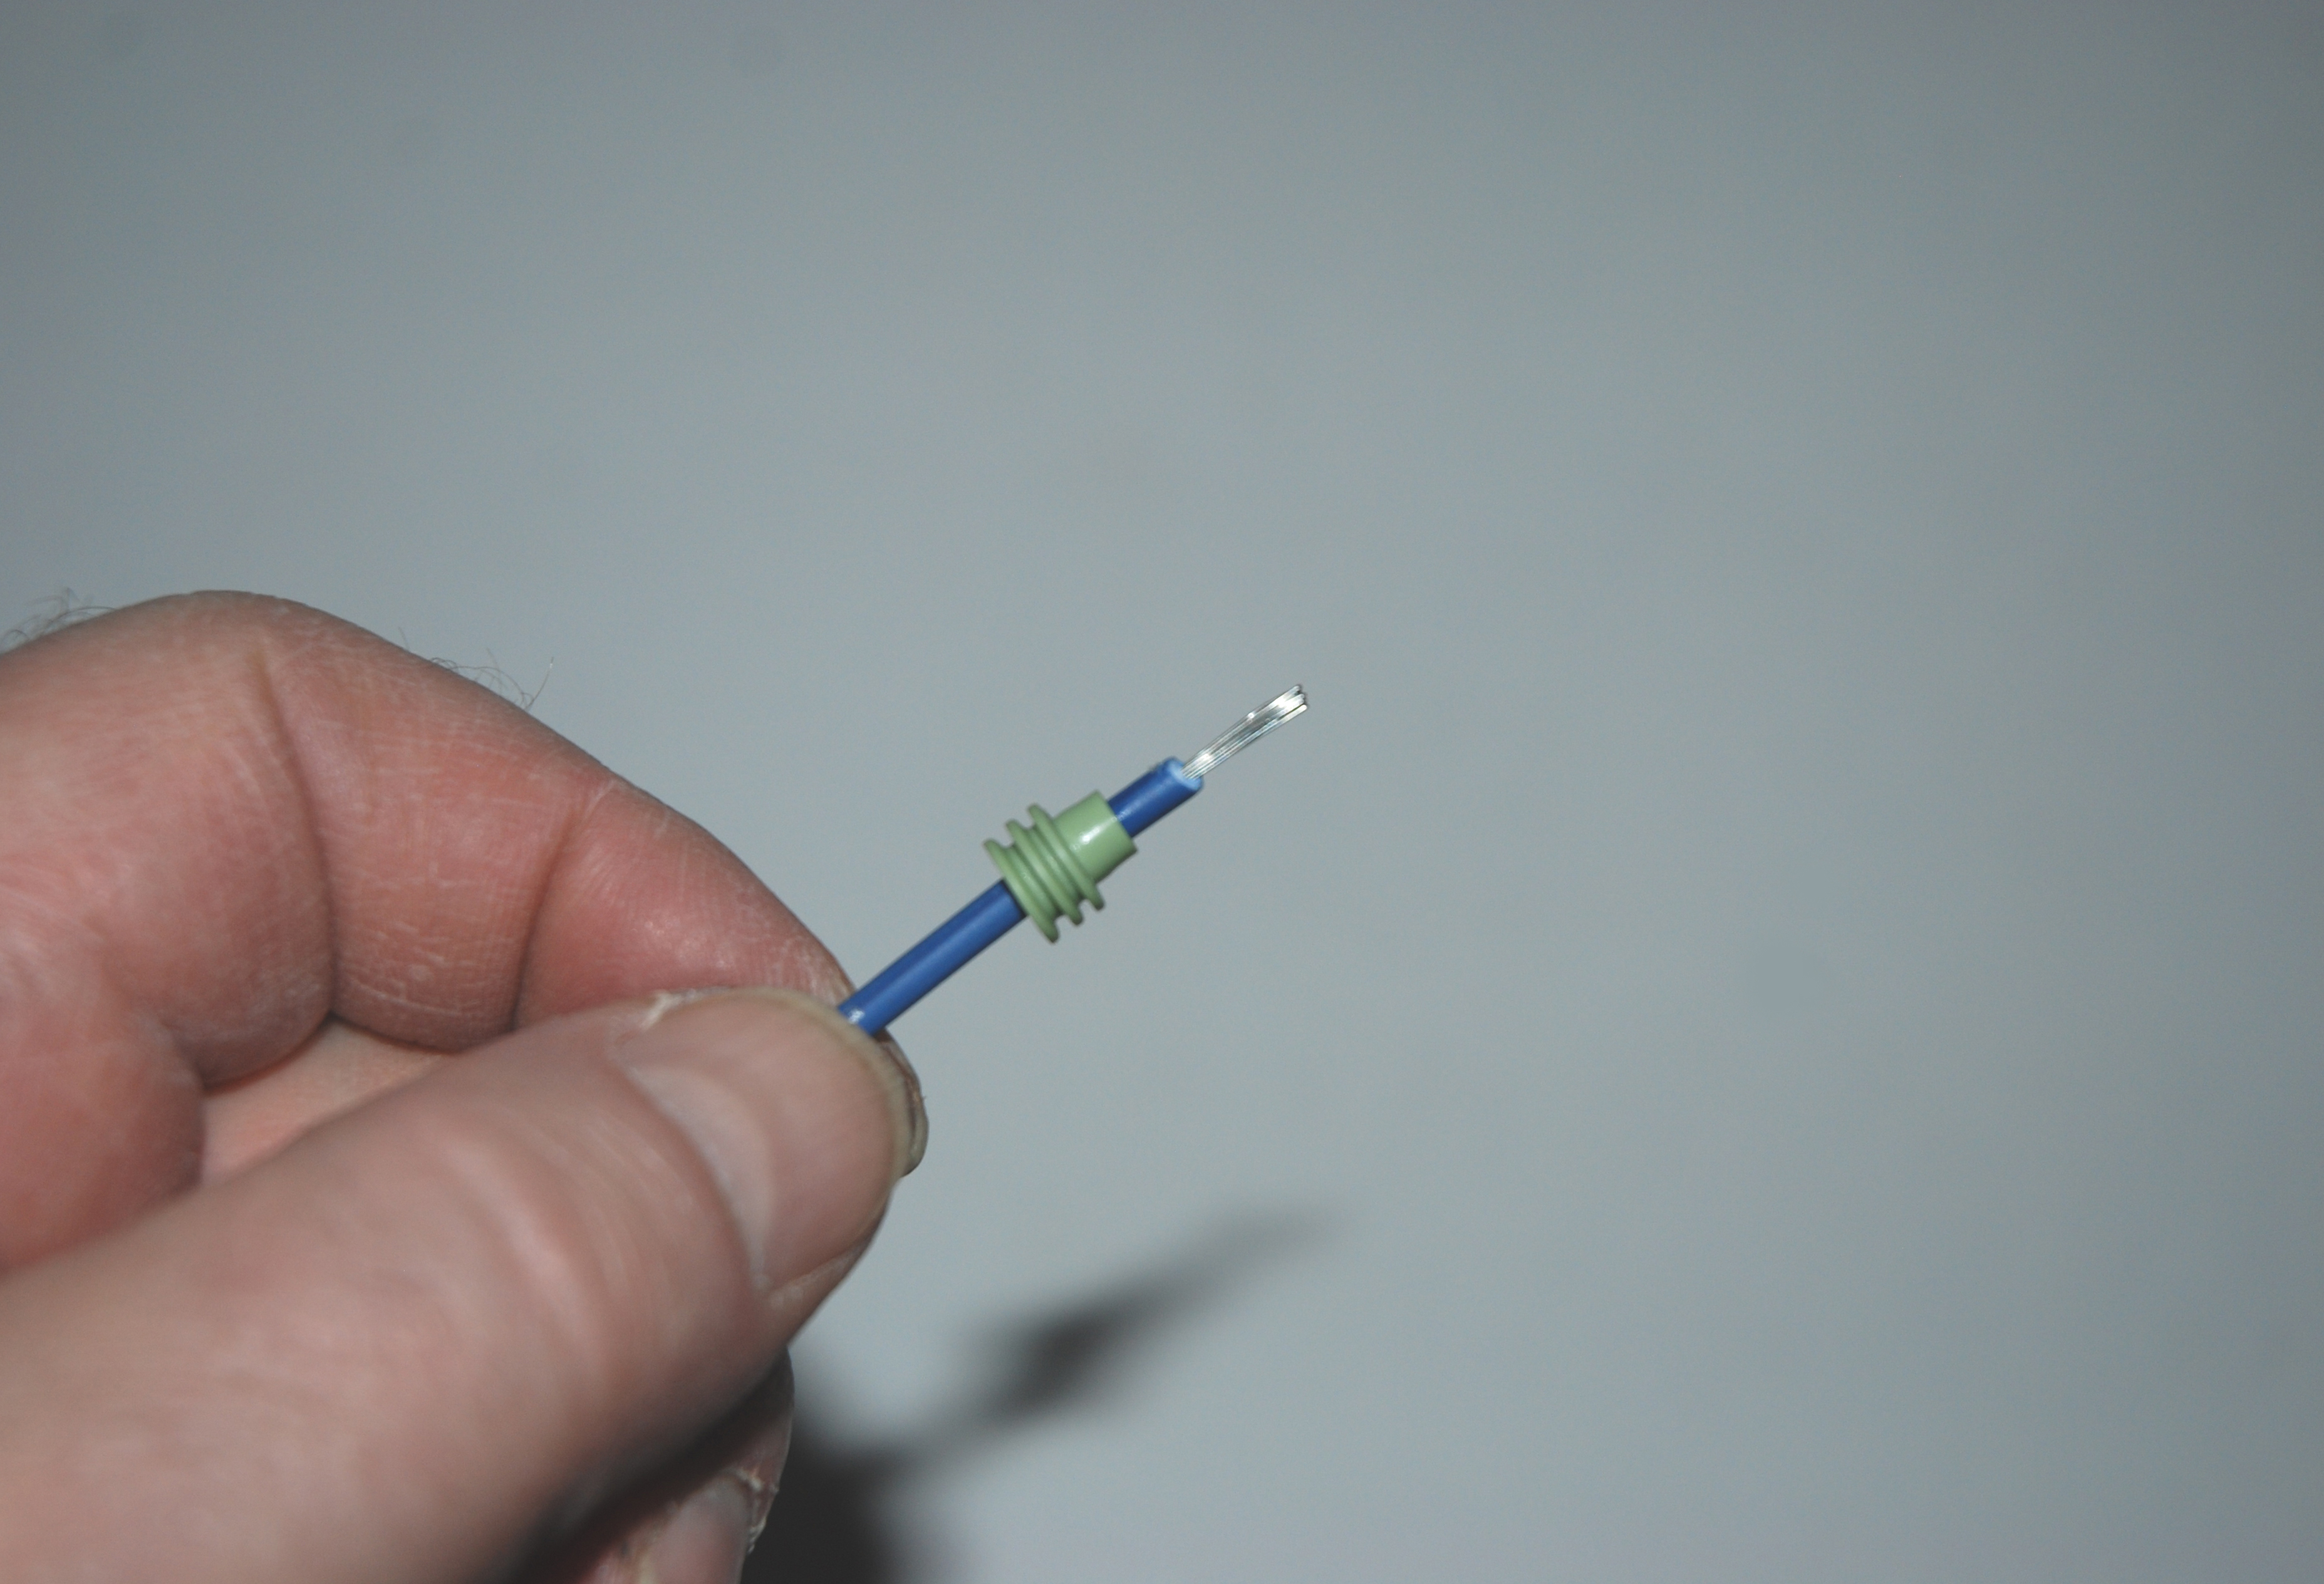
Slide the cable seal onto wire. Take a close look at the orientation of the seal. As you can see, the sealing ribs face away from the stripped portion of the wire. (Image/Wayne Scraba)
Insert the wire into the pin terminal and slide the seal forward to the end of the wire insulation (to the point where the wire has been stripped away). Push the wire into the pin terminal to a point where the seal stops in the insulation tabs. (Image/Wayne Scraba)
Crimp the wire into the pin by slowly squeezing the handles. Squeeze until the jaws of the pliers are fully closed. You can test the crimp by pulling back on the wire. If it doesn’t move, you’ve made a proper crimp, but if it moves, it’s better to open everything up and start again. You can either use a new terminal pin or attempt to straighten the original one. (Image/Wayne Scraba)
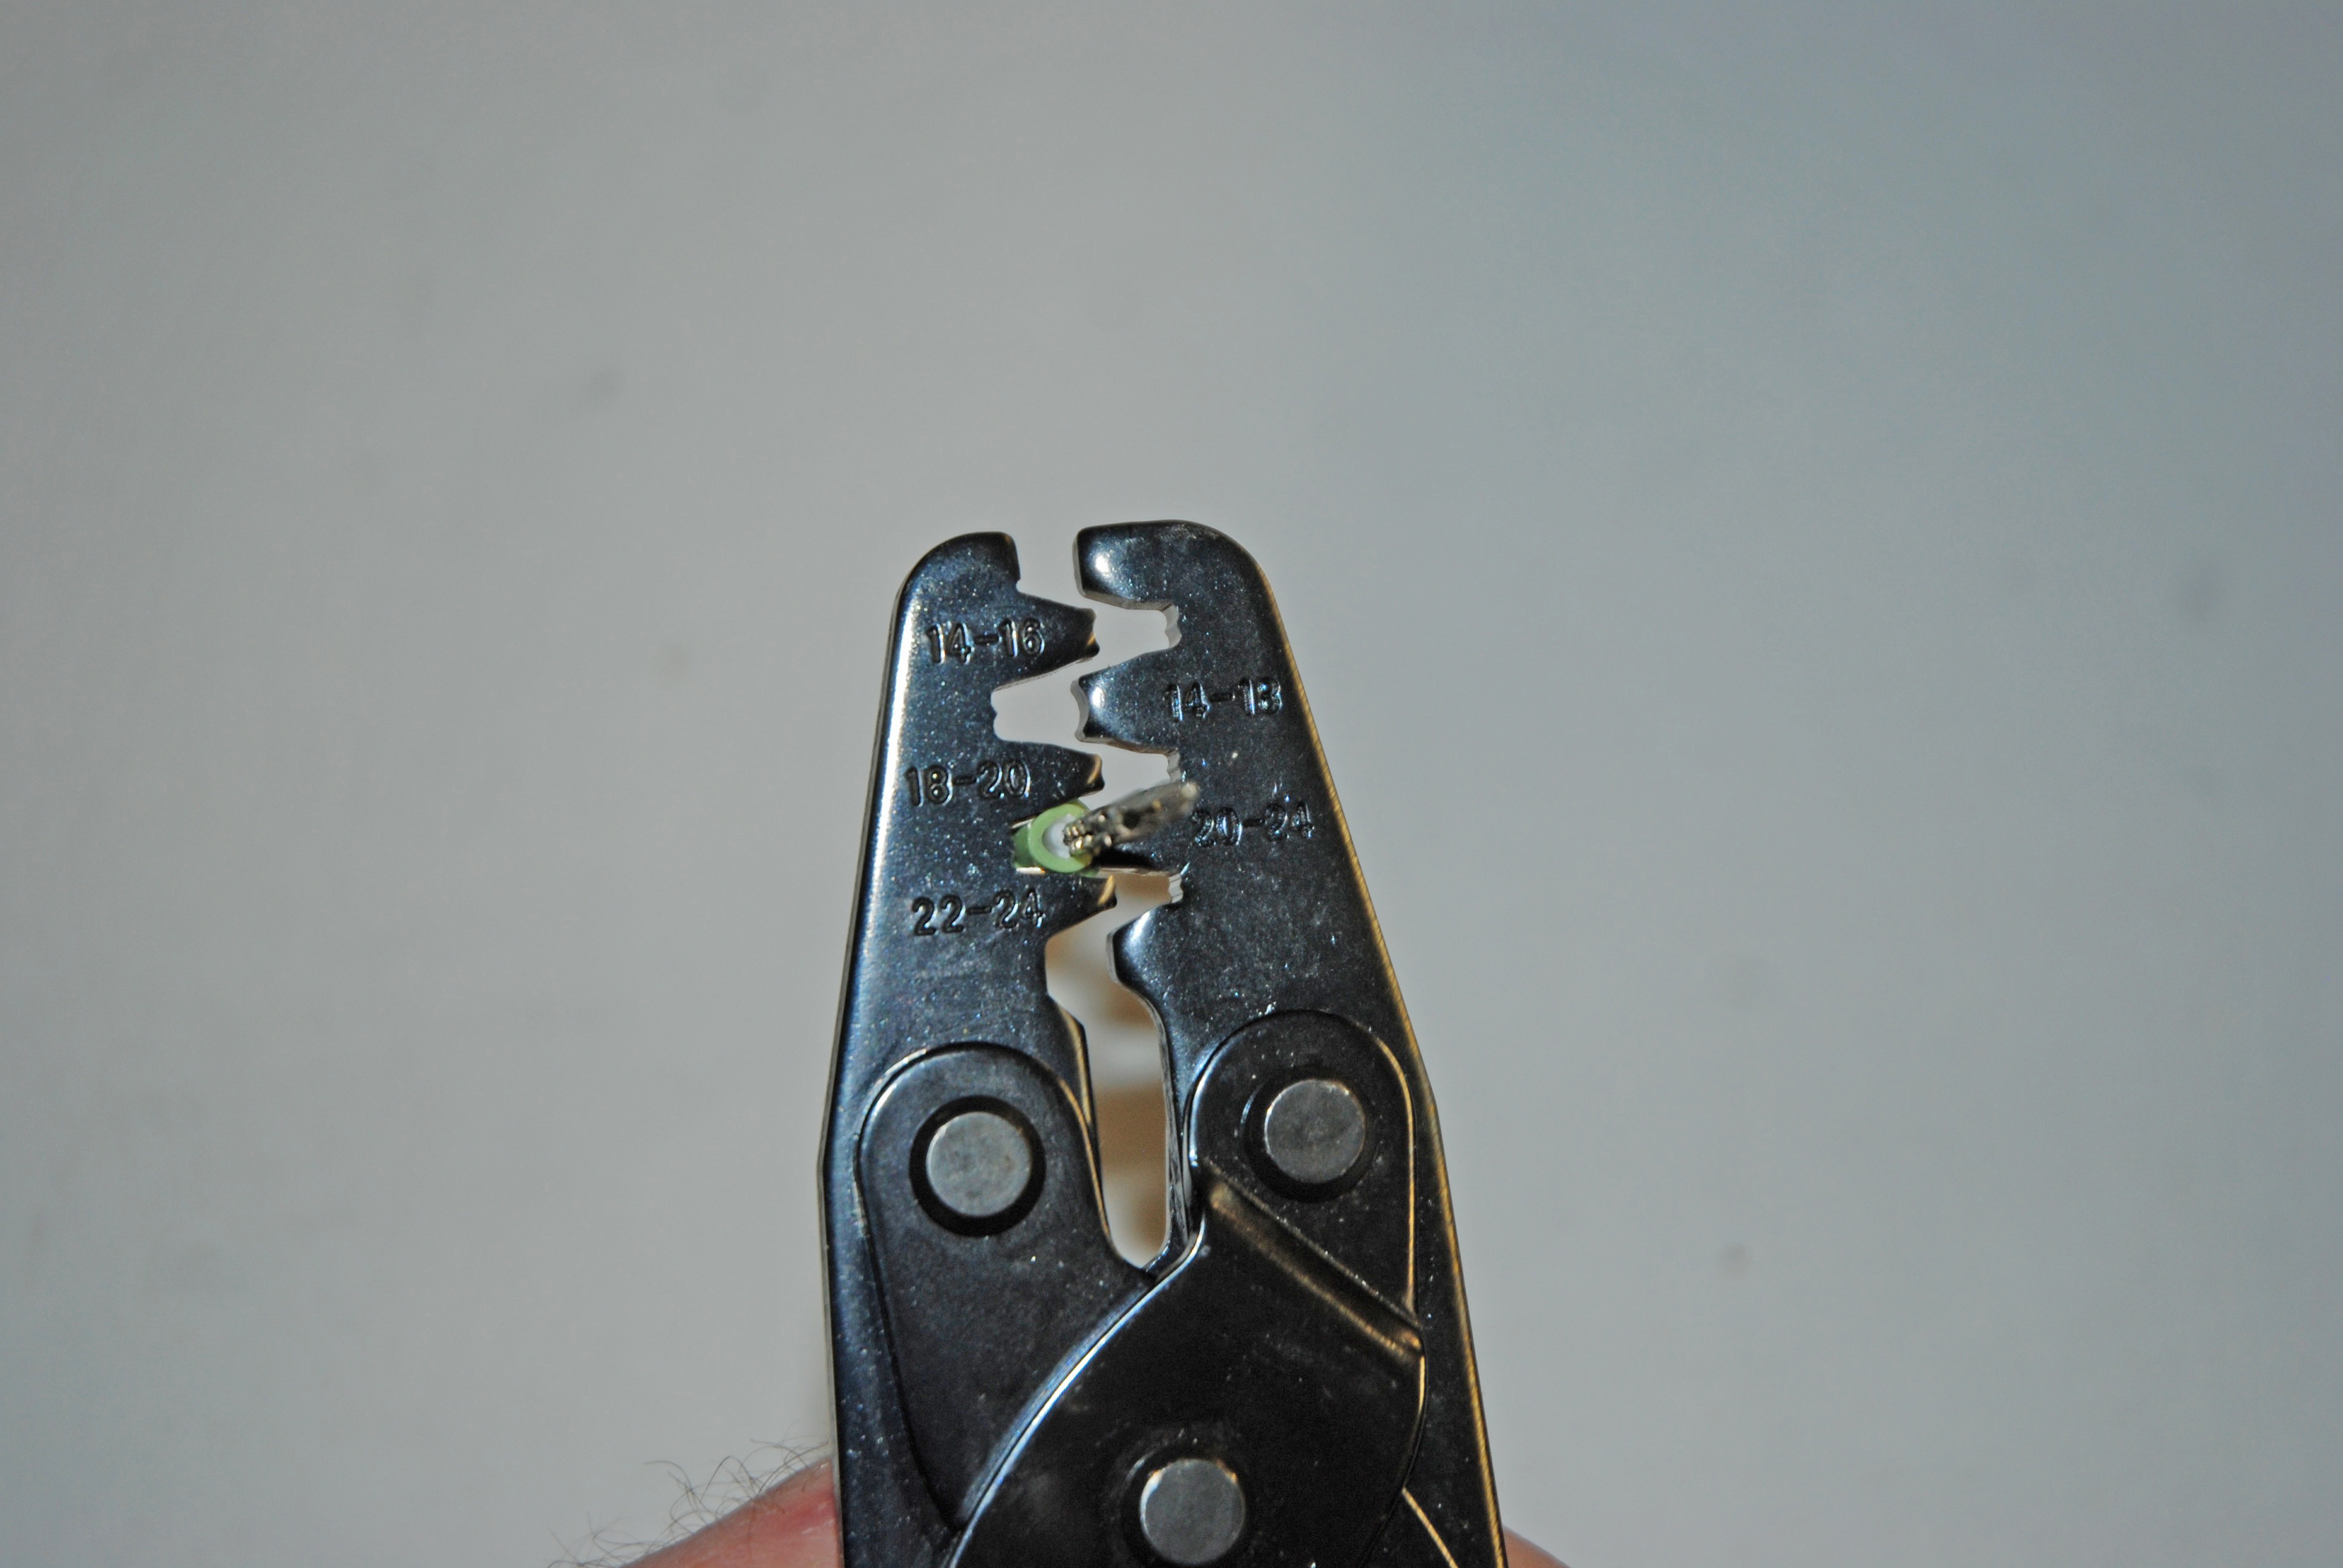
Move the terminal and wire to the right hand side of the pliers anvil. The rounded portion of the terminal should face the rounded section of the anvil. Close the tool lightly, allowing the pliers to bend one insulation tab at a time. Follow through with the second tab, then rotate the terminal so that the first tab is in a position to be crimped. The idea is to alternate each insulation tab until both form an approximate circle. Don’t squash the insulation tabs past a full circle (if that happens, the terminal won’t be waterproof). (Image/Wayne Scraba)
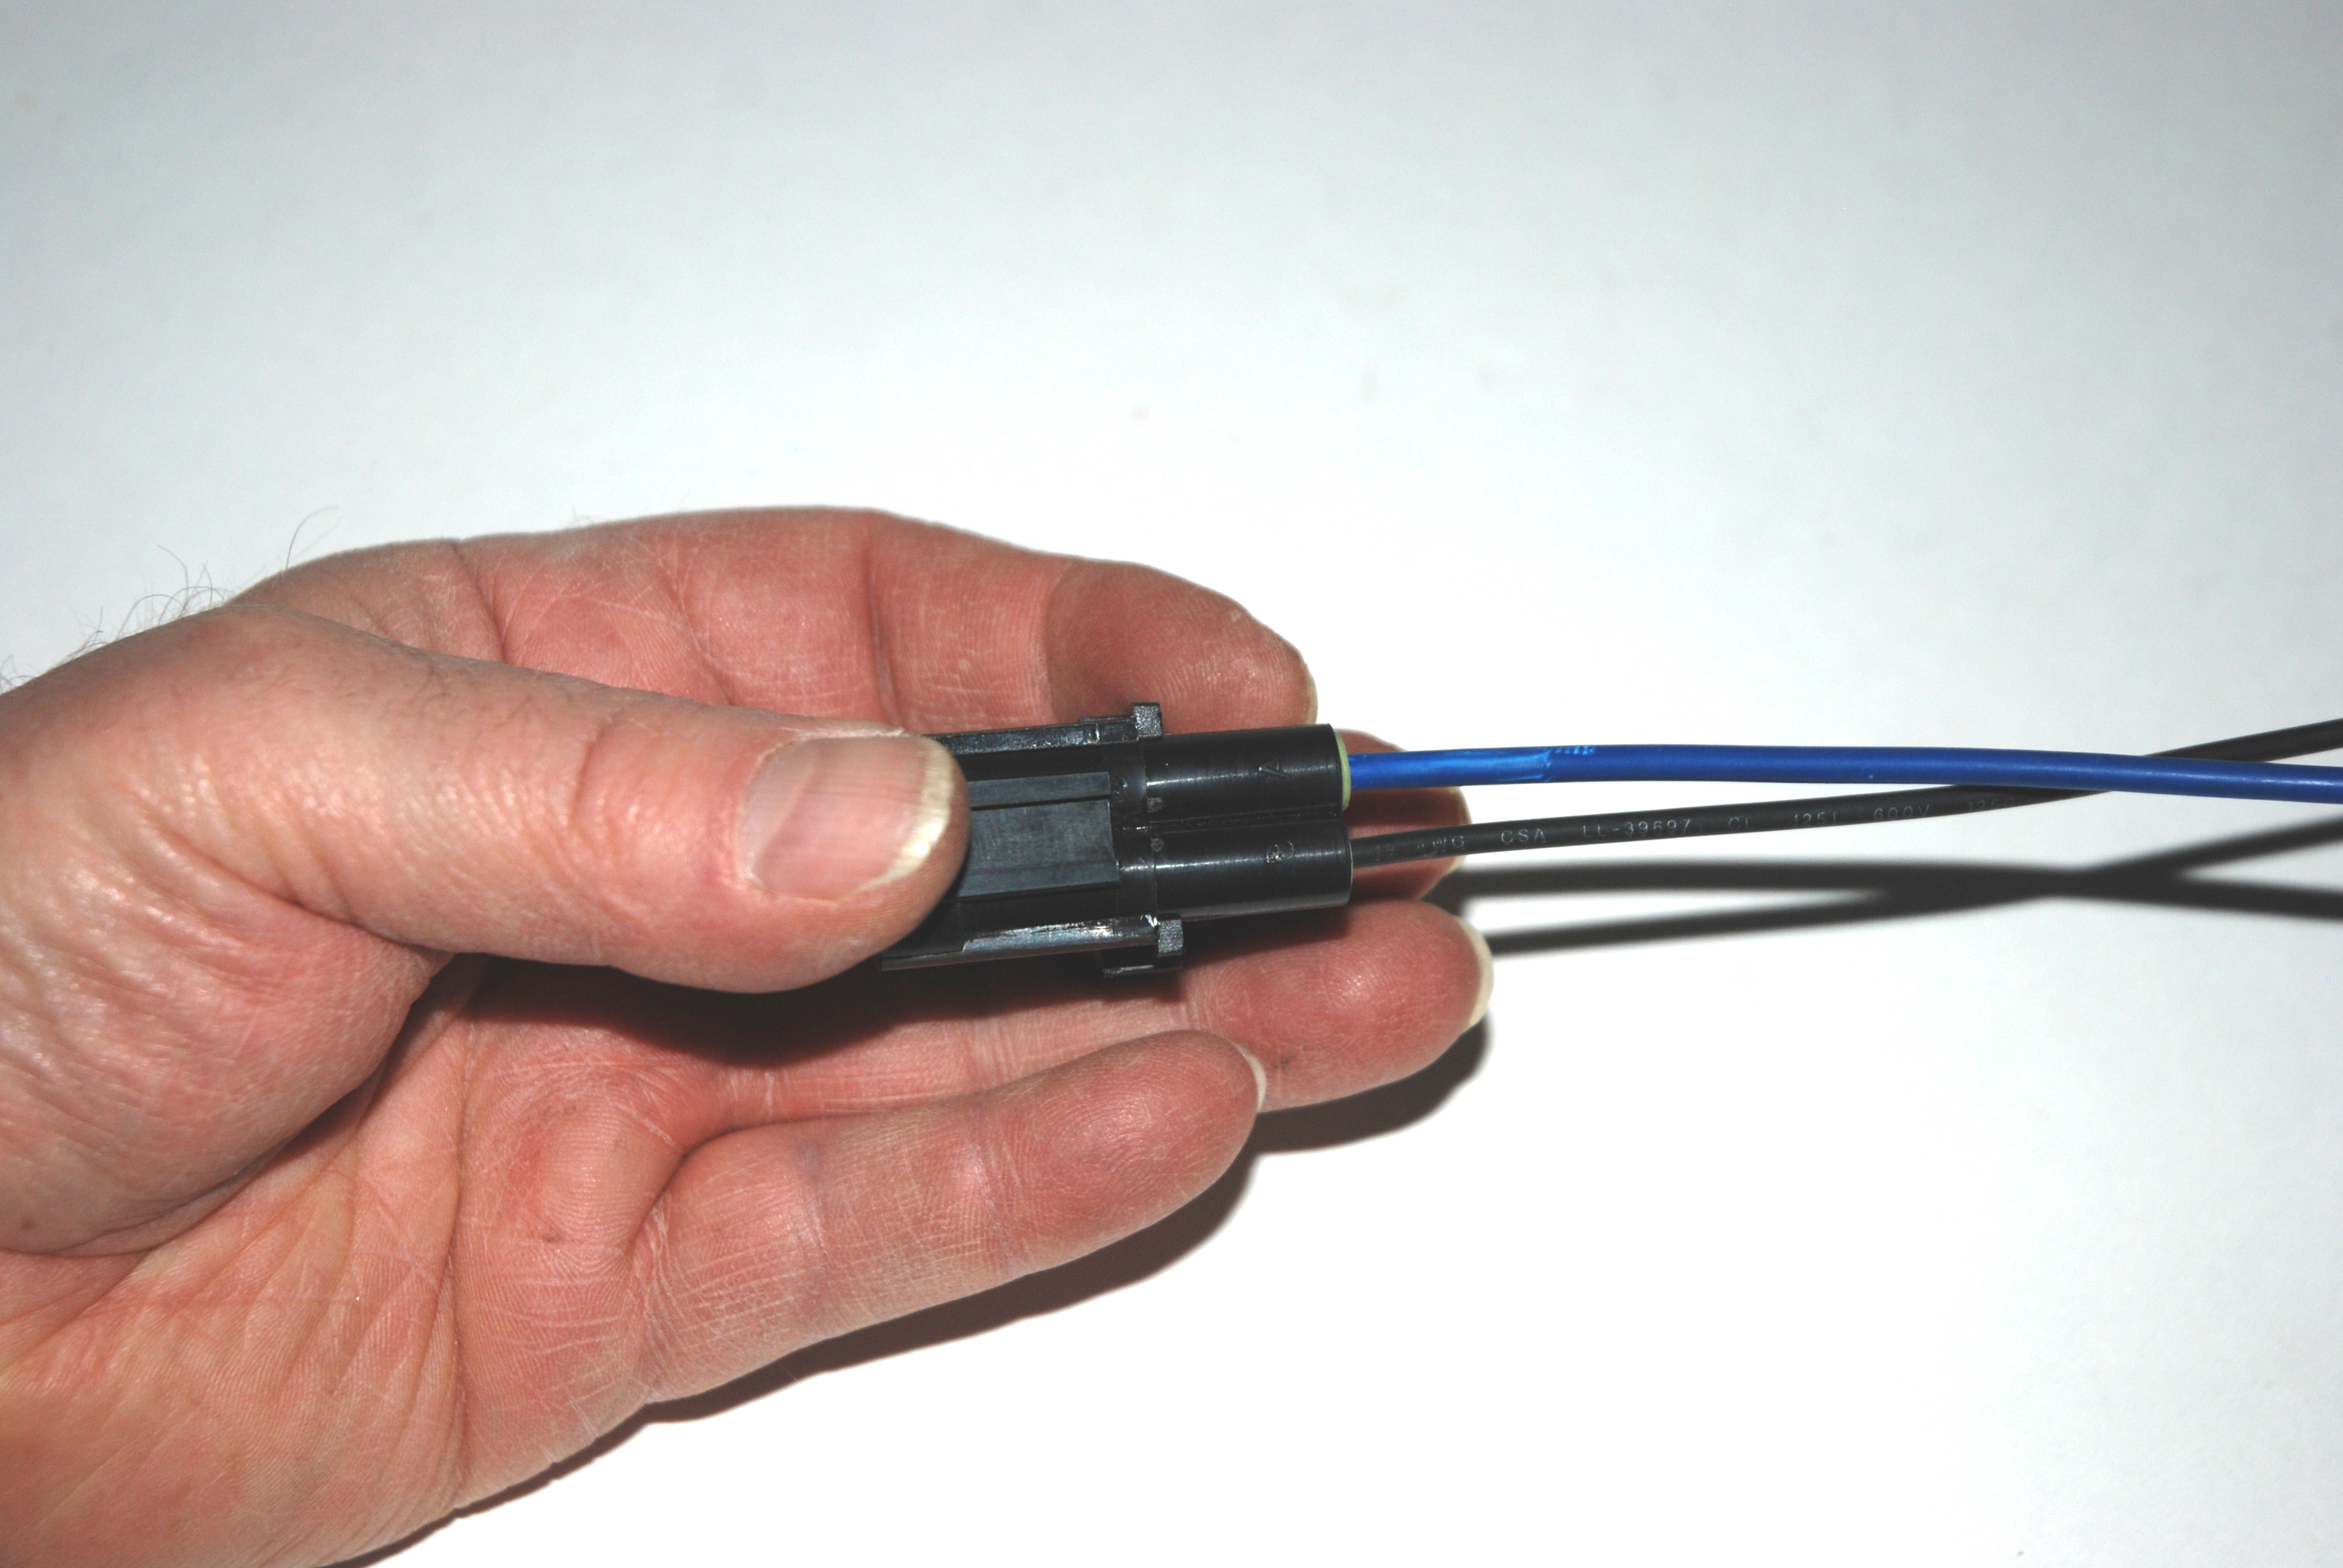
Insert the wire, pin terminal first into the plastic connector (don’t forget—male pin terminals go into male connector bodies). Once you’ve inserted the pin, you should hear a “click.” This means that the locking ears have set properly. You can test the finished product by pulling backward on the wire. Obviously, a properly assembled and locked wire cannot pull back through the plastic connector. Repeat the entire process for the female pin terminals and ends. If you make a mistake, simply go back and work with a fresh pin terminal. They certainly aren’t super-expensive. (Image/Wayne Scraba)
A motor head
[…] There are all sorts of different electrical and electronic connectors available in today’s marketplace. They’re all used for the same thing: Providing cable (or harness) to cable (harness) connections. Some like weatherpacks are common and easy to use. We covered them in a previous article. […]
One other great feature of this connection system is the ability to engage and disengage the terminal interface many times without only a minor degradation in electrical performance. This system was tested after 100 engage/disengage cycles and it still performed to design criteria for voltage drop across the contacts. Not sure anything else out there can do that.