With some exceptions, namely older diesels and Corvettes, most tachometers use electrical pulses from the ignition system to indicate an engine’s rpm.
Though this method delivers an accurate reading, installing a new tach can be confusing because of the different ignition systems used by the OEMs and the aftermarket.
Story Overview
- Wiring an electric tachometer depends on the type of ignition system your engine runs
- Improper tach installation can seriously damage both the tach and the ignition system
- This article has wiring diagrams for hooking up an Auto Meter tach to common OEM and aftermarket ignitions
- Learn how to route wires to avoid damage from tears and heat
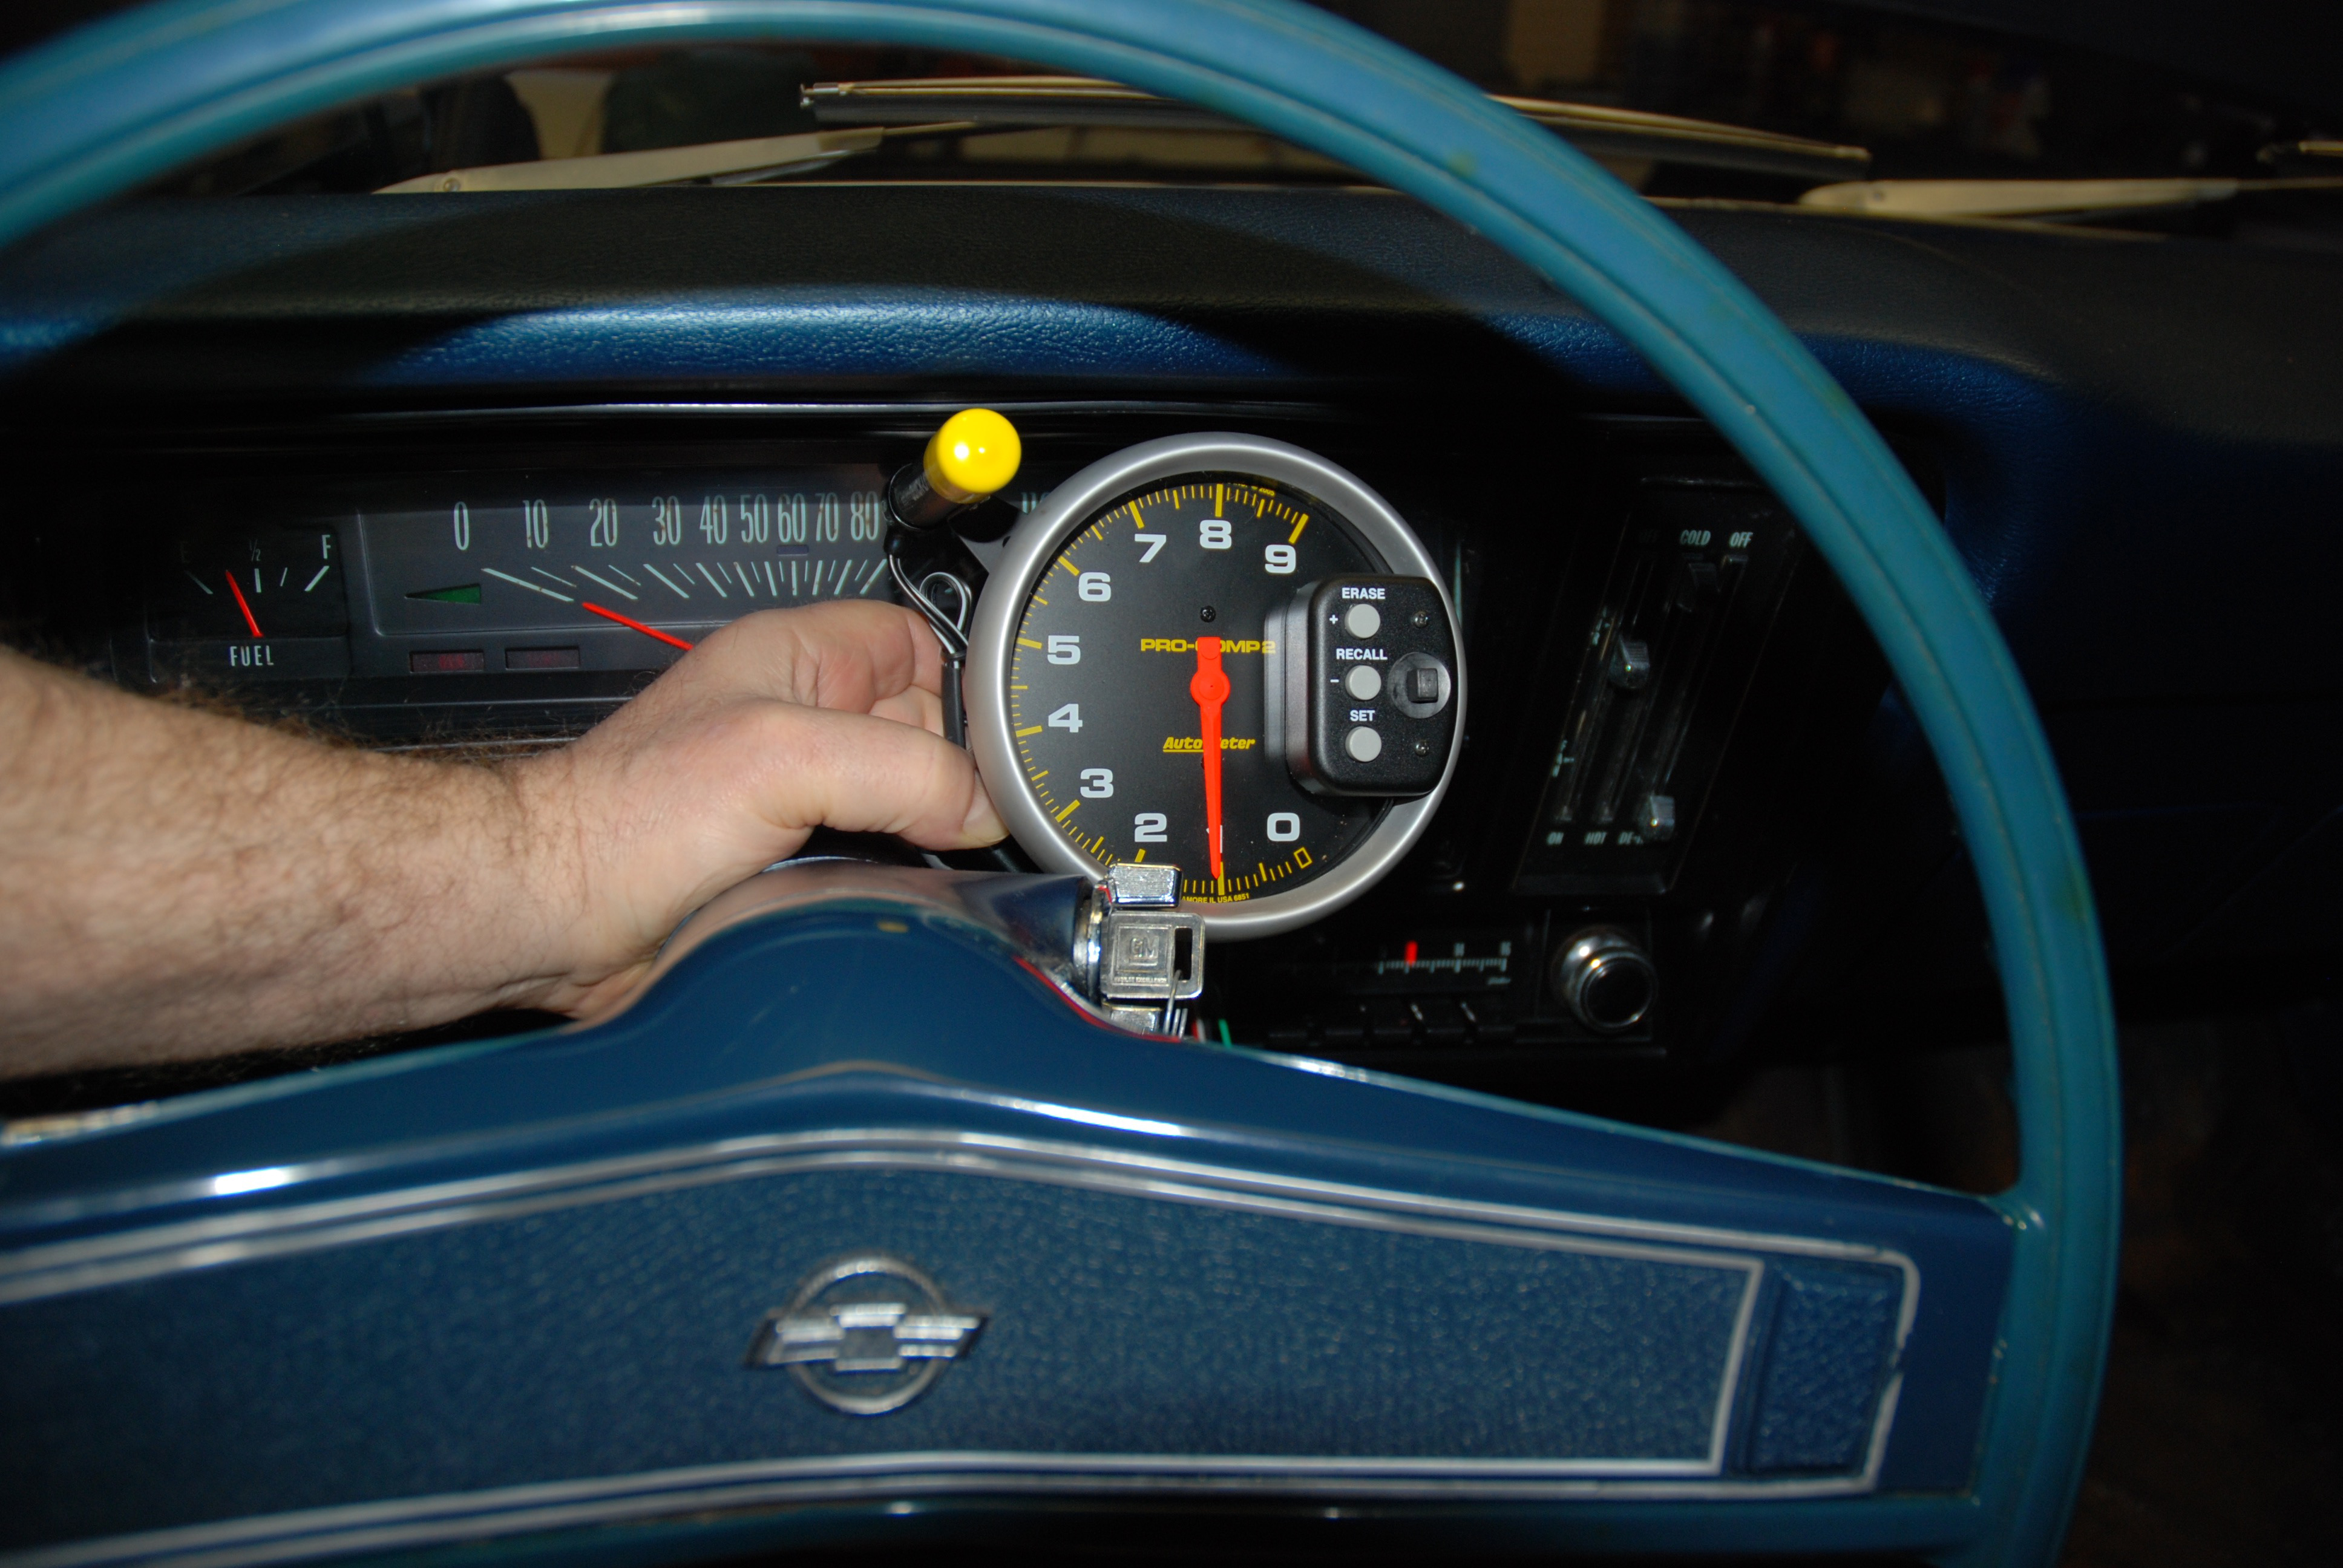
Tachometer installation can be as simple as connecting the tach’s sending wire to the negative side of the ignition coil, while other ignition systems feature a dedicated tach sending circuit.
In either case, installing the tachometer incorrectly can cause significant damage to both the tach and ignition system.
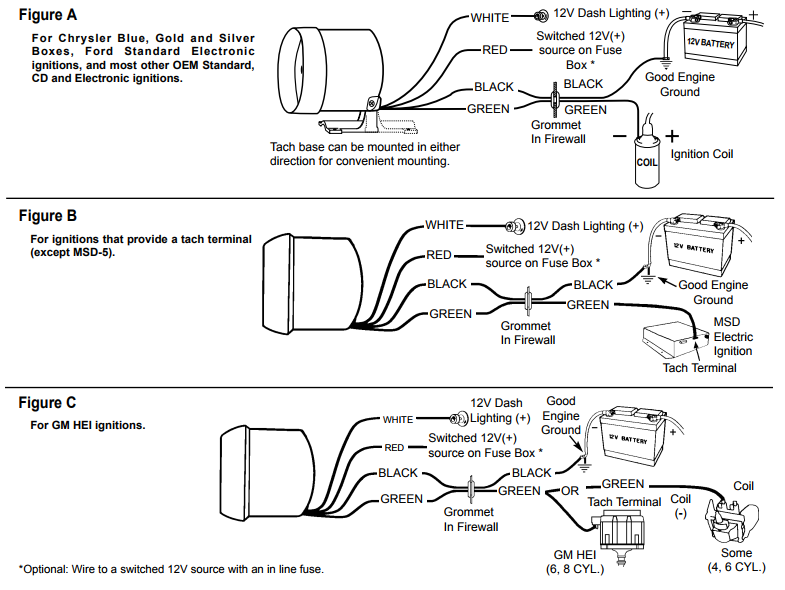
We don’t want that to happen to you, so we looked to the gauge experts at Auto Meter, who created a cheat sheet for tachometer installation.
It includes diagrams for common ignition systems, including those used by General Motors, Ford, and Chrysler plus many aftermarket manufacturers. The tachometers in the diagram use a specific Auto Meter wiring color code, so if you’ve got a different brand of tachometer you should reference its own schematic.
Of course, this cheat sheet only covers the tachometer’s needle movement. Your tachometer will probably have a backlight bulb so you can read it at night, which gets wired into your dashboard’s lighting. This usually involves splicing into another gauge’s lighting wire—but be careful not to exceed the circuit’s current rating. In most cases, the additional current (in amps) from a single bulb is negligible, but it’s important to check anyway to avoid overload.
Auto Meter gave us some other tach-installation tips too:
Tachometer Installation Tips
- Make sure your tach is set up for your engine’s cylinder count. You’ll often see an internal switch for 4-, 6-, or 8-cylinders.
- To avoid cutting or unsheathing the wire, use a rubber grommet when passing them through a firewall or sheetmetal.
- Fans, headers, and other engine hazards can shear or melt your wires—remember that when you route them.
- Don’t connect the tachometer and ignition power leads together. Separate battery leads will prevent excessive voltage drop.
- We recommend soldering wires for this application to ensure a reliable electrical connection.
- If your tach isn’t working, or giving inaccurate/erratic readings, check that you’re using the ignition coil recommended by your ignition system’s manufacturer.
- If your tachometer still isn’t working, it’s time to investigate your electrical grounds.
[See Also: How to Diagnose Electrical Ground Issues]
how about the tach hook up on cars less than 30 years old. ?
Hi LK,
Thanks for your comment. We have a significant database of that information available and would be happy to assist you with any questions that you may have. Please give us a ring toll free at 866-248-6357 to speak with one of our knowledgeable technicians about your application. When it comes to newer vehicles, there’s unfortunately a lot more variation in terms of what’s required due to design differences in engine and ignition controls not only between makes, but also individual models and model year ranges, so it’s difficult to put together a simple one size fits all solution / article.
Kind regards,
Kris Carlson
AutoMeter Products, Inc.
I need an aftermarket tacho set up for my freightliner FL 60 running a 5.9 cummins diesel.
Thank you I need this information.
[…] Download Image More @ http://www.onallcylinders.com […]
the negative port of ignition gives the signal voltage to tachometer so how much ohm the resistance between the negative port and ground?
hi..
cau send me wiring for fix tachometer.I use MITSUBISHI engine 4G63,with microtech LT10-s.
how does the old 60’s era 3 wire ford tachs hook up. I know they are in line with the resistor wire Ford used back then but which color wire goes where?
I have a tachometer that calls for running to a W terminal on the alternator. I don’t have a W terminal on the alternator, do you think I would be okay to run to the negative side of the coil? It is a digital dispaly.
Thank you.
Hi
I have a 3 wire aftermarket tach that has ambiguously worded wiring directions.
It comes with a red “12v switched” and black “ground” which are self explanatory.
My issue is with the green signal wire. The instructions say to attach to negative side of coil with pionts, Pertronix, Duraspark and the tach port/gray wire on an MSD.
However, I am using a Pertronix CDI box (with no tach port) but it does have a gray wire for the tach signal. I am currently using this gray wire spurred into my FiTech EFI and also into my USShift Quick 4 controller. Can I also spur the gray wire into the tachometer. I am pretty sure it’d be OK but wanted to check first as the one wire will be then serving three seperate other items.
Thanks
Good nite
I bought a 5 inch tach with shift lite (7599)
And after we installed it the needle is not reading
Right. The car is – 2007 Nissan tiida (supercharged impul version. 4 cylinder motor (4 separate coil pack)
Can you send a wiring diagram please
I also bought the tach adapter and still can’t get it to work
I am hooking a tach up in my boat tht has seperate coil no promlem there but Also want to put one seperate in my 99 linc navagator which is basically a ford i heard it cant b done is this true if not than does the wiring go im pretty good w auto electric thanks mark
Hey Mark, since your Navigator was made after 1996, it uses an OBD protocol–and there are some companies that make a module that plugs into the OBD port and can interpret the signal to drive a tachometer. Auto Meter’s CAN Bridge comes to mind–click here to learn more about it.
I need to know what the number relate to colored wires.only 3posts on back and what position should the switches should be in for 8cylinder 455
can you show me the wiring for a tach (Original equip.) in a 1972 buick Skylark?
Can my 2006 f150 with a 5.4 triton V8 use the auto gage tachometer? It is fuel injected and I don’t know if I red some sort of adapter.
I have a 1971 mustang mach1 that I have installed a CRT performance ignition on my 351 cleveland engine. I bought a iEquus tach I want to use. I need to know how and where to correctly connect the tach to the CRT performance ignition so I won’t damage or destroy anything. Thank you
I want to install a “Type R” 2 inch tacho in my 1930 Model A Ford. The Model A is 6 volt, positive ground. I can use a solid state voltage converter to get the 12 volts required for the tacho, but the signal wire off the coil (to distributor) will be positive not neg. Will this work ?
I’ve got an auto meter with shift light but I’m having trouble finding the pulse wire ony 2006 vw new beetle with the 2.5?
A lot of new vehicles don’t have a traditional tach signal wire nowadays, and instead rely on a data signal from the ECU–which itself is often interpreted from the crank position sensor. I know Autometer offers a Distributorless Ignition Tachometer Adapter that takes a signal from a coil wire and translates it into a tach signal–perhaps that’ll work. Before you buy though, I’d click here to reach out to the tech folks at Summit Racing, they’d be able to offer better details.