 In our first installment of our ’68 Mustang rejuvenation project, we prepped our Blueprint 408 Windsor to be dropped in and replace the tired original 289. Since then, we did go ahead drop it in, but you’ll have to wait until the next installment to see that process. Our main point in dropping in the 408 right now is to set the stage for our transmission swap from a C-4 auto to T5 5-speed.
Now, for those that read the first article, you might remember that this particular ’68 Mustang has a lot of good stories and long history with one person. The author’s mother has owned it since 1971 when she was 16-years-old, and she has driven it for most of those 45 years. A little quick math will tell you that means she’ll be 62 years old this year- a point in time when most people are happily switching to automatics rather than stepping on clutches and rowing gears. So, why on earth are going the opposite way?
Let me tell you a little story.
A couple of years ago, my mom and her brother visited a friend up in the Great Smokey Mountains. While there, the friend tossed her the keys to his 2003 Saleen Mustang convertible to use while she was up there. Now, all of her previous experience with stick shift cars had been with stiff and jerky manual linkage in 1960s and 70s transmissions with imprecise shifters that felt like stirring a stick through rocks. So she was leery at first — this was high up in the mountains near the Tail of the Dragon after all! However, she liked the look of the clean, dark blue Saleen, so she decided to give it a try. And that’s when she discovered the world of difference a modern transmission equipped with a hydraulic throwout bearing makes. The light pedal effort with smooth engagement, paired with a firm and precise short-throw shifter, was wildly different than the leg-tiring clutches and log-truck-long throws she had been used to. My mom drove that Saleen for week, and almost talked the owner into selling it to her.
She still loves a fun car, so we decided to take the plunge and go for manual trans swap in the ’68. Needless to say, for our manual trans swap we’re going with a quality hydraulic throwout bearing. Paired with a clutch designed to have stock pedal effort (in reference to a late model Mustang), we should have a winning setup that will feel like that Saleen, but have 408 Windsor grunt to play with, and be wrapped in sexy ’68 Mustang steel.
There are a few transmission options on the market when it comes to overdrive manual trans swaps in classic Mustangs, but our favorite for street and mild autocross and track use is the good ‘ol Tremec T5. That’s not only because they enjoy a long history of being reliable and lasting a nearly forever when properly cared for, but just as importantly, they actually fit. T5s are fairly compact and round-cased transmissions, so they will tuck right up into any Mustang from 1964 ½ to 1973 with no cutting or permanent modification required. That’s not the case with the square cased TKO 500 and 600 — both of which will most certainly required some cutting or notching, or creative (and not recommended) driveline angle alteration. Forget about the T56 or other 6-speeds; you’ll be cutting and raising the tunnel to accommodate those.
The T5 swap has been around since at least the 1990s, so there are several companies that offer kits, with some wide variation in quality and components. Another problem, as anyone who has looked into exactly what it takes to swap a modern overdrive transmission into a classic Mustang will quickly discover, is that there is no such thing as a truly all-inclusive, everything-you-need package. Sure, there are a couple that get somewhat close and provide maybe eighty-ish percent of the necessary parts, but that last 20 percent or so can be a real pain to source because those small parts will come from various companies. That’s where Summit Racing saw an opportunity to step up and provide something unique. Thanks to their amazingly expansive catalog, they carry all of the brands required to put together a truly all-inclusive kit — so that’s exactly what they did.
Starting with an American Powertrain T5 swap kit as the basis, and working with expert Mustang technicians at Mustangs Etc in Van Nuys, CA, the Summit Racing package are being trial fit to ensure as easy and straightforward of an install as possible. The first available kits will be for small block powered (289, 302, 351W) 1967-1968 Mustang and Cougar, with 1964 ½-1966 and 1969-1970 following soon after. If there is significant demand, big-block kits may come later.
We should be clear — these kits aren’t intended for those that like to piecemeal things together, junkyard hop, or eBay and Craigslist browse. These kits are intended for those who want a single part number kit with all brand new, brand name parts.
Could you piece the same kit together for less?
Actually, no, not likely. You could go straight to the manufacturers to buy the same parts, but thanks to Summit’s size and buying power, they can typically sell parts for a bit less than elsewhere. Plus, where else are you going to get free shipping on all this stuff?
On top of all of that, everything in these kits is 100-percent bolt-in, meaning you could swap back to stock if you ever wanted to. That’s a bonus for our ’68 test car, because if a few years from now my mom is still enjoying her Mustang, but shifting that clutch is starting to become a problem, it can all be pulled out to put the C-4 back in it. We kept all the parts, just in case.
Scroll through the slideshow below to see how our T5 installation went.
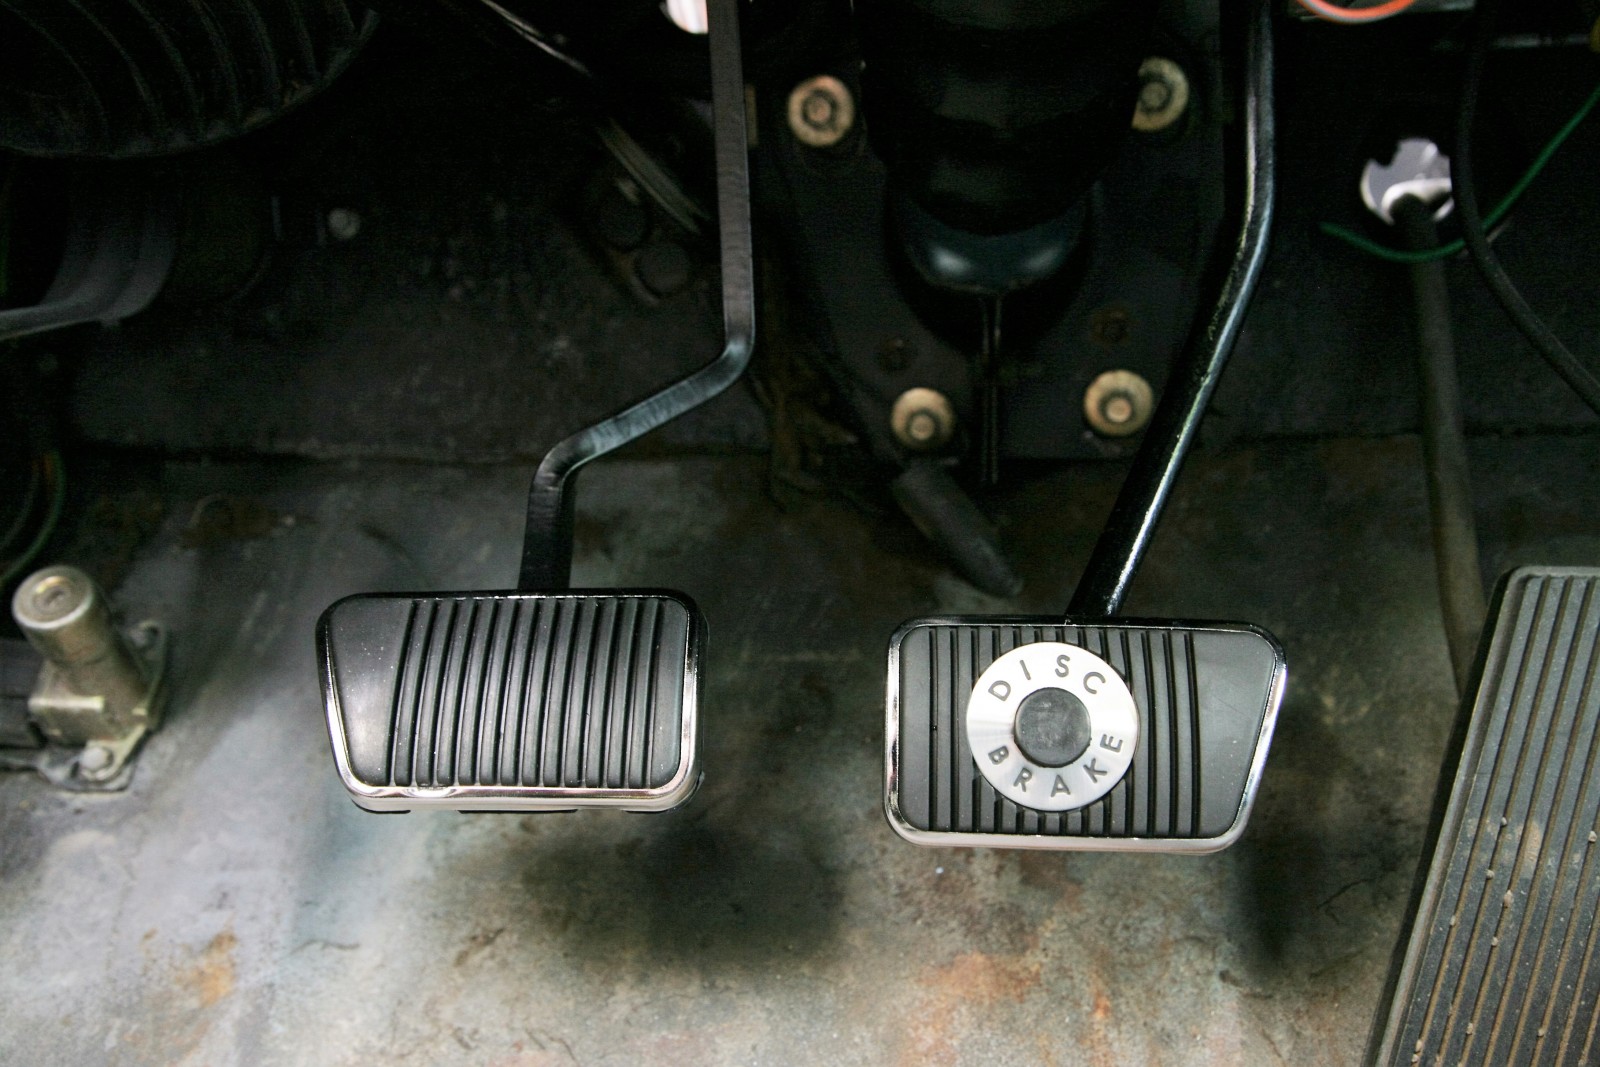
Here’s one of the first unique parts about these Summit Racing kits; they include all the parts necessary to swap from auto to manual pedal assembly, like a Scott Drake clutch pedal. As for the brake, you can retain your original automatic pedal and just trim the pedal pad to manual size using the new manual pedal rubber pad as a template (the pedals are otherwise identical, and the trimming does not affect structural integrity), or pick up on OEM original like the reconditioned one you see here from Mustangs Etc in Van Nuys, CA. We say go with the trimming; it’s easy and lets you use the parts you have.
As we mentioned, Summit wants this to be a premium kit that creates the best driving experience, so rather than a standard bushing set, the Scott Drake roller bearing kit is included.
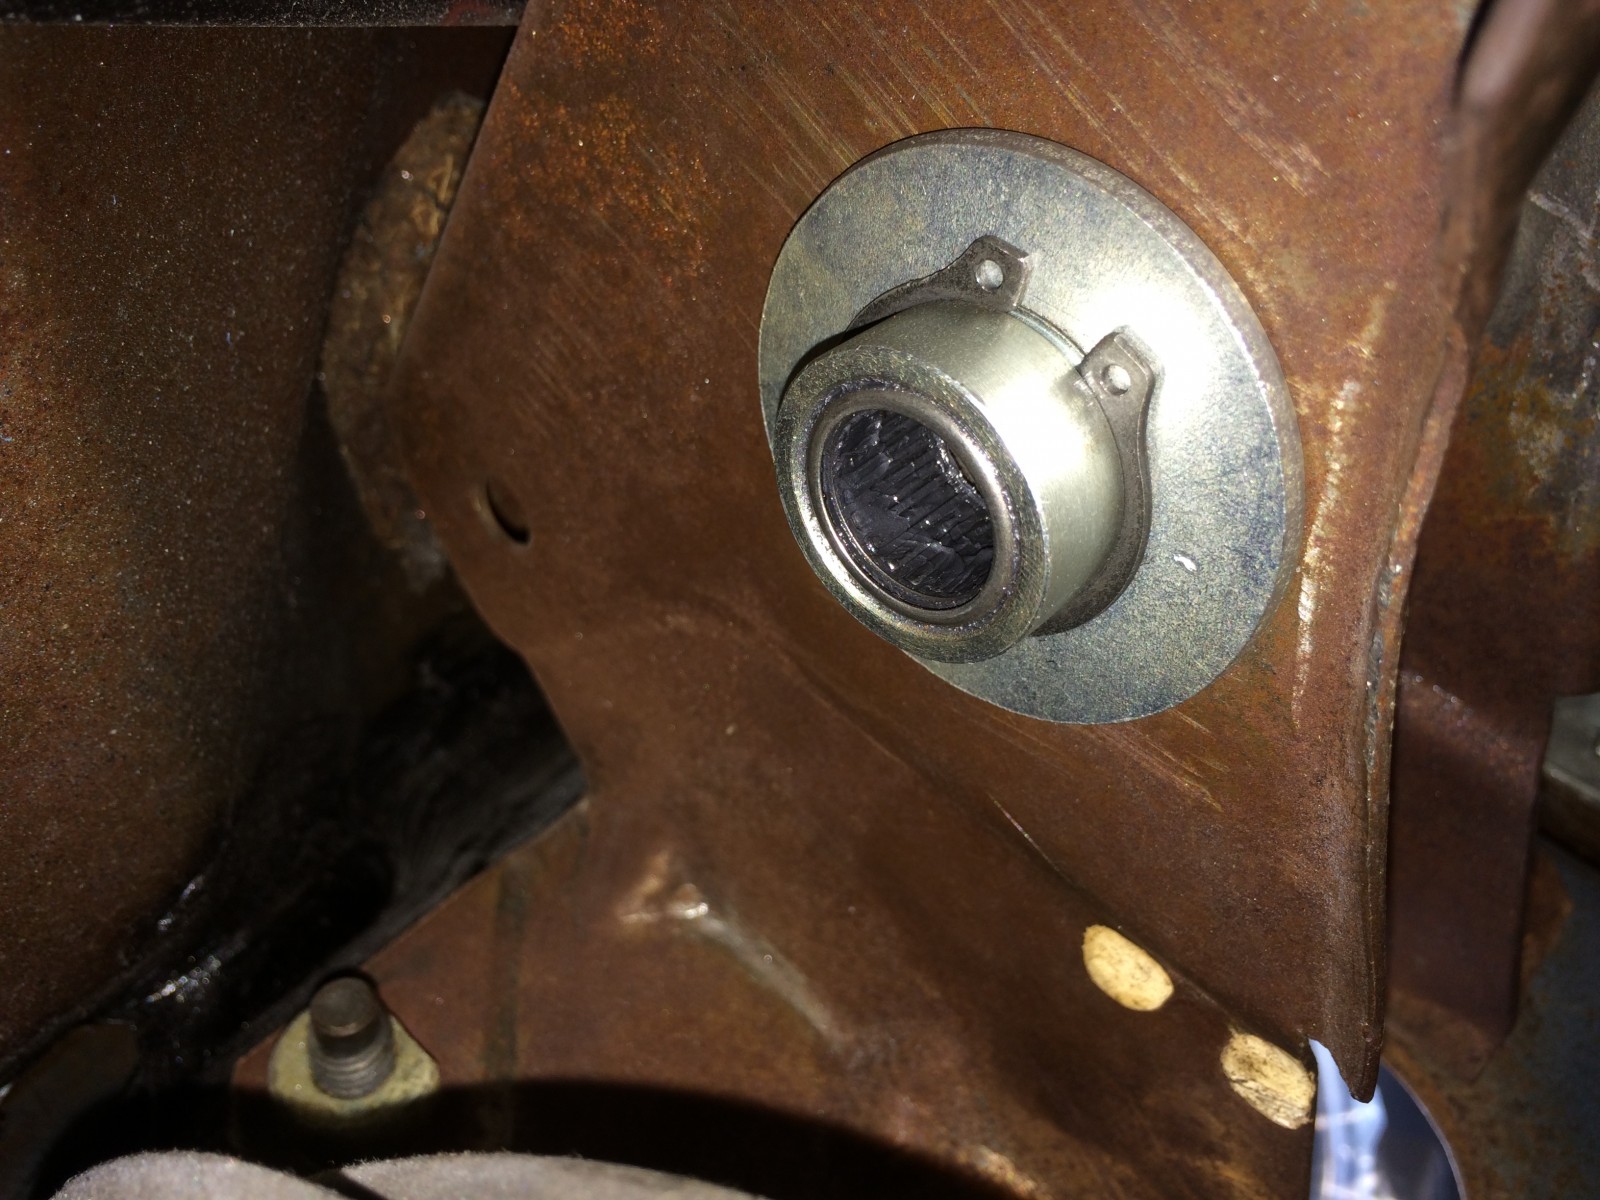
Using high-quality needle bearings for the pedal shaft to ride on greatly reduces friction and will create a much smoother and quicker responding pedal with decreased effort. These bushings will also easily stand up to the increased load the clutch pedal will create for many years. There’s really no reason to not do this upgrade.
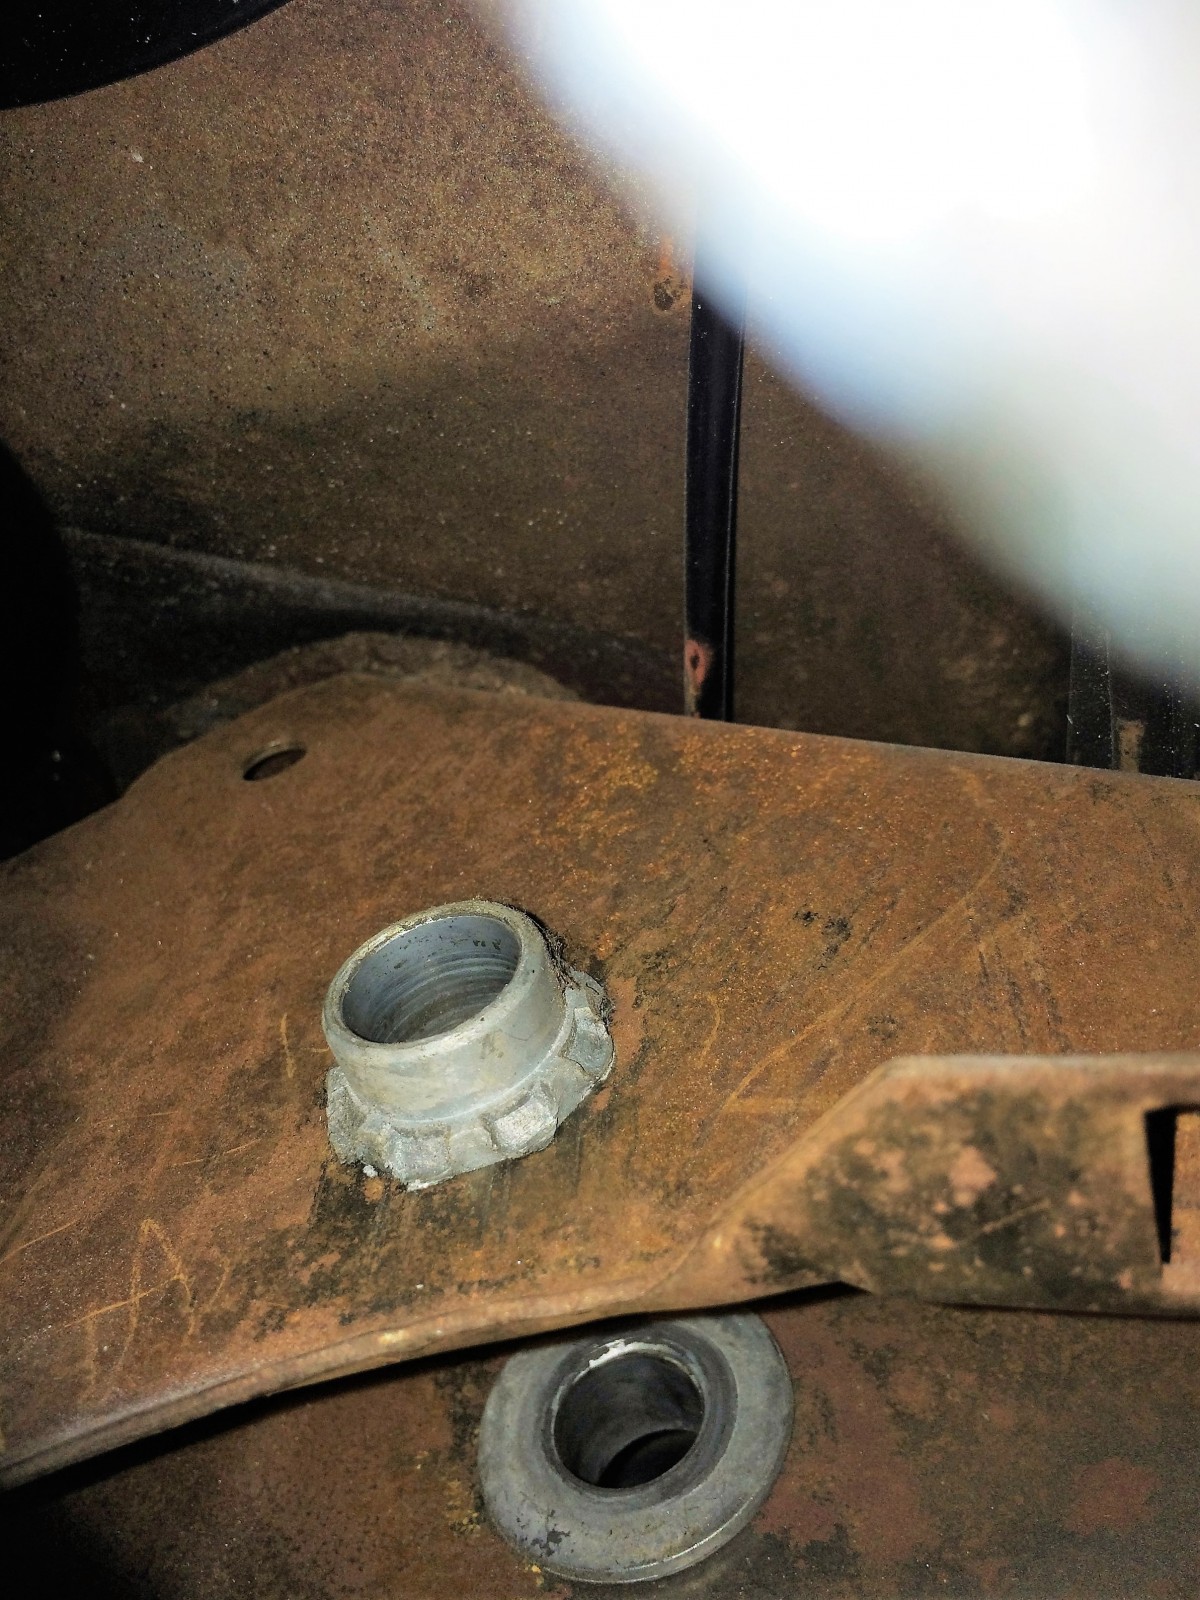
On well cared for automatic cars, it’s not uncommon for the original cast aluminum pedal bushings to be in near perfect condition, like our high-mileage examples. They just don’t see that much movement or load. On the flip side, the bushings in manual trans cars are often in very poor shape from the extra movement and loads of the clutch pedal. To remove it, we have to destroy it, unfortunately. It’s a tight space, but we find a hammer and chisel will take care of it. Just be careful to not damage the brace.
TECH NOTE: Manual brake cars use this lower mounting point, but original ’67-’68 power brake cars have a higher mount point- except for some early ’67 cars which still use the earlier ’64.5-’66 style bracket which does not differentiate between manual and power mounting locations. For more details on variations between years and what fits what, we recommend visiting; www.MustangSteve.com/fyi_brakepedals/msFAQbrakepedals.html.
The roller bearings are tight fit, so once the stock bushing is removed, it may be necessary to clean up the mounting hole a bit. Ours had a couple of small burs, but otherwise slid right in. The C-clip will retain it.
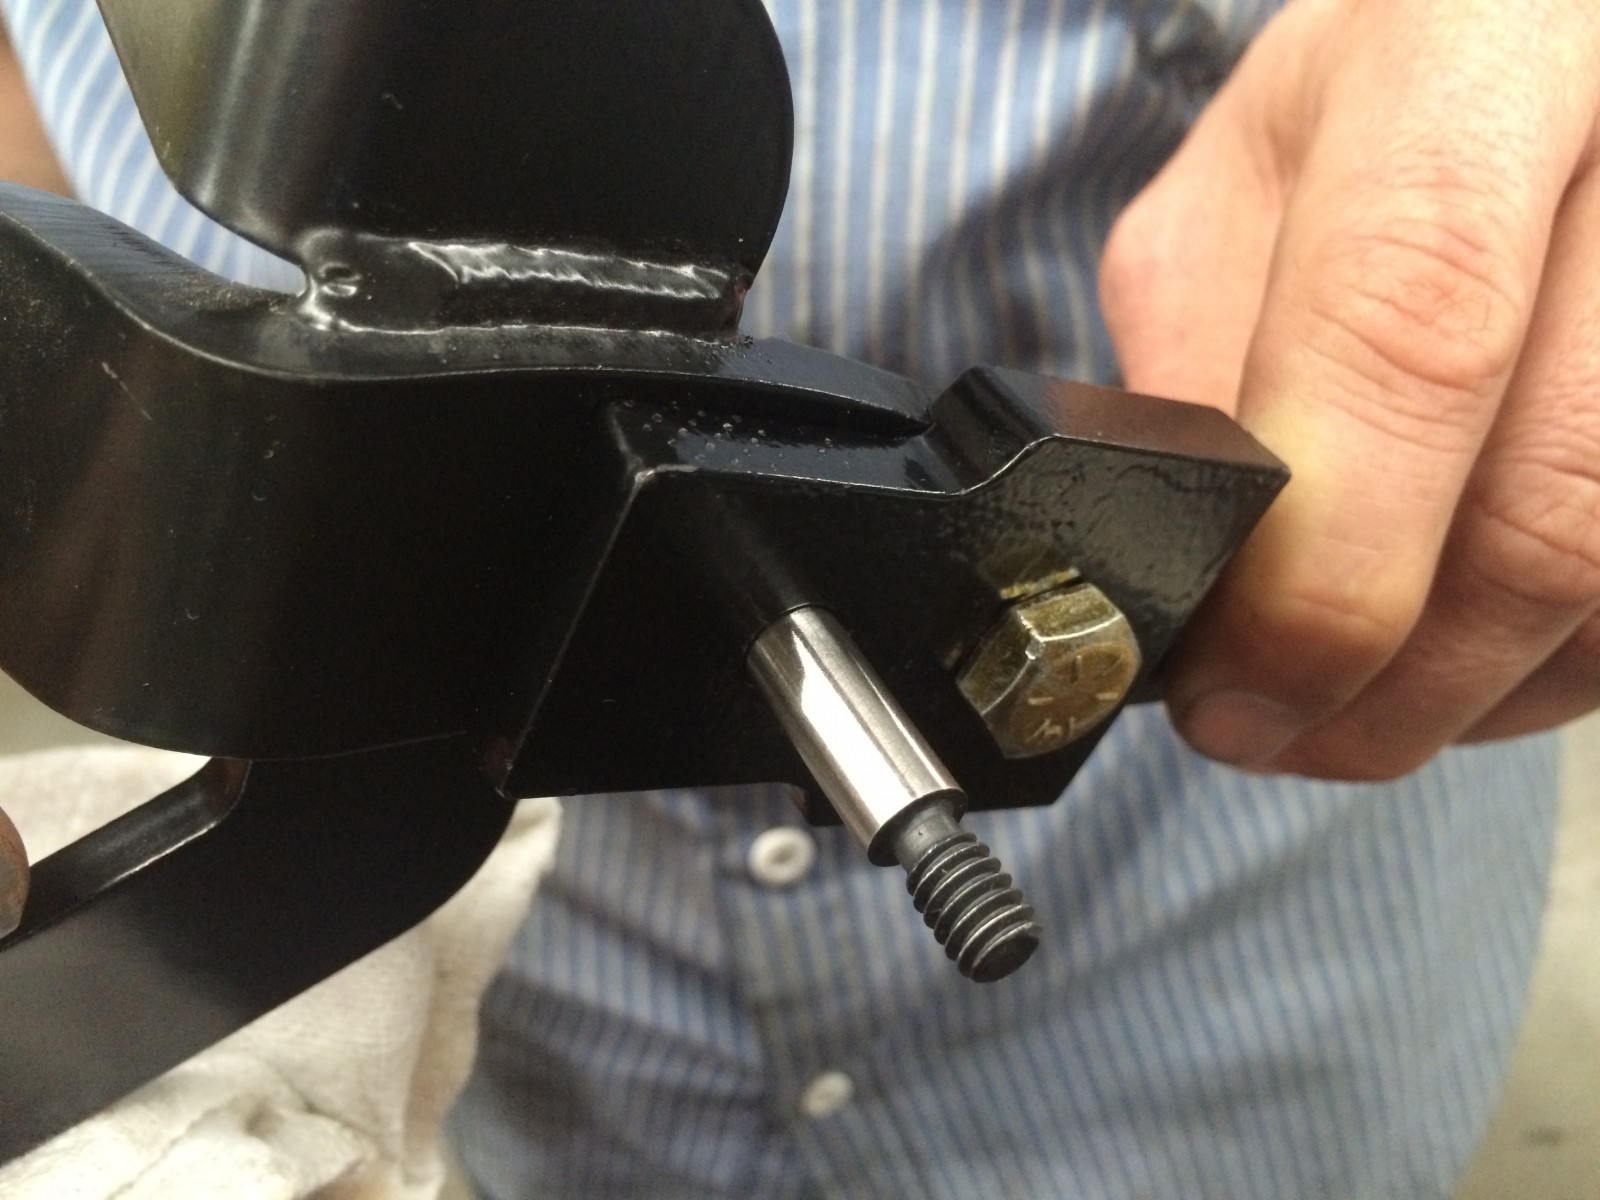
Since it’s very tight under the dash, it’s a good idea to bench prep the pedals before installing them. For our hydraulic clutch we need to mount a rod end included in the American Powertrain hydraulic bearing kit. The lower mounting hole on our Scott Drake pedal required a little opening up for this.
This smooth shoulder on the bolt will provide the surface for the rod end that will be starting point of the linkage that the clutch master cylinder will thread into.
Here’s the assembled clutch pedal ready to go under the dash on the new roller bearing shafts.
Regardless of the original transmission, all ’67-’68 Mustangs have circular spot on the firewall below the brake master cylinder for clutch linkage. On automatic cars like ours, the center needs to be tapped out. Be careful not to deform the firewall.
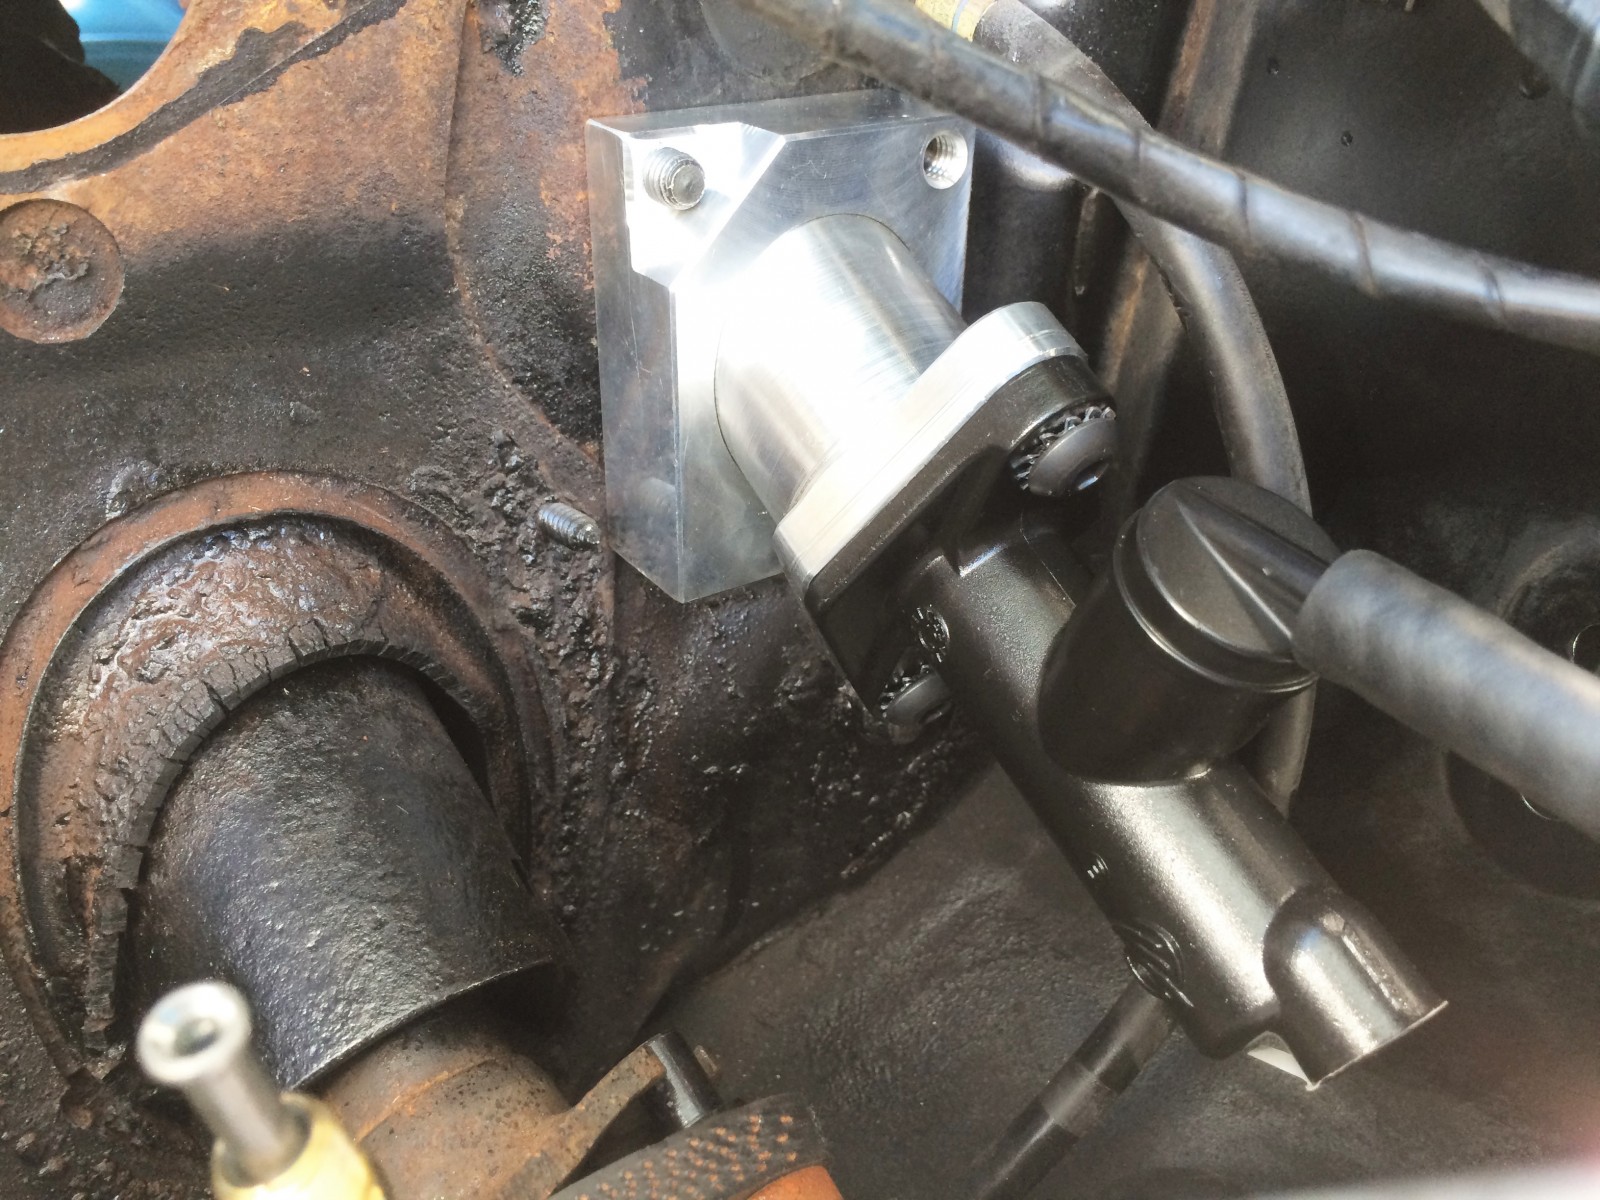
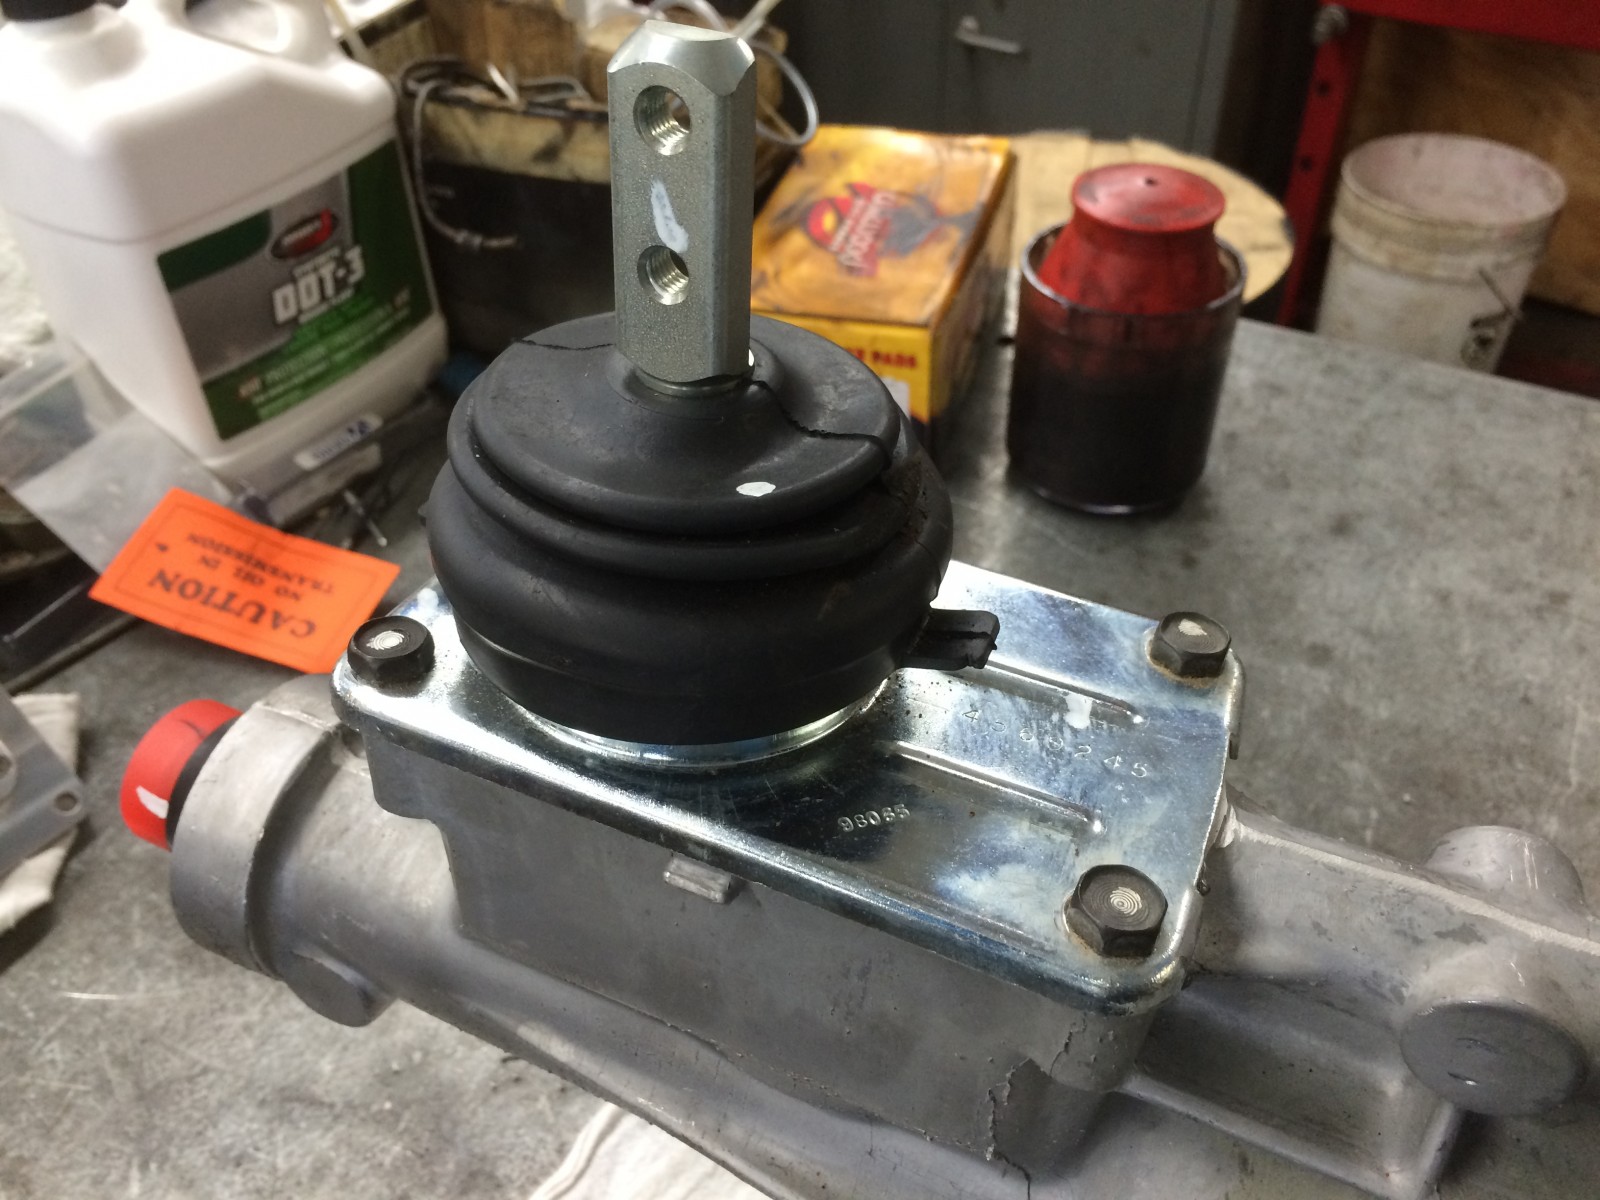
However, rather than linkage in that spot, we’re mounting a Wilwood clutch master cylinder on this very cool billet aluminum adapter from American Powertrain. The adapter is designed to position the master in such a way to mimic the angle of the rod for the factory linkage. Doing this maintains correct geometry with the pedal and eliminates the possibility of side loading the piston in the master cylinder. The adapter uses a backing plate that sandwiches the firewall for increased strength, and it makes a perfect template for marking the holes to be drilled.
Here’s the view from under the dash with the master cylinder installed. The backing plate/template will prevent the firewall from flexing.
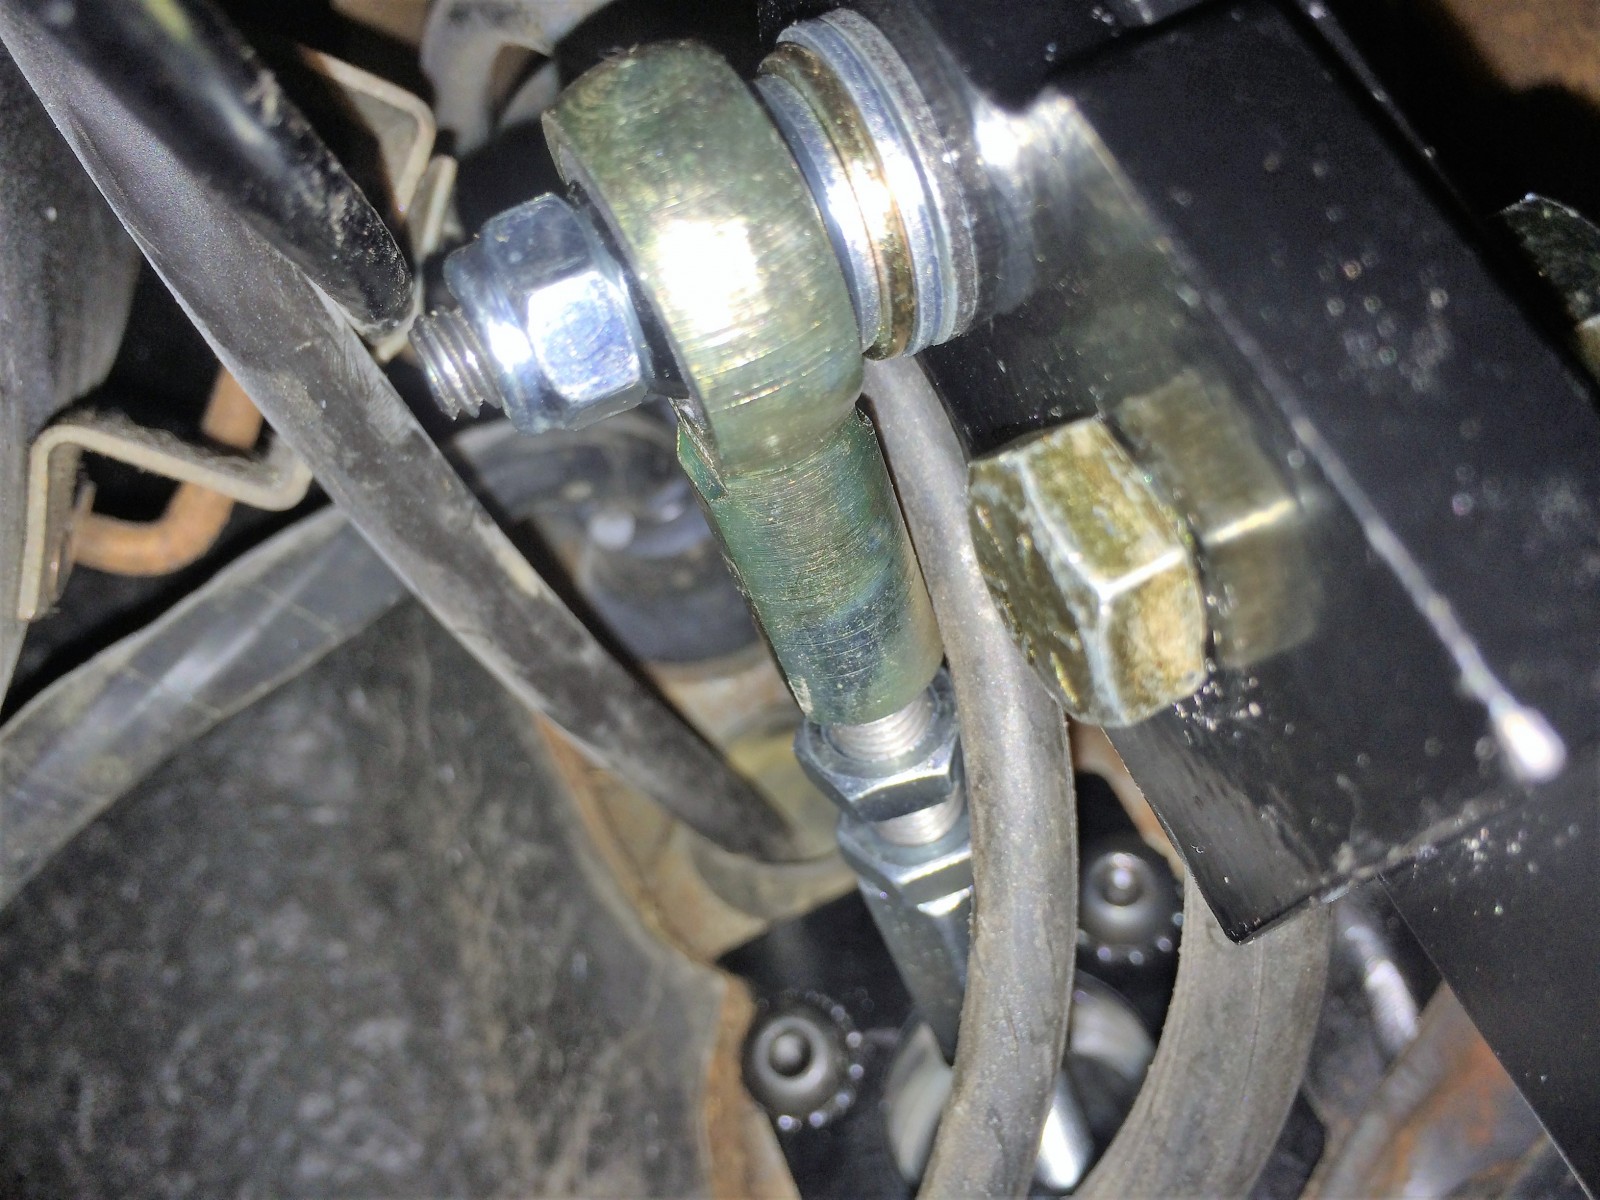
With the pedals installed, the rod end on the clutch pedal can be attached to master cylinder rod. The pedal height can also be adjusted here via the linkage. This is also where we’ll set the pedal stop with the jam nuts to ensure that the bearing is not overstroked once we have everything installed.
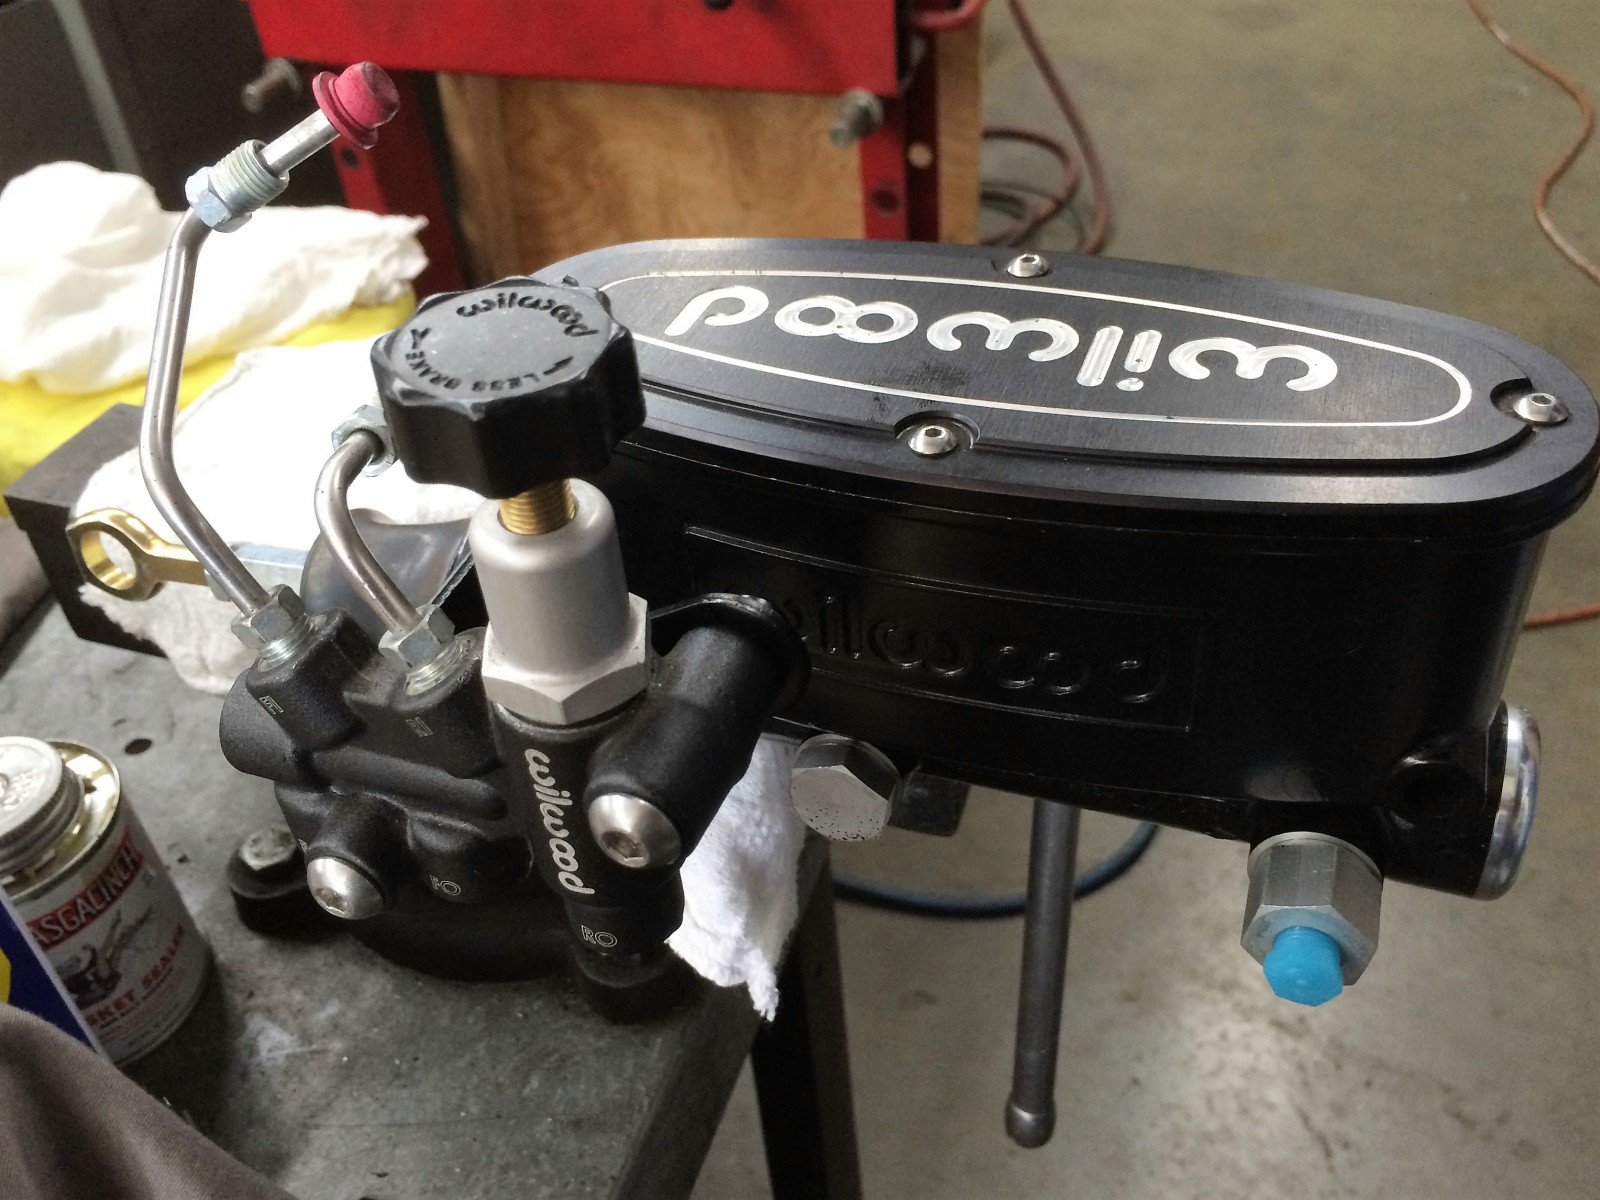
If you have stock brake master cylinder and brake lines, there should not be any clearance issues with the clutch master cylinder. However, if you have a custom brake kit, there could be some changes necessary. For us, our Wilwood proportioning valve needed to be relocated to the other side of the brake master cylinder.
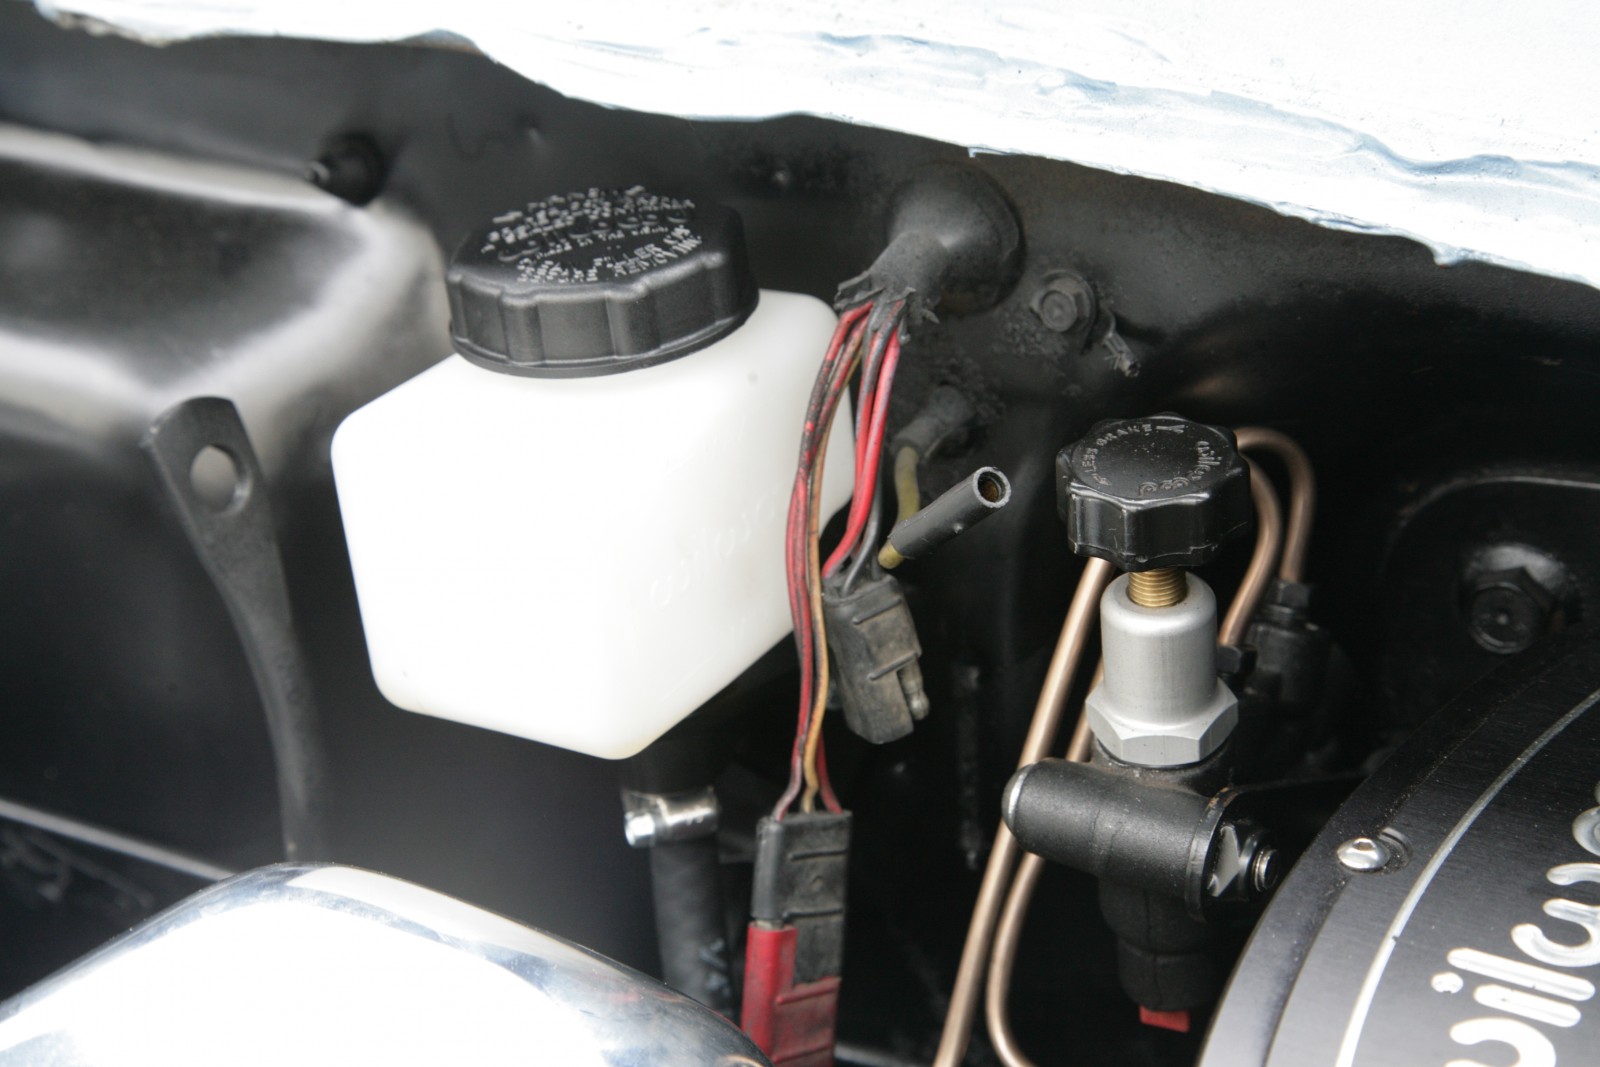
The Wilwood clutch master cylinder uses a remote reservoir, so it needs to mounted to a convenient place on the firewall. Just to the left of the master cylinder should be ideal for most cars and provide easy filling. While it needs to be elevated above the master cylinder and bearing for bleeding purposes, after it’s fully bled it can be mounted lower.
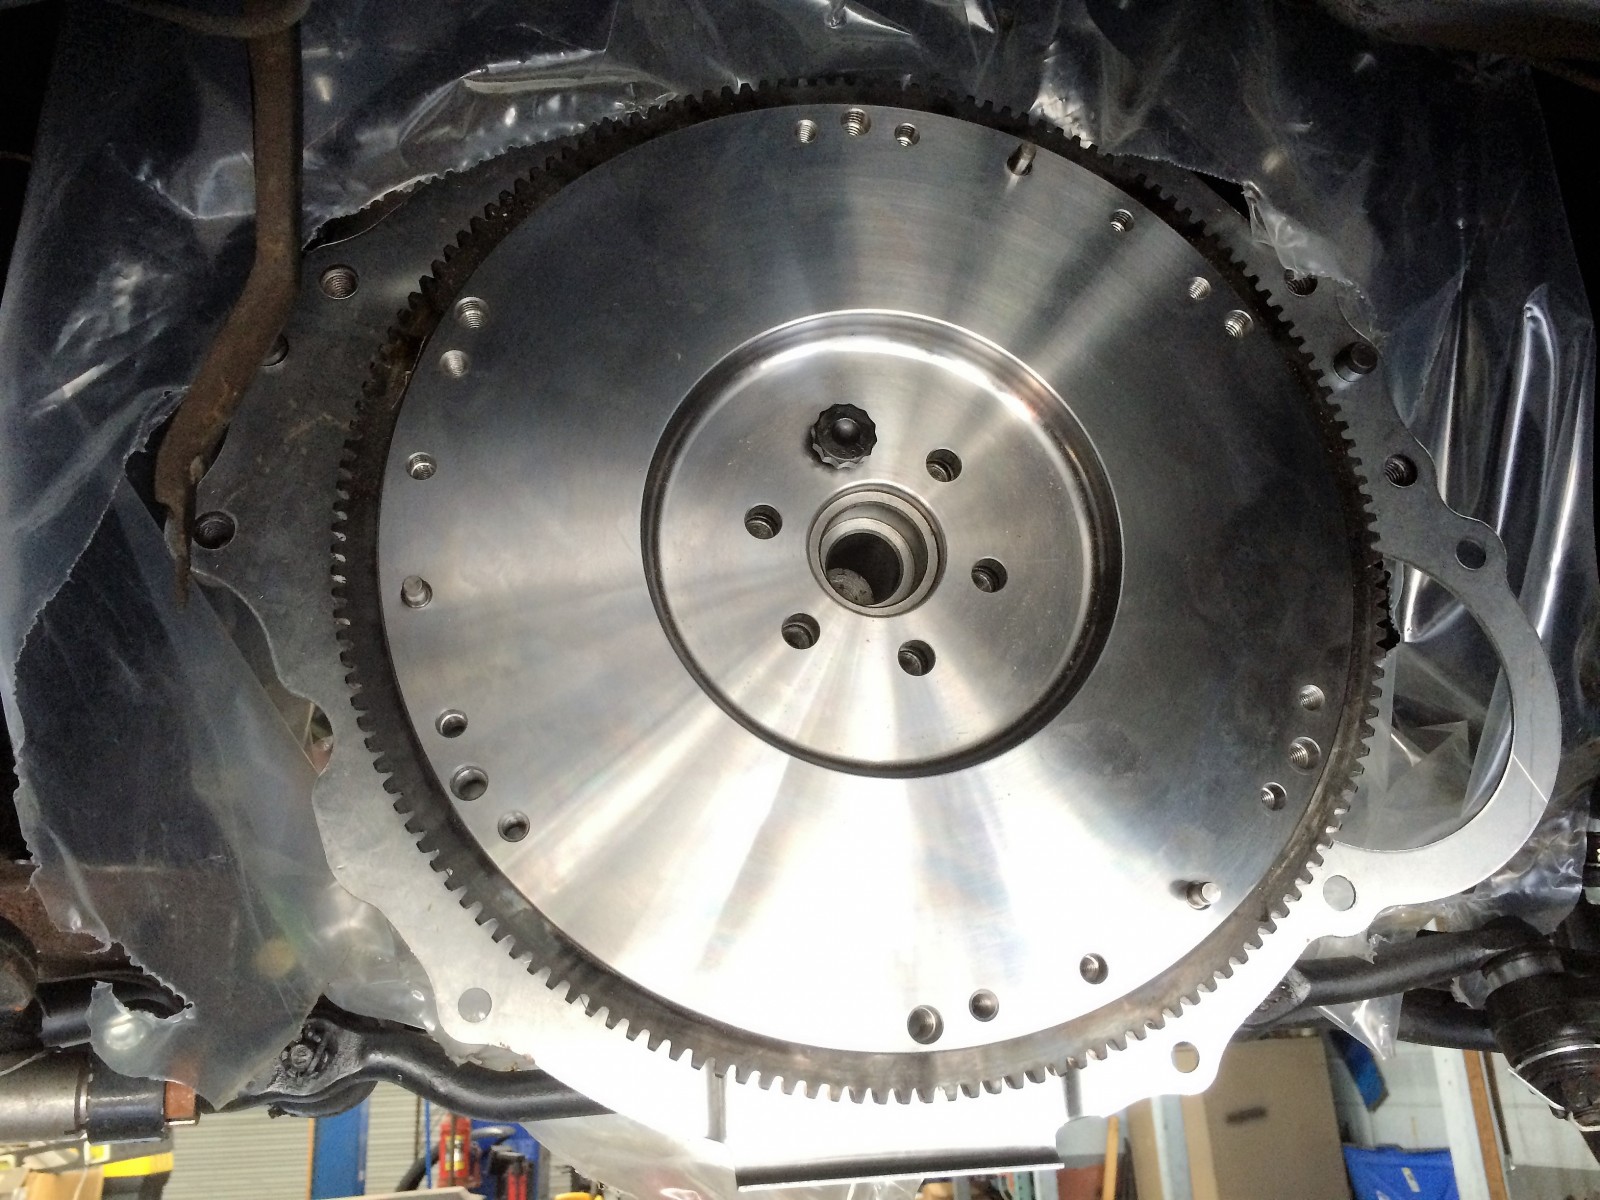
Time to move underneath the car! The Summit Racing package includes a new Ford Racing bellhousing spacer plate and a Centerforce steel flywheel, plus the correct ARP bolts to install it.
We’re a fan of torqueing to spec whenever possible, but it’s especially important to be on the mark for critical components. A torque wrench combined with a flywheel stop wrench will make it easy to tighten the flywheel bolts to 85 ft.-lbs.
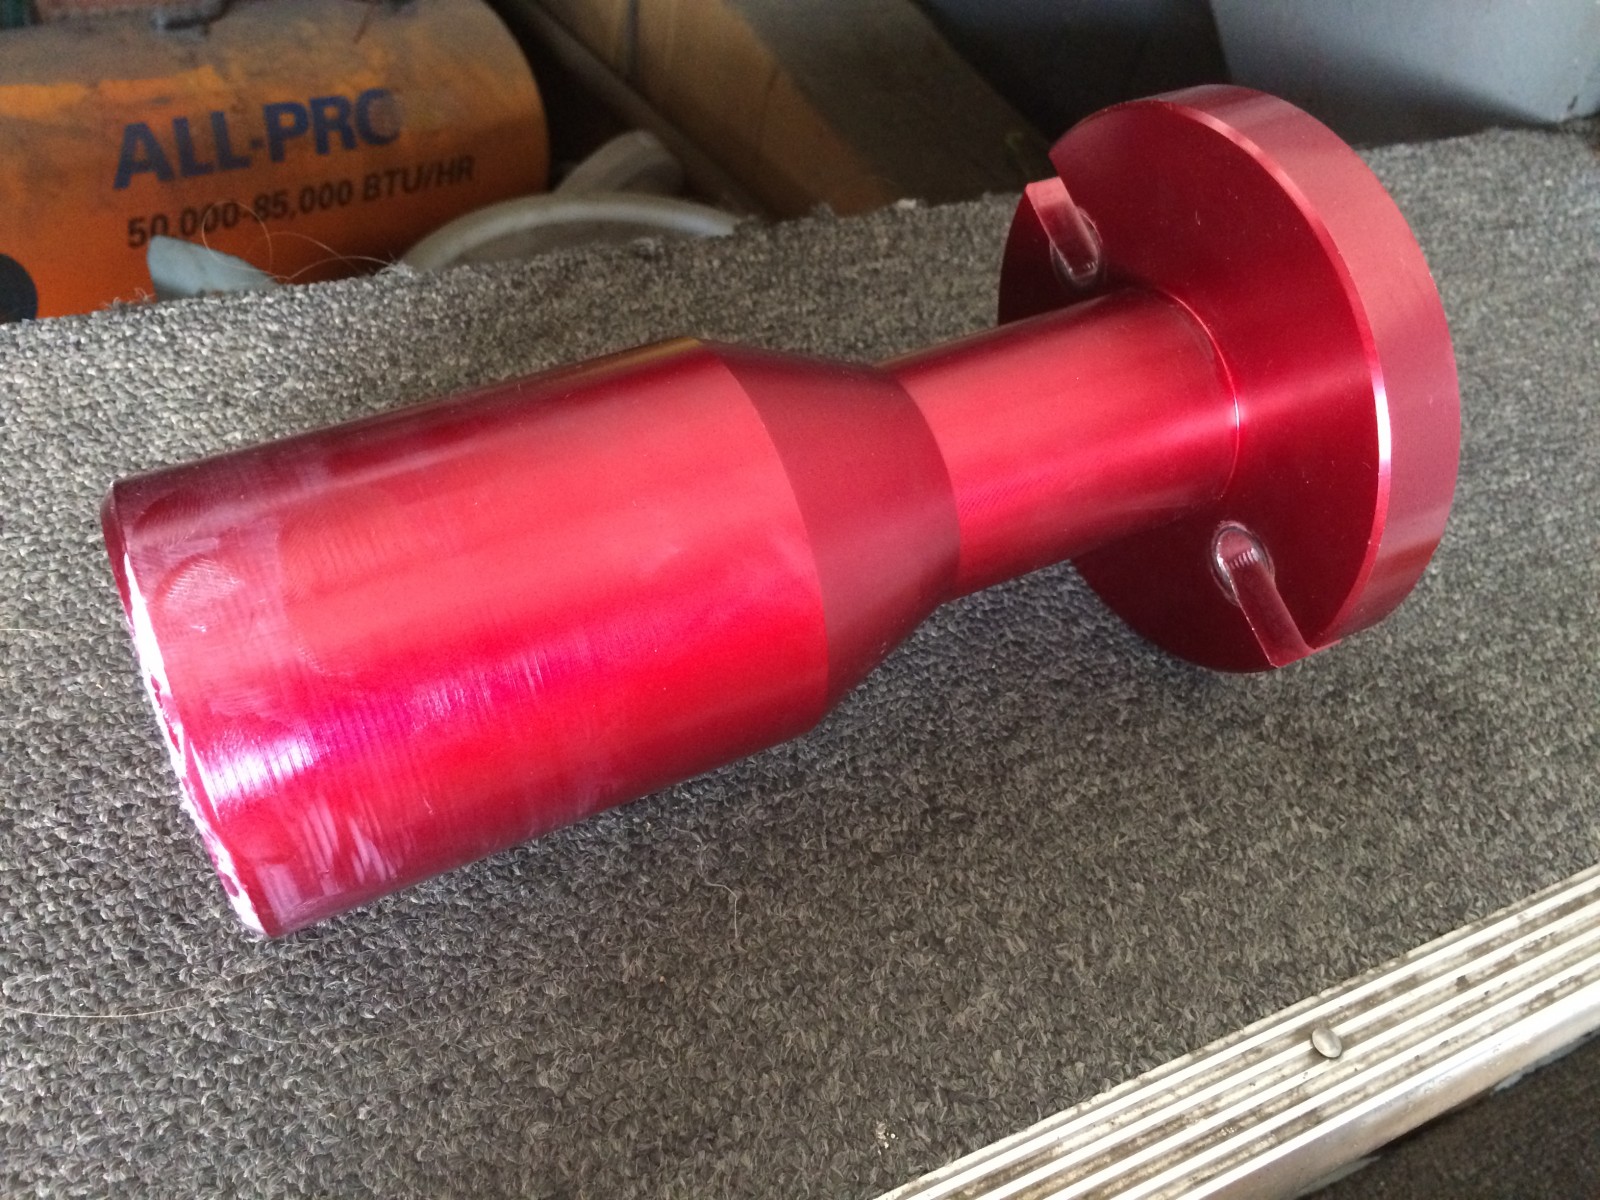
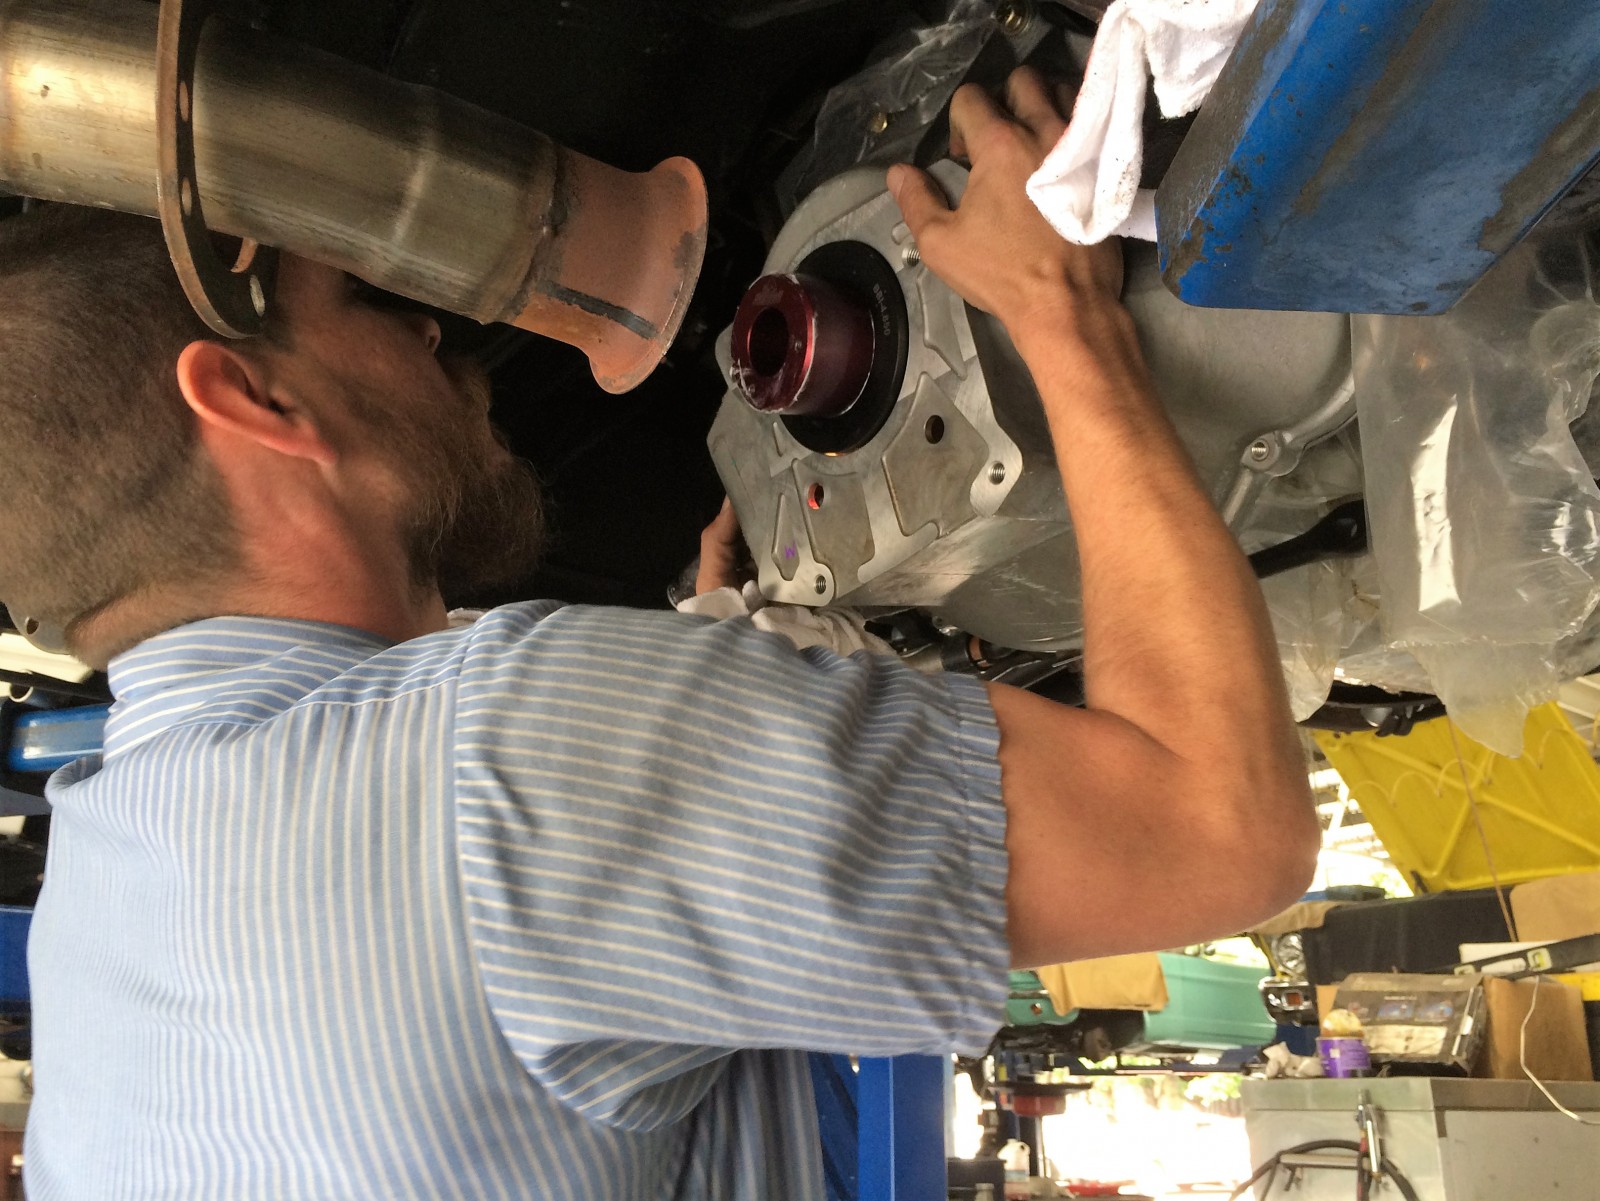
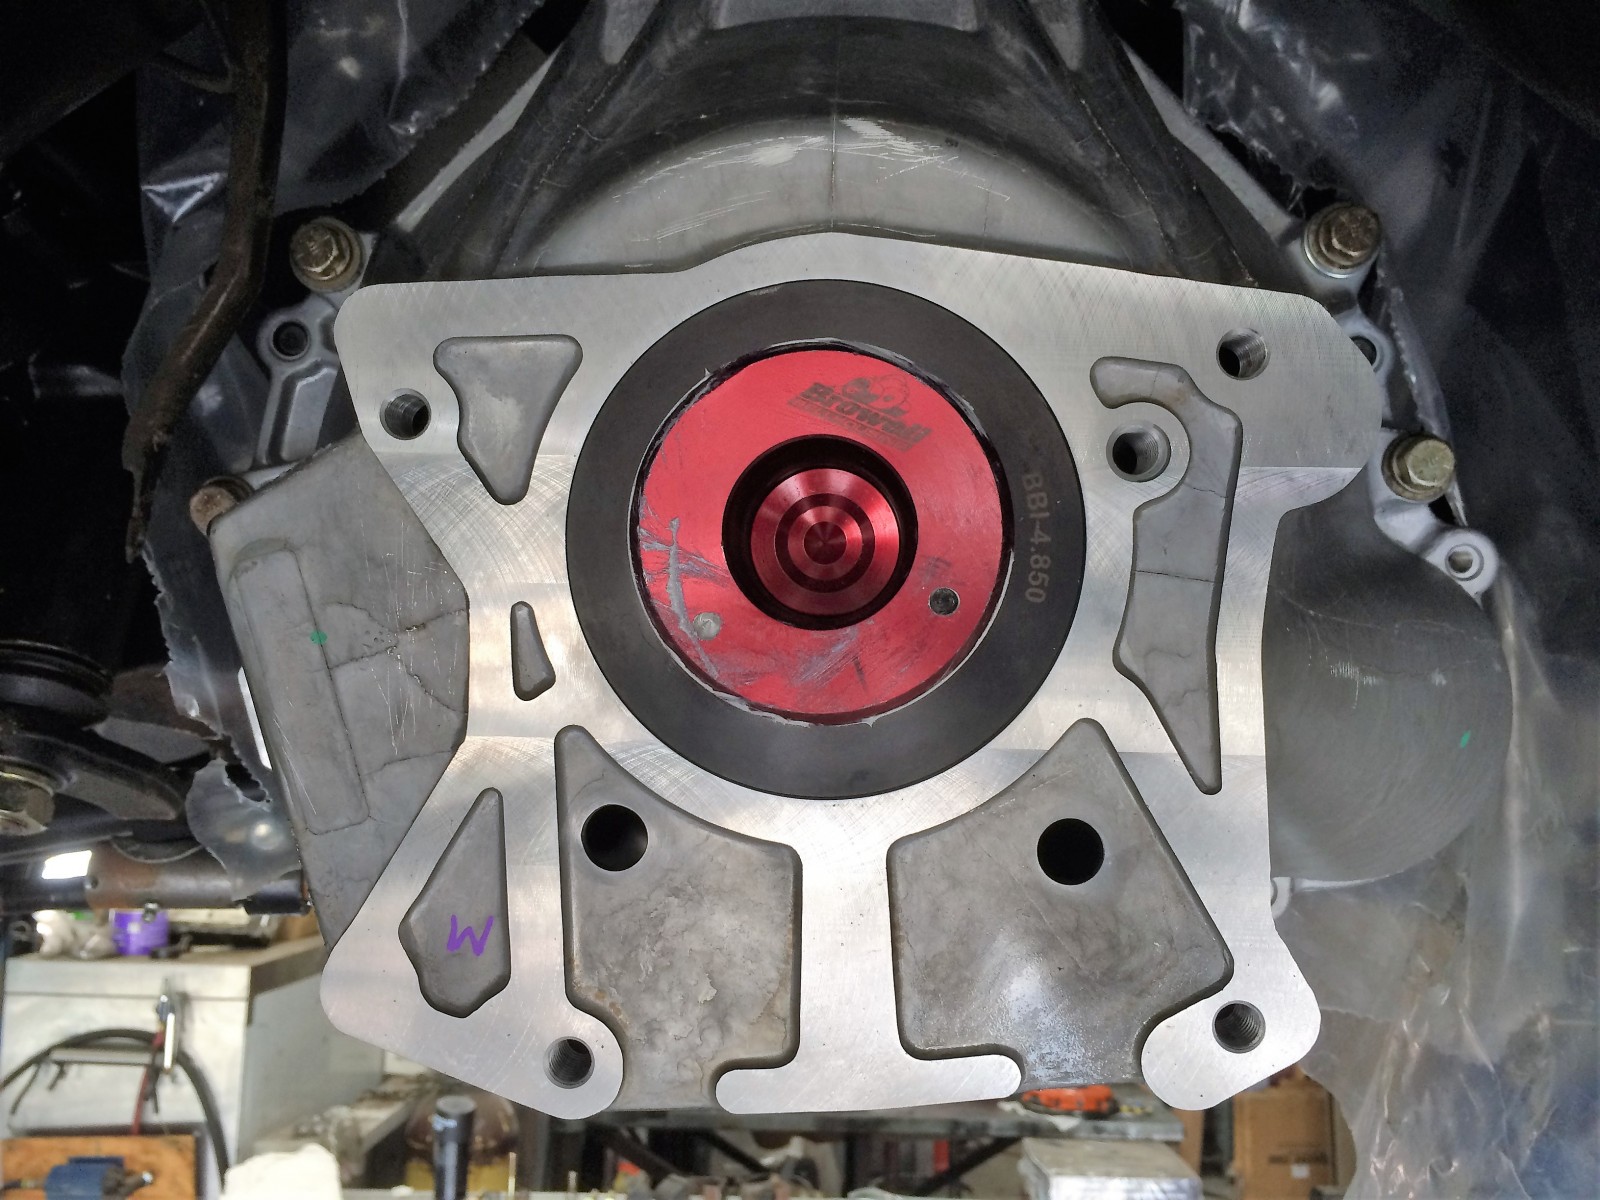
Modern transmissions have tapered roller bearings with very tight tolerances that support the input shaft, so ensuring that the bellhousing has perfect alignment becomes much more important than with vintage transmissions. A bellhousing alignment tool like this one from Browell Bellhousing is the ideal way to go, but not critical as there is a way to check it with a dial indicator. American Powertrain includes instructions on exactly how to do this.
Snug fit is an understatement. When using one of these tools, grease is required since when used with the correct 4.850 ring, there is only a few thousandths clearance.
We got lucky; everything was machined correctly and our new Ford Racing bellhousing was a flawless fit with no adjustment needed! If adjustment is needed, offset dowel pins are available in Summit Racing’s catalog.
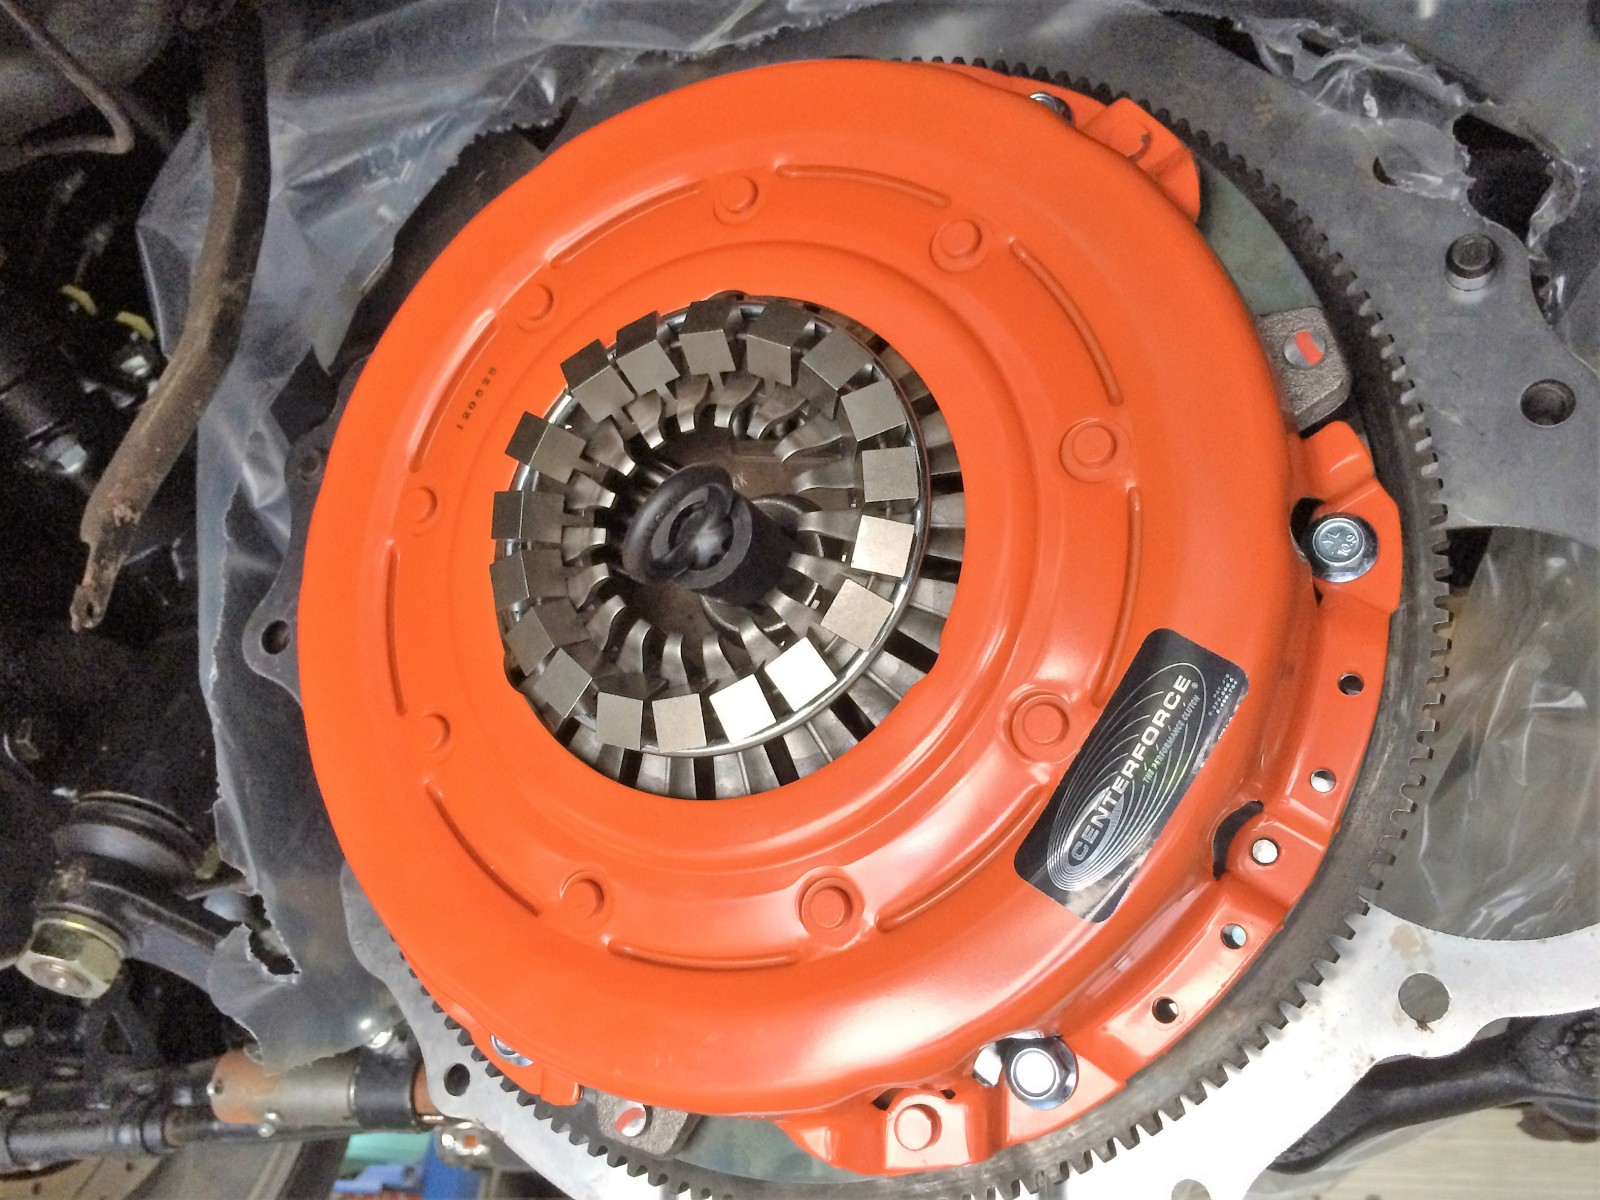
When it came to picking out the clutch for this kit, we wanted to hit down the middle with a clutch that maintained excellent drivability with a stock pedal feel and easy engagement, but with the ability hold big horsepower and some aggressive driving and clutch drops. Centerforce’s renowned Dual Friction kits are perfect for this. The Summit package even includes ARP clutch cover bolts (not shown in this pic), and the correct pilot bushing is included with the American Powertrain parts.
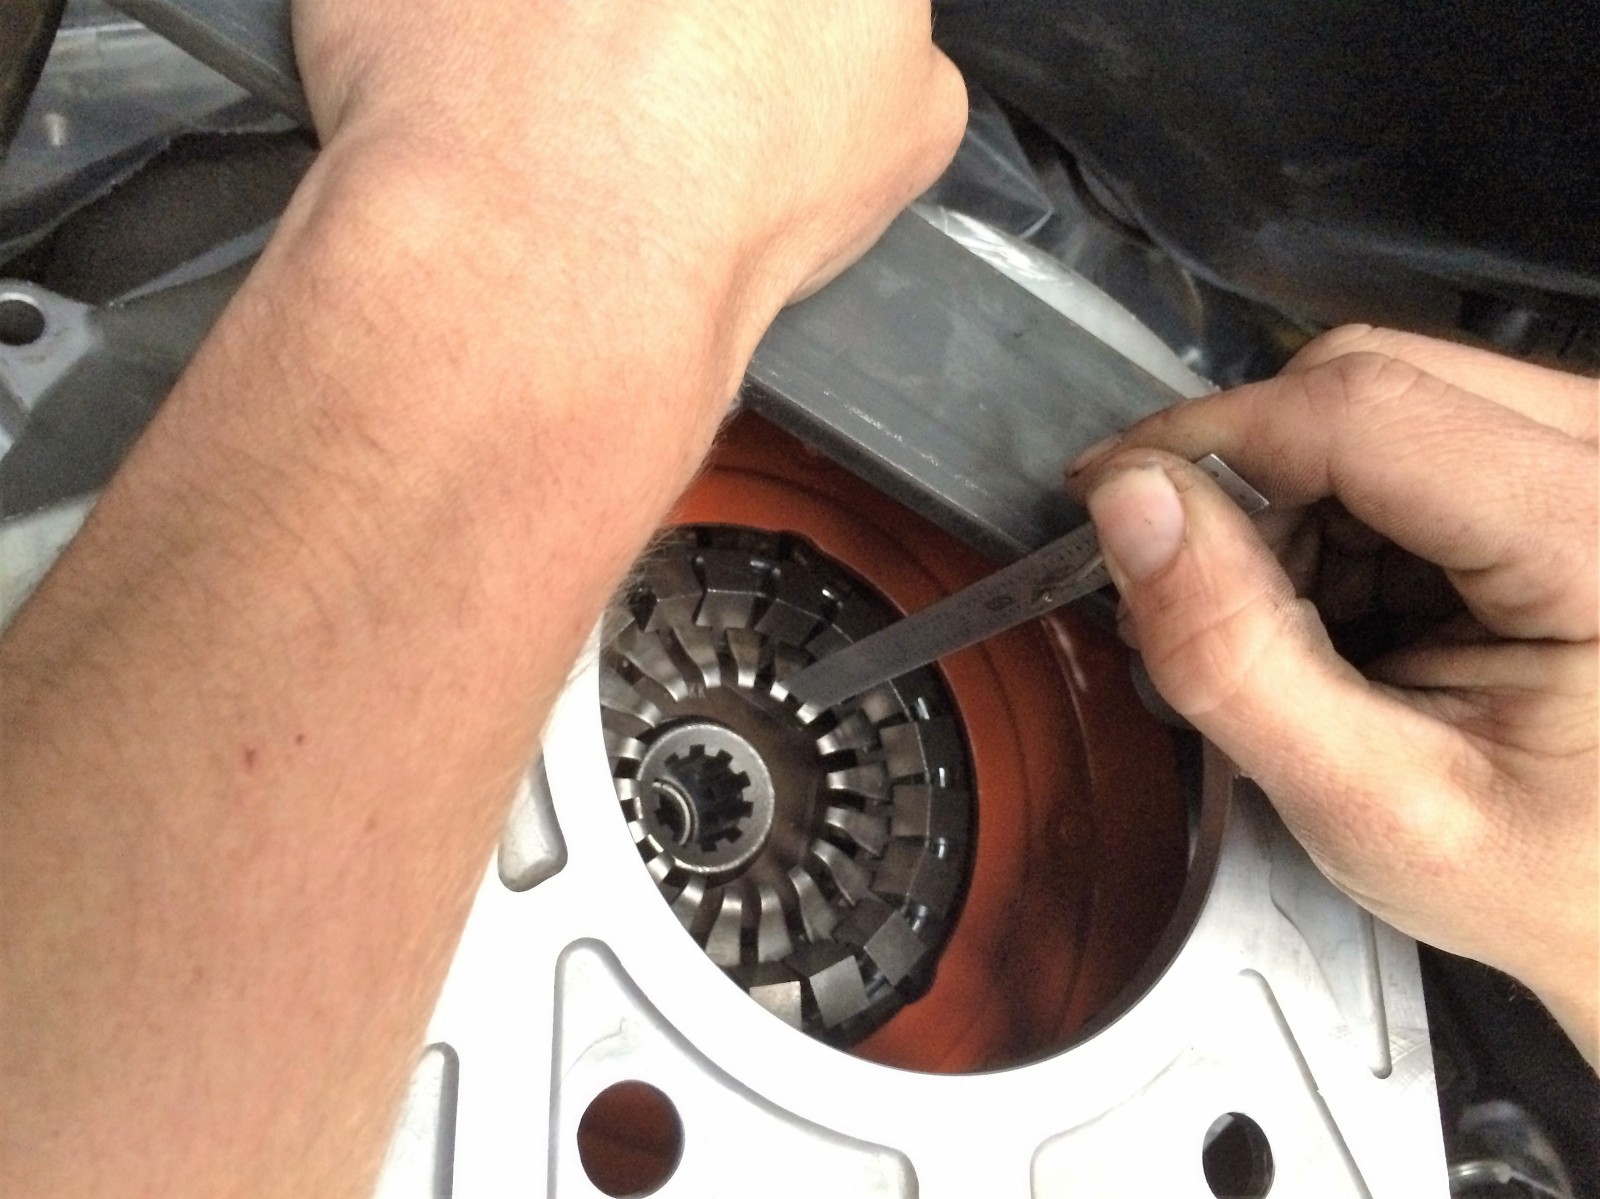
So here is where we need a bit of math to make sure we set up the hydraulic bearing correctly. We need the exact distance from the bellhousing face to the top of the clutch fingers. Use a straight edge, or a good piece of flat plate, to measure to and write the number down; you’ll need it.
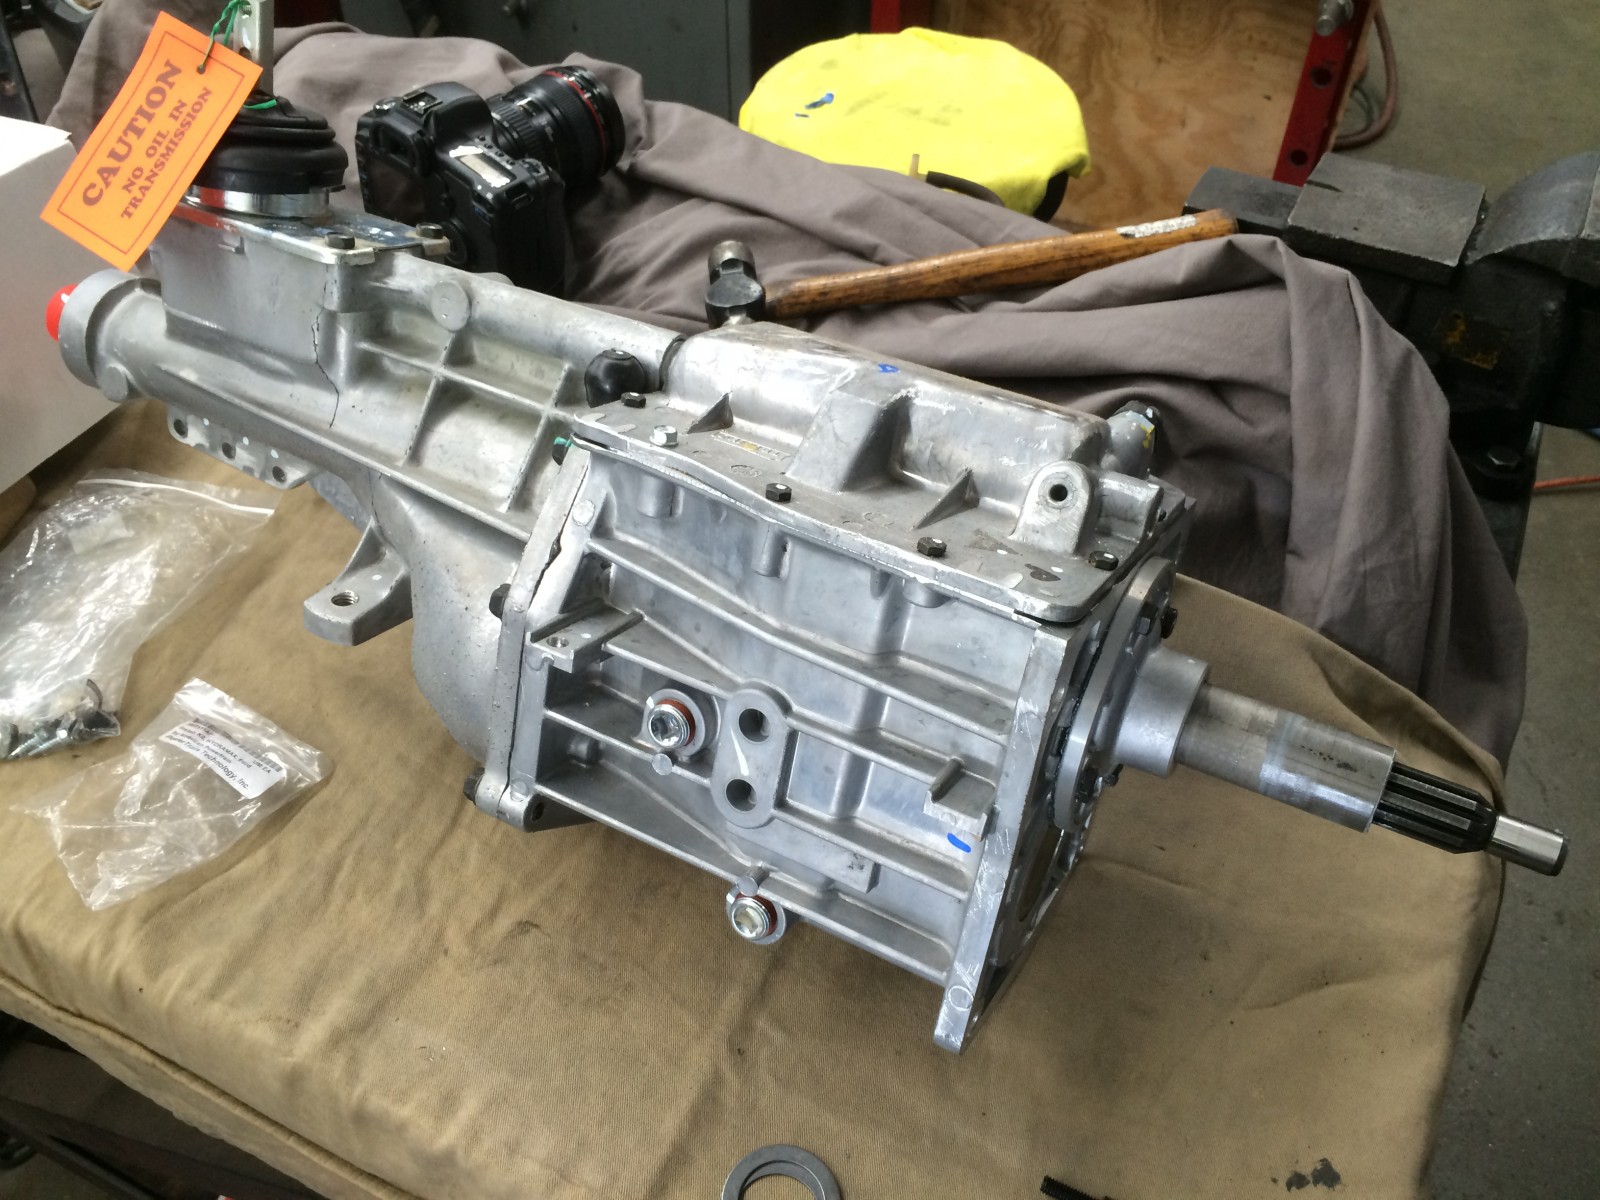
No used junkyard transmissions with questionable history here; the Summit package includes Ford Racing’s Super-Duty T-5. Those who know their trans specs will note that this T5’s torque rating is lower than our 408W produces, but we know from experience that they will live a very long time at our power level, provided hard launches on slicks aren’t in the cards. For the street, autocross, and occasional hard throttle stabs, we should be fine. If we happen to need more, T5s are able to be built to handle 700+ horsepower.
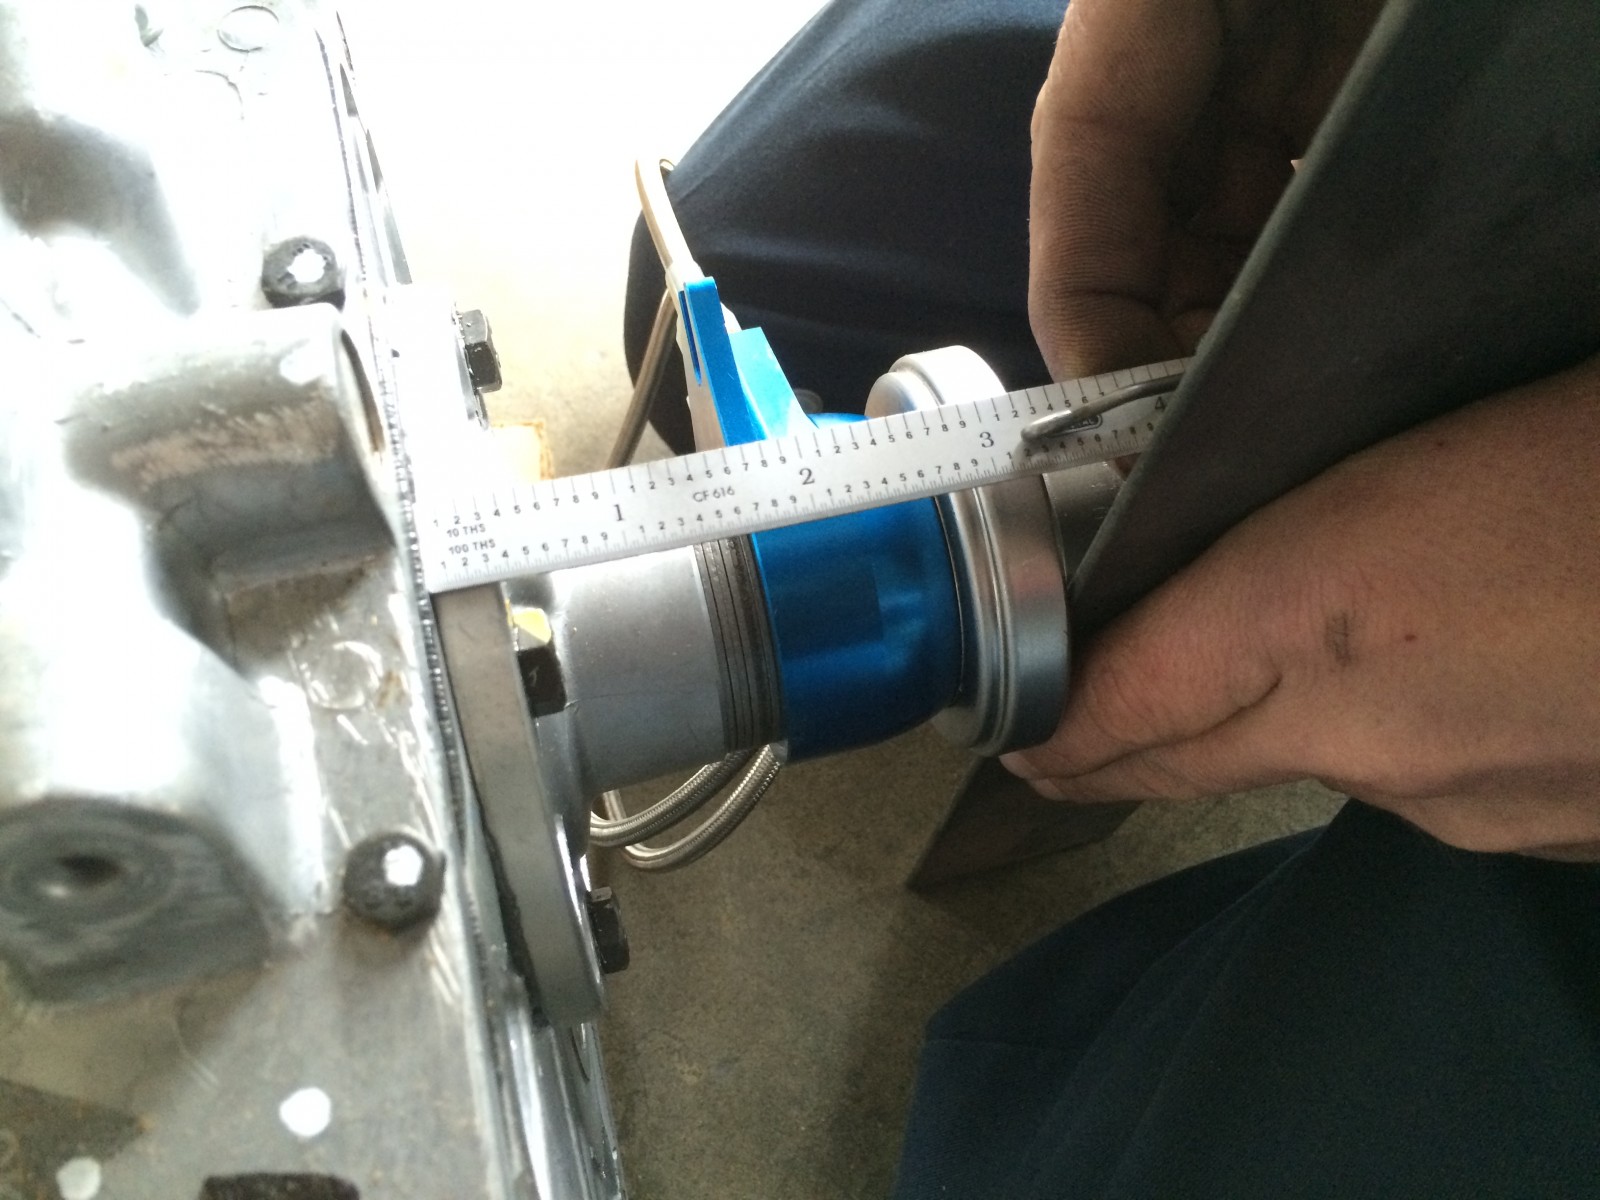
With the throwout bearing on the input shaft, we need to measure from the face of the bearing to face of the trans where the bellhousing seats against it. Ignore our shims in this pic; we were already mocking up.
What we need is a .150-.200 clearance to the fingers, so using the stack of shims provided in the American Powertrain kit, we stack until we find the right number.
The formula we need is;
(Bell to fingers) – (Bearing face to trans face) – (.150) / (.054 thickness of Ford shims).
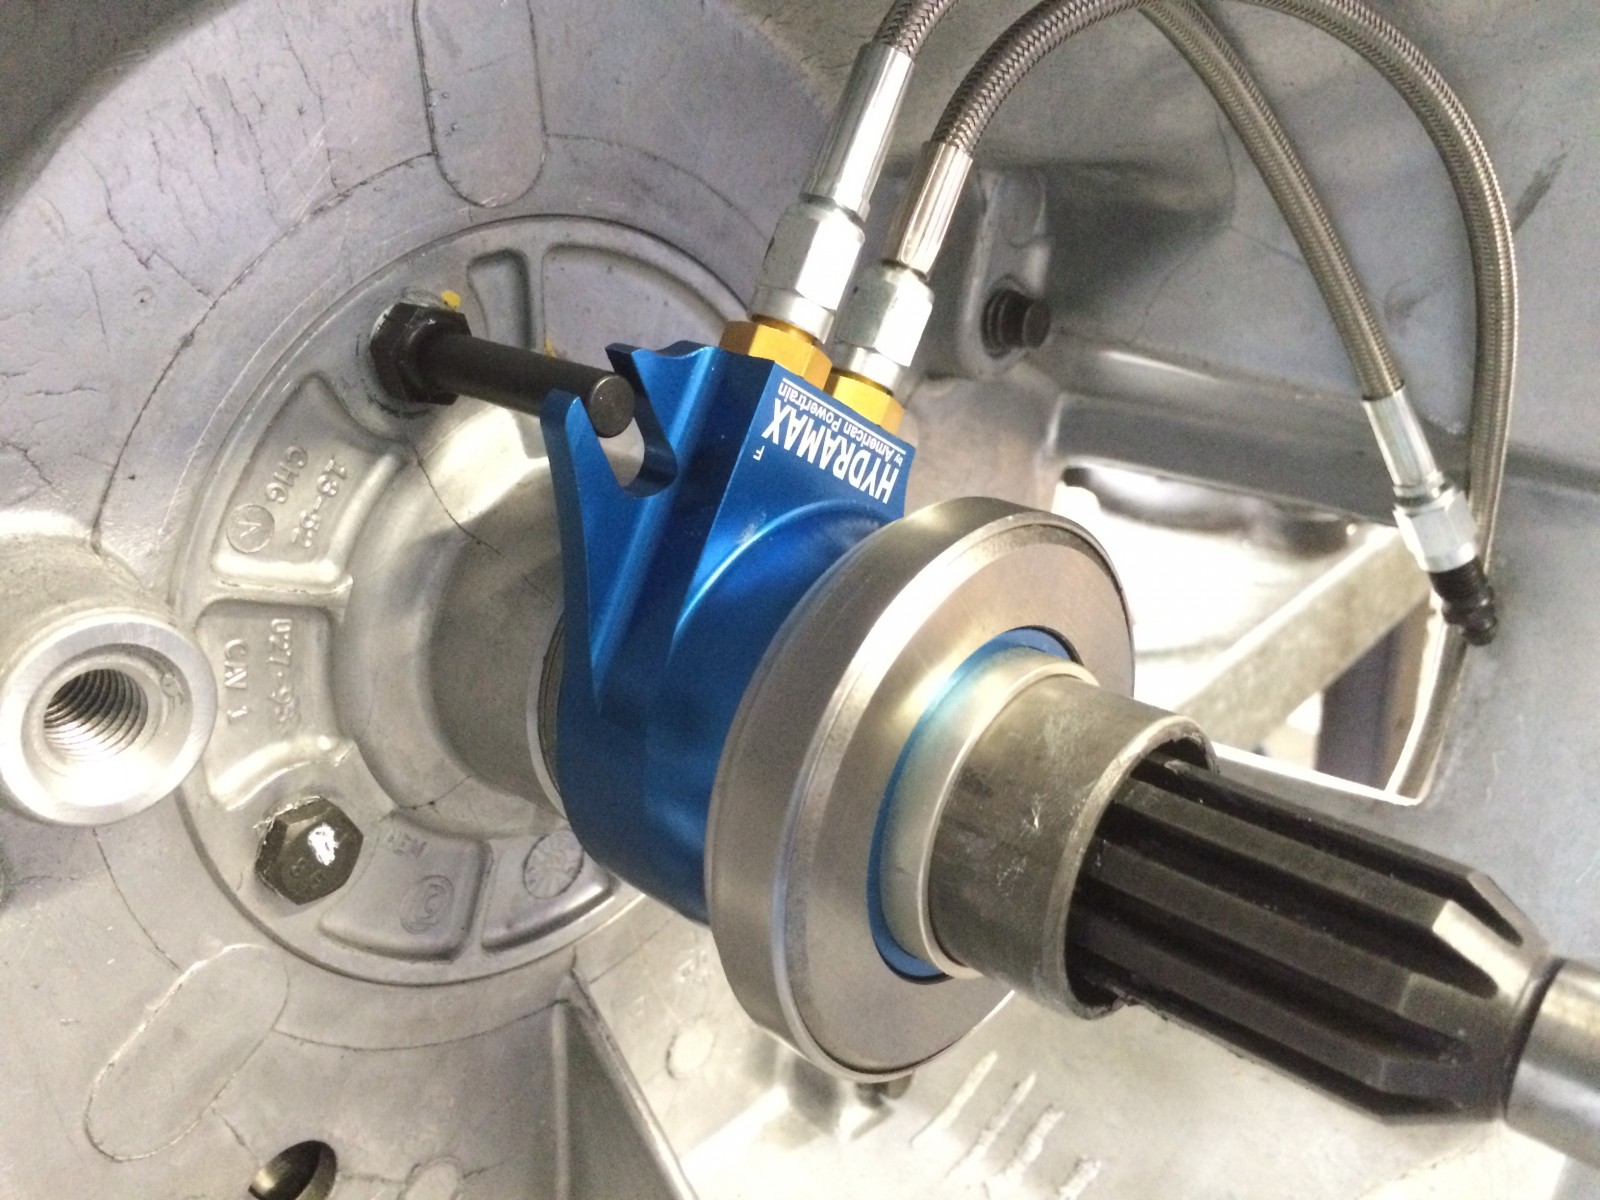
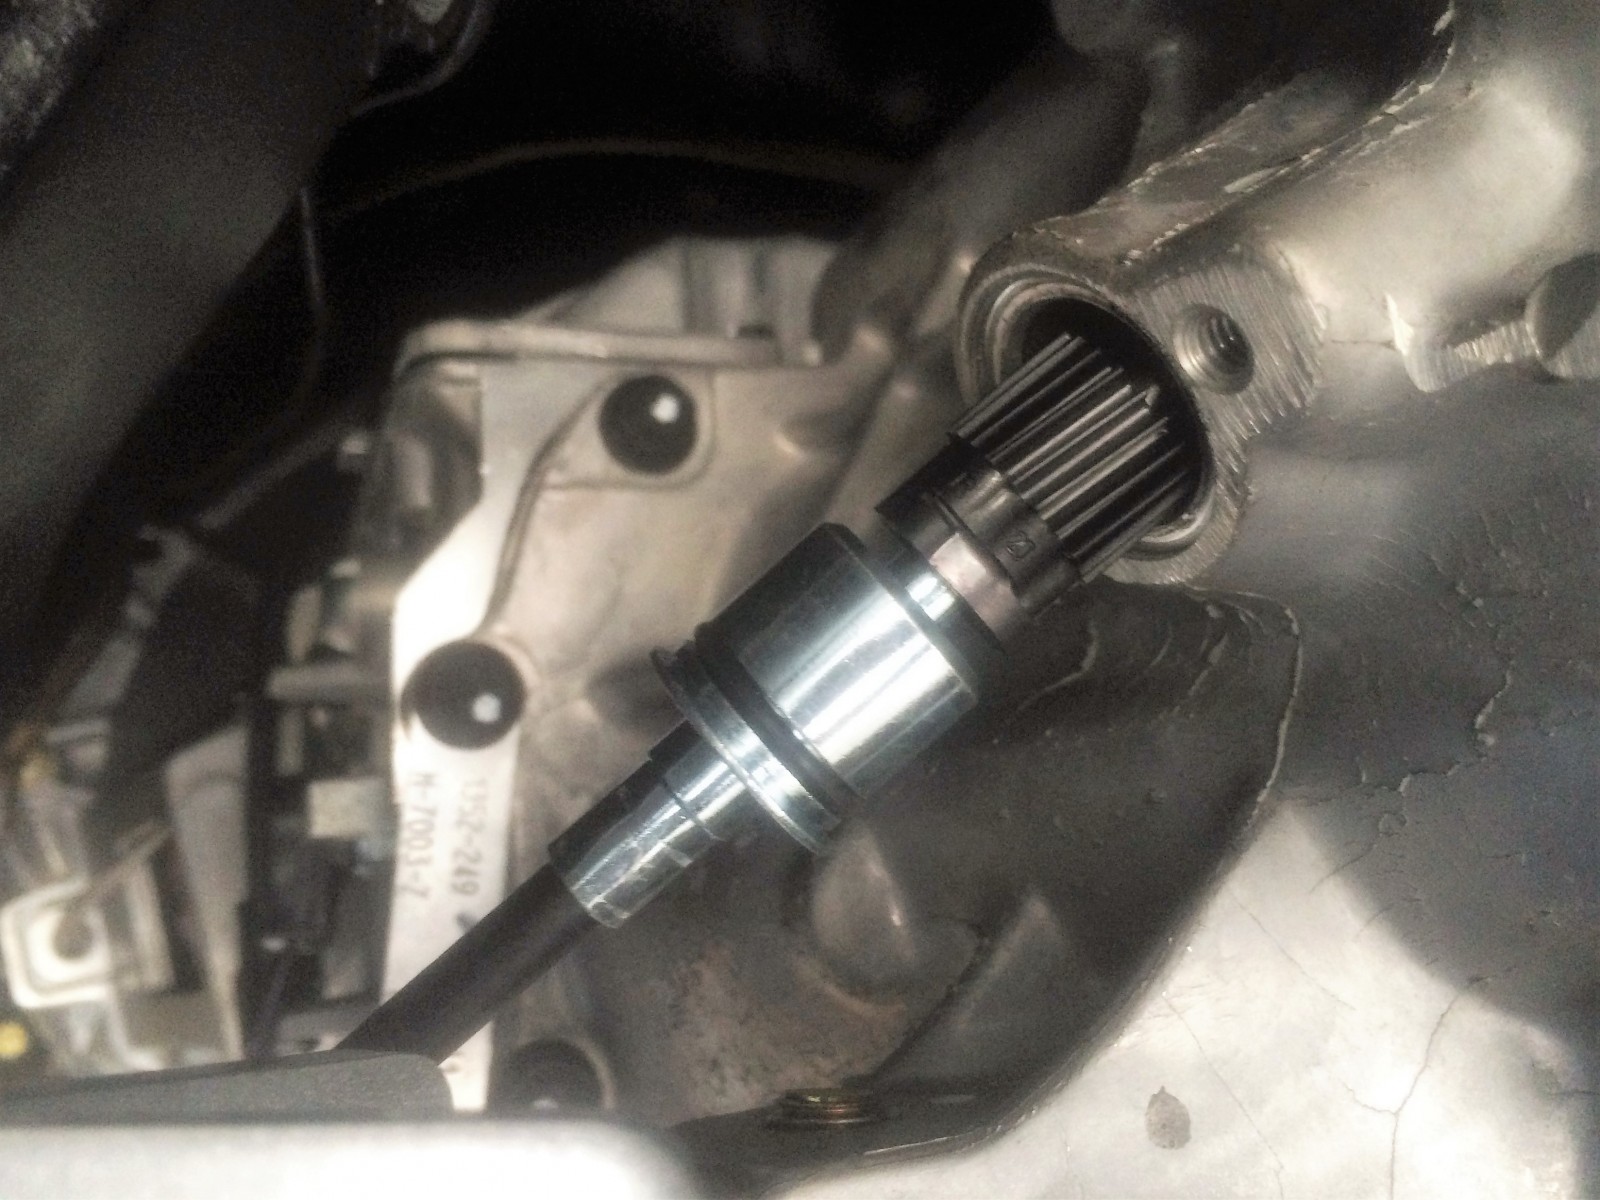
After establishing that, the bearing is indexed with a stud that replaces one of the front bolts on the T5. The pressure and bleeder lines are routed out through the original clutch fork window in the bellhousing. Speaking of bleeding, the system should actually be bled without even using the bleeder line; it’s for -worst case. American Powertrain is nice enough to ship the bearings fully bled, so basically all you have to do is slowly depress and lift the clutch pedal for a few minutes to push air out through the reservoir. It really is that easy!
The stock T5 shifter isn’t too bad, but there is a lot of room for improvement. Also, in the case of our vintage Mustang swap, that thick rubber boot actually causes some interference, so we’ll be swapping it out.
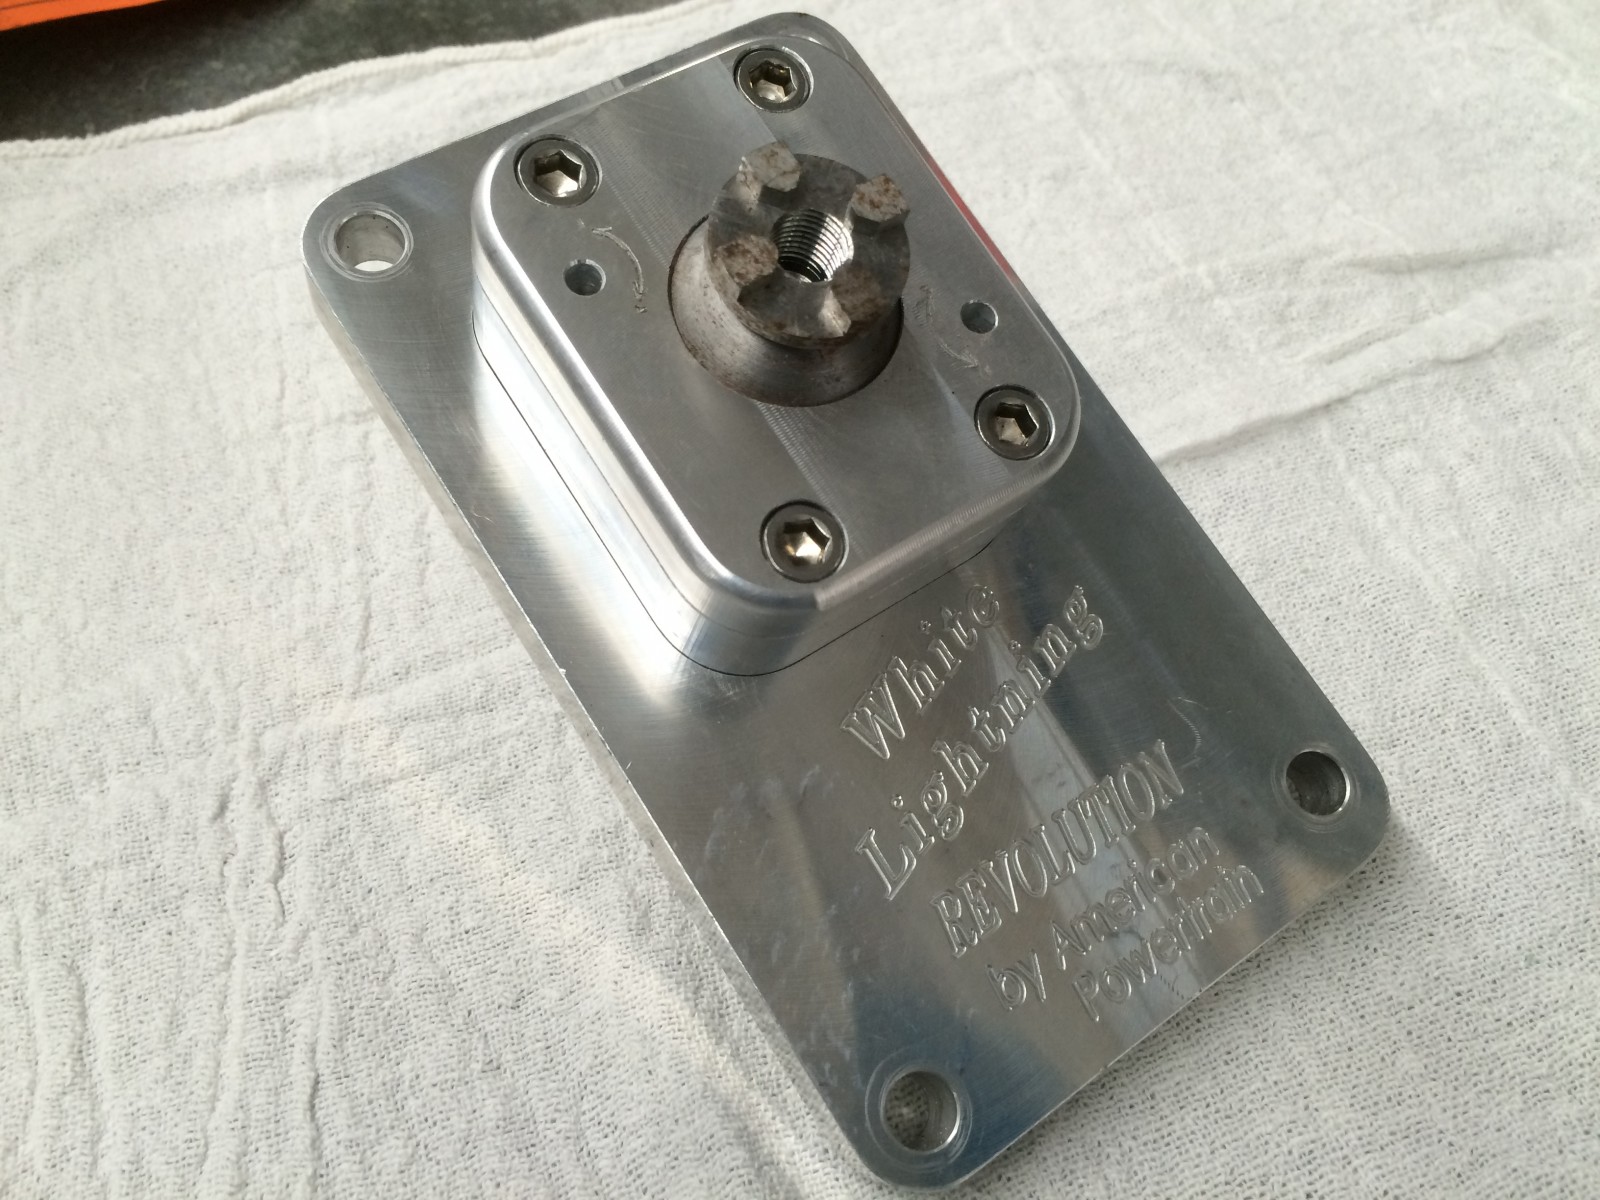
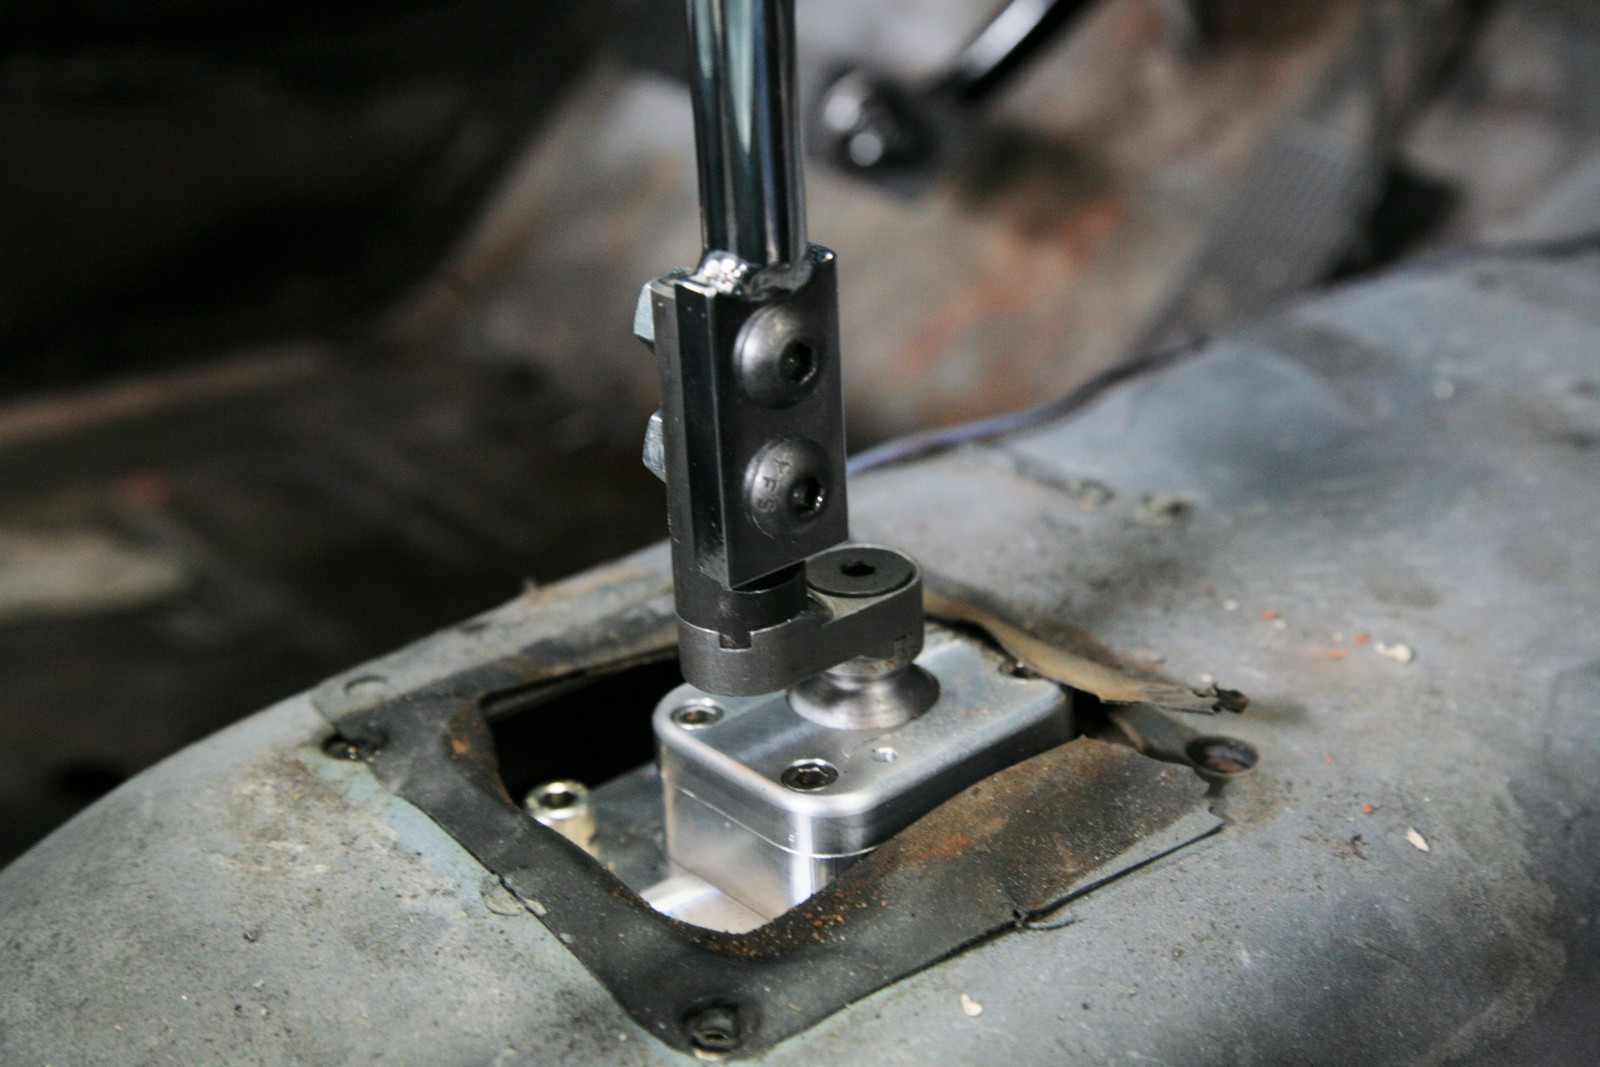
American Powertrain took the opportunity to develop their own short throw shifter dubbed “White Lightening Revolution.” Not only will it drastically reduce shifter throw, its low profile creates more room in the tunnel.
No gasket needed here; sealing the new shifter is as simple as a generous bead of high-temp RTV silicone. We also added a bit more lithium grease to the shifter cup.
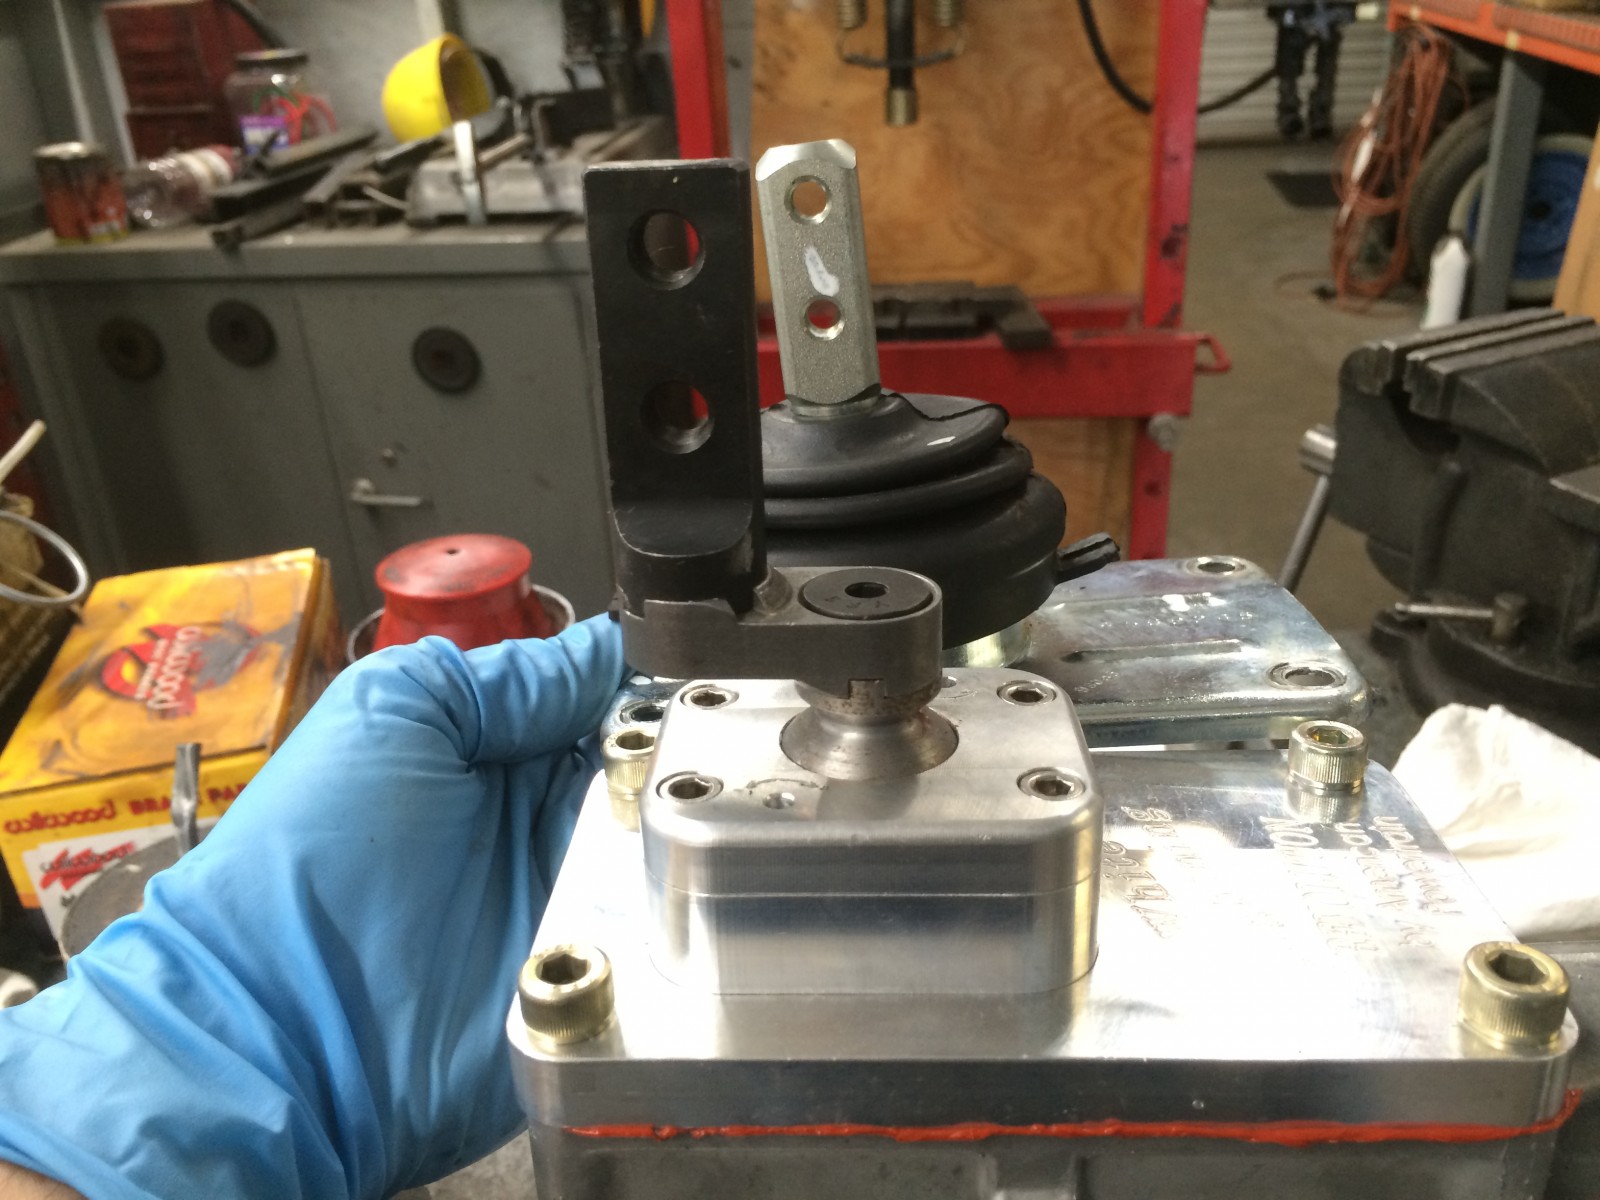
The White Lightening uses this adapter to move the shifter handle about 1.5 inches toward the driver for better ergonomics.
A standard T5 style shifter handle mount attaches to the adapter, which means you can use whatever T5 handle you choose on the kit. Note the offset vs. the stock shifter in the background.
It’s tight fit when sliding the T5 into place, but once in, the White Lightening shifter fits the factory automatic cutout like a glove.
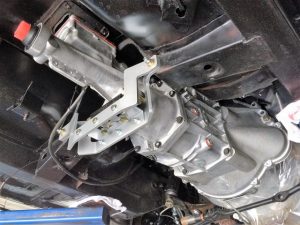
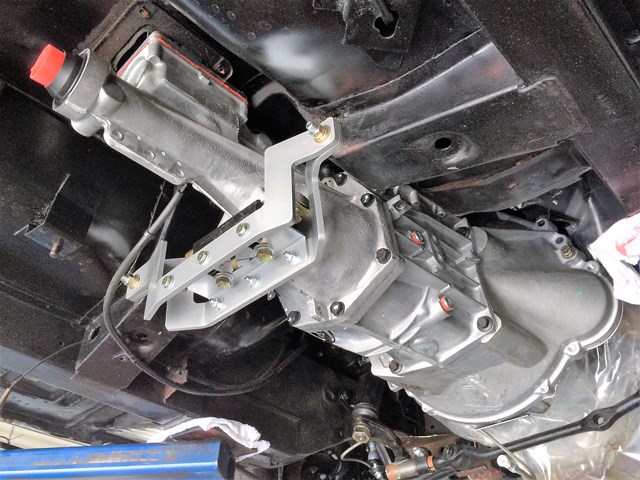
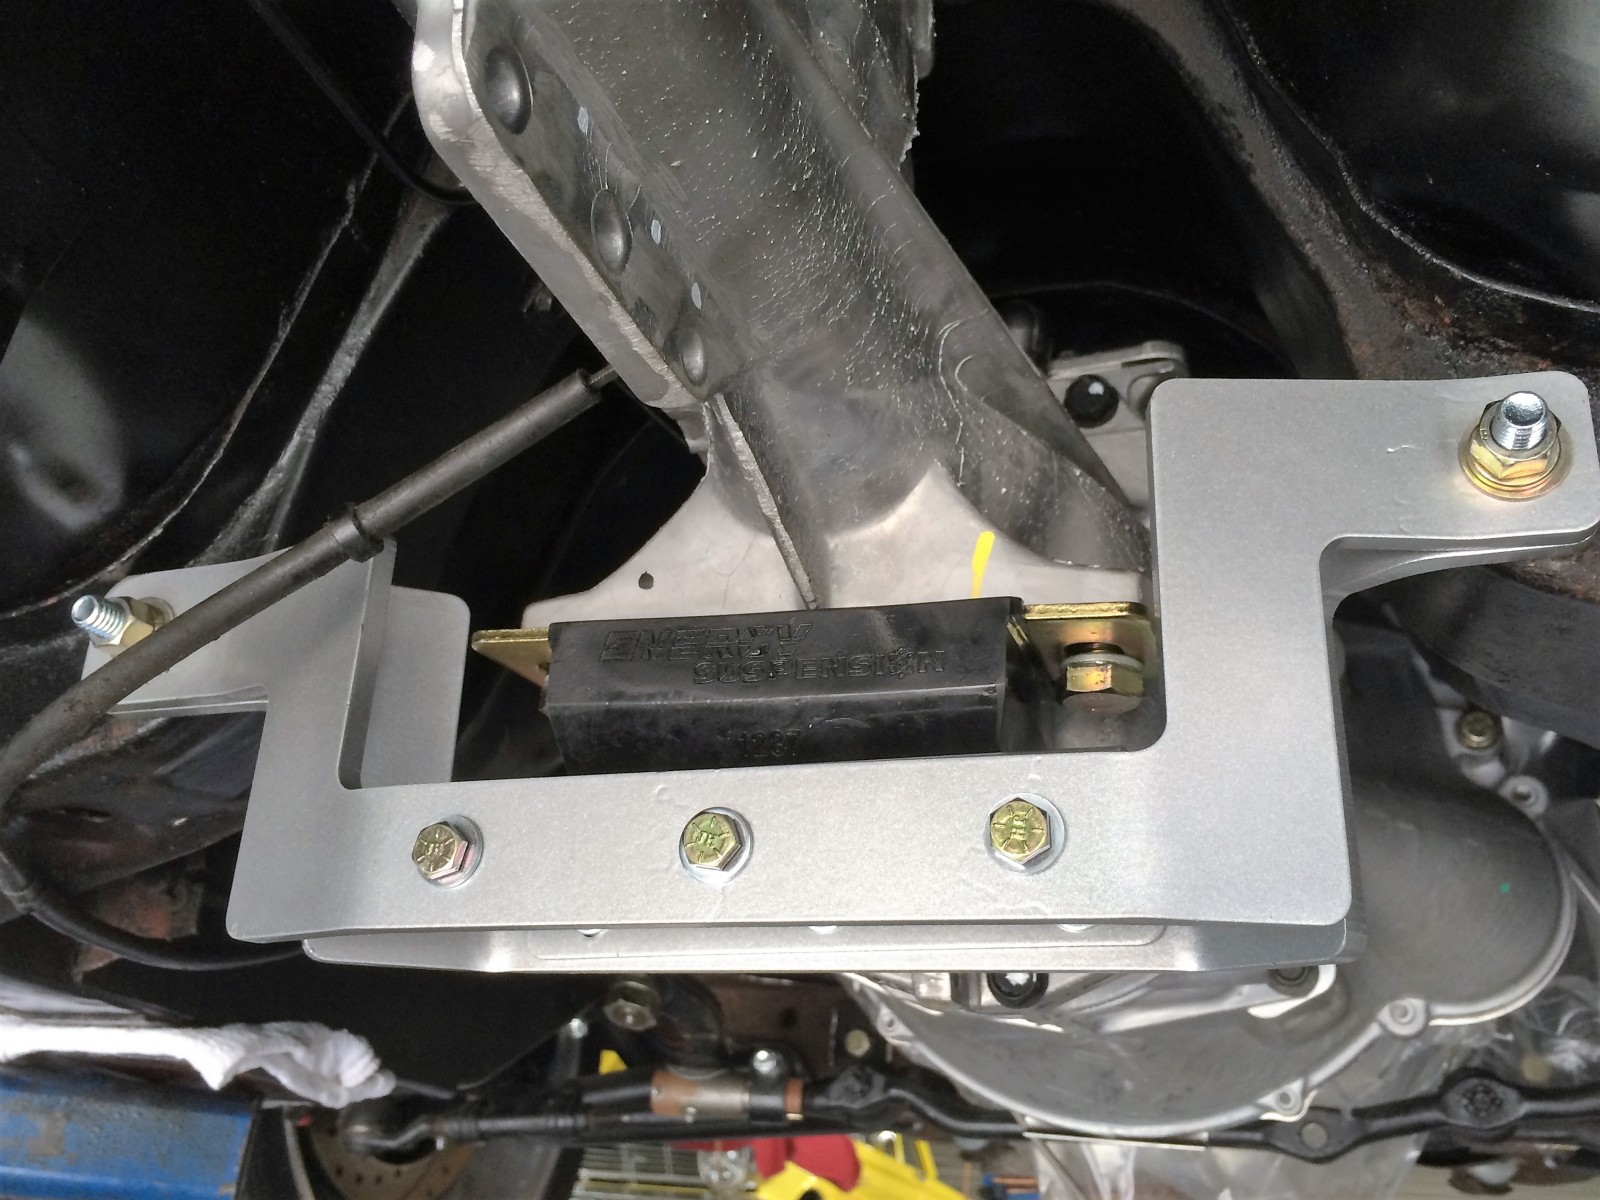
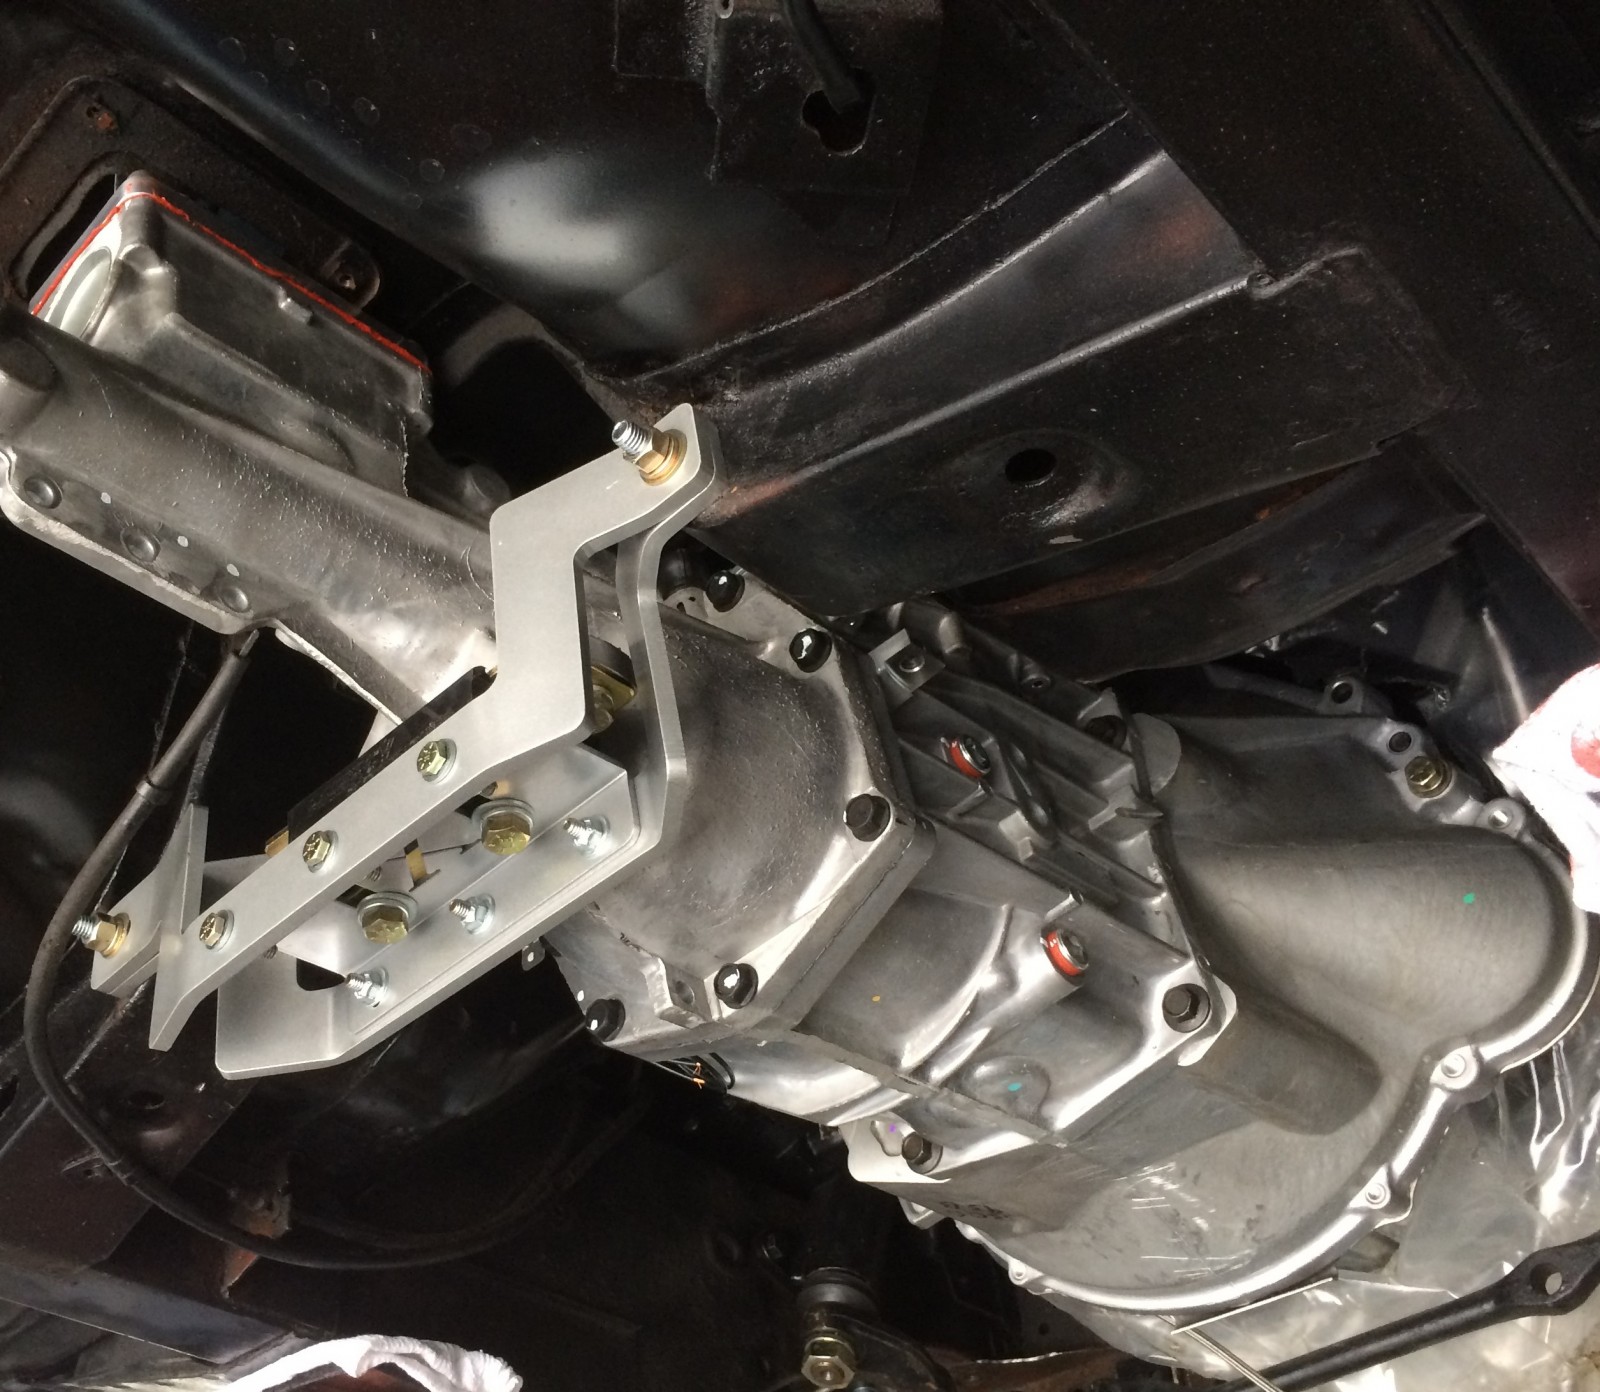
American Powertrain uses a unique offset style crossmember that mounts to the rearward side of the factory tunnel brace to create an abundance of clearance for long tube headers. The included mount is an Energy Suspension poly.
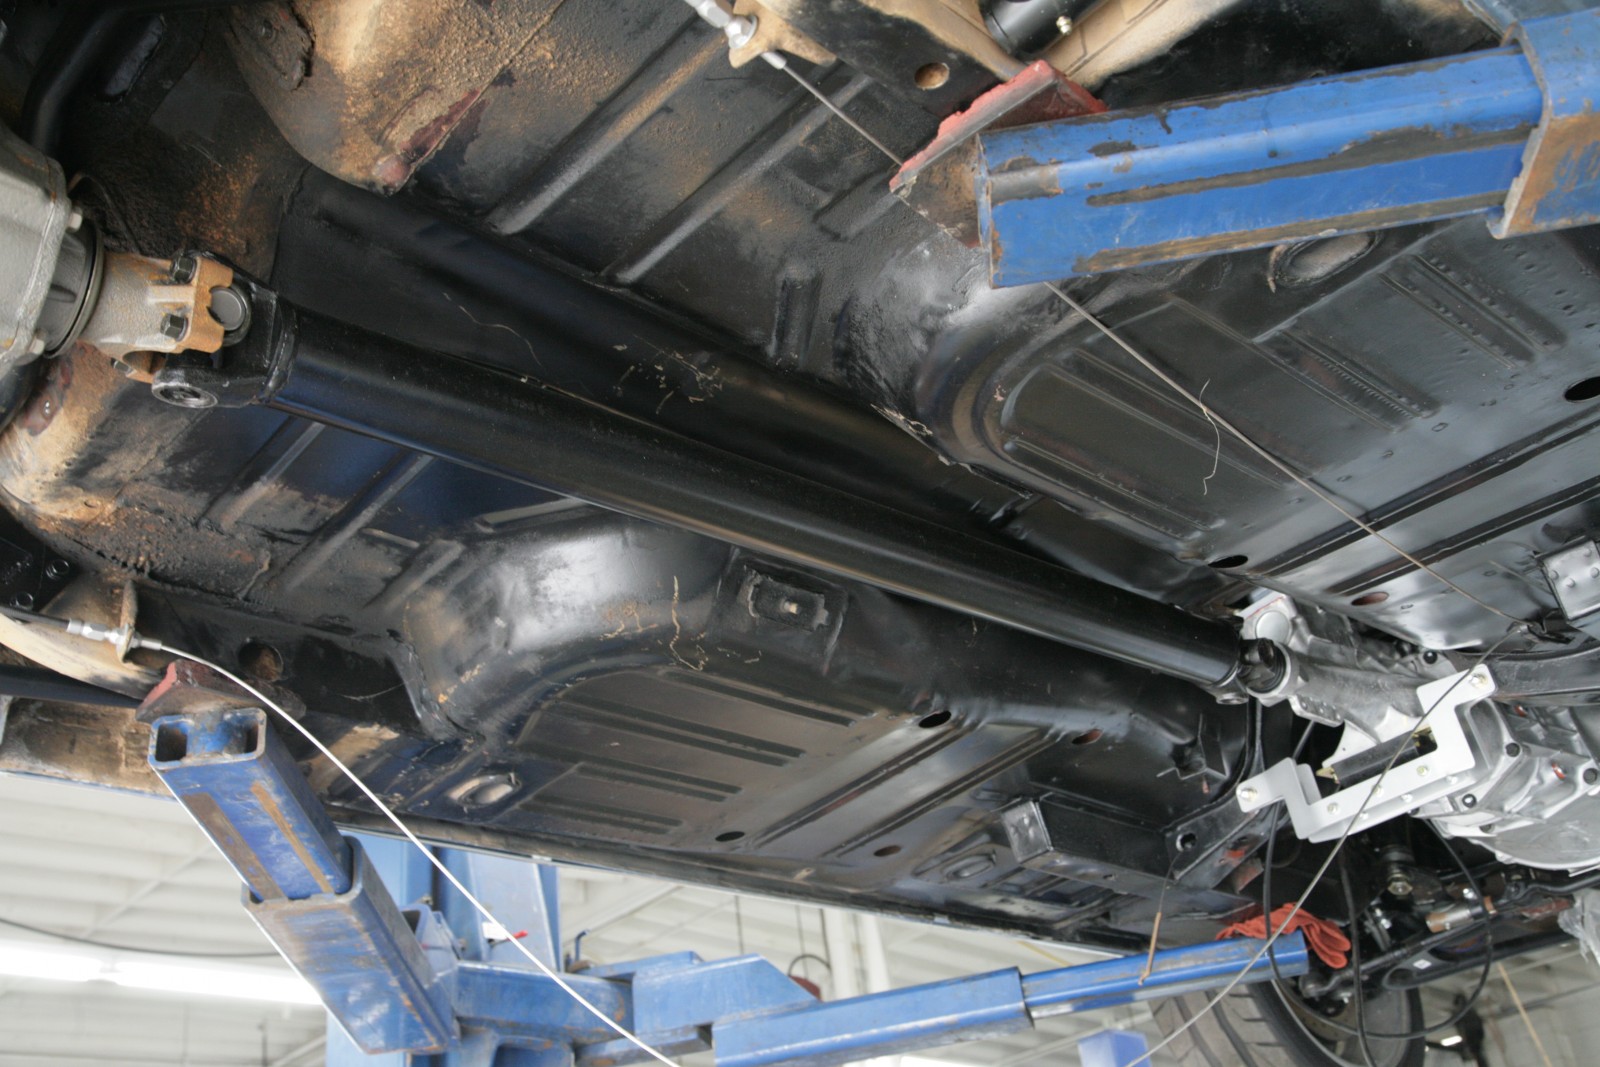
Here’s a great visual representation of what we meant by the T5 fitting into vintage Mustang transmission tunnels so well. When properly positioned, there’s not a single cut or clearancing needed, and it looks like it could have been factory equipment.
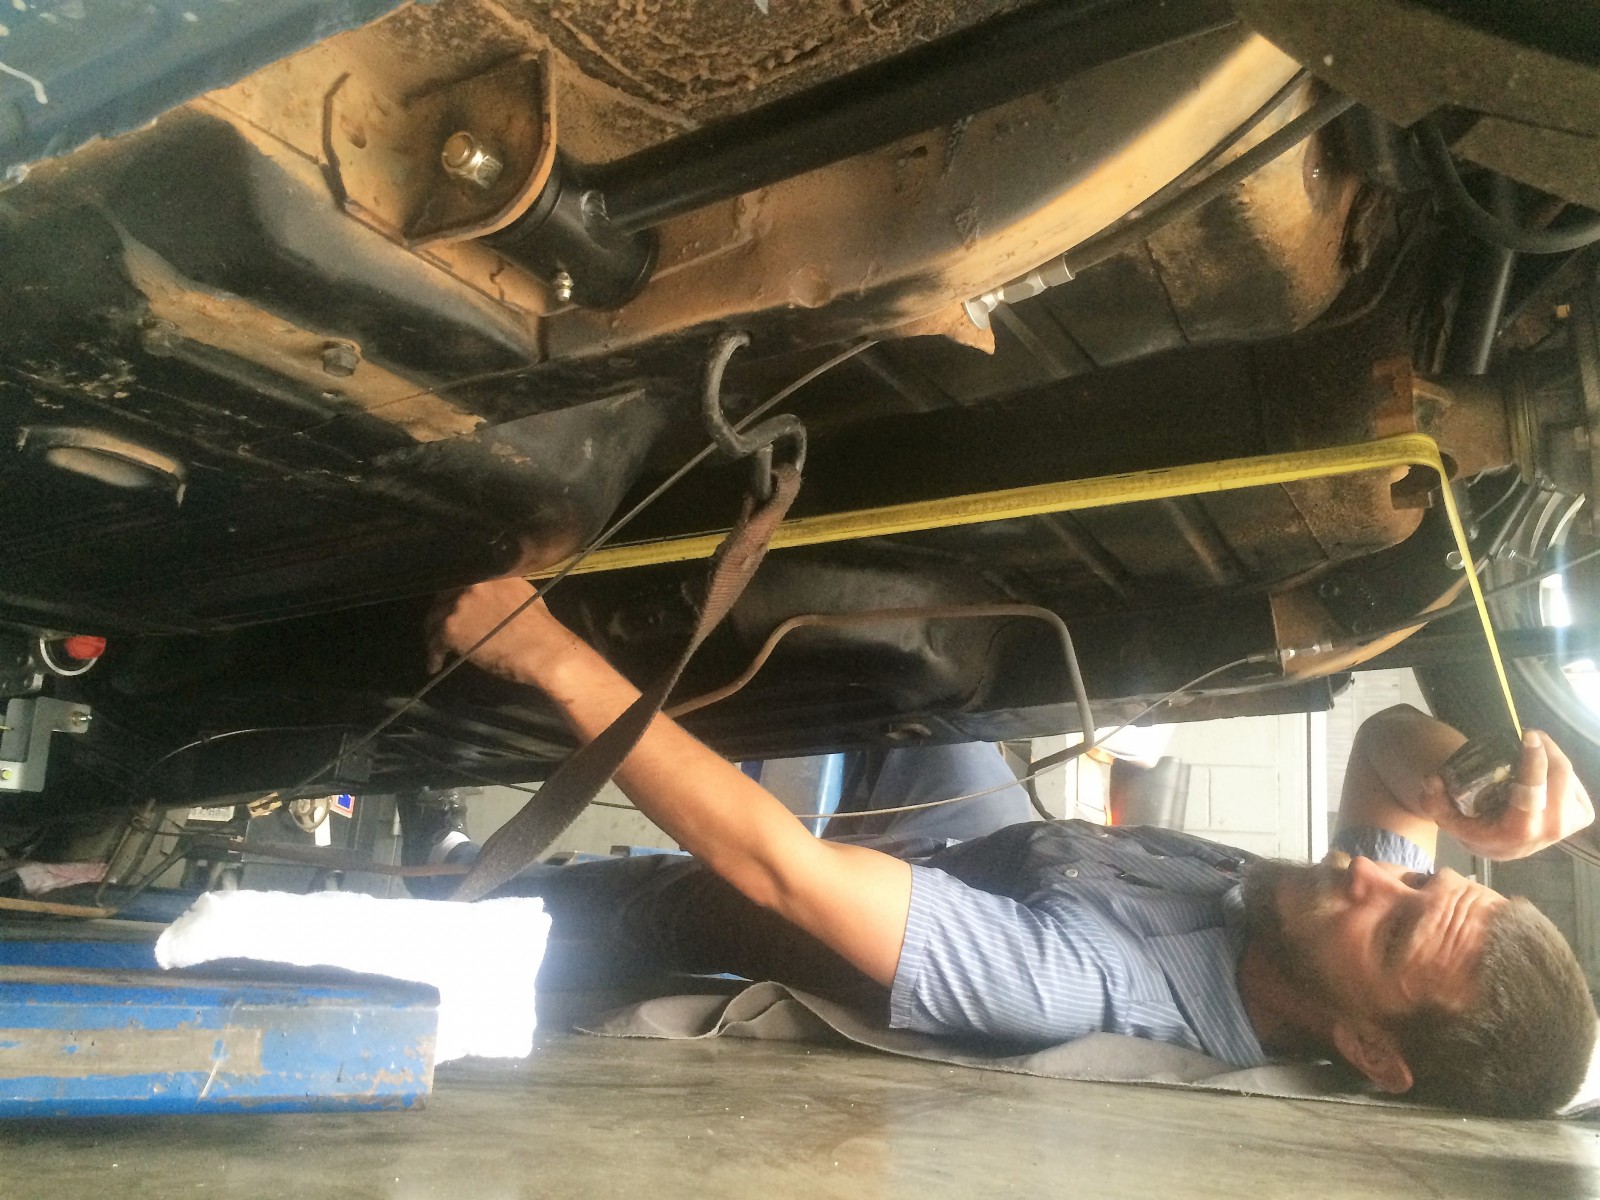
The one piece that will not come with the American Powertrain portion of the Summit package is the driveshaft. That’s because they want you want to measure exactly the length needed with the trans in the car. This needs to be done at ride height, so with all tires on the ground, or with jackstands under the axle and the full weight of the car on them. The measurement is from the machine face of the tailhousing to the u-joint seat in the differential yoke. Also make sure to measure the cap diameter so you order the correct U-joint.
Roughly a week after you send back the driveshaft spec sheet, a custom built steel driveshaft specifically for your project will arrive. Ours fit flawlessly.
Also included in the American powertrain kit is a new speedo cable with a black 20-tooth gear, which suits our 3.50 gears perfectly. For other ratios, different tooth counts are available in Summit’s catalog.
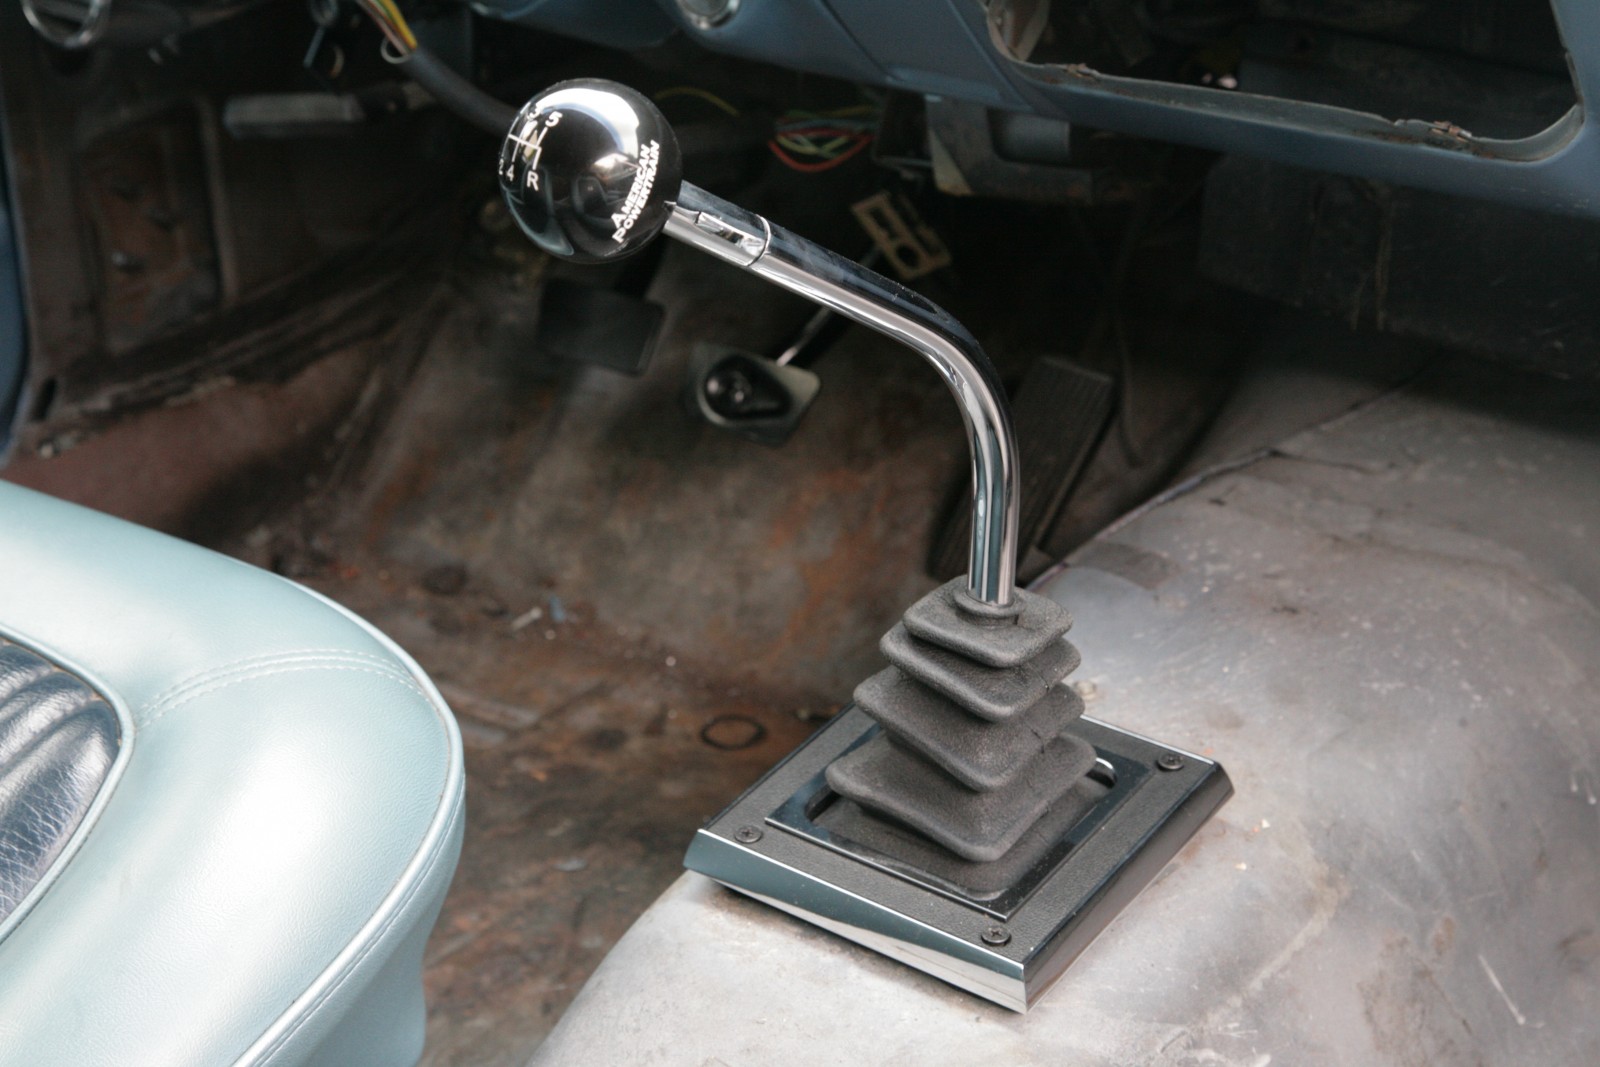
There are numerous T5 shifter sticks on the market, but we want this swap to be stealthy, so we’re using Scott Drake’s 4-speed style T5 stick. The White Lightening uses slightly larger diameter bolts, so we had to open up the holes a step.
With the stick installed on the adapter plate, it’s easy to see that the small bit of offset works to center the stick perfectly in the stock automatic shifter opening.
The black shift knob comes standard with the American Powertrain kit, and the Summit package adds in the correct Scott Drake shift boot and bezel. Even with a stock length handle, the throws are quite short thanks to the White Lightening shifter. (Image/Christopher Campbell)
One last touch; the Summit package even includes brand new clutch and brake pedal pads and chrome trim. The plain black brake pad for non-disc brake cars is standard, but SDK- C5ZZ-2454-D for disc brakes cars is available separately.
Summit Racing 1964.5-1966 Mustang
(289, 302, 351W) Auto to T5 5-Speed Swap Kit Parts List
ARP-200-2802: ARP Pro Series Flywheel Bolt Kits
ARP-150-2202: ARP Pro Series Pressure Plate Bolt Kits
AWR-PFFO10001A: American Powertrain ProFit Manual Transmission Installation Kits
AWR-HMFO02601G: American Powertrain Hydramax Hydraulic Clutch Release Systems
CTF-700220: Centerforce Steel Flywheels
CTF-DF920830: Centerforce Dual Friction Clutches
FMS-M-7007B: Ford Racing Bellhousing Separator Plate
FMS-M-6392-E: Ford Racing Bellhousing
FMS-M-7003-Z: Ford Racing Super-Duty T5 Transmissions
SDK-C5ZZ-7210-T: Scott Drake Shifter Lever
SDK-C5ZZ-7277-B: Scott Drake Manual Shifter Boot
SDK-C4ZB-7262-B: Scott Drake Shifter Boot Retainer
SDK-C6ZZ-7519-AR: Scott Drake Clutch Pedal Assembly
SDK-C5ZZ-7A624-B: Scott Drake Clutch Pedal Pad
SDK-C5ZZ-7B544-A: Scott Drake Clutch Pedal Pad Trim Cover
SDK- C5ZZ-2457-G: Scott Drake Brake Pedal Pad
SDK-D1ZZ-2A487-B: Scott Drake Brake Pedal Pad Trim Cover
SDK-C5ZZ2478RBMK: Scott Drake Clutch Pedal Roller Bearing Kit
Summit Racing 1967-68 Mustang/Cougar
(289, 302, 351W) Auto to T5 5-Speed Swap Kit Parts List
ARP-200-2802: ARP Pro Series Flywheel Bolt Kits
ARP-150-2202: ARP Pro Series Pressure Plate Bolt Kits
AWR-PFFO10001A: American Powertrain ProFit Manual Transmission Installation Kits
AWR-HMFO02601G: American Powertrain Hydramax Hydraulic Clutch Release Systems
CTF-700220: Centerforce Steel Flywheels
CTF-DF920830: Centerforce Dual Friction Clutches
FMS-M-7007B: Ford Racing Bellhousing Separator Plate
FMS-M-6392-E: Ford Racing Bellhousing
FMS-M-7003-Z: Ford Racing Super-Duty T5 Transmissions
SDK-C5ZZ-7210-T: Scott Drake Shifter Lever
SDK-C5ZZ-7277-B: Scott Drake Manual Shifter Boot
SDK-C4ZB-7262-B: Scott Drake Shifter Boot Retainer
SDK-C7ZZ-7519-AR: Scott Drake Clutch Pedal Assembly
SDK-C5ZZ-7A624-B: Scott Drake Clutch Pedal Pad
SDK-C5ZZ-7B544-A: Scott Drake Clutch Pedal Pad Trim Cover
SDK- C5ZZ-2457-G: Scott Drake Brake Pedal Pad
SDK-D1ZZ-2A487-B: Scott Drake Brake Pedal Pad Trim Cover
SDK-C5ZZ2478RBMK: Scott Drake Clutch Pedal Roller Bearing Kit
 In our first installment of our ’68 Mustang rejuvenation project, we prepped our Blueprint 408 Windsor to be dropped in and replace the tired original 289. Since then, we did go ahead drop it in, but you’ll have to wait until the next installment to see that process. Our main point in dropping in the 408 right now is to set the stage for our transmission swap from a C-4 auto to T5 5-speed.
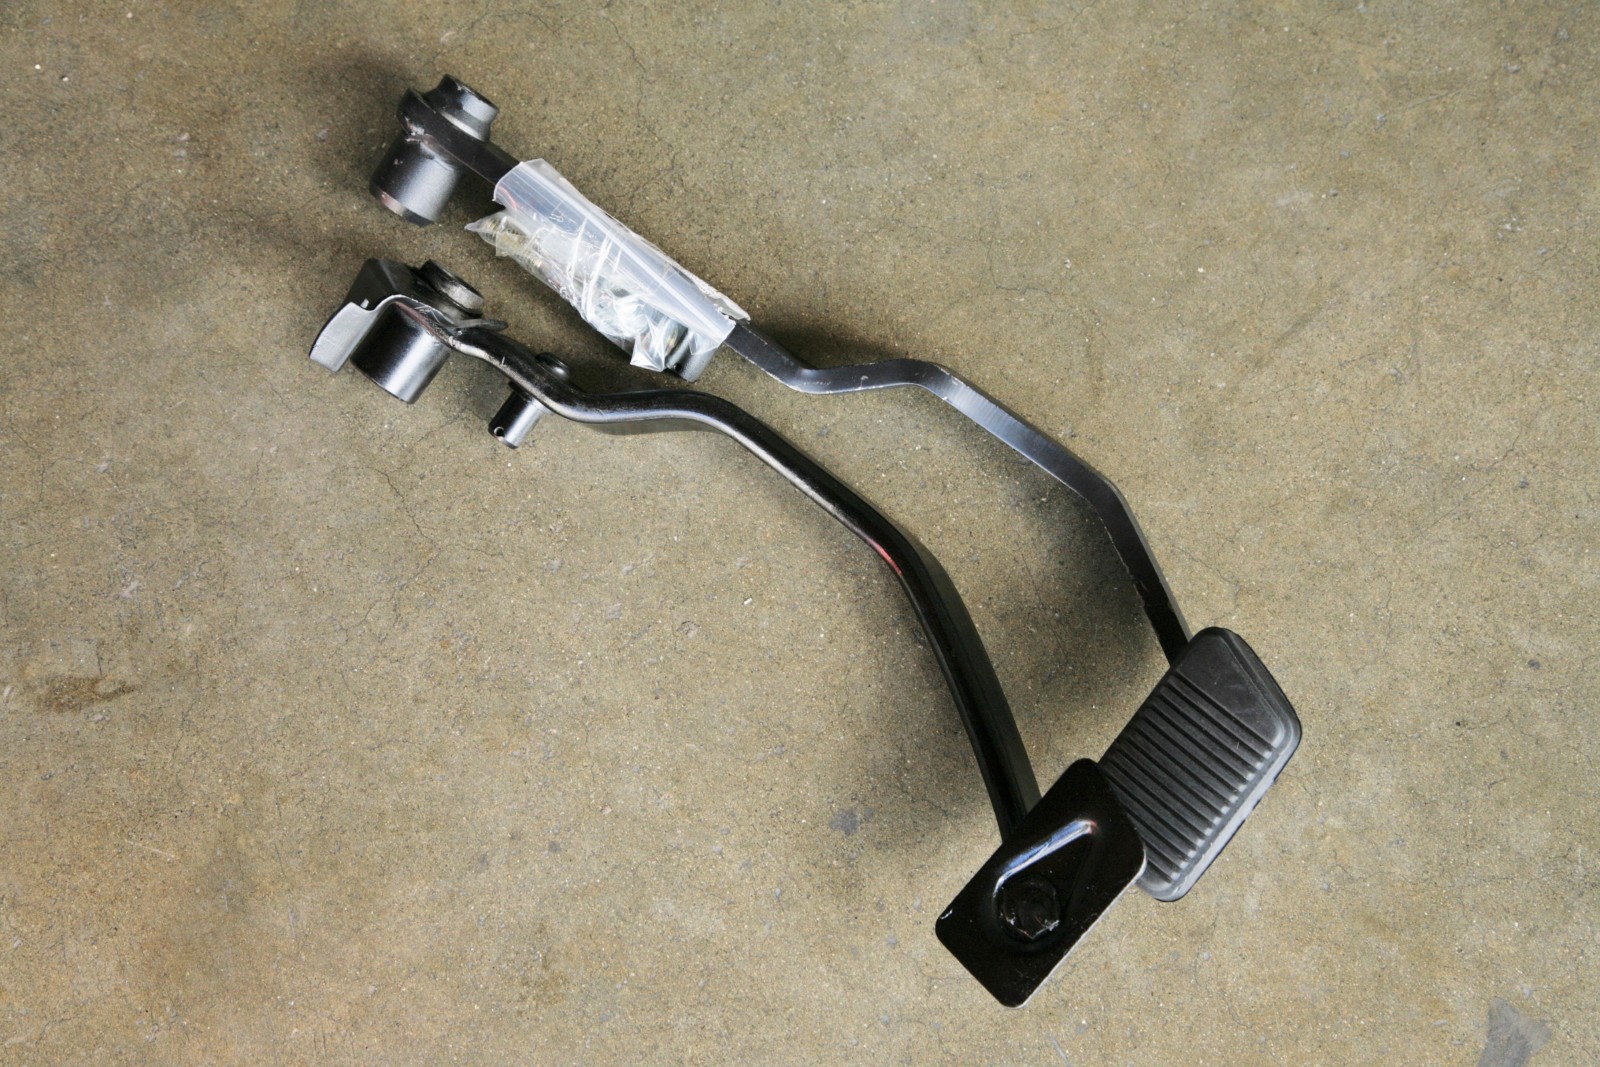


[…] a 408 cubic inch stroker small block under the hood, Read all about the swap at Summit Racing's OnAllCylinders […]
[…] you remember our last installment when we swapped in a T5 5-speed trans in place of the C4 automatic using Summit…, one of the main reasons for doing so was the joy of driving. Well, by far the biggest impact on […]
I need a T5 swap kit for a 1965 comet 5.0
Does anyone make a conversion kit for swapping a C4 automatic transmission to a 3 speed manual on a 1967 ford mustang 6 cylinder? I have to 3 speed manual transmission and the proper bell housing. I just need to find a conversation kit.
Thank you
Jeff C.