By the 1970s, racers knew big roller-cammed motors ran a whole bunch better when converted from a points distributor to an electronic one. Those long duration roller motors idled better and seemed easier to tune with a good electronic setup. Another plus: engines like the big block Chevy—a known spark plug killer—actually became easier on parts.

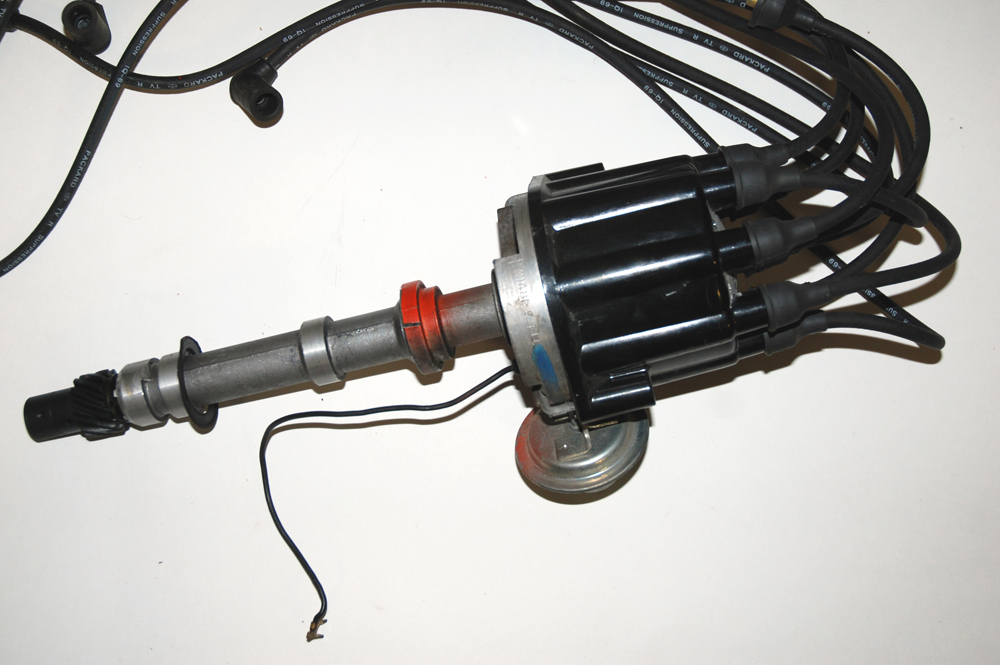
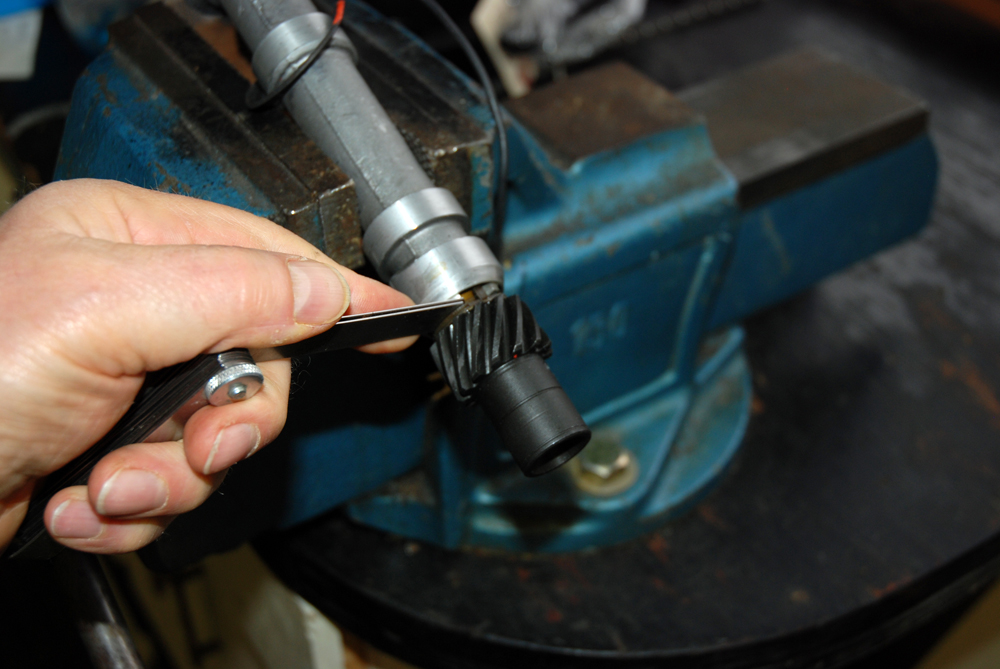
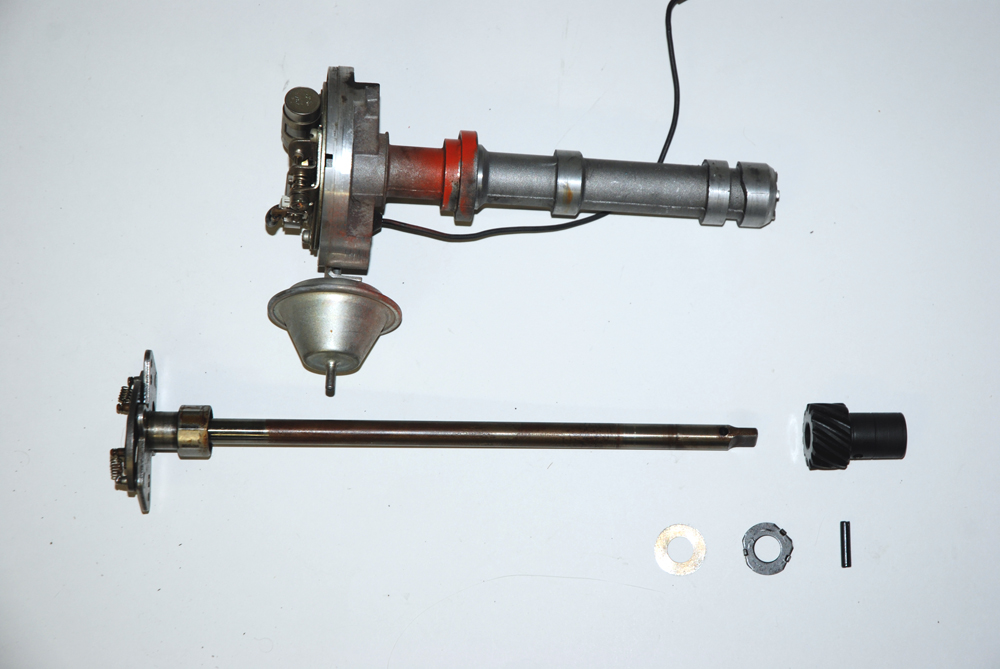
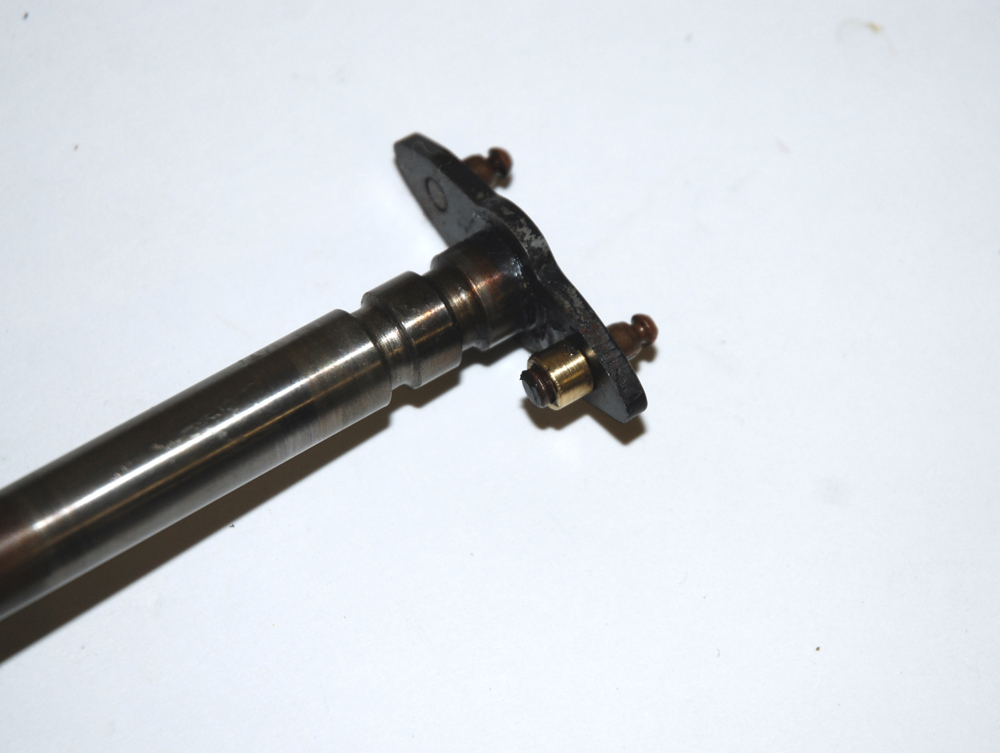
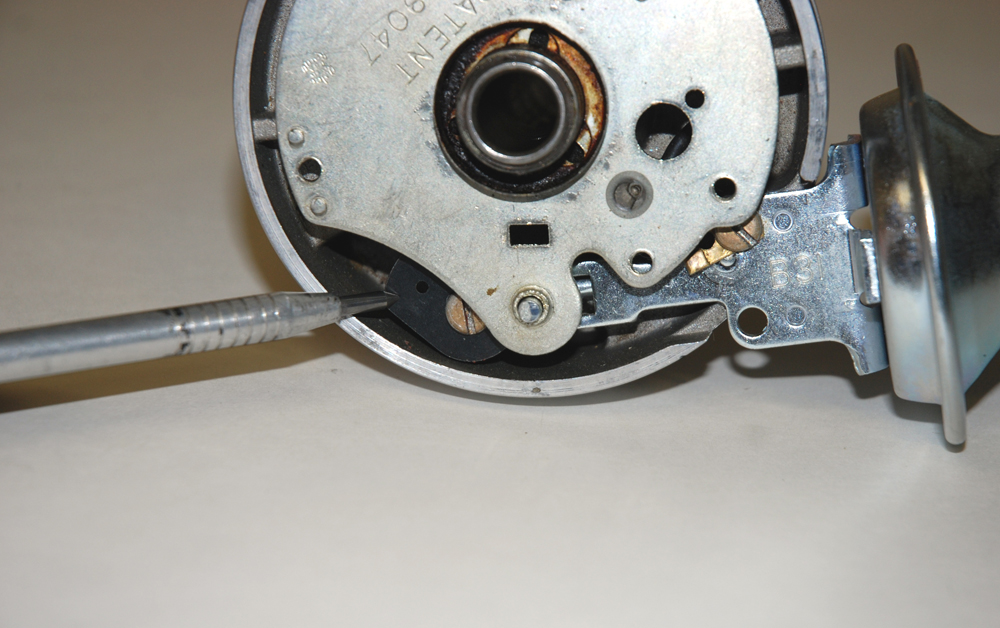
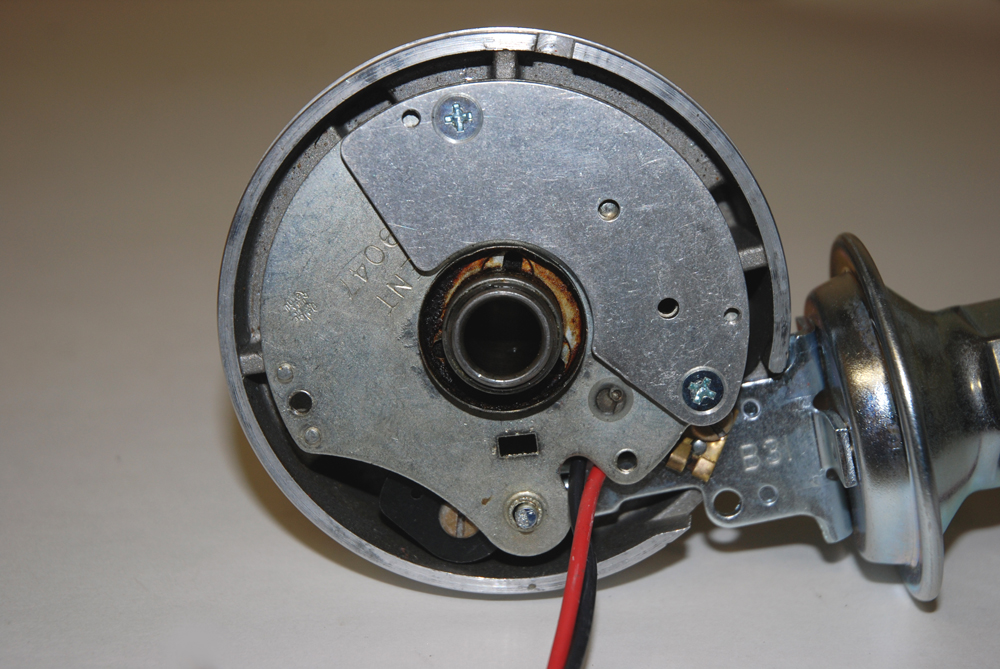
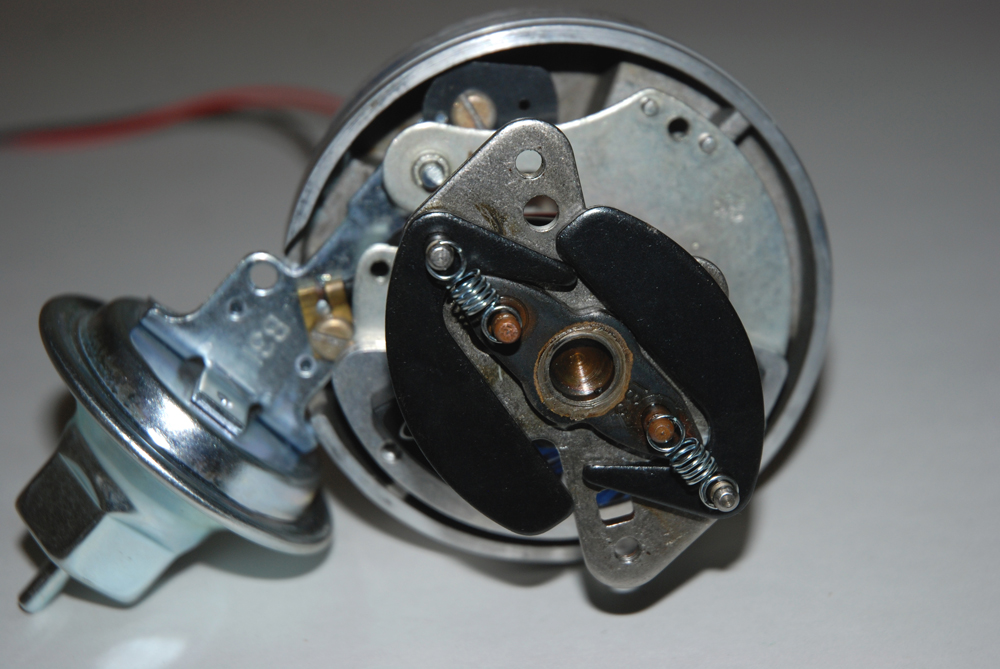
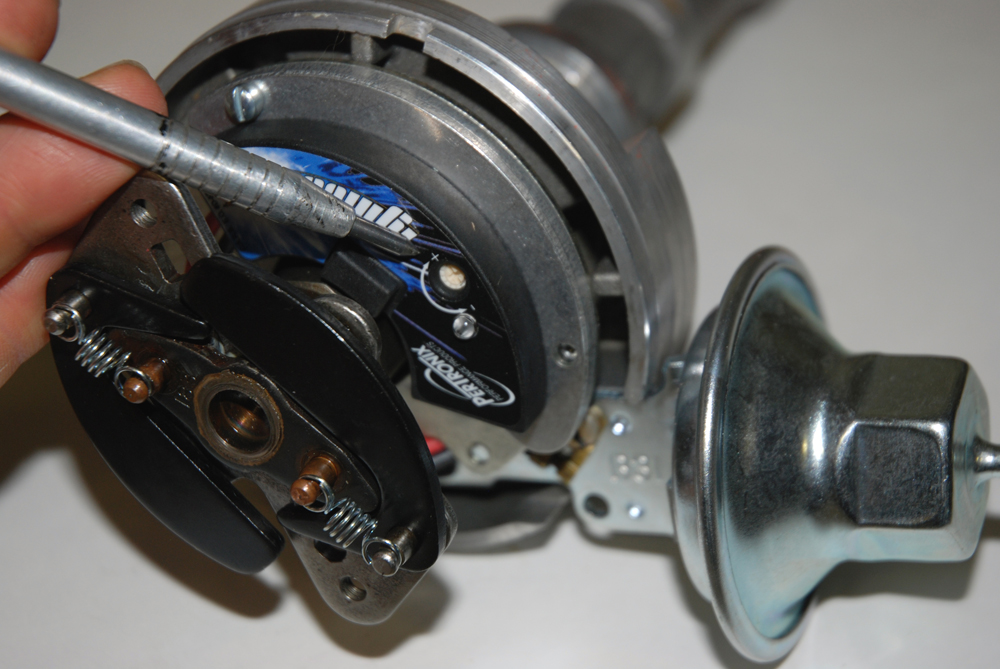
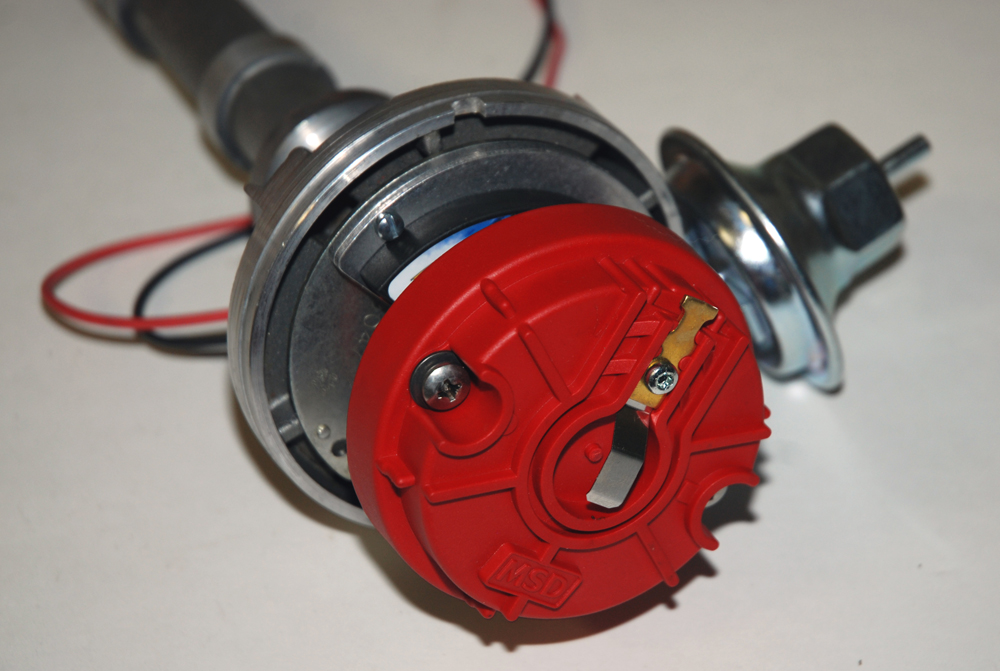
Today, you can get the performance of an electronic distributor for just about any V8 engine you have. But what if you want that performance with the look of a vintage points distributor? On a recent small block Chevy engine project, we wanted the Delco distributor to look like something we could have built four decades ago. Thanks to Summit Racing, we picked up all the parts we needed to do the job: PerTronix Ignitor III electronic conversion kit, Pertronix 7mm wires and Flame-Thrower coil, Crane adjustable vacuum advance kit, and parts from ACCEL, Moroso, and MSD. The photos will show you how it all went together.


a delco single point engine distributor removed from the vehicle
using a feeler gauge to check shim thickness on a distributor shaft
a disassembled automotive distributor
brass bushings on a distributor shaft
adjustable vacuum advance installed on a distributor
points plate removed from a distributor
dial caliper next to a distributor shaft and gear
nylon distributor shim washers
close up a mechanical advance mechanism on an automotive engine distributor
pertronix ignition module in a vintage distributor
rotor on an engine distributor
ignition wires and a flame thrower 3 ignition coil

Here is the patient, a bone-stock Delco single point distributor. Most Delco points distributors from 1957 to 1974 are the same internally. This particular example came off an uber-low mileage Chevy 307 (look at the dates on the wires—10-69!). That meant the shaft bushings would be in good shape but the advance curve would be pathetically slow.

Check the clearance between the oil slinger and the distributor drive gear with a feeler gauge. Our gap was huge at 0.060-inch, which will require a big shim pack to get the proper clearance.

Next, knock out the roll pin on the distributor gear. With the gear removed, you can take out the shaft. Remove the point set and condenser as well.

With the shaft out, remove the stock black plastic advance limiter bushing and replace it with the brass piece from the Moroso advance curve kit. Don’t hammer the bushing on—gently press the bushing in place using an old socket as a spacer in a bench vise.

We replaced the factory vacuum advance unit with an adjustable advance from Crane Cams. It allows you to configure the rate at which the vacuum advance comes in. You change the advance rate by sliding a 3/32-inch Allen wrench through the vacuum port; turning the adjustment screw clockwise increases advance. Crane includes a vacuum advance limiter (shown by the pointer) as an option for engines with high lift/long duration camshafts that don’t generate much engine vacuum.

The PerTronix Ignitor III eliminates the need to replace and adjust points. Even better, it provides multiple sparks throughout the rev range and has a built-in adjustable rev limiter. Installation is dirt simple: 1) Replace the old coil wire grommet with the one from the PerTronix kit. 2) Route the PerTronix unit’s wires under the advance plate. 3) Attach the spacer plate (at right) with two 8/32-inch flathead screws. 4) Attach the Ignitor III module to the spacer.

In the old days, it was common to use shaft rocker arm shims to set distributor end clearance, but Moroso offers a proper shim kit for the job. We needed .070-inch worth of shims (new ones plus the originals) to get the preferred .020-inch end clearance. Proper end clearance allows the distributor to spin more smoothly, which means less spark scatter.

If you’ve decked the block or milled the cylinder heads, you’ll find the distributor might not fit correctly. On a Chevy V8 like ours, the distributor will sit too far down on the oil pump drive shaft. Moroso offers these cool nylon shims that allow you to space the distributor up on the intake manifold to correct the problem.

We lightly lubed the mechanical advance mechanism with a dab of lithium grease under the weights. We used a pair of weights and a set of medium weight springs from the Moroso advance curve kit. Three different pairs of springs are included, so don’t be afraid to mix and match as needed. Every combination will require a different rate of advance along with varying amounts of vacuum advance. Typically, cars with an automatic transmission like a quicker, shorter curve when compared to stick shift combinations. Compression ratio, your elevation above sea level, and fuel quality will also have an impact on how much (or little) advance your engine will tolerate.

The pointer shows the adjustment screw for the built-in rev limiter on the PerTronix Ignitor III. The range of adjustment is 4,000-9,000 RPM. Setting the limiter is easy when following these steps: 1) Spin the adjuster screw clockwise until it stops. 2) Turn the screw counterclockwise until it stops. The built-in LED indicator lamp will slowly flash. 3) Turn the dial clockwise as you watch the indicator lamp. A long flash is a 1,000 RPM increment; a short flash is a 100 RPM increment. Example: seven long flashes and one short flash is 7,100 RPM. 4) Allow the rev limiter to cycle through three times. It’s now set. 5) You can either set the rev limiter outside of the distributor with a nine volt battery. The red power wire goes to the batteries positive post; the negative post is jumpered to the spacer plate on the distributor.

This MSD rotor has a blade is slightly longer than most OEM replacement rotors. That helps better deliver the spark to the right distributor cap terminal. The ACCEL cap has brass terminals, which are much better spark conductors than aluminum. Aside from the hex on the vacuum advance unit, the distributor looks just like the trick setup used in the 1960s.

If you didn’t have a chrome plated coil back in the day, you weren’t cool. The PerTronix 0.32-ohm Flame-Thrower coil fits the bill and is designed to work with the Ignitor III ignition system. The icing on the cake is the PerTronix 7mm spiral core ignition wires, which are dead ringers for the OEM Packard wires GM used.

Parts List

PerTronix Ignitor III Ignition Kit

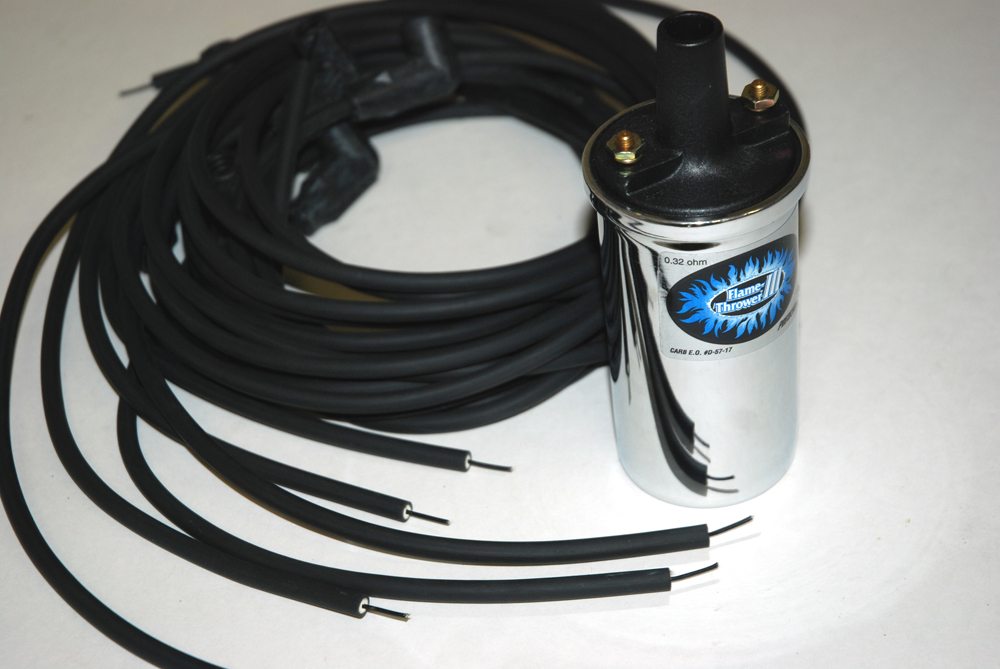
PerTronix Flame-Thrower III Coil

PerTronix 7mm Stock-Look Wires

Crane Cams Vacuum Advance Kit

Moroso Distributor Advance Curve Kit

Moroso Distributor Shim Kit

Moroso Housing Shim Kit

MSD Rotor

ACCEL Distributor Cap

Note: You can also use ACCEL Rotor and Cap Kit ACC-8120 in place of the MSD rotor and ACCEL cap shown above.

Author: Wayne Scraba

Wayne Scraba is a diehard car guy and regular contributor to OnAllCylinders. He’s owned his own speed shop, built race cars, street rods, and custom motorcycles, and restored muscle cars. He’s authored five how-to books and written over 4,500 tech articles that have appeared in sixty different high performance automotive, motorcycle and aviation magazines worldwide.