Freshening up your car’s interior with new seats and carpet not only changes the look, but also how you feel when you are driving. It just feels better when it is all new, no tears or rips, and no springs poking you in the tush.
When it comes to seating, sometimes the stock seats are just not what you want in your ride. Summit Racing offers a wide variety of upgraded seat options that fit almost anything. Some vehicles are popular enough to have bolt-in brackets available. Other vehicles will need universal brackets or home-fabricated brackets. Most will need universal-fit sliders for fore-and-aft adjustment. Those may require some level of fabrication to get the fit just right.
This is the universal-fit slider on a ProCar seat slated for a 1966 Corvette. We’ll have to fabricate mounting brackets to install these. (Image/Jefferson Bryant)We bent some 11-gauge (1/8-inch) steel into simple brackets for the front of the seat. The slider mounts have slotted holes so we can move the seat up and down or side to side to properly position the seat. (Image/Jefferson Bryant)
Making a set of seat brackets is not difficult. You need to consider the forces on the brackets when designing them. You don’t want a bracket to collapse in the middle of a quarter-mile blast or when carving some corners. That’s why seat brackets should be made from heavy-duty materials such as 11-gauge steel or thick aluminum.
Next, we measured across the rear seat mounting point to determine the length for a crossbeam-style mounting bar. We could have used four individual brackets, but the one-piece mount adds some additional strength and keeps the sliders square to the floor. (Image/Jefferson Bryant)We used ProCar seats for the Road Runner as well. They look great and hug your body in the right places. We ordered them with cloth upholstery, which was replaced with custom leather as seen in the lead image to this story. Yes, we’ll unbolt the seats before we install the carpet. (Image/Jefferson Bryant)
You don’t want bolt your new seats to a floor covered with crusty old carpet, do you? Of course not. One- or two-piece carpet that is molded to fit the floorpan is available for most popular cars. These are pretty easy to install. One-piece carpets come rolled up in a box and need some coaxing to uncurl. To get the carpet flat, unroll it on a flat surface and leave it alone for a day or two. This is best done outside on a warm sunny day.
This is one-piece molded carpet for the Road Runner. It came rolled up in a box and had to be stretched out on a flat surface to get the wrinkles out. A couple of days in the warm sun is usually enough to do that. (Image/Jefferson Bryant)Spray can adhesive is great for many things, but carpet isn’t one of them. It’s not sticky enough for automotive use—your carpet will peel up within a few months. You want to use a proper carpet adhesive like this upholstery contact cement. (Image/Jefferson Bryant)
Some cars, especially 1960s and 1970s European models, use “cut and sewn” carpets that come in several pieces. This type of carpet is more difficult to install, but it could be the best choice for custom vehicles and hot rods that don’t have a molded carpet option.
We’ll show you how we made seat brackets to install ProCar seatsin a 1966 Corvette and a 1967 Road Runner. We’ll also show you carpet installation in a 1973 VW Beetle.
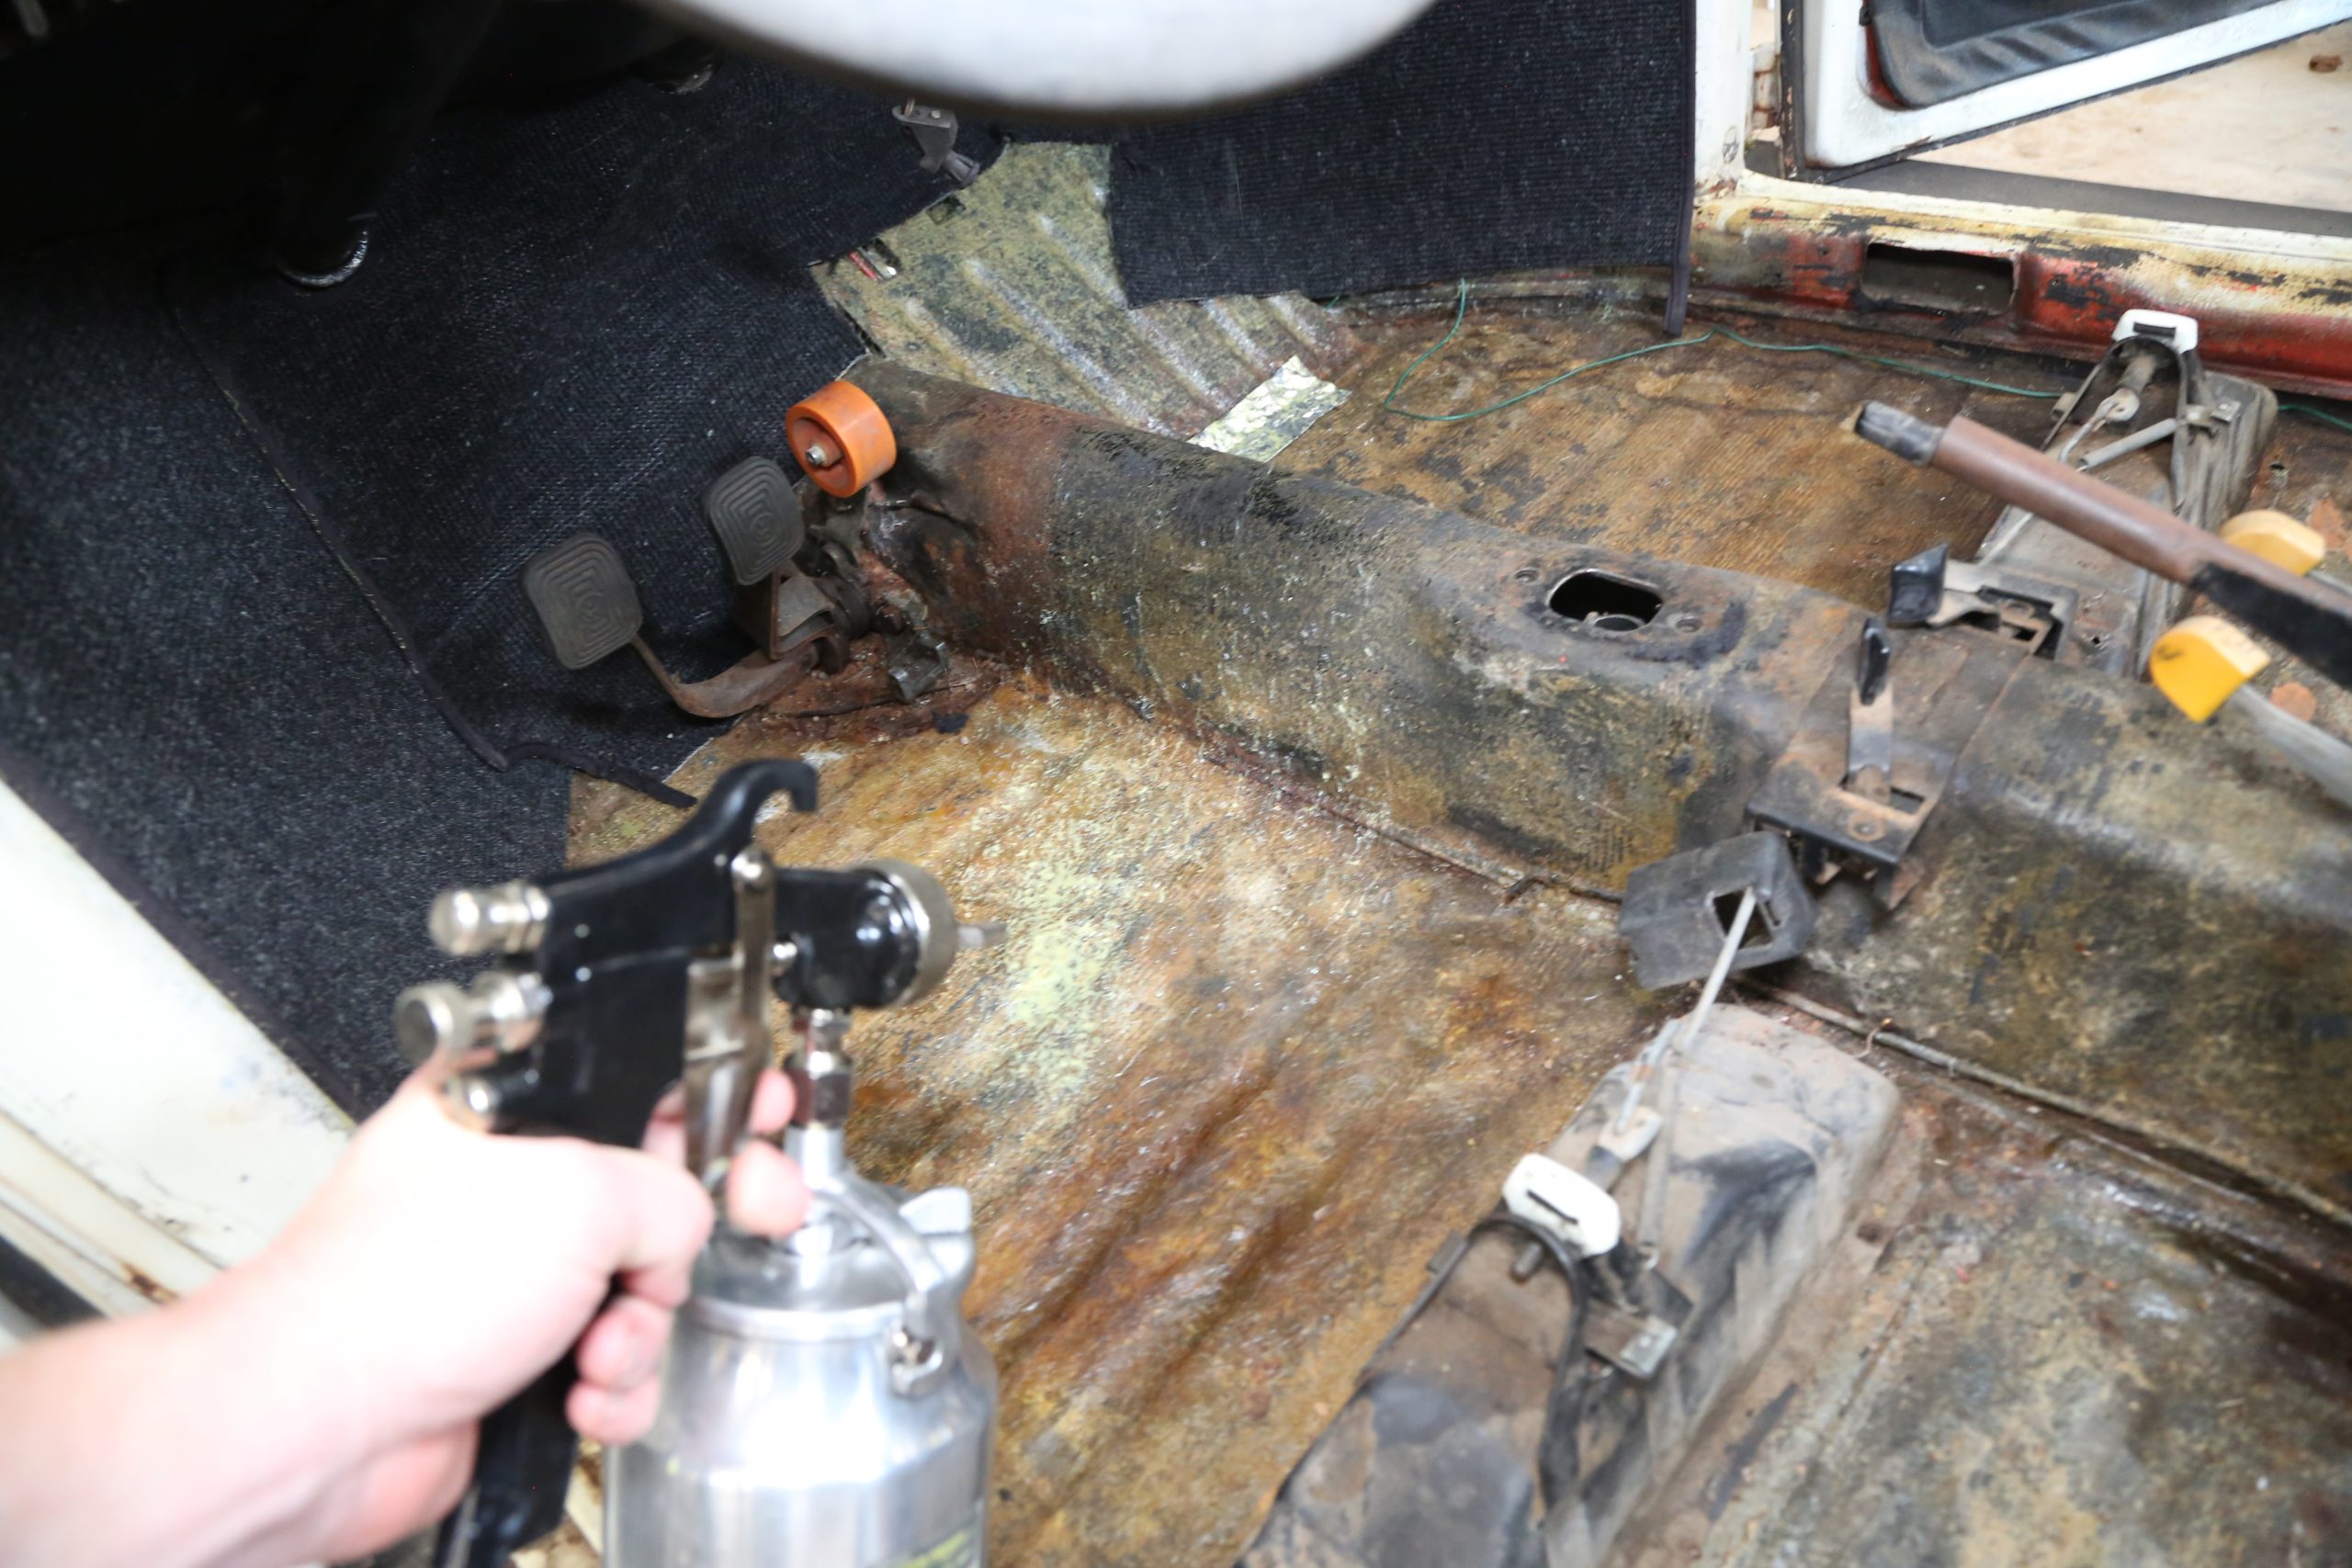
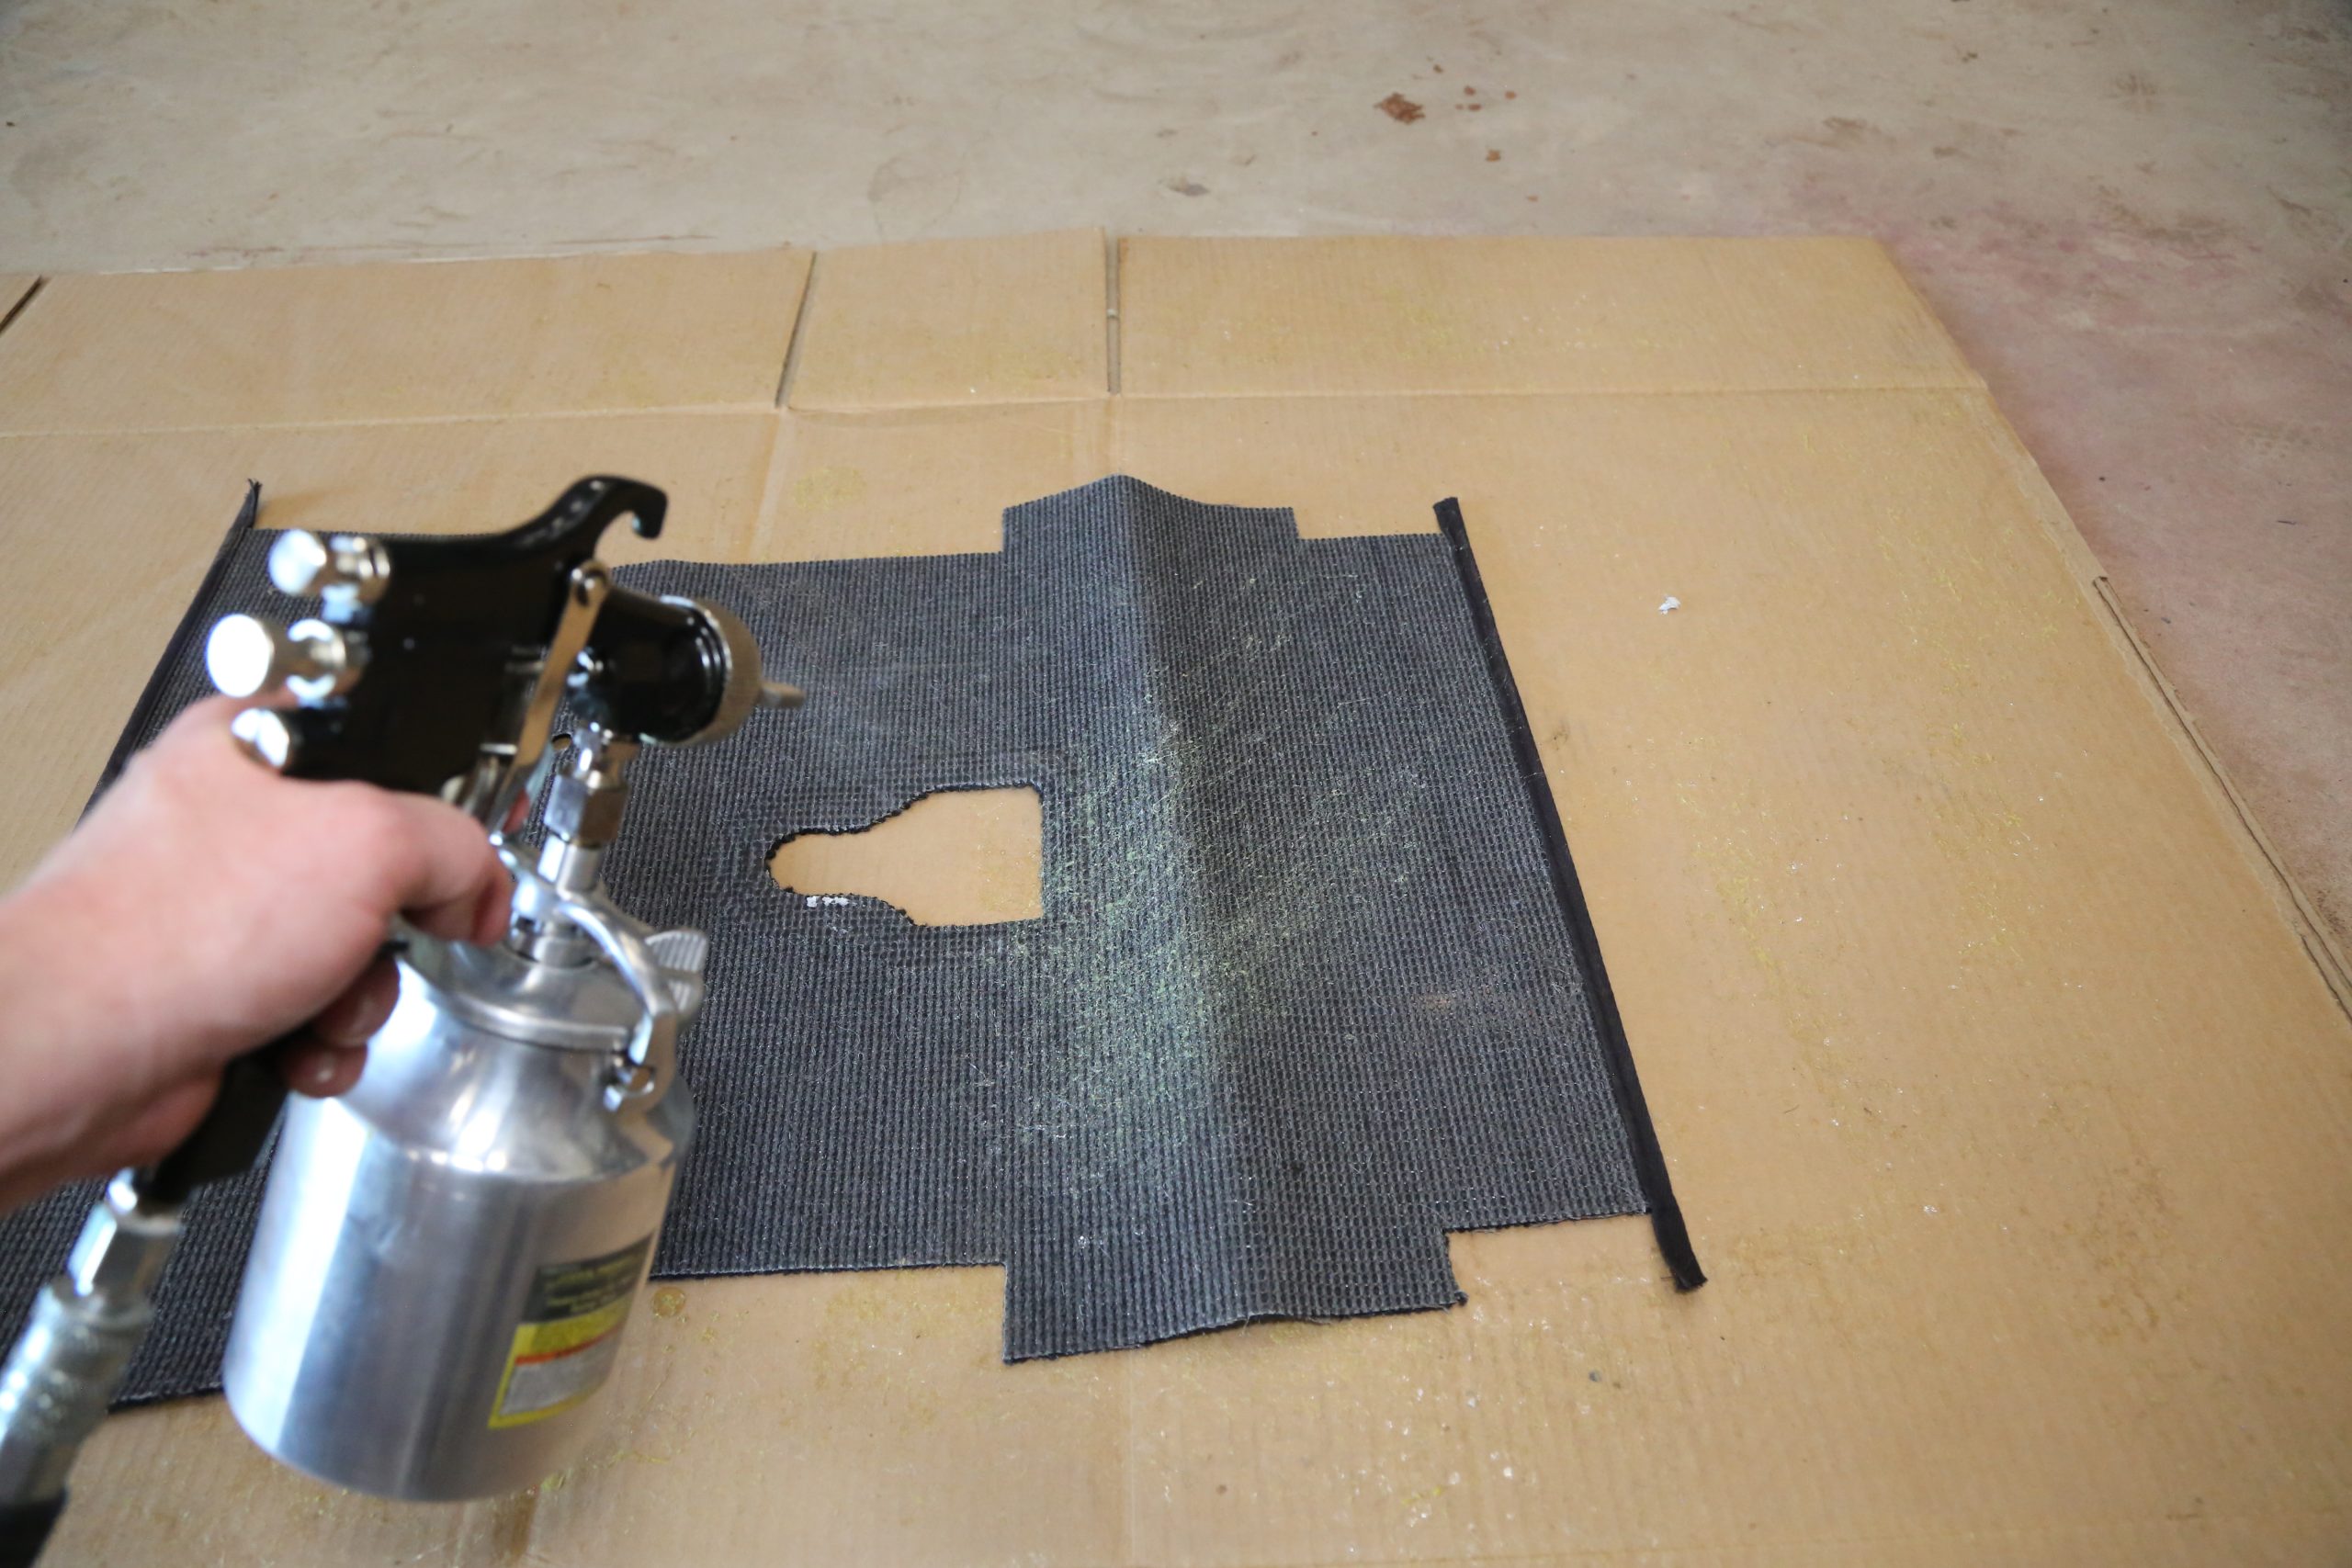
Now we’re ready to install the TMI carpet in our 1973 Vee-Dub. This car has cut-and-sew carpet, but the basic installation procedures apply to one-piece molded carpet too. The adhesive is sprayed directly onto the floor with a basic (i.e., cheap) siphon-feed paint gun. Make sure to mask anything you don’t want to get covered in adhesive. This stuff is major sticky and a pain to remove! (Image/Jefferson Bryant)The backside of the carpet gets sprayed too. Let it sit for a few minutes to tack up before installing the carpet. If you lay it down too soon, the adhesive won’t bond properly and the carpet will lift. (Image/Jefferson Bryant)Once the carpet is down, you have to find the mounting holes for the seats, console, shifter, etc. A small pick and a razor blade are the best for locating holes and then trimming away the excess carpet. DO NOT attempt to pre-cut the carpet before installation—you are guaranteed to ruin it! (Image/Jefferson Bryant)Bolt in the hard-to-reach items as you go while the rest of the interior is out. It will make your task much easier. In vehicles with cut and sewn carpet like our Beetle, installed components also help hold curved sections of carpet in place. (Image/Jefferson Bryant)Here’s our Bug with its new carpet in place. You can see the entire install on the Reddirtrodz YouTube channel. (Image/Jefferson Bryant)
Jefferson Bryant has been a full-time automotive journalist since 2003. He has written countless how-to articles, nine books, and built several award-winning vehicles.


Comments