Vehicles have had some sort of plastic trim since the 1930s when the OEMs made knobs, handles, and other interior bits out of Bakelite. All plastics, even today’s formulations, will eventually fade, chip, crack, and just outright break. While you might just toss a broken piece of plastic trim or just learn to live with it, many pieces can be repaired to live again.
There are all kinds of products out there for plastic repair, but most plastics can easily be repaired with good old JB Weld or cyanoacrylate (CA), otherwise known as super glue. The really oily types of super glue don’t stick very well, but JB Weld works on dang near anything.
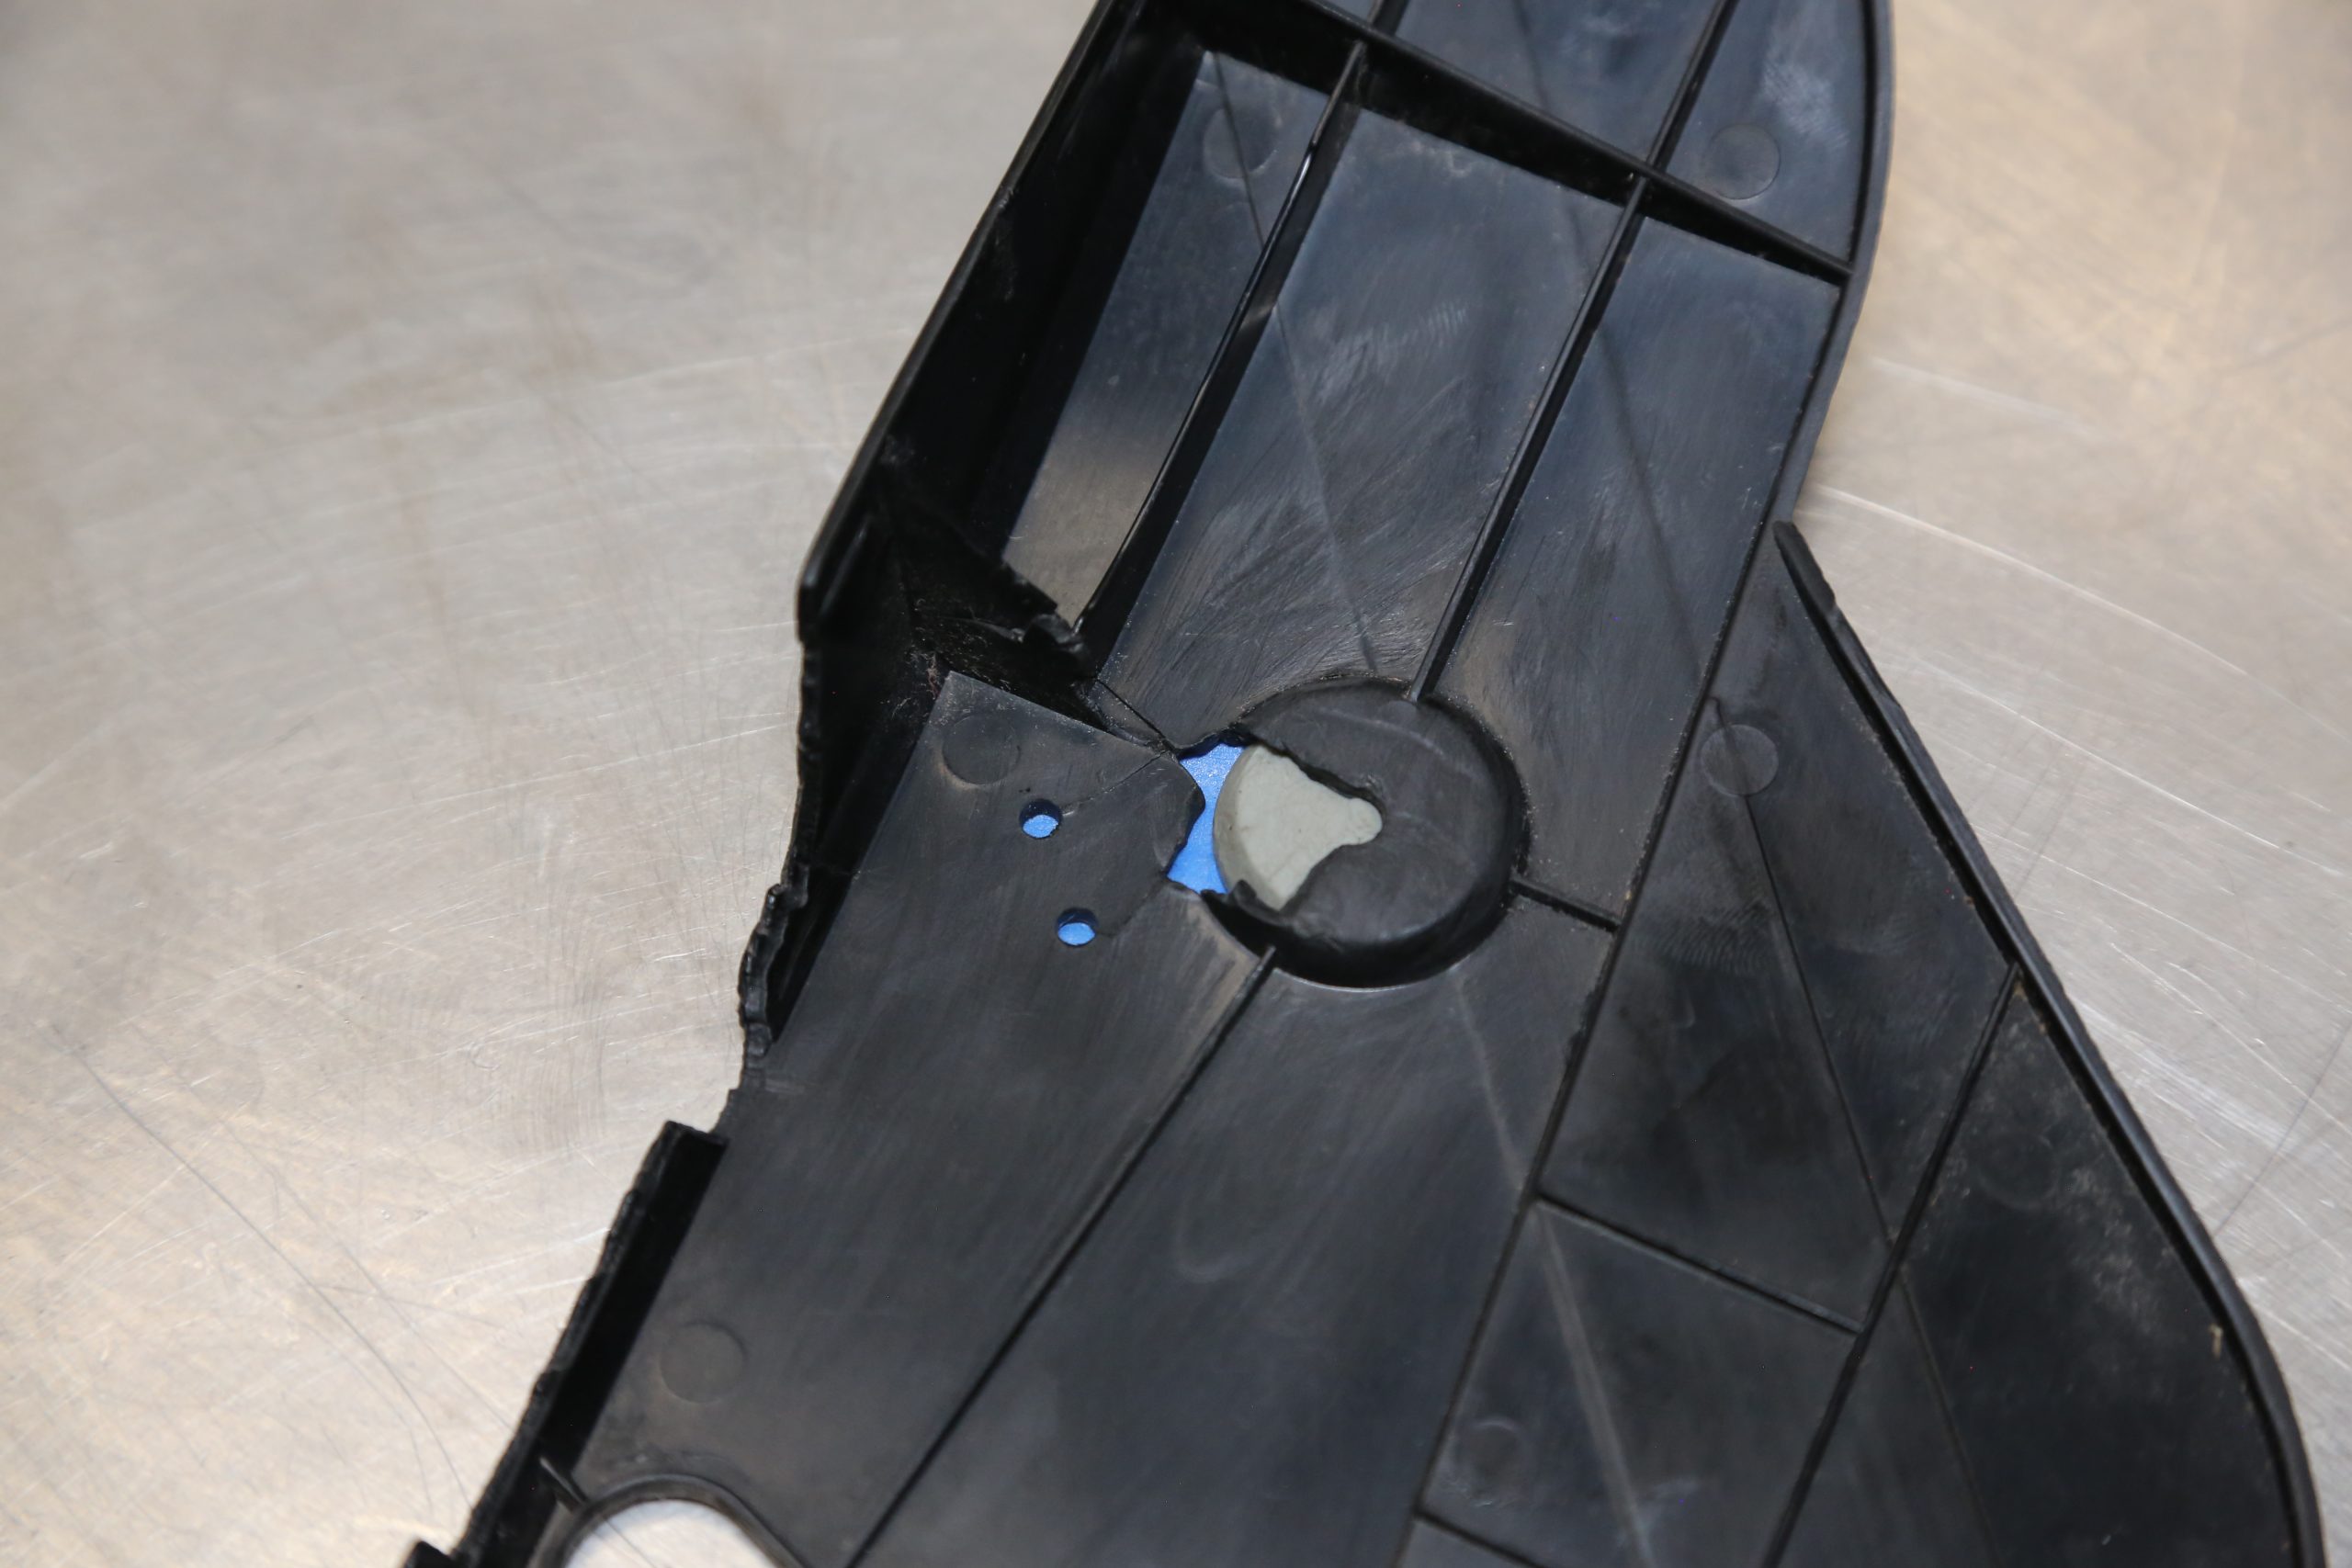
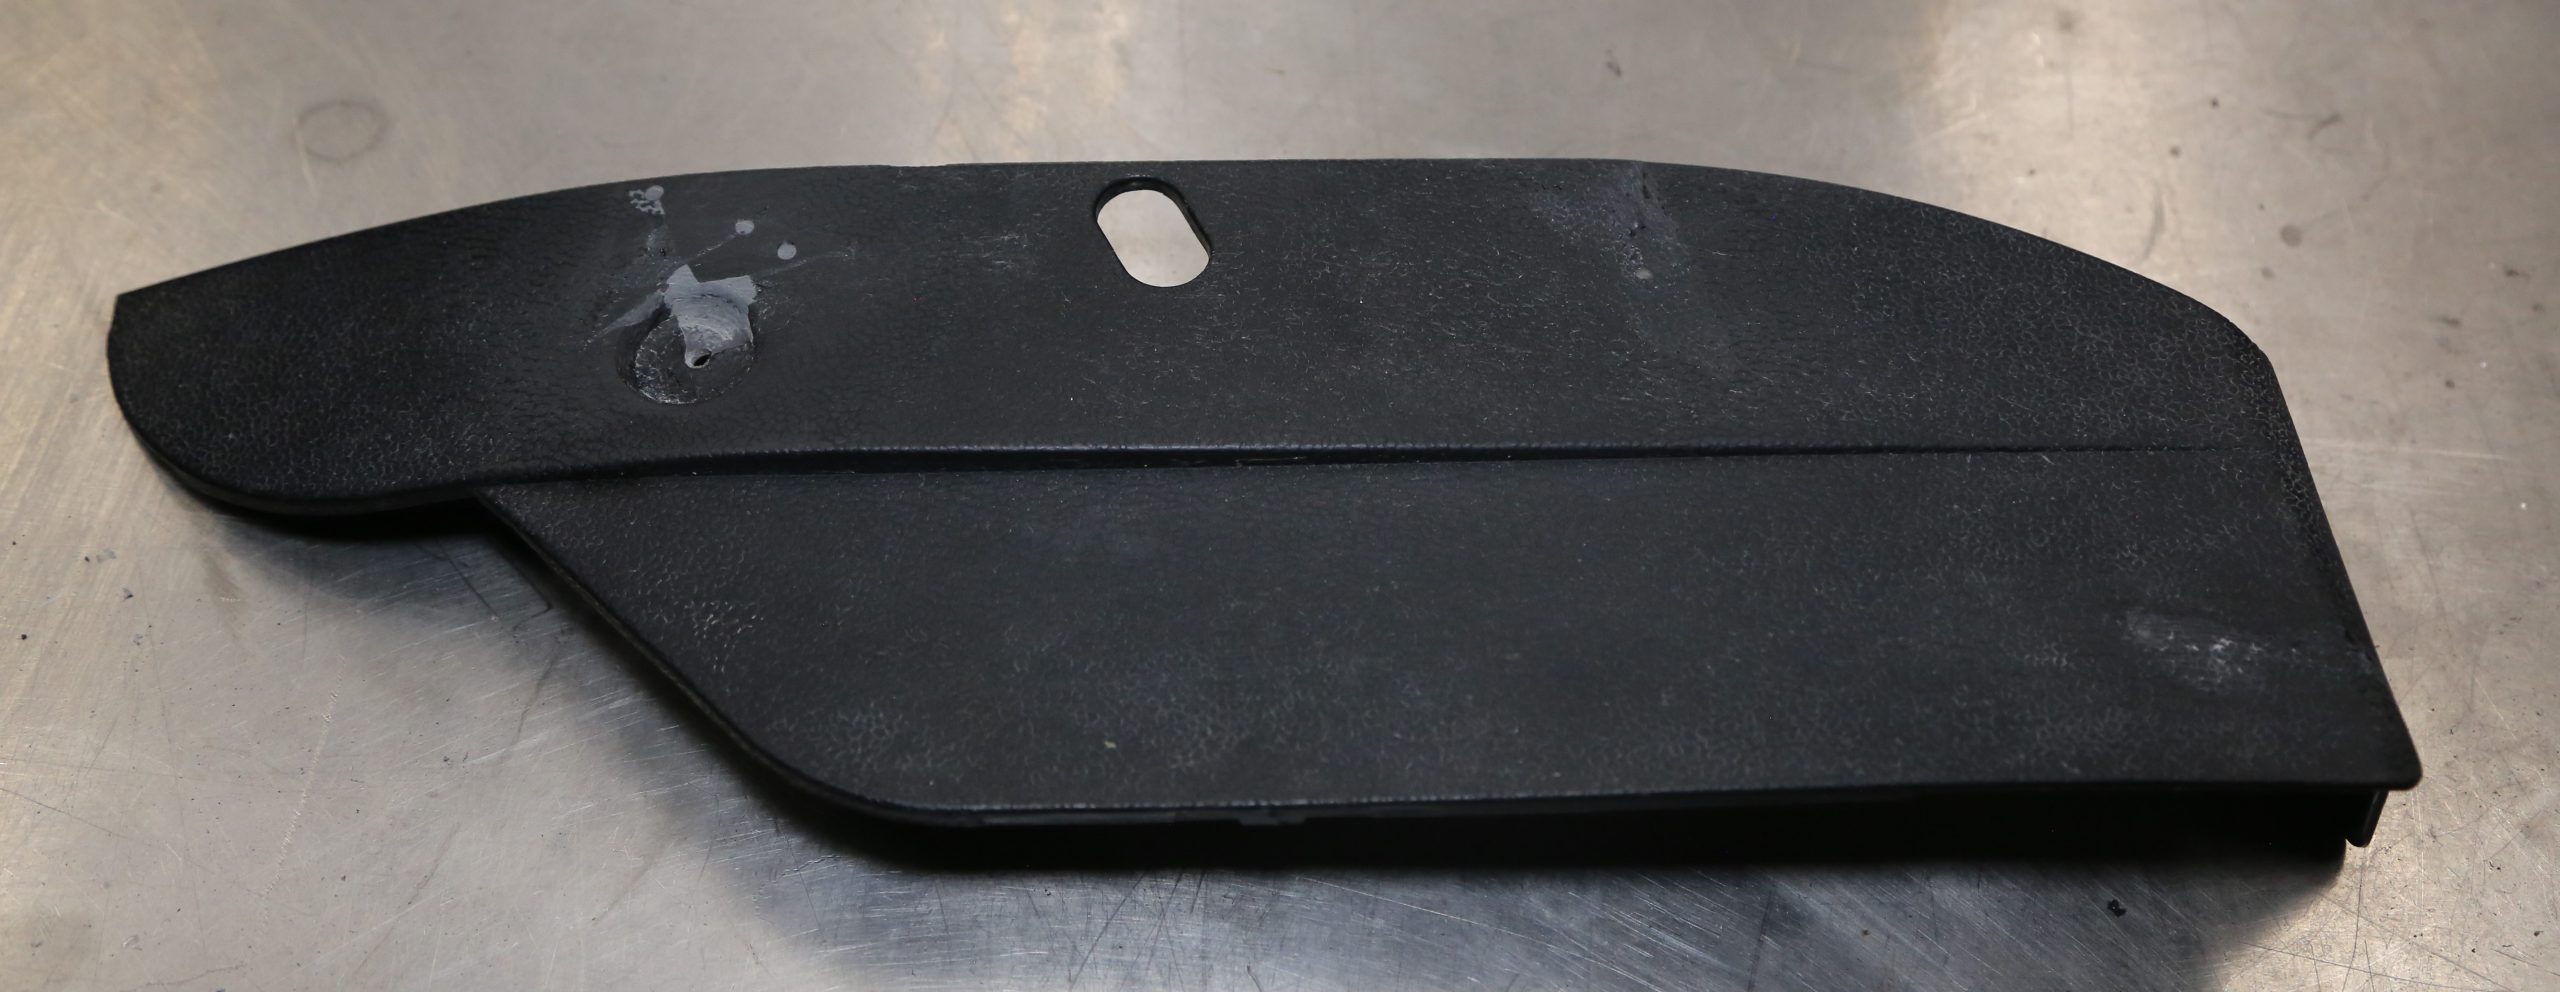
Repairing a broken tab is relatively simple, but what about more complex problems such as a missing piece? We are going to show you how to fix your broken plastic trim with some surprisingly simple tricks. Our example is a seat trim cover for a 1974 VW Beetle. When we recently installed new seat covers, and when we removed one of the covers the main side screw boss fell apart. It also has a few cracks that need to be repaired.
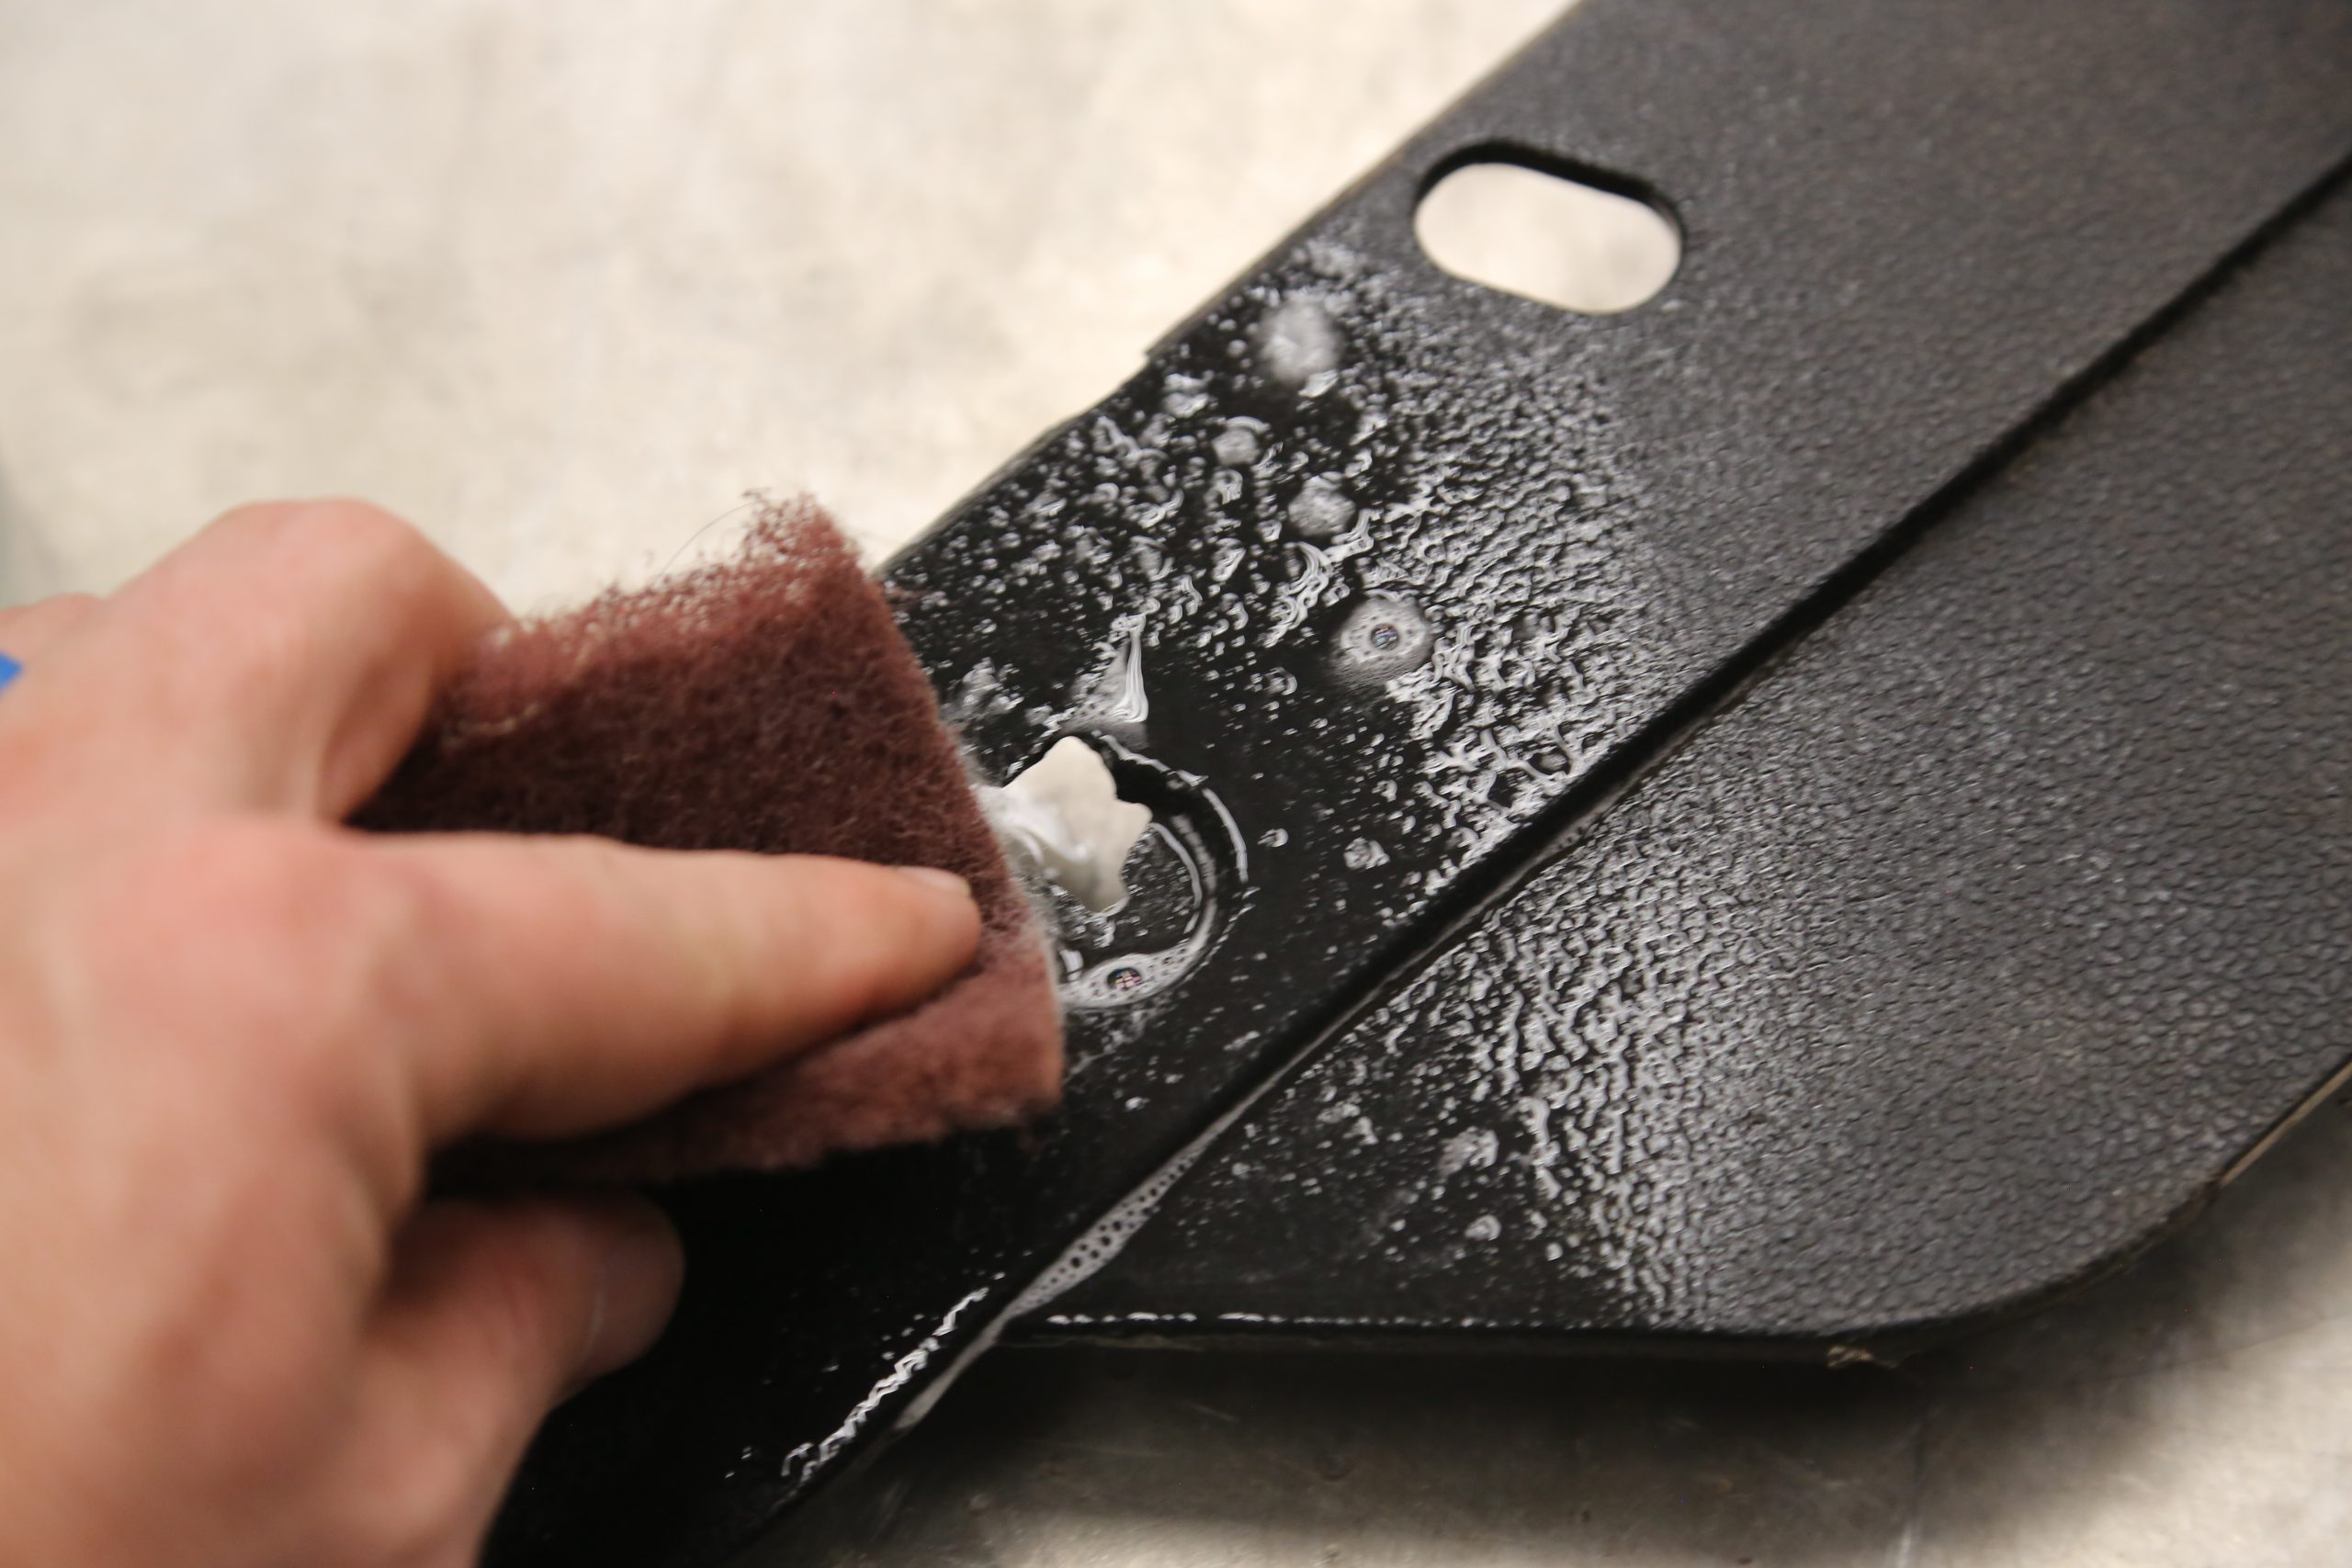
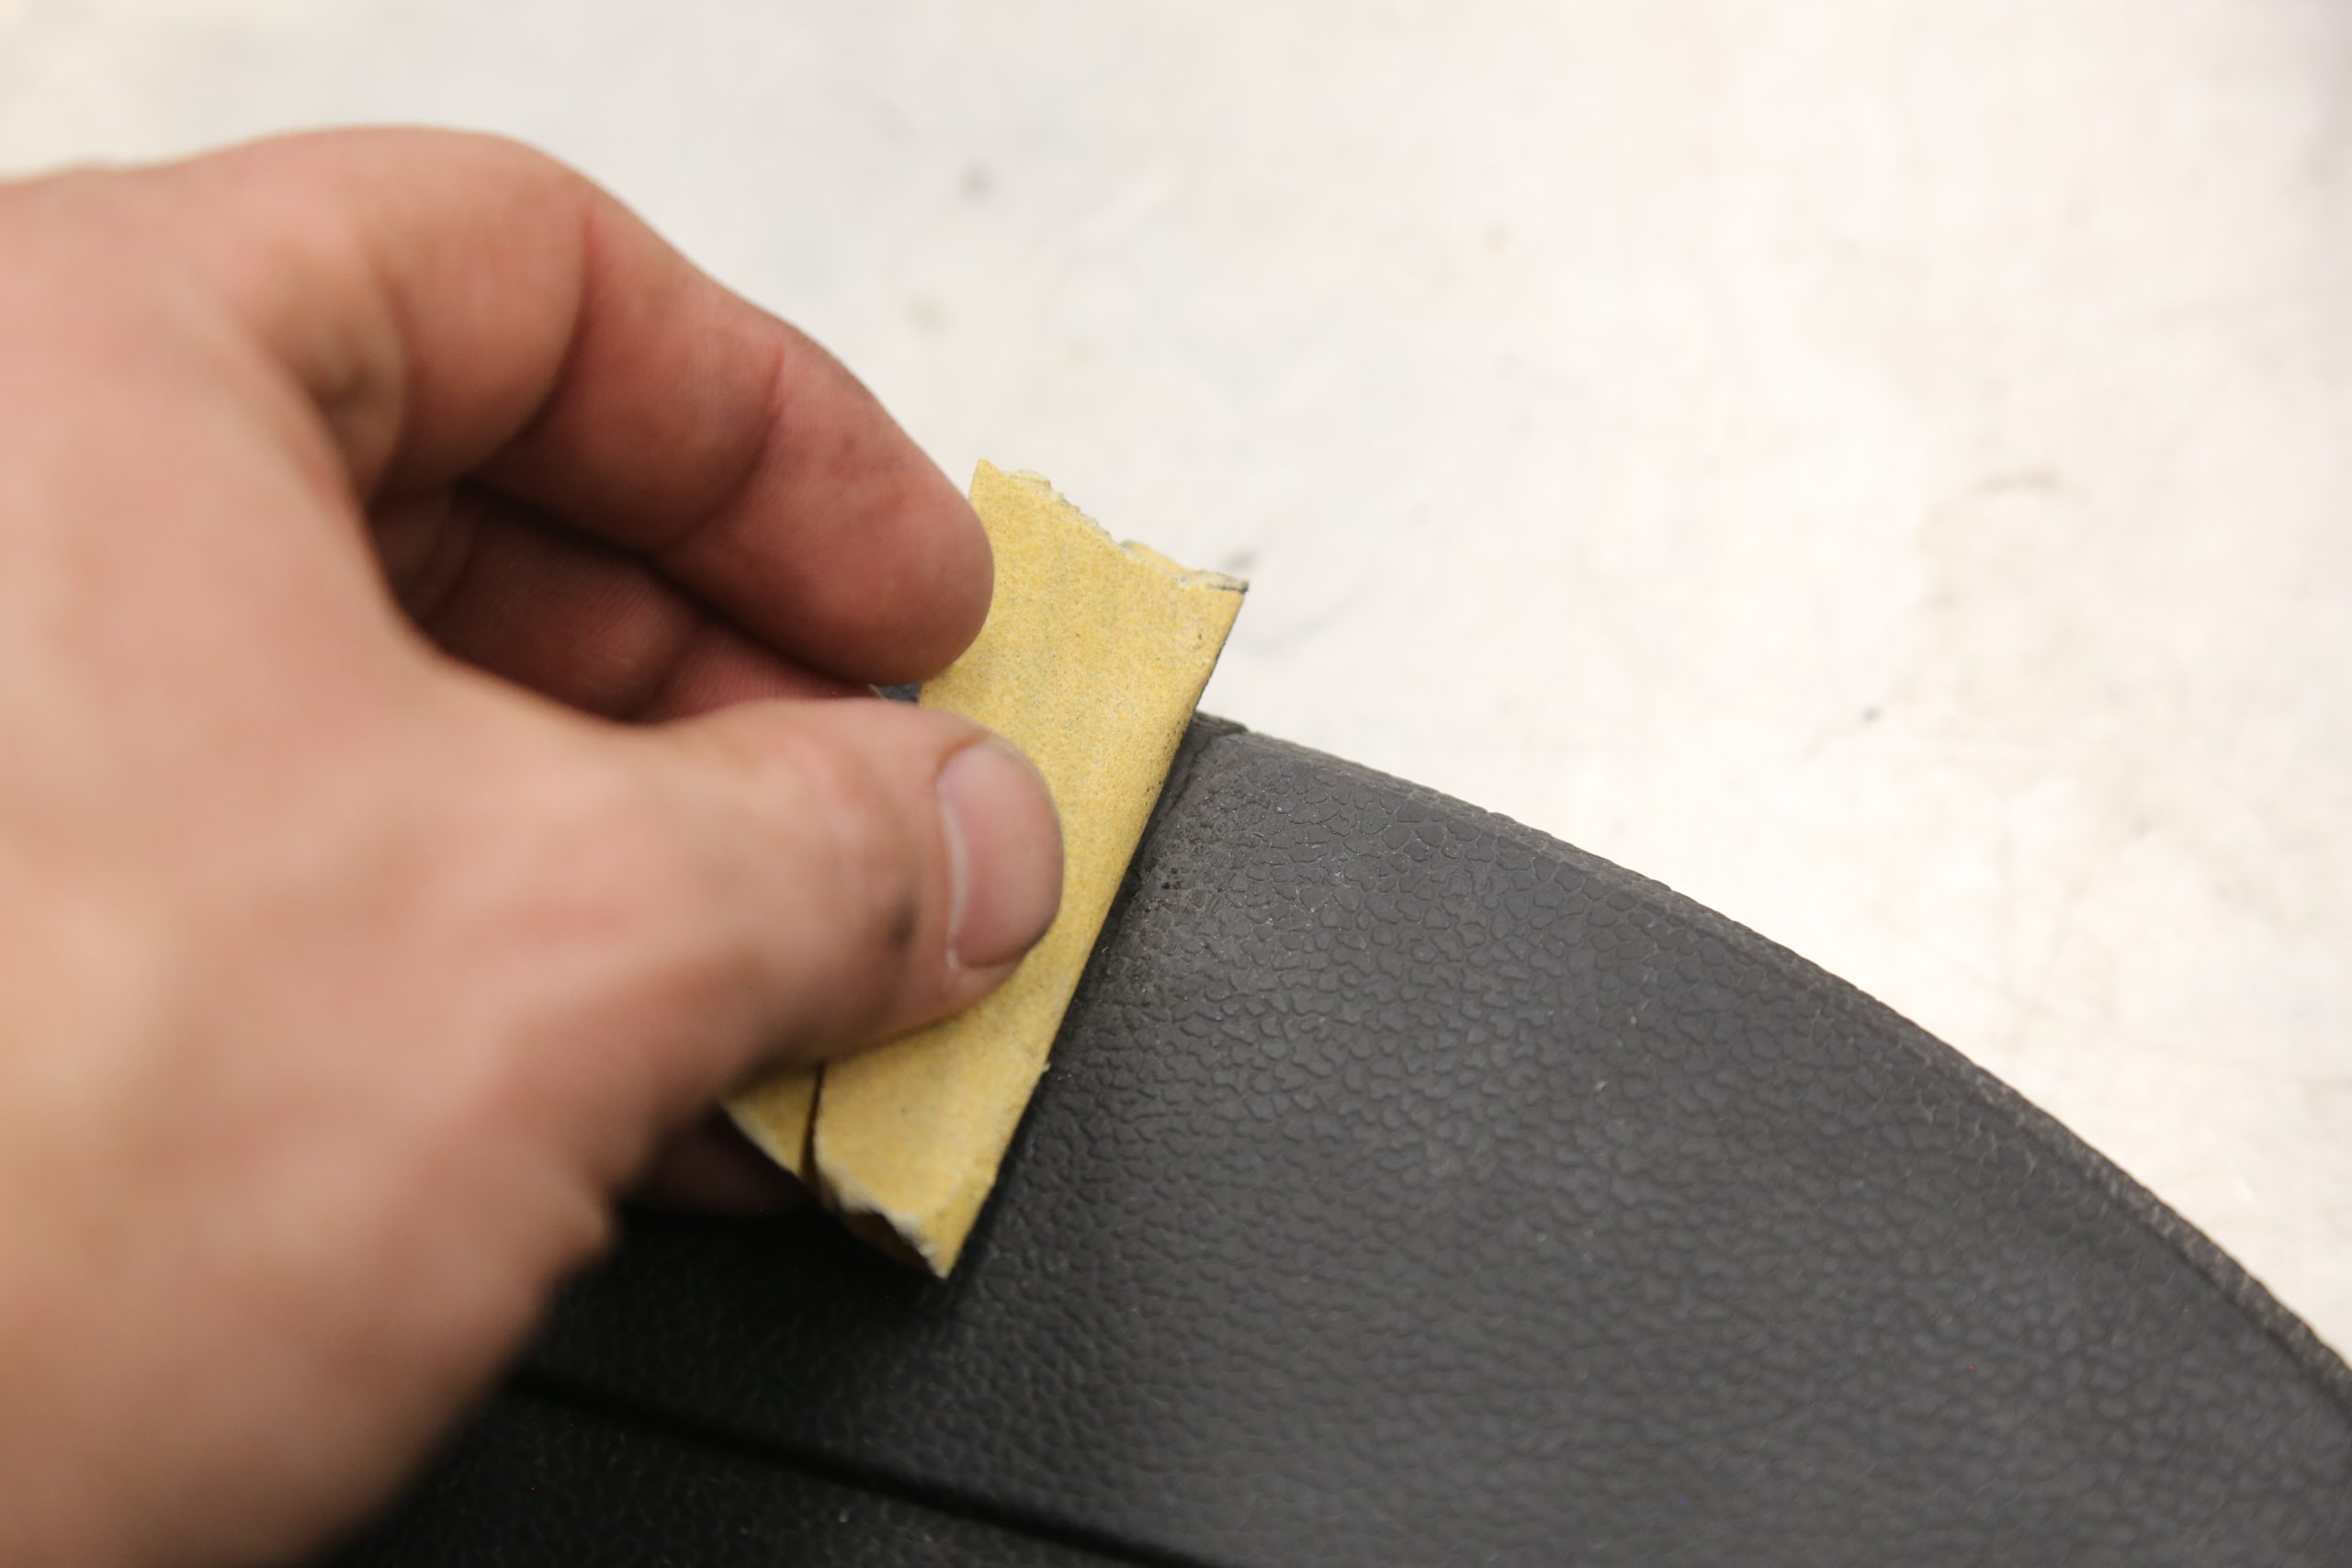
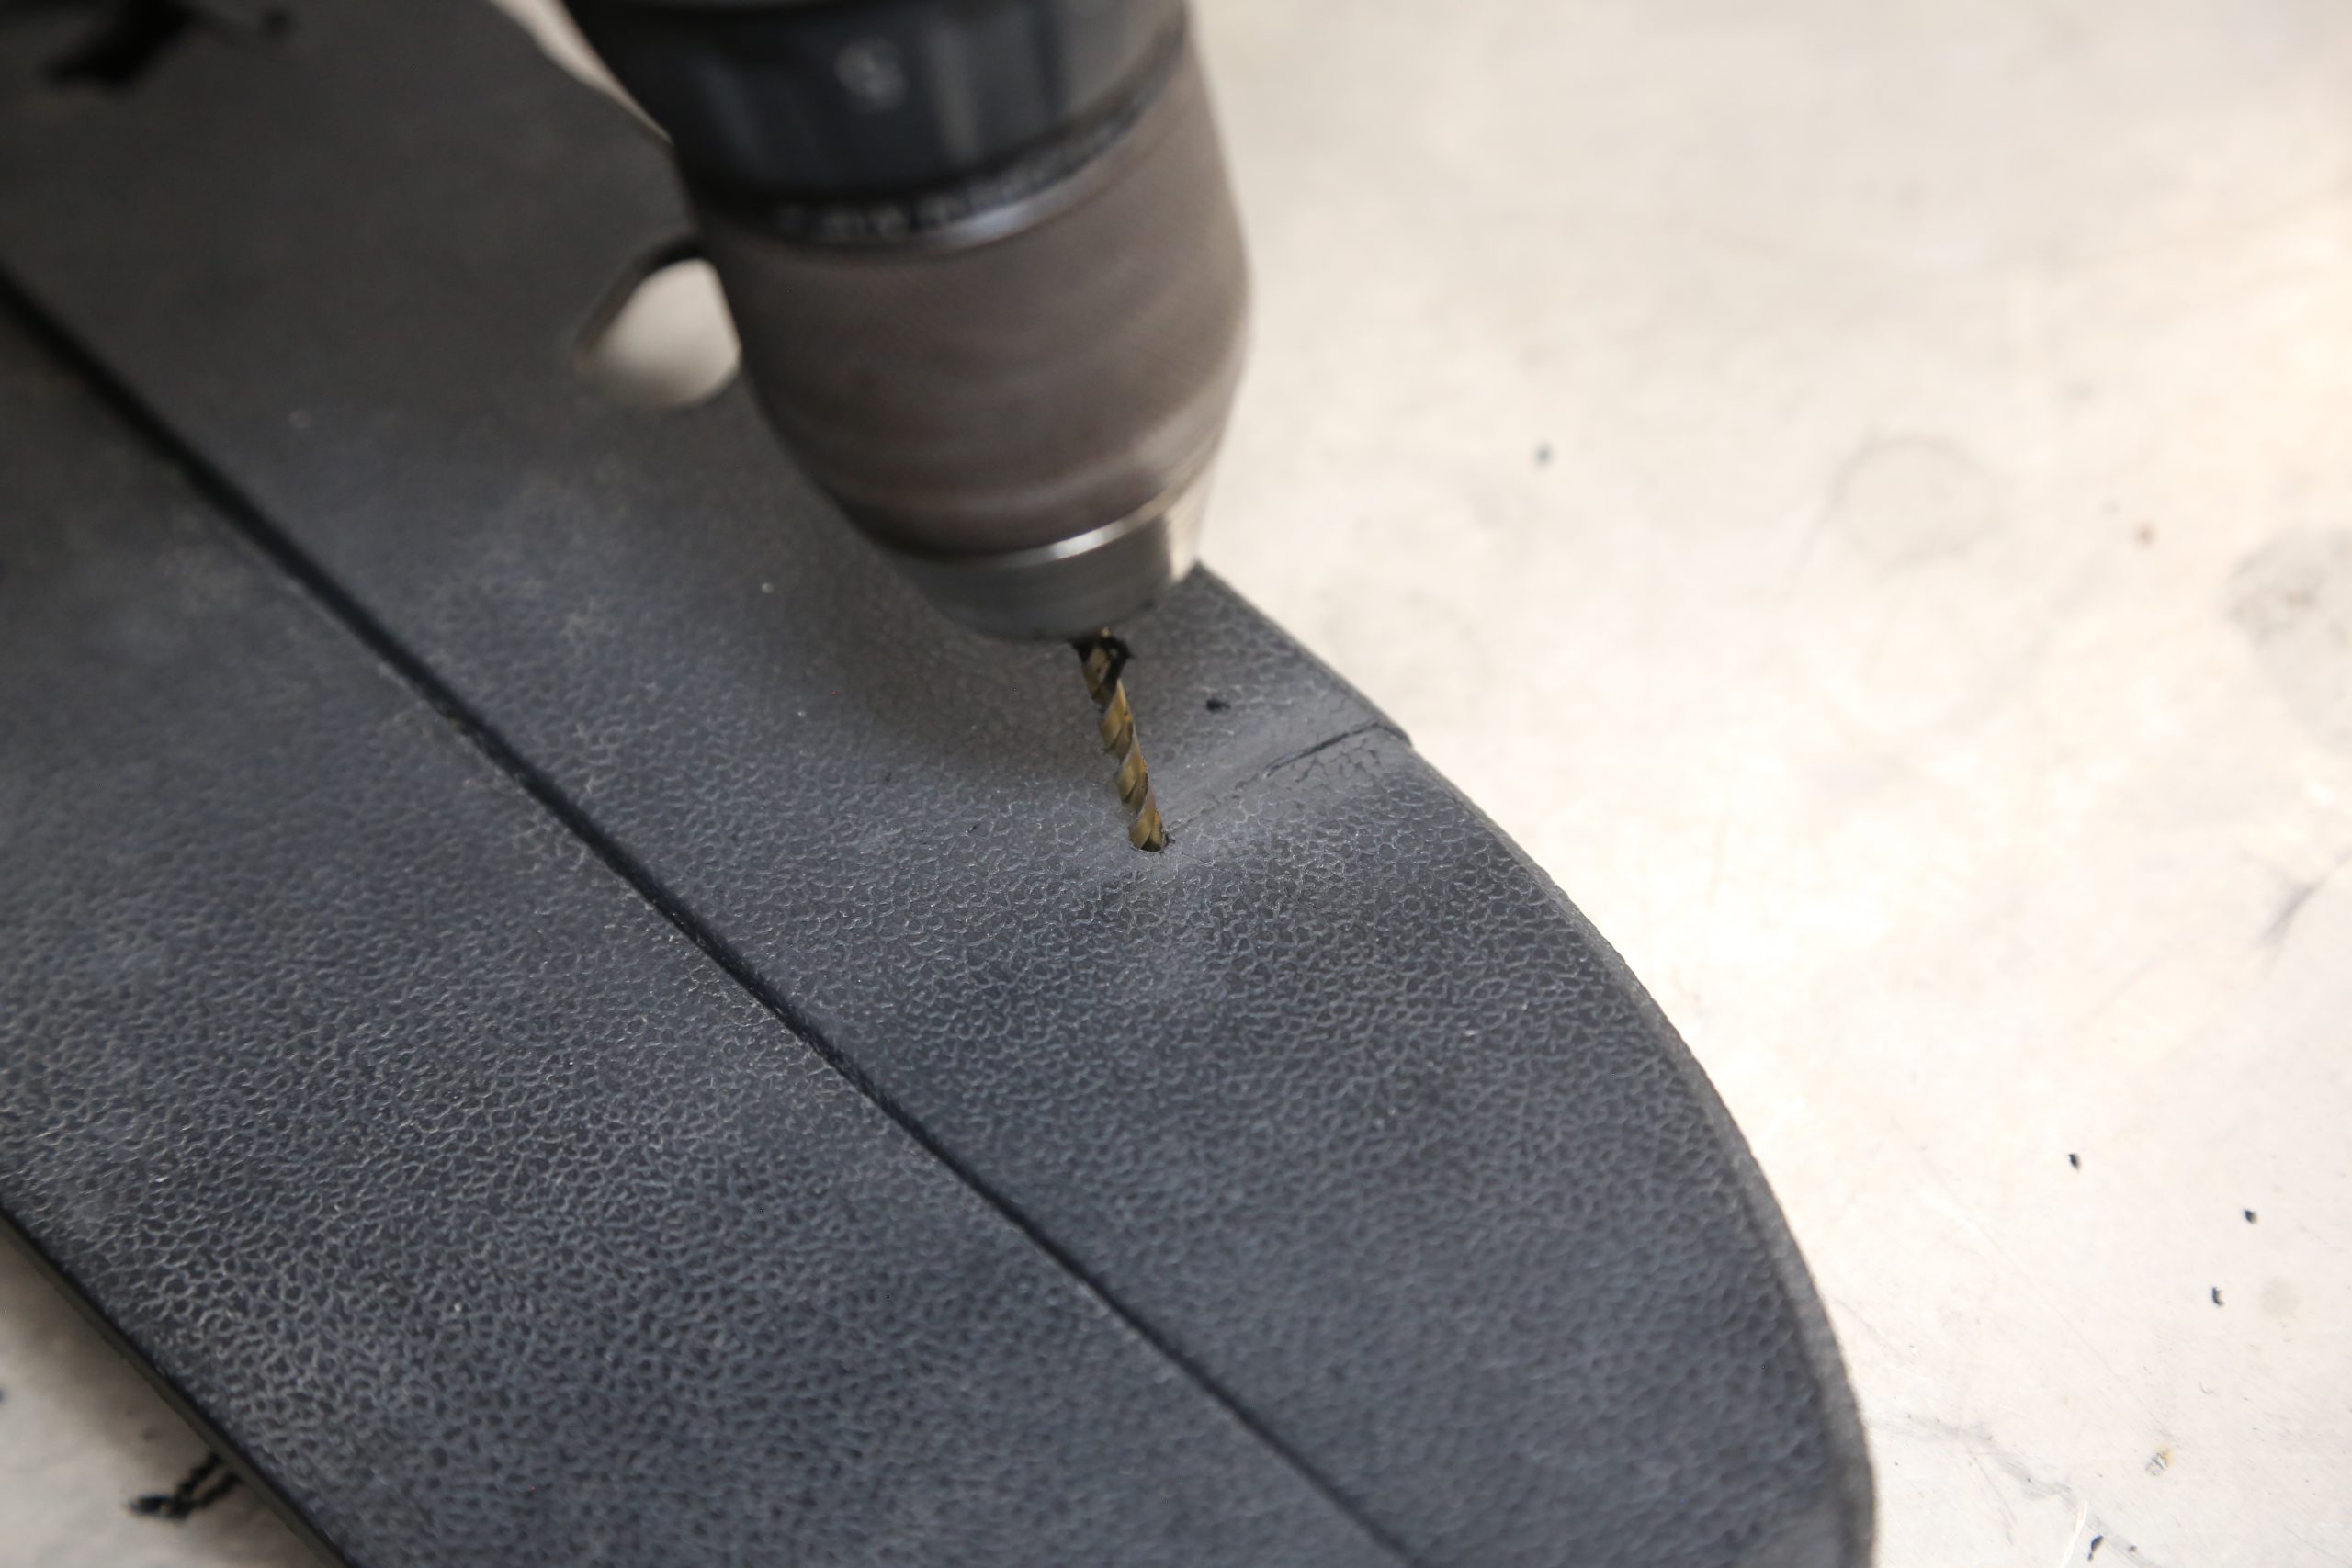
Cleanliness is the key to plastic repair. Plastic tends to be a little oily, so you need to scrub it with a good all-purpose cleaner. We also scrub the repair areas front and back with a Scotch-Brite pad to give the glue some mechanical bond. We drilled each end of the cracks with a 1/8 inch bit to stop them from spreading and to relieve the stress in the plastic. Just like a metal weld, the edges are leveled with sandpaper.
We are using two different materials to fix our panel—JB Weld KwikWeld Epoxy for recreating the screw boss area, and cyanoacrylate glue with a quick-cure accelerator to fill the cracks and blending the repairs.
The trick to using CA glue is getting the right thickness for the job. For our project, we used medium-thick glue, which flows like slightly warm syrup and is good for filling small gaps. Thicker glue flows more like cold syrup and is good for filling large gaps. Thin glue flows like water and is good for bonding parts.
Other items we used to complete the repairs is small bit of modeling clay to recreate the missing piece of the screw boss; masking tape; 80, 150, 220, and 320 grit sandpaper; Rust-Oleum Truck Bed Coating to replicate the grain pattern; and Rustoleum Painters Touch semi-gloss black paint to finish the job.
The entire process took us about two hours to complete. Preparation is the key to success, and remember to use only as much glue as you need; adding more will not fix the problem. Now go out and fix those broken plastic bits!
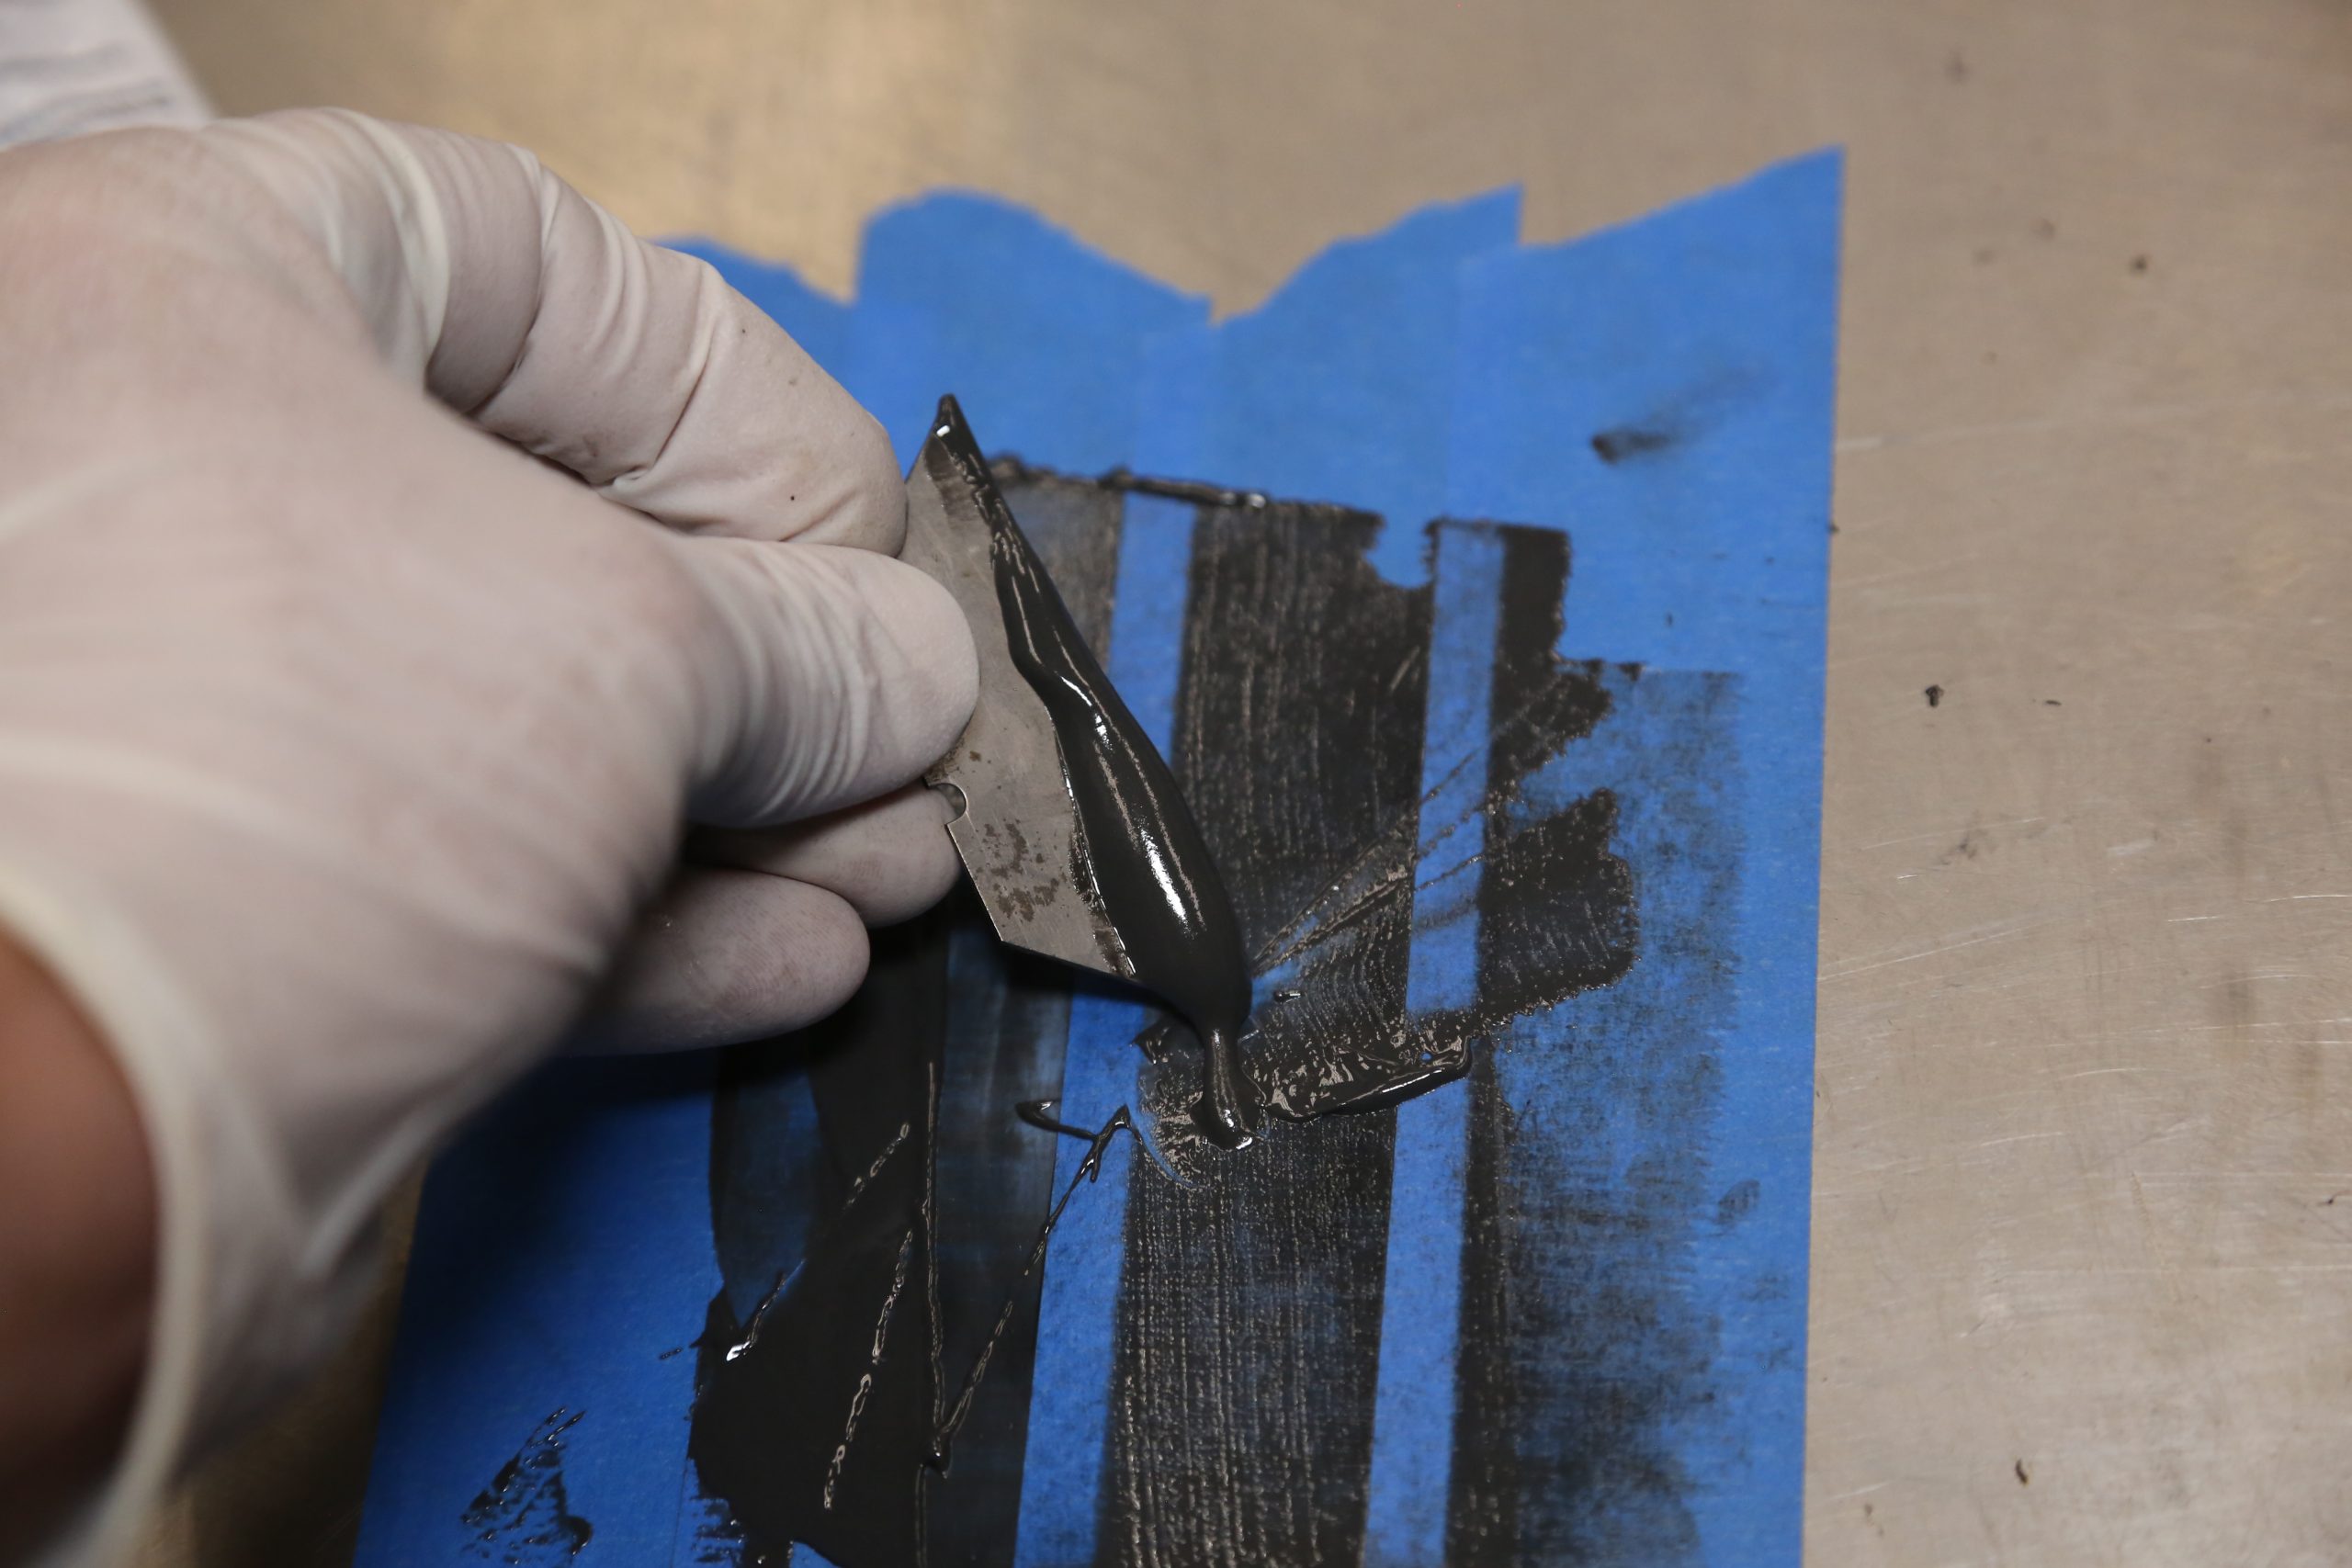
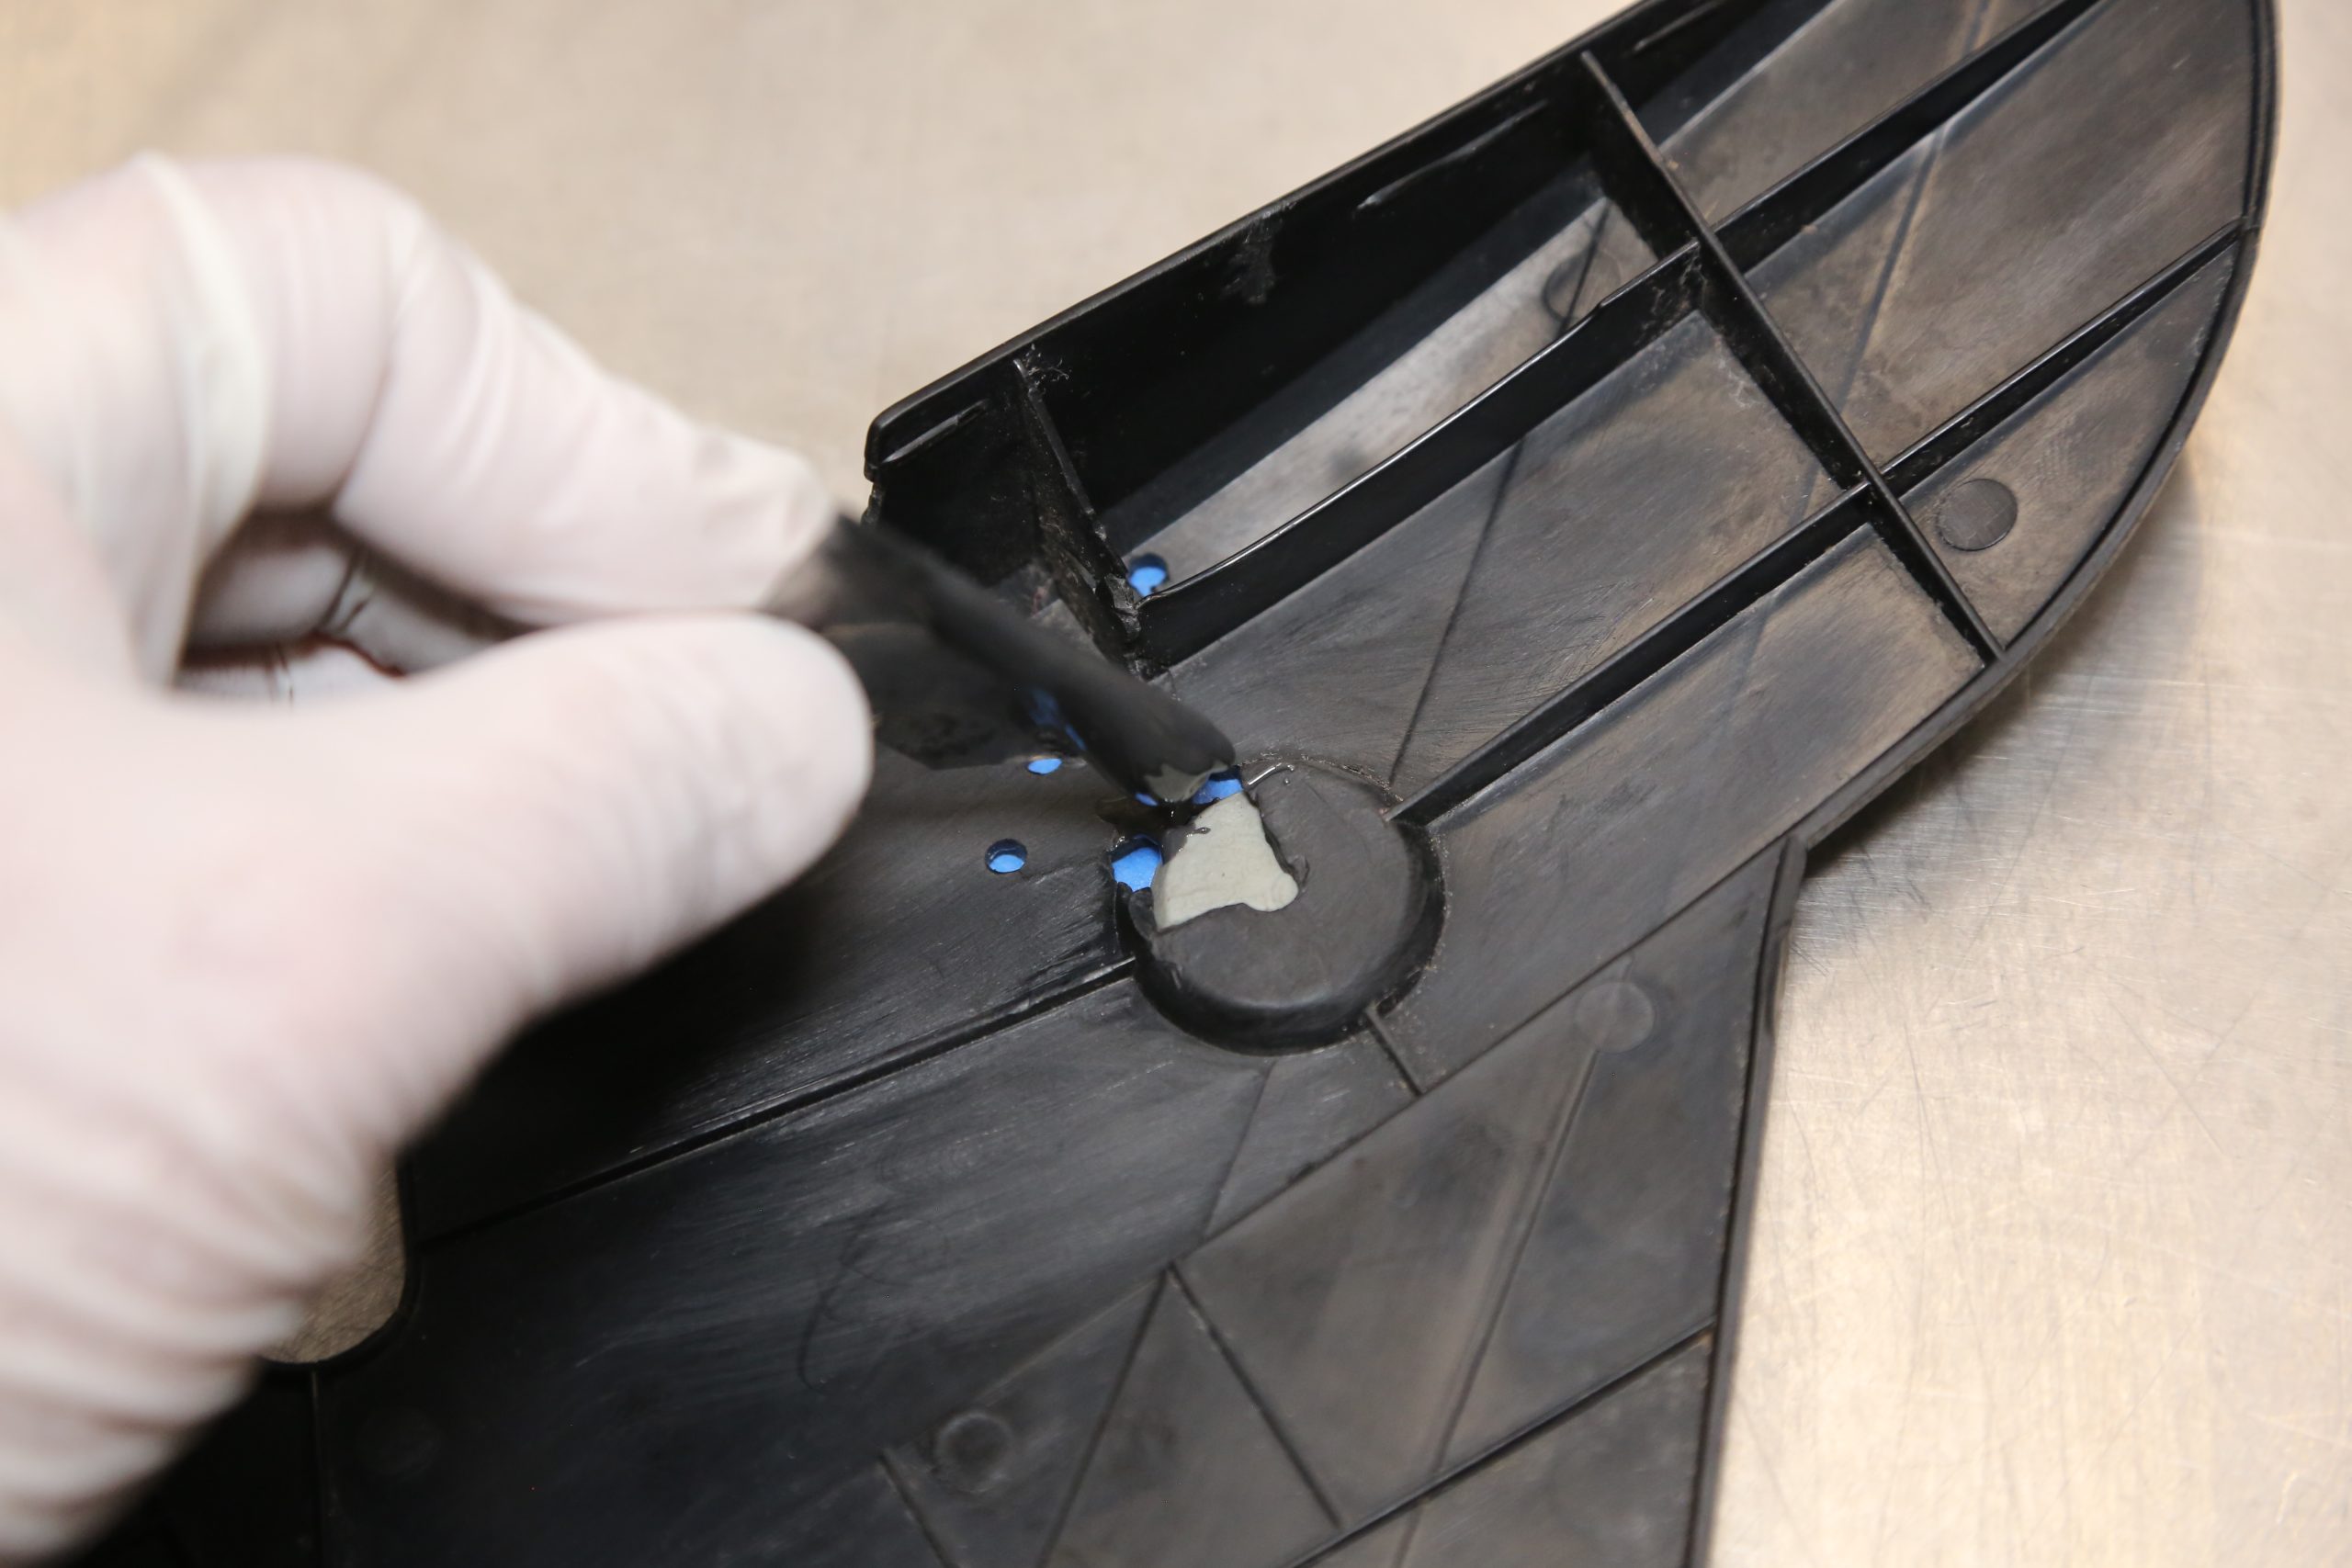
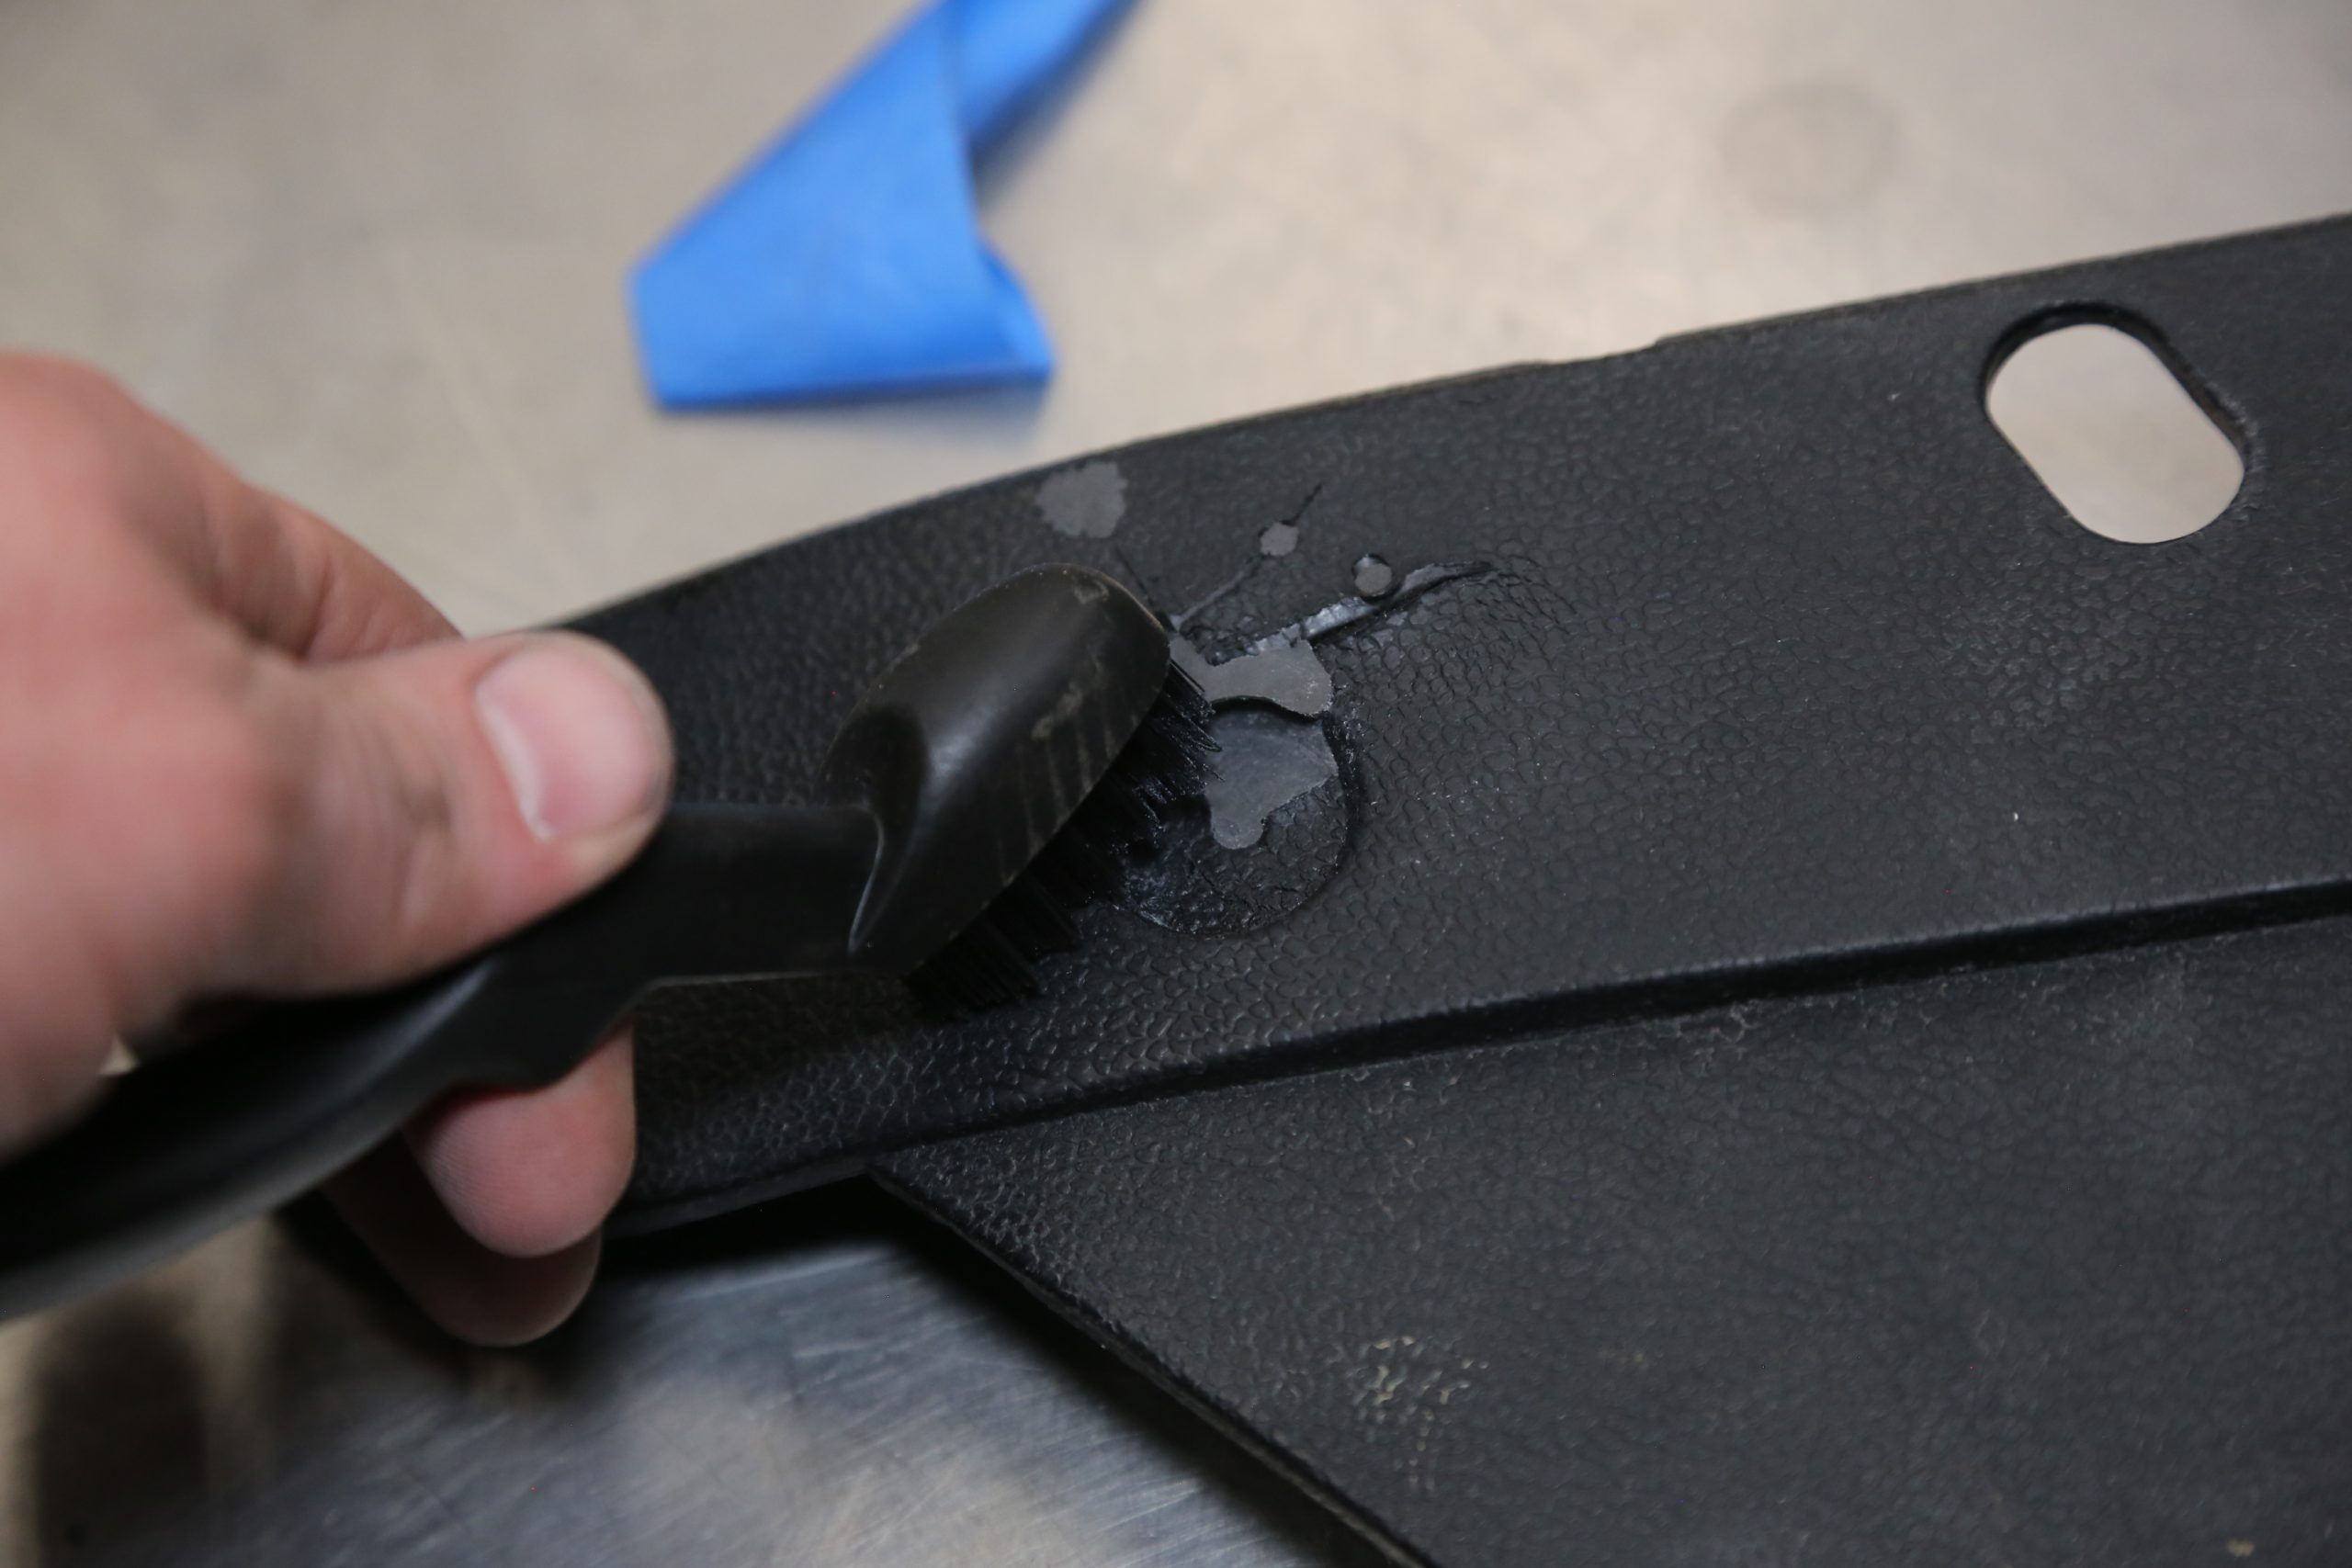
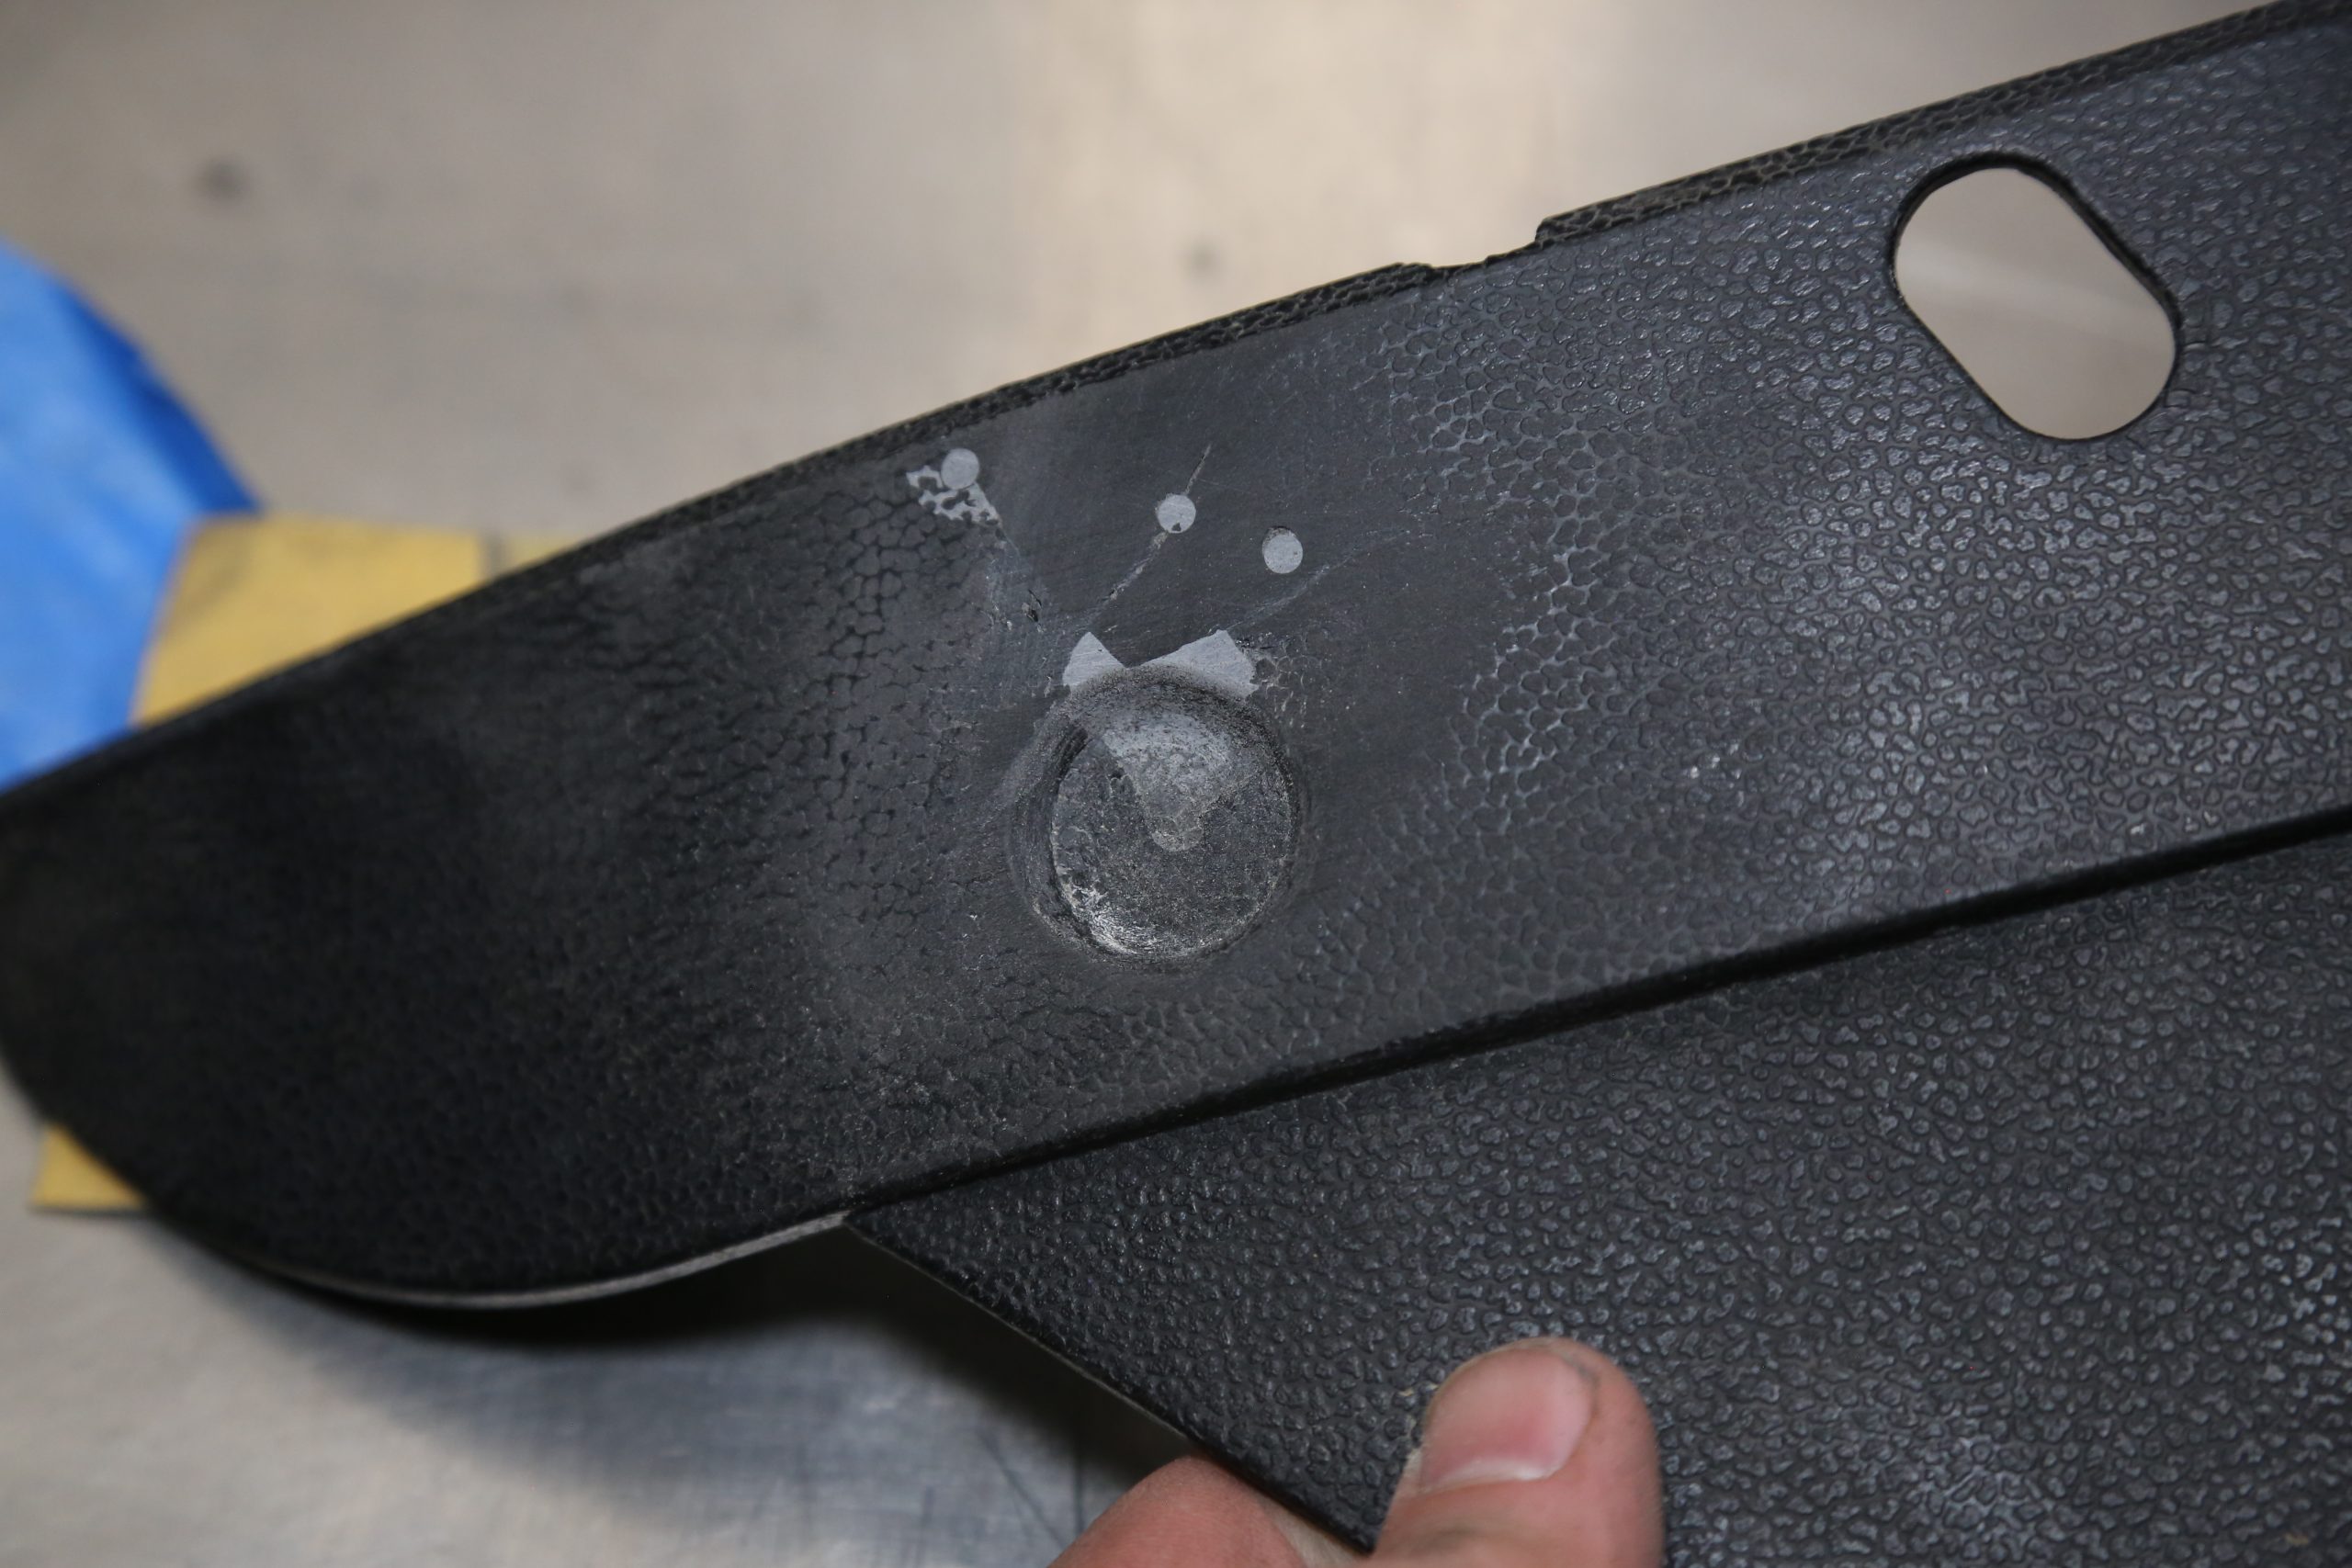
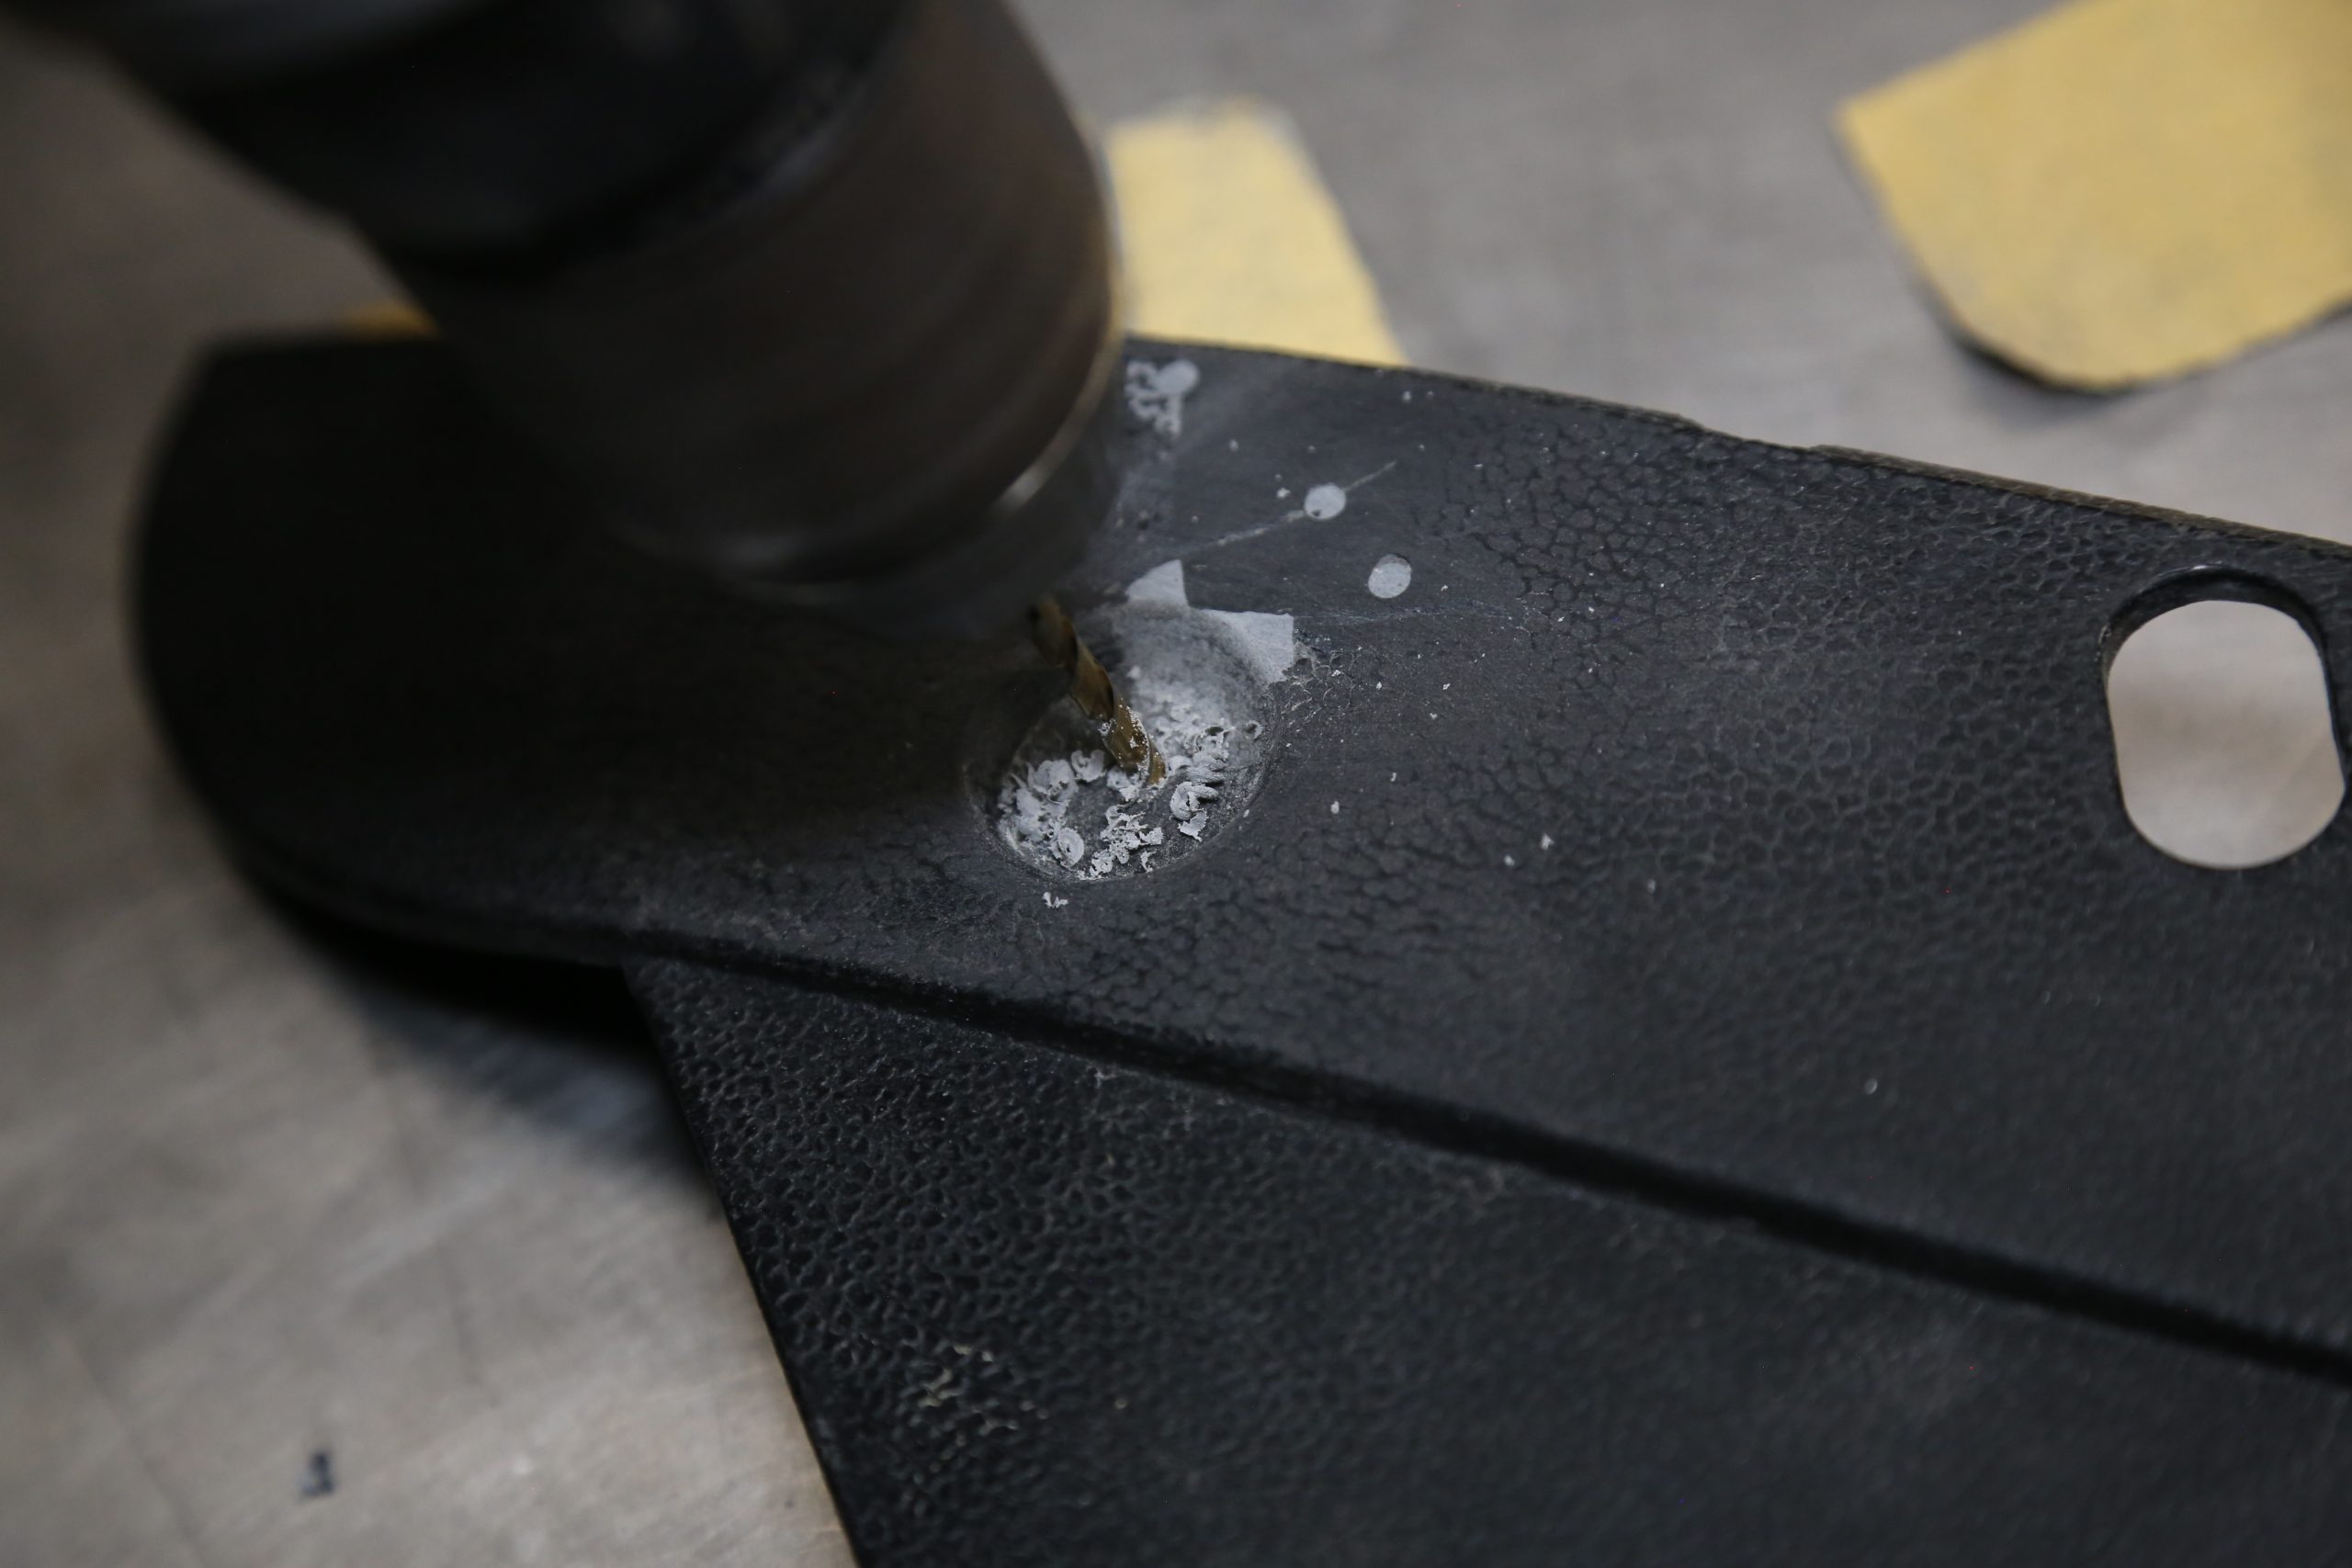
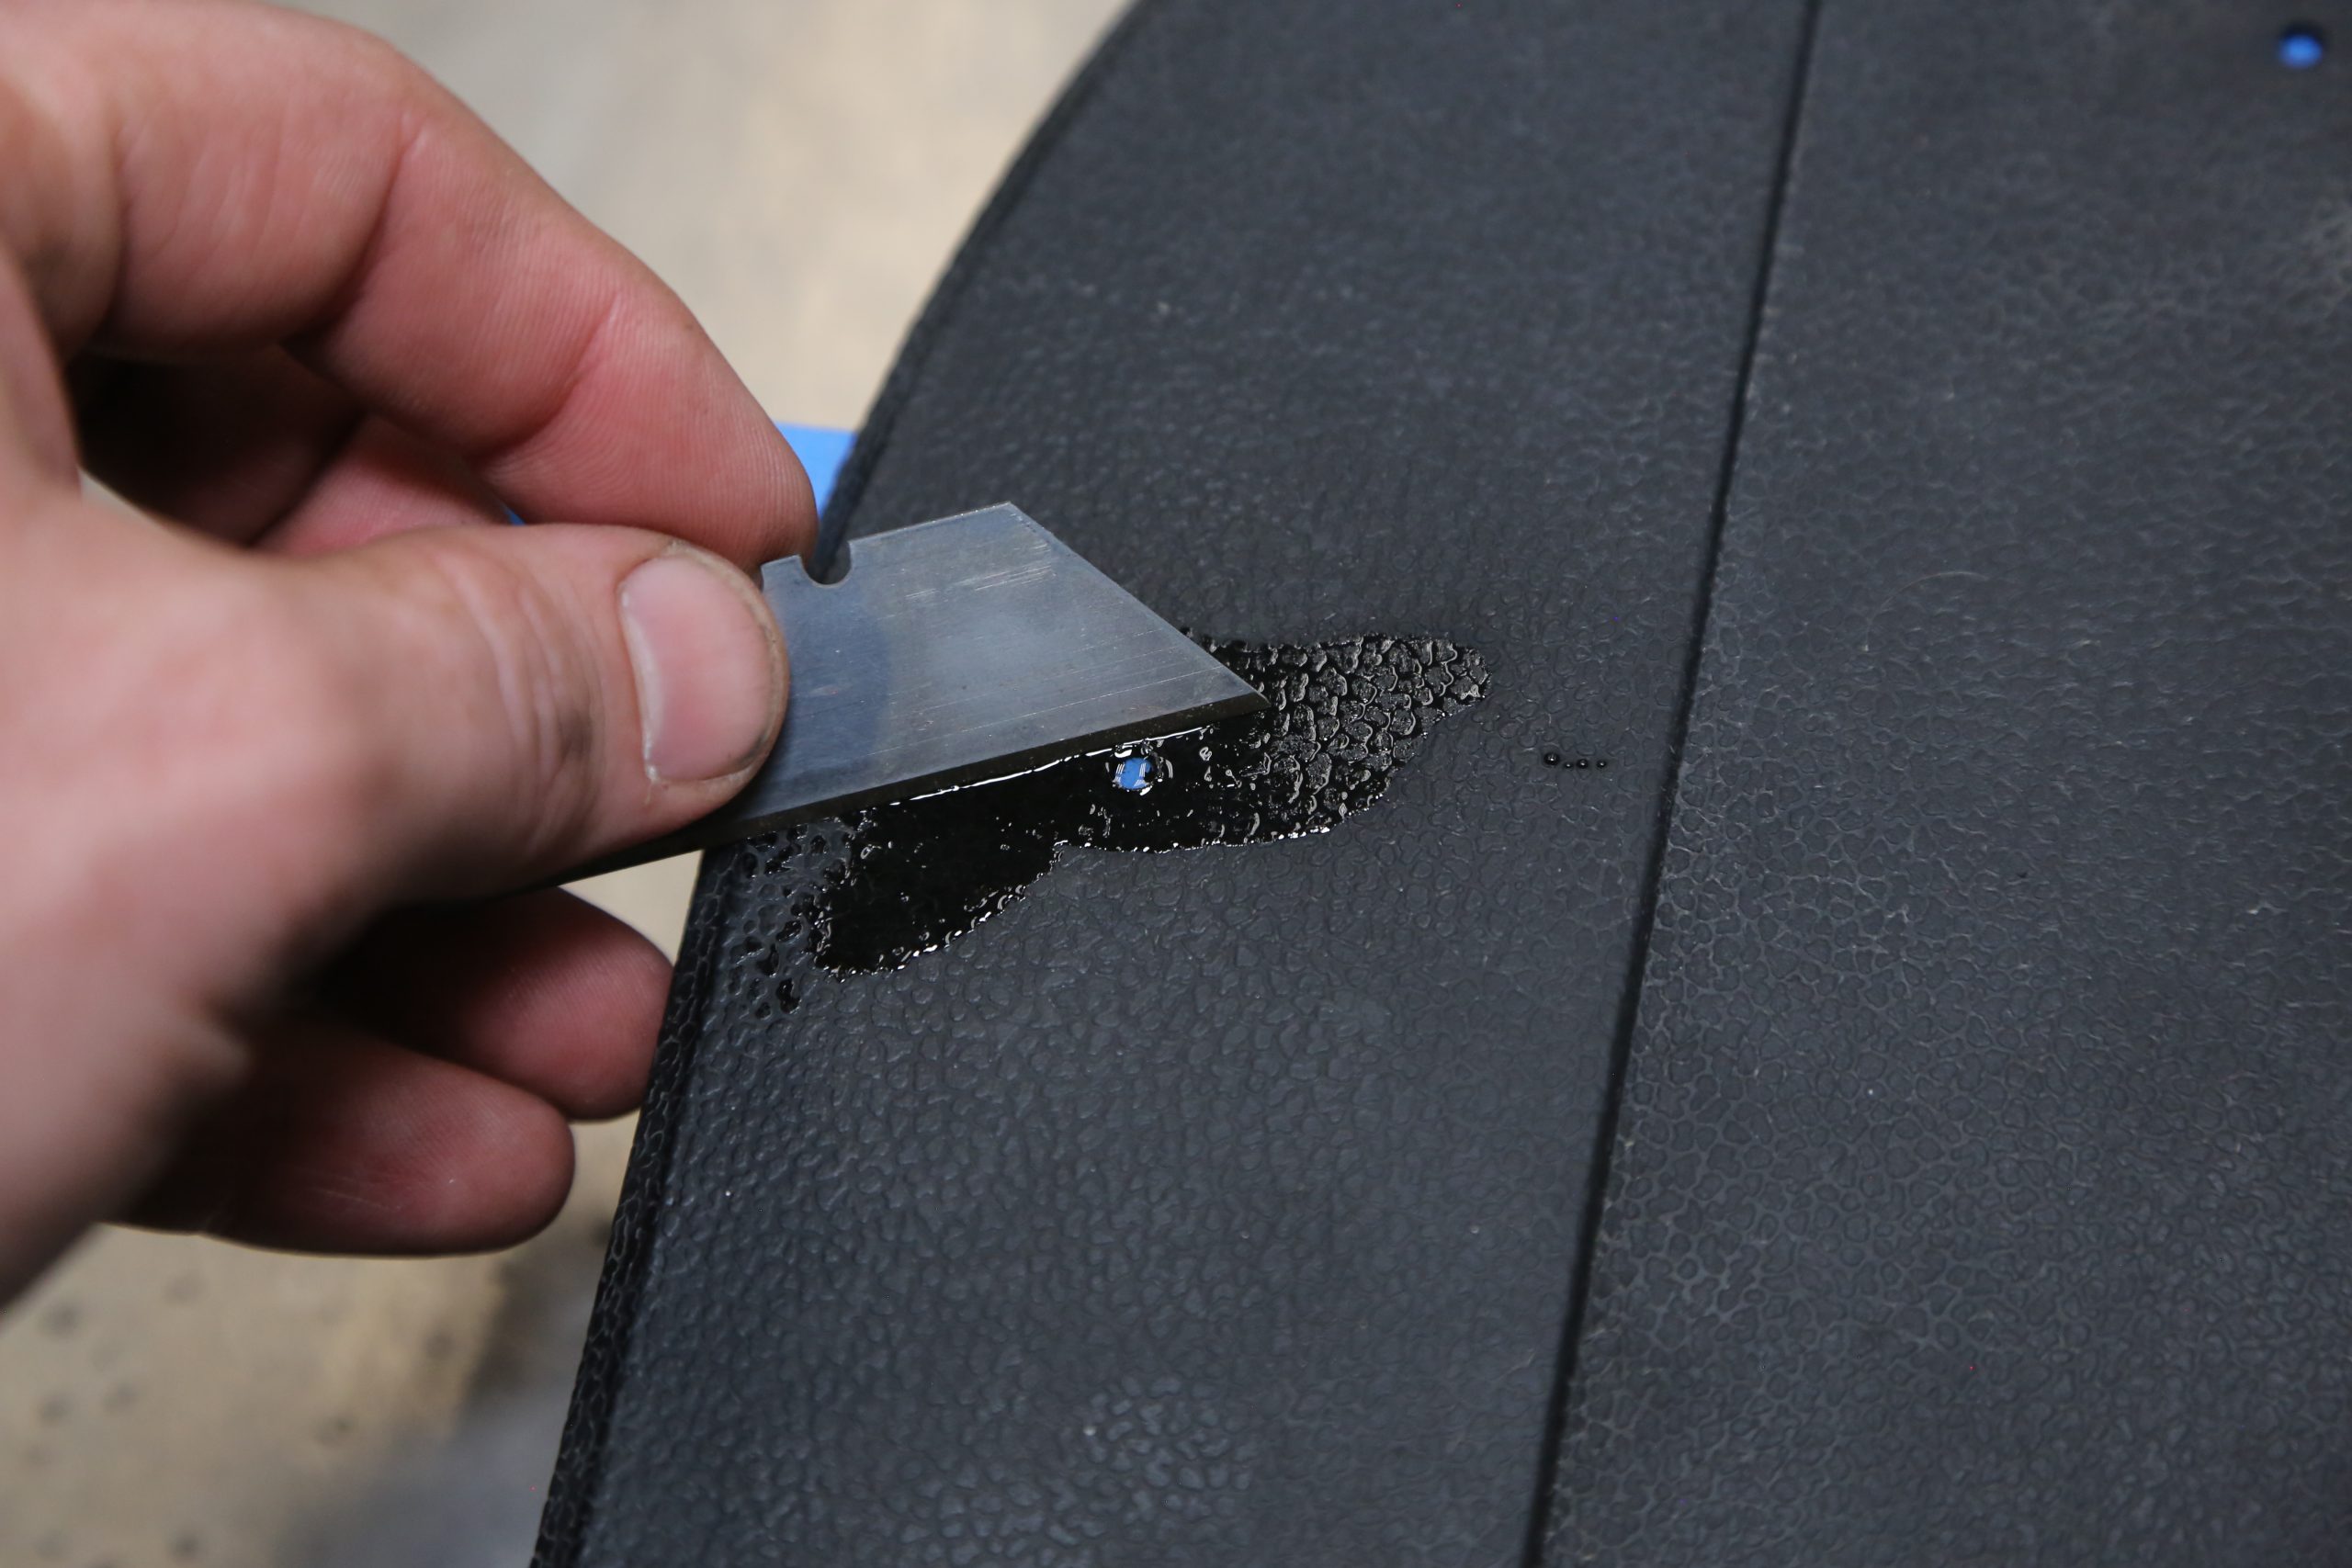
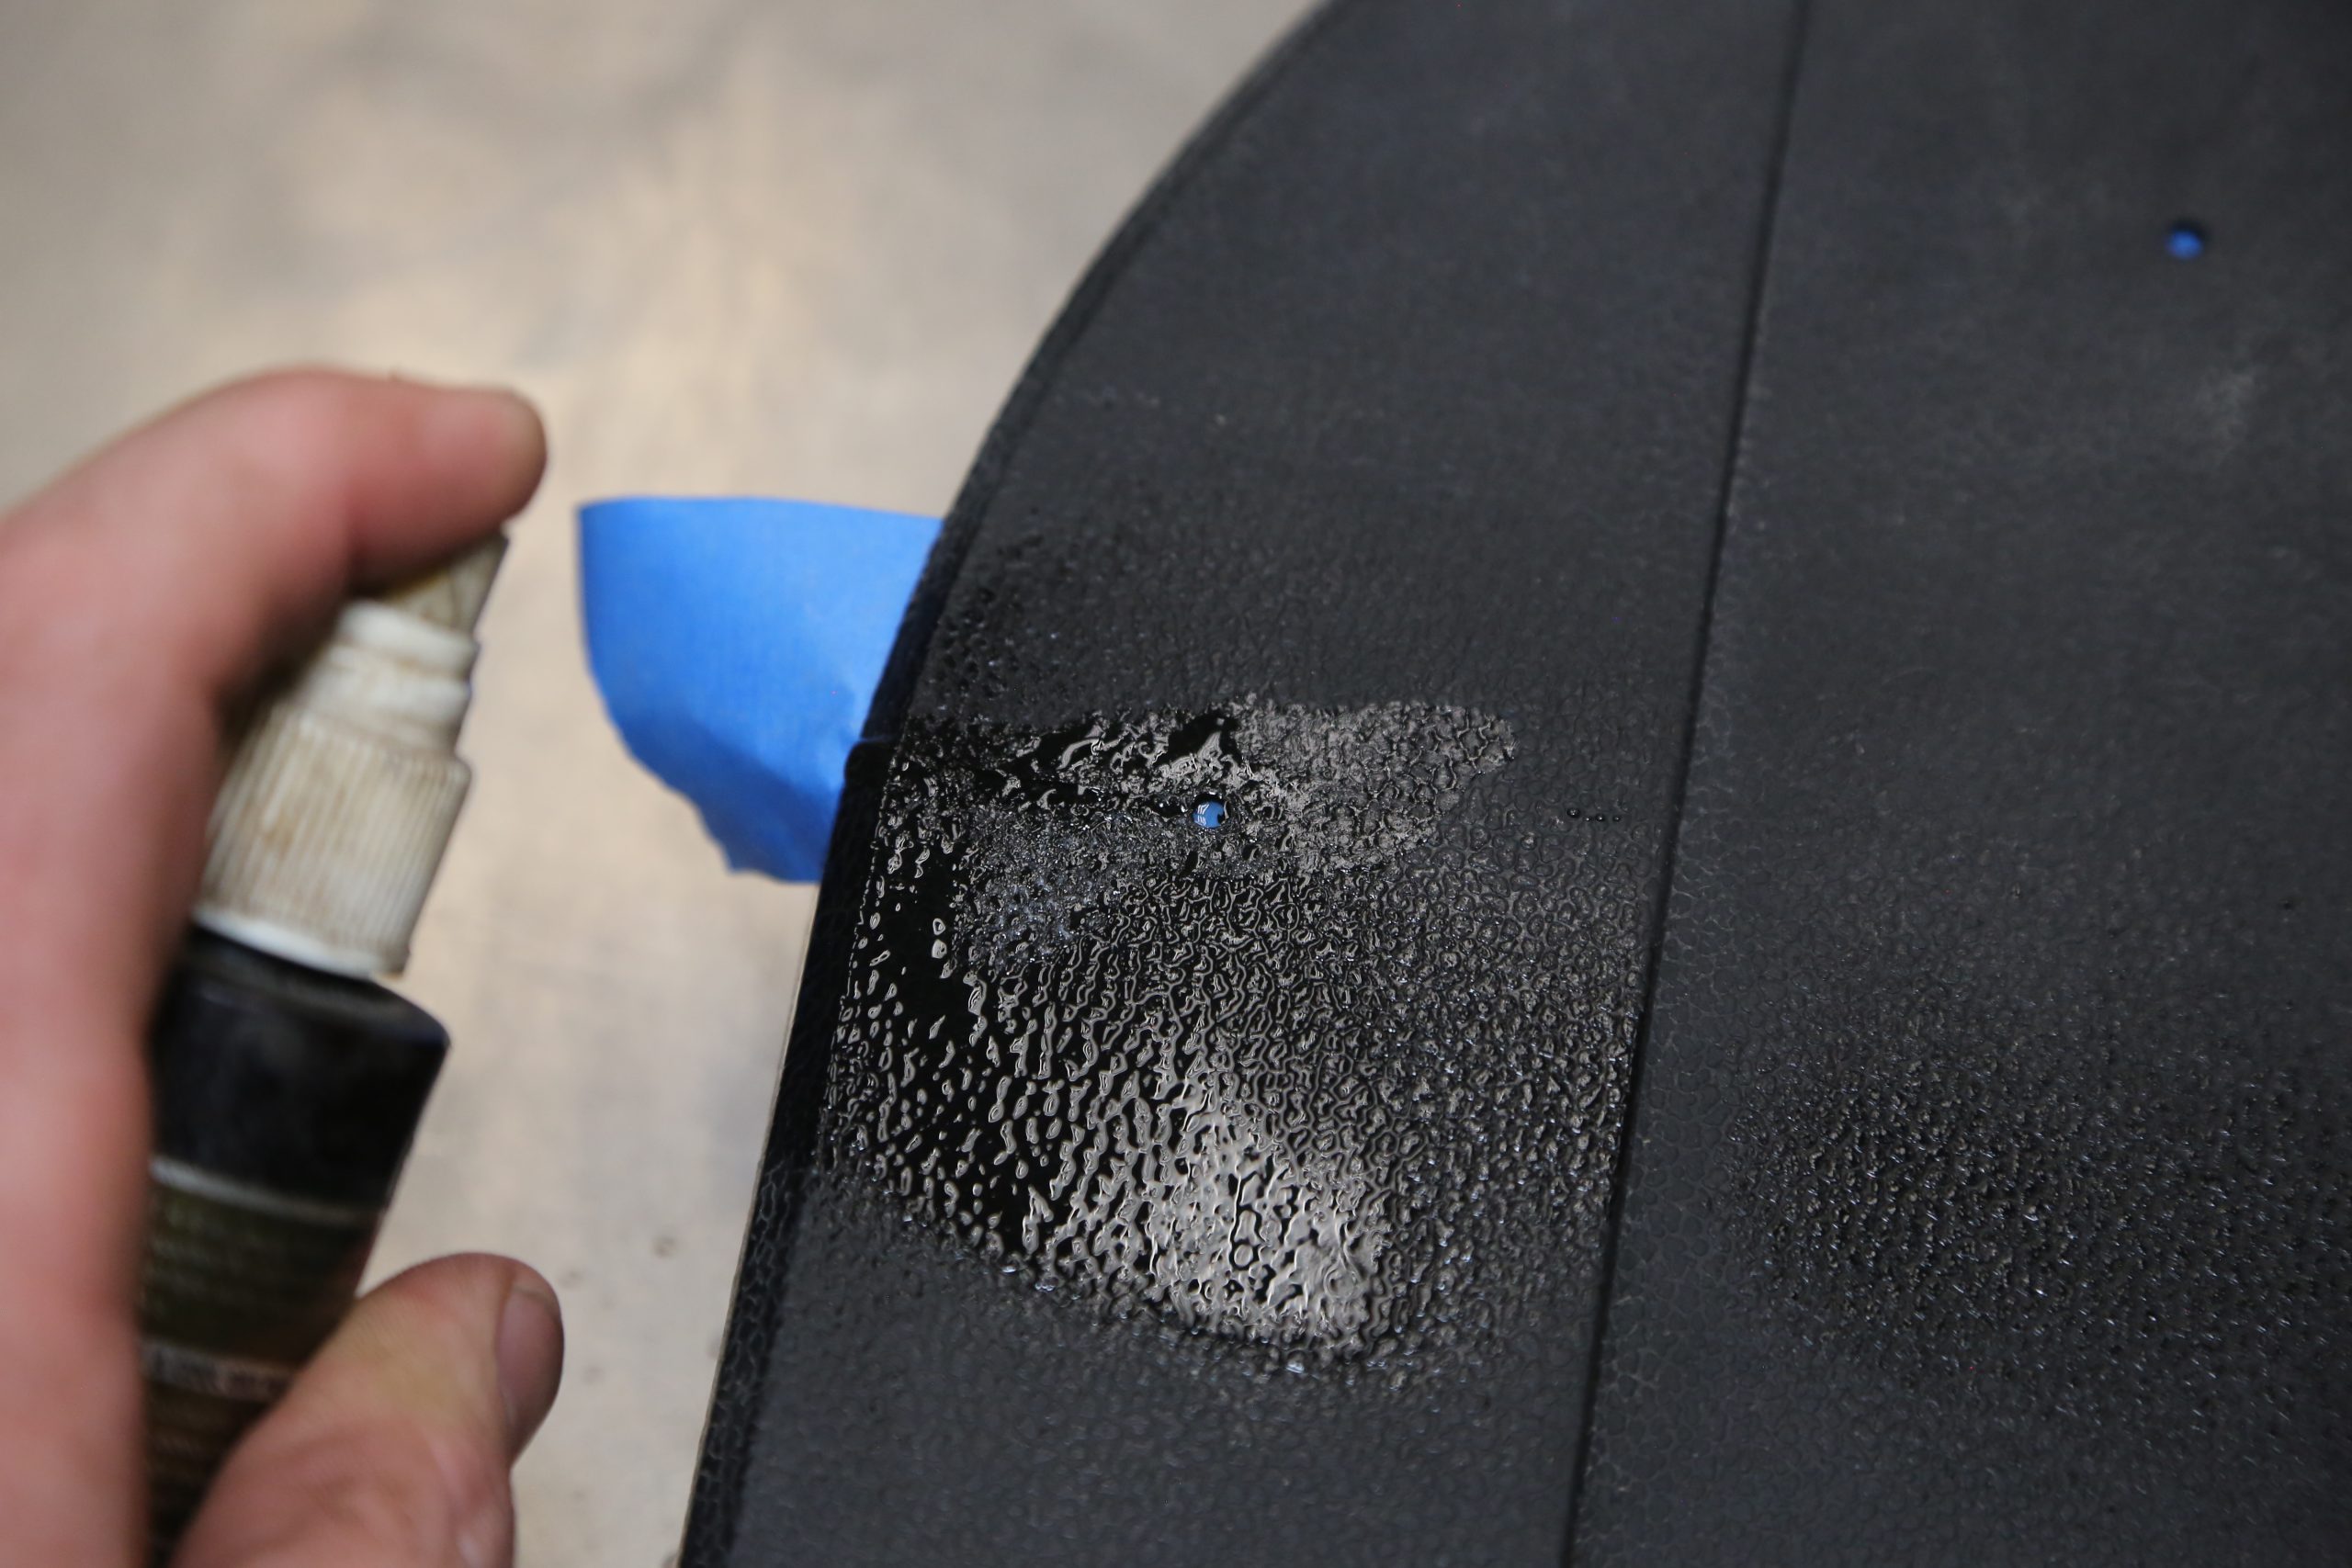
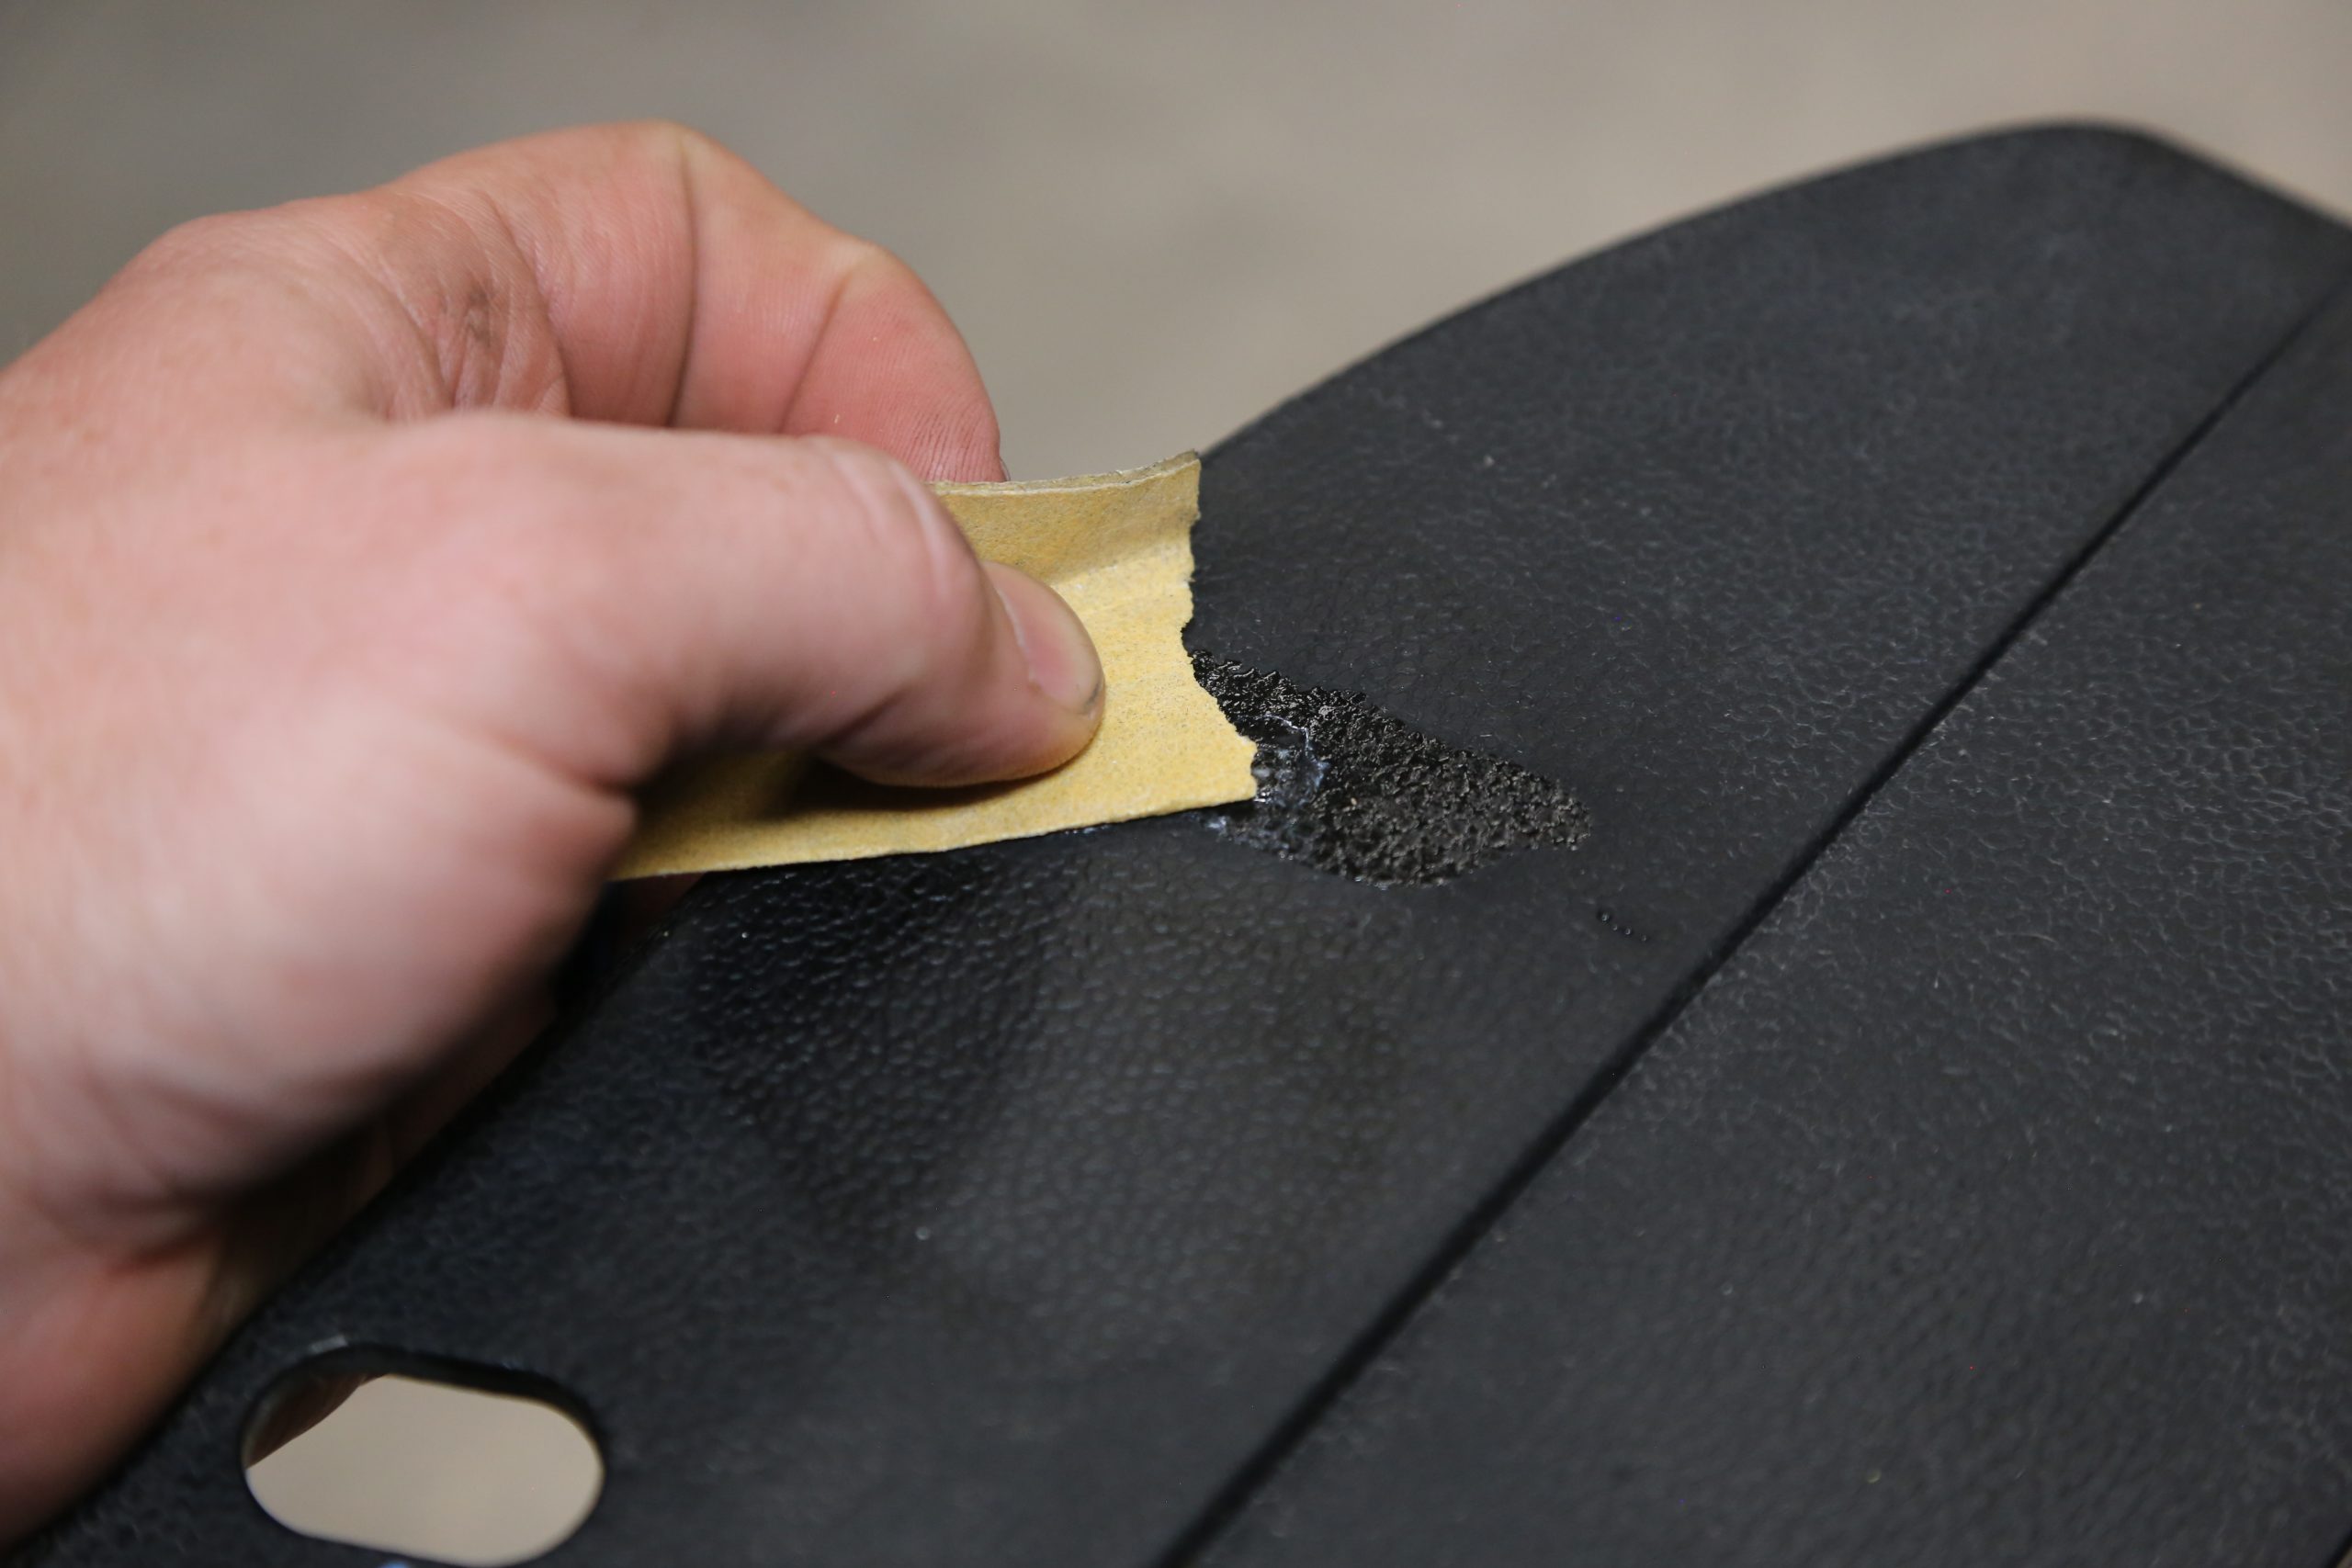
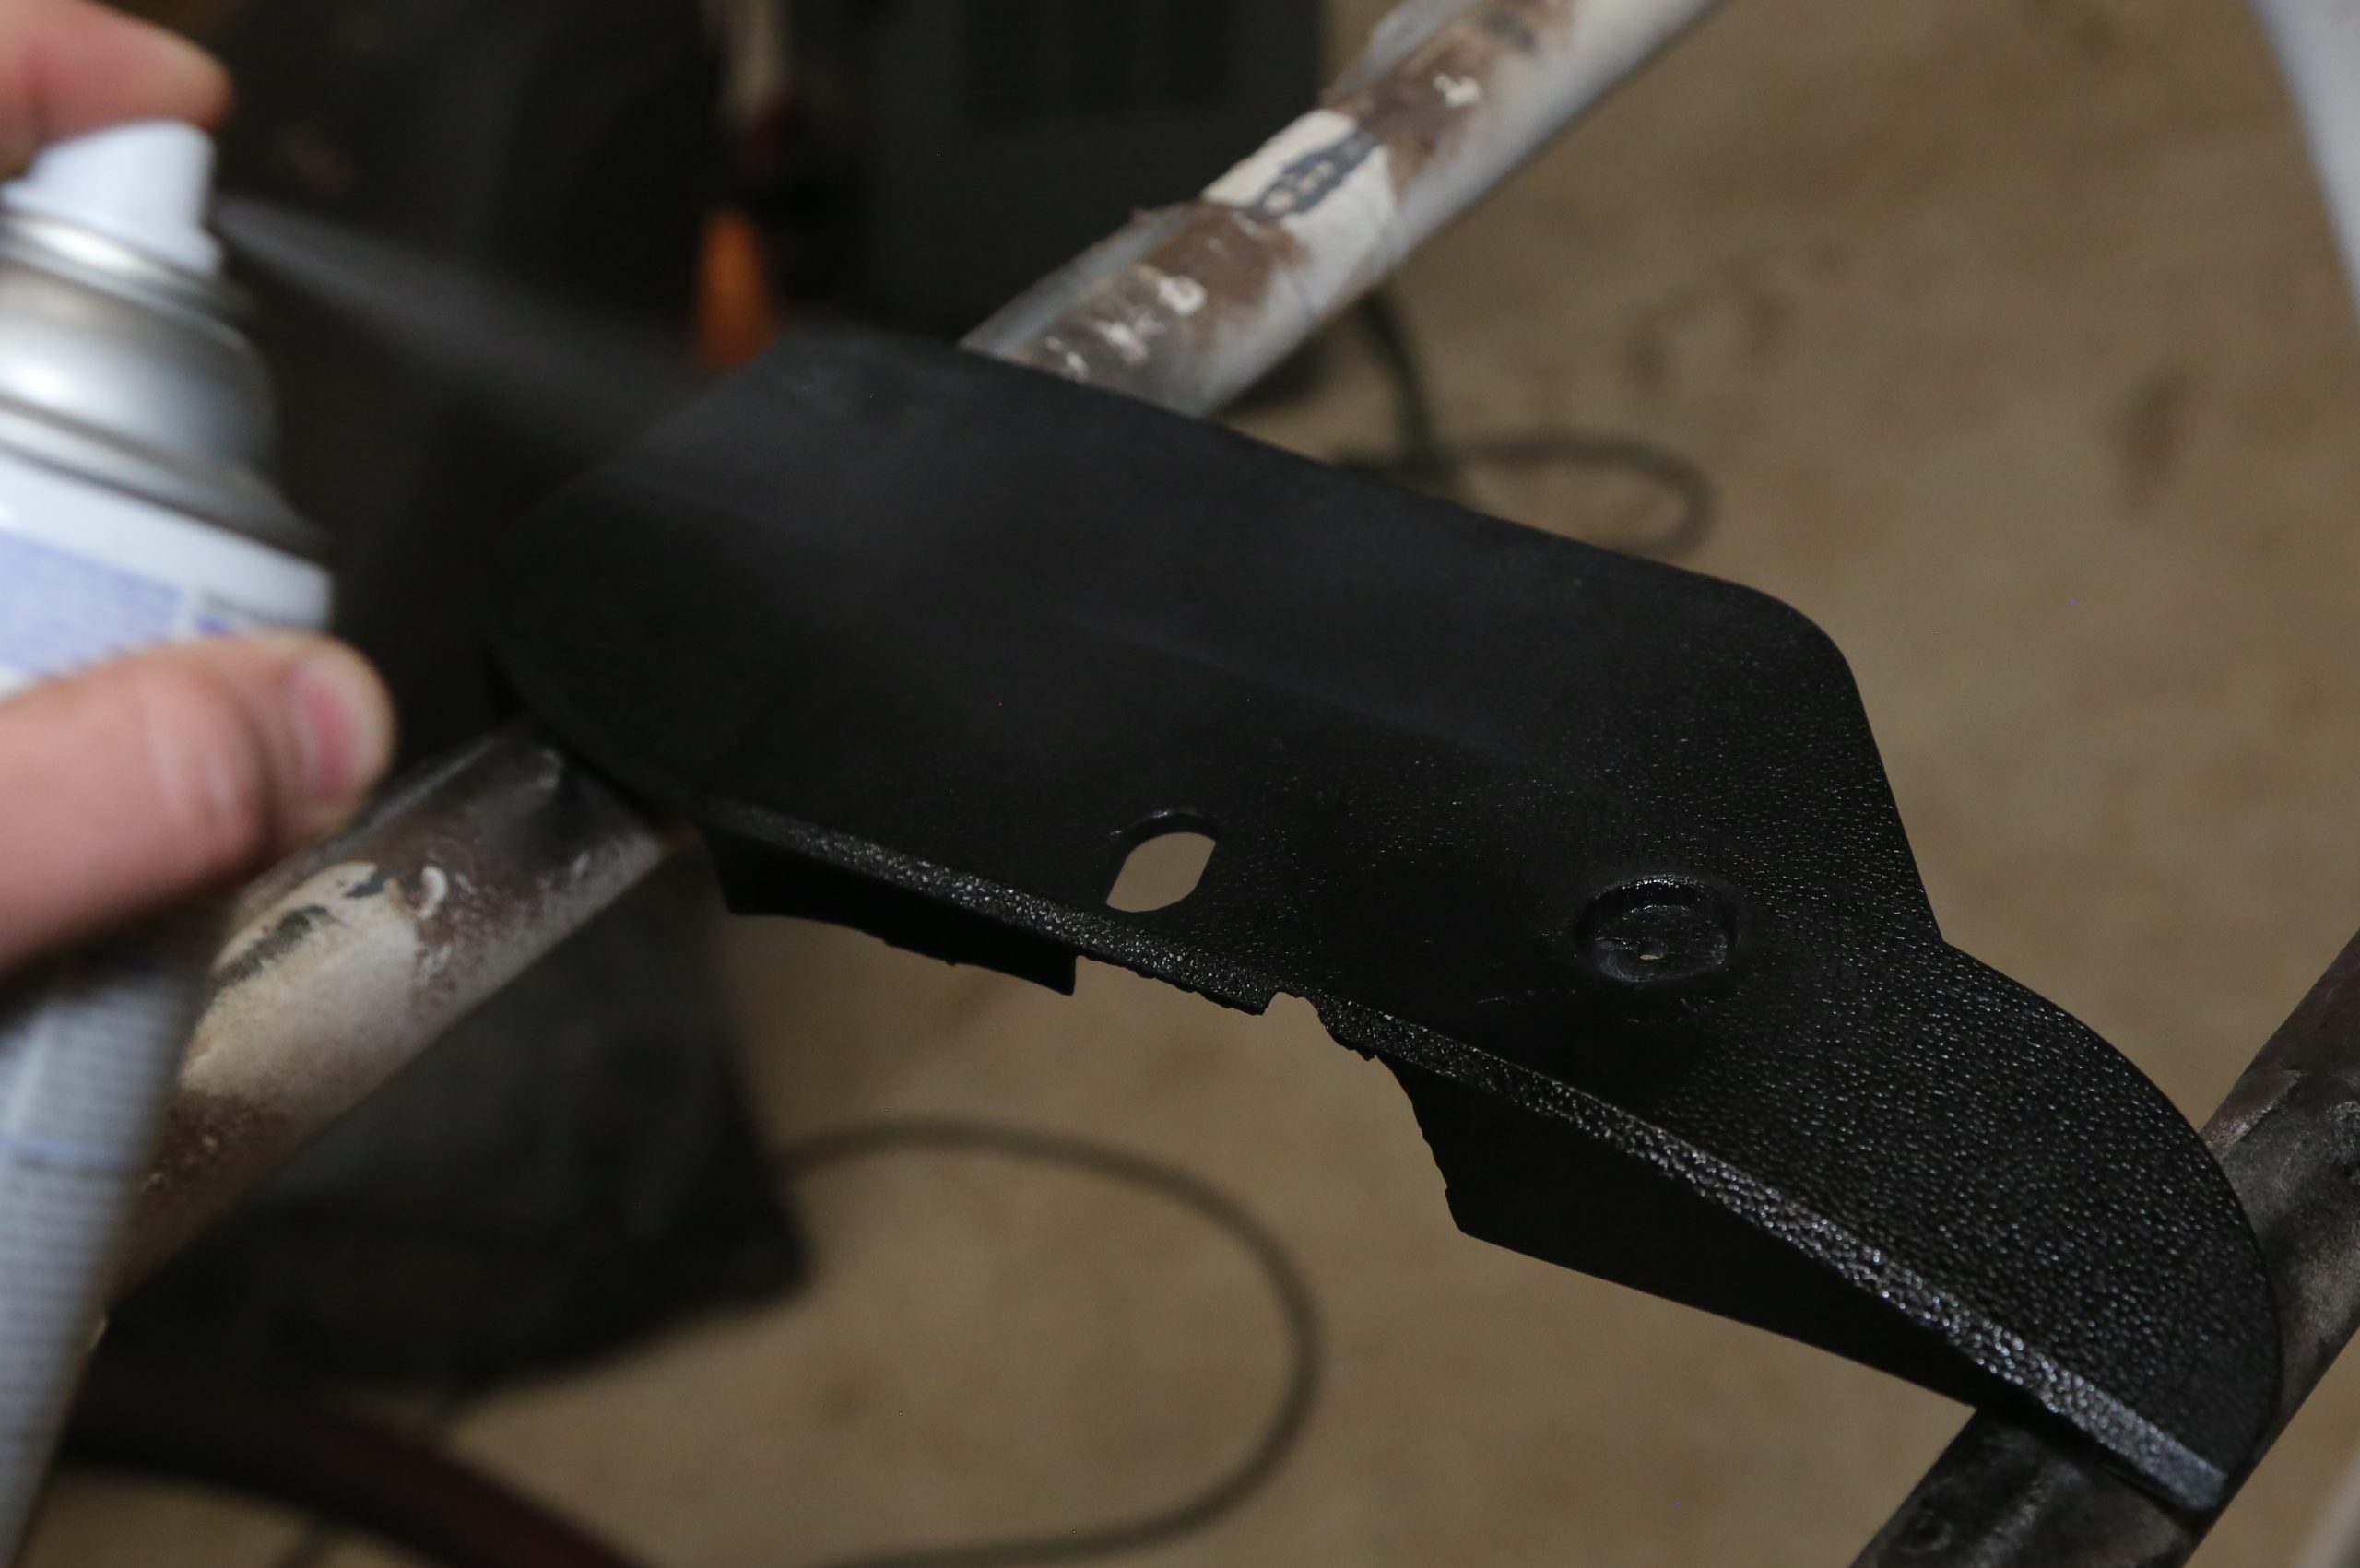
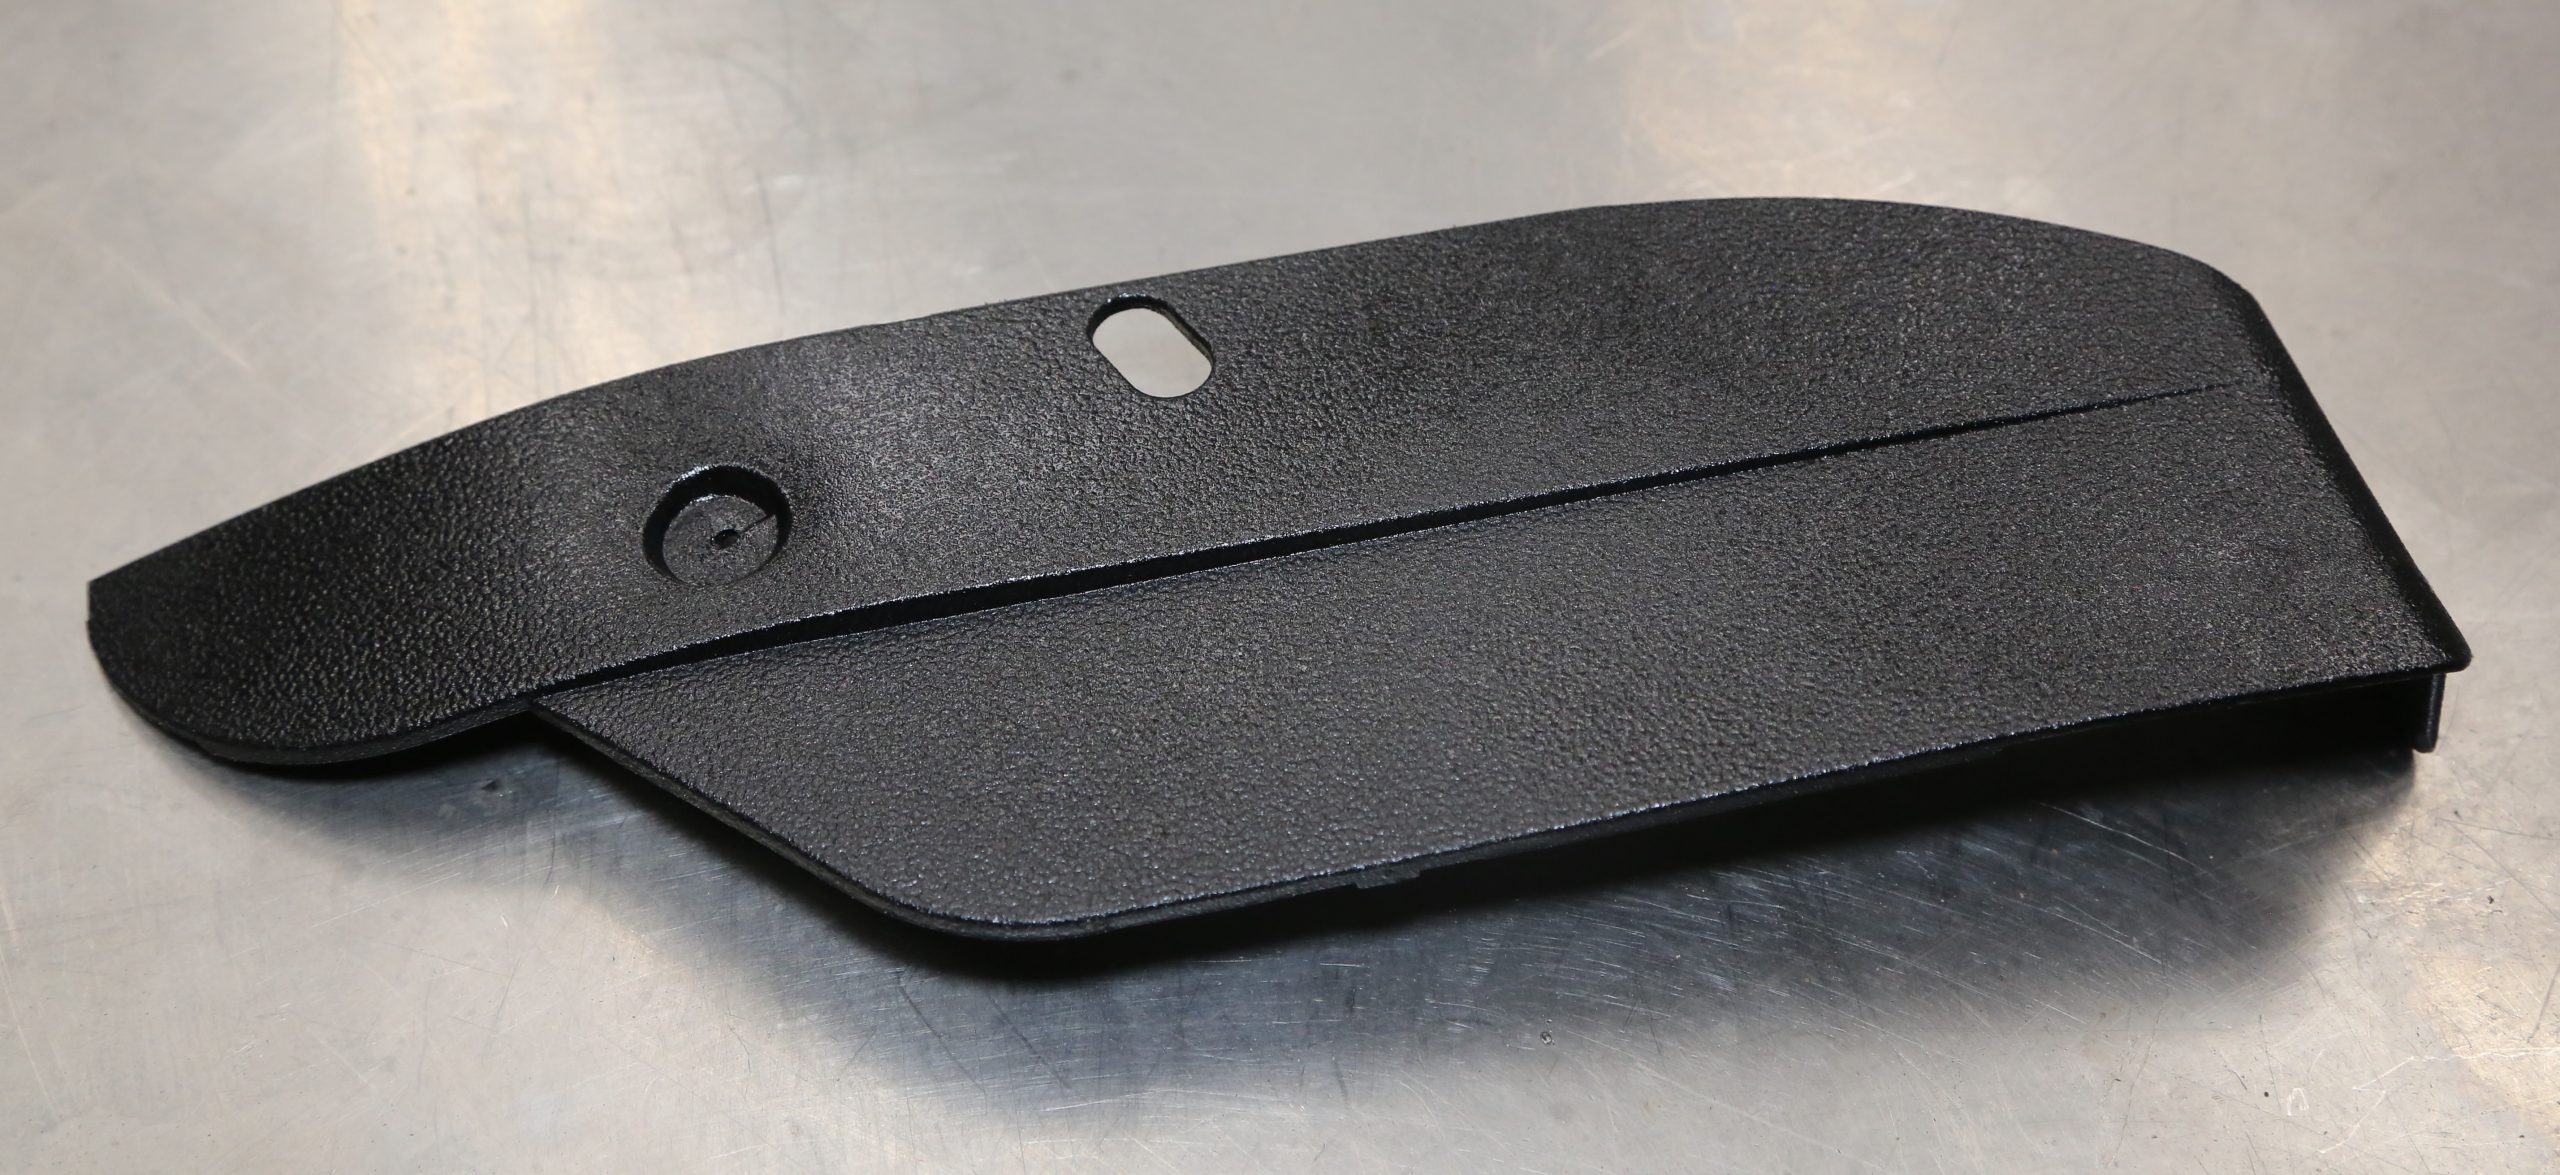
Our VW seat trim cover is 49 years old and has seen a lot of abuse. We started off by cleaning it with Mothers All-Purpose Cleaner and scrubbing the entire panel with a ‘red’ Scotch-Brite pad, including the rear of the repair areas. (Image/Jefferson Bryant)We sanded a small groove the entire length of the crack with 220 grit sandpaper to create a filet that will be filled with the CA glue. The backside was prepped as well. (Image/Jefferson Bryant)Each end of the crack was drilled with a 1/8 inch bit to relieve the stress in the plastic and stop the crack from continuing. This is critical for a good repair. (Image/Jefferson Bryant)We used modeling clay to take an impression of the screw boss. We’ll use it to recreate the missing area. The remaining gaps were covered with masking tape. Once we are finished, it will look like it did originally. (Image/Jefferson Bryant)A little trick we used to mix the JB Weld KwikWeld was to lay down some masking tape on the work bench and mix the goo on the tape with a razor blade. (Image/Jefferson Bryant)The JB Weld KwikWeld was slowly poured into the repair area. You want this to flow in from one side to the other so that there are no air pockets. KwikWeld cures in about five minutes so you can work with it almost right away. (Image/Jefferson Bryant)Once the KwikWeld had cured, the clay was removed. A nylon brush was used to scrub away any remaining clay. (Image/Jefferson Bryant)The repair area was sanded smooth and blended to the rest of the panel with 80 and 320 grit sandpaper and blended to the rest of the panel. We also filled the cracks with CA glue—we’ll show you that process a little later. (Image/Jefferson Bryant)The last step is drilling out the screw hole. JB Weld is hard stuff, but you can chip it if you’re careless with the drill bit. Take your time. (Image/Jefferson Bryant)There were two cracks on the backside of the panel that needed repair. These were prepped using the same methods we used to fix the screw boss. The back side was taped over and the crack slightly spread apart to accept the medium-thick CA glue. We used a razor blade to smooth out the glue so there wasn’t a big glob to sand off. (Image/Jefferson Bryant)The CA glue we used requires an accelerator to cure. We sprayed accelerator on the repair, curing the glue in seconds. The backside was also glued together. (Image/Jefferson Bryant)The CA glue is very hard and the plastic is relatively soft, so we skipped the 80 grit sandpaper and used 150, 220, and 320 grit paper to knock down the glue. (Image/Jefferson Bryant)The finished repair looks like this. The grain is gone, but we have trick to fix that too. (Image/Jefferson Bryant)Rust-Oleum Truck Bed Liner works really well to regenerate plastic grain. The trick to getting the grain right is the distance between the can and the part. We did several light misting coats, varying the distance from 18 to 30 inches. This allows the paint droplets to dry in mid-air so they hit and stick to the panel. This adds the texture to match the existing grain. We used Rust-Oleum semi-gloss black paint to finish the panel. You can vary the amount of paint you spray to dial in the level of gloss and texture you want. (Image/Jefferson Bryant)The completed panel looks great and you would never know it had been repaired if you hadn’t seen us do it. This process works for most plastic parts you’ll find in your car. (Image/Jefferson Bryant)
Jefferson Bryant has been a full-time automotive journalist since 2003. He has written countless how-to articles, nine books, and built several award-winning vehicles.
Comments