Rips and tears in upholstery are not only unsightly, once they start, they only get bigger. You can throw a set of cheap covers over them to get by, but the damage will continue unless you address it. Full seat cover replacement is expensive, especially for vehicles that are not “mainstream” classics like 1960s muscle cars and classic trucks. Professional repairs are equally expensive and require the vehicle to be down anywhere from a few days to several weeks.
The other option is repairing those ripped or torn seat covers yourself.
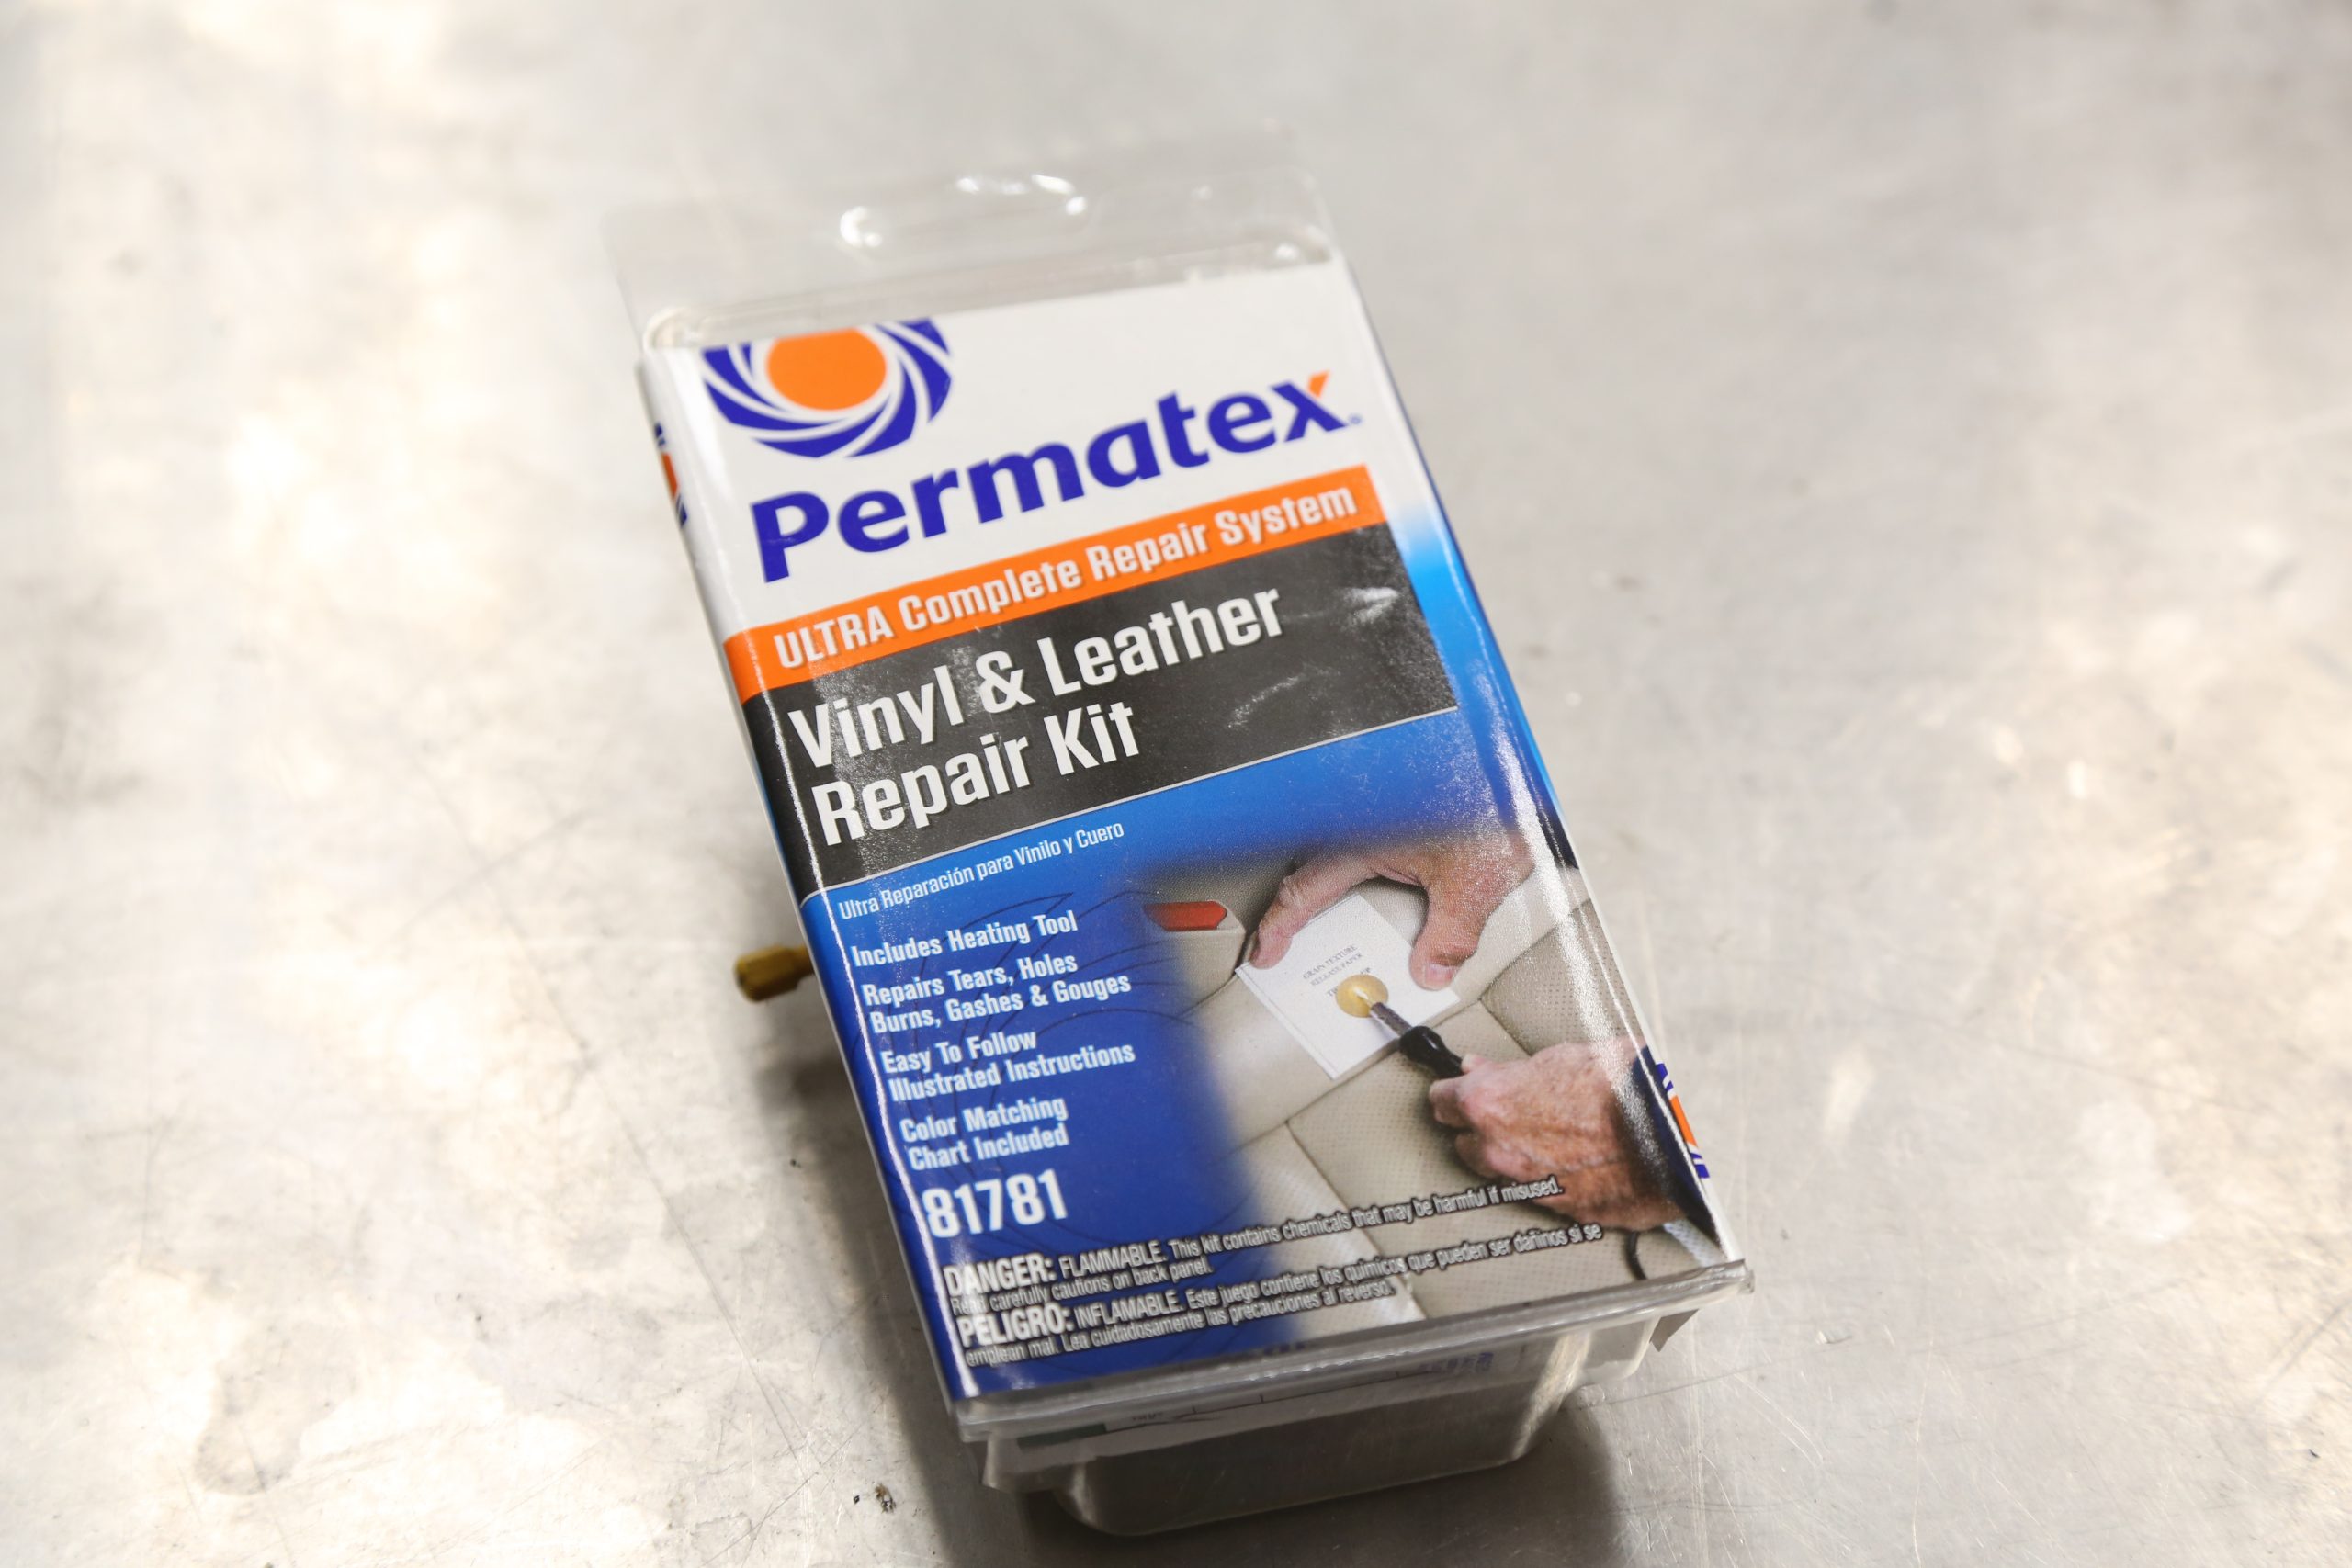
It is not as hard as you may think, and the results can be really good if you take your time. We recently repaired a damaged leather seat out of a 2007 Acura using one of these Permatex Ultra Vinyl & Leather Repair Kits.
And we have to say it turned out very nicely.
The exact Permatex kit we used, part number PTX-81781, is designed to repair vinyl, leather, and vinyl-plastic (think dash material) upholstery and trim.
(Image/Jefferson Bryant)
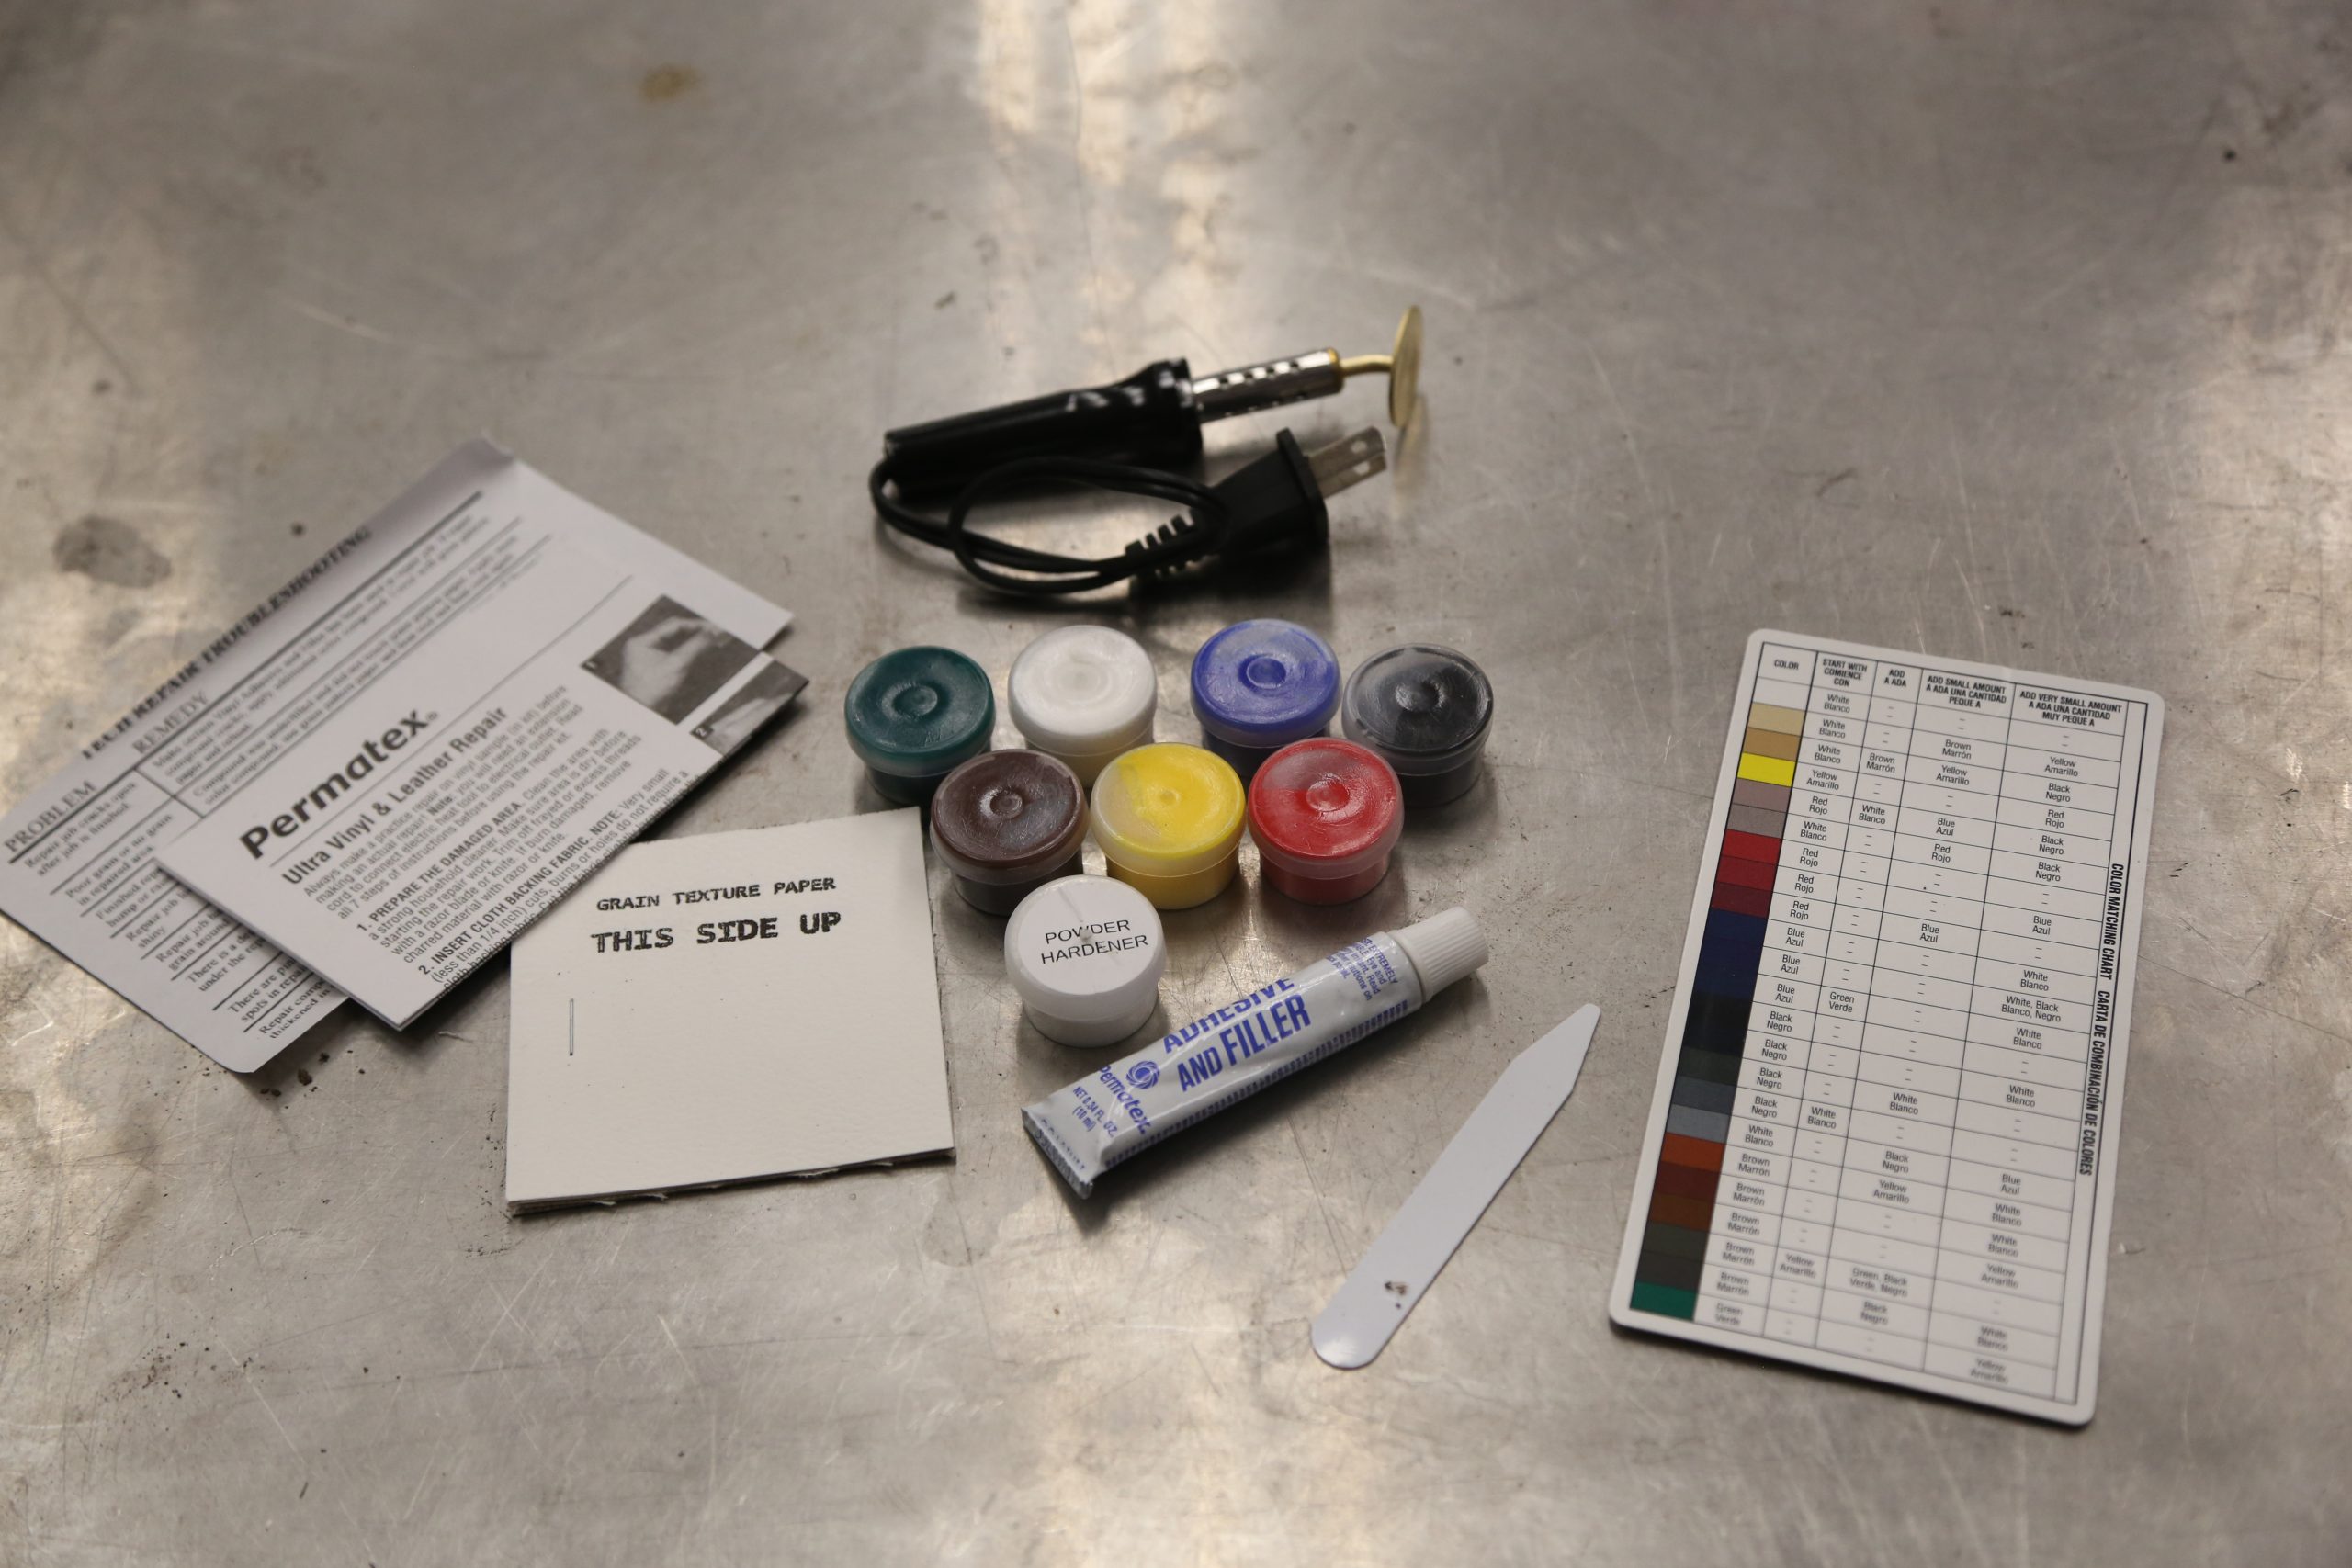
It comes with an assortment of master color bases, three grain pattern sheets, two sheets of repair fabric, repair adhesive, hardener (for hard vinyl repairs), and a heat spoon. Professional upholsterers use an industrial grade heated spoon or spatula to make this type of repair. The heated spoon also speeds up the drying process to minutes as opposed to overnight.
The kit’s seven color compounds allow you to mix up the correct color to match the rest of the material. For our Acura’s black seat, we mixed the black compound with some white and blue to match the original color, including the fading that naturally occurs.
The Permatex Ultra Vinyl & Leather Repair Kit is best for smaller seat repairs such as cigarette burns and two inch or smaller tears, or for blending seams in large repairs. You can use it to repair longer tears or missing pieces of upholstery, but you must work in sections and will need extra fabric. You can use scrap material or purchase some at a local fabric store.
If the seat foam under the tear is worn, you may need to build it up. Our seat had some foam degradation. We fixed that with a small piece of generic automotive trunk carpet material (technically it was subwoofer box carpet) that added enough bulk to replicate the missing foam.
The Permatex Ultra Vinyl & Leather Repair Kit has enough material to handle larger repairs on hard vinyl like a dash or door panel. Cracks that are a quarter inch or smaller can be filled with the included materials. Larger cracks in a dash pad can be filled with fabric or closed-cell foam, but the better solution is a bit of structural expanding foam that is cut down and sanded to fit. If the foam is badly damaged you will probably have to remove the pad and fix it on the work bench.
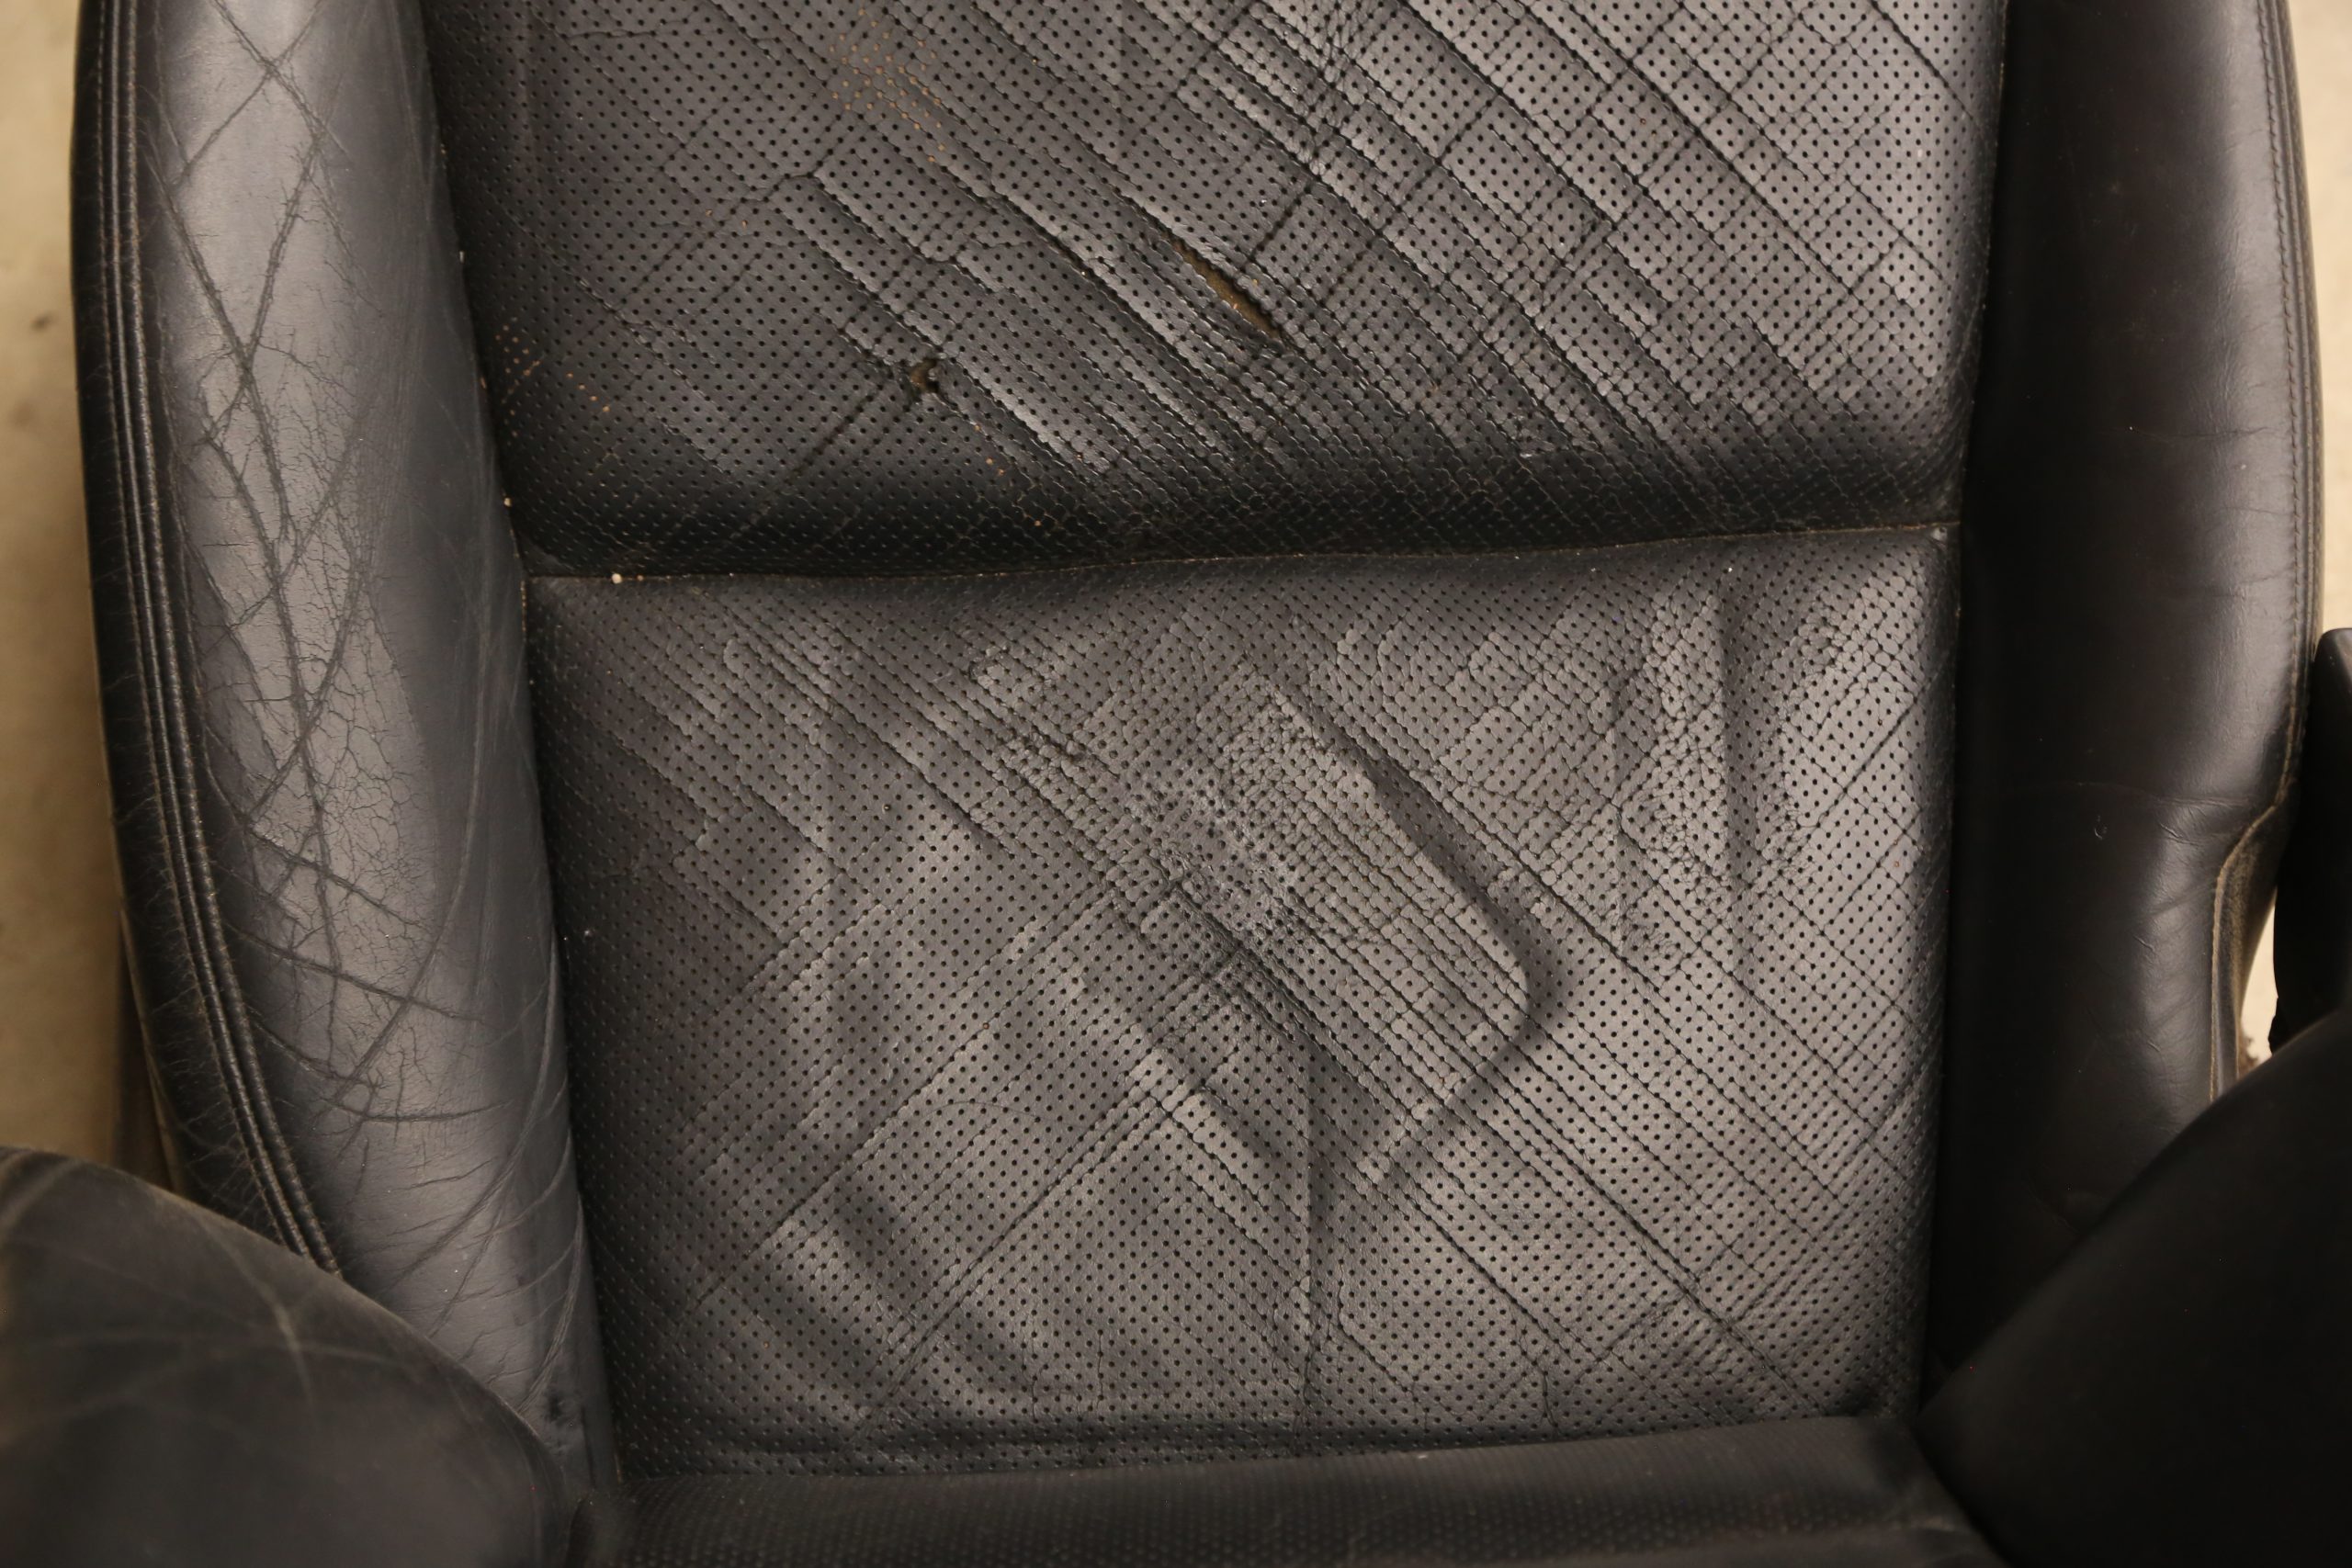
The original seat for our Acura had a 6 x 12 inch section of leather missing, so we picked up a used seat that only had a couple of small tears that are easier to fix. In the end, our repair looks really good and blends in well when looking at the entire seat. With practice, you too can get professional results with a DIY kit that’s pretty darn cheap.
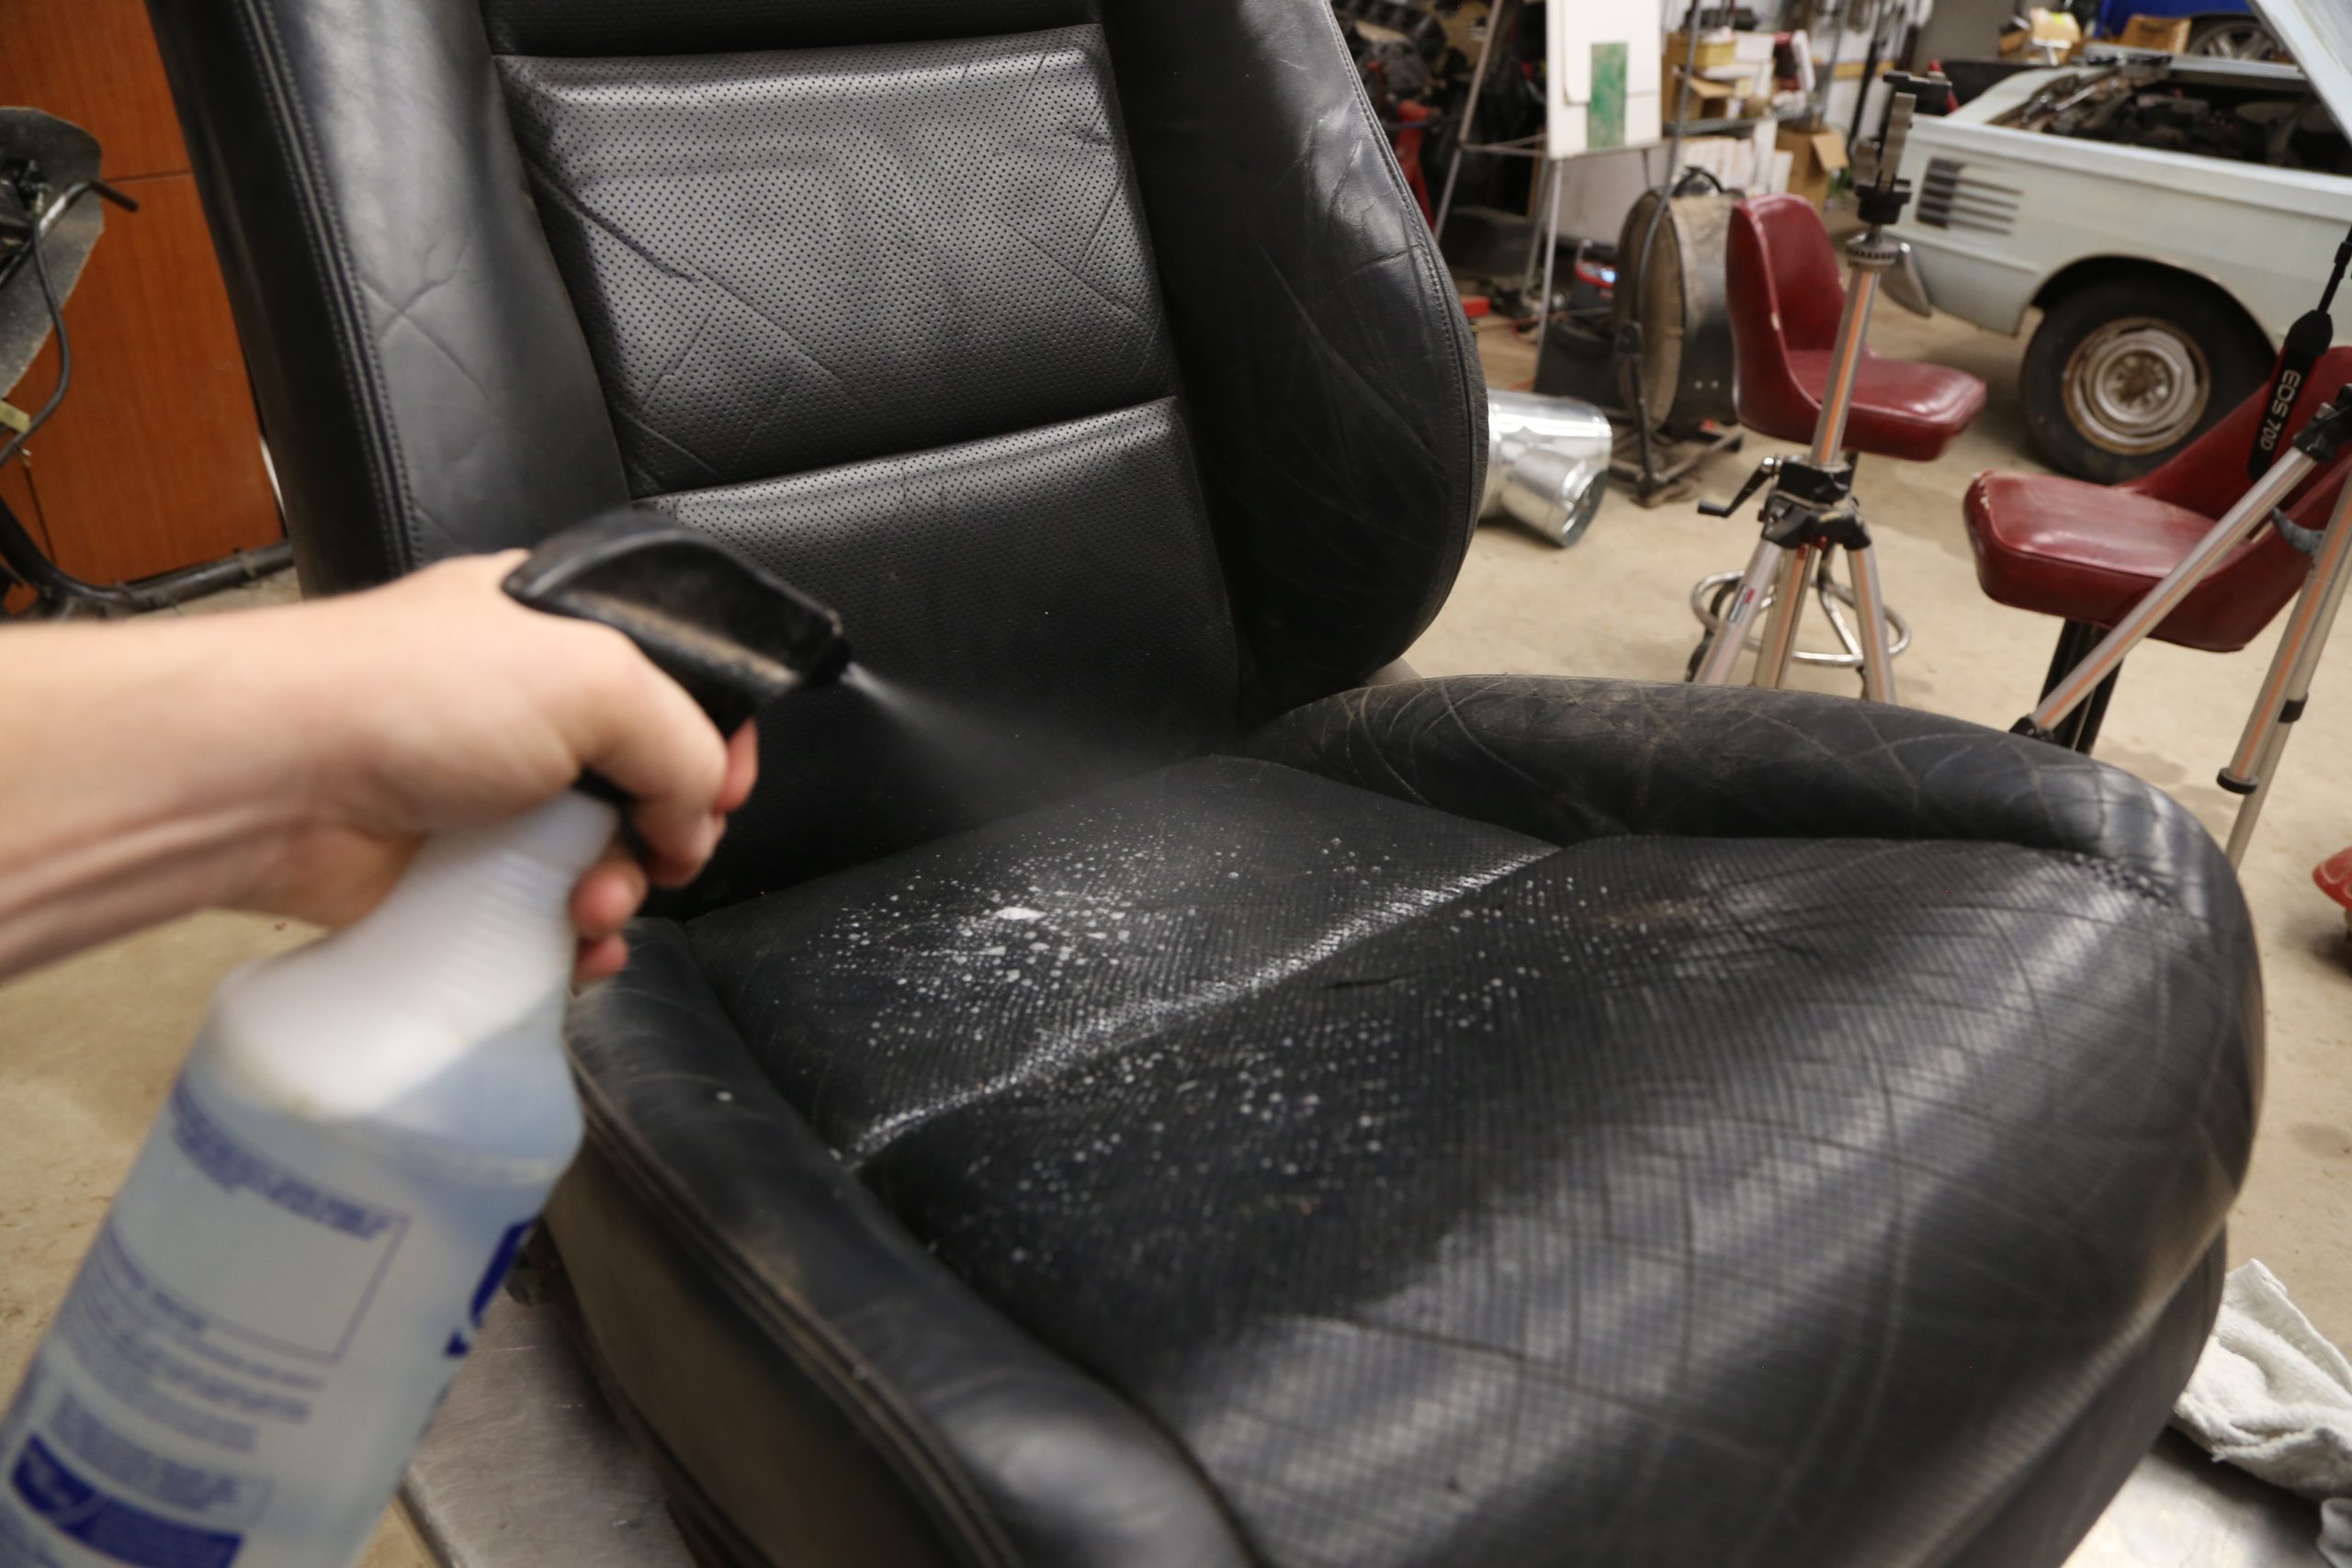
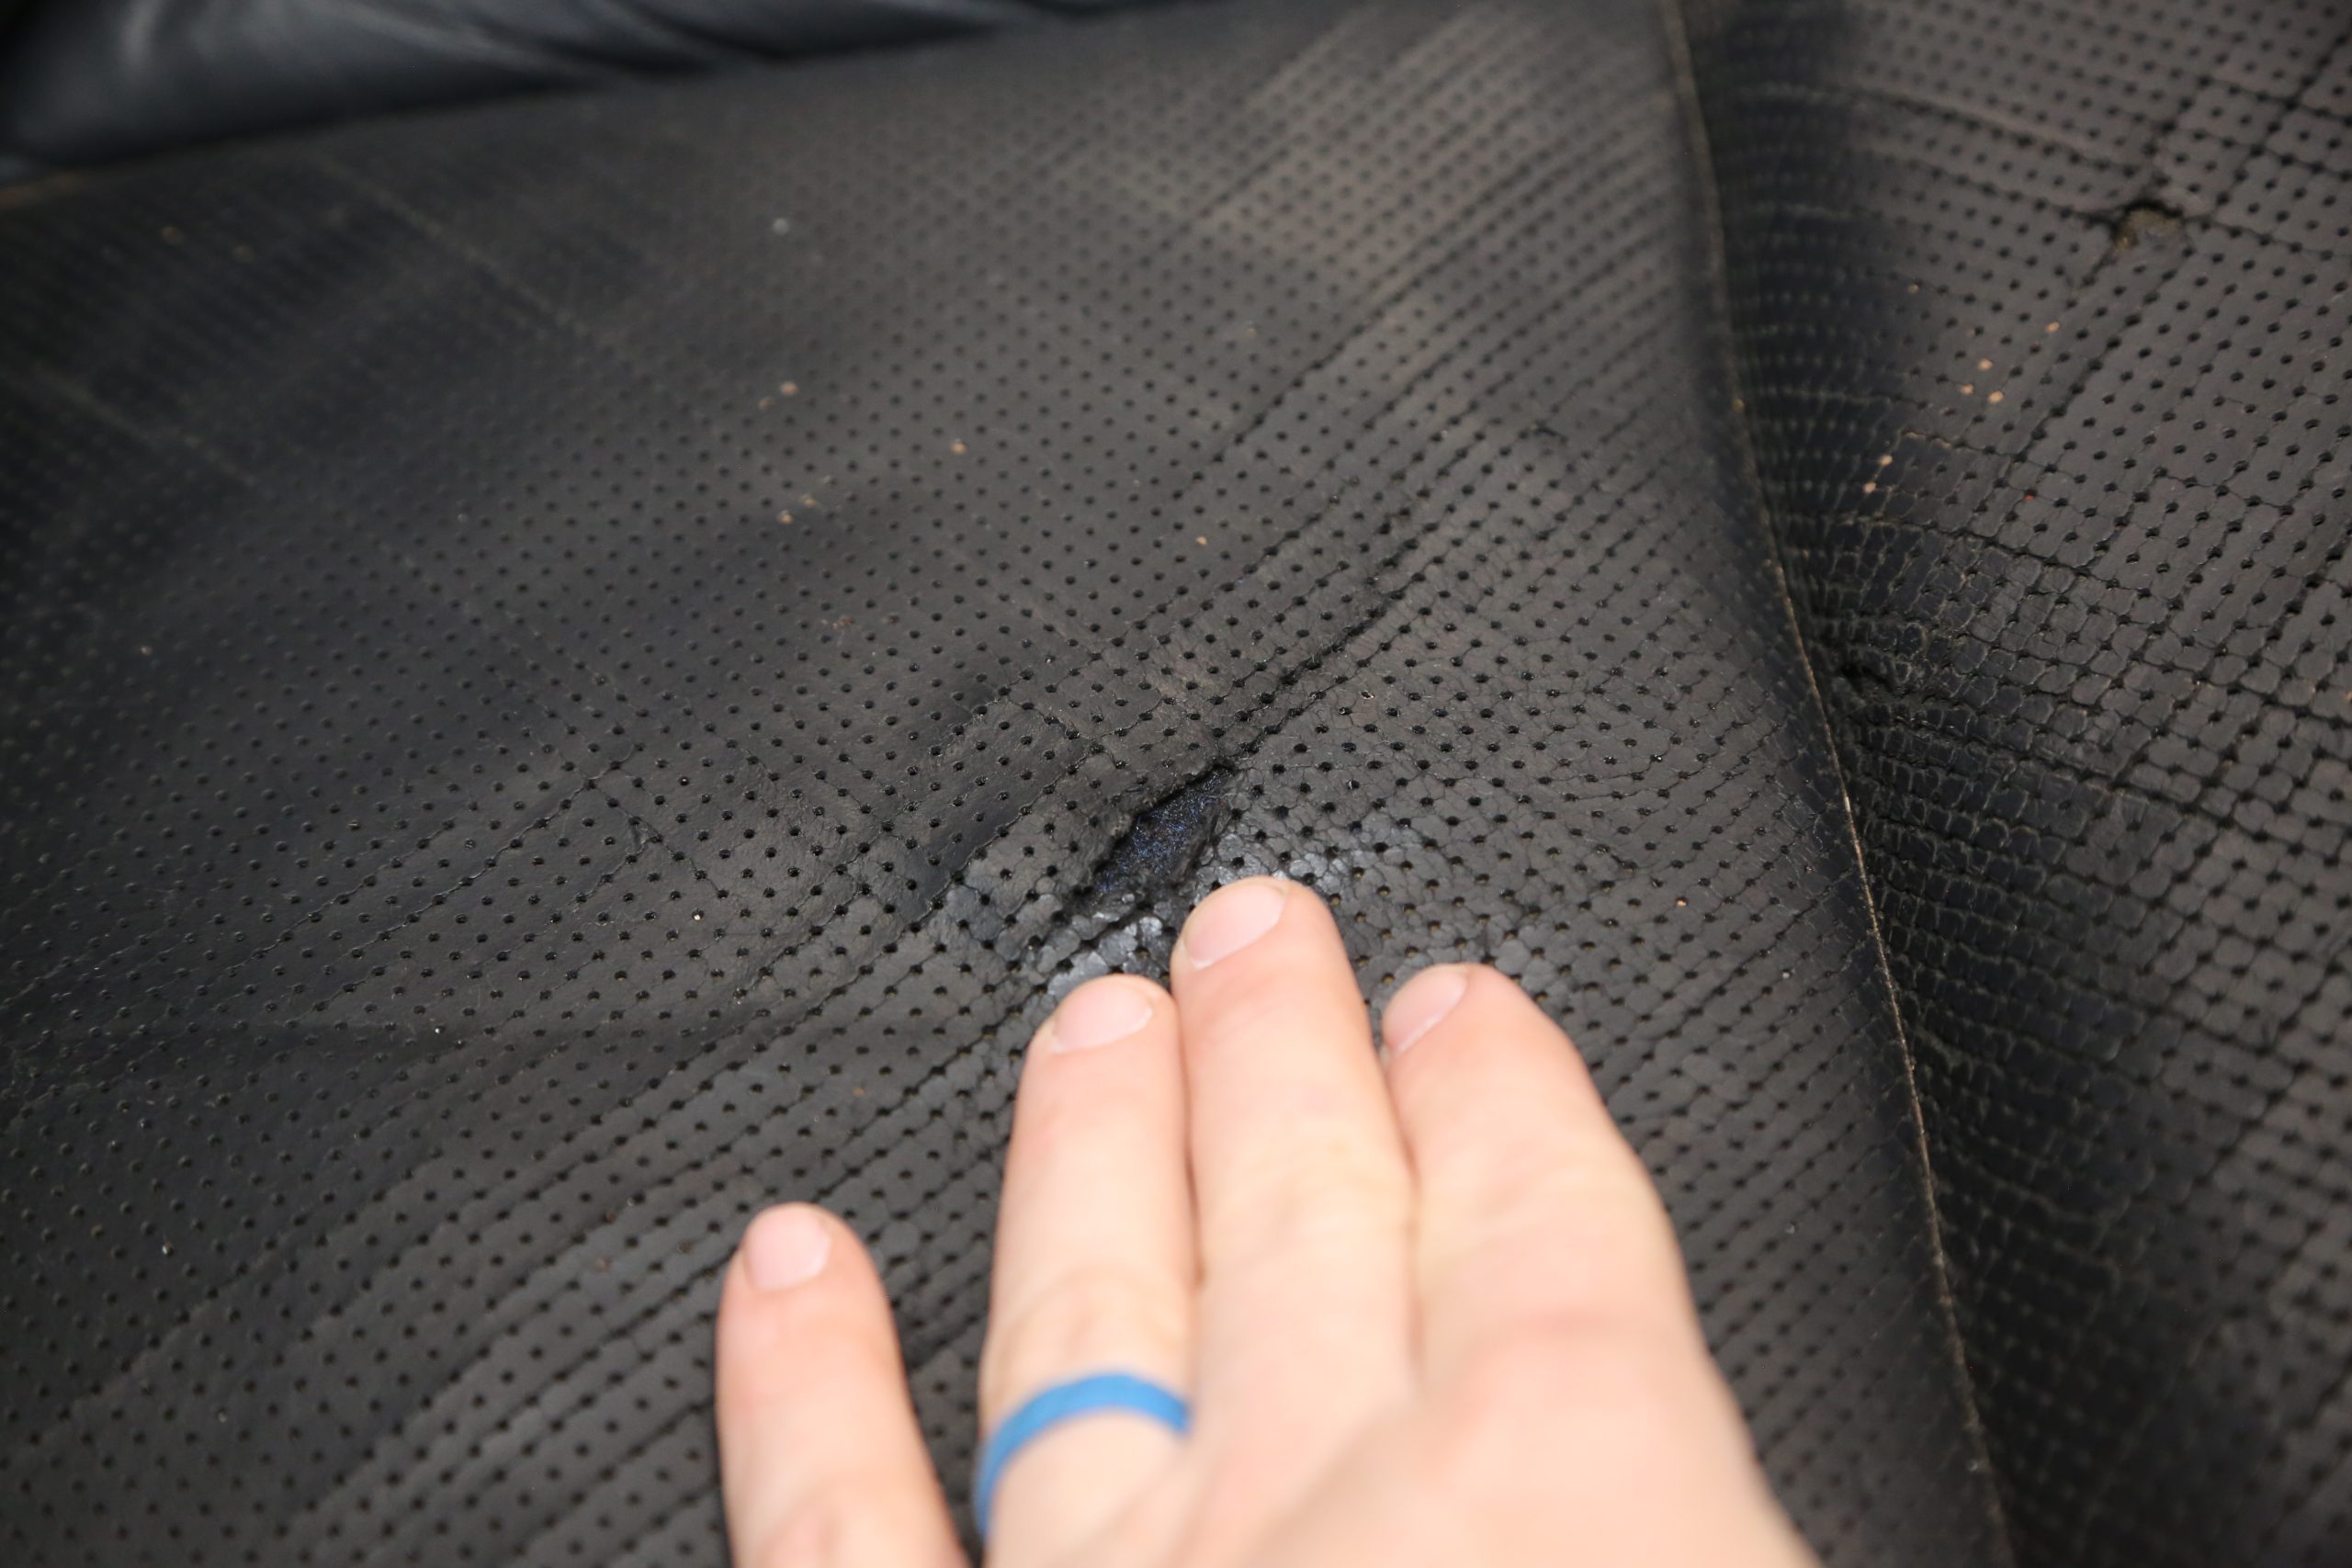
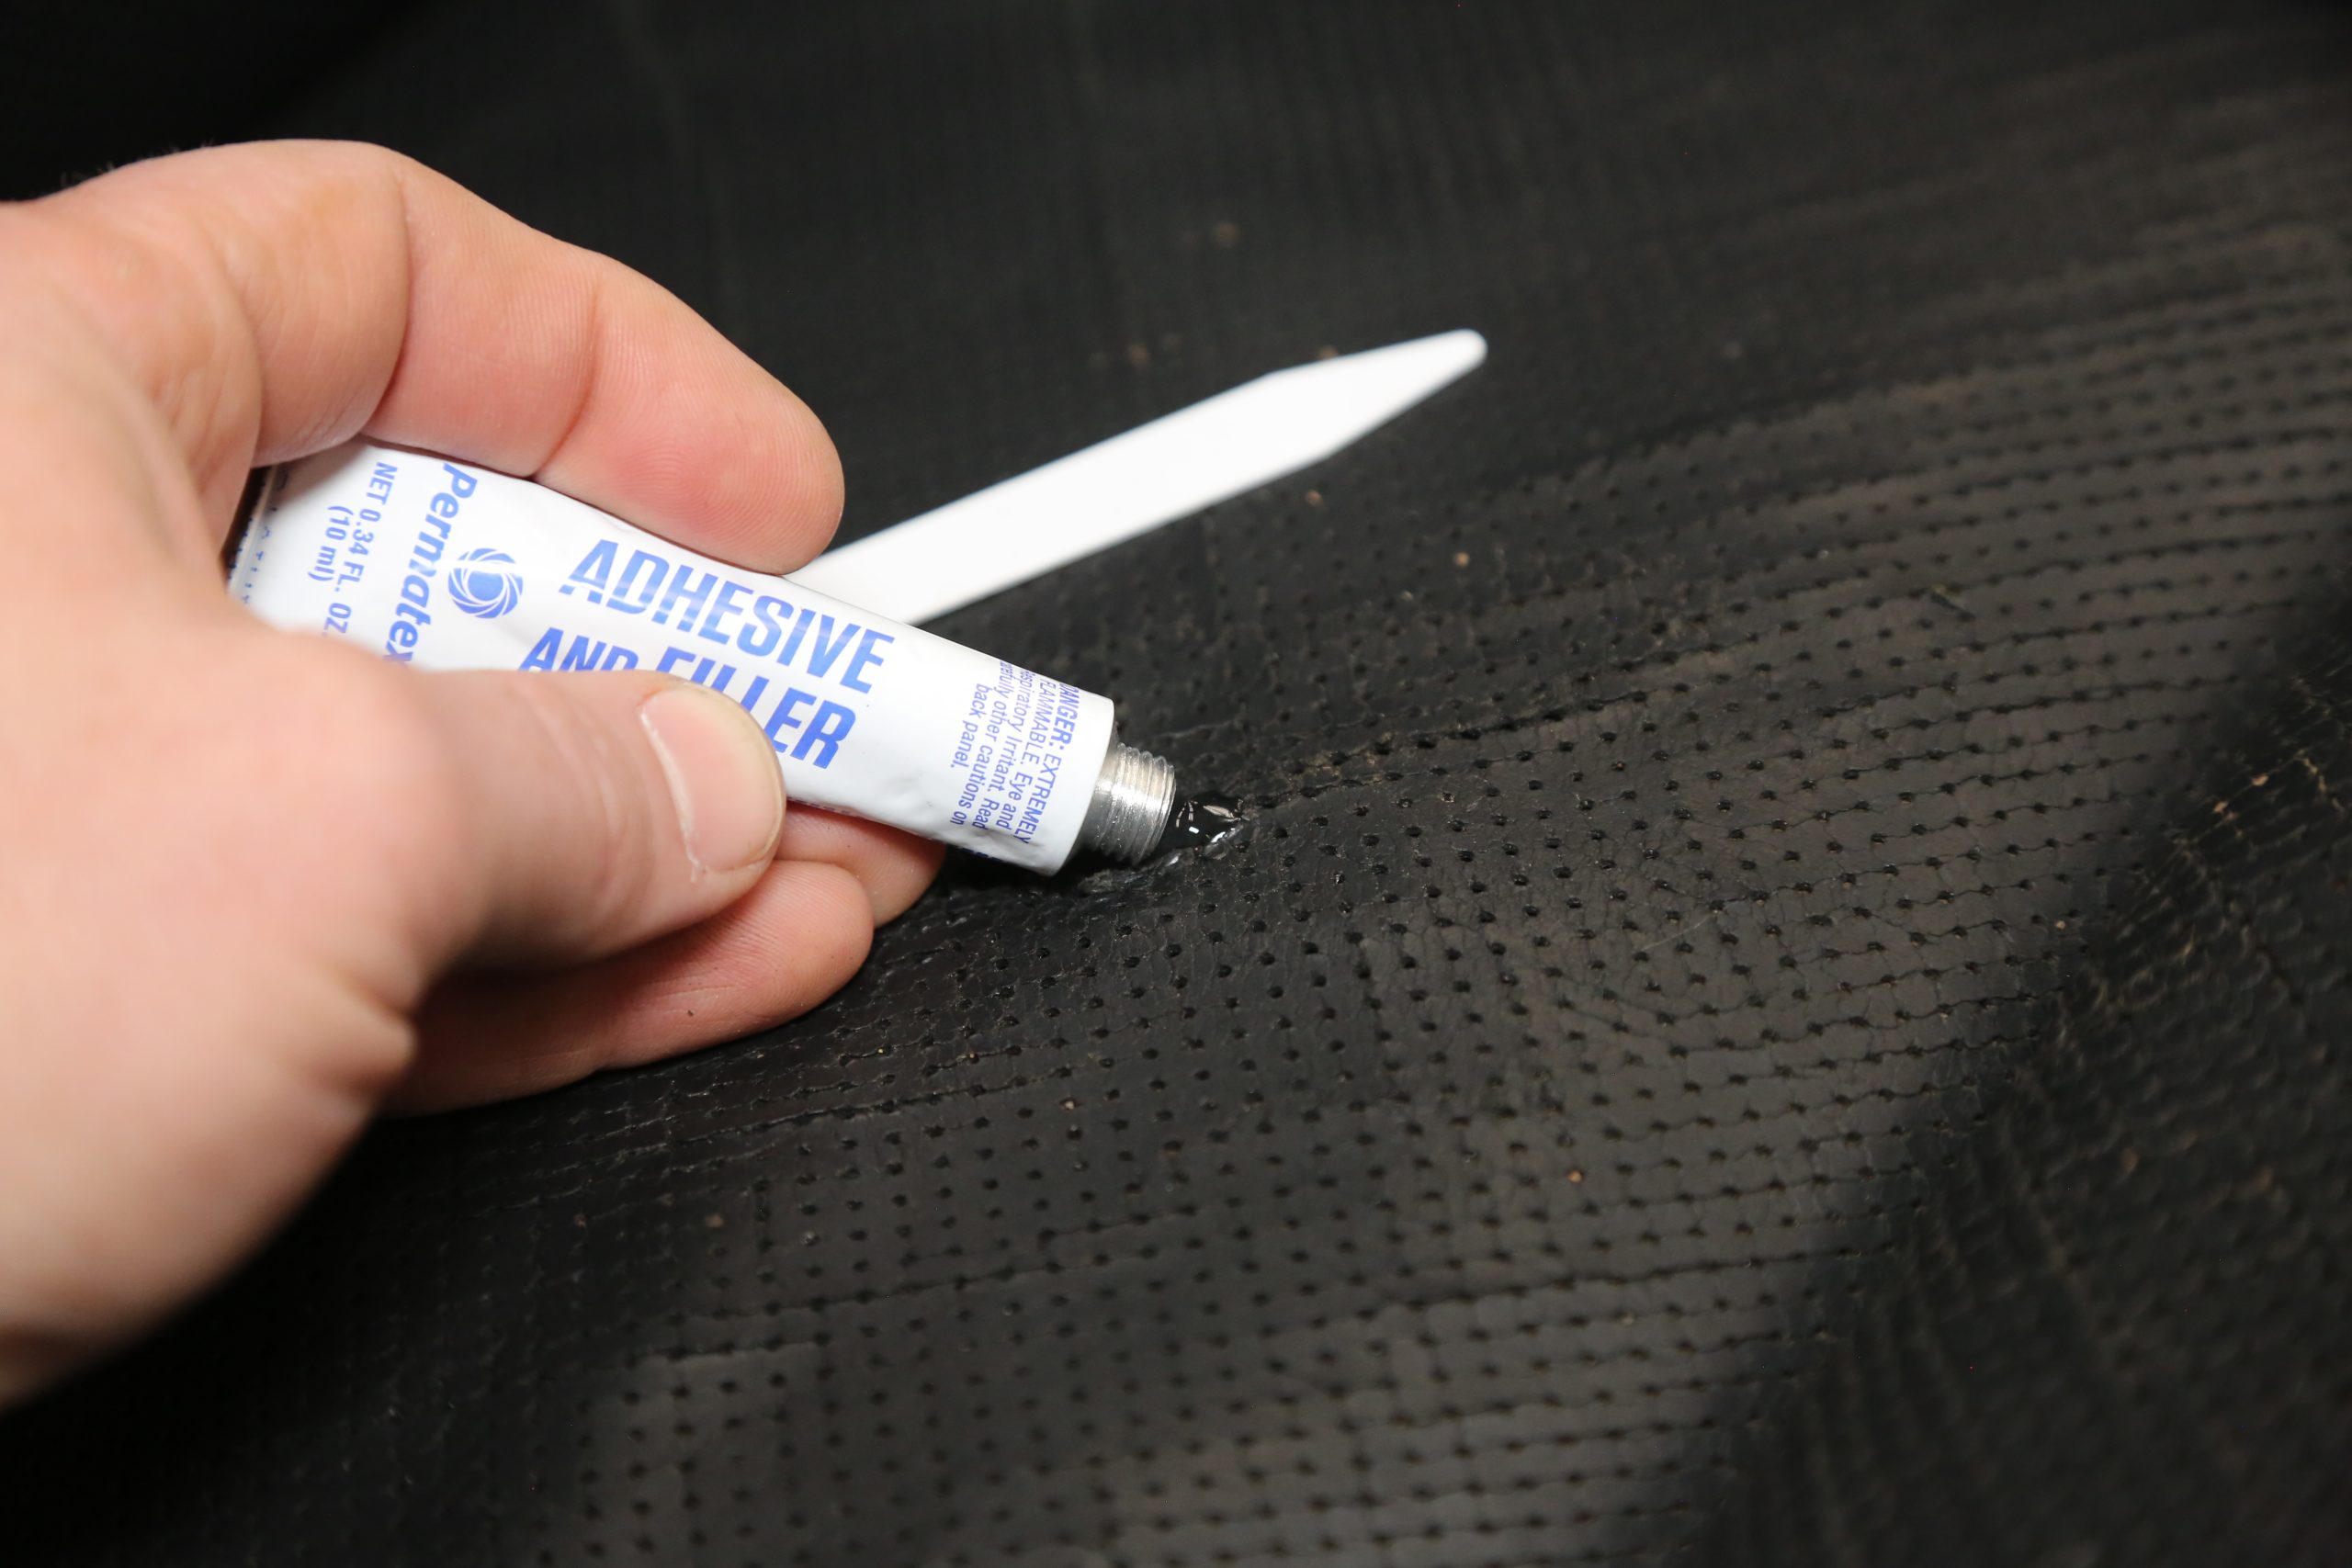
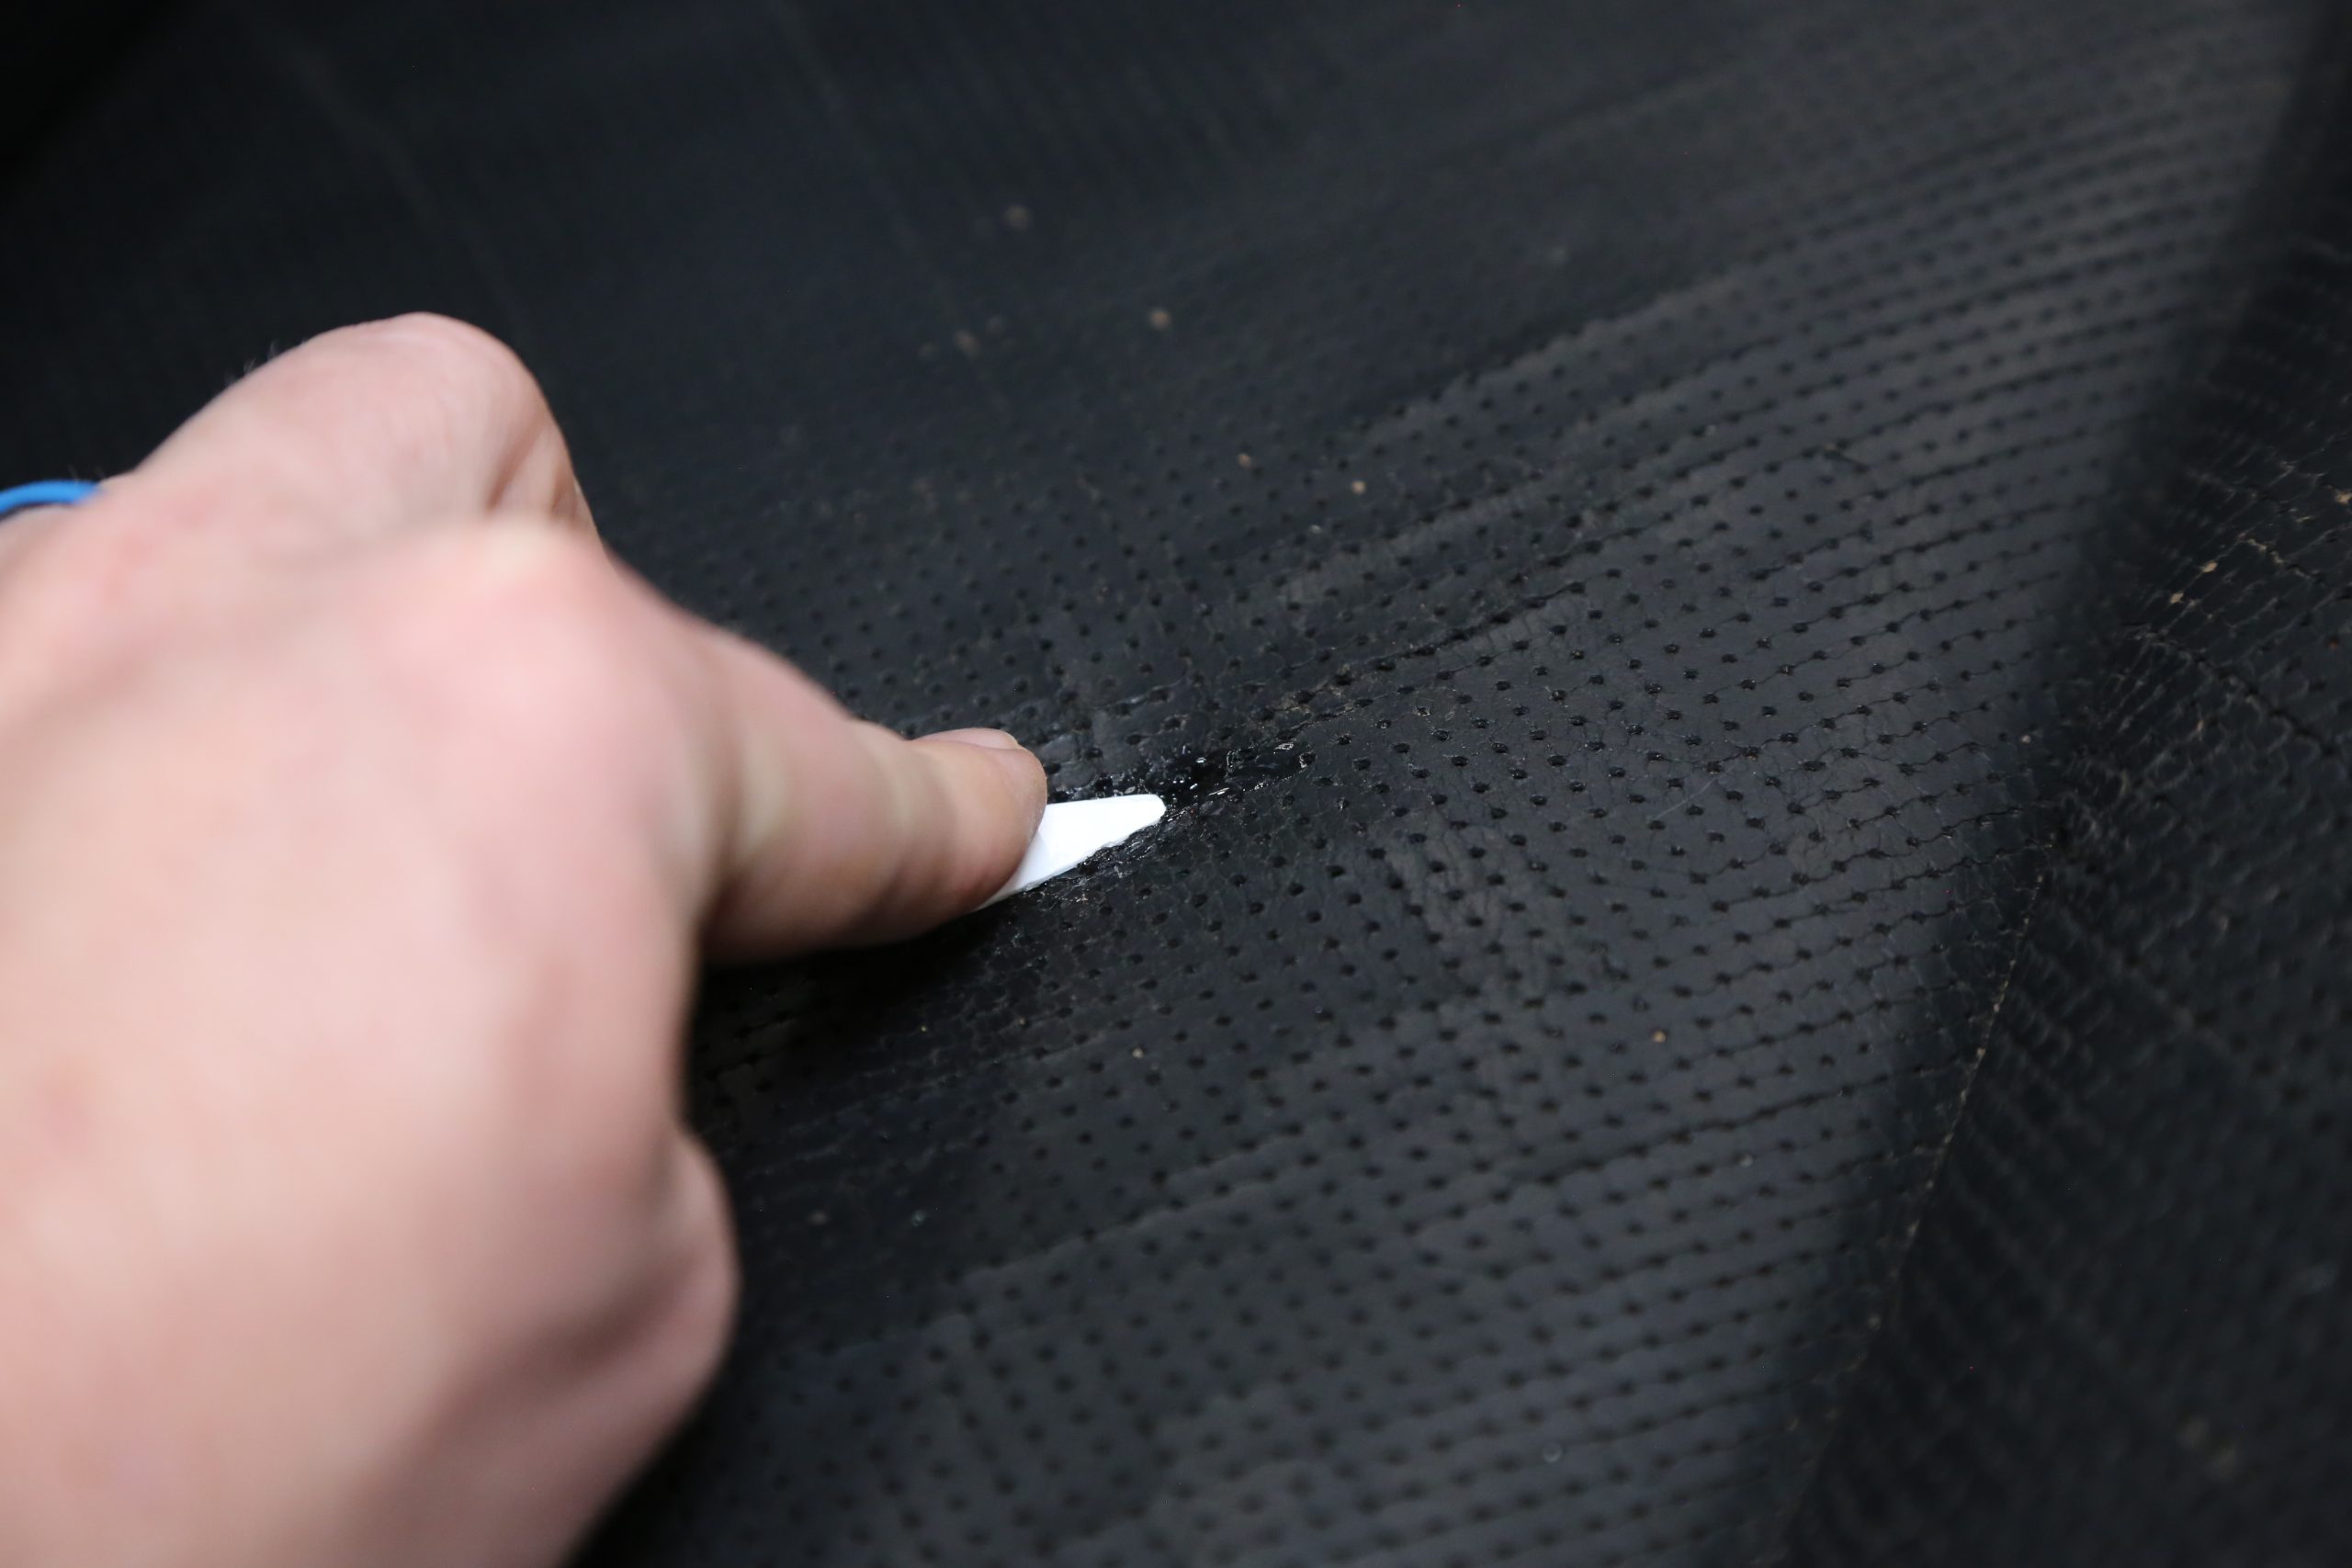
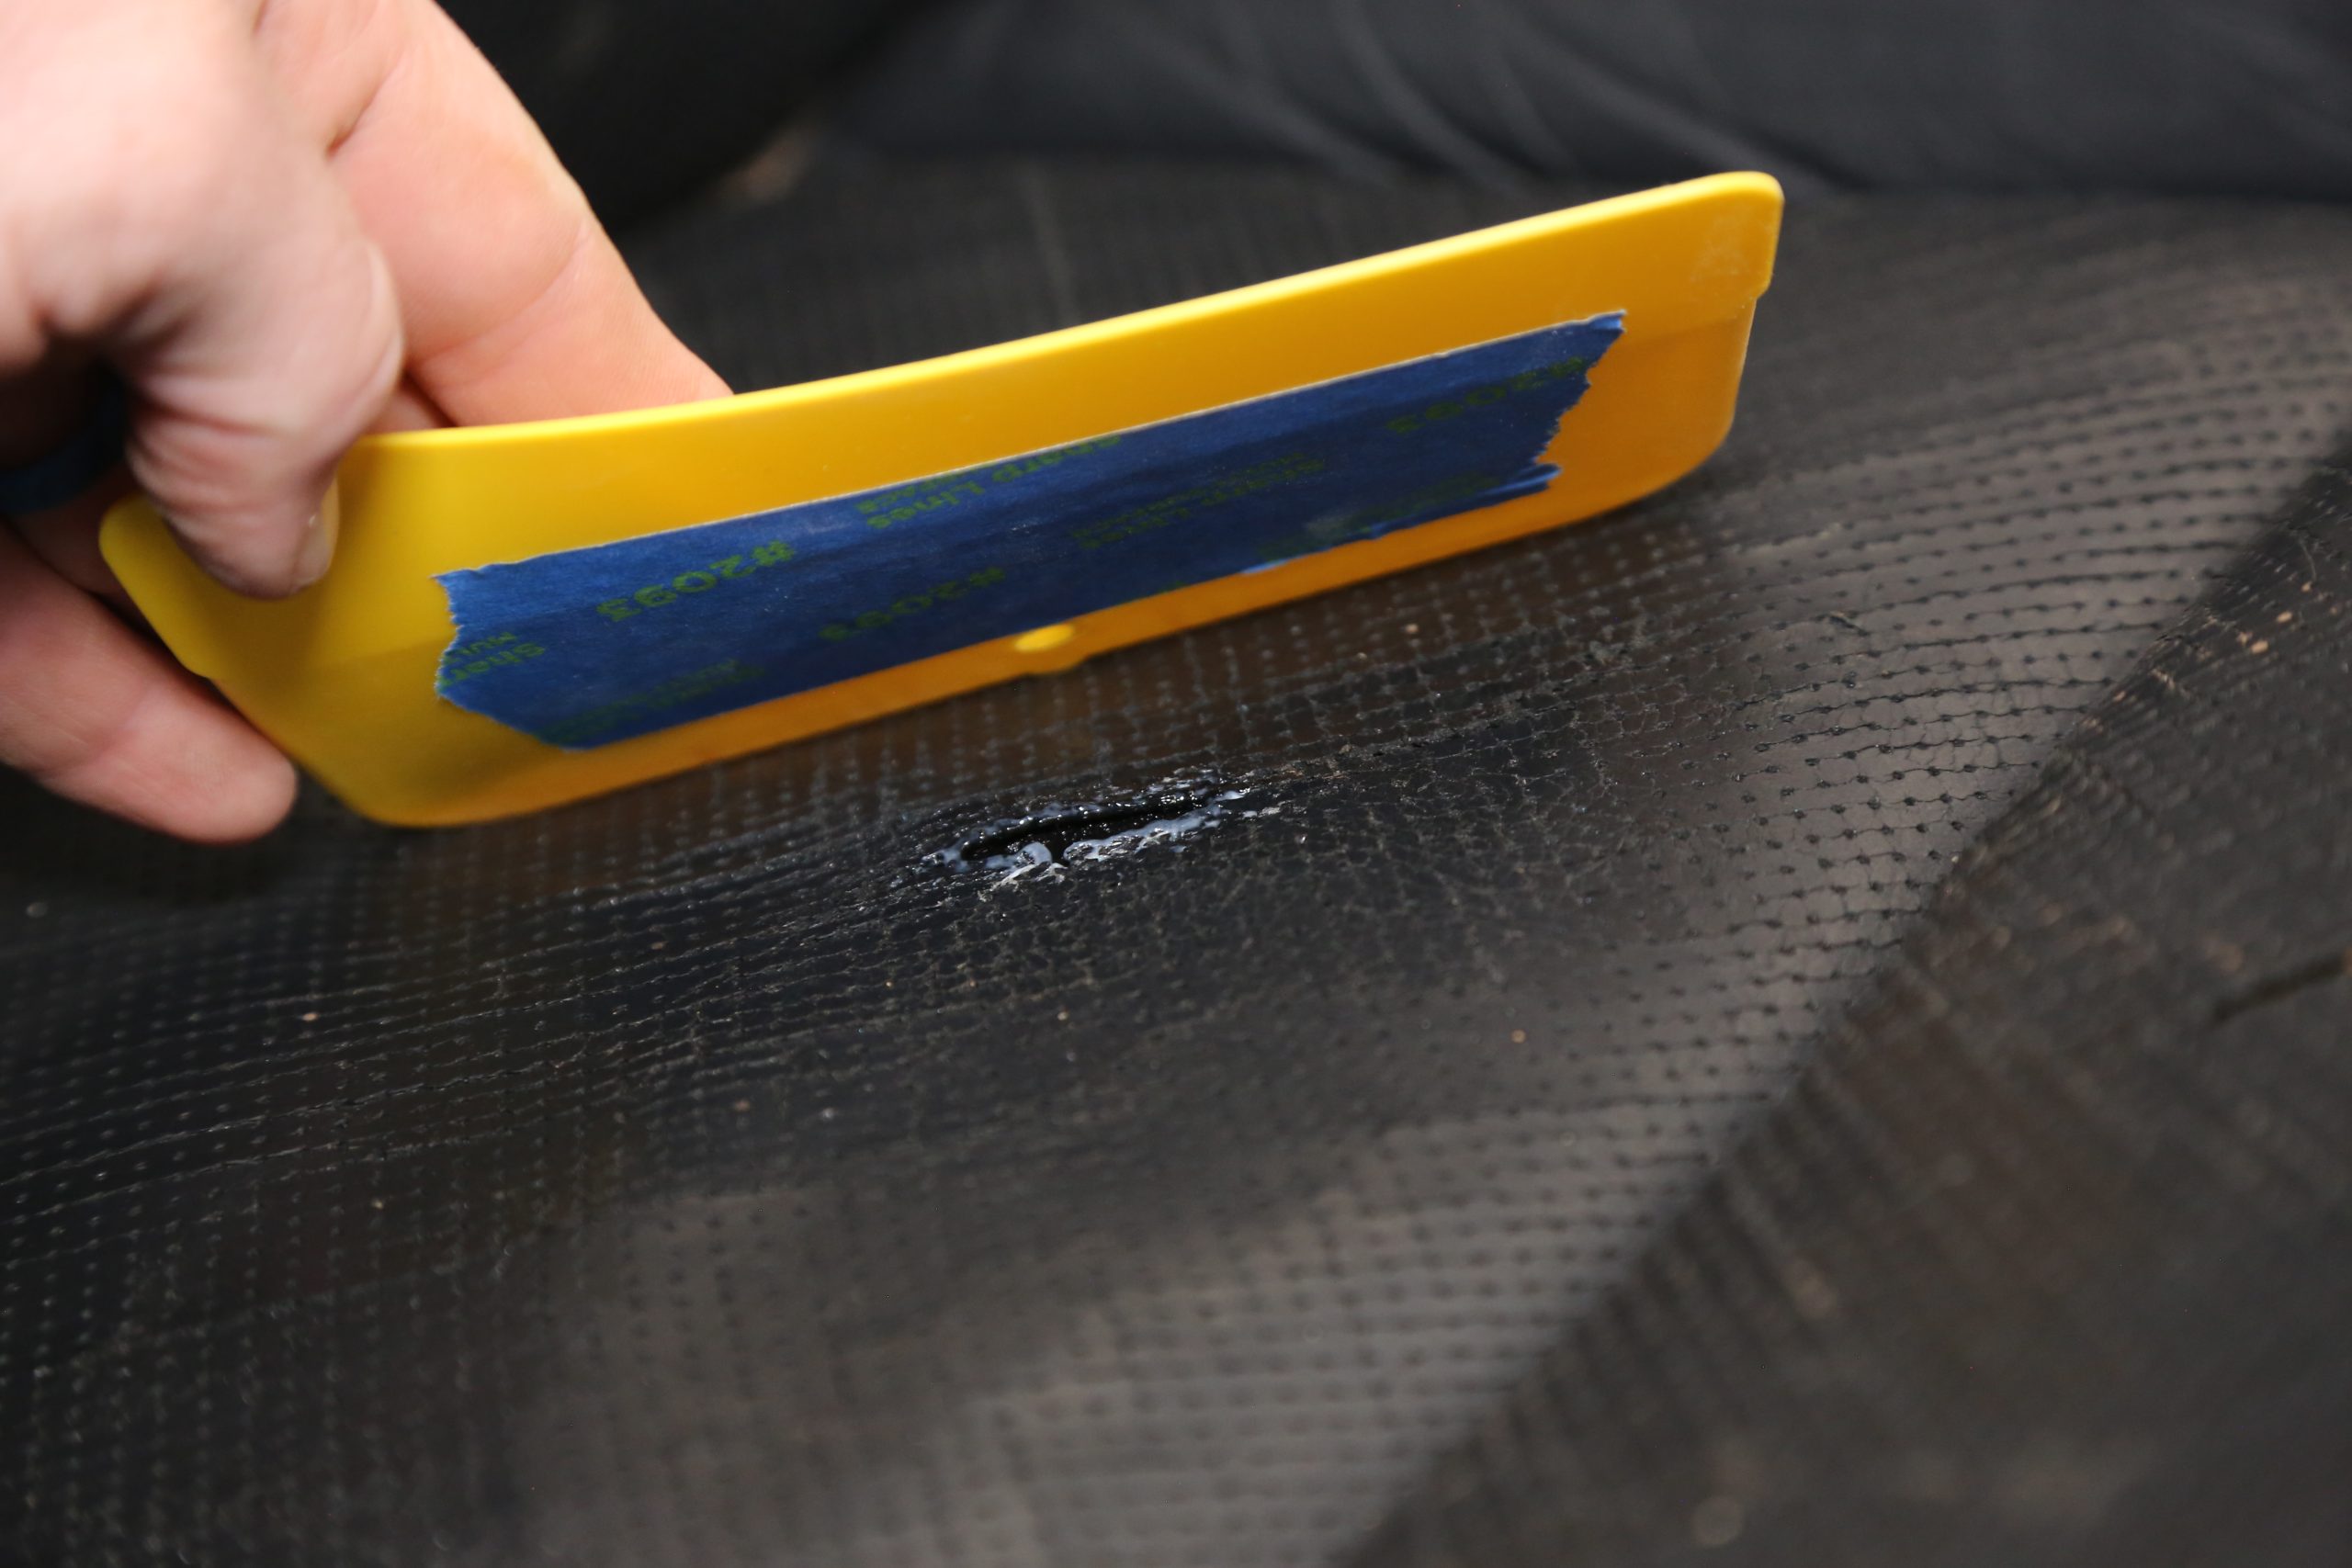
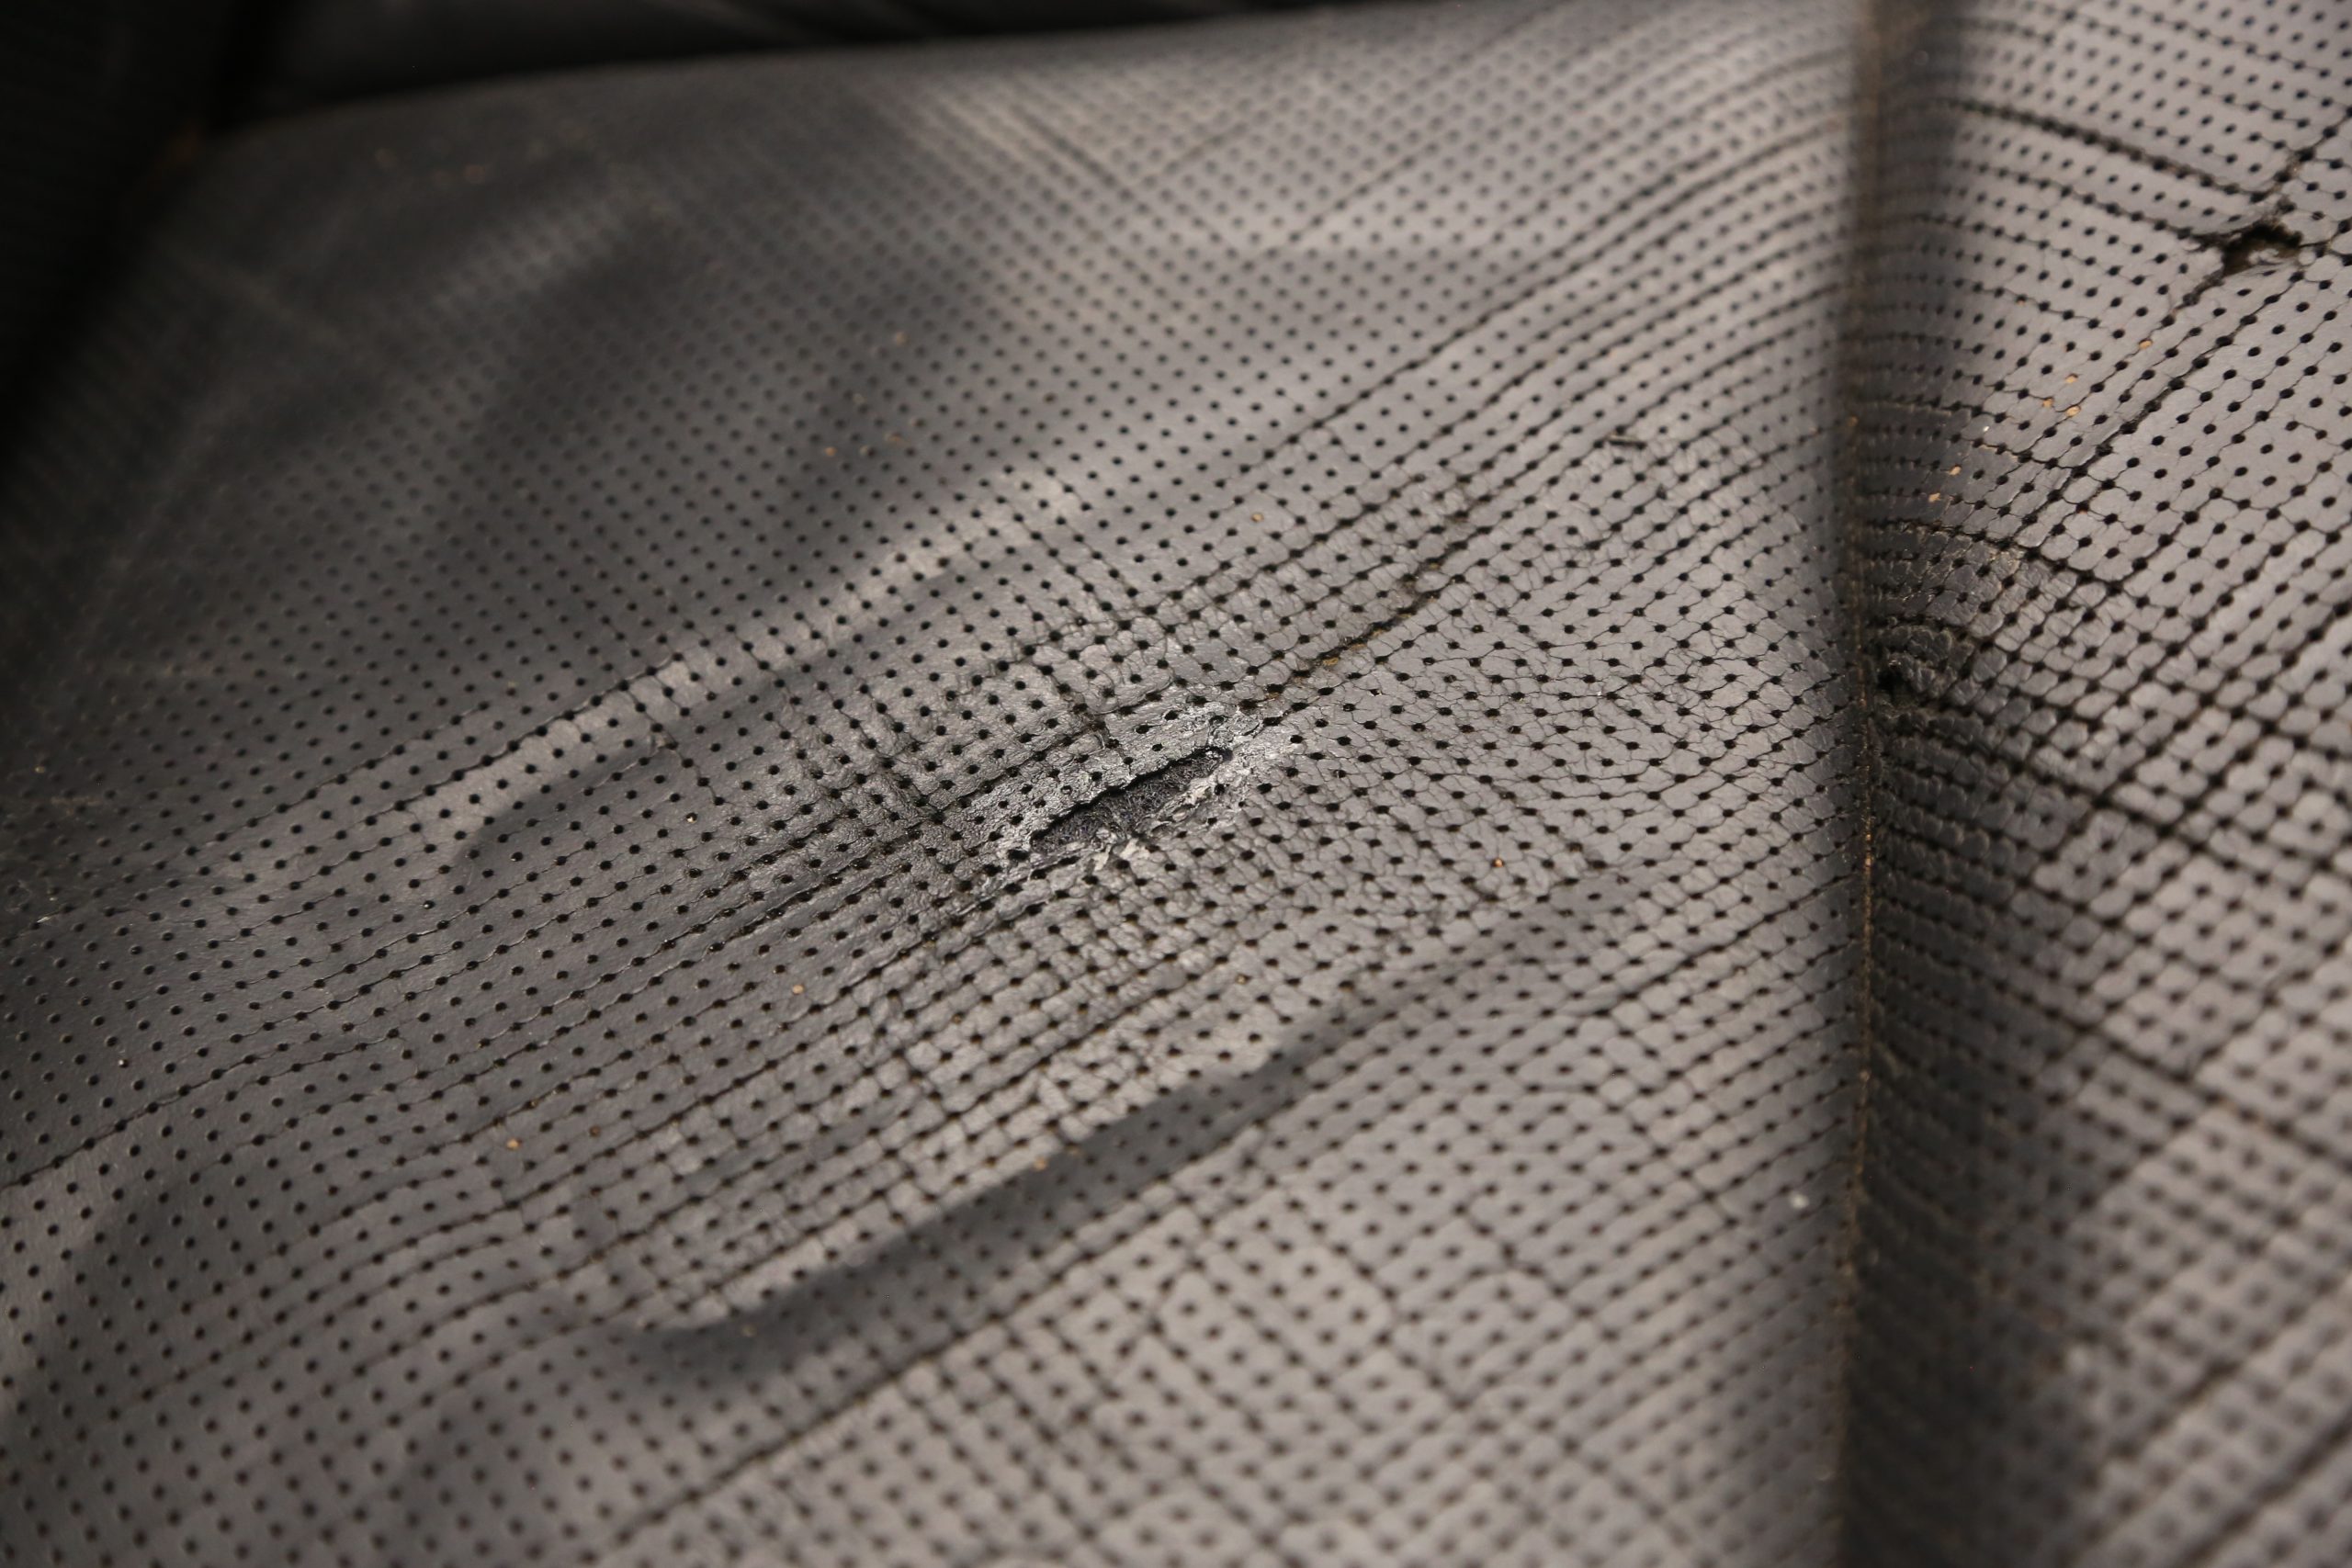
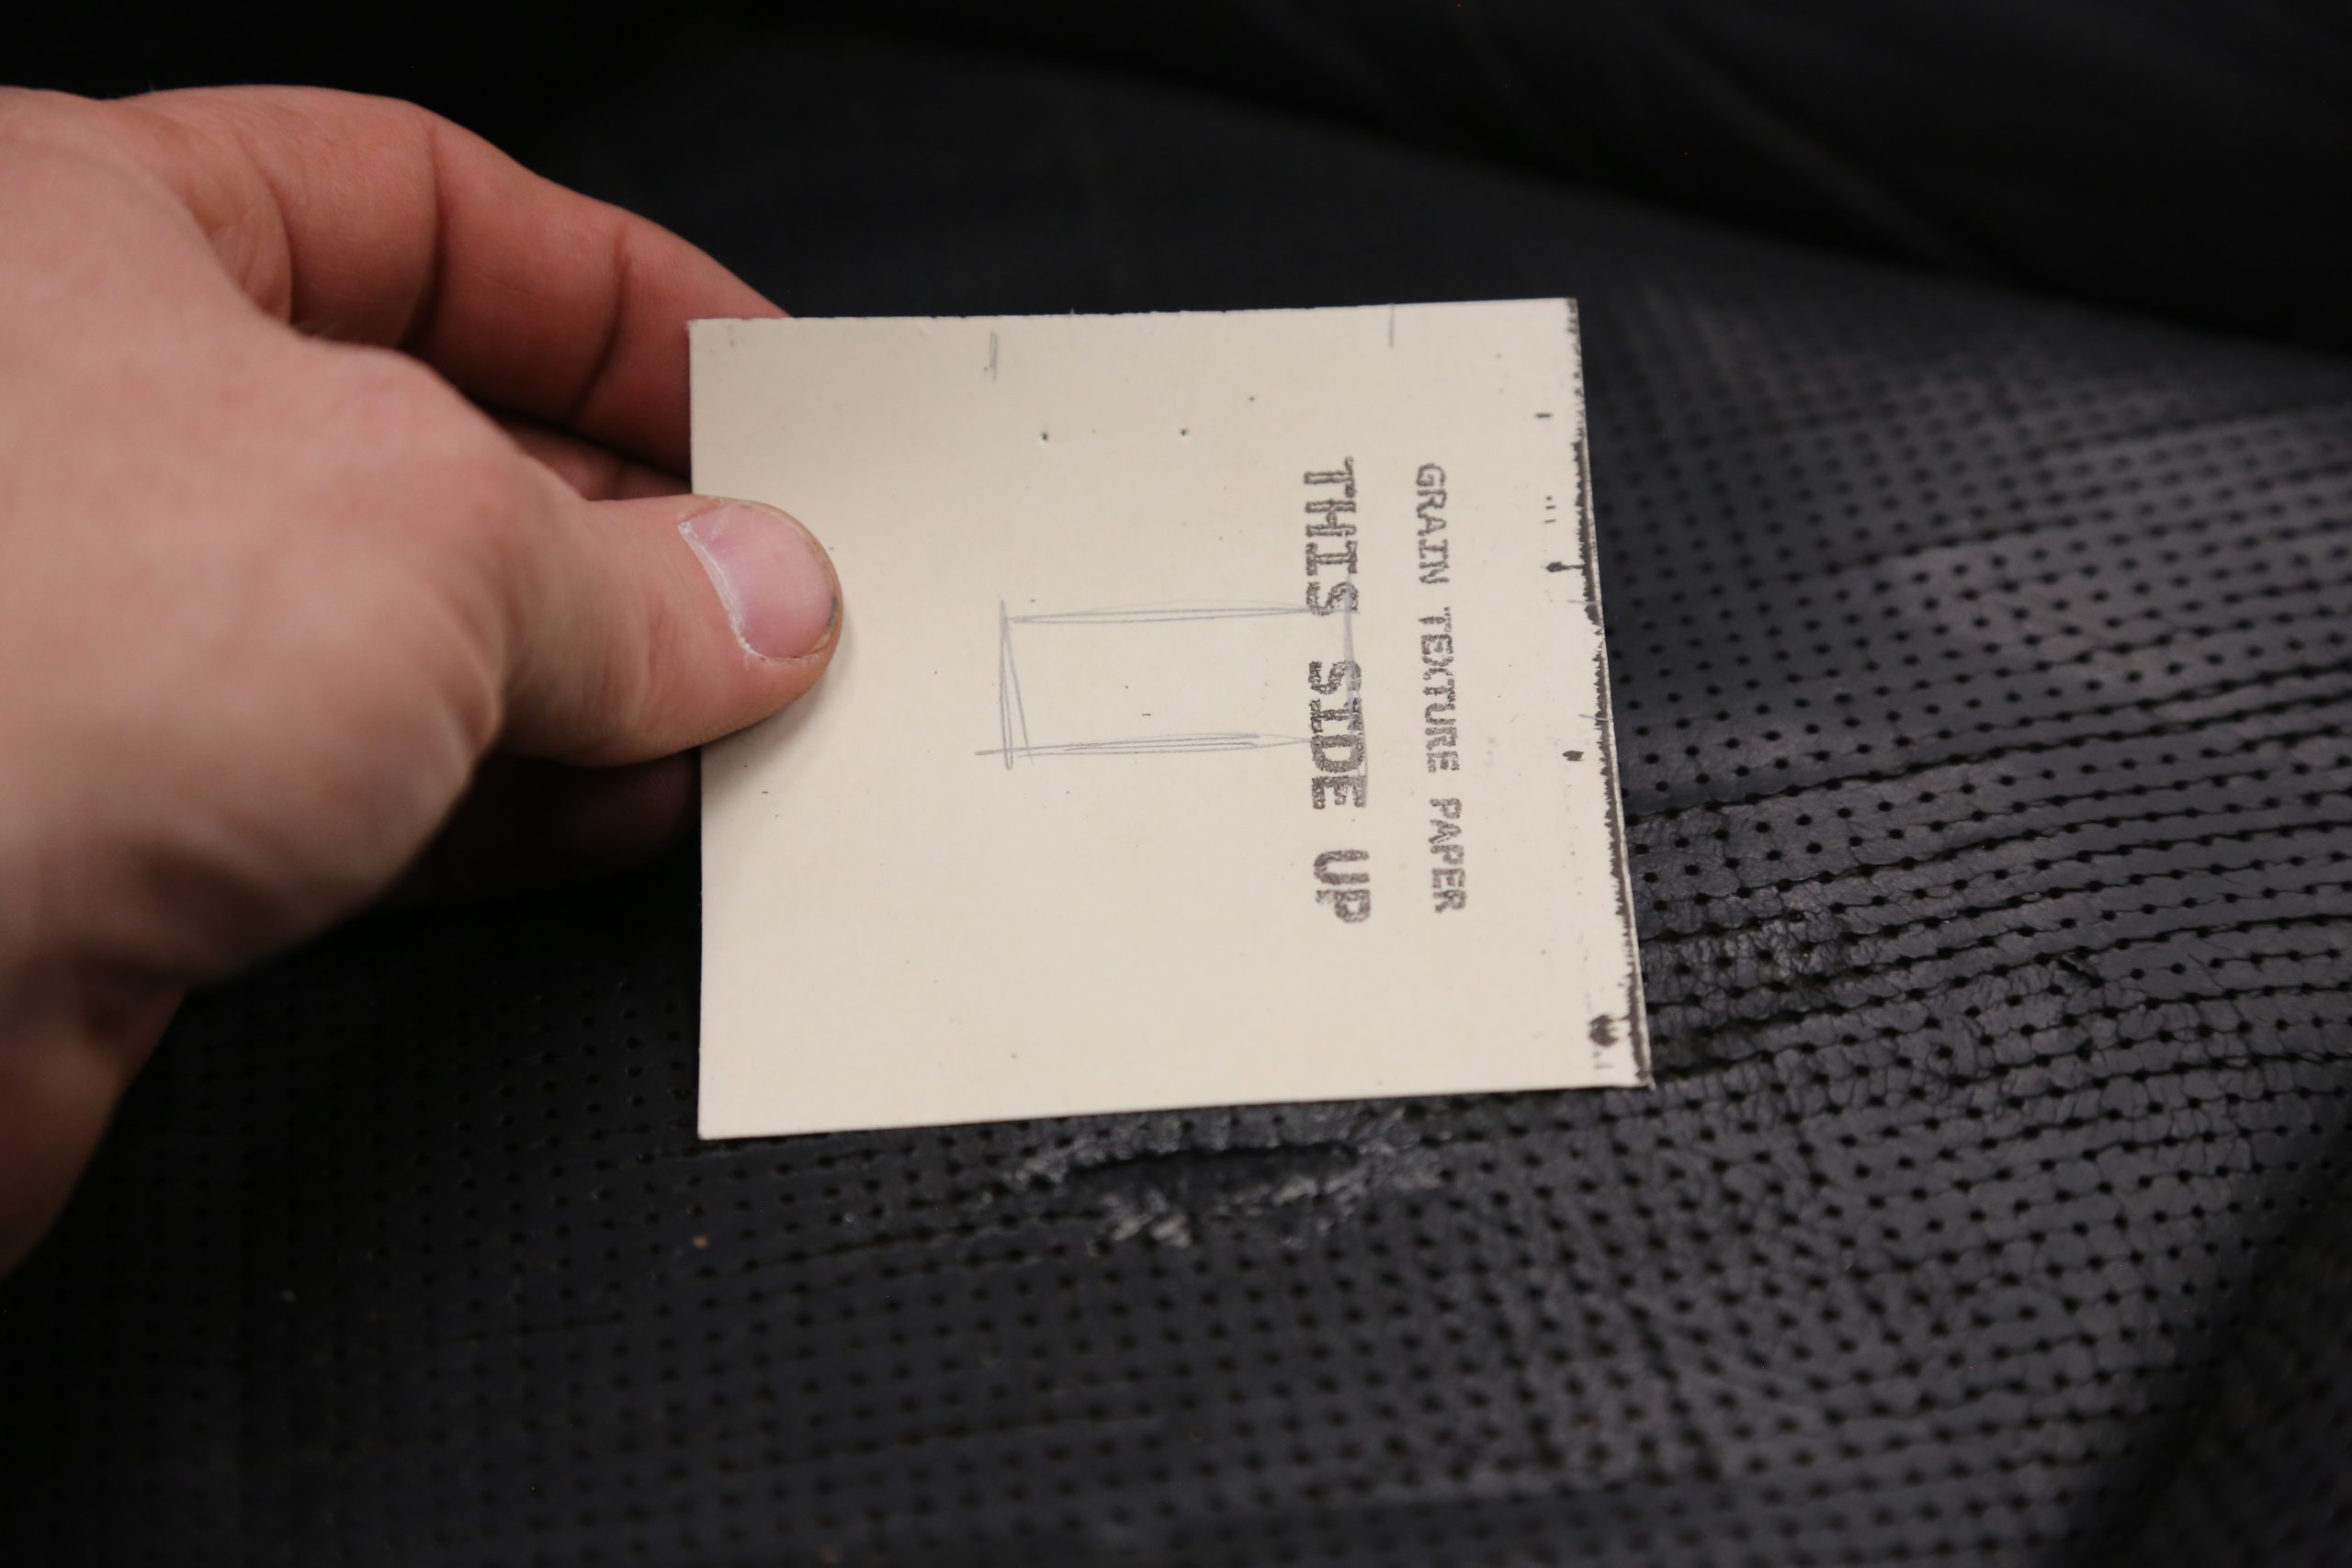
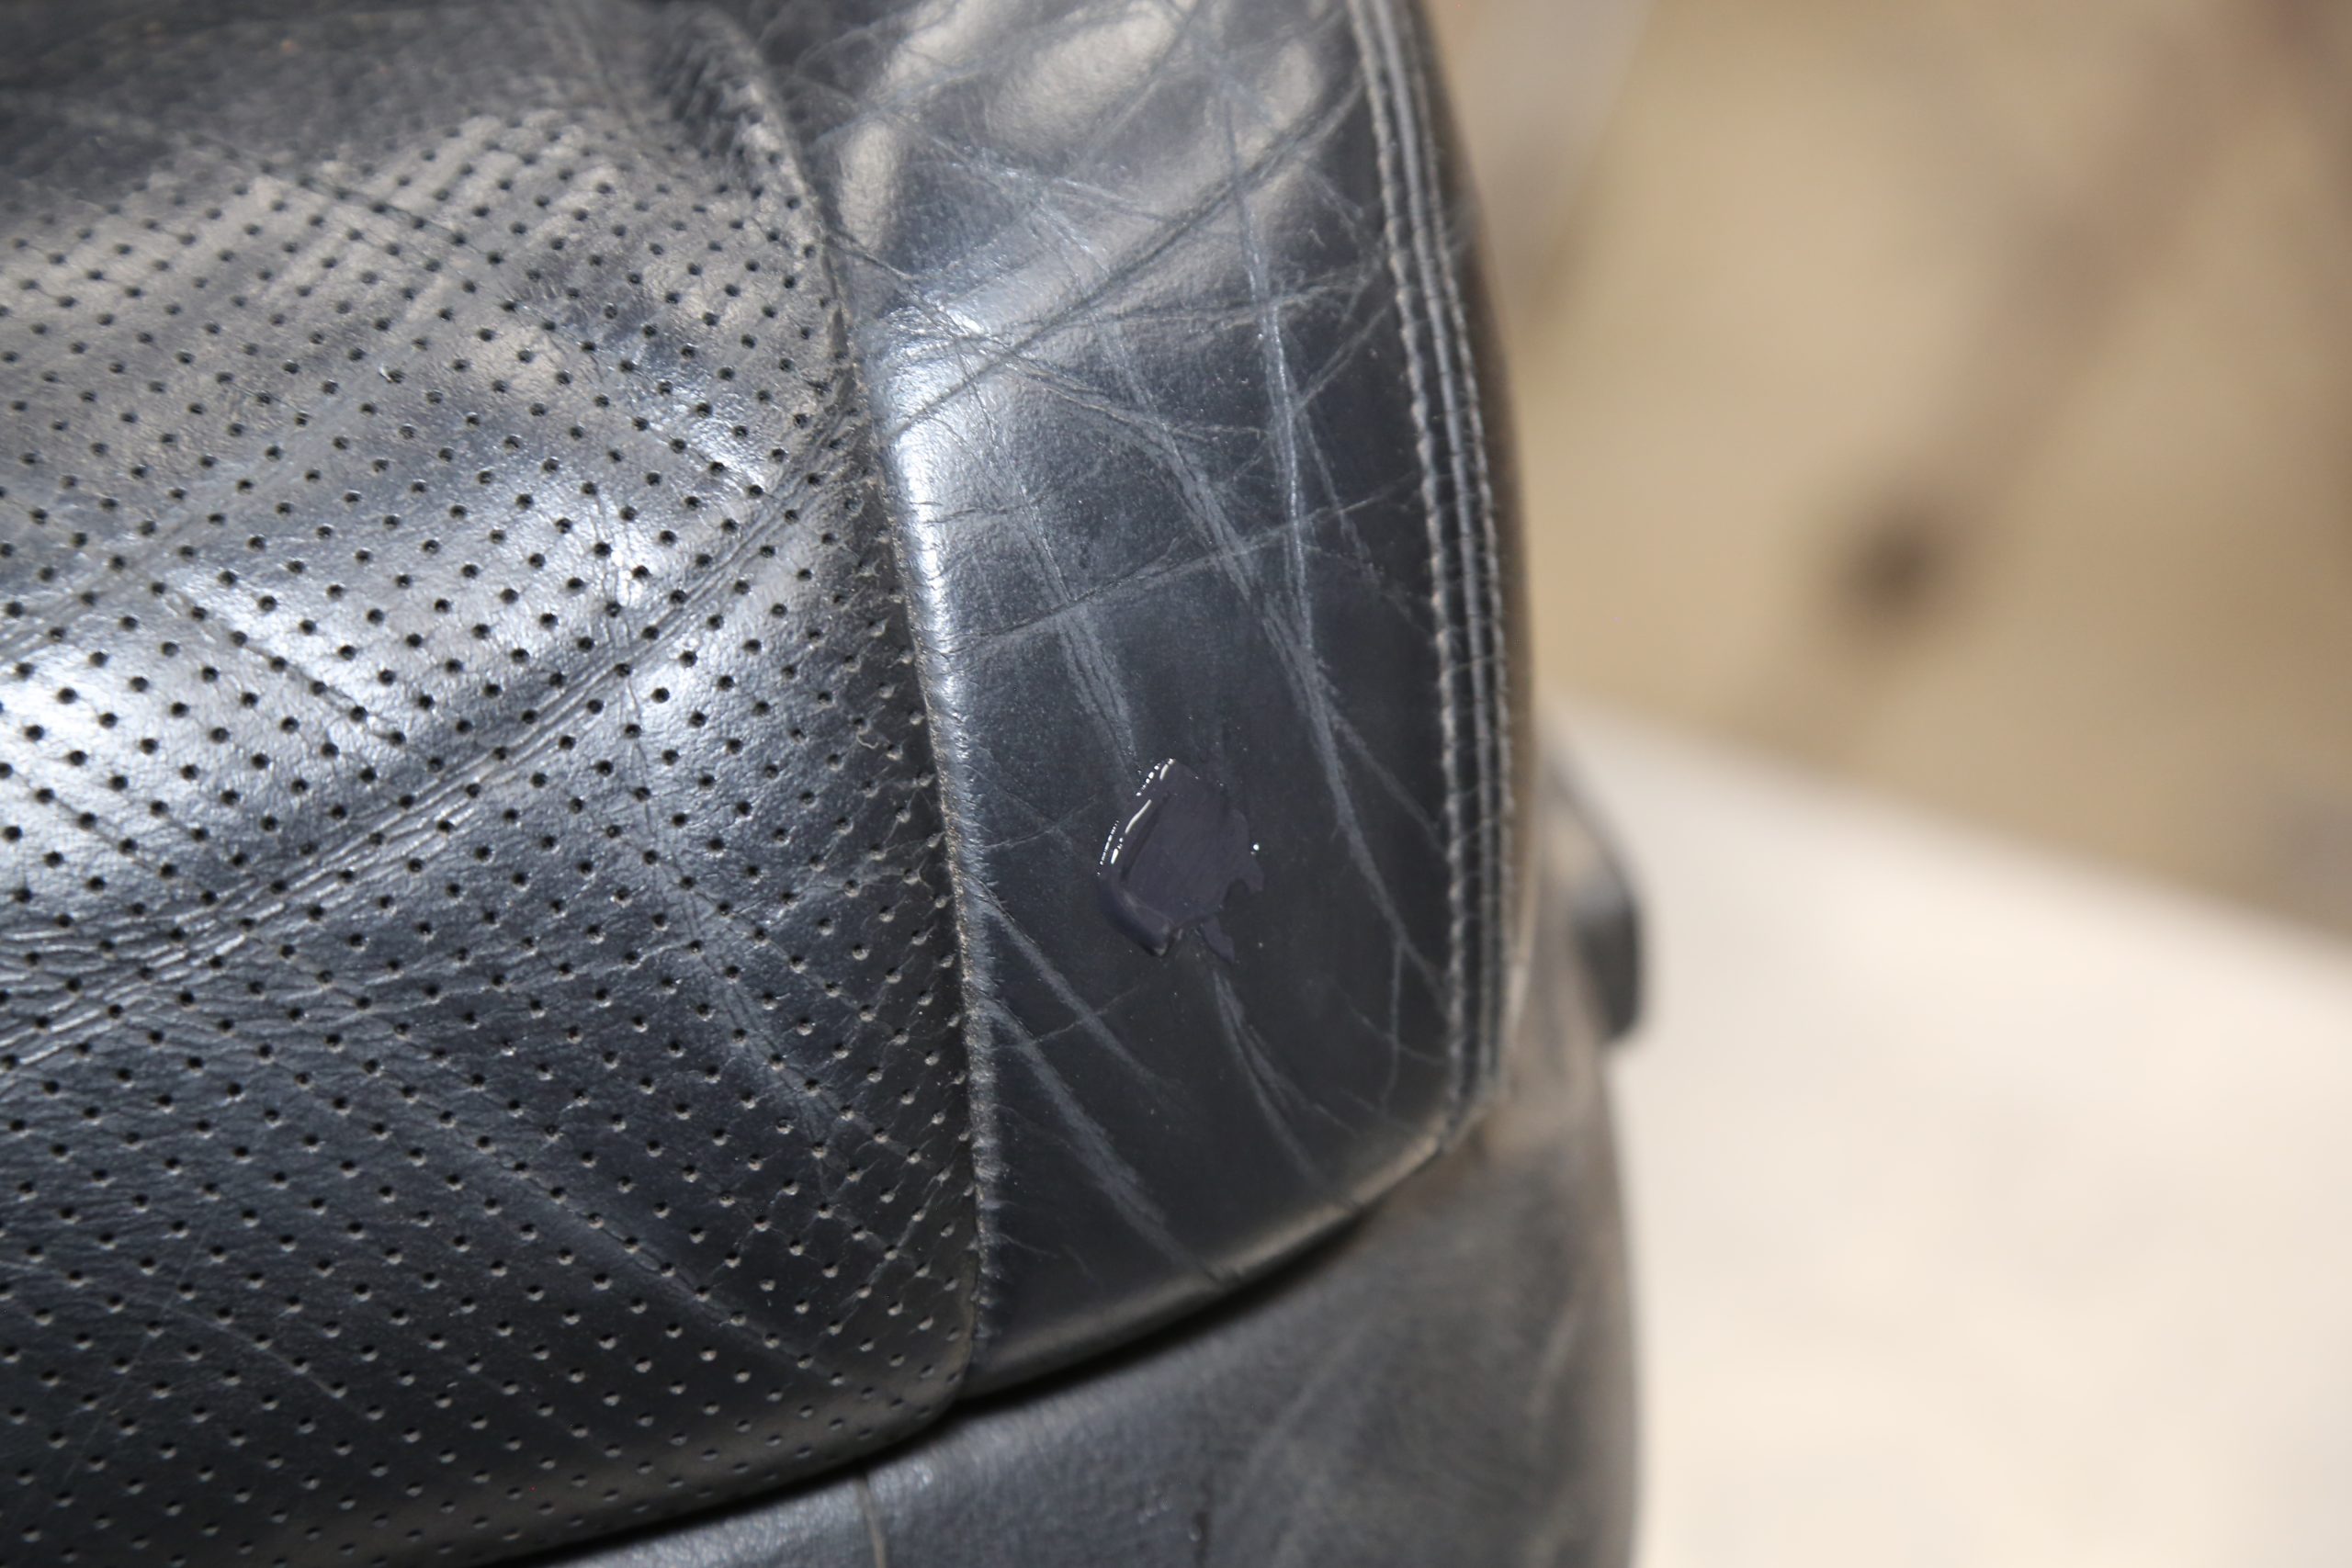
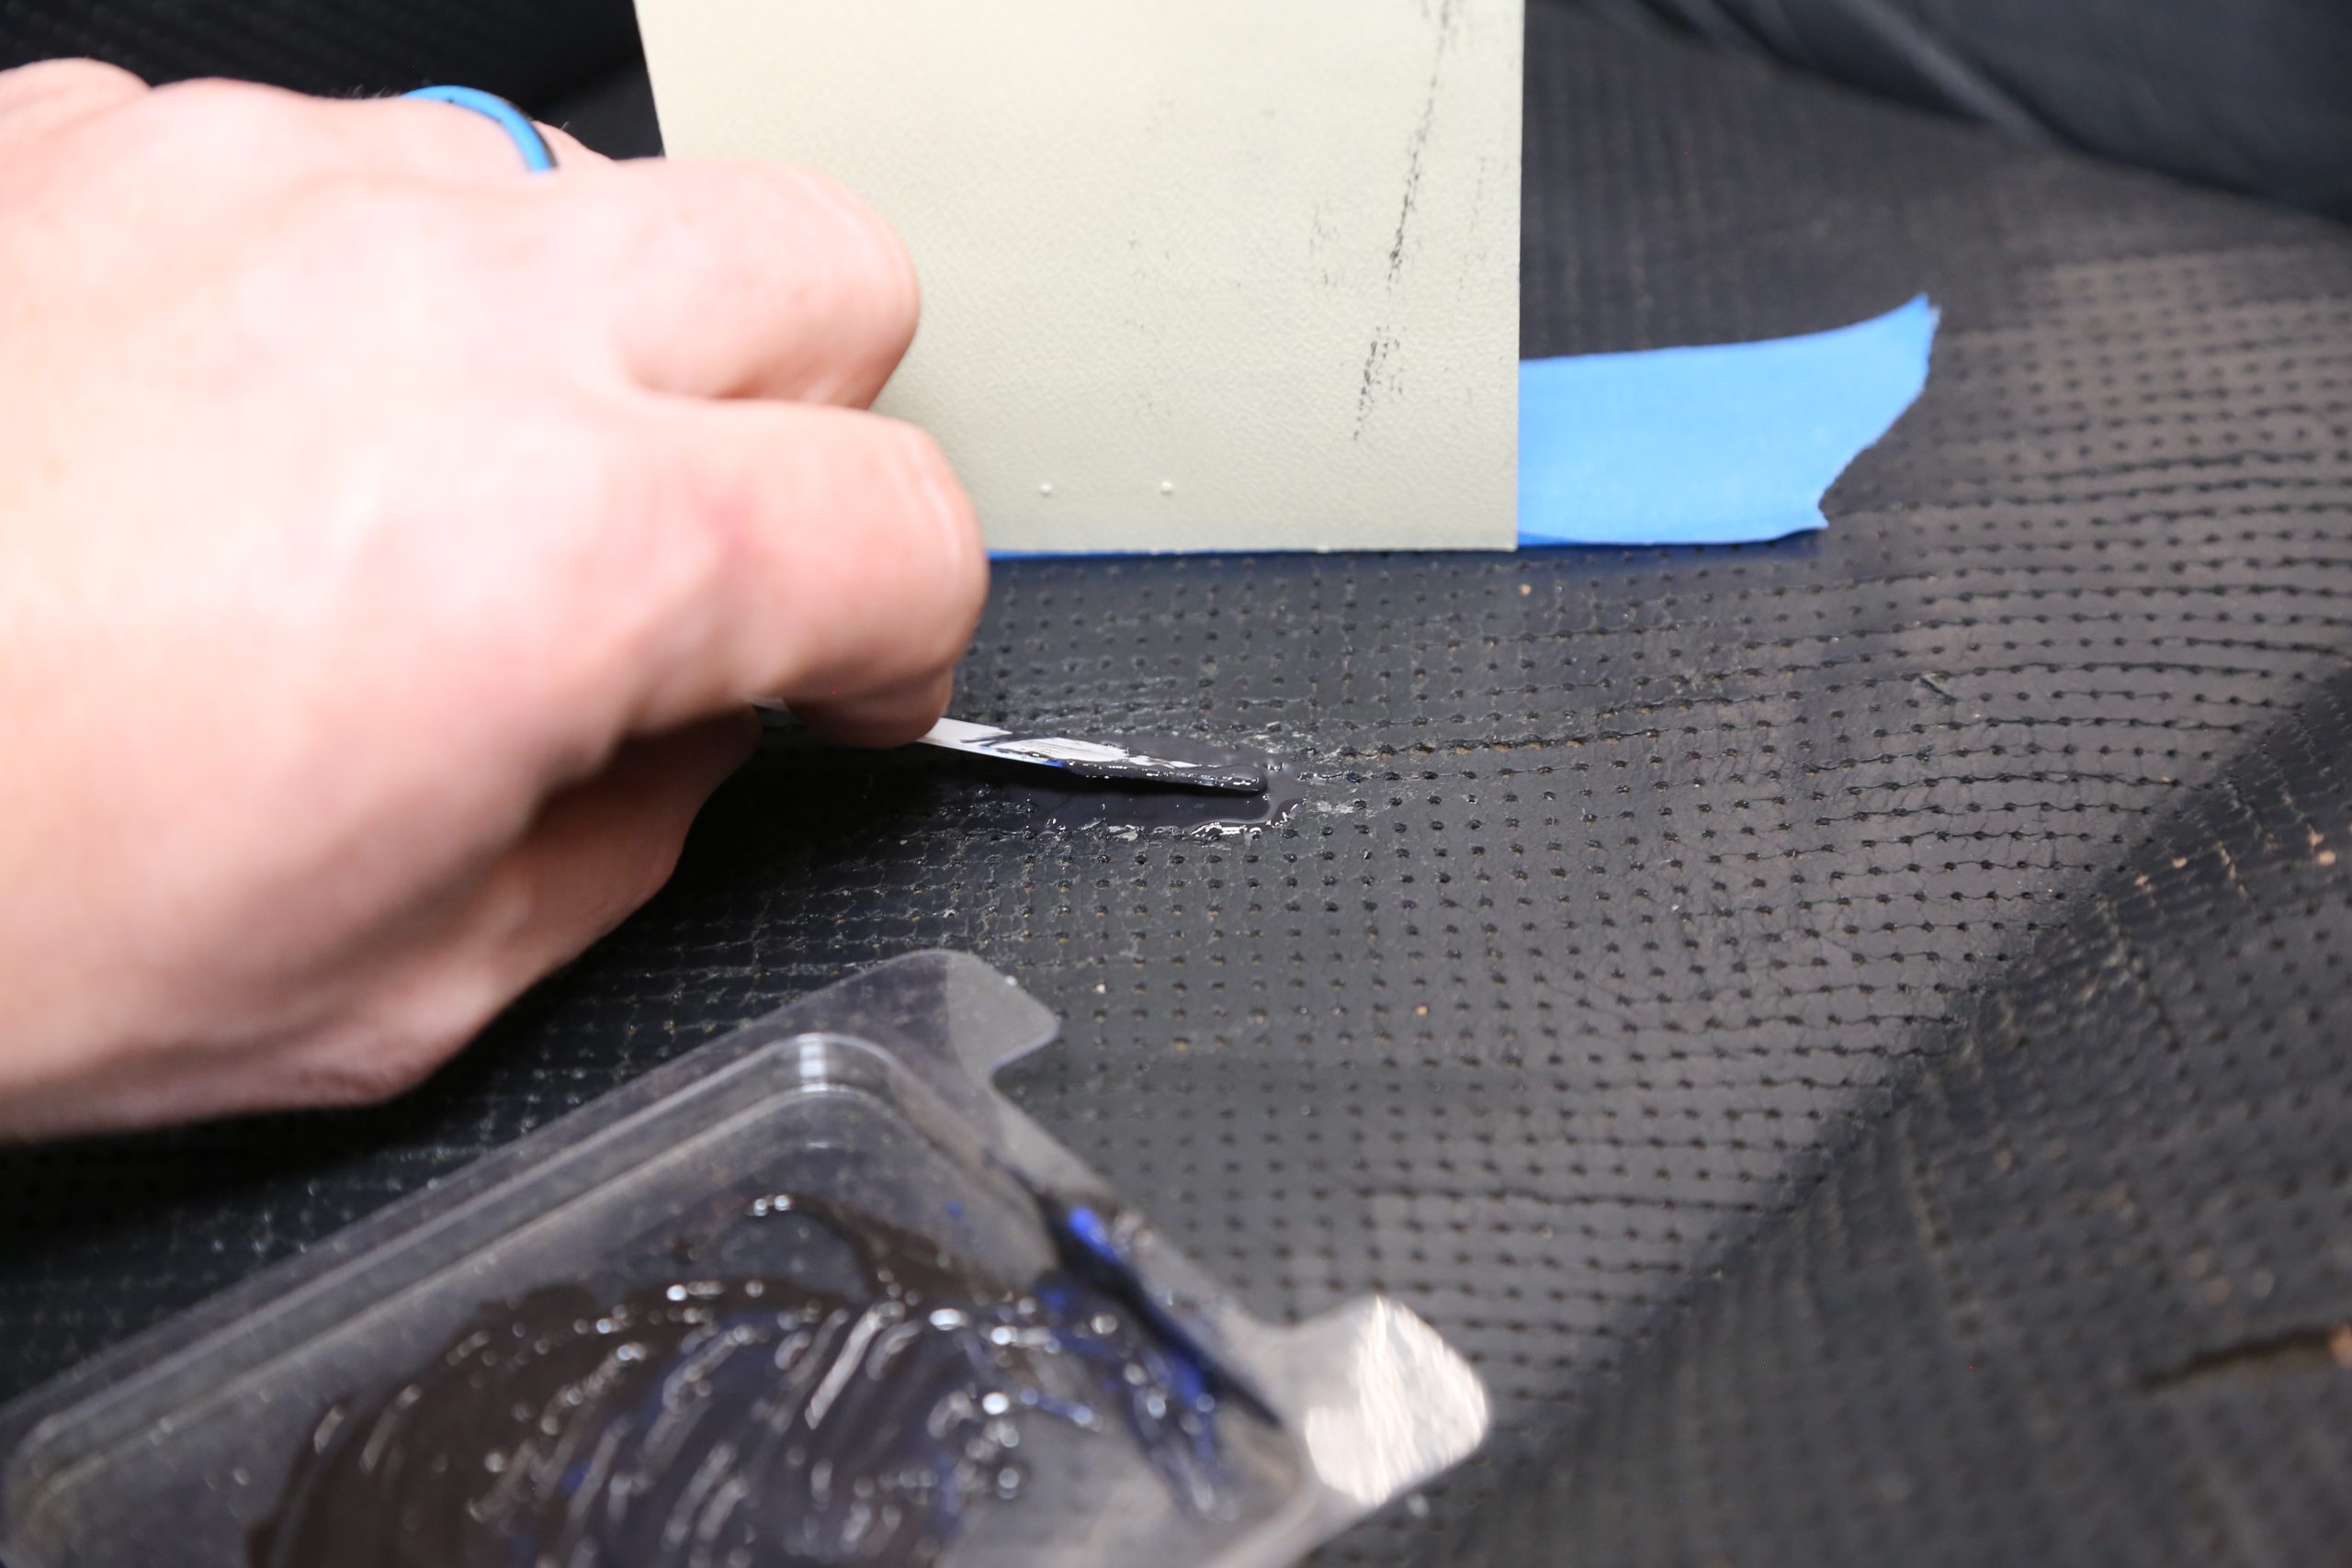
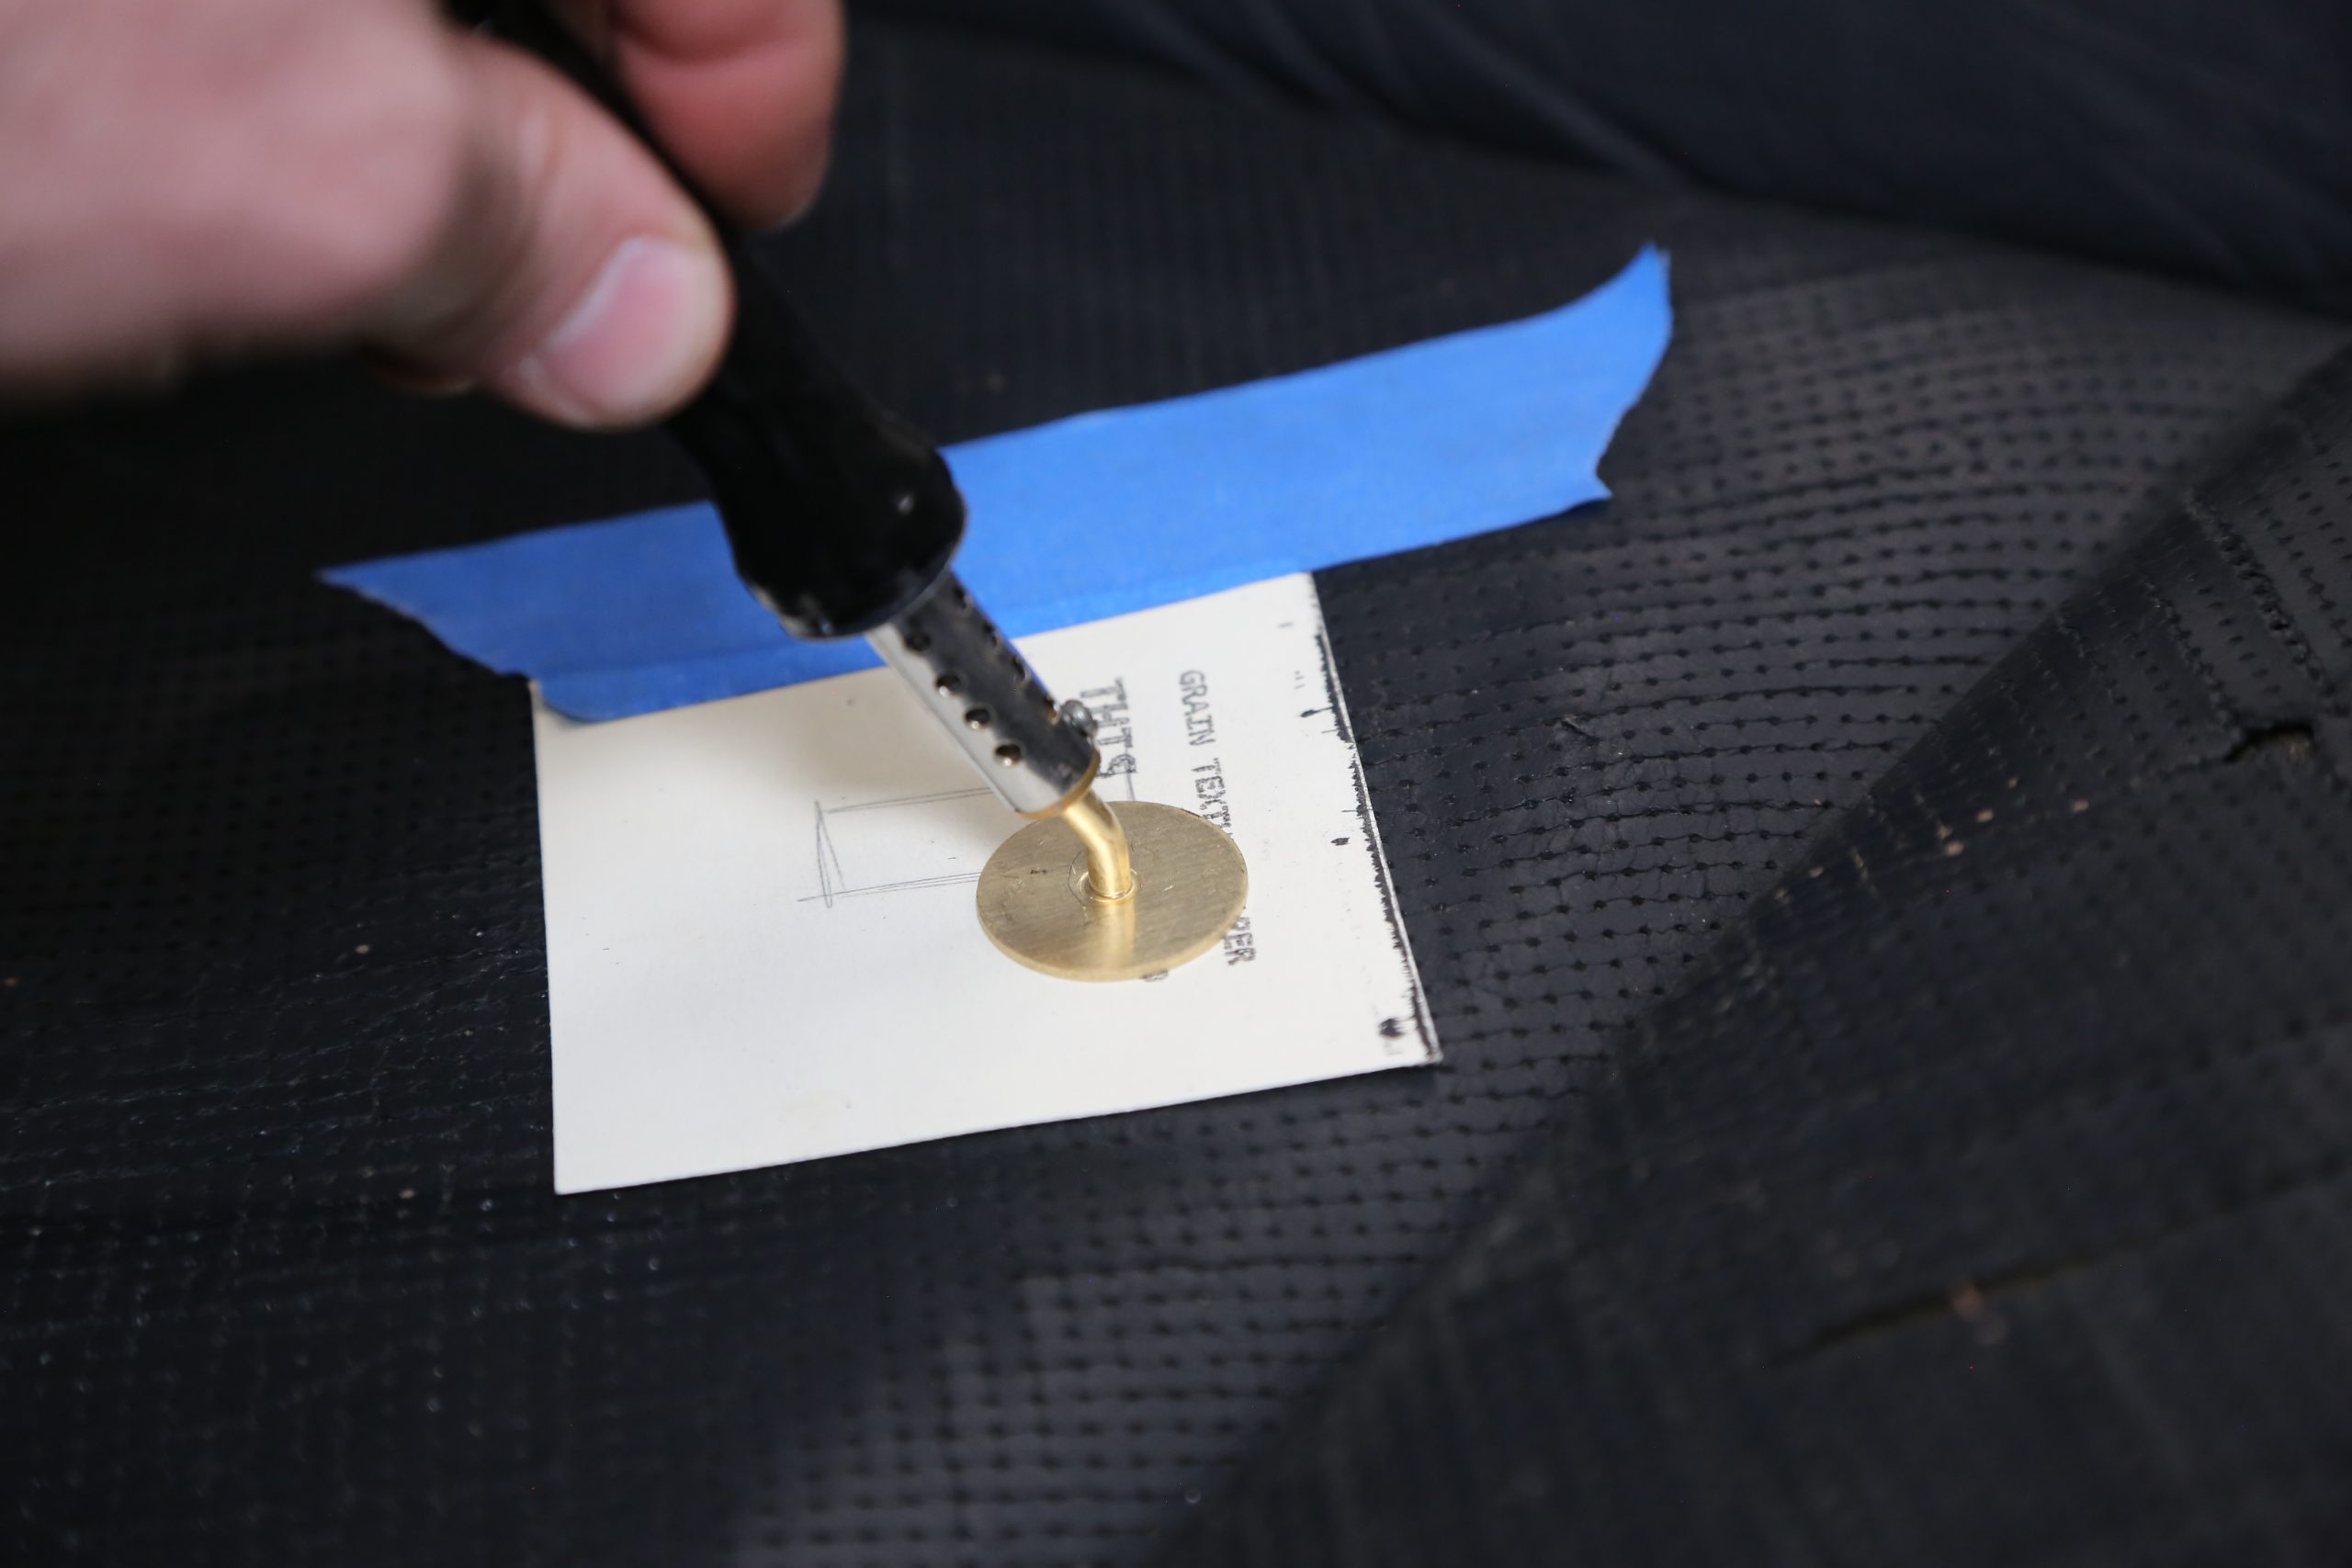
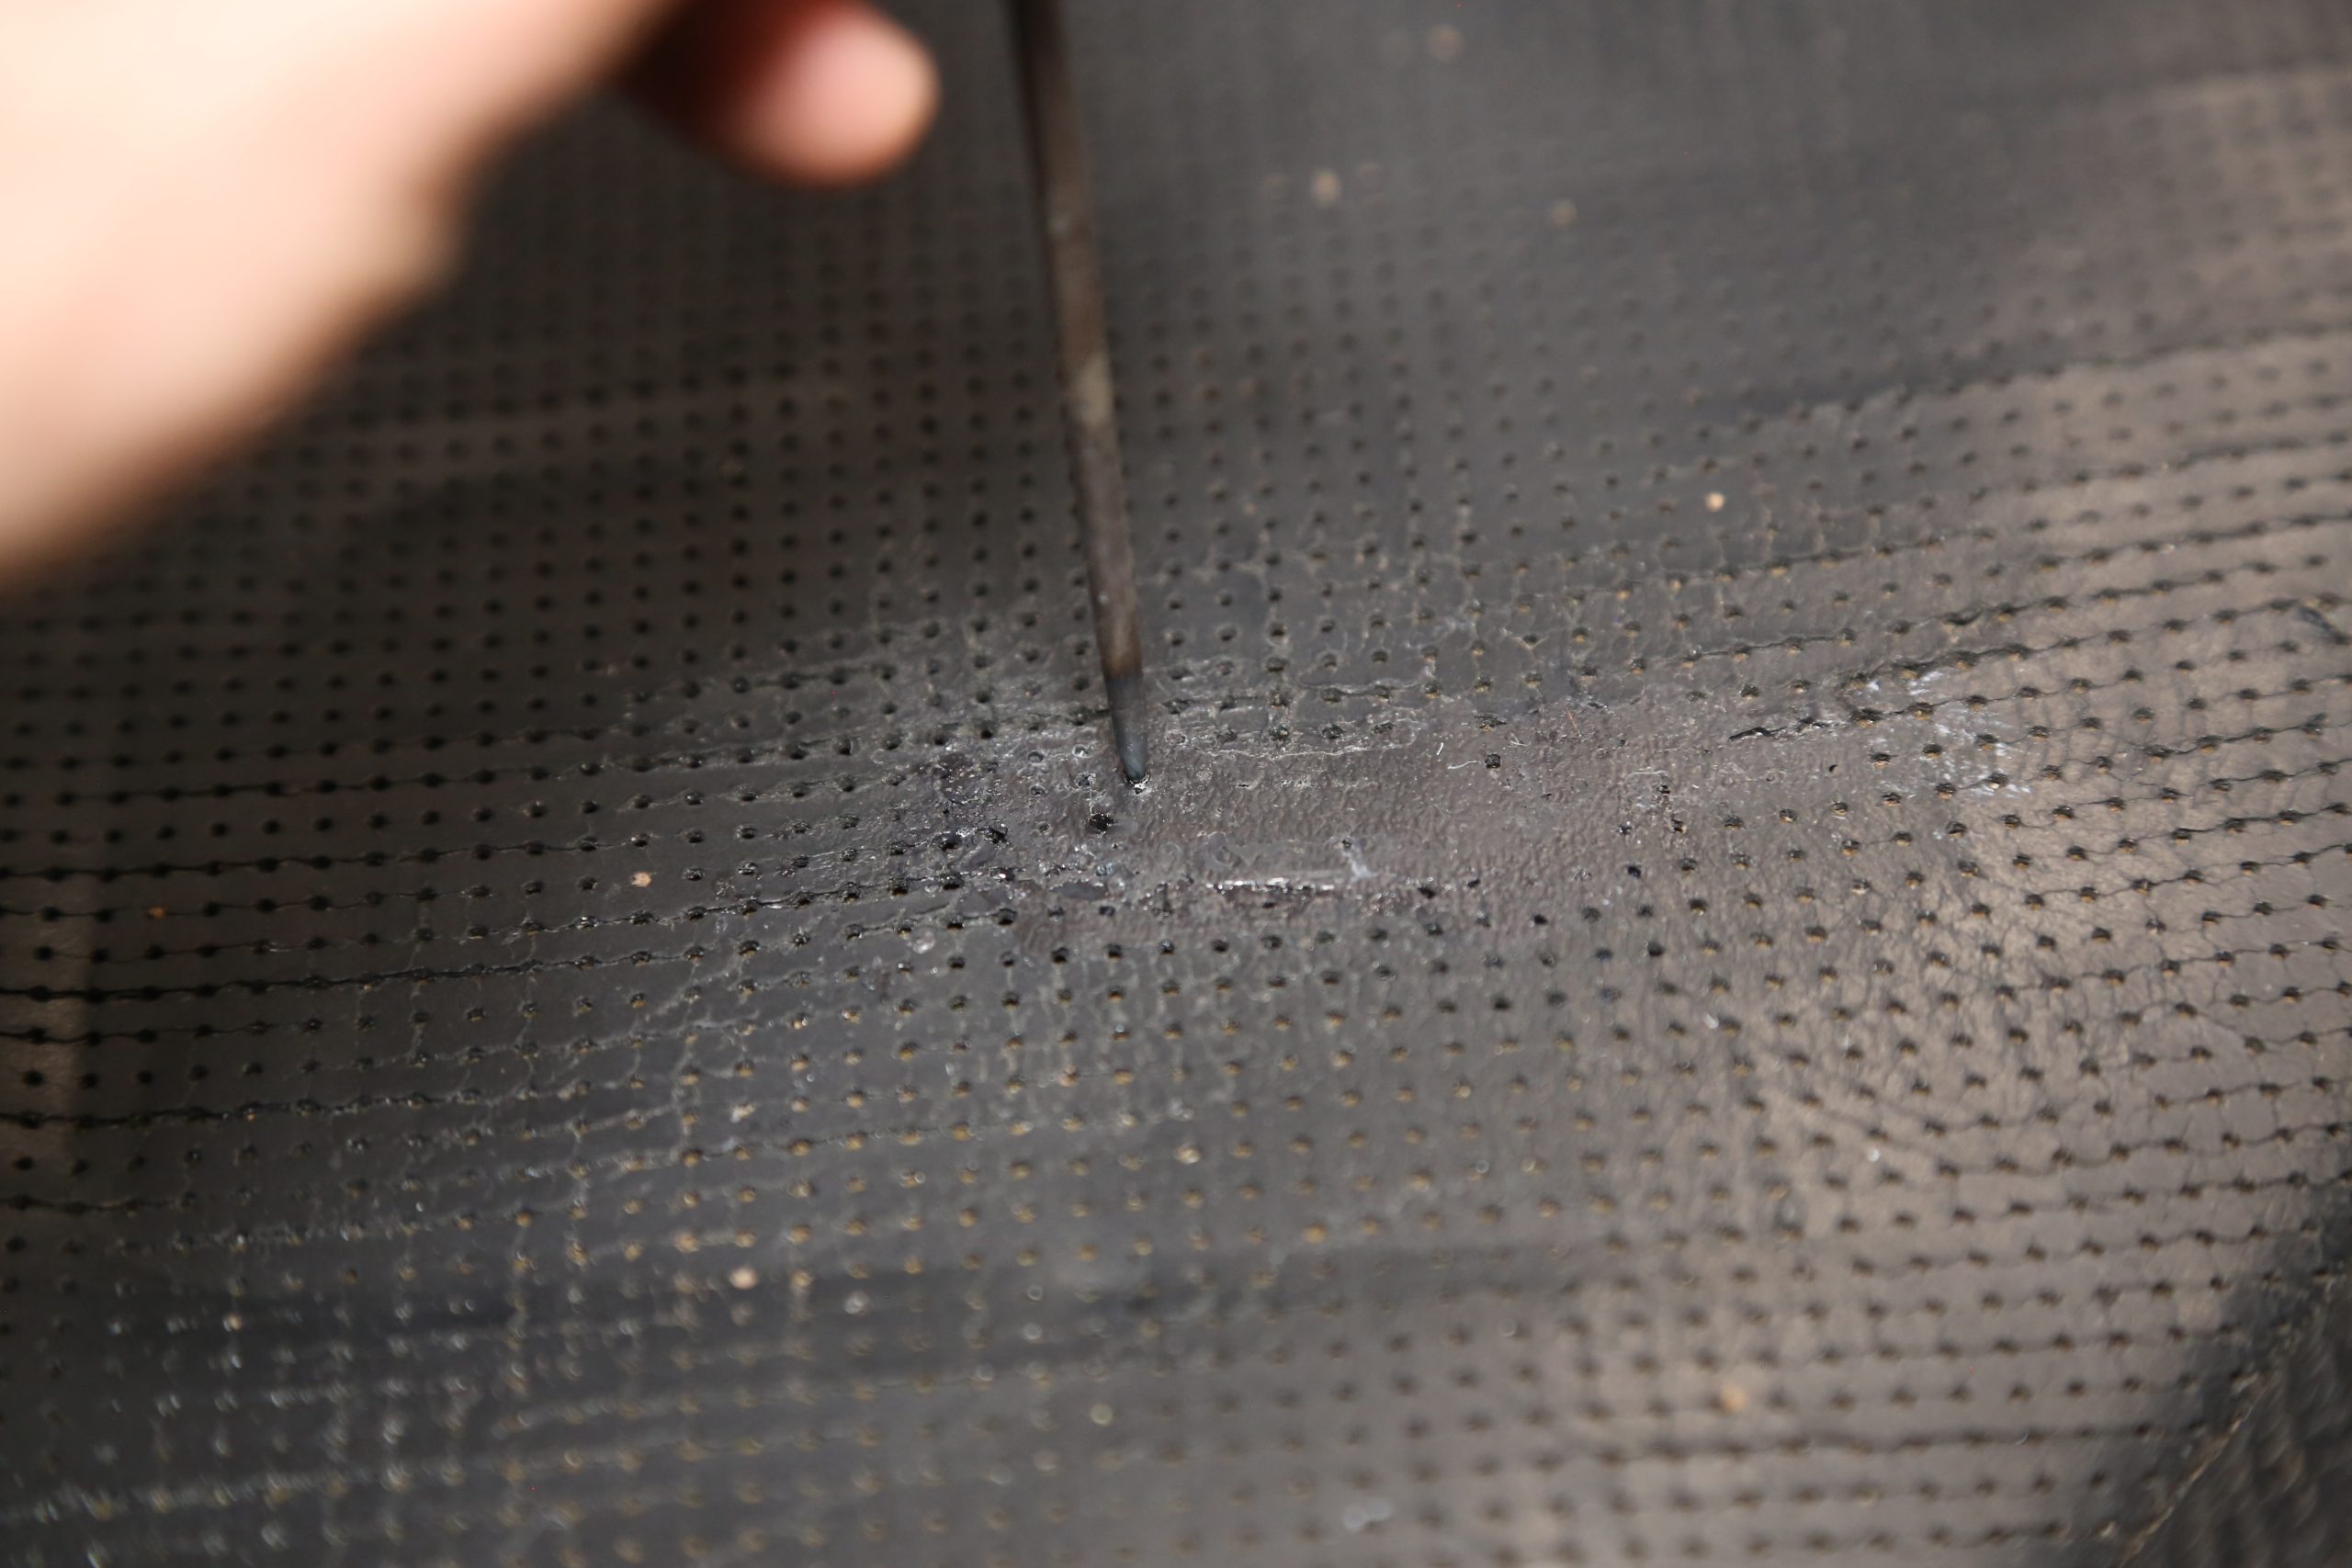
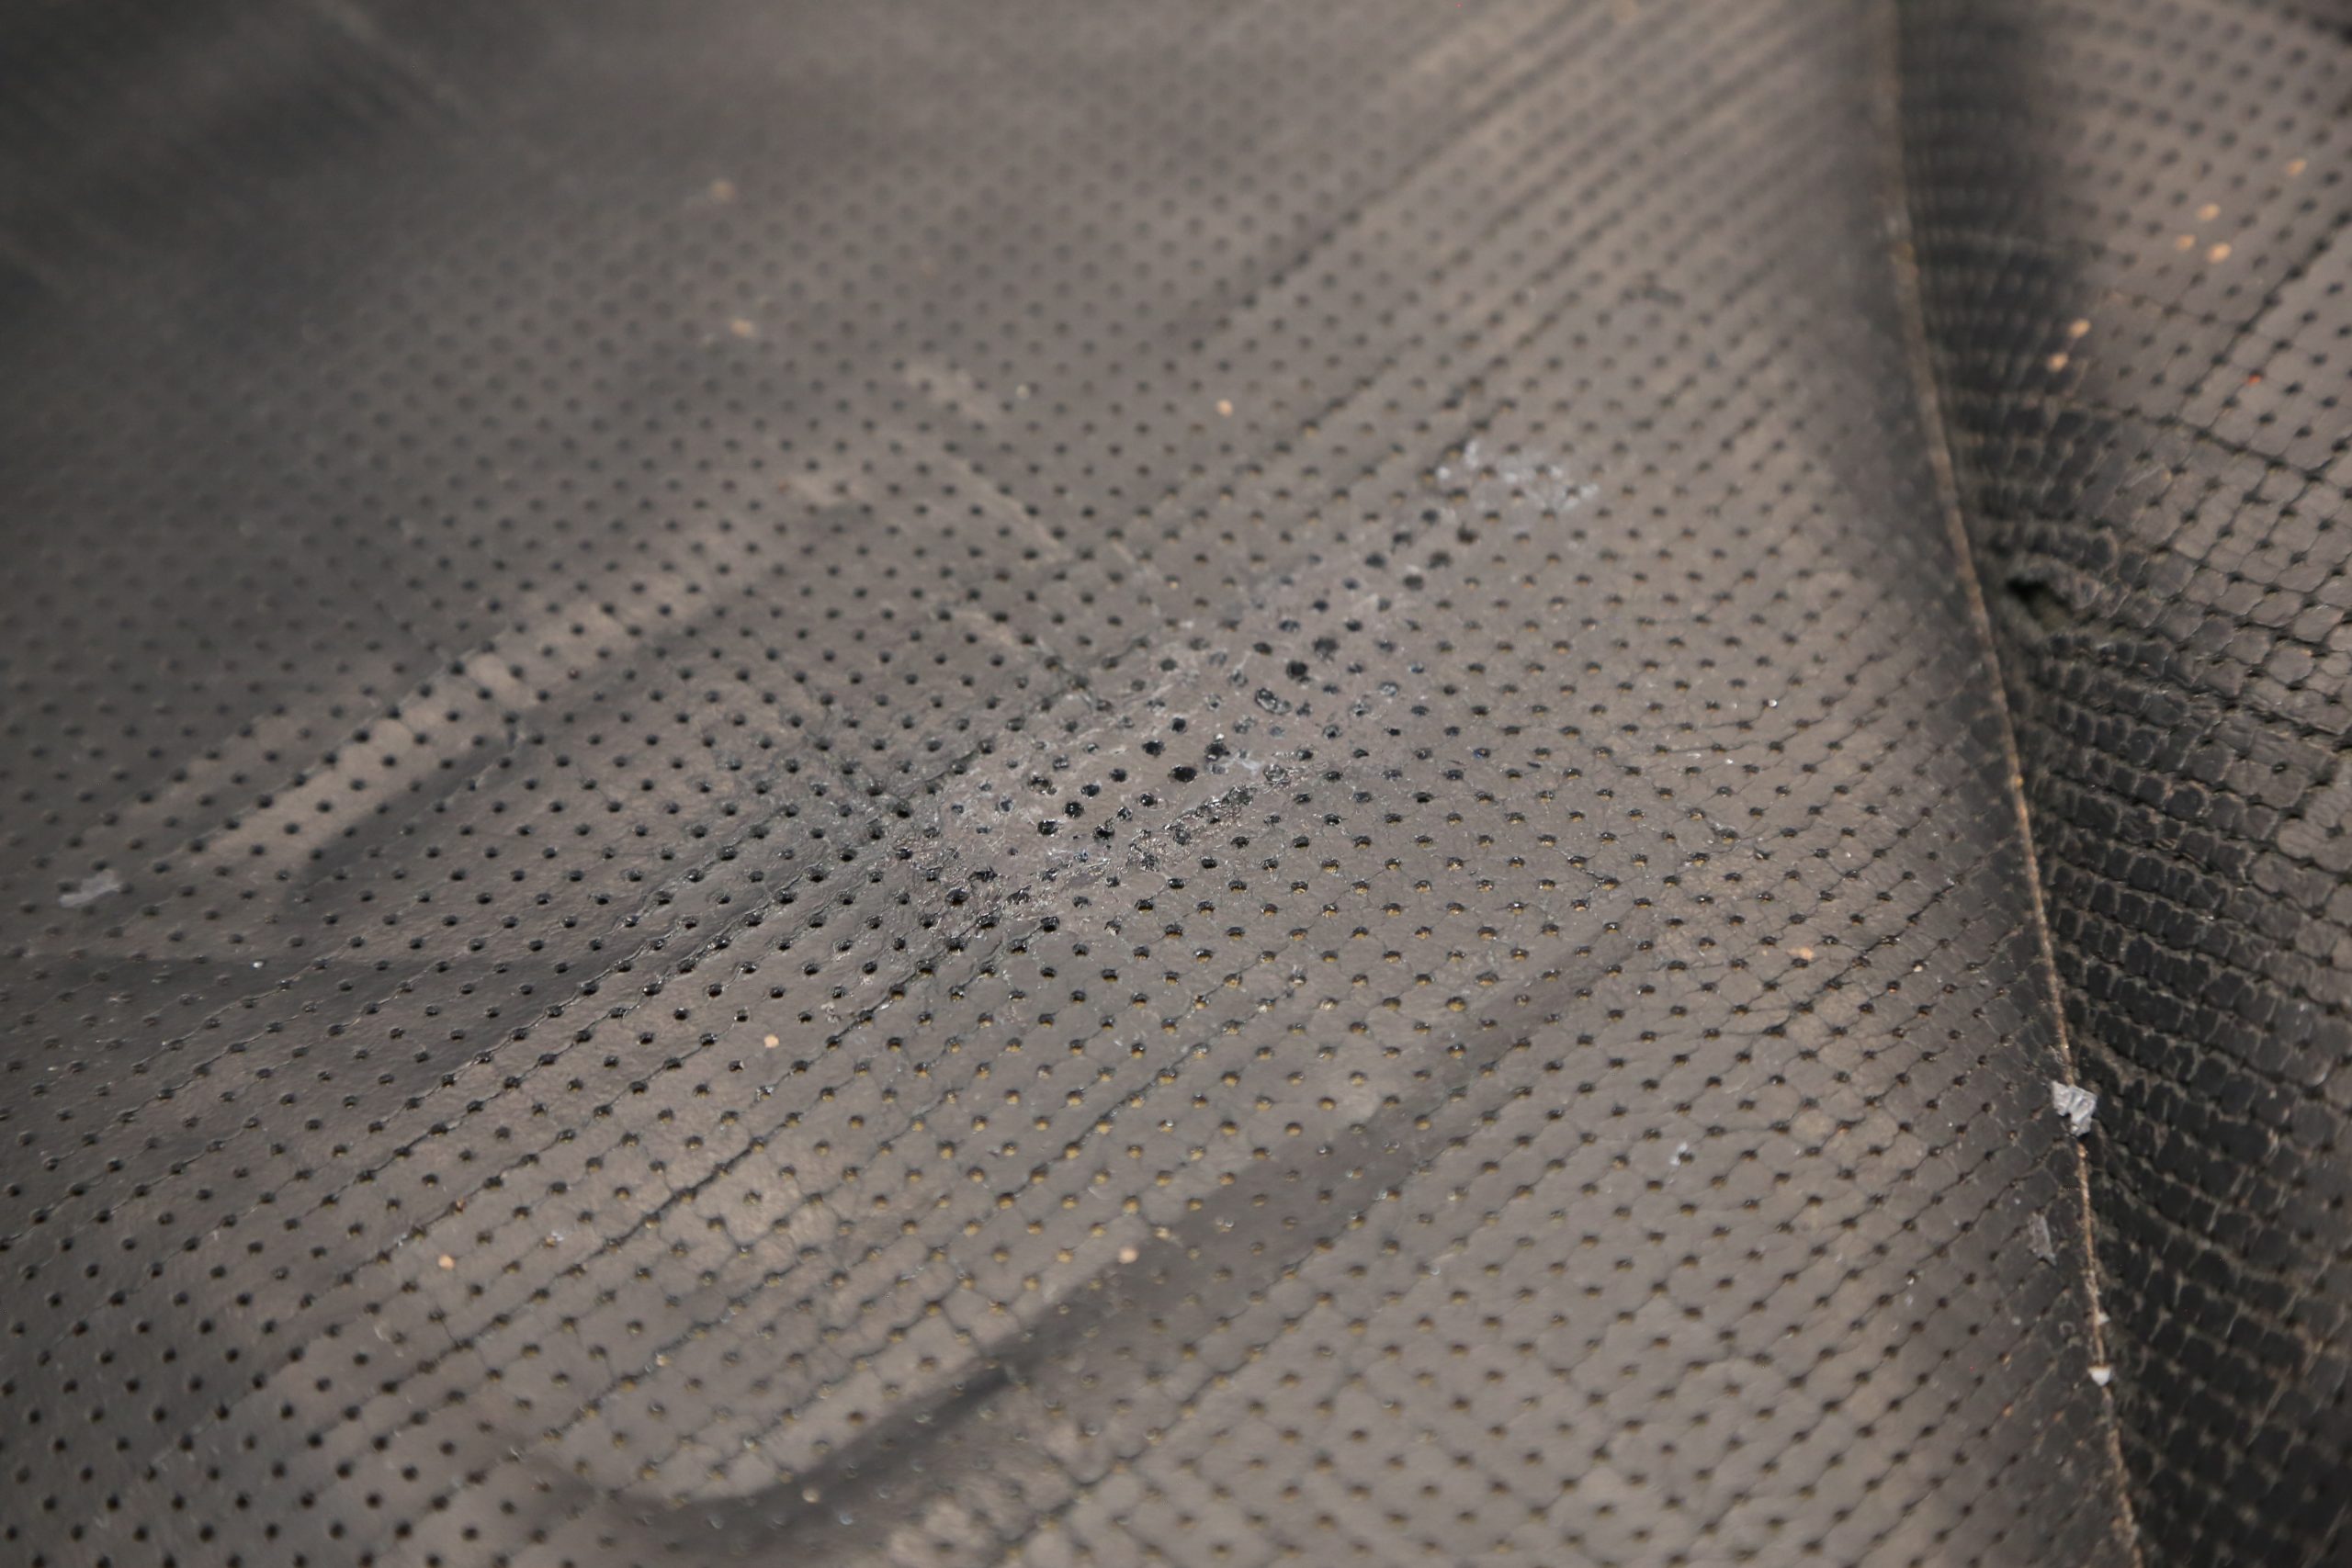
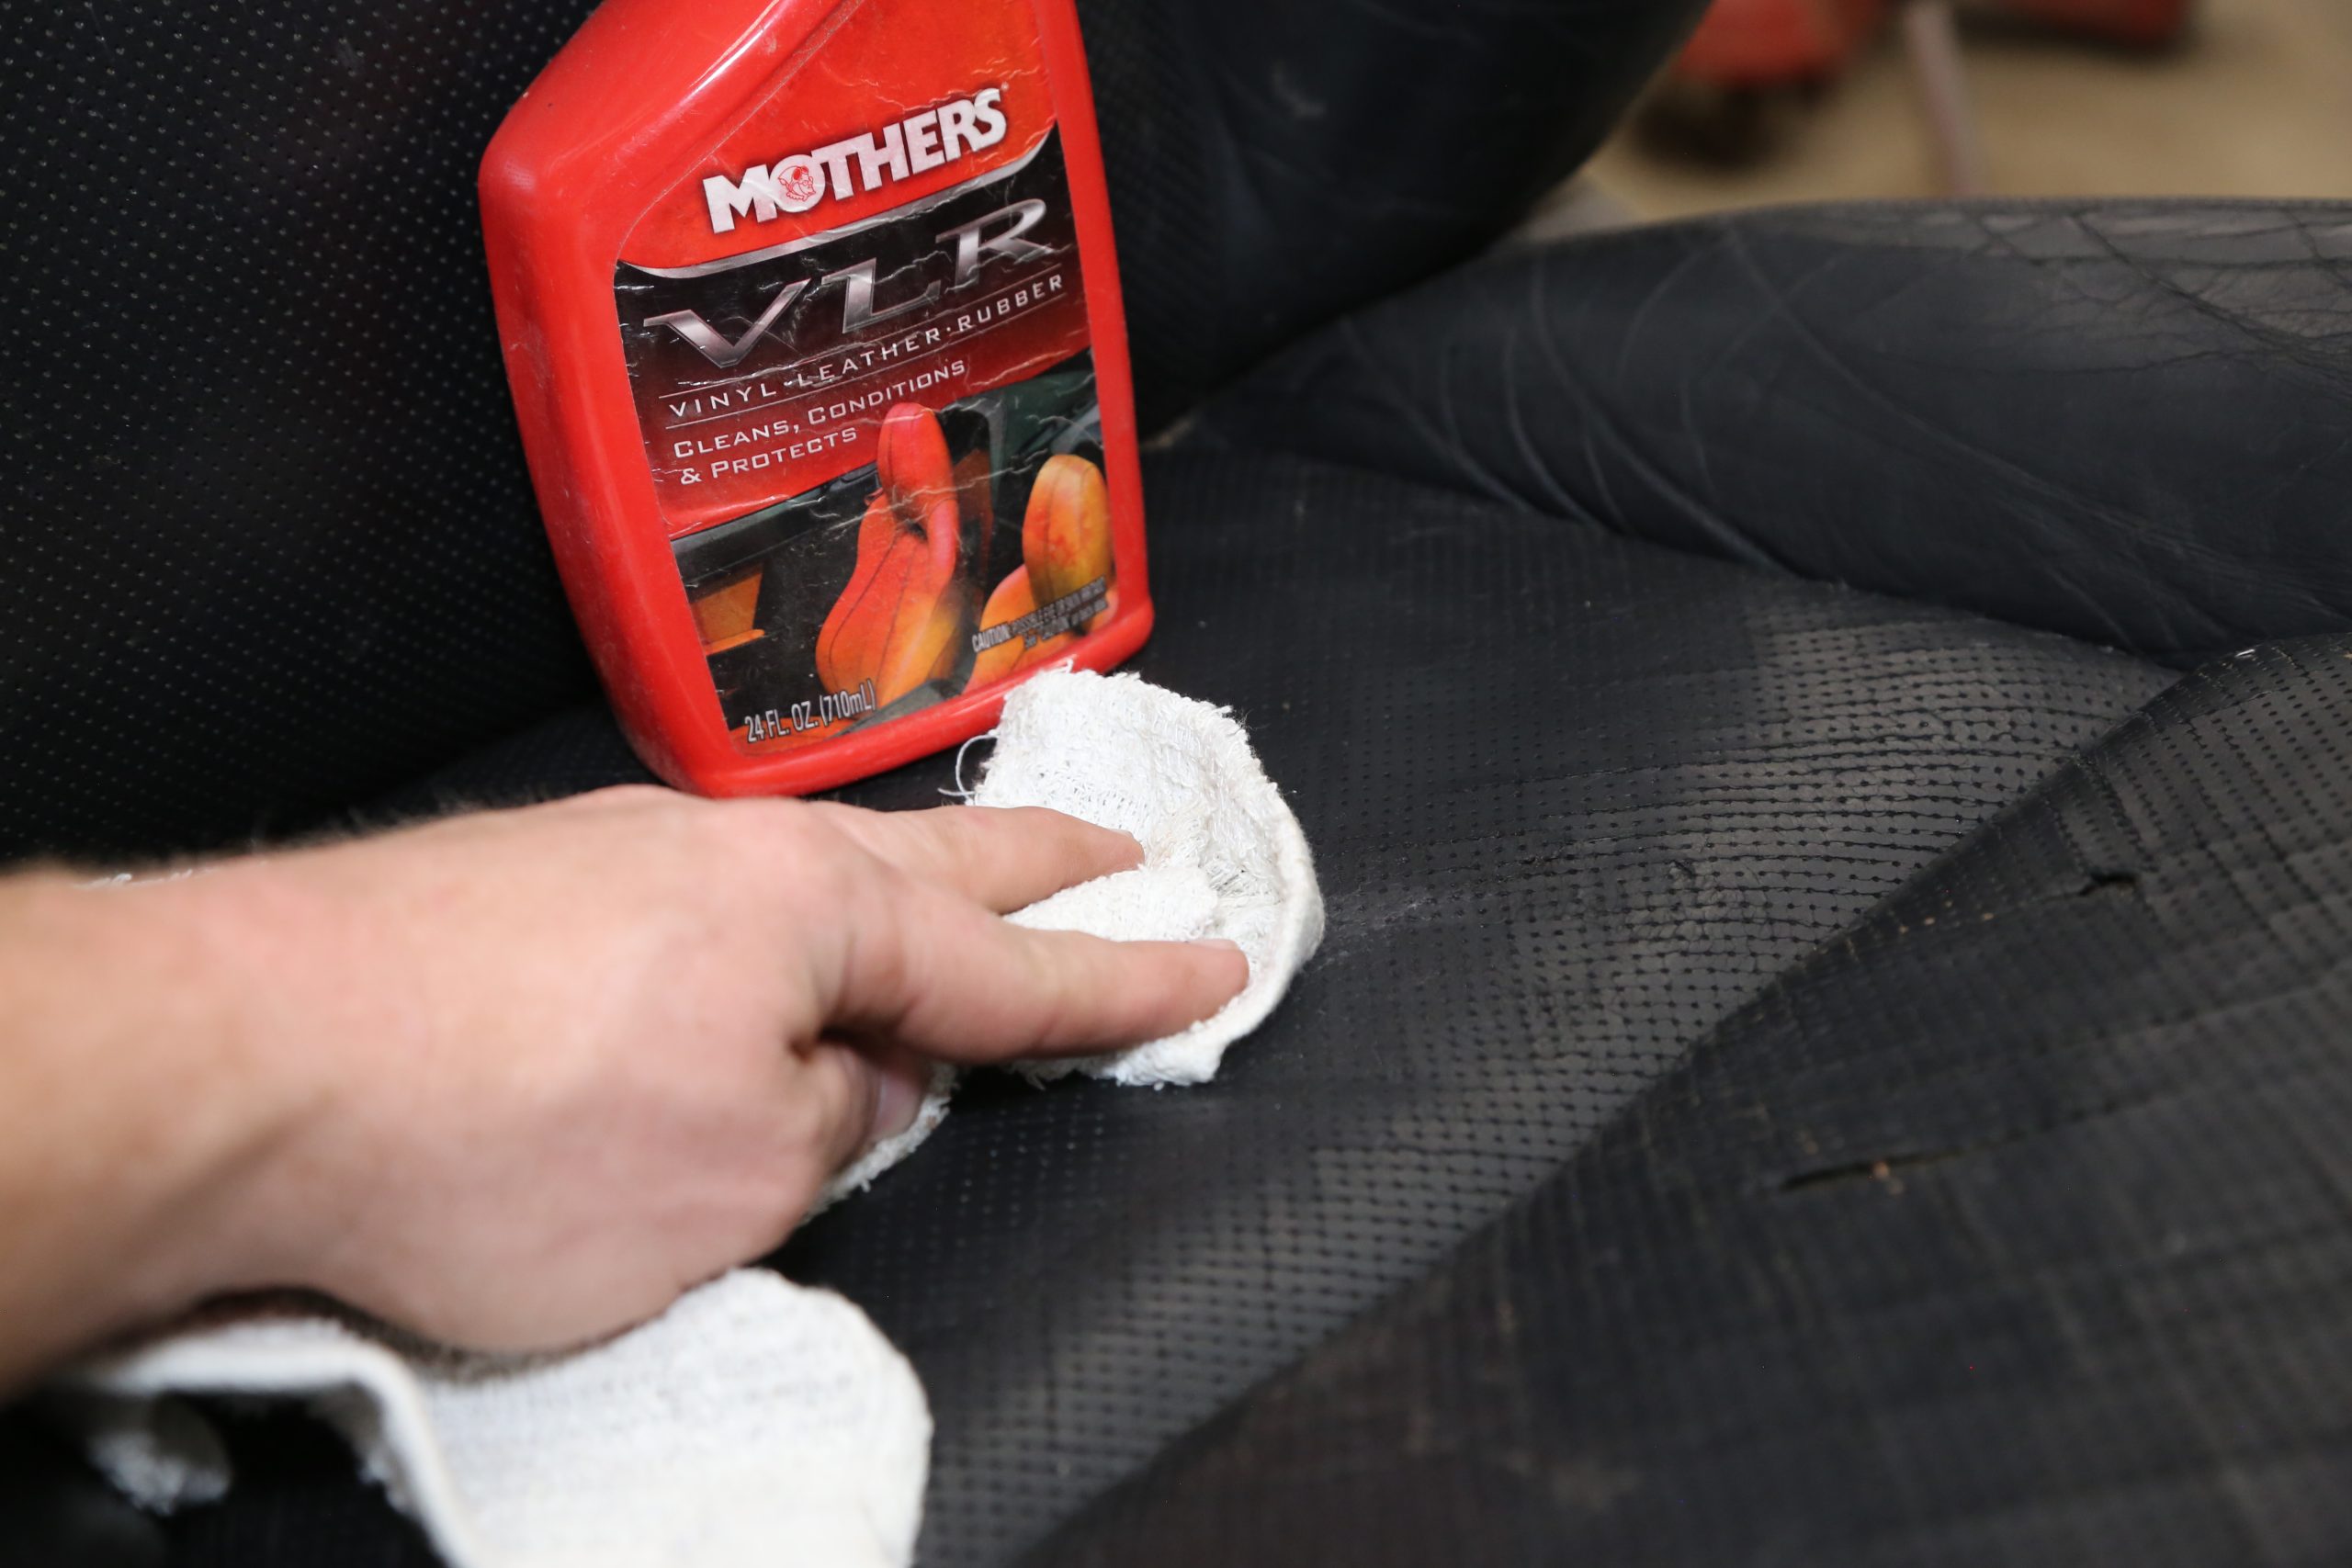
The Permatex Ultra Vinyl & Leather Repair Kit comes with master color bases, three grain pattern sheets, two sheets of repair fabric, repair adhesive, and hardener for hard vinyl repairs. It also includes a heated spoon which is the key to a good repair. You even get a color chart to help you match your existing upholstery. (Image/Jefferson Bryant)We vacuumed the seat, cleaned it with some Mothers All-Purpose Cleaner, and let it sit for an hour or so to dry. The seat material must be completely dry before starting. (Image/Jefferson Bryant)This seat has several tears, but we are focusing on this one first. Because the leather is perforated, we opted to use a slightly more robust backing material. A small strip of thin carpet was slipped into the tear and aligned using a pick tool. (Image/Jefferson Bryant)Next, the adhesive filler was applied. You don’t need a ton, just enough to fill the hole and bond the tear to the base repair fabric. (Image/Jefferson Bryant)We used the supplied plastic spatula to press the filler into the fabric and leather. The filler shrinks, but that gives you room for the color compound later. It takes about four hours for the filler to cure. (Image/Jefferson Bryant)Here is a trick for loose upholstery like our leather. We put a strip of masking tape on a body filler spreader, placed it over the repair, and put some weight on it to keep the leather from curling up. The tape keeps the filler from sticking to the board. (Image/Jefferson Bryant)Once the filler cures, the repair is ready for the color compound. It looks bad, but we’ll fix that. (Image/Jefferson Bryant)The Permatex kit comes with three grain sheets, which can be used many times. These are all ‘synthetic’ grains–there isn’t a true leather grain. You just have to use the one that best matches the material you are repairing. We marked the area of the repair on the back of the paper so we know where to apply the heat. (Image/Jefferson Bryant)We mixed up the color compound using the black, white, and blue colors in the kit. You need to compare the mixed color with the upholstery to get a good color match. To test the color, simply dab a little on an undamaged part of the upholstery and look at it from different angles. Our mix was close, though it could be a shade darker. The compound just wipes of with a towel. (Image/Jefferson Bryant)Once we got the compound color where we wanted it, we applied it with the spatula. This is the tricky part—it is easy to add too much. It is better to start with a little and add more if needed. Just barely fill the repair area and blend to the edges. (Image/Jefferson Bryant)We secured the grain sheet to the seat with a piece of tape, then worked the heated spoon over the sheet to cure the compound. It takes 30 to 45 seconds of heat to the set the compound, but we found that we needed to work the spoon in small circles over the sheet for about two minutes to make sure it didn’t lift. You may need to refill some areas, especially if the compound hasn’t fully set before you lift the paper. The compound needs to cool off for several minutes before removing the paper. (Image/Jefferson Bryant)The repair is really close color-wise but very noticeable because it doesn’t have the perforations to completely match the rest of the upholstery. There is no way to use a grain sheet to match the perforations, so we had to get creative. We heated up the tip of a small pick with a propane torch and used it to make perforation holes. You don’t want push the pick all the way through, just enough to make it look right. We found that we could make two to three holes per heating. If you get the pick too hot, it will make a mess of the repair and you must start over. (Image/Jefferson Bryant)Matching perforated material takes patience as it’s very easy to put a hole in the wrong place. It doesn’t take much to get off the pattern as we did here. It’s close enough for this project, and the other repairs will look better now that we have some experience. (Image/Jefferson Bryant)The new repair looks shiny and doesn’t quite match, so we used a piece of Scotch Brite pad to smooth it out a bit and blend the repair to match the wear of the seat upholstery. (Image/Jefferson Bryant)We cleaned the leather with some Mothers VLR vinyl and leather conditioner to bring the sheen back. The conditioner should help rejuvenate the leather to make it more pliable and a less susceptible to tearing. (Image/Jefferson Bryant)Our final repair. Once the seat is in the car and it gets some use, you will never even notice it. Not bad for a cheap DIY kit and a few hours! (Image/Jefferson Bryant)
Jefferson Bryant has been a full-time automotive journalist since 2003. He has written countless how-to articles, nine books, and built several award-winning vehicles.

Comments