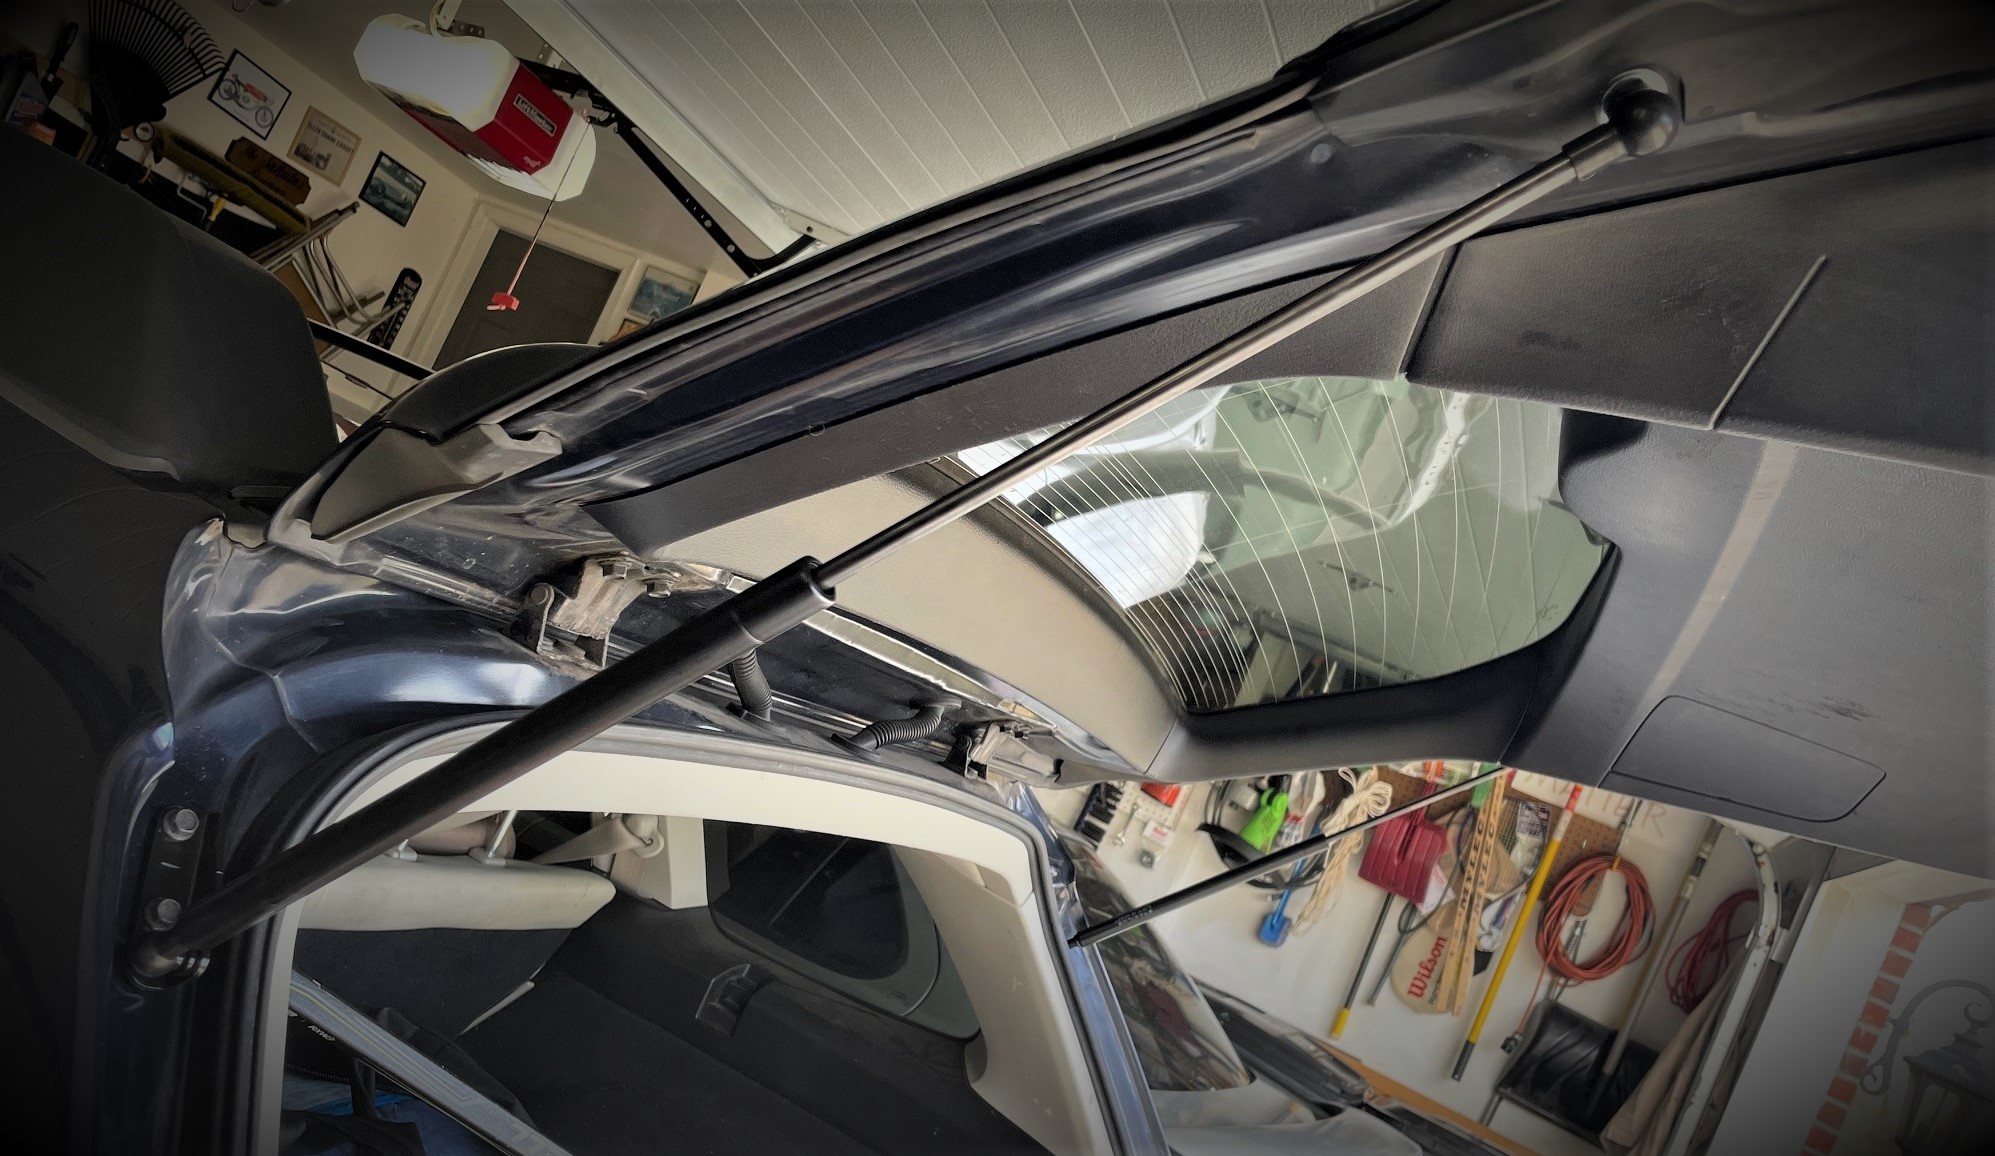
A while back, I received a nasty bonk on the head from the hatch of our station wagon as I pulled my son’s hockey gear out of the back—a not-so-subtle indicator that the hatch lift support struts had finally failed.
The good news is, for many applications, fixing a failed lift support or tailgate strut is a relatively cheap and easy job, but it does help to have a little bit of know-how beforehand to ensure you select the best replacement lift struts and then install them properly.
So to help you out, we put together this handy lift support replacement walkthrough.
How to Tell if Your Tailgate or Hatch Lift Support Struts Are Bad
First things first: Before you go buying new parts, there are a few easy signs that your lift supports are failing—and a few subtle ones too.
We’ll run down a list of signs that you can watch out for and it may help avoid a nasty bonk on the head from a failed hatch support.
Hatch is difficult to open (raise) or close
Hatch no longer “pops” open when you release the lock
Hatch won’t fully open into its highest position
Hatch won’t stay in position or gradually sags and droops
Greasy residue on the strut
Scraping, squealing, or otherwise odd noises while opening hatch
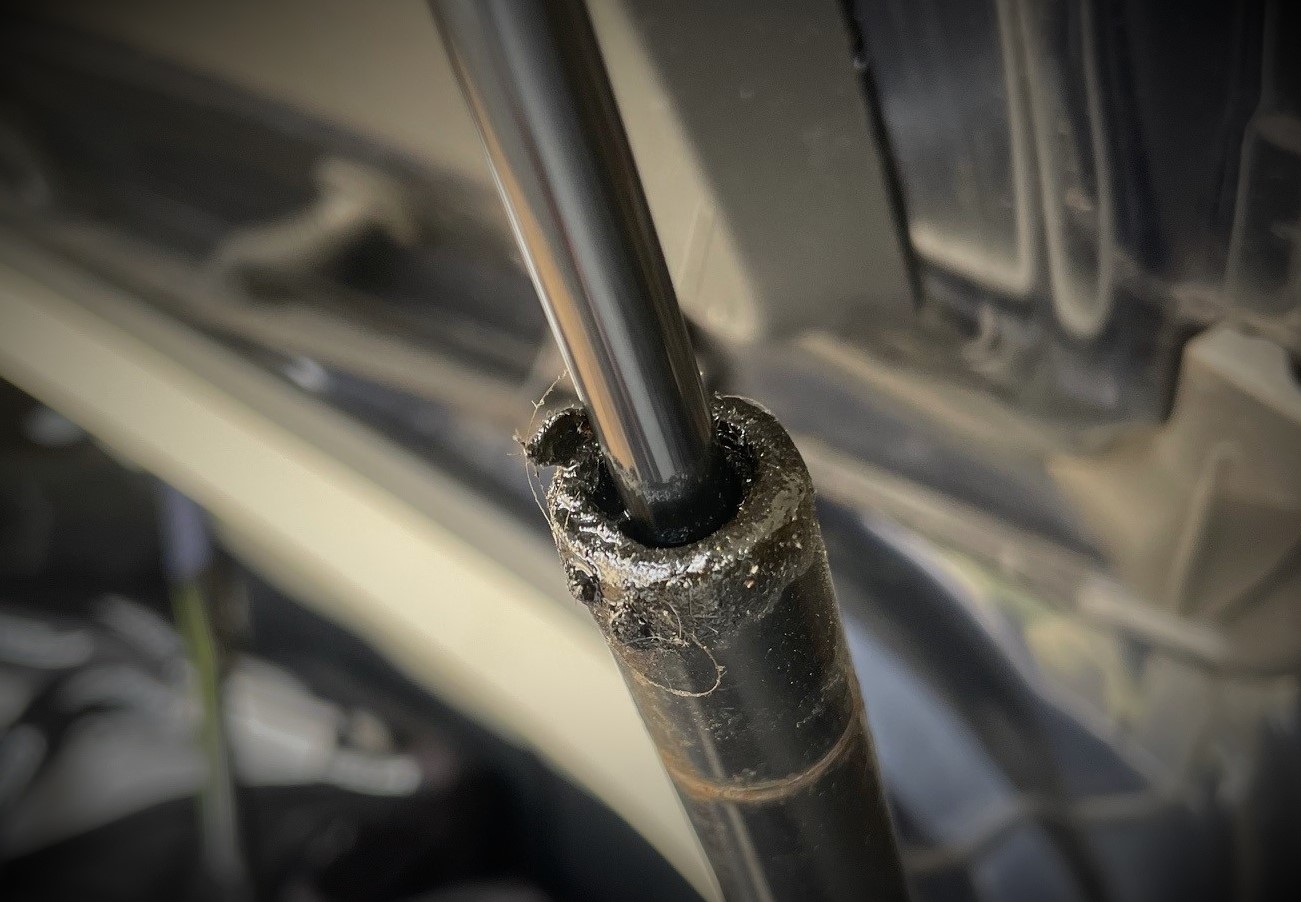
While a bonk on the head is an obvious sign of a bad lift support, you can look for more subtle indicators to prevent that from happening. For instance, this slimy goo around the strut’s piston tells us that the gasket has failed and the fluid inside the strut is seeping out. (Image/OnAllCylinders)
Tip: Replace Both Struts at a Time
Save yourself some hassle and replace both struts during the job—even if only one appears to have failed.
That’s because, since the one went bad, it meant that the other lift support has been working overtime to carry the full weight of the lift hatch—which can quickly shorten its lifespan too.
So we’ve found that replacing them as a set is the best way to avoid the headache of doing the same job over again, say, just a few months later.
How to Replace a Bad Tailgate or Hatch Lift Support
Though every vehicle application is different, in our experience, most most modern cars follow a similar process. We’ll outline the procedure on our 2012 Subaru Outback using a pair of replacement struts from Stabilus, and if you follow along, you’ll see some handy tips and techniques that’ll probably help you out too—regardless of the vehicle you’re working on.
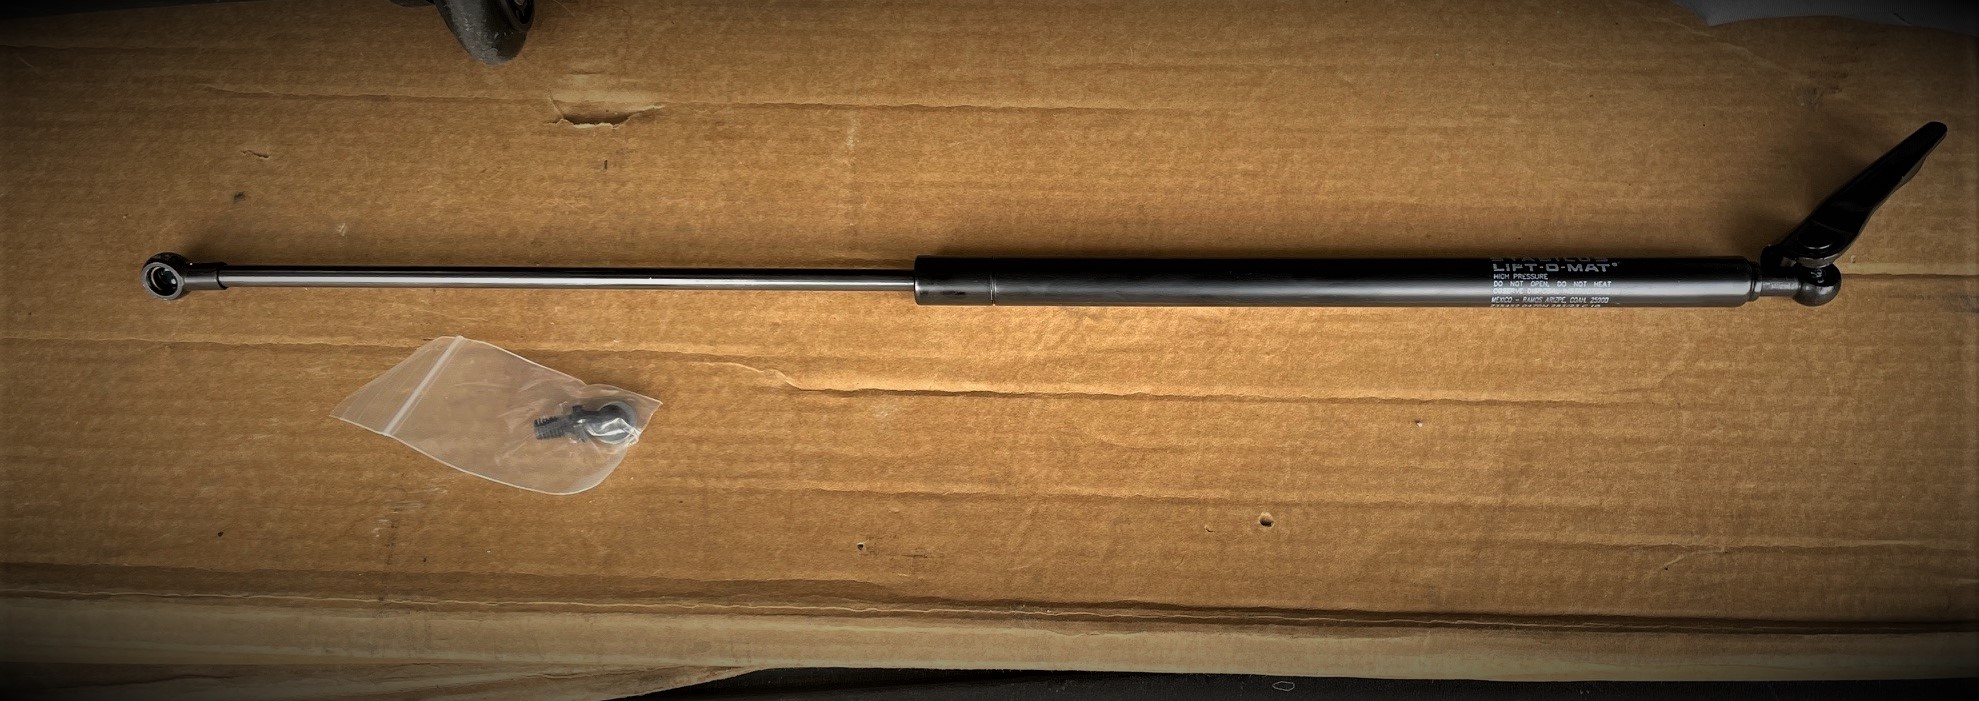
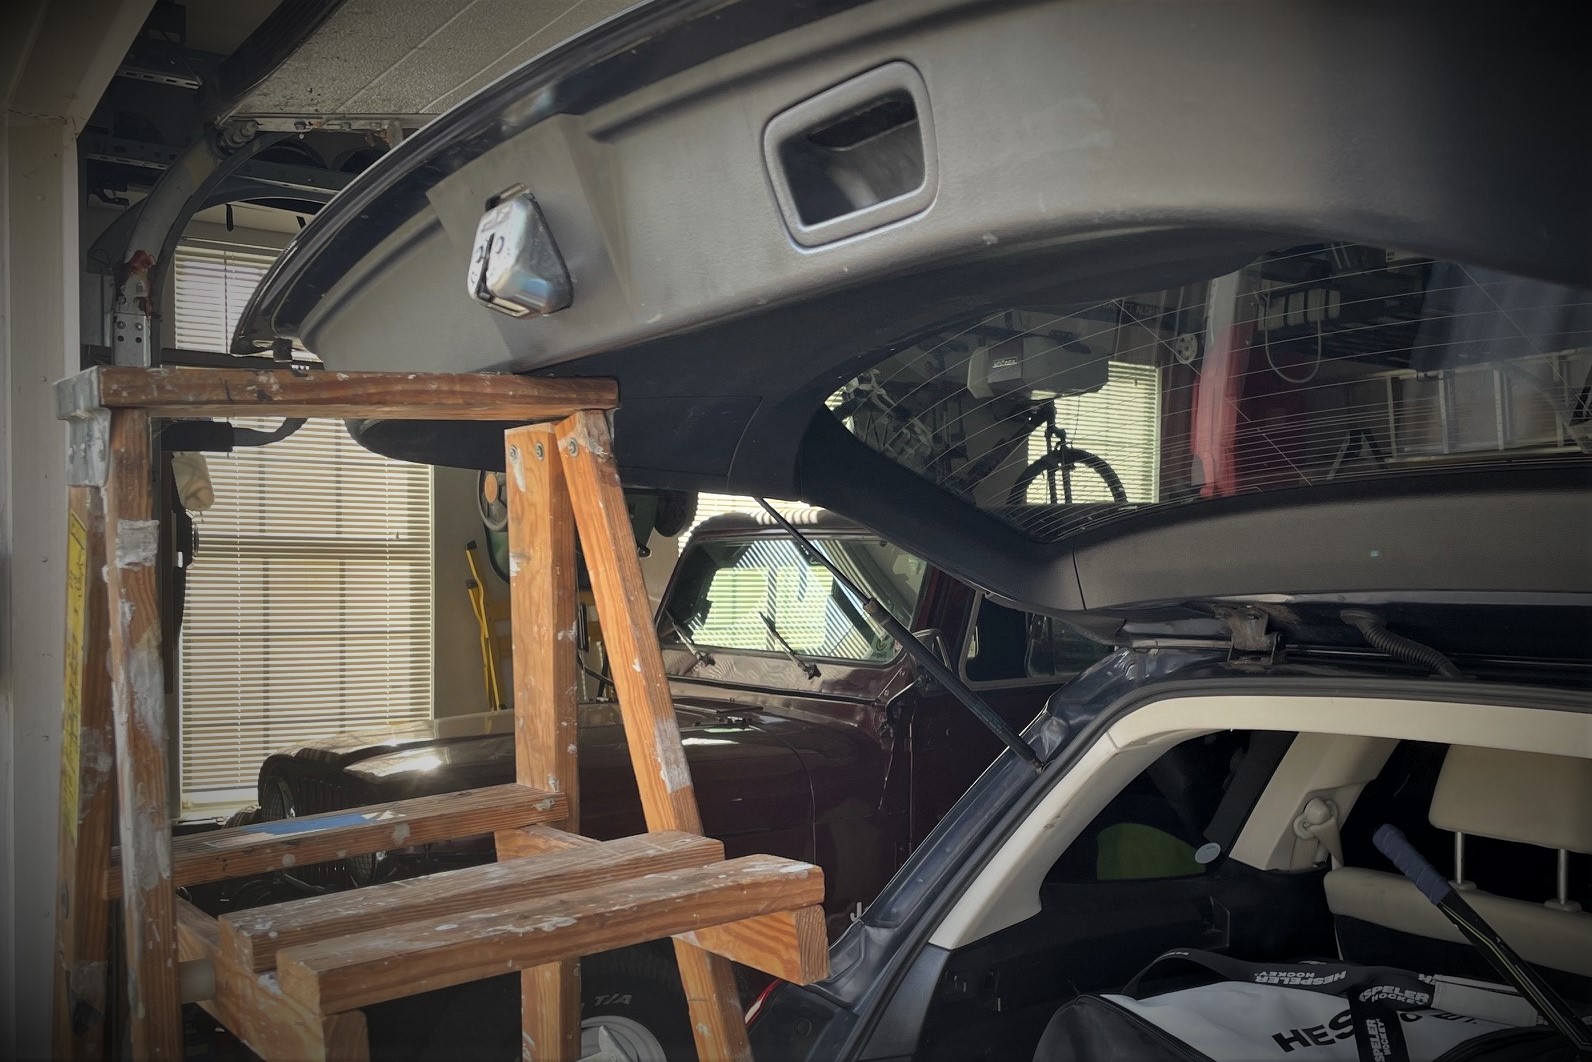
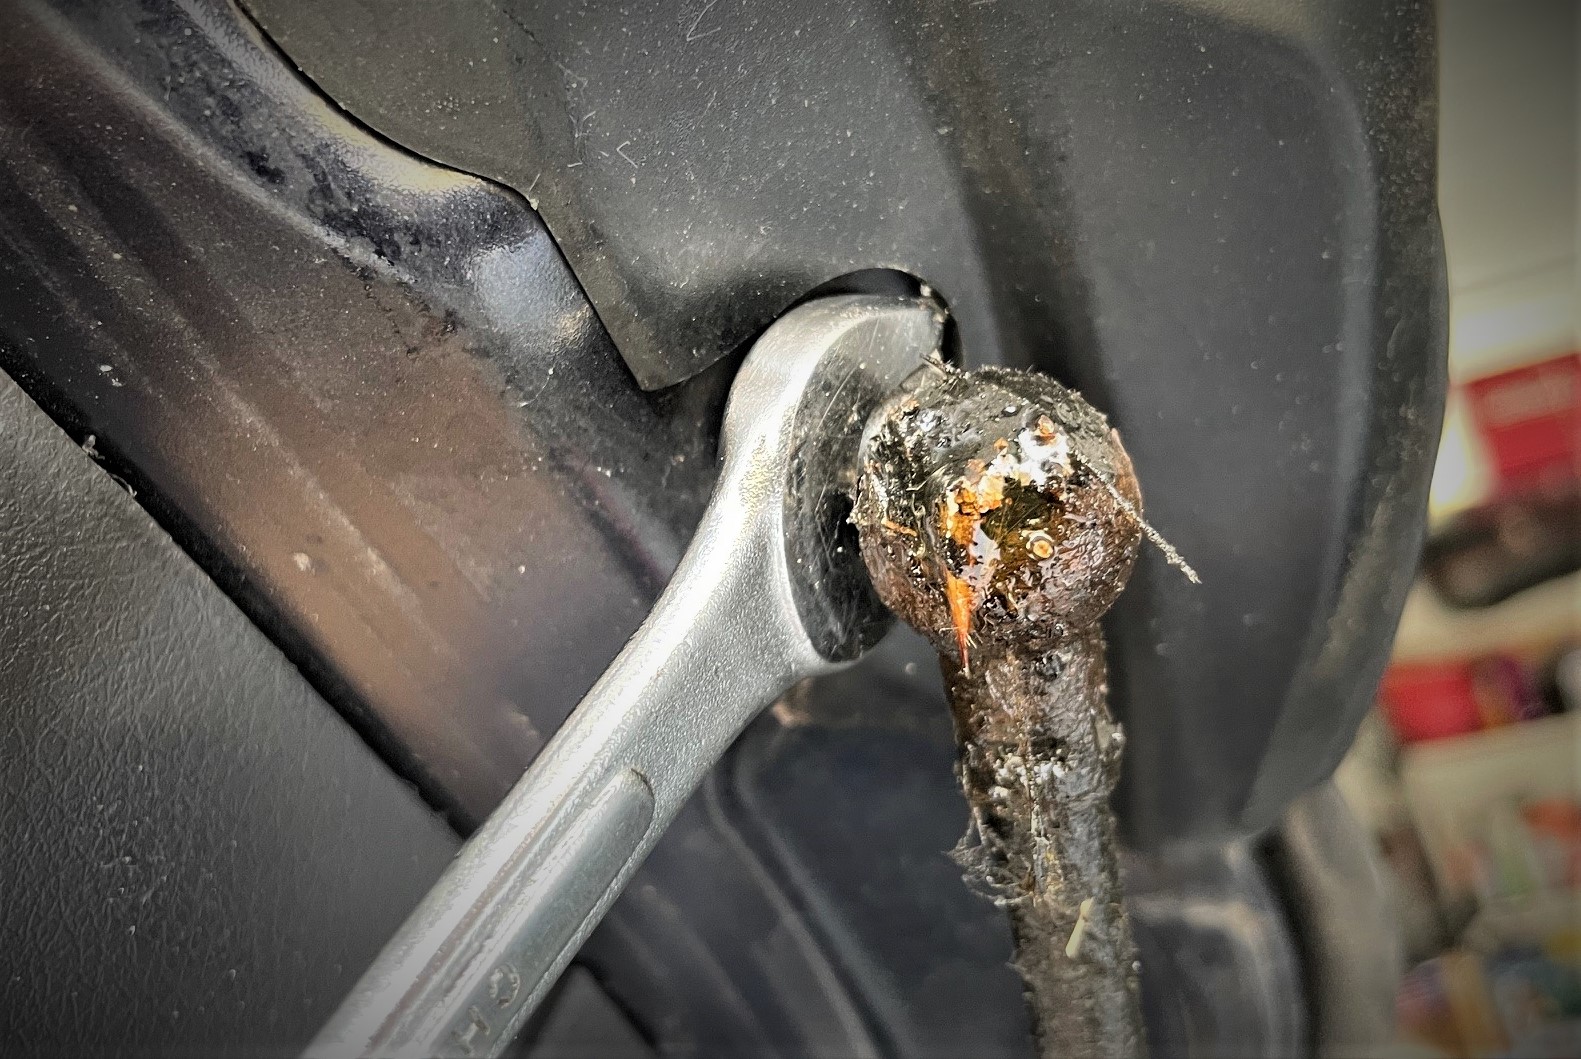
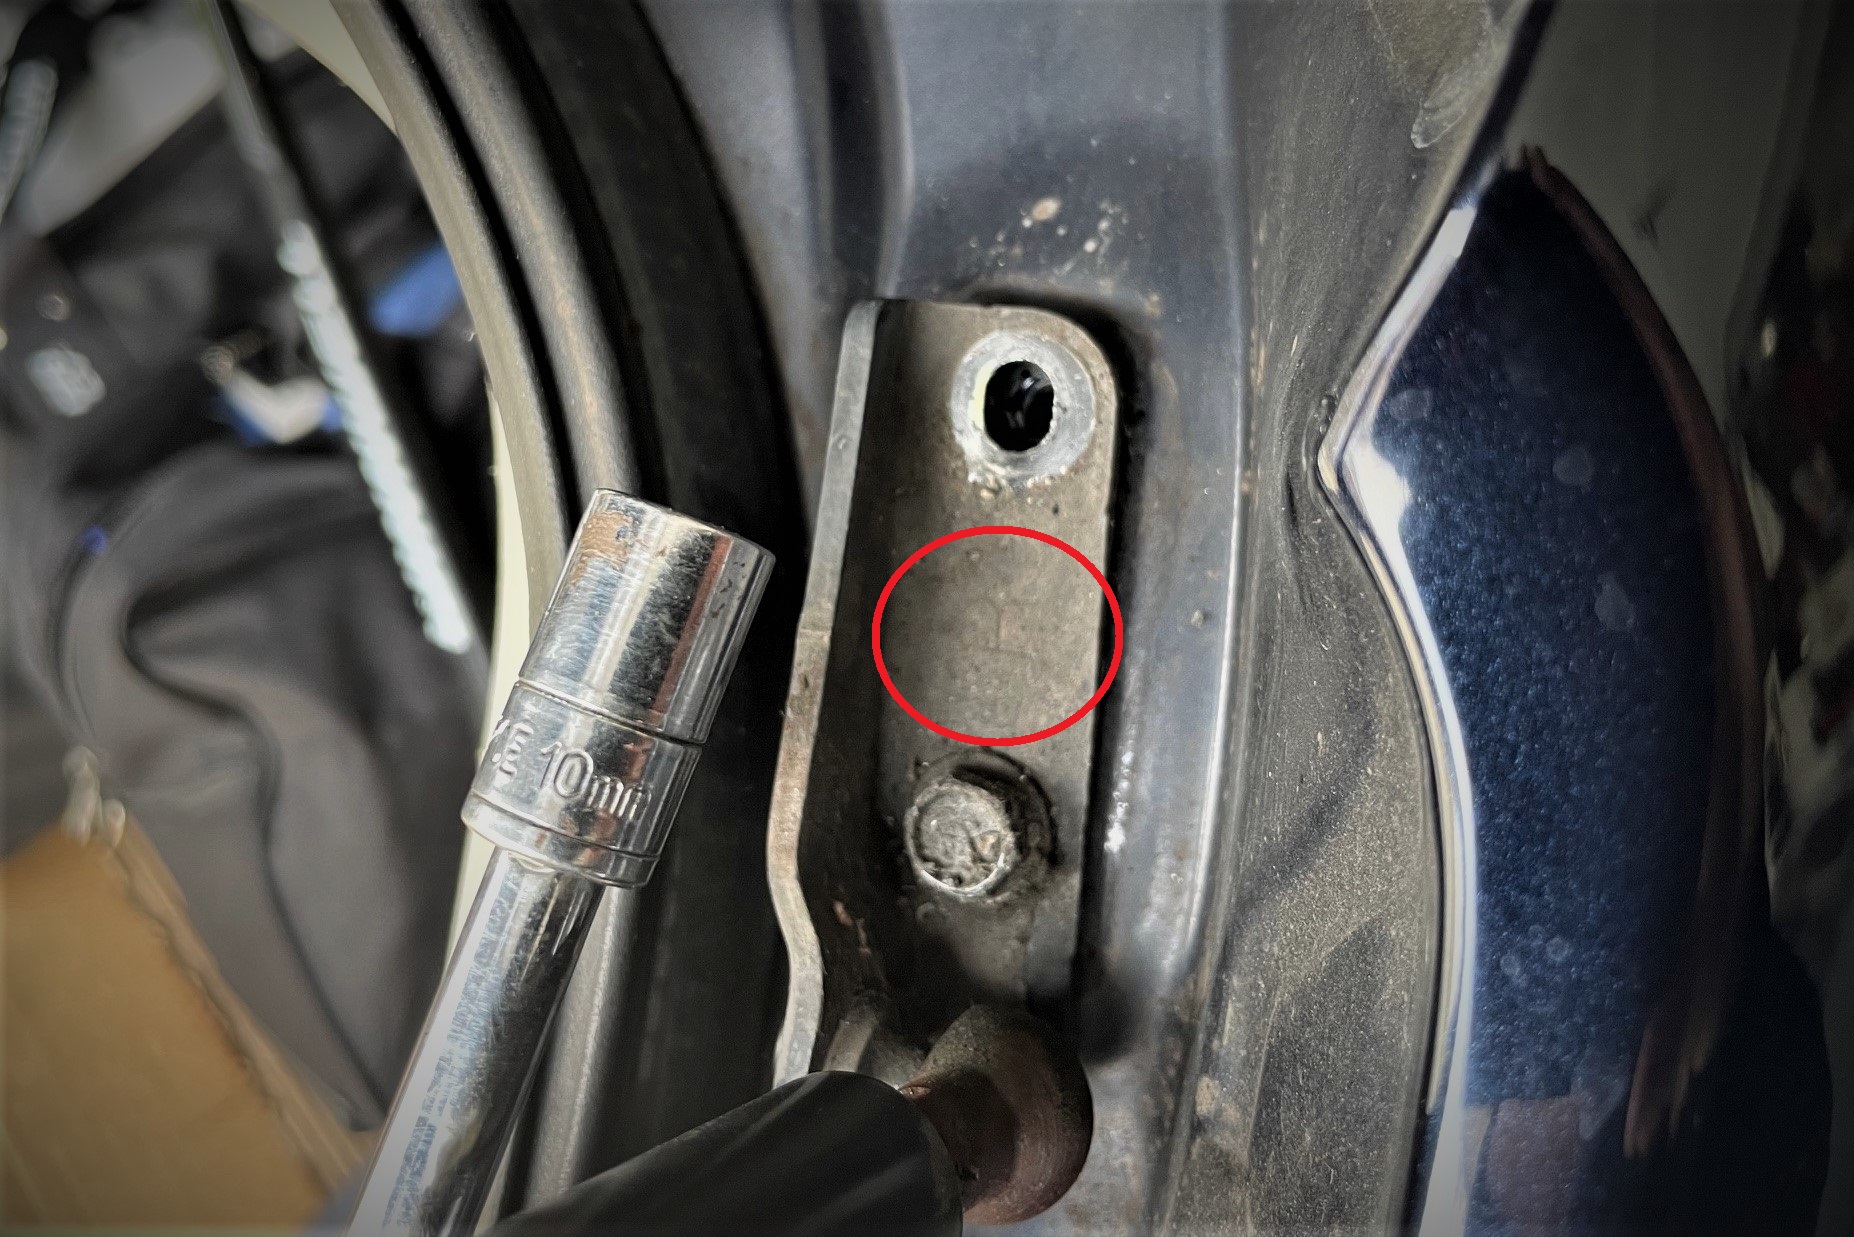
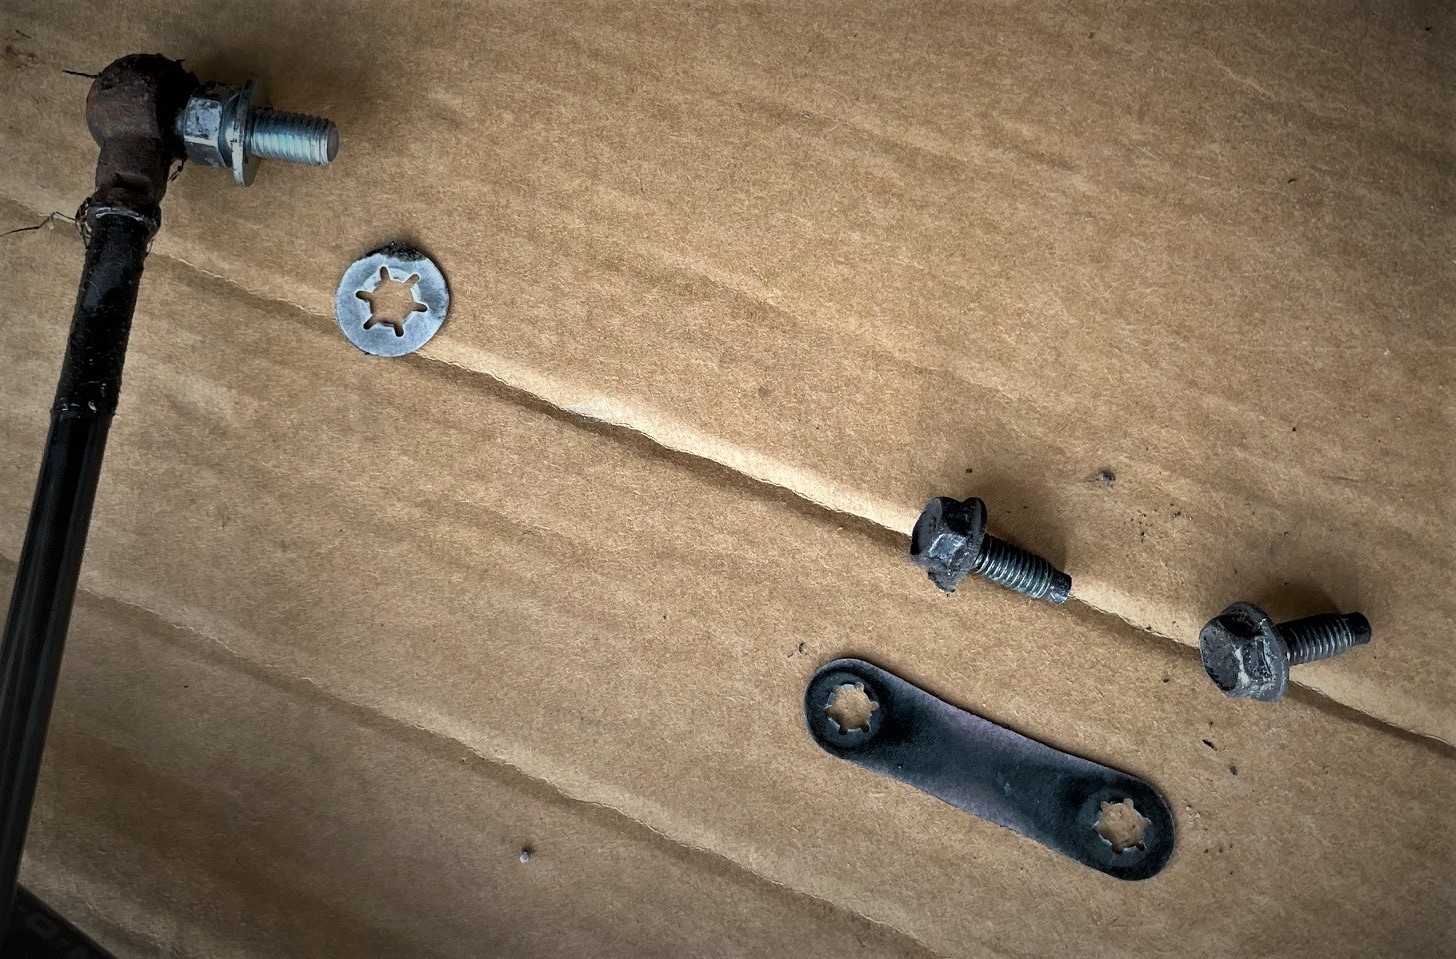
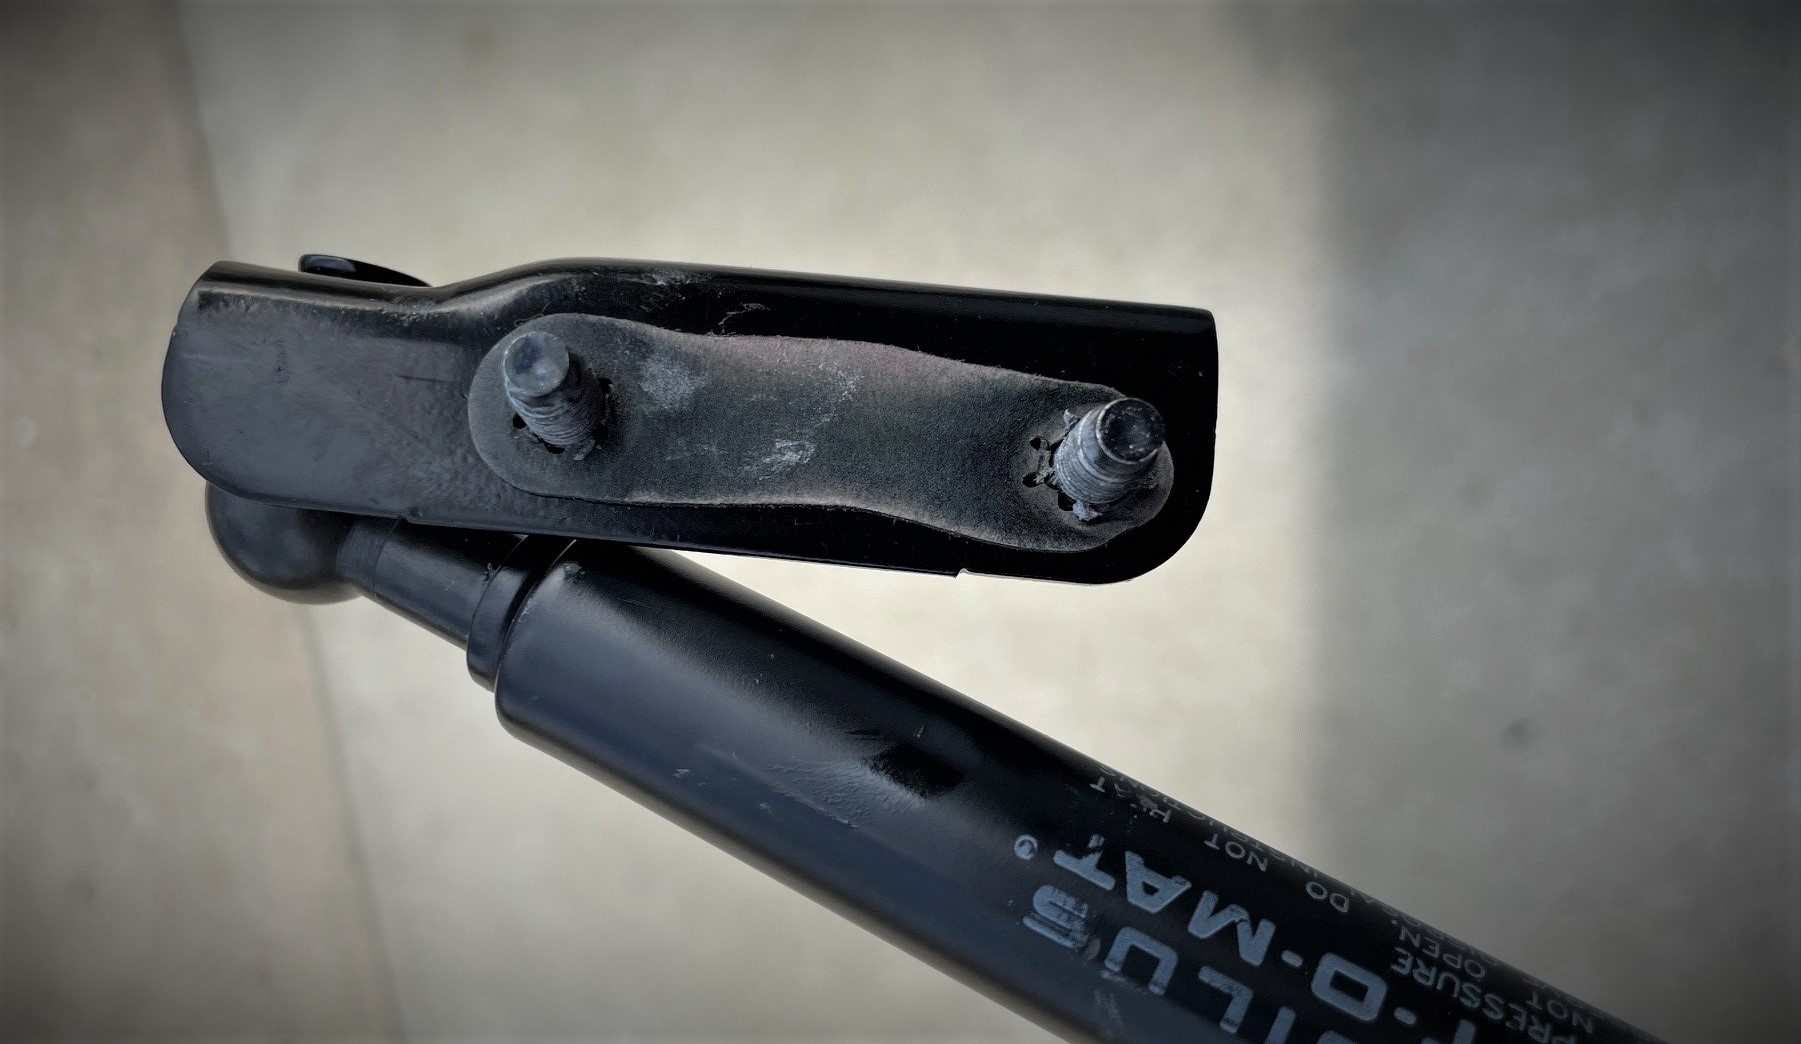
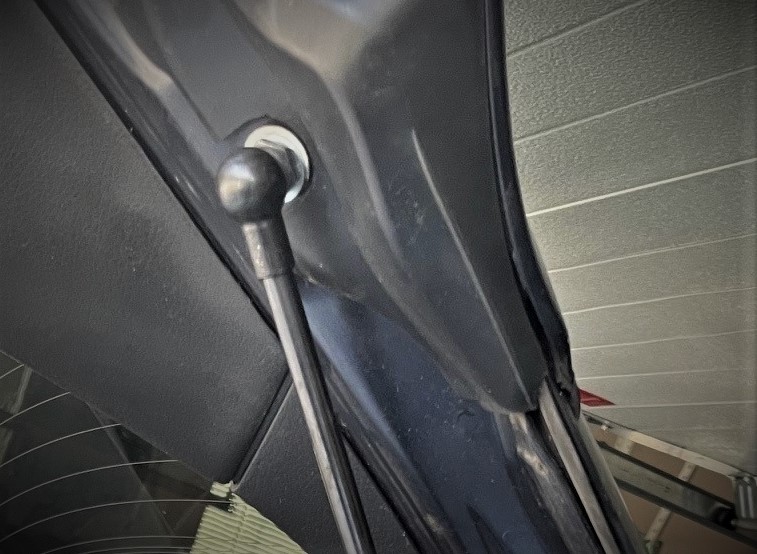
For our replacements, we opted for Lift-O-Mat Lift Support Struts from Stabilus. The lift support strut kit included the strut support, mounting bracket, and a new ball joint/mounting stud (in the baggie), which meant we didn’t have to fiddle with separating or cleaning the ball-and-socket joint from the old strut, eliminating a ton of hassle. TIP: These particular struts are sold individually, so be sure to order both a Left and a Right and replace them at the same time. (Image/OnAllCylinders)Important! Hatches and tailgates are sneaky heavy, so before you start removing bolts and brackets, place a ladder or other sturdy support under the liftgate to keep it in position—and to prevent it from crashing down on top of you. (Image/OnAllCylinders)Starting with the ball-and-socket connection on the liftgate itself, we removed the ball stud. For the Subaru, it was a simple lefty-loosey affair with a 12mm wrench. But recalling our note about the ladder above, make sure the hatch is supported or it’ll make removing this bolt really tough, and you could risk scratching your paint or, worse yet, getting bashed on the head. Also, note how the goo from the leaking strut made it all the way down the piston shaft to the joint here too. (Image/OnAllCylinders)When removed, the ball stud stays attached to the old strut. In our case, the Stabilus strut came with a new ball stud which meant the entire old assembly could be discarded. Make sure you clean around the area to remove any grit or crud before you reinstall the ball mount. The OE stud had a small plastic gasket that we saved and reused on the reinstall too. DO NOT pop the new strut socket onto the ball stud yet—that happens later. (Image/OnAllCylinders)Removing the strut-to-body mount is easy with a simple 10mm socket. Look closely and you’ll see the the Subaru folks are nice enough to label the bracket with an “R” (circled) to denote the right side. TIP: In addition to the left/right distinction, make sure to note the top/bottom orientation here, as it’s easy to install a bracket like this upside down—which can cause a bunch of confusing fitment problems later. (Image/OnAllCylinders)Stabilus is an OE supplier, so we’re not surprised that the new replacement support is dang-near identical to the original Subaru part when placed side-by-side. (Image/OnAllCylinders)As alluded to above, both strut mounting points had a slim, plastic gasket between the bracket/stud and the painted body surface. It is really important to clean and re-use these, because they protect the paint under the bracket from getting worn away with time. Rust has a habit of sneaking onto exposed metal under hinges and brackets like these, which can lead to serious corrosion issues later on—thanks for coming to our Ted Talk. (Image/OnAllCylinders)Tip: Put the bolts into the bracket and slip the gasket(s) over the bolts to retain them before you get ready to install the strut. This will save you a lot of hassle with positioning the bracket. (Image/OnAllCylinders)Just like the original parts, our replacement Stabilus struts have the left and right sides clearly marked on the brackets. (Image/OnAllCylinders)Stabilus puts a small dab of grease in the socket end of the strut. Resist the urge to pack-in more grease here, as it can attract grit and grime that could hasten the demise of the joint. You can also see the metal retaining spring/circlip the holds the ball once it’s snapped into place. (Image/OnAllCylinders)Installing the new lift strut is a reversal of the removal process. Start with the large bracket on the vehicle body first, before pressing in the ball-and-socket joint. The socket should snap onto the ball with a modest amount of pressure—but once it’s in, it can be difficult to remove, so wait until you’re ready. (Image/OnAllCylinders)The left side is a mirror image of the right side. All told, the job took less than 30 minutes and we no longer live in fear of getting konked on the head. (Image/OnAllCylinders)
Paul is the editor of OnAllCylinders. When he's not writing, you'll probably find him fixing oil leaks in a Jeep CJ-5 or roof leaks in an old Corvette ragtop. Thanks to a penchant for vintage Honda motorcycles, he spends the rest of his time fiddling with carburetors and cleaning chain lube off his left pant leg.


Comments