When the weather turns cold and icy, many hot rod and race car owners park their ride for winter storage. Some folks pull the vehicle into a designated slot in the garage and don’t give it any consideration until spring thaw. But for others, it’s the perfect opportunity to go through the car and inspect various systems and components. This routine allows you to fix what needs to be fixed and make any needed changes or improvements for the coming year.
And if you’re fitting snow tires to your daily driver, you may also enjoy this article: 5 Seasonal Storage Tips for Your Winter & Summer Tires
Oil, Lube & Fluid
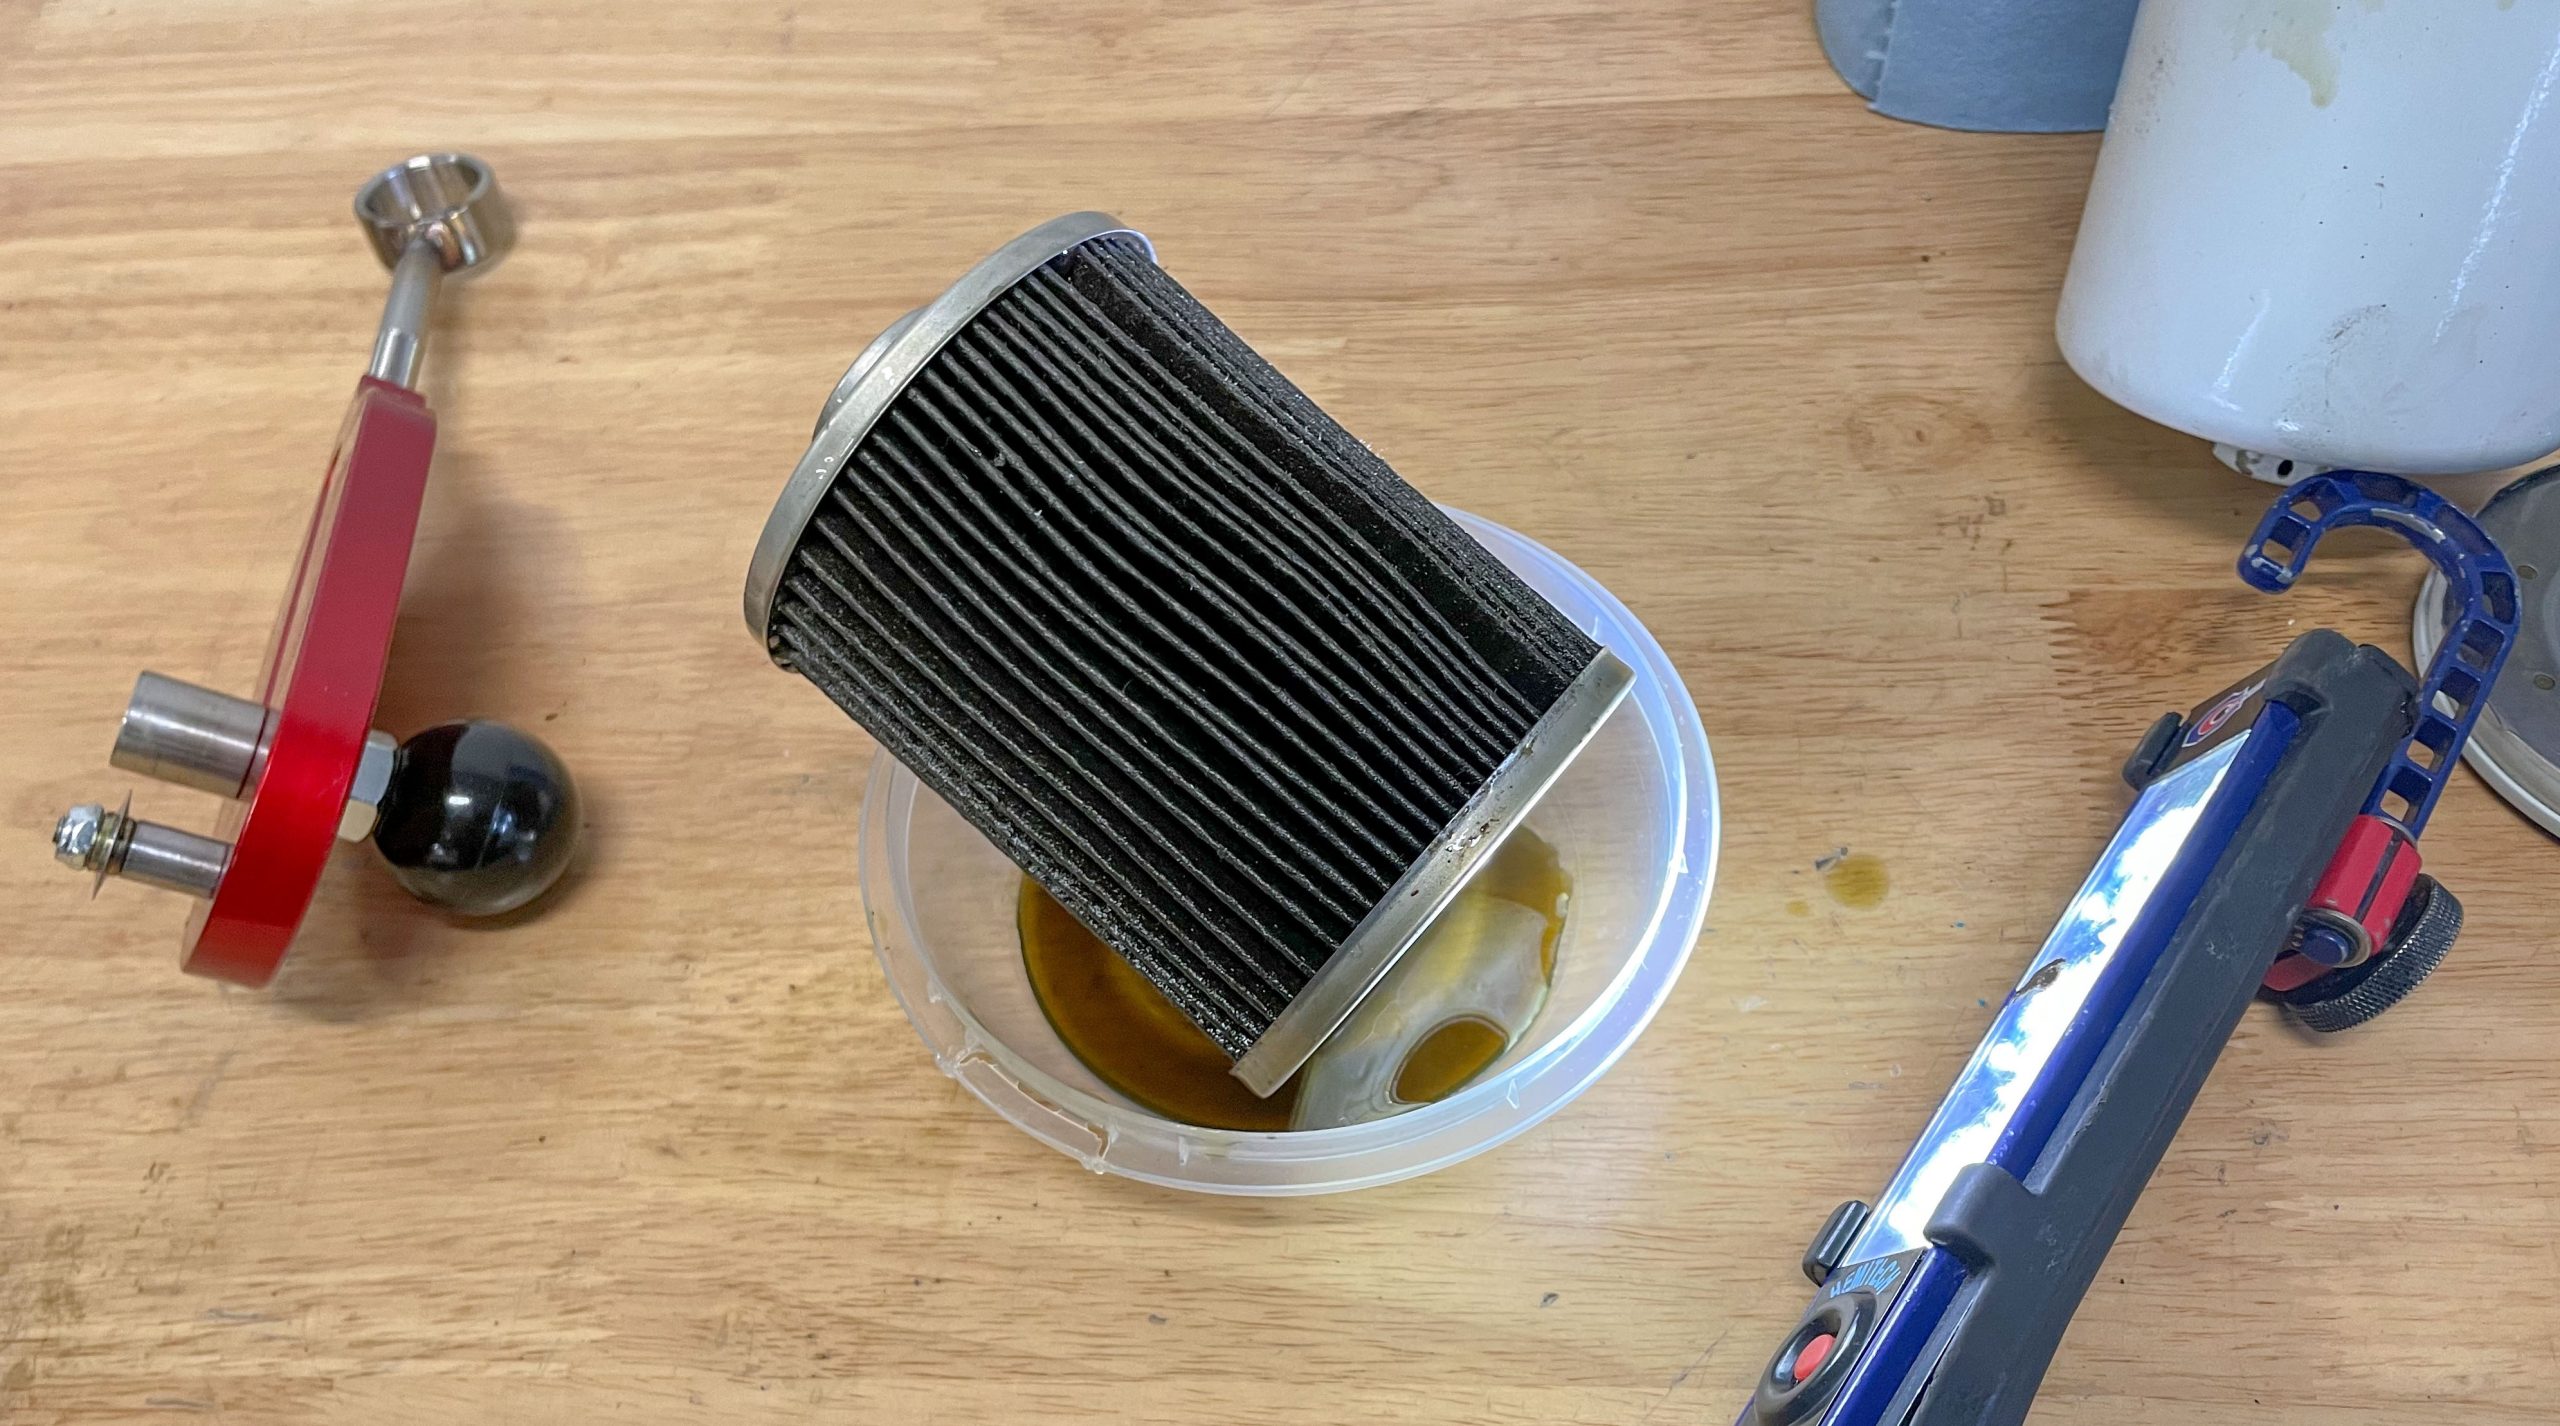
First things first. It’s likely a good time to change oil, cut the filter apart, and inspect for potential issues. If there’s no sign of trouble (for example, shiny metallic or gold colored flakes), then you’re good to go for next season.
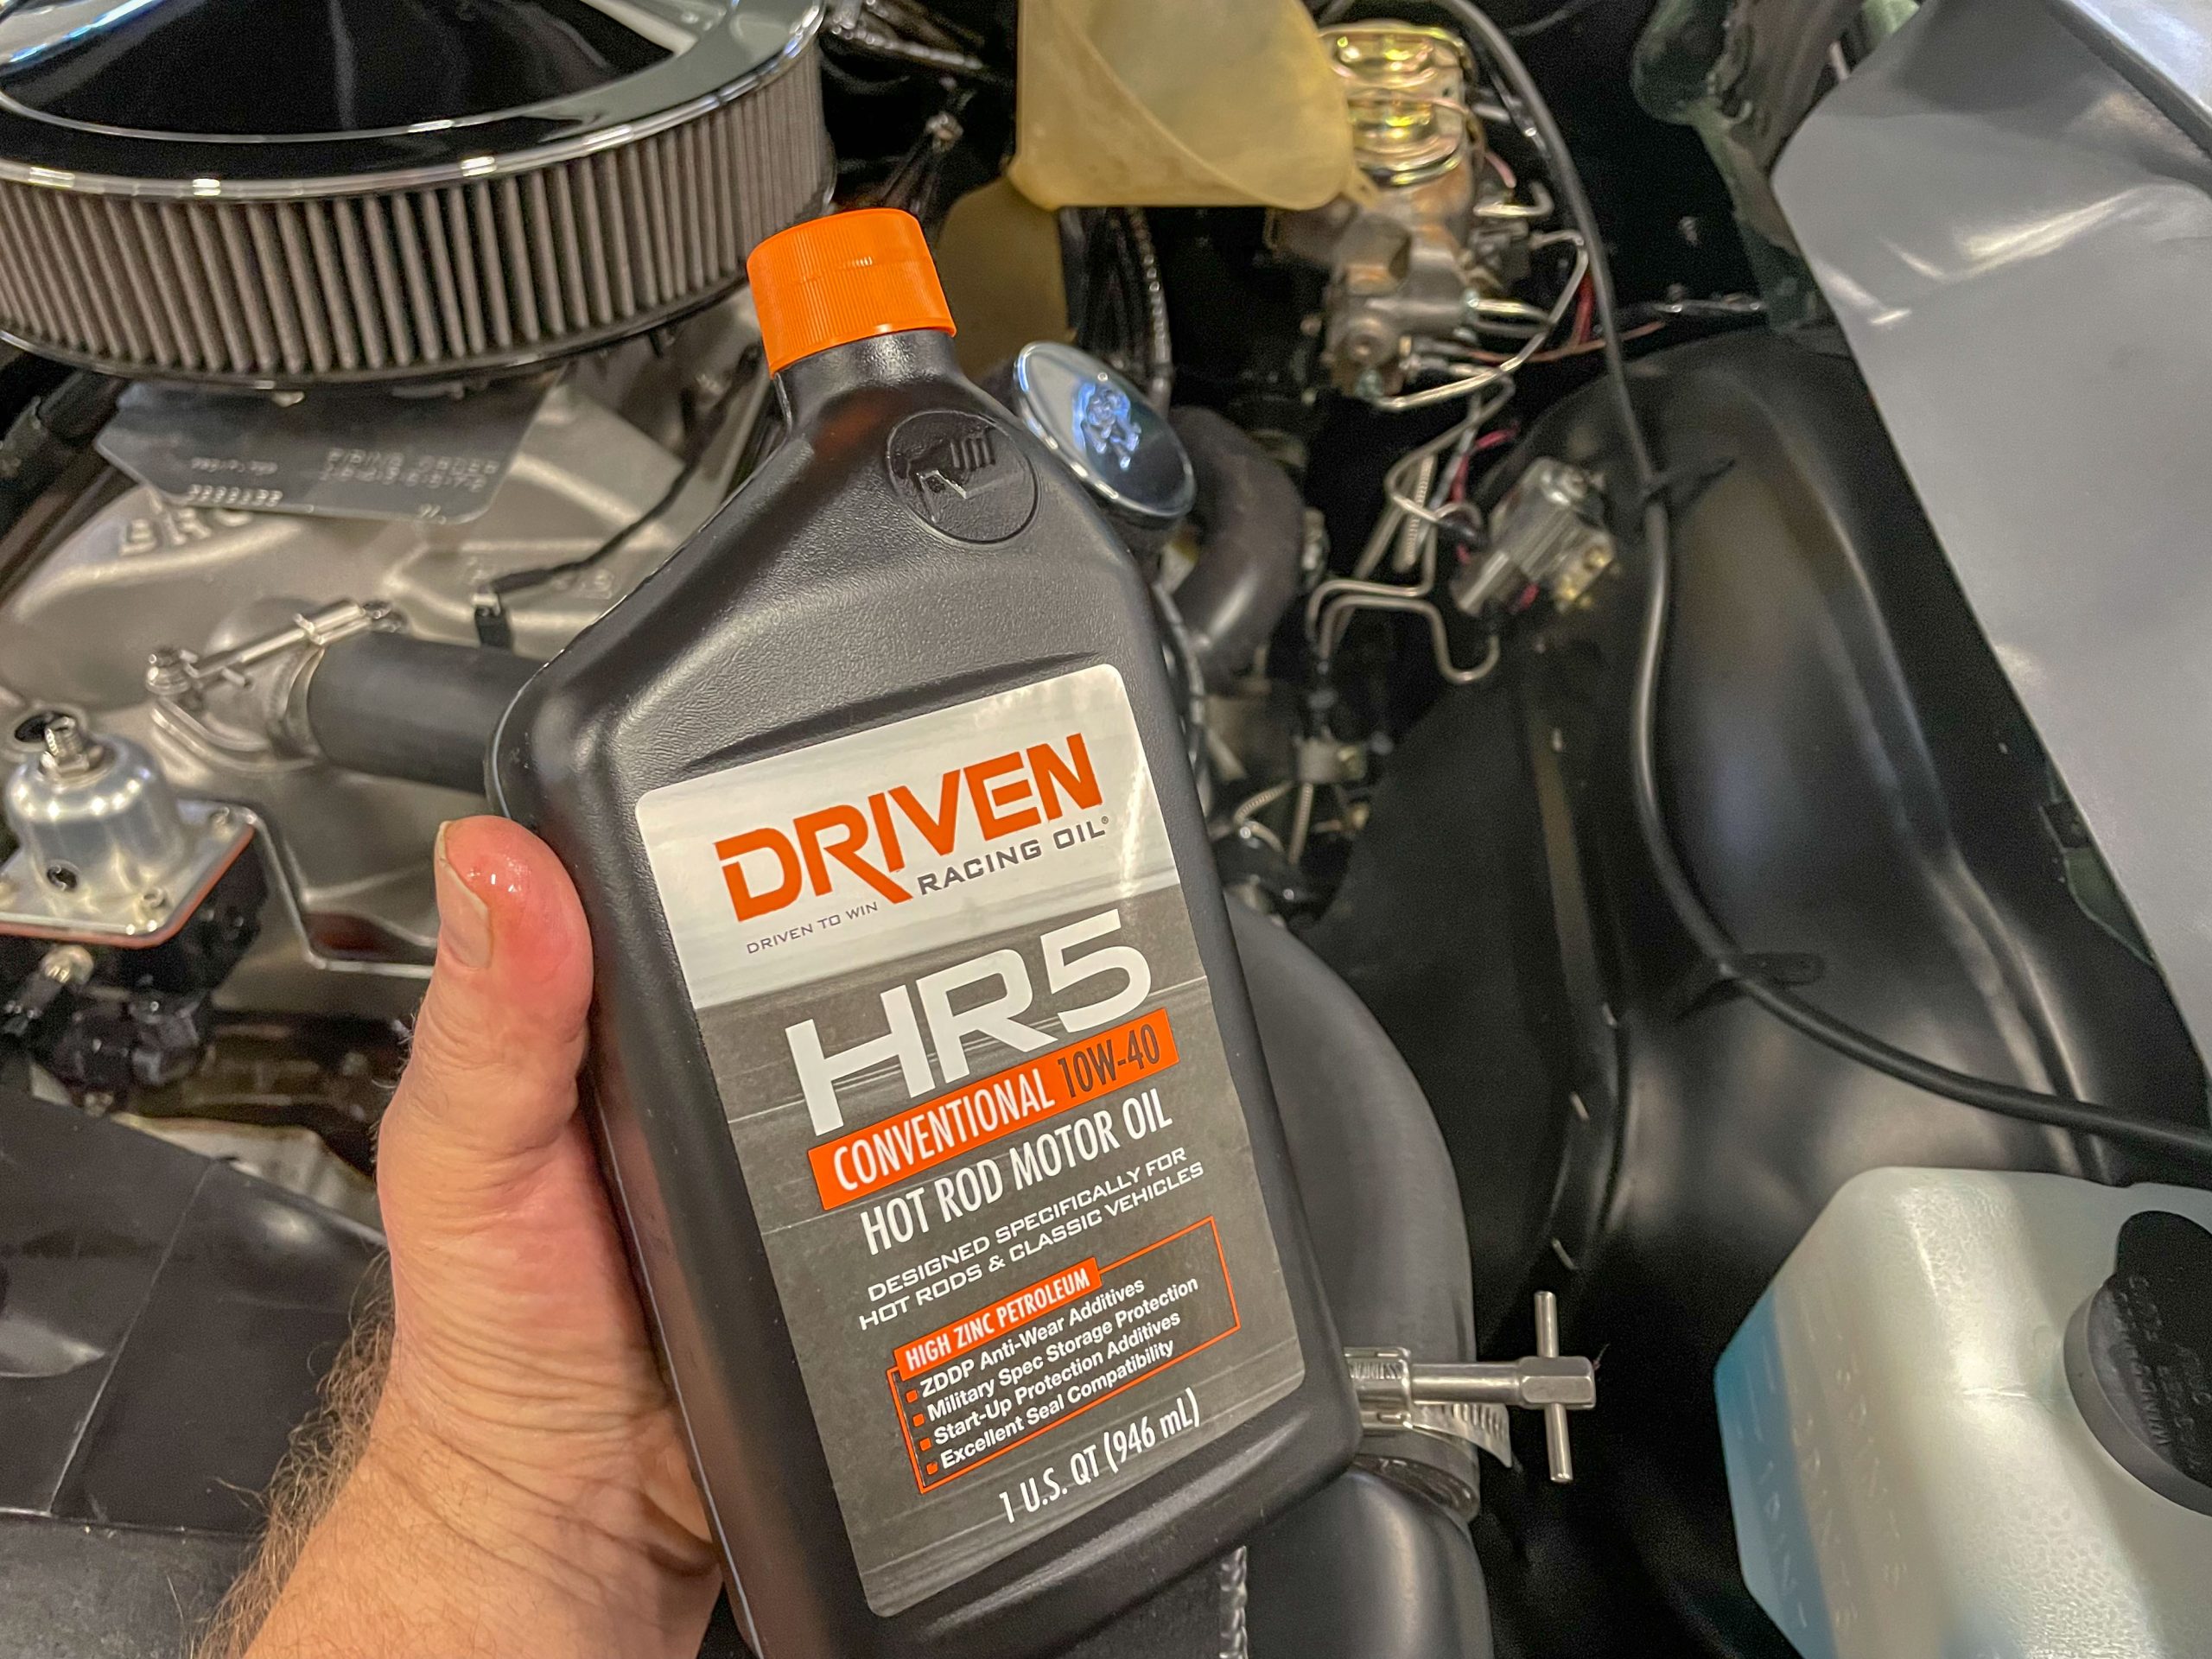
Some oils are specifically designed with chemistry that allows for long periods of storage. Case-in-point is the Driven Hot Rod Motor Oil I use. Driven notes this oil uses the same oil additive technology developed for the U.S. Military for storing and shipping their combat equipment—guarding against rust and corrosion, so your engine is protected even when it’s not running.
Two other considerations are the transmission fluid and the rear axle lube. It’s a good time to change the fluids here too. In my case, there wasn’t a lot of running time on the transmission or the rear end, so I opted to leave everything alone.
If you do have a lot of running or dragstrip time on the fluids, now’s the time to replenish it. While you’re at it, it’s also the perfect opportunity to inspect the ring and pinion and to replace the transmission filter. Keep in mind a transmission filter change (with a fresh gasket) will set you back anywhere from $10 to $45 or so, depending upon the transmission. It’s definitely cheap insurance.
Chassis, Drivetrain & Undercarriage
While you’re under the car, take a close look at the driveshaft. Obviously, universal joint inspection is important. Ditto with replacement if the joints are bad. But it’s also important to look for any sort of damage to the shaft itself. Does it have a lot of nicks and bruises? Are the weights intact? Is the tail shaft seal, yoke, and pinion seal good?
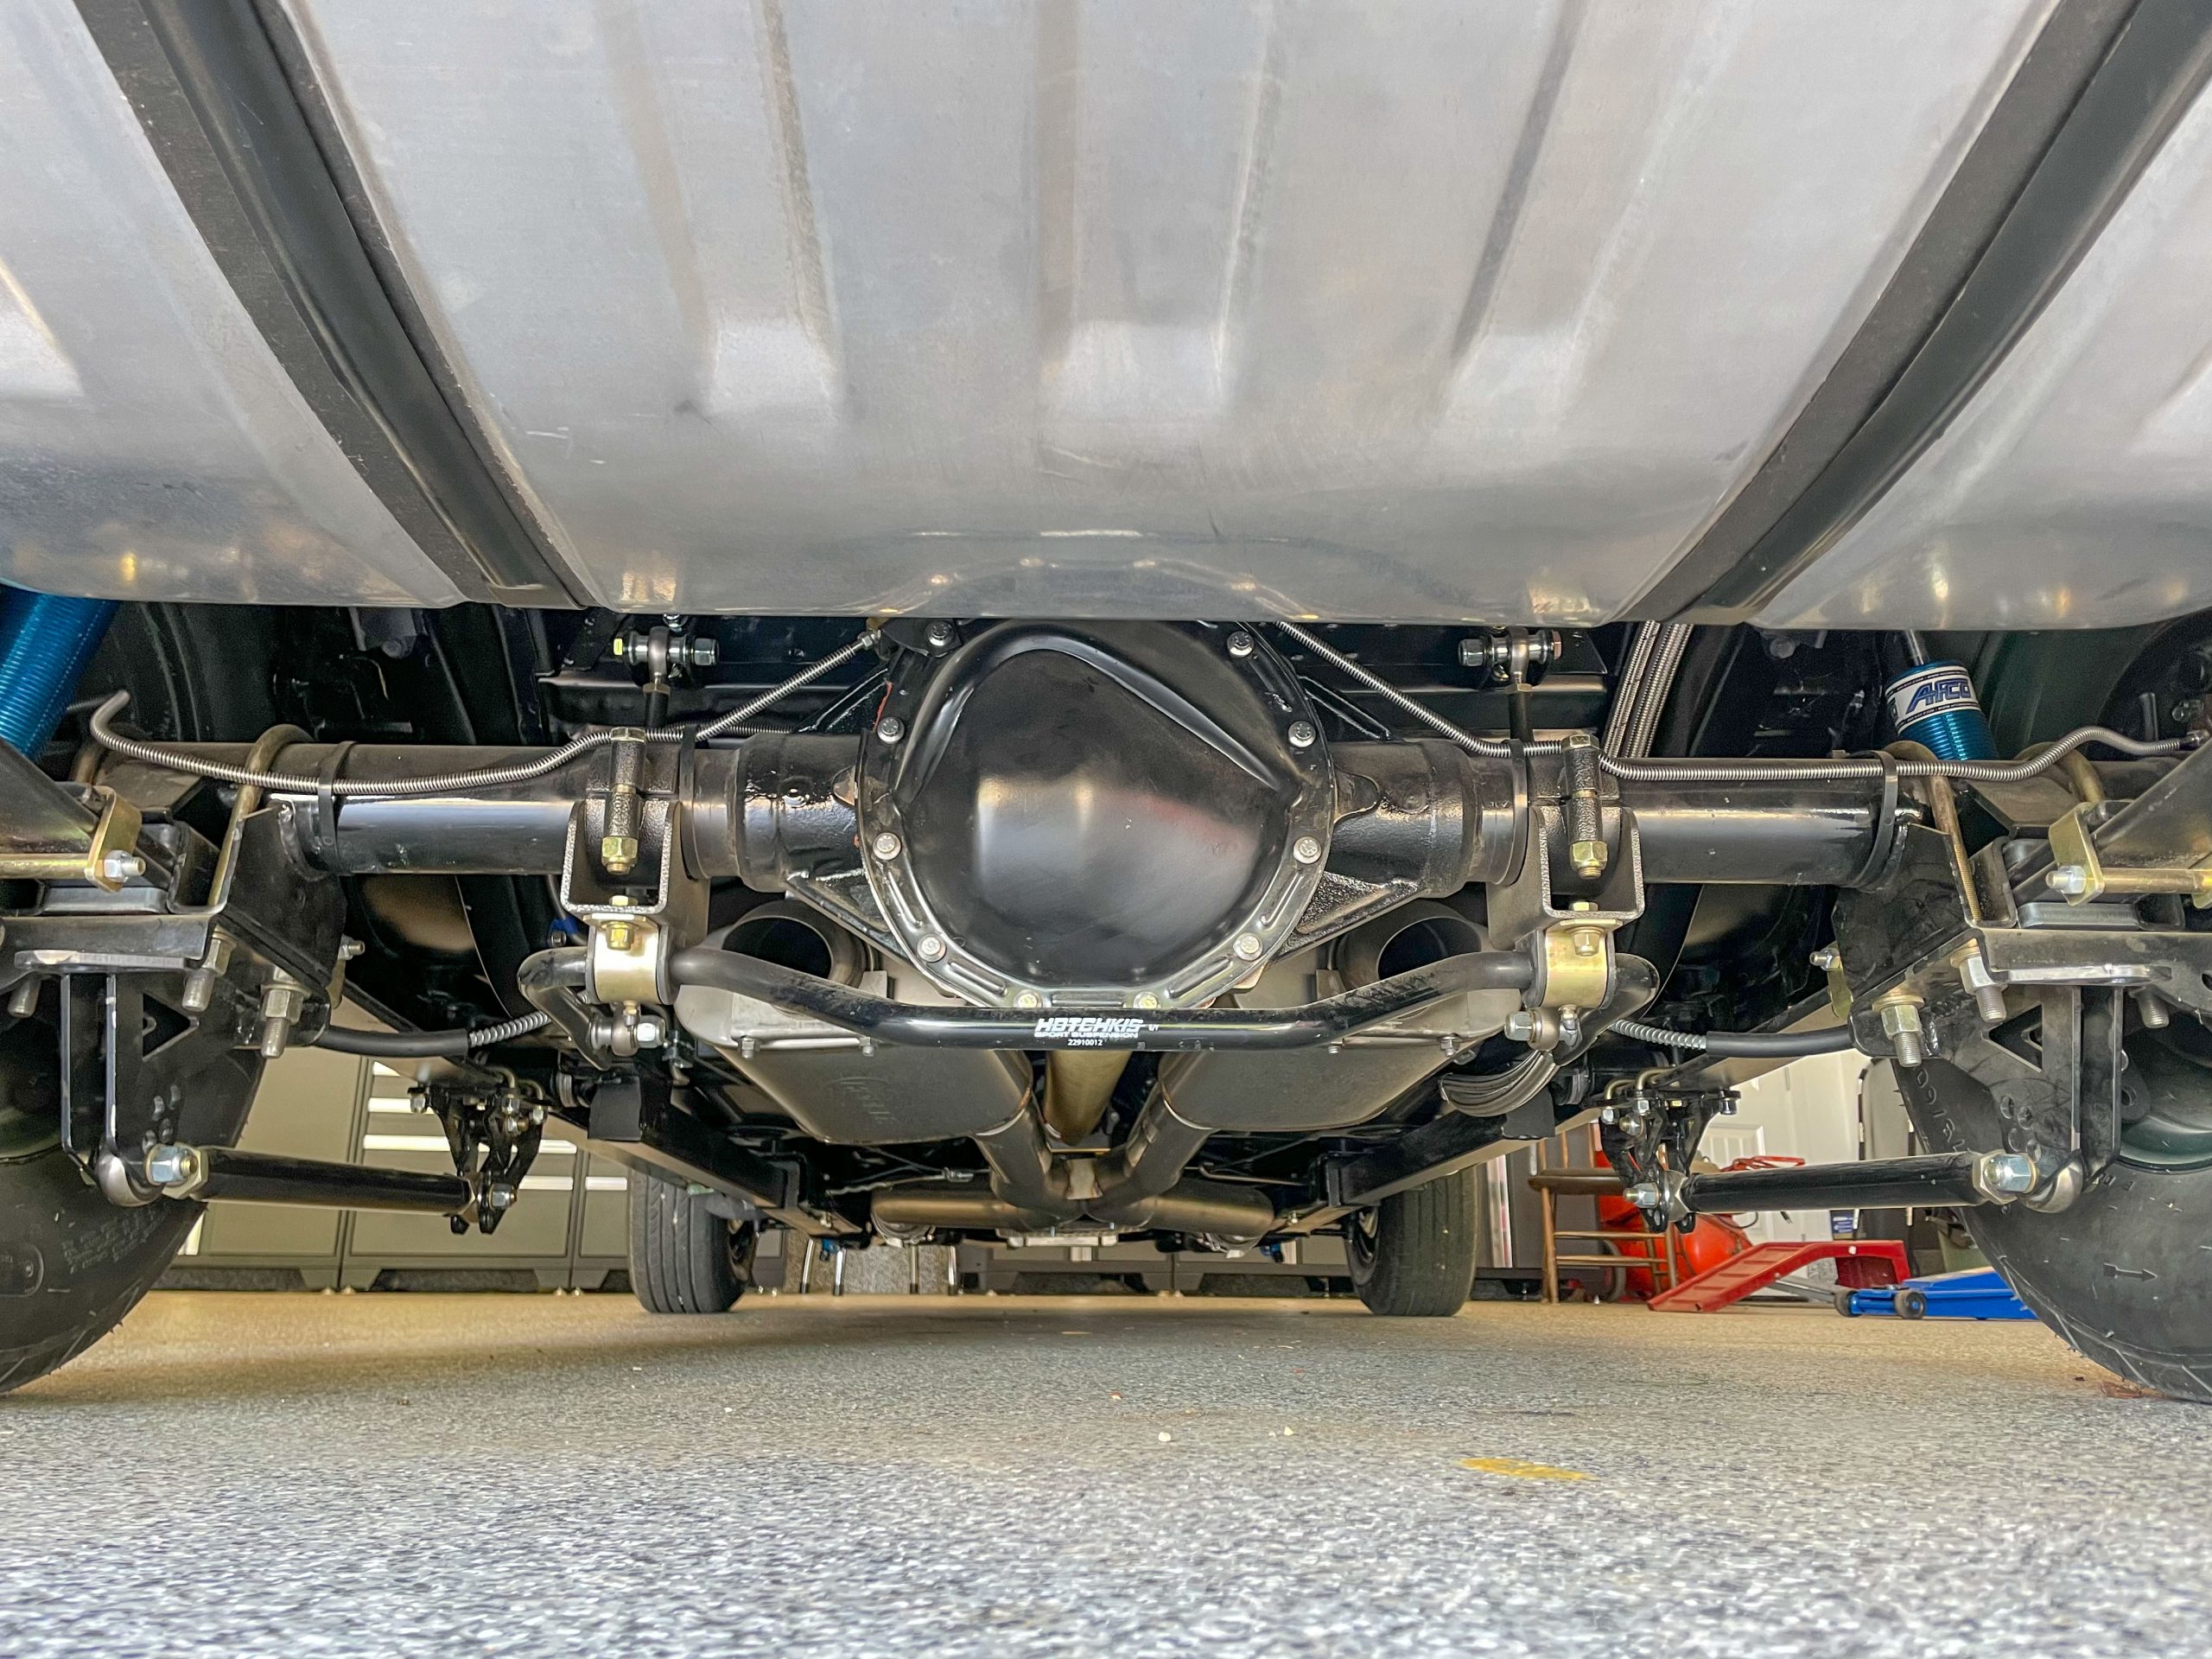
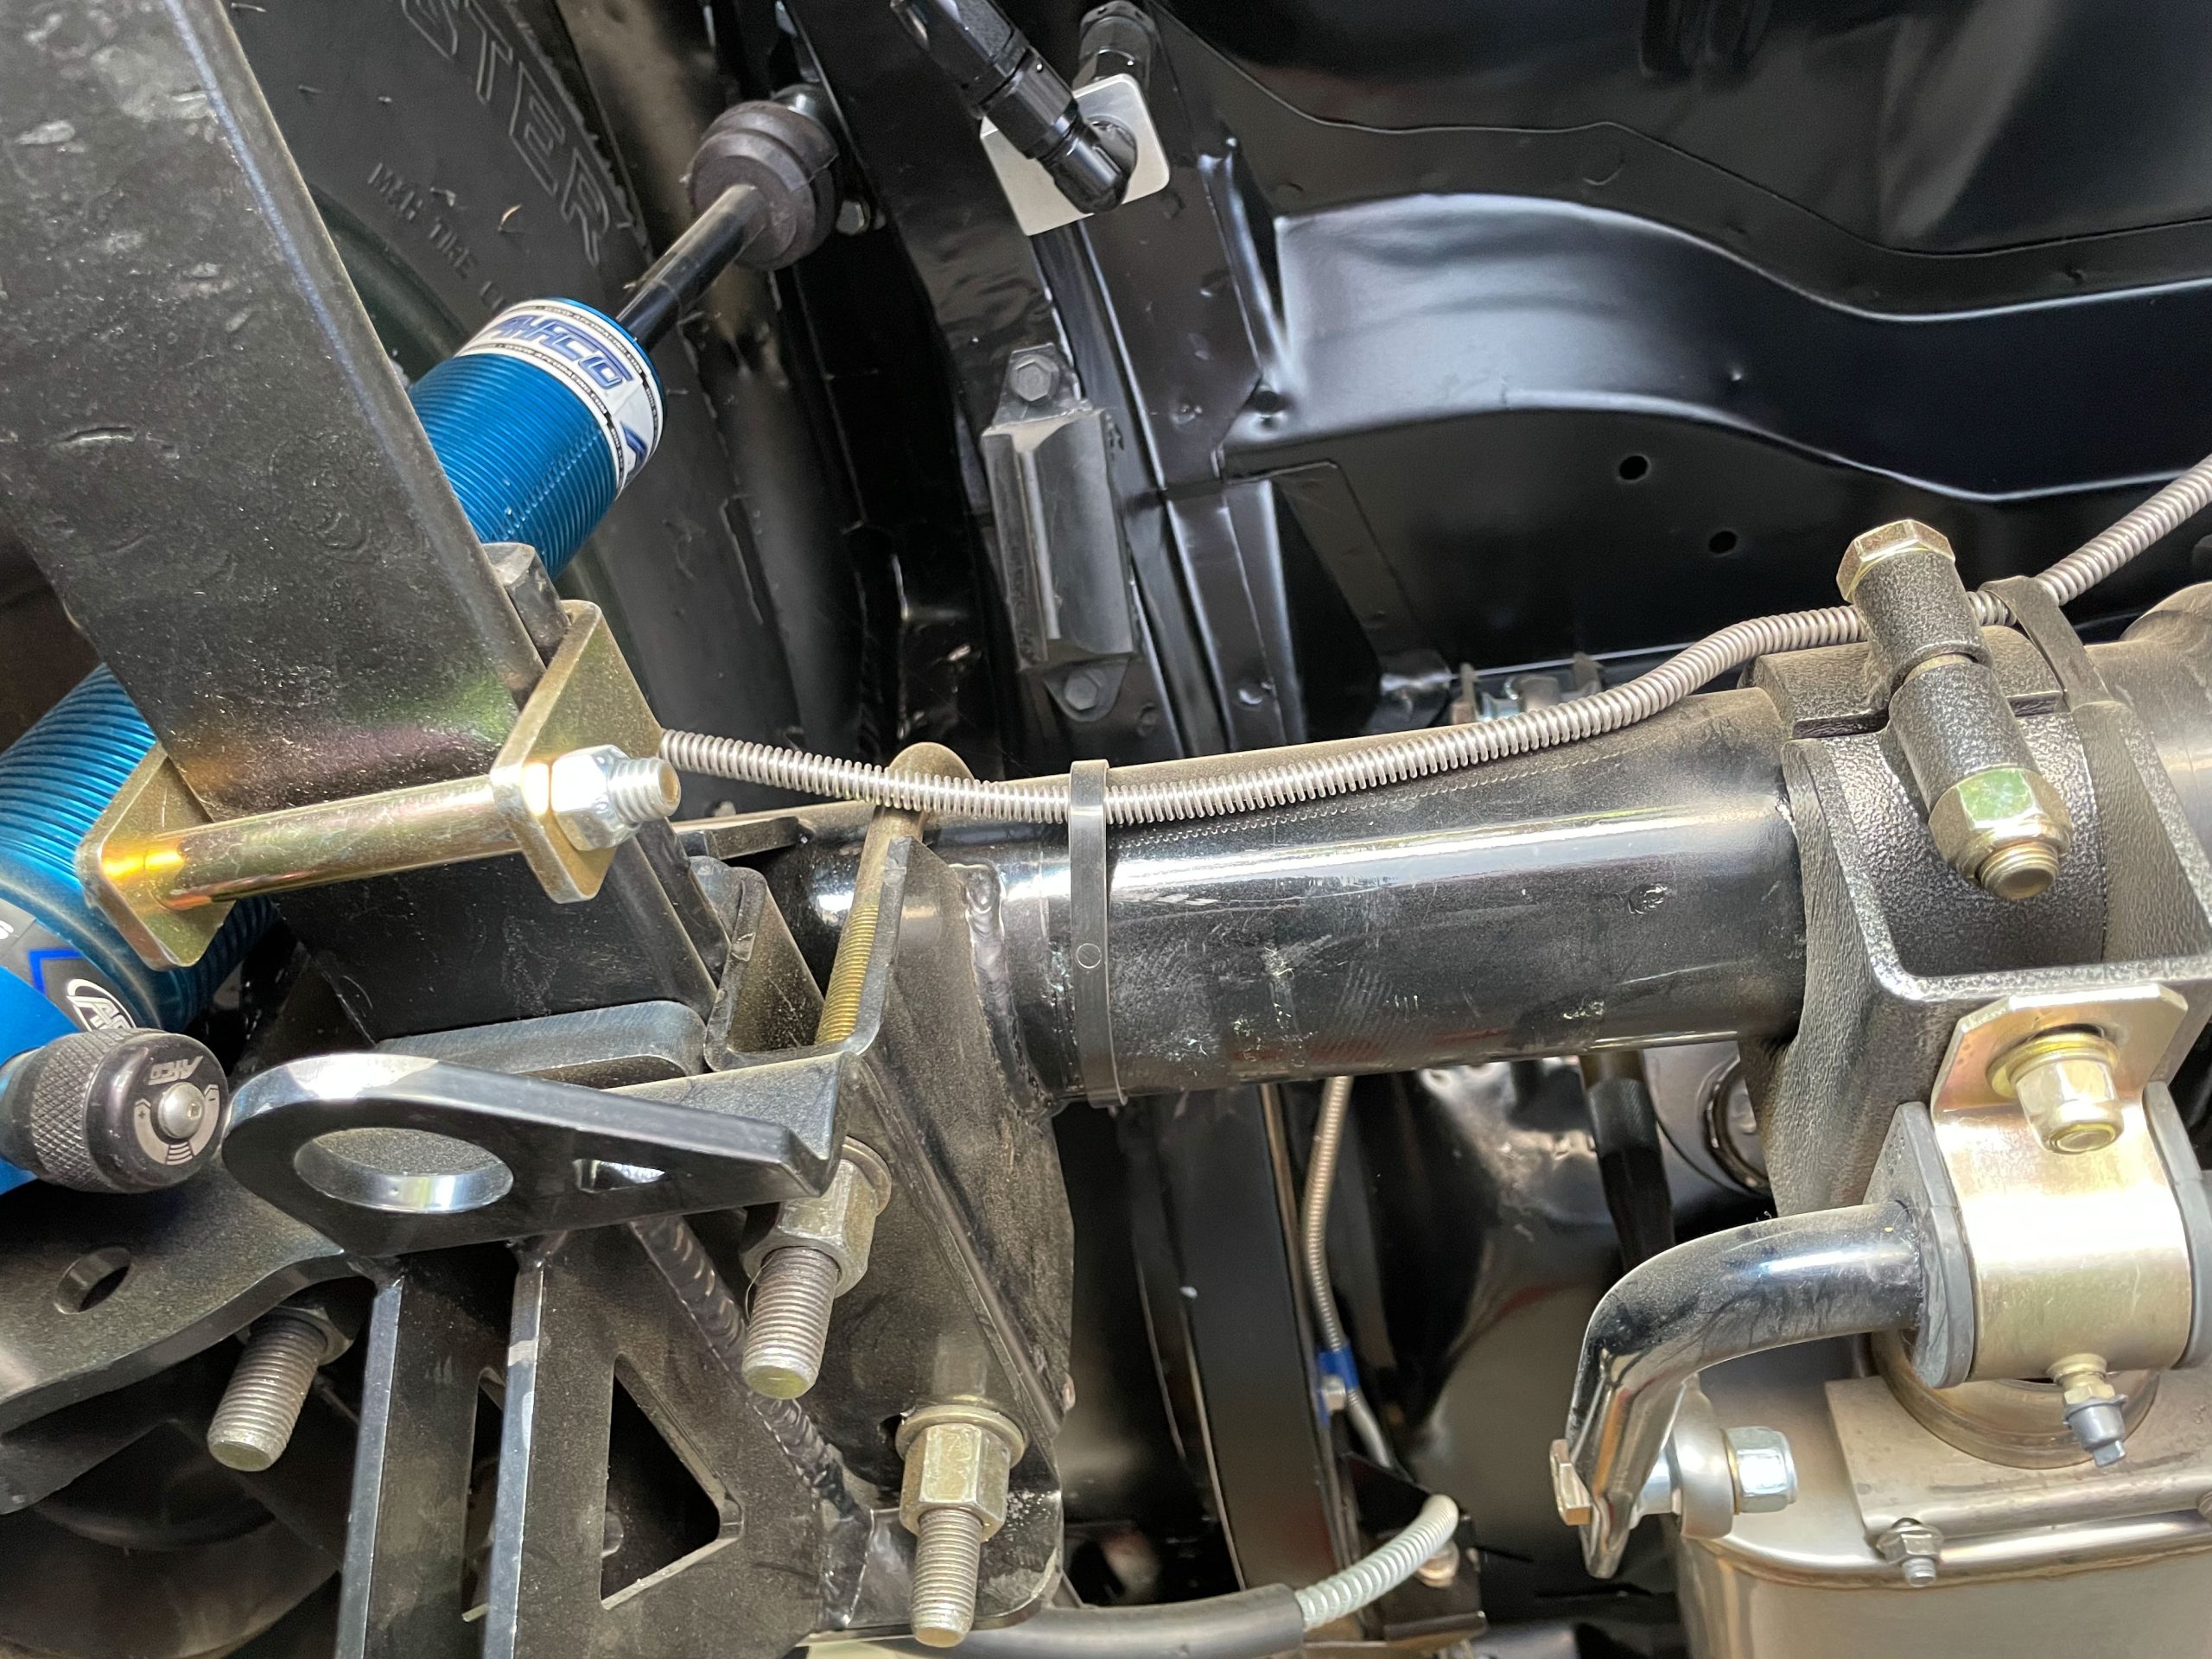
In keeping with the bottom side of your car or truck, it’s a really good time to go over the rear suspension components along with the shocks and springs. Plenty of drag race and fast street cars also incorporate a number of rod ends. An example is my simple Nova. It has eight rod ends out back—four on the traction bars and four on the home made anti-roll bar.
And this doesn’t count the spherical bearings in the rear shocks. A lot of use, coupled with dirty conditions, can cause significant deterioration. Bottom line here is, they’re wear items, so give them the once over.
Inspect the shocks too. Play close attention to evidence of fluid leaks. Look over the springs and take the time to check the torque on all rear suspension components.
Wheels, Tires, Suspension & Steering
Obviously, the front suspension and steering should be carefully examined. Again, inspect the springs and shocks. Look at any steering components for signs of wear. In my case, I discovered a front wheel bearing that needed readjustment. In the process I removed the bearings and had a close look at them along with the races. They looked great and I suspect the guy who put it together initially (me) made a mistake. If you have rod ends on the front end (for example, an aftermarket bump steering kit), look at them as well.
I always go over the wheels and tires too, checking for damage or odd wear characteristics. Sometimes in cars with close tire-to-body panel clearance (inside or outside of the tub) you’ll find a sidewall has been marked. If the damage is on the inside, then it’s tough to see with a casual inspection. That’s why it’s a great idea to look things over with the car in the air.
You may appreciate this infographic too: A Quick Guide to Tire Wear and What it Means
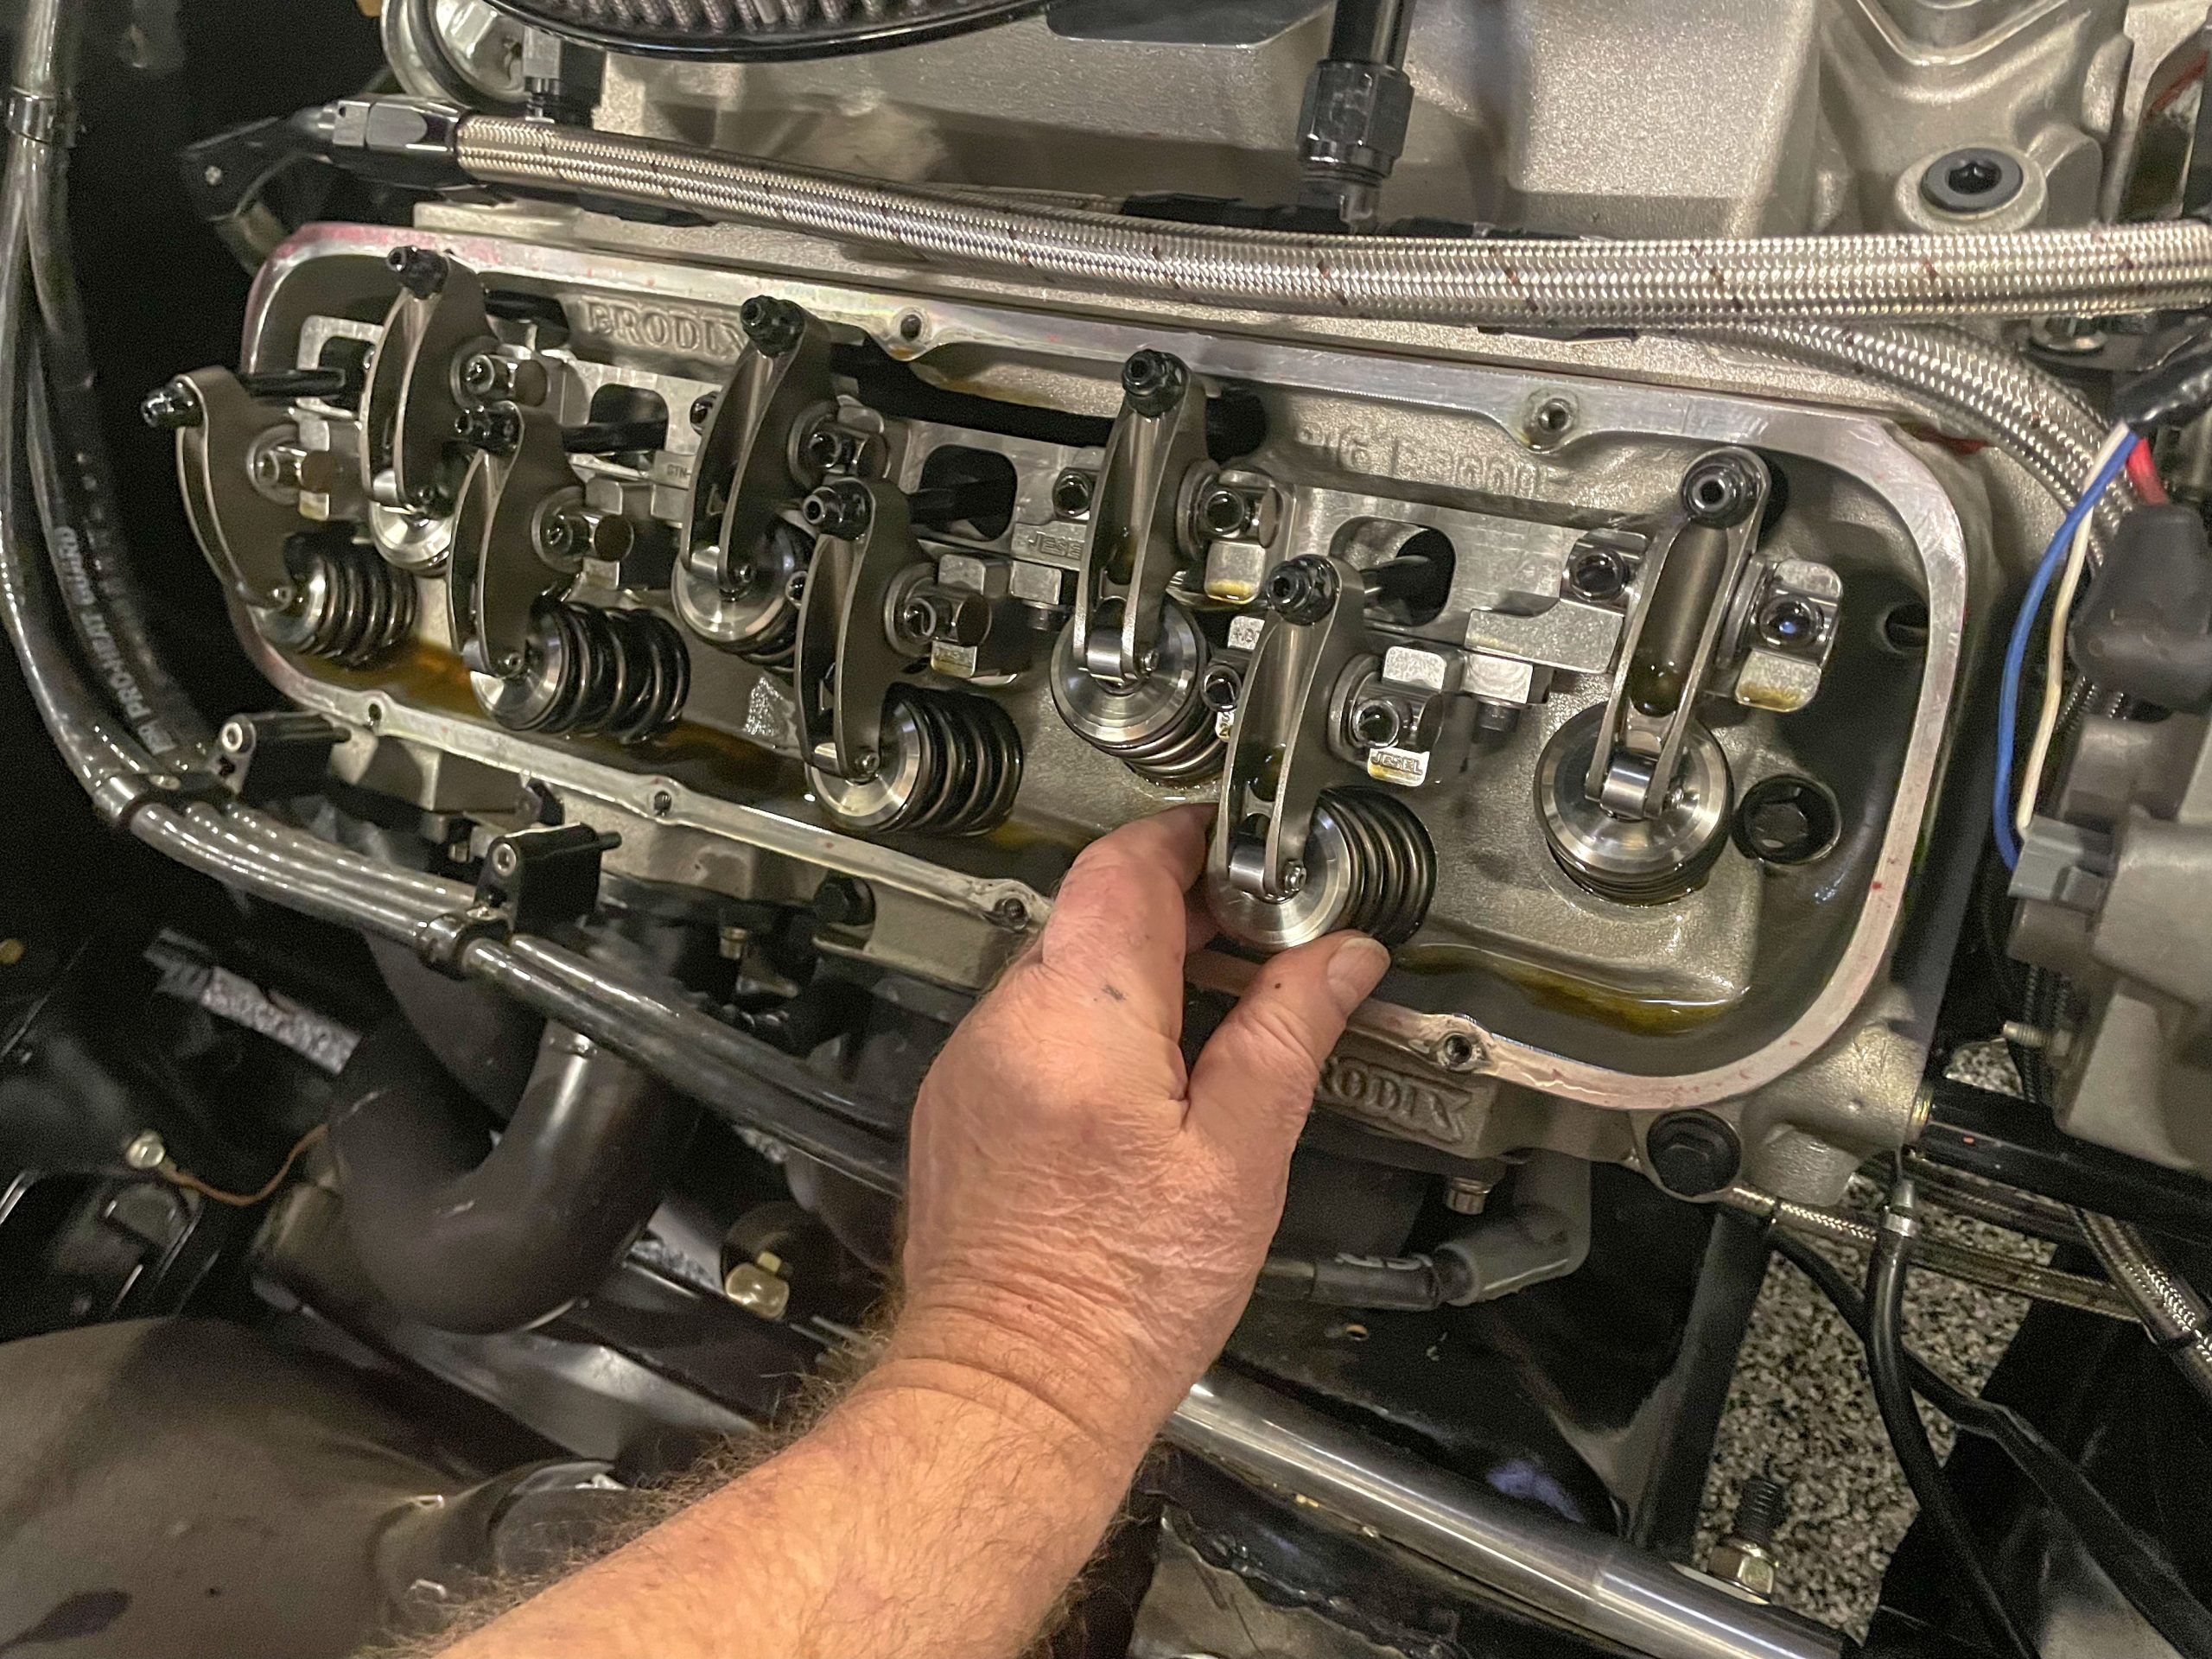
Engine, Valvetrain & Fuel System
In my case, I always back off the valves. With a big cam and a lot of valve spring pressure, it’s easier on valvetrain pieces—including those springs, rockers, and lifters. With some cars that use a shaft rocker, it’s not always possible to just back off the rockers. I never touch the adjusters when removing the rockers on a Jesel shaft setup.
Instead, I bump the engine and completely remove the rockers on cylinders that aren’t loaded by the cam and continue until they’re all removed (and be sure to number which cylinder and valve the rockers came from). In the spring, the rockers can be reinstalled and there’s not even a need to reset the lash. Since the rockers are off, there’s plenty of room to inspect each valve spring for damage and inspect the seals. You can also remove and replace each pushrod and check for wear issues or damage.
The fuel system is important too. If you use gasoline additives (octane boosters) or gasoline with alcohol in it, it’s a good idea to drain the tank and flush out the fuel pump, regulator(s), and carburetors. The additives and alcohol can raise havoc with fuel lines too (even braided steel line). Some folks just add gas stabilizers. But some gasolines are much more stable than others. It’s your call.
Battery, Brakes & Cooling
With an electrical system, it’s good idea to give it a visual inspection for abrasion damage or other issues. I regularly check the battery—and while I don’t trickle charge the battery on this car, I do put it on a slow charge every month or so.
If the brake fluid in your car is old, consider flushing the system and replacing it. Brake fluid can absorb moisture and that’s why some cars are susceptible to caliper, caliper piston, and wheel cylinder corrosion. Flushing it is often a pain, but a power or speed bleeder can reduce the agony.
Finally, inspect the cooling system. We’ve looked at cooling issues in various articles over the past year. Keep in mind that coolants can wear out. It’s not a big job to flush the system.
***
As you can see, there are quite a few things to consider when you put your hot rod away for off-season idle time. Some are big tasks. Others take a few minutes. Bottom line here is, it’s easier to catch an issue now than to fix the carnage later. For a closer look, check out the following photos:


Sweet car! Great article
Excellent tips. While many are dreaming of going faster. Getting loader and looking nice we forget about the “basics “. Now is the bed time to check on them before spending time and money only to find failure due to an inexpensive oversight.