Excessive exhaust noise is something few of us ever consider (I certainly didn’t), but today many jurisdictions place limits on the amount of noise a car, truck, or motorcycle can emit.
Typically, those limits regulate the number of decibels the vehicle can produce. In addition to the max dBs, the regulations usually spell out the location where test equipment is situated in relation to the vehicle, and in some cases, lay out a range of engine speeds for the test.
For the most part, the laws take into account only one major component of decibel measurement and that’s “L-Max.” L-Max along with L-Min parameters aren’t all that tough to grasp. They’re simply the highest and lowest values measured by the decibel meter over a given period of time.
You may also enjoy this article: Hearing Protection For Hot Rodders & Racers
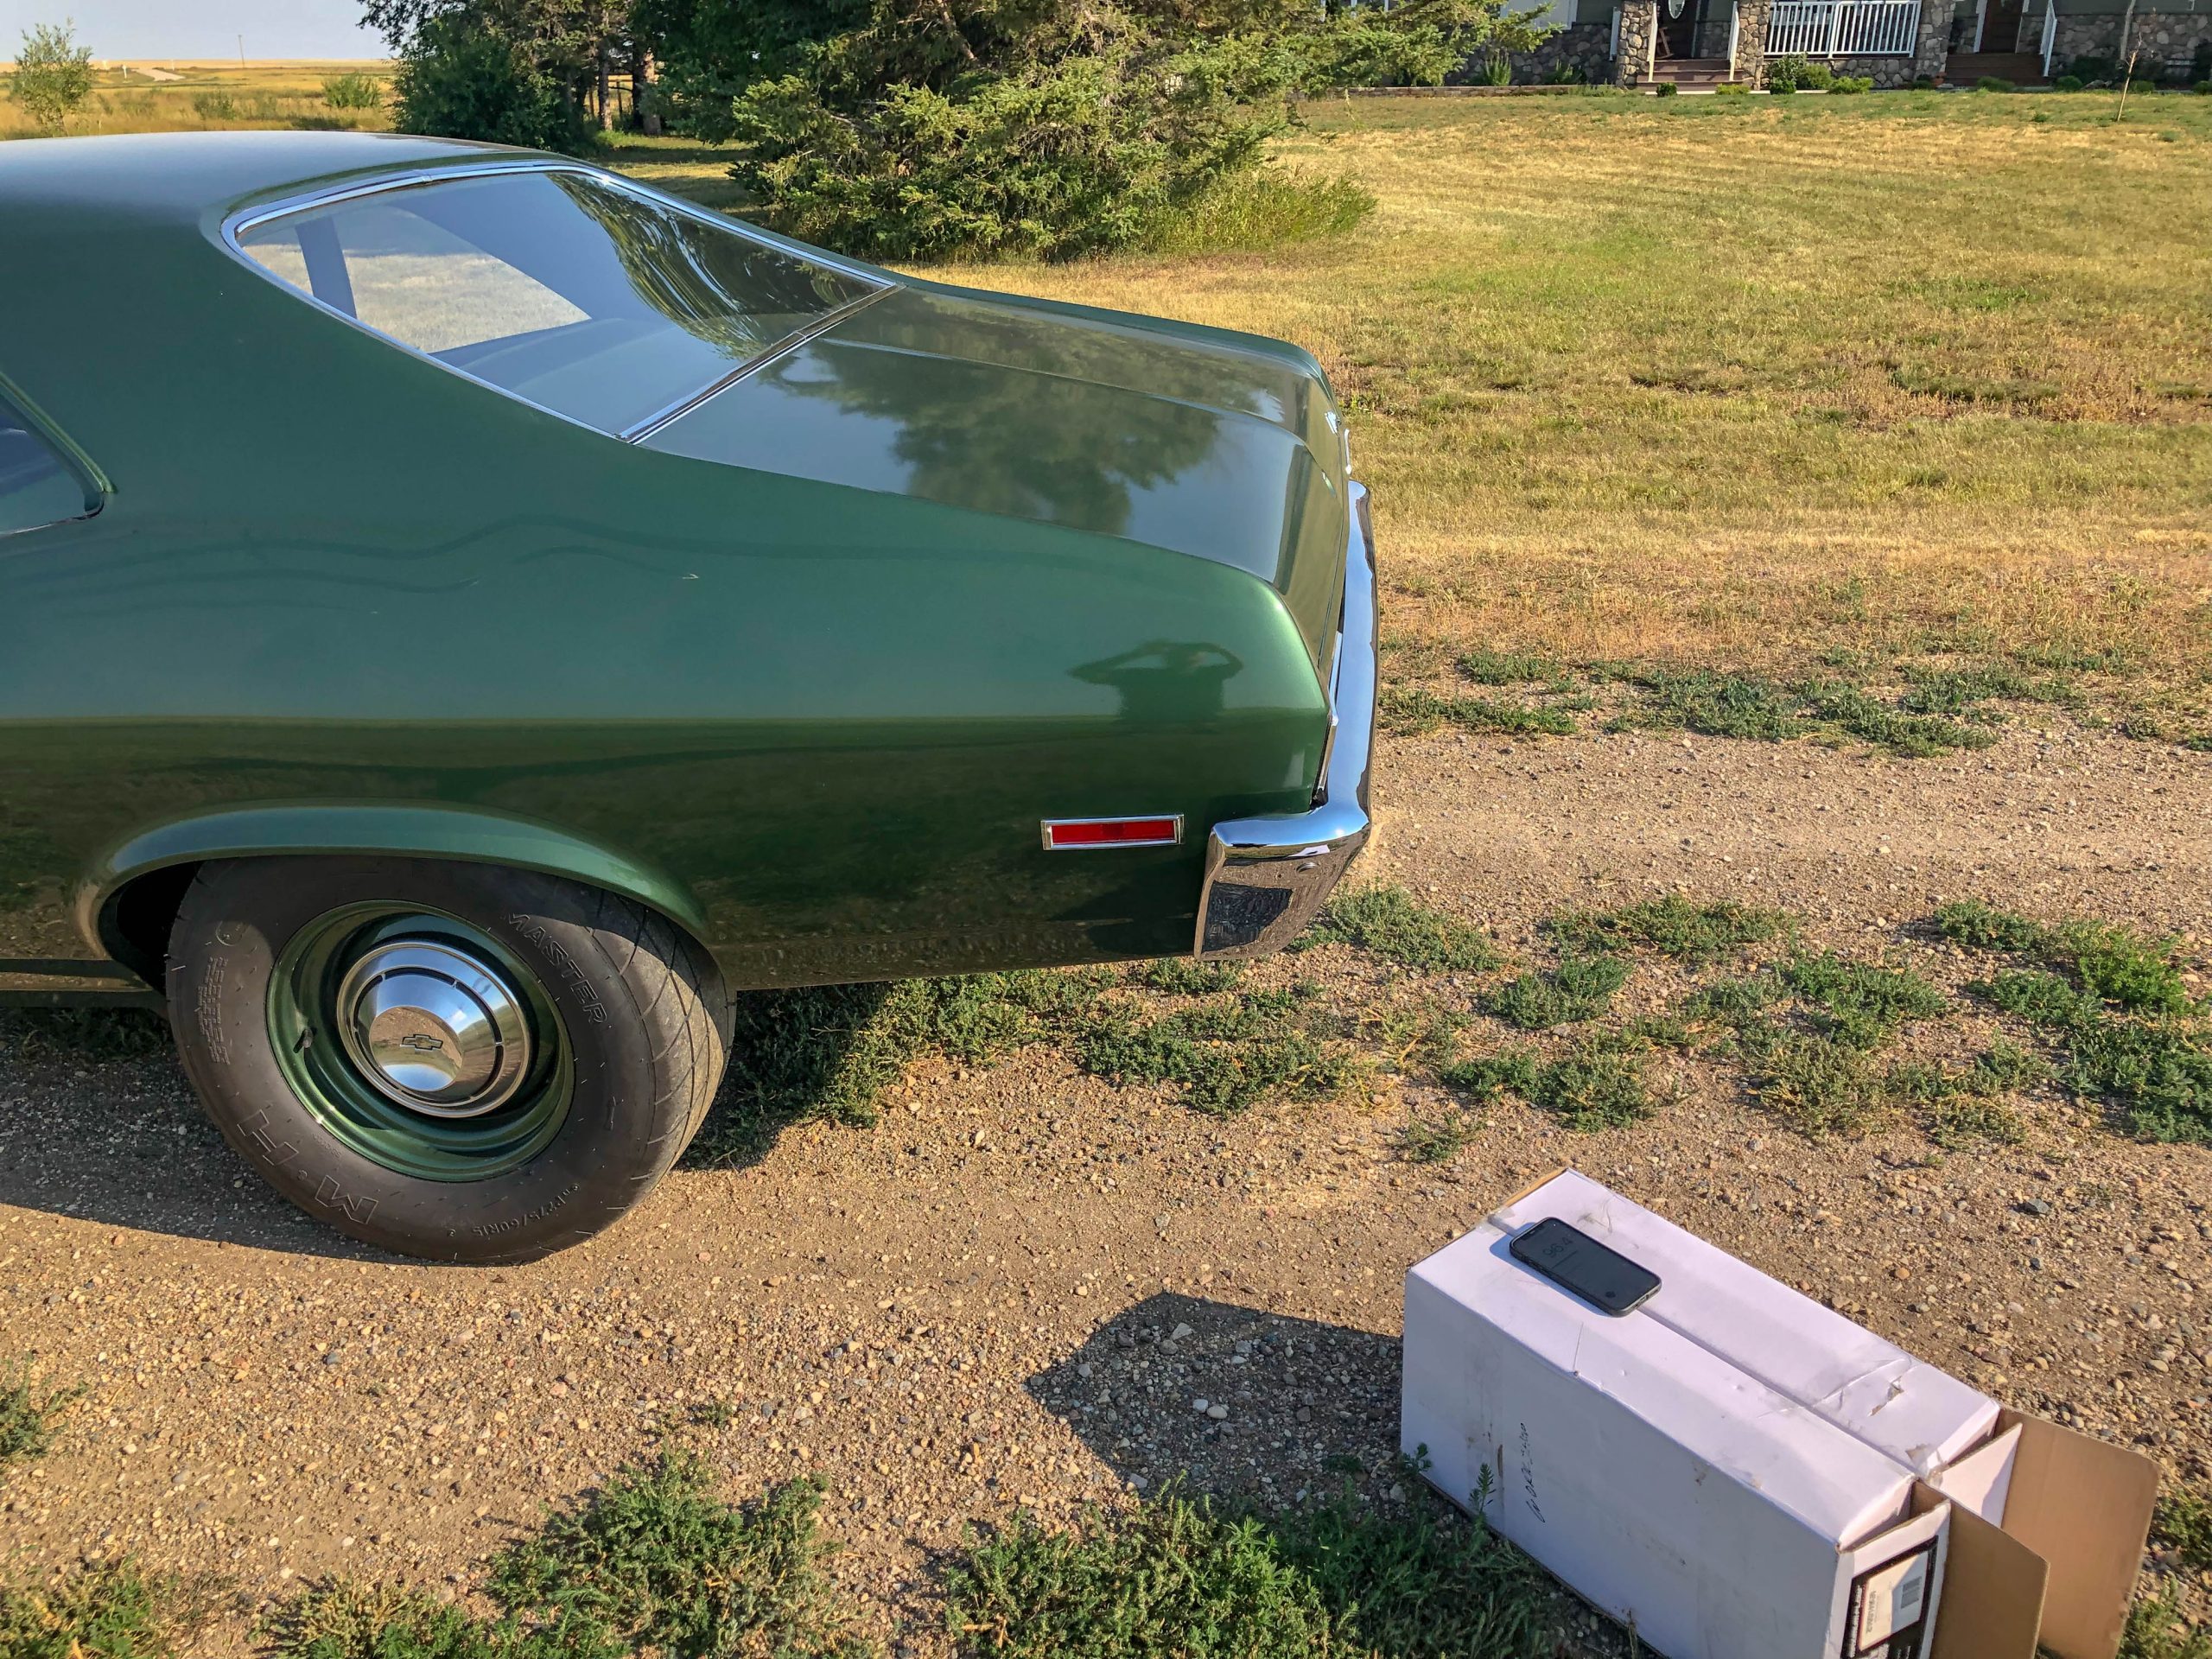
As noted above, I’ve never taken much of an interest in the maximum decibels produced by my cars. But during my last project, I decided to move halfway across the country—starting the build on the west coast before finishing it in the heartland.
While I was finally finishing the car, the government decided to impose a decibel limit on vehicles.
Essentially, the exhaust system was done and I wasn’t excited about making major changes. It was a simple arrangement: Headers with slip on tubes terminating into a bolt-on four inch collector and a slip on reducer on each side. From there it went into a three inch diameter Hooker headers “X” cross over into a pair of three inch inlet/outlet Hooker VR304 mufflers with turnouts welded to the end. The mufflers were located under the back seat and the turnouts dumped just ahead of the rear axle.
So what about the decibel limit? In my case, the government dB limit is 101.3 (using the L-Max scale). 103.3 dB is a fail. There is some wiggle room though. If the car is under 103.3 but over 101.3 dB, you’ll get by with a warning.
Fair enough. I knew from driving my car that it’s pretty loud. But how loud is loud? I answered that by simply downloading a dB app for my smartphone. As it turns out, these are the numbers I came up with (using the government test procedures), and they’re high:
- L-Max: 104.7 dB
- L-Aeq: 97 dB
- LC Peak: 132.2 dB
- TWA: 74 dB
The only number I’m concerned with is L-Max. Clearly, my car failed (big time).
What could I do?
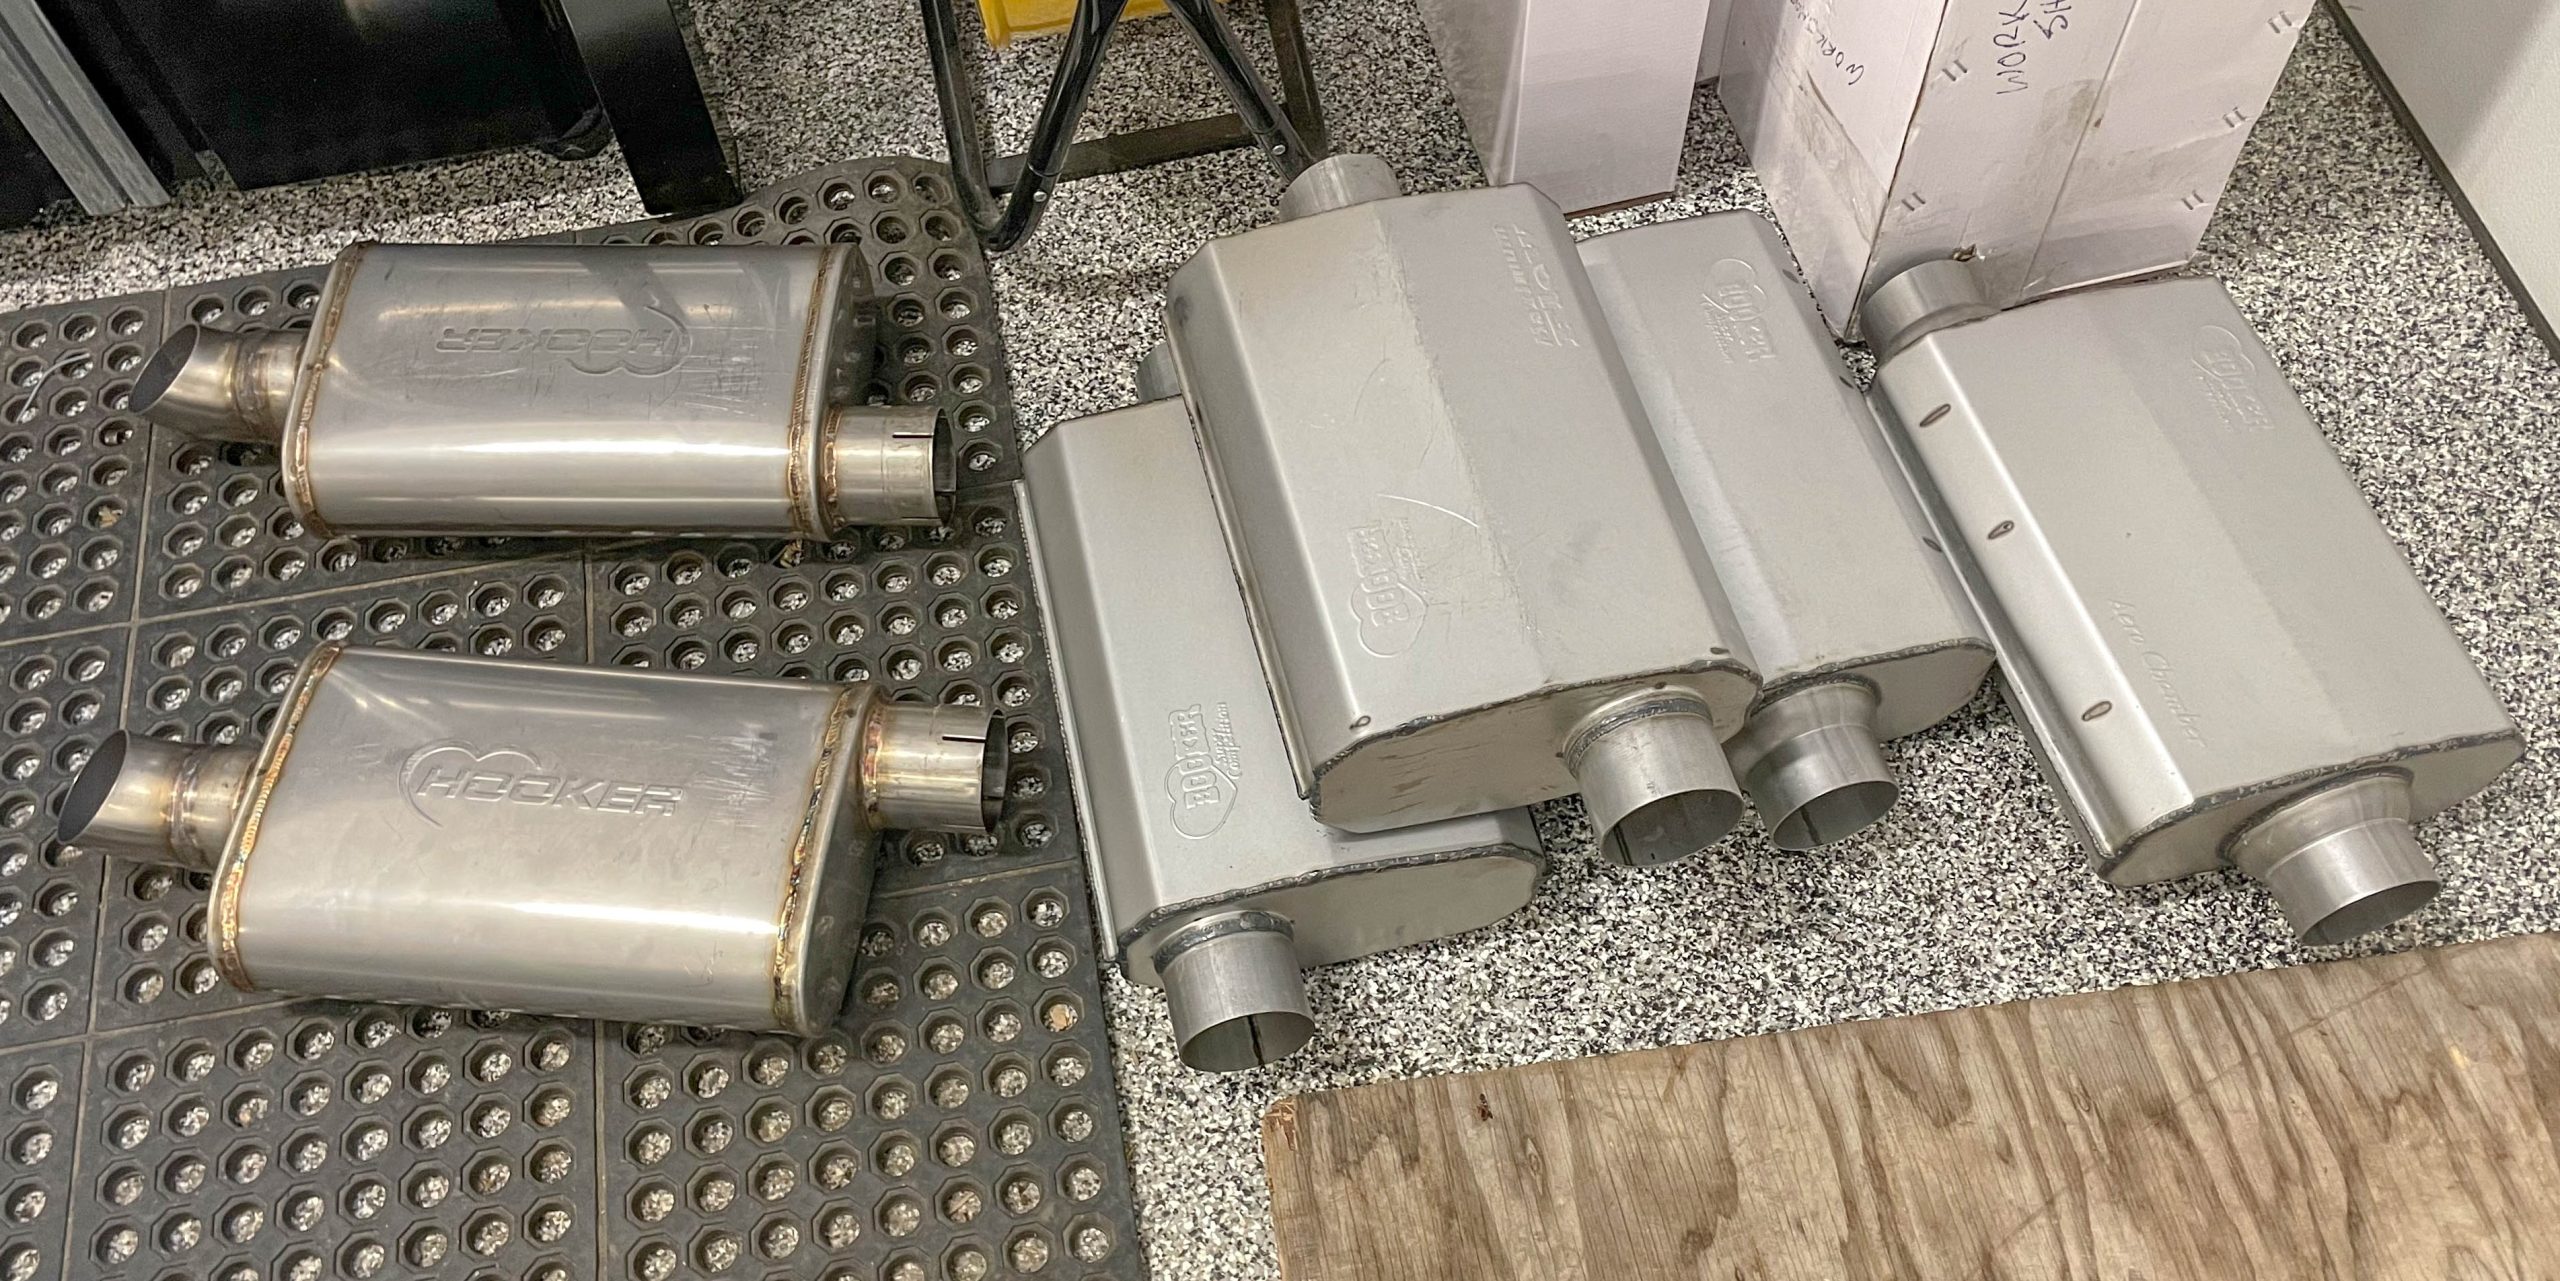
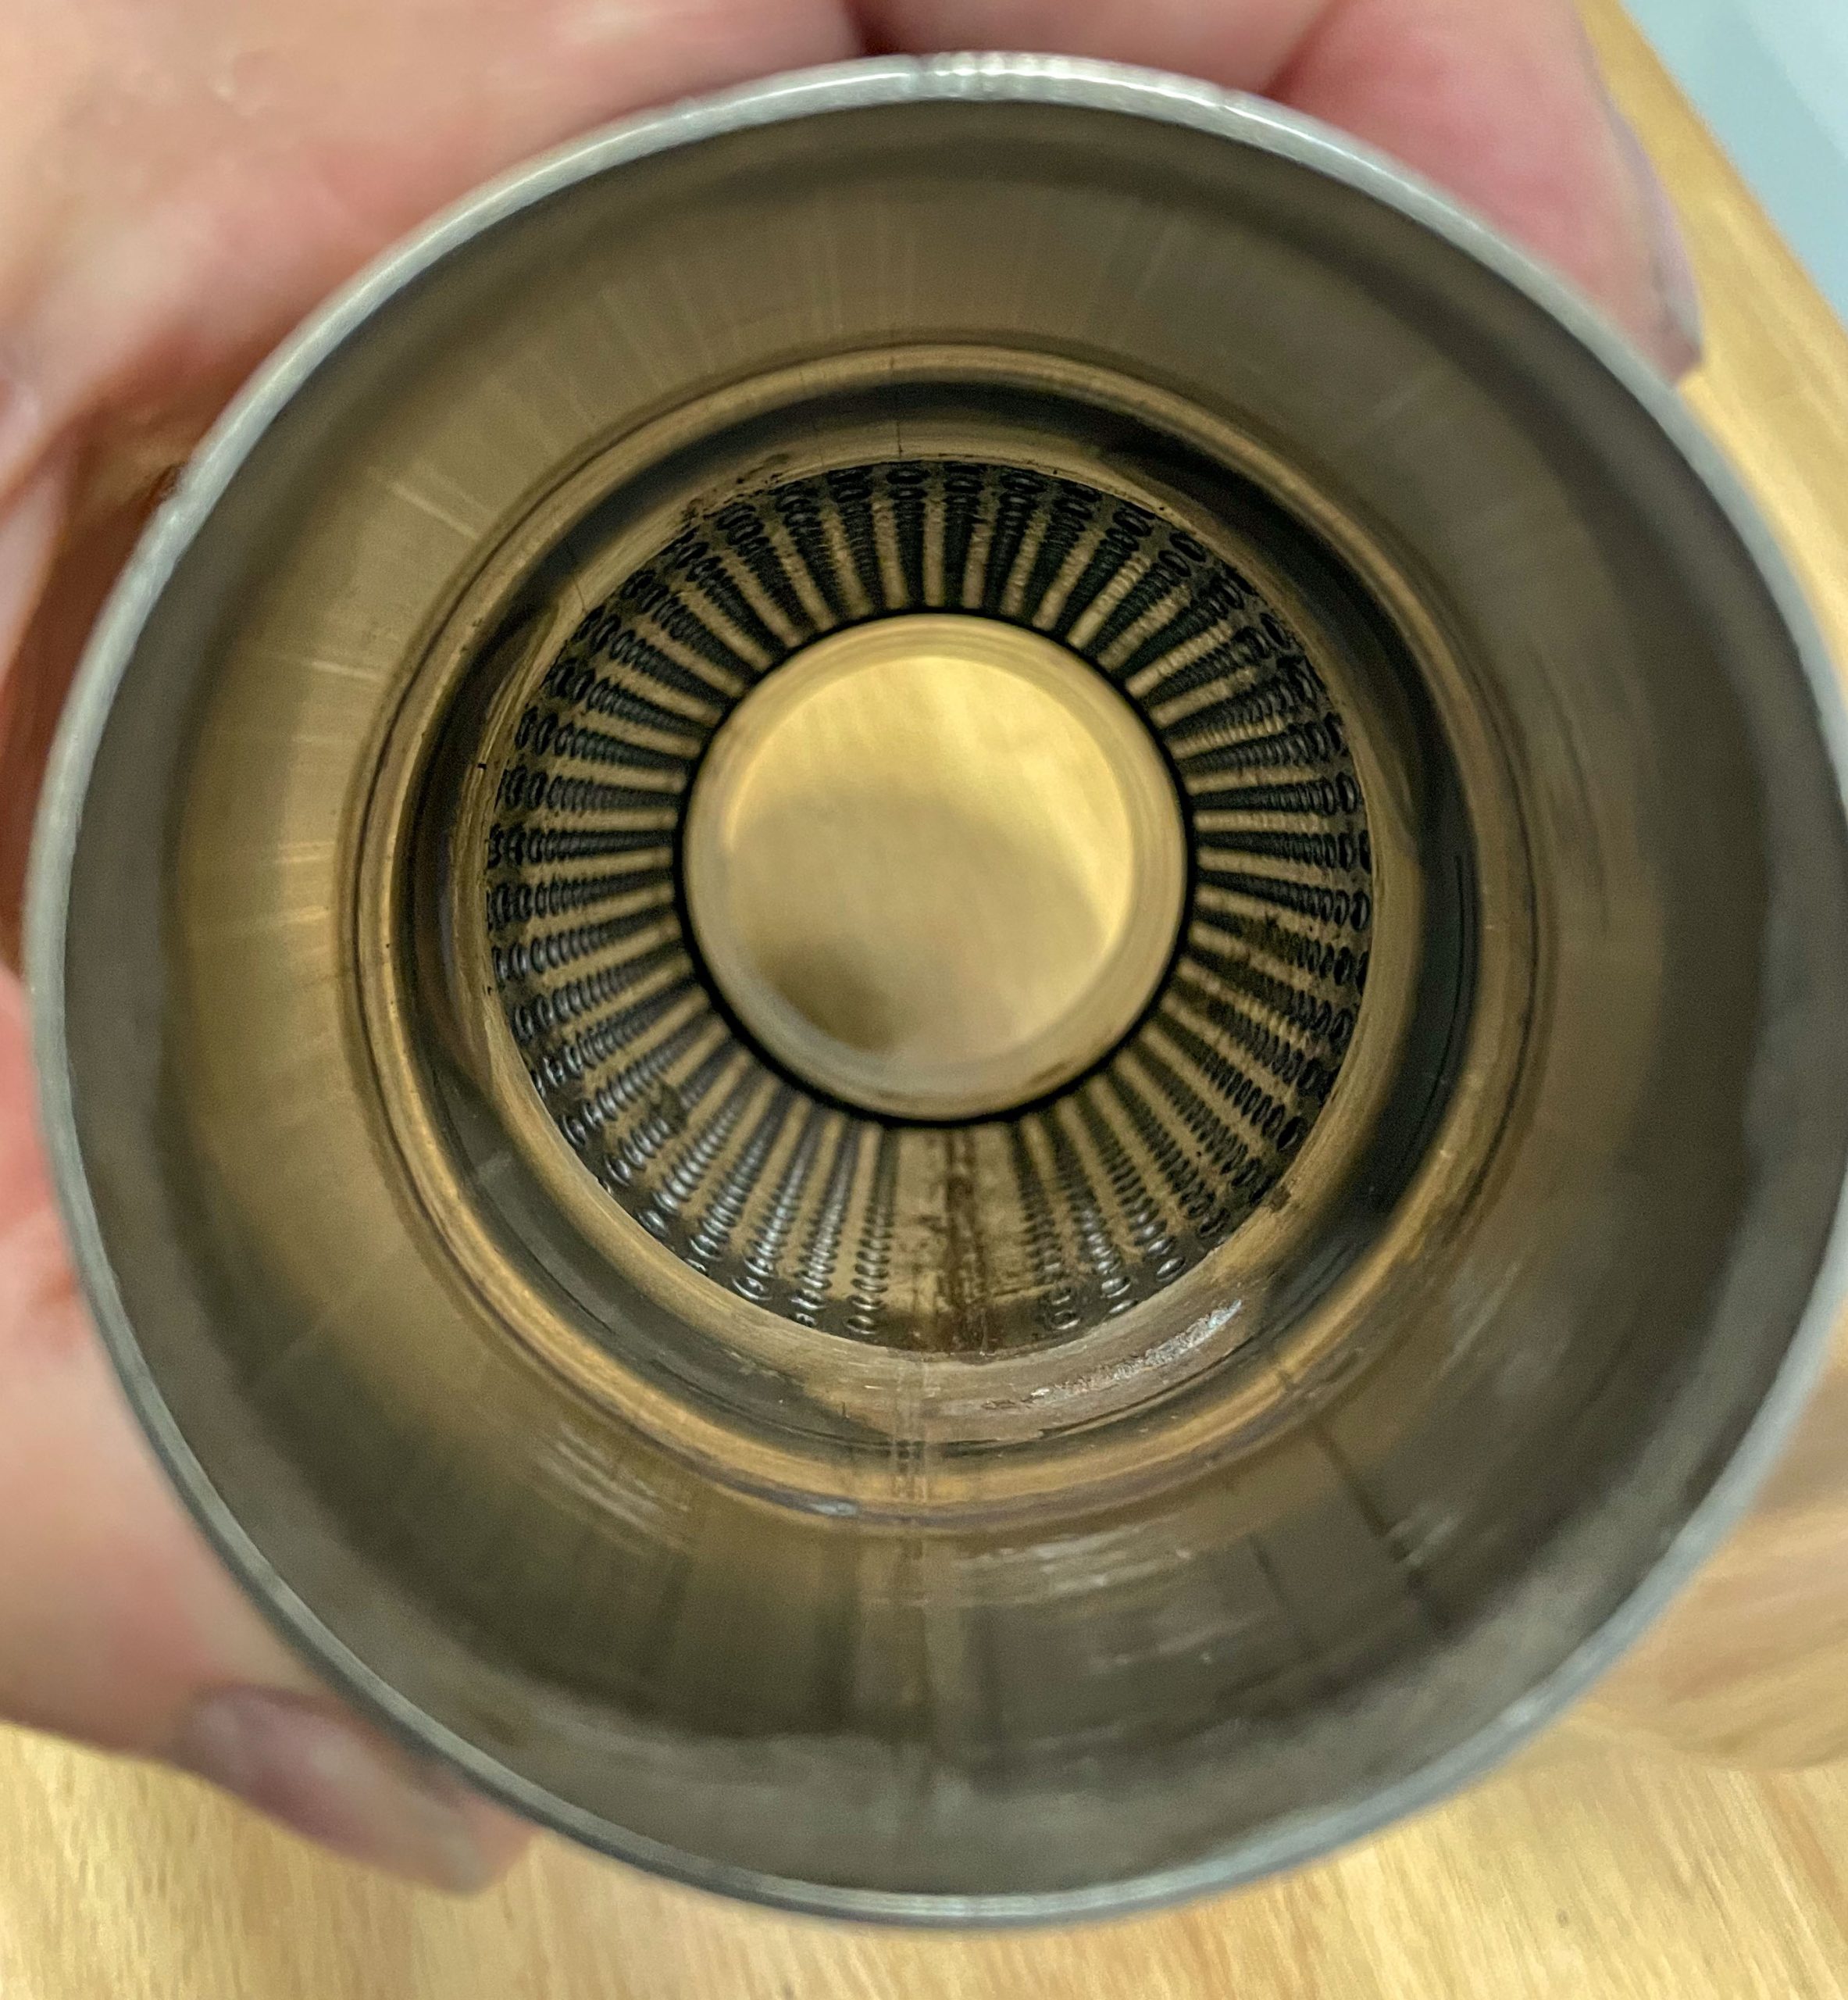
In my parts stash, I had a set of three inch tail pipes with hangers. I also had two other sets of three inch Hooker mufflers. One set was a Hooker Aero Chamber design and the other was a Hooker Maximum Flow configuration. Both are welded steel case mufflers. The VR series mufflers I had in the car are very similar to the Hooker MaxFlows except they’re lighter with a wrapped stainless steel case. The MaxFlow and VR304 mufflers are a straight through perforated core design with fiberglass packing. Testing by others has shown that this Hooker straight through layout is extremely efficient from a performance perspective, and most likely quieter than a chambered setup.
The first thing I did was attempt a test fit of the tail pipes. I guessed the tail pipes would help to reduce the sound (by revising the exit location). But I also knew going in that the passenger side would be extremely difficult fit and the driver side would only prove slightly easier. The dilemma here is I have a Weldon electric fuel pump mounted over the rear axle on the passenger side and there’s a large home-brewed ARB interfering on both sides. After a few hours of quality time under the car, I came to the conclusion the tail pipes weren’t going to make it.
Time for Plan B.
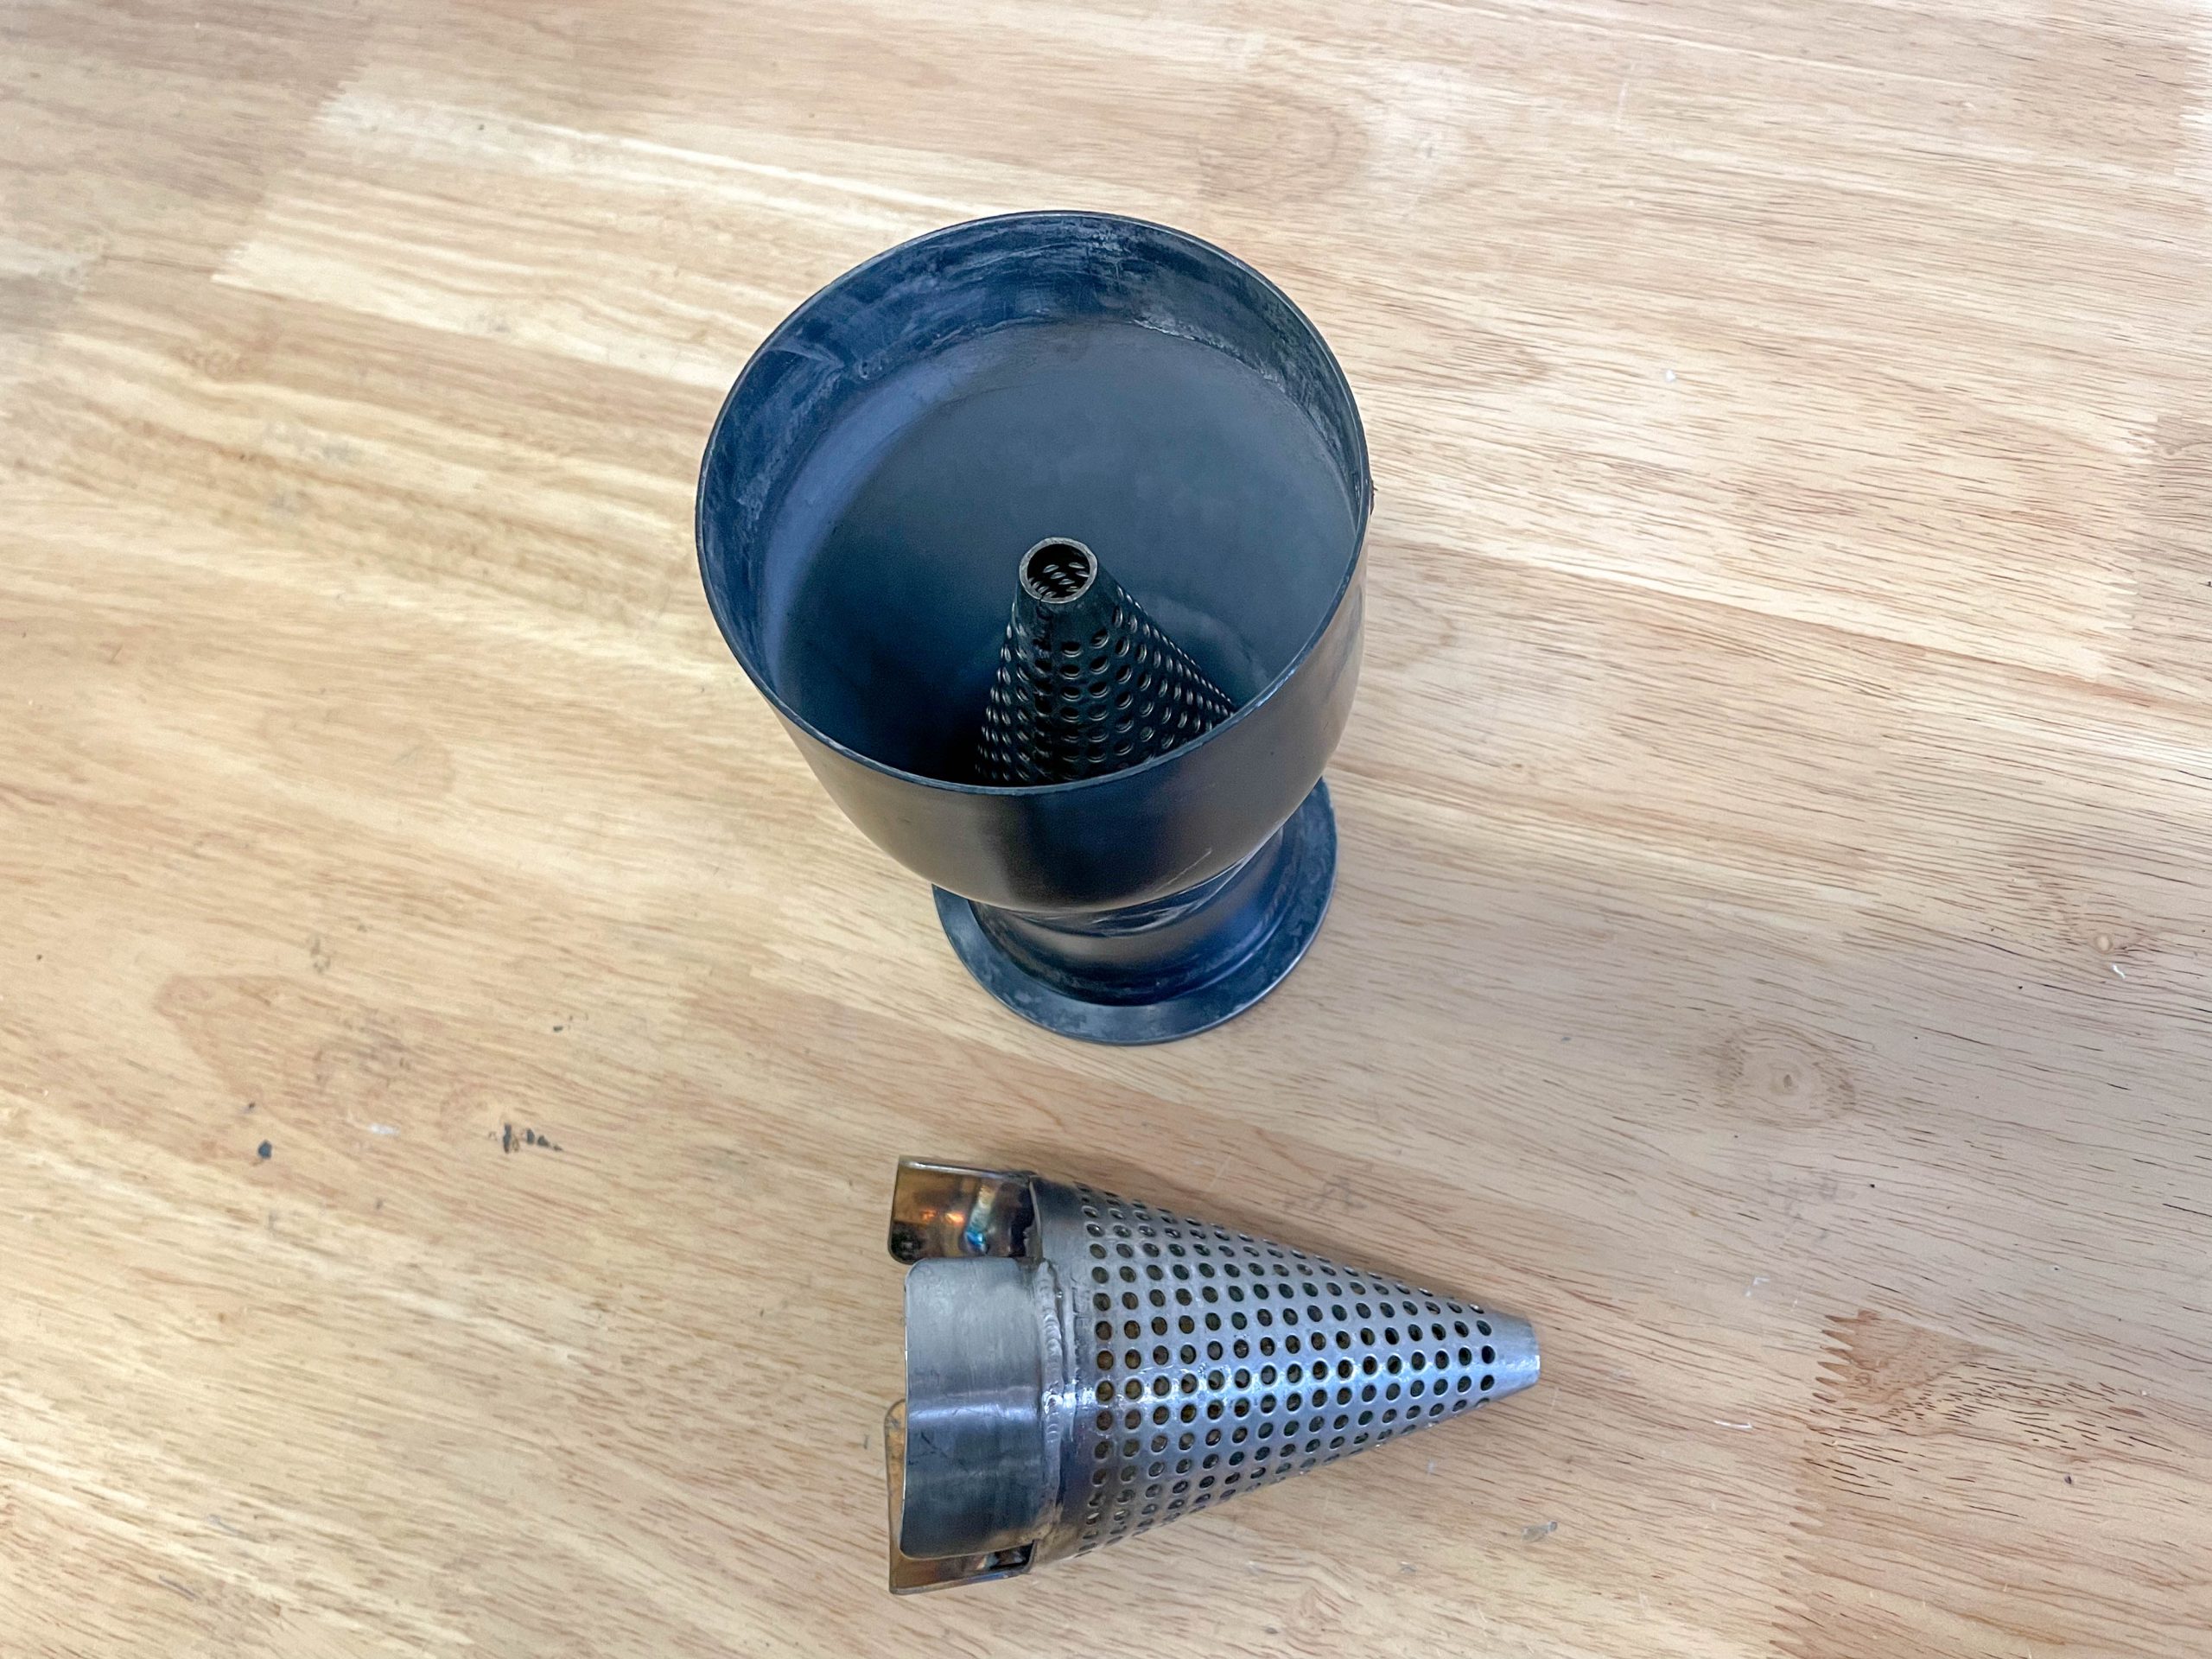
Right about here, I started to peruse SummitRacing.com for solutions. I came across several different exhaust cone dB “killers.”
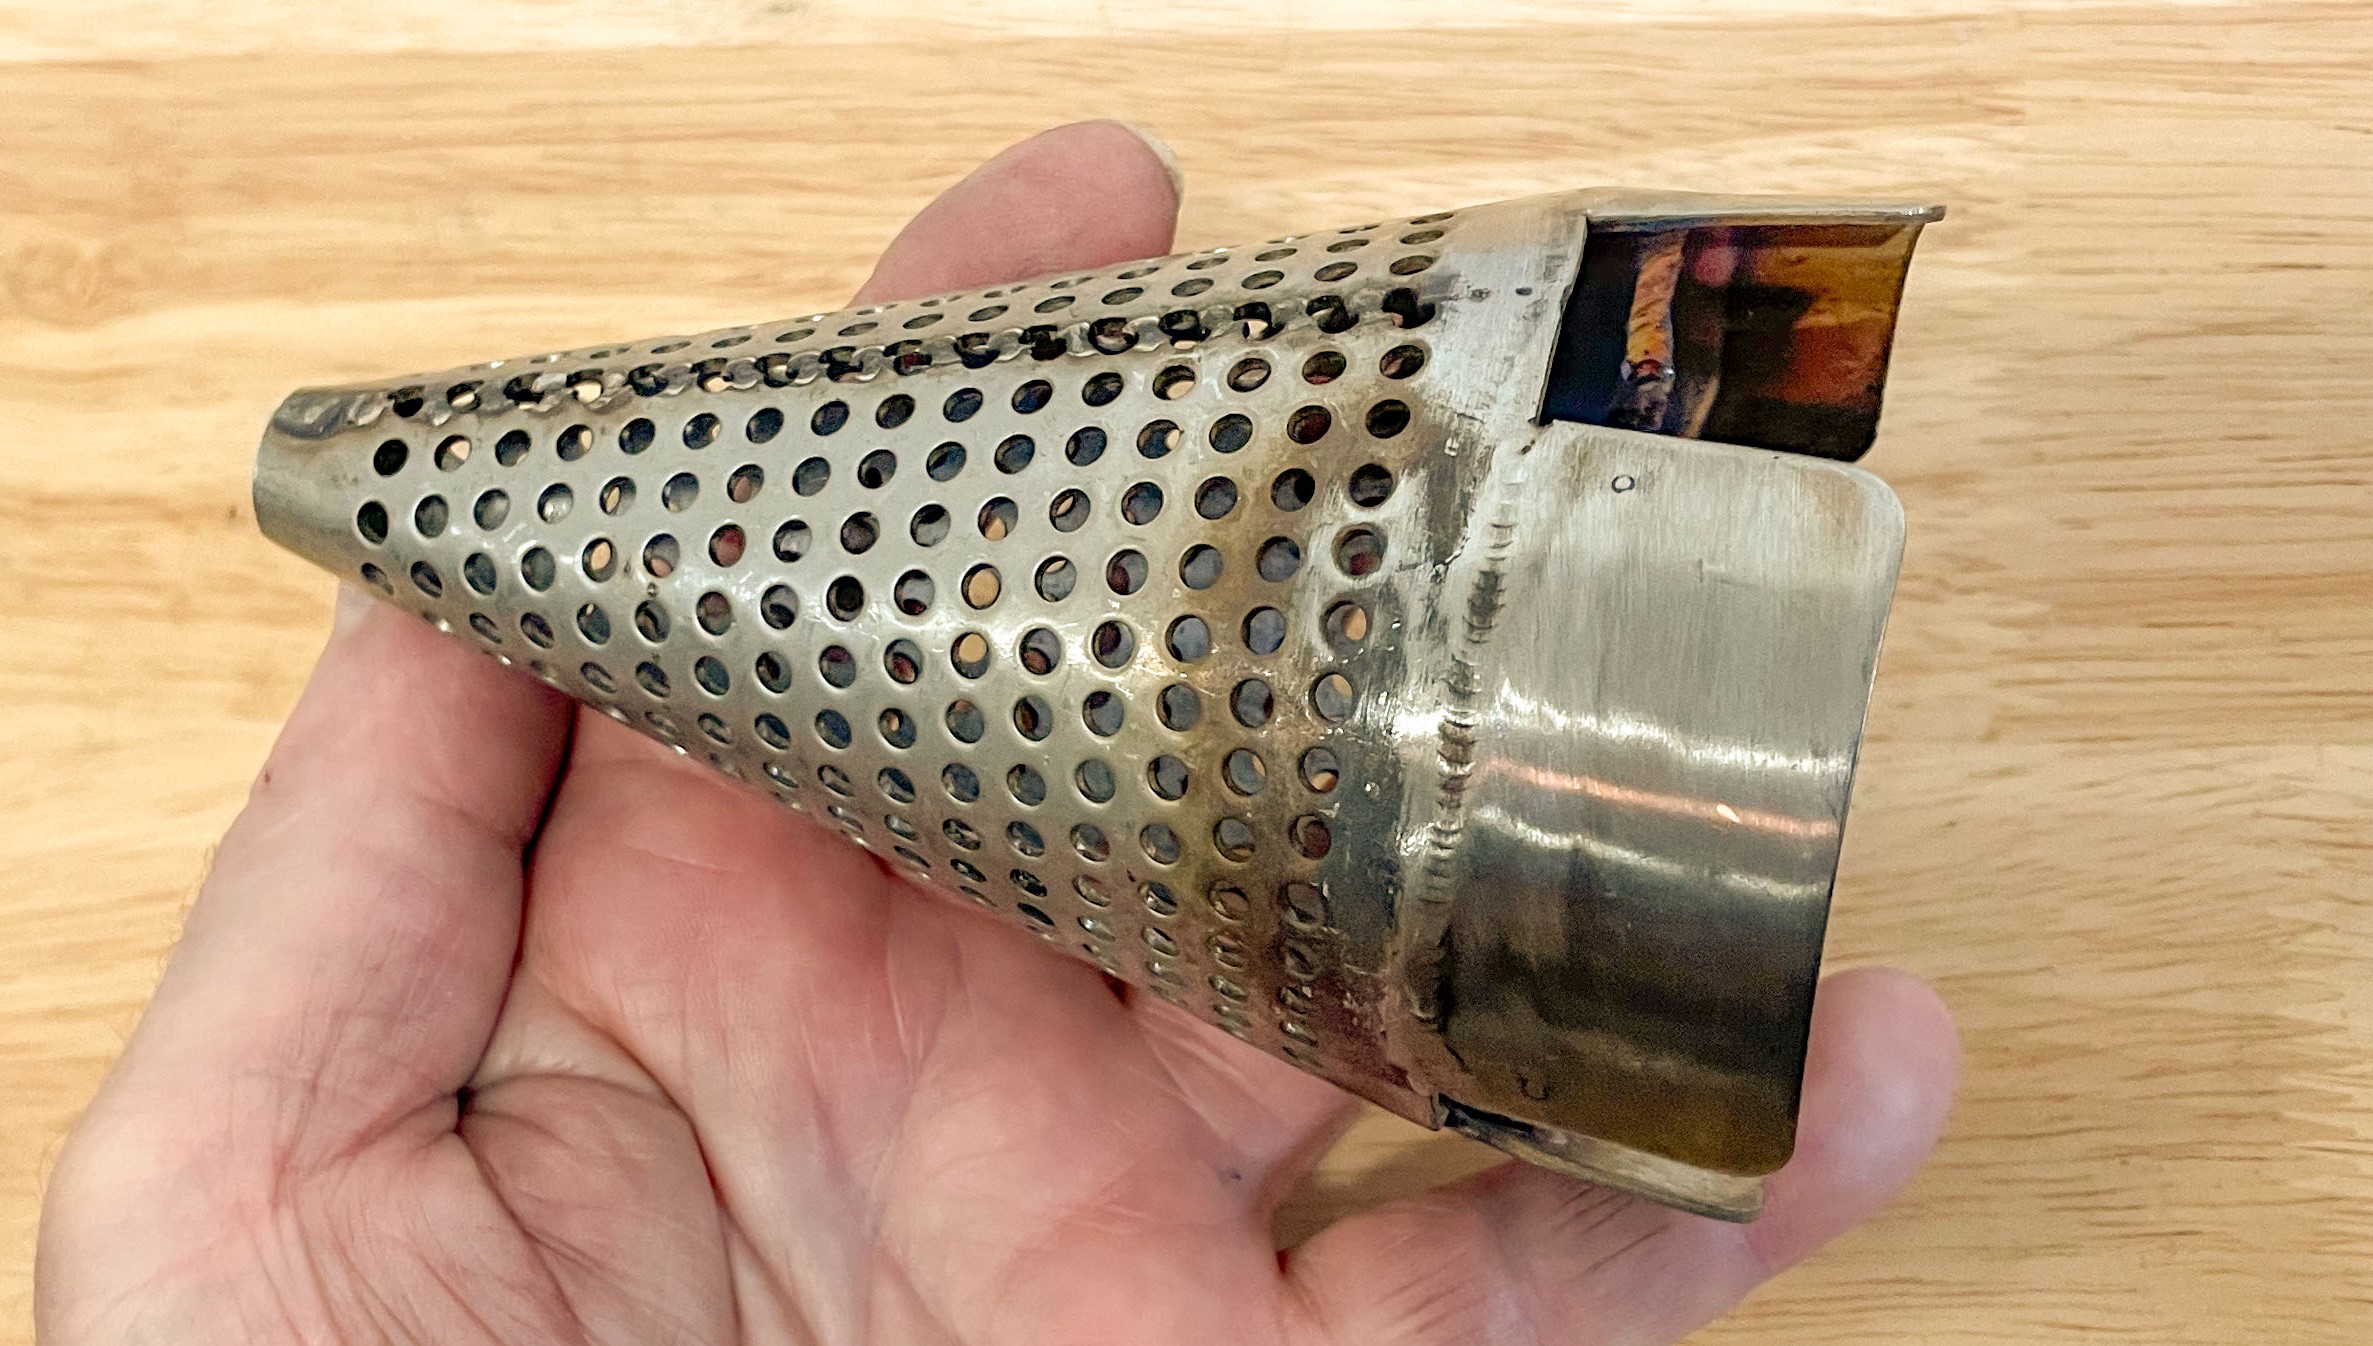
They way cones work is they help to dissipate sound energy without restricting exhaust flow. Typically, the surface area of the cone “holes” is larger than the overall diameter of the pipe they’re installed into.
I recalled in my old days at National Dragster that Dynatech had done quite a bit of research into taming the exhaust note out of a gas dragster (this was back when the NHRA was mandating mufflers). My pal, Eric Saffell at Dynatech tested a set of perforated cone inserts on a mild BBC drag motor: 720 hp peak (engine hp), 2-1/4 tubes into a four inch collector with 29 inch primaries. Back then, Eric recalls the meter was to be located at 60 feet perpendicular to the vehicle (this is a lot further away than the test parameters I was dealing with): “Seems like we tested at a few different RPMs (3,000, 3,250, 3,500) and saw a consistent two dB reduction. The project goal wasn’t to produce a quiet muffler, rather to fit the requirements of the sanctioning body.”
Cones were definitely “in” when it came to my to-do list.
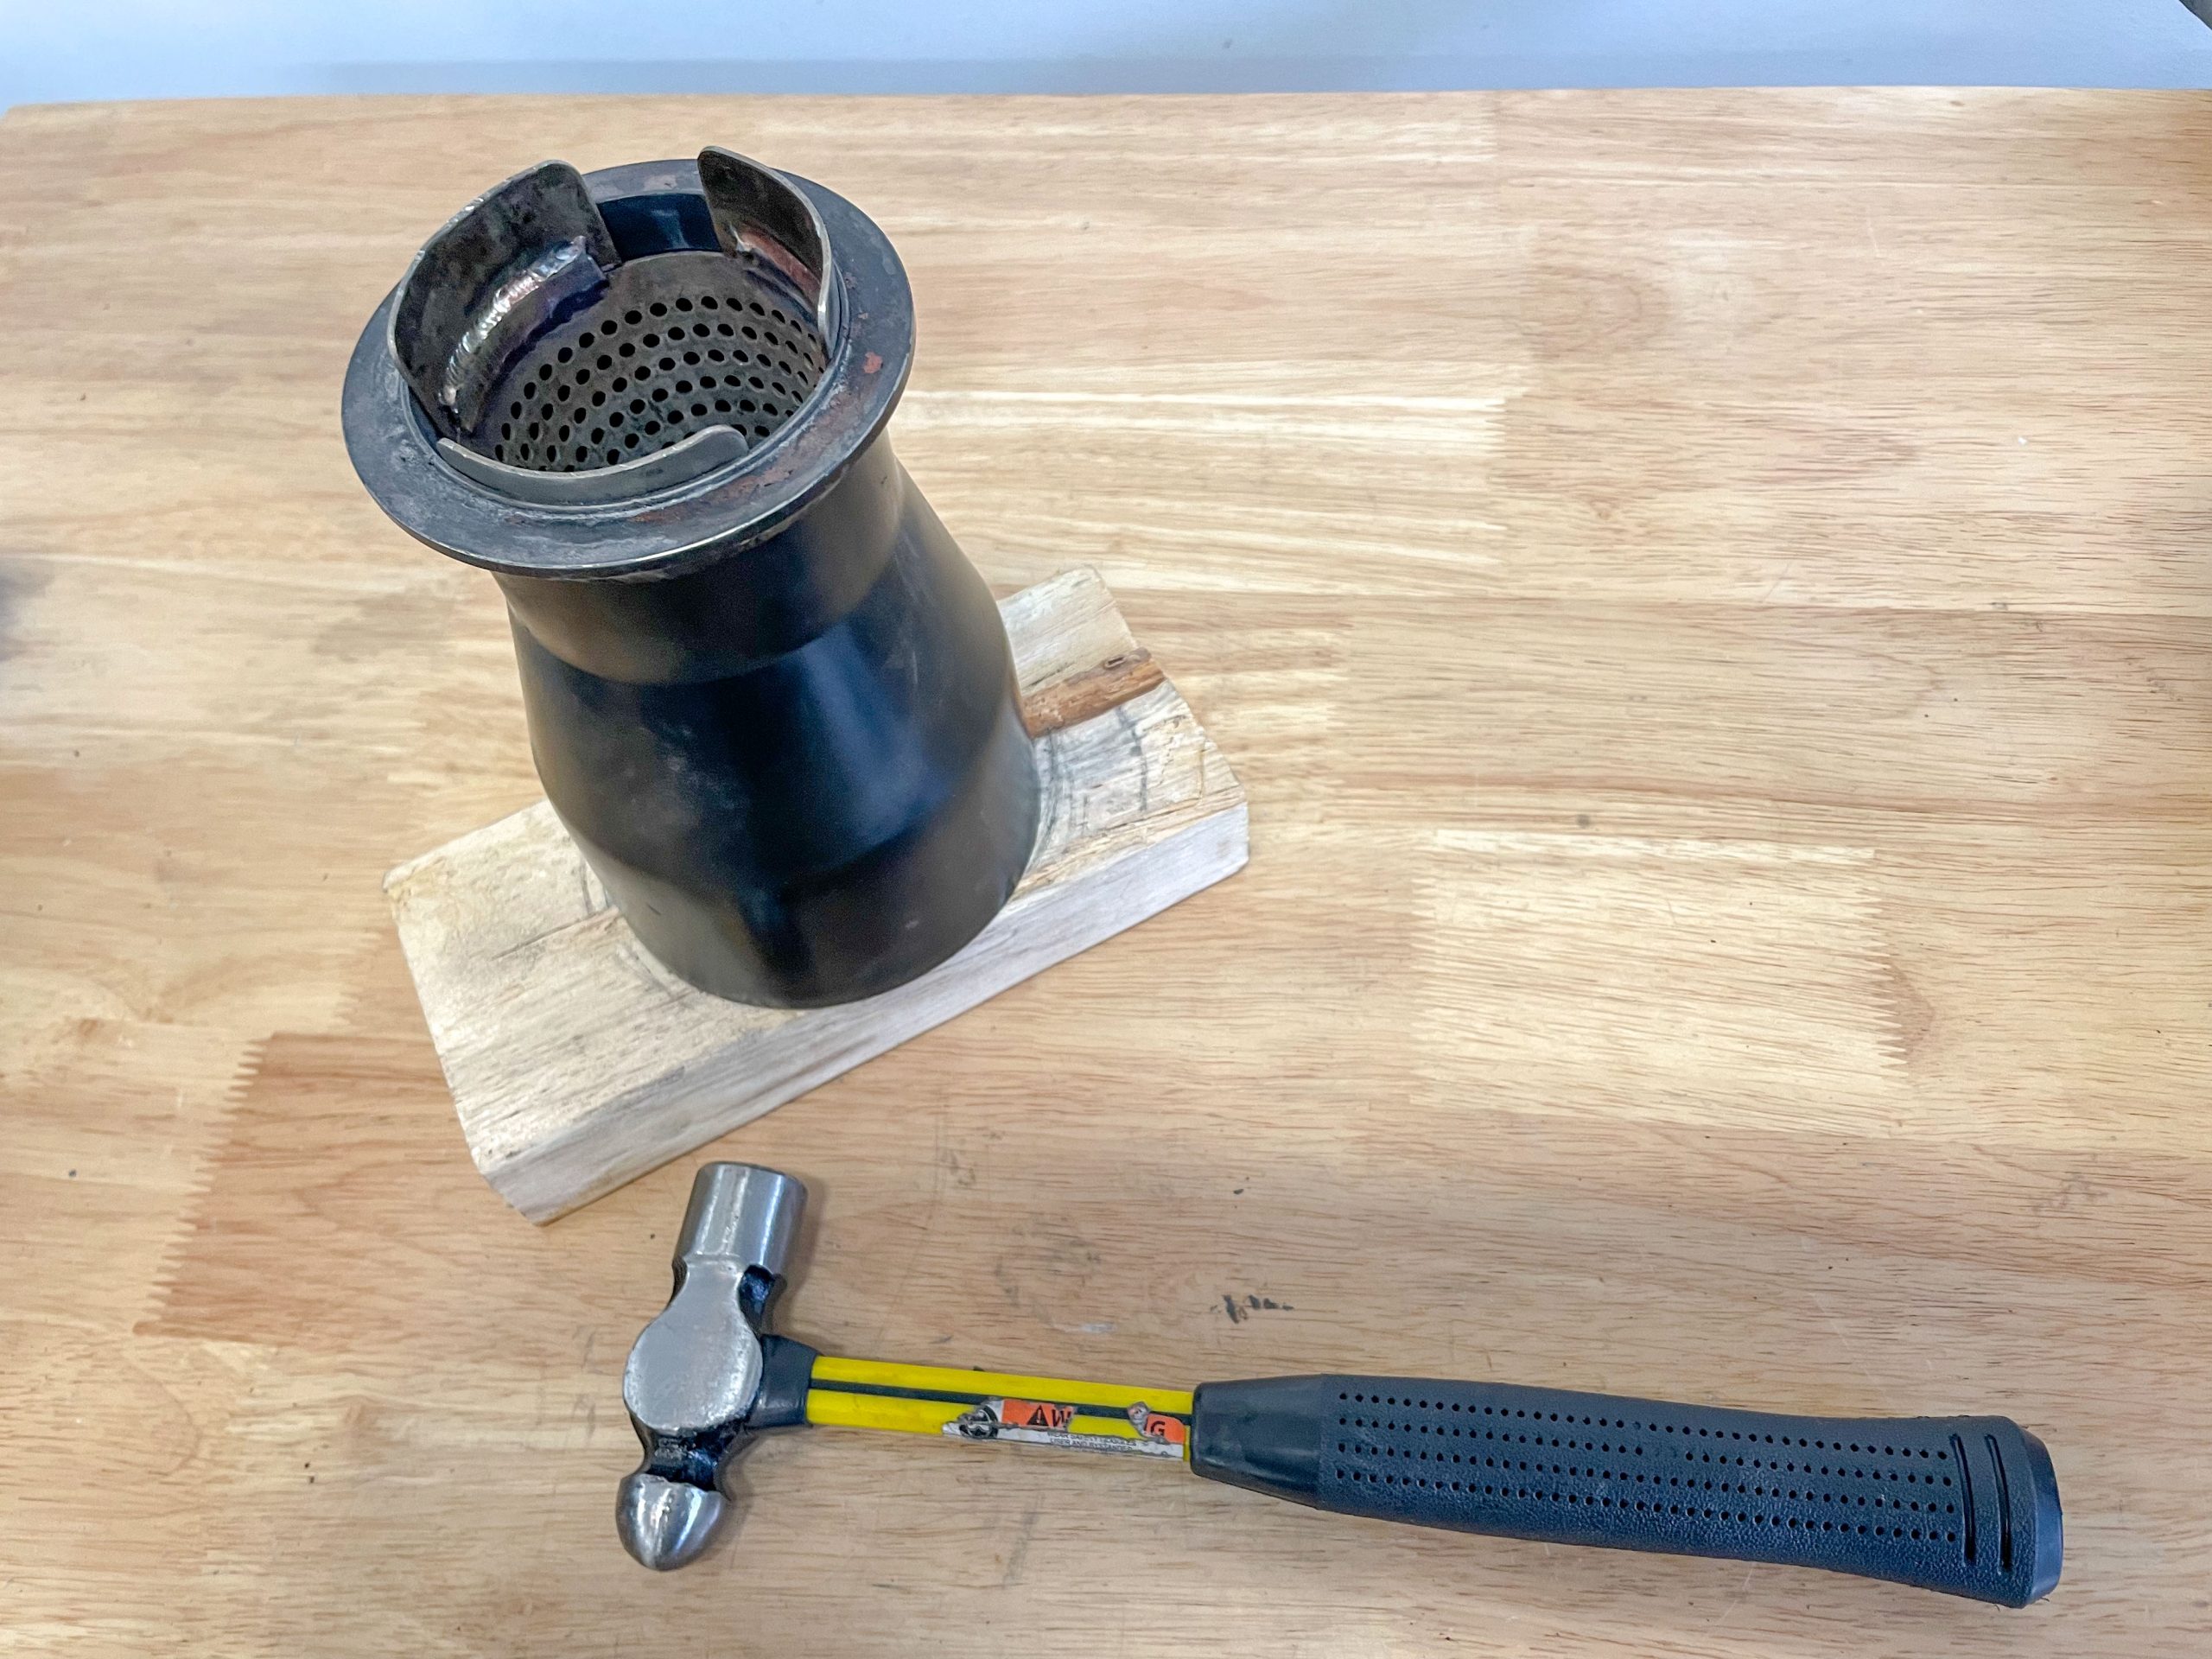
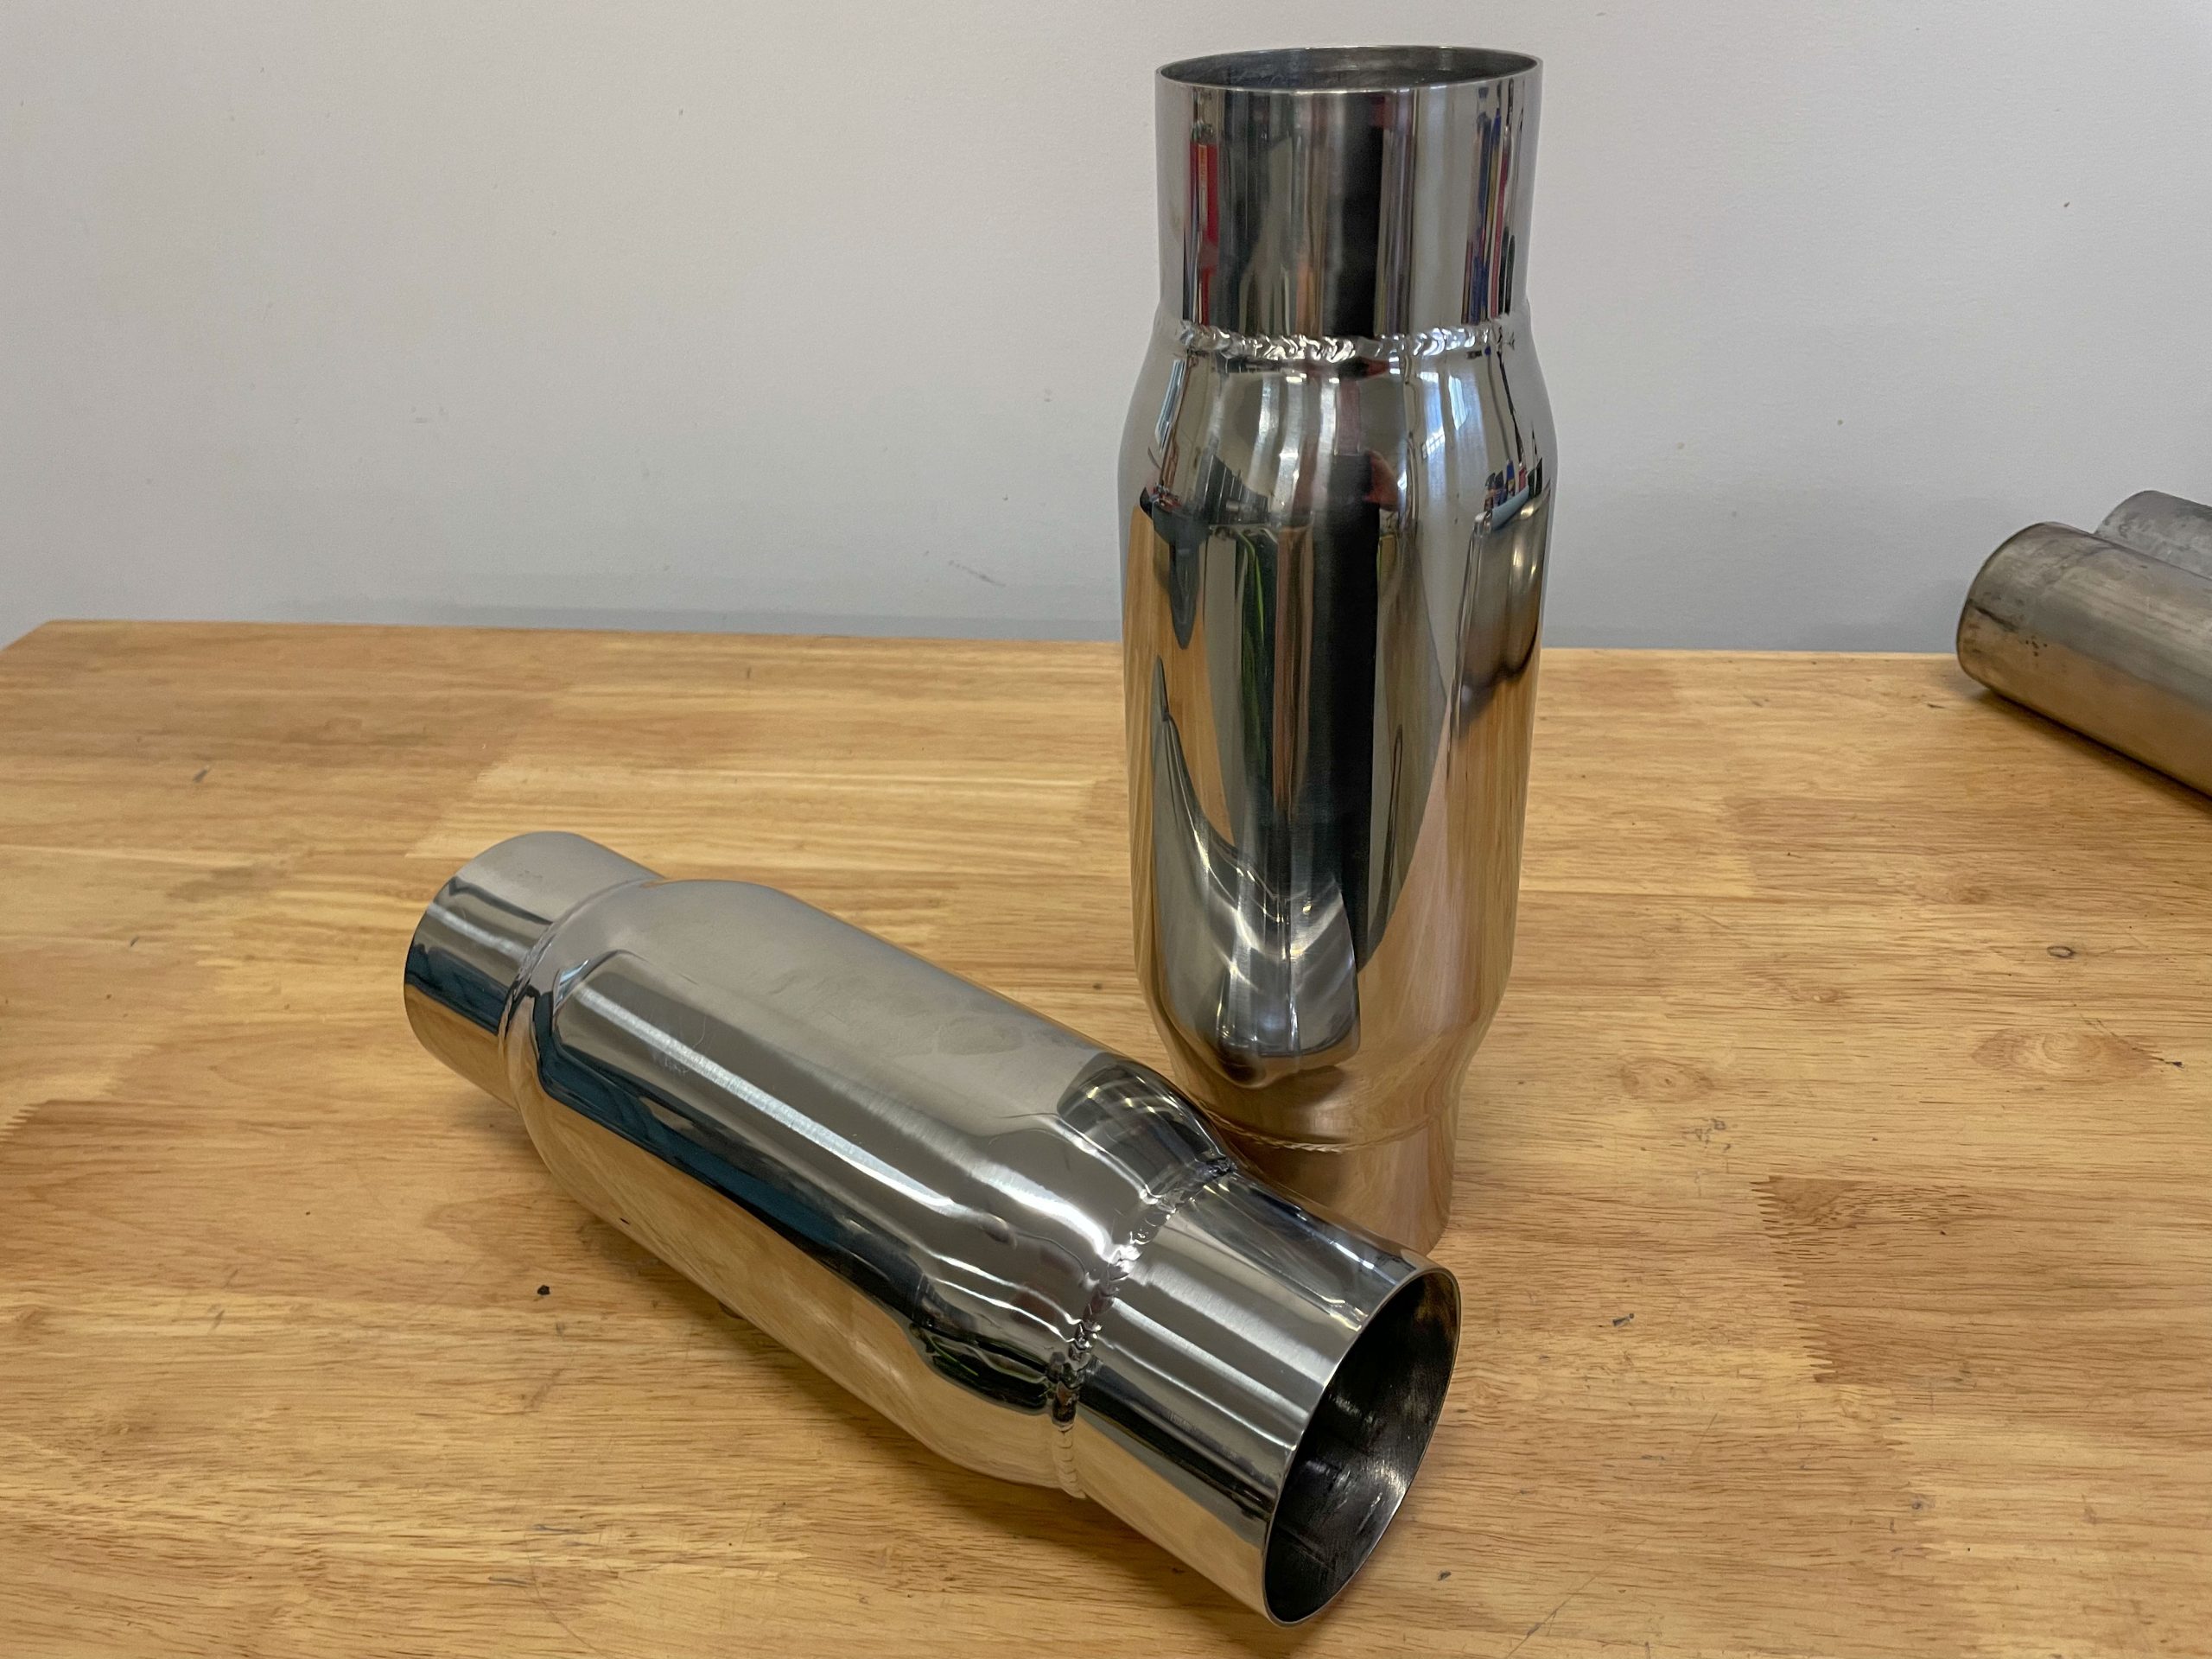
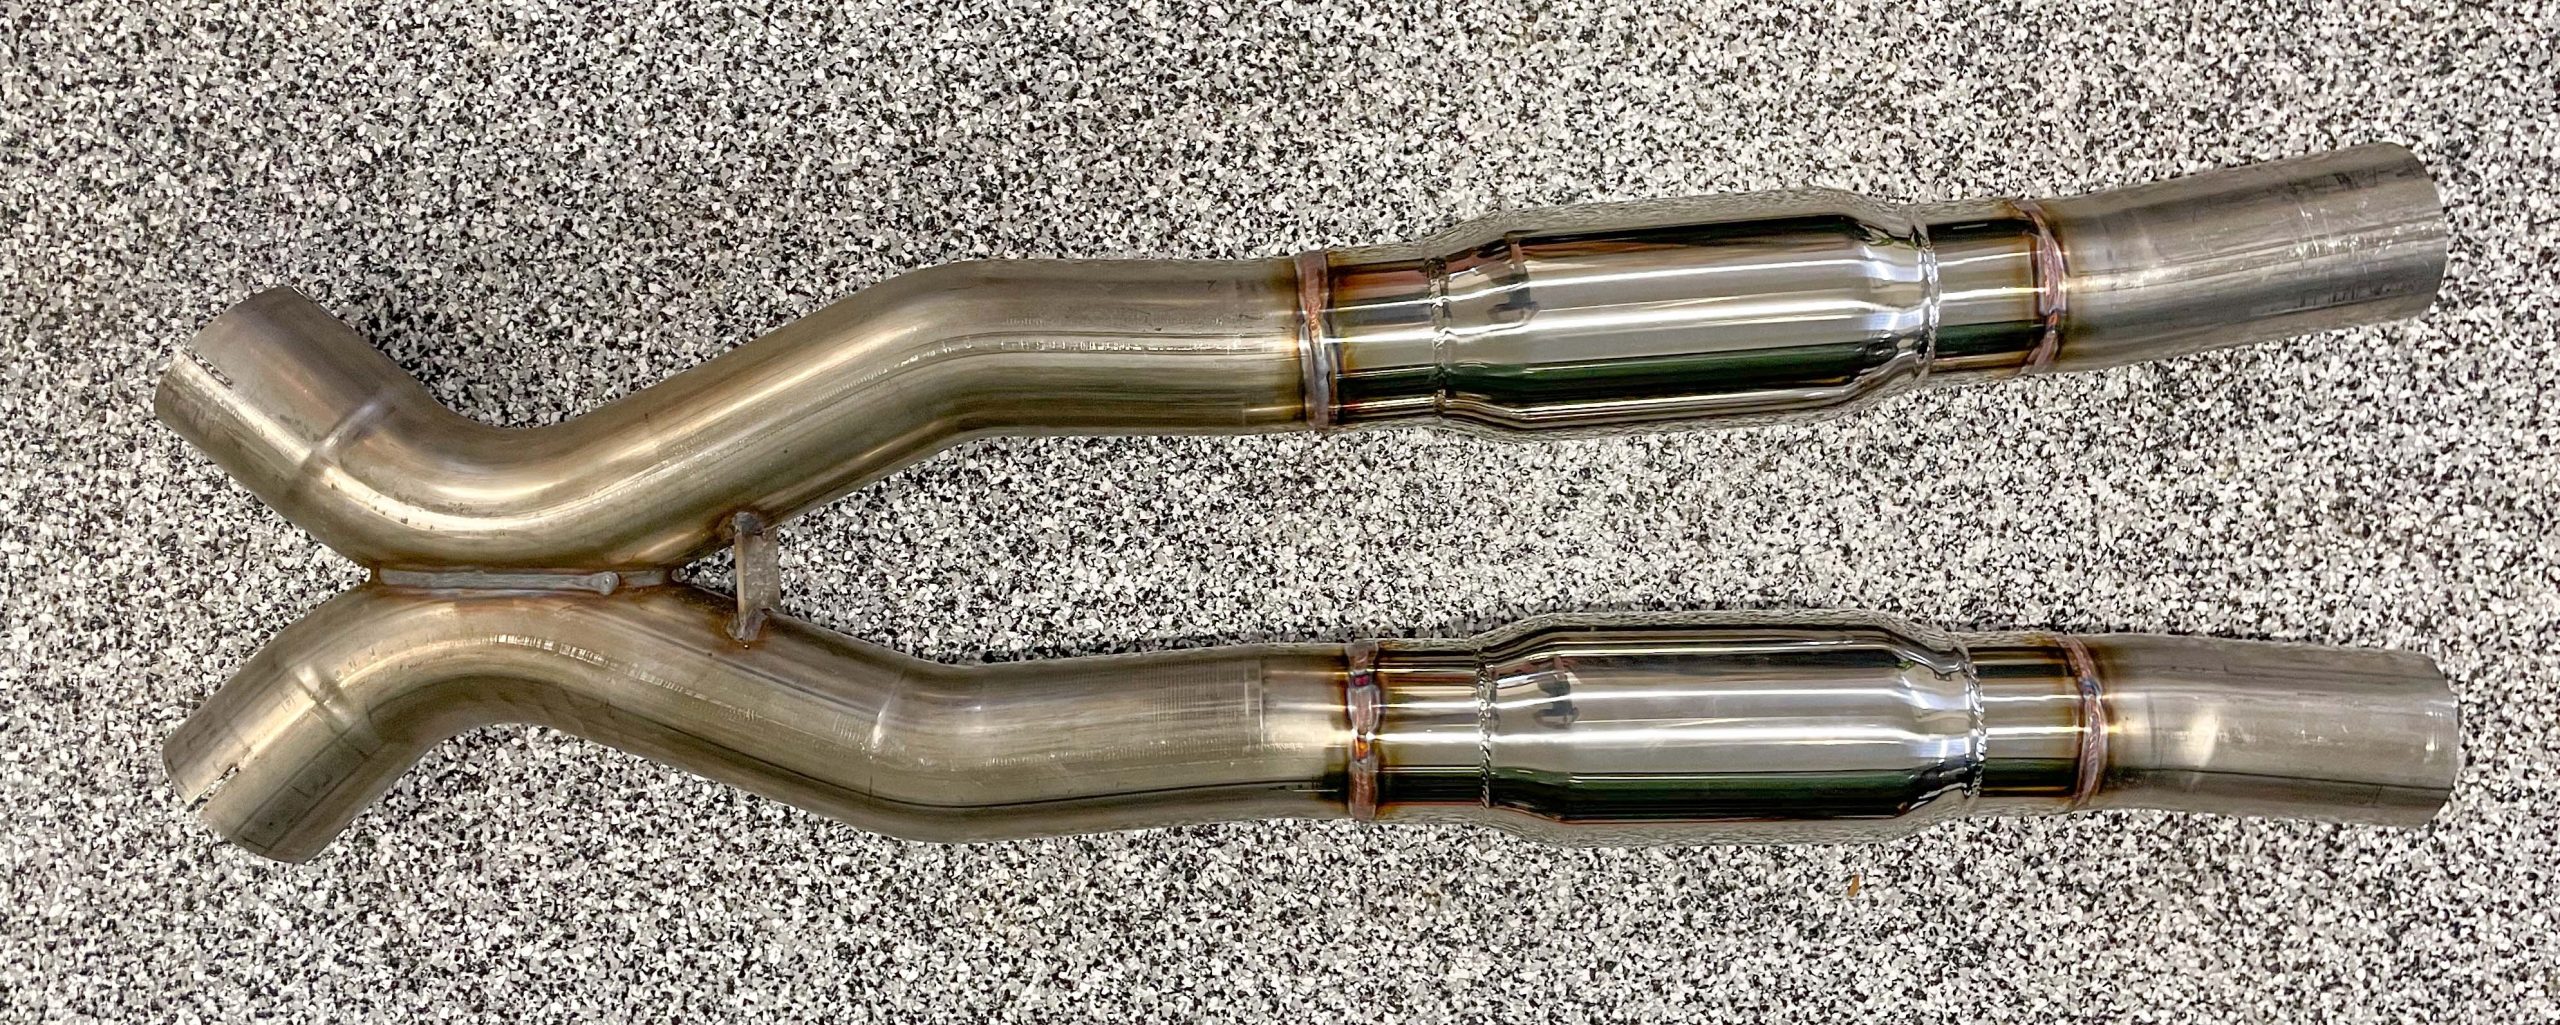
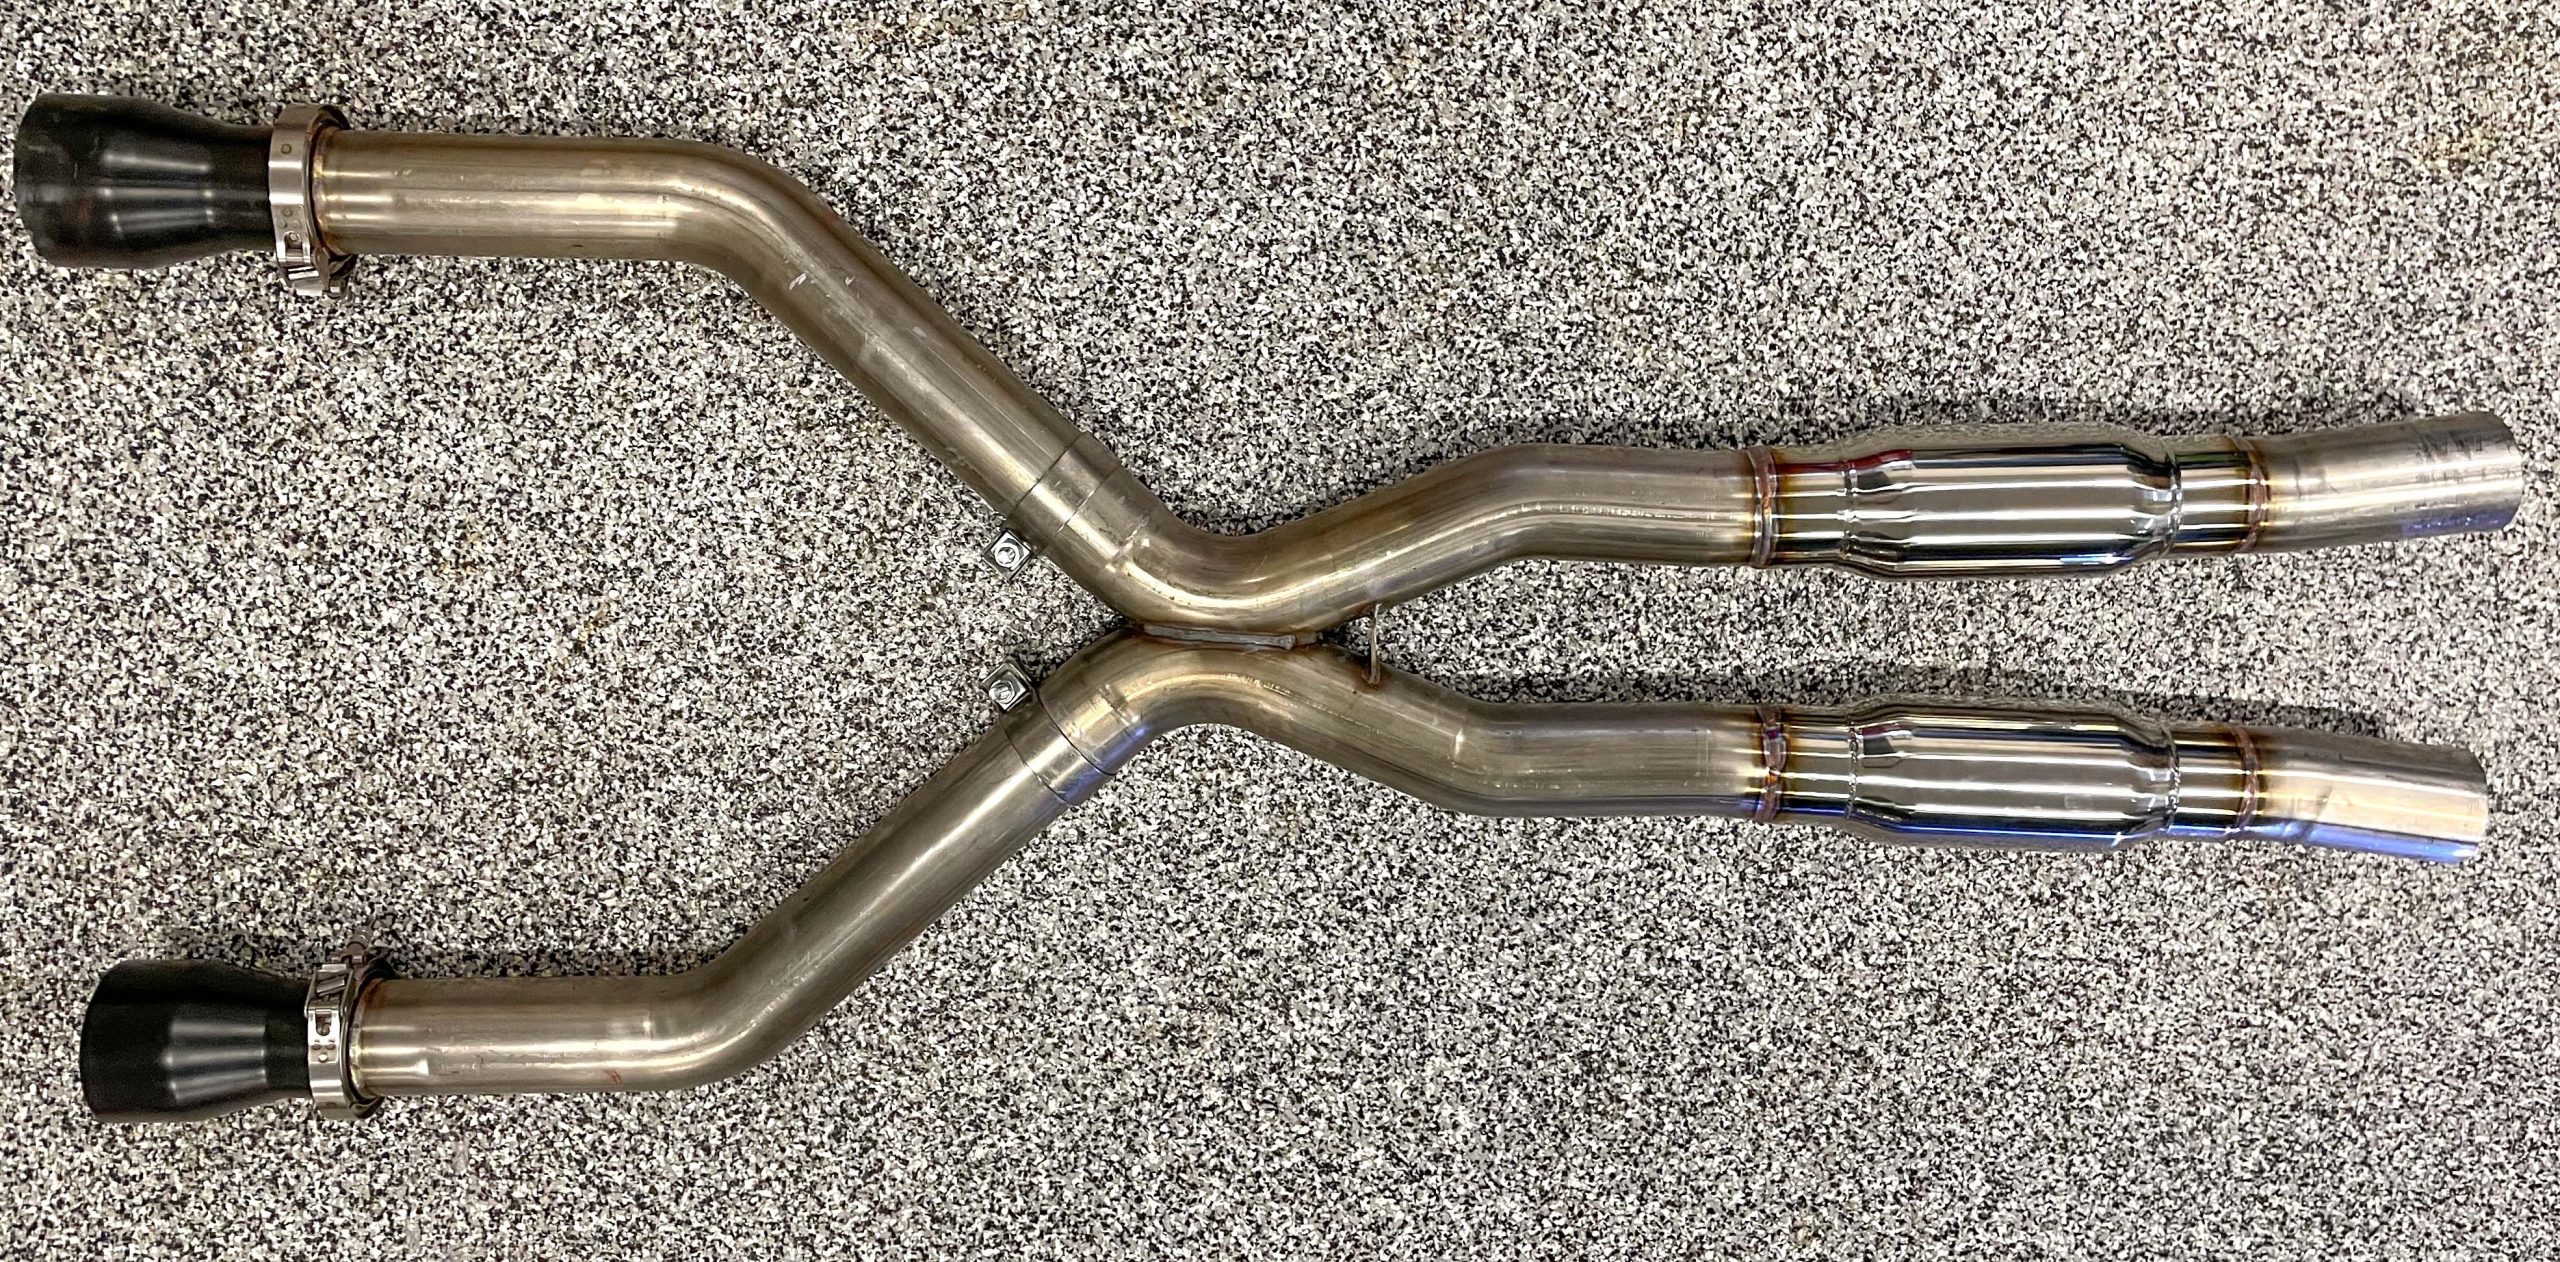
There are a couple of ways to properly install cones. The best location is in the collector or reducer, with the “pointy end” facing the engine. The other option is to install them in the tail pipe (same direction), but they won’t be as effective. The cones I selected were Summit Racing part number SUM-629020. This is a three inch diameter stainless cone that can either be bolted or welded into the pipe. It measures 4-3/4 inches long. I chose to have them welded right into the slip on reducer I was using. The reducer is a four inch down to three inch slip on job that was fitted with a V-band clamp for the exhaust hook up.
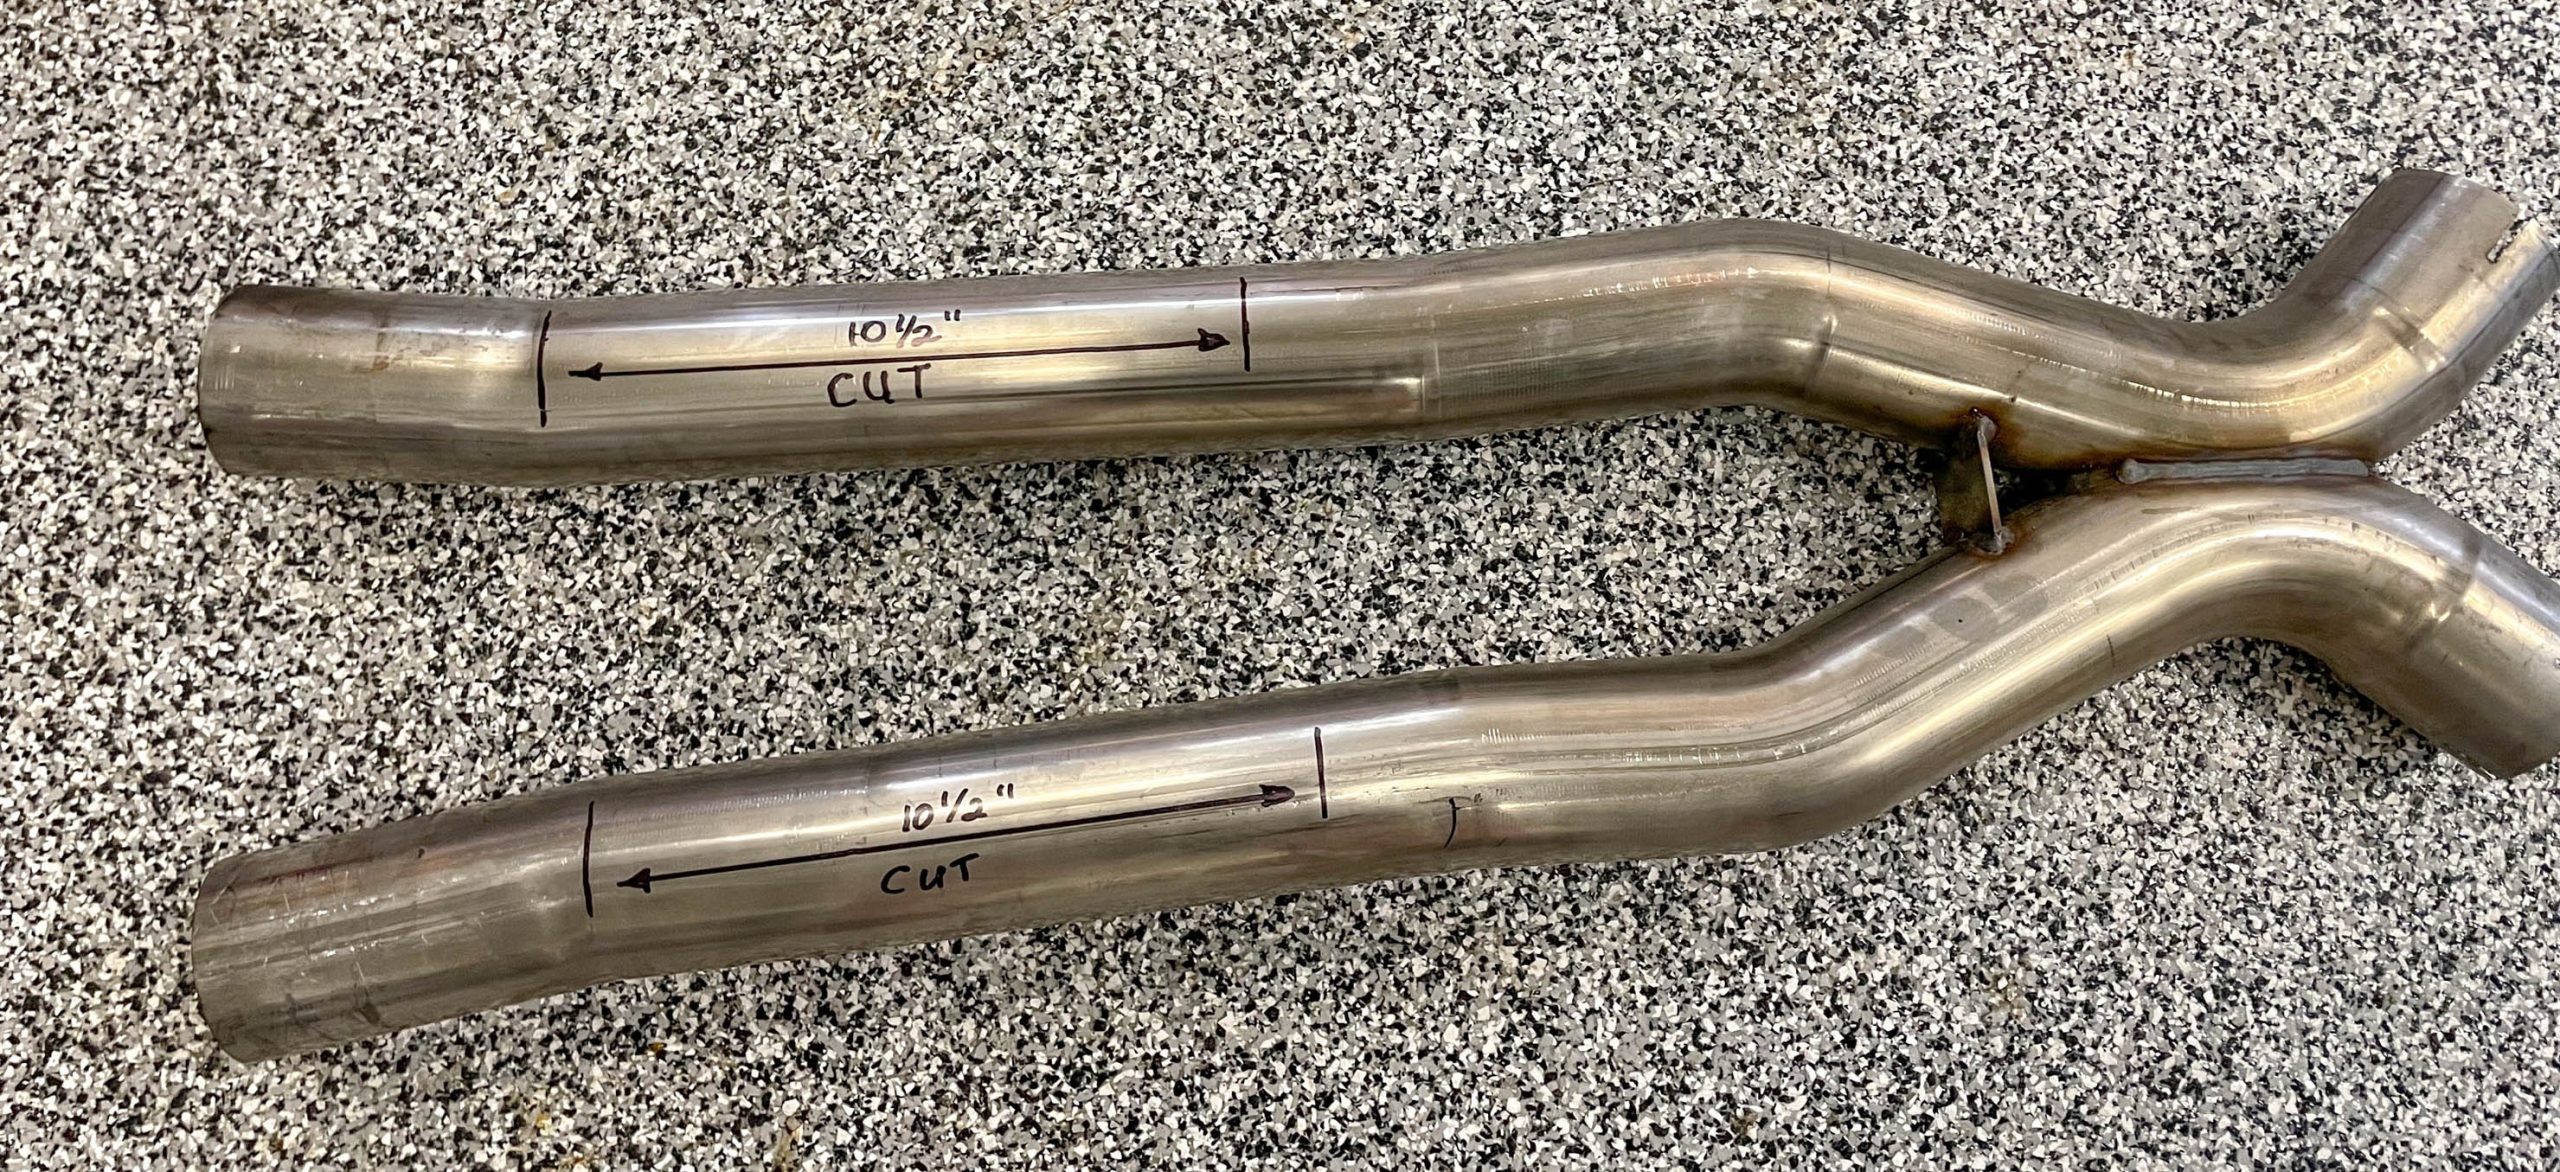
It has been my experience that a good X-style cross over can add a certain “shriek” to the exhaust note (particularly when the “X” is timed correctly), when compared to an H-style cross over or individual pipes. In addition, the drone in the system I have is considerable. I suspect the location of the turnouts is creating a bit of an echo chamber under the car.
My research pointed toward a set of three inch inlet/outlet bottle style resonators. There are several options available with of course, bigger being better.
But in my case, the exhaust pipes run relatively close to the big aluminum Mark Williams driveshaft I have in the car. In addition, there isn’t a lot of straight pipe I can cut out of the exhaust pipes (this is due to the X-cross over). As a result, the largest resonator I can fit is a four inch diameter job that is 12 to 14 inches long.
Once again, Summit Racing provided the solution: A set of Vibrant Performance bottle style stainless steel resonators. These resonators have a total length of 12 inches. The diameter is four inches and the actual case measures 9-1/2 inches long. (In particular, the part number for the ones I chose is VPE-1794.)
The plan was to add the resonators and cones and then test the system. Muffler swaps are easy enough if it proves necessary. To get there, I pressed the cones into the reducers and marked the mid pipes where the resonators would be spliced into. You’ll note in the accompanying photos the mid pipes are marked so that a section of tubing 10-1/2 inches long will be removed. The resonators are 12 inches long overall. The reason for the 1-1/2 inch discrepancy is due to the fact I wanted a bit more engagement in the slip on reducer (fixing a past miscalculation on my part).
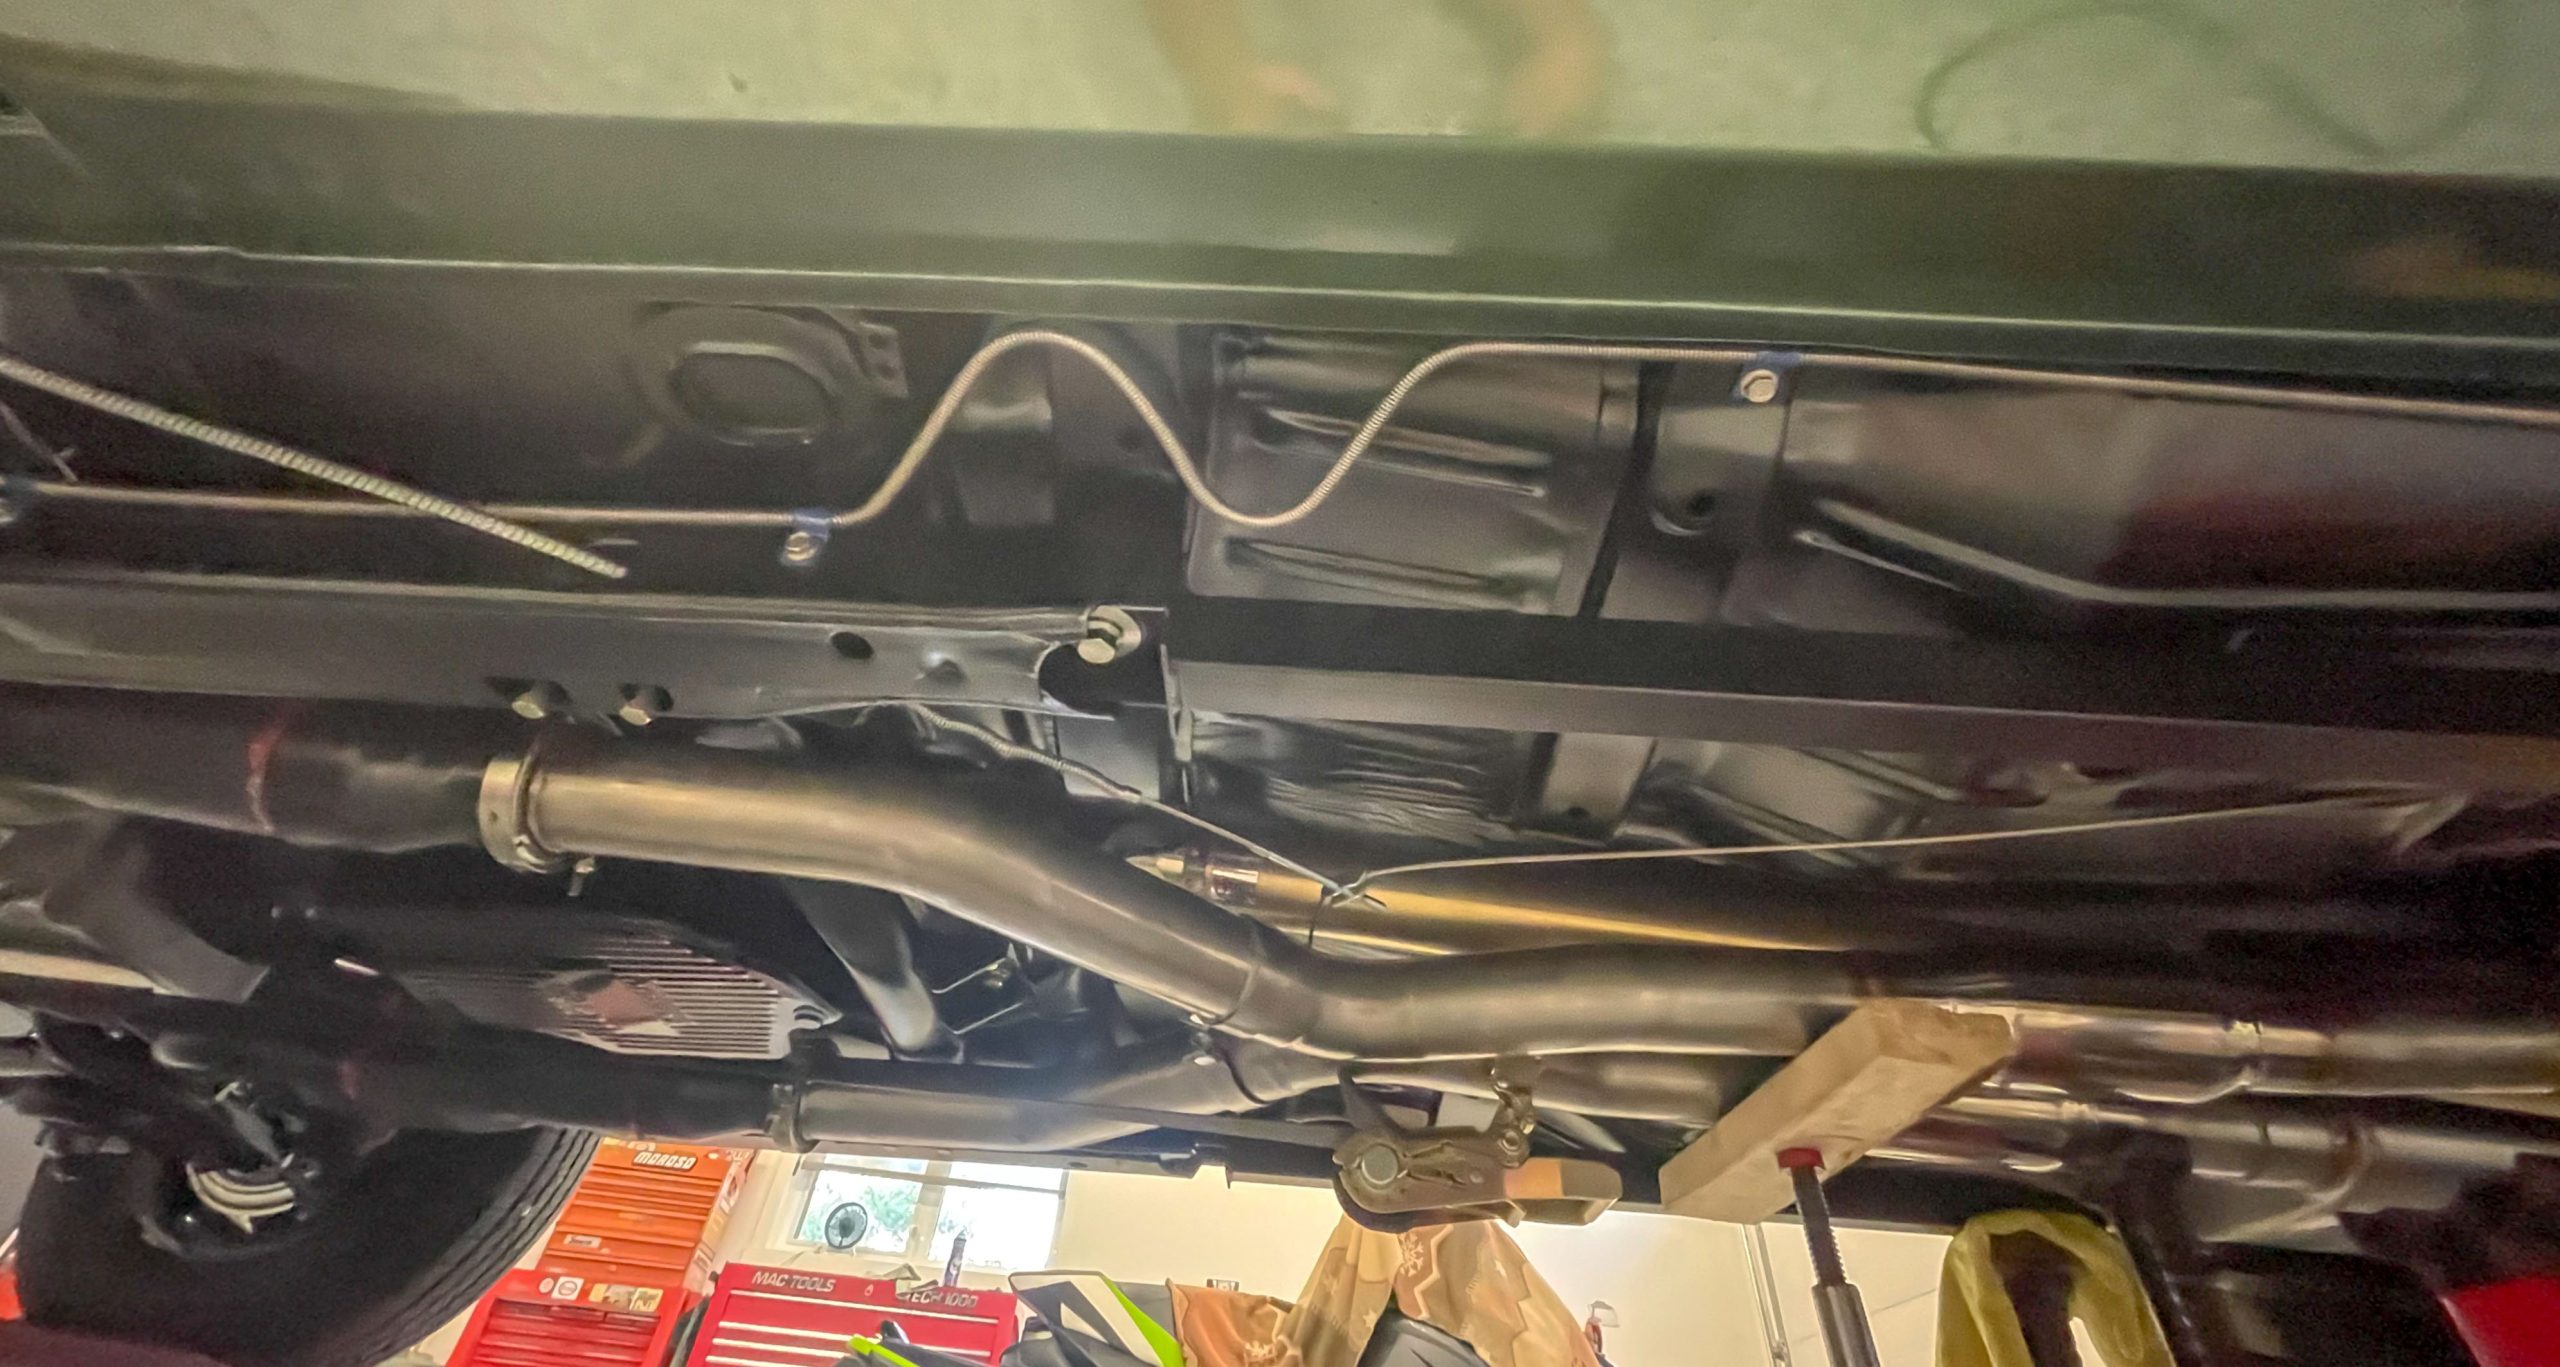
Next up, I hauled the pieces to a cool shop in my little town. This one-man shop does fabulous work, and better still, he’s fast and reasonable. A few days after dropping off the parts, I was back reassembling the exhaust.
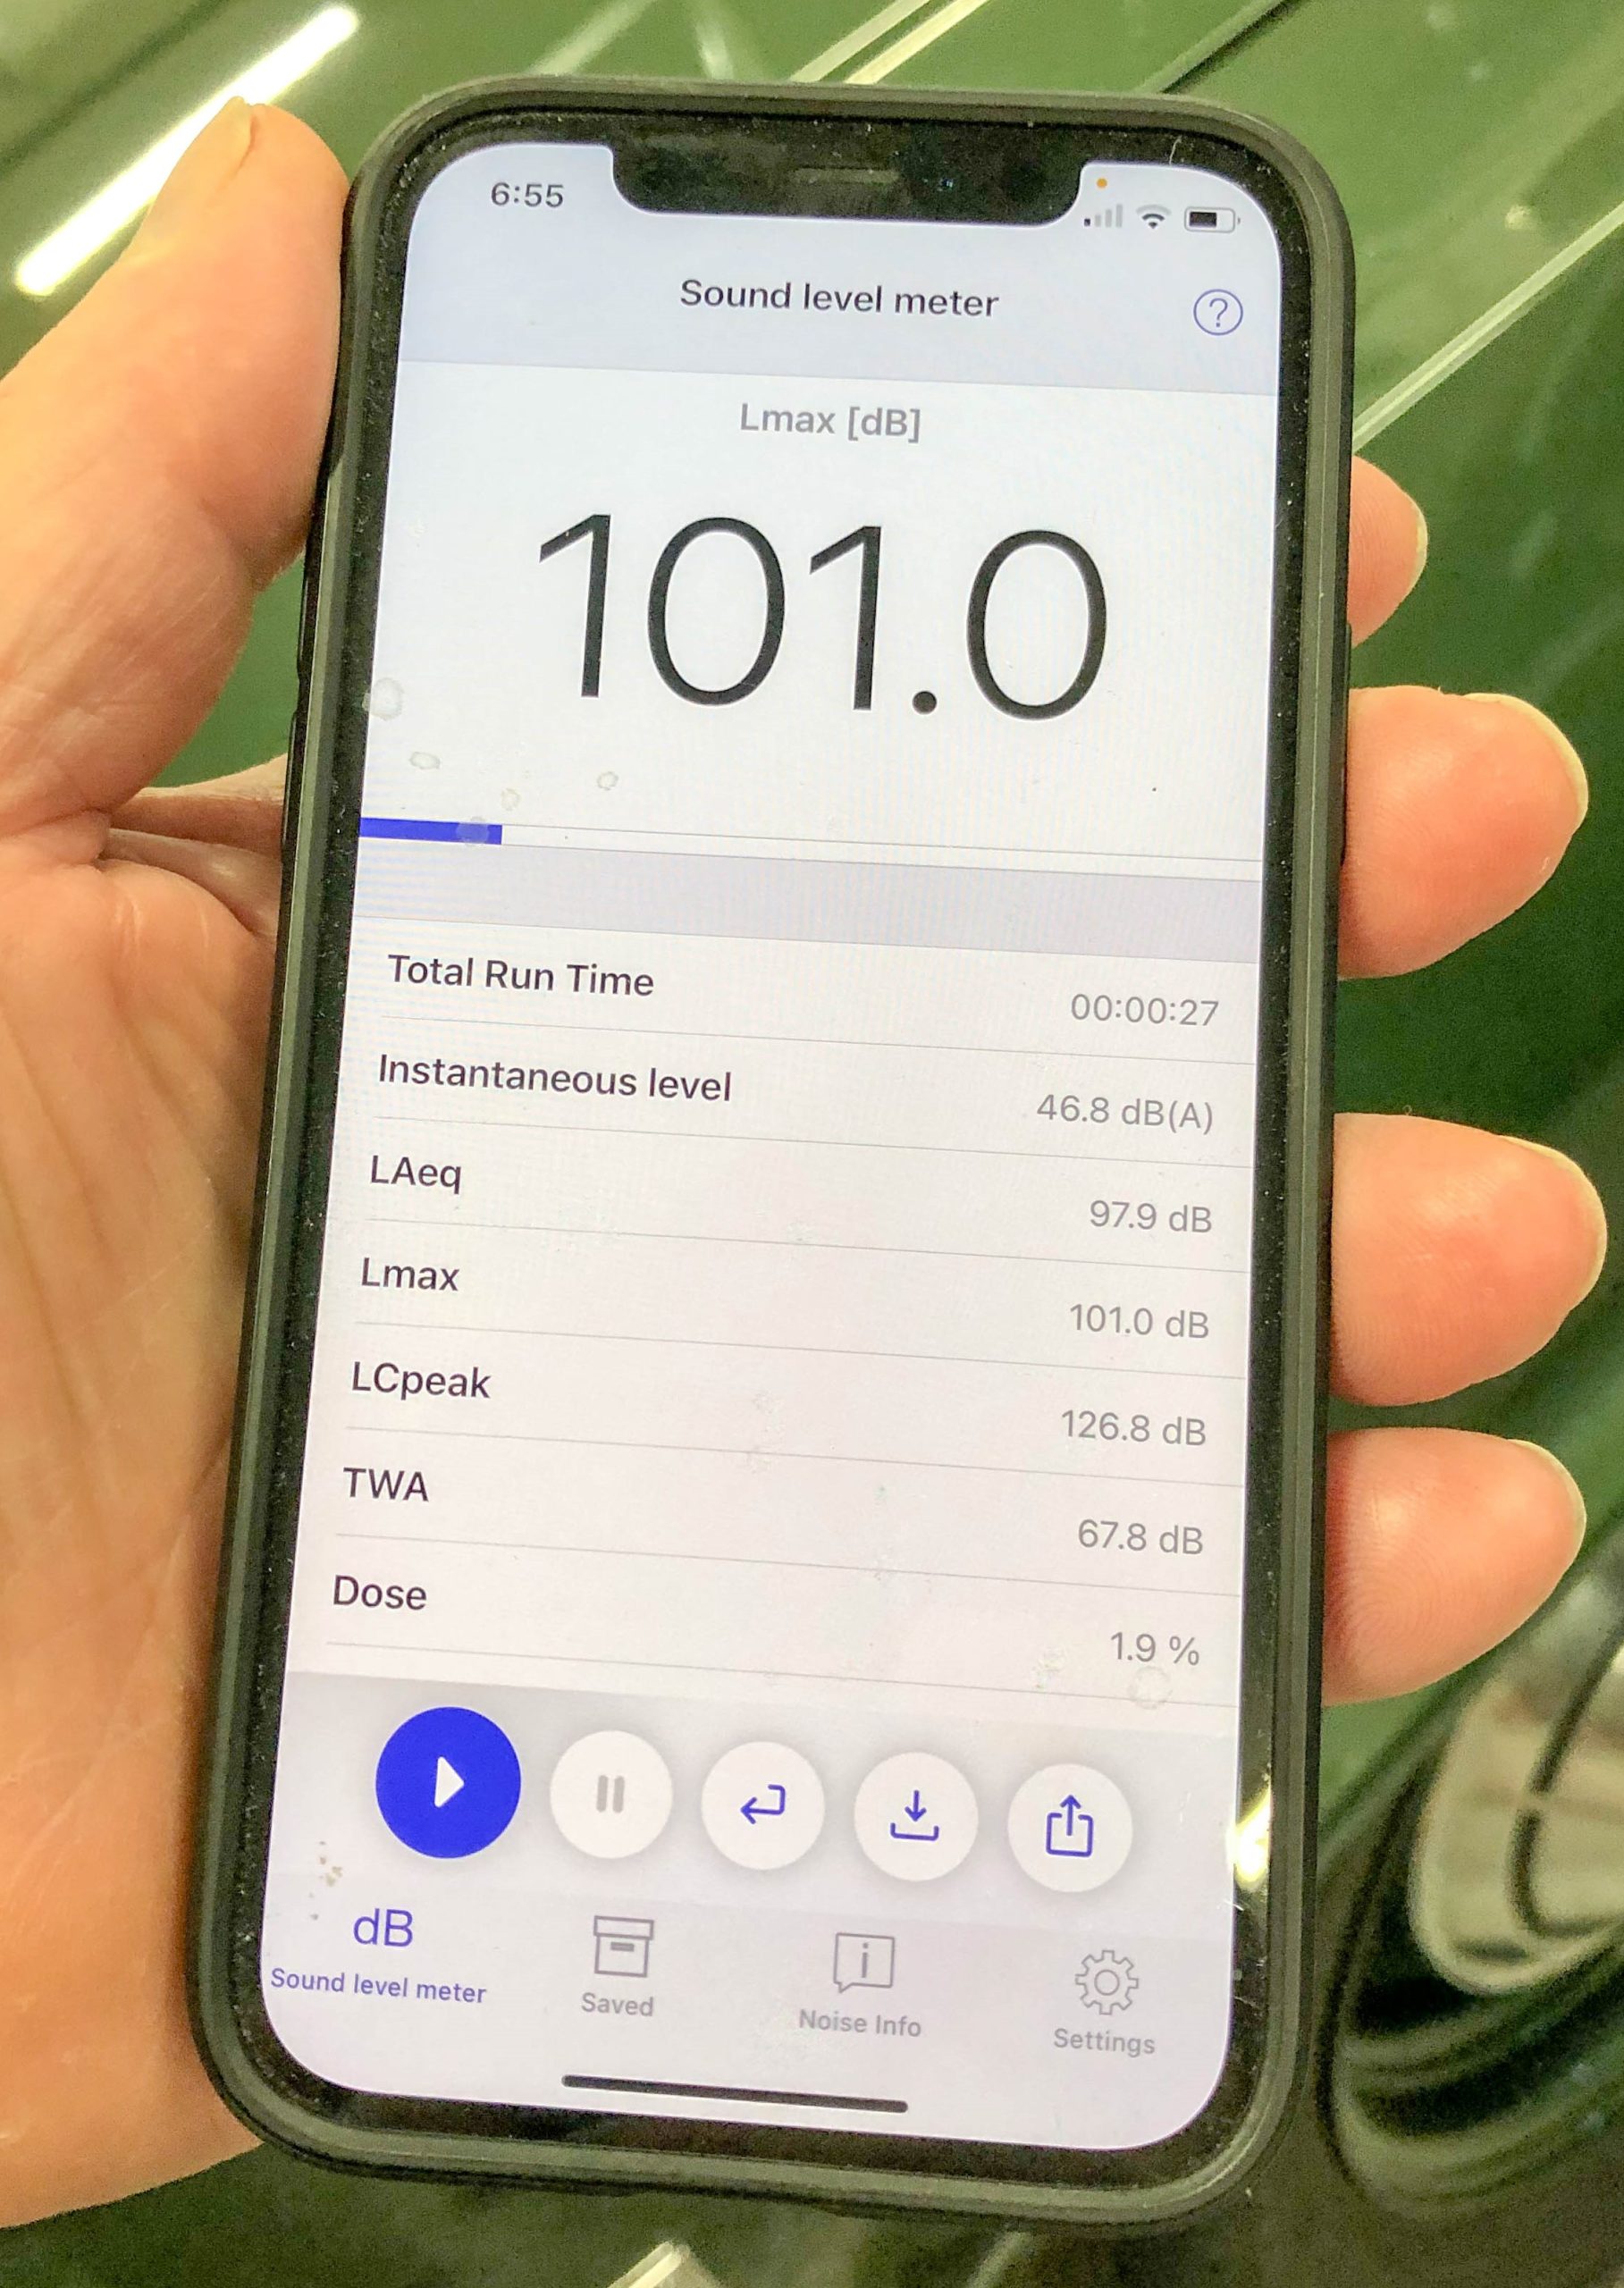
Once reassembled, the moment of truth arrived. Honestly, I had some trepidation. But the last photo in the series shows the result: 101 decibels on the L-Max scale. On the opposite side of the car, the reading was 100.9 dB.
That will get me a pass without the need for wiggle room, and there are some options to quiet the car down even more. For example, turbo mufflers will definitely drop it down some, plus cars like my big block Nova don’t have room for a clutch fan. Because of that, they have a considerable amount of fan noise. This adds up to more decibels being emitted by the car. Obviously that be “cheated” by backing off the belt tension for a test or by replacing the engine driven fan with an electric job.
Bottom line here is, I think I managed to dodge the dB bullet without killing the flow or making drastic changes to the exhaust system. Works for me and feel free to try it in your exhaust setup.
Sounds of silence? Close enough. It’s quieter.


Comments