Overheating is an all-too-common occurrence for Jeep XJ Cherokee owners, and running excessively warm most of the time is essentially taken as given.
Perhaps the biggest issue with the XJ cooling system is the XJ itself. The 4.0L inline six engine is nearly three feet long from the bellhousing to the front of the crank, so the boxy little brawler ends up with an undersized radiator and not much room for large fans. Less than four inches exists from the shroud mounting points to the front of the engine, to be exact.
As such, even though the stock thermostat is 195 degrees F, most Cherokees are rarely under 210 degrees F, unless aided by very cool ambient air. If you love the low speed (but high engine stress) fun of off-roading, it can be a recipe for overheating or cooling system failure. This is the type of stuff you really don’t want to worry about when you’re far off the grid or even just out for some fun.
(Image/Christopher Campbell)
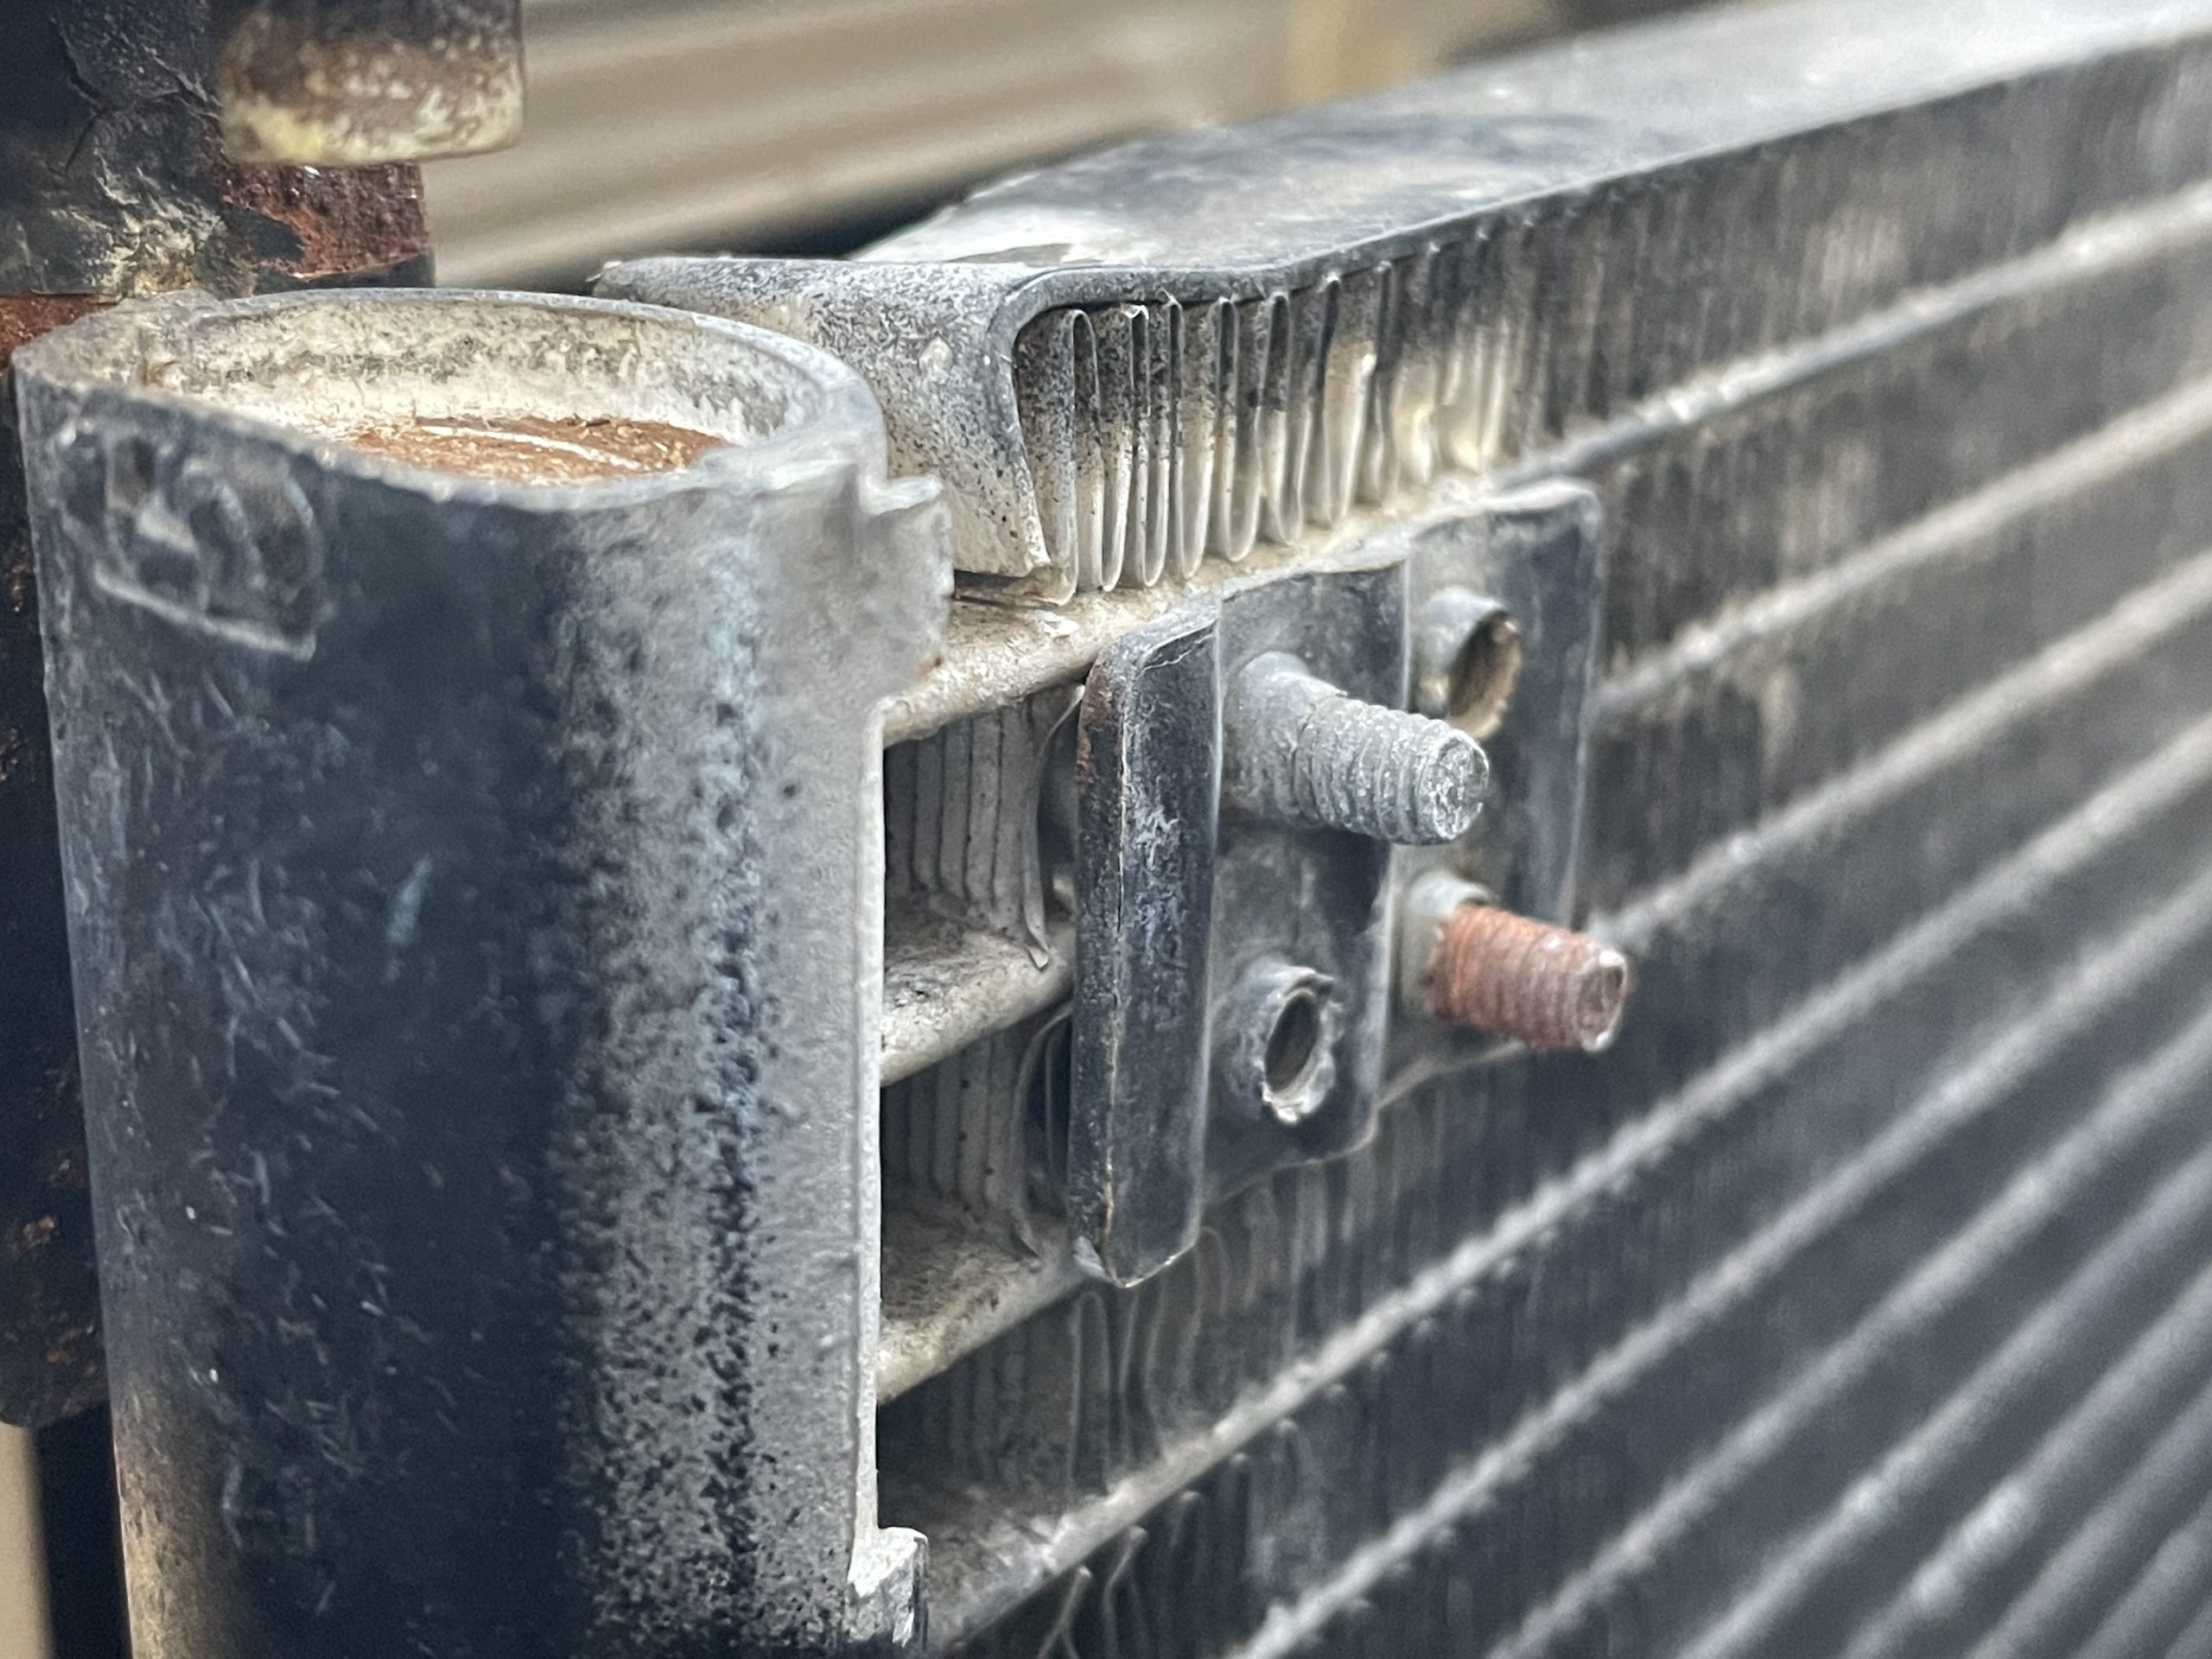
Since the last big road trip we took in our XJ ended with a steady drip from the corner of the radiator where the fins meet the tank, we knew we had stressed the system and failure was imminent. That coupled with the fact that the rest of the cooling system was obviously 23-year-old original factory equipment led us to the conclusion that it was time to dive in and do some upgrades.
There’s a full parts list with part numbers and links at the bottom of this story.
Since we know the factory stuff is marginal, we’re going to use the best bolt-in upgrades available. Our goal is to create a reliable cooling system that will actually keep our XJ in the 200 degree F range, even with the A/C on in while in traffic in the summertime. Or while running trails in Utah and the southwest. To do that, we went straight for a few of the best cooling options at SummitRacing.com, including a Mishimoto aluminum radiator and triple electric fan, and a Flowkooler water pump. All of which are designed to help 4.0L sixes run cooler even while crawling at low speeds.
We’ll also show you a few common, but not very effective cooling mods that our XJ had installed and the problems they can create.
If you’ve got a warm-running XJ, follow along as we show you how to get those temps under control!
Parts List for the Jeep Cherokee XJ Cooling System Swap & Upgrade
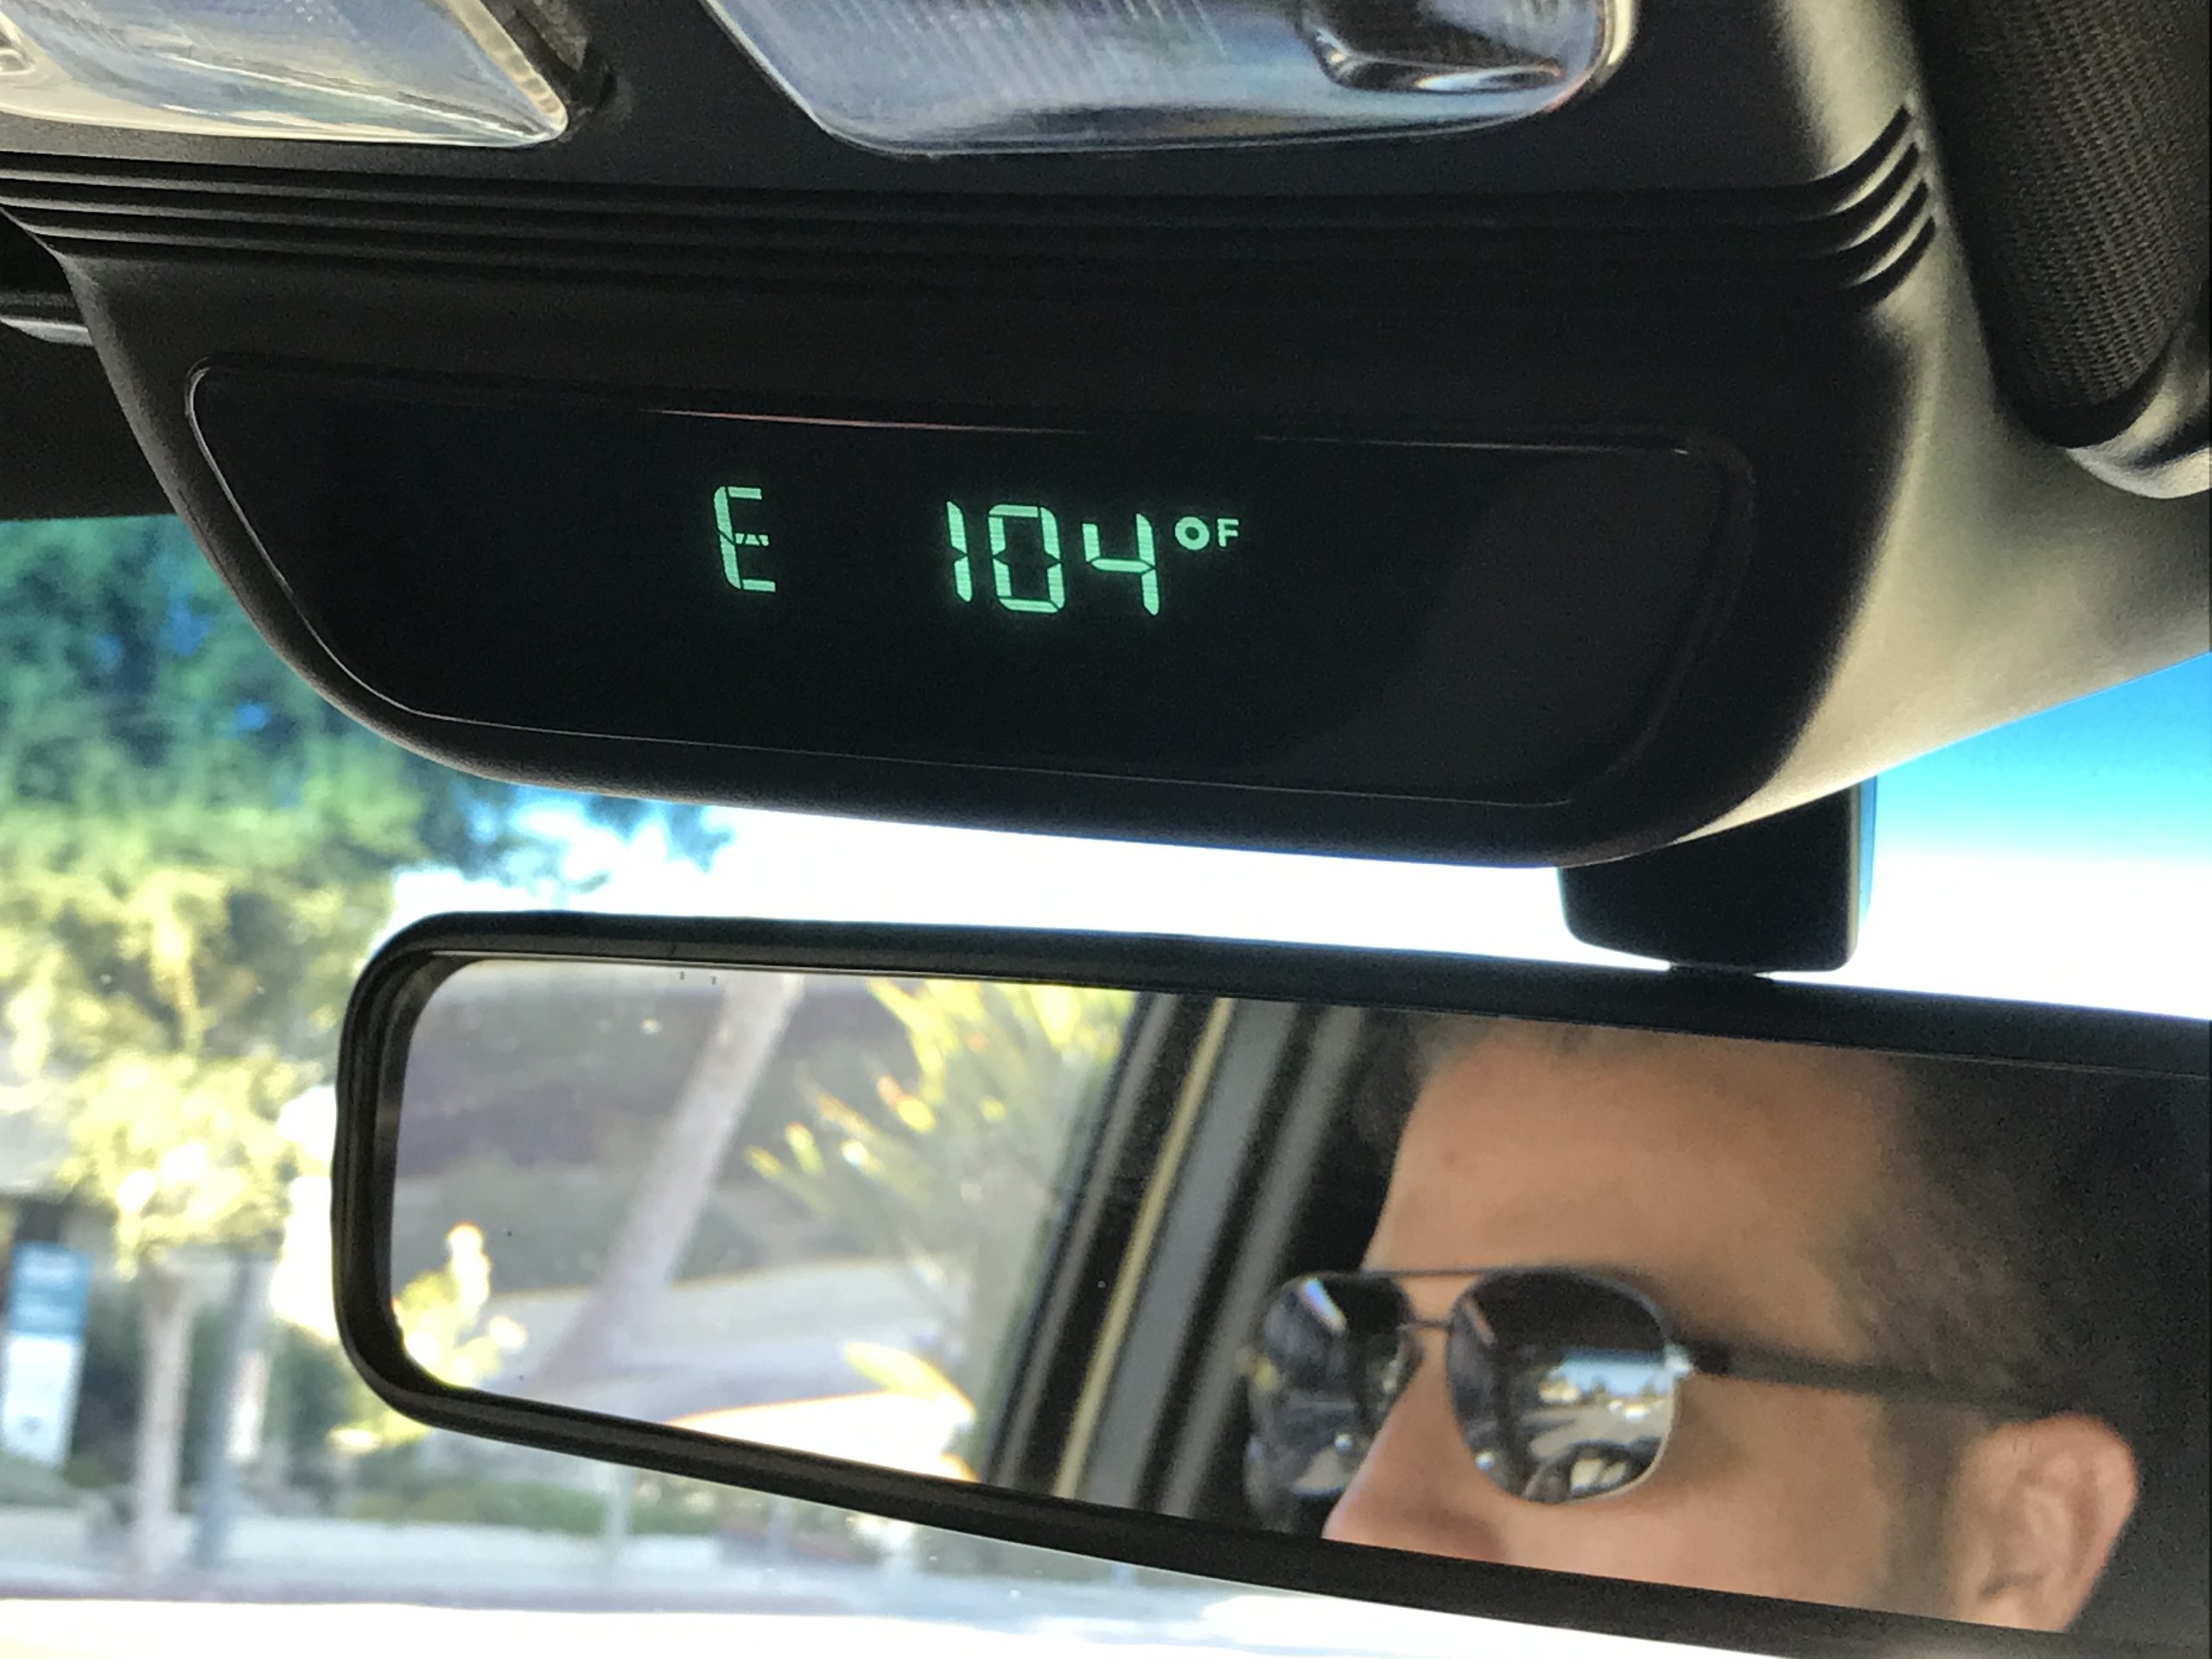
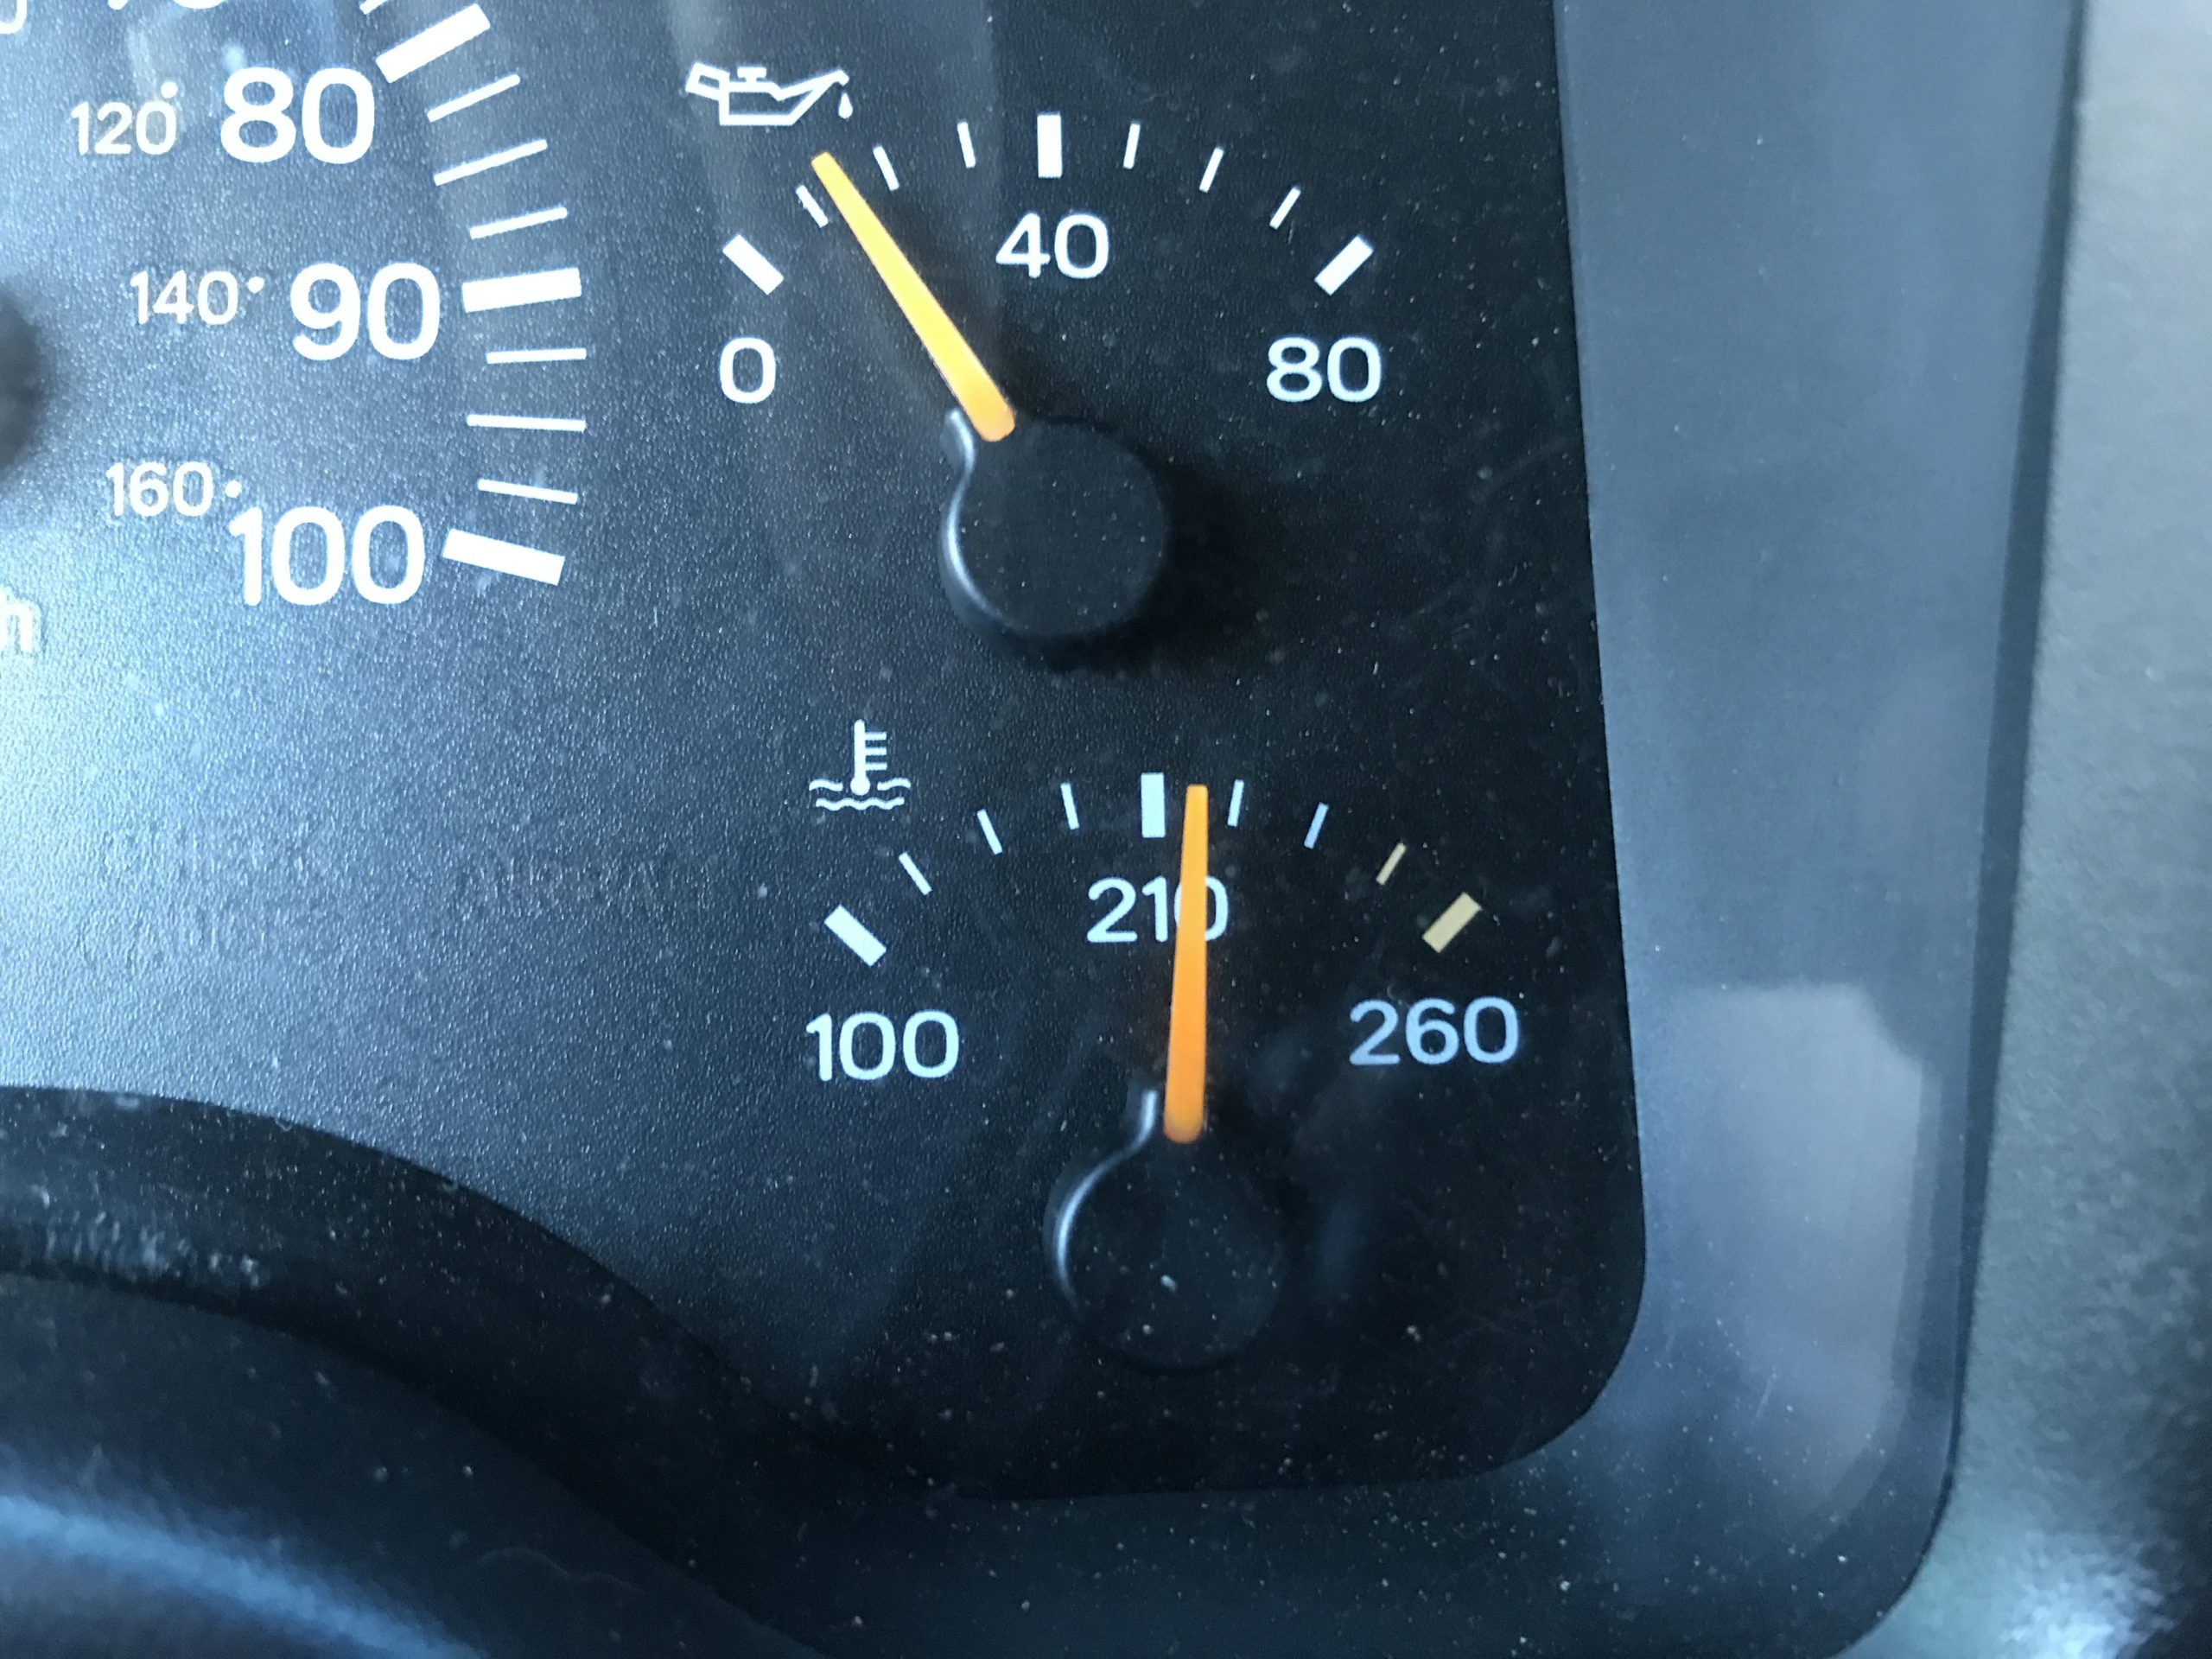
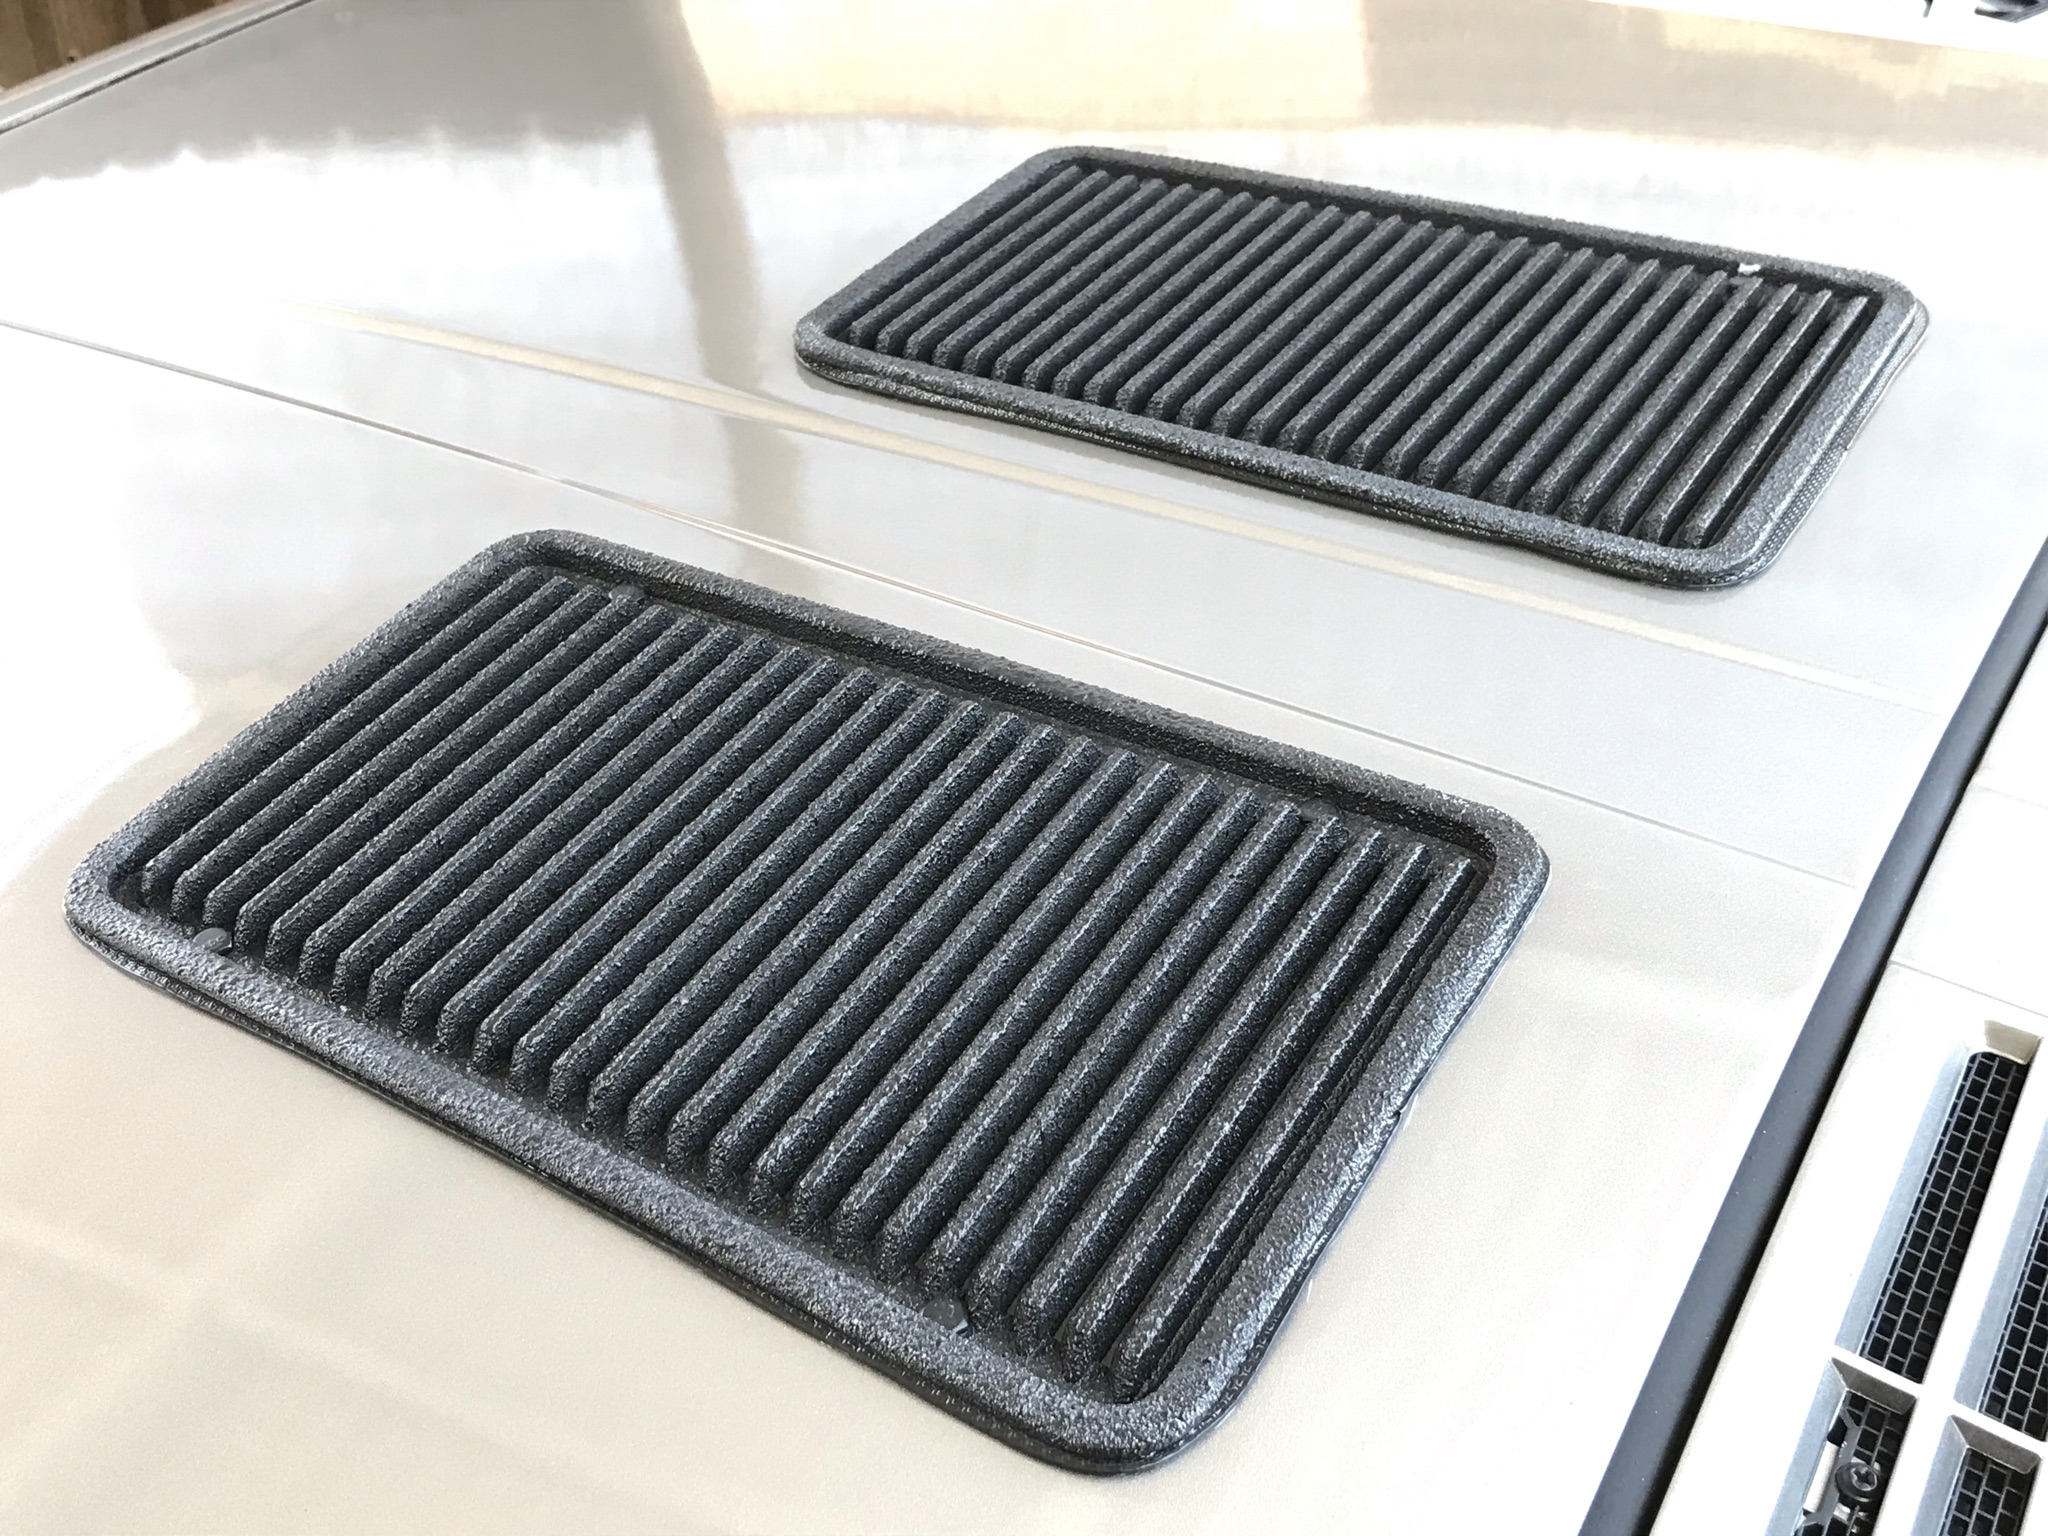
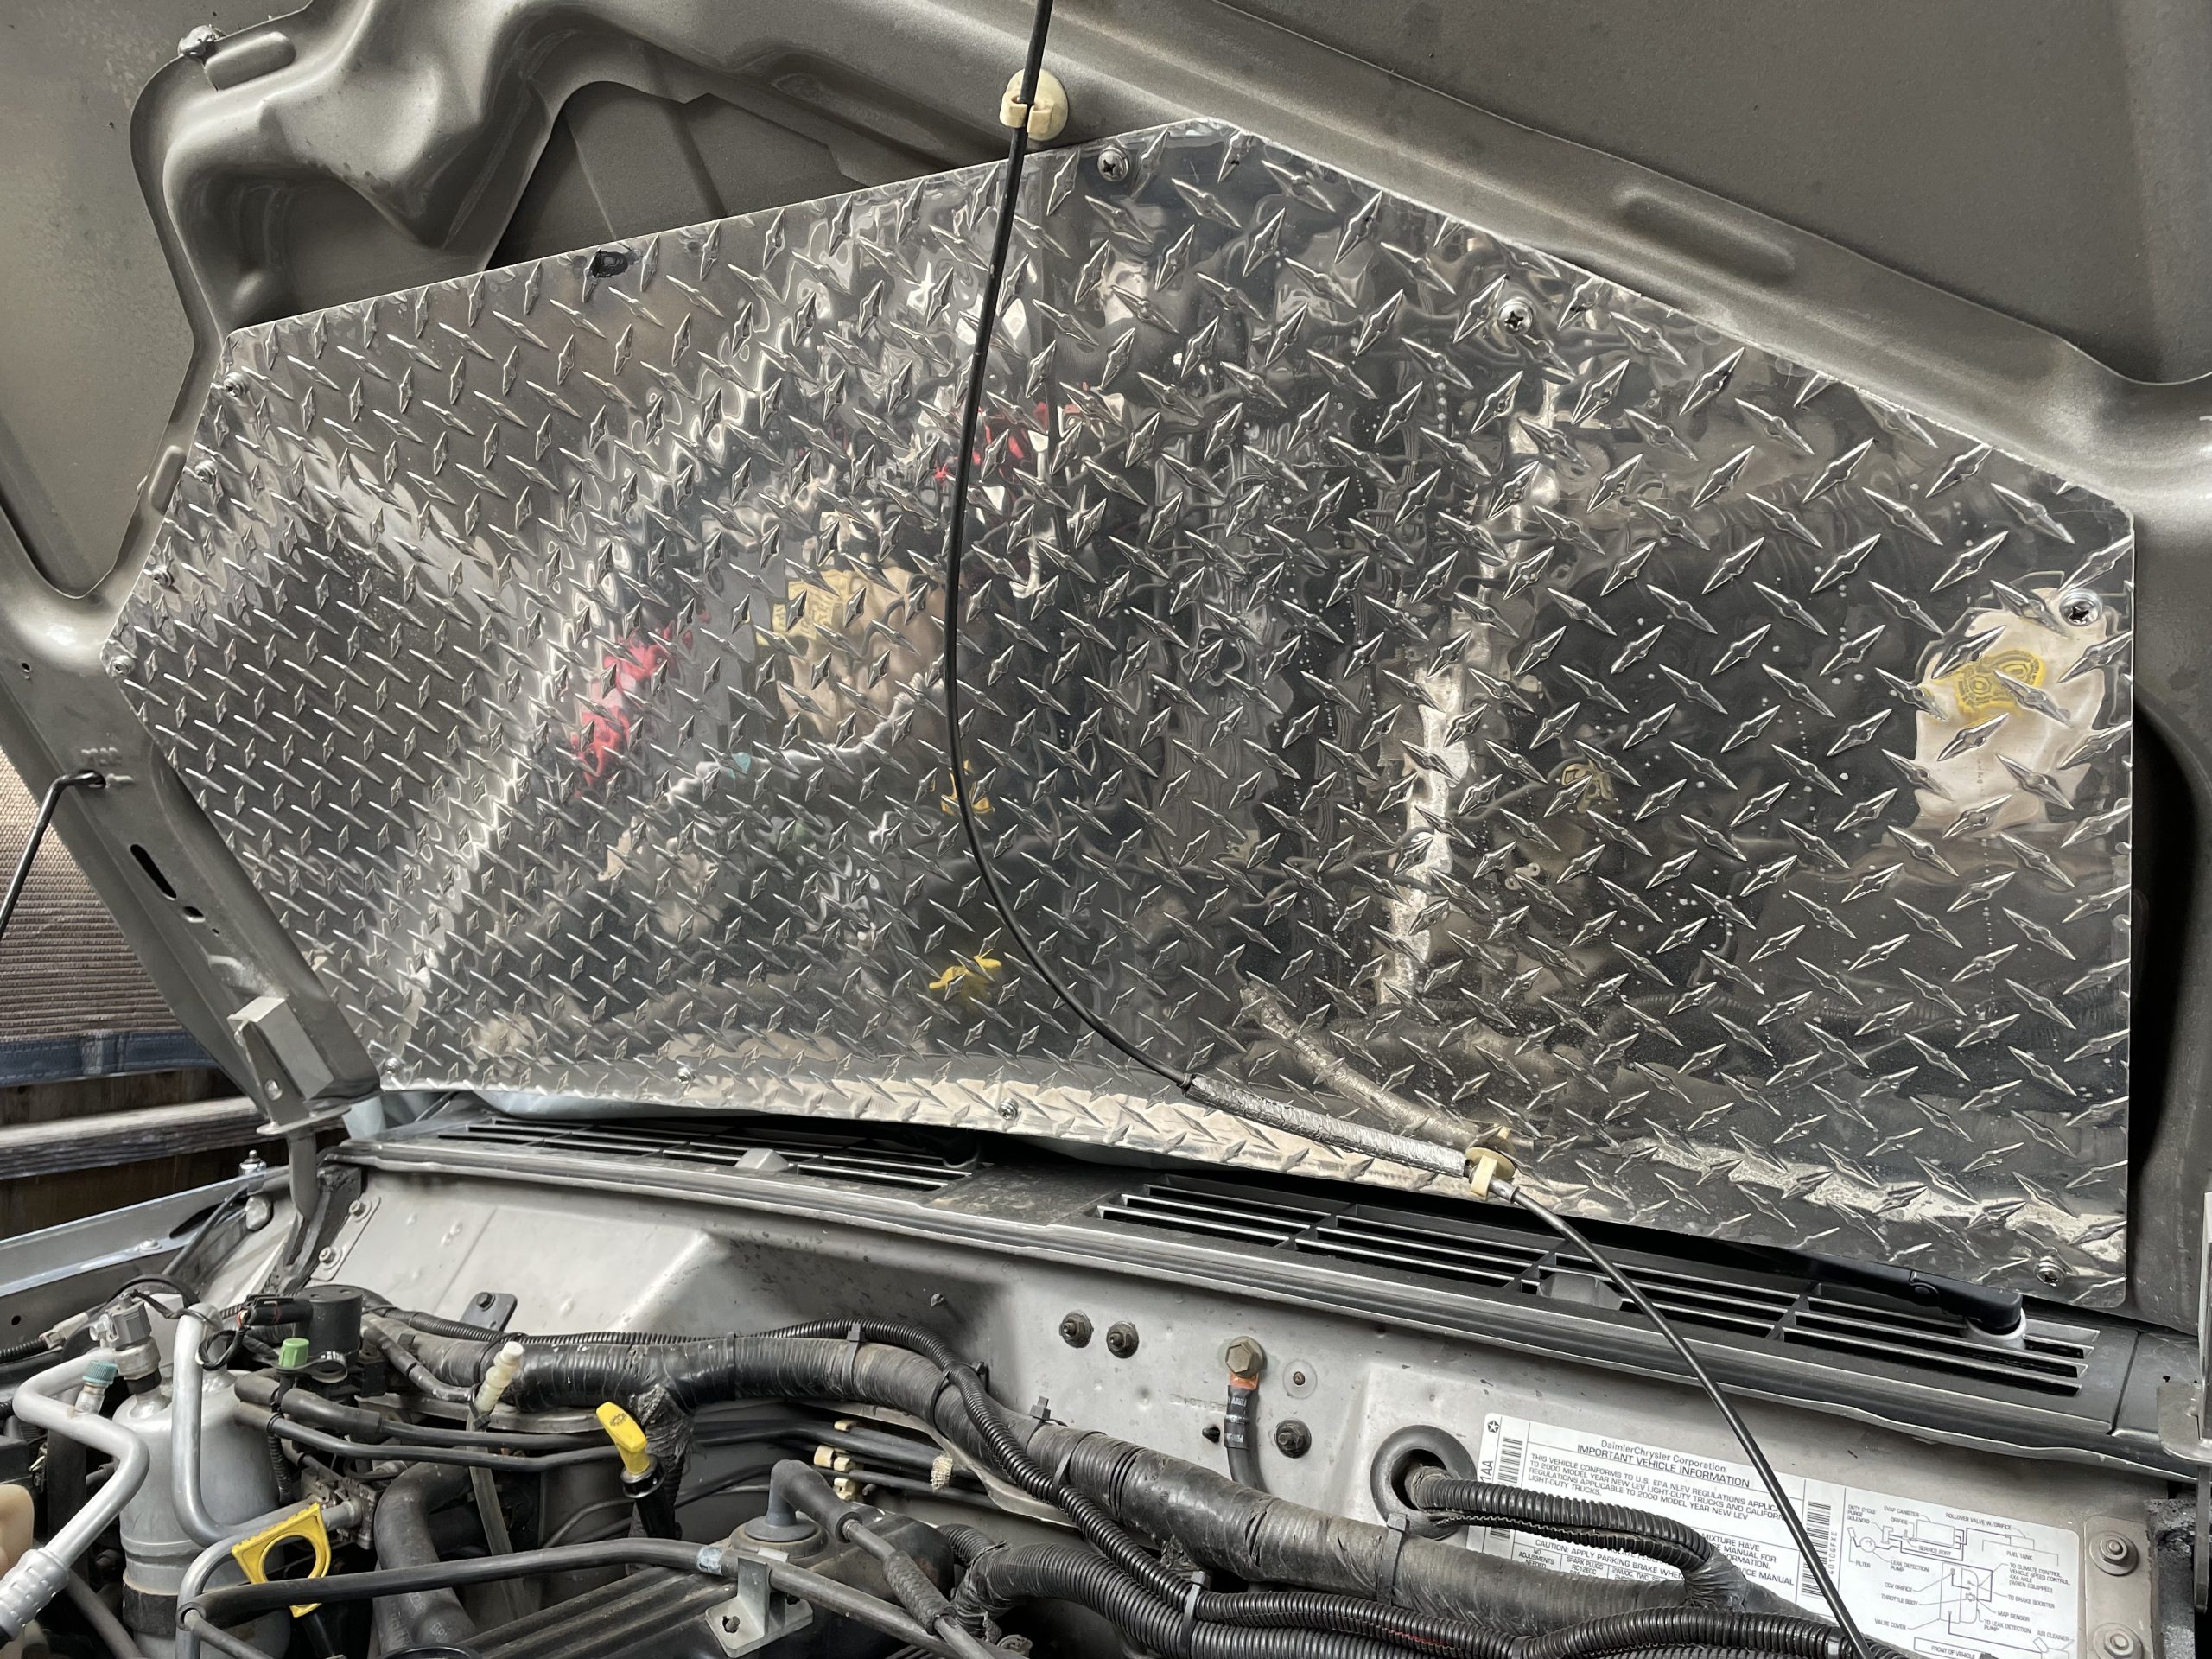
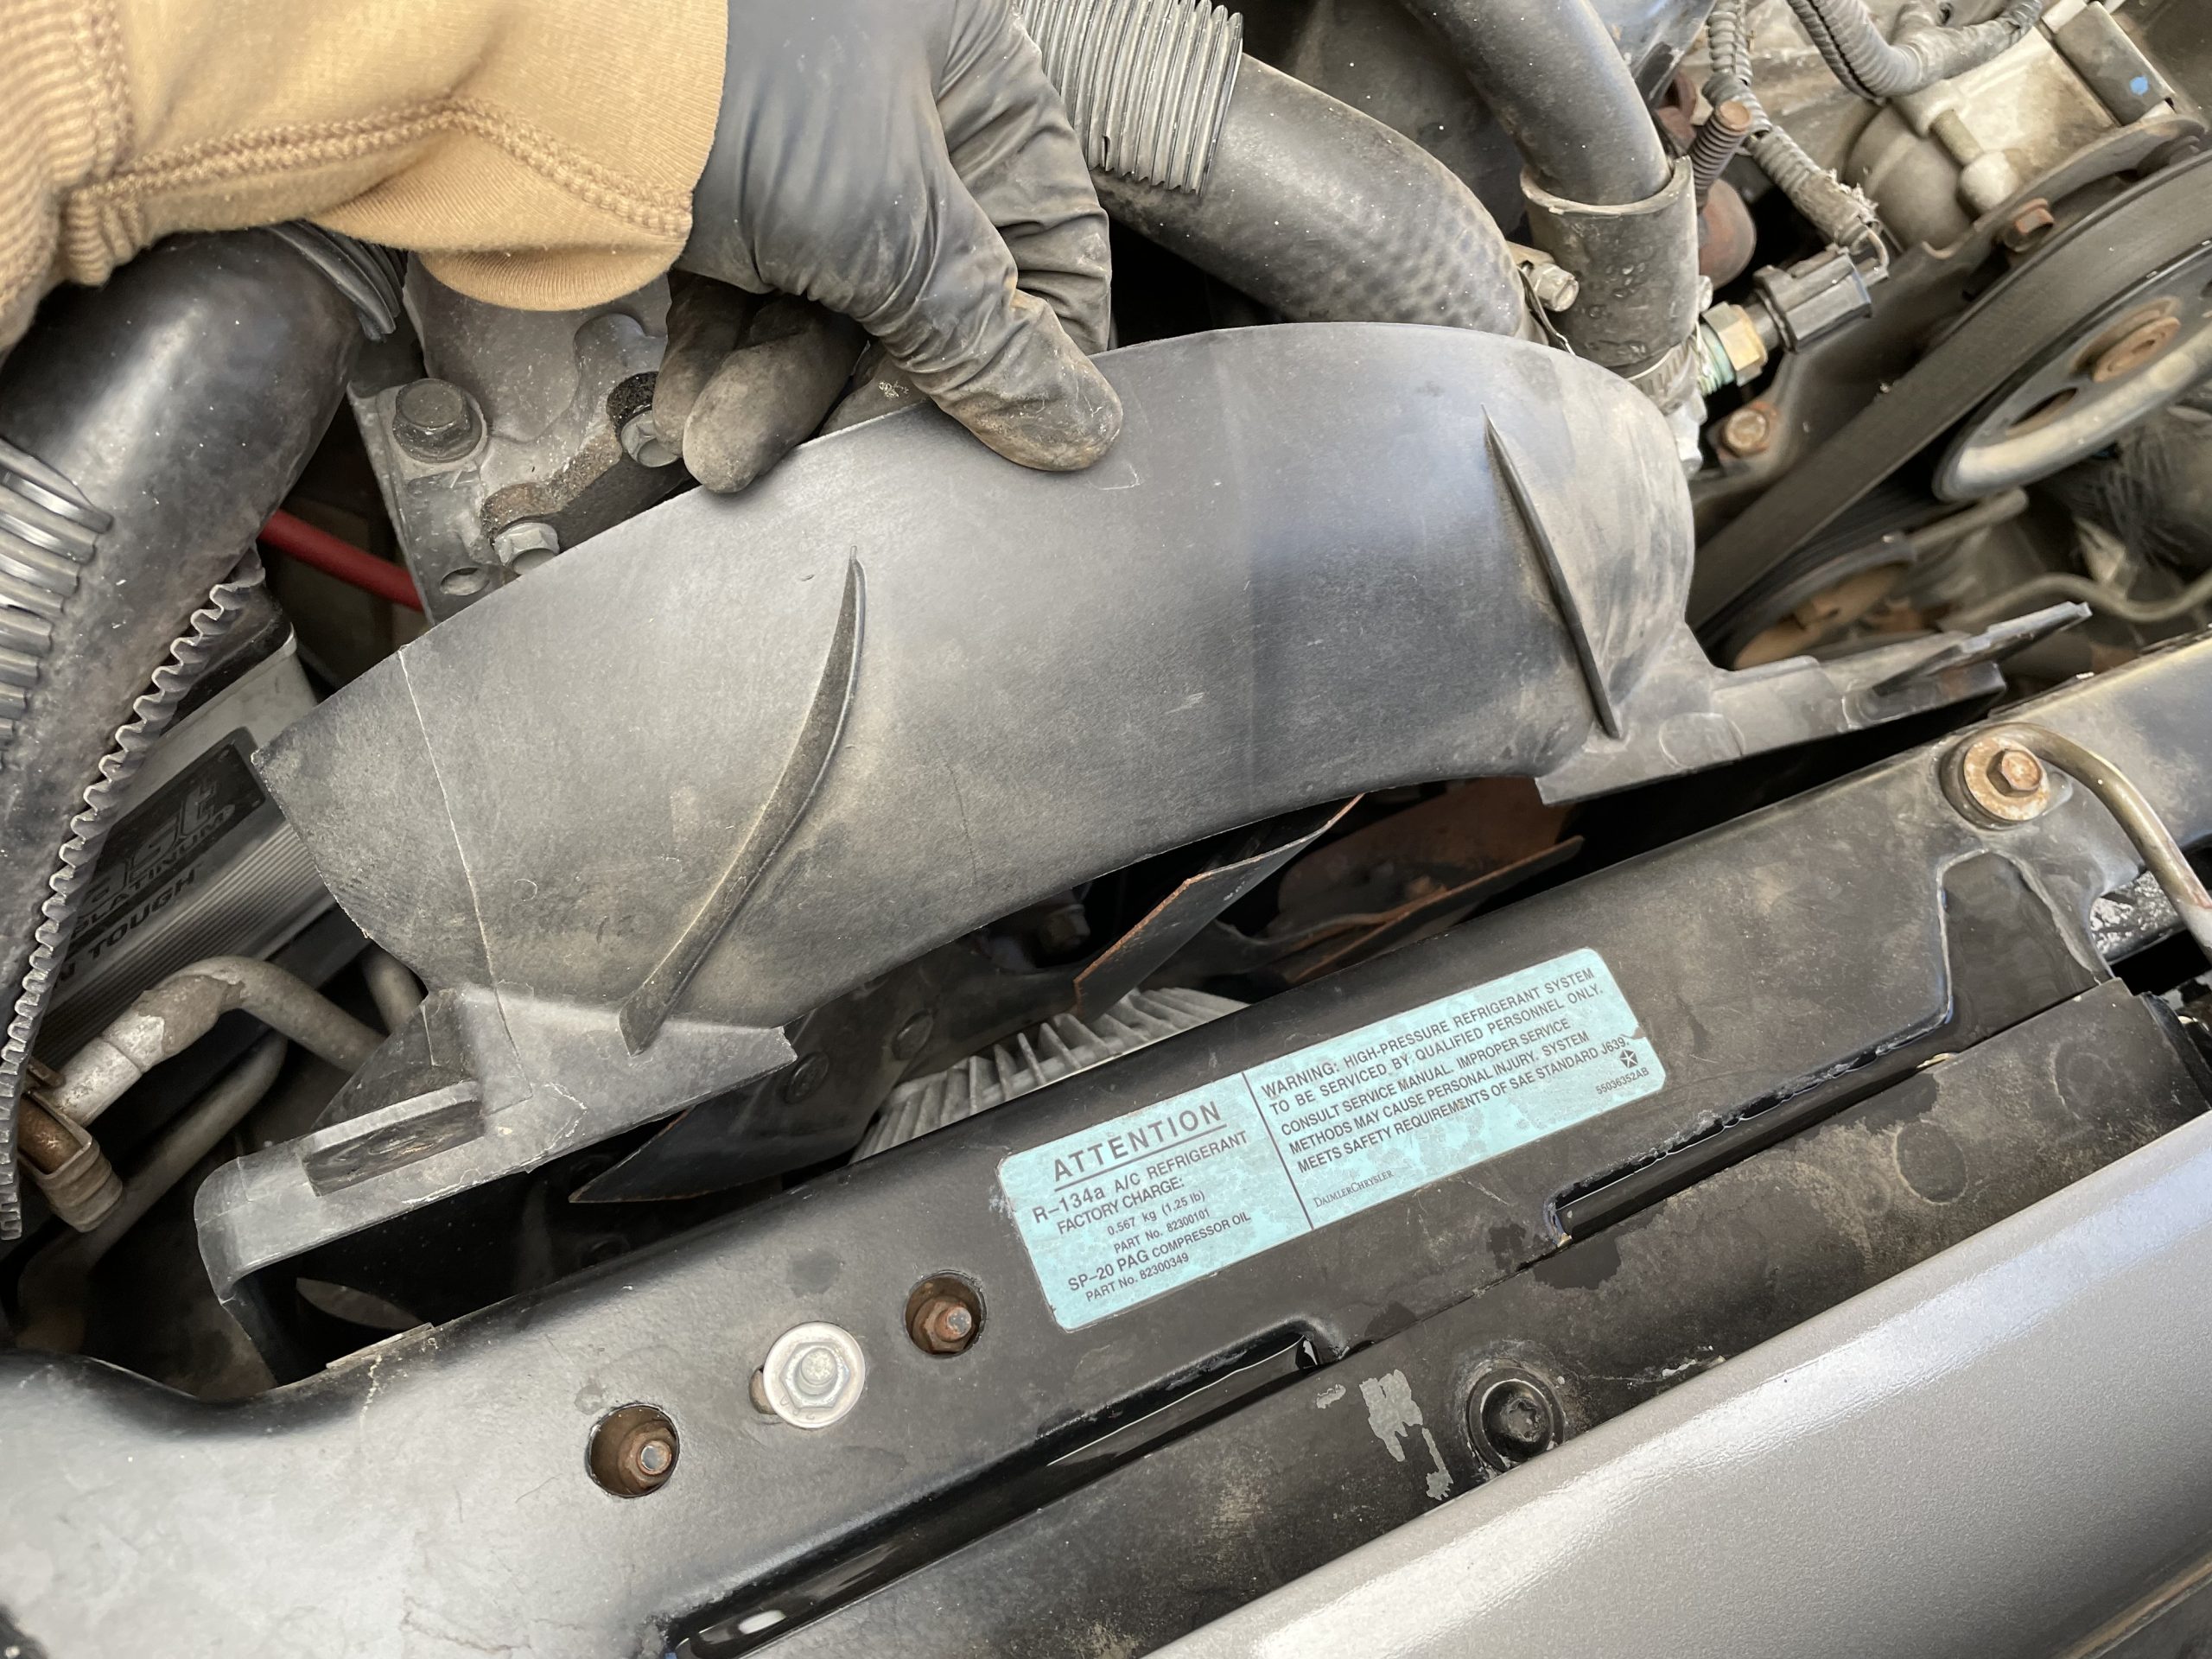
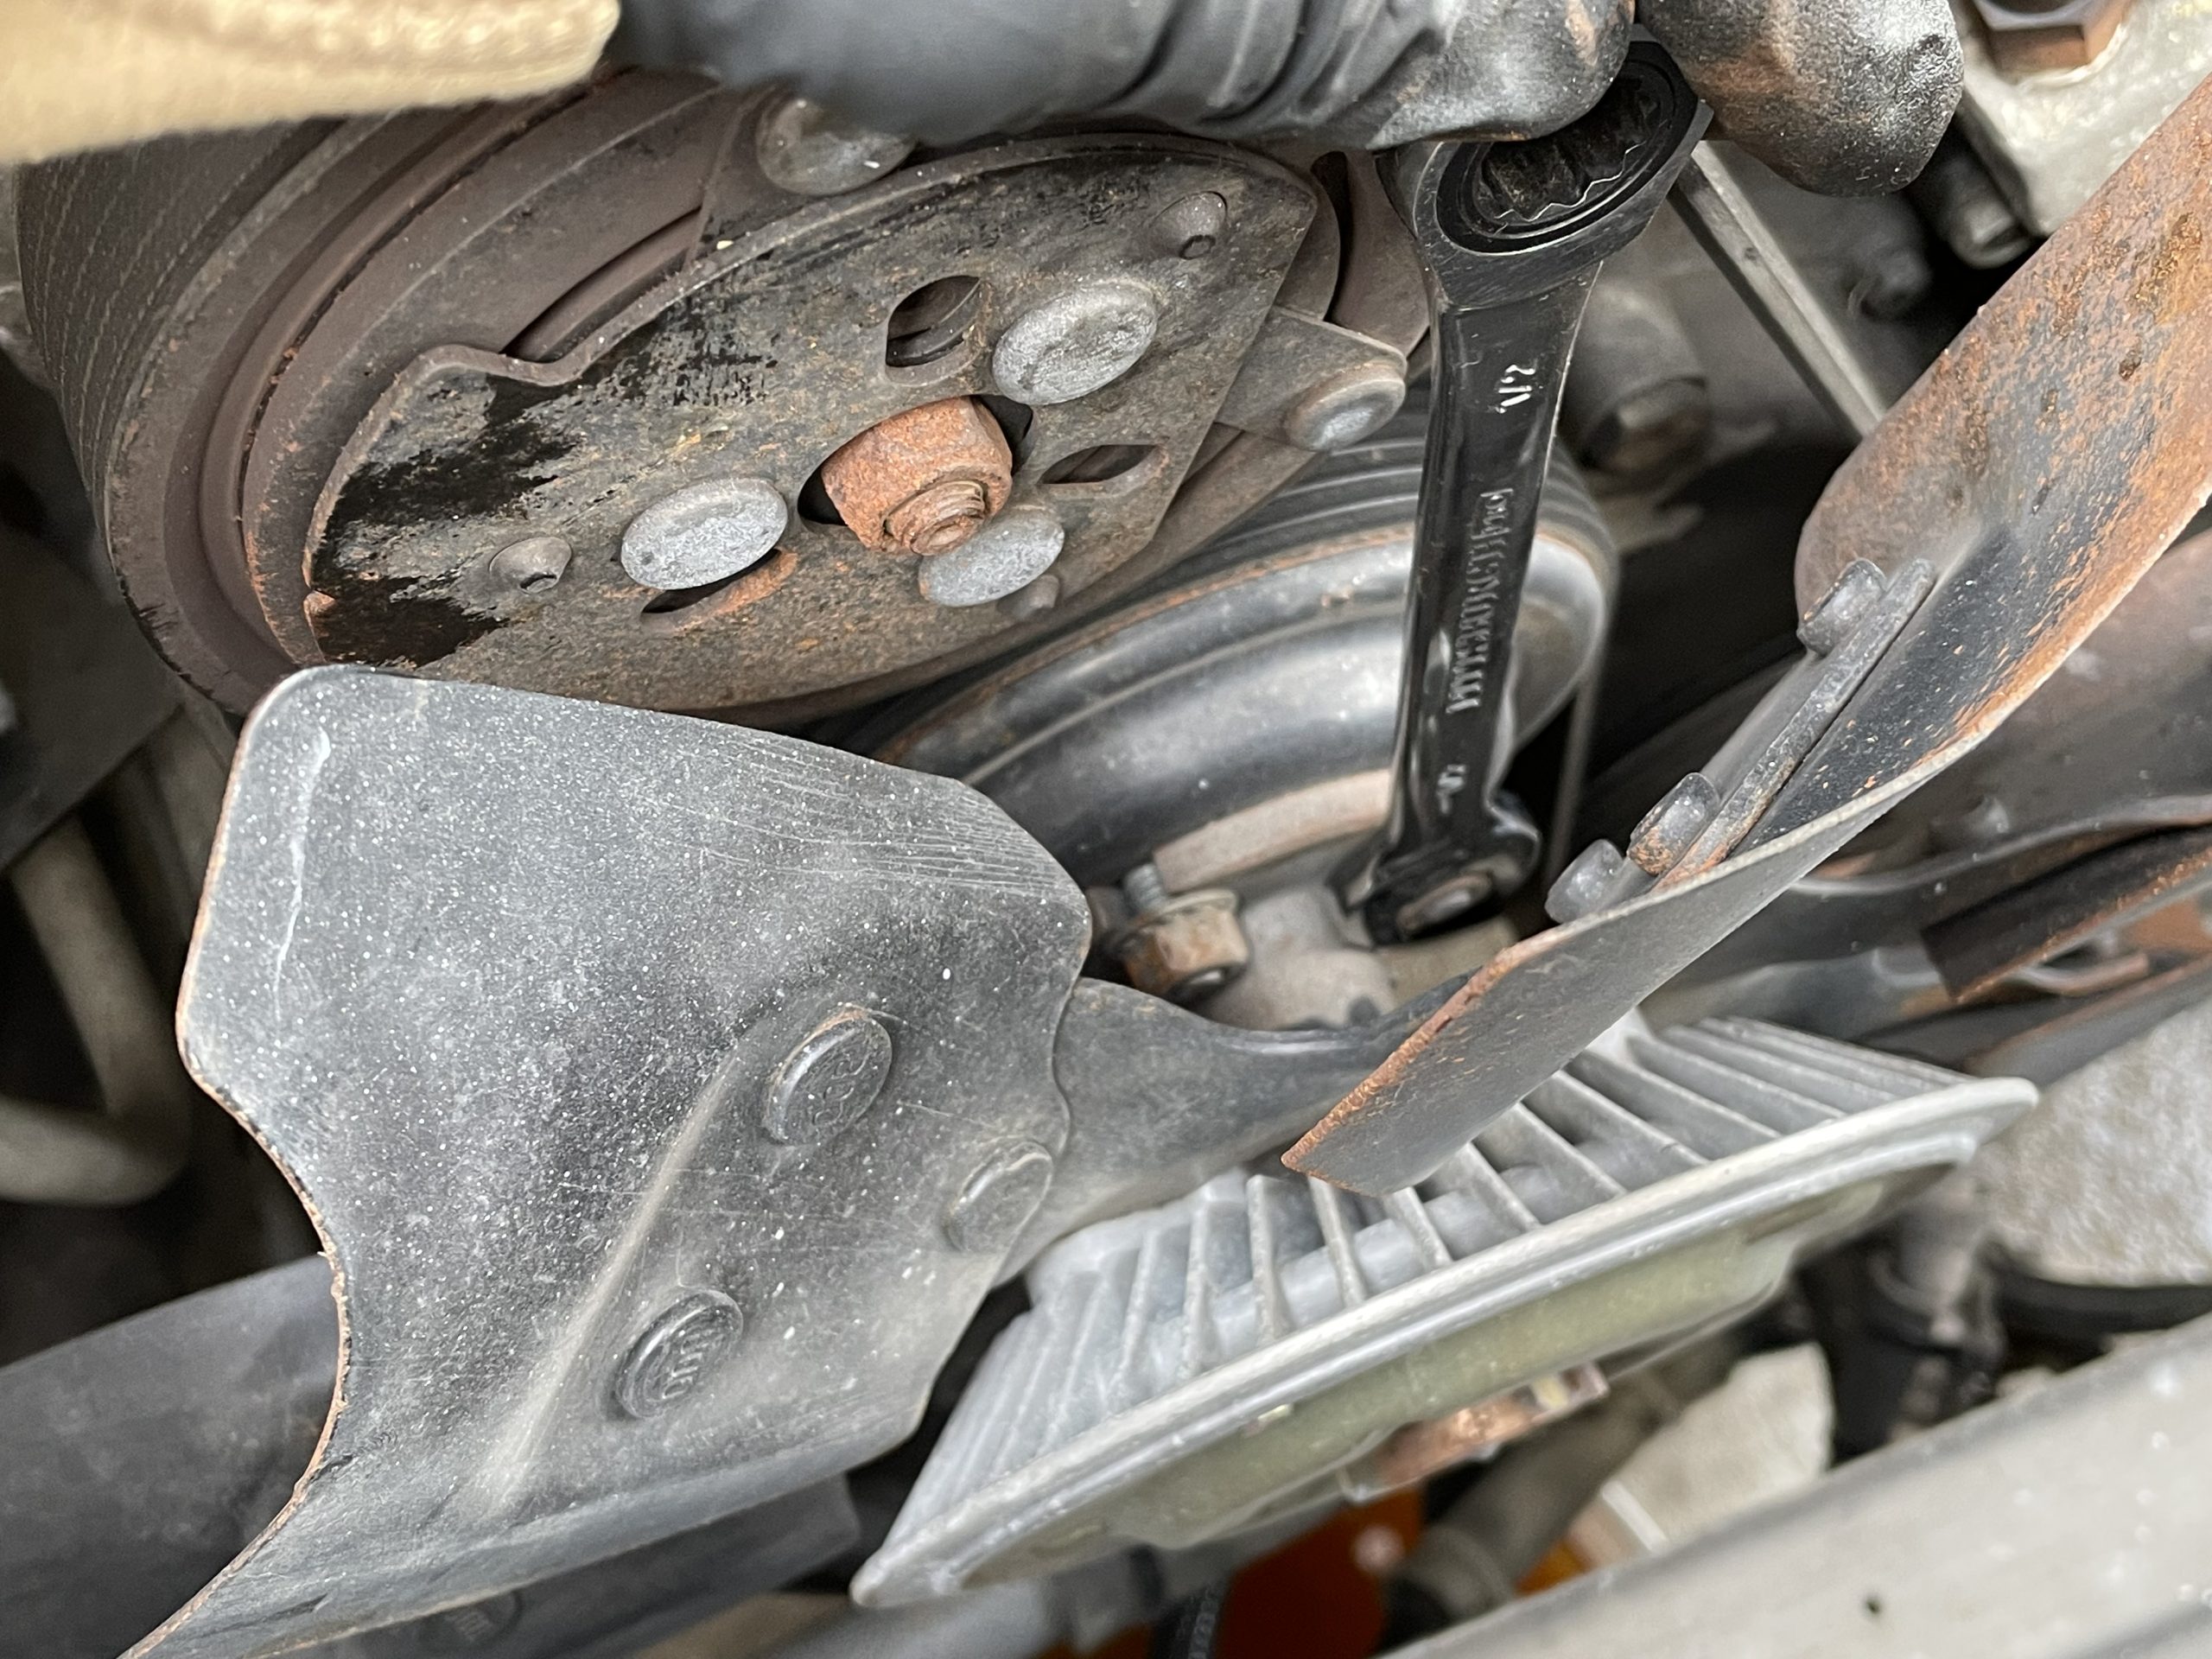
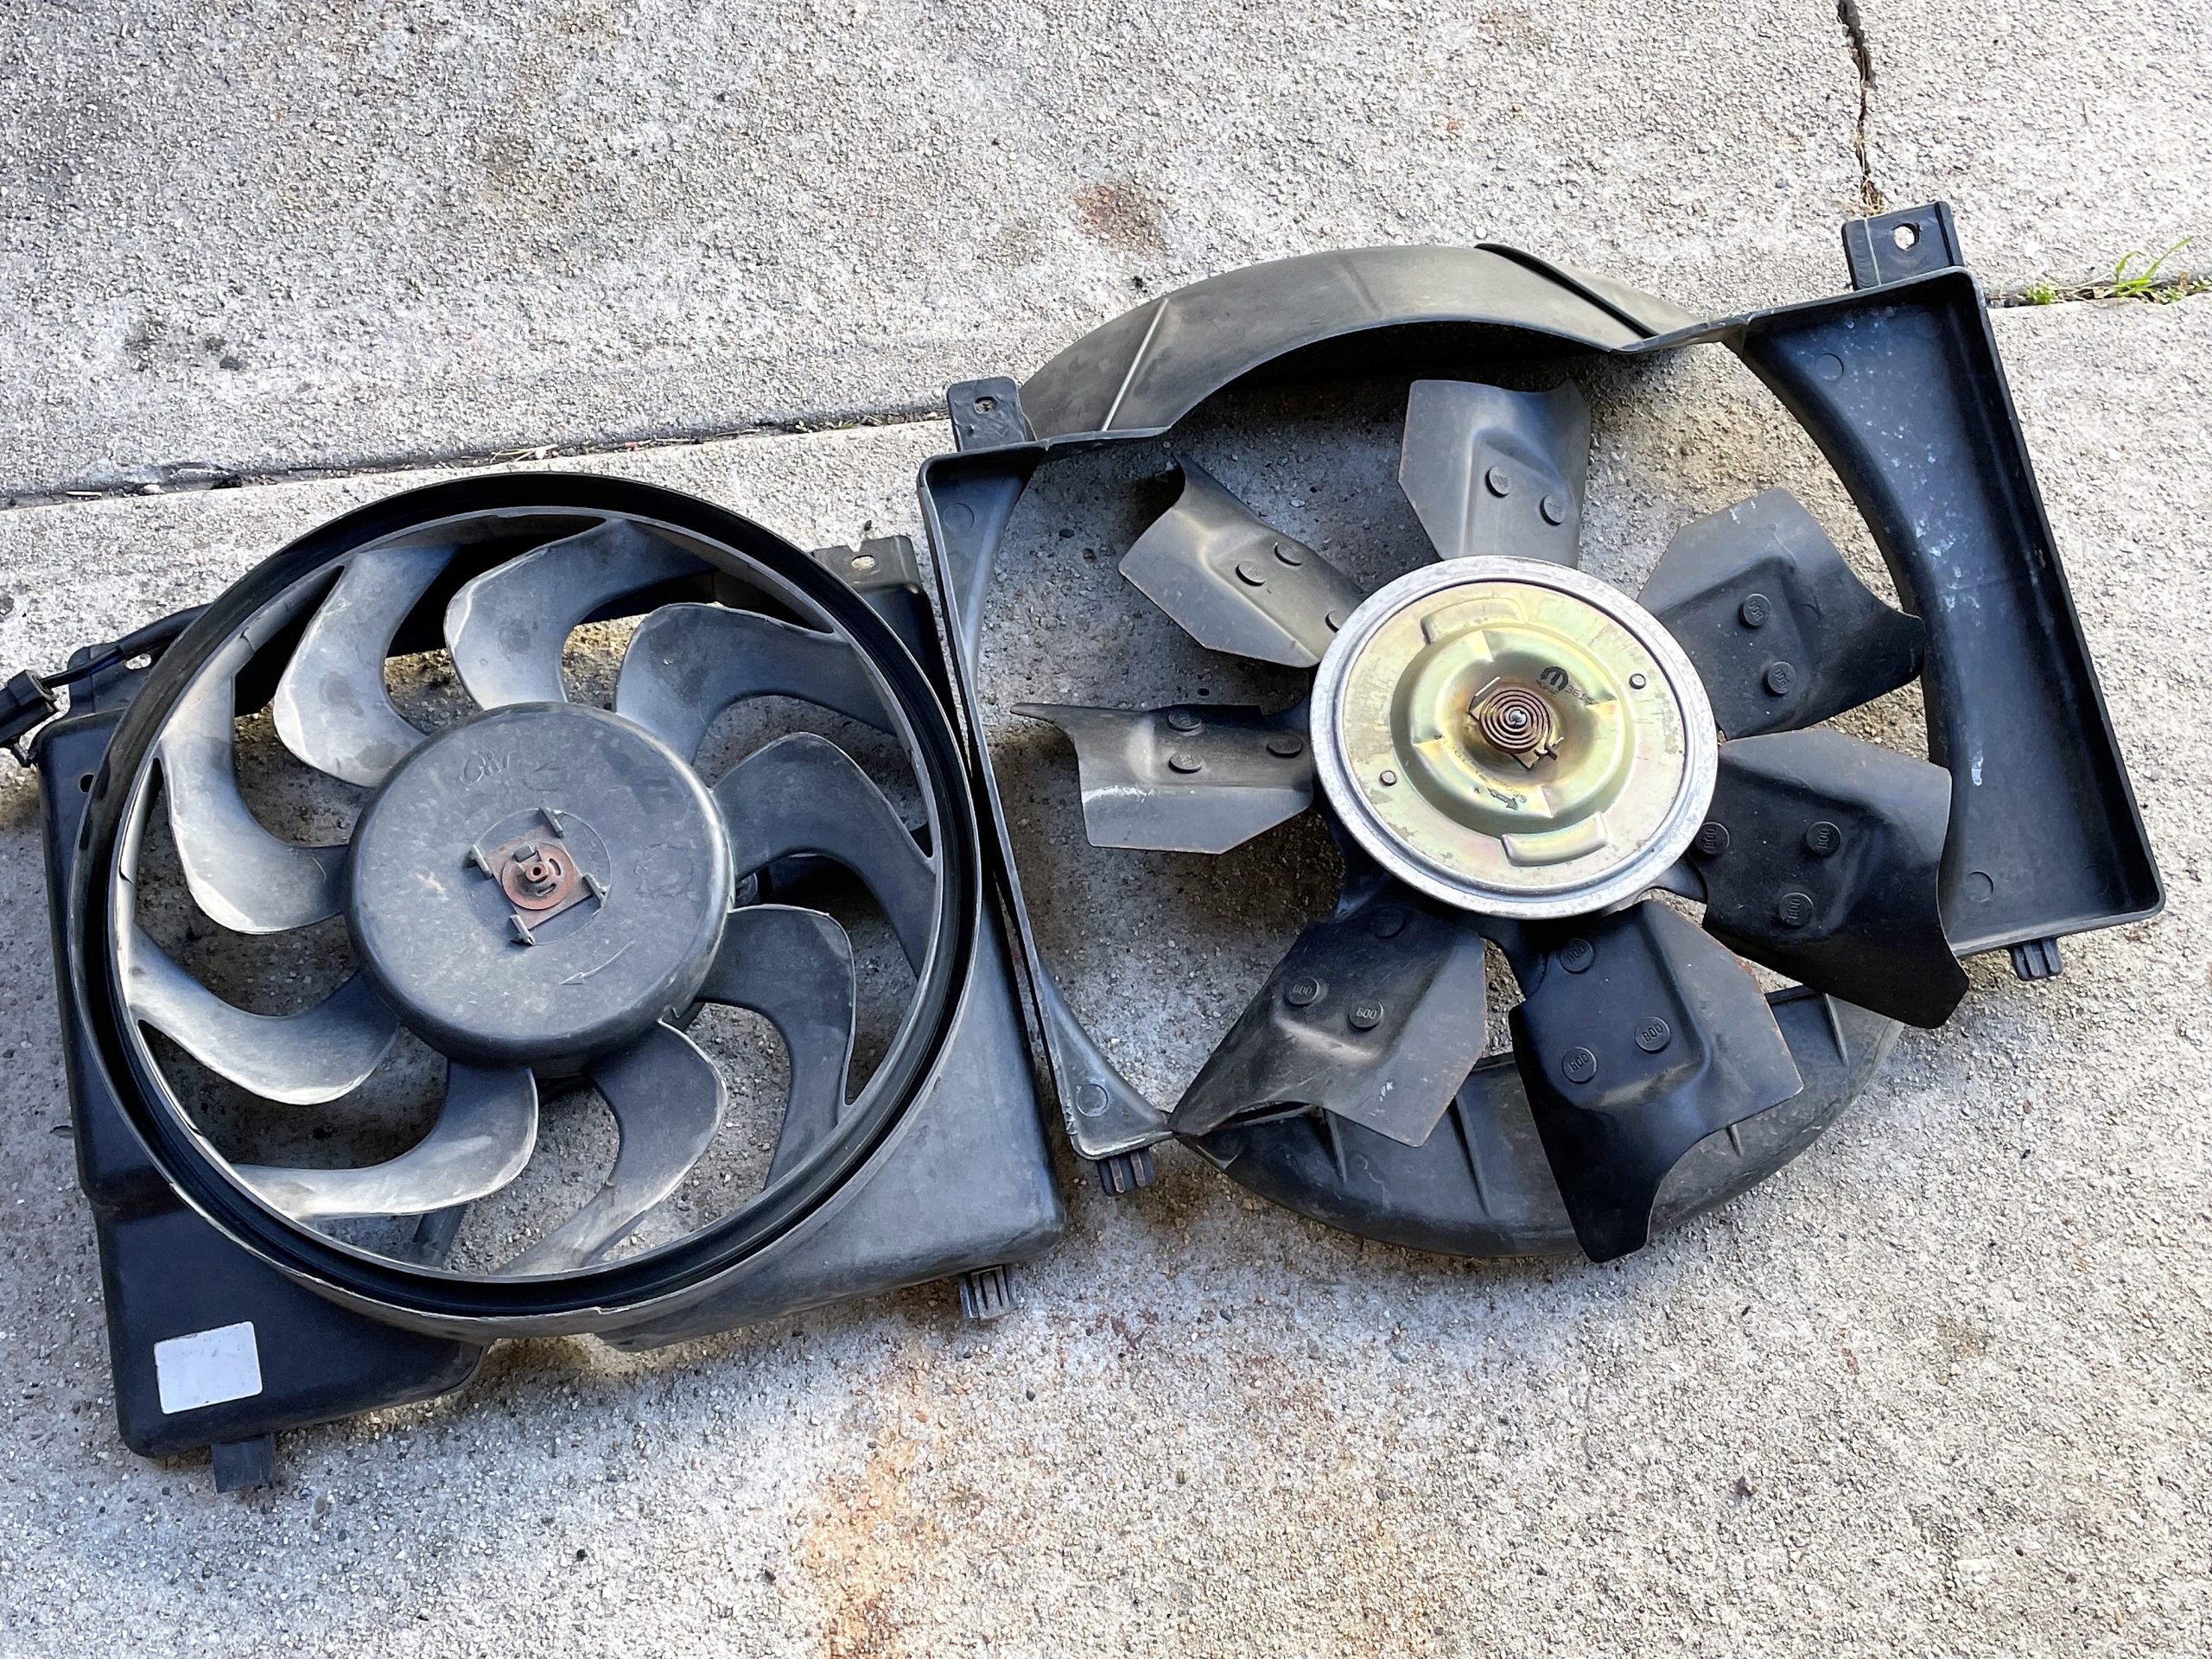
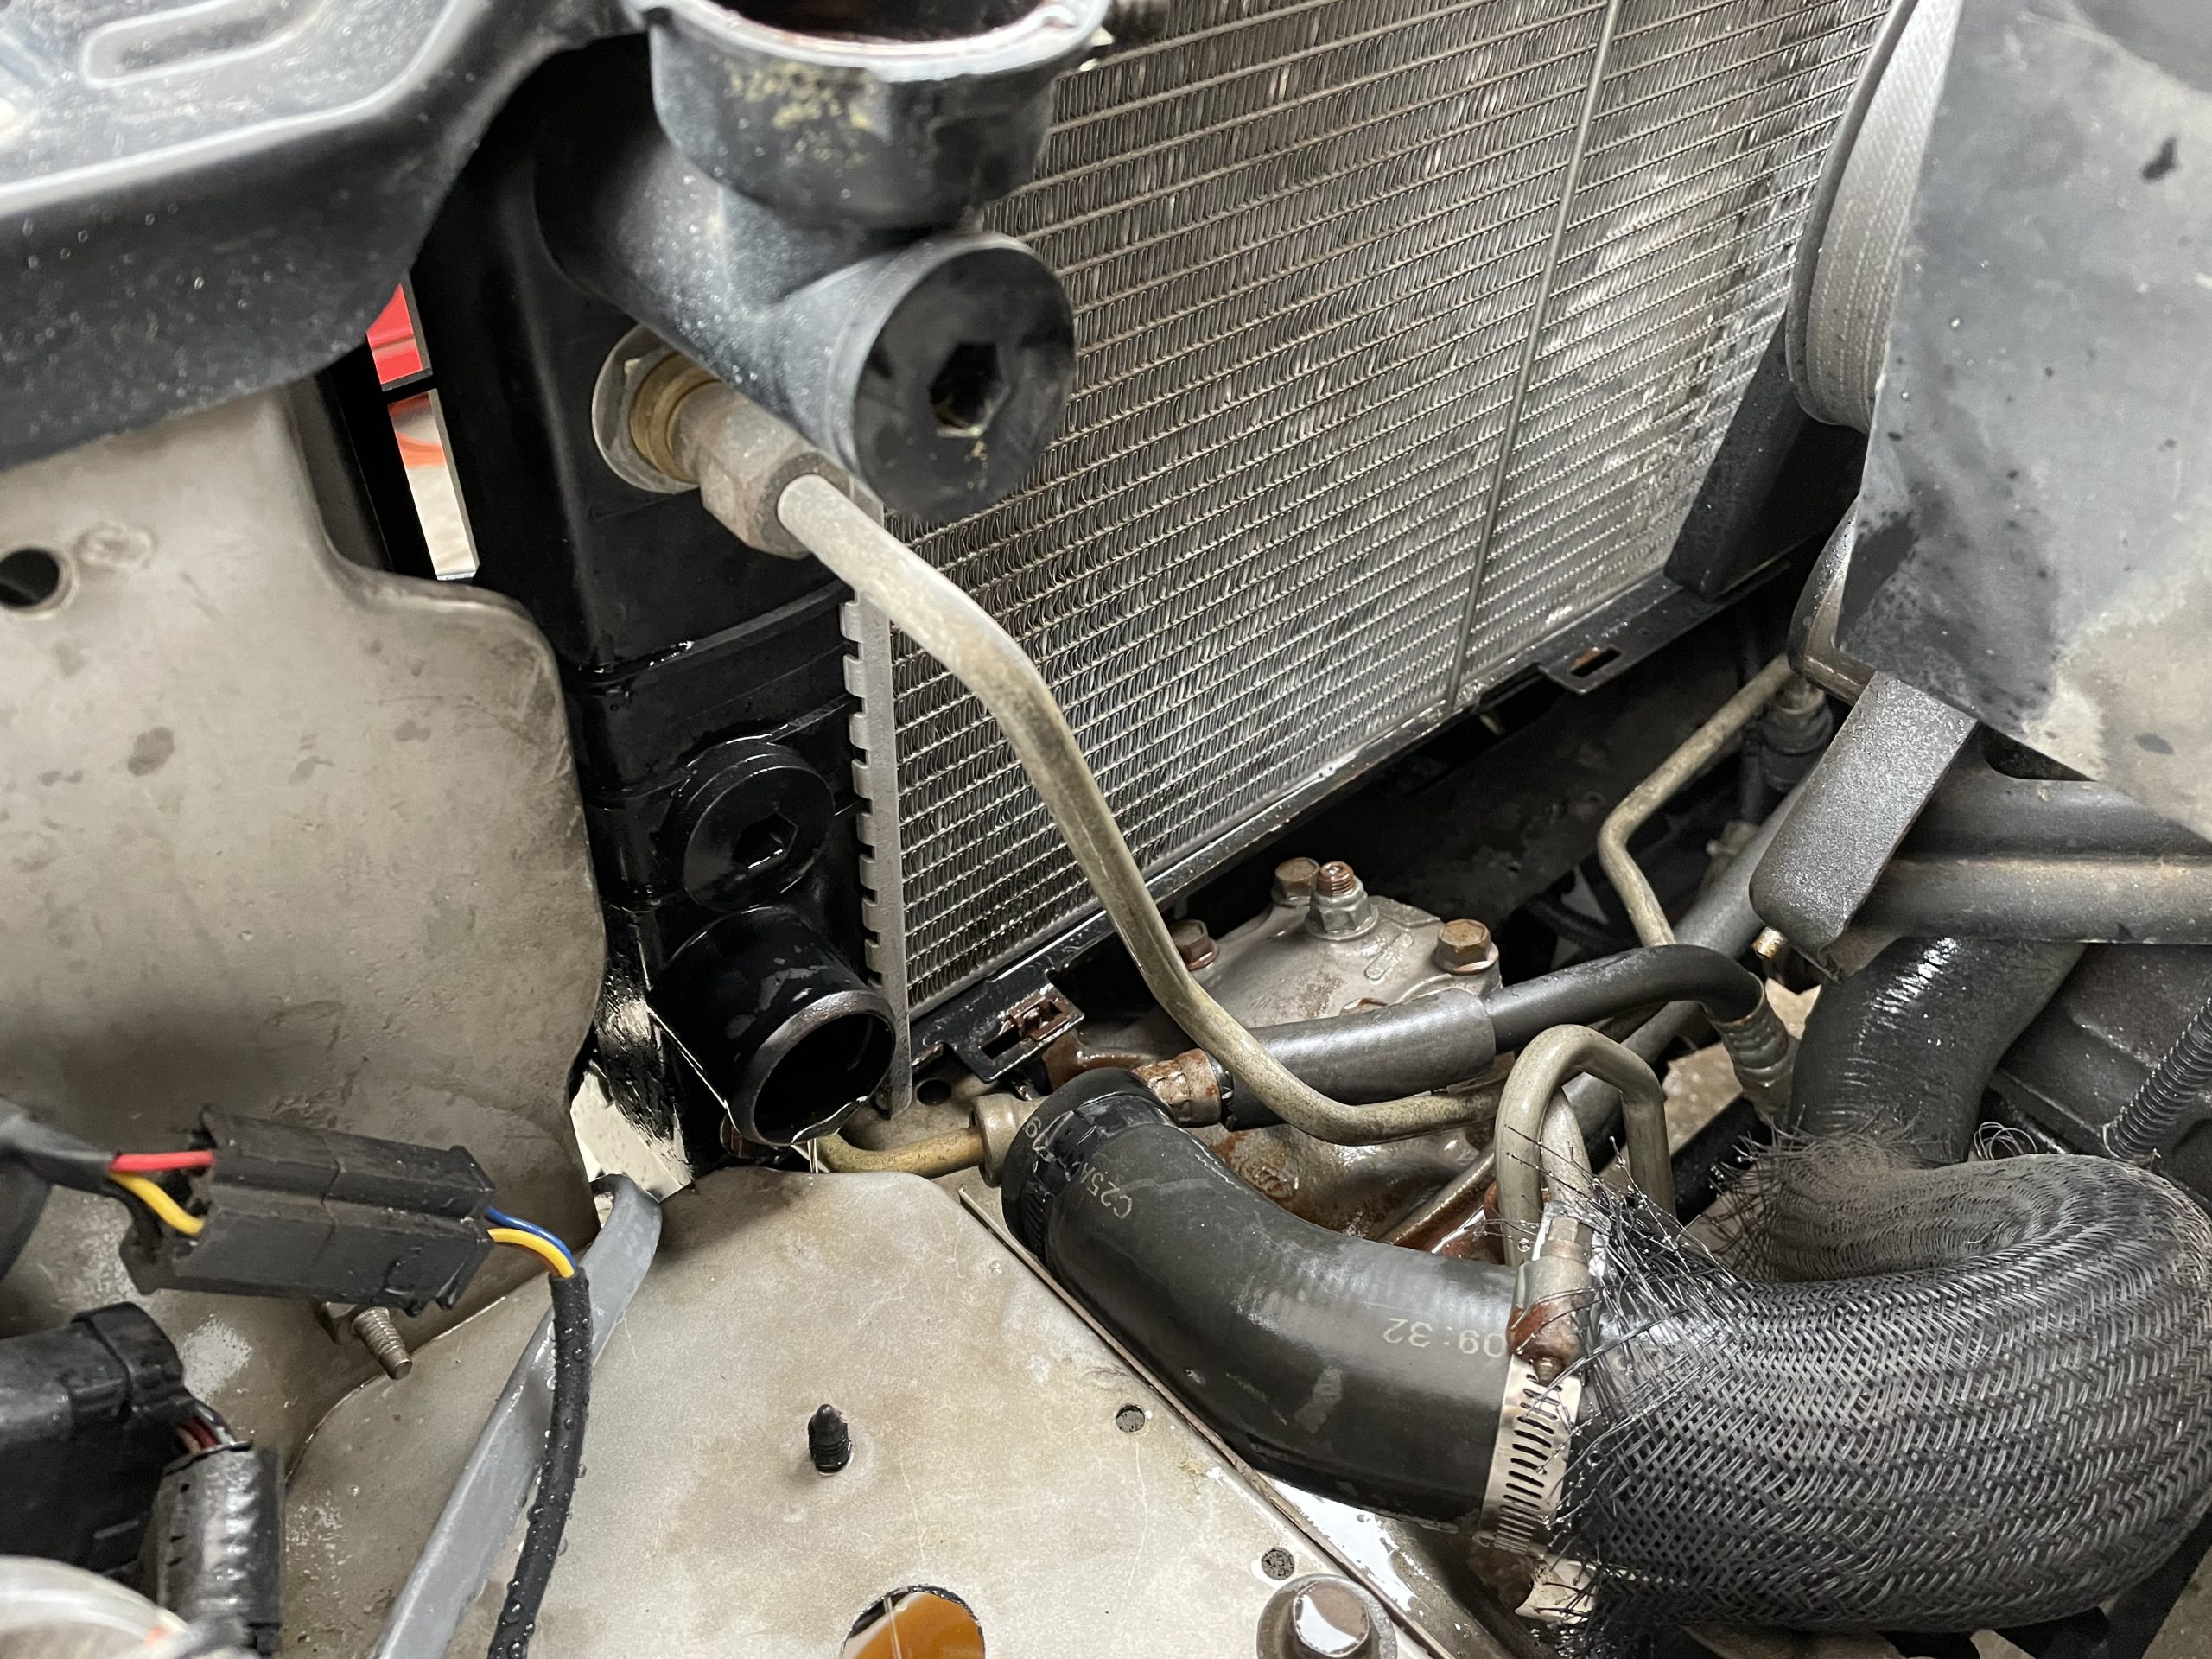
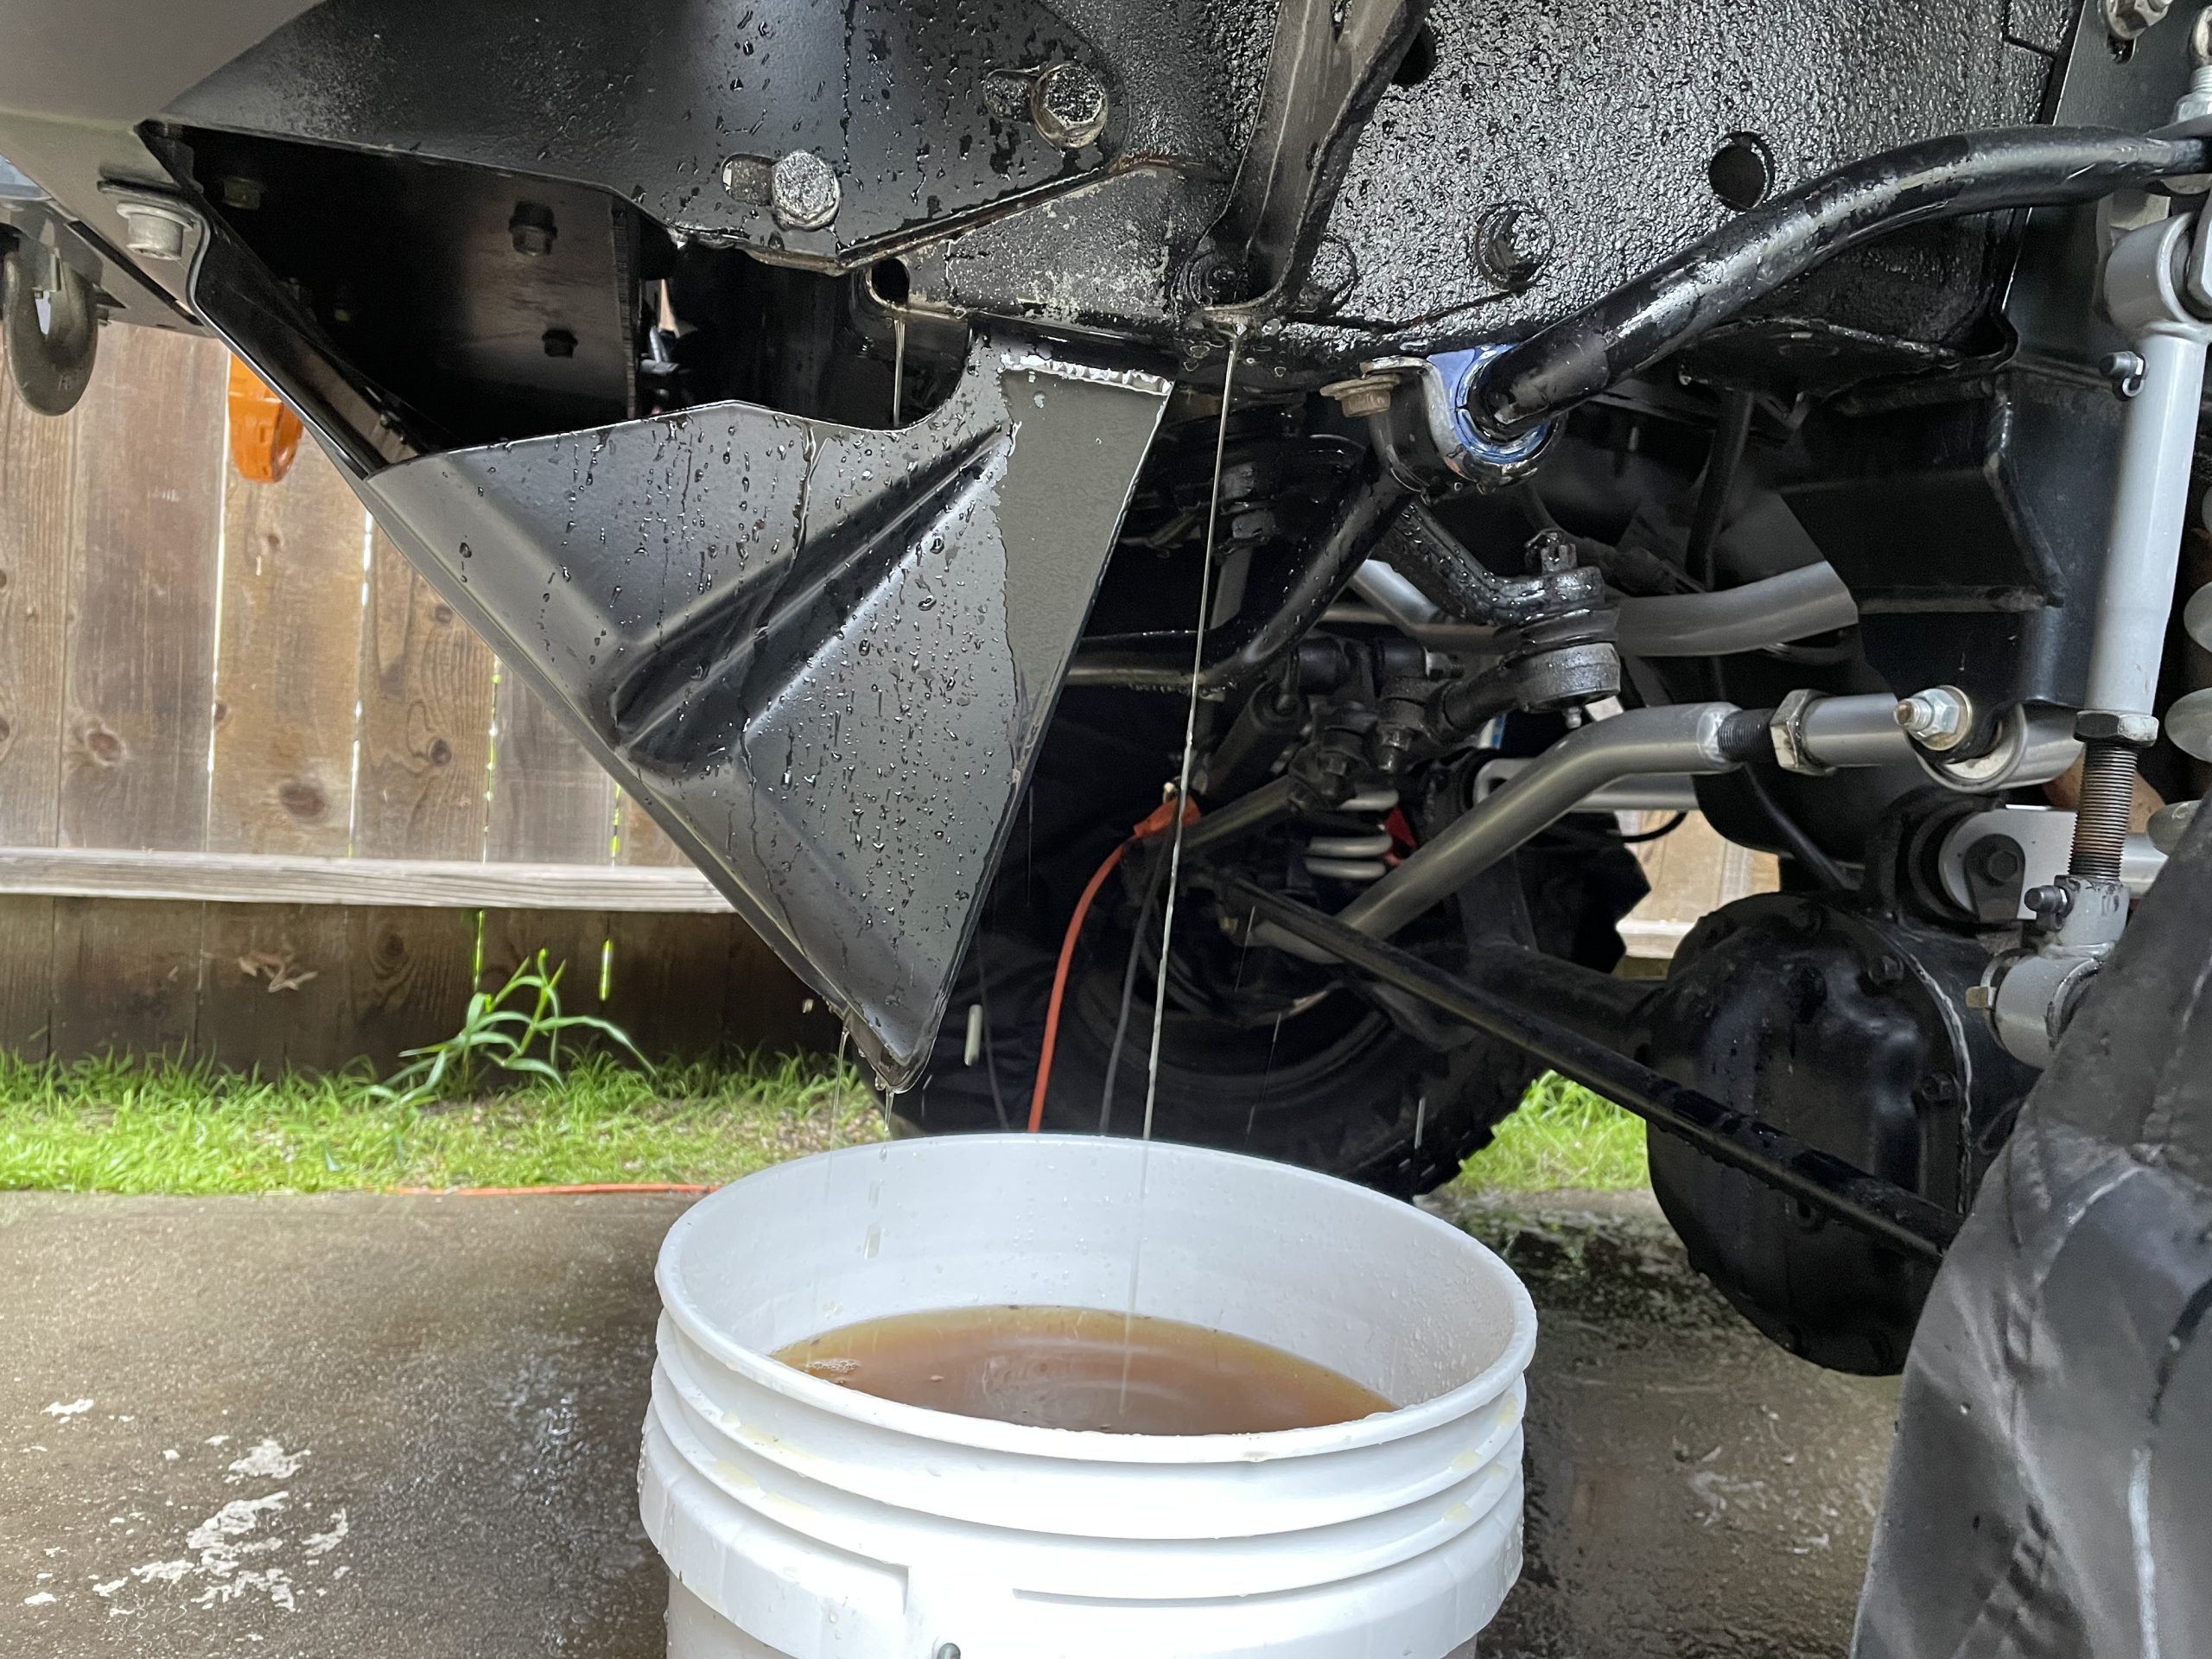
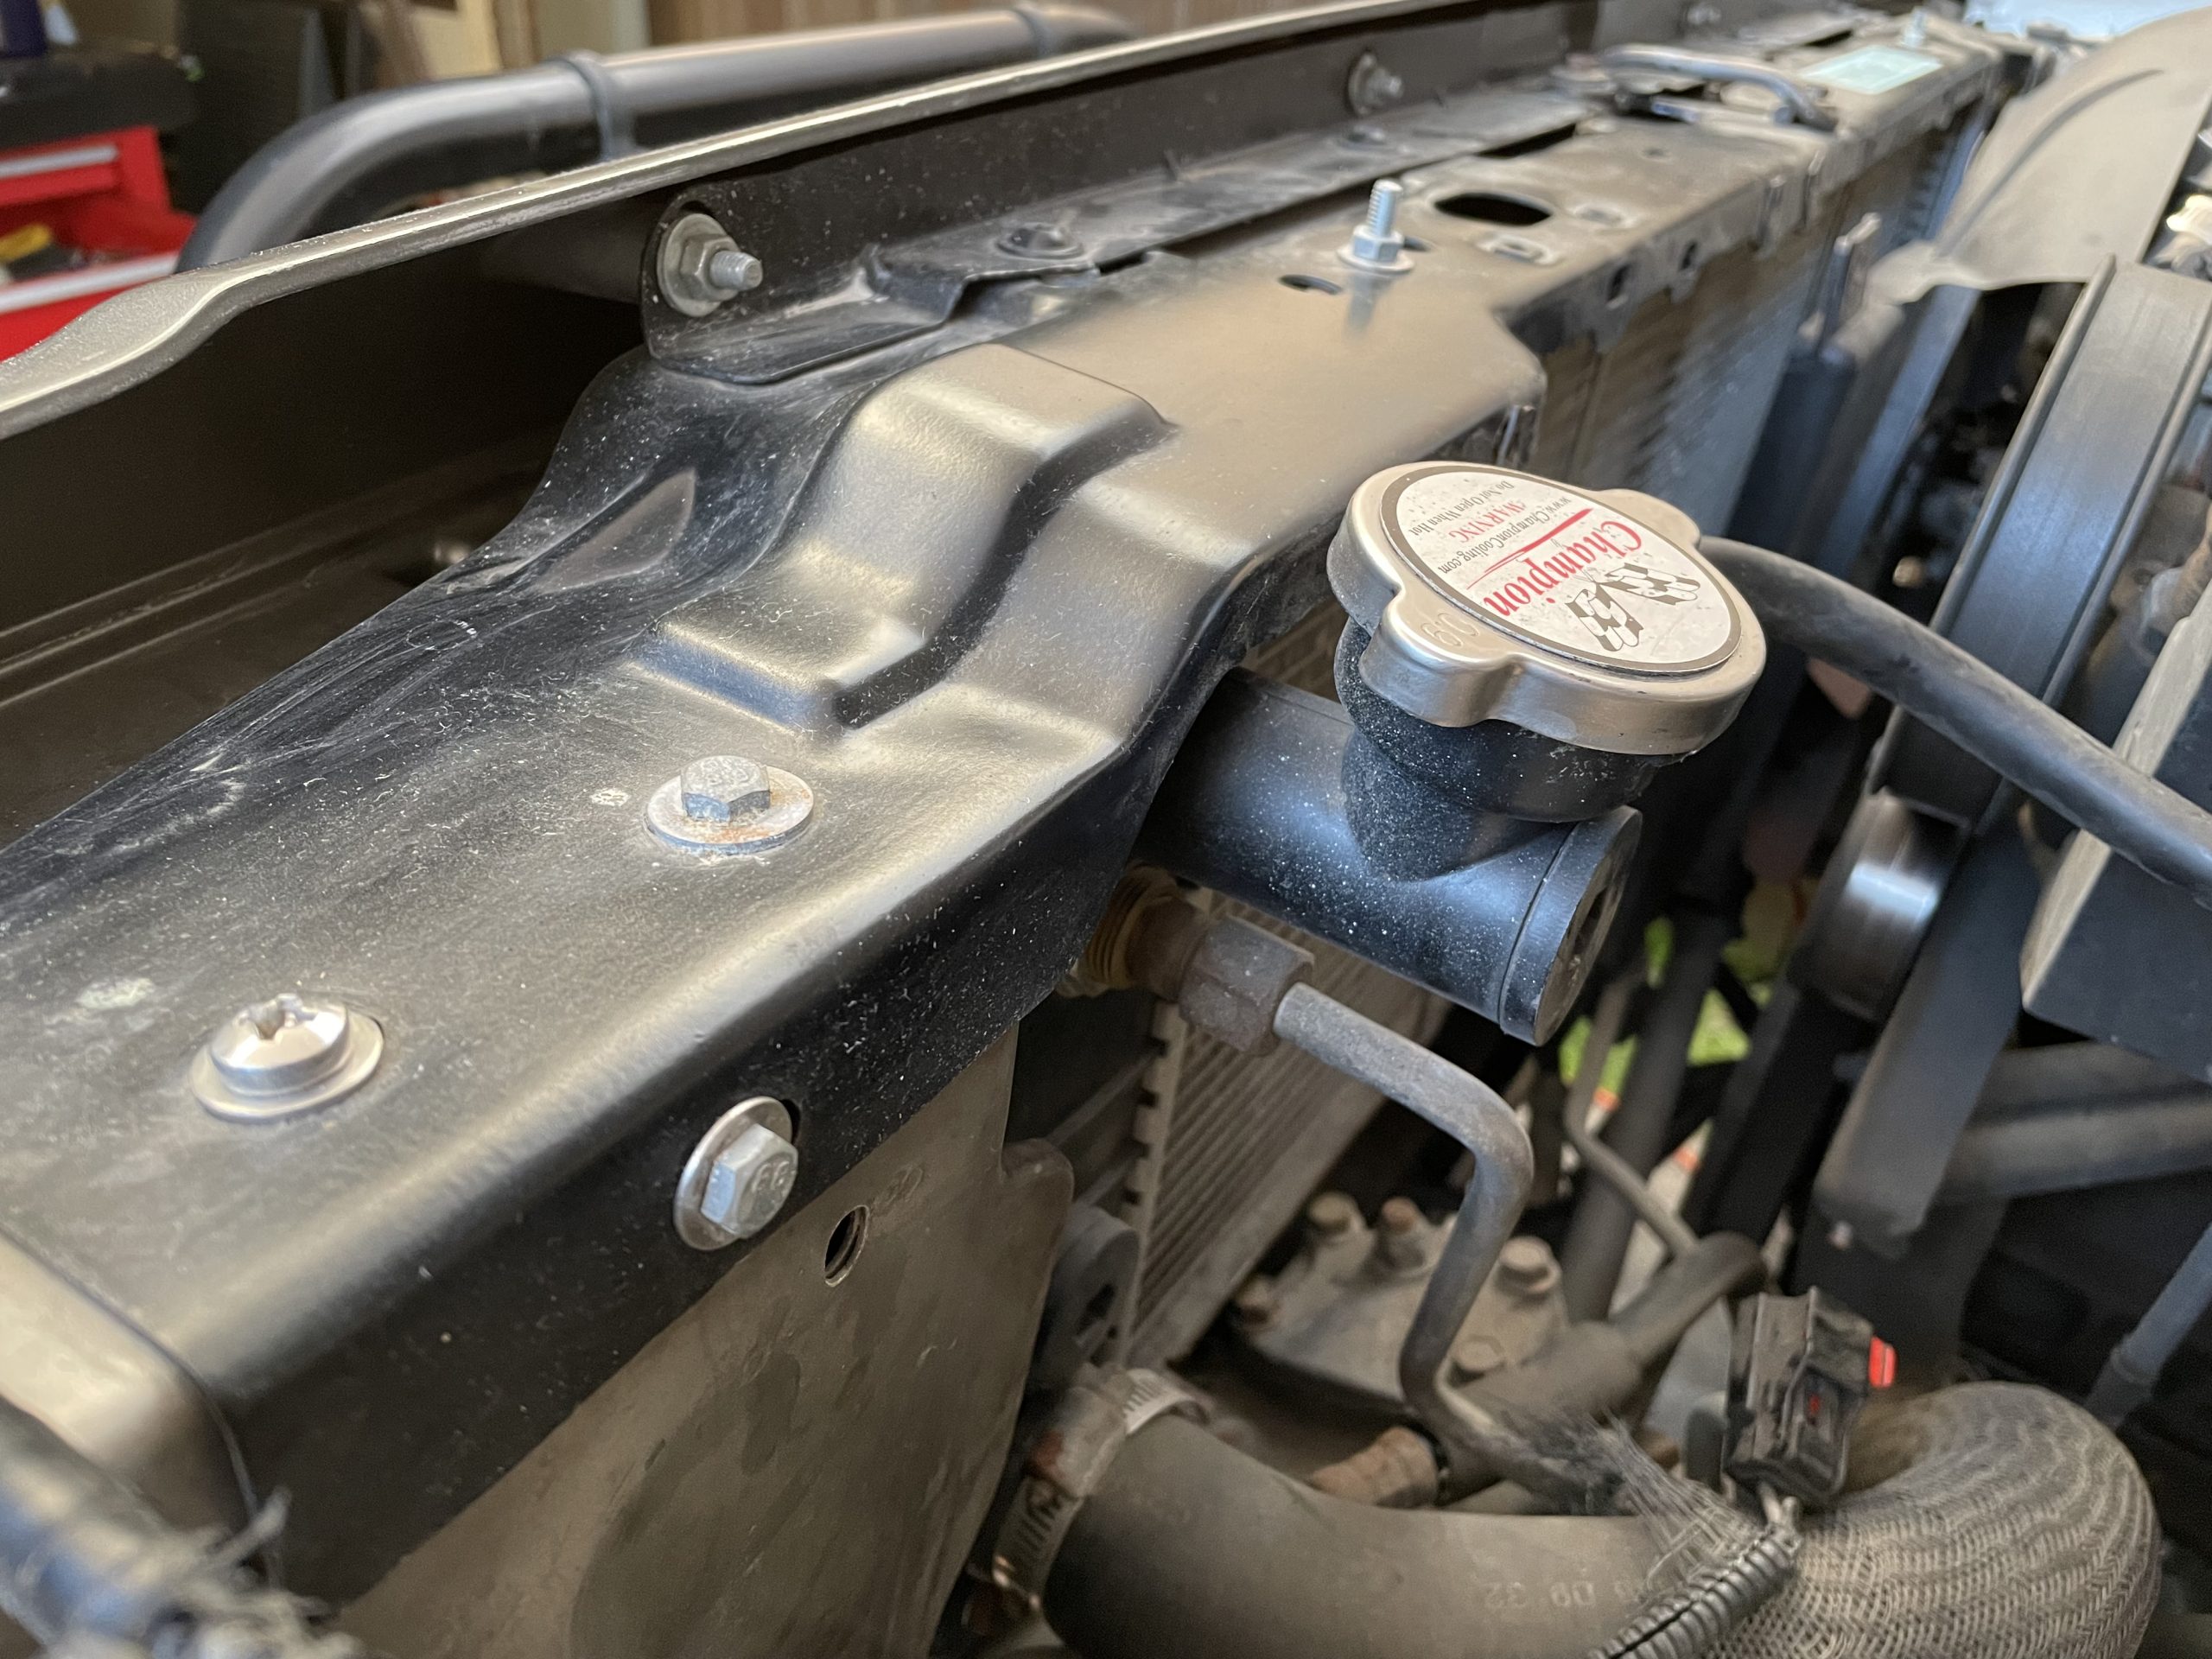
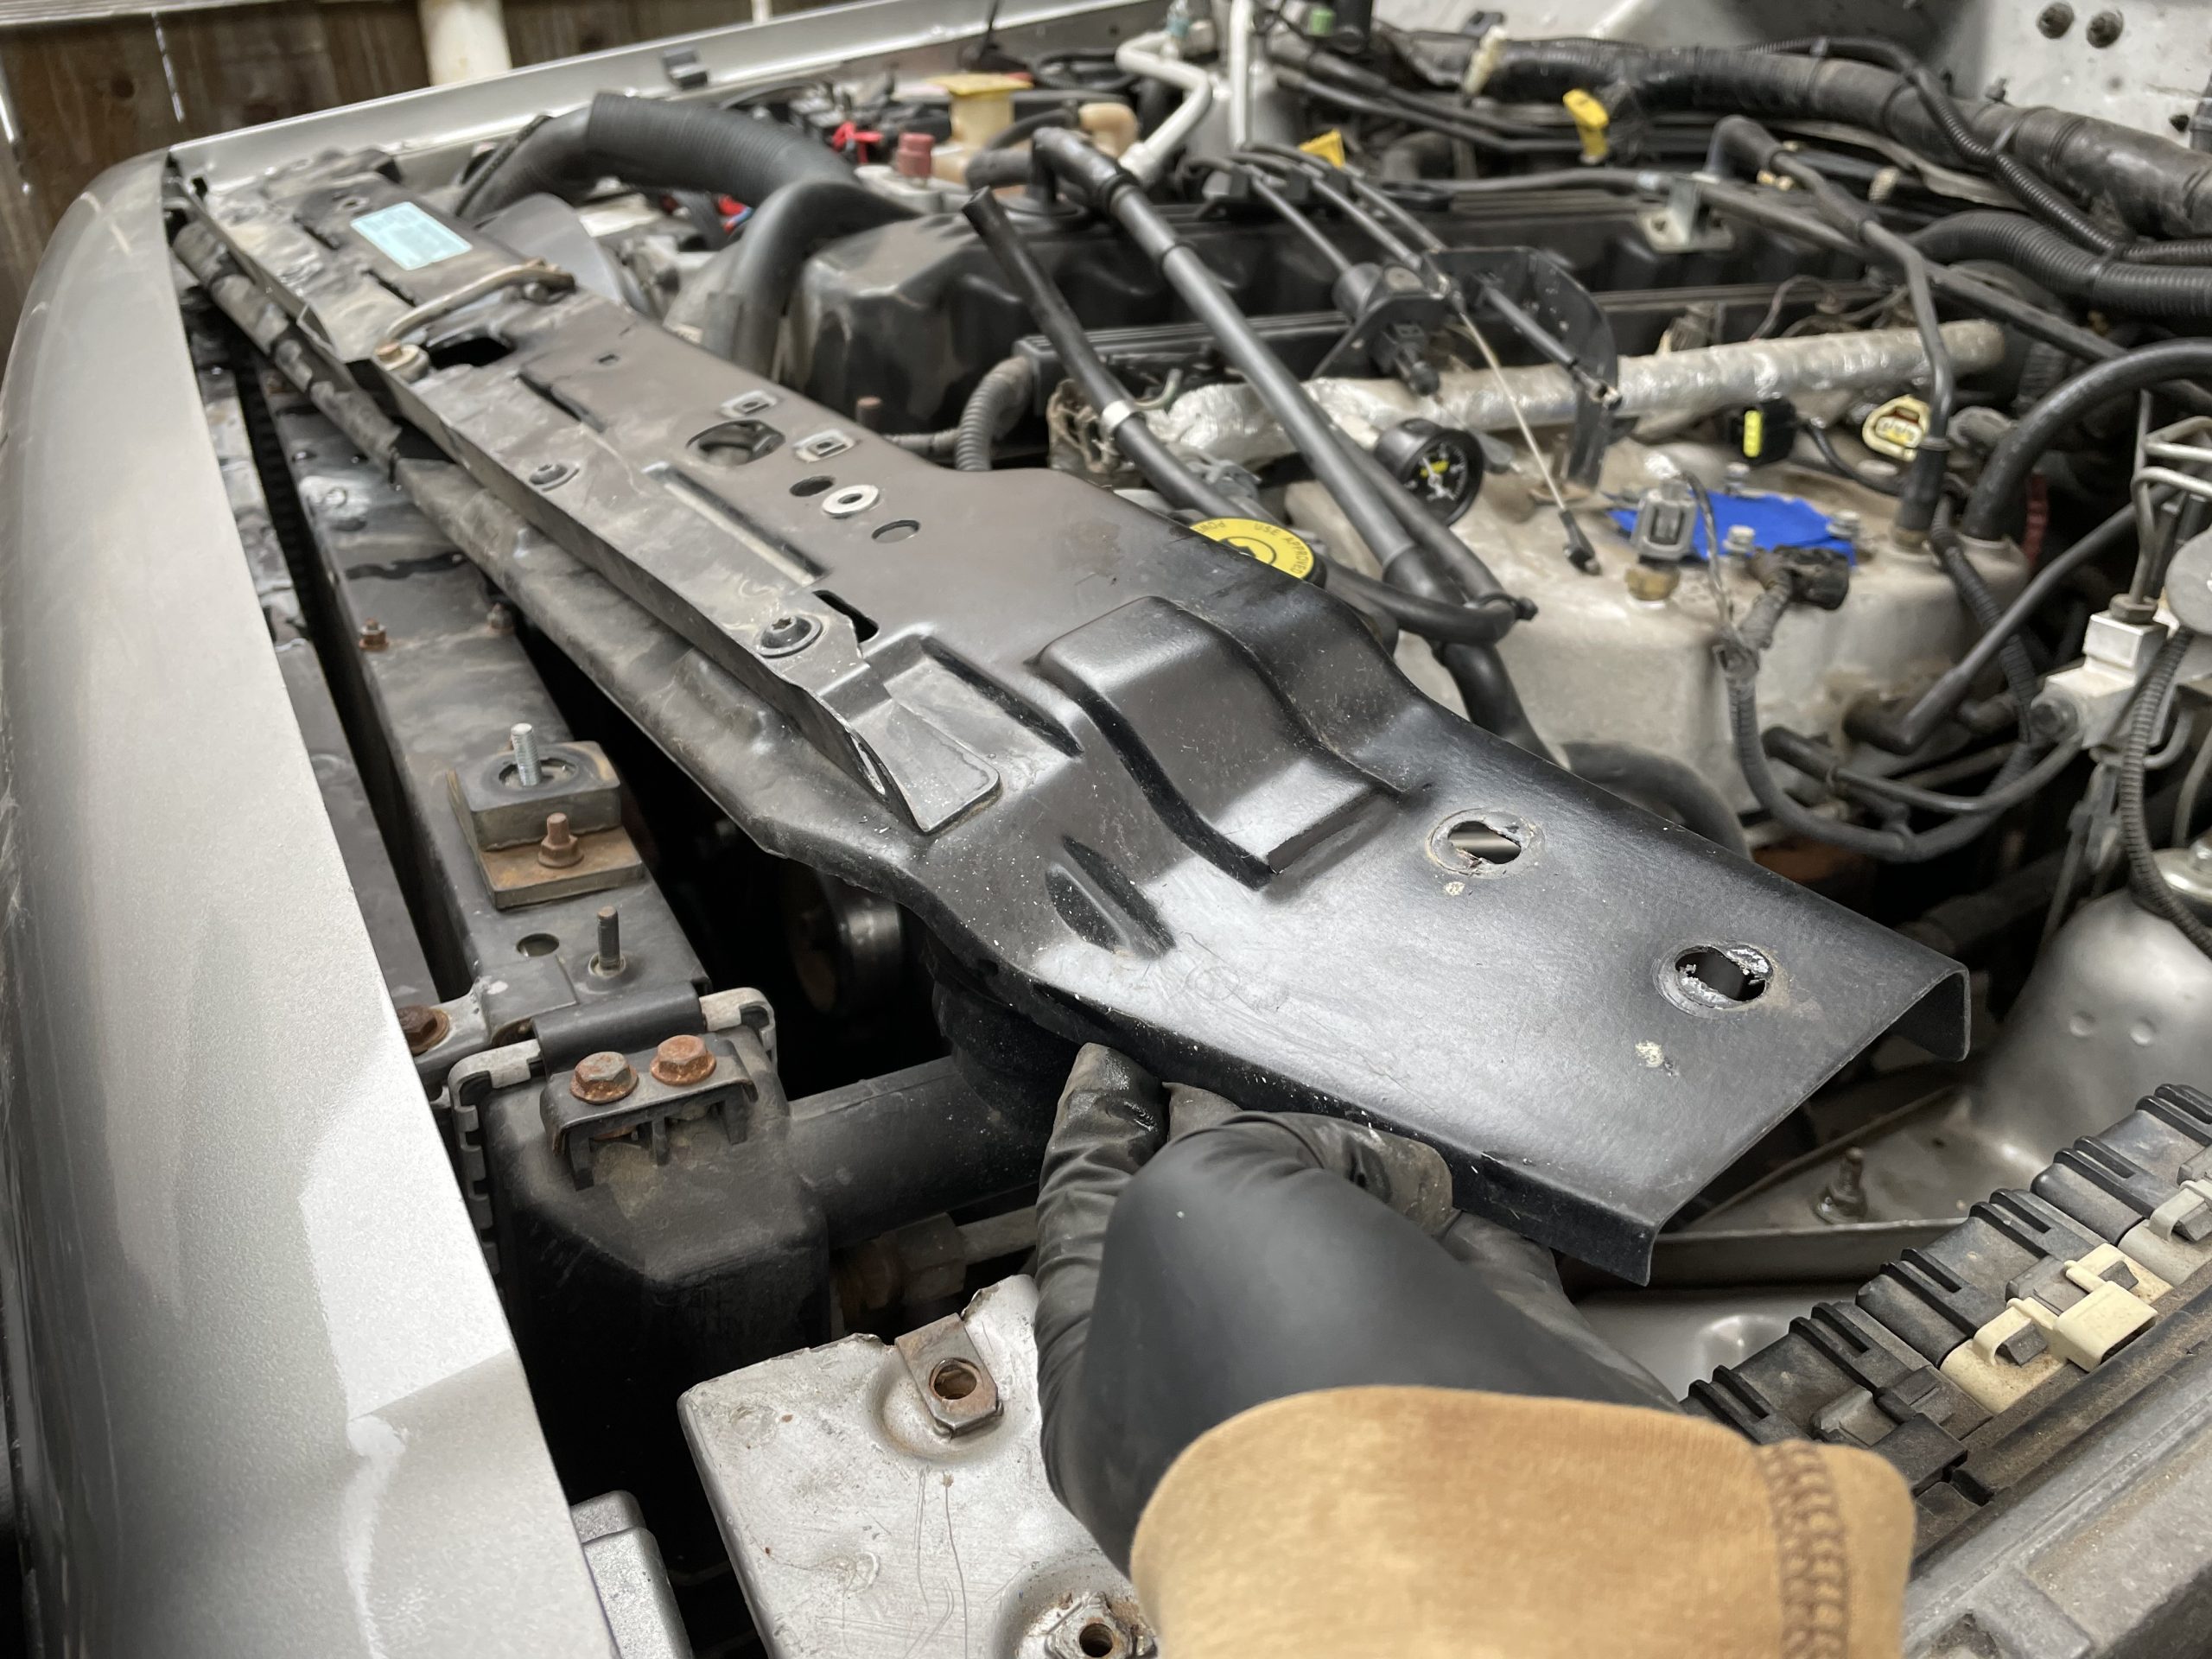
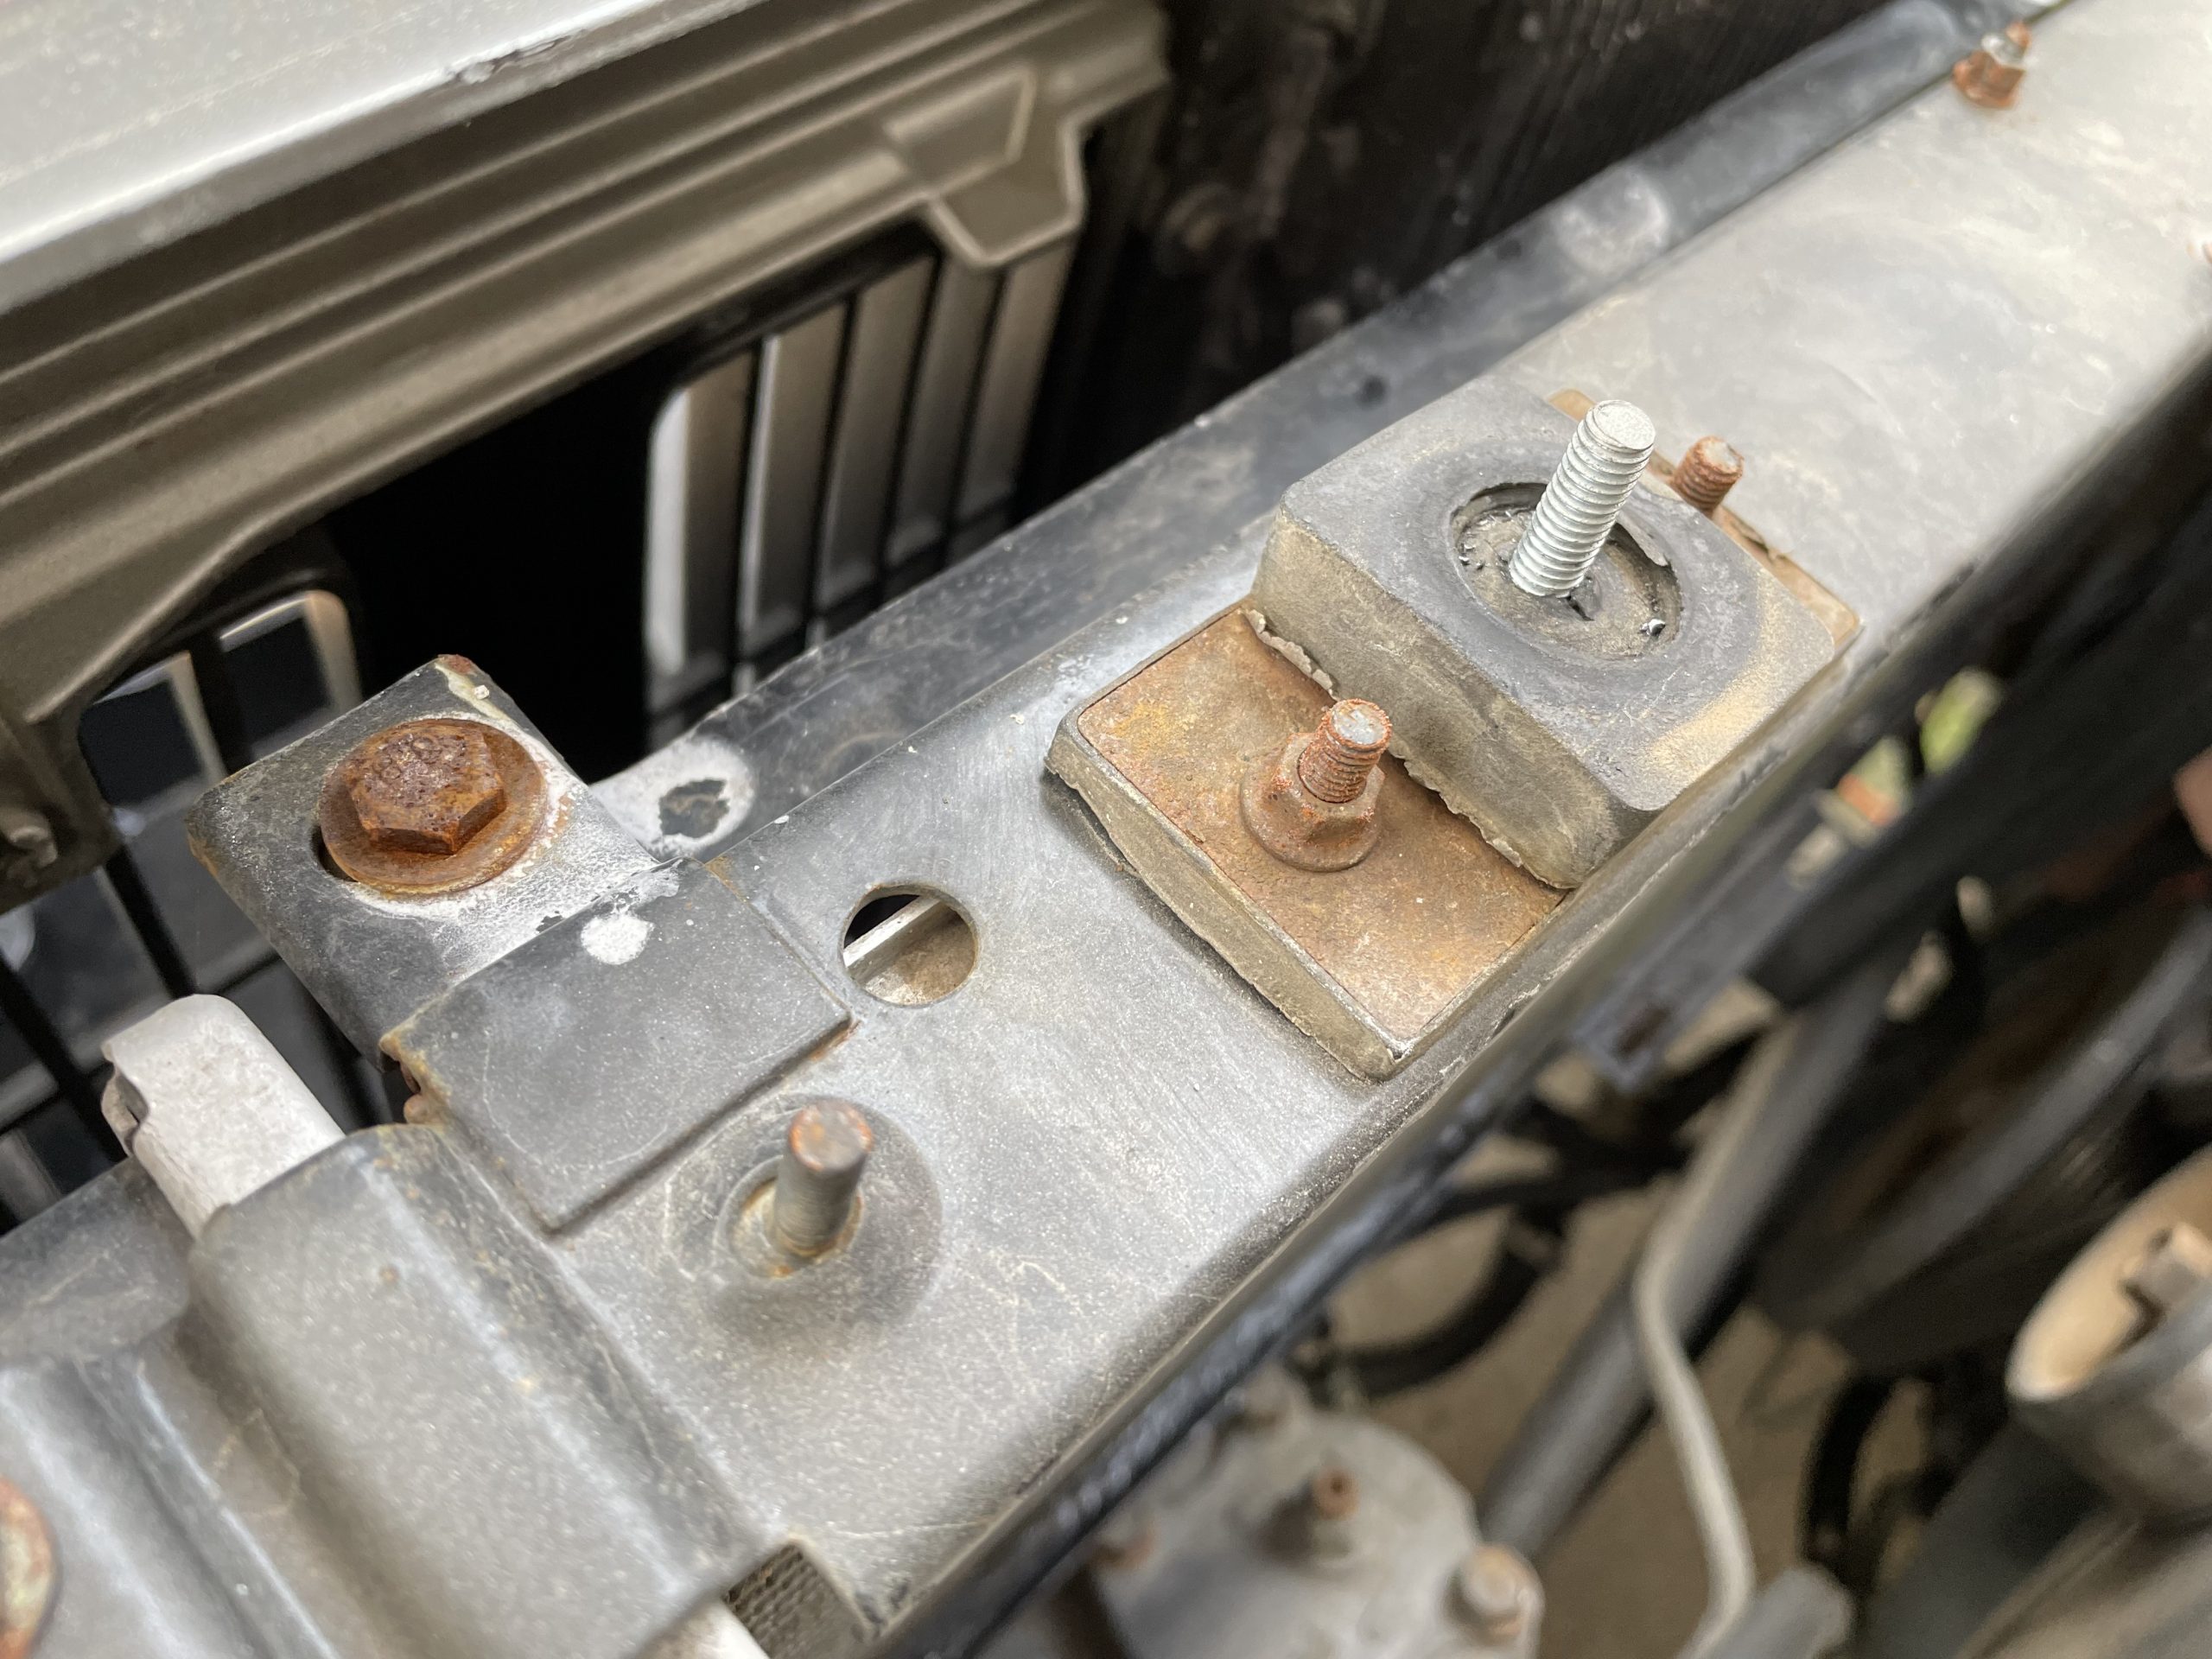
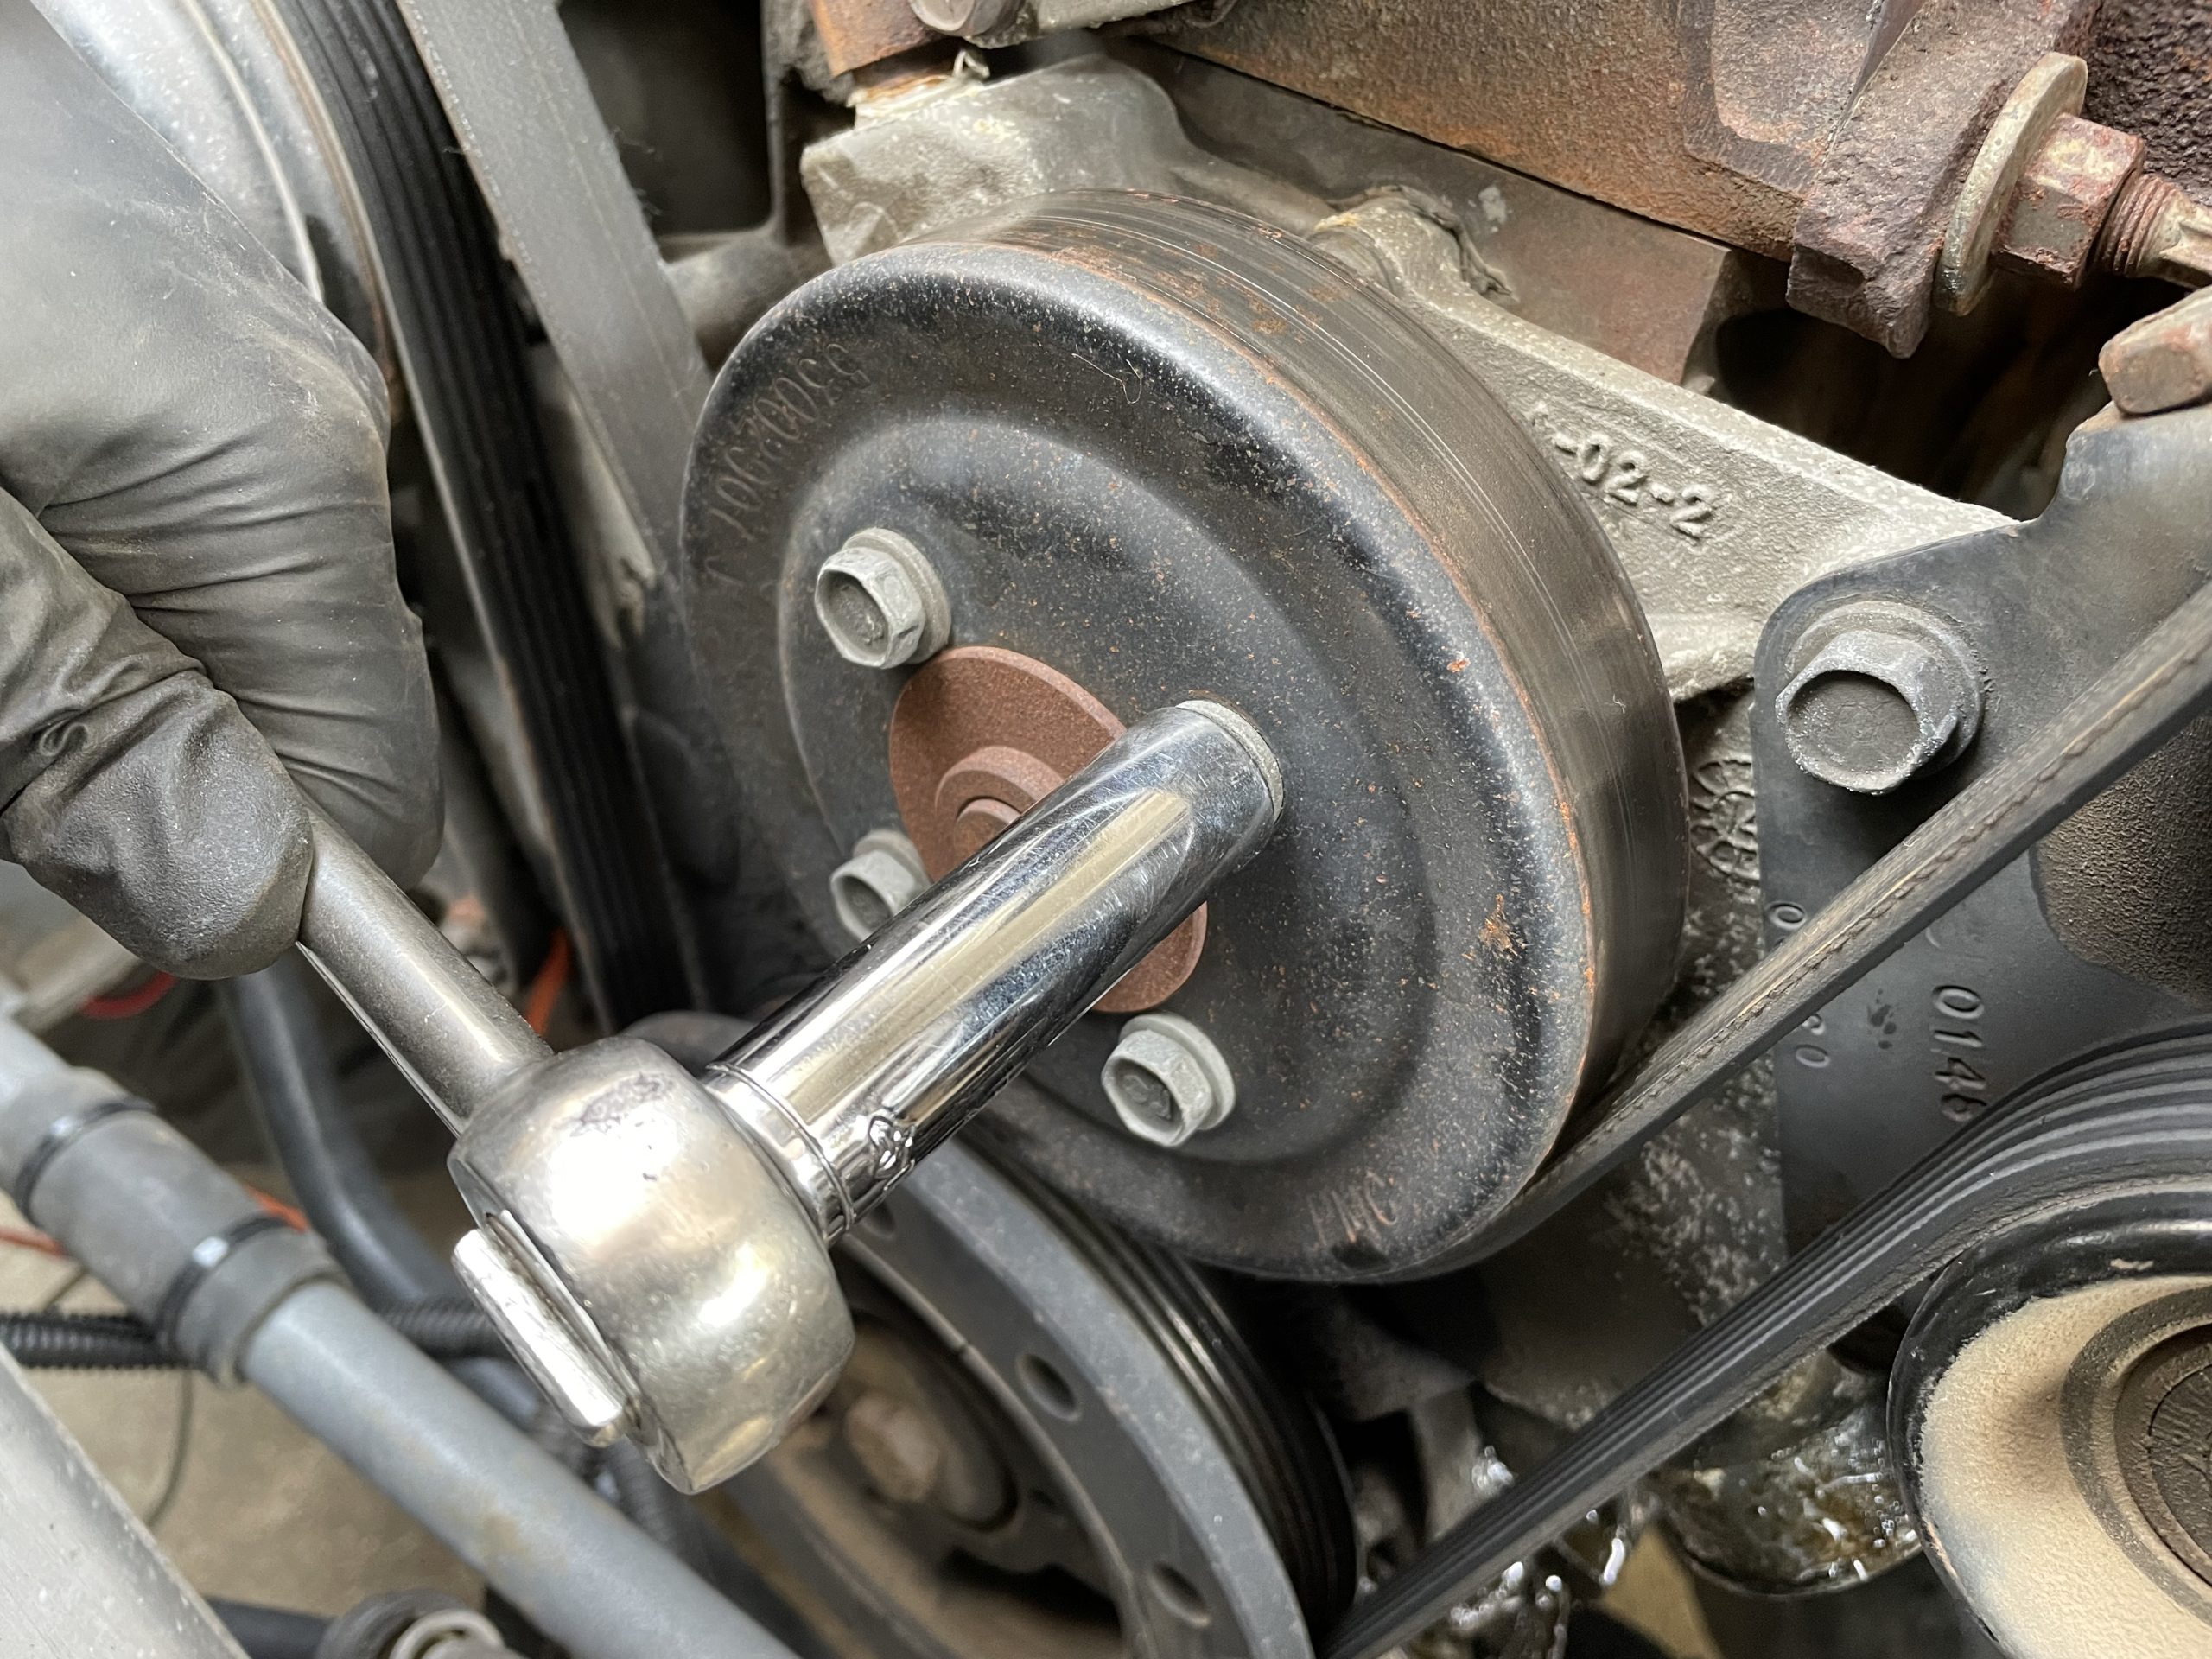
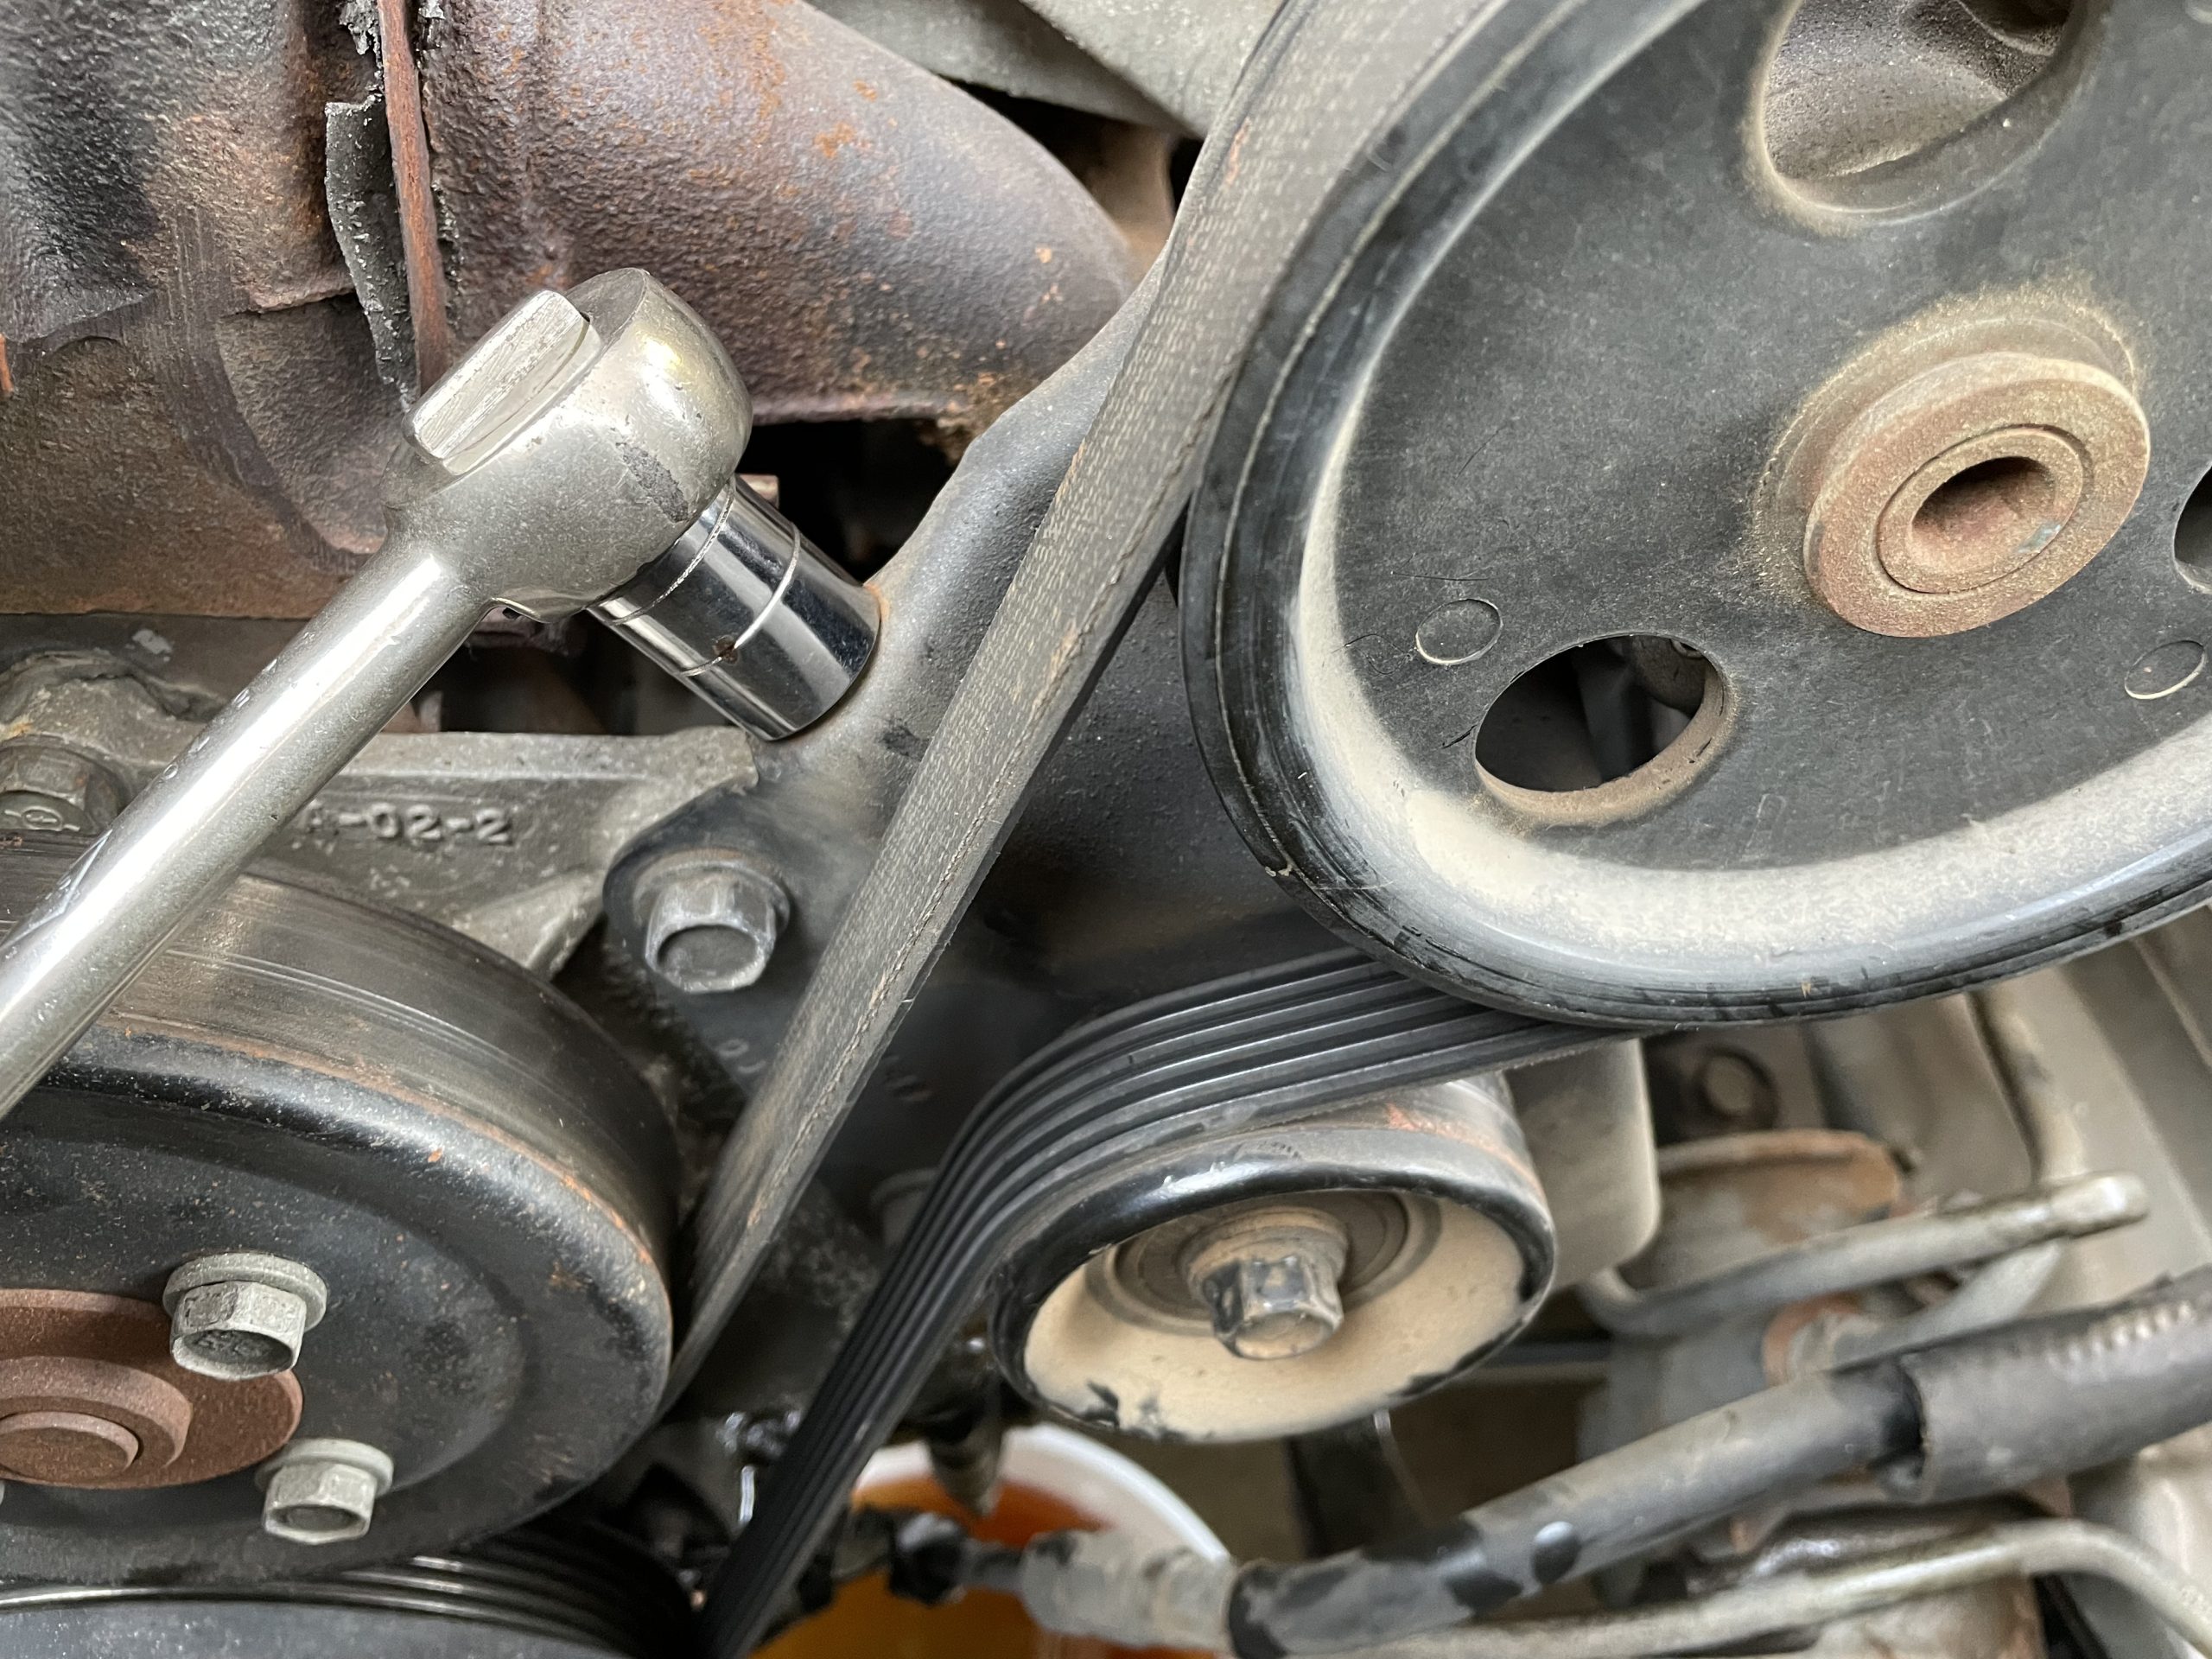
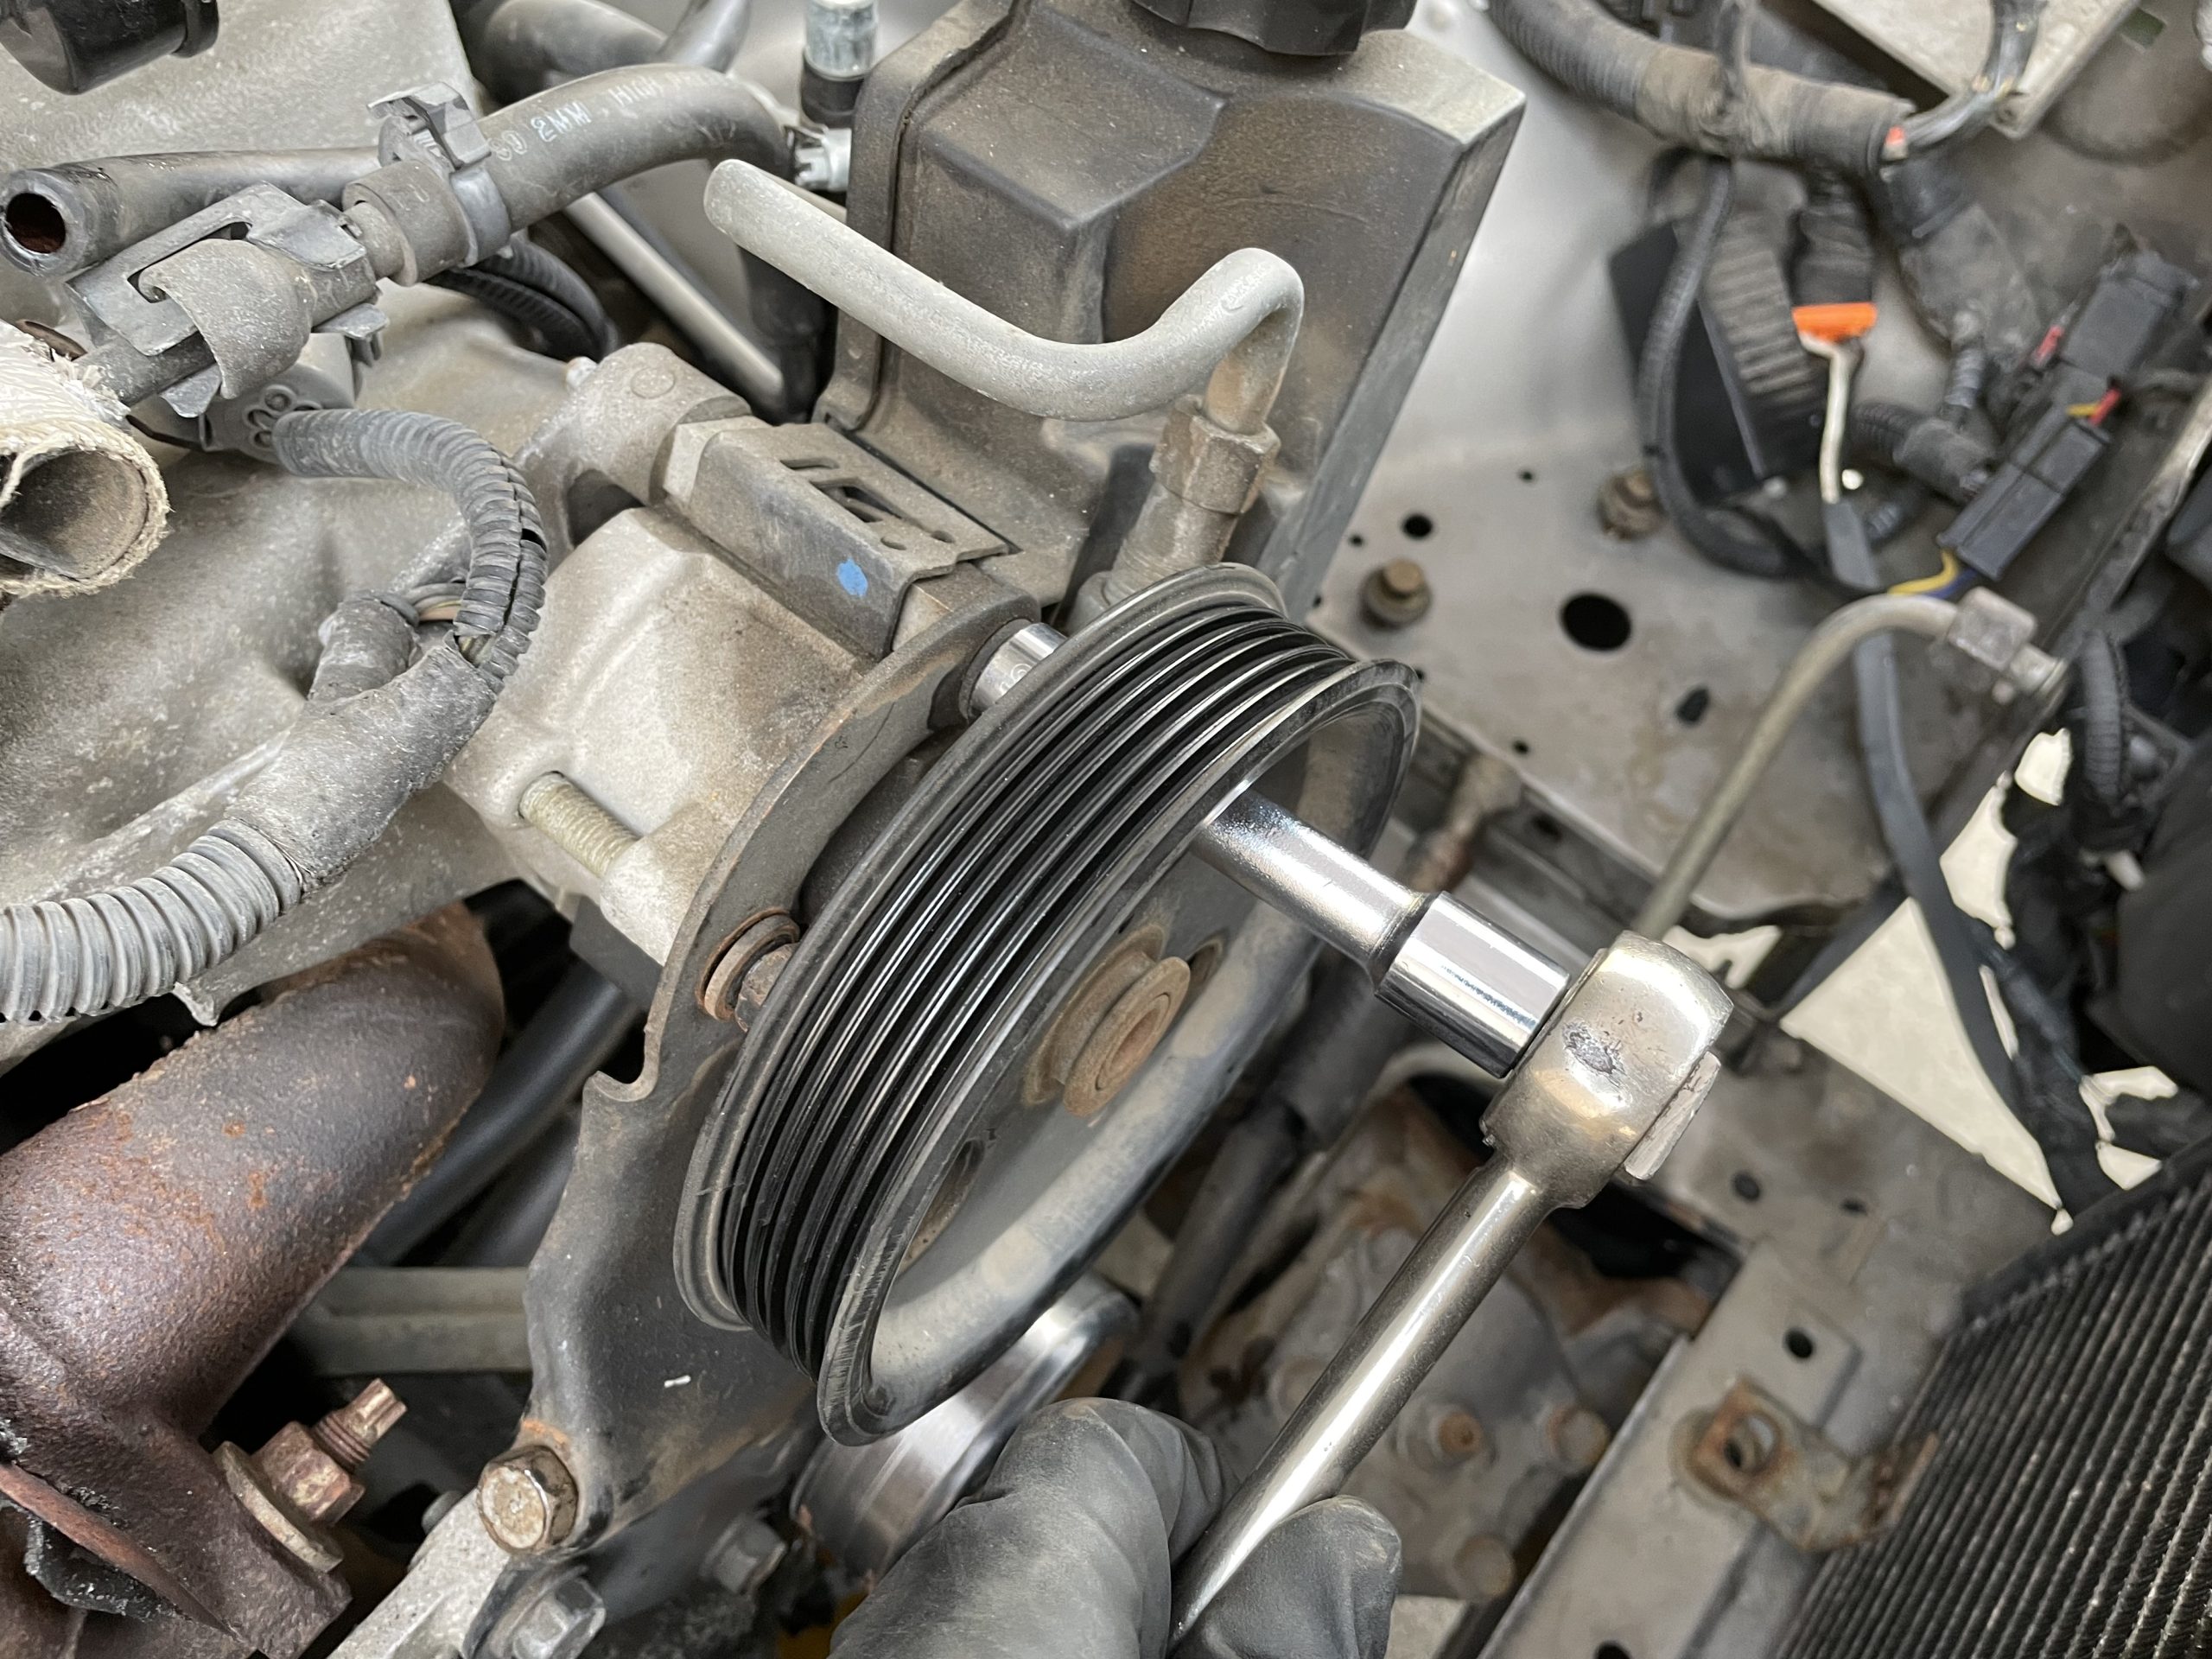
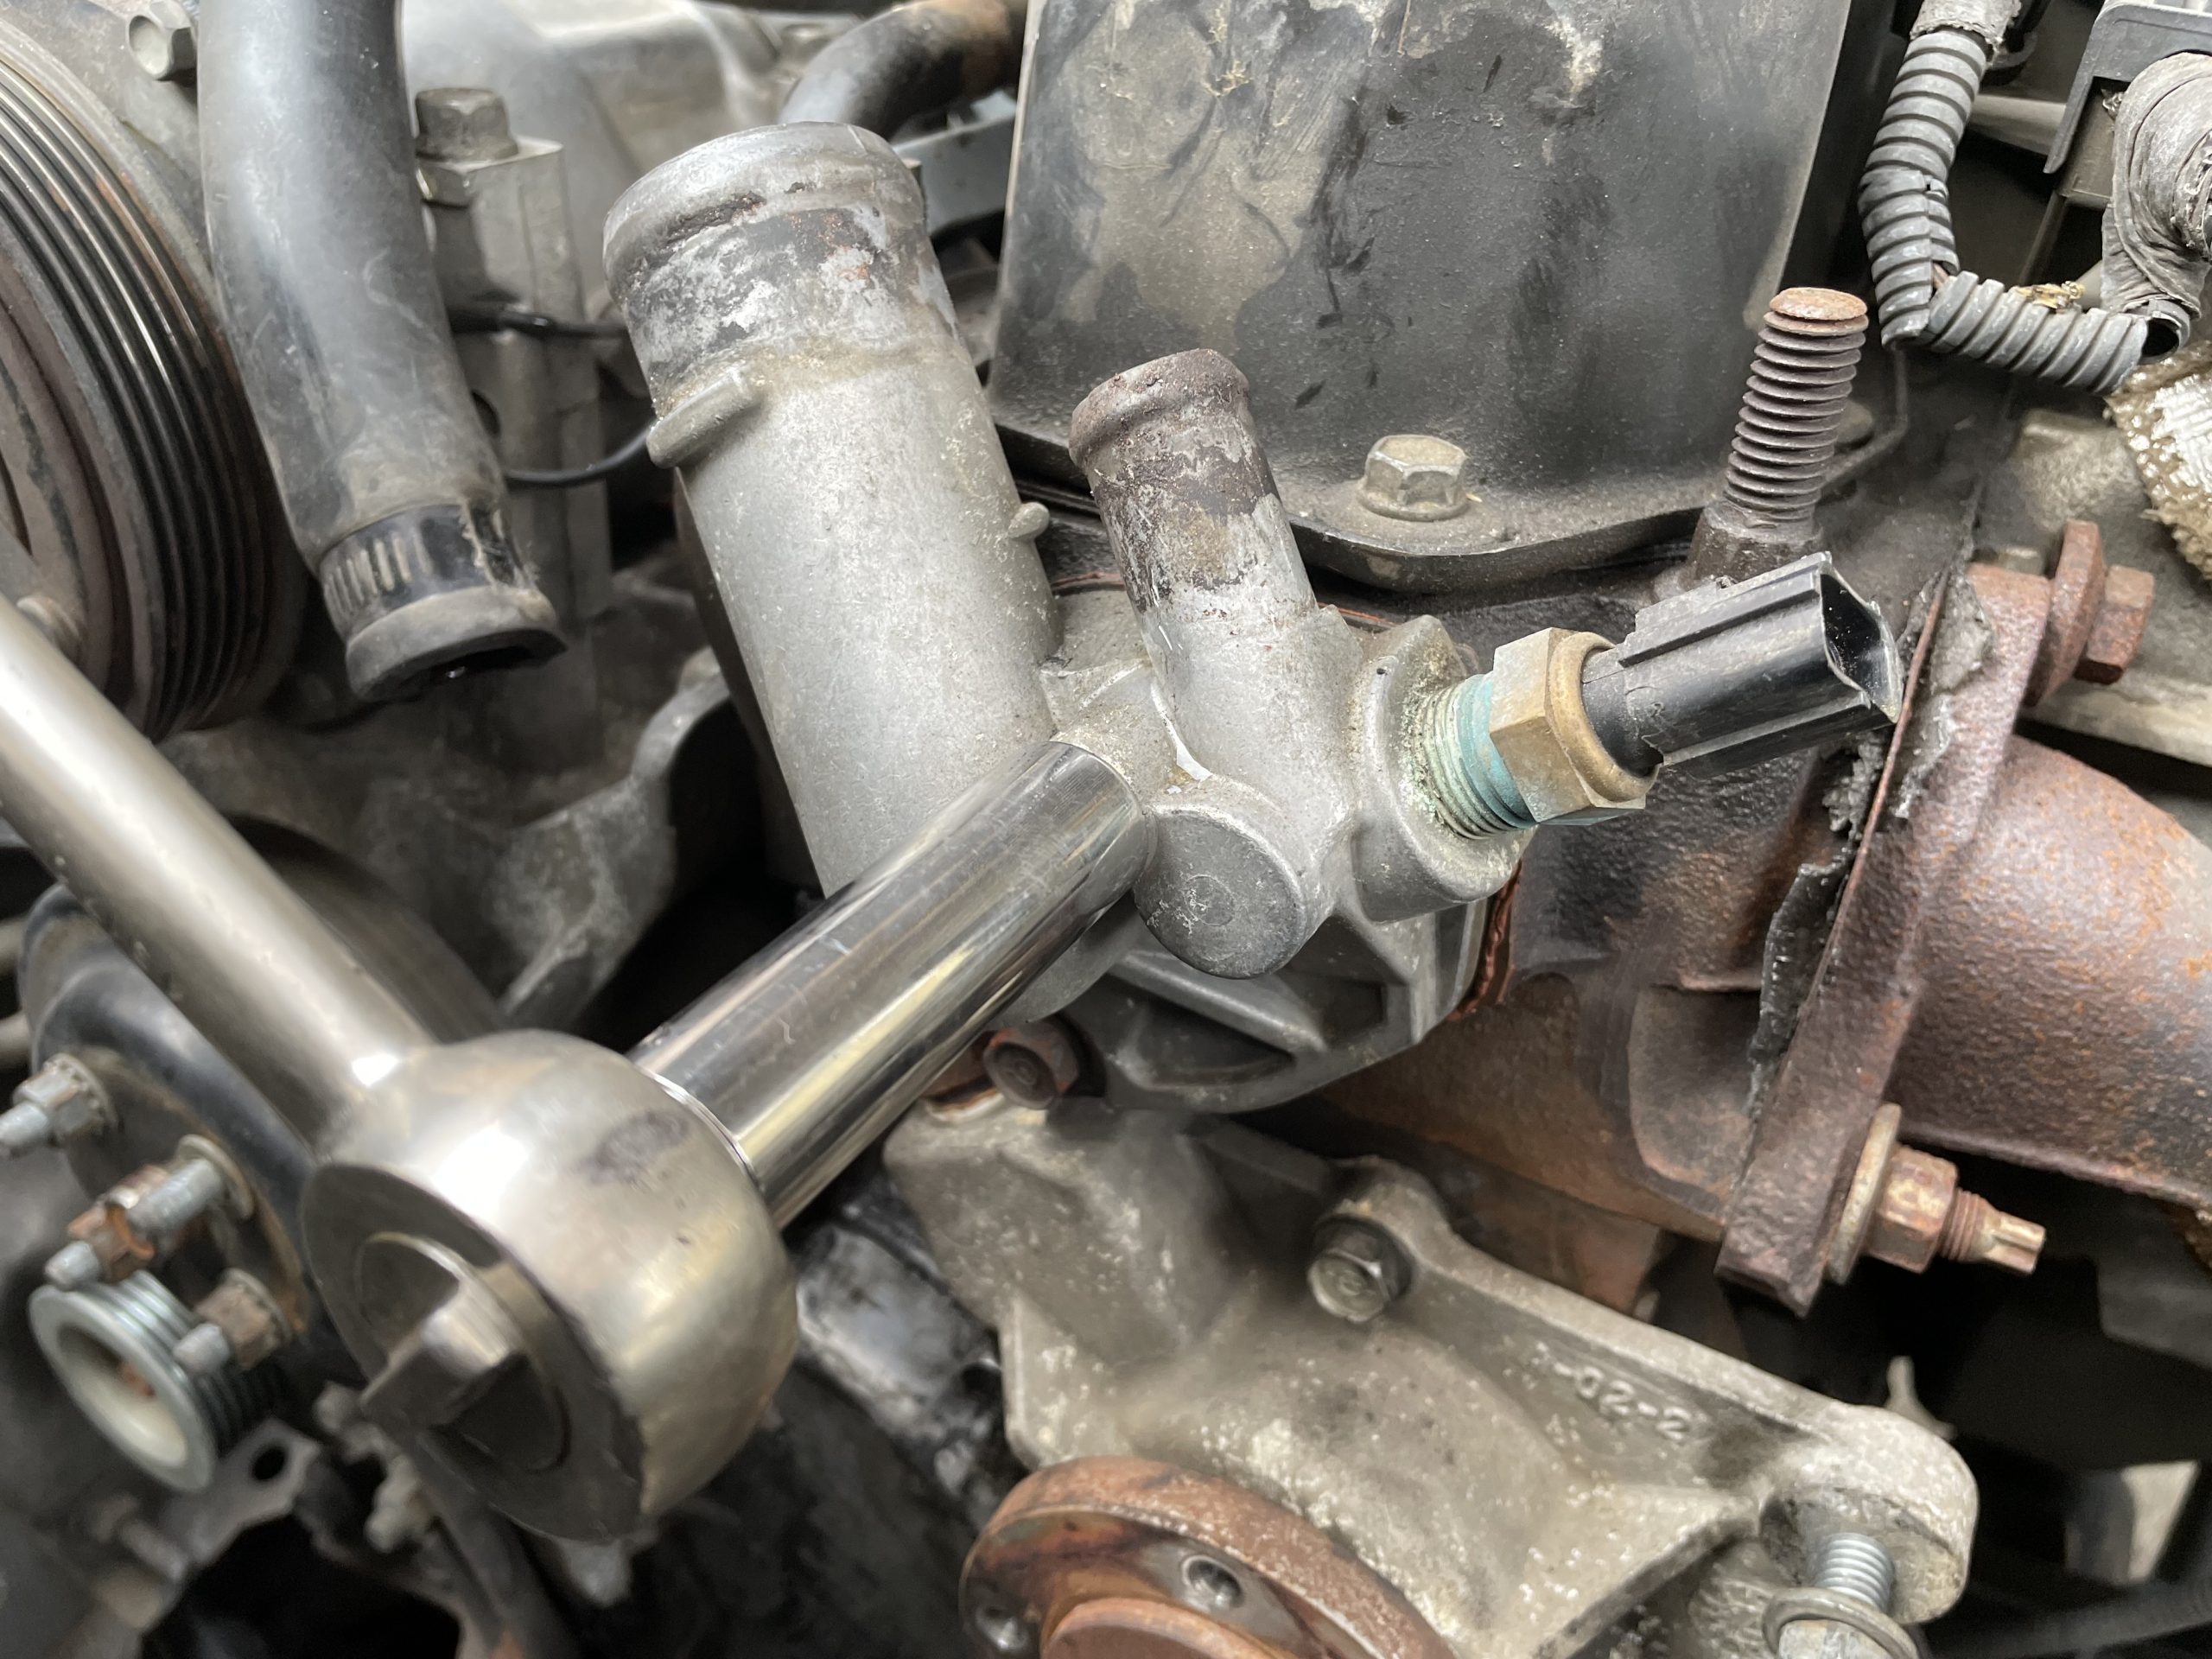
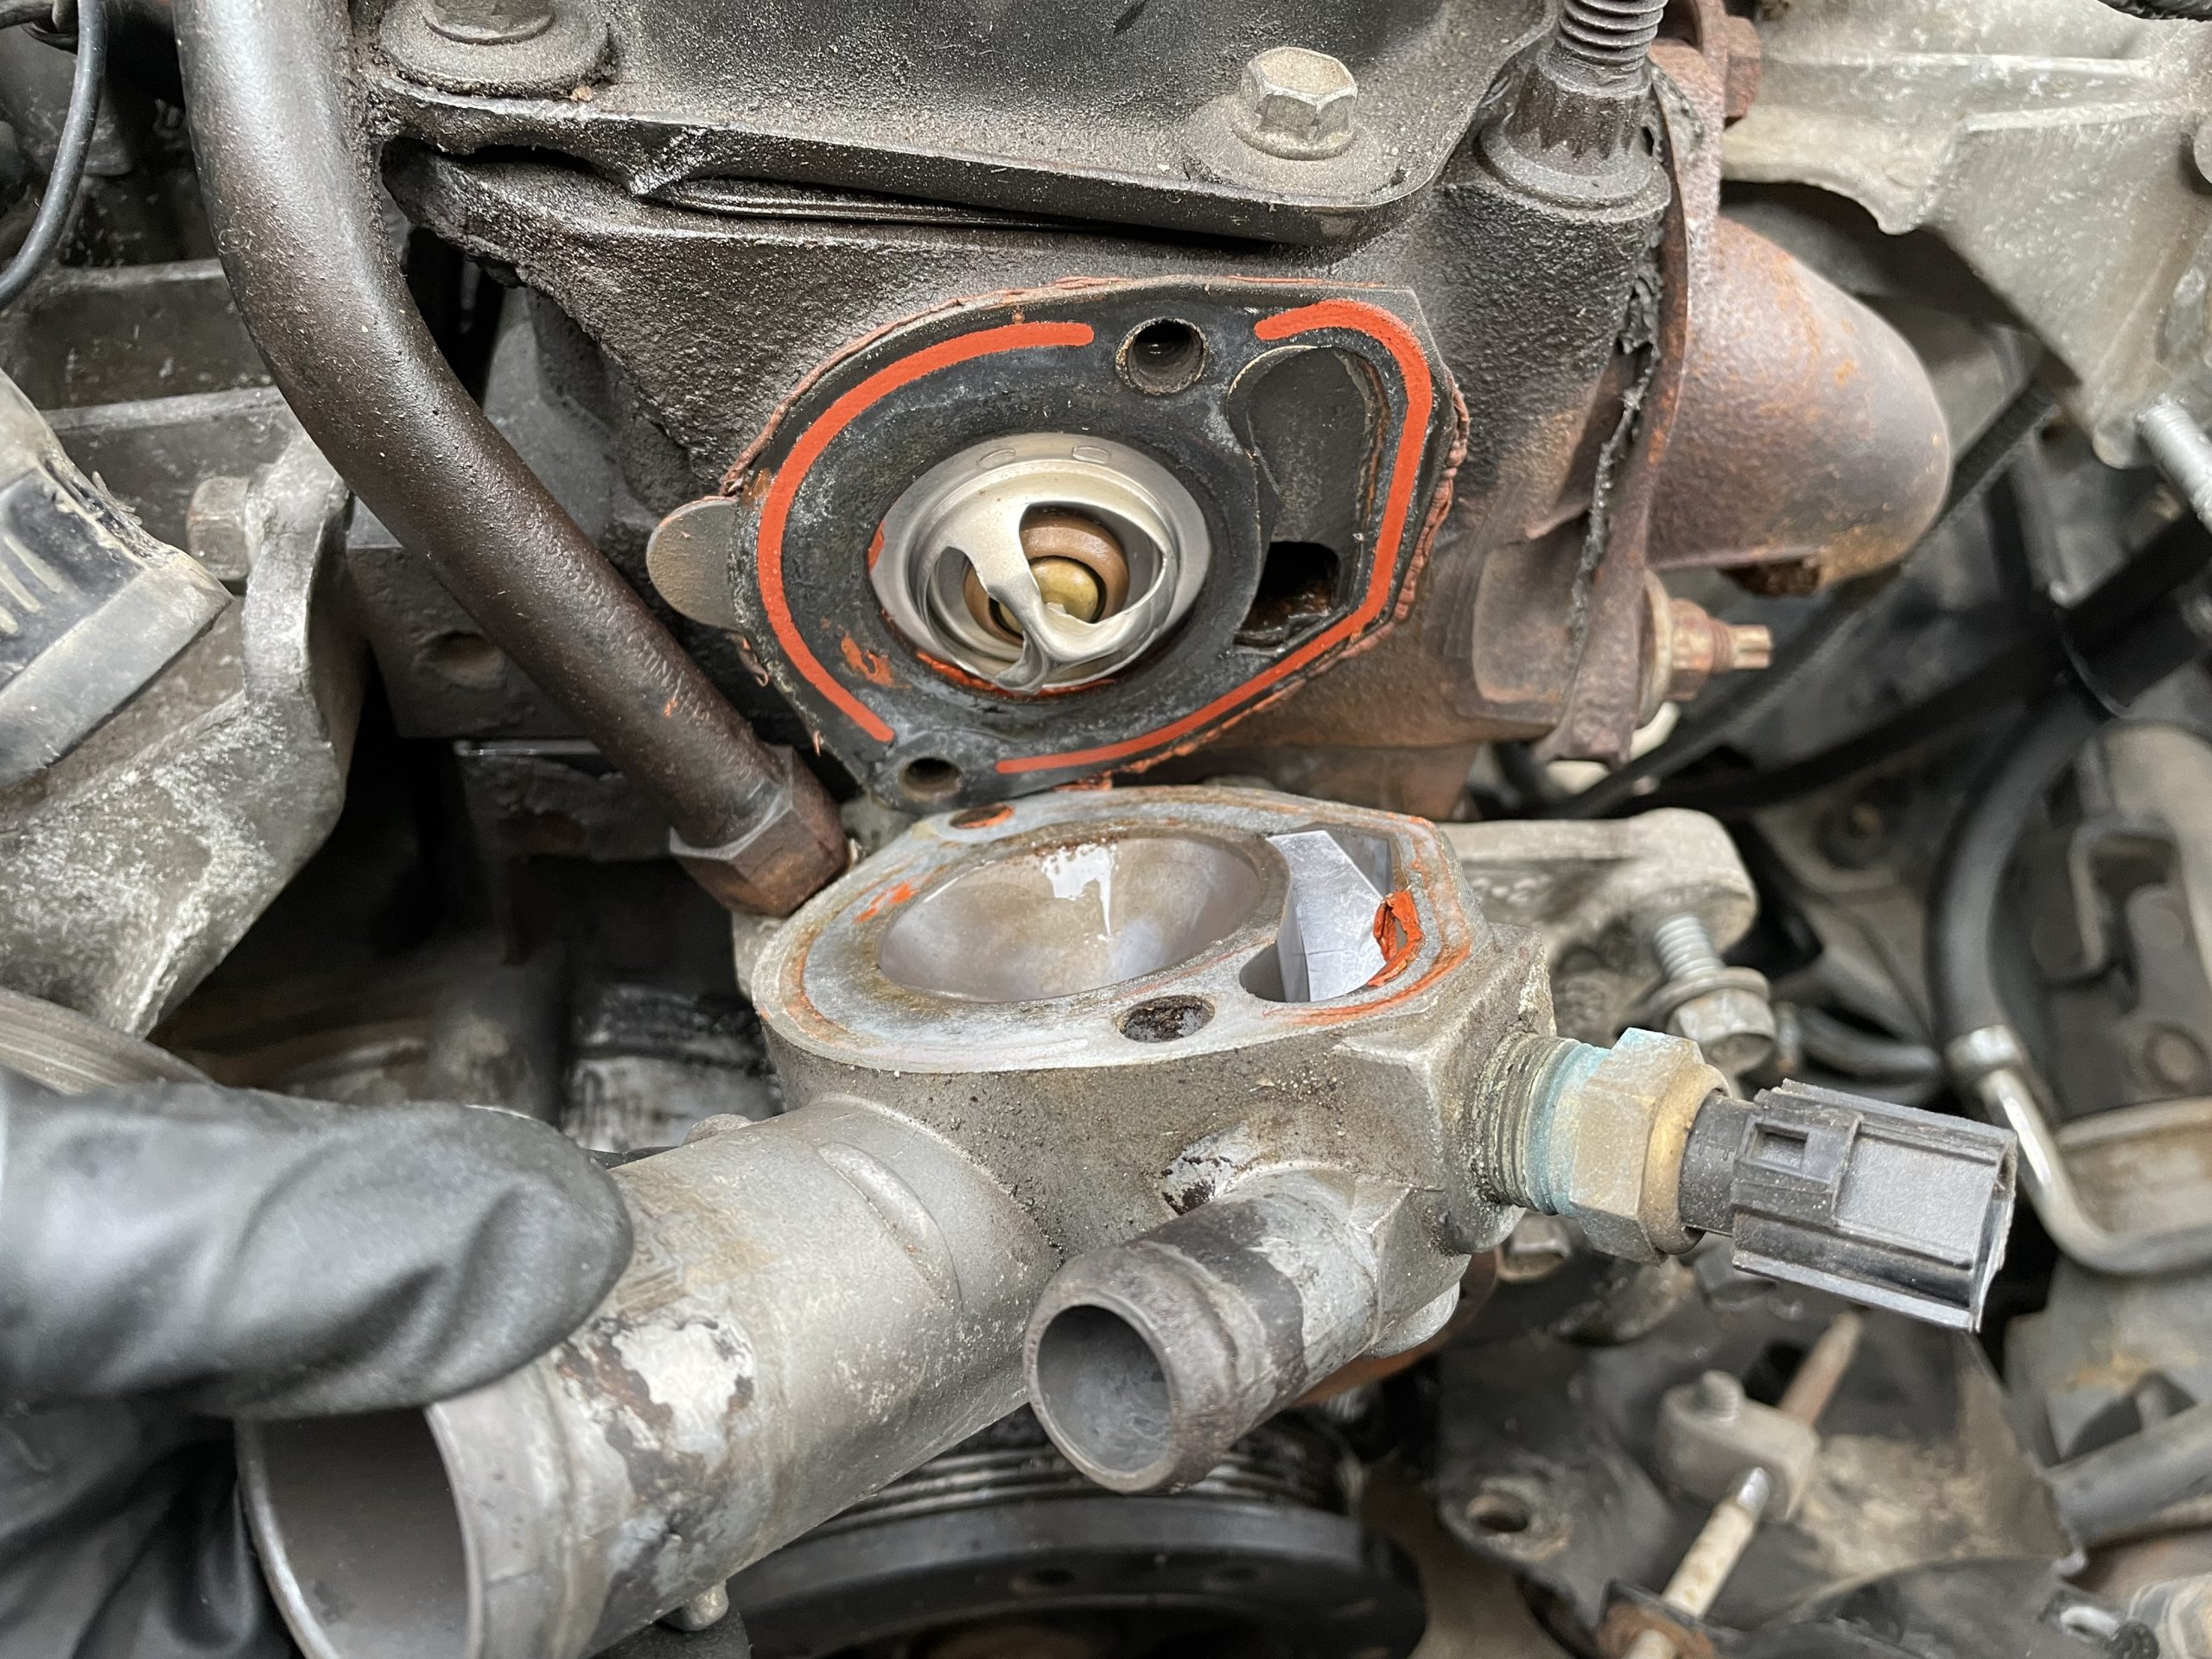
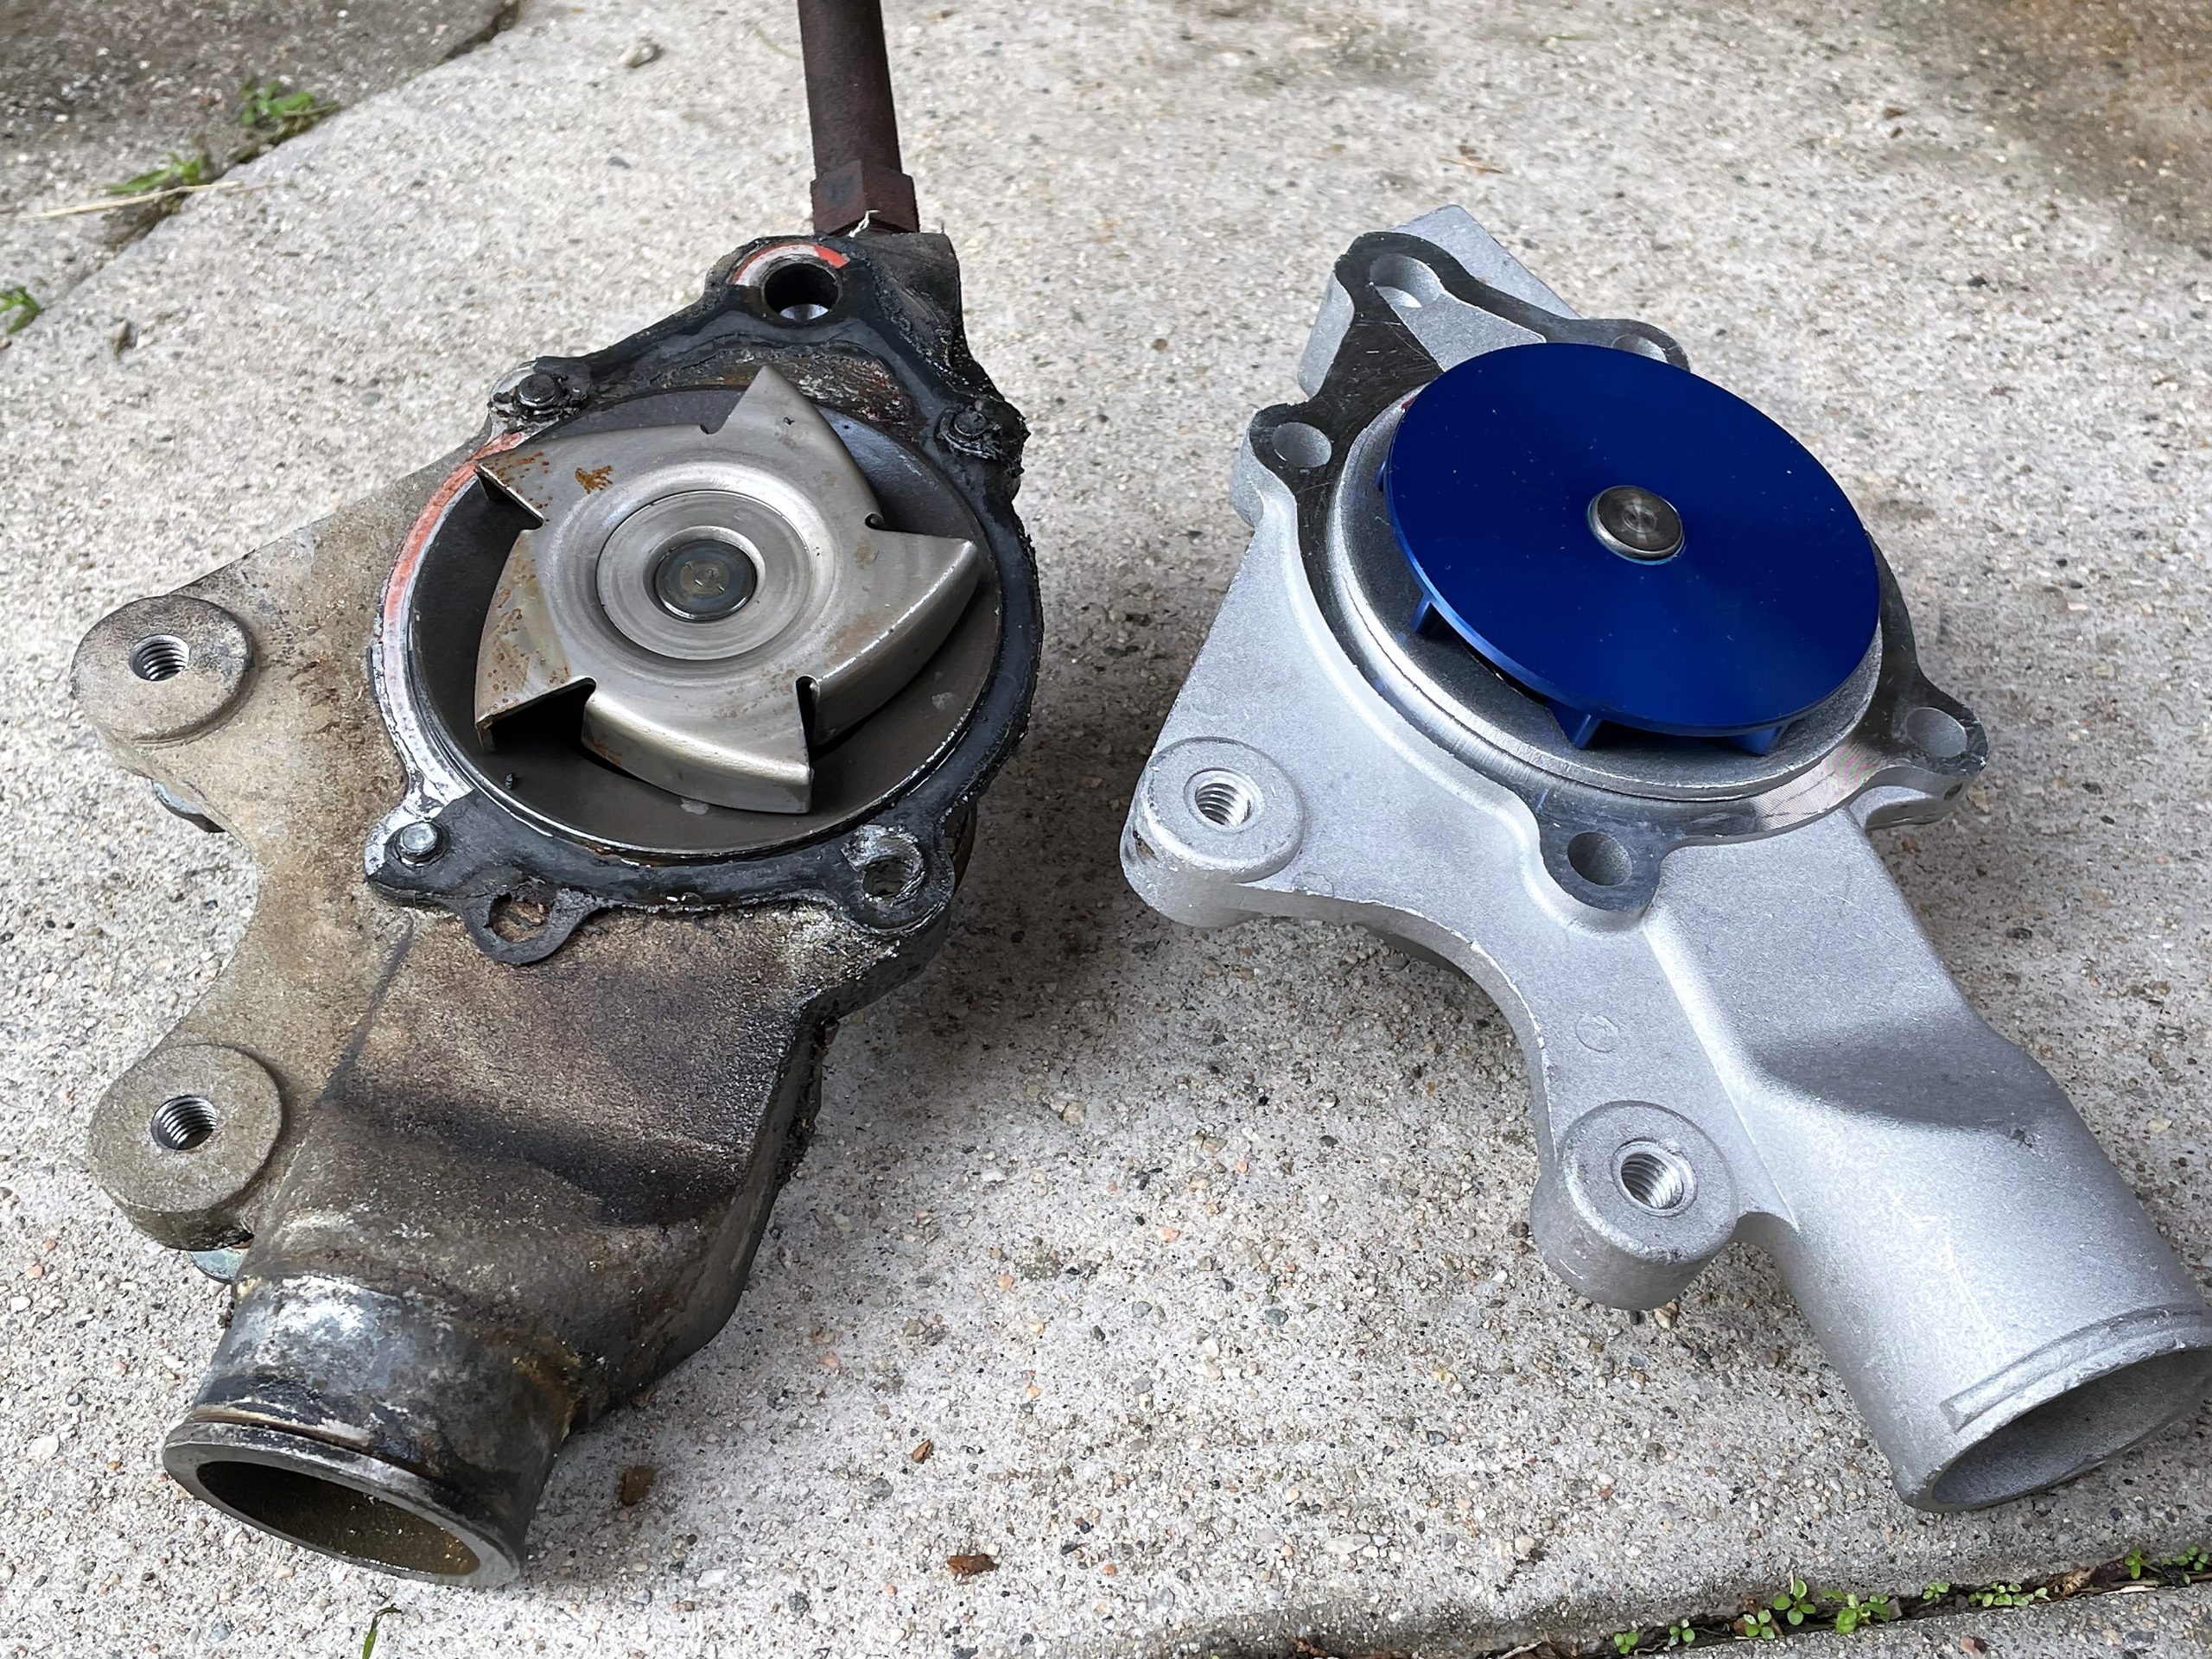
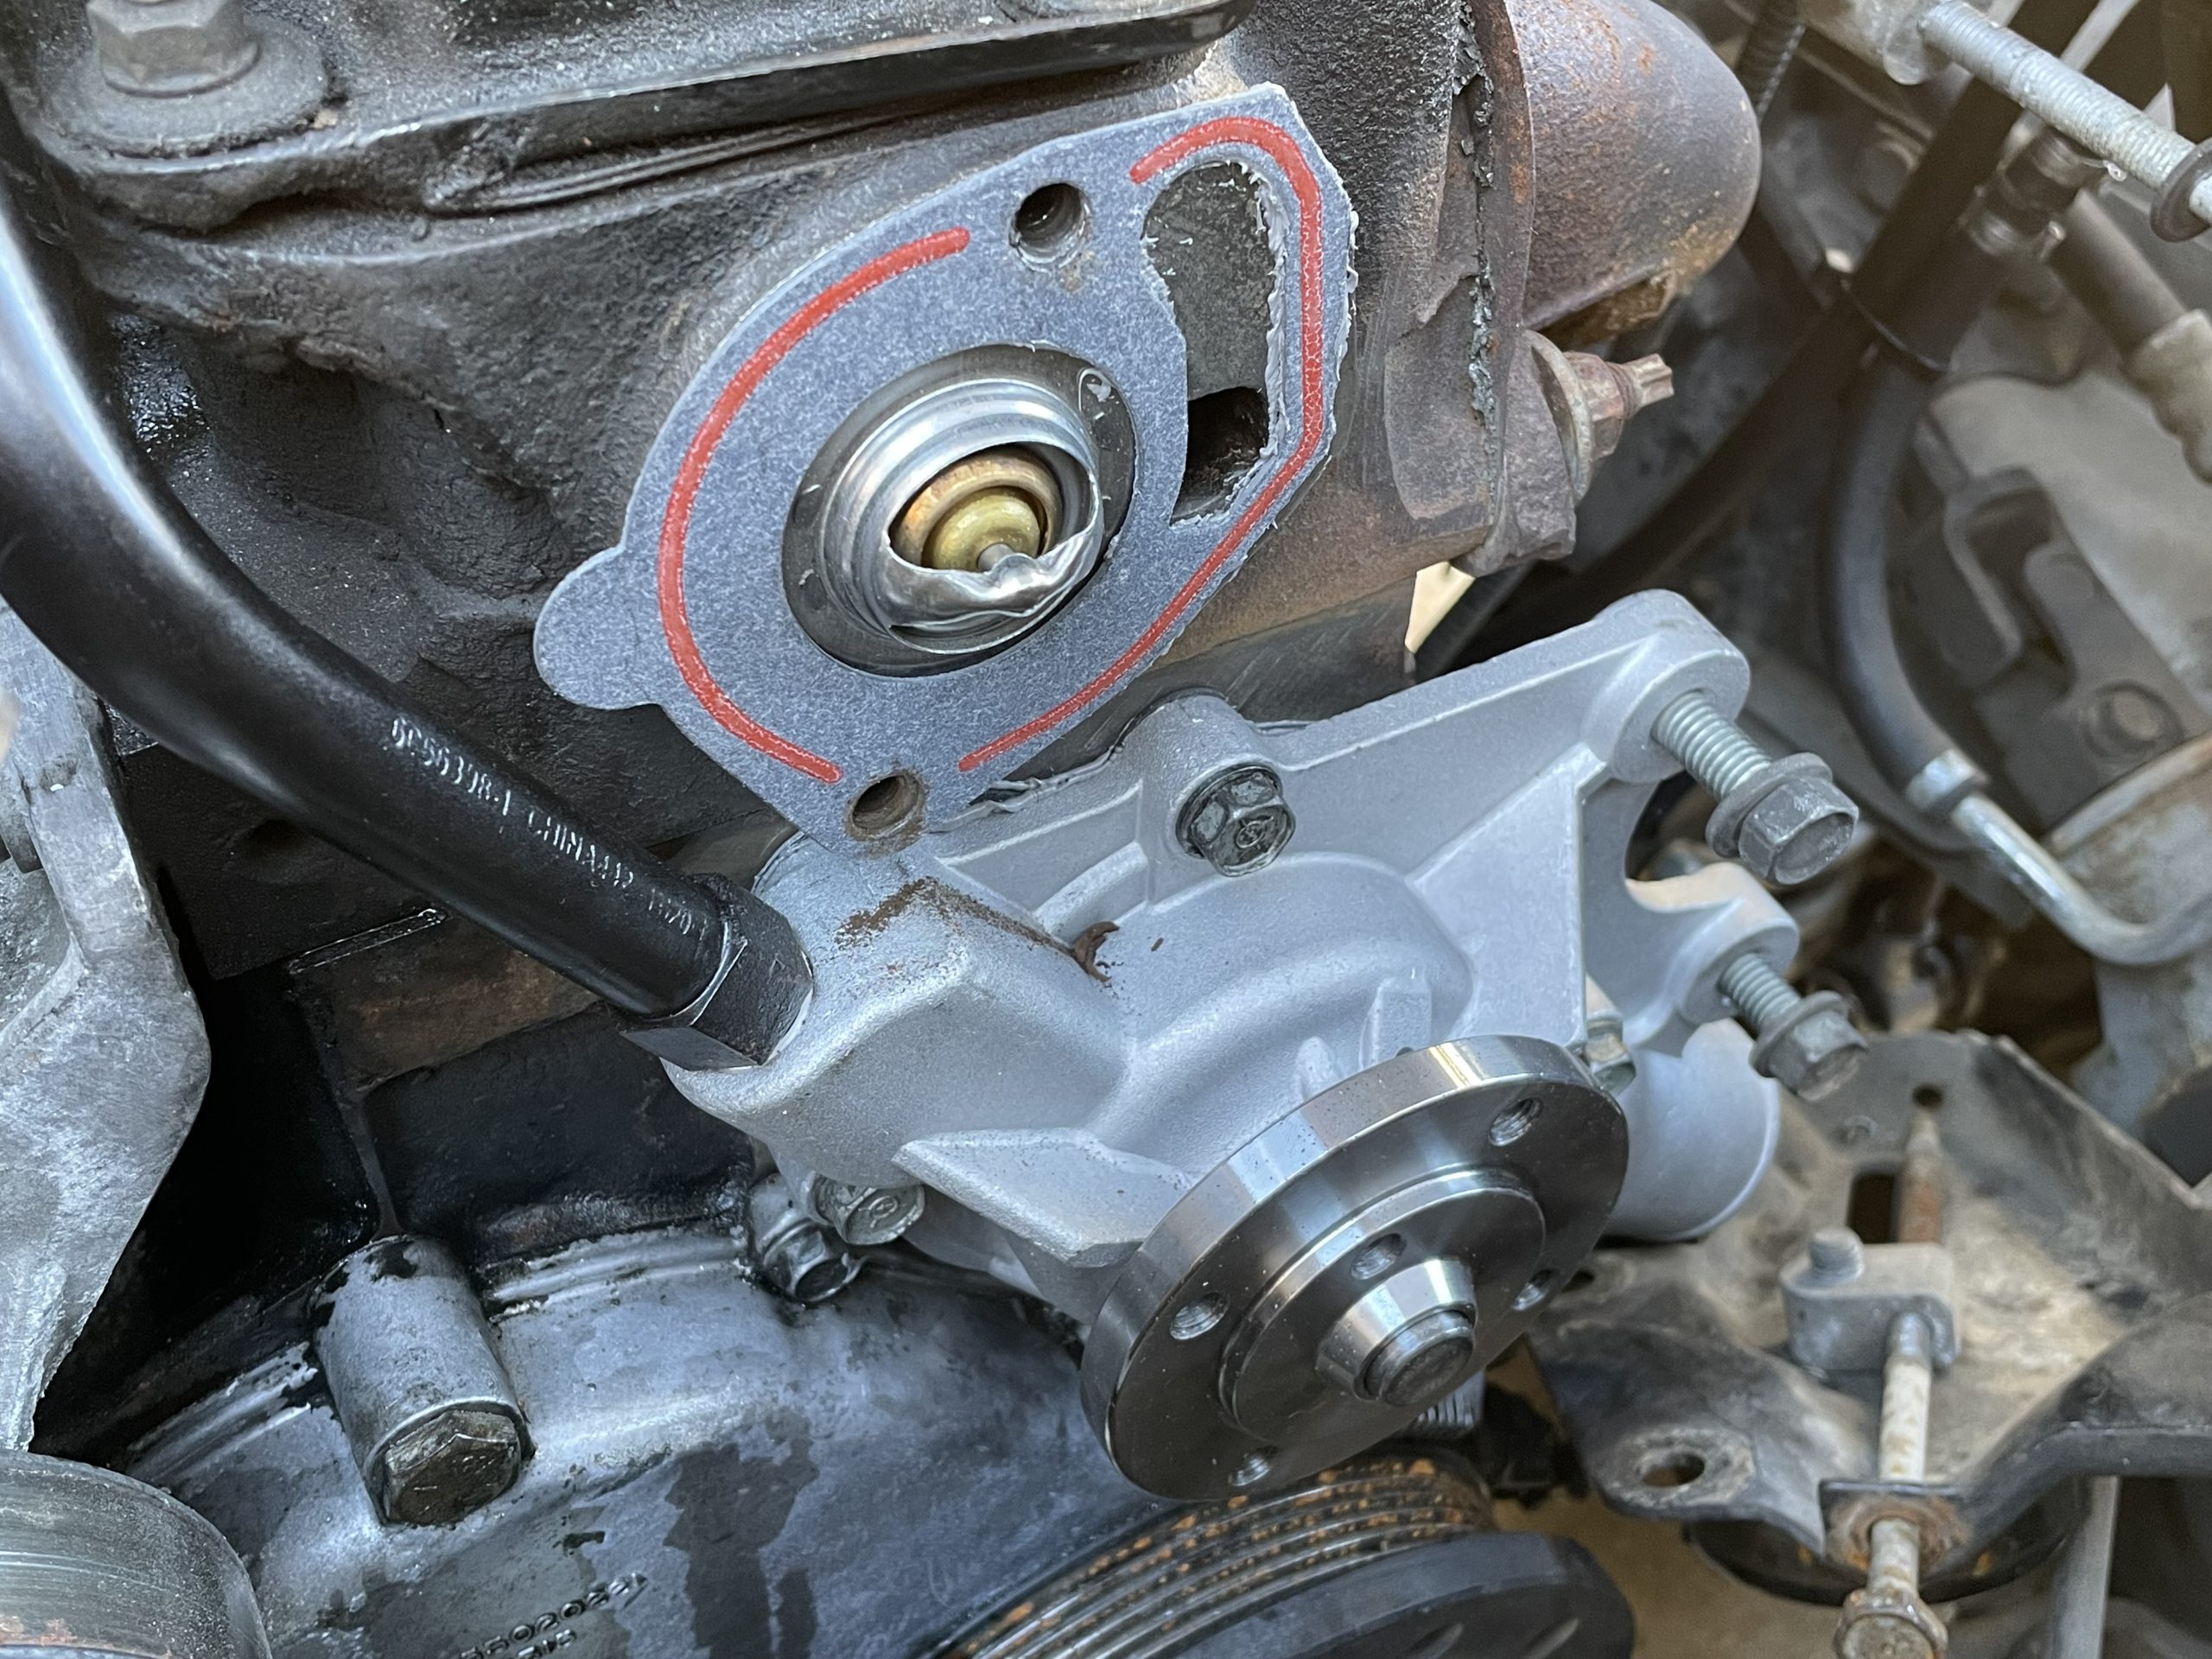
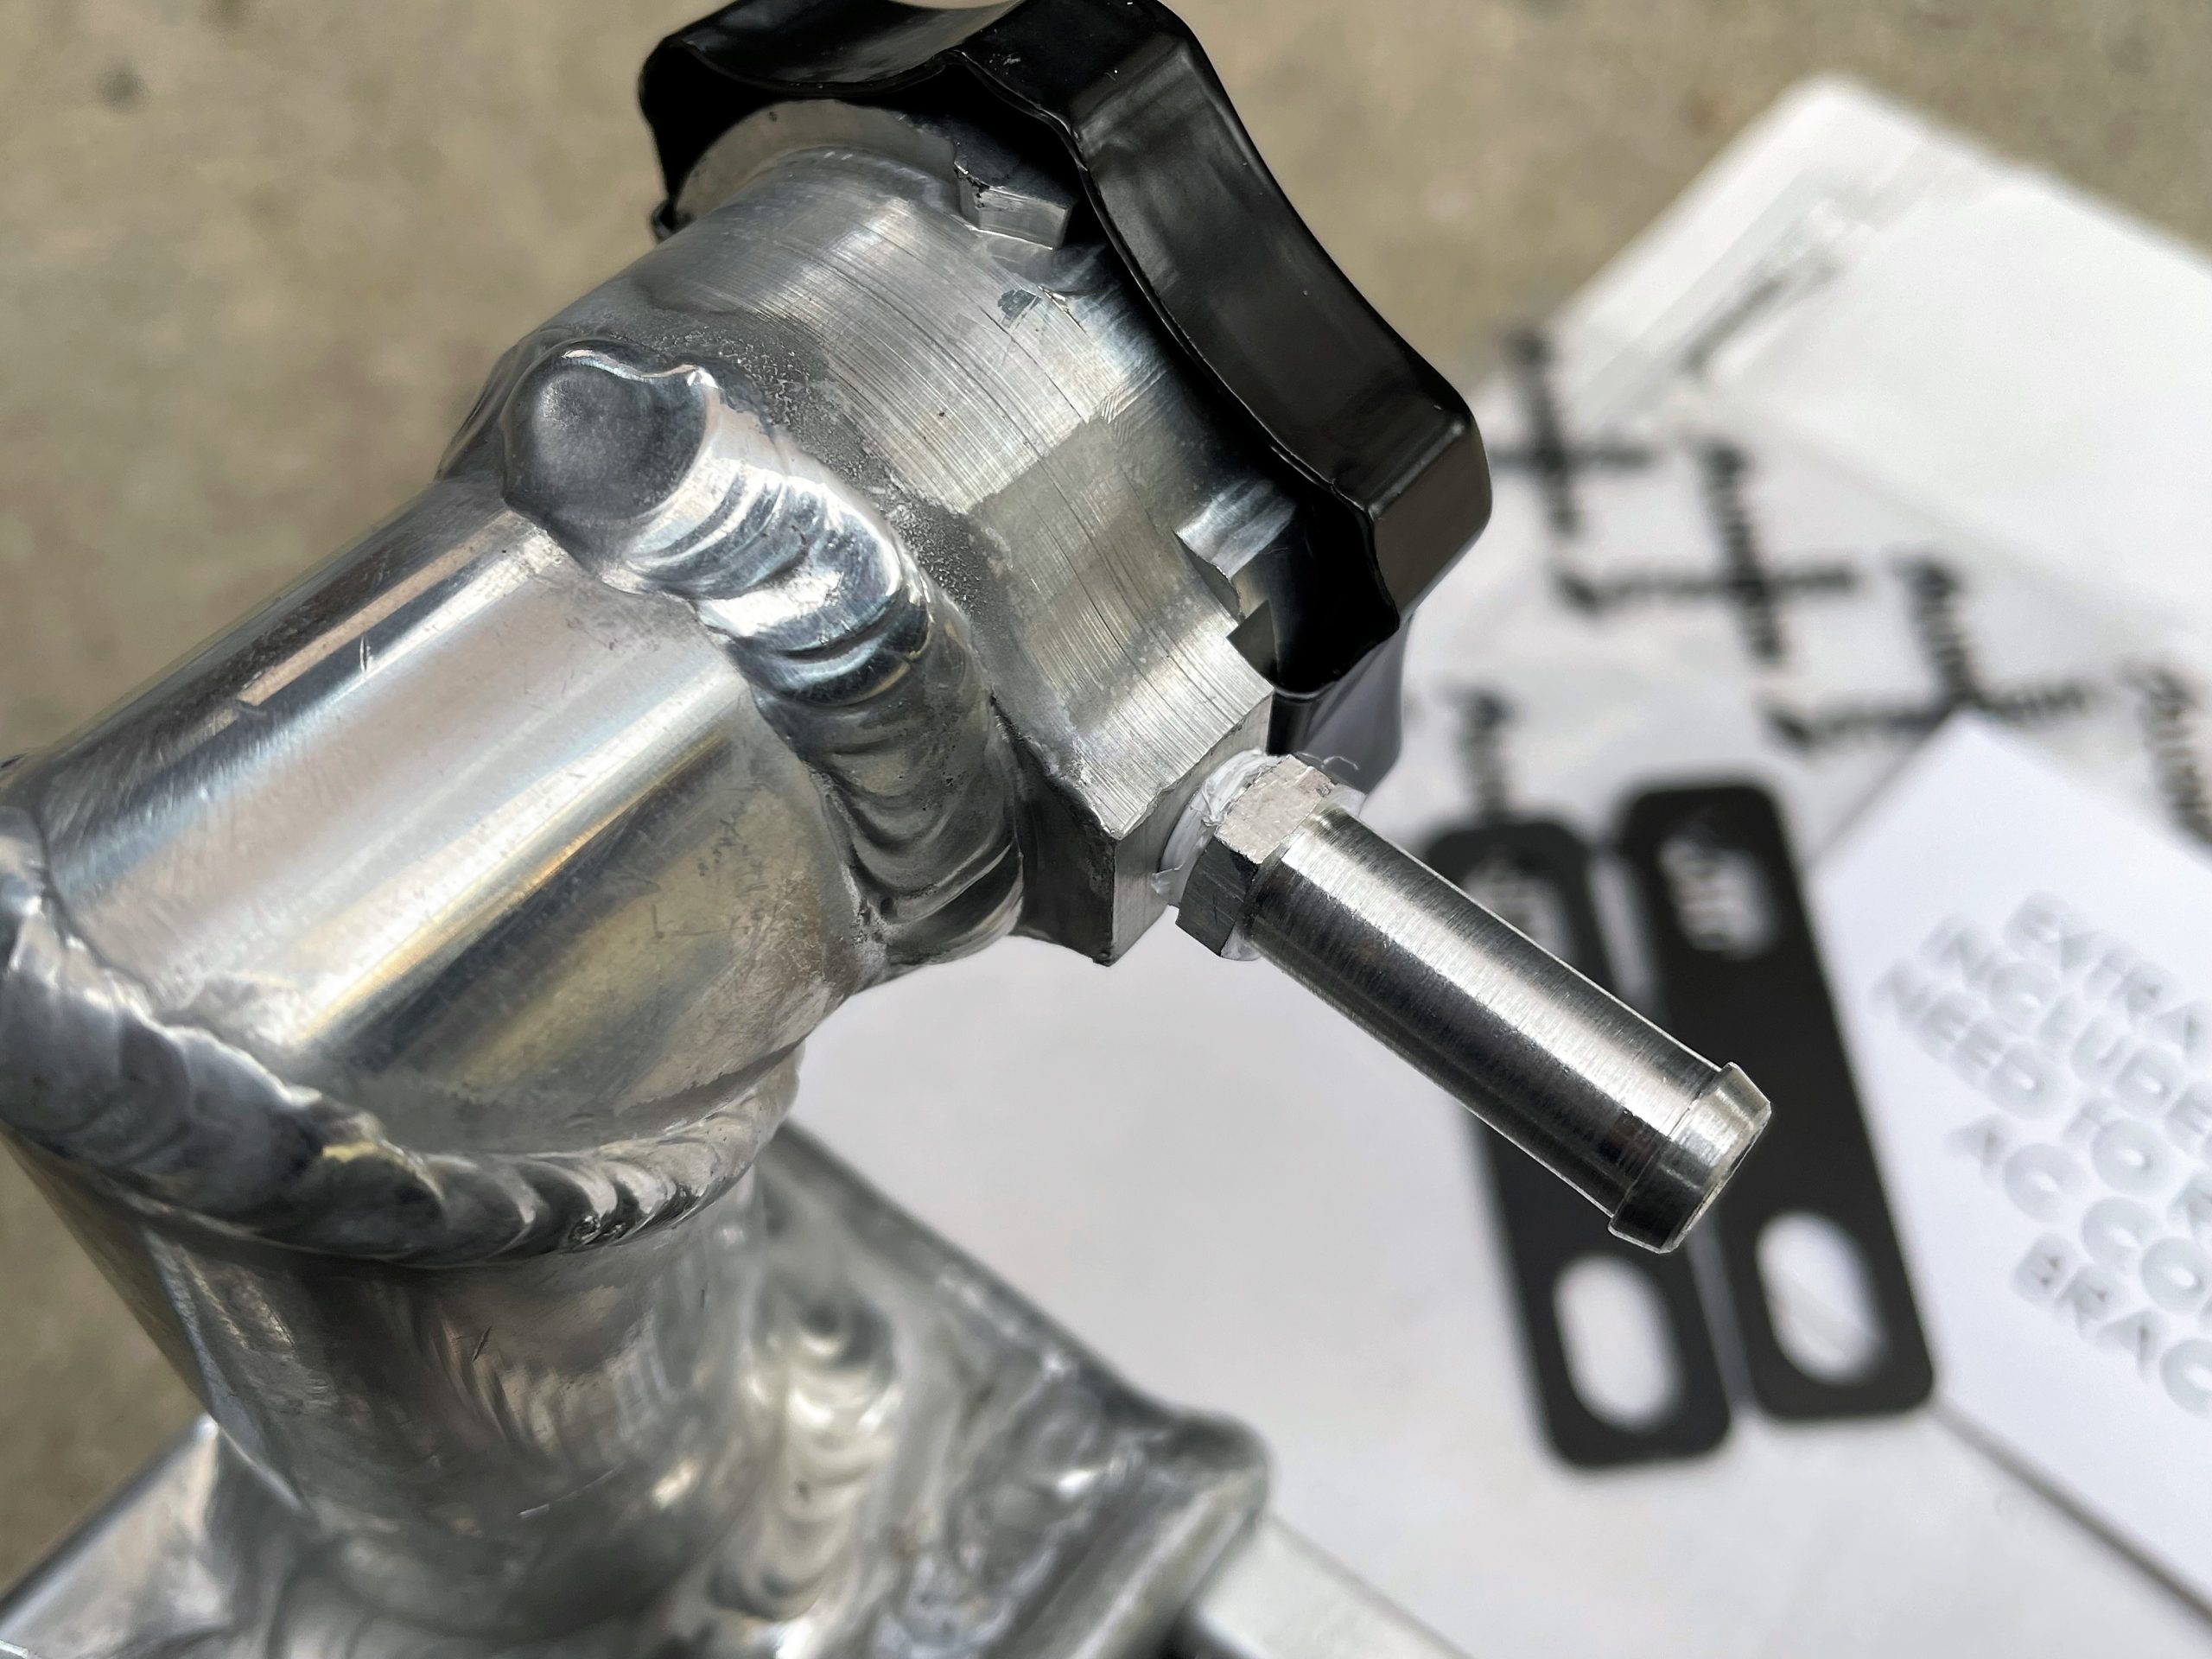
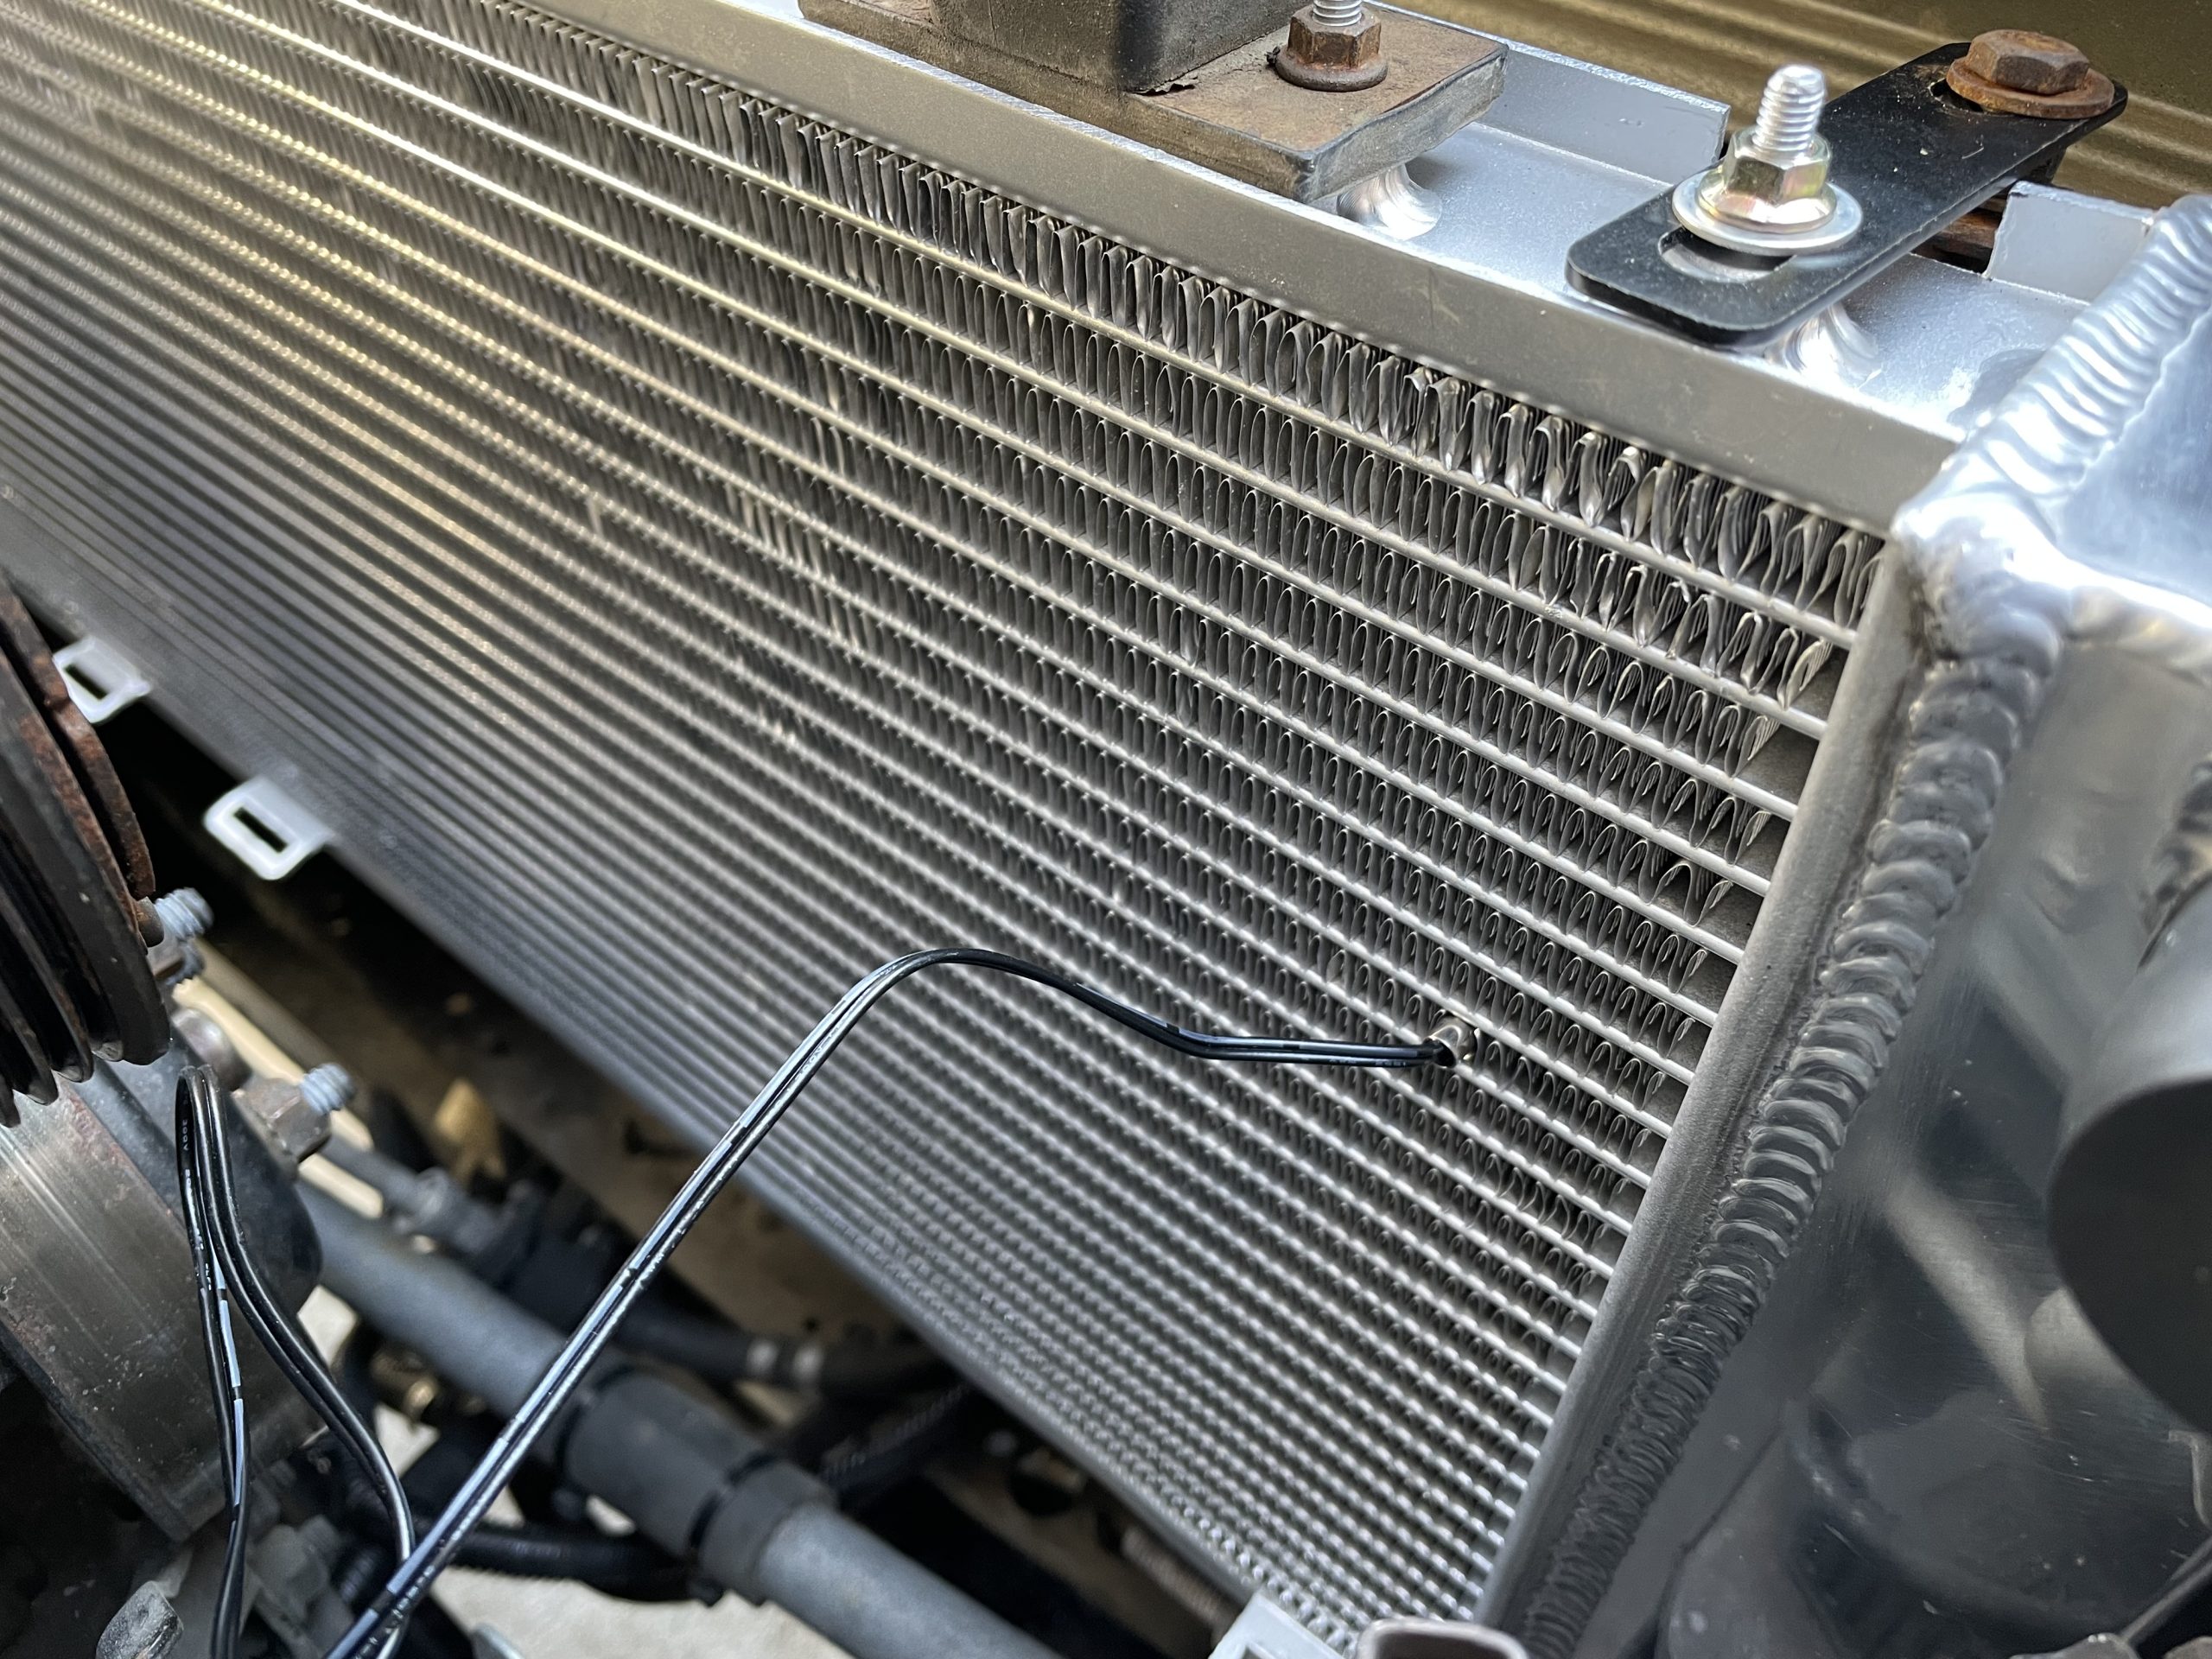
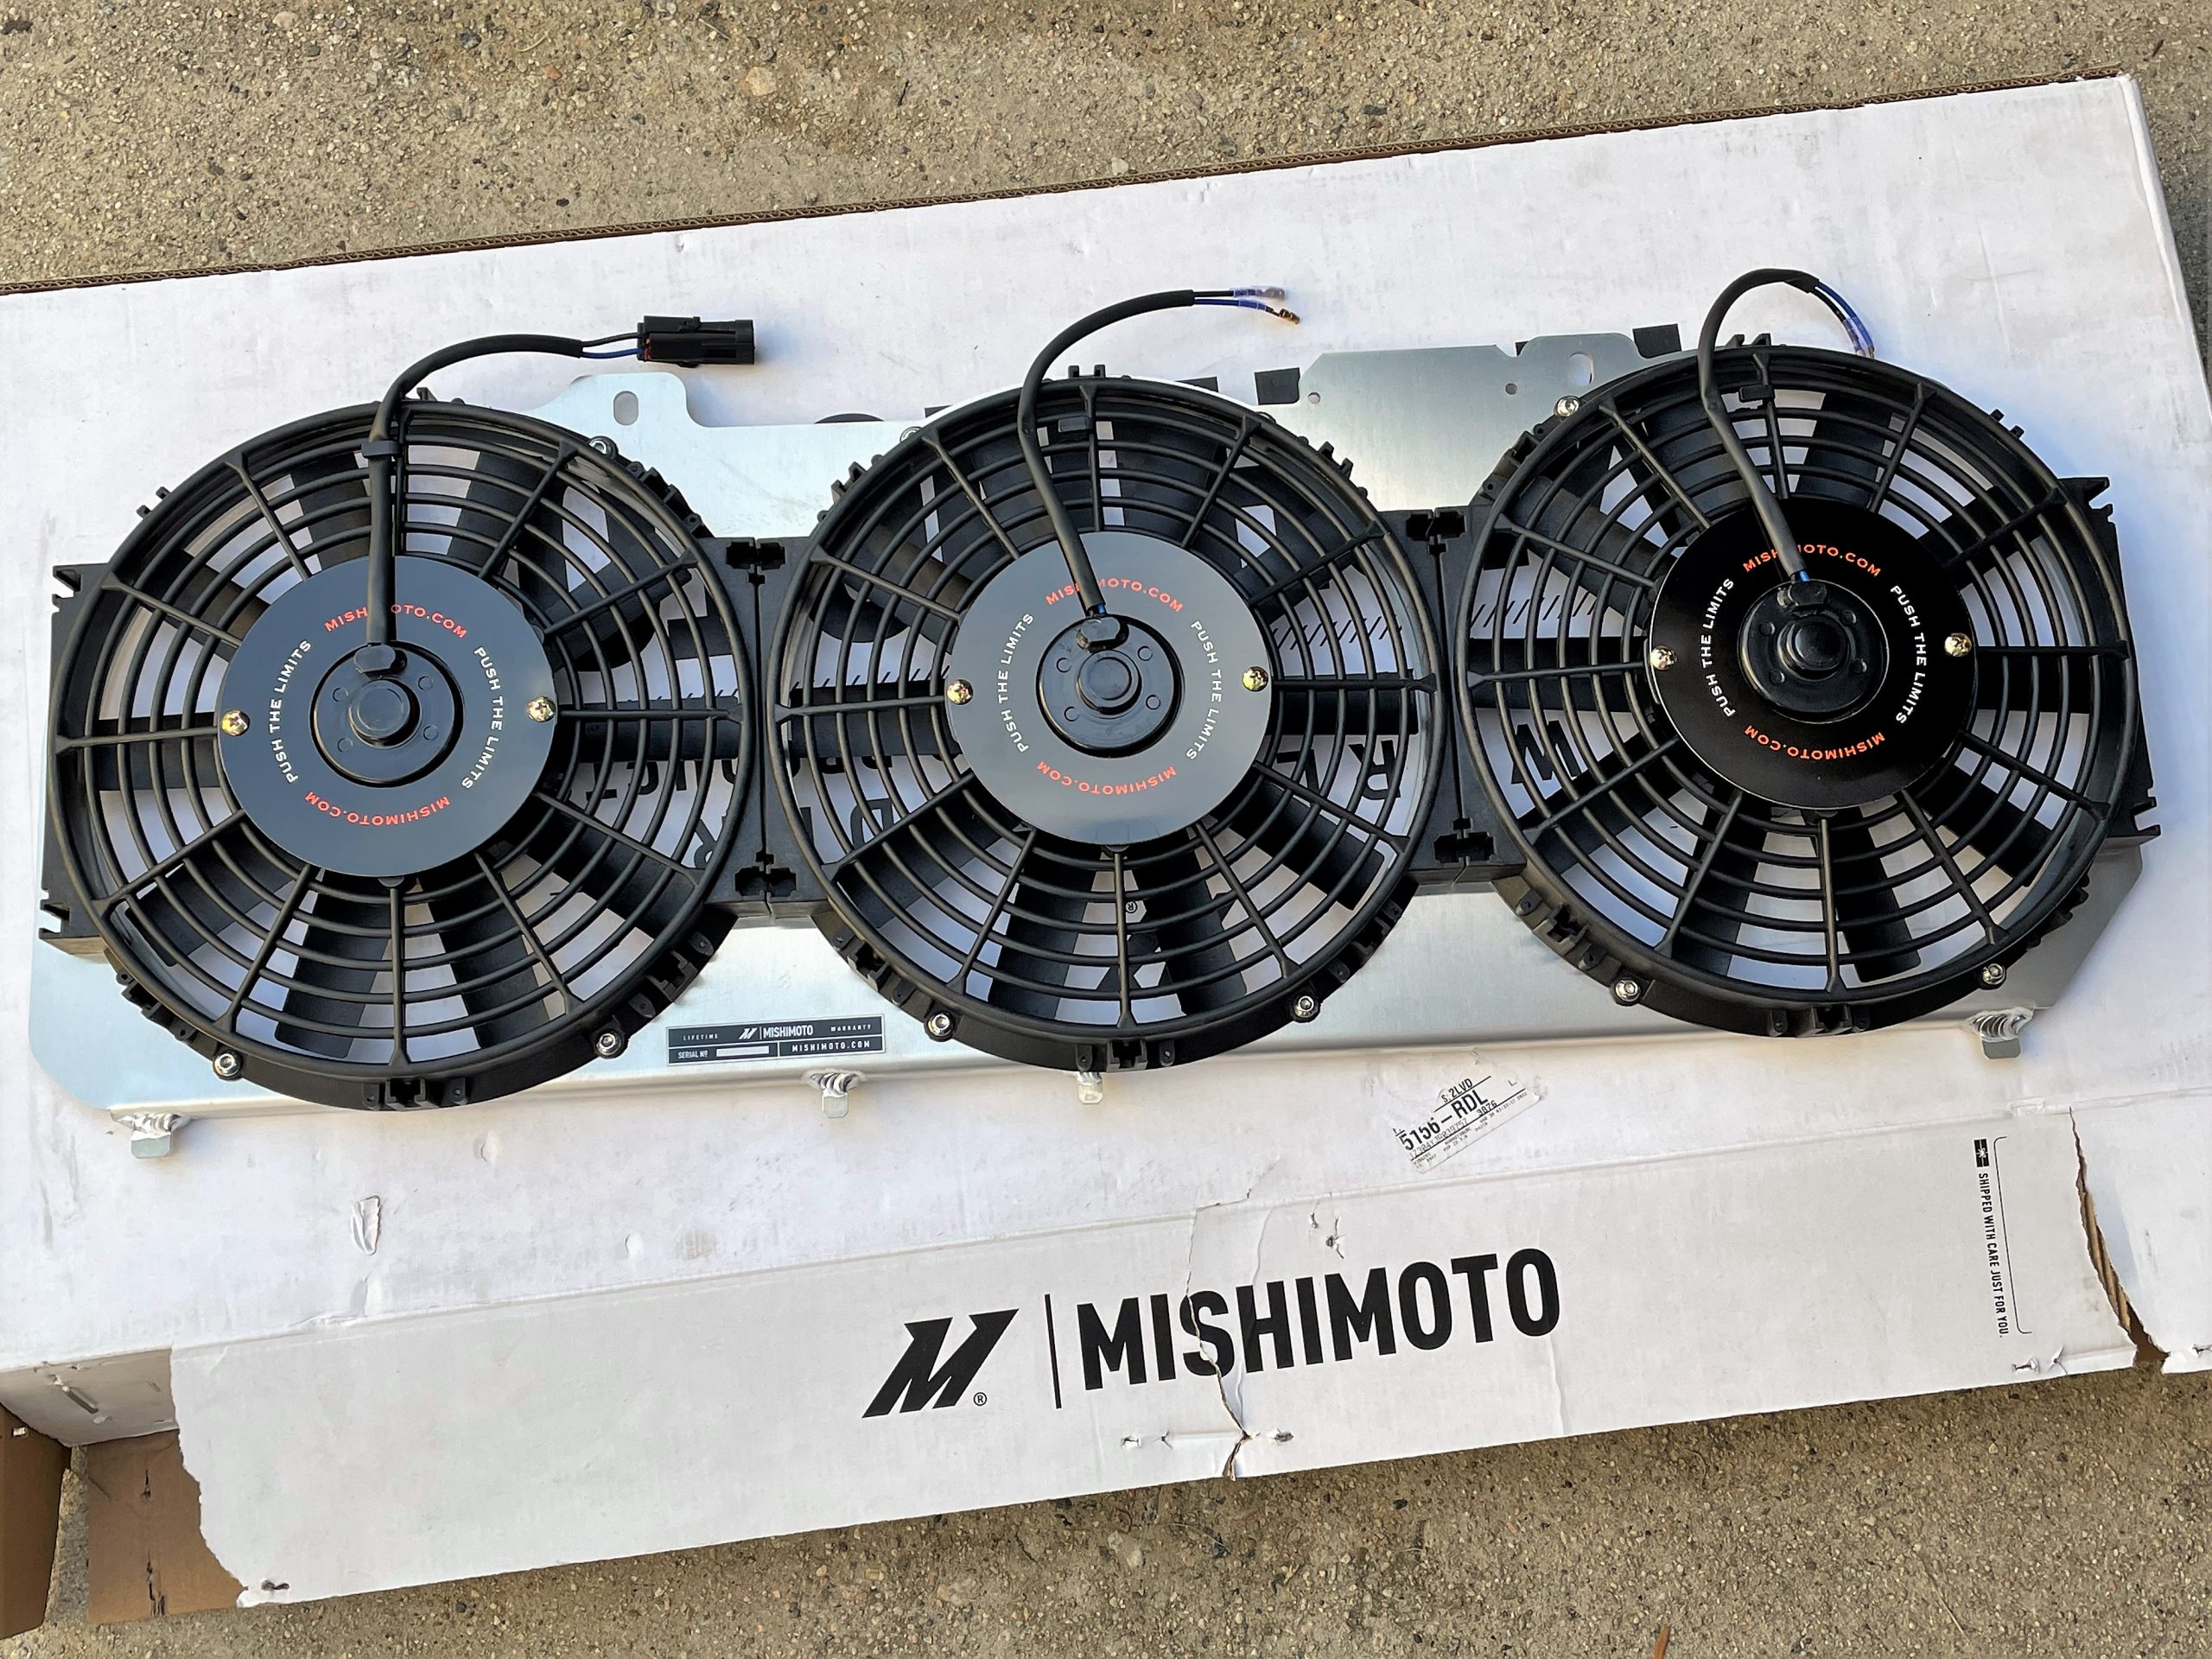
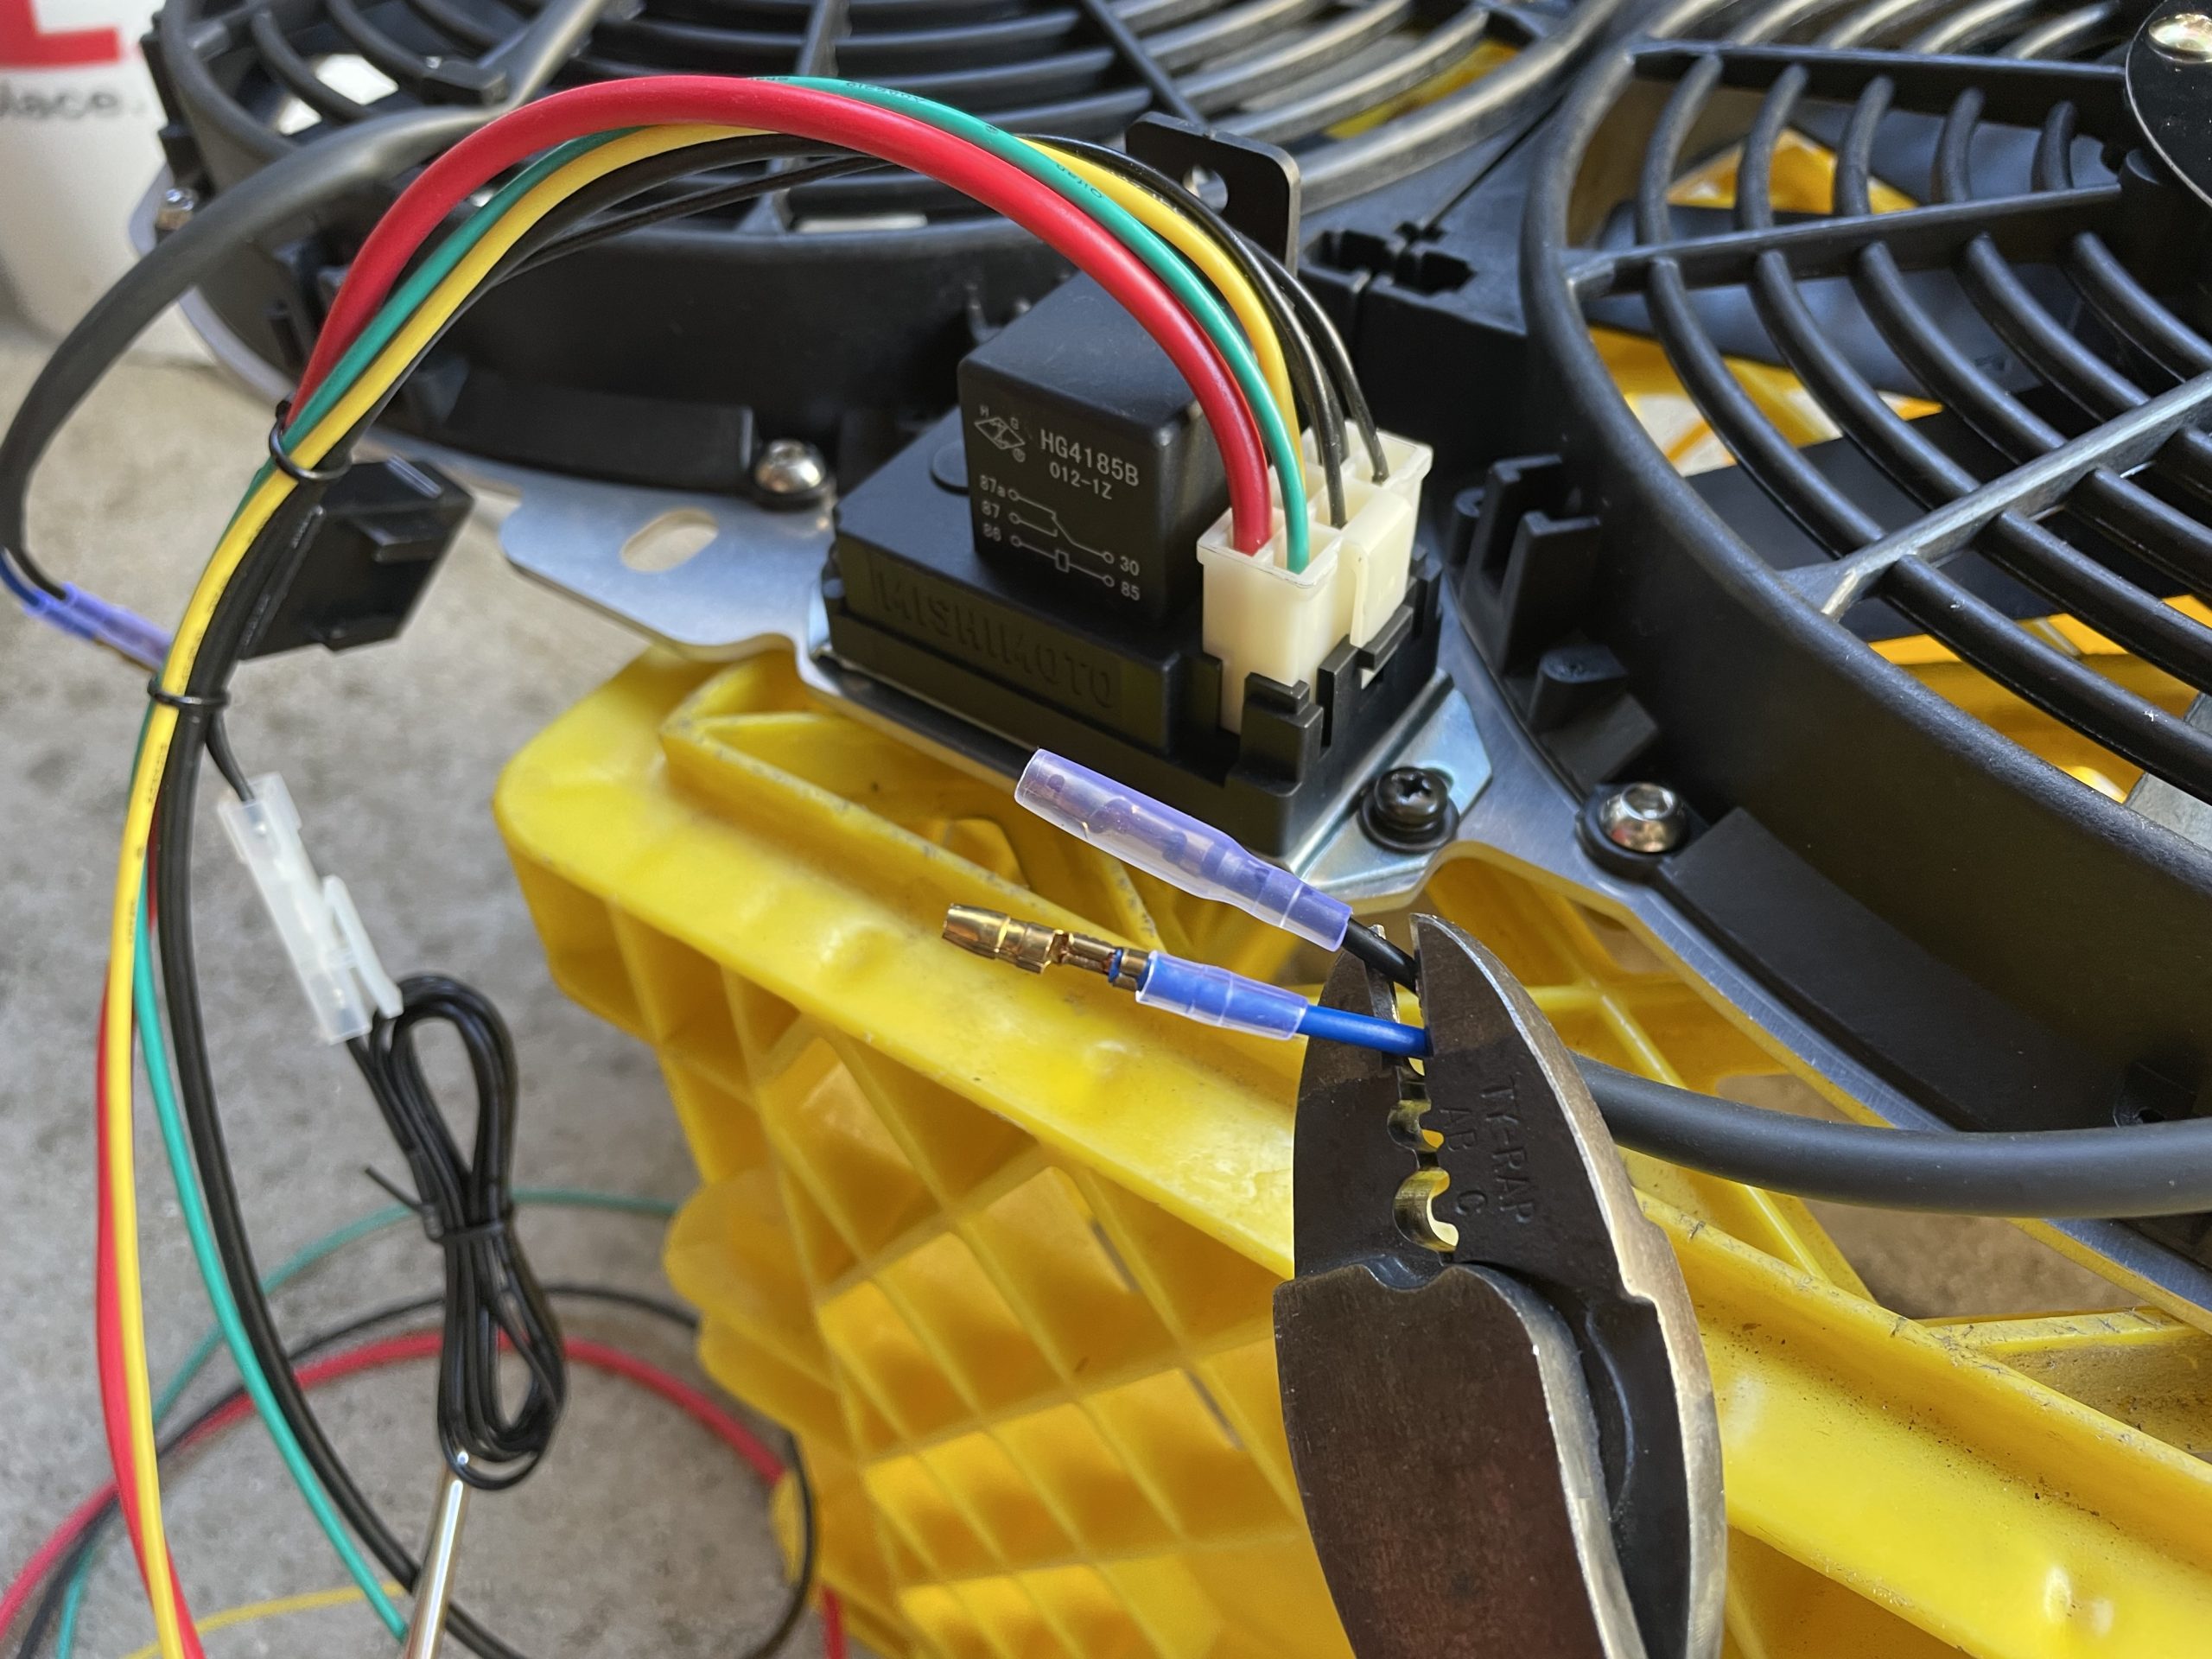
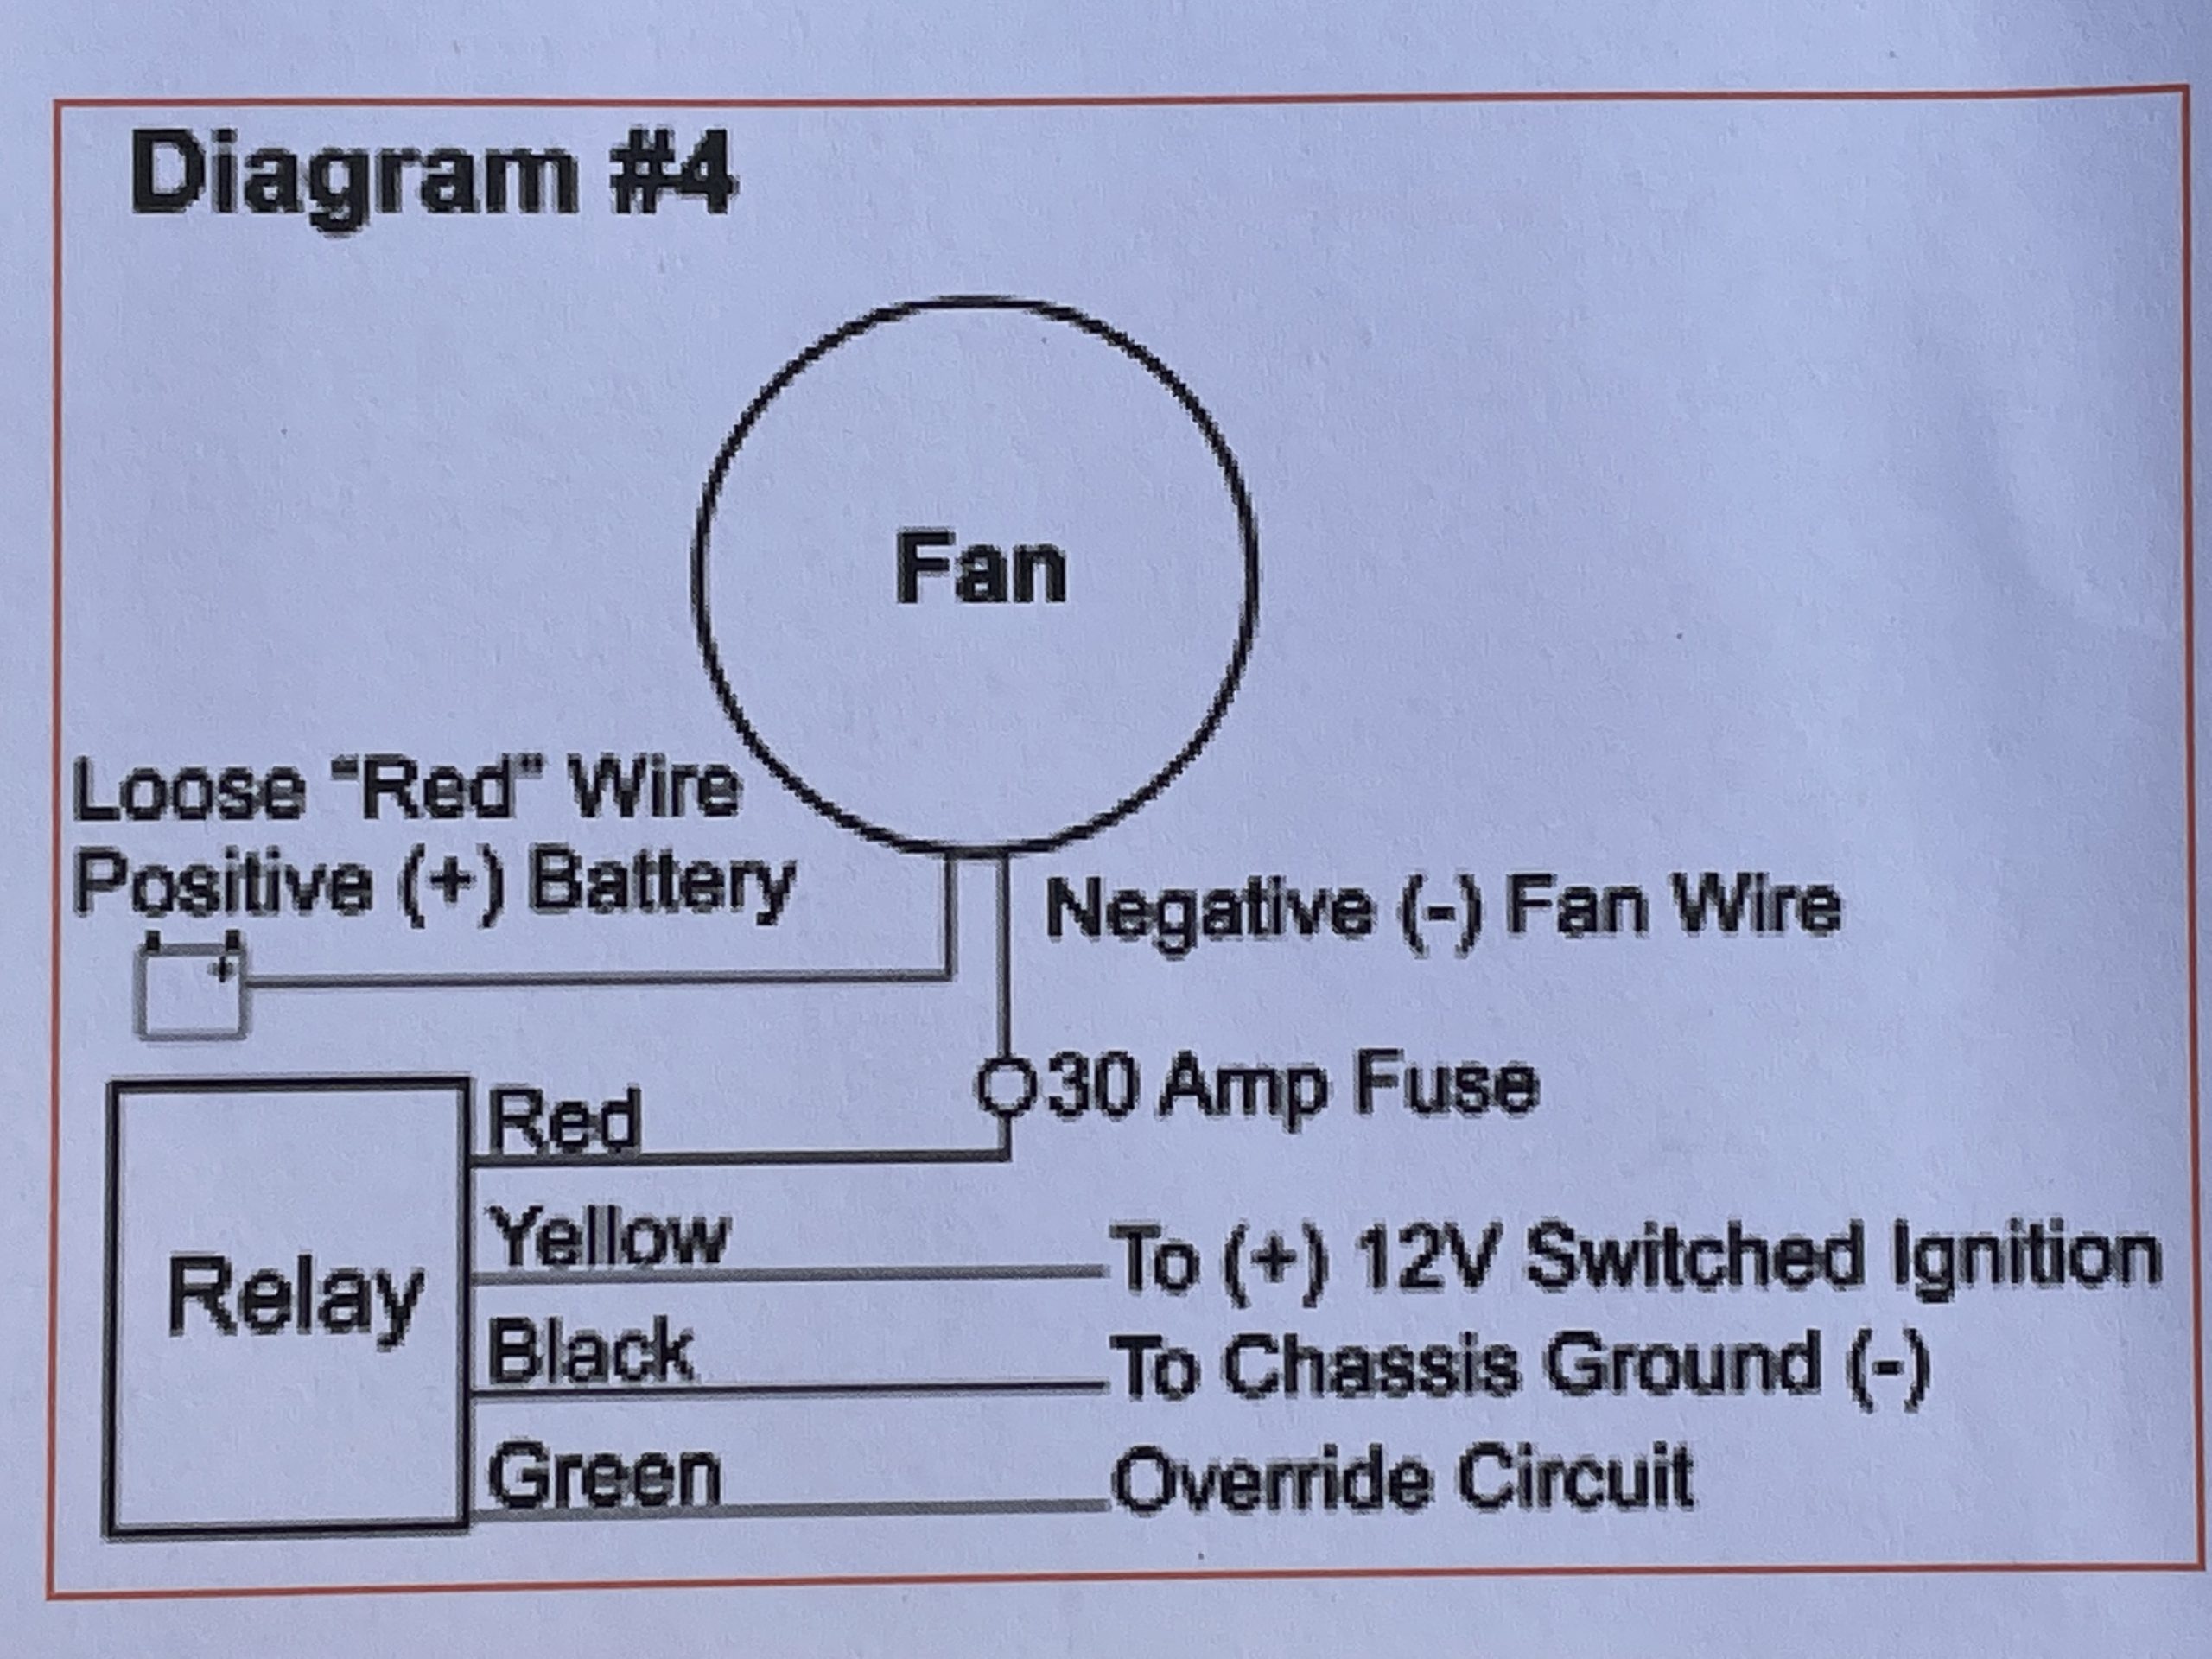
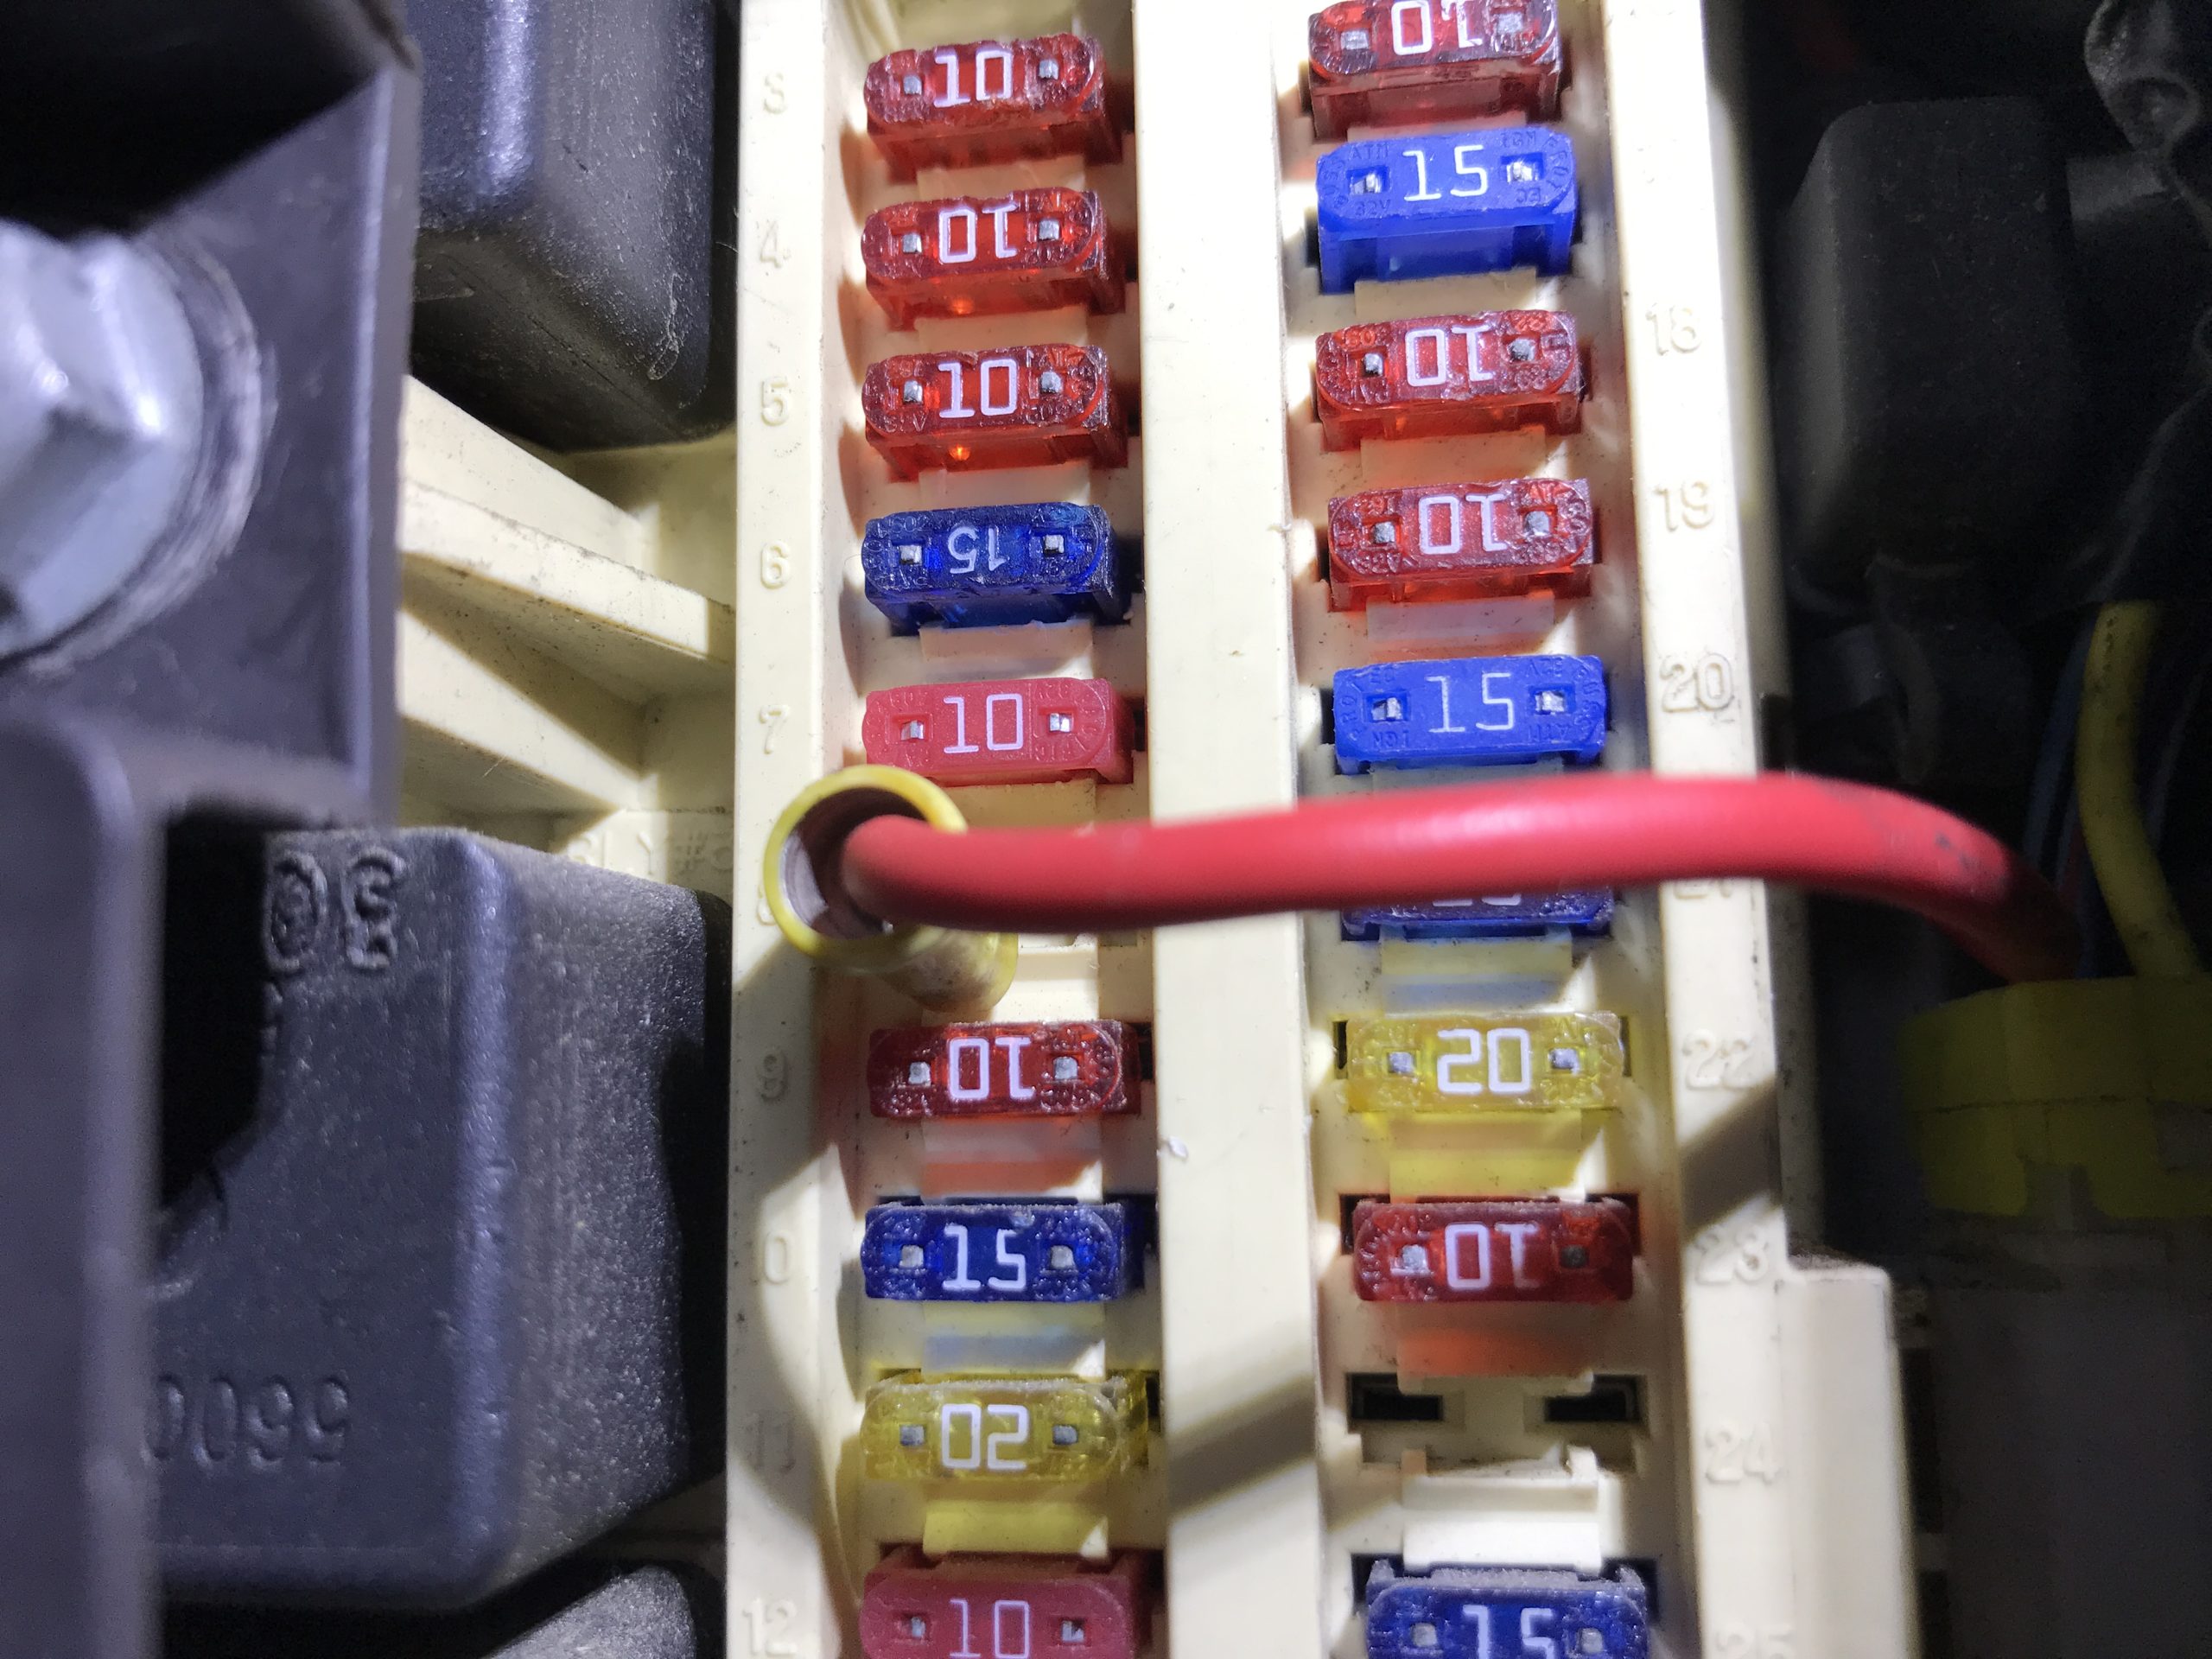
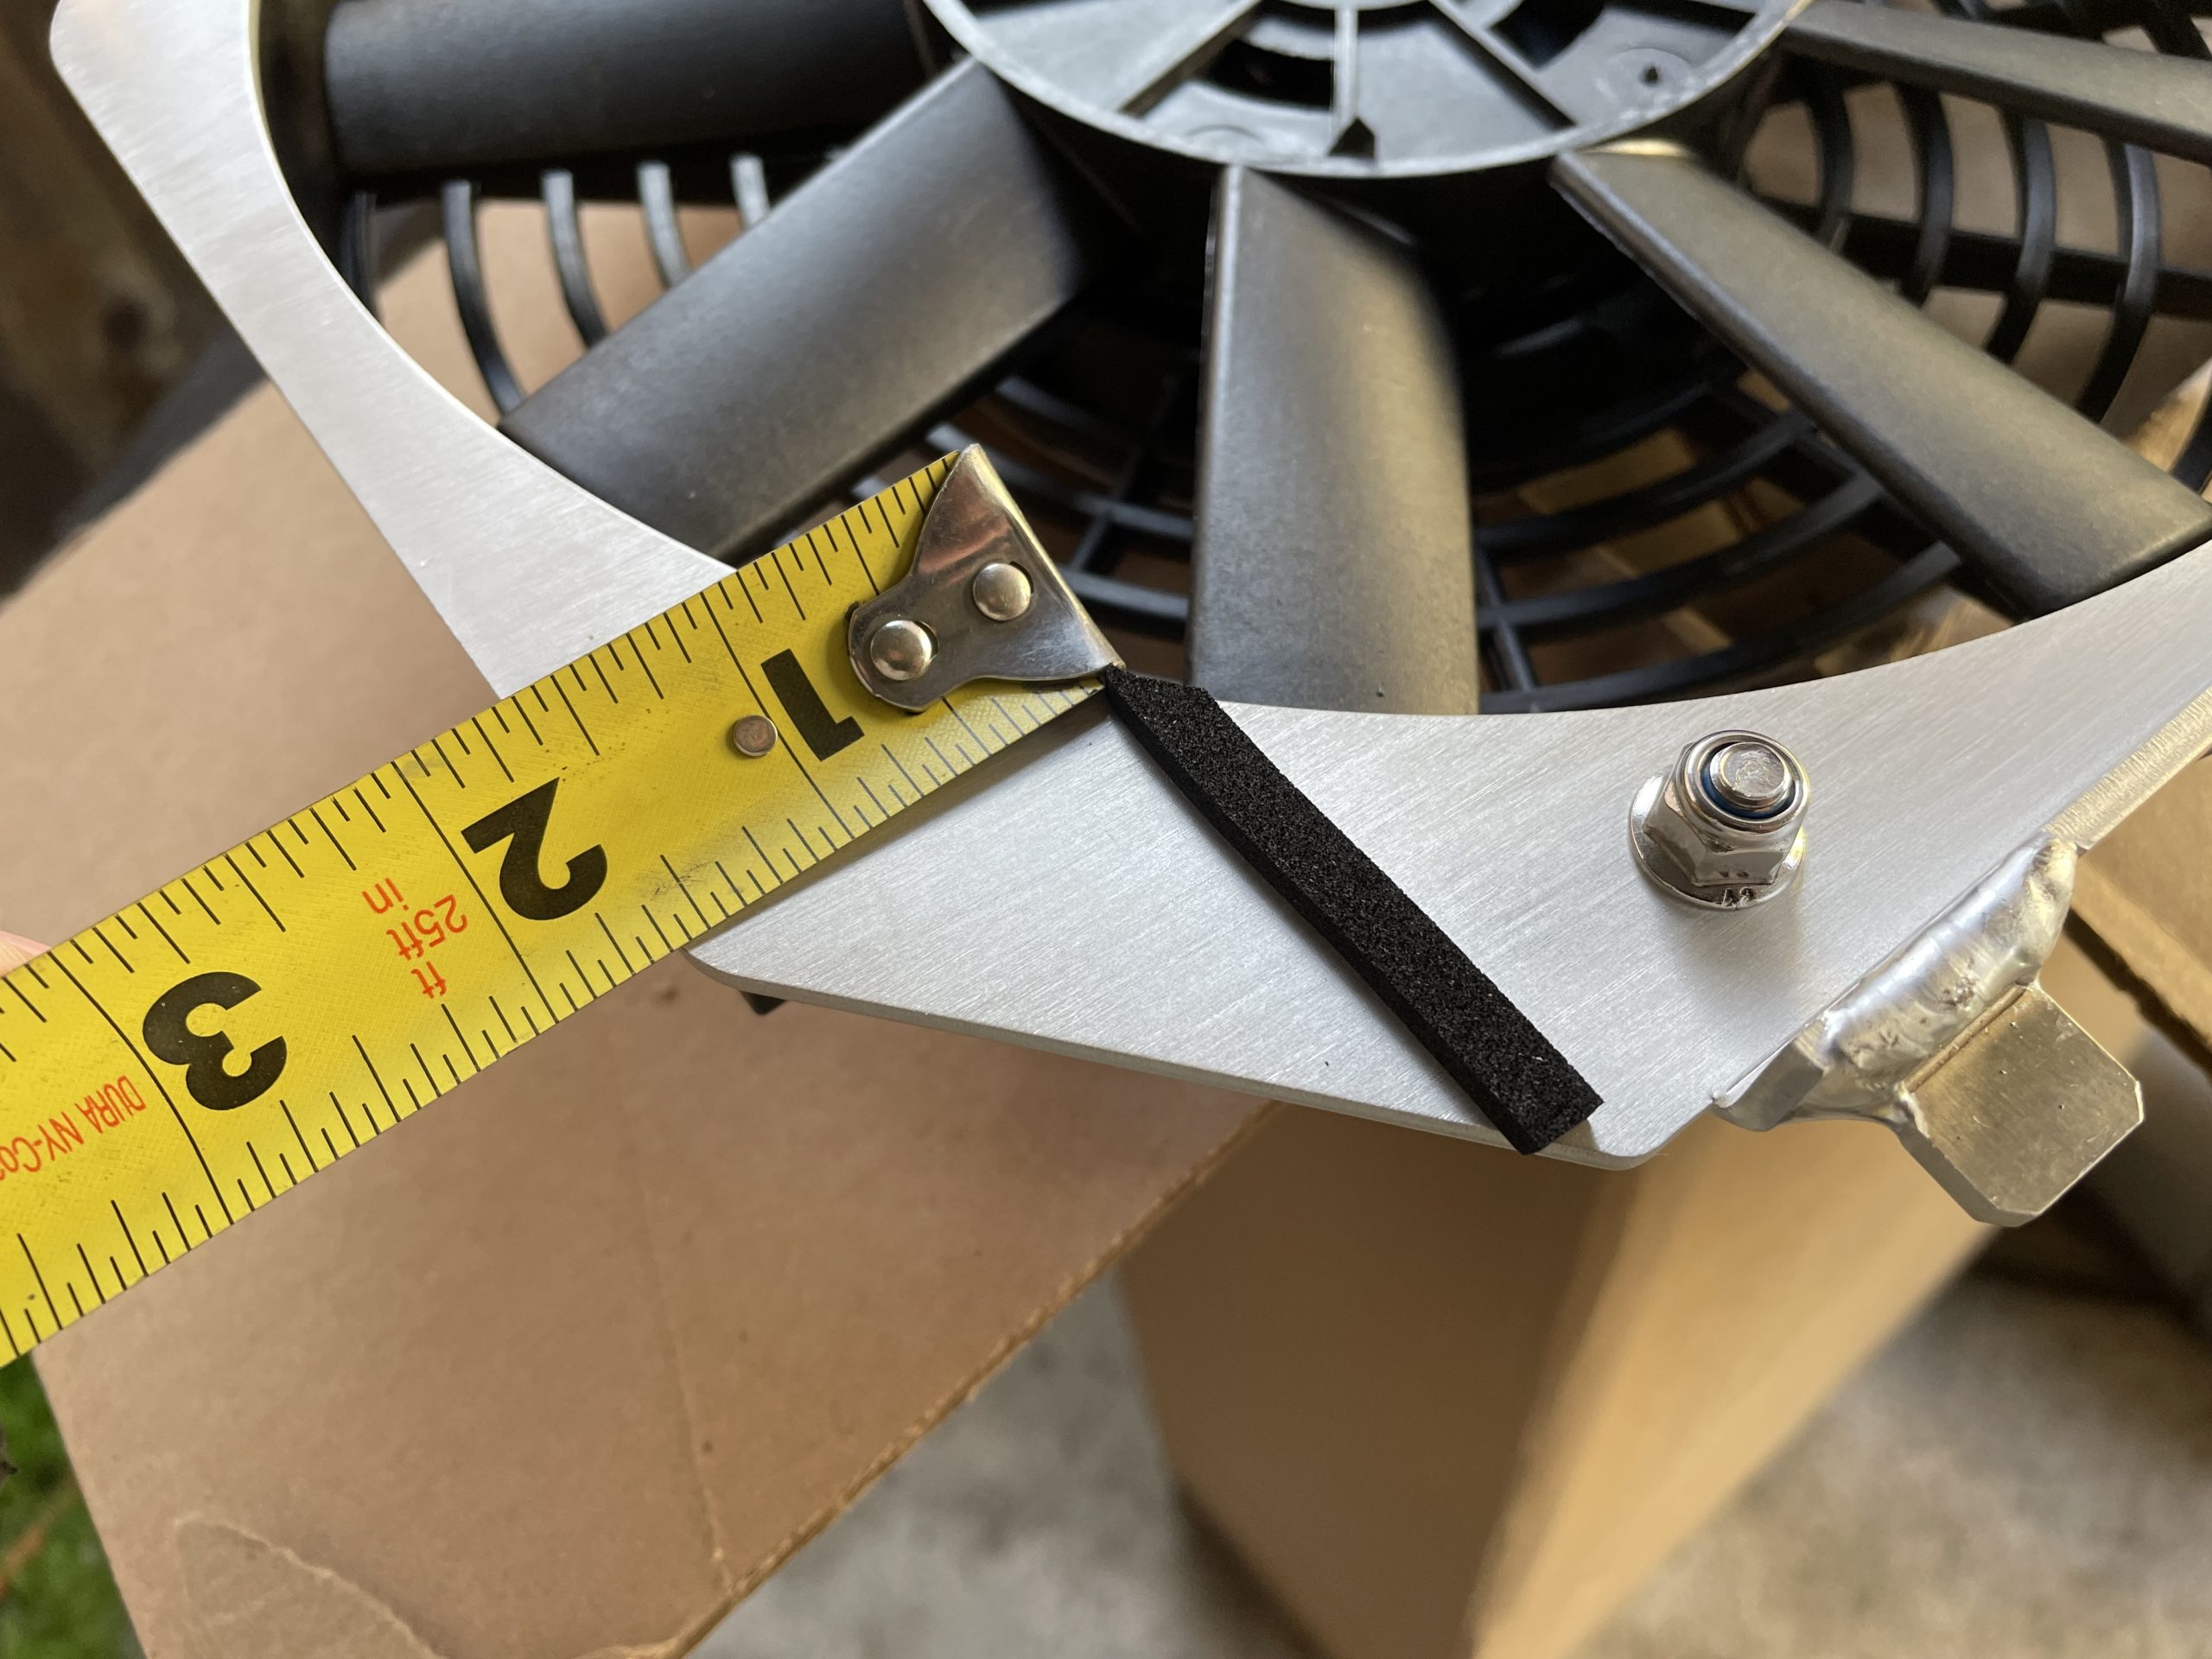
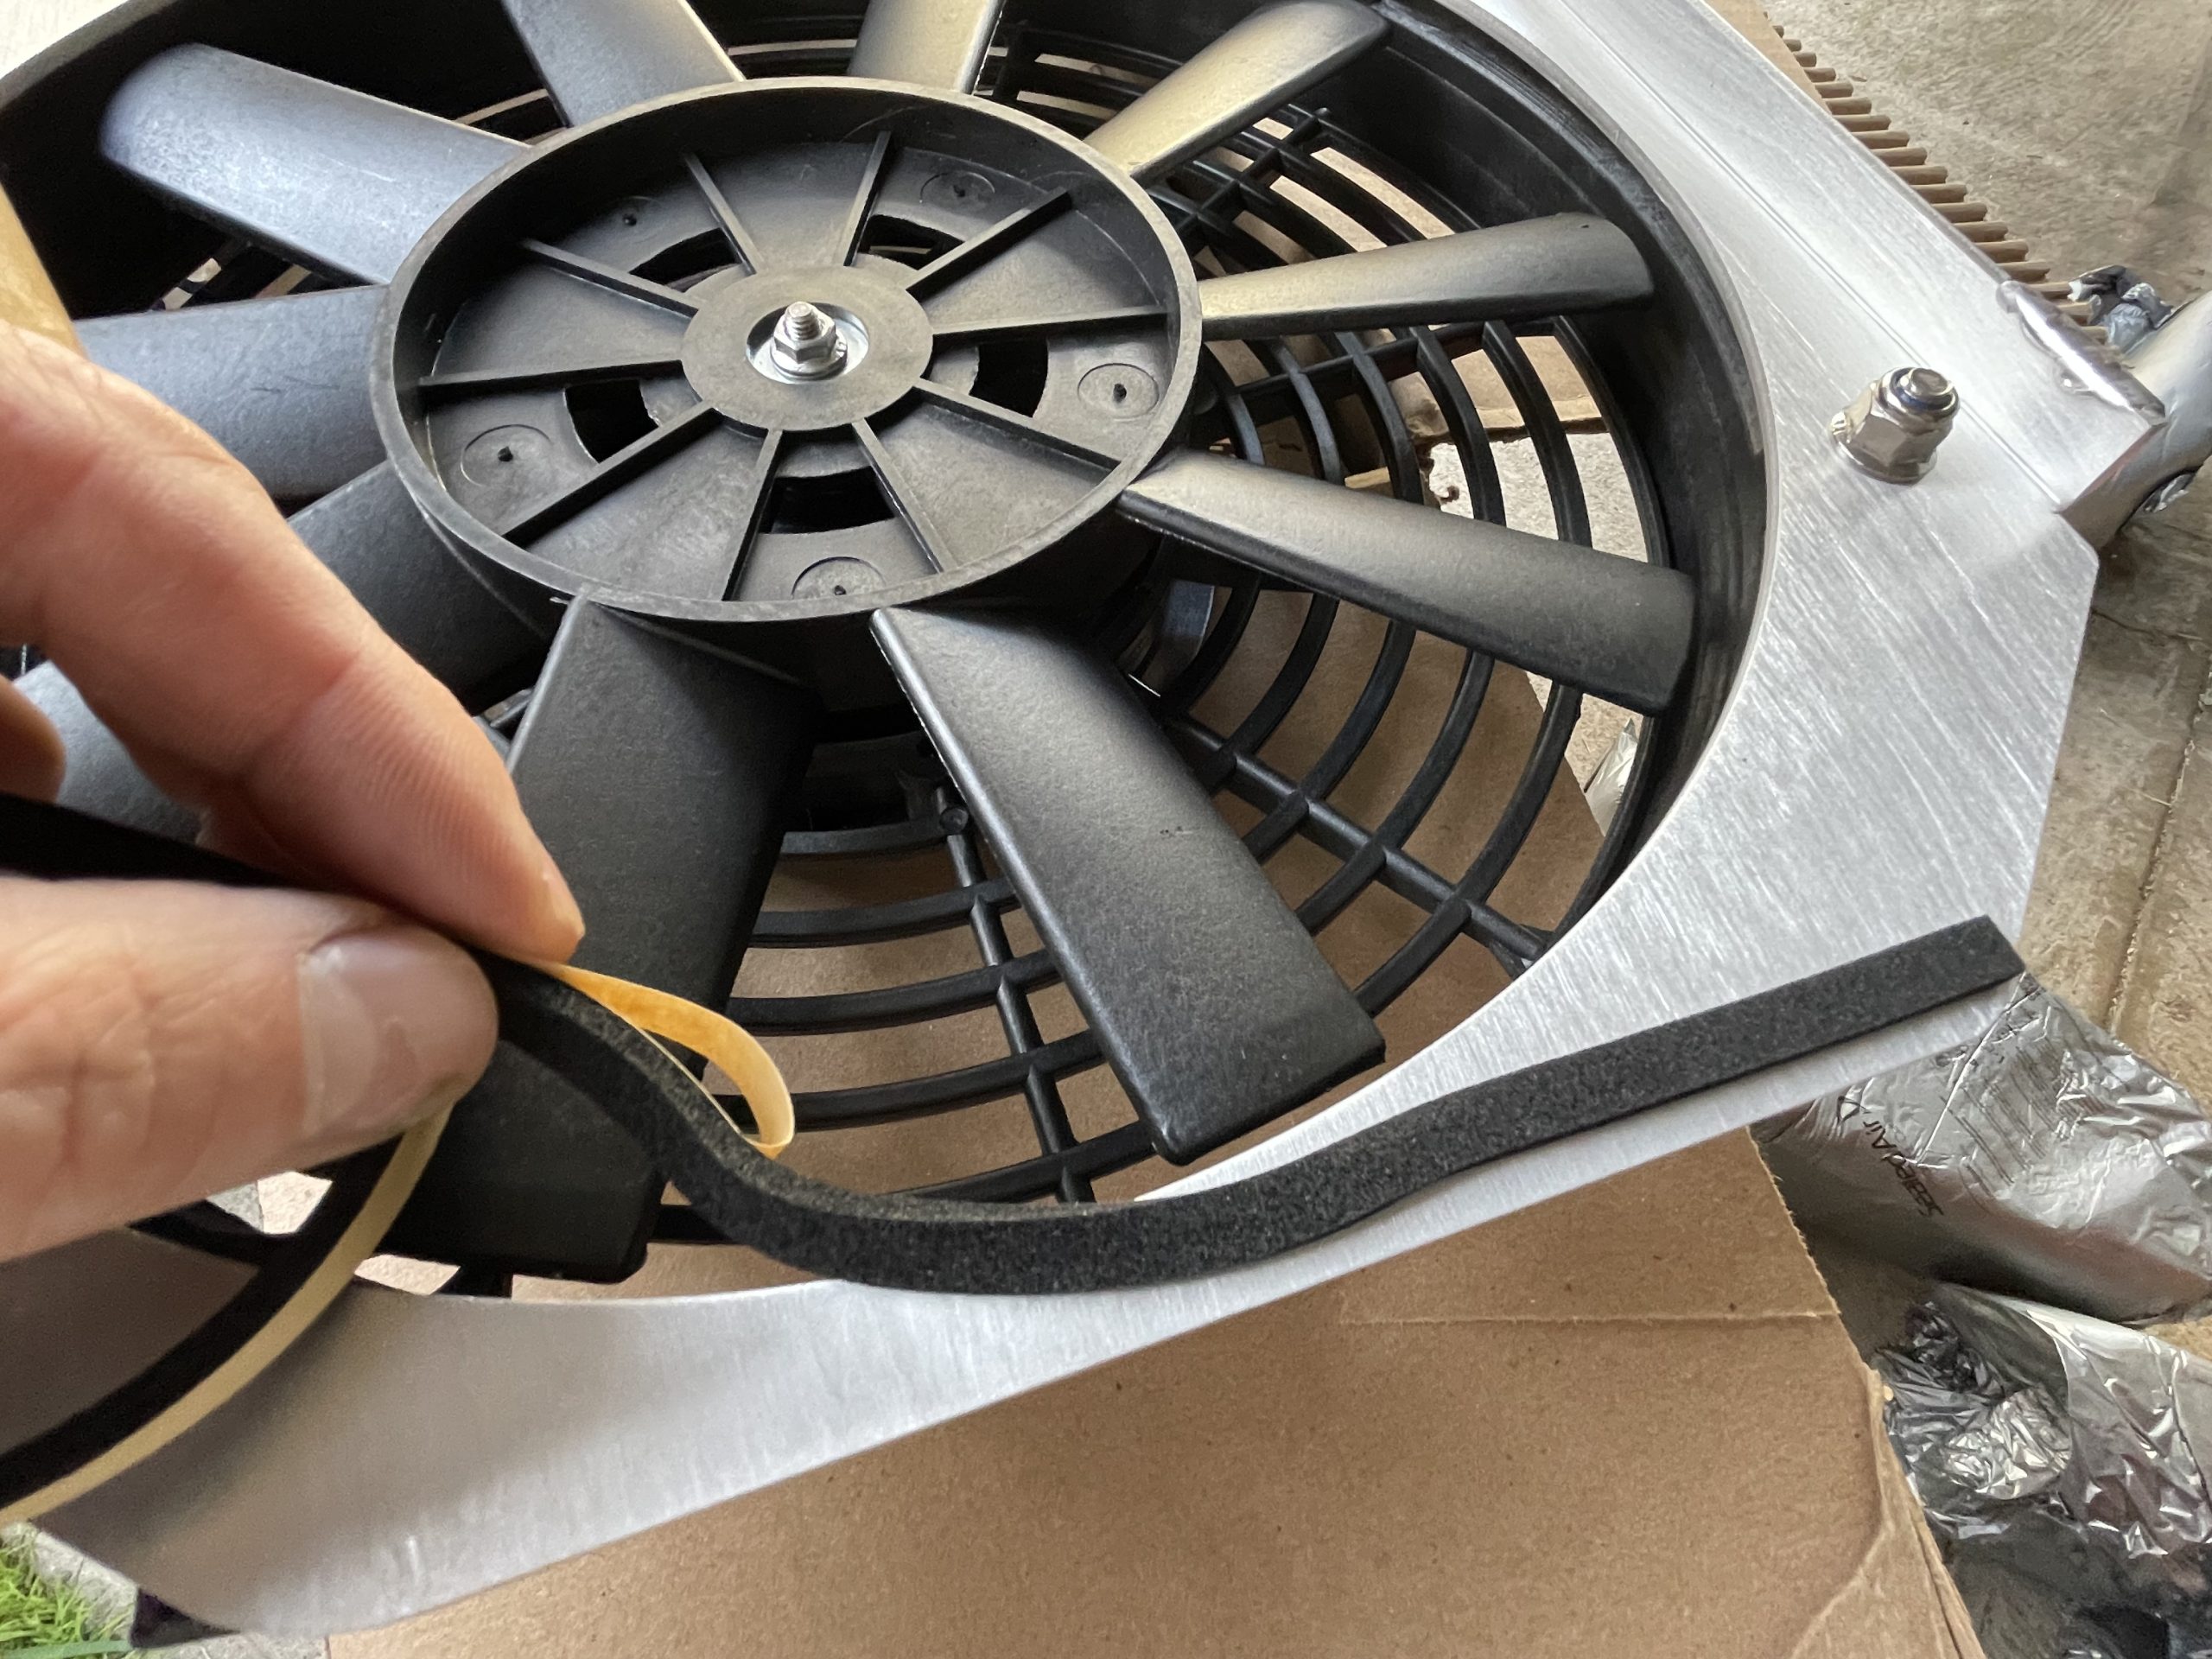
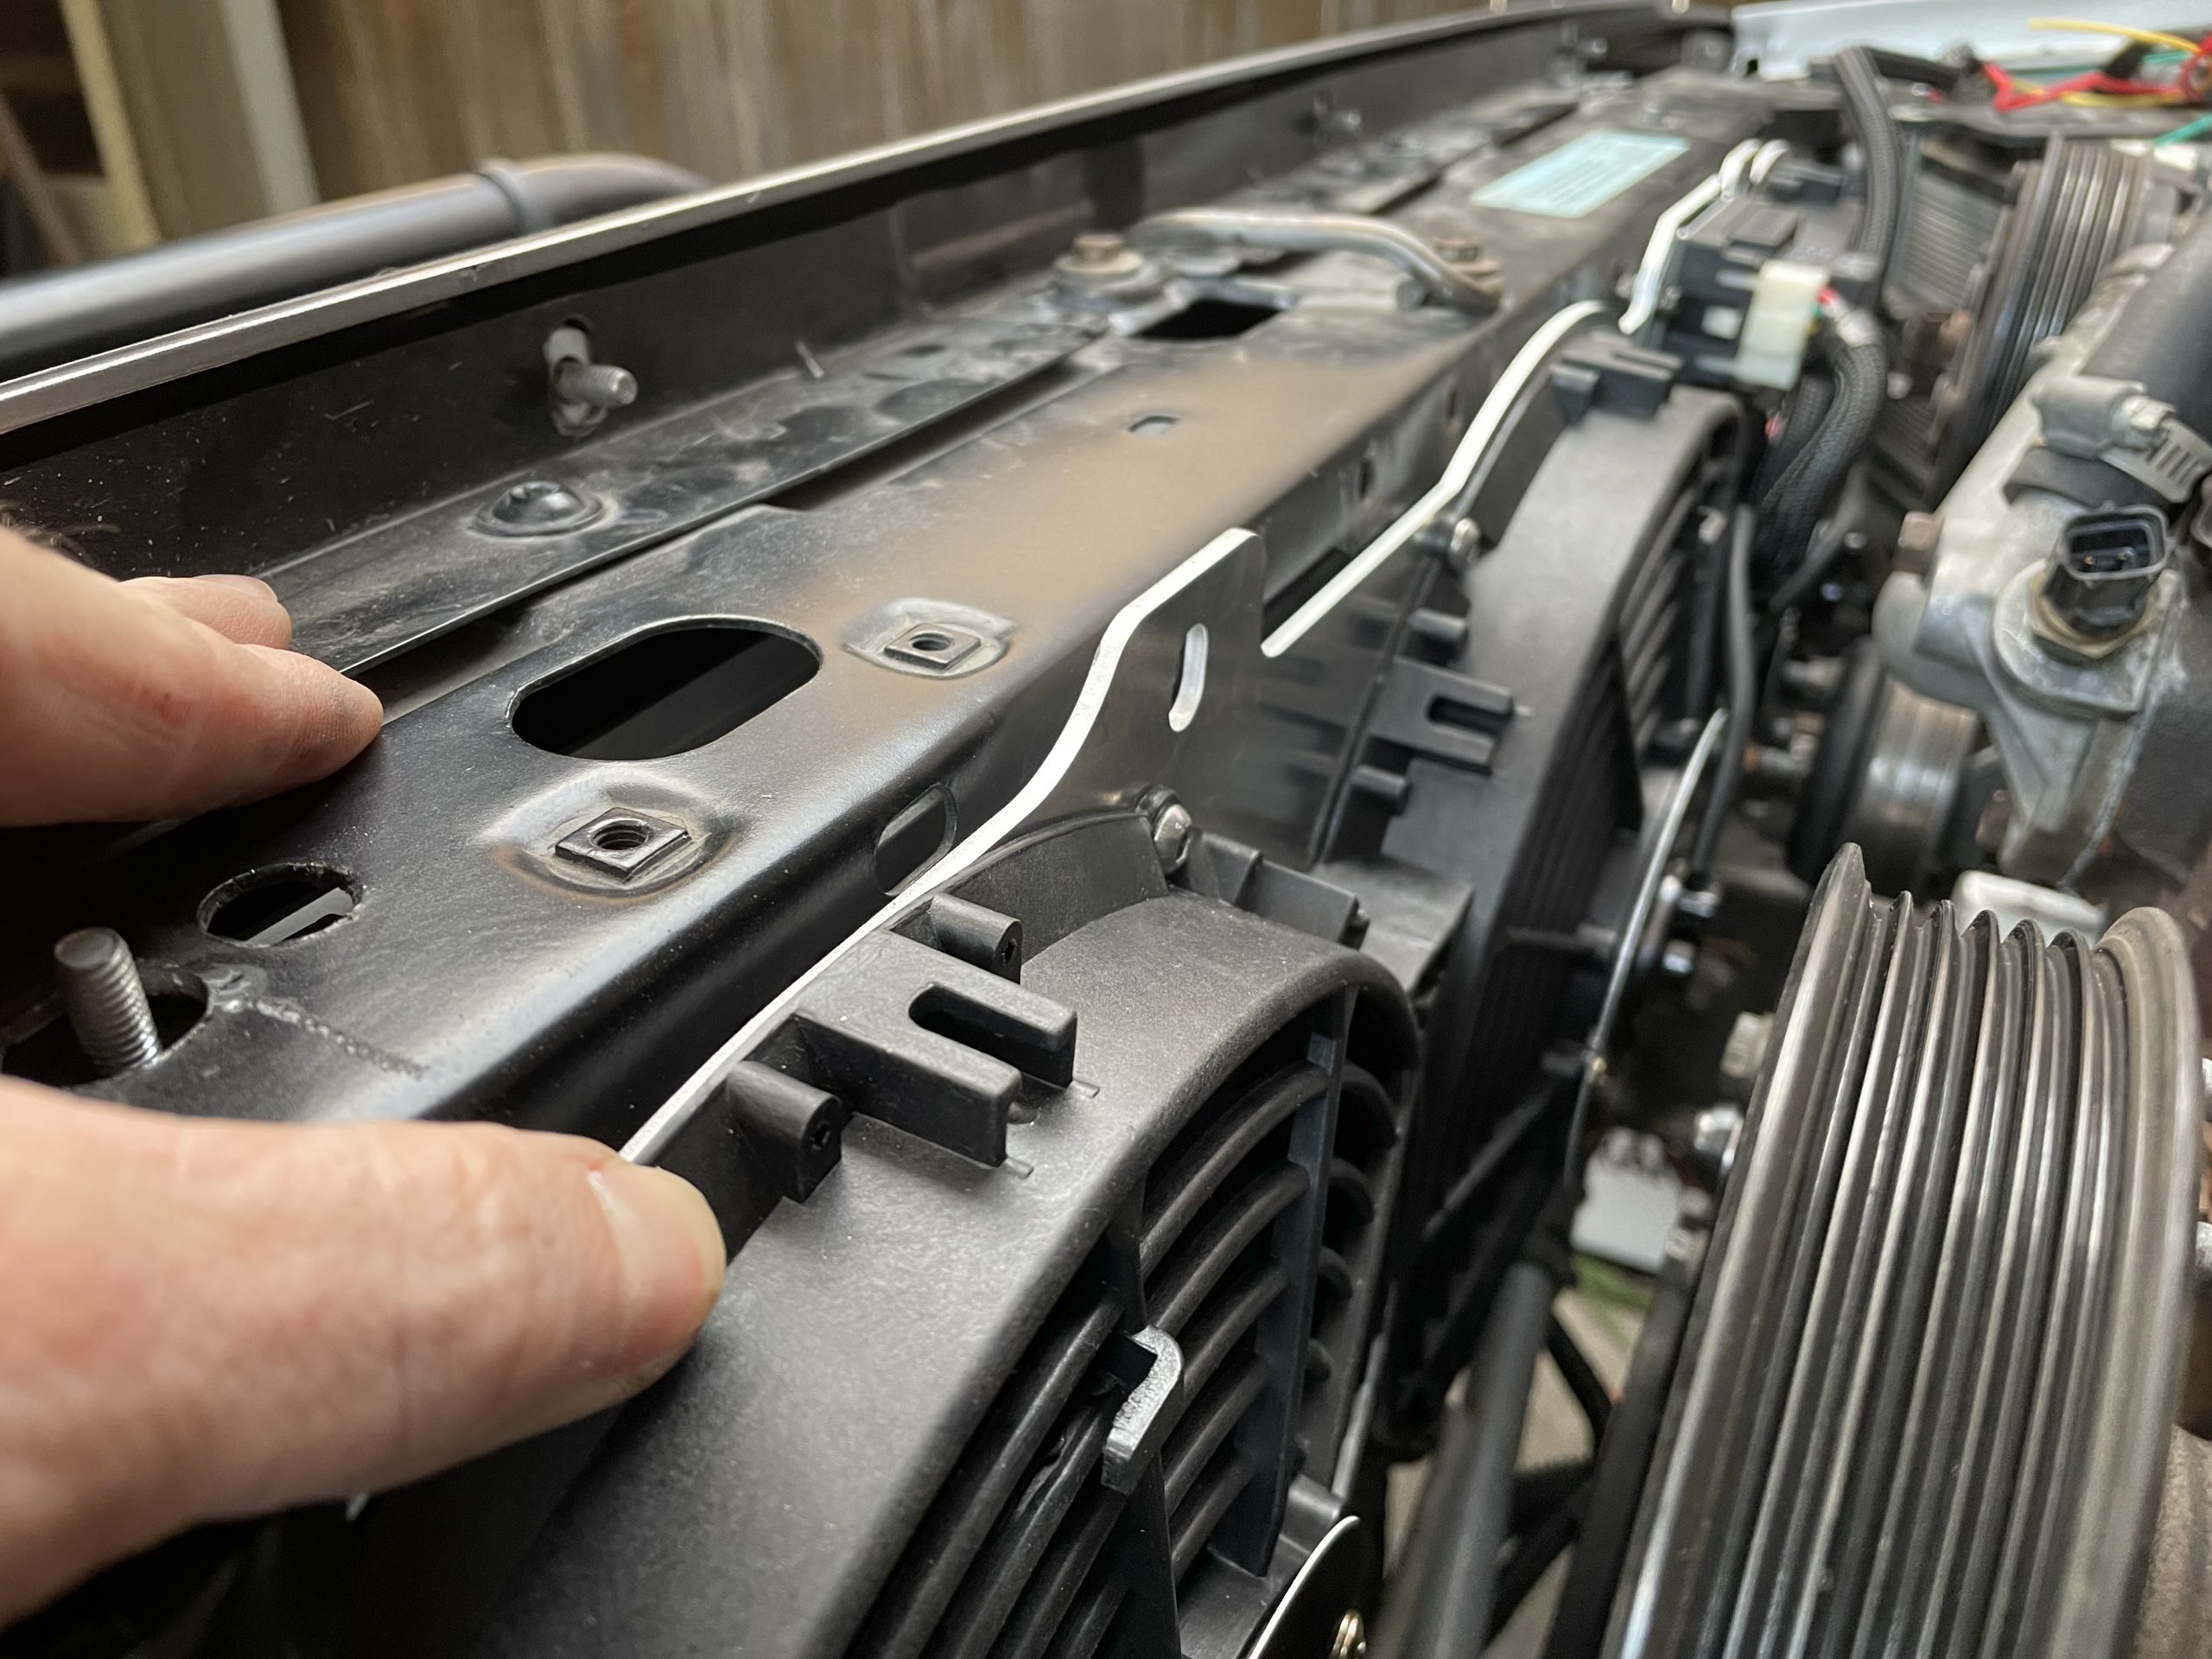
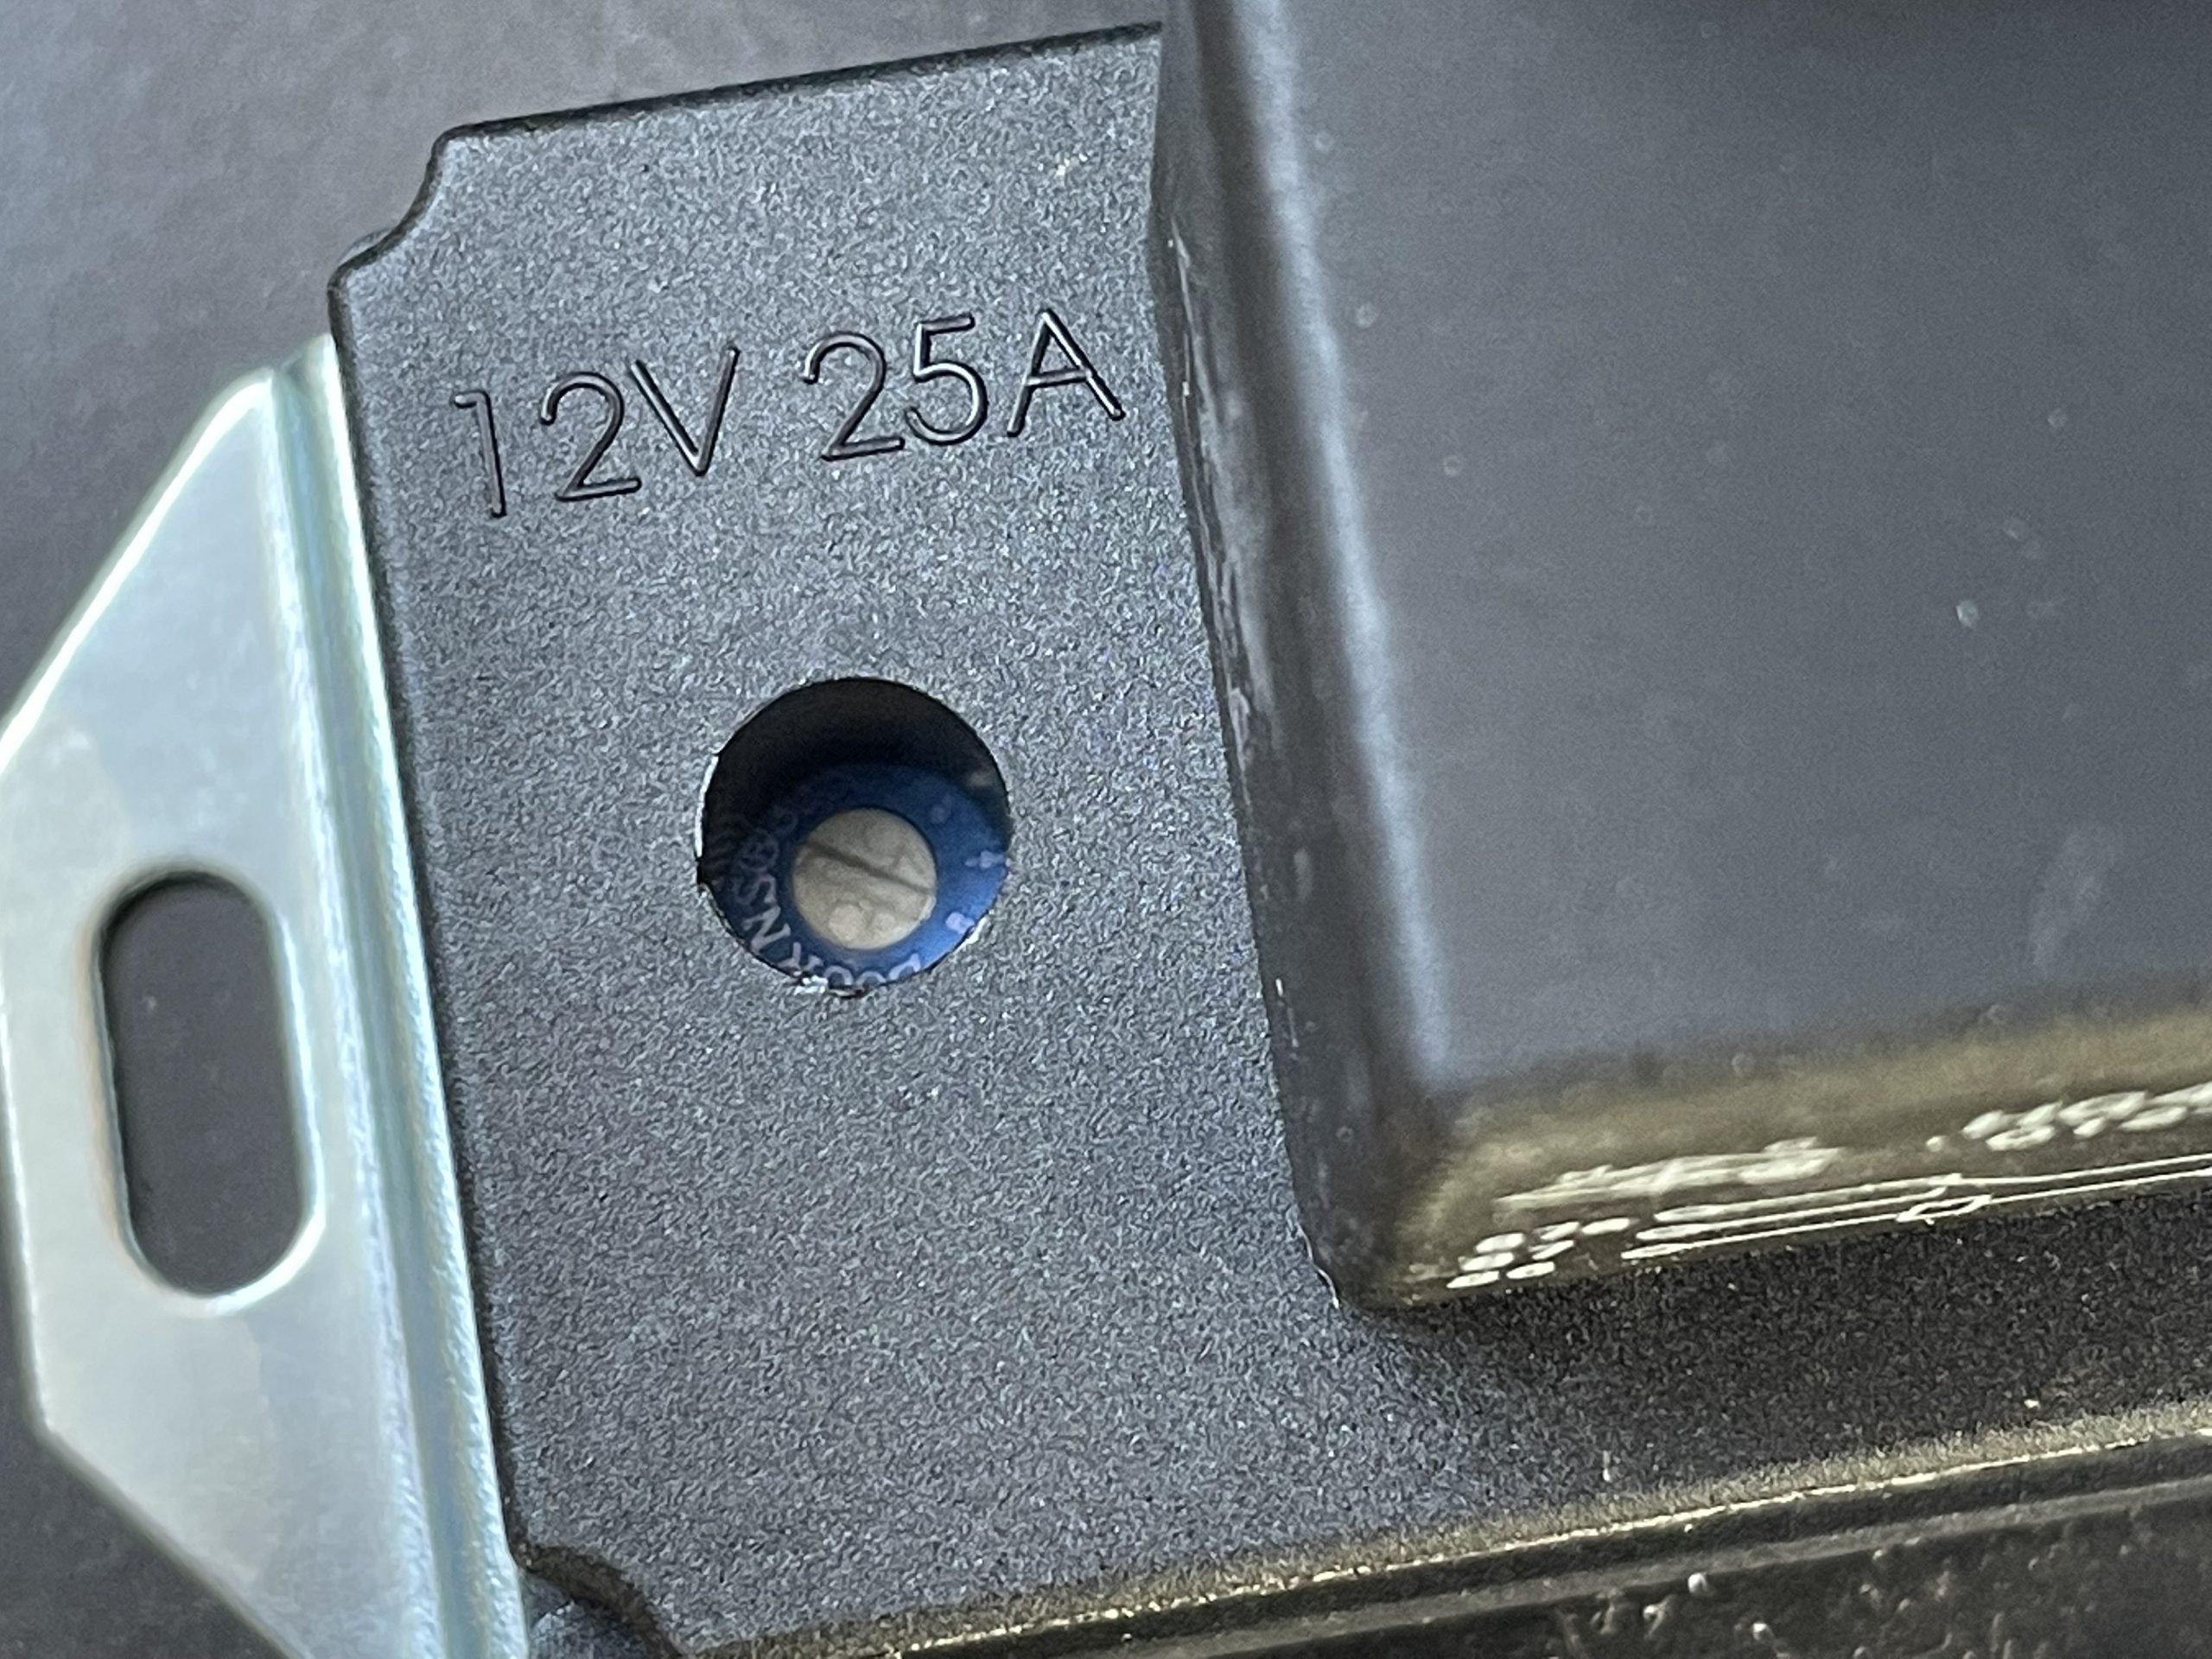
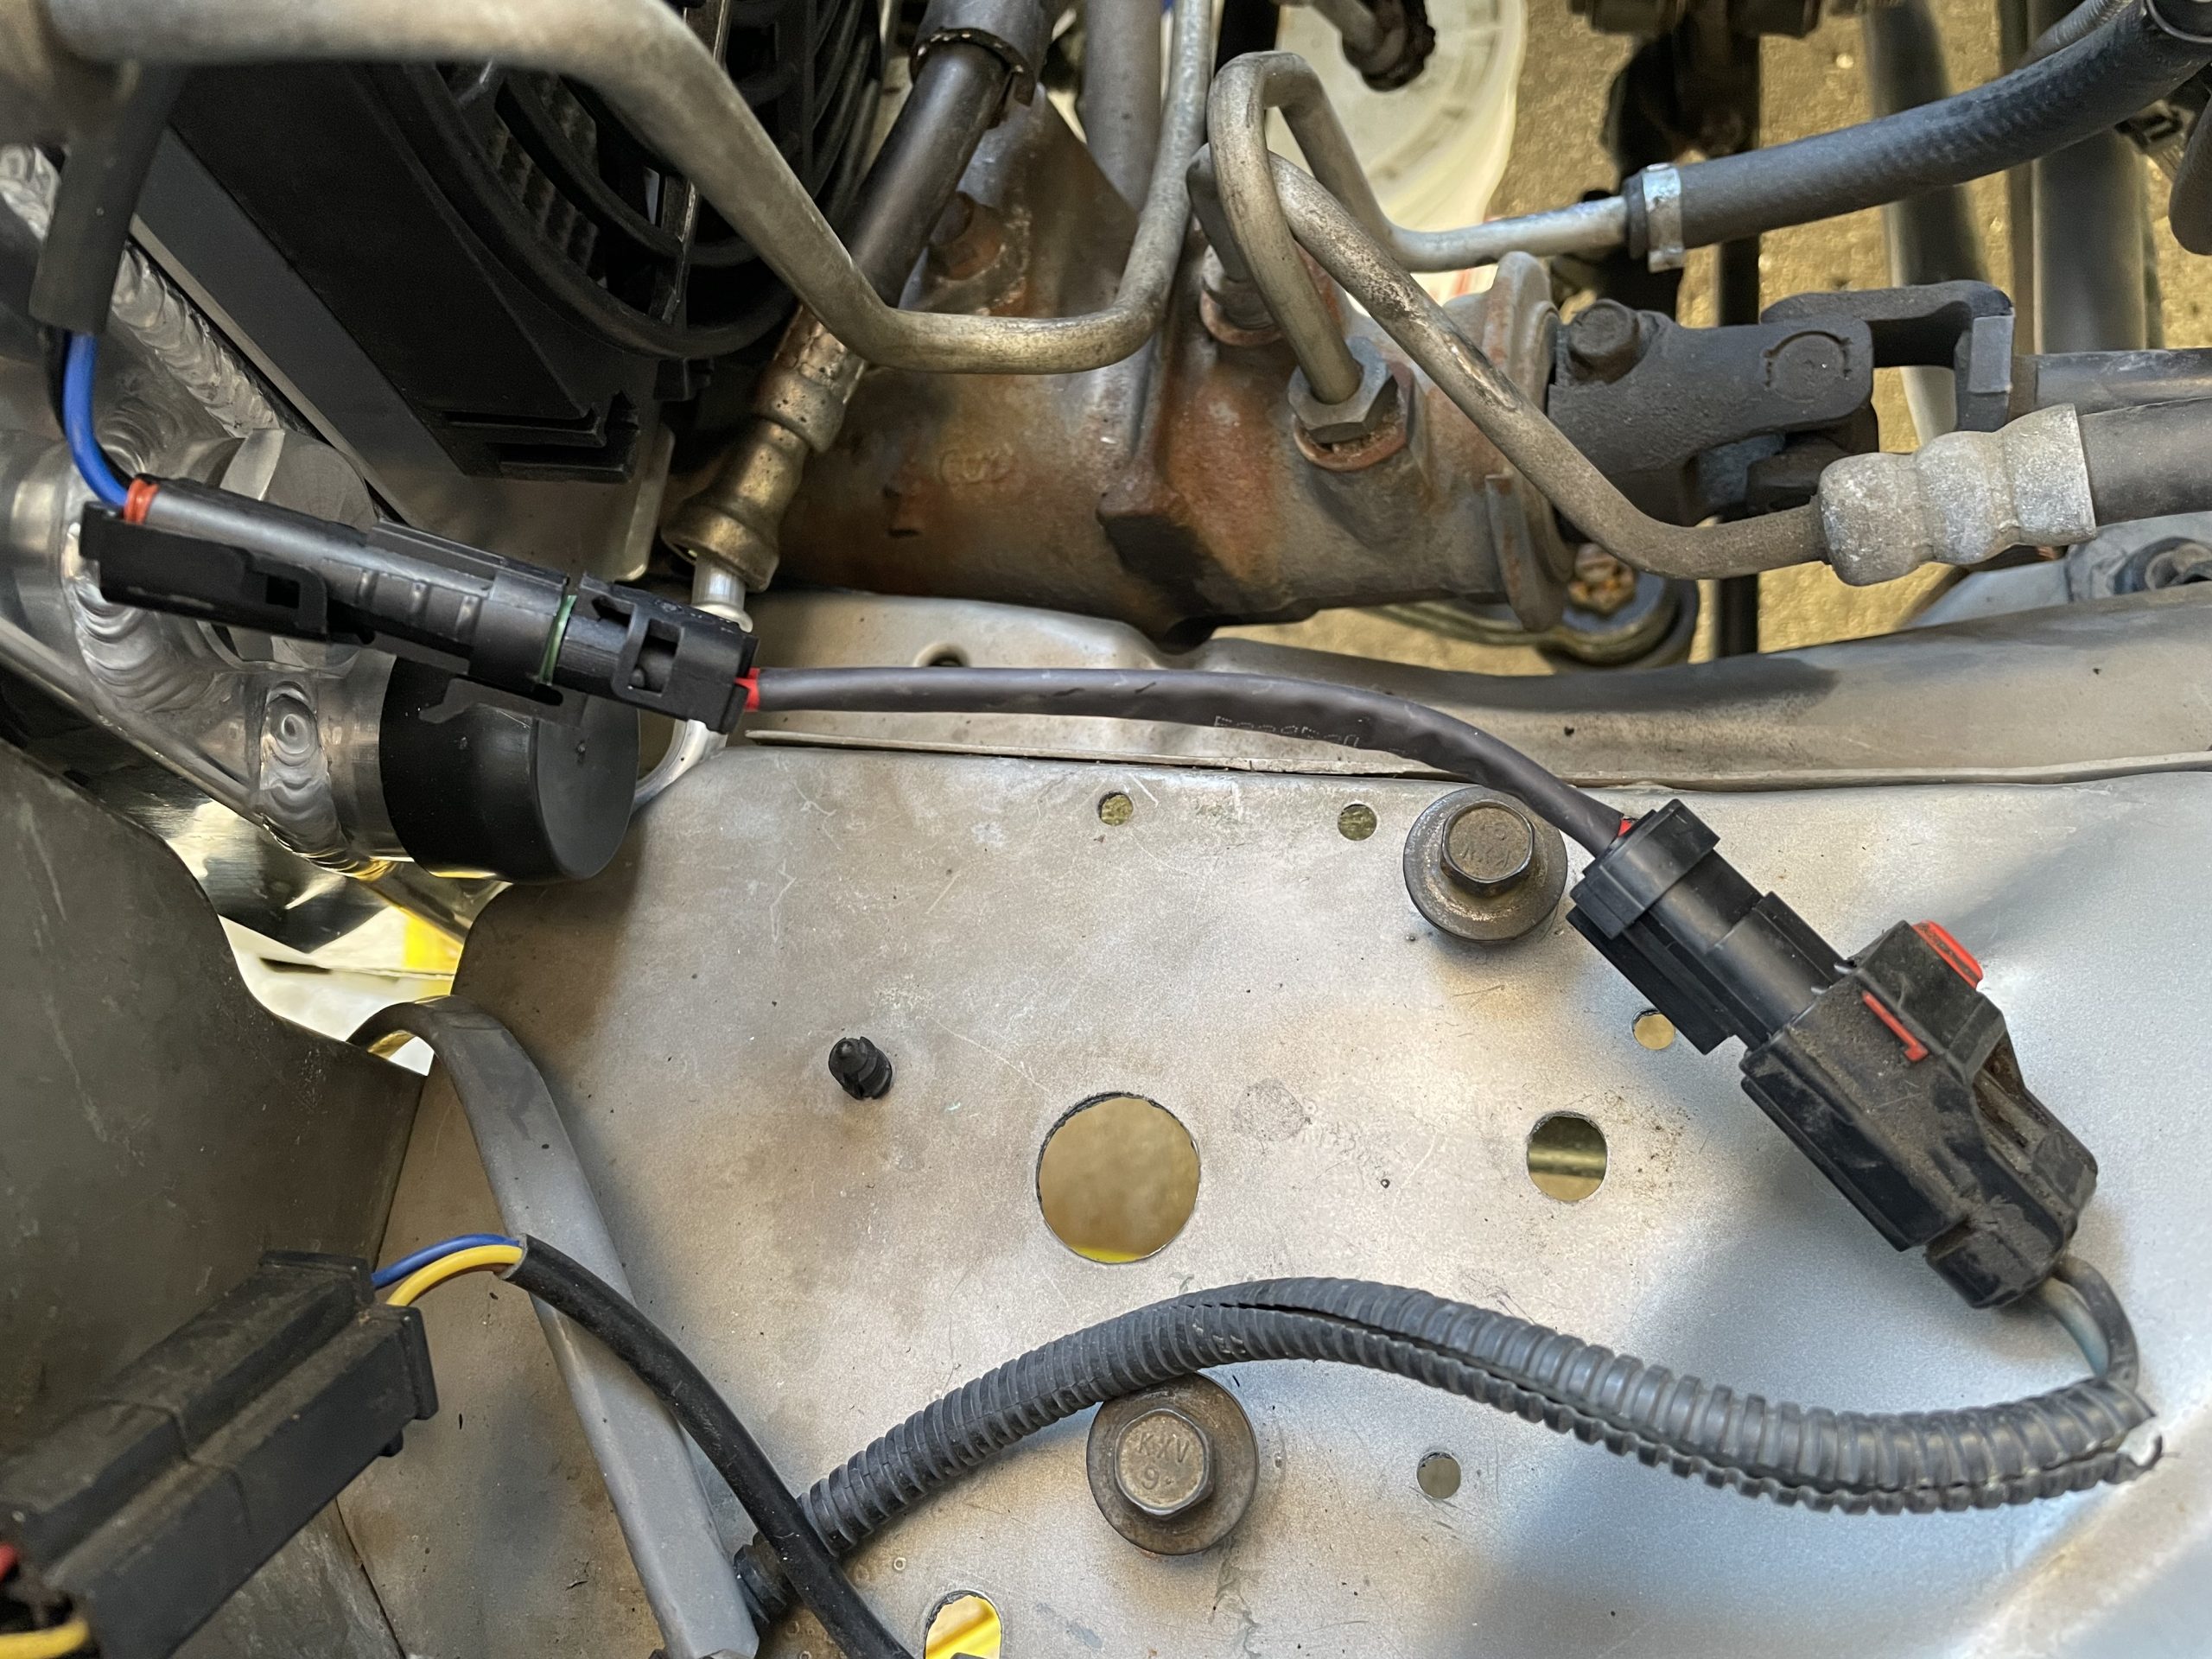
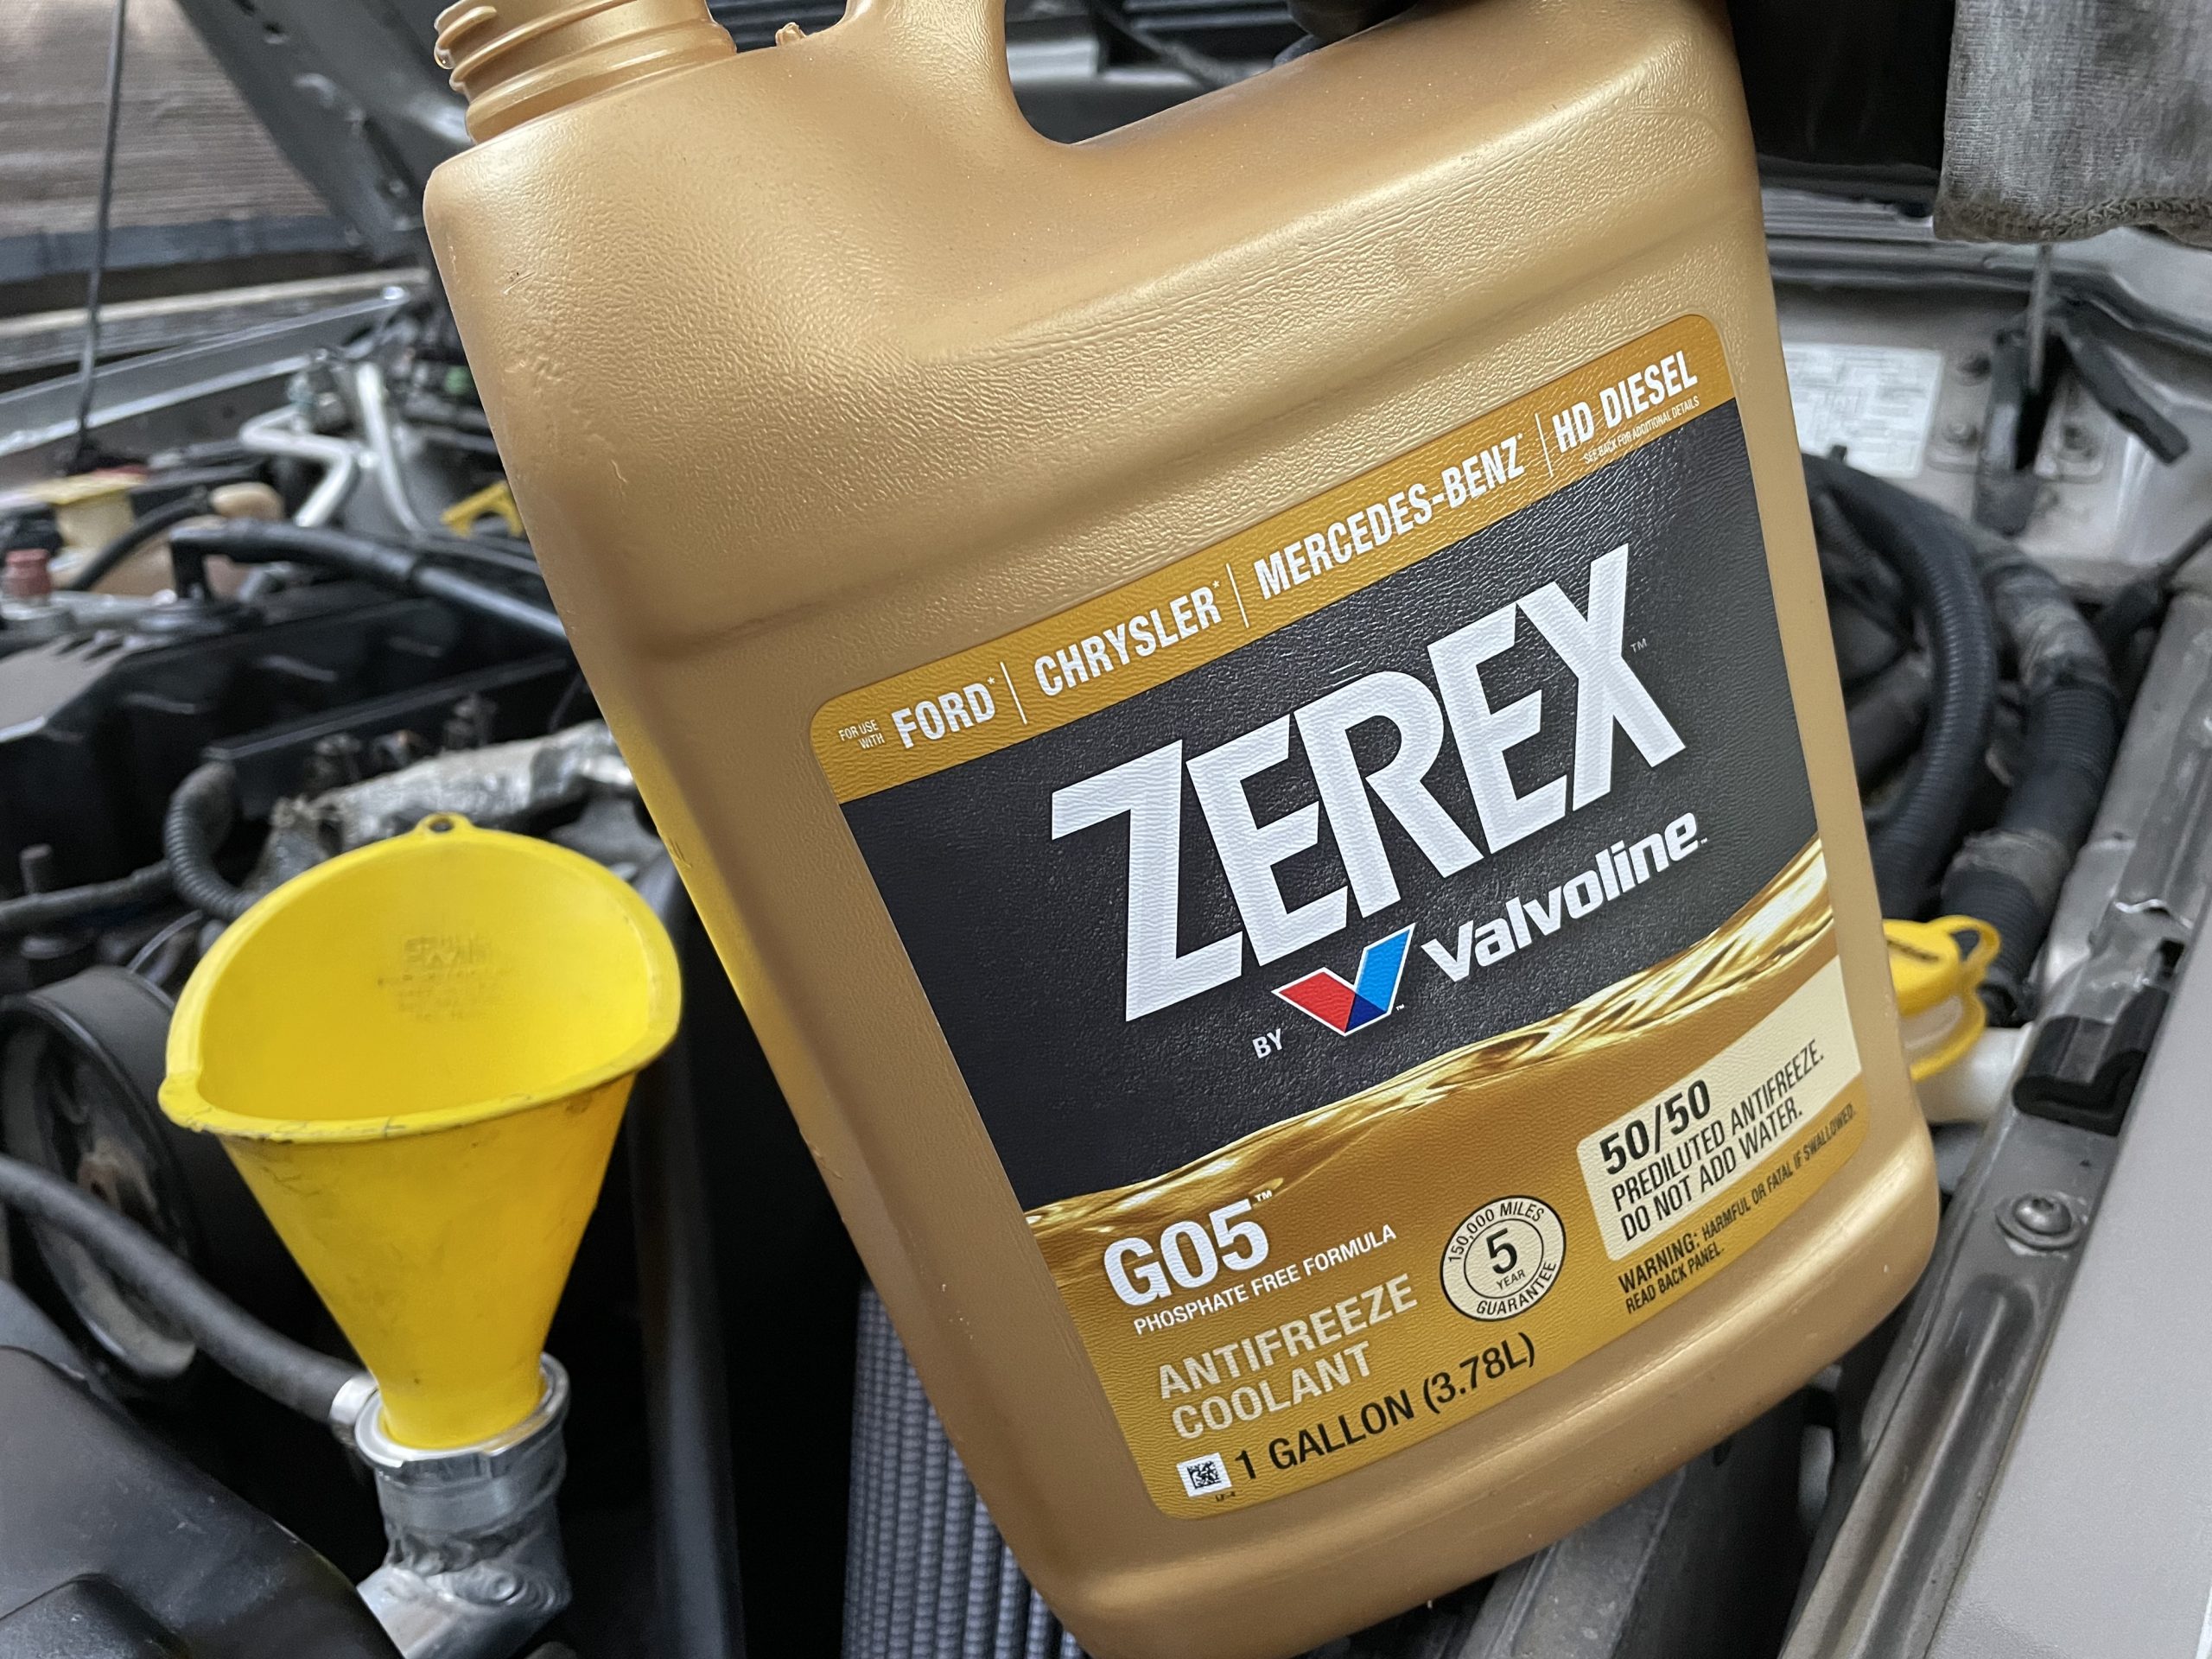
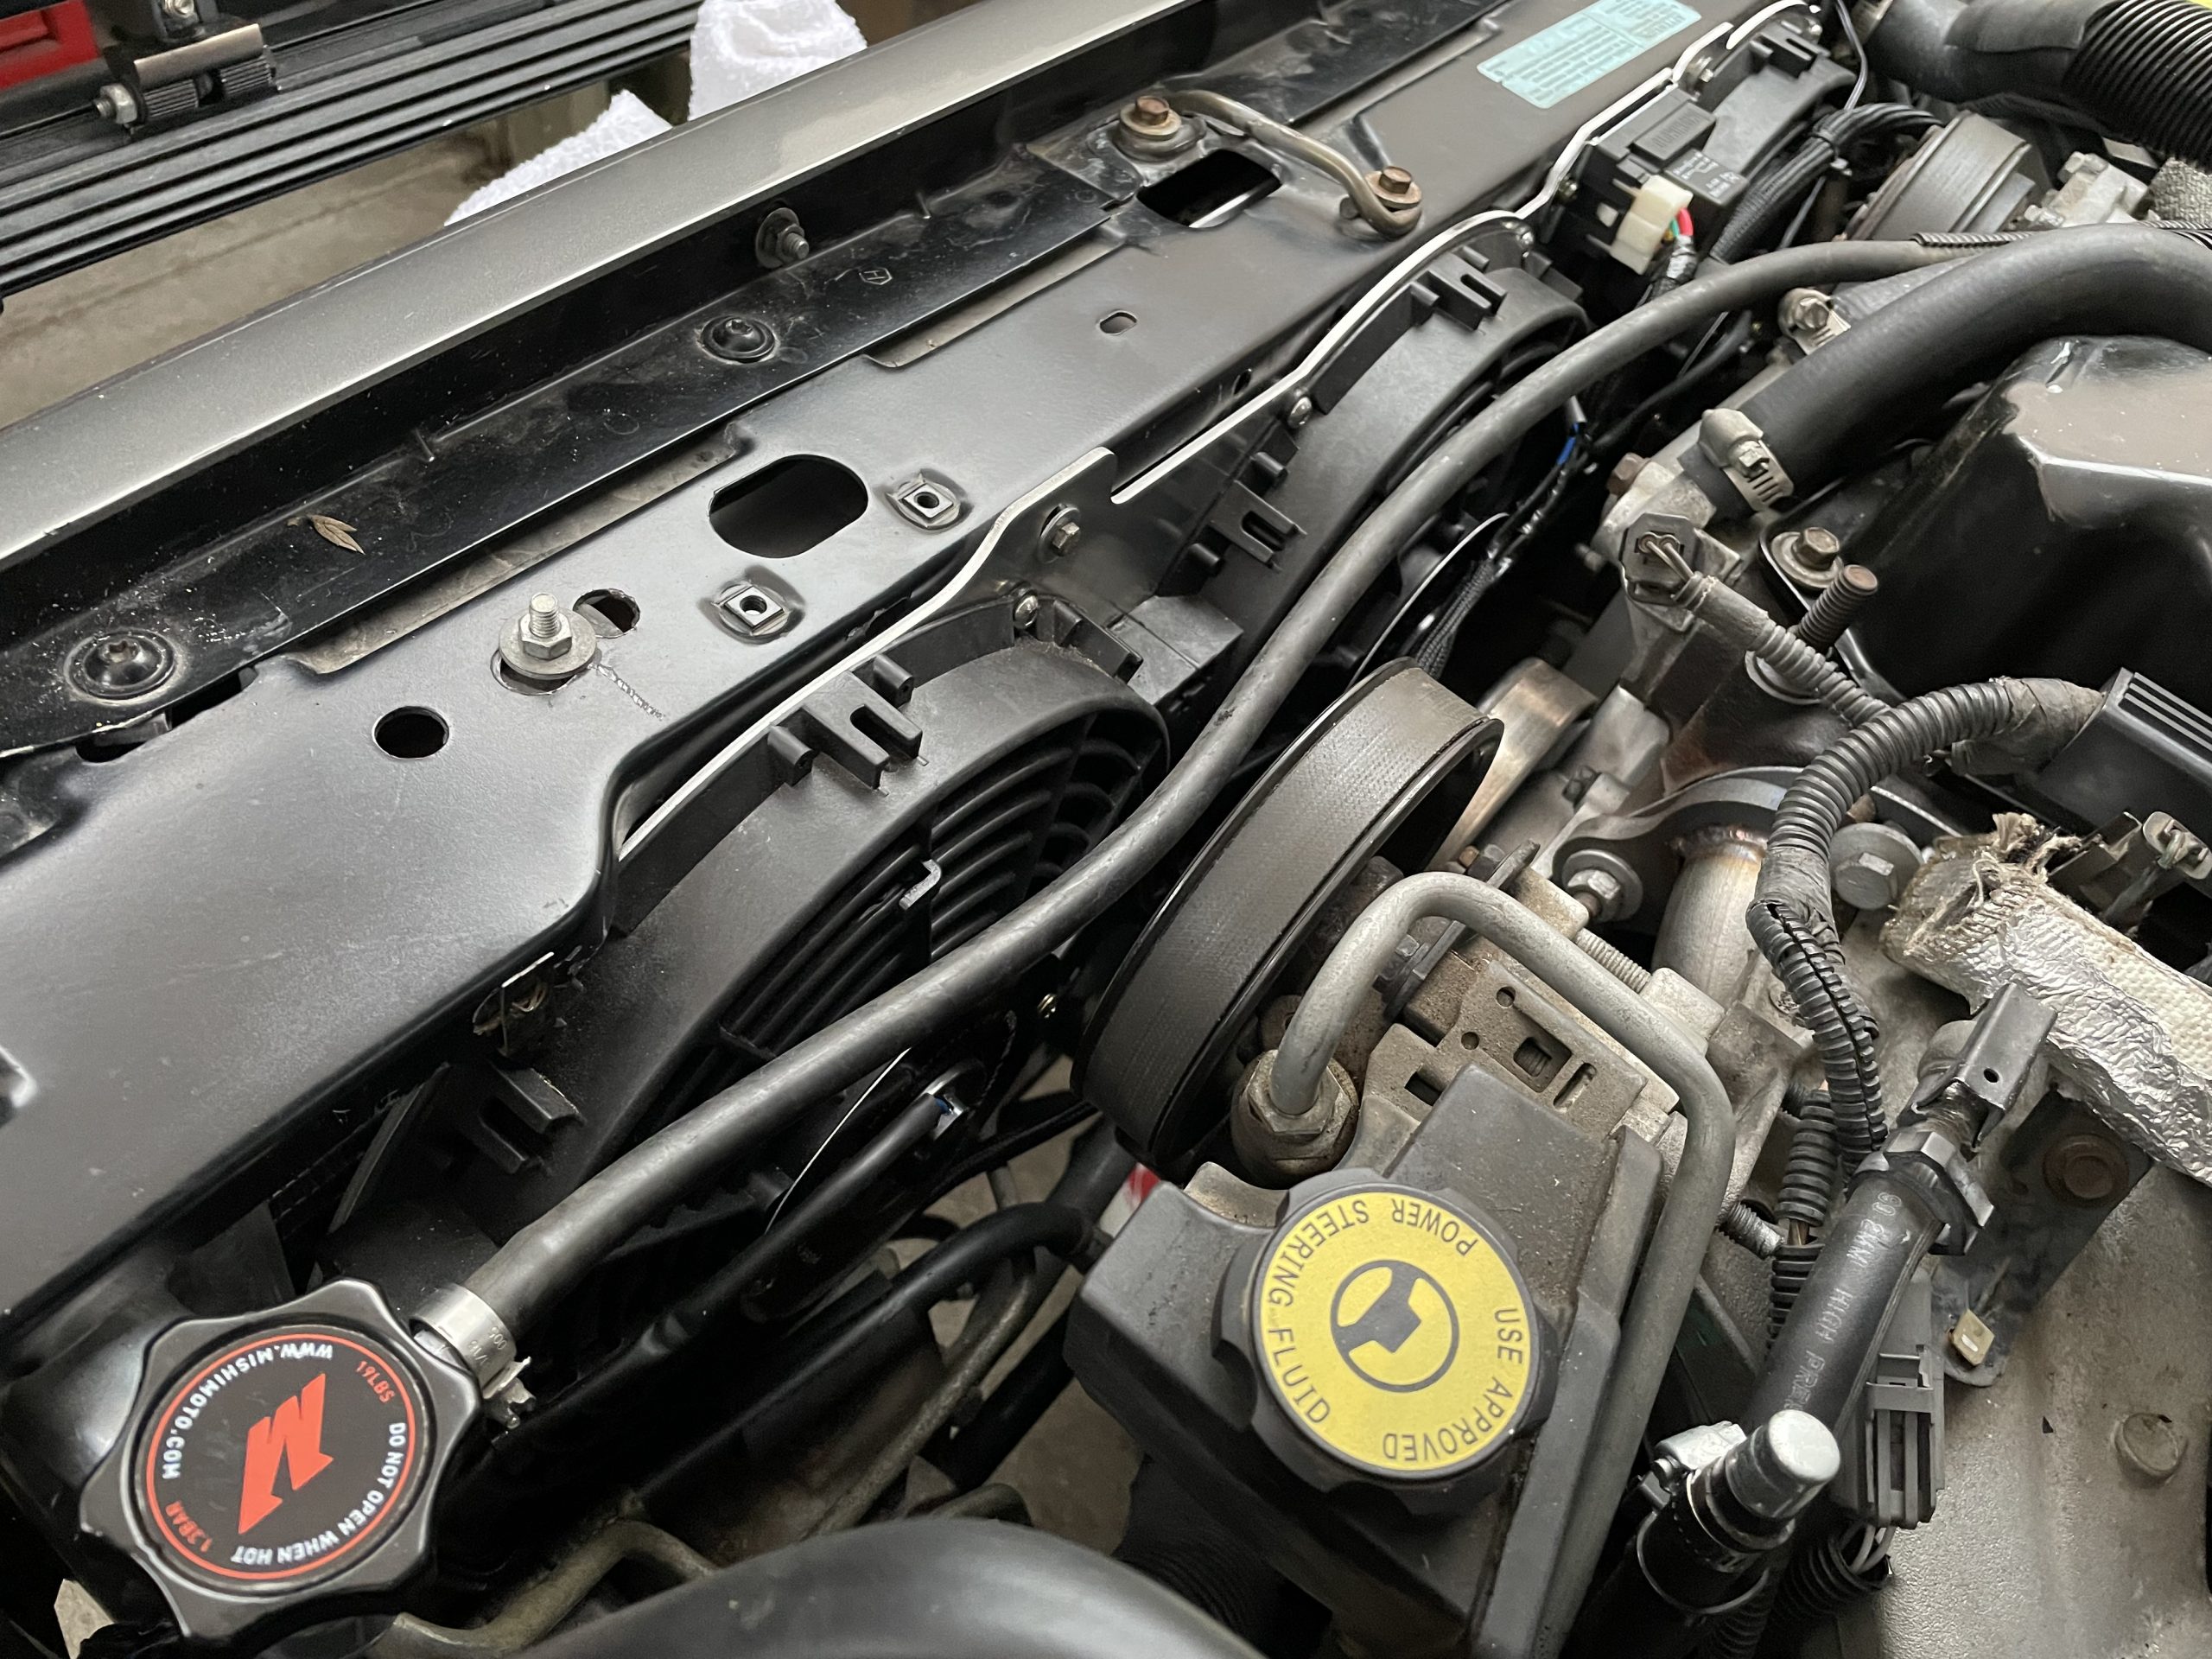
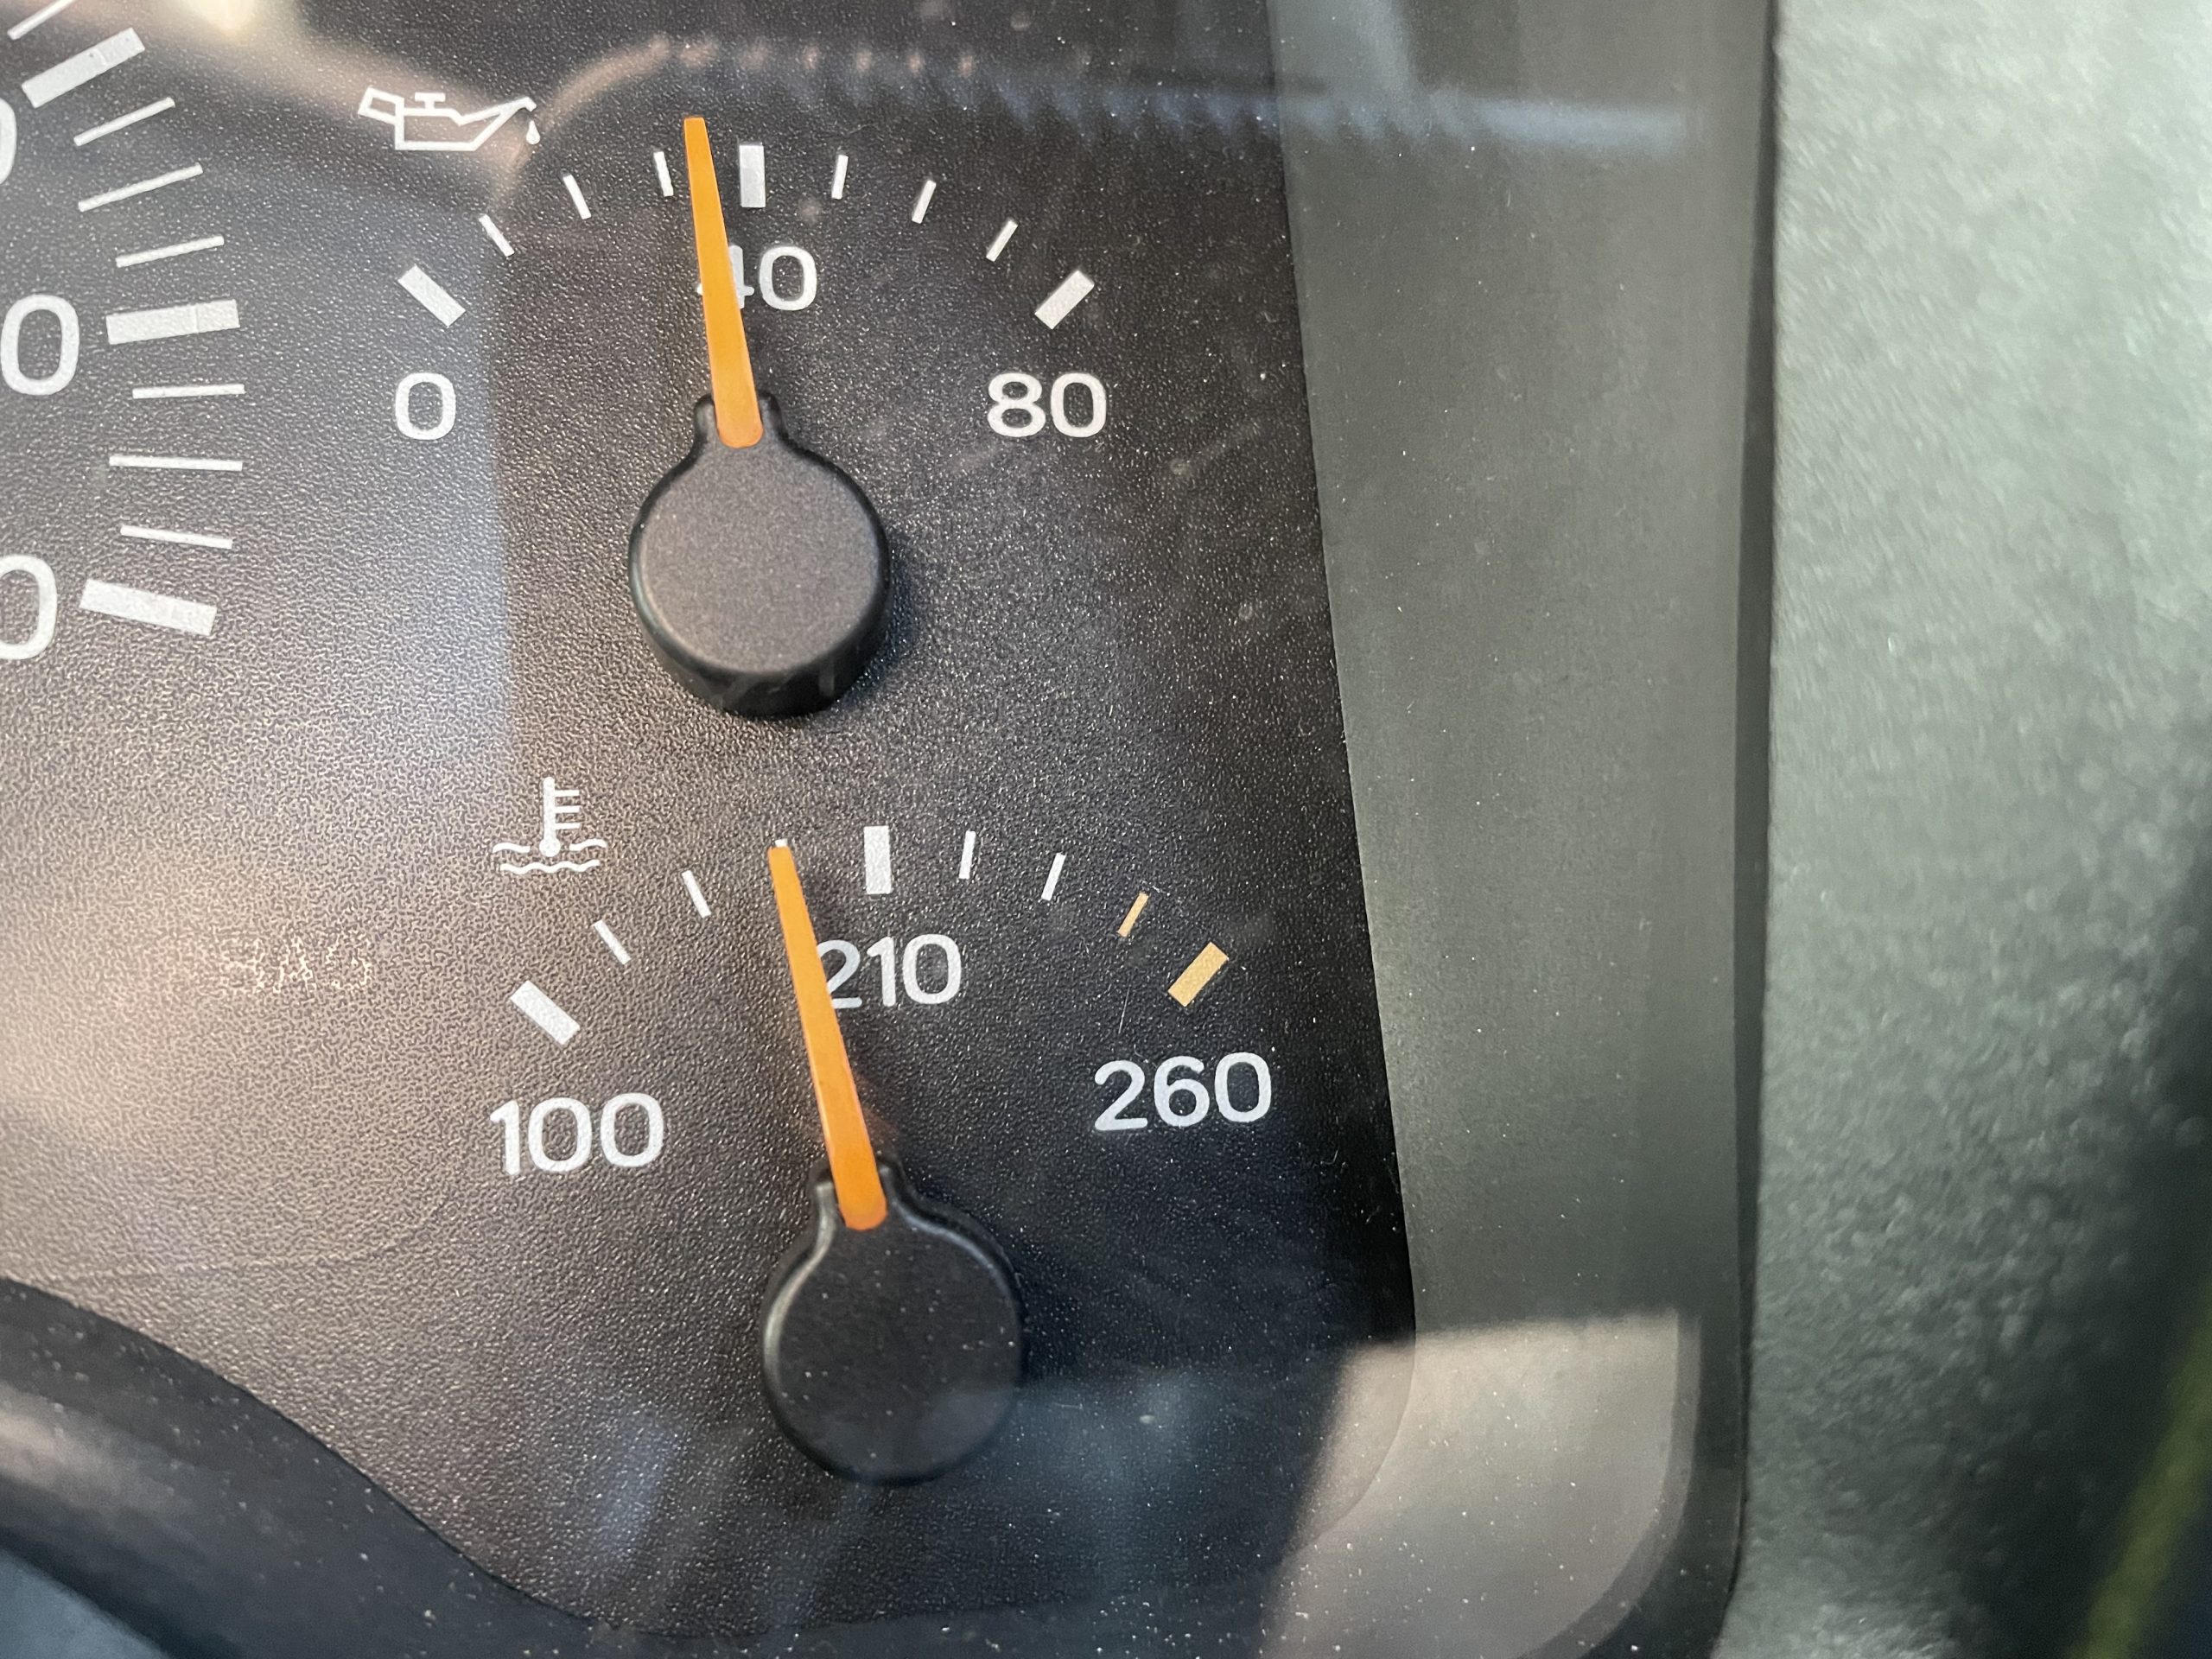
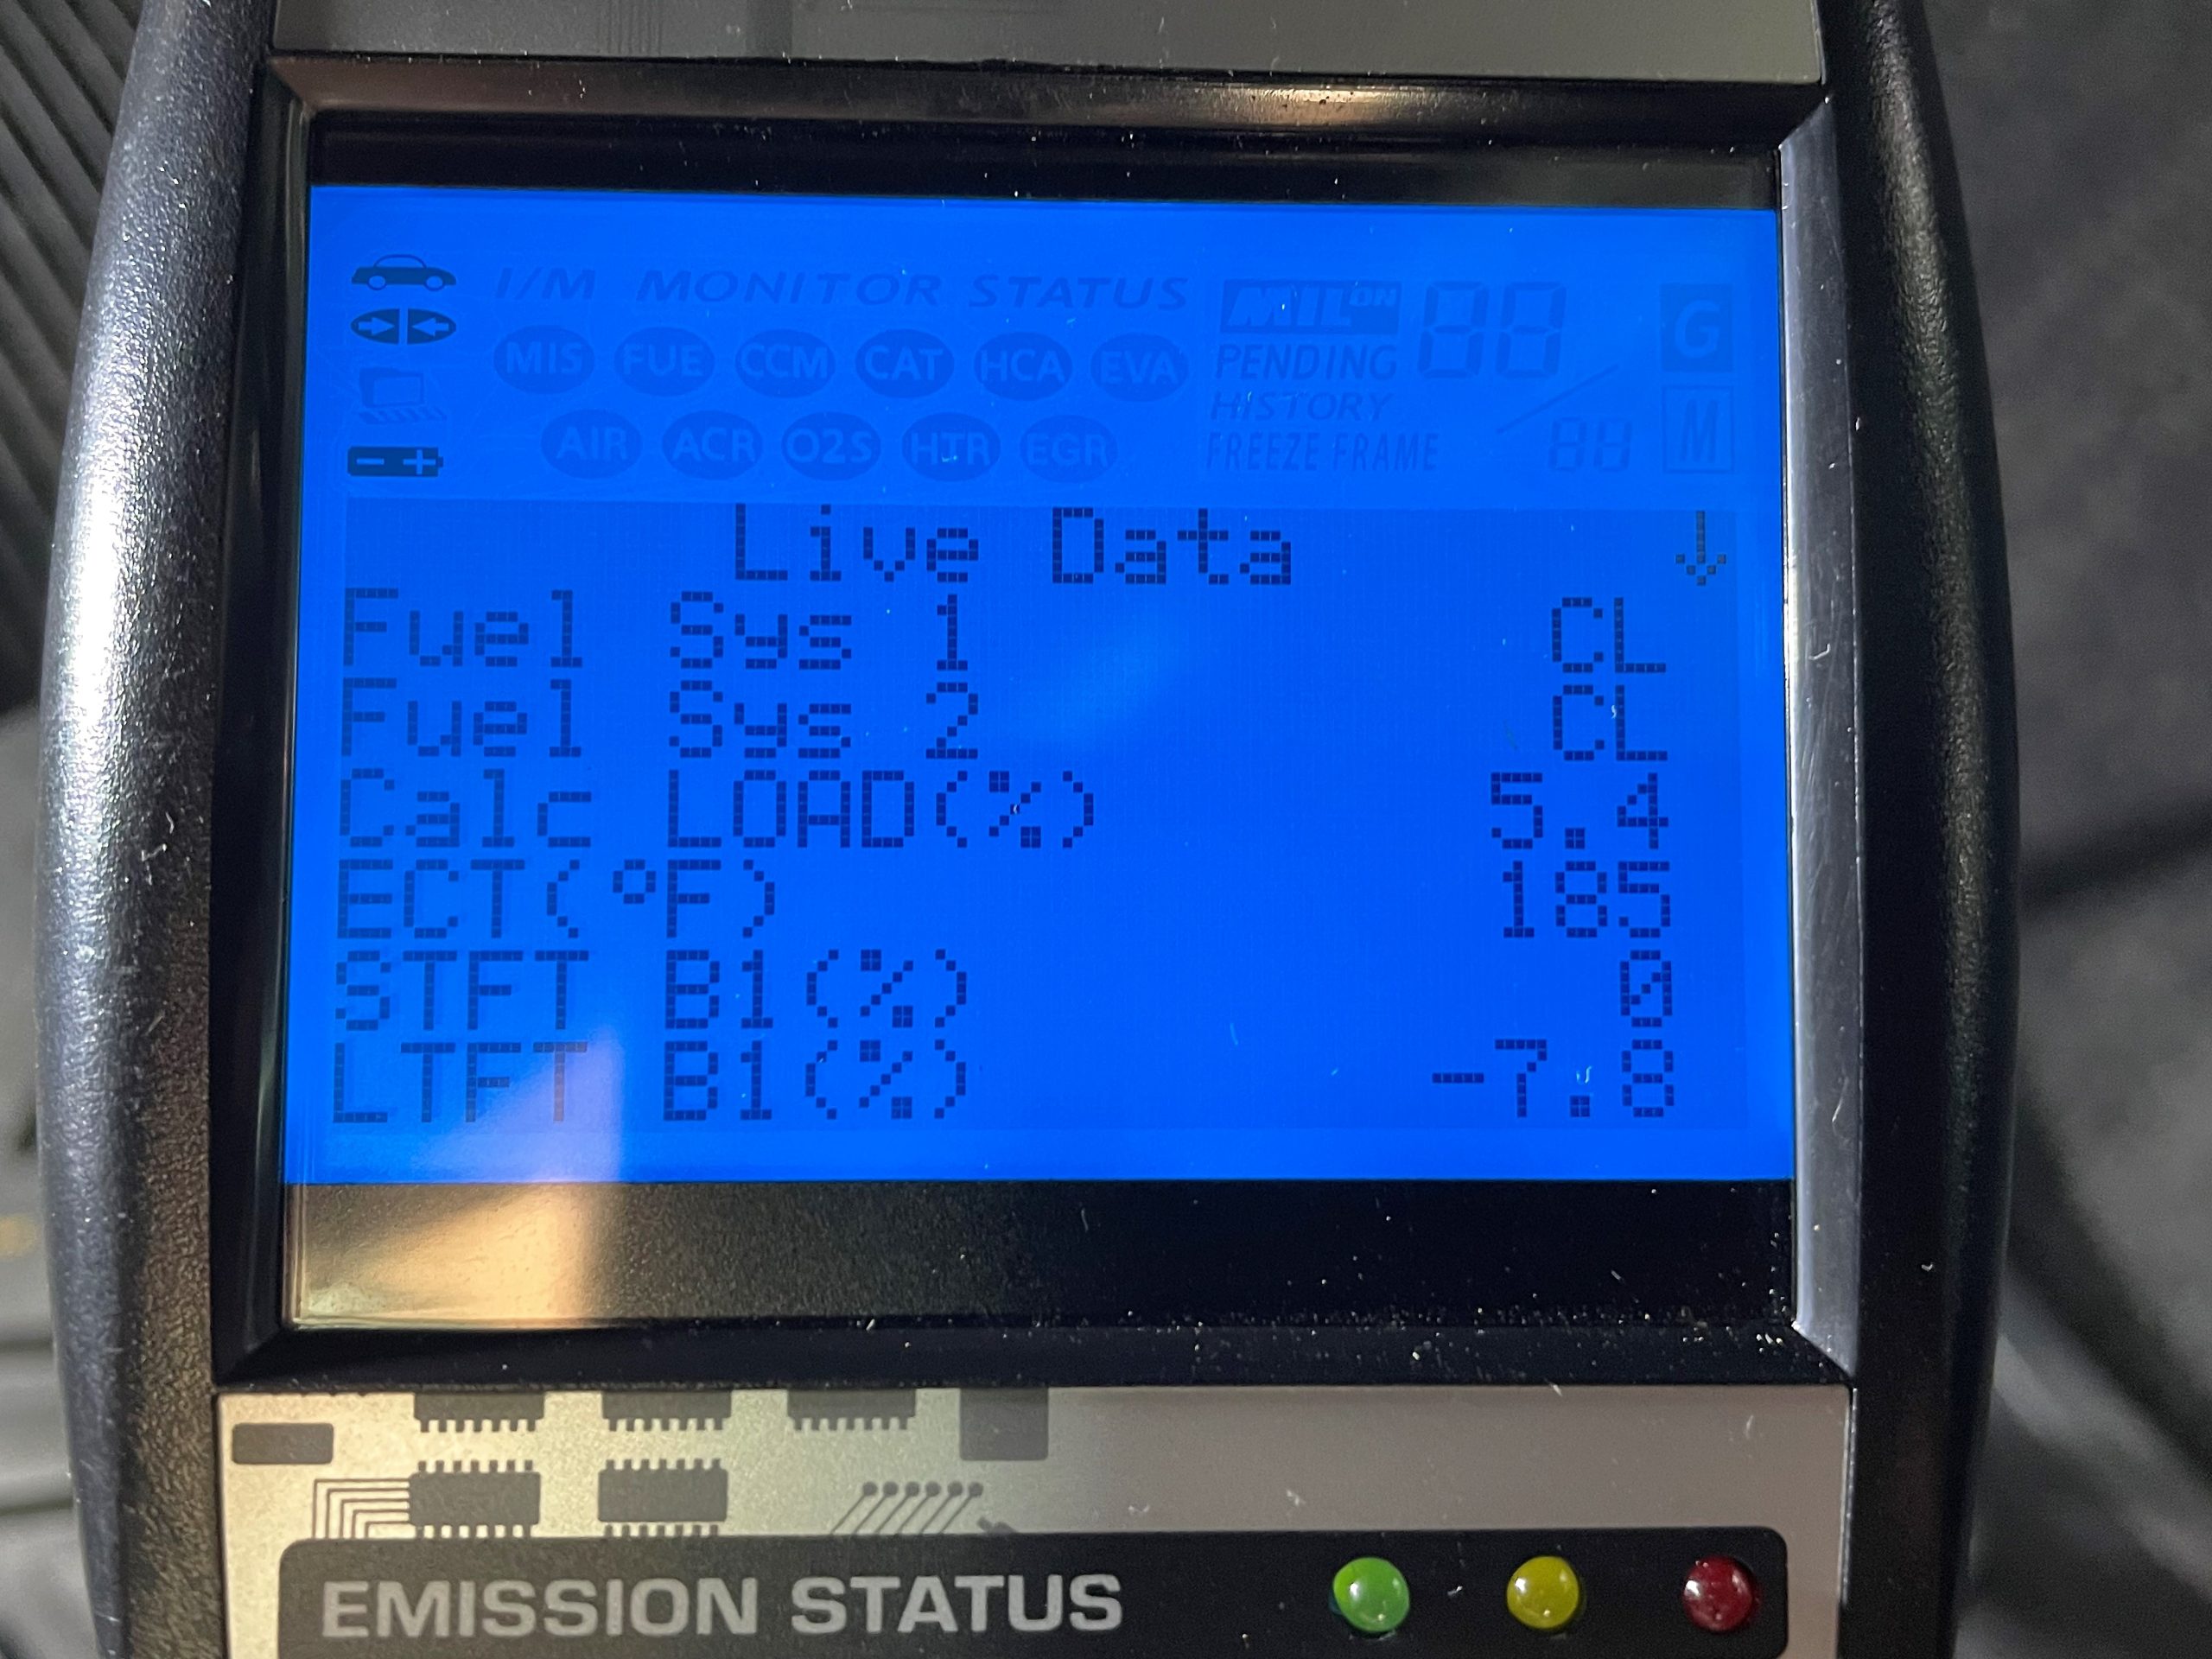
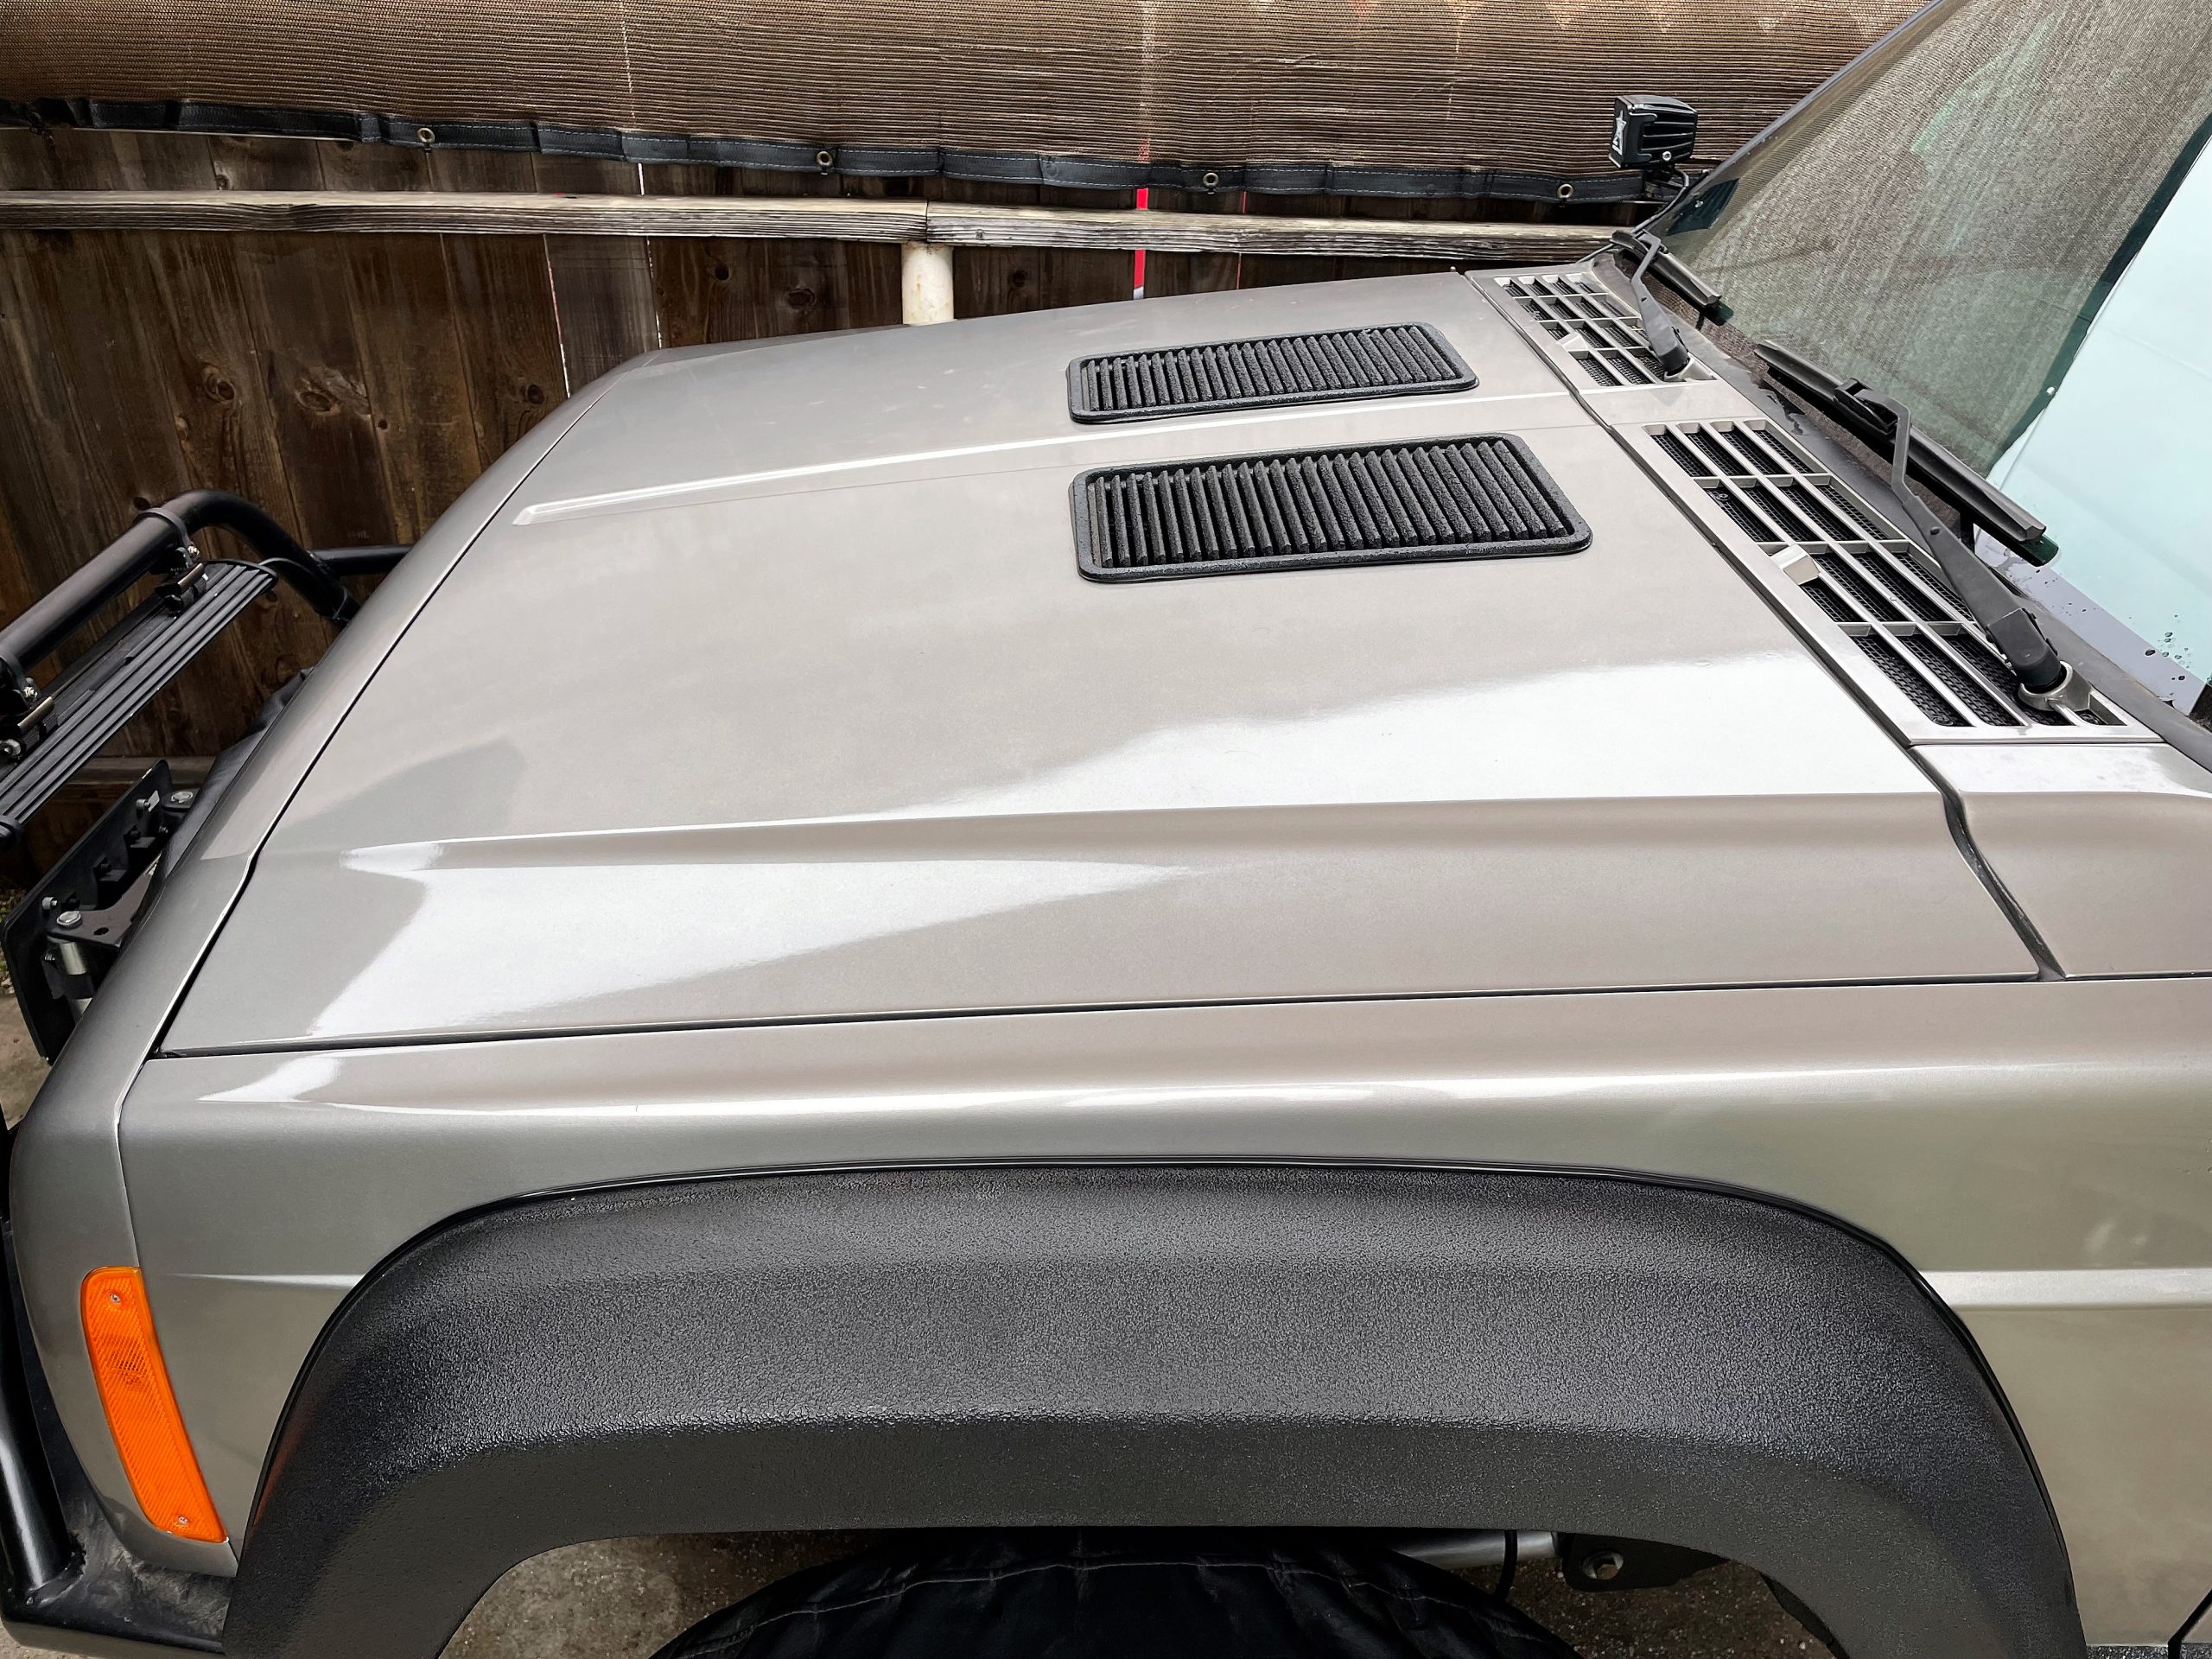
Hot summers are a particular challenge for XJ Cherokees with aged stock cooling systems. In Southern California, and the southwest where we often go off-road, we regularly see temperatures that crest 100 degrees Fahrenheit. Pair that with low speeds, A/C, and traffic, and engine temps climb quickly. (Image/Christopher Campbell)In conditions like these, our XJ hovers in the 210 to 220-ish degree range. Not abnormal for a 4.0L I6, but certainly not ideal for efficiency or oil life and it is stressing components. This pic was snapped at a stop light on a warm day in Southern California (hence the oil pressure) and is pretty average for our XJ. It’s been as high as 225 F, which makes us pretty uncomfortable when we’re far away from cell phone range. (Image/Christopher Campbell)While we like the way the custom hood louvers on our XJ look, and they do provide a vent for hot air to radiate outward, they are small and were not very effective in reducing our Cherokee’s engine temperature. To extract heat in any meaningful way, hood vents need to be thoughtfully angled and placed to take advantage of the airflow over the hood—and be designed to create a low resistance path for air to flow. (Image/Christopher Campbell)Our Cherokee also had this aluminum panel installed on the bottom side of the hood when we purchased it. This highlights another issue with hood vents; they allow water to drip through and onto the engine and harness. Not usually a big problem in light rain, but it can be a very large issue when sitting for extended periods in a rainstorm. The panel kept the engine mostly dry, but it also rendered the hood vents completely useless. (Image/Christopher Campbell)Have you seen a Cherokee running around with the rear of the hood popped up? This is another quick and easy mod in an attempt to extract hot air from the engine bay. These 1.5 inch aluminum spacers and some longer hood bolts are all it takes. (Image/Christopher Campbell)The result is a hood that’s popped up significantly at the rear. This method is typically more effective than hood vents, but it’s not very aesthetically pleasing, and it also allows water to drip in around sides and rear of the hood. Thanks to the aluminum panel under our hood, the actual gap between the bottom of the hood and cowl is only a bit over 3/8 of an inch, which doesn’t create much of a path for airflow. We’re also fairly sure it won’t clear underhood components without the hood lift blocks, so we’ll be removing it. (Image/Christopher Campbell)Here’s the stock XJ Cherokee cooling system layout. On the passenger side, there is a mechanical clutch fan that does the majority of the cooling, which means it’s almost always fully engaged. On the driver side is an electric fan that is controlled by the ECU to turn with the A/C, or when the thermostat hits about 220 degrees F with the A/C off. Although in practice, XJ owners report it kicking on anywhere from 208 to 230 degrees F. (Image/Christopher Campbell) Time to pull the stock fans. The shroud on the mechanical side is only held by a couple of bolts at the top on the core support and tabs on the bottom. Unfortunately, there isn’t enough room to slide it out with the fan attached. (Image/Christopher Campbell) A ratcheting wrench is your friend to get the clutch fan off the water pump pulley. (Image/Christopher Campbell) On the driver side, the factory electric fan also only has two bolts that hold it to the core support with tabs on the bottom. The factory harness is behind the headlight. (Image/Christopher Campbell)Beside a crack in the electric fan shroud, our stock fans are in good shape. We were not able to determine how many cfm the electric fan is rated for, but we did note that it doesn’t spin very quickly when hooked directly to power. Either it’s a fairly low cfm fan, or our fan is tired. We’re also hoping removing the drag of the clutch fan will free up a little power for the 4.0L six. (Image/Christopher Campbell)While there is a drain on the passenger side of the radiator, it’s a pain to get to, and it won’t make less of a mess than just pulling the lower radiator hose. We went for the fast drain option. Note, we removed the factory airbox for easier access and photos. (Image/Christopher Campbell)A five-gallon bucket will suffice for draining the radiator since the entire XJ cooling system holds about four gallons with about two gallons in the radiator and water pump. If you position it in roughly this spot, you’ll catch nearly all of the coolant. (Image/Christopher Campbell)Removing the radiator requires removing the top of the radiator core support. Fortunately, this can be done without removing the grille by simply removing the four nuts that connect to the top of the grille. There are also three bolts per side and two studs that connect to the radiator. We don’t know why one of them is a Phillips head screw. Typical Jeep things. (Image/Christopher Campbell)With all of the bolts loose, the top of the core support will slide out. (Image/Christopher Campbell)The upper line for the trans cooler is a simple flare fitting that unbolts, but the lower is a push-on style fitting that will require a 3/8 fuel line quick disconnect tool for removal. This hose will probably require significant force and wiggling to release. (Image/Christopher Campbell)The last thing holding the radiator in place is the two bolts that mount the A/C condenser. We’ll also be saving those rubber mounted studs to transfer to the new radiator. (Image/Christopher Campbell)With the serpentine belt is still holding the pulley tight, it’s a good time to break the water pump pulley bolts loose. Leave them in place for now. (Image/Christopher Campbell)The 4.0L doesn’t use a spring-loaded idler pulley to keep tension on the serpentine belt like most modern systems. The idler pulley tension is set by this bolt on the power steering pump bracket. Backing it off will loosen the idler pulley and allow the serpentine belt to be removed. (Image/Christopher Campbell)The power steering pump needs to be unbolted from the intake manifold. The three mounting bolts are accessed through the holes in the pulley. Once these are loose, the pump can be set aside and the mounting bracket removed from the water pump. If you removed the airbox, the pump will easily lay on the engine bay in that location. (Image/Christopher Campbell)The thermostat housing is just two bolts. Getting the factory radiator and heater hoses off was the most annoying part. We’ll be replacing the heater hoses as well, and we’d encourage you to do the same. (Image/Christopher Campbell)We were surprised to find a fairly fresh 195 degree F thermostat and gasket with no gunk or corrosion! (Image/Christopher Campbell)As part of our cooling system efficiency upgrade, we decided on a FlowKooler water pump. This pump doubles the water flow rate at low rpm & idle, but at 3,500 rpm the flow rate drops to normal rate to prevent excess water flow at high speed. It also generates 22 percent more water pressure inside the engine block to help suppress hot spots, steam pockets, and pinging. Surprisingly, the pump is also claimed to be about 32 percent more efficient than the factory style pump, meaning less horsepower is required to turn it. (Image/Christopher Campbell) Our water pump gasket came off pretty cleanly, but we always use a razor blade and bit of green Scotch-Brite to get the surface perfectly smooth and clean. Great time for us to de-grime the front of the engine and maybe figure out where the oil is coming from for a future update. (Image/Christopher Campbell)We’re going to try out a 180 degree F thermostat instead of the stock 195. It’s worth noting that a lower temp thermostat will NOT help your car run cooler if you are reaching the thermal capacity of your cooling system, as evidenced by the fact that our Cherokee ran in the 205 to 220 degrees F range with a 195 F thermostat. Cooling capacity is mostly governed by the efficiency of the water pump and the ability of the radiator and fan to transfer heat. We’re hoping the lower thermostat will work with the low speed efficiency of the FlowKoooler pump by getting the water circulating earlier. (Image/Christopher Campbell)Here’s the star of the show! Mishimoto’s all-aluminum 2-row core radiator design is thicker than stock and features a 100 percent increase in fin surface area, and a 90 percent increase in coolant capacity. It’s an upgrade in every way and a direct fit for 1989-2001 Jeep Cherokee XJs with any factory style radiator. It also carries a serial number and a lifetime warranty. (Image/Christopher Campbell)The filler neck comes with a port and a cap to run either open or closed style cooling systems. We’ll be running an open style with the factory overflow bottle. (Image/Christopher Campbell)The Mishimoto radiator does make use of every bit of real estate available while still fitting the stock mounts and accessory brackets. Note that we swapped the upper rubber isolator from the old radiator onto the new Mishimoto. (Image/Christopher Campbell)This is the one spot that may need a little massaging for the Mishimoto to fit properly. The lower transmission cooler line fitting was just barely pressing against the engine bay on our XJ. We lightly tapped the body seam a few times with a hammer to gain clearance. (Image/Christopher Campbell)Another possible clearance issue are these studs on the A/C condenser. Ours were pressing against the radiator when we tried to mount it, so we opted to grind them down a little to gain clearance. (Image/Christopher Campbell)It was thoughtful of Mishimoto to include these condenser brackets, because you are definitely going to need them if you still have A/C. That plug is for the water neck if you decide to run a closed style cooling system. (Image/Christopher Campbell)The Mishimoto relay/controller uses a standard push-in style temperature probe to trigger the fans. The push probe should slide in between the fins of the radiator about three inches down from the top of the radiator and one inch over from the side tank. Note the A/C condenser brackets; you’ll need 2 x 8mm nuts to attach them to the radiator. (Image/Christopher Campbell)On the driver side, the factory transmission cooler lines will connect directly to the radiator. The top flare fitting should just be snugged tight. The bottom quick release fitting should just click into place, however, if you’re going to have a leak, this will be the spot. Our recommendation is to replace the hose with a new one, or just remove it and run a piece of transmission hose from the hardline on the transmission—which is what we’ll be doing. (Image/Christopher Campbell)Our upper and lower radiator hoses were the originals from 2000 and feeling pretty puffy, so we went with quality Continental parts. No point in having a nice cooling system fail because of 23-year-old hoses. Mishimoto also makes a nice silicone radiator hose kit if you want the upgrade. Either way, make sure to use the corrugated plastic sleeves to protect the hoses from abrasion. (Image/Christopher Campbell)To get as much airflow as possible in the tight space between the radiator and the engine, Mishimoto uses multiple small fans in an array to cover the length of the radiator’s core. Each 10 inch fan flows 950 cfm for a total of 2,850 cfm, which a claimed 41 percent airflow increase with all three running, compared to both factory fans with the fan clutch hot. These fans also carry a lifetime warranty. (Image/Christopher Campbell)An electric fan’s effectiveness is dramatically increased by a good shroud, so Mishimoto did some in-house testing vs. the stock Cherokee shrouds to make sure its shrouds would help the fans keep a high flow rate across the entire radiator core. The real key here is an efficient and tight fitting shroud that makes sure that the fans pull air through the radiator, not from gaps that allow the fans to pull from an easier path. (Image/Mishimoto)The relay/control module for the Mishimoto fans features a 40/60 amp relay and an adjustment screw that allows the fans to turn on between 150 to 240 degrees F. Each fan pulls 13.08 amps at startup, so if all three start at the same time, it will draw 39.24 amps. Once started, each fan pulls 6.8 amps for a total draw of 20.4 amps. (Image/Christopher Campbell)The fans come with barrel clips attached, but we’ll be clipping them off to splice the wires together. The blue wires are 12V+, while the black ones are 12V-. (Image/Christopher Campbell)This is the basic wiring diagram for the fans and the relay/controller. The black 12V- wires from the fans will be connected to the heavy gauge red wire from the relay/controller. The blue wires from the fans will be connected to a loose red wire included in the kit that will run directly to the battery. The yellow wire is 12V+ switched. The green wire won’t be in this application used unless you opt to run a manual override switch. If you need some additional instruction, Mishimoto has created a video to assist with wiring. (Image/Christopher Campbell)Believe it or not, there isn’t a reliable or easy to reach source for switched 12V+ under the hood. The best option for the XJ is to run a wire through the firewall grommet on the passenger side and tap into the fuse panel in the in the passenger side kick panel. Any 12V+ switched source here will work. You can use an add-a-circuit kit or tap directly into an unused port such as #8 on this generation Cherokee. (Image/Christopher Campbell)The Mishimoto kit includes a jumper wire for 1997-2001 XJs that will connect the driver side fan directly to the factory wiring to command A/C. We’re going to try to this set up for now, but we may end up wiring all three to run together based on the radiator temps so we get the total 2,850 cfm at all times. (Image/Christopher Campbell)To prevent metal-on-metal contact, Mishimoto supplies a roll of foam tape for the fan shroud. For the passenger side, measure 1.5 inches over from the edge of the shroud and place a foam strip on the top and bottom. (Image/Christopher Campbell)On the driver’s side, just run a strip of tape from top to bottom. (Image/Christopher Campbell)The Mishimoto fan shroud will slide right into the three factory mounting tabs at the bottom of the core support. At the top, the shroud has two large bolt holes that will line up with holes in top of the core support. We removed all other J-clips and even tapped the edge of the core support flat in a few spots to get a nice, flush fit. (Image/Christopher Campbell)The adjustment screw on the relay/controller has a range of 150 to 240 degrees F. It’s a trial and error process to figure out exactly where you want the fans to switch on. We’re going to start in the 170ish degree range and adjust from there. Be gentle when turning it; the screw has a short sweep and can be damaged if turned too far. (Image/Christopher Campbell) Here’s the factory electric fan harness with the Mishimoto jumper. If you decide to run all three fans together on the relay/controller, do not splice into this harness, just disconnect it. Removing it will not trigger a code. (Image/Christopher Campbell)Our initial crank was done with distilled water, but our final fill will be with Zerex G05. Hybrid Organic Acid Technology (HOAT) coolants like this are ideal for the XJ and our upgraded components. To flush out the old coolant, we ran distilled water through the system and drained it a several times. (Image/Christopher Campbell)All buttoned back up! We love the look over stock, and we were surprised how quiet the fans are. Placing your hand in front of grille, you can feel the air being pulled through. (Image / Christopher Campbell)After 25 minutes of idling in the driveway while we checked for leaks and verified functionality, this is where our engine temp climbed to on the factory gauge. Nice improvement, we can’t wait to see the result on a hotter day. (Image/Christopher Campbell)Since the factory gauge makes you guess the actual operating temperature, we plugged into the OB2 to get sensor level data. Our engine never climbed over 185 degrees F, even with no additional airflow across the radiator from driving. This should translate to 195 to 200 degrees F in real world summertime driving conditions. (Image/Christopher Campbell)And to top it all off, now we can run our hood flush again without worrying about heat! (Image/Christopher Campbell)
Christopher Campbell has been heavily involved in the automotive world since he began building his first car, a 1967 Ford Ranchero, with his dad at the age of 14. That started a lifelong passion with custom hot rods and muscle cars. After graduating from Cal State Long Beach, he went to work for HOT ROD magazine as Associate Editor. From there he became Technical Editor at Popular Hot Rodding magazine. Currently he creates freelance content for OnAllCylinders as well as many diverse enthusiast magazine titles such as HOT ROD, Muscle Mustangs and Fast Fords, Mopar Muscle, Super Chevy, Mustang Monthly, and 8-Lug.
Comments
13 responses to “Ultimate Jeep XJ Cherokee Cooling System”
Hi David,
We recently did a 1,500 miles road trip to Utah with it. The temps were only in the low 80’s, so not a huge strain on the system, but we never saw over 195-ish coolant temps while off-road, even when we used the A/C. It was quite warm through Nevada on the way home, and the coolant temp did creep up to just under 210 when we pulled long grades at 70+mph in 3rd gear with the A/C on. It cooled down again to around 200-205 once we were able to cruise in OD for a while. I may look at adding some speed vents (thin rubber flaps) to the shroud to ensure air can pass through the radiator freely enough at freeway speeds. I’ll update again once we start getting some actual hot weather in the SoCal area.
How is this holding up with summer Temps? I’m looking at adding the mishimoto fans (already have the radiator, water pump and thermostat) but I’m in las vegas and often see days well over 100 degrees.
The system has been working well in regular driving and keeping the gauge on the dash mostly below the 210 mark. During this project, we learned that the dash temp gauge in the OBD2 Cherokees (1997 and later) does not accurately reflect the engine coolant temperature. You have to scan the ECU and run live data to see the actual Engine Coolant Temperature (ECT). After this install, the Cherokee will sit and idle with the A/C on in ~85-degree weather and stay at about 195-197 ECT. This rolls up to about 205 ECT when running around town. It occasionally goes up to 210 ECT, though the needle on the gauge does not move. On our Cherokee, the 210 mark on the dash gauge is actually 215-220 ECT.
The decision to go with the electric fans depends on how you plan to use your Cherokee and what your goals are. The electric fans increase cooling greatly at lower speeds, e.i. off-road, around town, and crawling, but they won’t offer a significant airflow increase at normal driving speeds. We did it for the low-speed airflow, plus eliminating parasitic drag on the engine for efficiency gains for long trips. So far, that is working out.
Ive done everything u have done, and after 1 year with all three fans running the hot august weather has created an overheat issue with mine. I believe the stock 90 amp alternator isnt enough to run all three fans a/c and blower on high at idle.
Hi Carl,
You’re correct, running all three radiator fans plus the blower motor on high while at idle does begin to tax the factory alternator. Our Cherokee has an upgraded stereo system as well, and while it still charges at 13.5-14 volts when the engine speed is above ~1,200 rpm, at idle we’ve noticed a strong dip in voltage when the fans, blower, and radio are on. We’ll be adding an upgraded alternator to the project list. Summit Racing has multiple good options to choose from.
Christopher, thanks for a great article; clear, concise and practical! I to have been chasing the dream of a cool running Cherokee and believe I’m getting close however not totally satisfied that it’s the best that it can be. I picked up some good intel from your article that I want to follow-up on. I’ve looked at many of the forums that are out there however find them not to be very helpful.
I hope that you don’t mind if I pass along my successes with the hope that it may be helpful to others with the same challenges.
Here are my vitals: 2000 Cherokee Sport, 4.0 with 159,000 miles, AW4. 4.5″ lift running 33′ BFG KO2’s, with 4:56 gearing. California smog compliant (pre-cats).
Engine: I was blessed with the infamous 0331 head that failed; i replaced that approximately 15.000 miles ago with an aftermarket replacement. The engine survived it without any issues other than a noisy lifter (right under the leak). Cylinders balance out fine, good oil pressure is fine. My heating concerns did not start until sometime after this upgrade.
Cooling system: Just as you had, I went to the Mishimoto radiator and electric fans and that provided an improvement. I did also replace the water pump and 195 thermostat with the OEM issue from Chrysler. This made a visible difference in coolant temps. In the process of attempting to diagnose the problem I discovered the inaccuracy of the factory temp gauge. I installed an electric temperature gauge in the upper radiator hose to see coolant temperature exiting the engine. The live date favored the electric temperature that I had installed, which was cooler by about 10 to 14 degrees.
Drive train: I like the 33’s; regearing down to the 4:56’s was a logical necessity and I’m sure greatly contributed to minimizing the load on everything, including the burden on the cooling system.
Exhaust System: I did go with a Banks Cat-Back system some time ago, nothing too exciting there. However, and later down the road, I was questioning the condition of the pre-cats. I never got a code for cat failure but i did locate a procedure for testing flow, the outcome was marginal assuming that I had done this correctly. I decided to replace the pre-cats (Walker – CARB compliant of course) and also at the time decided to replace the stock exhaust manifold with the Banks exhaust header after discovering a crack in the stock manifold. These two items produced the most significant improvement in coolant temps running under load. It also solved the hot-start vaporizing problem that I was having in the fuel system. (I had added a DE insulation kit for the fuel rail and injectors when I started having that problem, however, it did not solve the issue).
All that said, I can run down the road in 100 degree weather showing just under 210 on the factory gauge and 185 to 190 on the accessory gauge. Coolant temperature is very sensitive to load; I have seen up to 220 (on the accessory gauge) on a long grade and it does recover in a reasonable amount of time. AC definitely elevates the coolant temp on the flats and is a no-no on the climbs.
I would appreciate your opinion or any suggestions that you or anyone else may have. I’ve seen these Cherokees blowing down the highways full of people, gear stacked on the top in 100 degree weather and I have wonder what their gauges look like. Can I expect that this may be the best that can be done or am I worrying about nothing?
Hi Andy,
Your 2000 Cherokee build is remarkably similar to mine. Good choices in parts. There is an upcoming article where we go through the entire exhaust and intake system and upgrade to a Banks header, AfE intake, and Magnaflow exhaust components. The boost in power helped us on long grades both in terms of maintaining higher speeds and we also saw slightly lower cooling temps when under load. We also got a nice bump in MPG.
Most of the guys you see running loaded Cherokees at freeway speed have already fought through cooling system issues and found a formula that works well enough for them (there is more than one). I’ve learned that quite a lot of them also just don’t care about the temp as long as it’s not overheating yet. I tend to be a lot more conservative with cooling temps on all of my builds. My preferred temperature range to run the Cherokee is 195-205 degrees. It stays pretty comfortably there unless the air temp is over 100, or if I’m working it hard on a long grade or pulling a trailer. Realistically, anything under ~225 degrees is safe for a 4.0. I’ve seen guys claim that they can run up to 235-240 without failure, but this is really pushing up against the point where overheating, head gasket failures, or other issues will happen.
Some additional things you can try:
The overall condition of your engine’s cooling passages makes a big difference on a 4.0. Many have not been maintained well over the decades and significant scaling will occur in the iron block. Since you have a Mishimoto radiator, one thing to keep an eye on is the magnetic drain plug. Pull it off occasionally to see if you are accumulating a large amount of iron particles. This is something that can plug up a radiator quickly, especially one like a Mishimoto with smaller cooling passages. The magnetic plug does a good job of gathering this debris if you keep it clean. If you are seeing a lot of debris, a cooling system flush may help a lot, but I would recommend adding an inline coolant filter as well to save the radiator from clogging. Summit sells Champion coolant filters, and Gano is also a good choice.
If you’re looking for a bit more cooling capacity during the warm months than you are currently seeing, you can also try swapping your coolant for 100% distilled water mixed with an appropriate amount of Water Wetter or a similar additive to provide rust and corrosion protection. In warm months when the temp far from freezing (Water Wetter will not prevent freezing), this will provide better heat transfer properties than glycol-based antifreeze. This is what I run in my track cars in SoCal.
I do have one more cooling system trick that I plan to use on the Cherokee to show an option that compliments a good radiator and electric fans and might be the ultimate solution for off-roaders and rock crawlers. Watch for that in an upcoming article.
My name is Joe and I have a 1996 jeep Cherokee with dummy lights. I bought a OBD two sensor that can stick to my dash that tells me the temperature at all times was having problems with the fan clutch so I replaced it. She runs about 194F around town and up hills. But if I idle for too long, she’ll get to 219f. What do you think this is?
Hi Joe,
Replacing the fan clutch was good first step. This is often the culprit if you see temps creeping when sitting still or in stop-and-go traffic.
While 219 is actually still in the safe range for the 4.0, there are a few things to check and try if this is not how your Cherokee typically runs.
Make sure your electric fan is turning on by ~218 degrees (assuming you are running a factory unit)
Check your water pump to see if water is dripping from the weephole on the bottom side of the snout. This would indicate it is failing
Check for leaks in your radiator.
Replace your radiator cap
Flush your cooling system
You may also try upgrading to a standard fan clutch from a ZJ Grand Cherokee. Do not use the HD version, it will not fit.
Hello, I purchased and installed everything from your list. During start up I have this high pitch humming noise. I was wondering if it’s the water pump. I can hear the noise when I drive too, the higher rpms go up the louder the noise gets. Did you experience this?


Any trail time done on the set up? Any updates?
Hi David,
We recently did a 1,500 miles road trip to Utah with it. The temps were only in the low 80’s, so not a huge strain on the system, but we never saw over 195-ish coolant temps while off-road, even when we used the A/C. It was quite warm through Nevada on the way home, and the coolant temp did creep up to just under 210 when we pulled long grades at 70+mph in 3rd gear with the A/C on. It cooled down again to around 200-205 once we were able to cruise in OD for a while. I may look at adding some speed vents (thin rubber flaps) to the shroud to ensure air can pass through the radiator freely enough at freeway speeds. I’ll update again once we start getting some actual hot weather in the SoCal area.
How is this holding up with summer Temps? I’m looking at adding the mishimoto fans (already have the radiator, water pump and thermostat) but I’m in las vegas and often see days well over 100 degrees.
The system has been working well in regular driving and keeping the gauge on the dash mostly below the 210 mark. During this project, we learned that the dash temp gauge in the OBD2 Cherokees (1997 and later) does not accurately reflect the engine coolant temperature. You have to scan the ECU and run live data to see the actual Engine Coolant Temperature (ECT). After this install, the Cherokee will sit and idle with the A/C on in ~85-degree weather and stay at about 195-197 ECT. This rolls up to about 205 ECT when running around town. It occasionally goes up to 210 ECT, though the needle on the gauge does not move. On our Cherokee, the 210 mark on the dash gauge is actually 215-220 ECT.
The decision to go with the electric fans depends on how you plan to use your Cherokee and what your goals are. The electric fans increase cooling greatly at lower speeds, e.i. off-road, around town, and crawling, but they won’t offer a significant airflow increase at normal driving speeds. We did it for the low-speed airflow, plus eliminating parasitic drag on the engine for efficiency gains for long trips. So far, that is working out.
Excellent overview! Thanks much.
Ive done everything u have done, and after 1 year with all three fans running the hot august weather has created an overheat issue with mine. I believe the stock 90 amp alternator isnt enough to run all three fans a/c and blower on high at idle.
Hi Carl,
You’re correct, running all three radiator fans plus the blower motor on high while at idle does begin to tax the factory alternator. Our Cherokee has an upgraded stereo system as well, and while it still charges at 13.5-14 volts when the engine speed is above ~1,200 rpm, at idle we’ve noticed a strong dip in voltage when the fans, blower, and radio are on. We’ll be adding an upgraded alternator to the project list. Summit Racing has multiple good options to choose from.
Christopher, thanks for a great article; clear, concise and practical! I to have been chasing the dream of a cool running Cherokee and believe I’m getting close however not totally satisfied that it’s the best that it can be. I picked up some good intel from your article that I want to follow-up on. I’ve looked at many of the forums that are out there however find them not to be very helpful.
I hope that you don’t mind if I pass along my successes with the hope that it may be helpful to others with the same challenges.
Here are my vitals: 2000 Cherokee Sport, 4.0 with 159,000 miles, AW4. 4.5″ lift running 33′ BFG KO2’s, with 4:56 gearing. California smog compliant (pre-cats).
Engine: I was blessed with the infamous 0331 head that failed; i replaced that approximately 15.000 miles ago with an aftermarket replacement. The engine survived it without any issues other than a noisy lifter (right under the leak). Cylinders balance out fine, good oil pressure is fine. My heating concerns did not start until sometime after this upgrade.
Cooling system: Just as you had, I went to the Mishimoto radiator and electric fans and that provided an improvement. I did also replace the water pump and 195 thermostat with the OEM issue from Chrysler. This made a visible difference in coolant temps. In the process of attempting to diagnose the problem I discovered the inaccuracy of the factory temp gauge. I installed an electric temperature gauge in the upper radiator hose to see coolant temperature exiting the engine. The live date favored the electric temperature that I had installed, which was cooler by about 10 to 14 degrees.
Drive train: I like the 33’s; regearing down to the 4:56’s was a logical necessity and I’m sure greatly contributed to minimizing the load on everything, including the burden on the cooling system.
Exhaust System: I did go with a Banks Cat-Back system some time ago, nothing too exciting there. However, and later down the road, I was questioning the condition of the pre-cats. I never got a code for cat failure but i did locate a procedure for testing flow, the outcome was marginal assuming that I had done this correctly. I decided to replace the pre-cats (Walker – CARB compliant of course) and also at the time decided to replace the stock exhaust manifold with the Banks exhaust header after discovering a crack in the stock manifold. These two items produced the most significant improvement in coolant temps running under load. It also solved the hot-start vaporizing problem that I was having in the fuel system. (I had added a DE insulation kit for the fuel rail and injectors when I started having that problem, however, it did not solve the issue).
All that said, I can run down the road in 100 degree weather showing just under 210 on the factory gauge and 185 to 190 on the accessory gauge. Coolant temperature is very sensitive to load; I have seen up to 220 (on the accessory gauge) on a long grade and it does recover in a reasonable amount of time. AC definitely elevates the coolant temp on the flats and is a no-no on the climbs.
I would appreciate your opinion or any suggestions that you or anyone else may have. I’ve seen these Cherokees blowing down the highways full of people, gear stacked on the top in 100 degree weather and I have wonder what their gauges look like. Can I expect that this may be the best that can be done or am I worrying about nothing?
Again, thank you for a great article!
Hi Andy,
Your 2000 Cherokee build is remarkably similar to mine. Good choices in parts. There is an upcoming article where we go through the entire exhaust and intake system and upgrade to a Banks header, AfE intake, and Magnaflow exhaust components. The boost in power helped us on long grades both in terms of maintaining higher speeds and we also saw slightly lower cooling temps when under load. We also got a nice bump in MPG.
Most of the guys you see running loaded Cherokees at freeway speed have already fought through cooling system issues and found a formula that works well enough for them (there is more than one). I’ve learned that quite a lot of them also just don’t care about the temp as long as it’s not overheating yet. I tend to be a lot more conservative with cooling temps on all of my builds. My preferred temperature range to run the Cherokee is 195-205 degrees. It stays pretty comfortably there unless the air temp is over 100, or if I’m working it hard on a long grade or pulling a trailer. Realistically, anything under ~225 degrees is safe for a 4.0. I’ve seen guys claim that they can run up to 235-240 without failure, but this is really pushing up against the point where overheating, head gasket failures, or other issues will happen.
Some additional things you can try:
The overall condition of your engine’s cooling passages makes a big difference on a 4.0. Many have not been maintained well over the decades and significant scaling will occur in the iron block. Since you have a Mishimoto radiator, one thing to keep an eye on is the magnetic drain plug. Pull it off occasionally to see if you are accumulating a large amount of iron particles. This is something that can plug up a radiator quickly, especially one like a Mishimoto with smaller cooling passages. The magnetic plug does a good job of gathering this debris if you keep it clean. If you are seeing a lot of debris, a cooling system flush may help a lot, but I would recommend adding an inline coolant filter as well to save the radiator from clogging. Summit sells Champion coolant filters, and Gano is also a good choice.
If you’re looking for a bit more cooling capacity during the warm months than you are currently seeing, you can also try swapping your coolant for 100% distilled water mixed with an appropriate amount of Water Wetter or a similar additive to provide rust and corrosion protection. In warm months when the temp far from freezing (Water Wetter will not prevent freezing), this will provide better heat transfer properties than glycol-based antifreeze. This is what I run in my track cars in SoCal.
I do have one more cooling system trick that I plan to use on the Cherokee to show an option that compliments a good radiator and electric fans and might be the ultimate solution for off-roaders and rock crawlers. Watch for that in an upcoming article.
My name is Joe and I have a 1996 jeep Cherokee with dummy lights. I bought a OBD two sensor that can stick to my dash that tells me the temperature at all times was having problems with the fan clutch so I replaced it. She runs about 194F around town and up hills. But if I idle for too long, she’ll get to 219f. What do you think this is?
Hi Joe,
Replacing the fan clutch was good first step. This is often the culprit if you see temps creeping when sitting still or in stop-and-go traffic.
While 219 is actually still in the safe range for the 4.0, there are a few things to check and try if this is not how your Cherokee typically runs.
Make sure your electric fan is turning on by ~218 degrees (assuming you are running a factory unit)
Check your water pump to see if water is dripping from the weephole on the bottom side of the snout. This would indicate it is failing
Check for leaks in your radiator.
Replace your radiator cap
Flush your cooling system
You may also try upgrading to a standard fan clutch from a ZJ Grand Cherokee. Do not use the HD version, it will not fit.
Hello, I purchased and installed everything from your list. During start up I have this high pitch humming noise. I was wondering if it’s the water pump. I can hear the noise when I drive too, the higher rpms go up the louder the noise gets. Did you experience this?
Hello,
does it also fit the xj 2.5 tdi, ENC, VM model? with AC.
thanks