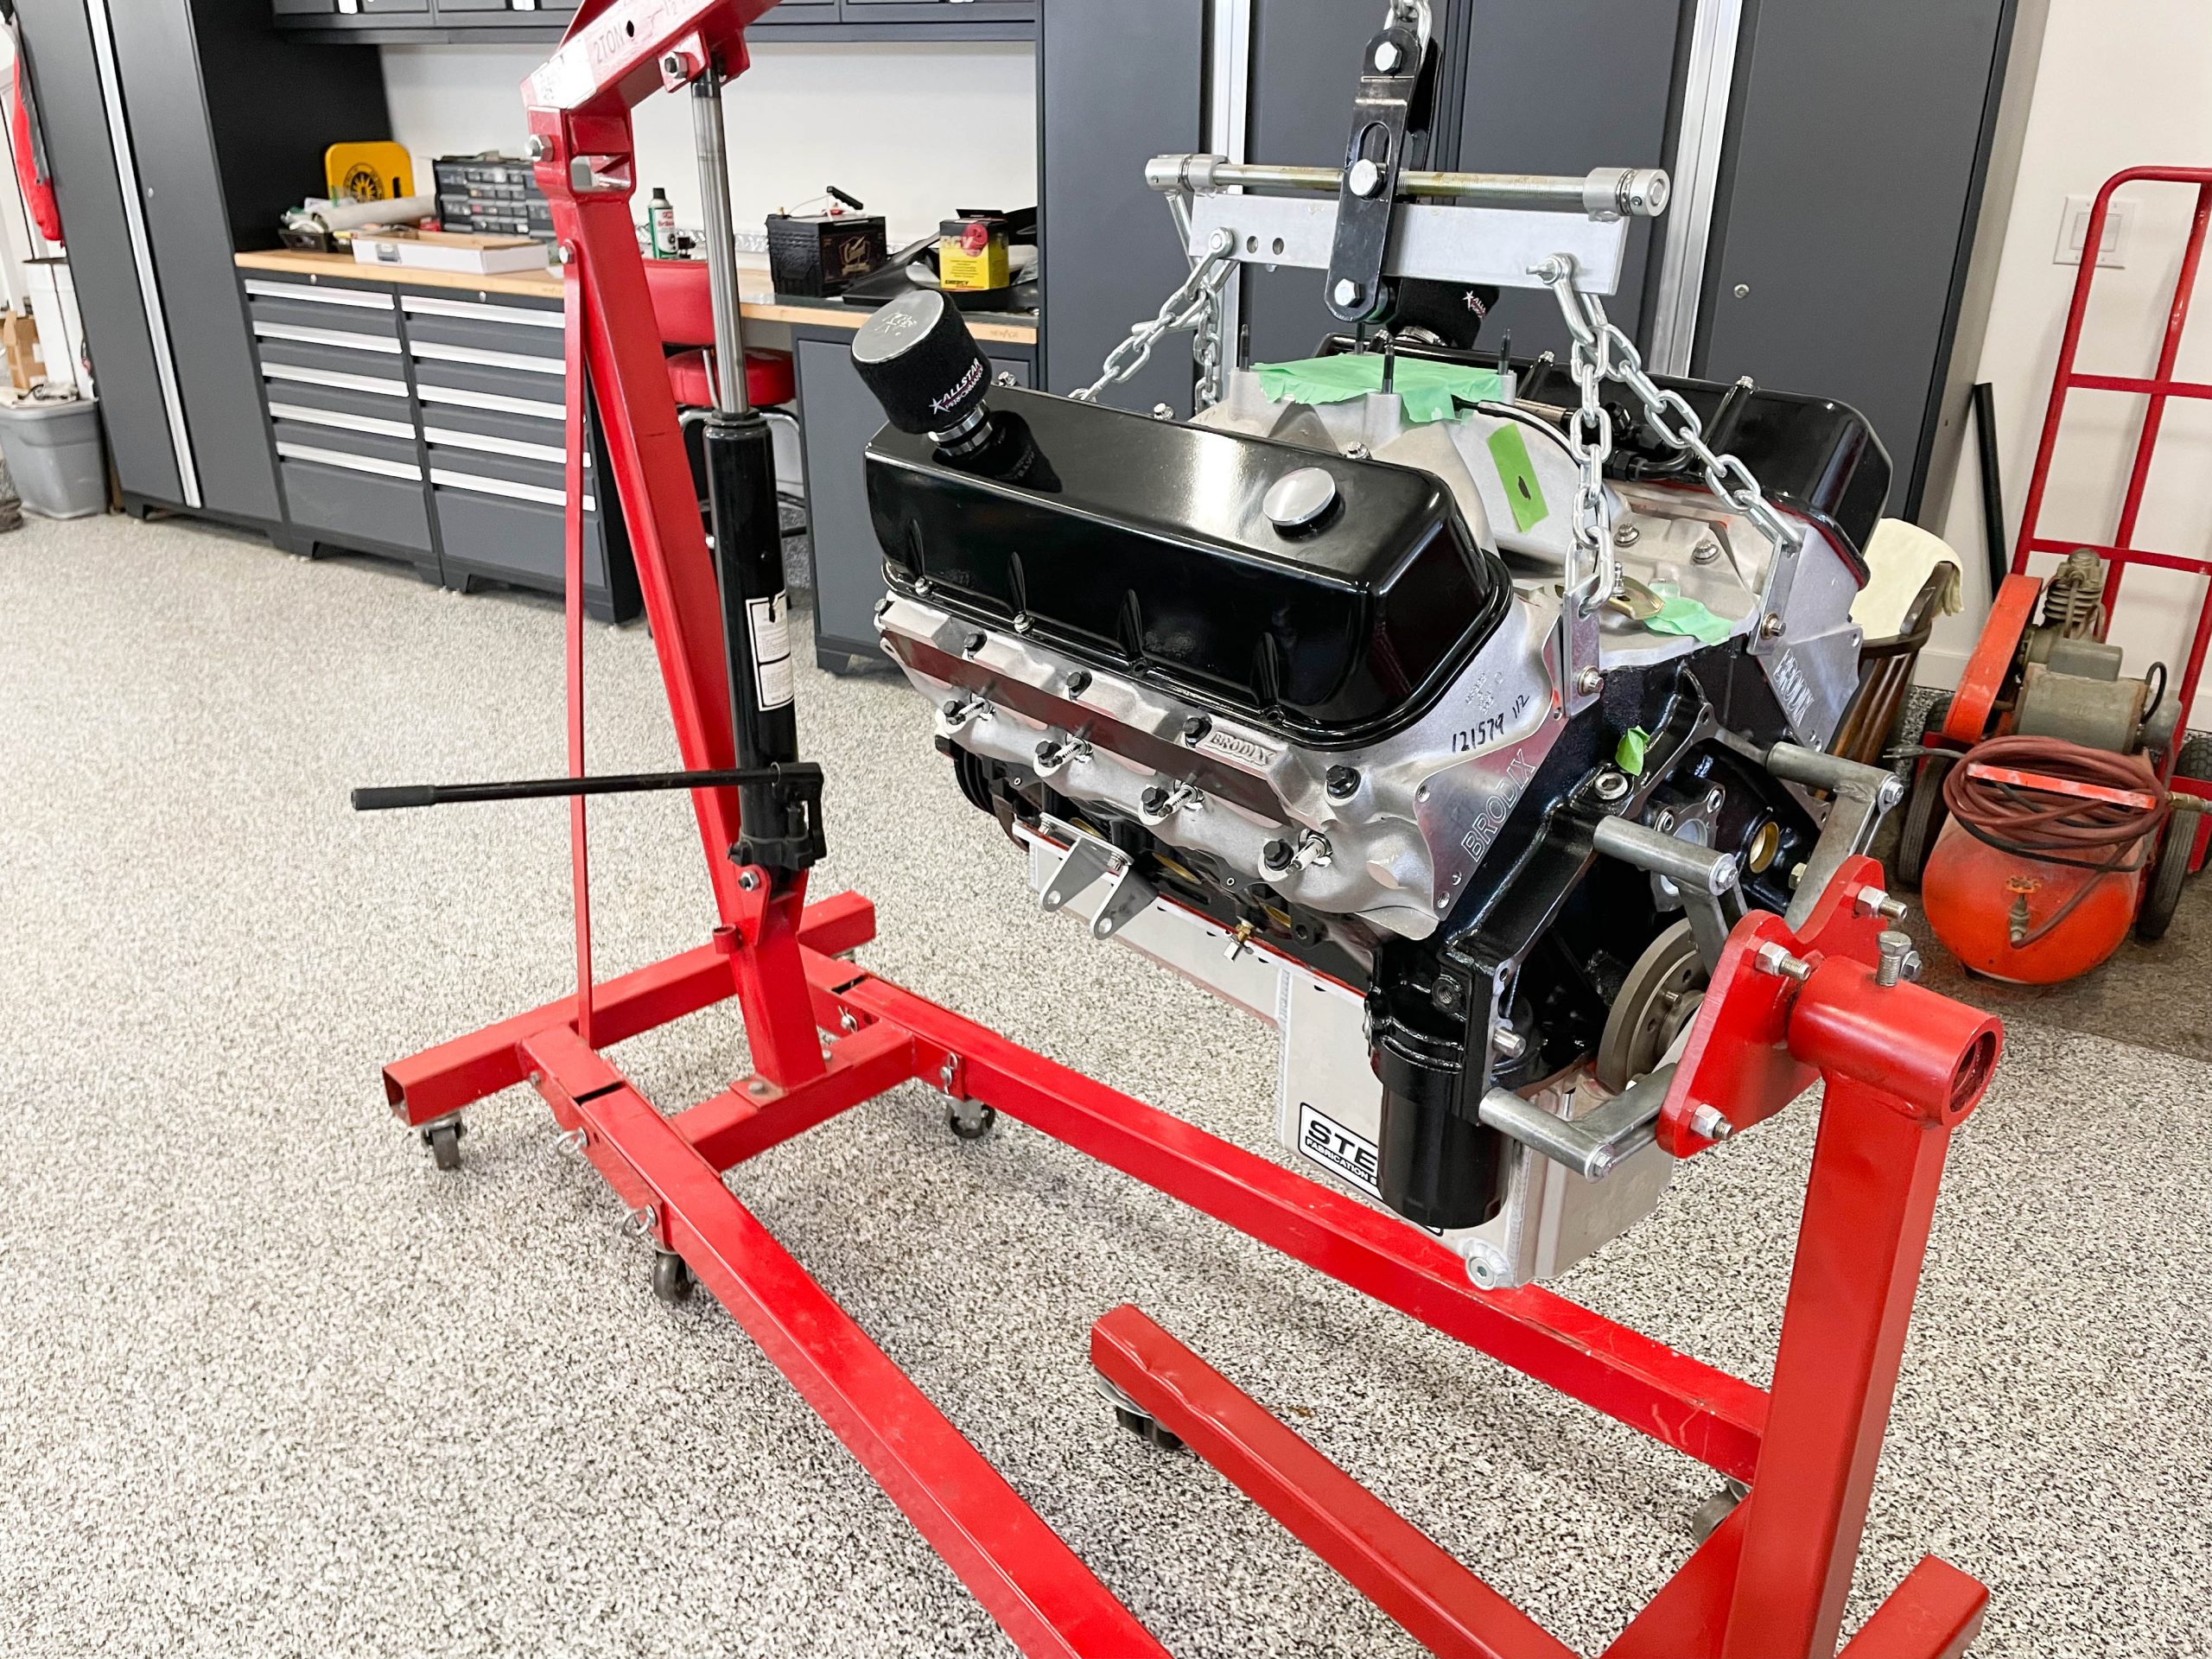
We’ve talked about engine installation tools previously, but this time around we’ll zoom in on engine leveling or tilter tools. There are all sorts of examples out there. Most install by way of chains to the ends of the cylinder heads, though a few bolt directly to the carburetor studs on the intake plenum.
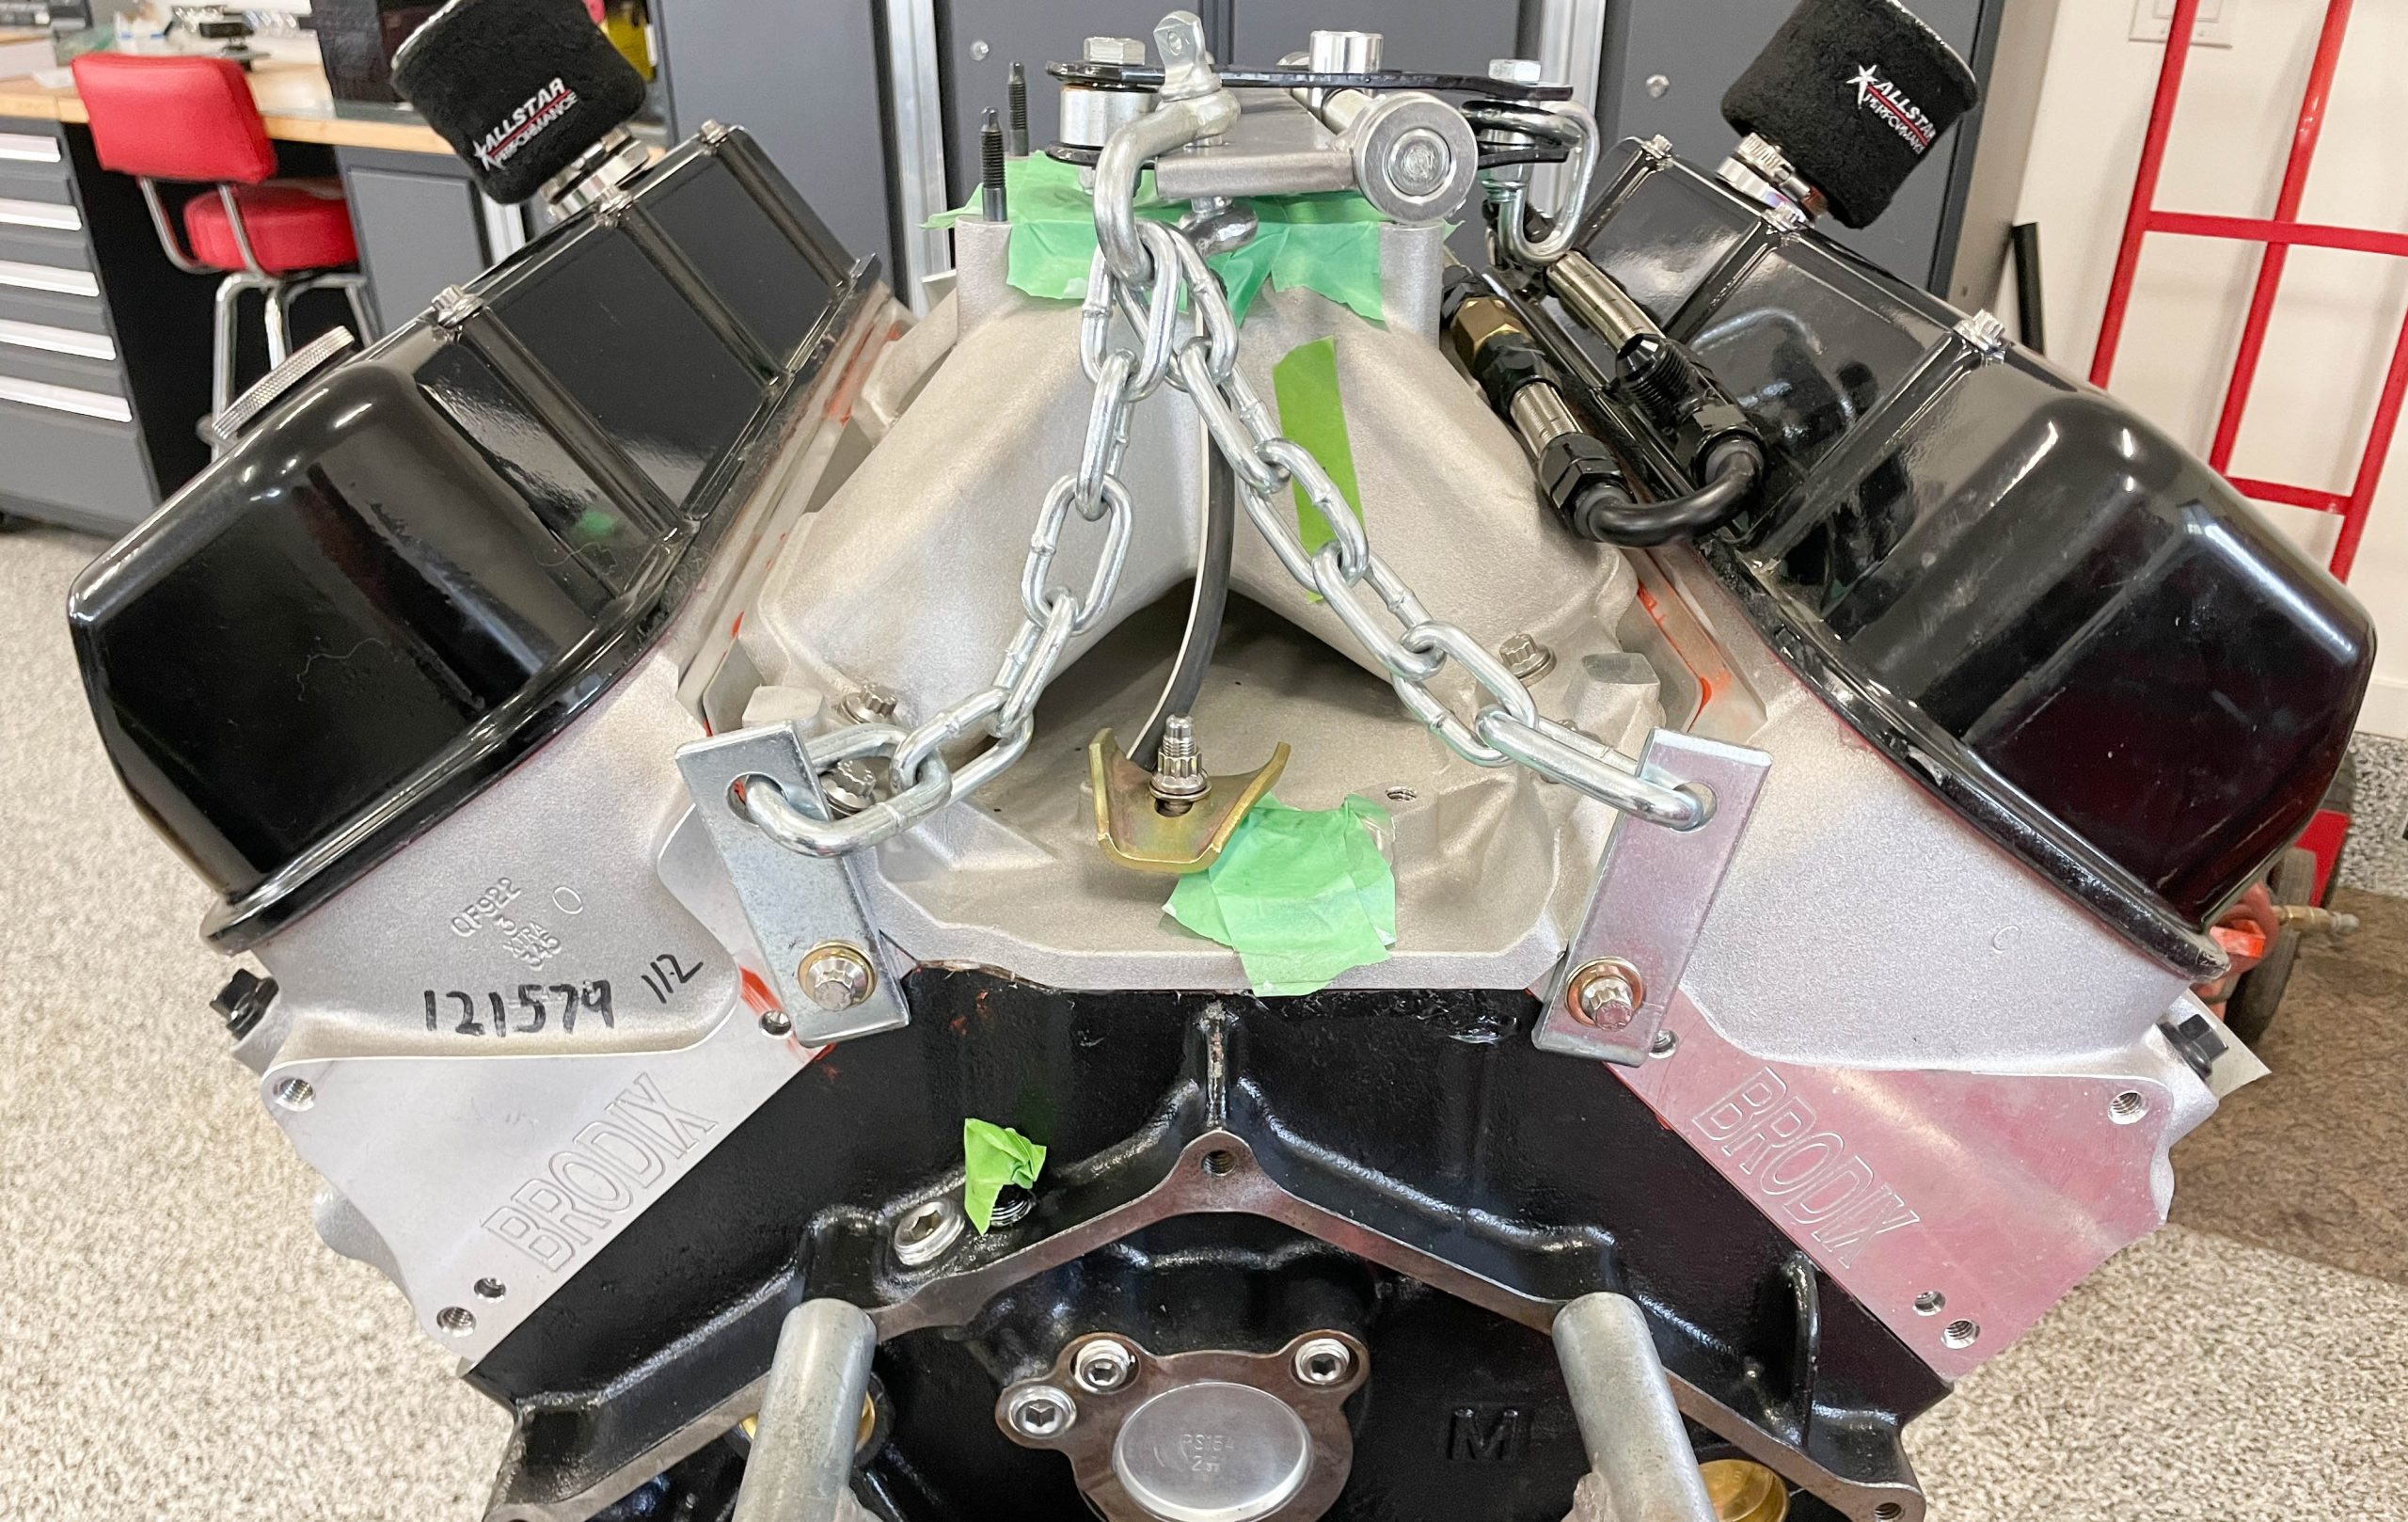
Fair enough. But there are a few folks out there who are wary of the tools that use four carb studs to suspend what could amount to 1,000+ pounds of engine and transmission.
Engine Tilters, Aluminum Thread & Fastener Strength
In truth you won’t exceed the ultimate tensile strength of even one 5/16 inch carb stud in this application. A single 5/16 inch coarse thread, grade 2 fastener has a typical tensile strength figure of 4,400 pounds.
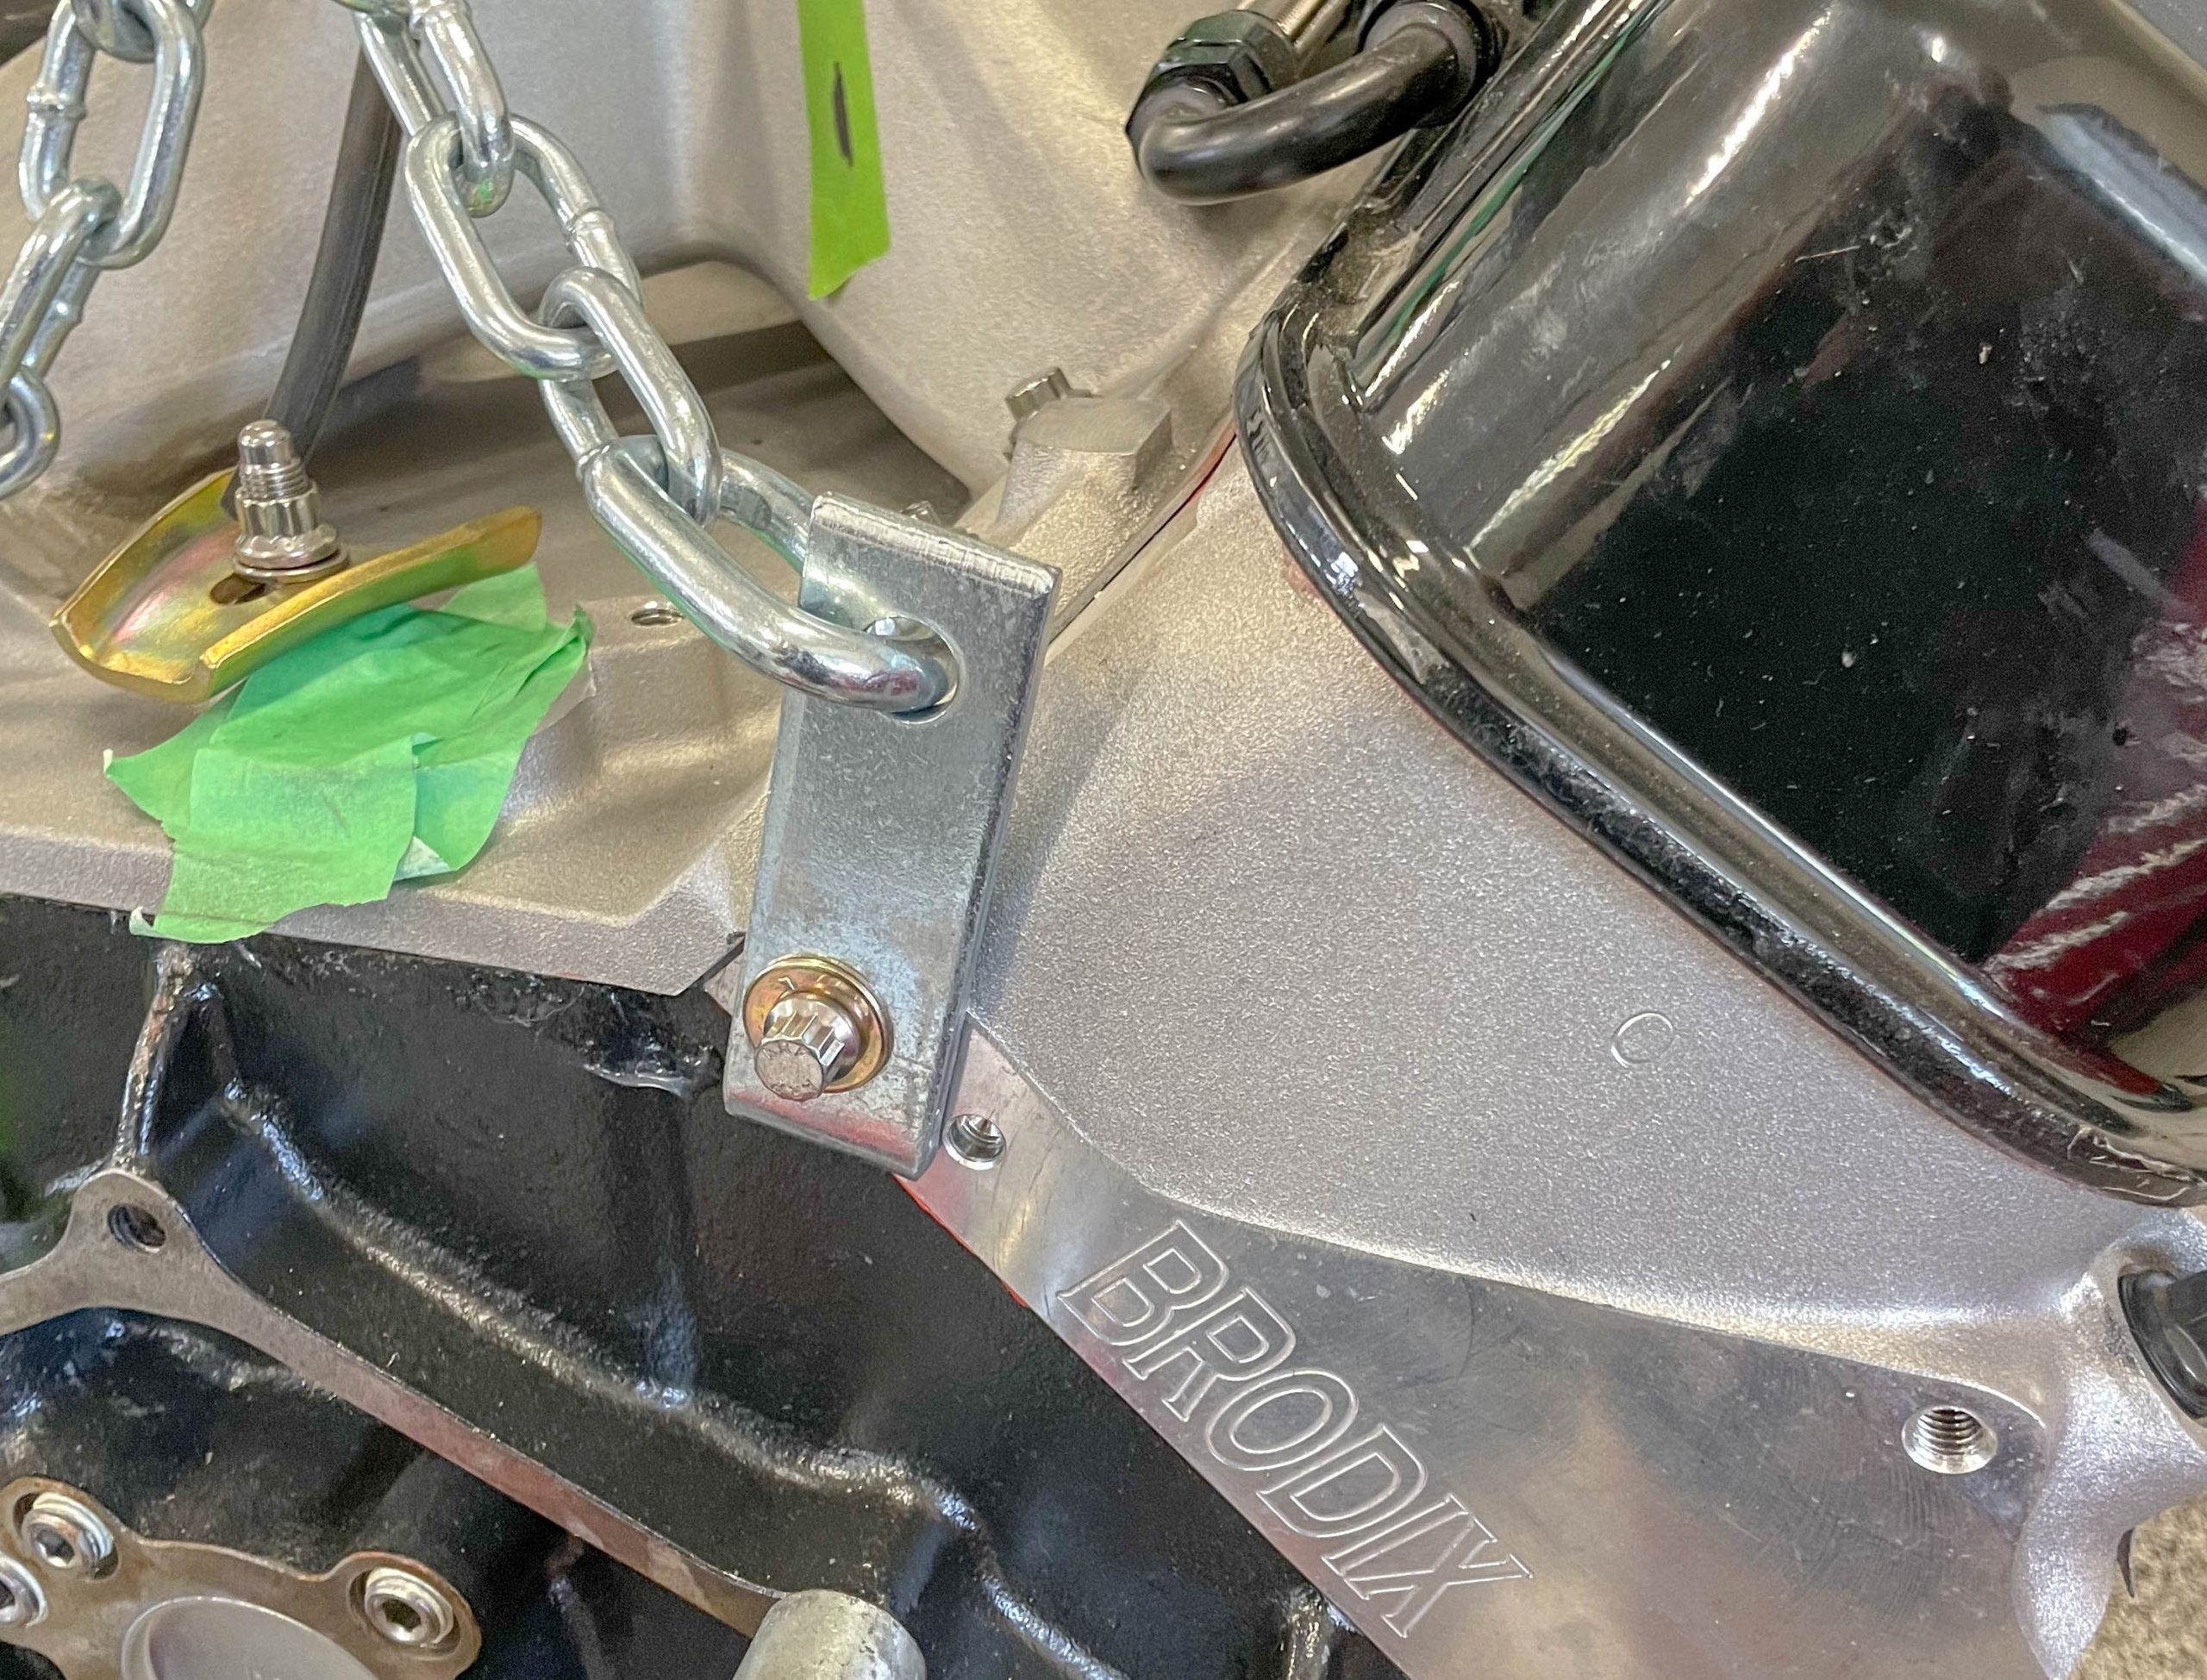
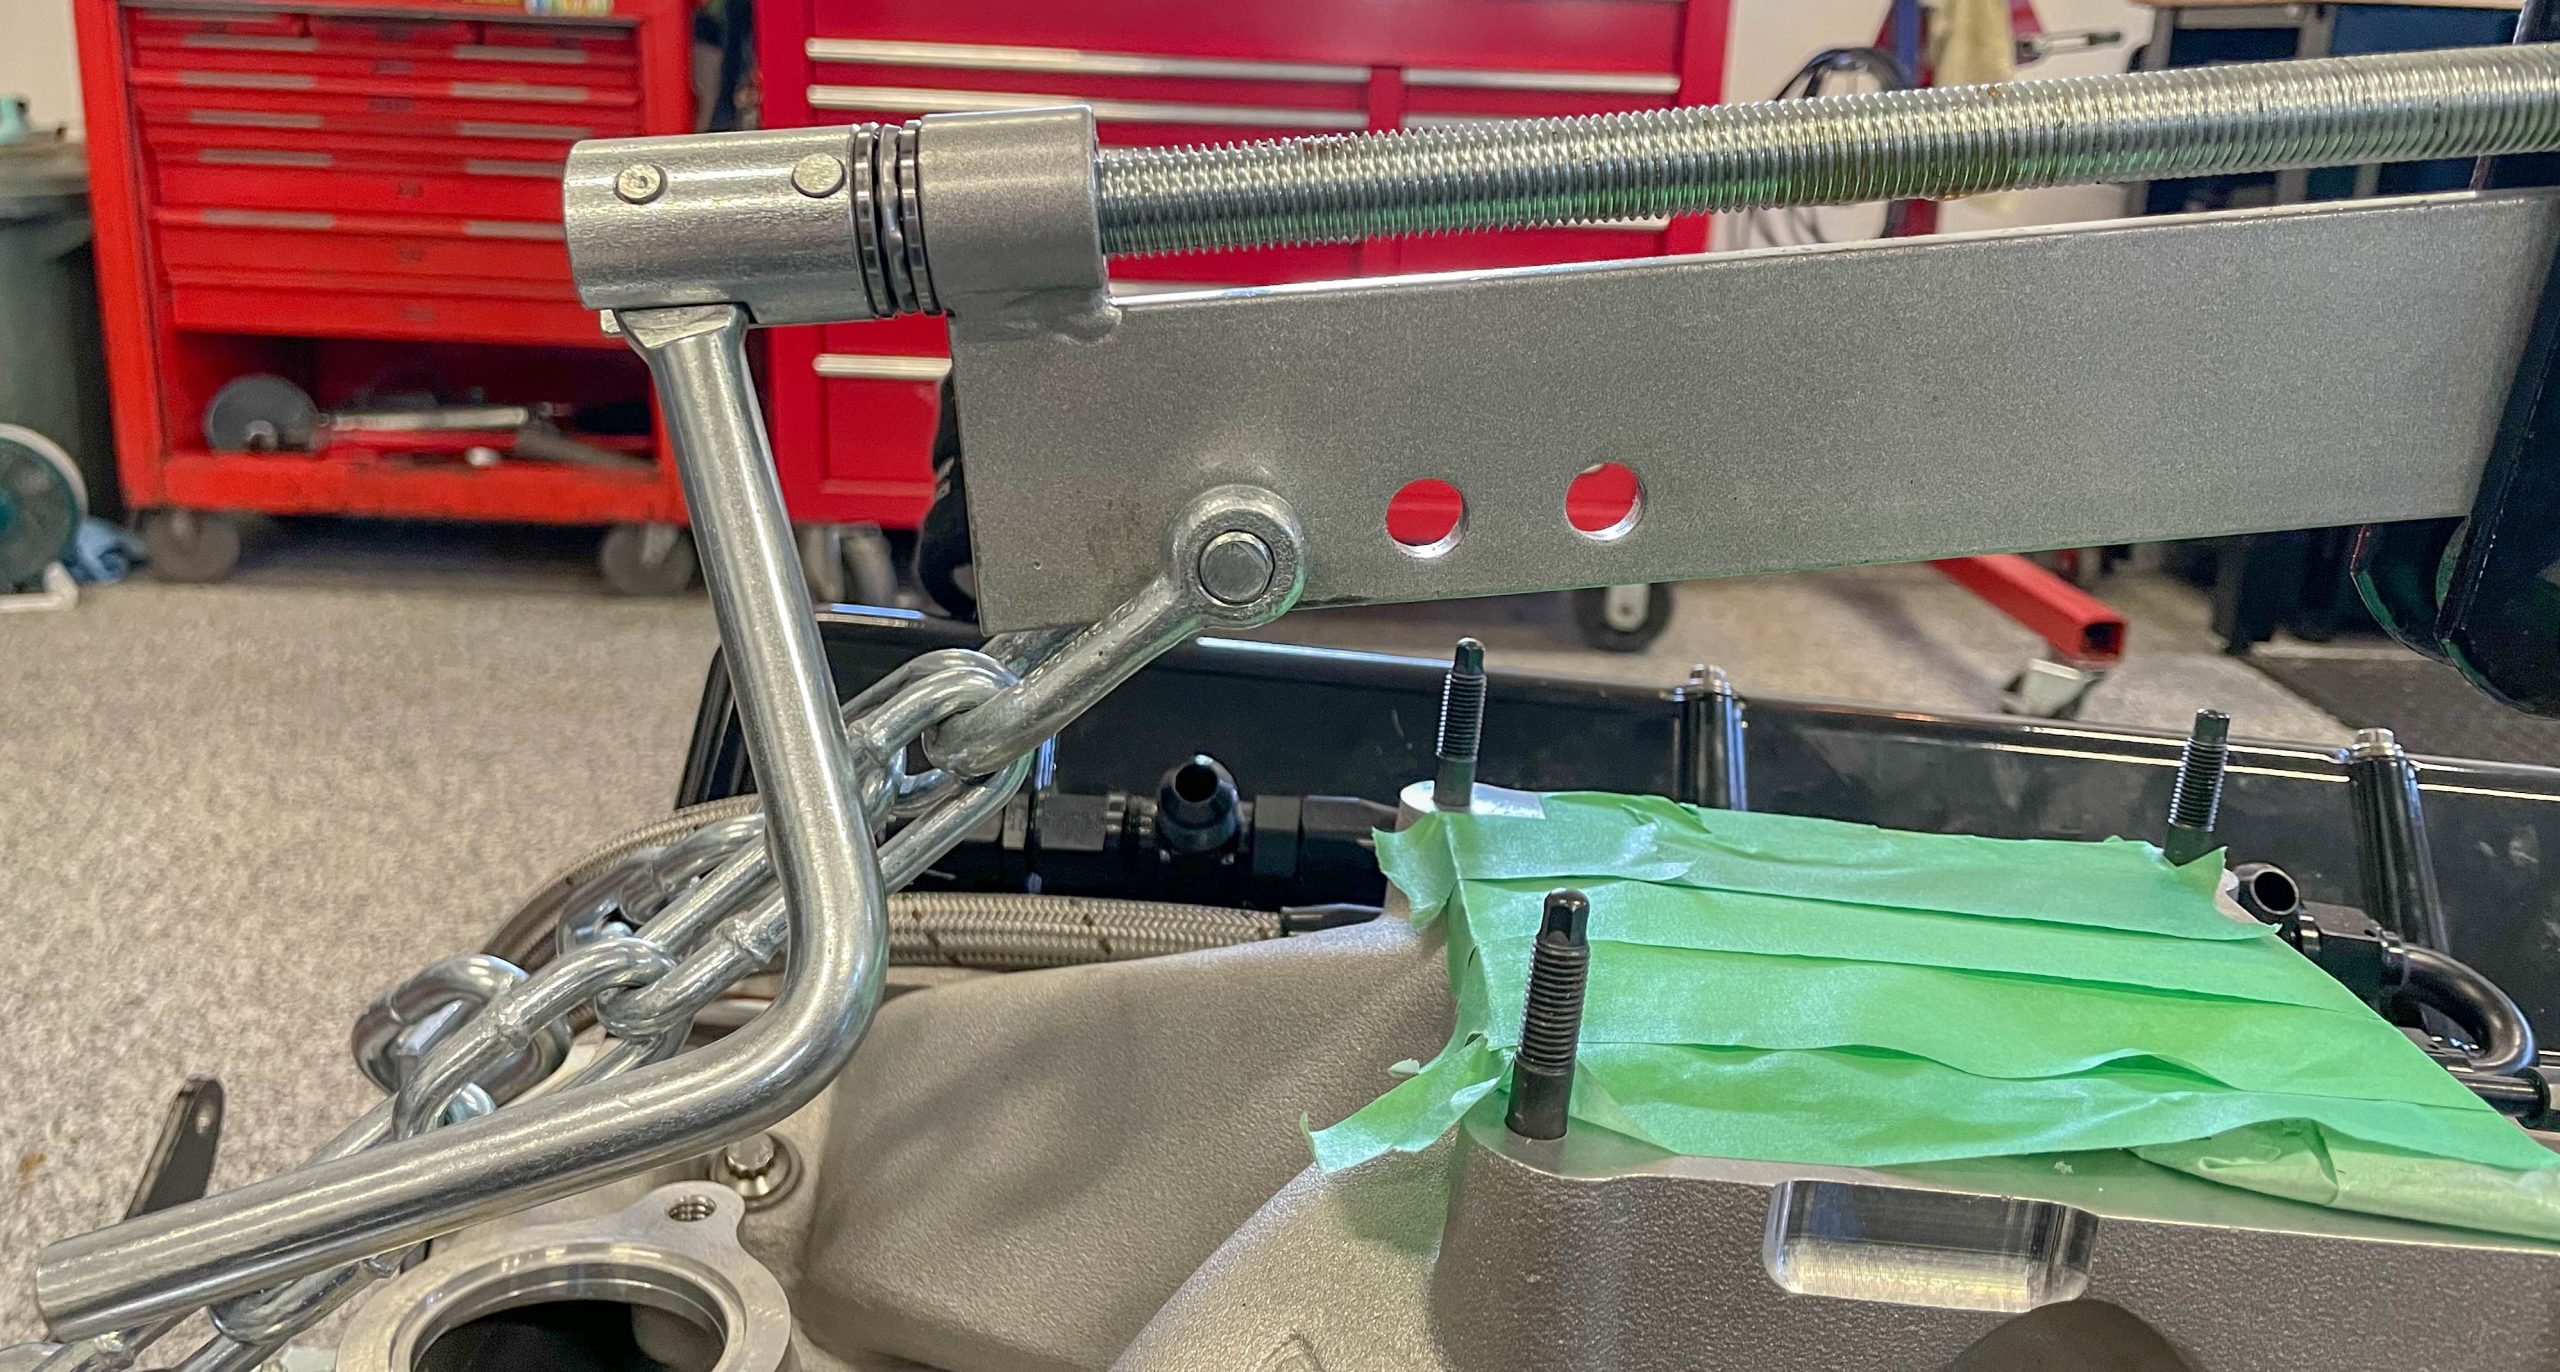
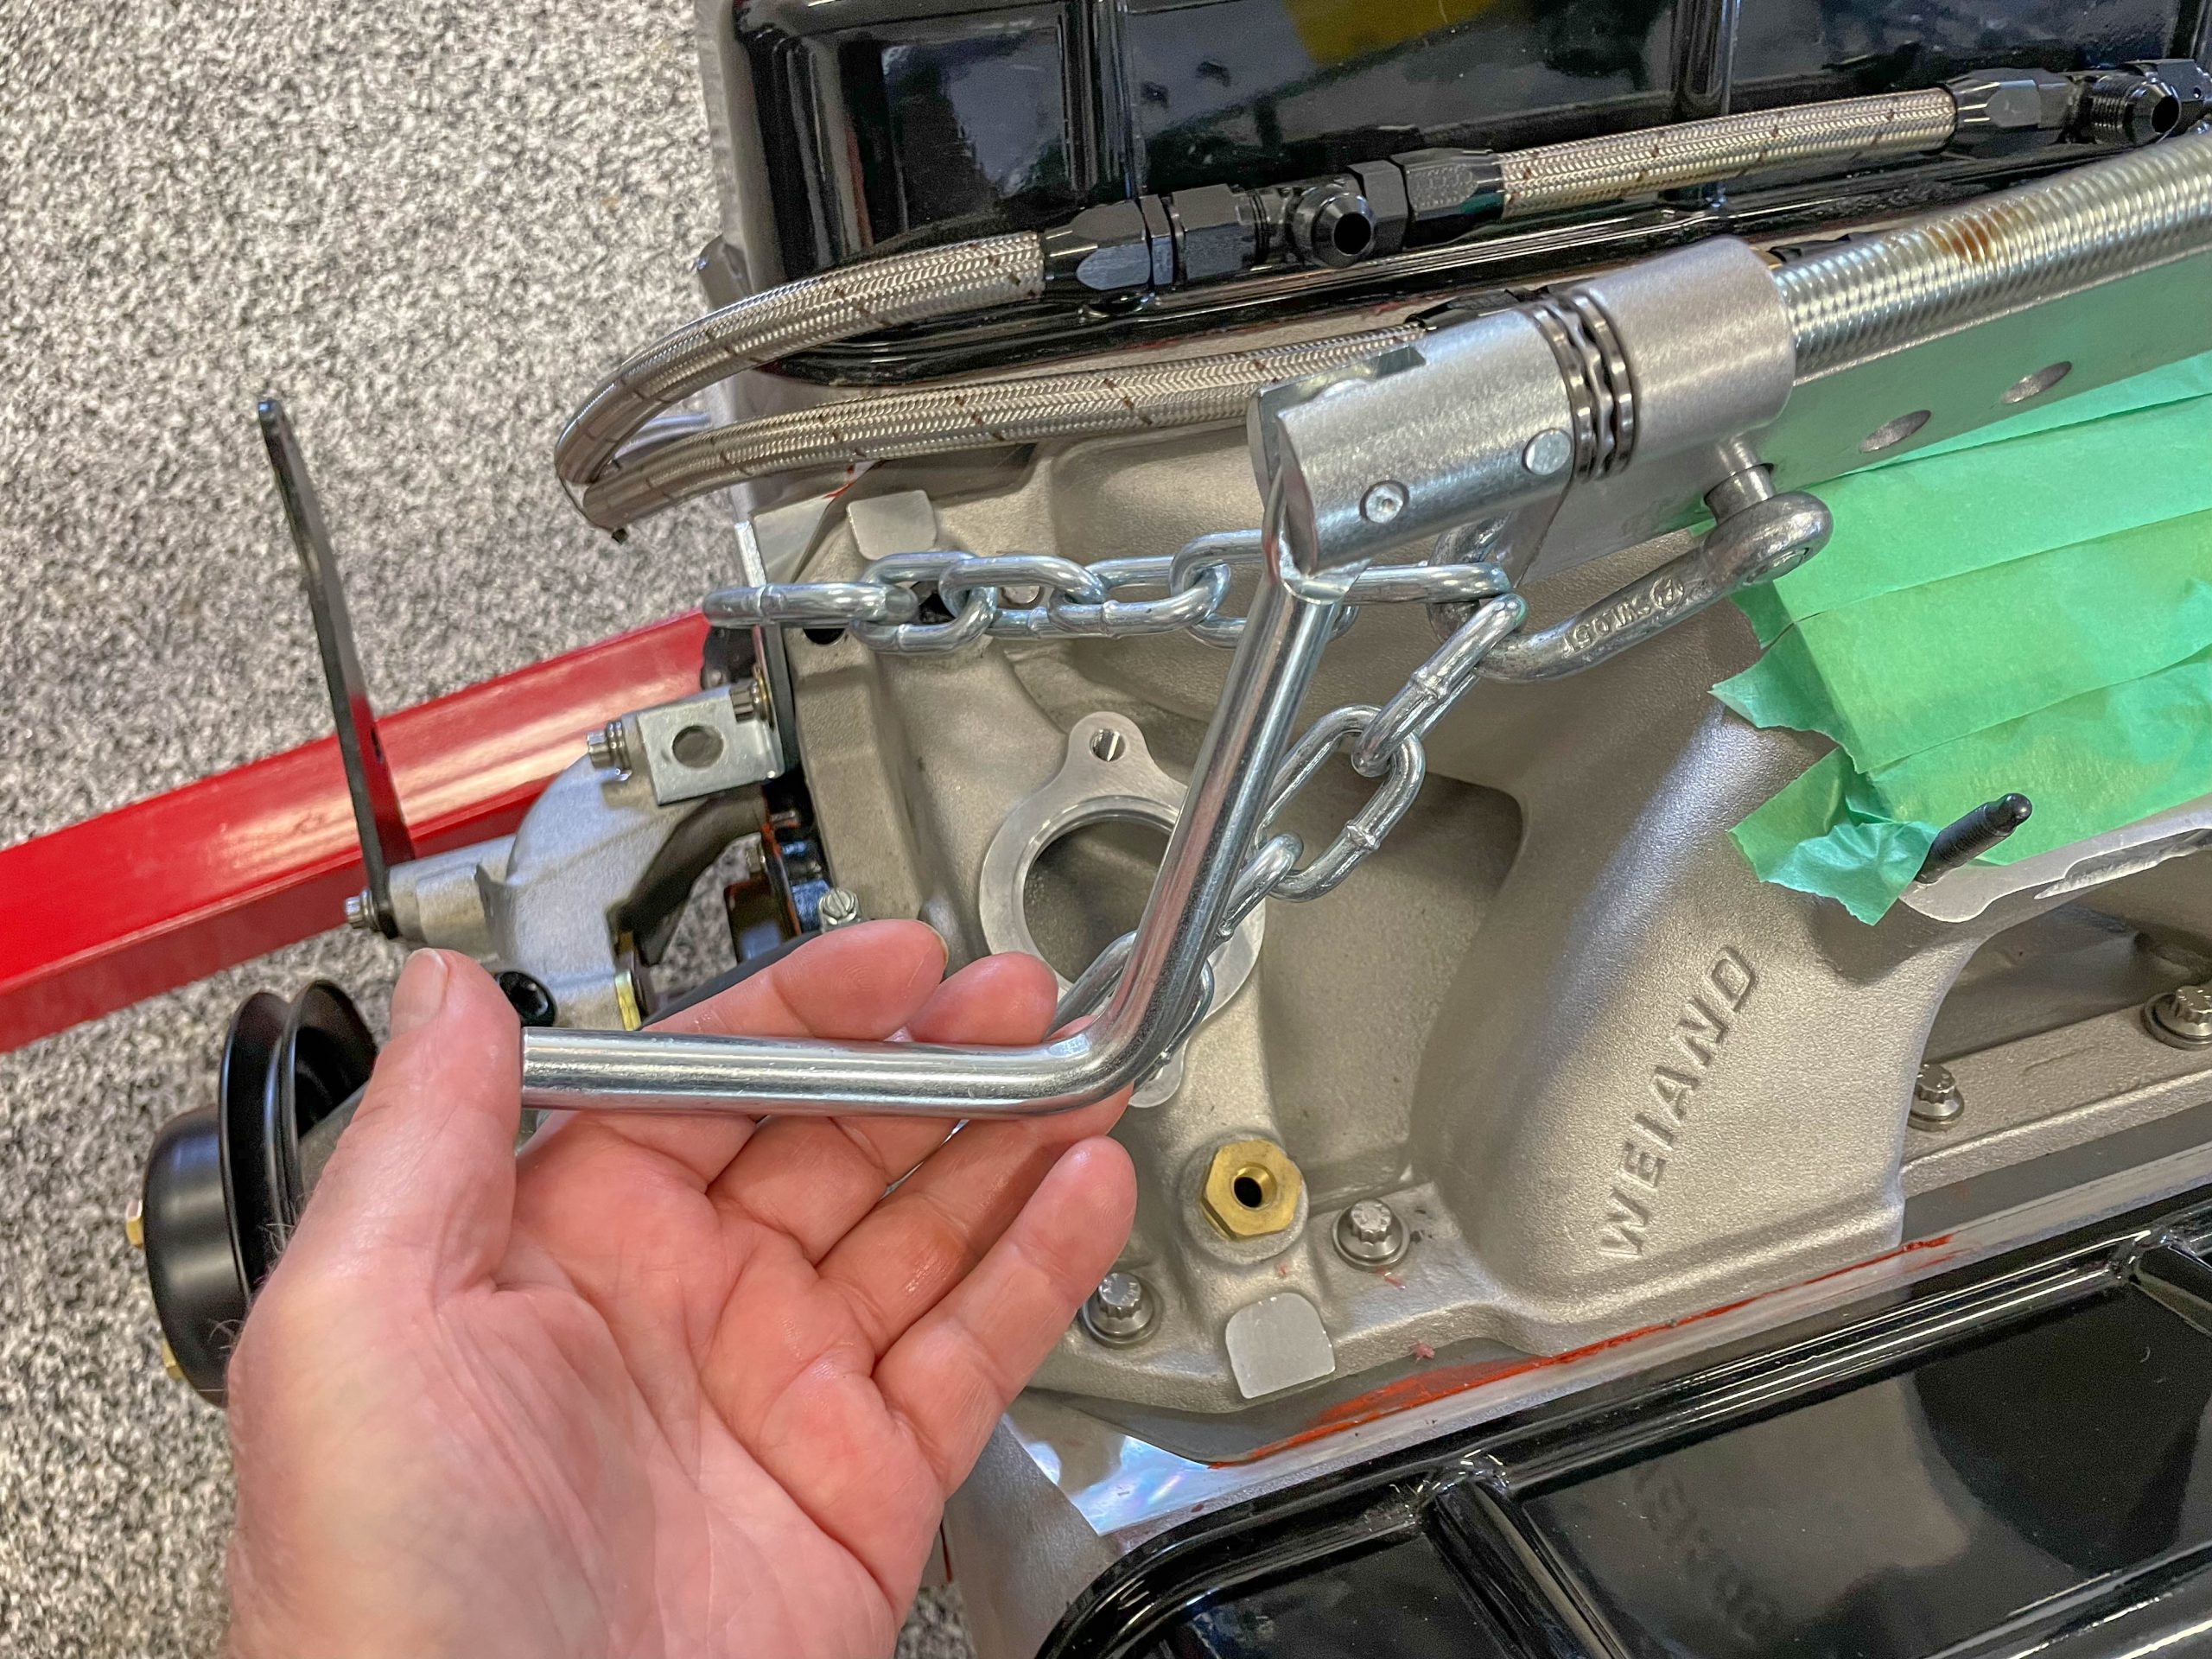
If a 3/8 inch fastener is used at the ends of the cylinder heads (as shown in this article), the load will be shear. Shear is approximately 60% of tensile. An equivalent single 3/8 inch grade 2 fastener mounted in shear can support approximately 3,840 pounds. But what you don’t know is the integrity of the thread(s) in an aluminum intake manifold—keeping in mind the amount of carb stud thread that passes through the intake too.
That’s what makes some folks nervous.
And of course, if you have a sheet metal intake, there’s no way you’re going to risk damage to it by using carb studs as a lift point. FYI, I have one of those carb plate lift/installation tools and I’m just more comfortable lifting an engine and transmission in and out of my car with four 3/8 inch fasteners run into the ends of the cylinder head.
Bottom line here is, there’s more fastener thread in the heads than there is in the intake plenum. The tensile strength on a single ARP 3/8 inch coarse thread stainless steel bolt (as shown in the photos) exceeds a grade 8 fastener at 9,300 pounds or approximately 5,580 pounds in shear. Hence my comfort zone rationale. You might be the same.
Want to really get into the weeds on engine fasteners? Check this out: Aww Nuts! (And Bolts. And Studs.) – Understanding Engine Fastener Types & Materials
Back to Engine Tilting Tools
The OTC Tools example used in this article is one I recently purchased: part number OTC-4305. It has an advertised load limit of 1,500 pounds—more than sufficient to lift and tilt an iron Chevy big block along with a Turbo 400 transmission. In order to use it effectively, the carburetor and distributor (and most likely, the thermostat housing) should be removed.
The reason is, these pieces get in the way of the chains. Plus, when removing or installing an engine, I always like to keep the distributor out of the equation. That way, I don’t have to worry about whacking the firewall or hooking on it during the process. As an added bonus, it’s easier on distributor caps.

When you use the tool this way, the chains should prove to be the right length. FYI, OTC recommends the chains be mounted no more than 45 degrees from the head to the beam.
One thing I did with my setup is modify the chain “L” brackets at the rear (bellhousing side). Since I prefer to lift at the ends of the heads, the rearward “L” brackets can easily hang up on the firewall. By slicing the protruding end of the chain hooks, it’s easy to get the engine into place.
All of the available (non-heavy duty) tilters on SummitRacing.com are designed with adjustable chain locations on the beam. Typically, there are three sets of holes in one end. This allows you to position the tilter for anything from a V6 to a small block to a big block.
Different levelers/tilters use different threads. Some are equipped with Acme threads (with a flat apex and valley). Others are coarse or fine standard thread. You’ll find that levelers with fine(r) threads can provide for more precise adjustment. No secret I’m sure.
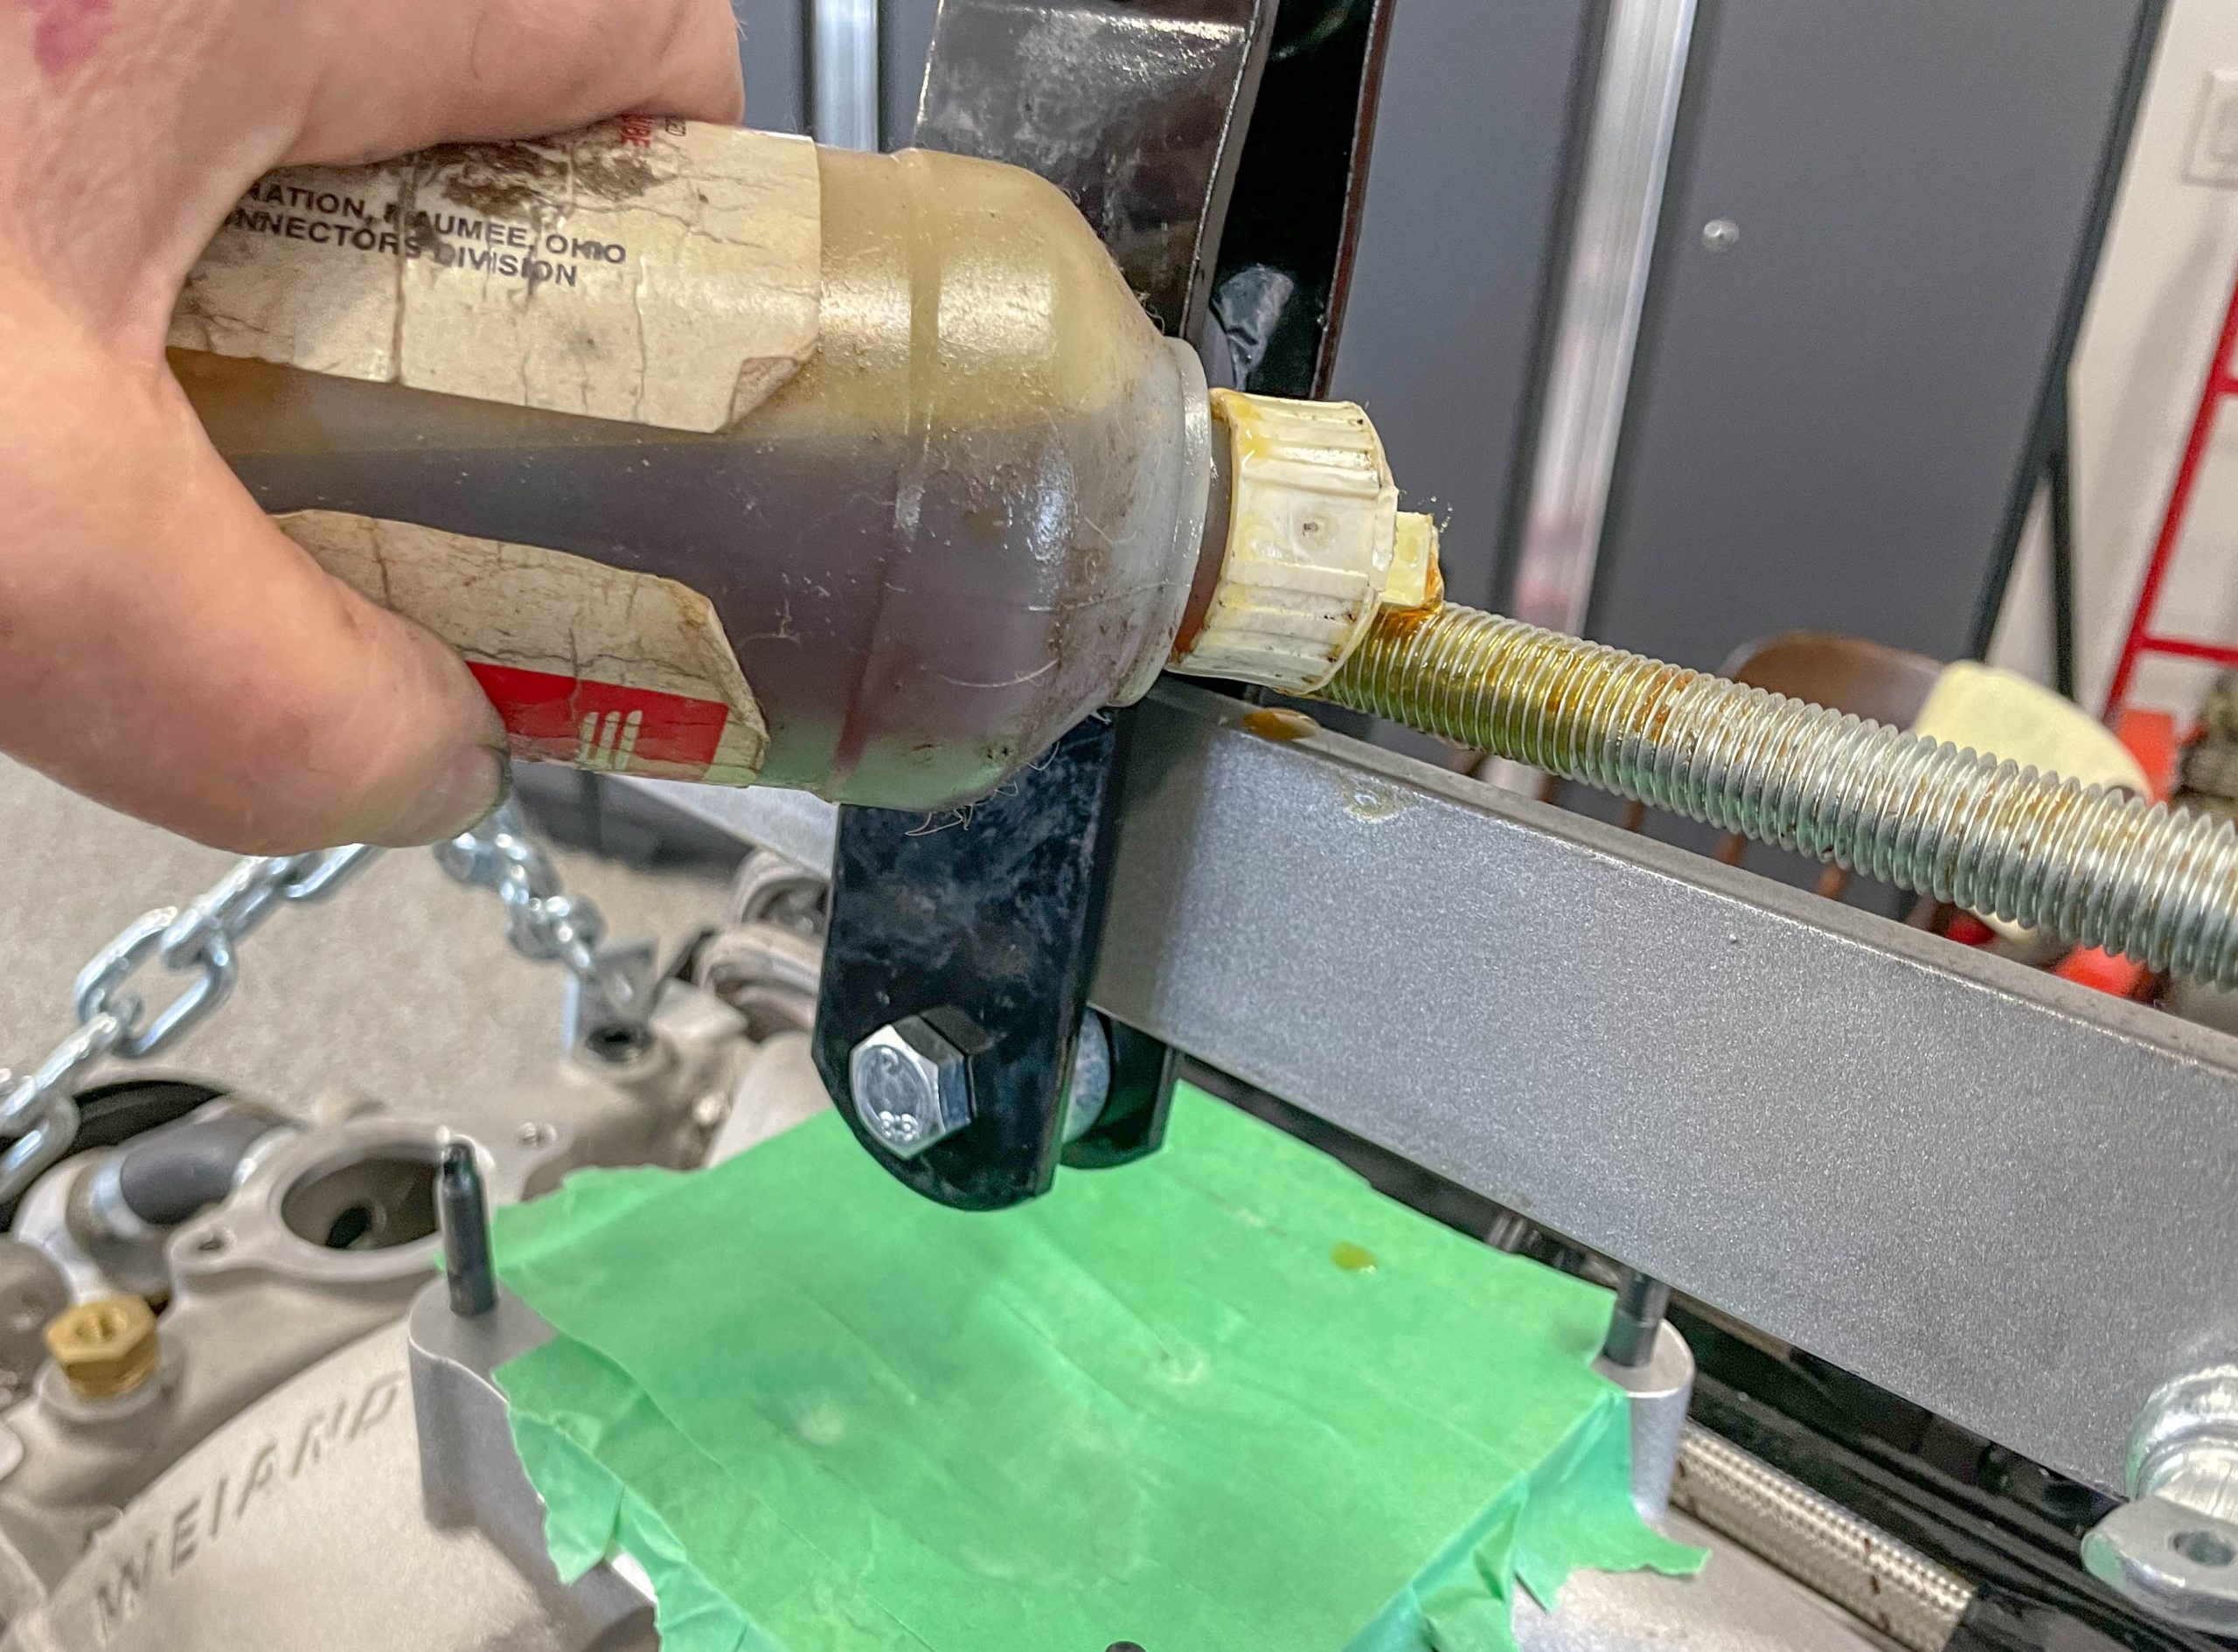
When using any tilting tool, be absolutely positive to use a lubricant on the crank screw threads. While the Acme threads used on some tools are pretty robust and pretty easy to work with, no thread works as slick as it does when lubricated. OTC recommends an extreme pressure lube for the job. I just use a squirt bottle filled with AN fastener assembly lube on the threads (because I have it handy and it’s easy to use). Cranking will prove to be a whole bunch easier.
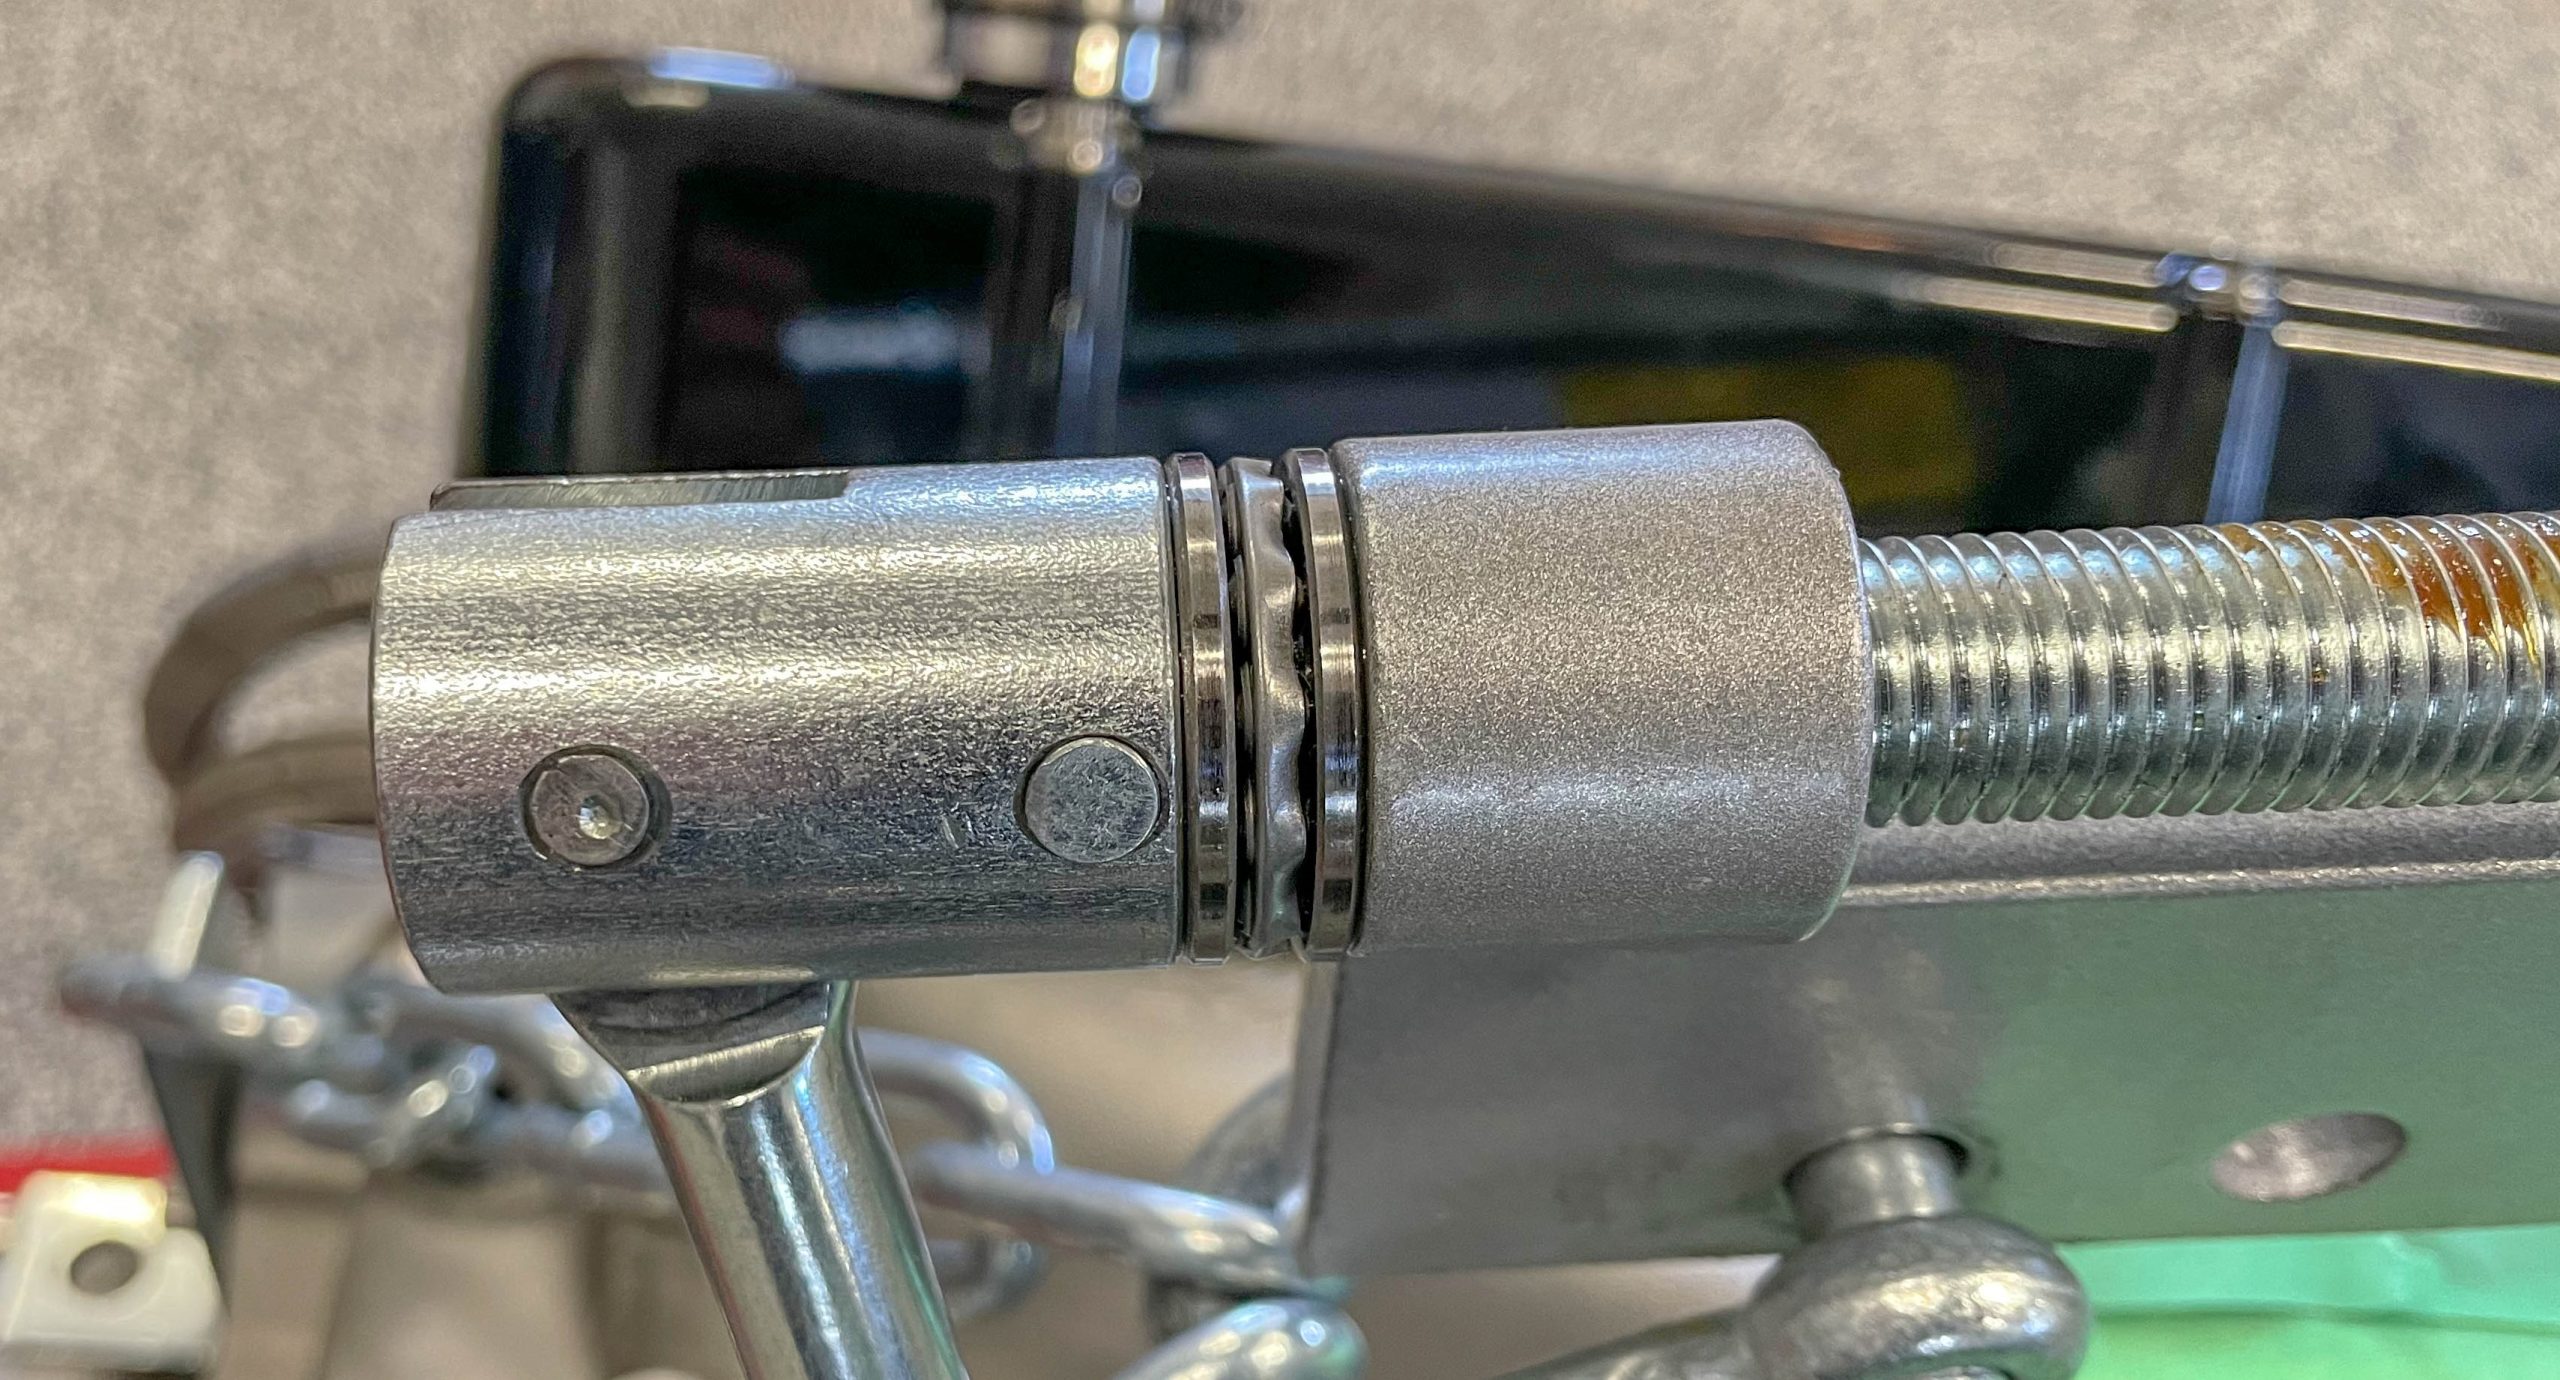
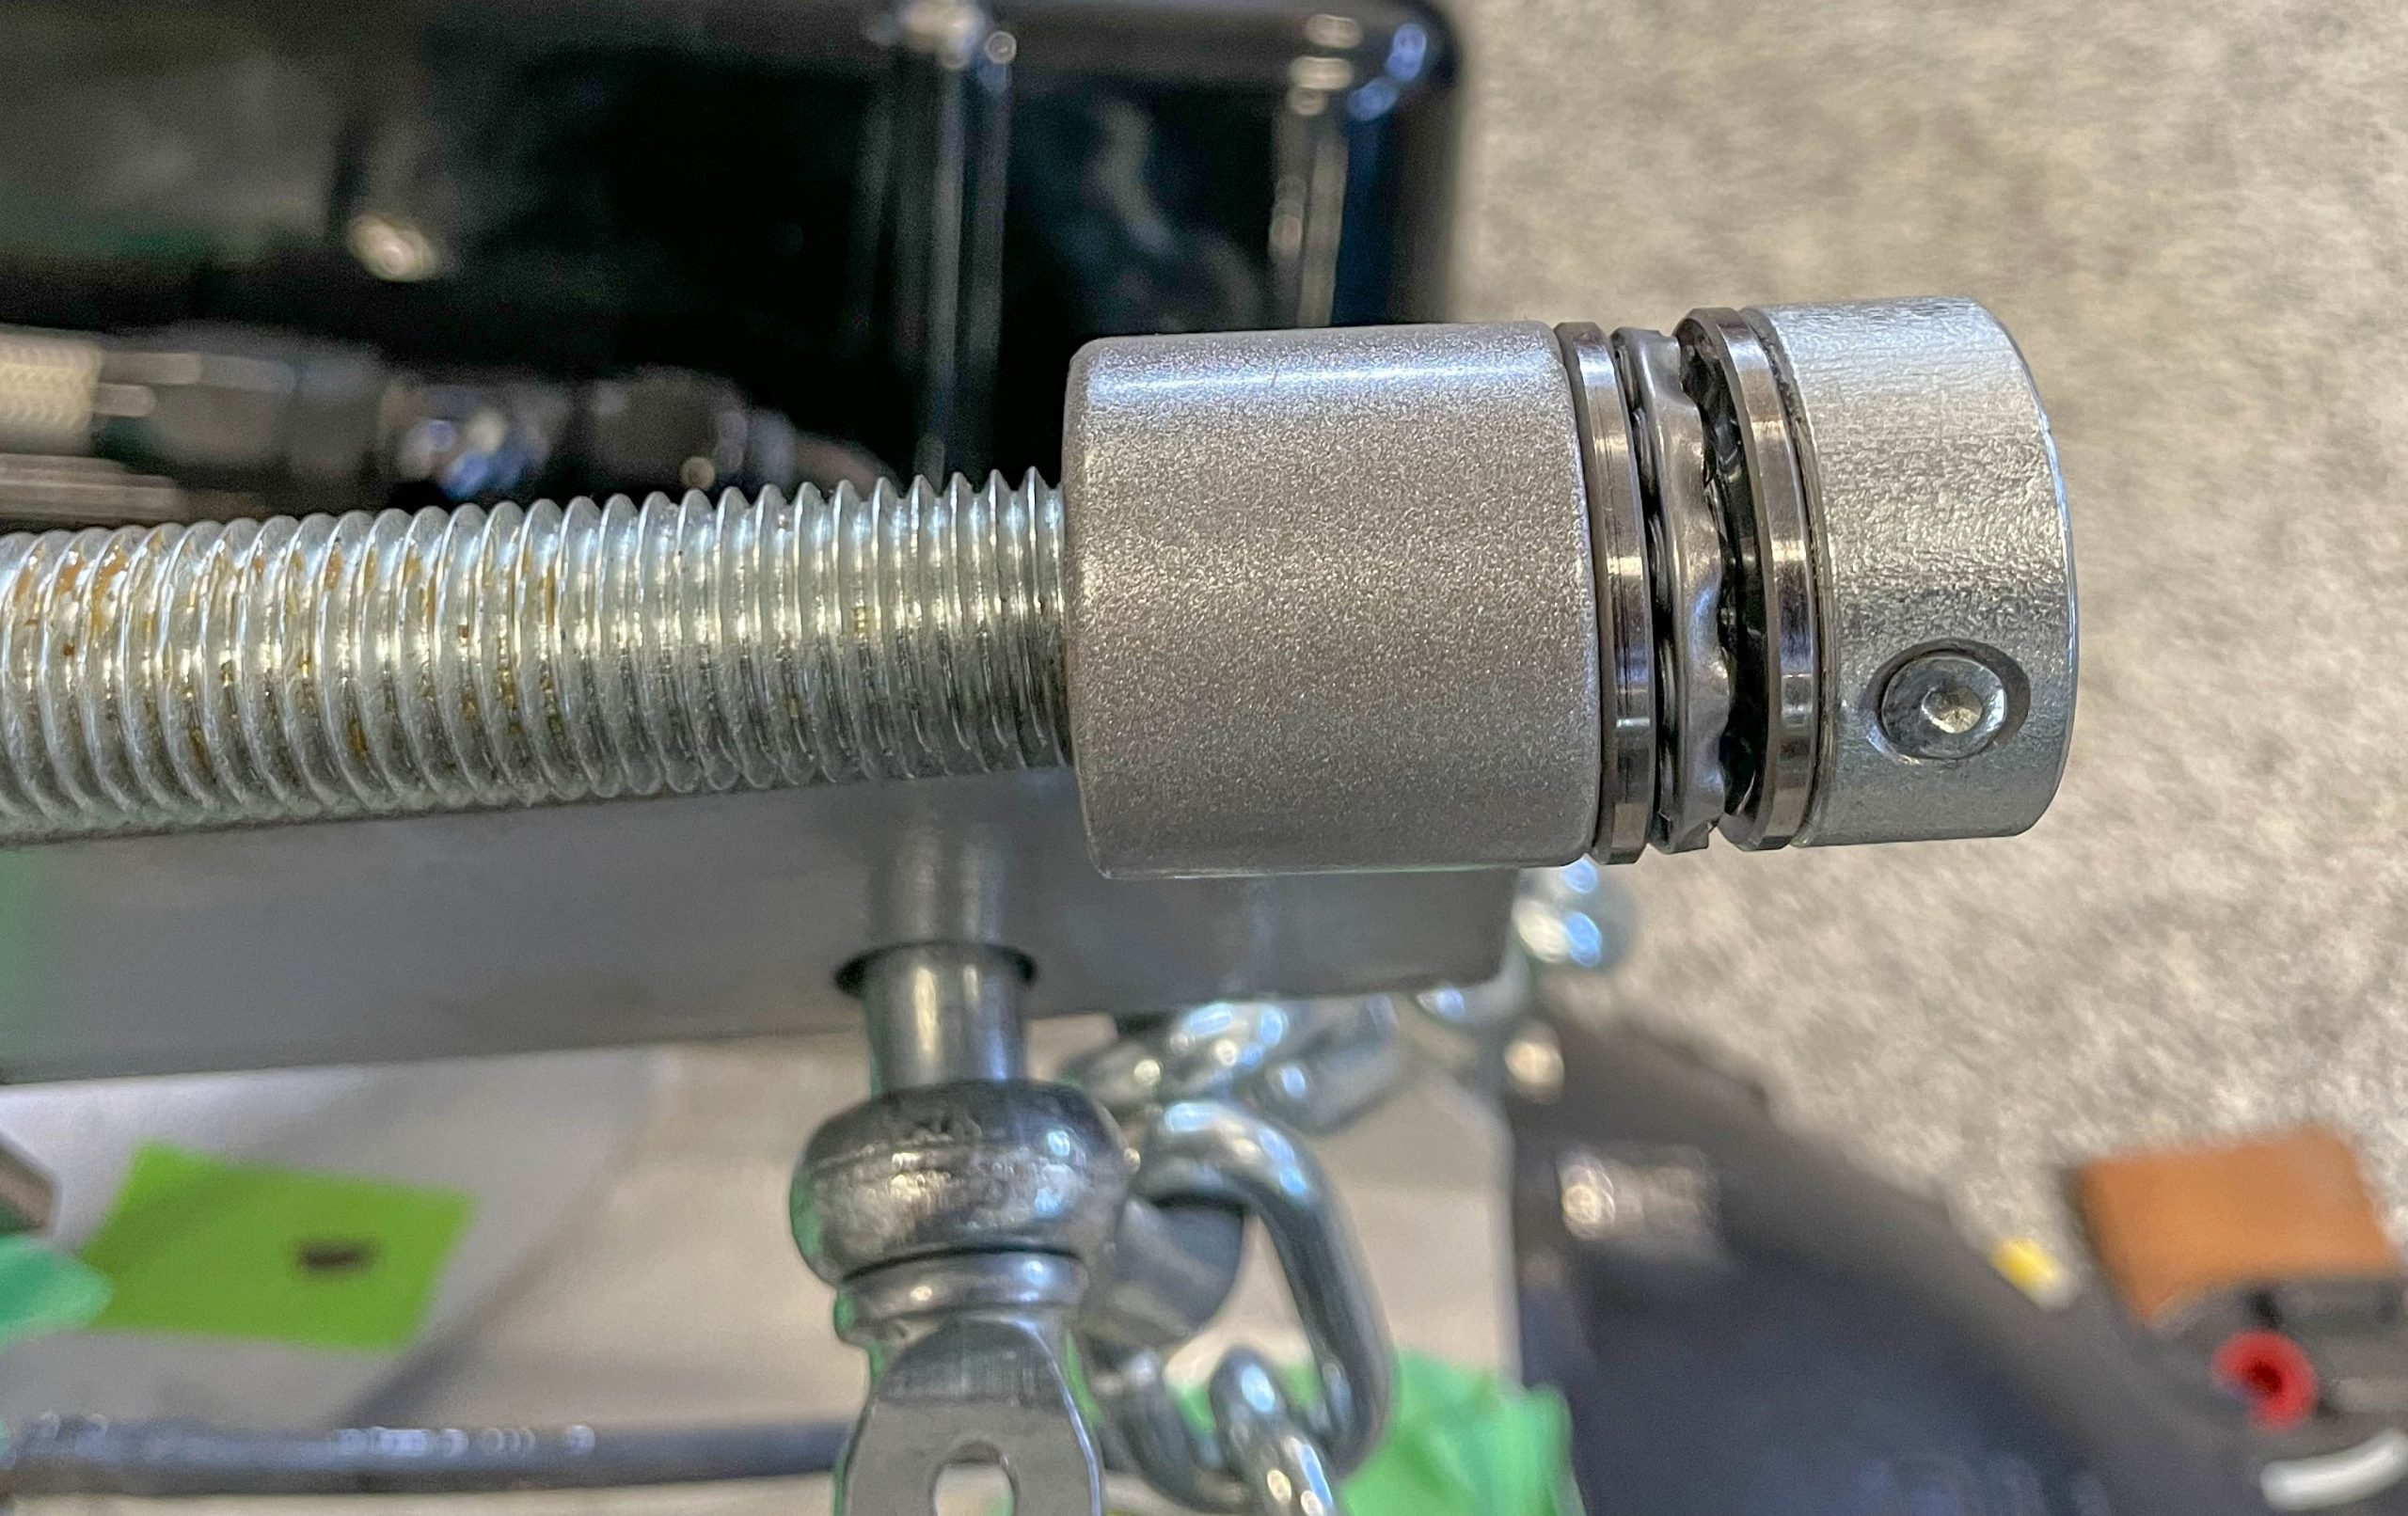
Speaking of cranks: Some load tilters such as the OTC model shown here have bearings on each end of the screw shaft. This, along with lubricating the crank screw threads allows you to change the angle easily while the tool is loaded.
Some tools also have cranks designed to pivot so that it can clear the hoist while at an angle. Others also have a hex that allows you to use an electric or air ratchet (or an impact or a ratchet or even a cordless drill) to adjust the angle.
As far as real-world use goes, almost everyone I’ve met who has a tilter claims they’ll never go back to any other device. They’re especially useful for installing big, long engine and transmission assemblies. They’ll work in every possible application, aside from those with long cowls that overhang the engine (1993-2002 Chevy and Pontiac F-bodies and later model Ford pickups come to mind). Click over to SummitRacing.com and you’ll find an engine tilter for virtually every pocketbook.
Level playing field? No doubt. And no more pinched fingers either.
Comments