Whether you’re installing a new stereo or simply replacing a crusty bulb socket, if you work around cars long enough, you’ll eventually have to splice some wires. And if you’ve ever dealt with intermittent electrical gremlins, you already know that making foolproof electrical connections is vital.
The good news is, splicing electrical wire is pretty easy with some basic tools and know-how. In fact, folks have been making reliable wire splices for over a century, which brings us to the lineman’s splice.
***
Story Summary Overview:
- The Lineman’s Splice, or Western Union Splice, was developed to repair telegraph lines in the 1800s
- It creates a reliable, strong, and electrically efficient splice between 2 separate wires
- A Traditional Lineman’s Splice uses solid core wire, yet the technique can be adapted to stranded wire
- This splice can be used in many situations, including wiring vehicle accessories, and is used by NASA in certain applications too
- This article offers a detailed walkthrough on how to make a successful Lineman’s Splice
***
The Lineman’s Splice
.JPG)
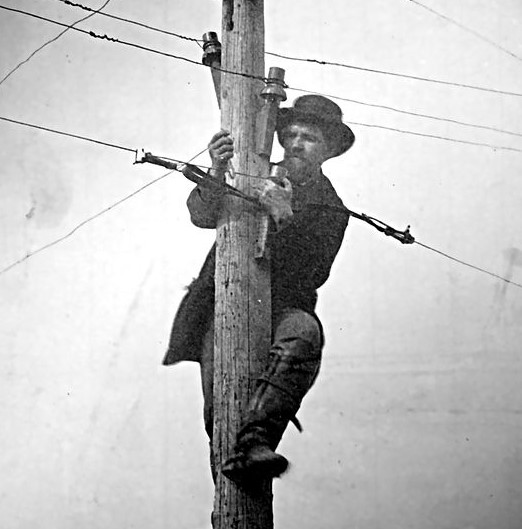
Back in the 1800s, if a telegraph line broke, it could sever communications between entire cities. So being able to connect telegraph lines reliably was kind of a big deal. That led the engineers at Western Union to develop what is known as the “Western Union” or “Lineman” splice. It’s simple, easy, and strong, and is so reliable that NASA once used it as a standard for wiring up literal rocket ships.
In other words, the Lineman’s Splice can be a good choice for your vintage* car or truck in a lot of situations.
* We say “vintage” there because for newer, late model applications, a crimp connection is usually the best option. A crimp connection tends to be more flexible and resistant to moisture damage than a soldered joint—particularly valuable in modern electronics systems that demand clean, precise electrical/digital signals. You can learn more about the pros and cons of crimping vs. soldering here.
A strong splice won’t make up for poor wiring harness management however—first and foremost, always make sure your wire runs are neat, properly secured, and out of the way. Putting your wiring in looms, wraps, or convoluted tubing is a smart move too.
Stranded vs. Solid Core Wires
Before we dive in, let’s quickly understand the difference between stranded and solid core wires, because the Lineman’s Splice was originally developed for the latter. That means many of the Lineman’s Splice examples you’ll find online use solid core wire. The process for making the splice with stranded wire however, is pretty much identical. So without digressing too much, here’s the distinction in a nutshell:
A solid core wire is a single piece of conductor (usually copper) wrapped in an insulator. Since it can handle a lot of current over longer distances relative to its size when compared to stranded wire, solid core wire is common in home electrical wiring. Yet it’s more prone to break when subjected to excessive flexing and vibration.
For that reason, you’ll likely find stranded wiring in your automotive electrical harness. Stranded wire is made up of tiny strands of conductor (again, usually copper), making it more flexible and resistant to breakage from stress and vibration.
“Conductor” is the fancy word for the metal part of the wire that carries the electricity.
Now, without any further ado…
***
How to Make a Lineman’s (Western Union) Splice
***
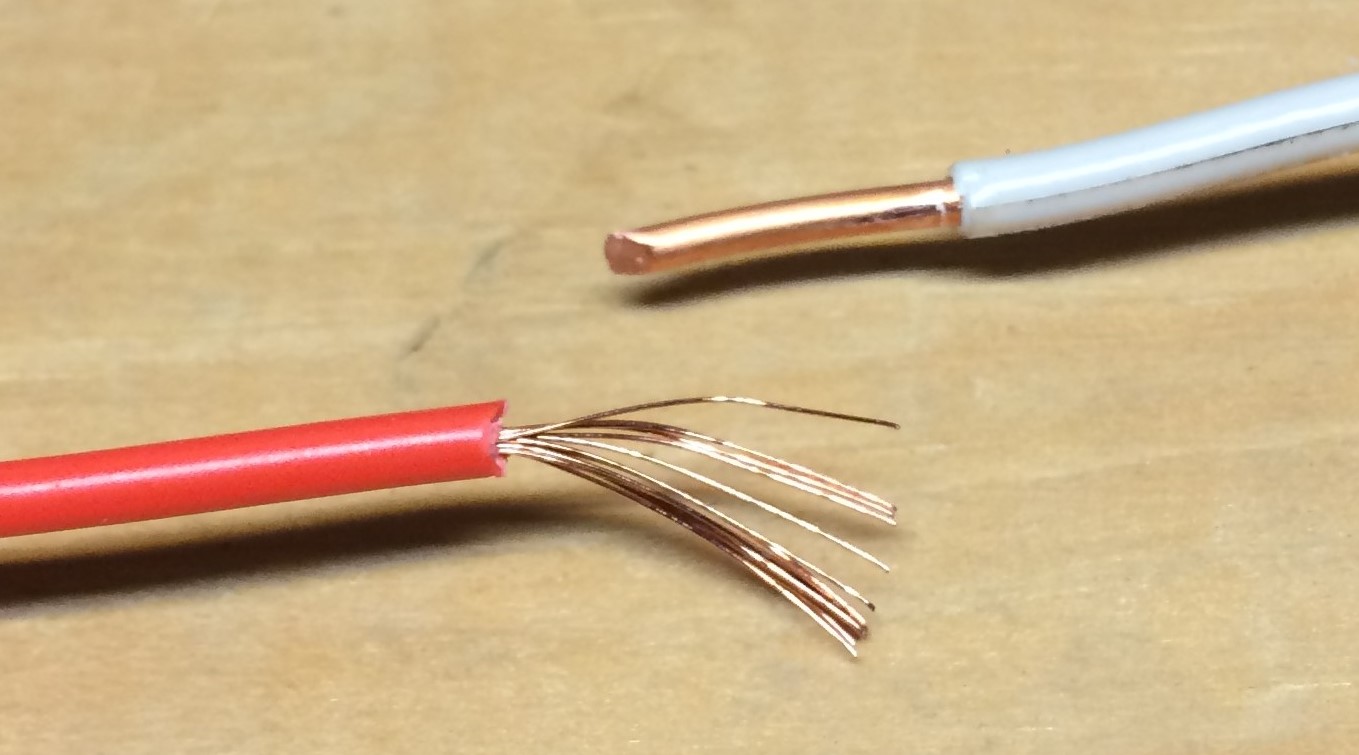
1. Strip Away the Insulator

Grab our old pal the wire stripper tool, and remove about a half to three-quarters inch of insulation from each end. Just remember to use the right wire stripping die for the wire gauge you’re working with, as it’s easy to cut the tiny strands within.
***
2. Twist Each Wire’s Strands Together Tightly

Again, you’ll more than likely find stranded wire in your automotive wiring harness. So to make it easier to work with for the splice, you want to twist the individual strands together tightly—basically, you’re going to imitate a solid core wire here.
Note: If you nerded-out and read those NASA specs, it calls for the wire to be tinned (EG, coated with solder) during this step too. But we’re skipping that part because (A) we’re not using solid core wire, and (B) leaving it stranded makes it a bit easier to wrap around the other connecting wire during the next few steps.
***
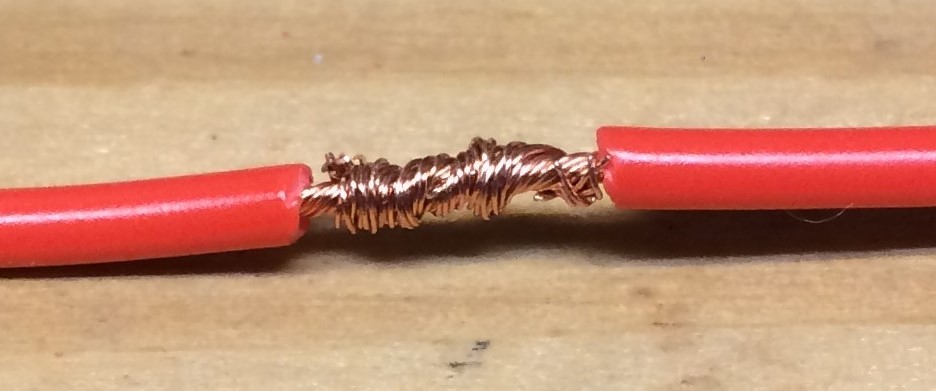
3. Make a 90ish Degree Bend in Each Stripped Wire End

Make a right angle bend in each stripped end to create makeshift hooks. You can make the bend around the middle of stripped part, perhaps starting it a bit closer to the insulator as shown in the pic above. This’ll give you more wraps around the opposite end during the next step.
Tip: Now’s the time to slip your heat shrink sleeve over the wire. You’ll read more about that in step six.
***
4. Wrap Each End Around the Opposing Conductor

Hers’s a critical step, because it ensures a strong mechanical and electrical connection between the two wires. Tightly wrap the wire ends against the opposite side. This can be a bit tricky to do cleanly using stranded wire, but just make sure you don’t have any loose stragglers or strands that pop out over the insulation.
***
5. Apply Solder to the Splice
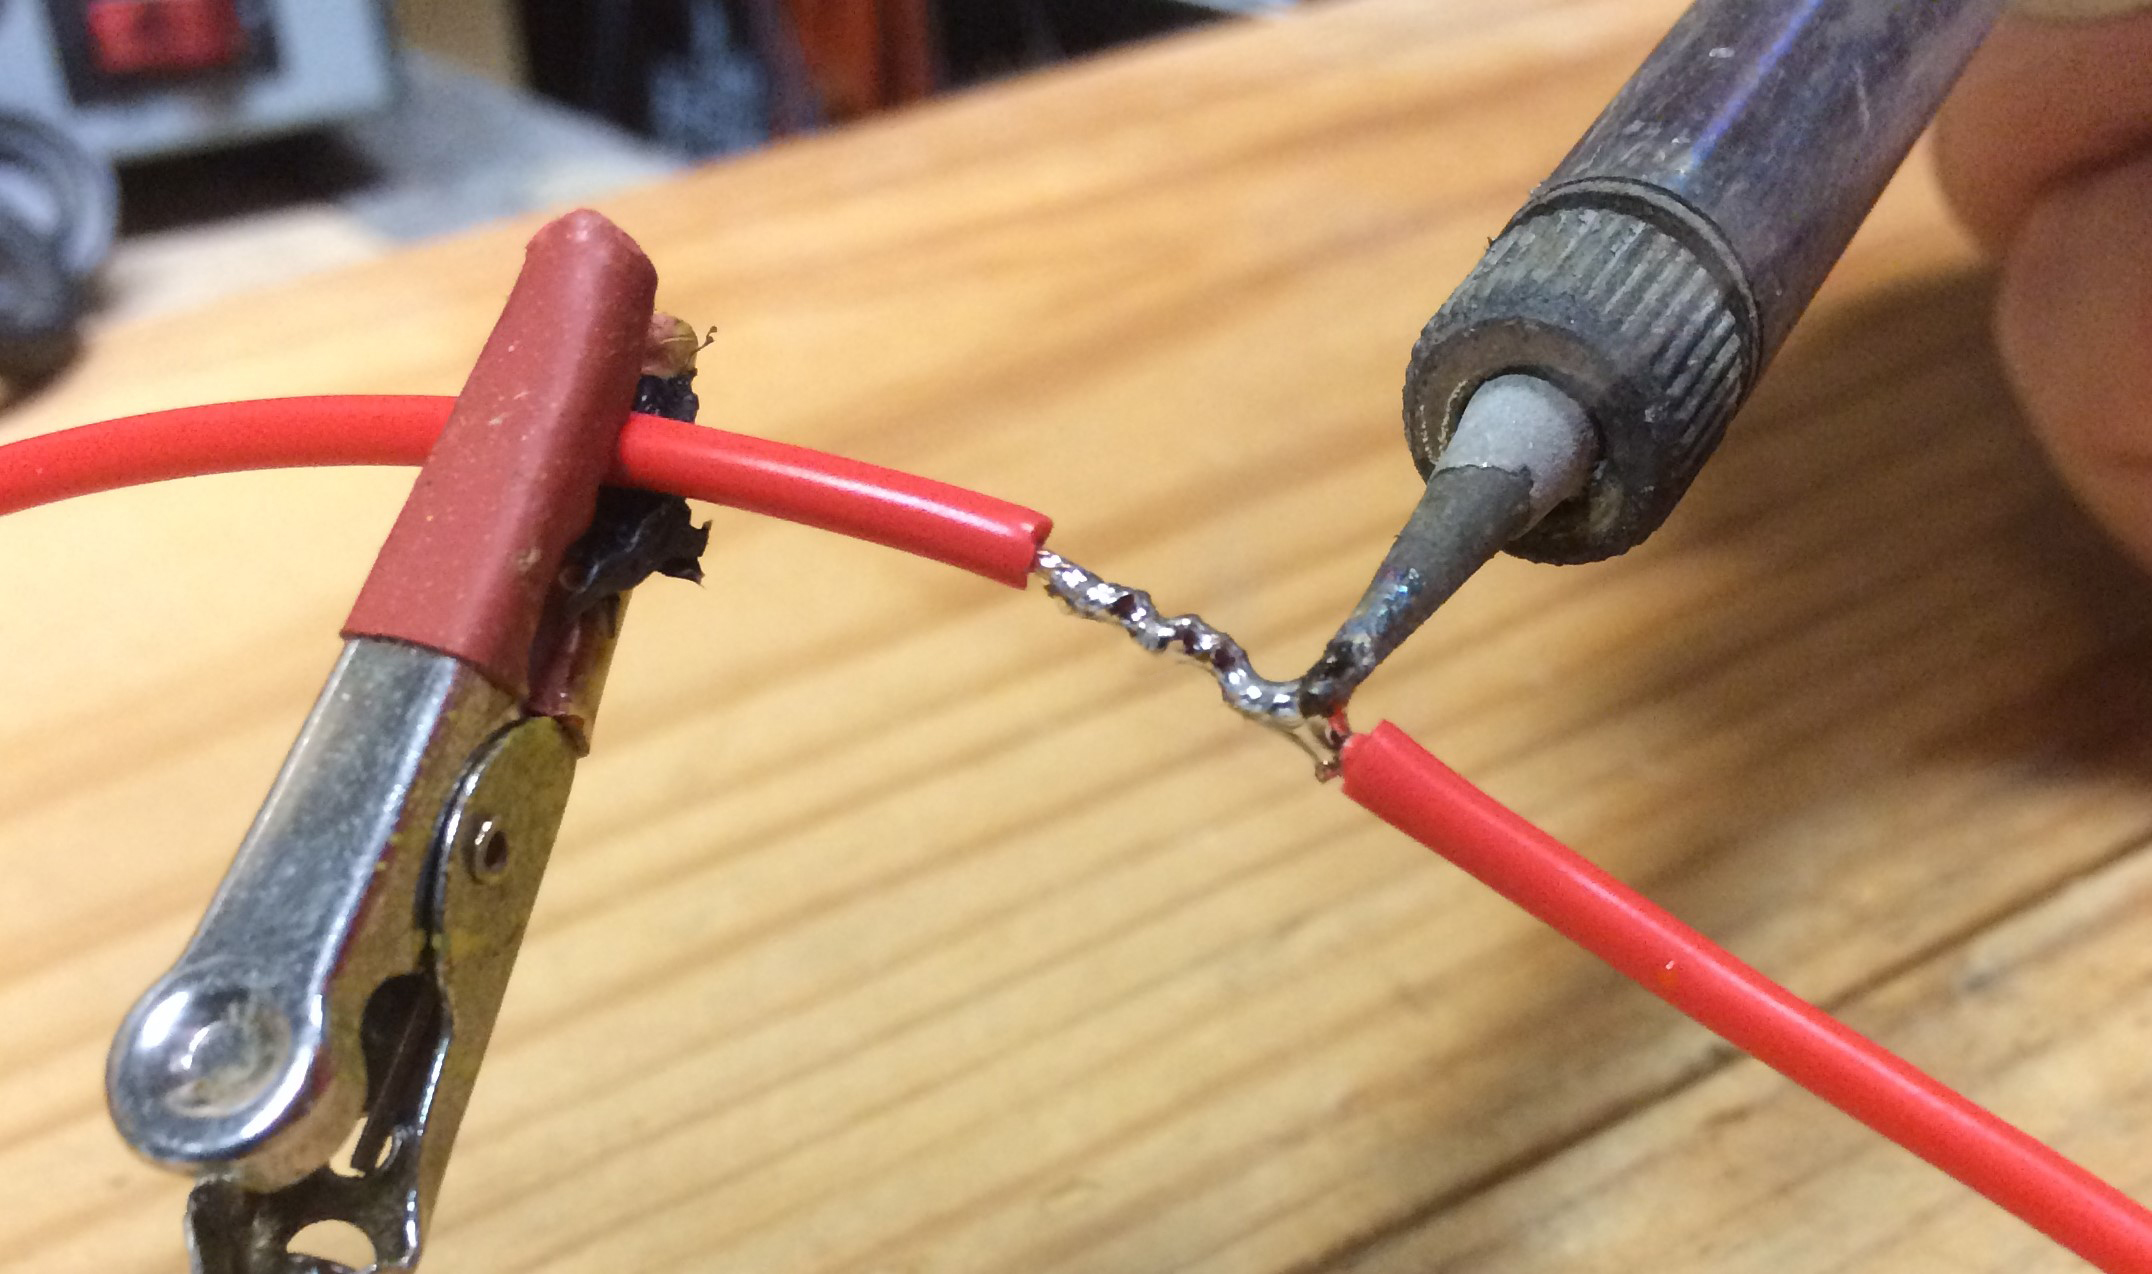
Yes, you’ll have to solder here. And if you don’t know how to solder, now’s the perfect time to learn. Here’s a quick tip though, remember to touch the conductor with the iron first, to superheat it and make it ready to accept the solder. Properly heated, the solder will flow into the joint easily.
Shopping for soldering gear? Read this: Tools Under $30 Gift Guide: Soldering Irons & Soldering Guns
***
6. Insulate the Splice

You’re not done yet—keeping moisture and gunk out of the joint is critical to avoid corrosion.
There are essentially two ways to insulate a connection like this. First, you could wrap it in electrical tape. But the tape will gradually lose its adhesion, particularly if the spliced wire is outside of the vehicle, like on a frame or behind a bumper.
The far better method is to use a heat gun and shrink sleeve, AKA heat shrink tubing.
Just remember to slip the heat shrink sleeve up around the wire BEFORE you make the splice. (We still make this mistake at least once a month.) You can simply slide it up out of the way while you work, then push it back over the splice when you’re ready. A few seconds under the heat gun will shrink the sleeve tight against the splice for a good, weather-resistant seal.
Tip: A small dab of dielectric grease inside the shrink sleeve ends prior to heating can also mitigate moisture ingress.
***
Inspecting Your Finished Lineman’s Splice

One last thing, it’s always a good idea to bench-test the splice while you have your iron heated up. But we’re confident that if you follow the steps above, you’ll be able to make foolproof connections in whatever electrical system you’re working on, whether it’s a hot rod, telegraph line, or Saturn V.
[…] few weeks ago, we ran an article on the Lineman’s Splice. While that particular splice has proven reliable over decades of use, it is a bit labor intensive […]
nice tip!
Good article. My preference is to “fan out” the individual strands of wire and then mesh them together and twist into a tight bundle before applying the solder. I have never had a splice try to separate while soldering it. I have used this technique on automobiles, motorcycles, and while working as an aircraft mechanic.
I’m a retired telephone repairman. In our business we use a tool made by the AMP Company that’s known as the AMP gun. It makes many different types of splices, with a simple squeeze of the handle. The splice can be end-to-end, as the one in your article was, or a T type splice into an existing run of wire. There are variations of all of these. The tool does all the work, and the splice is encapsulated in silicone to make it secure in a corrosive environment (as aerial and underground spliced wires are). I’d like to see an article about this wiring splicing technique, which seems to be unknown in automotive circles, but is universal in the telephone industry.
thankyou,i’m going to look into this one for myself
Also being a retired telephone cable tech I have done 10,000’s of splices but most were solid core wire. So I know what connector to use for which type of wire.
NEVER ever use 3M ScotchLoc’s on Stranded wire, you know, those BLUE ones they give you with the Walmart Fog Light kits. The V notch bites into the insulation of the wire and digs into the Solid core wire making the connection. But on stranded wire that V notch cuts 1/3 of the wires as it bites in making your 18 gauge wire now around 26 gauge as current will not flow thru the CUT wire twists.
I use only marine grade heat shrink(with adhesive/sealant)on splices. Also tinned 100%copper marine grade wire is great for things like fuel pump wiring and grounds that live up under the car…esp in the rust belt.
Very nice article , I have 2007 Pt cruiser and have put led lights on rear and they are for first gen do you have any info on wiring so they will work the way there supposed to. ?
Hey Gerald, thanks for reading. Are you simply looking to convert your rear bulbs to LEDs? It may be as simple as finding the right bulb type/ID and swapping them out. Though if you plan on retrofitting LED turn signals, you may have to change to an LED-friendly turn signal flasher/relay unit.
…
Check out this article and it’ll give you some more info on LED swapping.
Here is one additional tip, test your splice BEFORE you apply the heat shrink tubing. If you test it afterword and it needs repair you will have to cut away the tubing then take the splice apart to slip on a new piece of tubing.
That’s good advice–particularly if you’re working in a tight spot. Thanks for reading.
Beautifully articulate and simply explained thank you this is one of the most important things. People need to learn when they want to work on cars or anything basically ha ha ha.
I still preferred to do the spade plugs of the different sizes and colors because I’m addicted to the organizer with all the different little end that I could possibly cramp, but I can see how this linesman splice is way better if you’re not replacing the entire wire from front to back(yep, you guessed it. I’m also addicted to wiring diagrams and a giant array of different size gauge color, etc. of wires on spools all arranged on wooden rods like lace at the fabric store lol)
I will refer everyone who needs help to this site. Thank you so much.
Hey, we appreciate you reading it–and your insight!