There are a lot of ways to build an engine. Some are quick and dirty, get the job done affairs. Others are over-the-top meticulous, leave no rock unturned such as you often see with restricted class drag race cars like Stockers or Super Stockers.
No secret to many we’re sure.
There can be a middle ground too, but sometimes in any build, little details may get overlooked, often because of the zeal behind getting the job done. Those little details can sometimes spell the difference between a stellar build and a so-so combination.
What we have here are two dozen tips on topics that are seldom mentioned and sometimes overlooked. A good example is getting an engine all ready to assemble and forgetting to purchase a key component. Typically, that little piece of the puzzle goes missing right after all of the local auto parts stores are closed. And in this day and age, there’s no guarantee the local auto parts stores will actually have the part (a good example is engine assembly lube—the writer forgot to order it for a personal build and not one local jobber had any).
We’ll include several of those things in our list, simply because it’s a whole lot easier to order all of the little parts ahead of time and keep them on hand, instead of sourcing them locally after the build has begun. Other tips are obviously mechanical in nature—things where you might find a different or better way to do something.
***
Here are 24 Overlooked Engine Building Tips
***
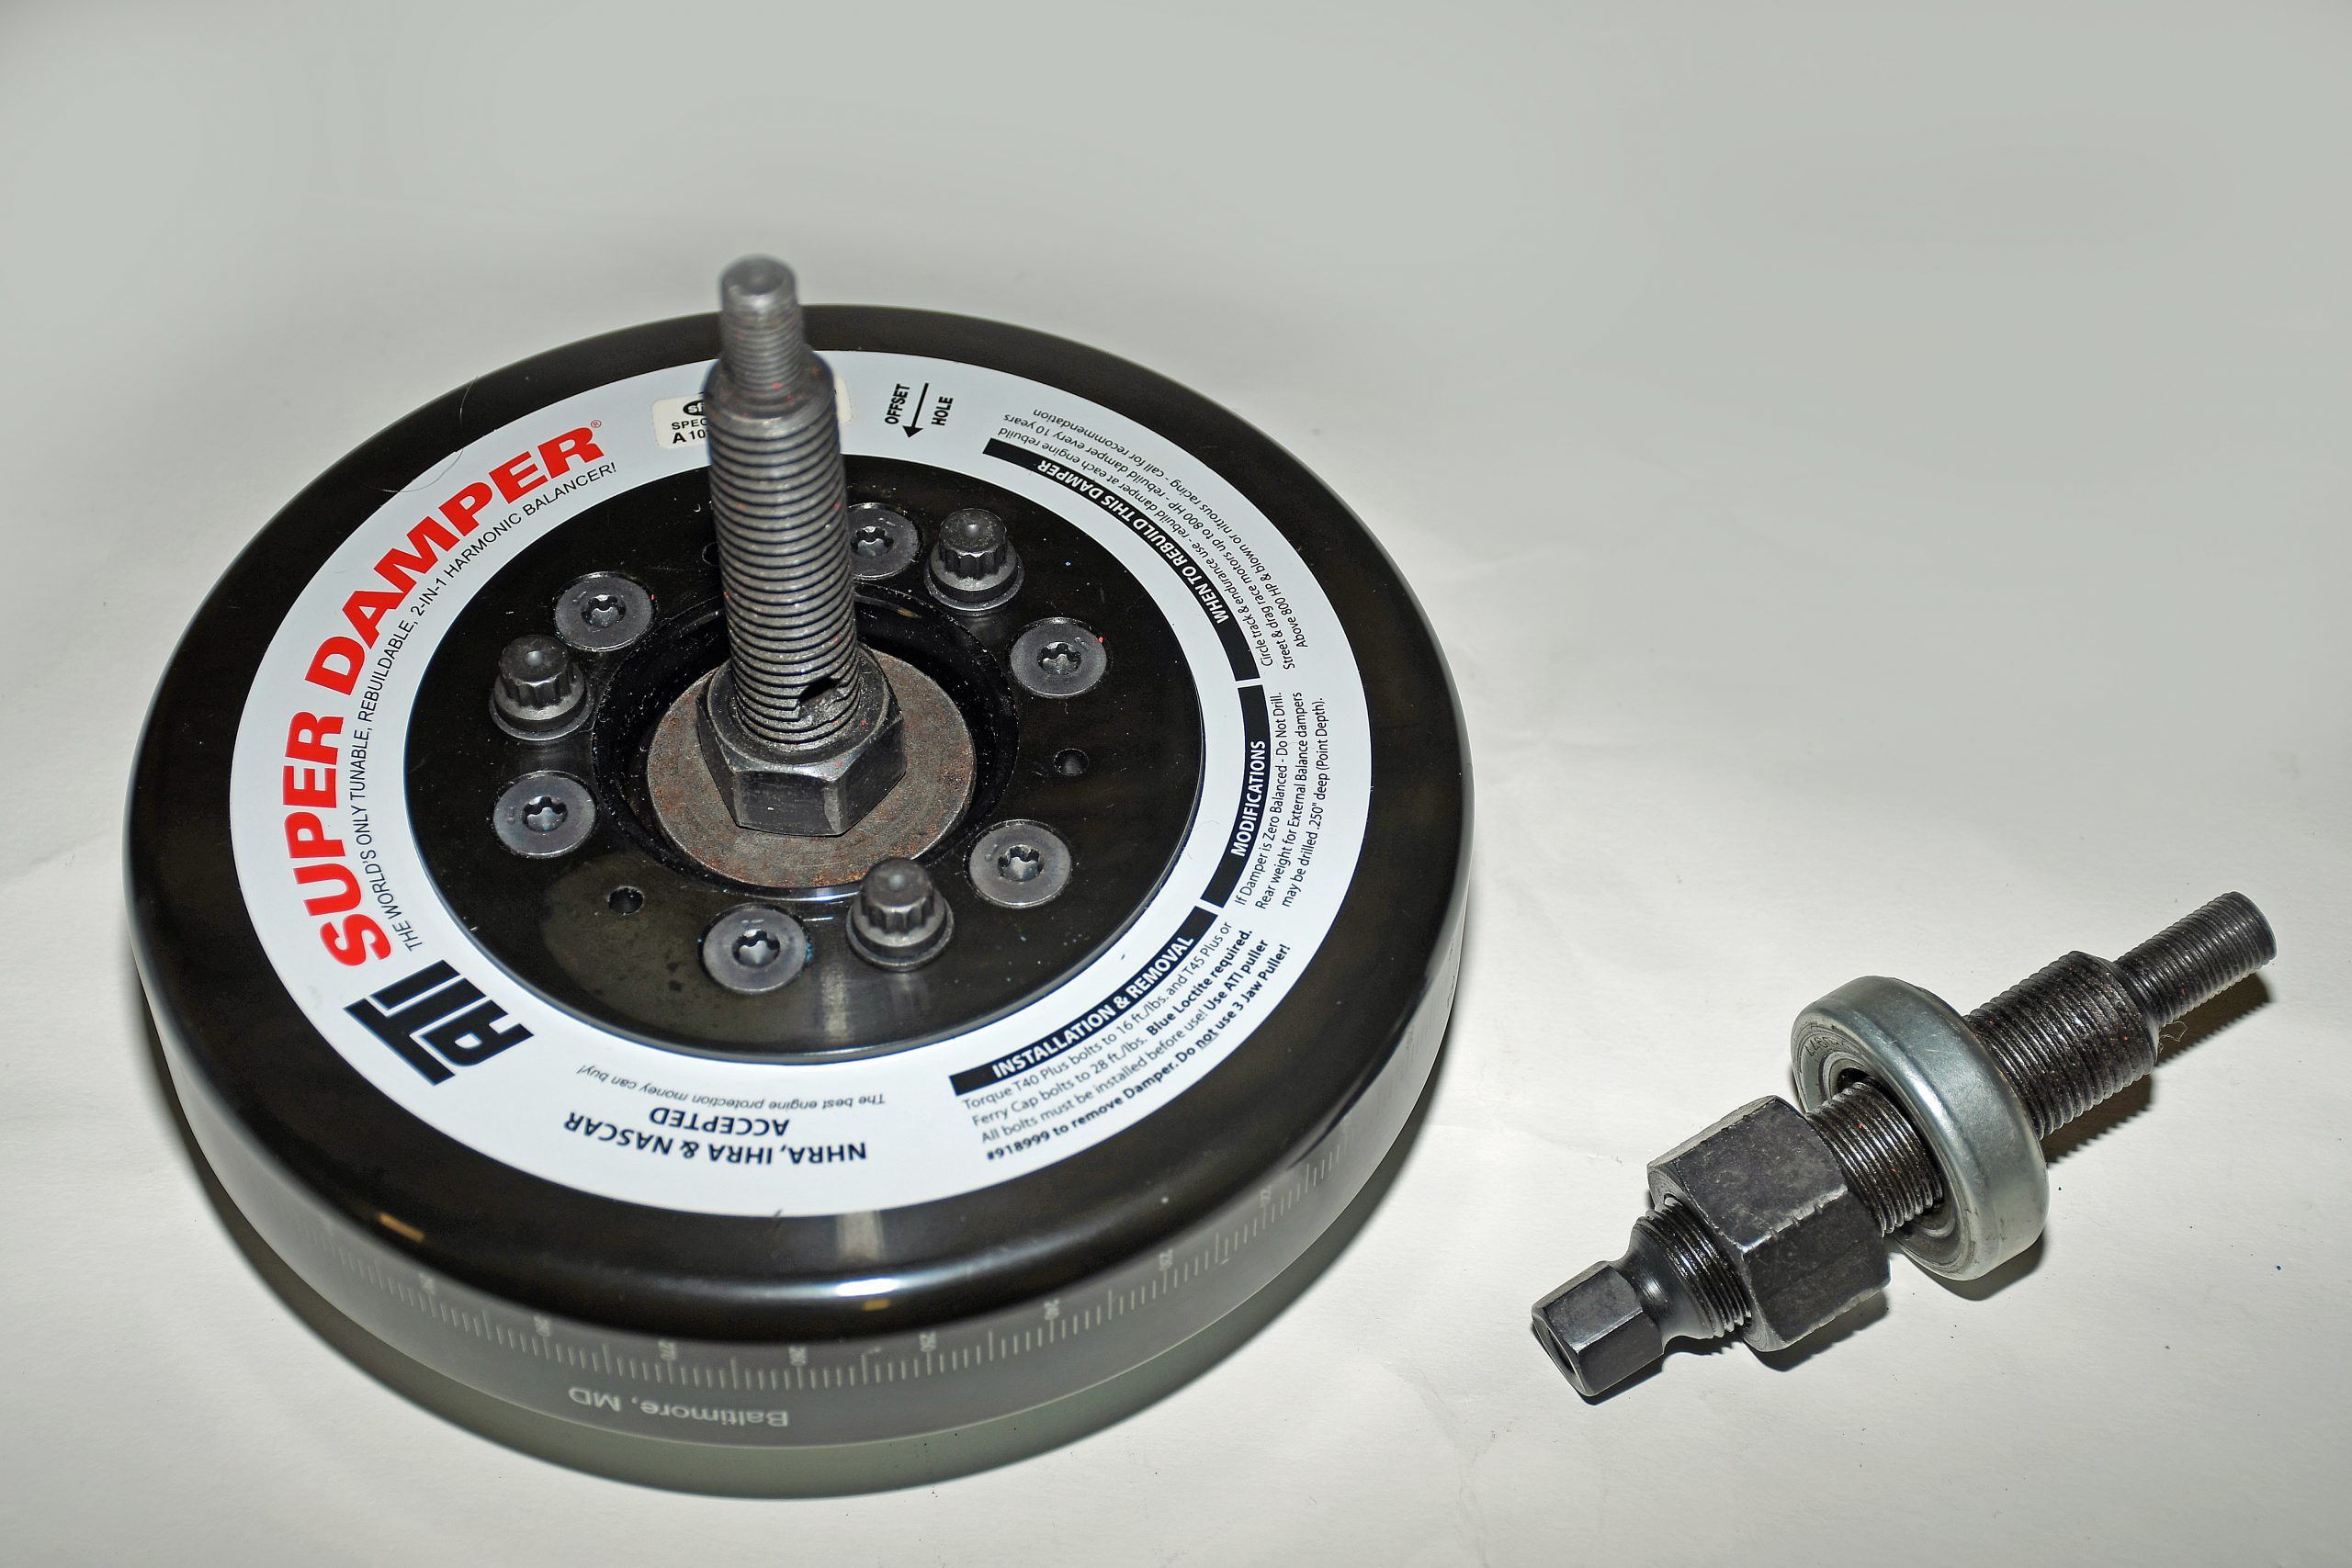
1. Balancing Act
When installing a harmonic balancer (damper), carefully measure the inner diameter of the damper along with the outer diameter of the crankshaft. Most manufacturers, such as ATI, provide the specs with the assembly. And before you physically install it, coat the crank snout and the ID of the damper with assembly lube (some manufacturers suggest anti-seize compound, but be positive the anti-seize you use is oil soluble—many are not).
***
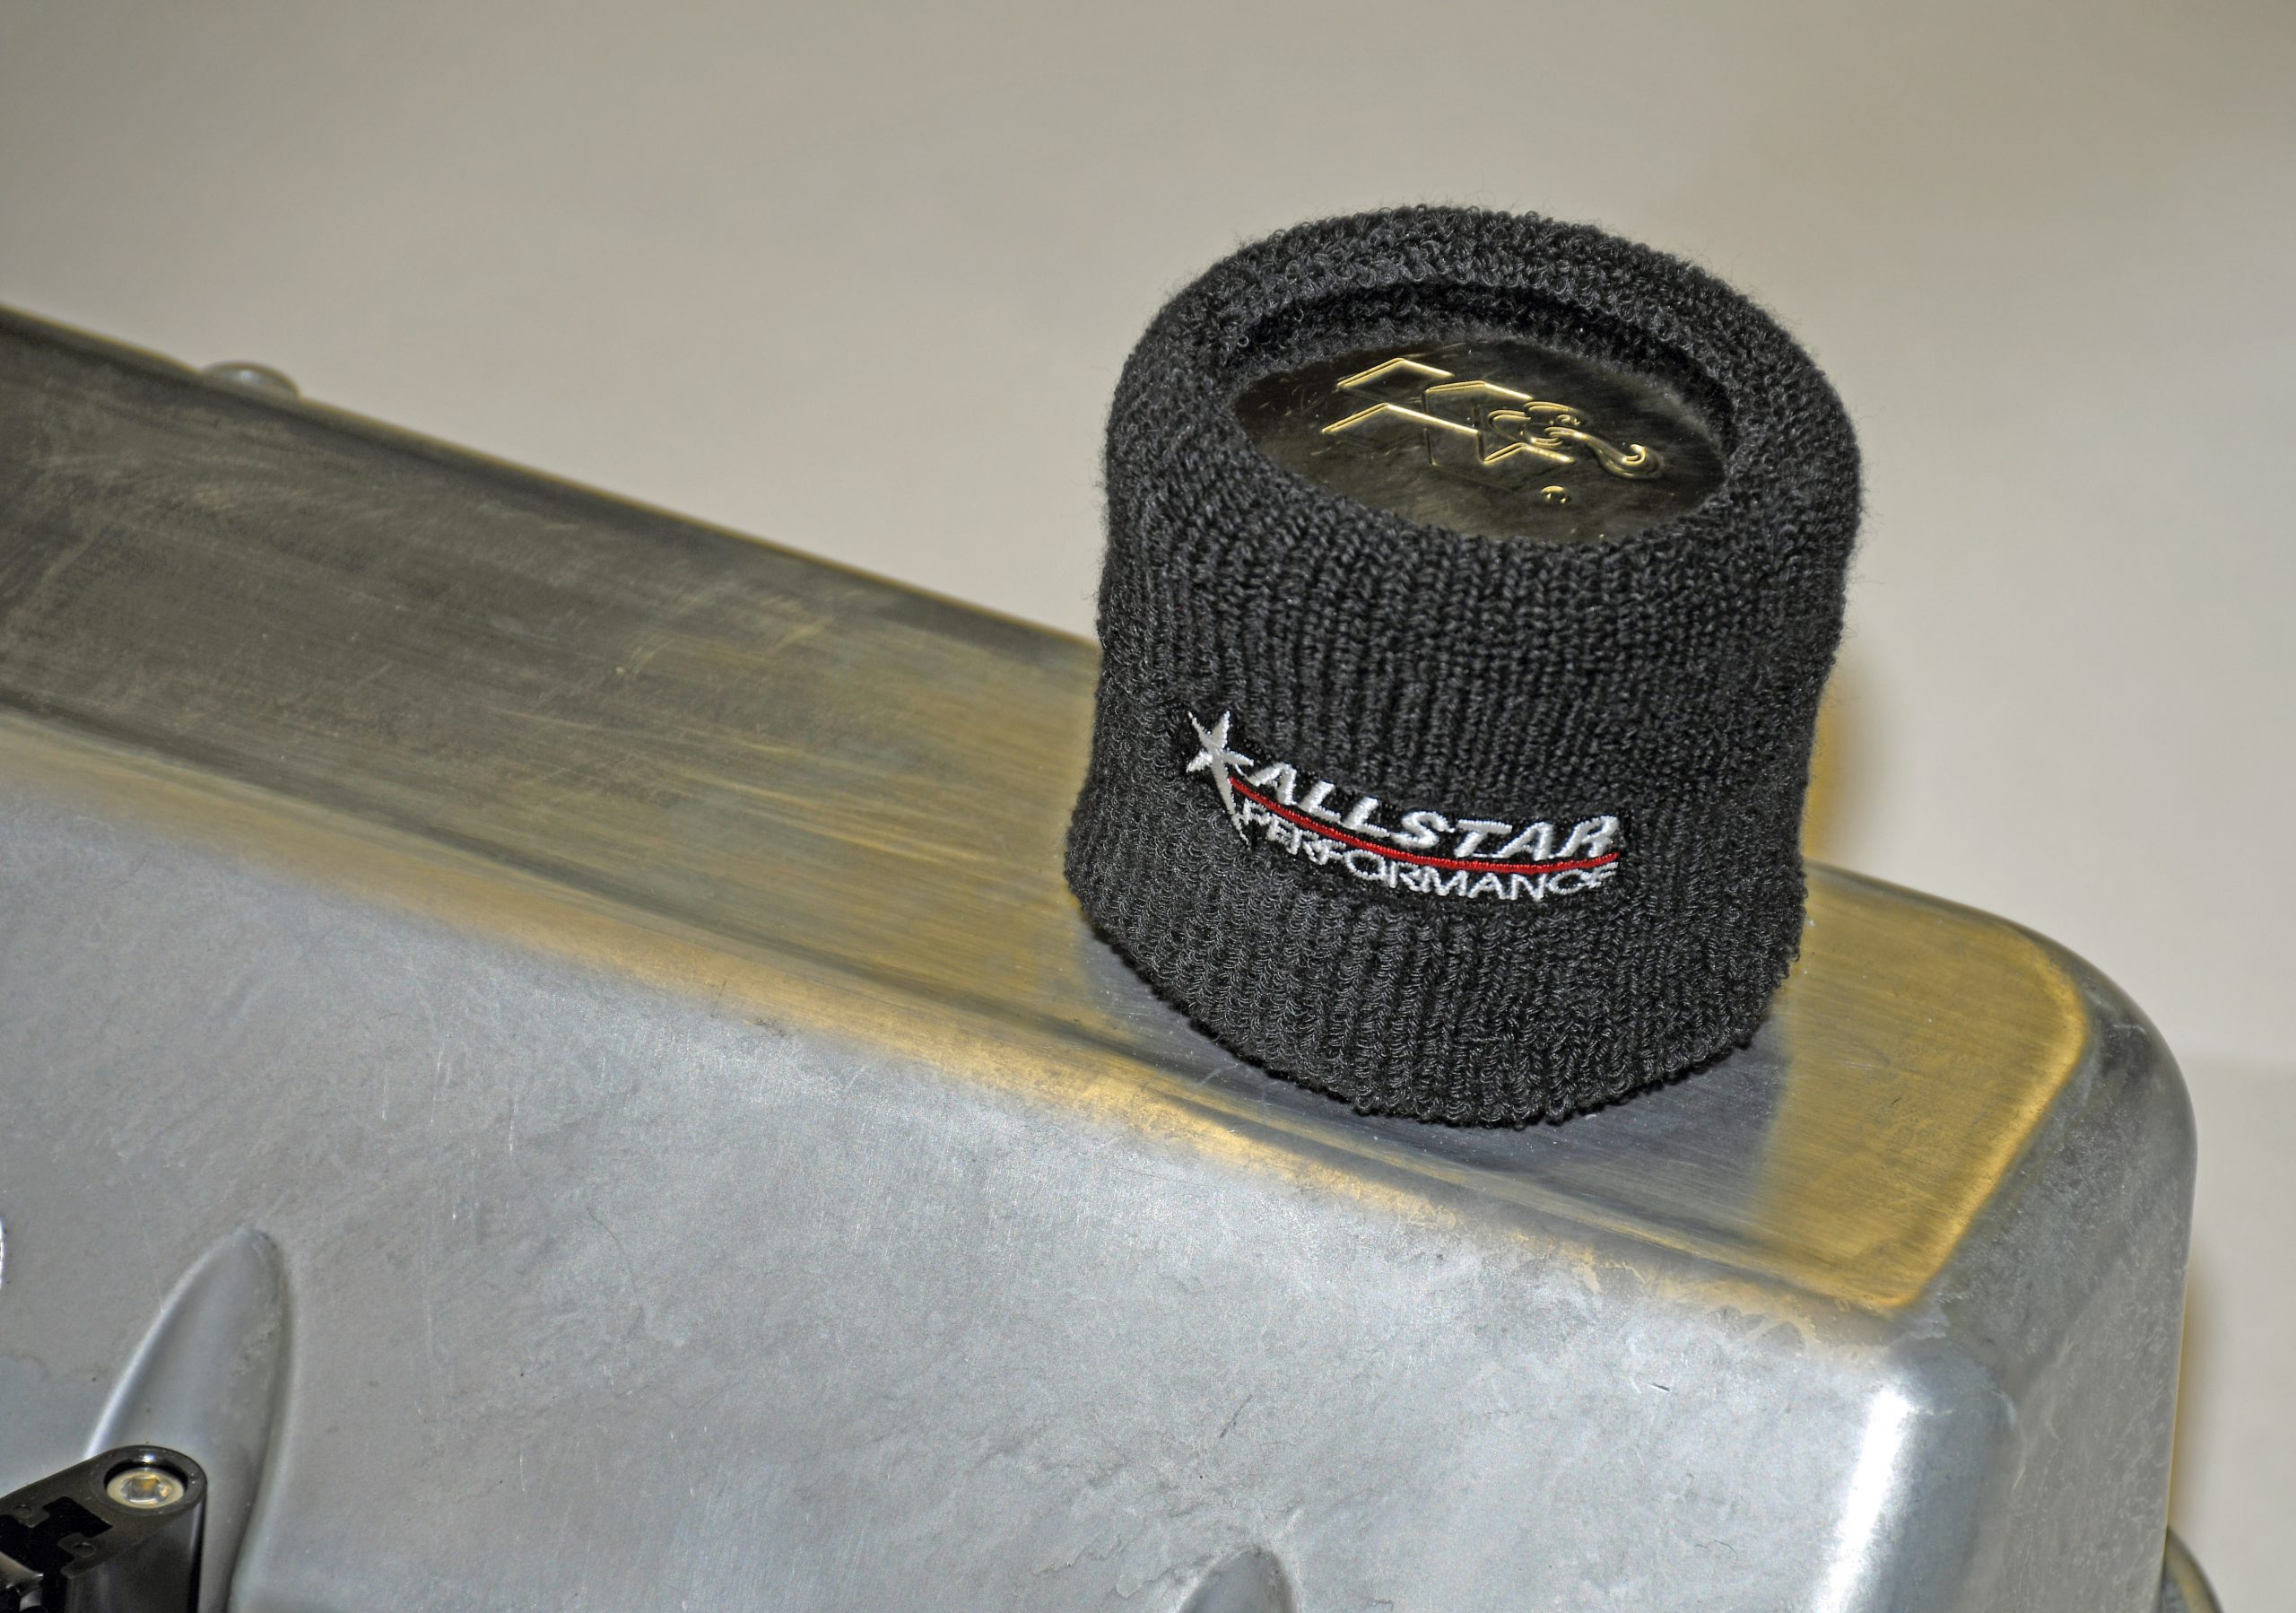
2. Spare Socks
Breather socks are nothing new. They cover breathers and primarily contain the oil mist that sometimes occurs when you don’t use a PCV system. But if your engine is a “heavy breather”, the socks can sometimes become saturated and the valve covers become plastered with oil. The solution? Just keep a couple of spares in an ordinary disposable sandwich bag. Simply swap the soaked ones for your spares and continue on your way.
***
3. Plugged Up
Don’t forget about the oil gallery plugs in your engine. They should obviously be removed in order to clean out the oil galleries. Sometimes the plugs are staked. It takes some time to get them out and because of the stake job, they’re pretty much useless. As a result, it’s really good idea to have a set of new gallery plugs on hand for a rebuild or fresh build. They’re not expensive!
***
4. Say Goodbye to Casting Flash
When the block is bare, this is the time to remove casting flash. Excess flash can cause two problems: It can break off and cause considerable internal engine carnage. It can also lead to sliced fingers and hands when working on an engine. Removing is easily accomplished with a small die grinder.
***
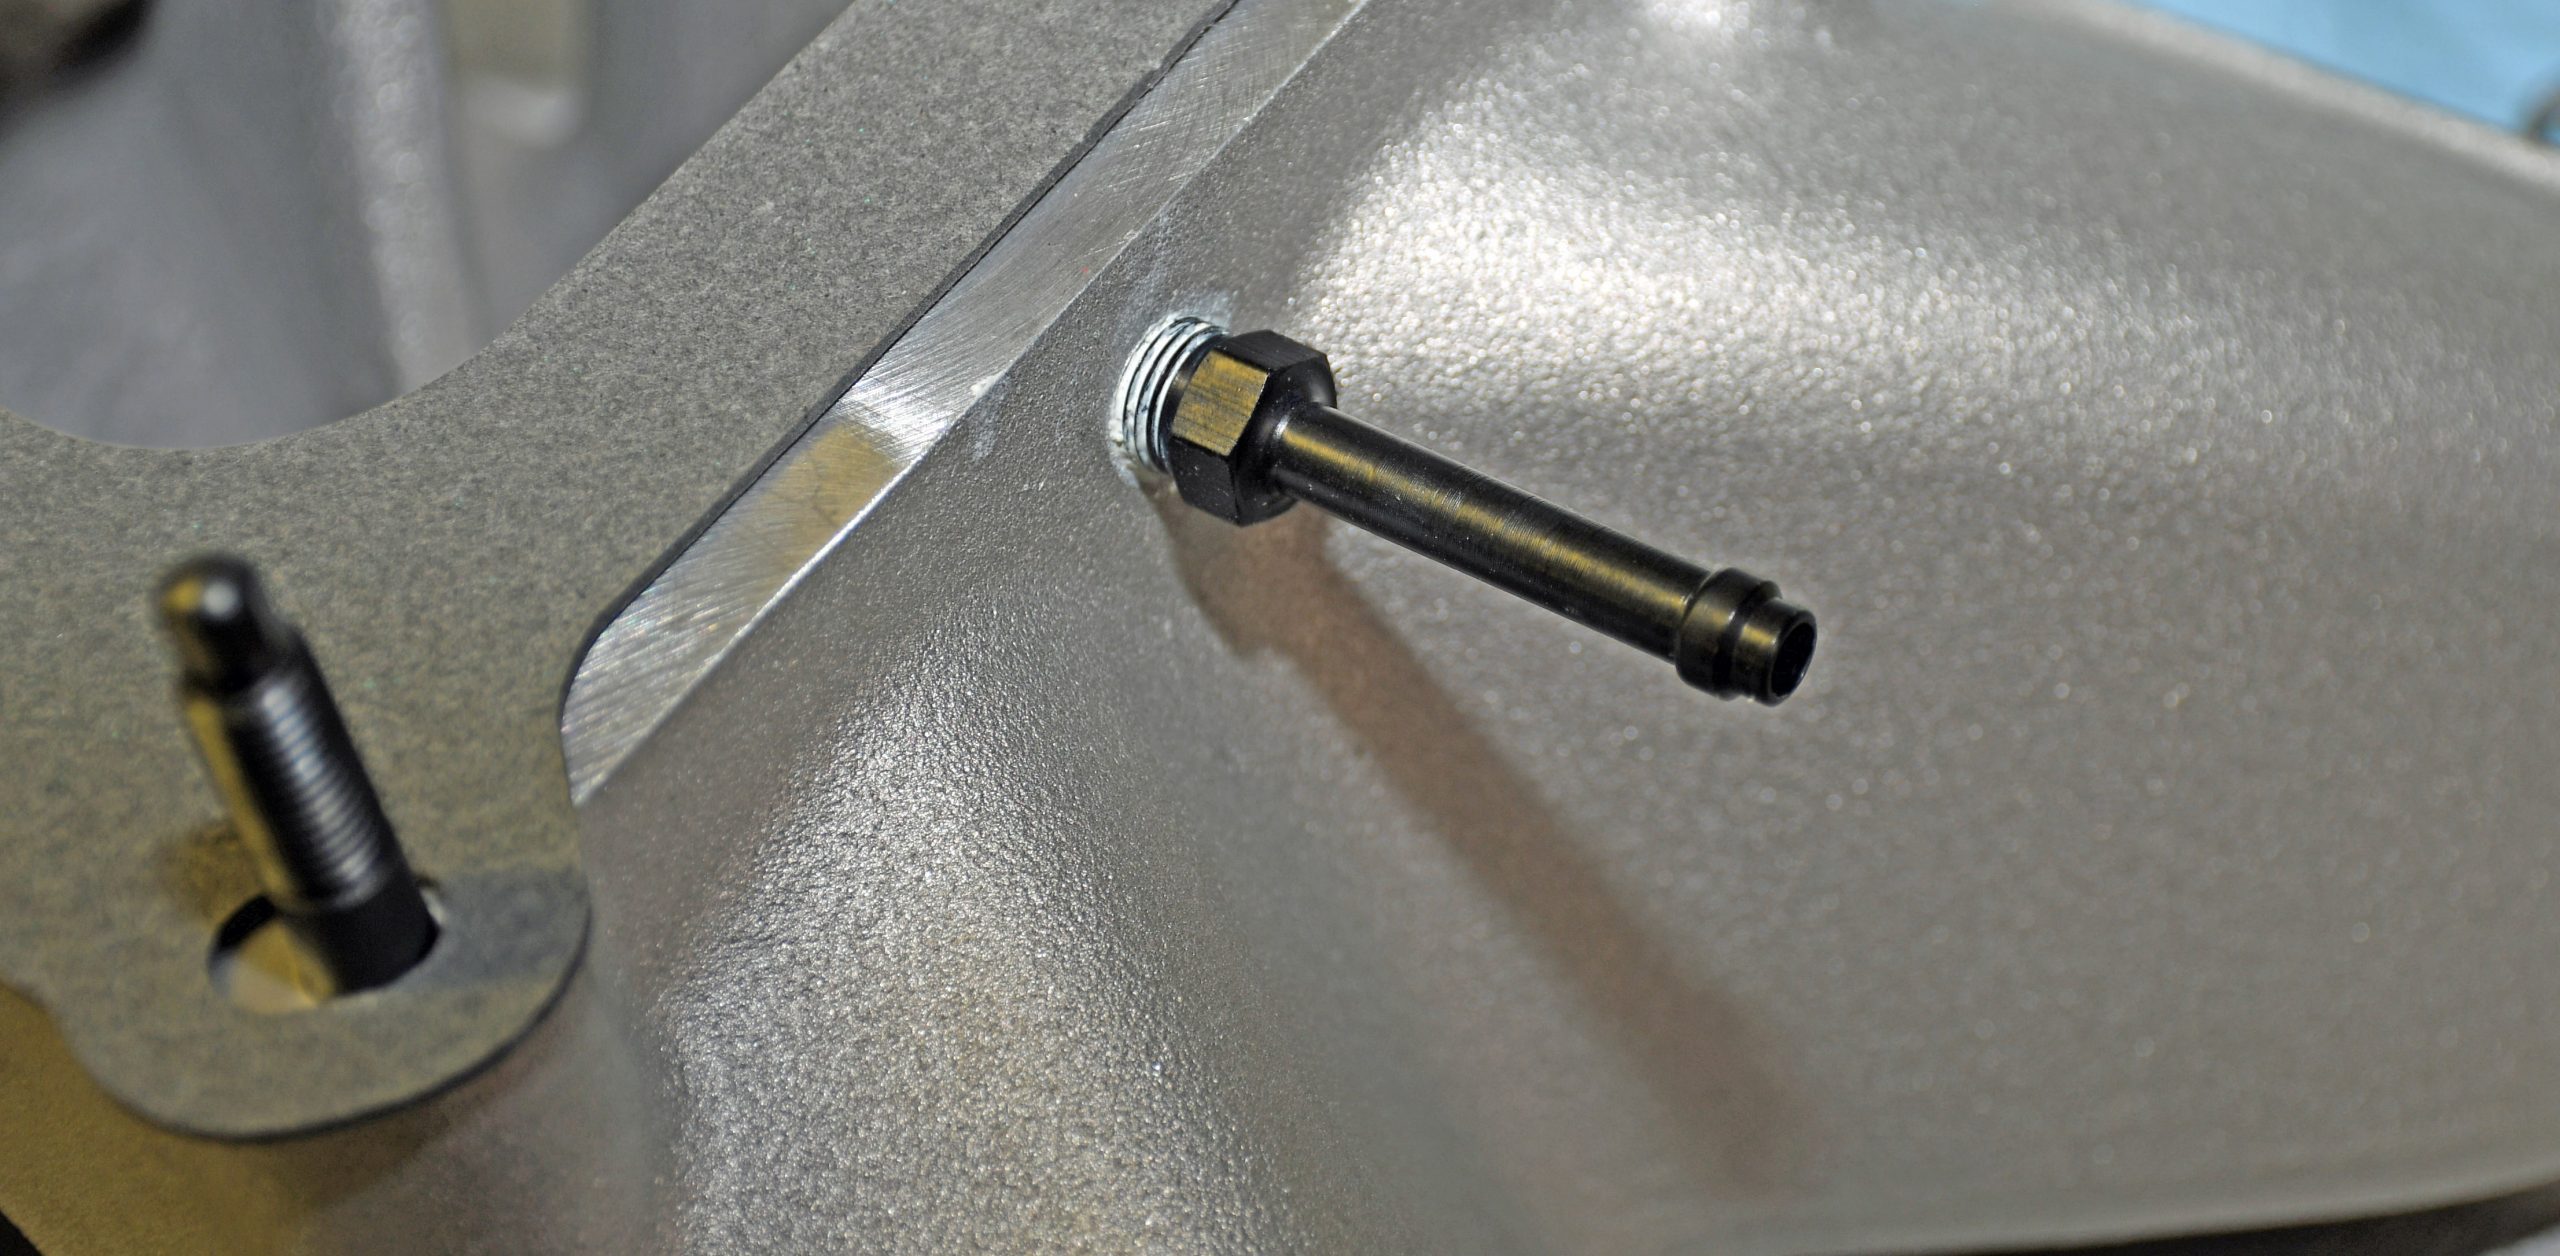
5. Vacuum VooDoo
Some race style intake manifolds are not equipped with a vacuum port. And some carburetors (for example, Holley’s Ultra HP series) do not have a vacuum port either. If you are using a vacuum advance distributor on the street (and there’s actually good reason to do so), then you’ll need a source of vacuum. Ditto if you prefer to tune your carburetor with a vacuum gauge. You can drill the carburetor base but it’s less complicated to add a fitting to the plenum.
***

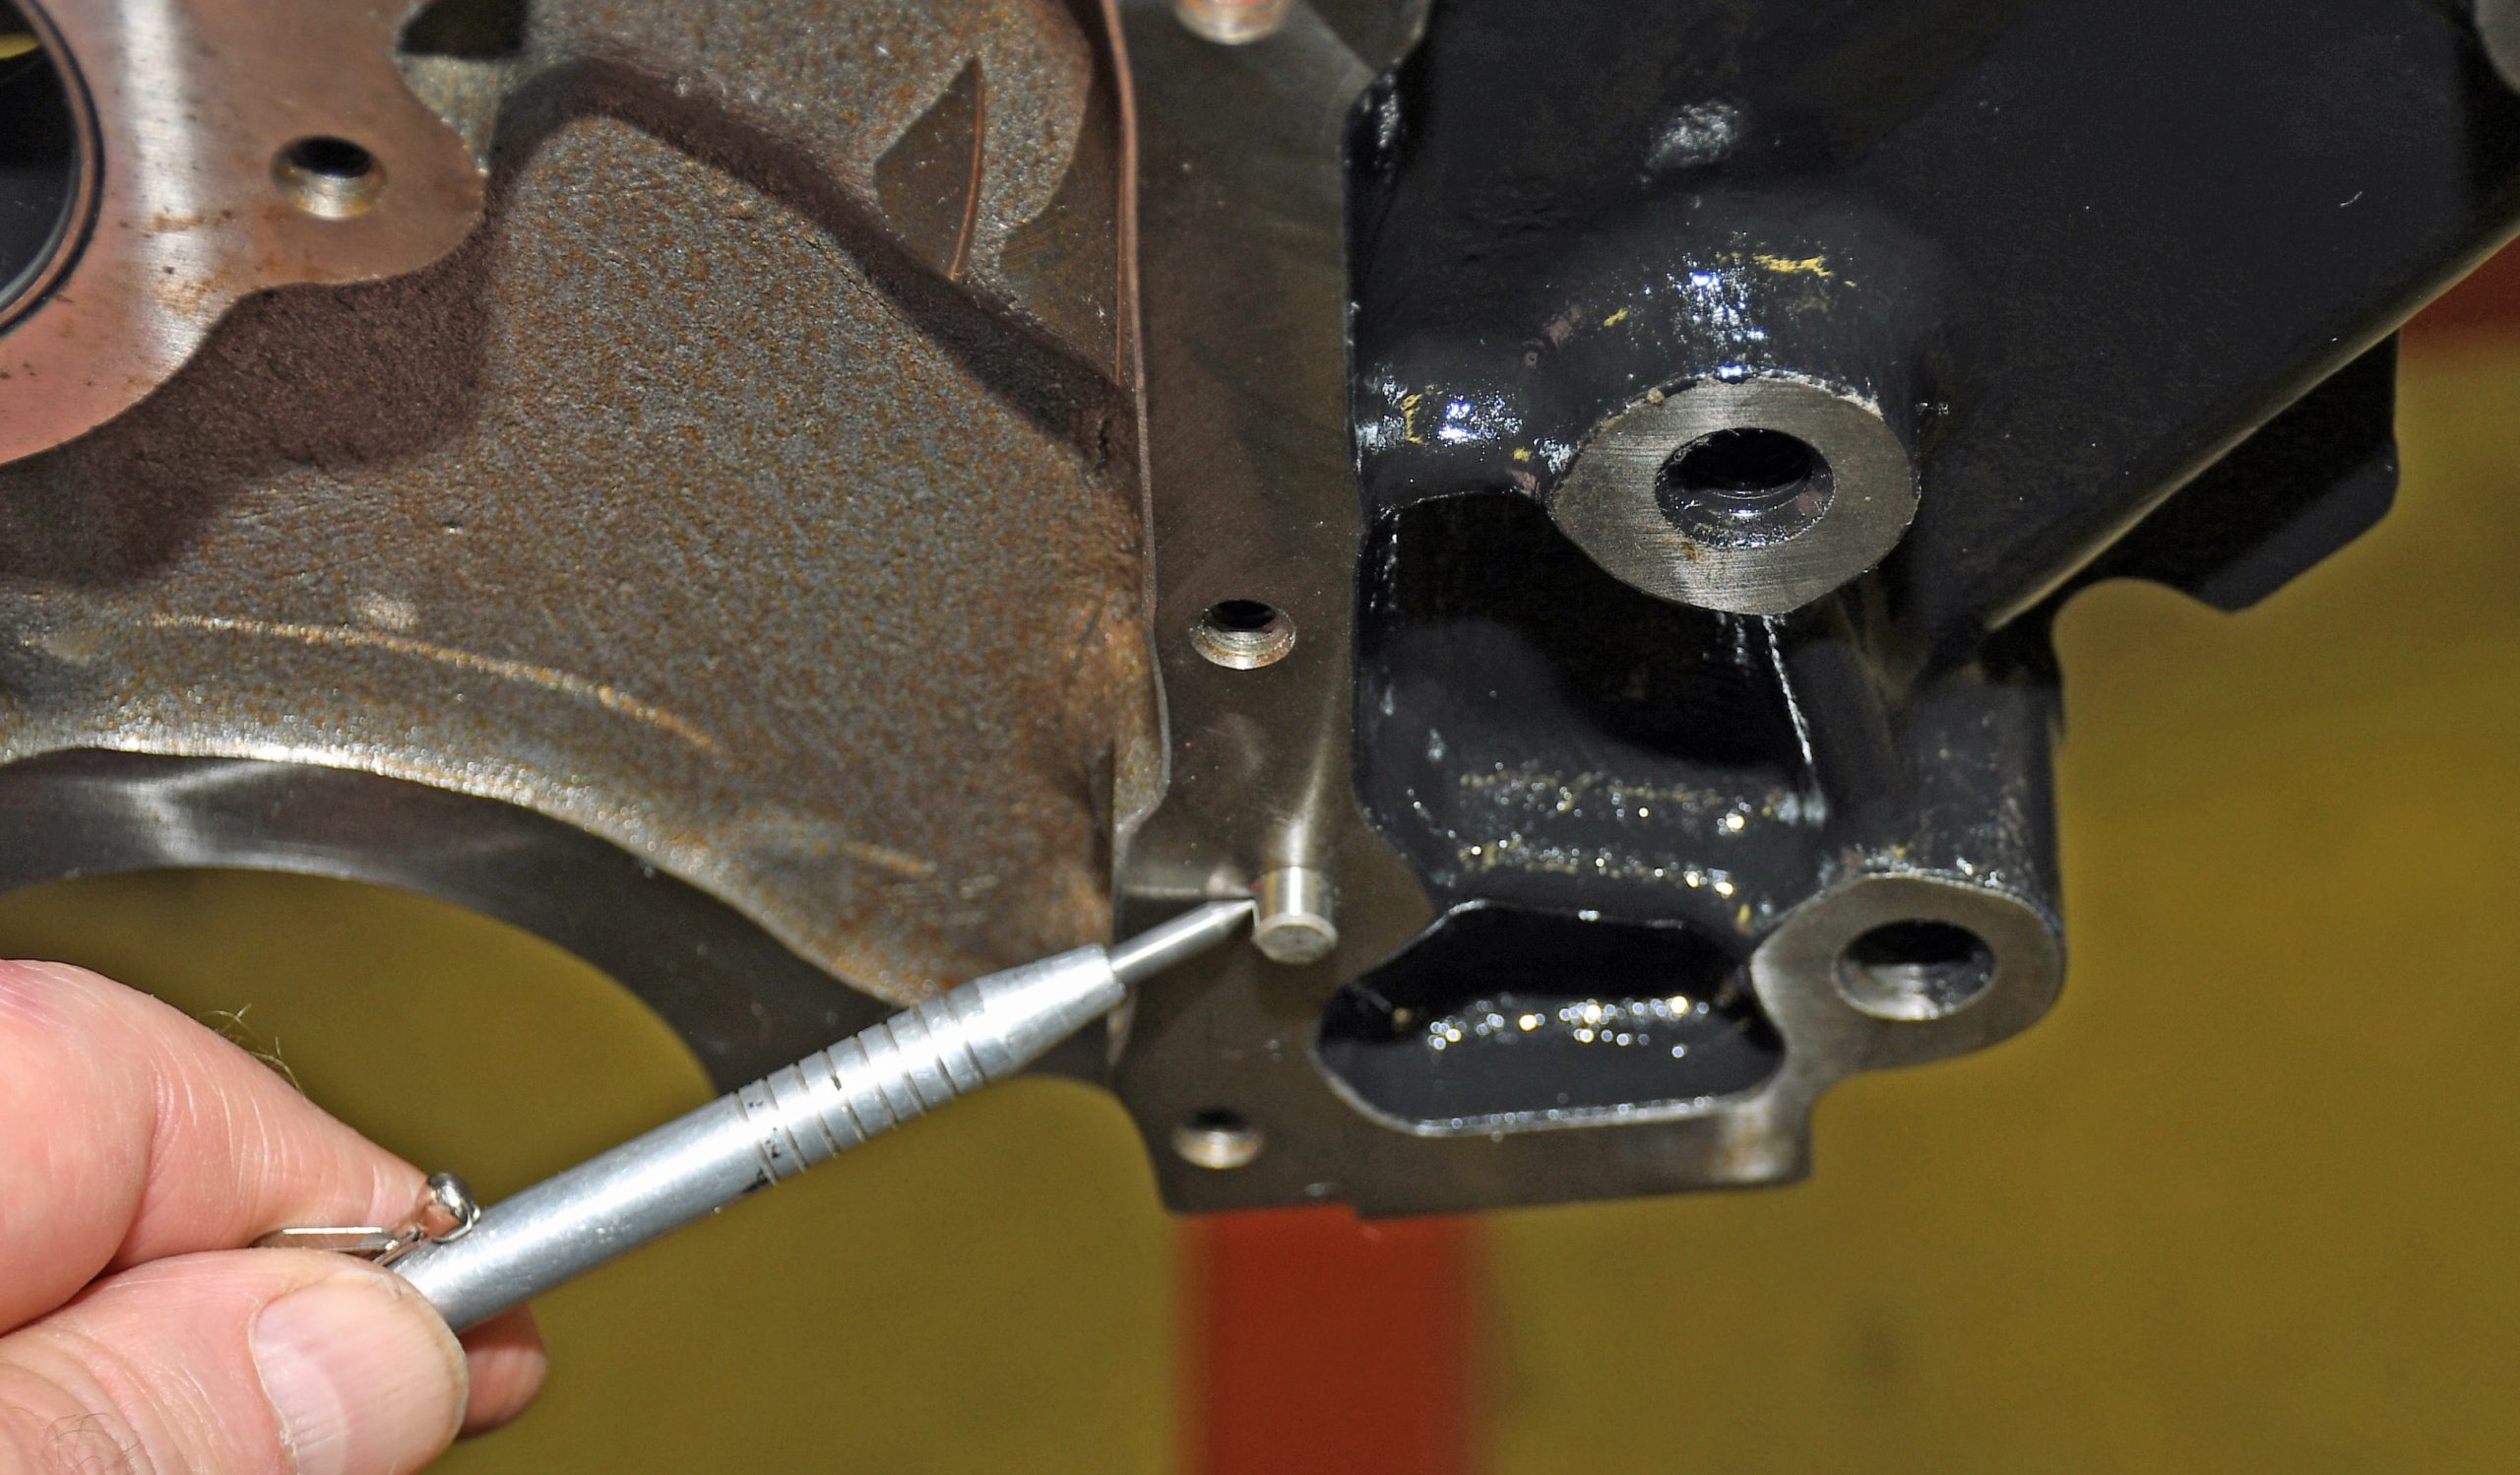
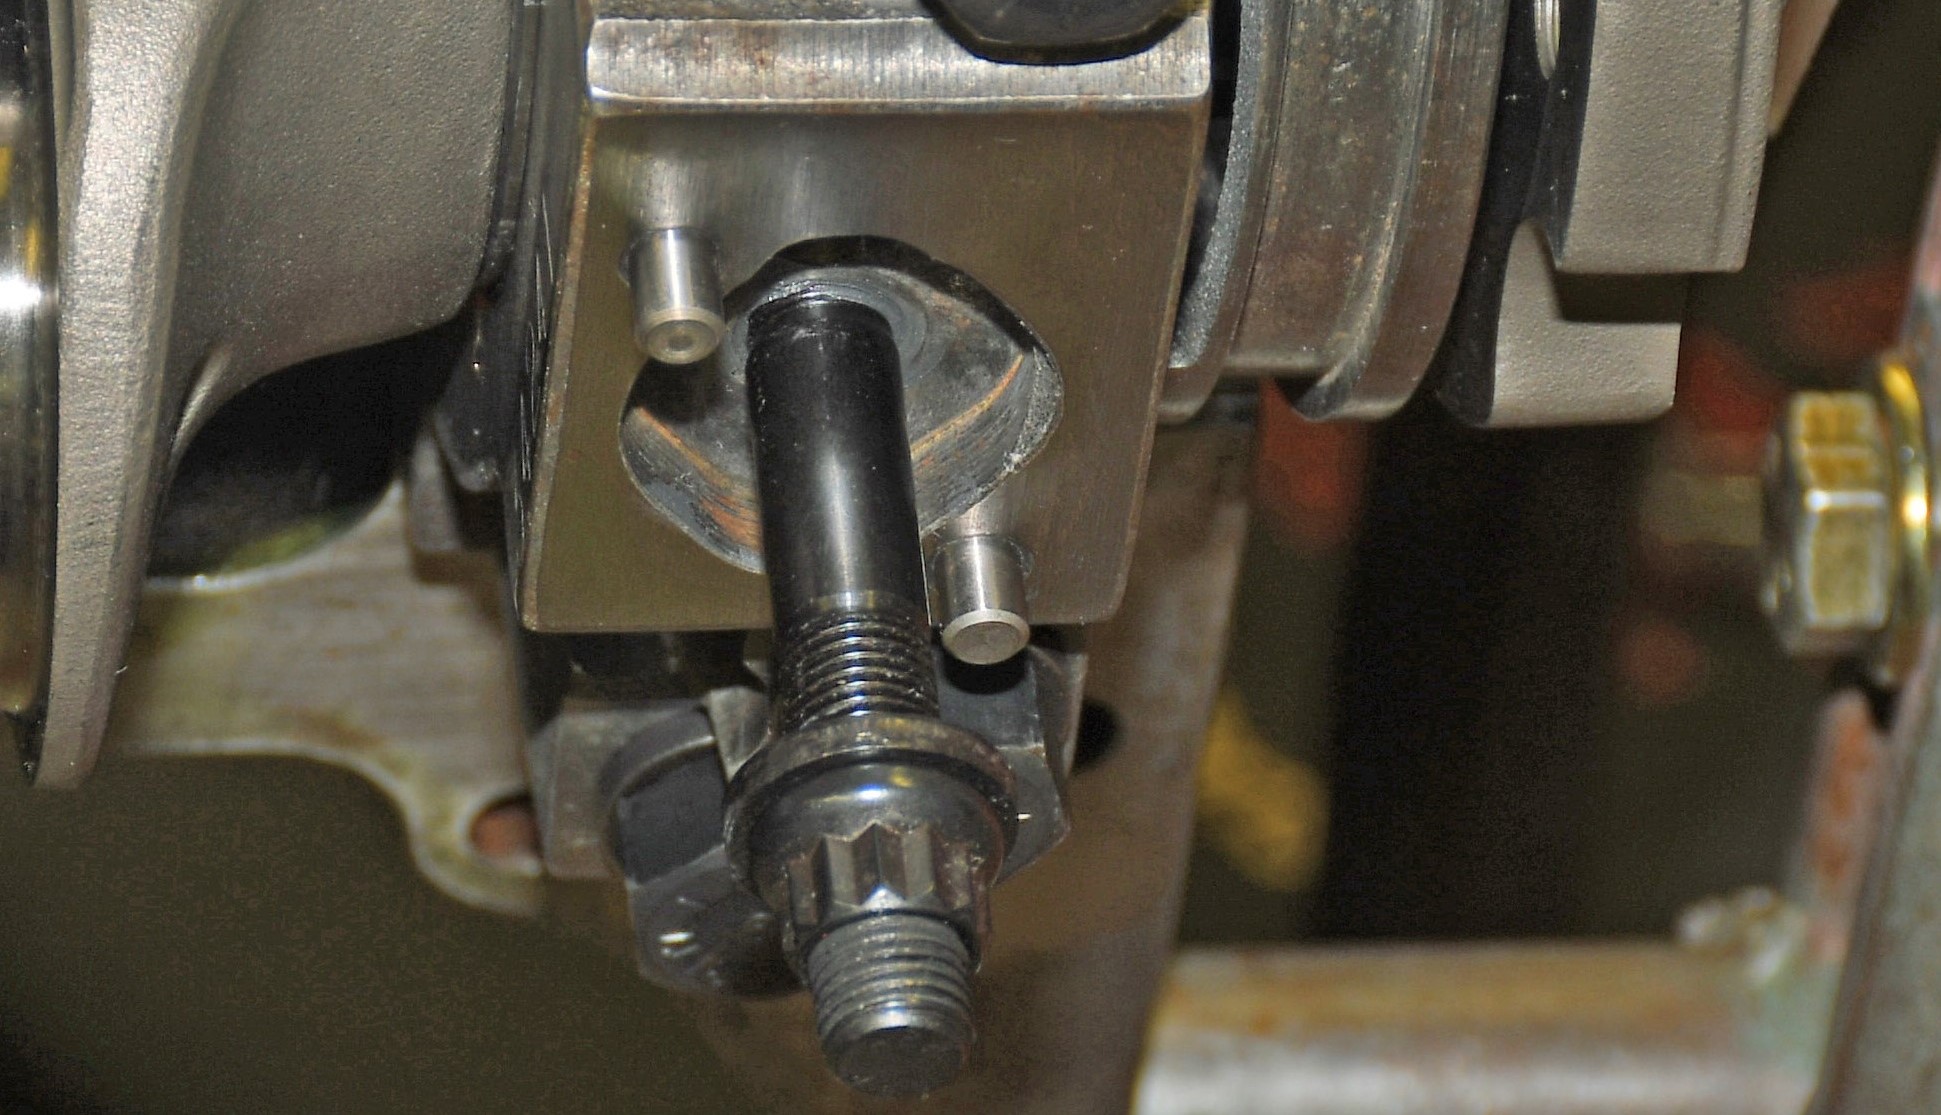
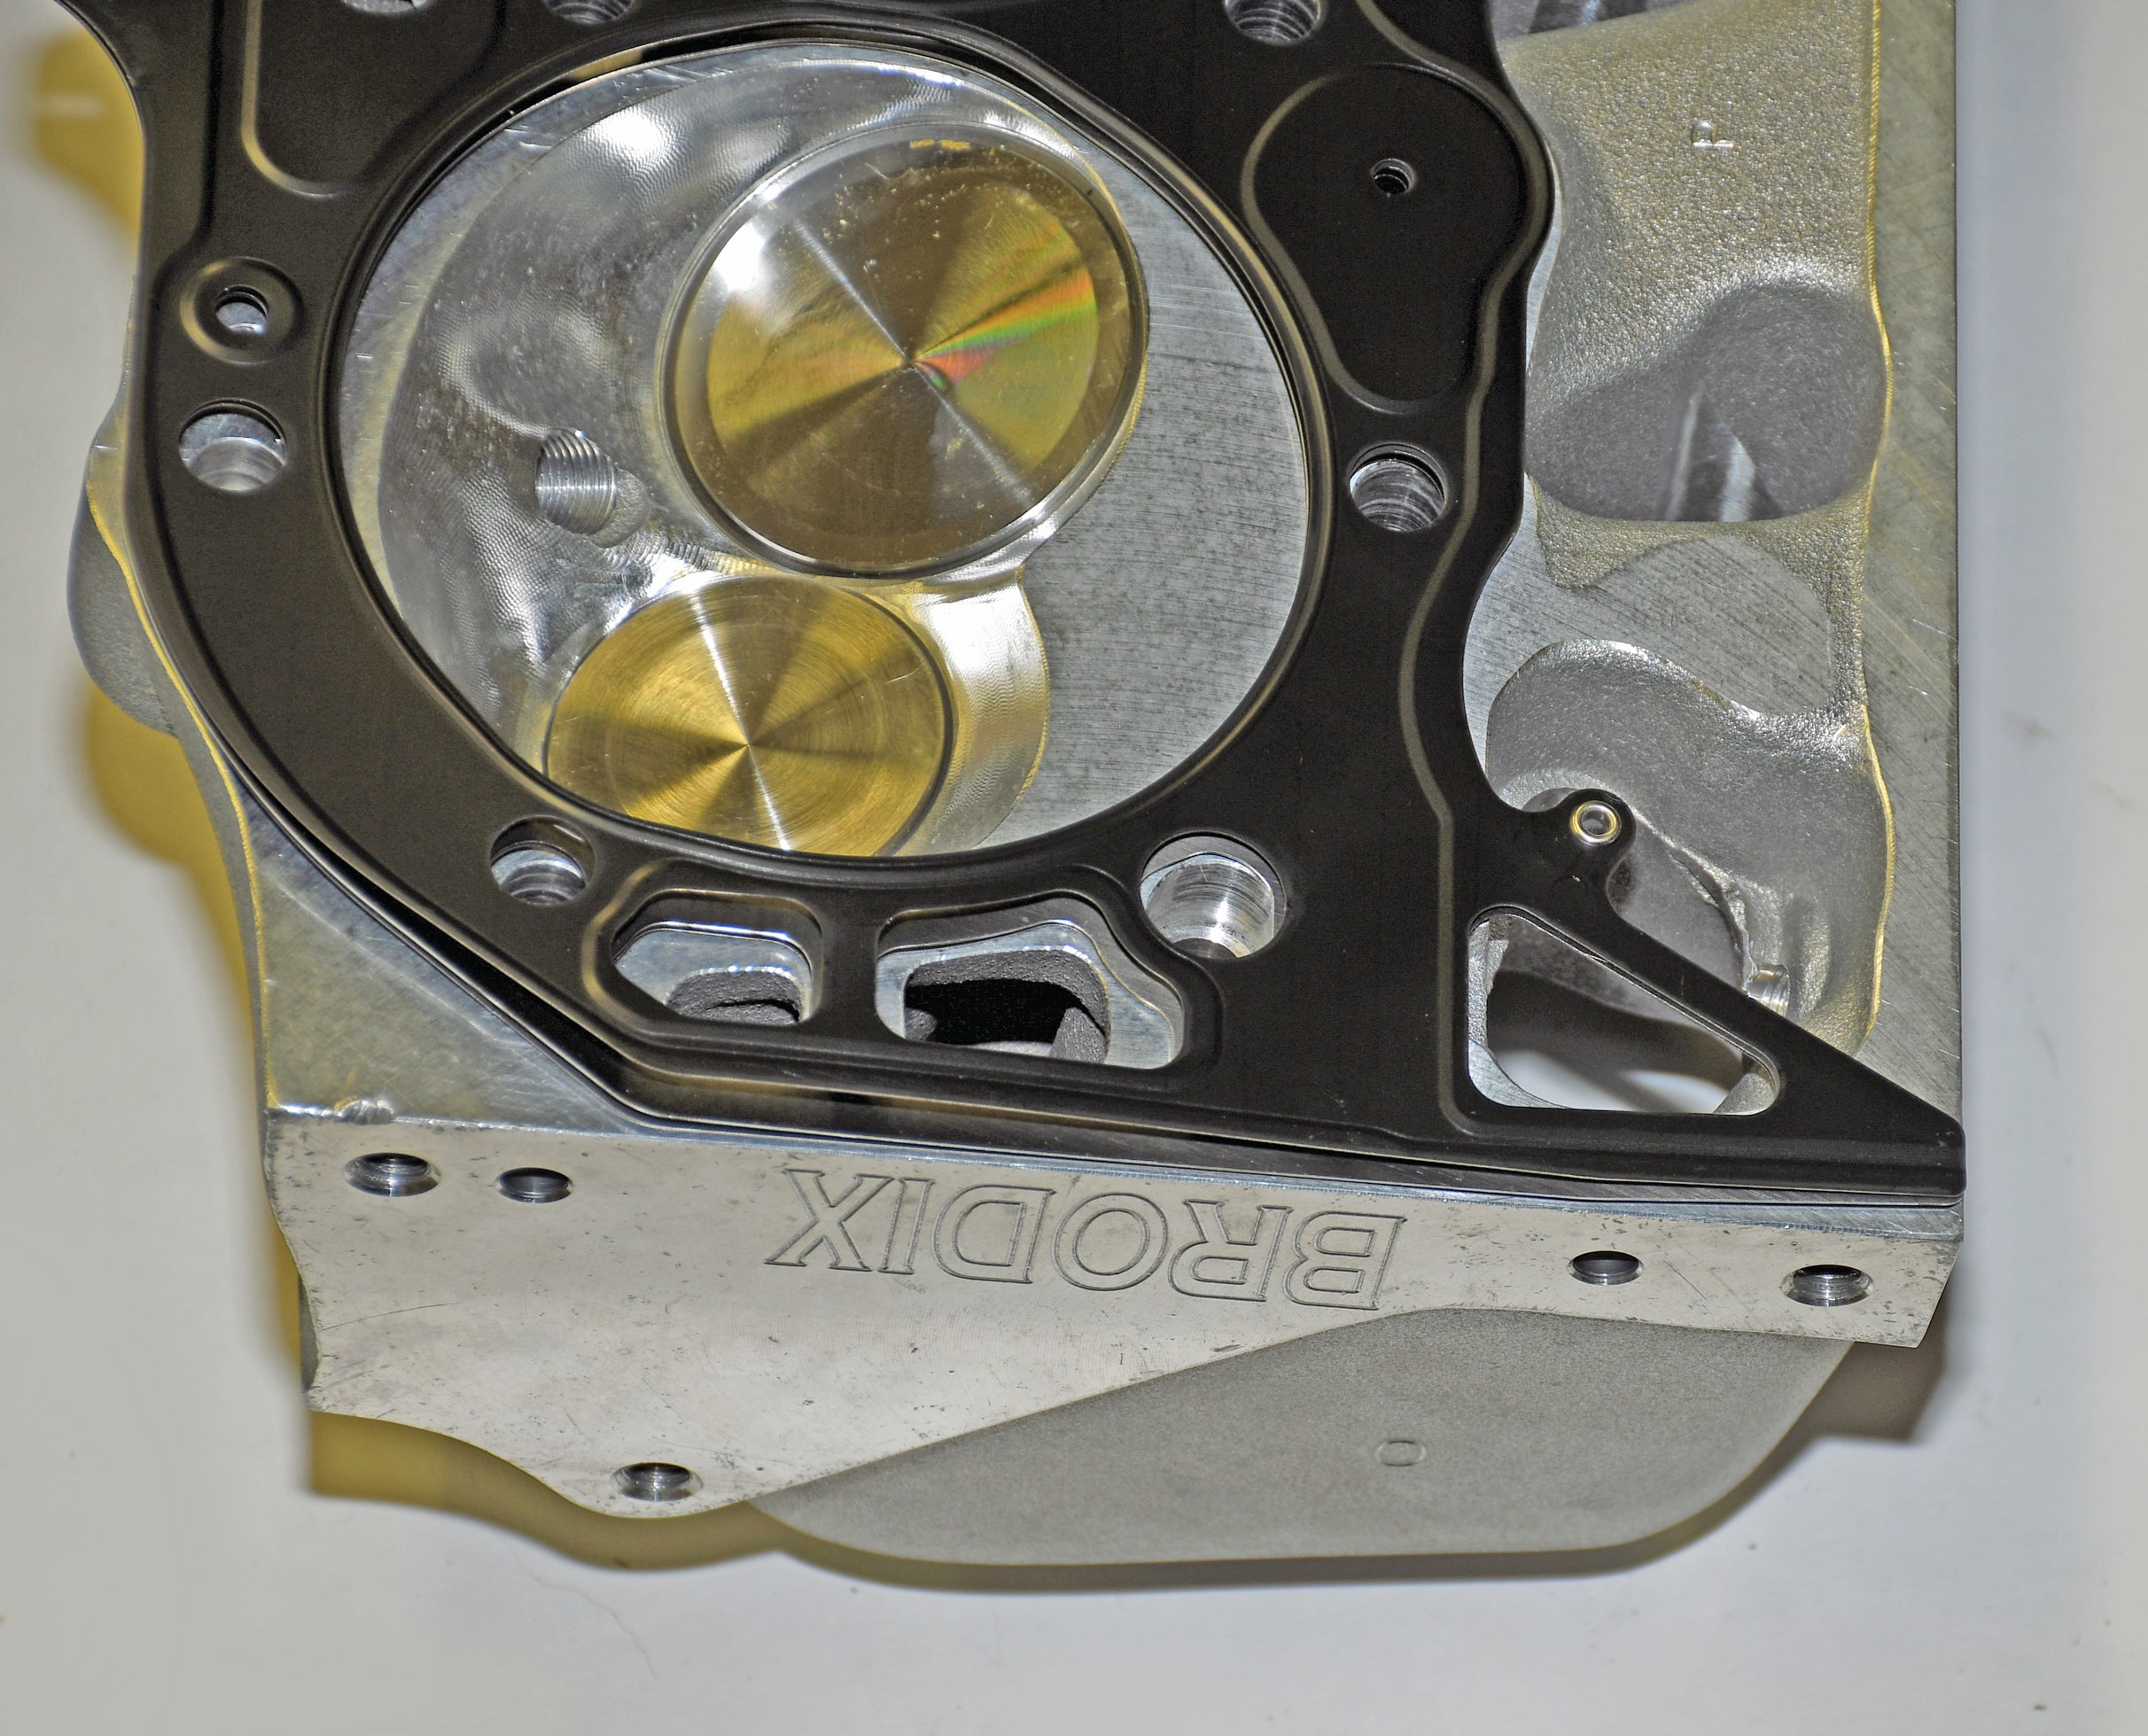
6. Get Decked
Don’t forget about the dowel pins on your engine block deck. If a machine shop decks a block, the dowel pins must be removed. But sometimes, the machine shop doesn’t replace the dowels. These aren’t expensive pieces, but they can be hugely troublesome to locate when you’re ready to assemble the engine.
***
7. Extensions
If you have a Holley carburetor-equipped car that sees any drag race action, you might want to consider the location of the jets, particularly on the secondary side. Here, the jets are located ahead of the bowl (and fuel) which creates a potential for momentary fuel loss problem. This problem can be cured easily with the addition of a set of jet extensions. These components simply fit over or screw into the jet body in the fuel bowl, extending to the rear of the bowl where gasoline is always present.
When jet extensions are installed, you’ll soon discover they interfere with the float. To solve this new problem, use a nitrophyl float assembly, notch it for clearance and then fill the notch with a gasoline resistant epoxy. If that seems like too big a task, Holley and others sell pre-notched, pre-filled nitrophyl carburetor floats.
***
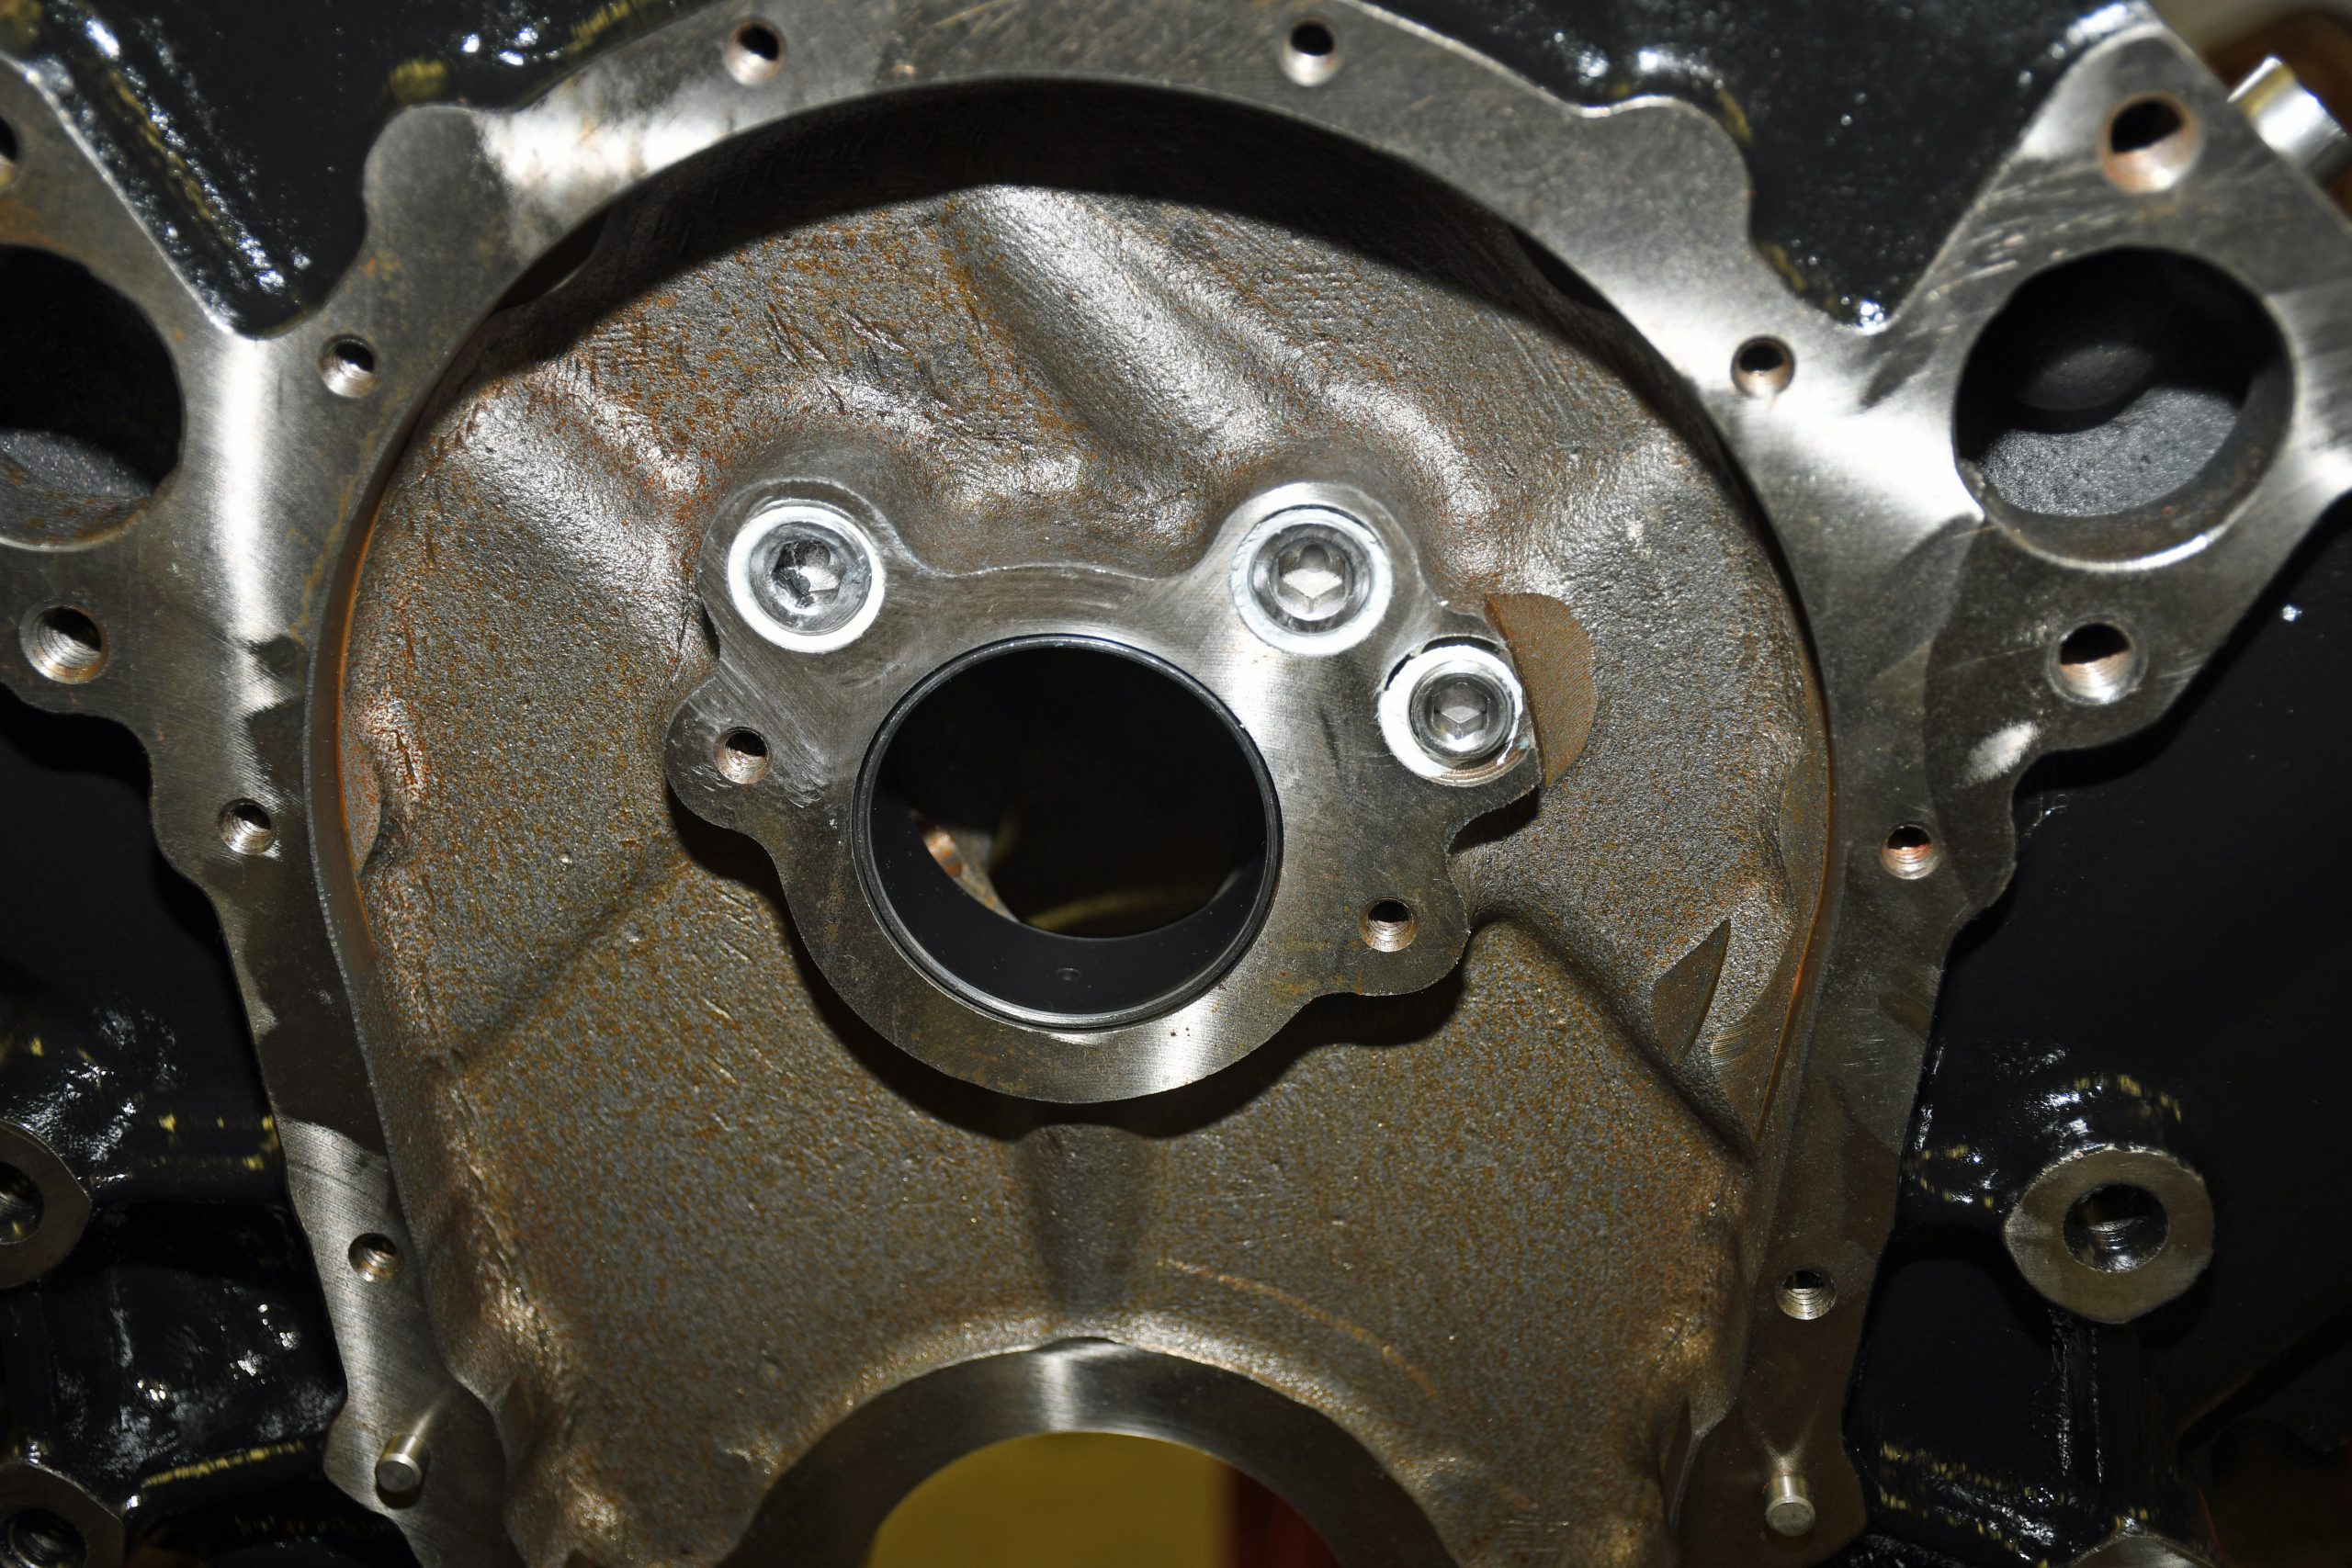
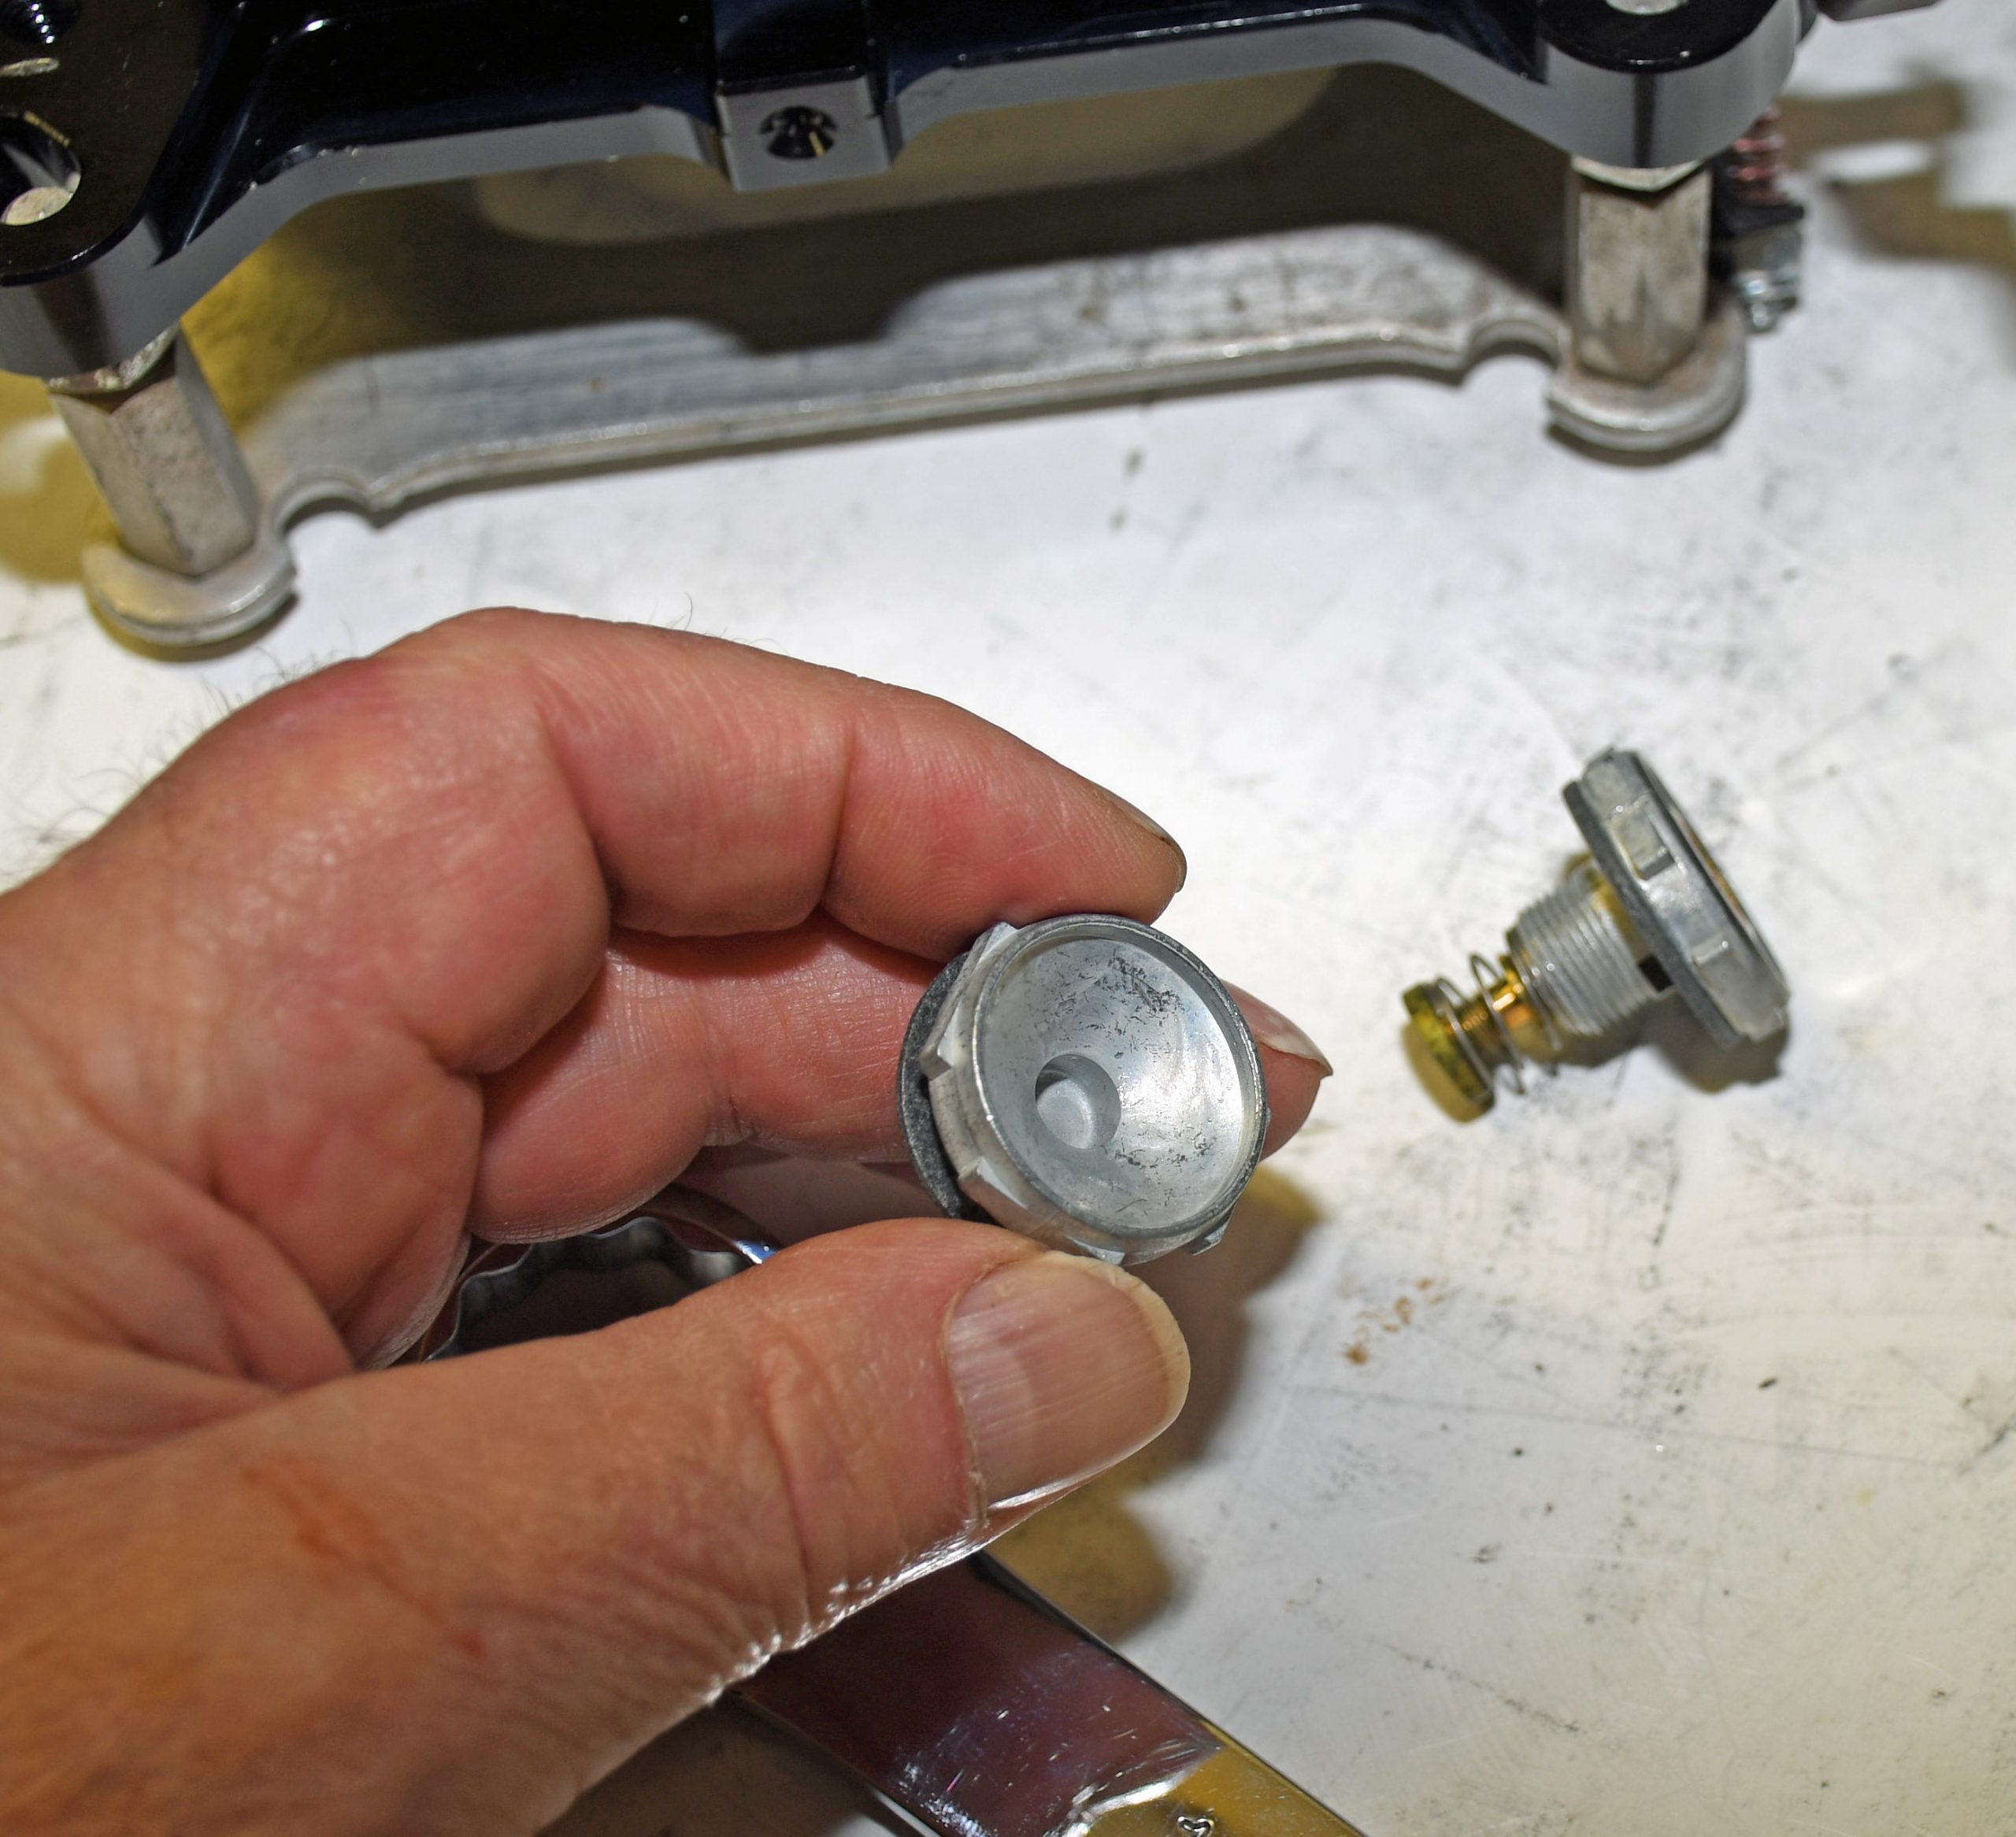
8. Dowel Duty
Many engines make use of dowel pins to locate the timing cover. You need them. They keep the oil seal in the timing cover aligned with the crankshaft. Don’t forget them! They’re often missed while collecting parts for a build and trying to find them locally can sometimes turn into a real challenge. For Chevys, the Pioneer Performance Products part number is 839059.
***
9. More Dowels
Quick tip: Those same timing cover dowels for Chevys mentioned above, also work for the oil pump.
***
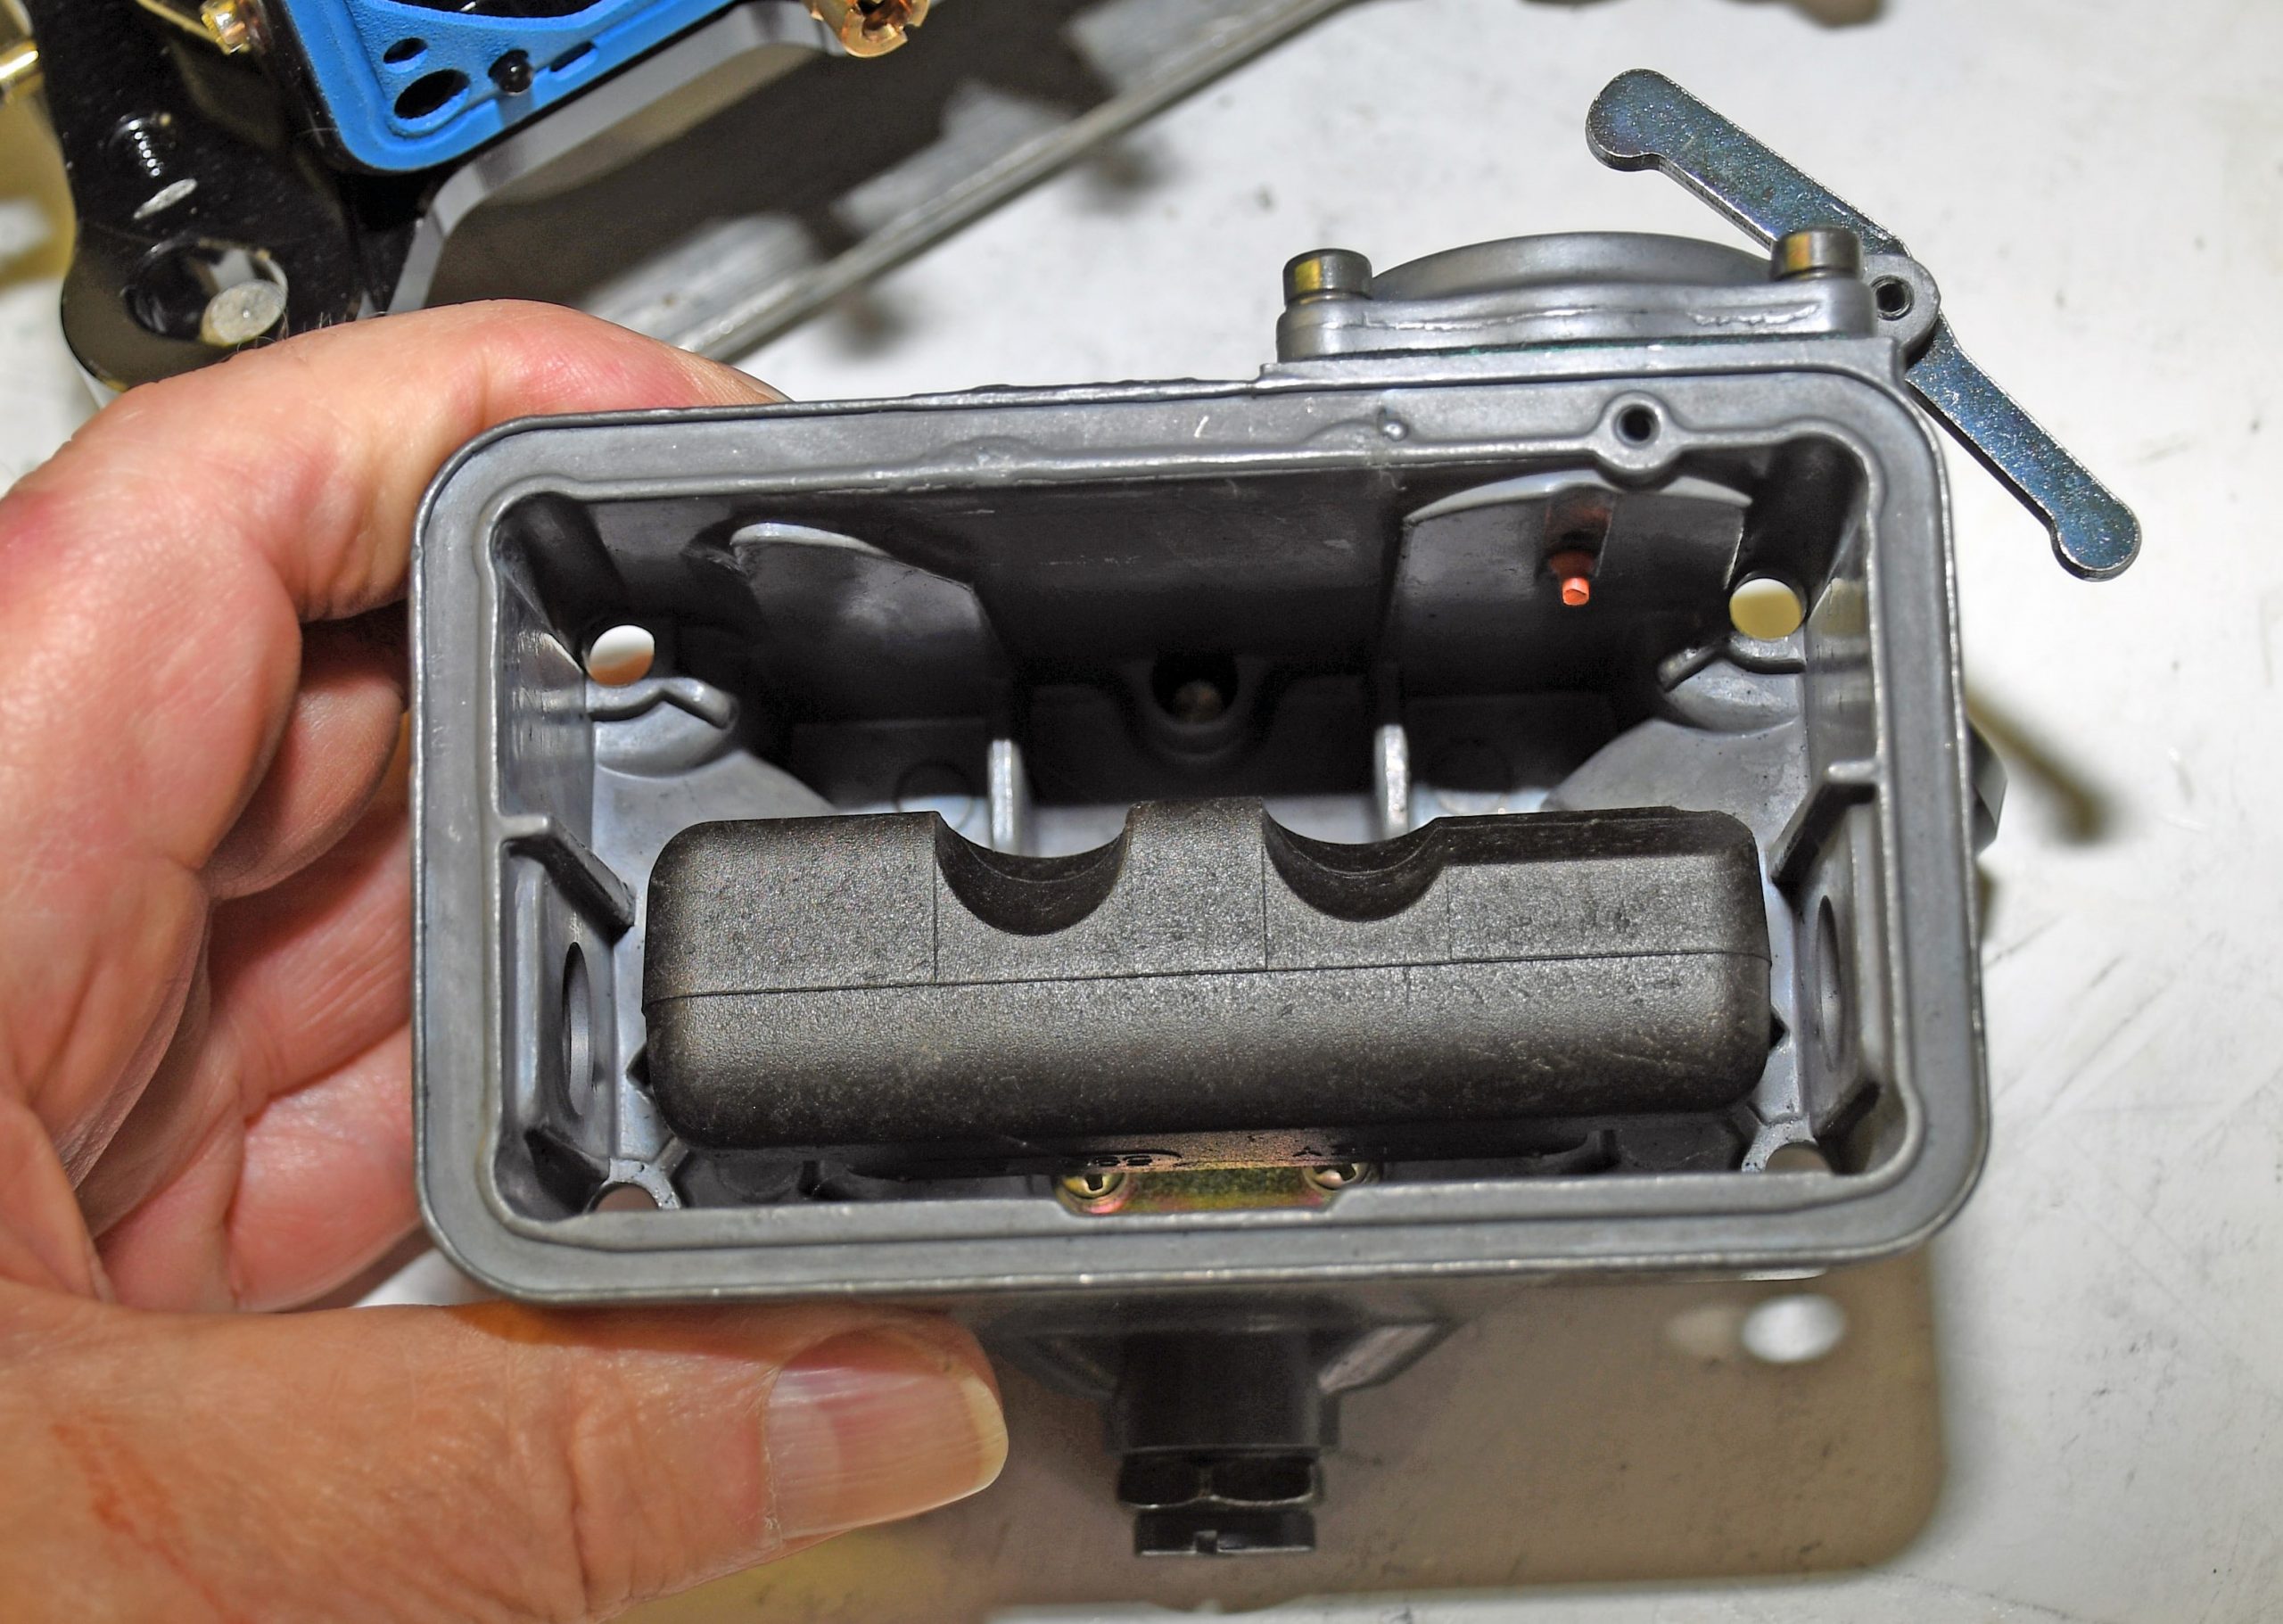
10. Getting the Power (Valve) Out
Remember our jet extension tip at number seven? In order to avoid fuel starvation, you must give some thought to the secondary power valve. The power valve is (located) higher than the jets and is the first to be uncovered as fuel is pushed to the rear of the float bowl. Since there is no way to put an extension on the power valve, and it’s not always practical to turn the carburetor sideways to eliminate fuel starvation, the best situation is to block off the power valve. Jetting must be increased approximately four to eight numbers (typically) if the valve is blocked.
***
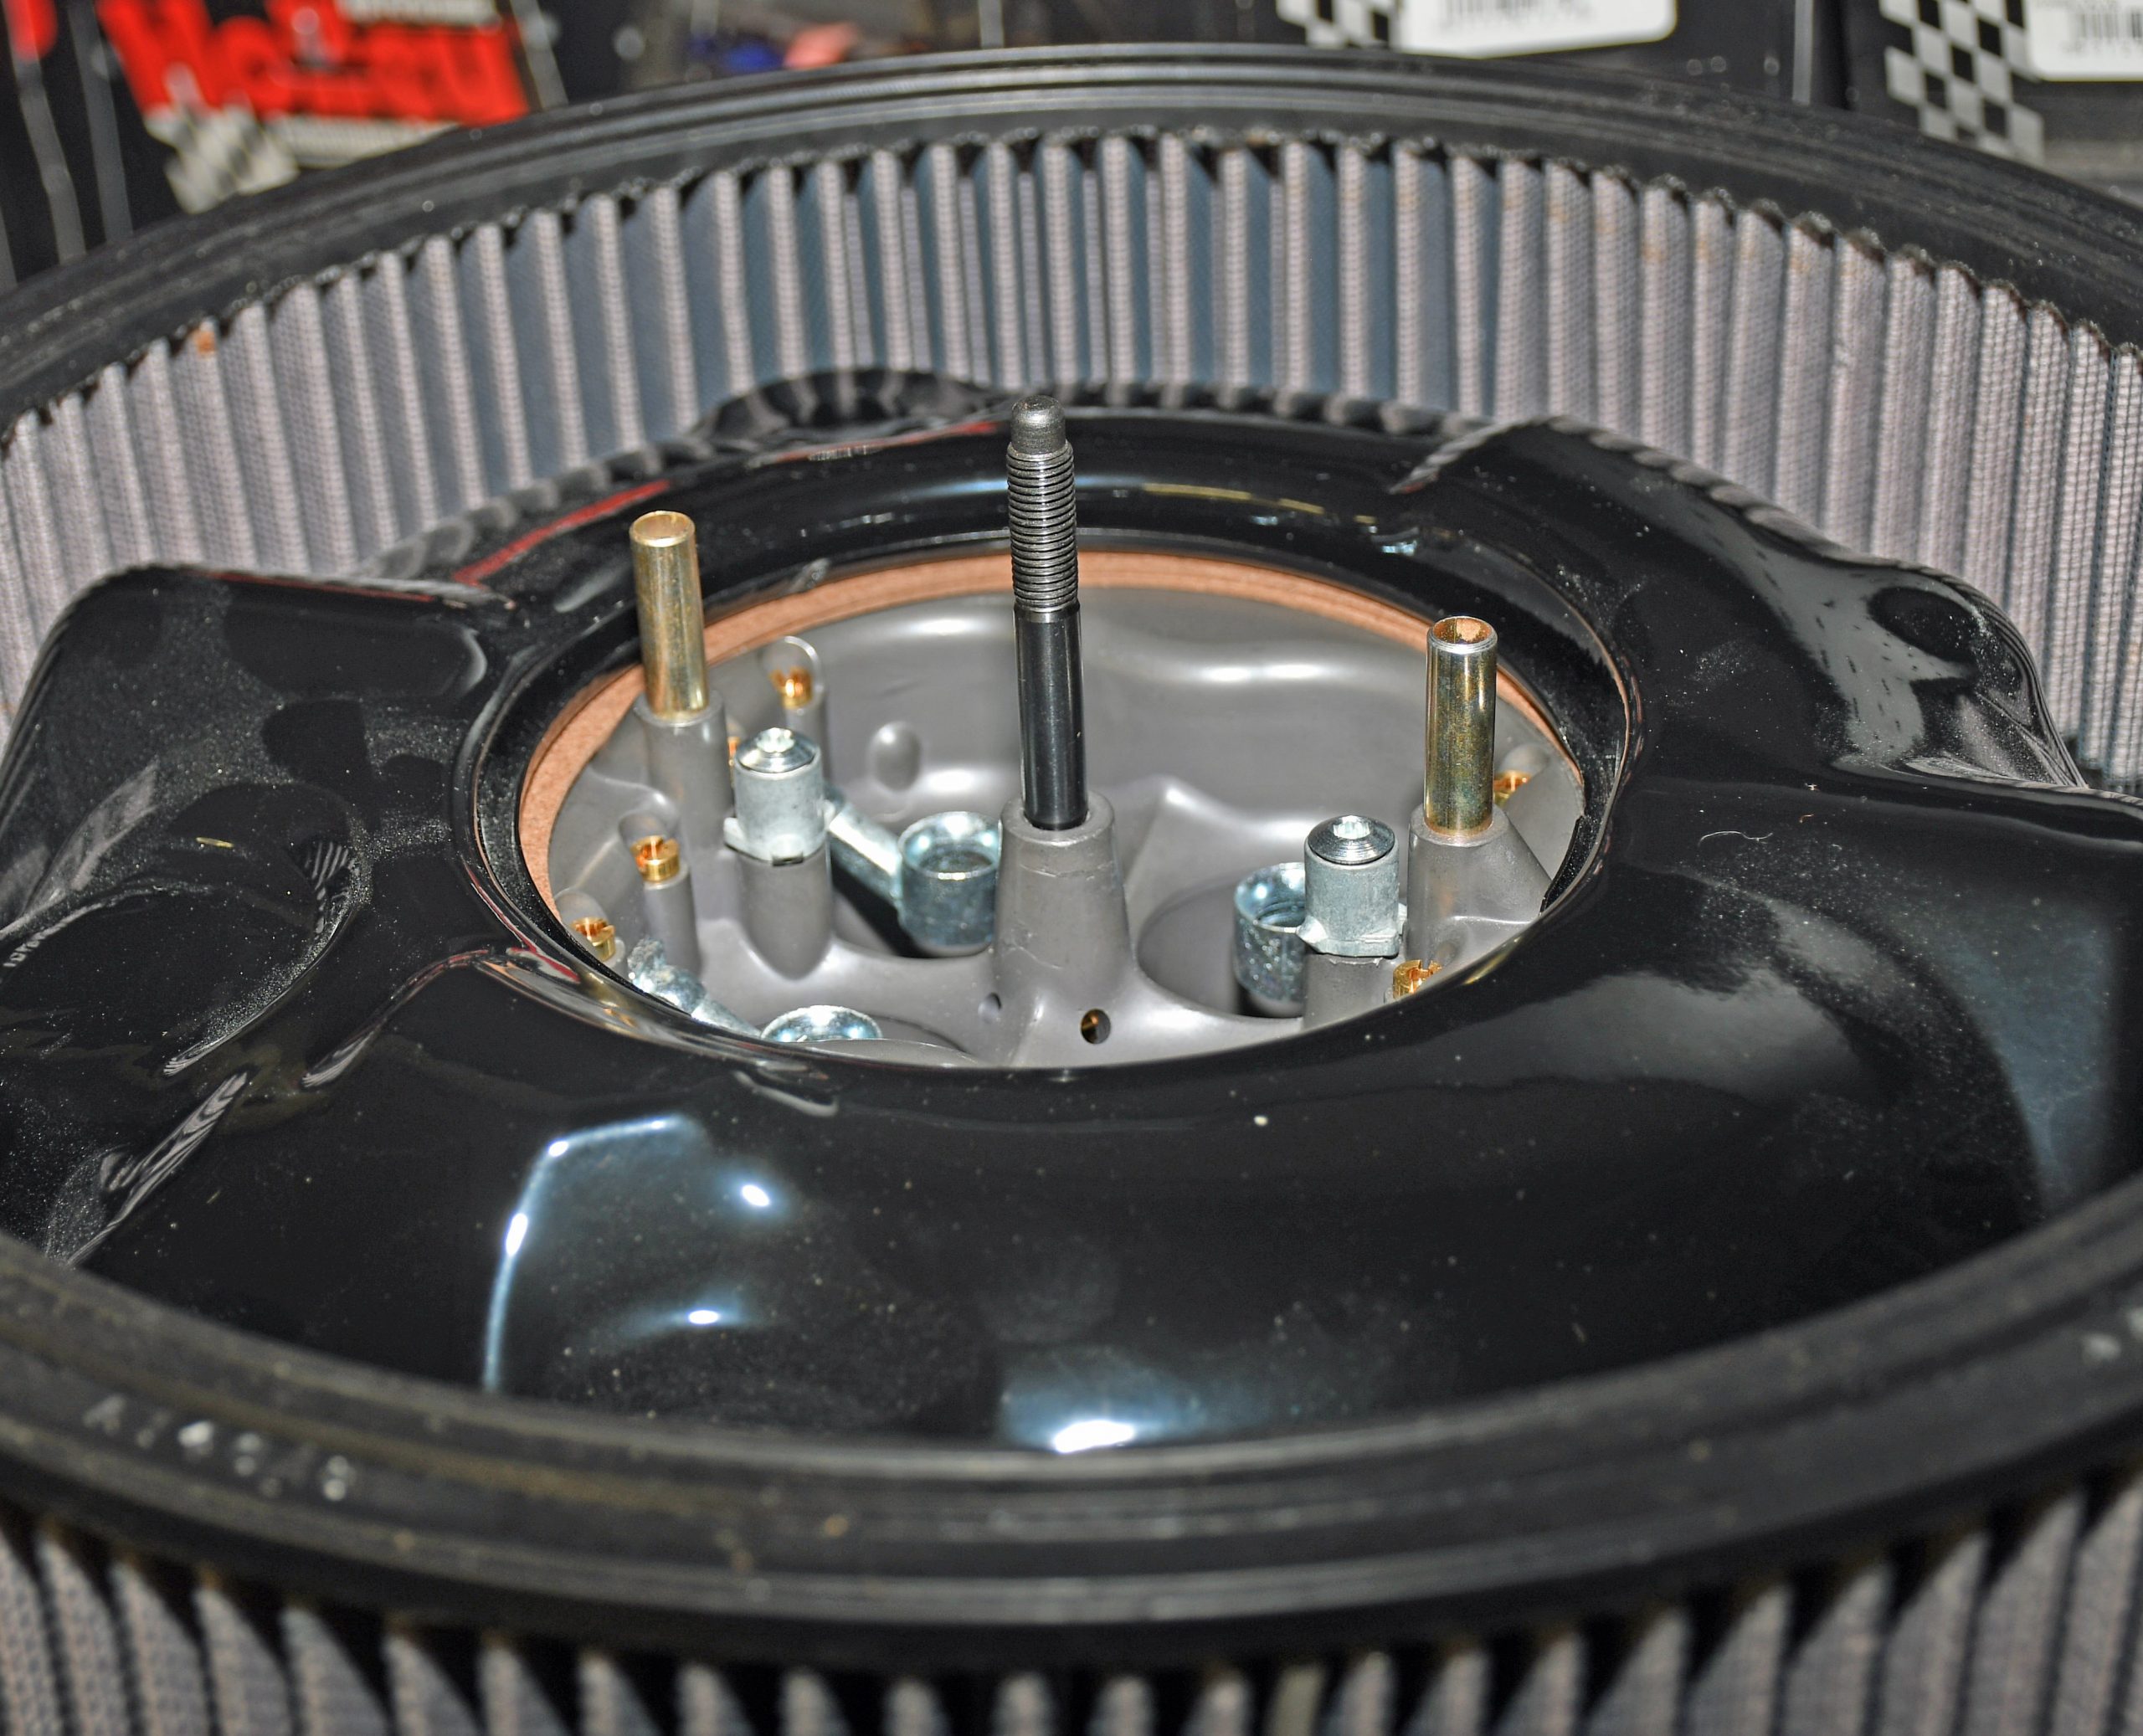
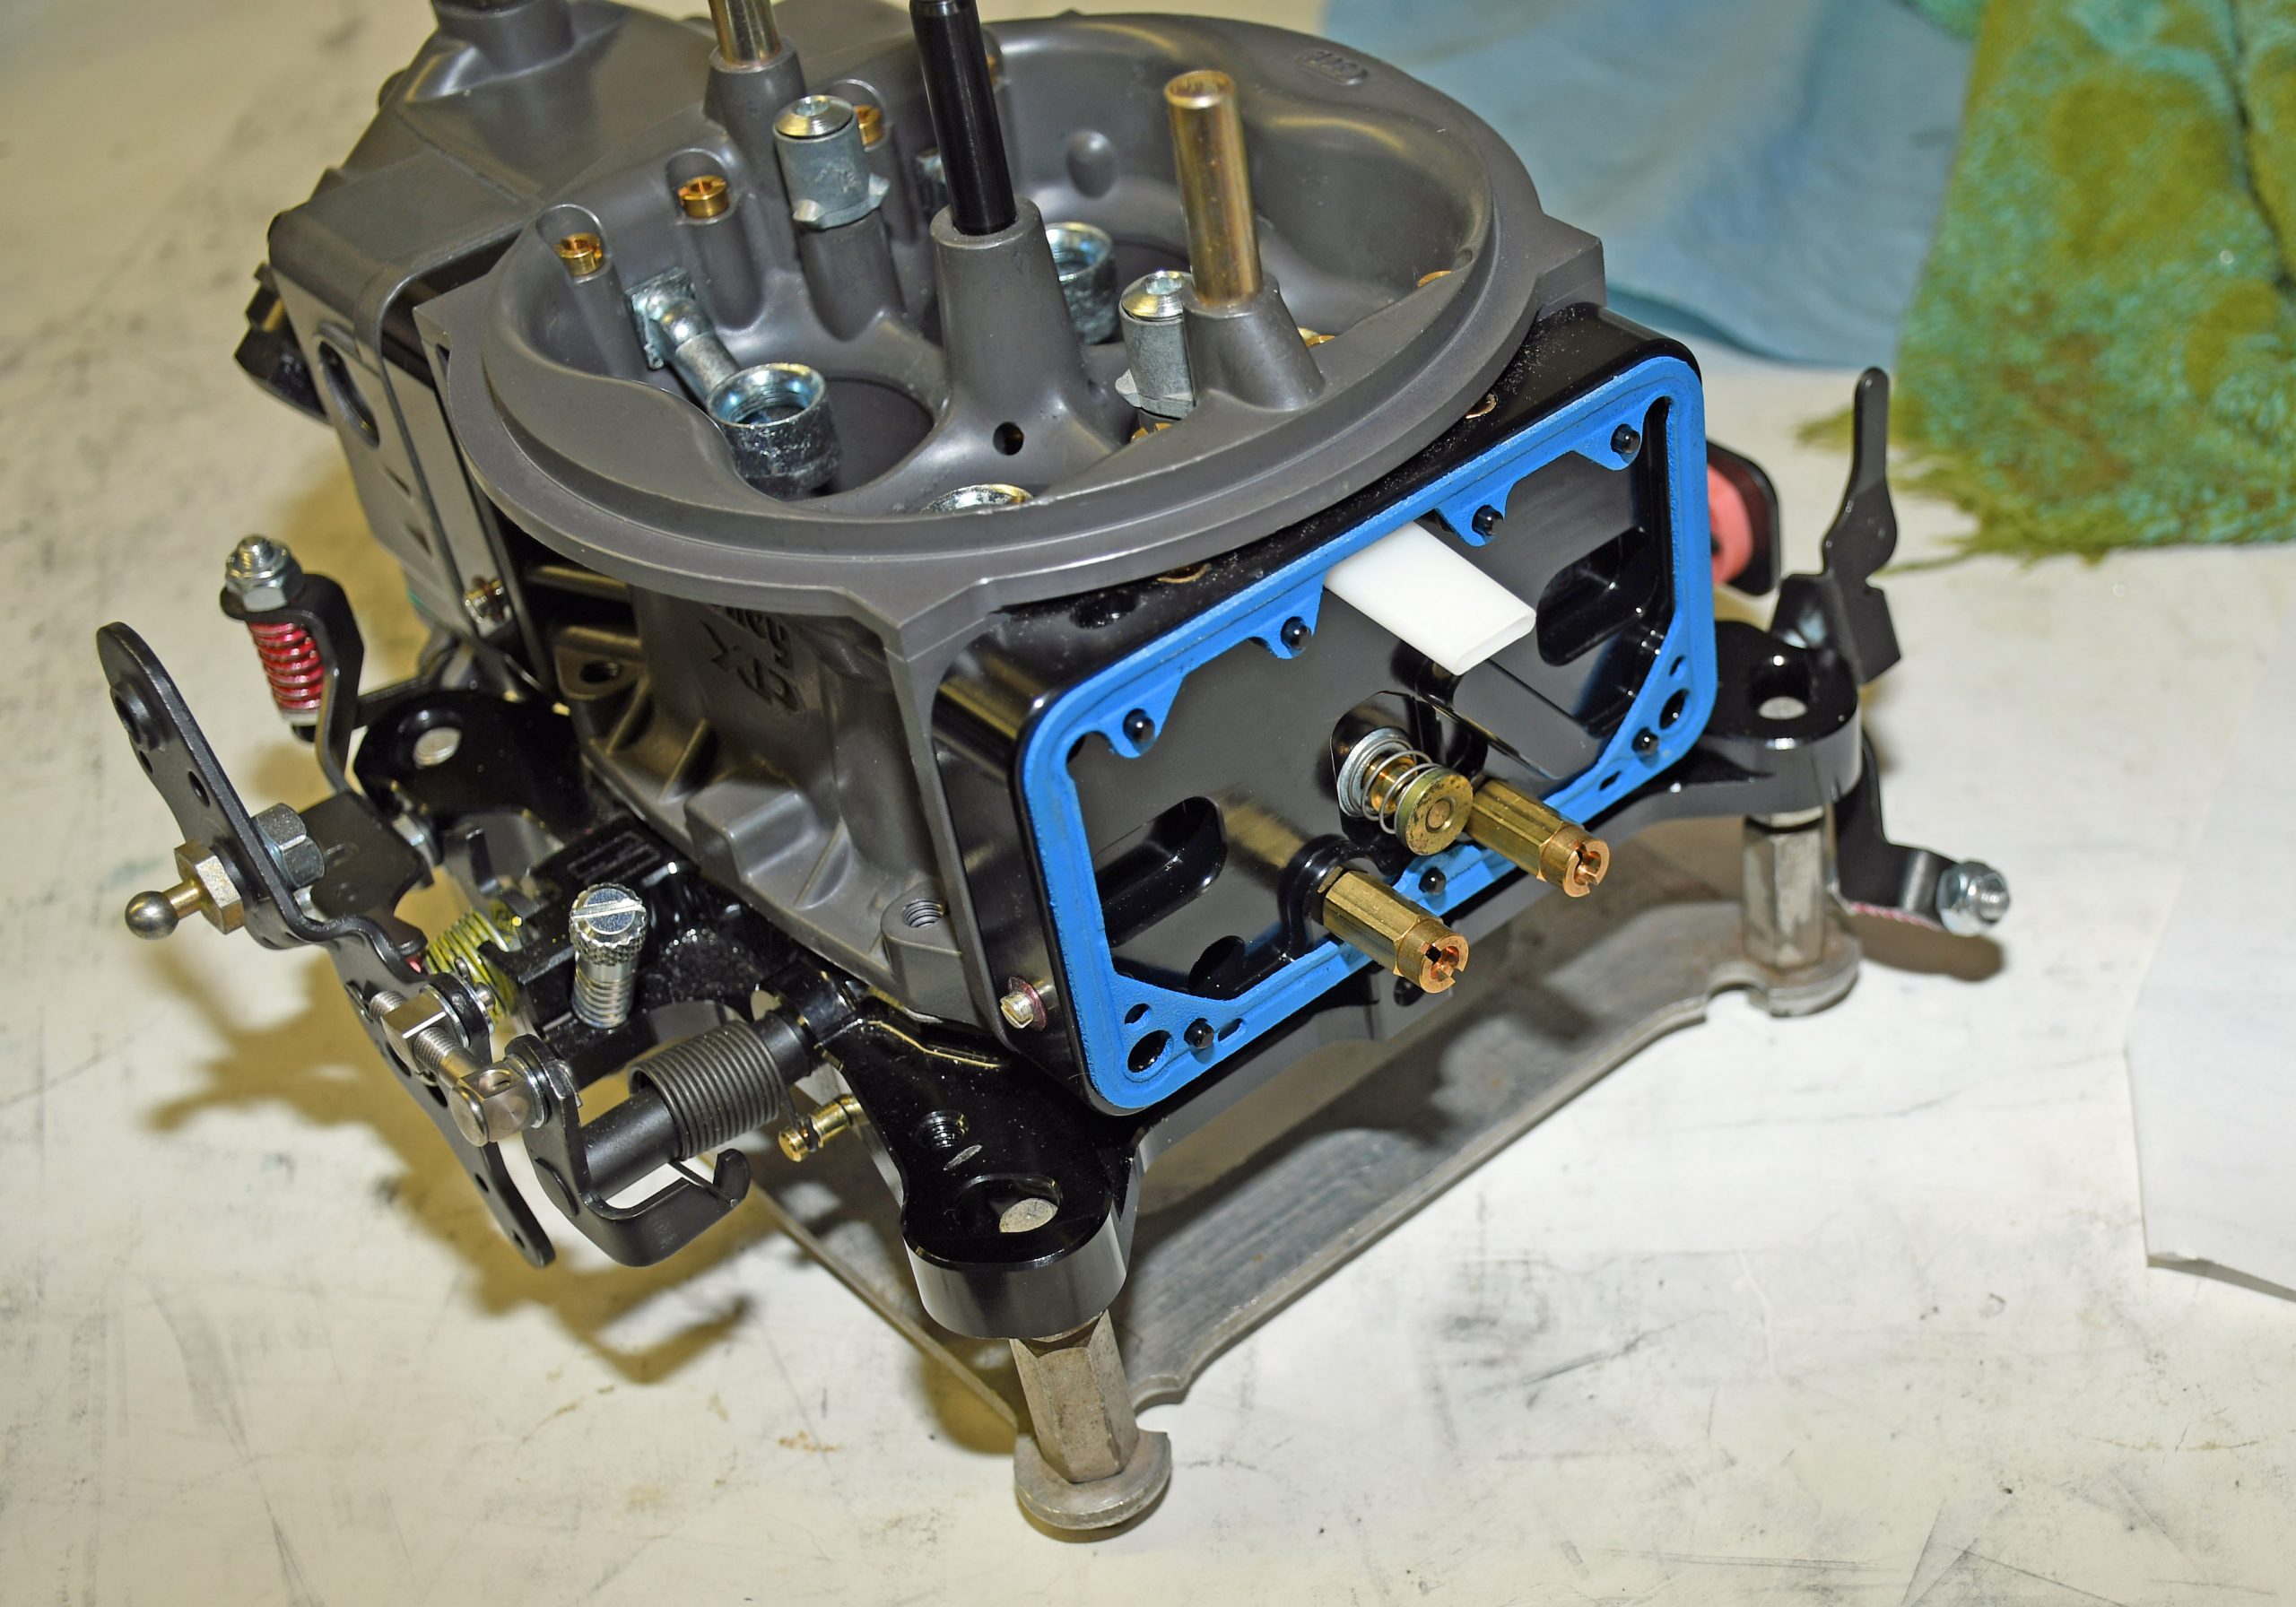
11. Stud Sizing
Air cleaner studs have been sized at 1/4-20 inch thread since pretty much the beginning of time. But that’s not the case with newer Holleys beginning with the HP and Ultra series. They make use of a 5/16-18 inch thread. Sure you can use adapters, but it’s easier to use the right stud. And if you don’t have one, 5/16-18 inch is the same thread size as a common carb base stud. That’s what we’re using for the carb in the image above.
…
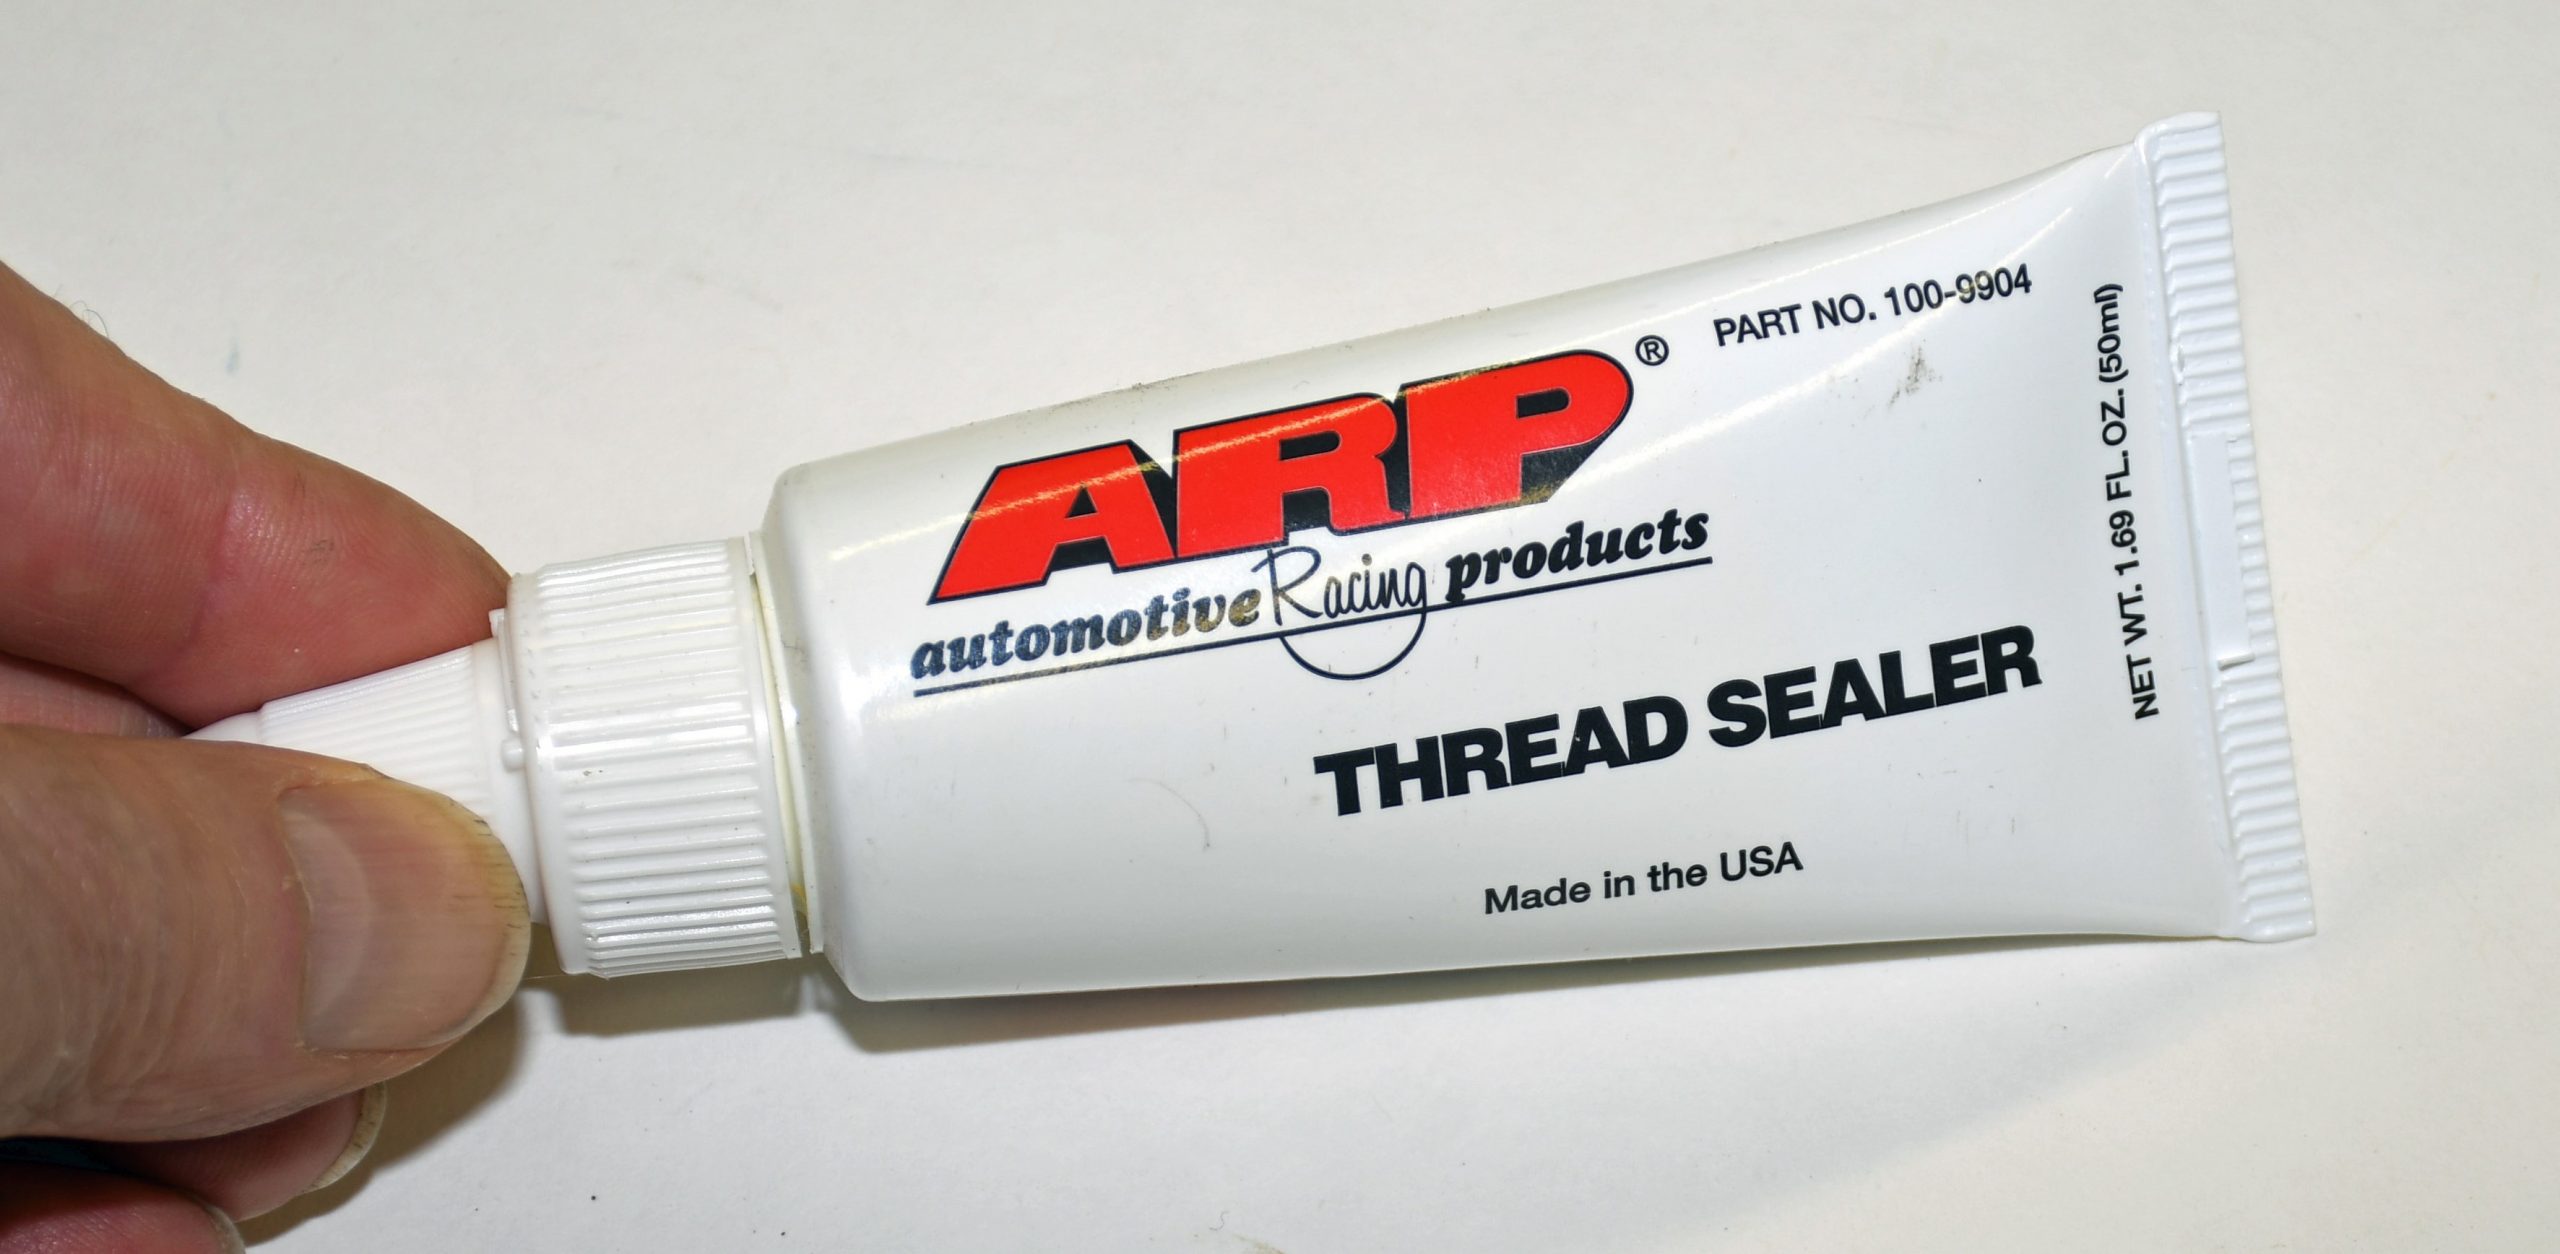
12. Beat the Heat
Something you might never consider in a build is the temperature rating of thread sealants—particularly if you’re using them on an engine. Not all PTFE thread sealants are created equal. Look at the temperature specification on the tube before you buy it! ARP makes a thread sealer that has a temperature range from -30 to 550 degrees F. Some of the others out there aren’t even close.
***
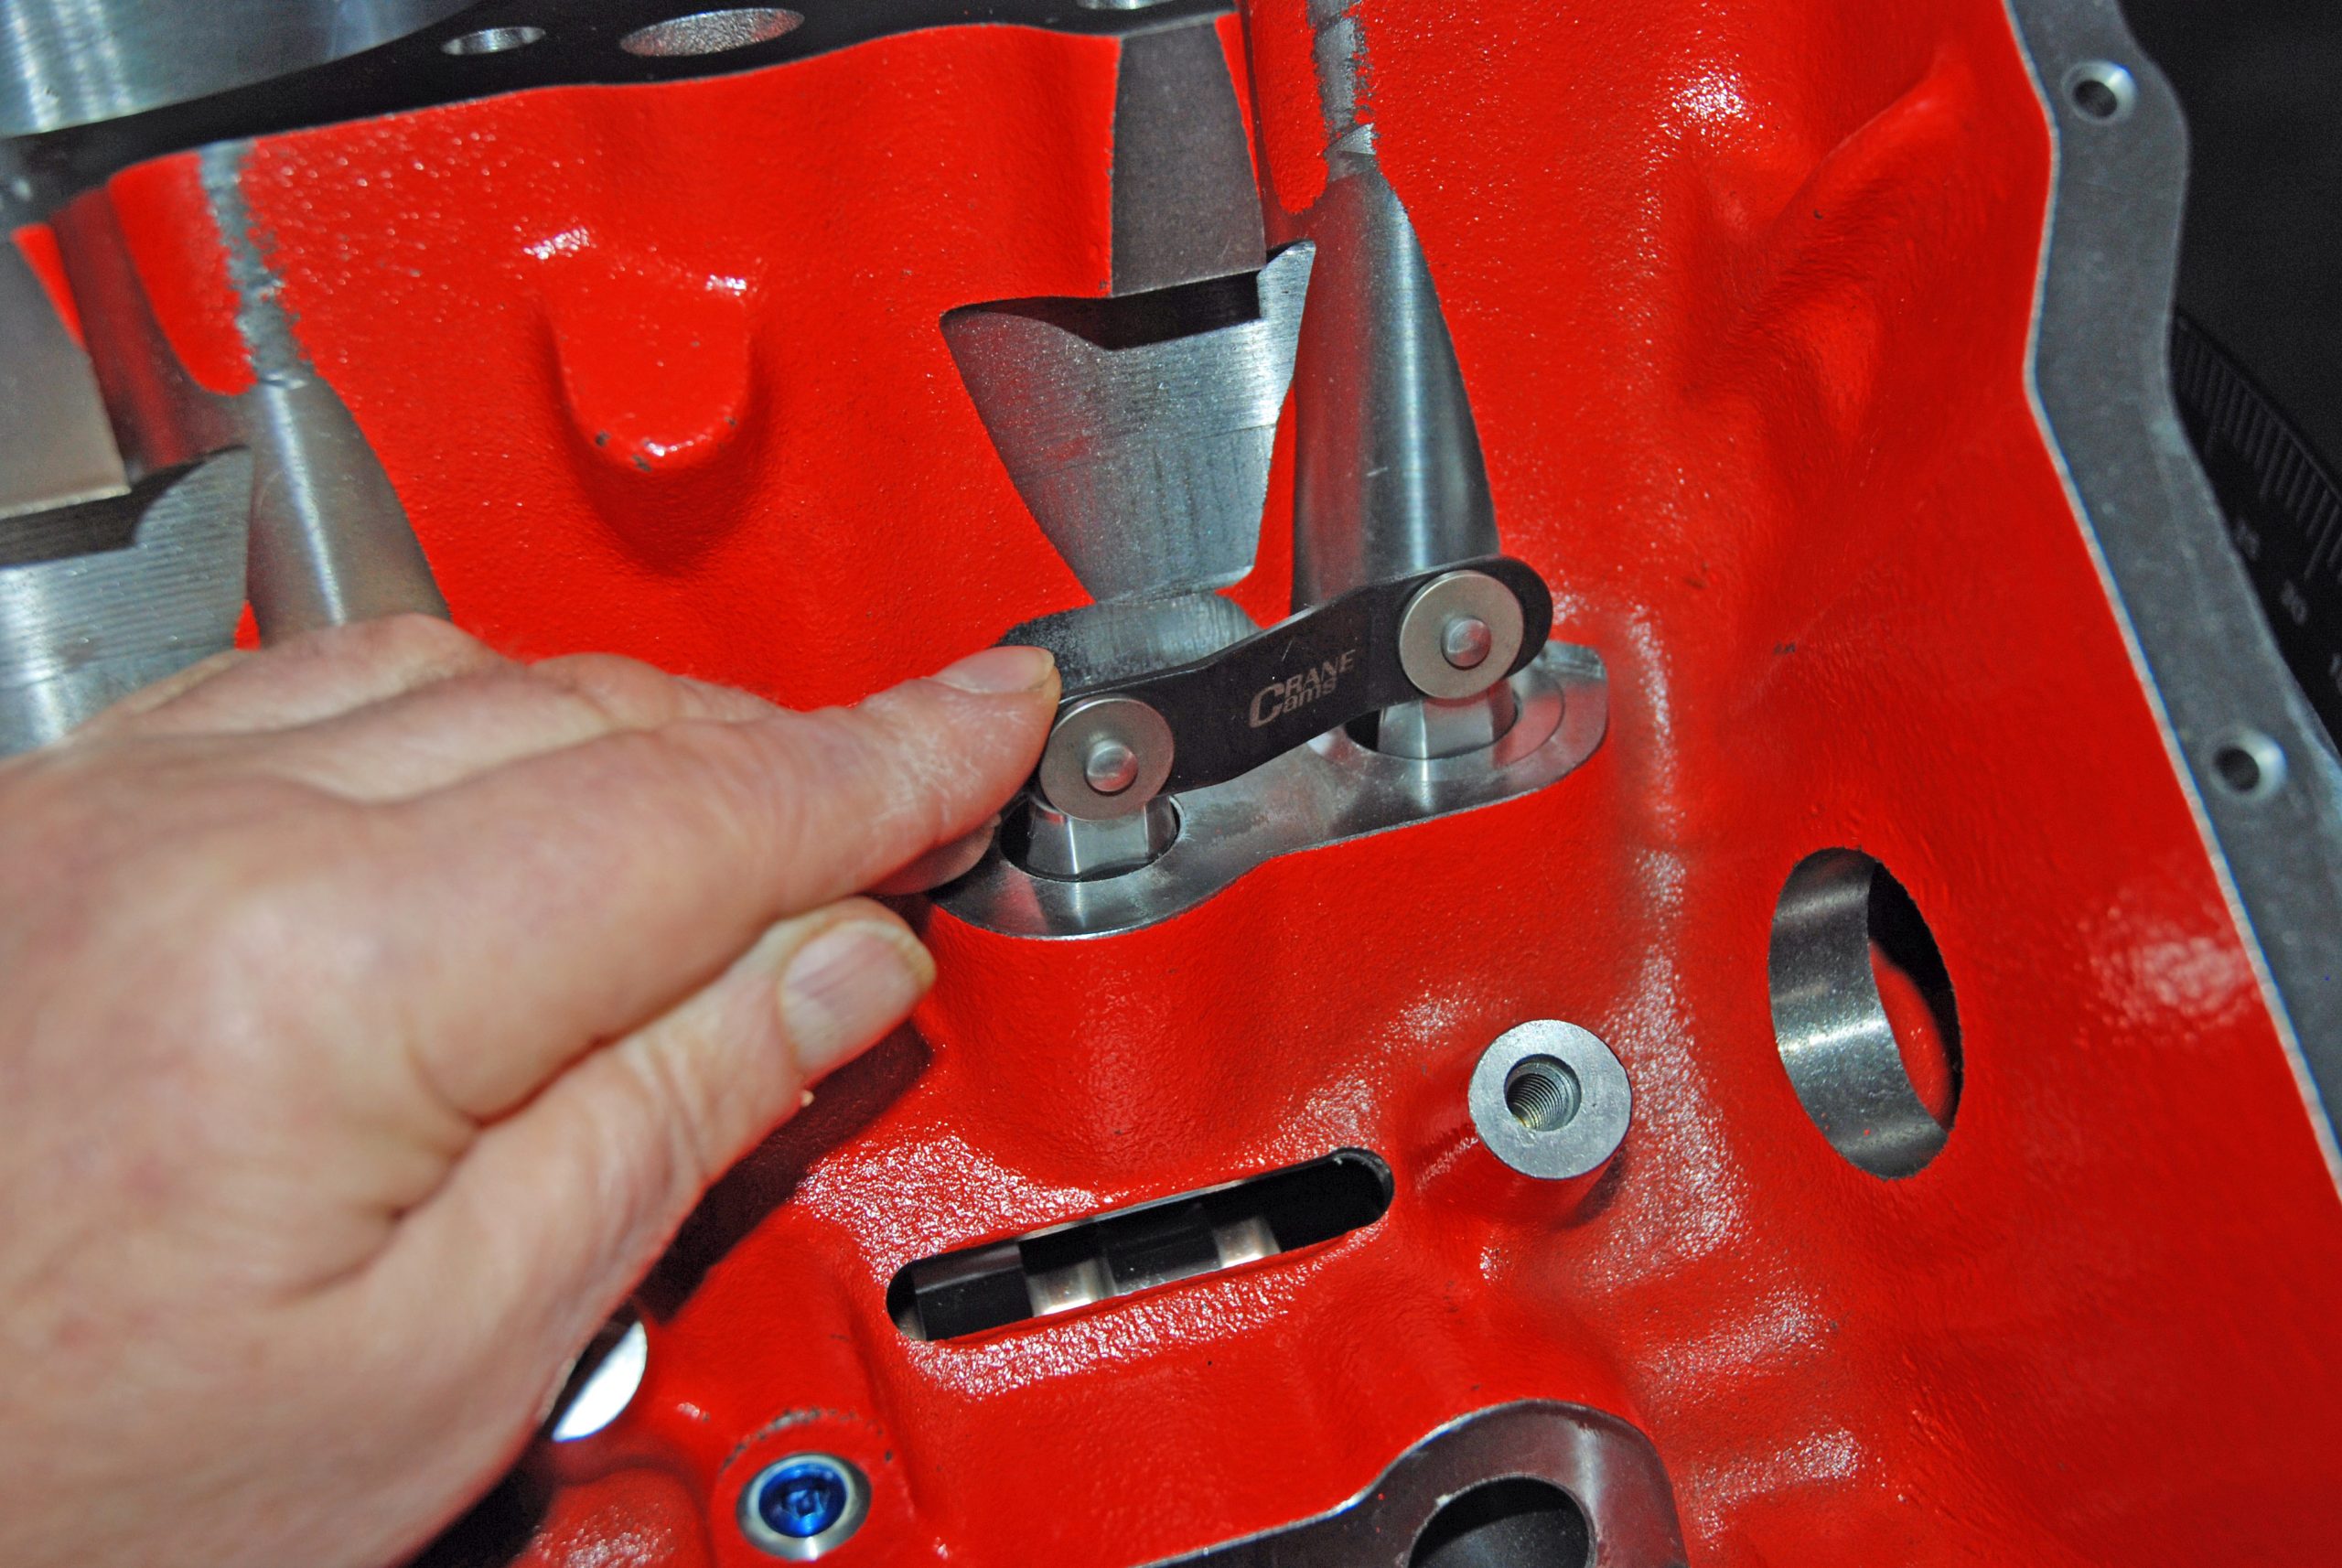
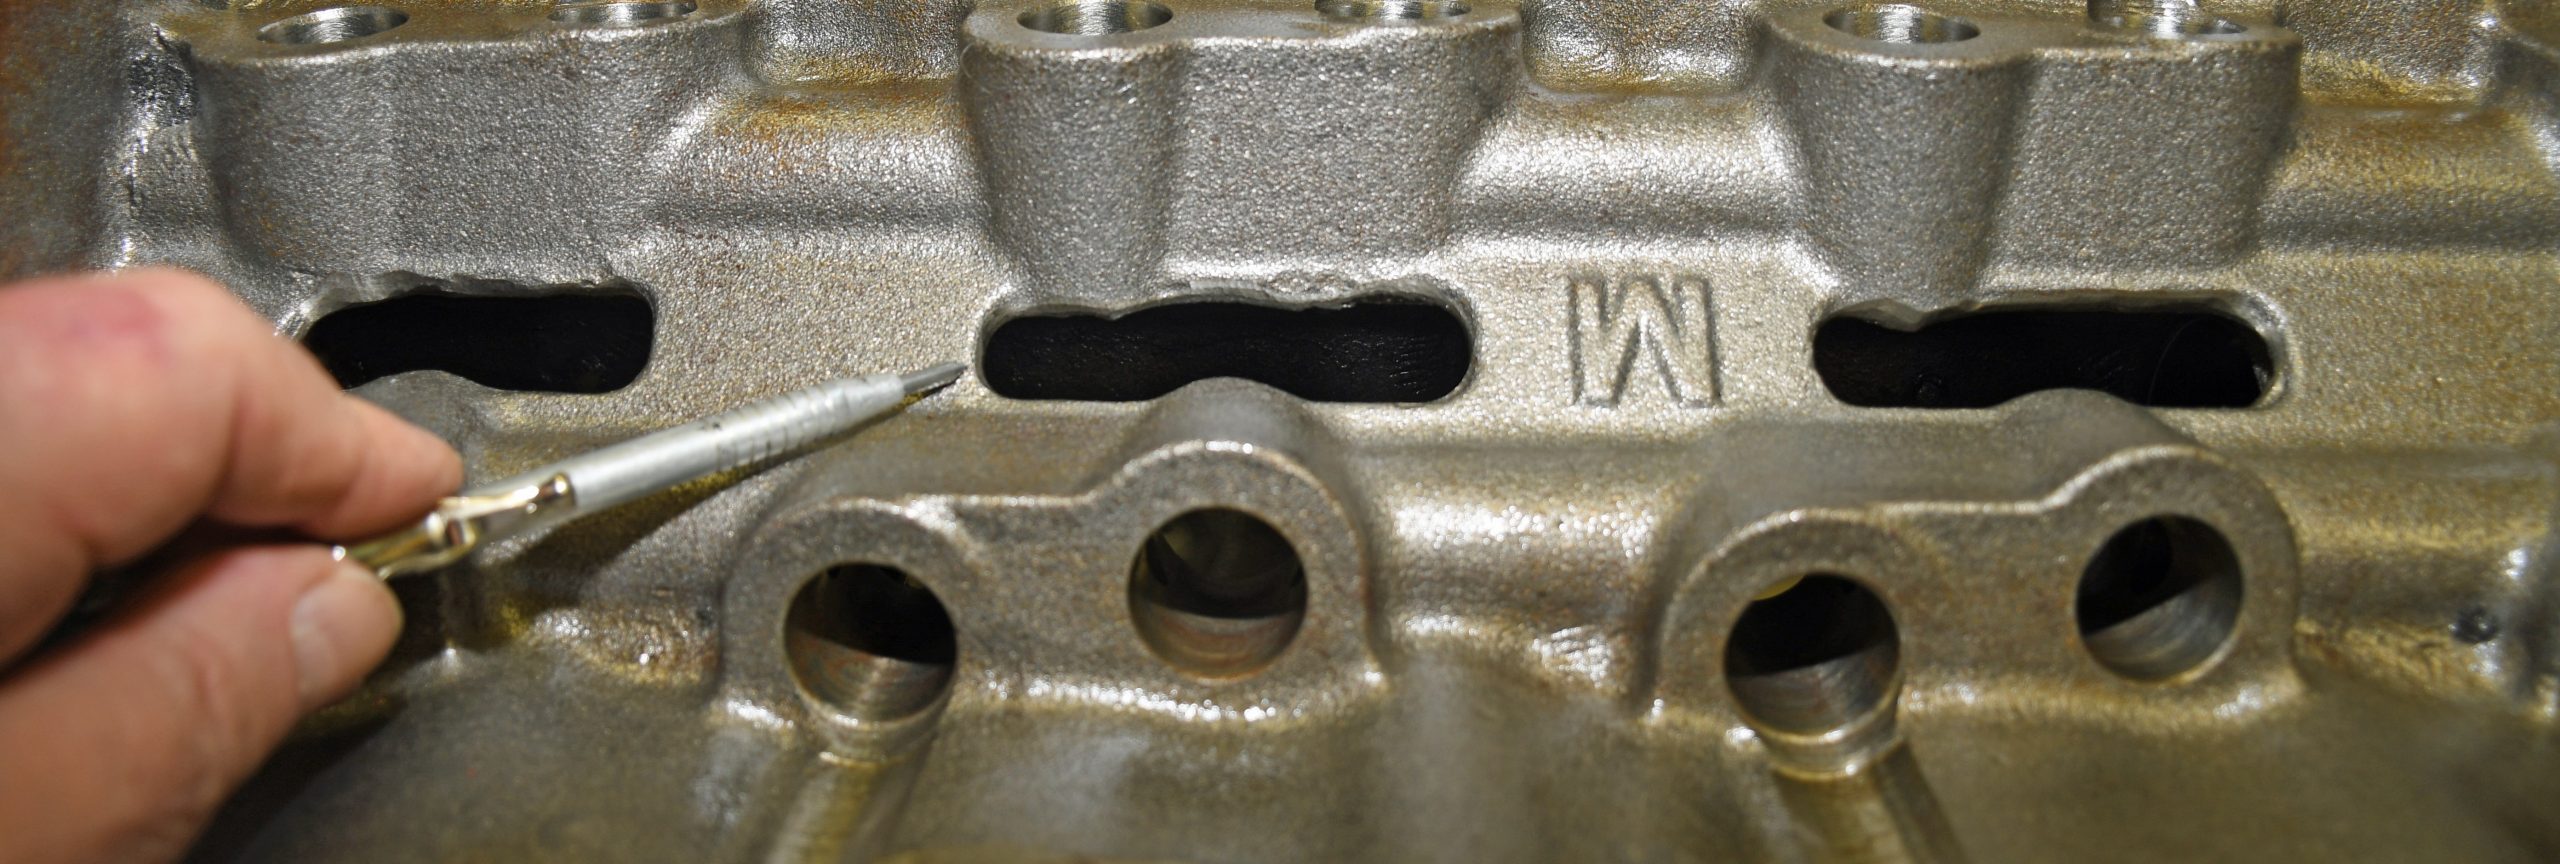
13. Interference Call
If you have a late model block or if you have an aftermarket block (like the Bowtie block shown here), and you’re using a roller camshaft, carefully check to ensure roller lifter tie bar doesn’t bottom in block. This can be an issue with some lifter configurations. If there’s interference, the block will obviously need machining.
***
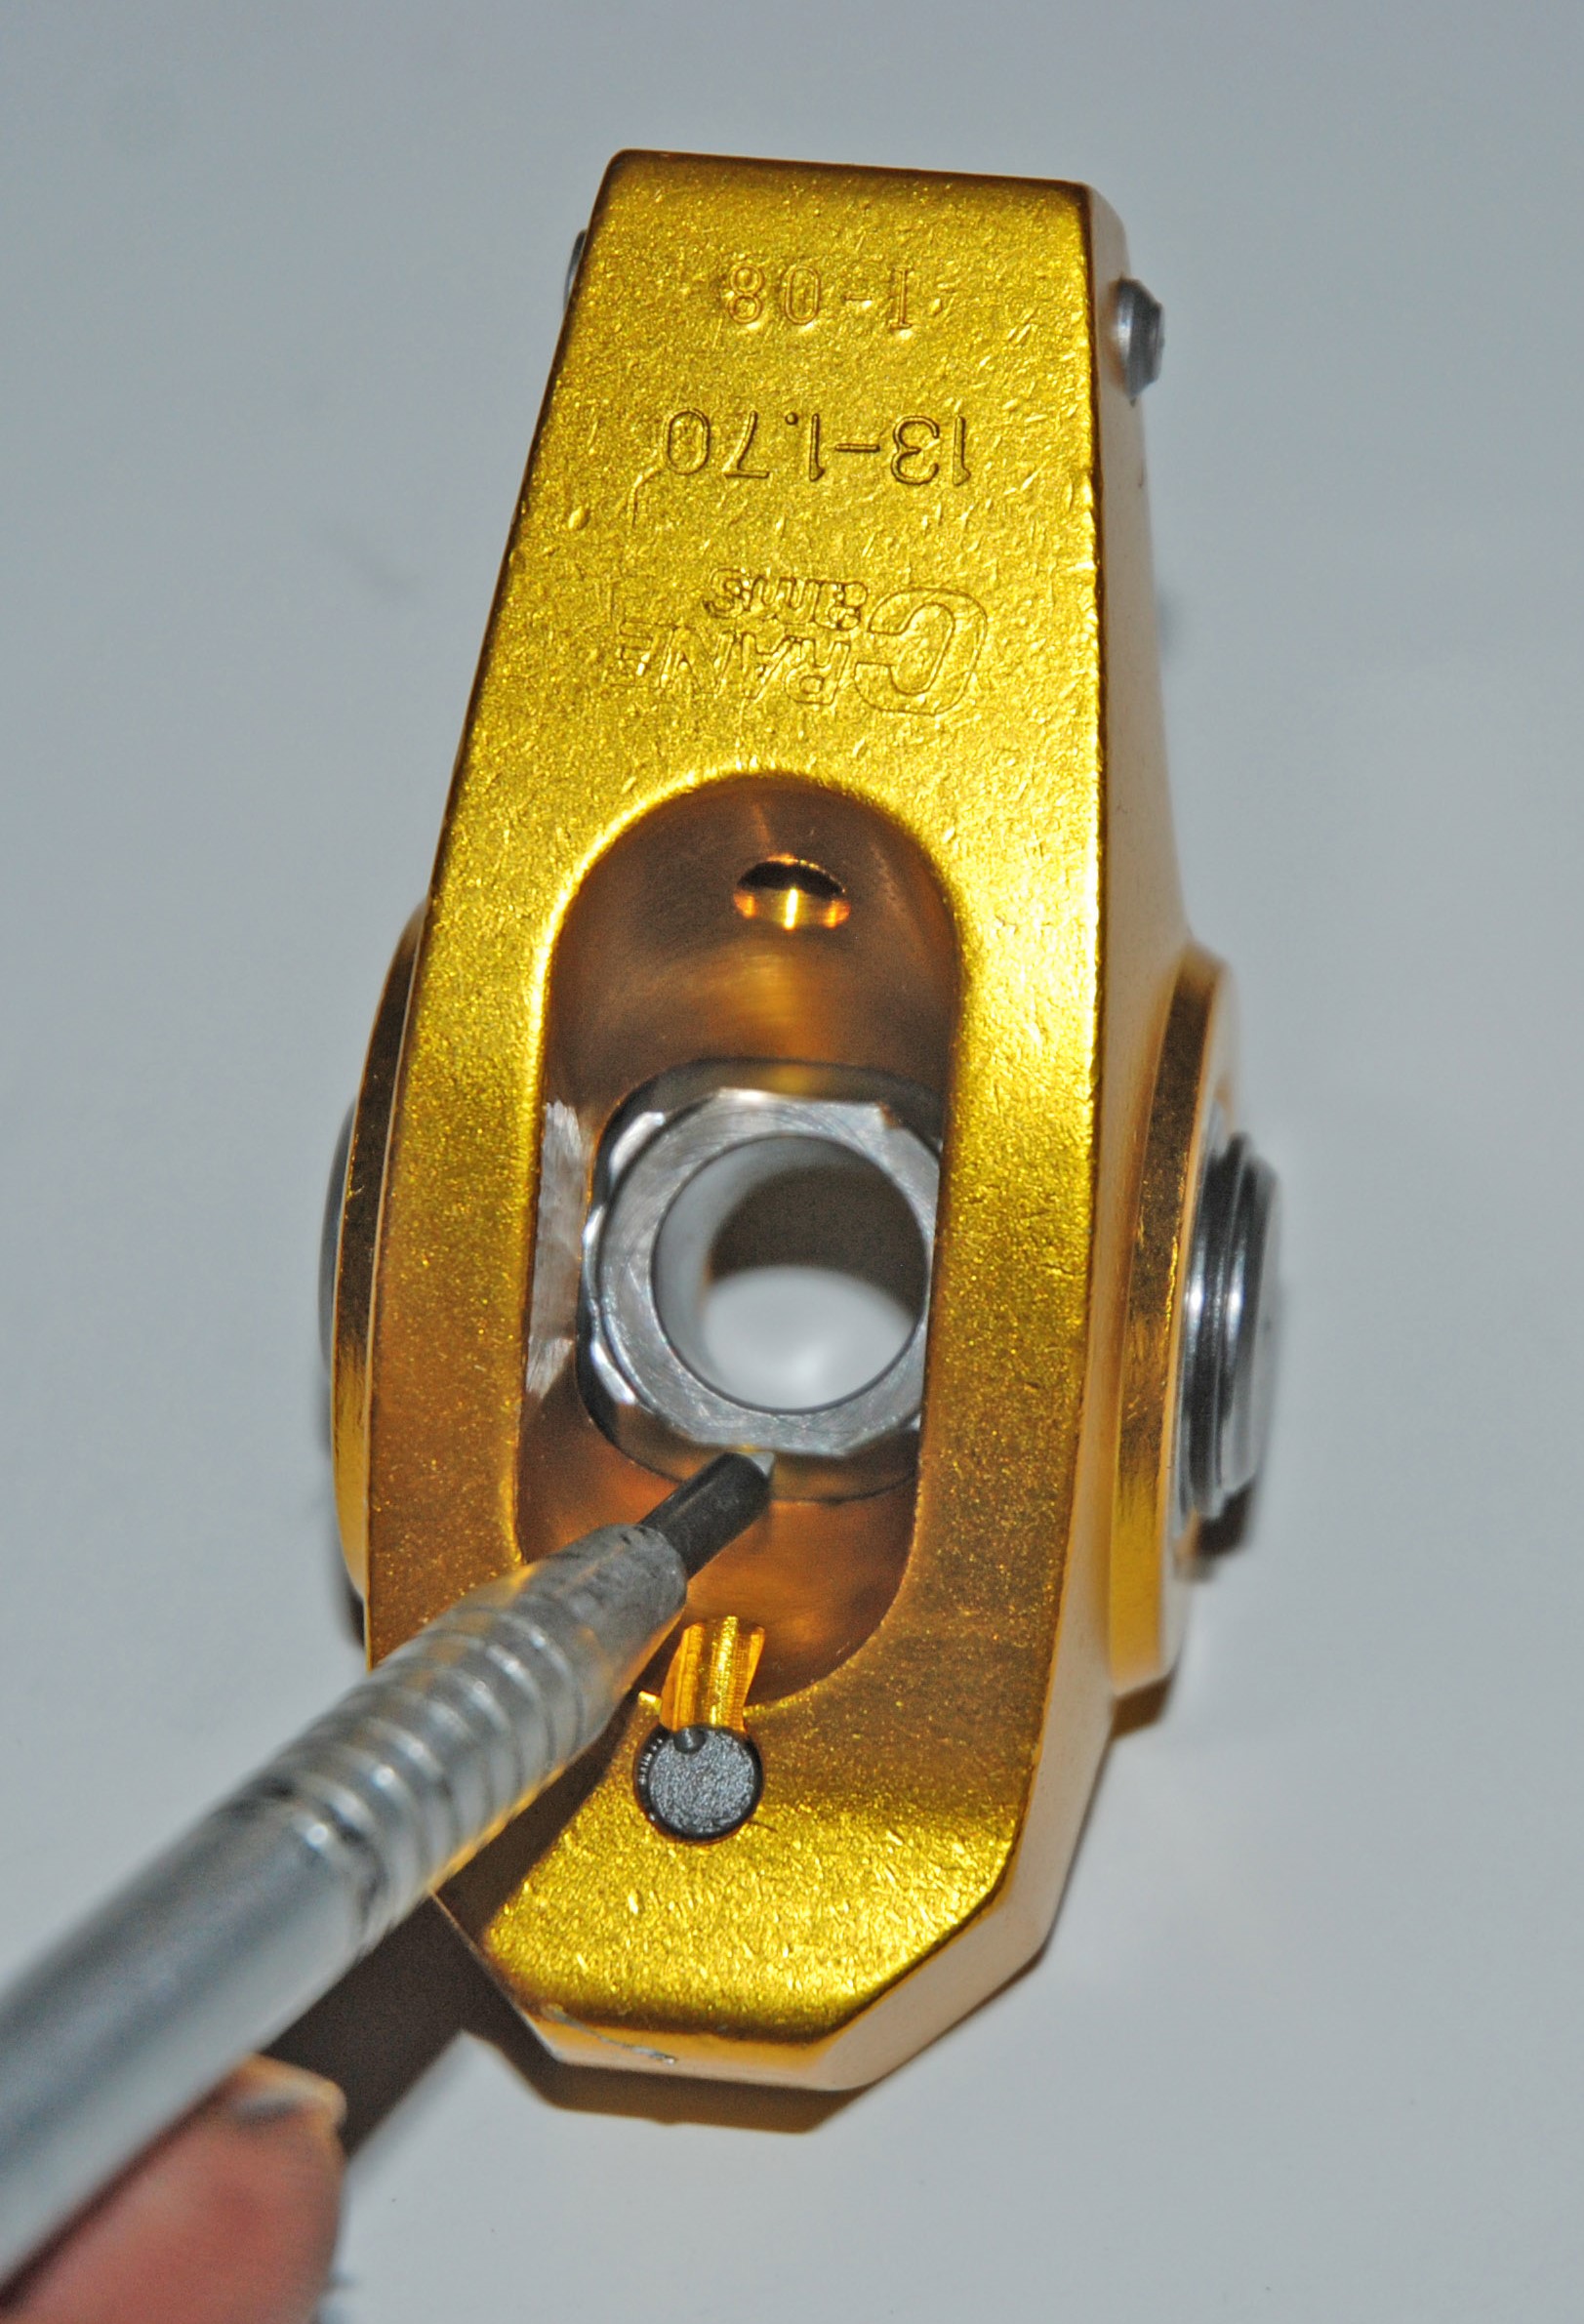
14. Off Your Rocker
Inspect conventional roller rockers carefully. On many roller rockers, the seat for the adjuster is flat on one side, and it is only on one side of the rocker. Don’t get it mixed up!
***
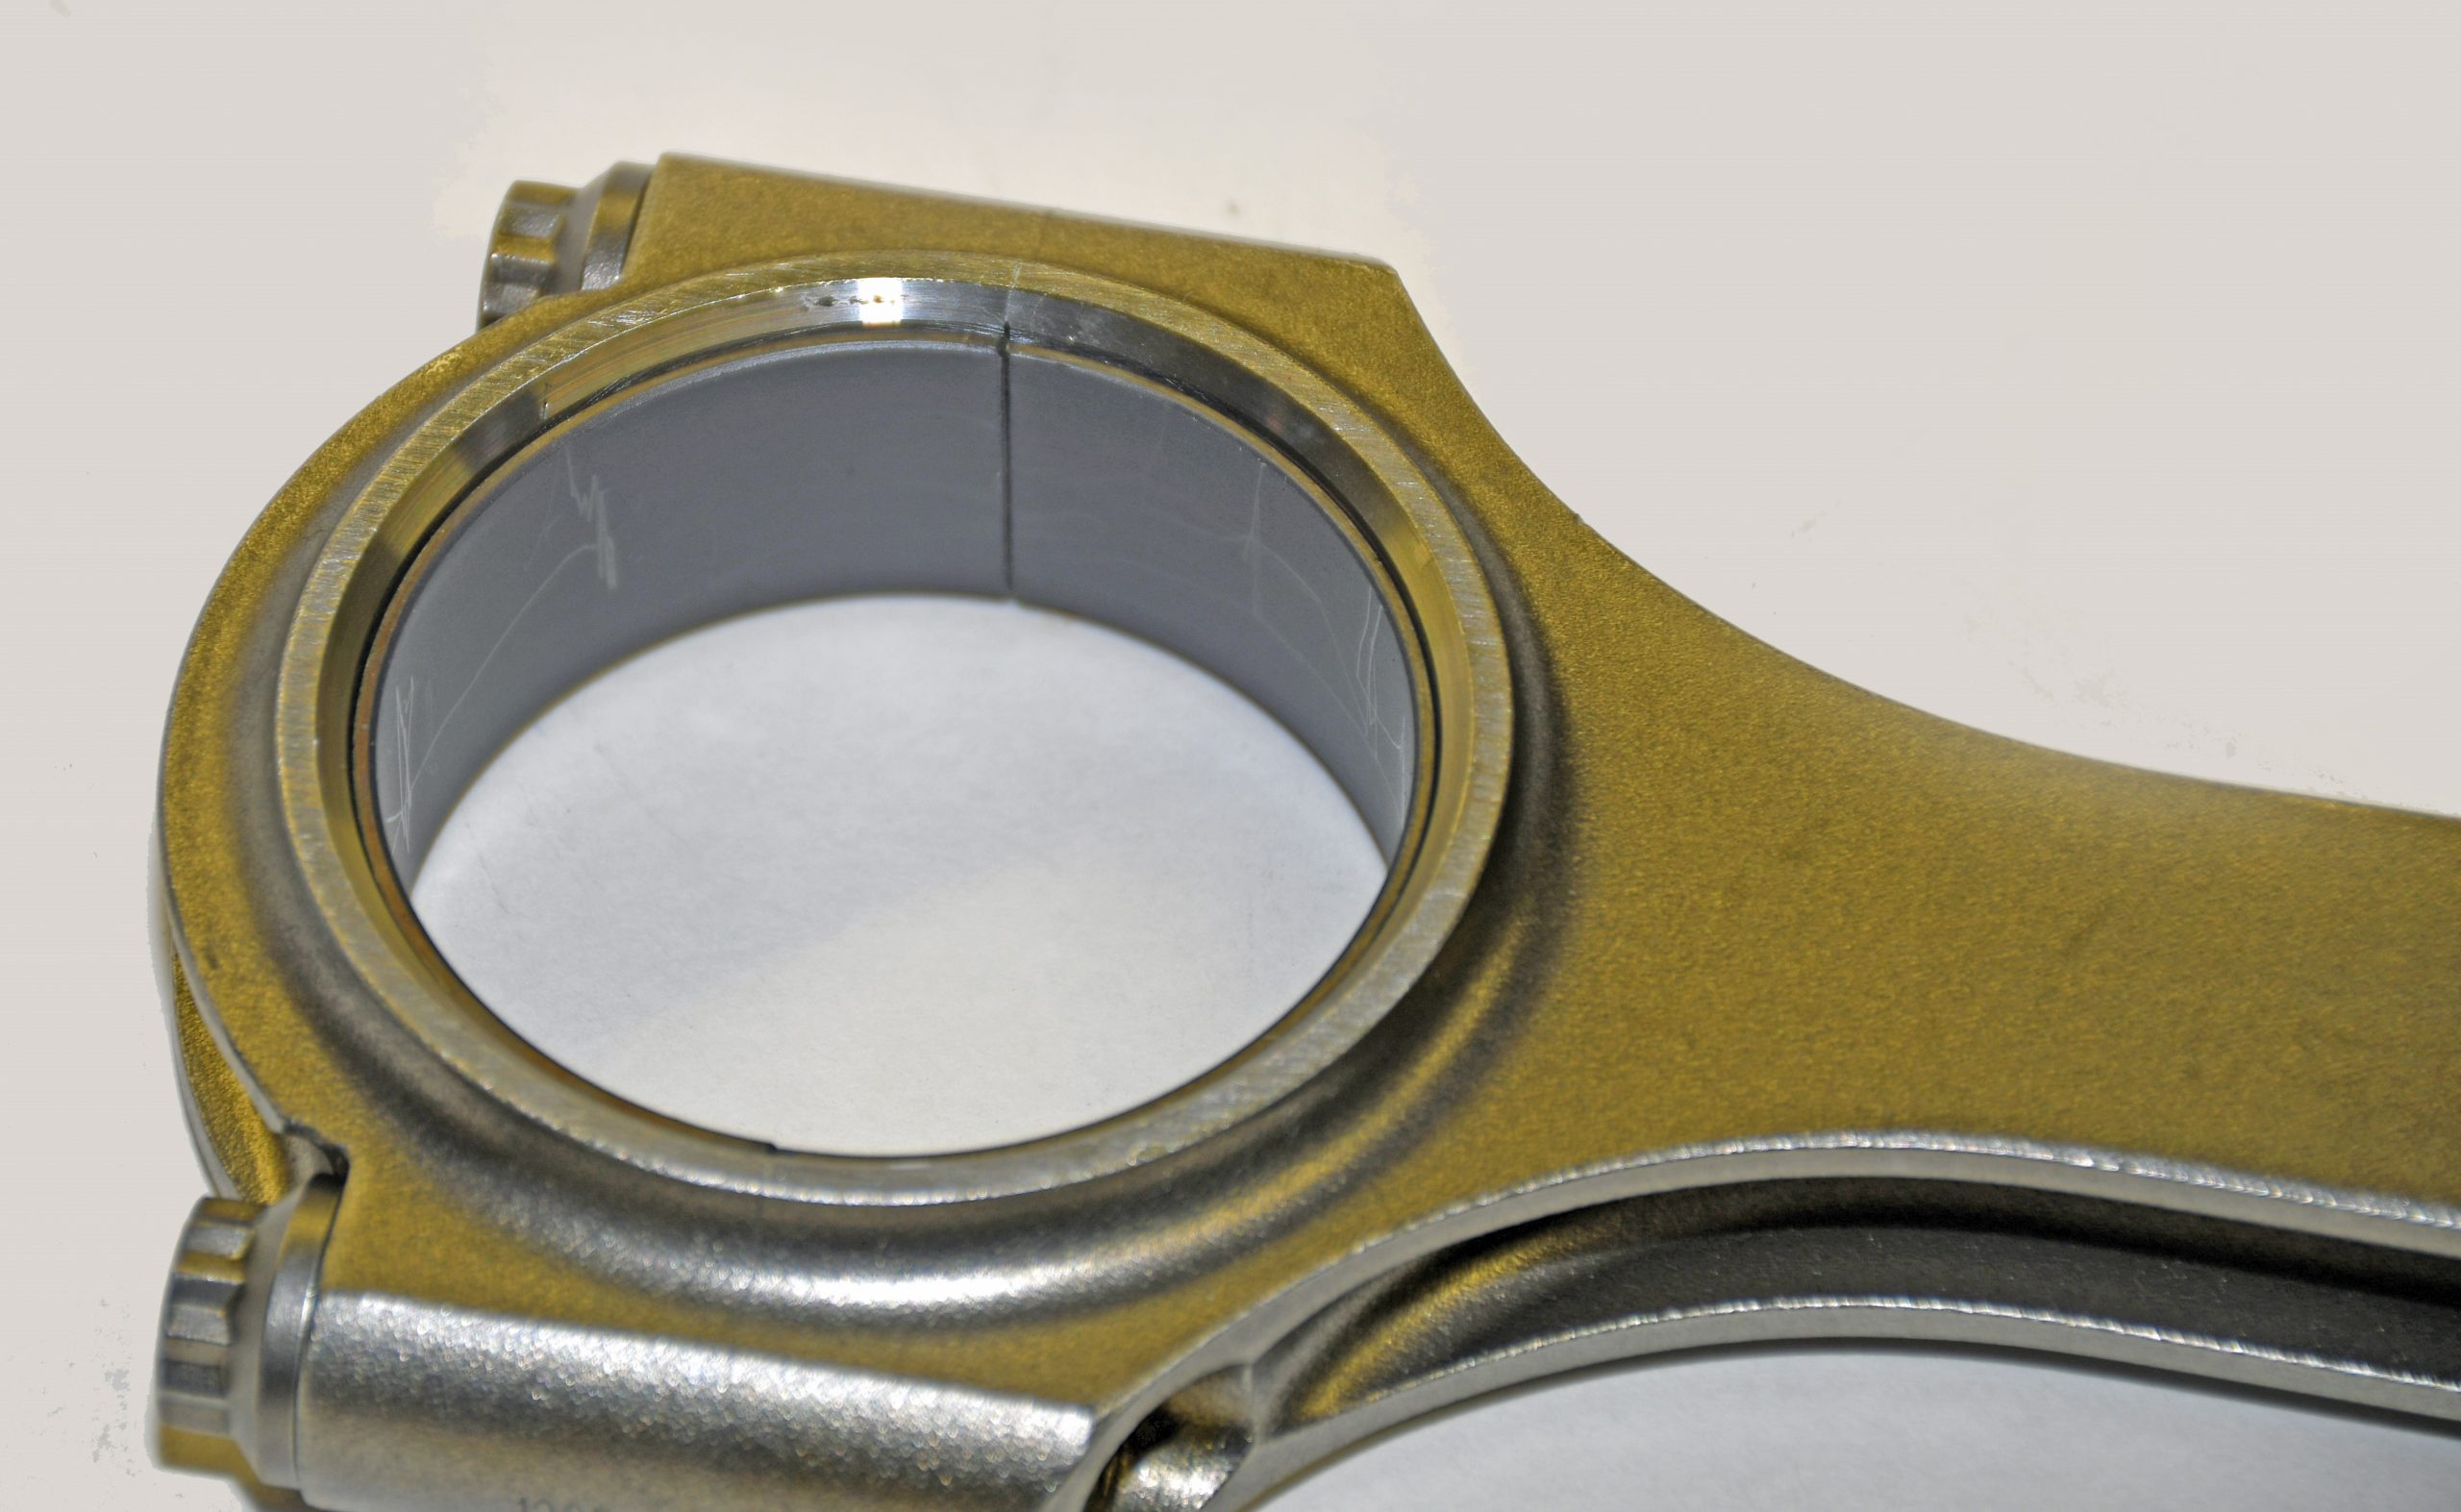
15. Misaligned Bearings
If you make use of narrow rod bearings in your combination (common with a large fillet radius crankshaft), keep a close eye on the bearing alignment prior to assembly. We’re not talking about the tang orientation. Instead, it’s sometimes easy to install the bearing halves slightly cocked in the bore. To resolve this issue, install the rod bearings in the connecting rod. Check the fit closely and lightly tighten. Double check the fit, split the rod (with the bearings intact) and then assemble. It can save you grief down the road.
***
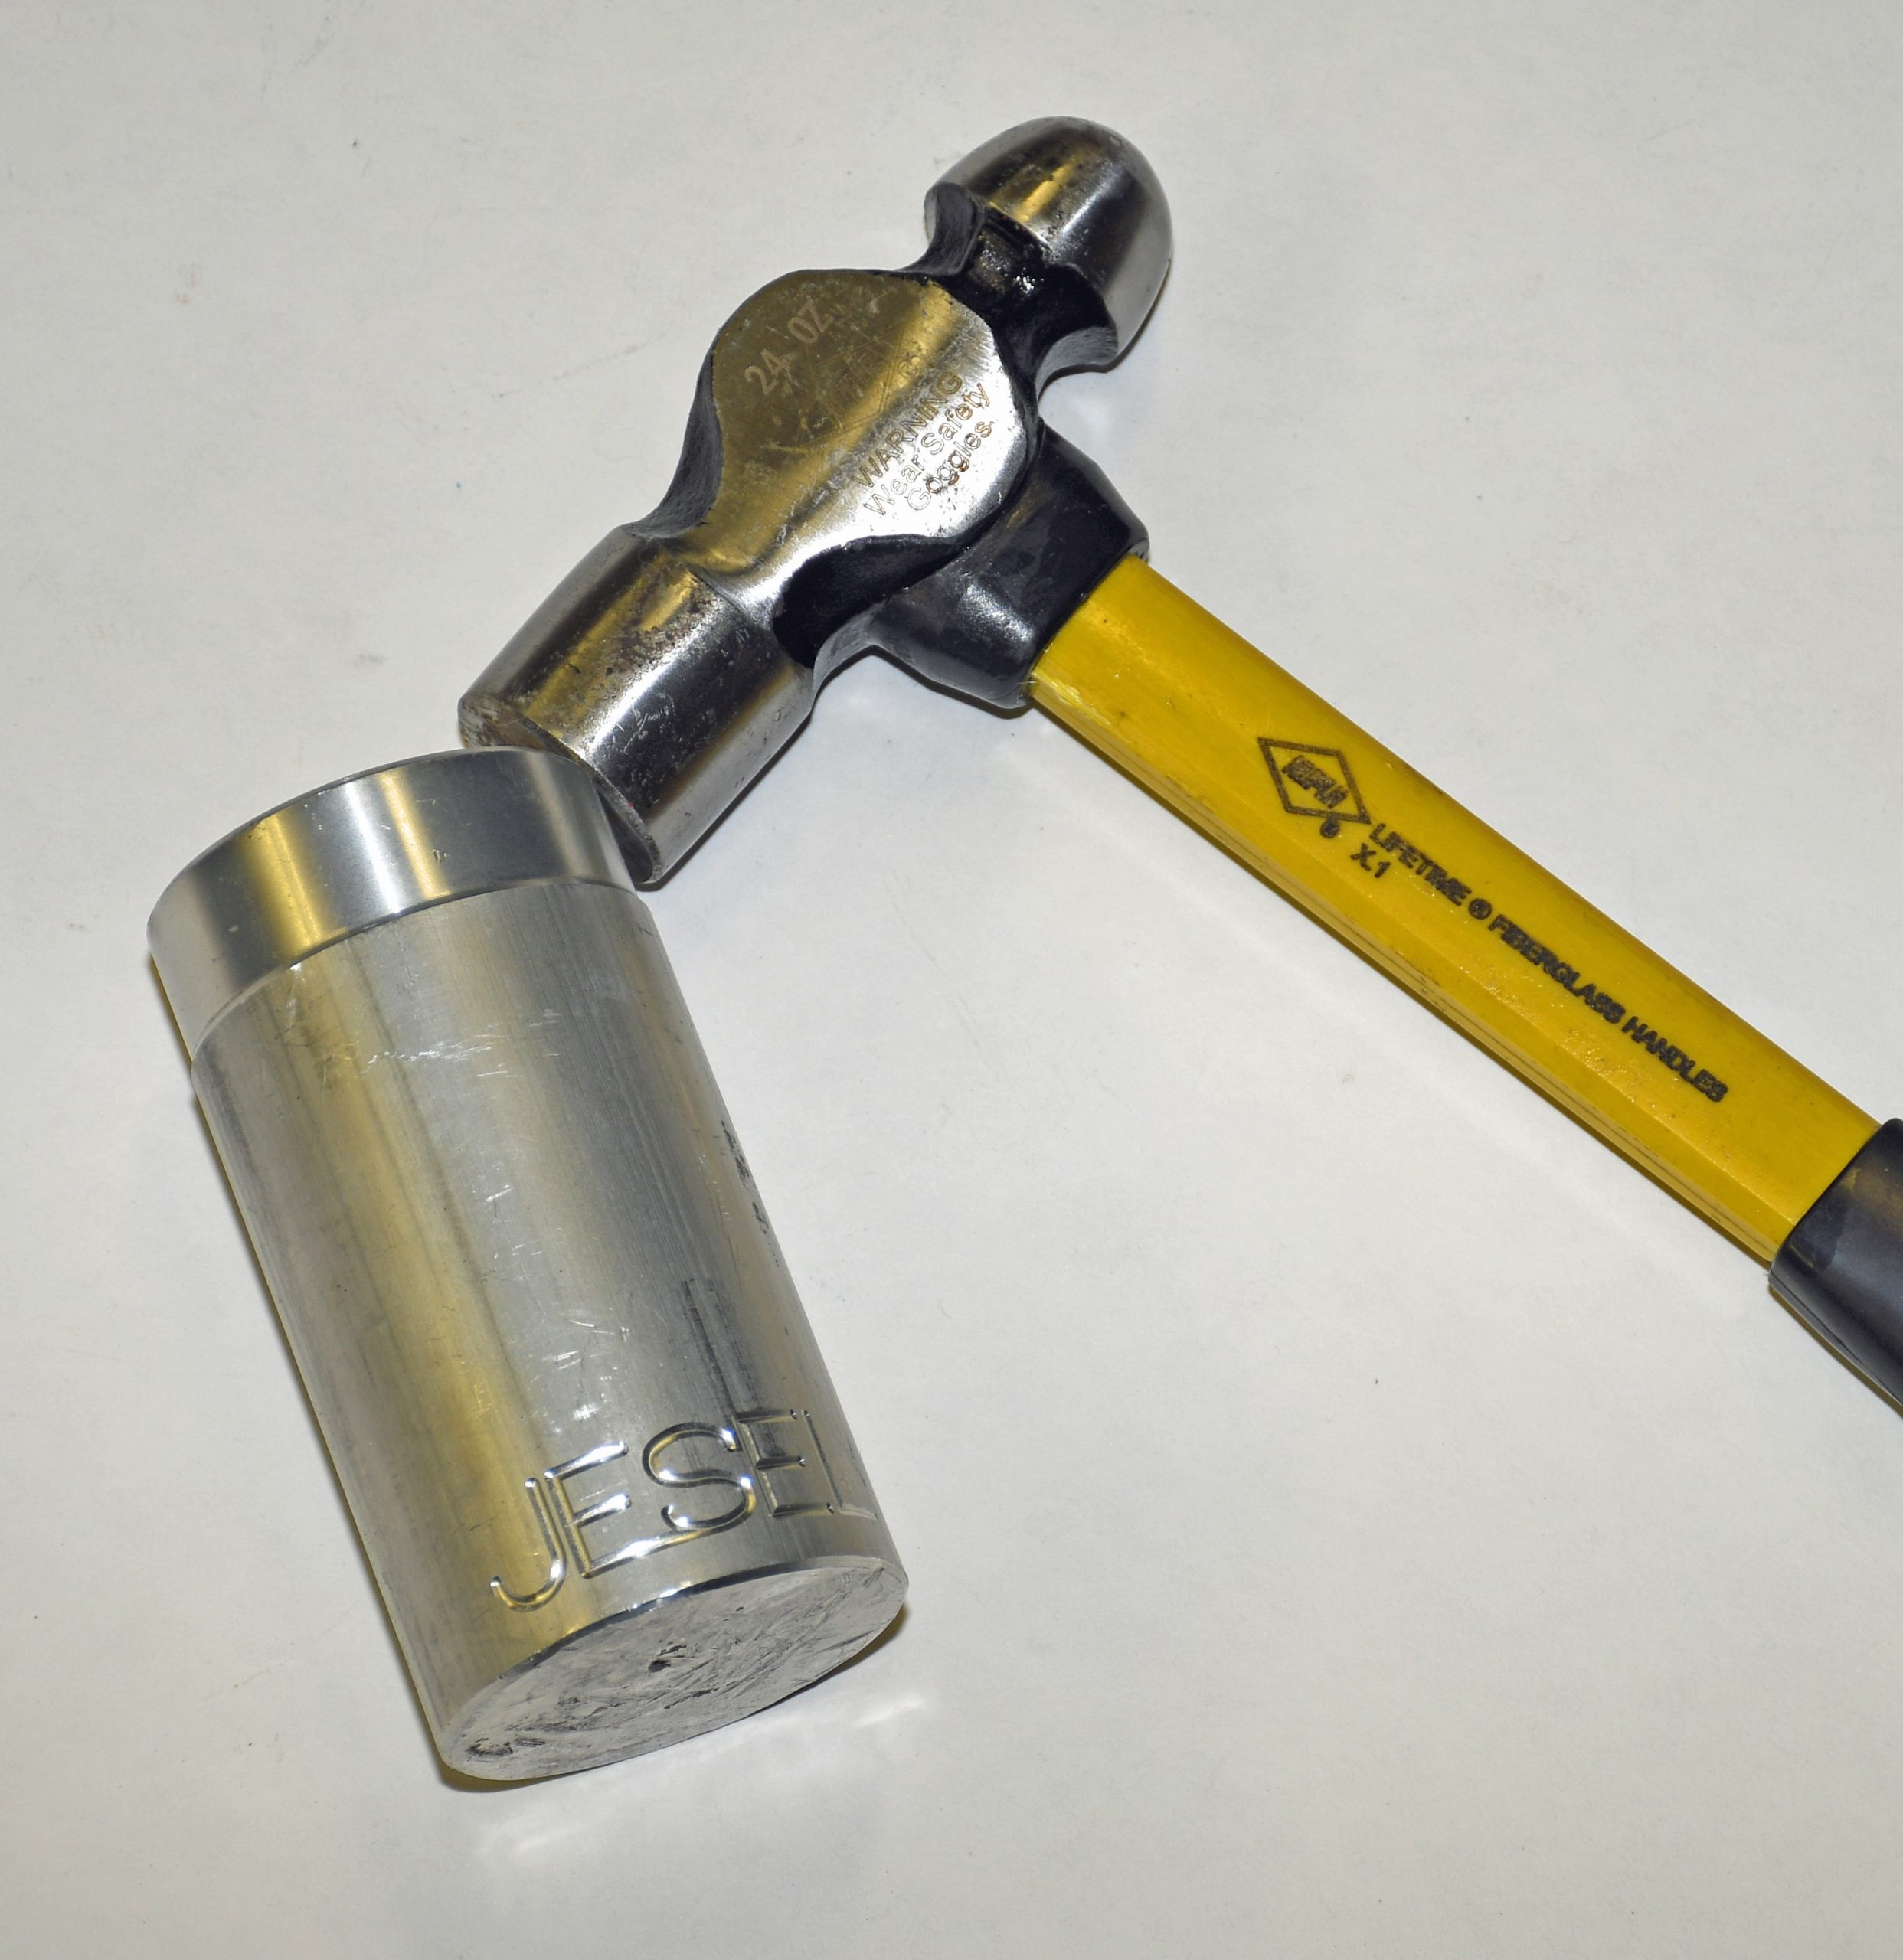
16. Driver
Jesel offers an aluminum driver to install the crank pulley on its belt drive setups (part number TOL-30001 for a SBC). Not only does the driver work for belt drive pulleys, it can also be used to install a crank sprocket for a conventional chain setup. In addition, it’s always a good idea to lightly coat the crank snout and the ID of the sprocket with assembly lube, prior to driving the pulley or sprocket in place.
***
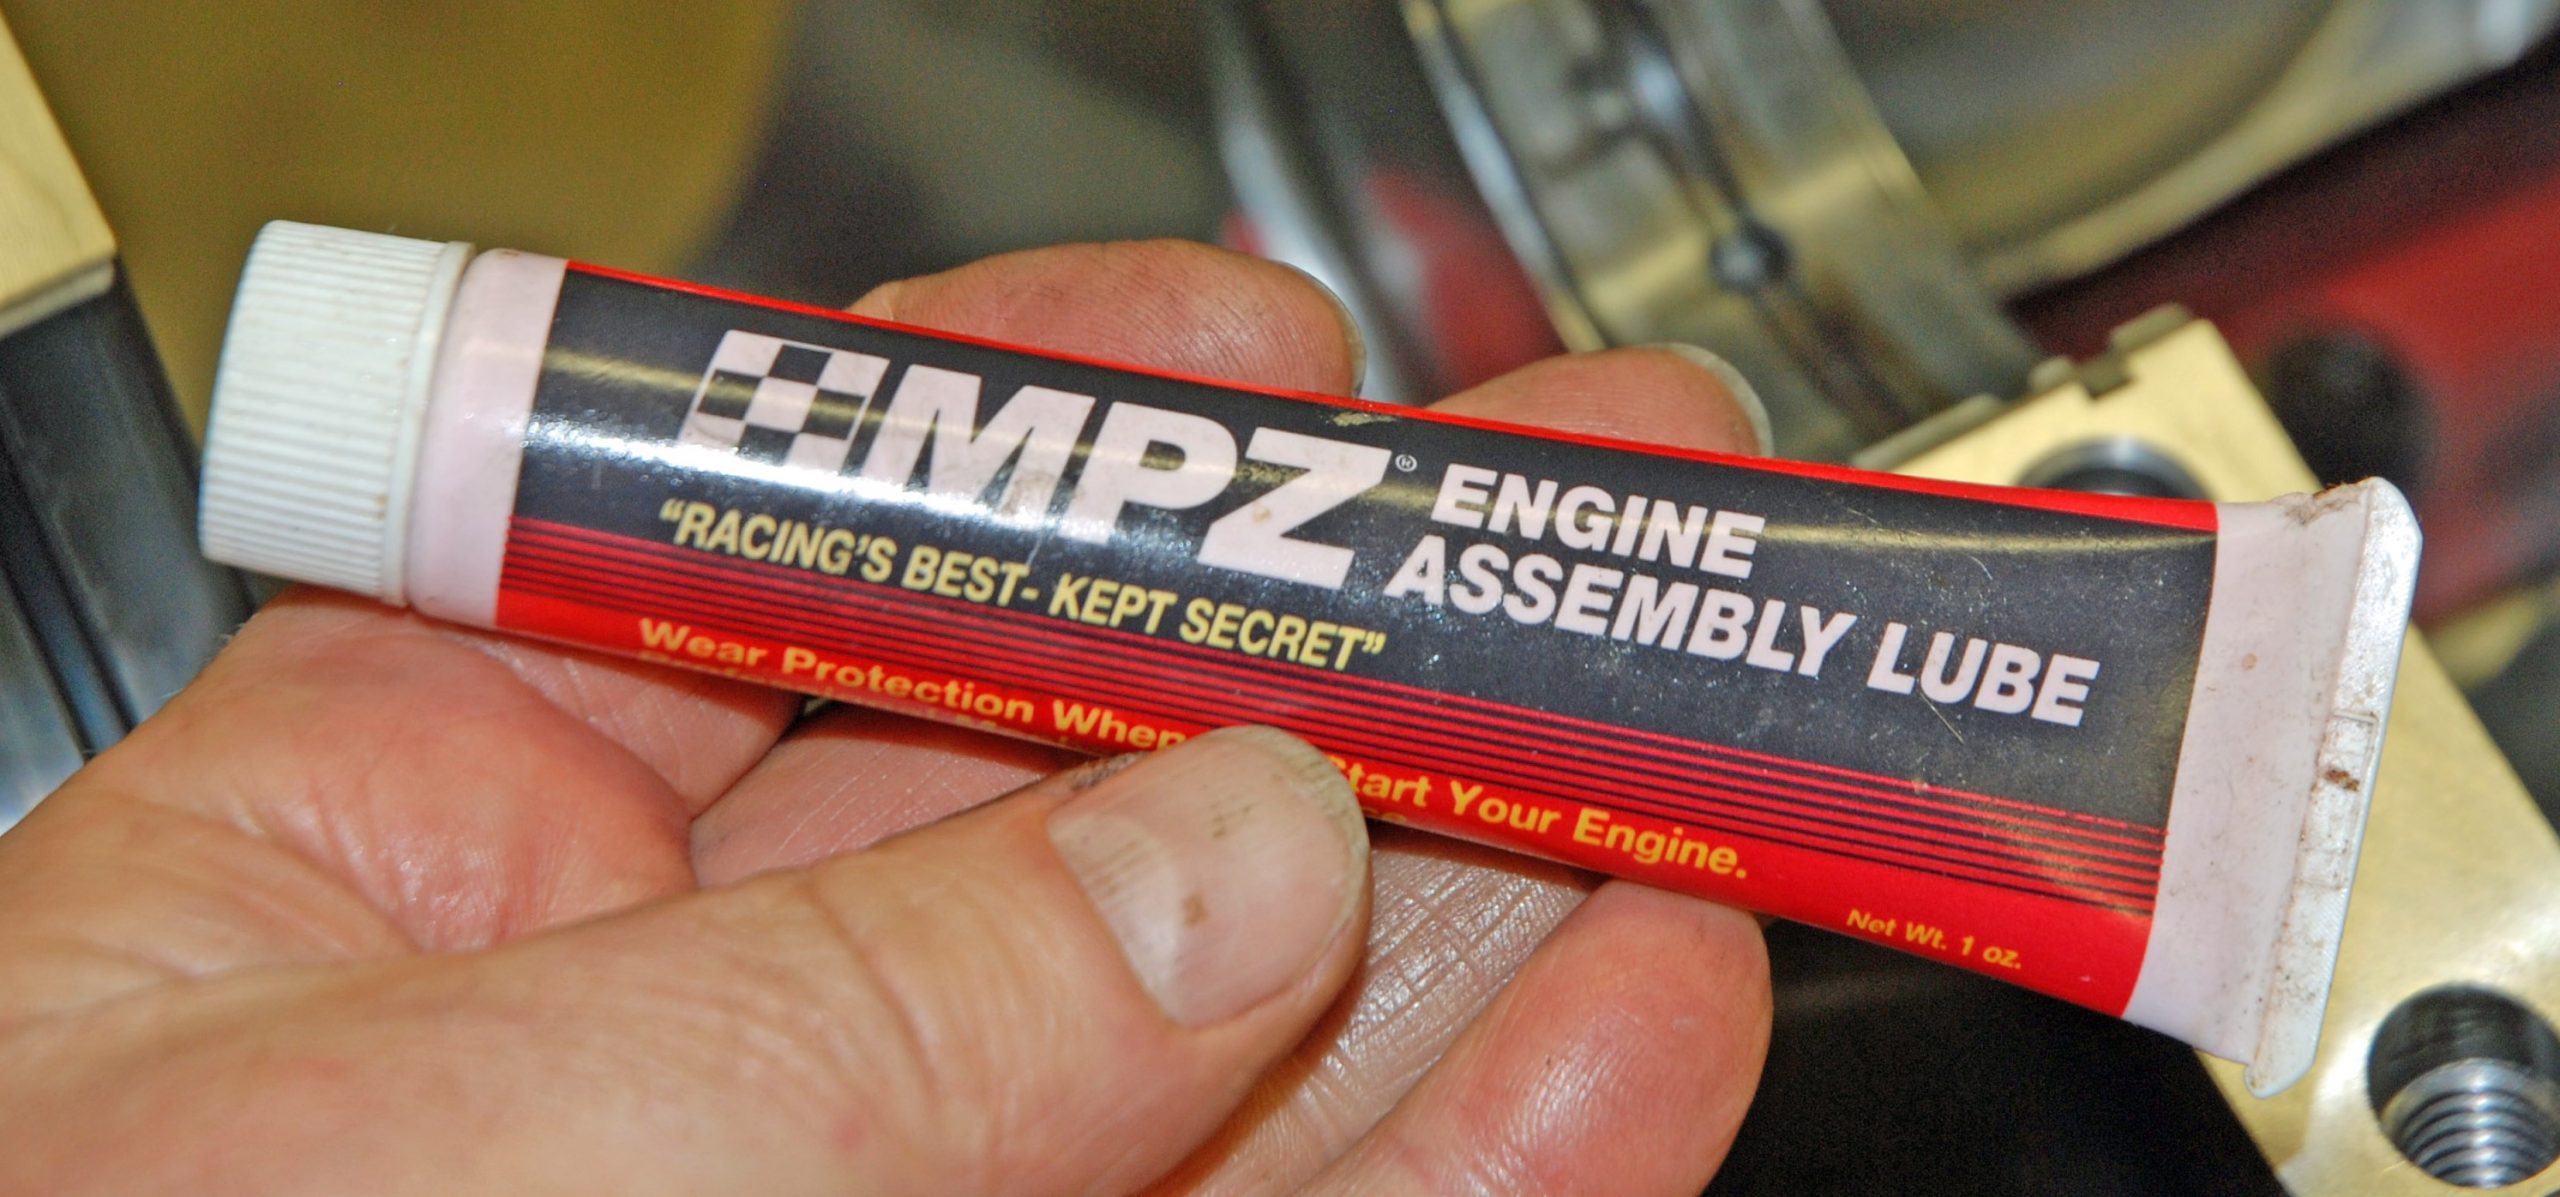
17. Lube Job
Speaking of assembly lube, it’s a good idea to use assembly lube when building an engine. Modern lubes are oil soluble. This means they won’t plug your oil filter. And no, a mix of STP and white lithium grease does not make for a good assembly lubricant!
***
18. Sealant for MLS Head Gaskets
Sealants should not be used on a MLS head gasket, such as this cylinder head gasket from Mahle. The only exception is this “ear” area on the gasket. It is often unsupported, and there’s a chance it can seep coolant. The solution is to use a tiny (thin) application of silicone on both sides of the ear.
***
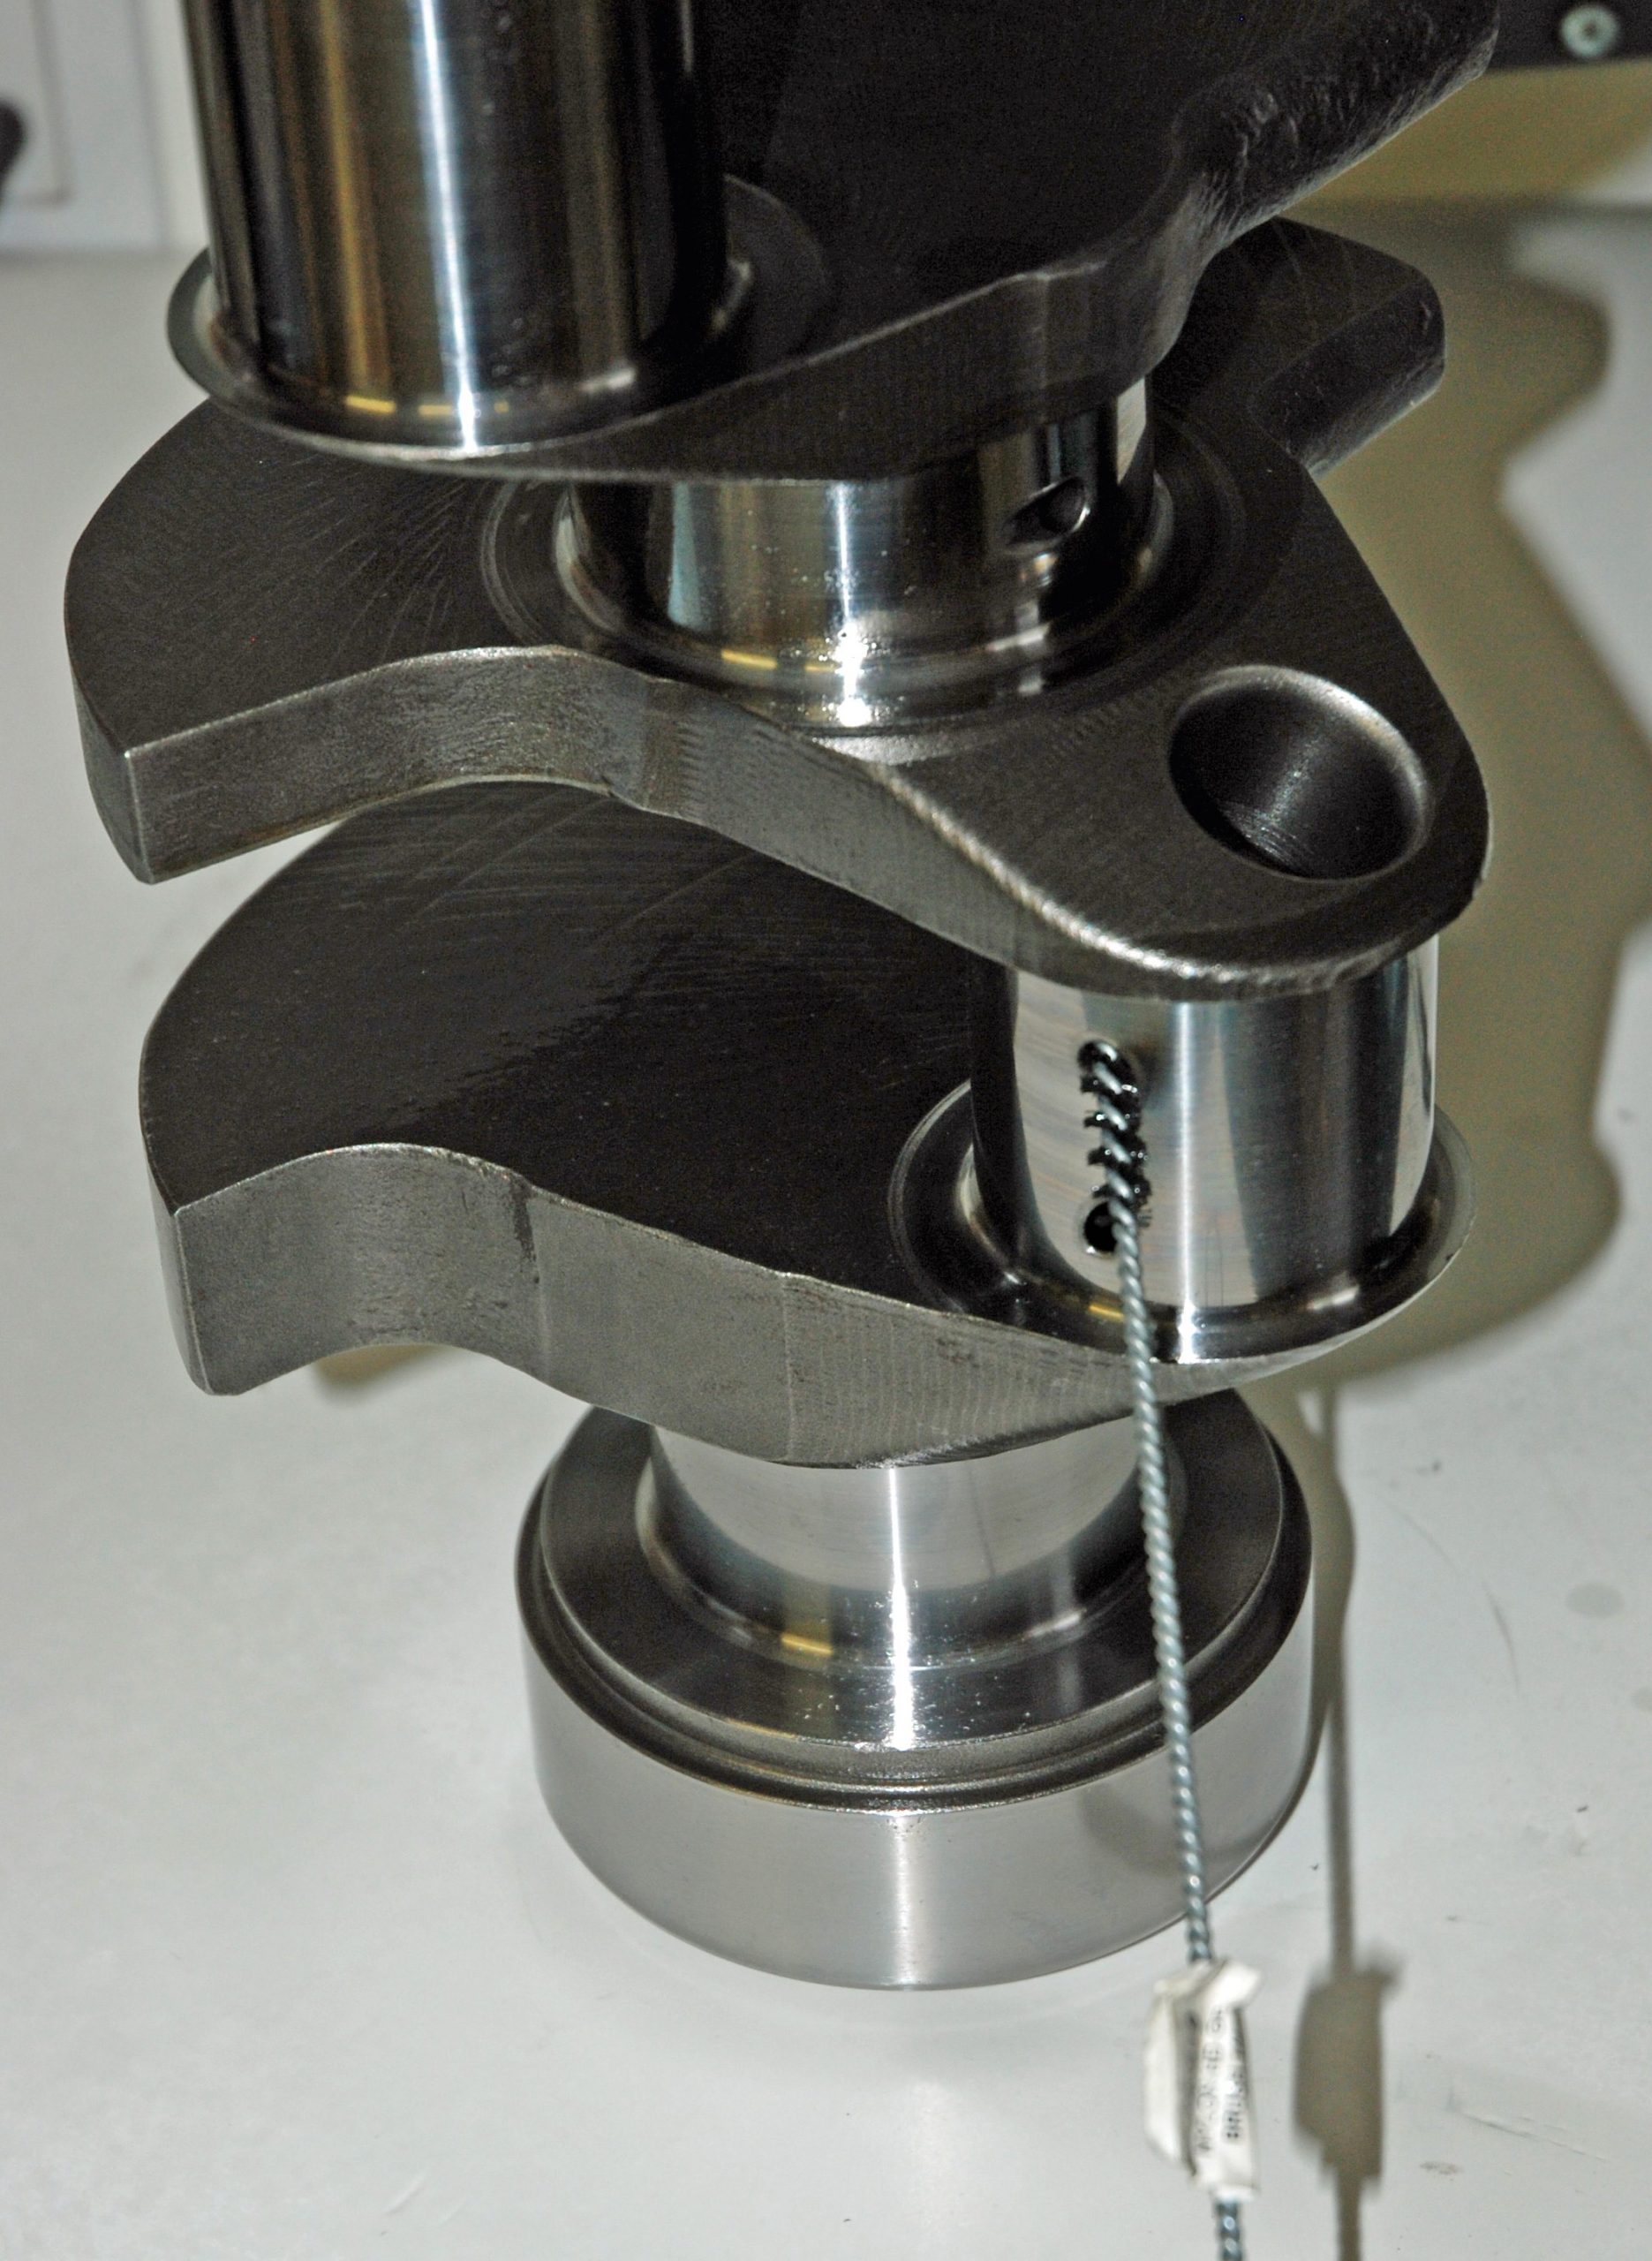
19. Cosmoline Crank
Don’t forget to clean a new crankshaft thoroughly. A new crank such as this can have grease, cosmoline, or other protectants inside the oil galleries in the crankshaft. The same applies to a known crank. You never know what might be lurking in the galleries.
***
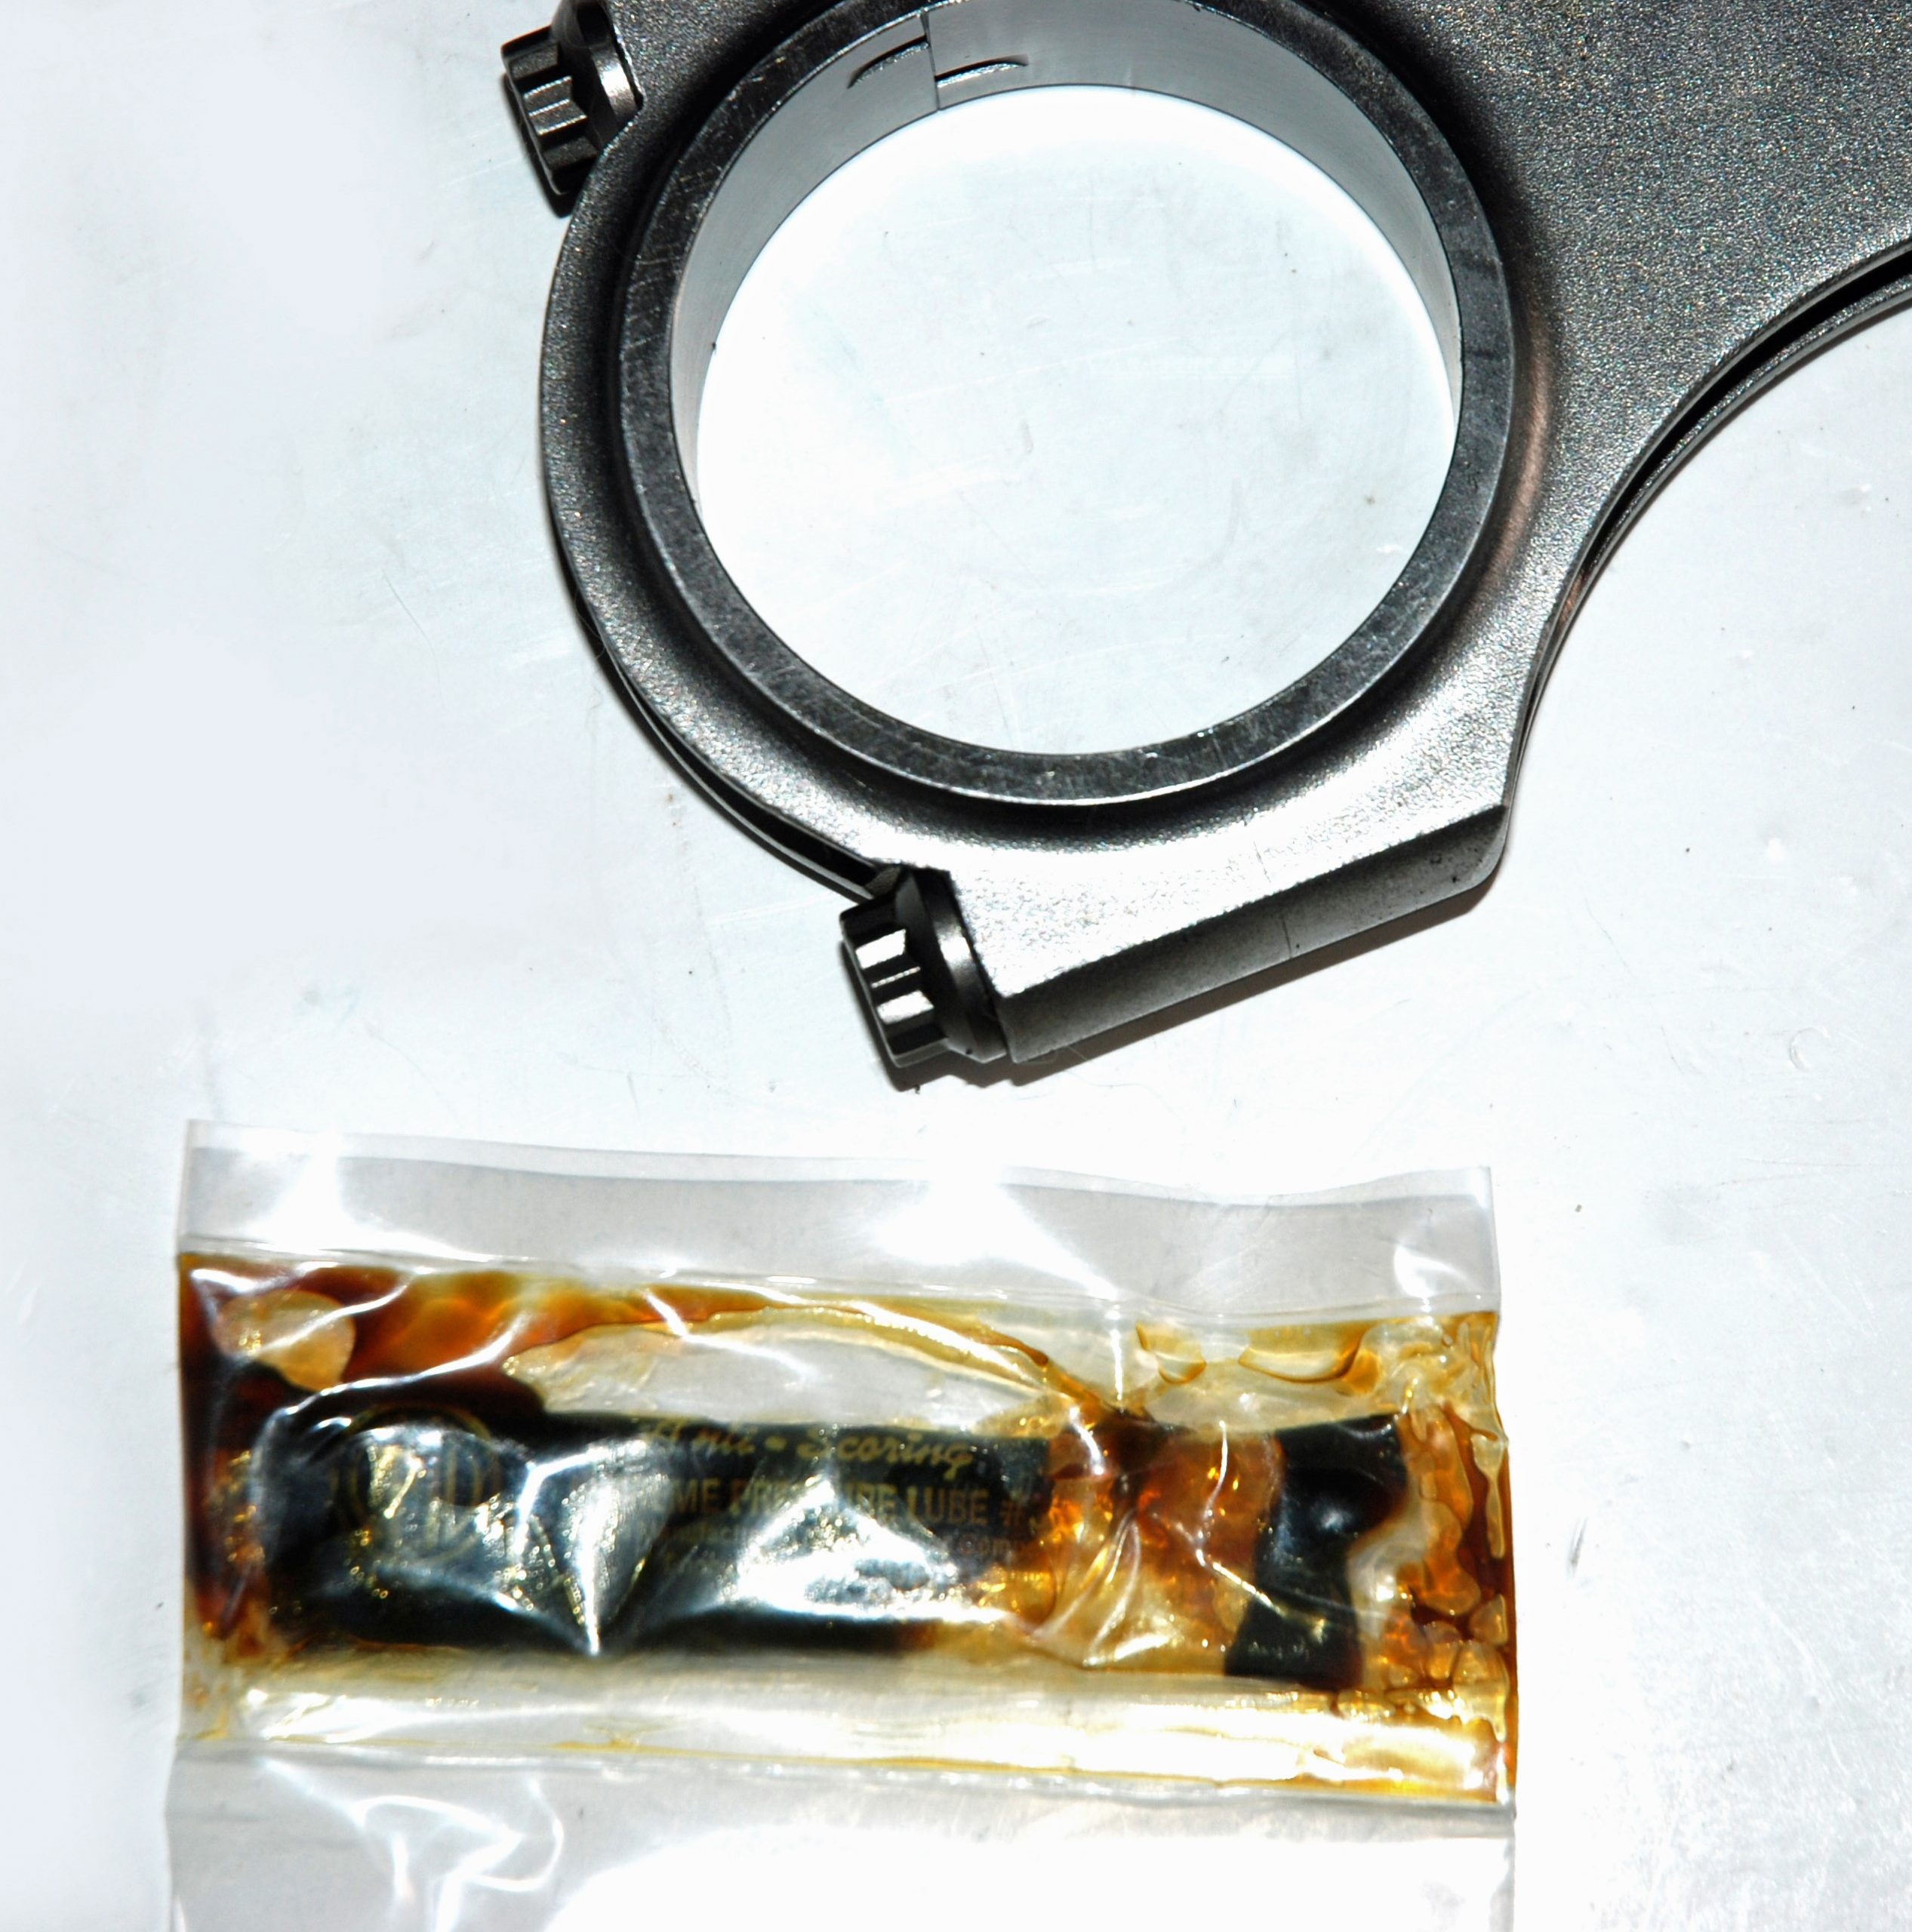
20. Thread Ease
The use of appropriate assembly lube is extremely important when dealing with connecting rod fasteners. Once the rods are properly cleaned to remove all dirt and foreign oils, spread the rod bolt assembly lube on the threads. Be certain to spread the lube under the head of the bolt prior to beginning the tightening sequence.
***
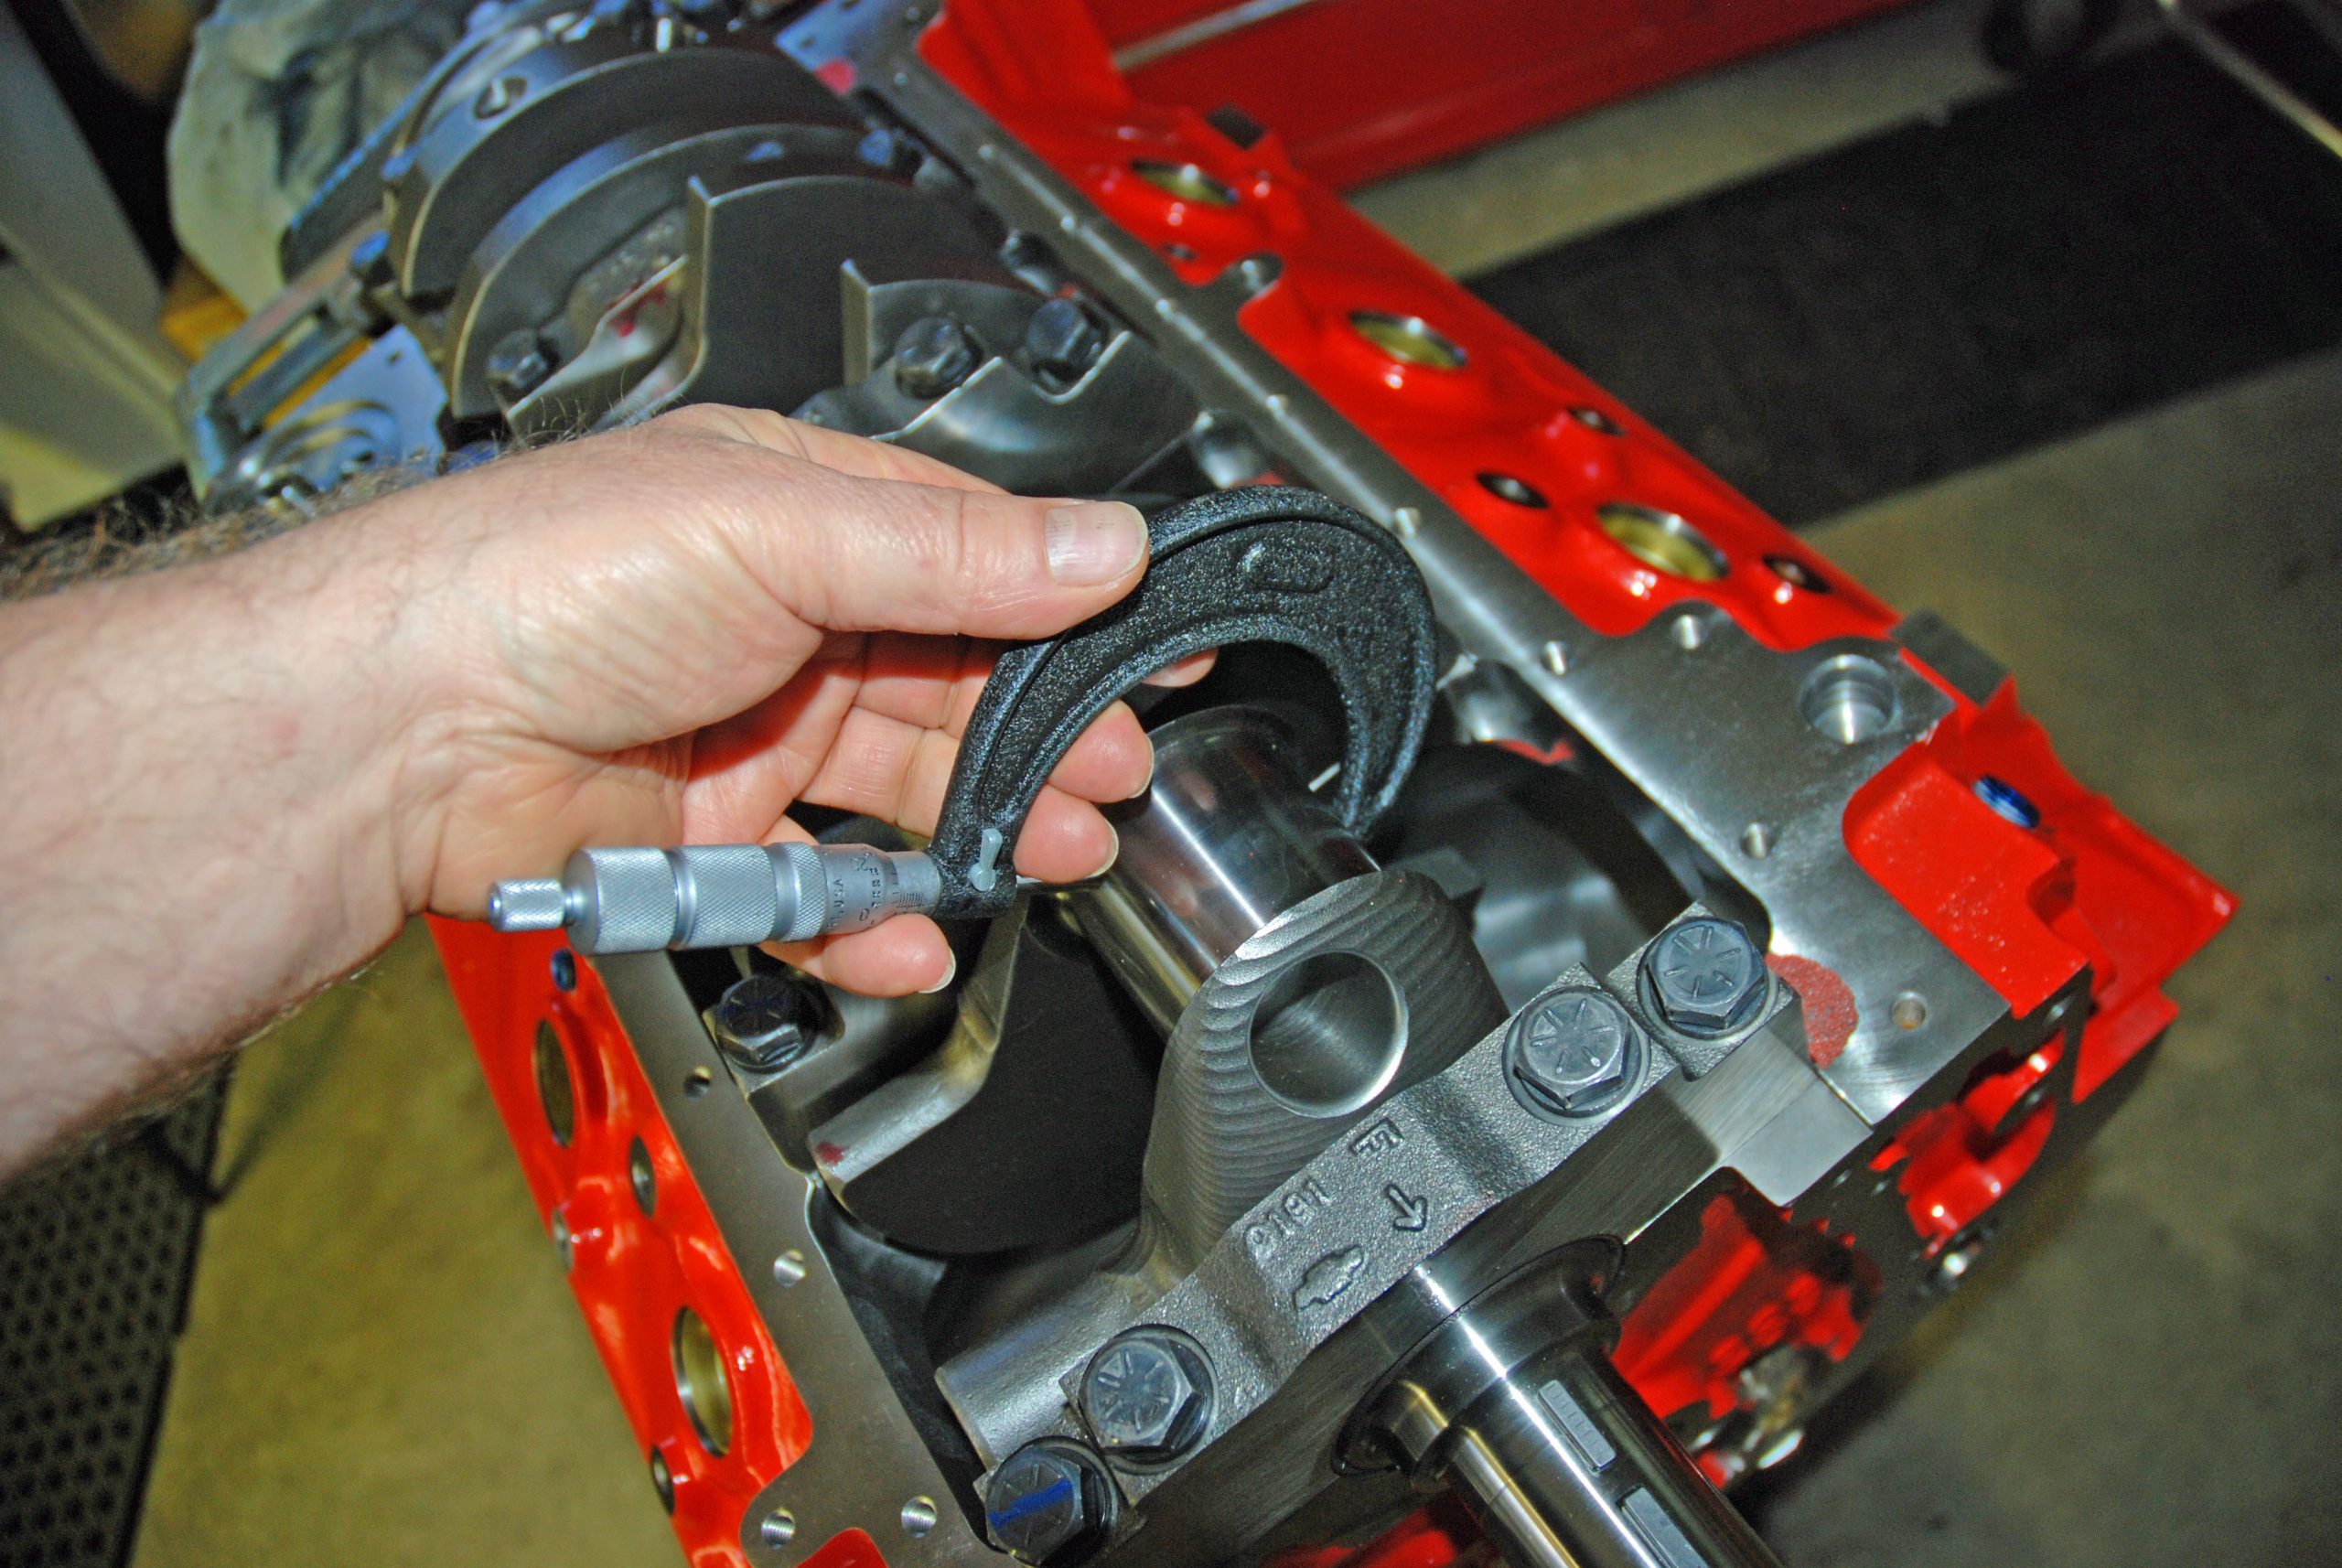
21. Measures Up
What do you use to measure the crank—a micrometer and dial bore gauge for measuring crank journals (rod and main) or Plastigage? The choice is yours but the micrometer and the dial bore gauge route will be more accurate.
Something else to consider is the Plastigage package is metric on one side and SAE (inch) on the other. Don’t mix them up.
***
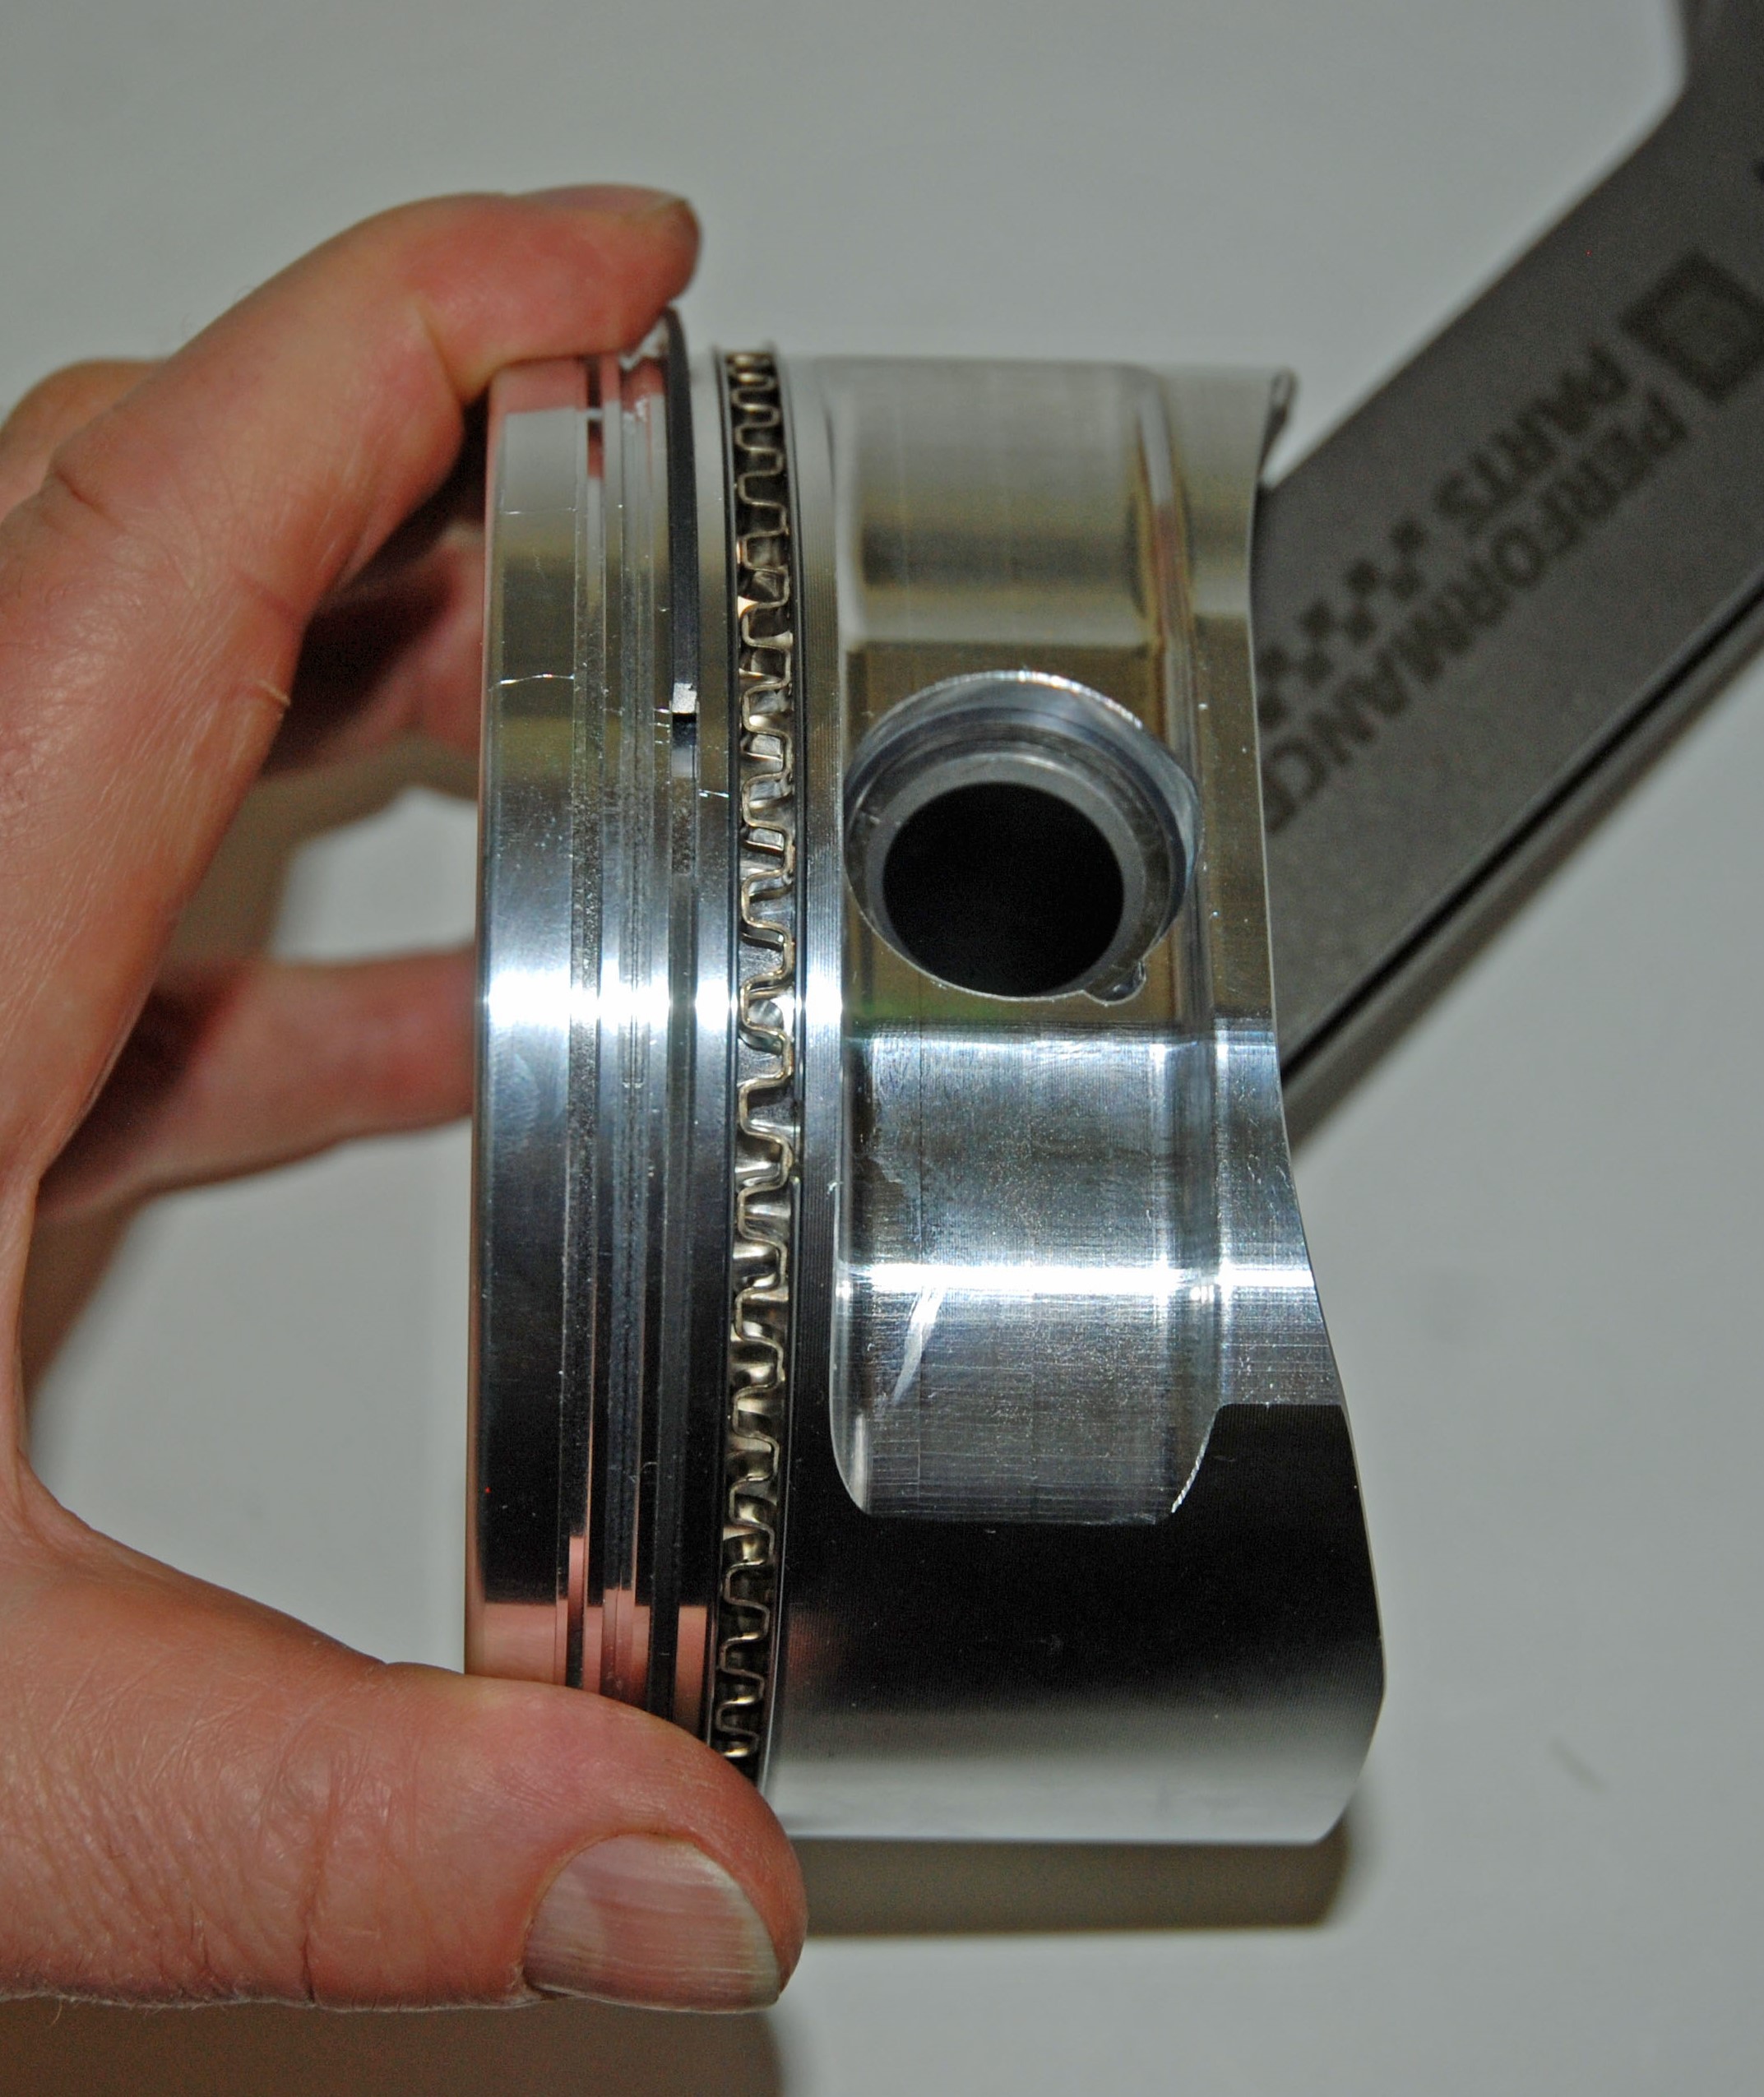
22. Ring Overlap
This is a common tip, but because it occurs so often and causes so much damage, we’ll mention it again: Always ensure the oil ring expander ends do not overlap. It’s very easy to do and it’s the last thing to check before sliding the piston and ring combination through a ring compressor.
***
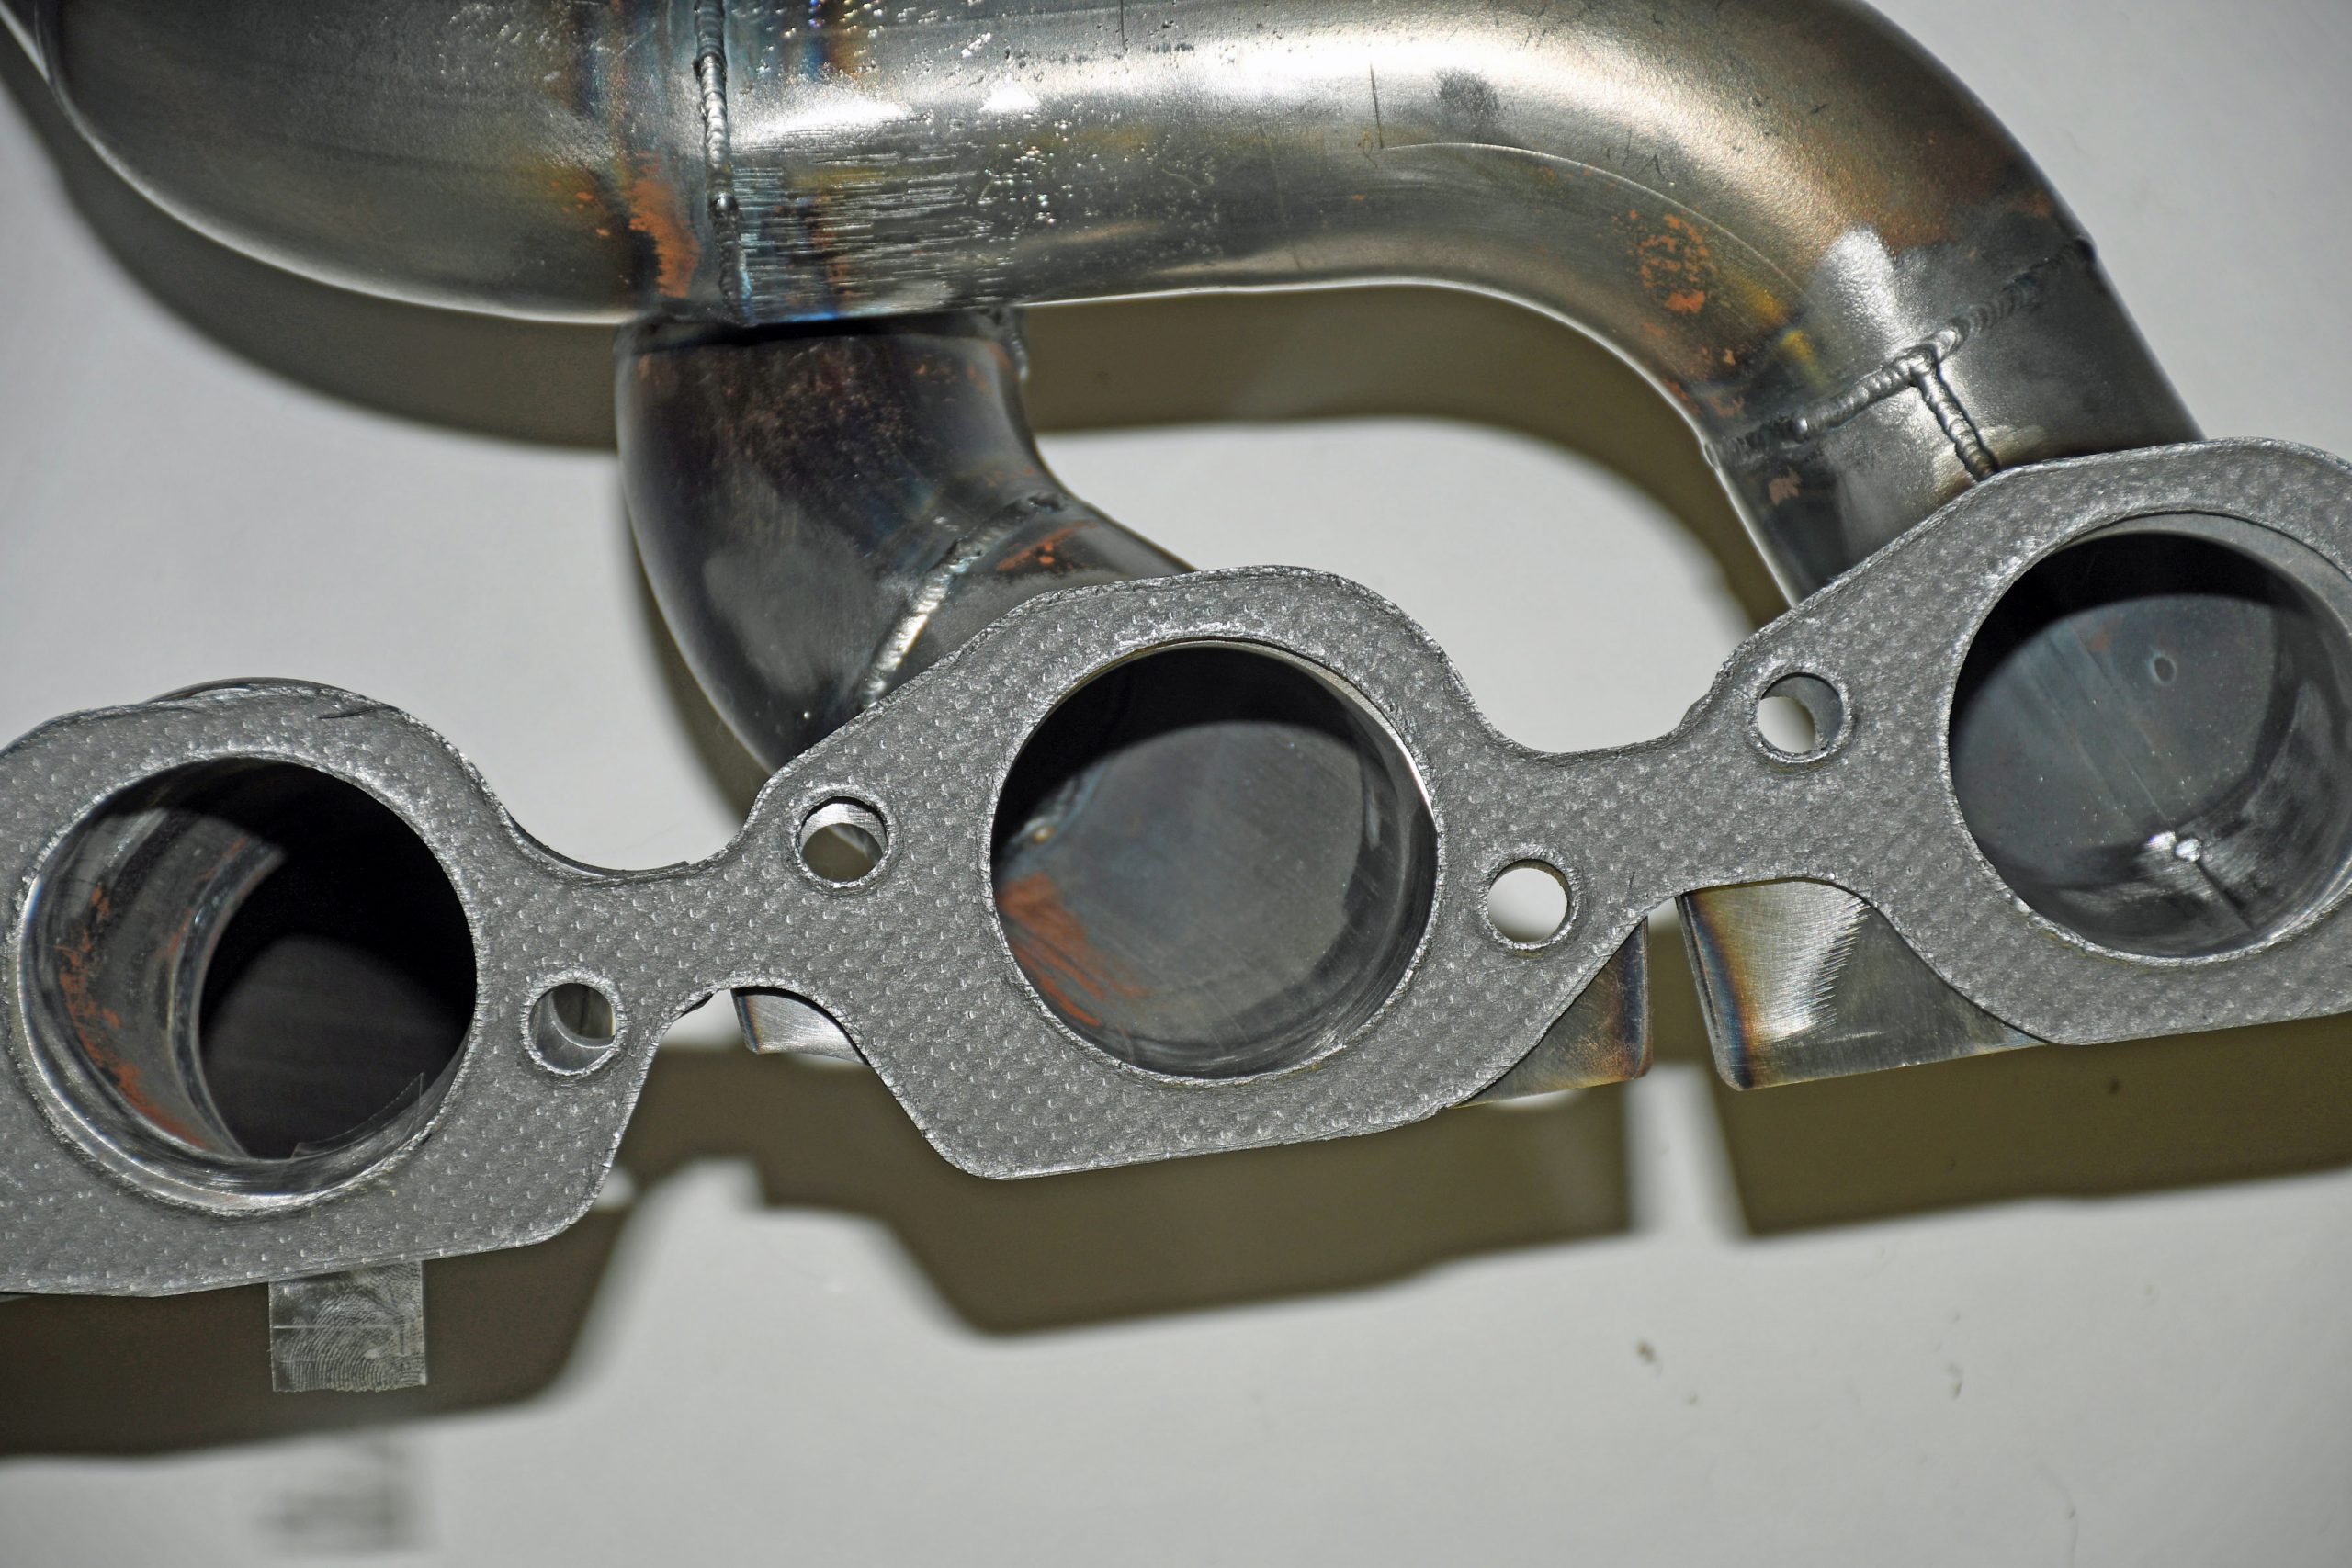
23. Header Holes
When shopping for header gaskets (same applies to intake gaskets), always keep the cylinder head port configuration and actual overall head port dimensions in mind. You don’t want the gasket hanging into the port. Instead, you want it to seal on the areas adjacent to and surrounding the port,
***
24. Semi-Sticky Situation
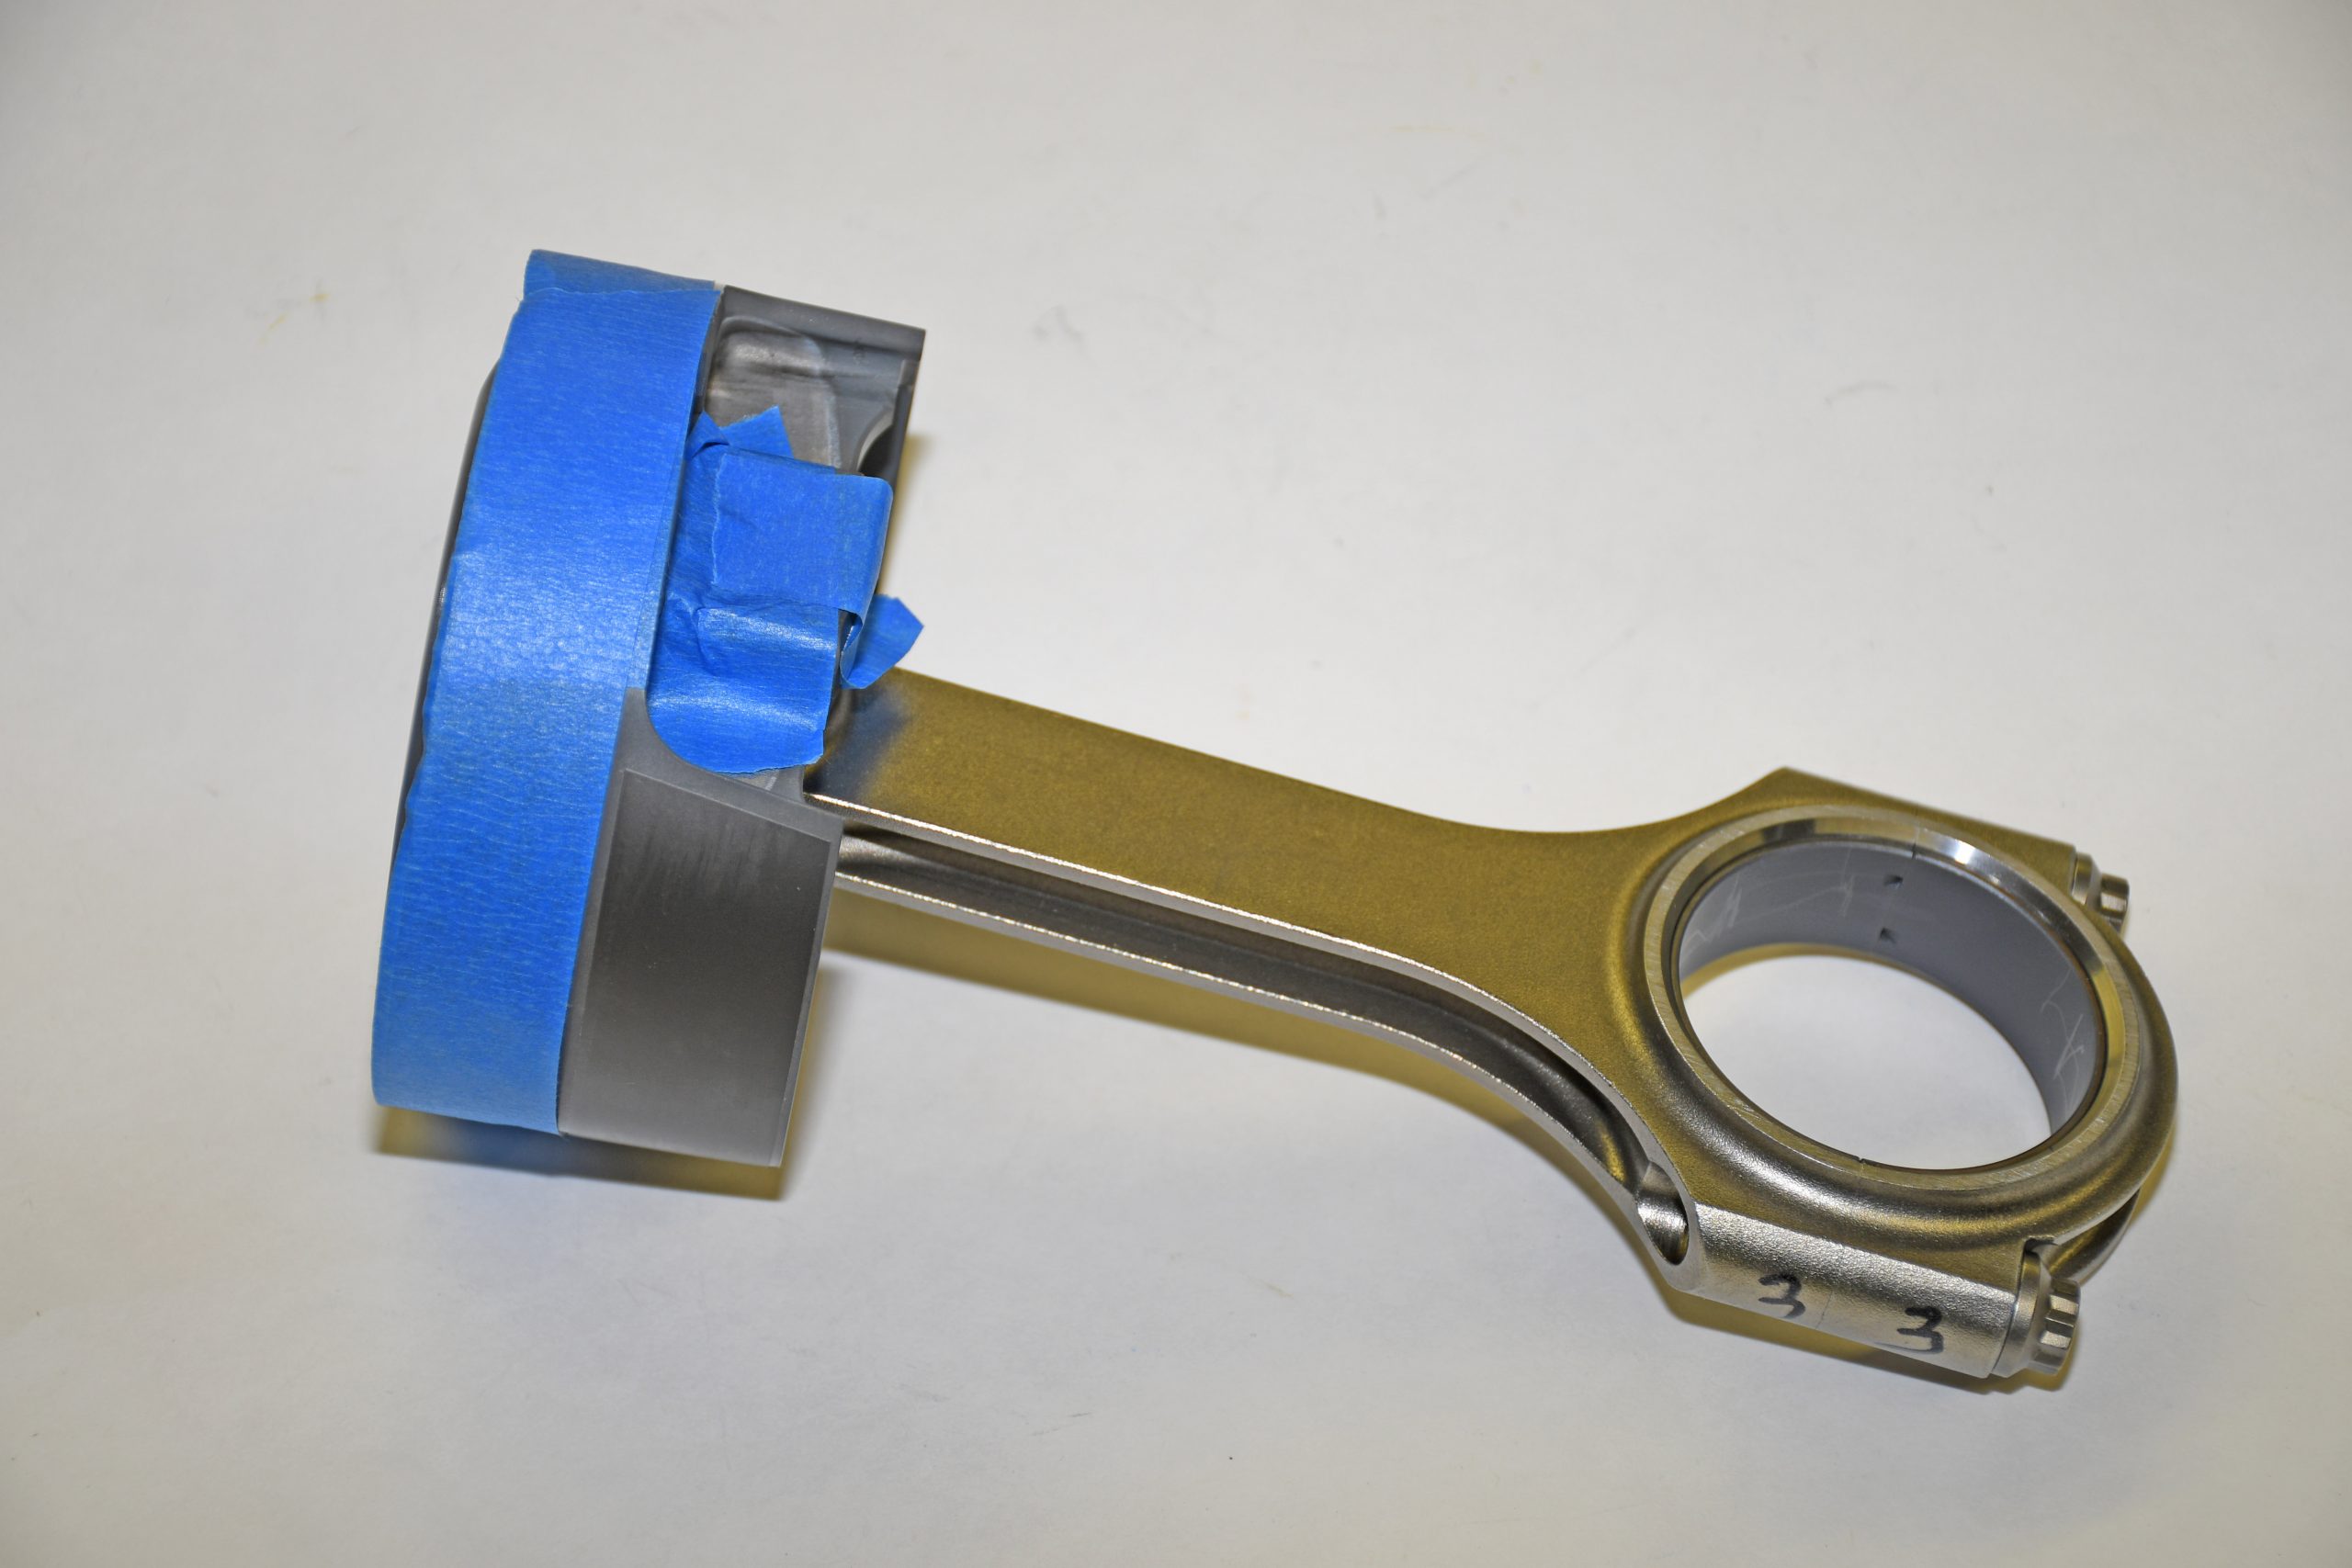
When you’re pre-assembling an engine to do things such as measuring deck clearance, degreeing a cam, or other tasks that mandate a piston and rod is installed in a given bore, there’s no need to install rings or pin locks. A lot of pro engine builders simply tape the ring lands up with a few wraps and at the same time, tape the pins in the piston. It saves a lot of trouble, since in the process, you’ll likely accomplish these tasks before everything is blown apart and balanced. In the end, the tape does no harm and it saves plenty of time.
#25 know what your oil clearances are supposed to be and measure ALL of them. You may have to mix and match various rod and main bearings to achieve proper clearance but not doing so can be catastrophic. Don’t forget the cam bearings either. Make sure the oil holes or slots are lined up properly and that the oil clearances are correct for them too.
Tapping a piston and rod assembly into a cylinder with the bearing insert in the rod insures the insert will end up on the floor. Put a short piece of fuel hose on any rod bolts to prevent gouging the crank.
First rate listing.
thank you for reminding me cause i don’t work on engines every day only on my own
when i need one for my self. yes this is a very good thing you did.
for us back yard engine builders. have a great day
Torgue fasteners in steps
Always check the head gasket fire ring diameter against the head using the dowels to align gasket! Some “big valve” heads chambers are too large for your “favorite” gaskets.
I have some questions about a Toyota 2.2 liter that I’m building can anyone help