Absorbent Glass Mat (AGM) batteries are commonplace in powersports applications nowadays.
There’s a big reason why: These AGM batteries are virtually maintenance free. Back in the day, a flooded lead acid battery needed to be routinely checked and filled to ensure it could maintain a charge. On the other hand, AGM batteries are pretty much hands off—provided you follow the proper steps to prepare them for the initial charge, that is.
That’s why we’re writing this quick article. If you buy your AGM battery from a walk-in store or dealership, there’s a good chance it’s already been properly charged and is ready to drop into your motorcycle, snow mobile, lawn mower, or whatever.
But if you buy your powersports batteries online, you’ll probably have to set up your AGM battery yourself. And this initial prep and charging process is critical; if you don’t follow the instructions, you risk permanently damaging your battery.
The good news is, these steps are all pretty easy and straightforward.
While your battery will likely come with its own instructions, we wanted to emphasize three tips to ensure your battery has a long service life.
***
3 AGM Battery Initial Prep & Charging Tips
***
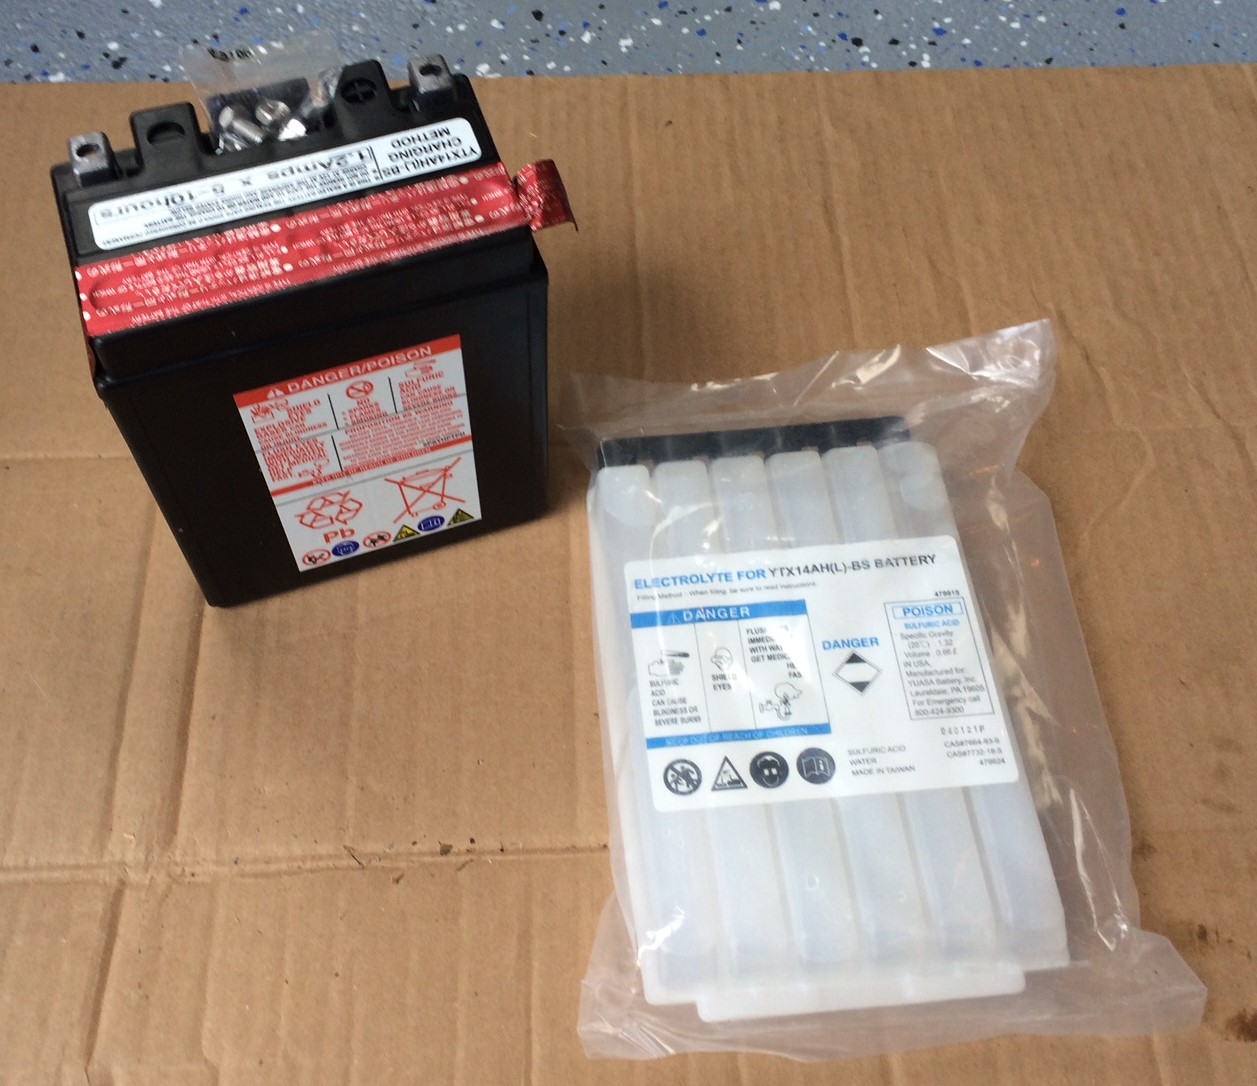
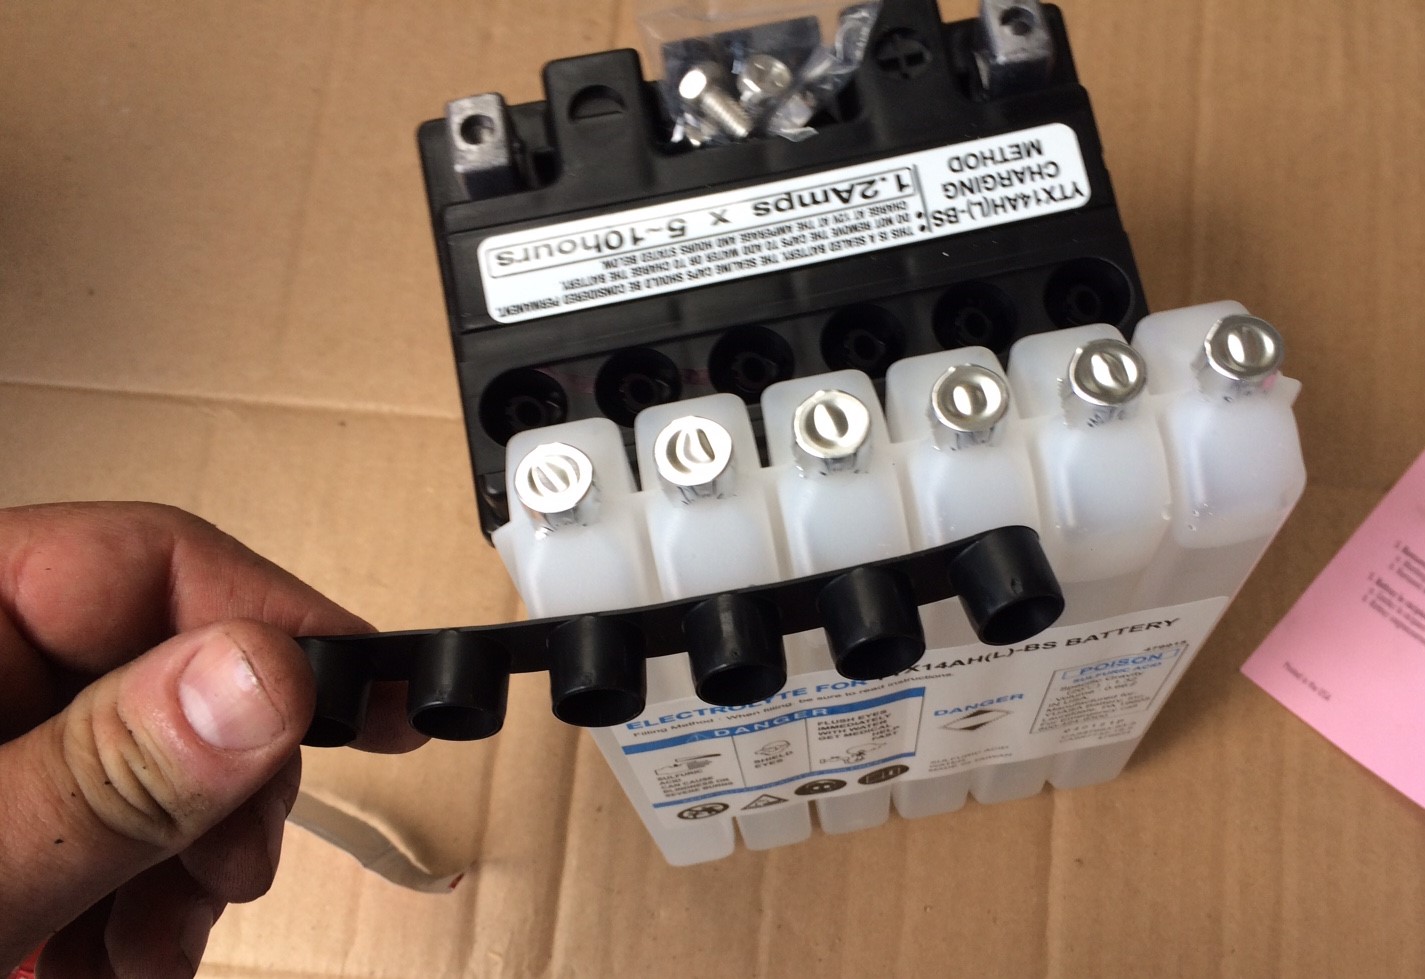
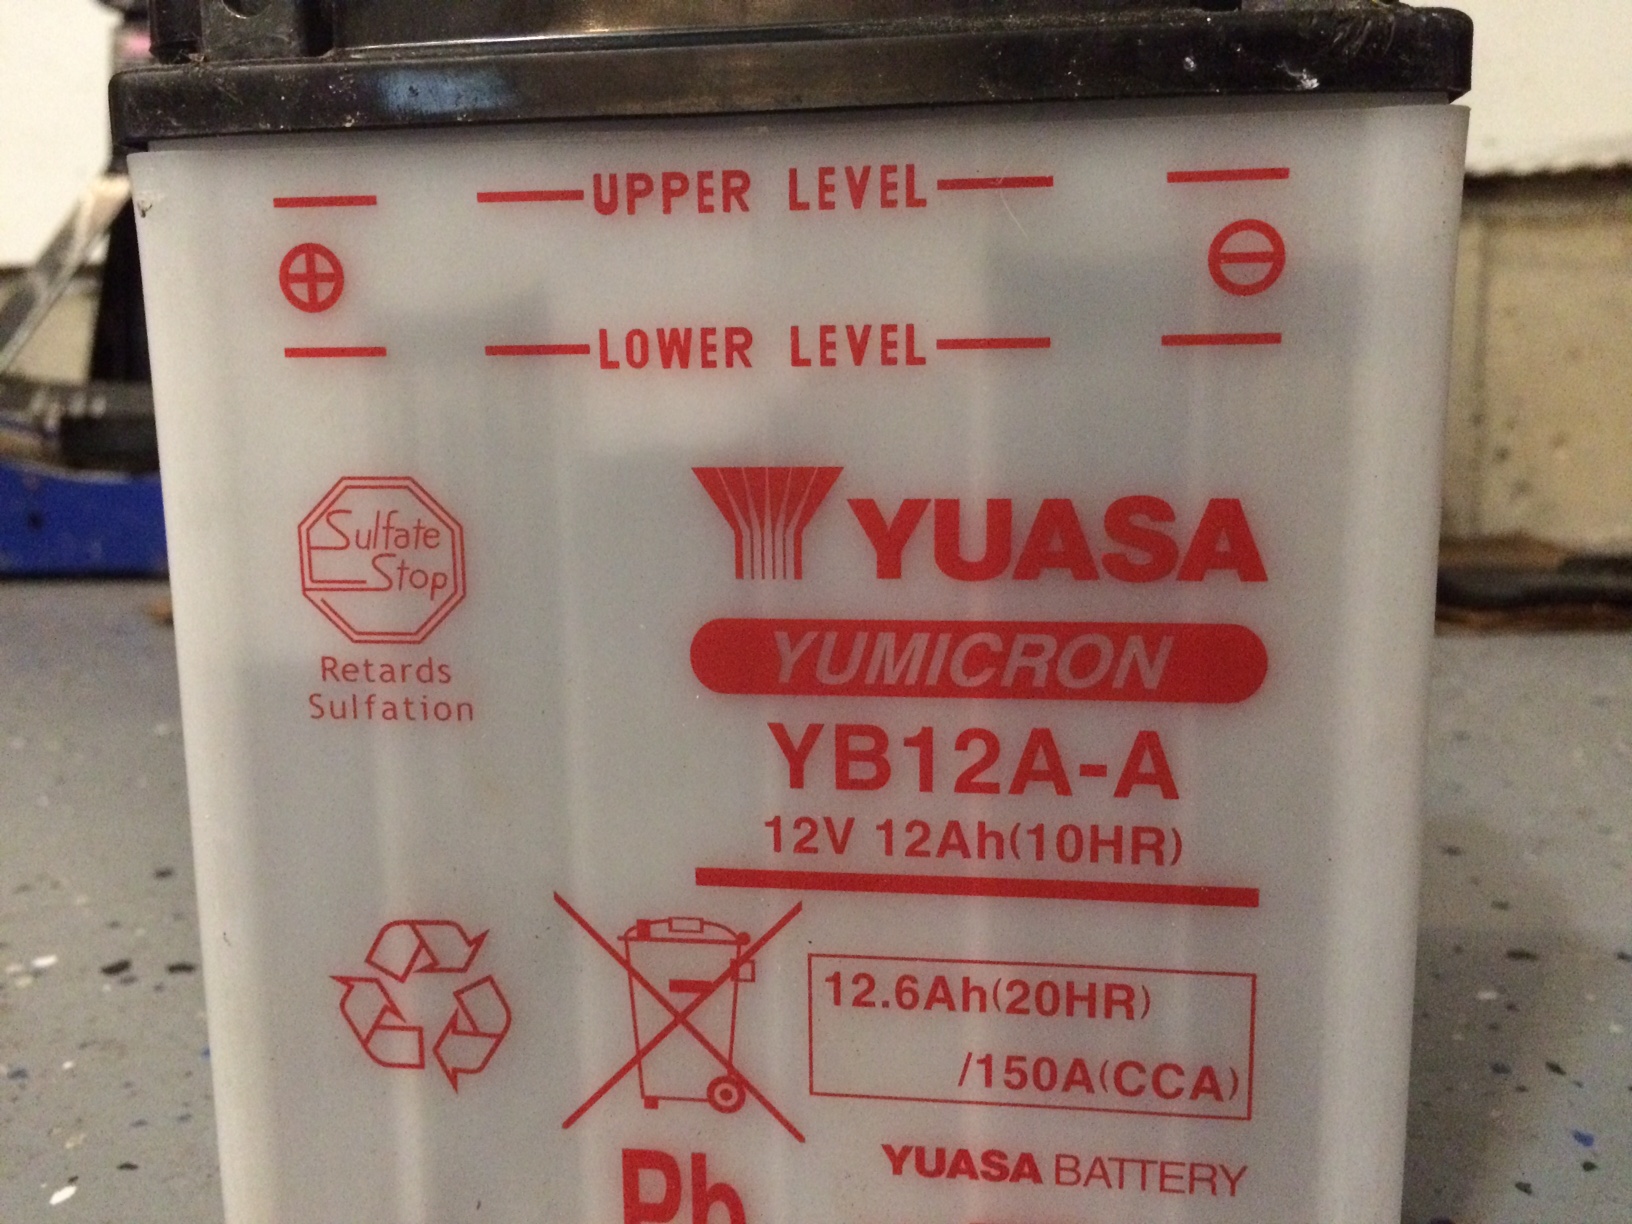
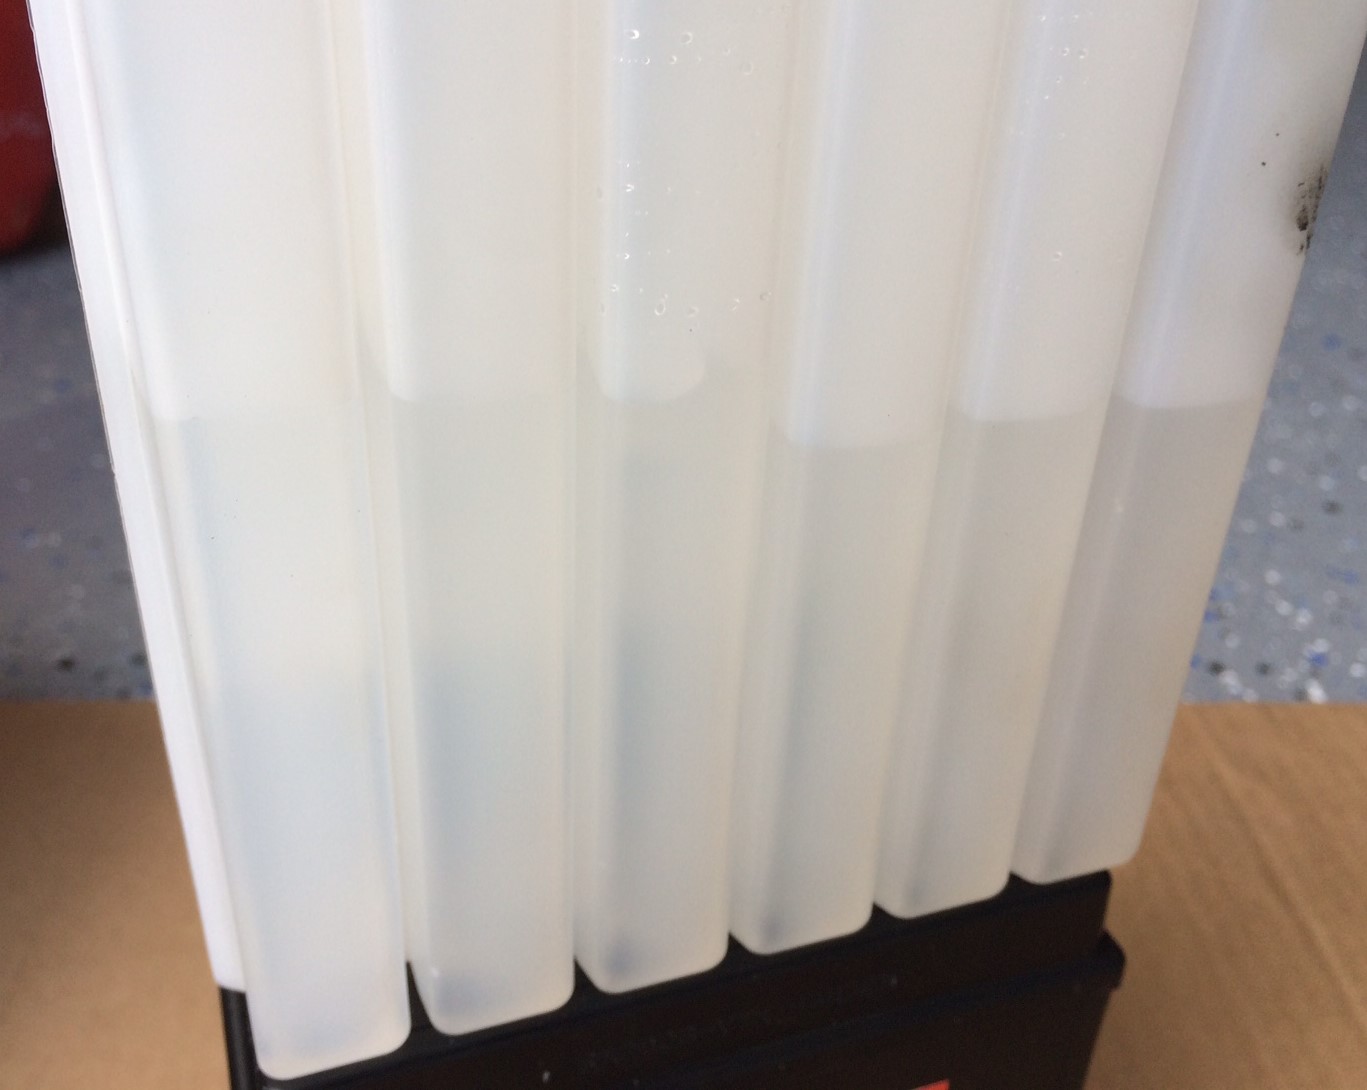
1. Fill Your Battery with the Right Amount of Electrolyte (Not Water!)
First off, electrolyte is essentially a fancy word for battery acid. It’s corrosive and can burn the skin, etch surfaces, and dissolve paint—so make sure you take the appropriate precautions when handling and filling your battery, and dispose of excess electrolyte properly.
It’s vitally important to realize that electrolyte isn’t water. Yes, unlike AGM batteries, flooded lead acid batteries get topped-off with distilled water as part of their regular maintenance process, but not before being filled with acid first.
More importantly, don’t confuse traditional lead acid battery maintenance procedures with any of the steps involved with prepping an AGM battery prior to its initial charge. No water, distilled or otherwise, is involved in an AGM battery’s filling process. You need to use electrolyte, AKA battery acid.
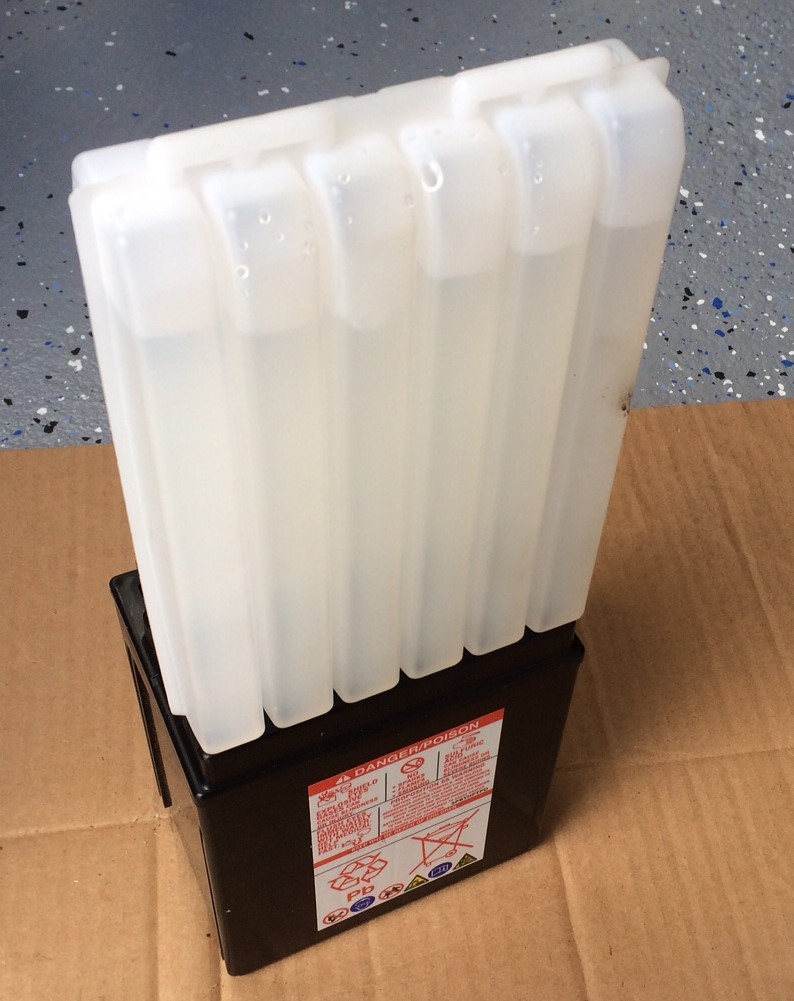
In all of our initial battery charging experiences, the AGM battery manufacturer has included the electrolyte with the battery purchase. But if yours didn’t, you can buy your battery acid separately.
Either way, you want to make sure you fill your battery to the proper levels.
***
2. After Filling the Battery, Wait for the Acid to be Fully Absorbed
This is probably the step that’s overlooked the most. After the electrolyte has drained into the battery…wait! This allows the acid time to absorb into the glass mat. Remember, it’s exactly what the “A” is in AGM, after all.
If you immediately throw the battery on the charger, it could damage the battery and shorten its lifespan. You may not notice it at first but over time, the battery could develop issues like weak starting performance and a rapid discharge rate.
How long you should wait depends on the battery manufacturer, but in our experience it’s about an hour or two. After the wait, you’re now ready to hook it up to a battery charger.
***
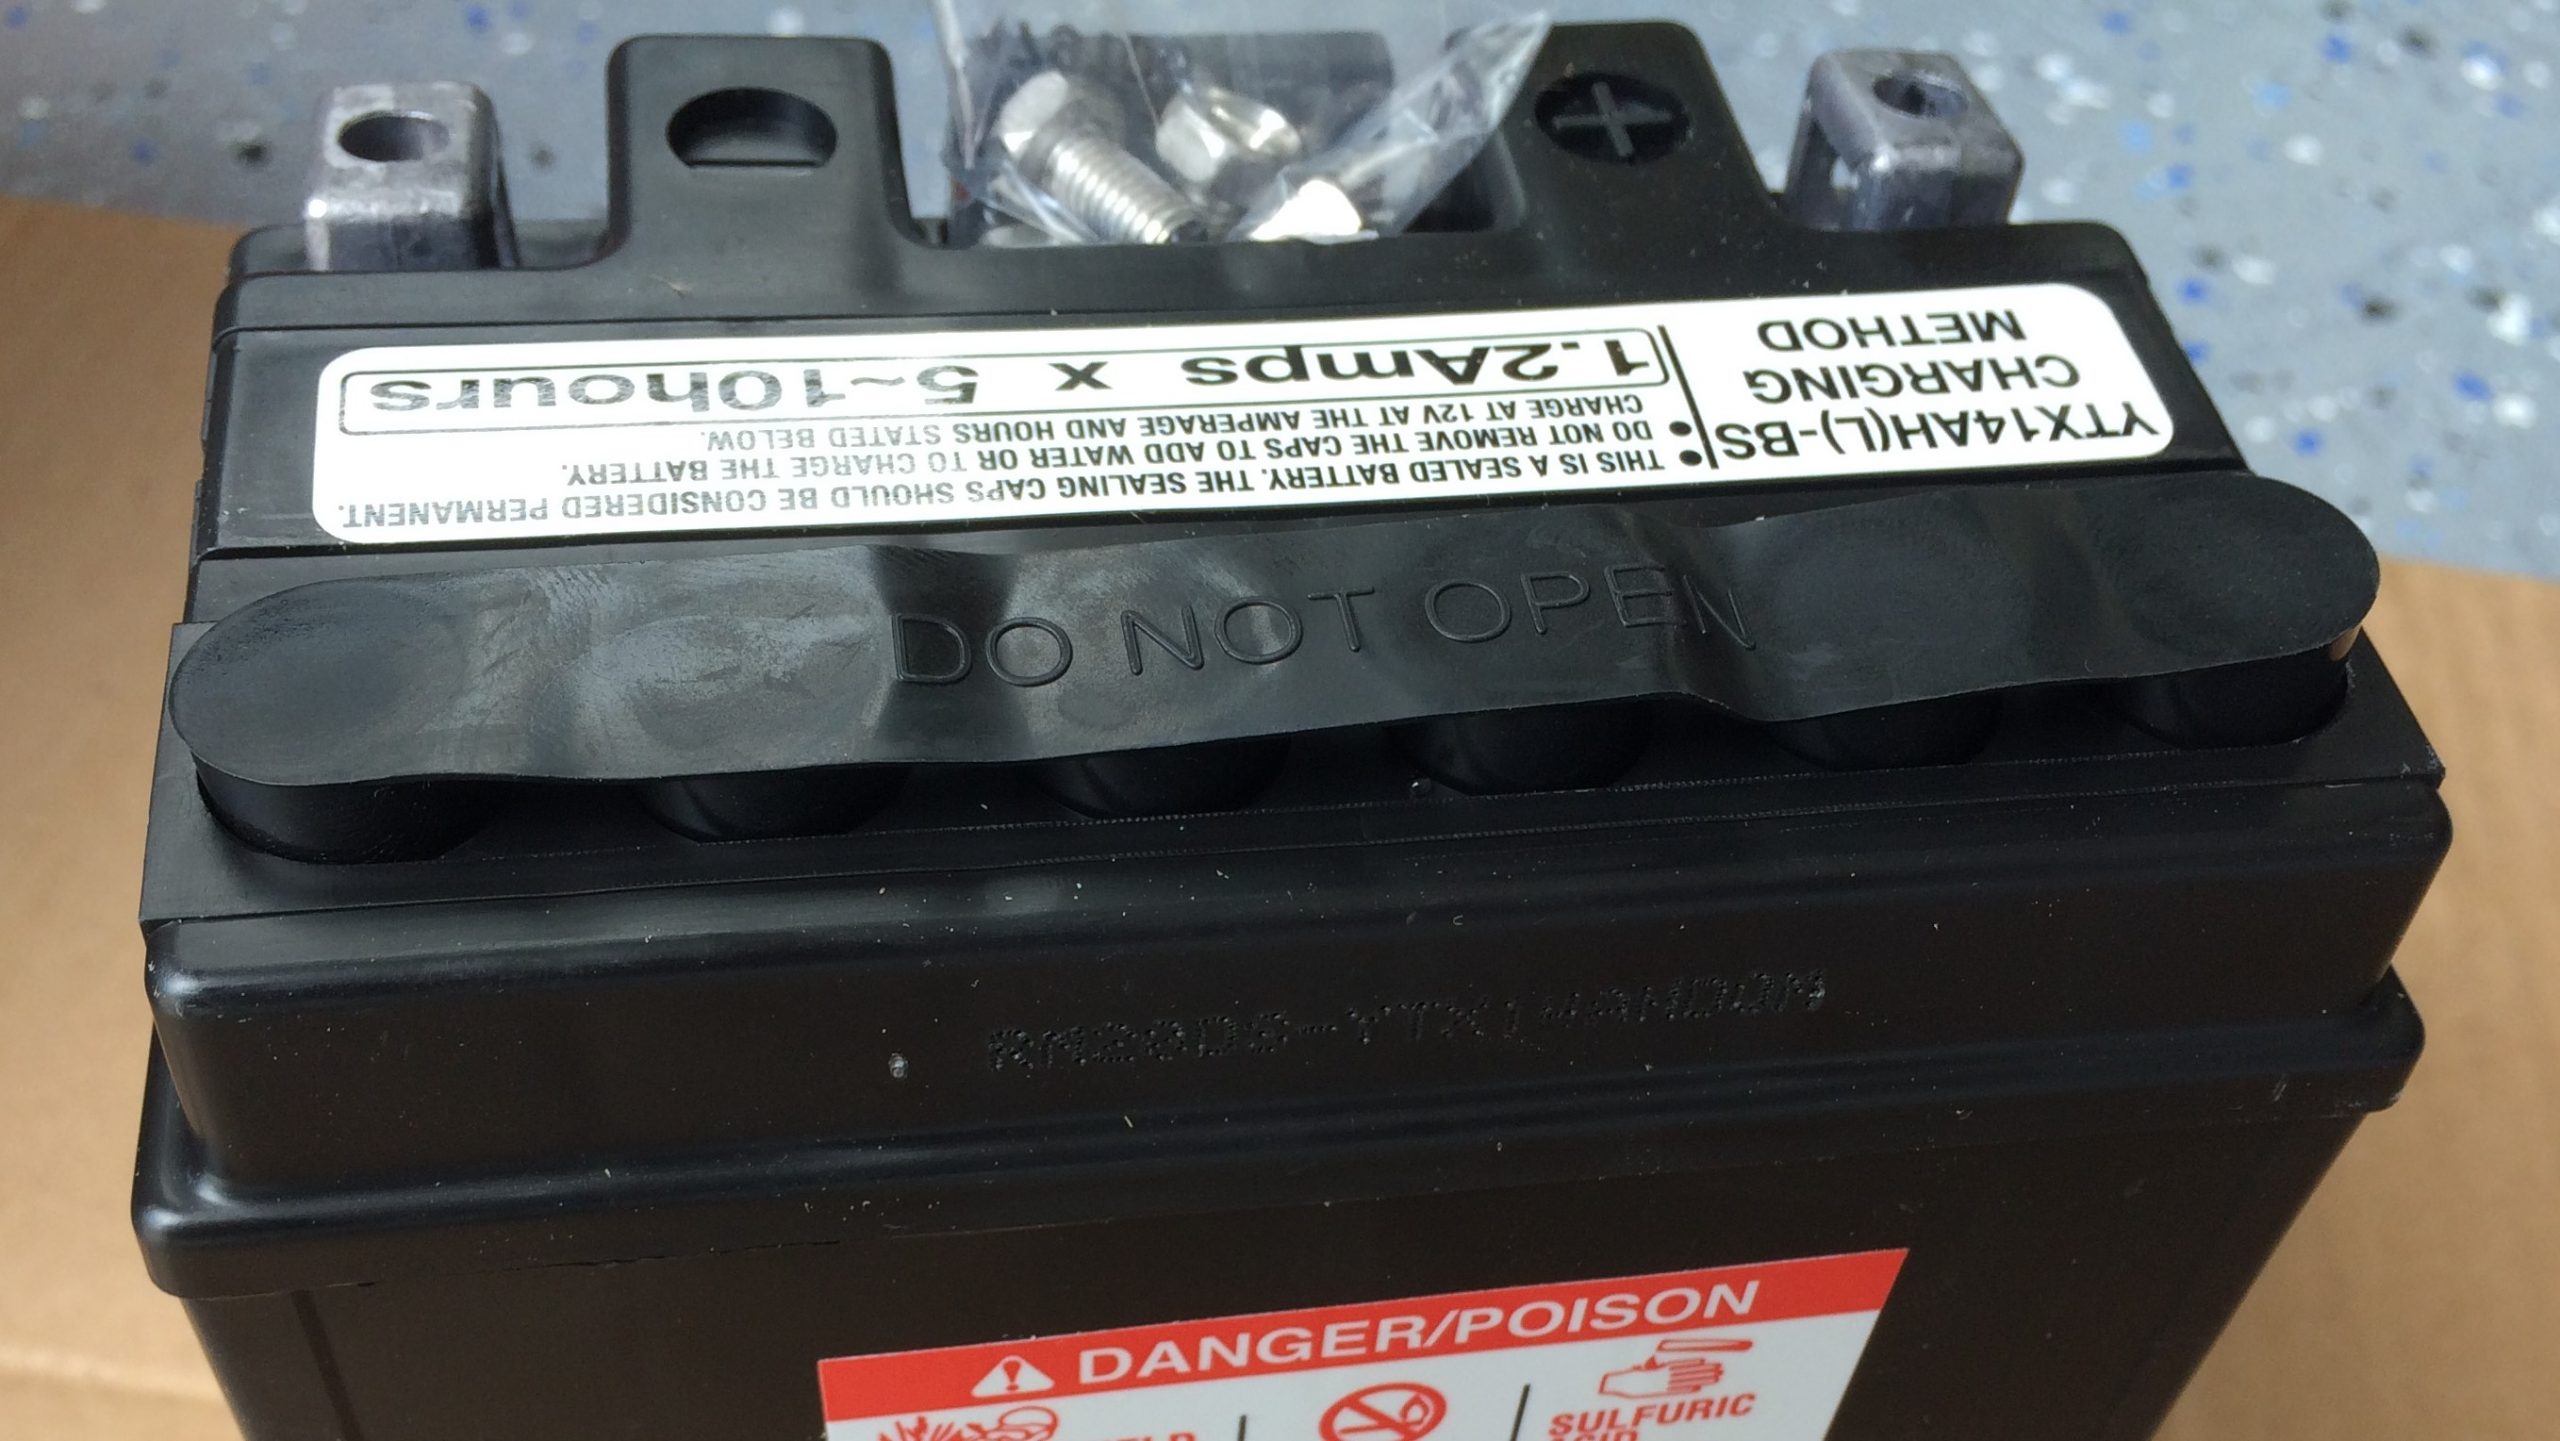
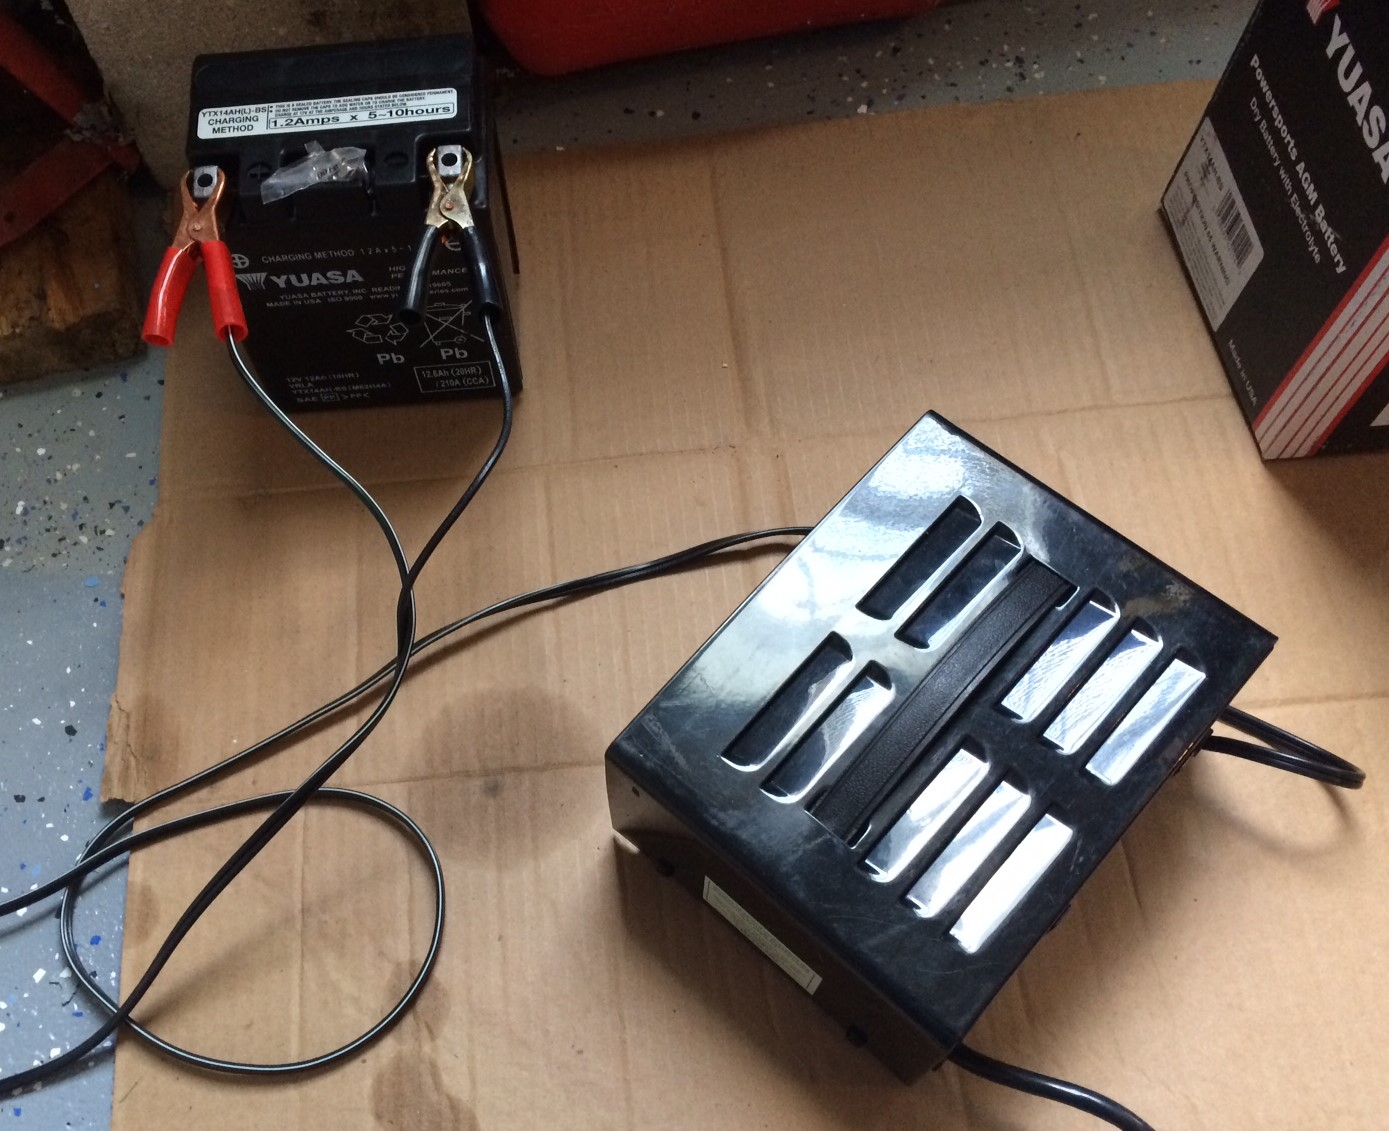
3. Use the Proper Current (Amperage) to Charge Your Battery
Here’s another simple aspect of battery prep that folks can overlook.
If you read our earlier story on EV Battery Life, you already know that batteries don’t always like being charged at high current levels. And that’s especially true for new AGM batteries getting an initial charge. While a lot of battery charger models have selectable current levels in excess of six amps, in our experience, many initial charging instructions call for a lower current rate, more like two amps.
In other words, charging at a greater current rate than specified will not speed up the process!
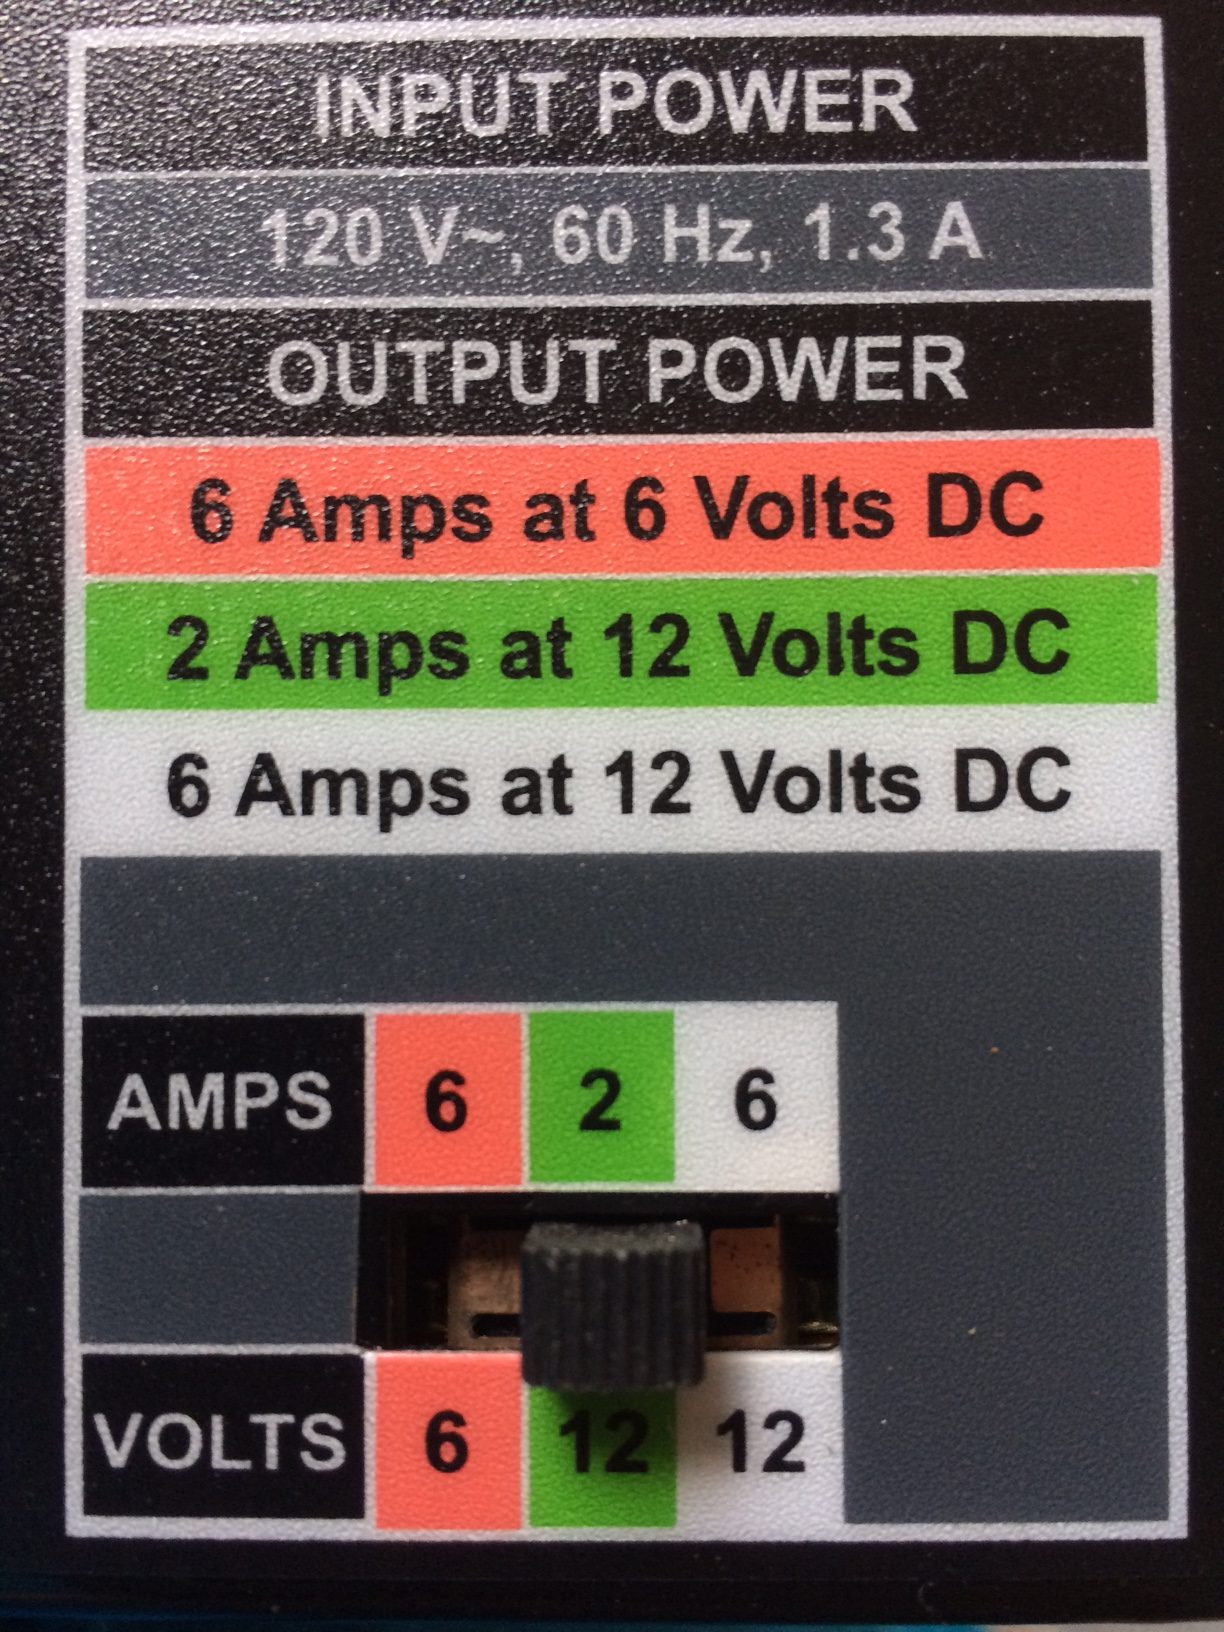
Slamming too much amperage into a new battery can fry the acid inside, which again, could significantly reduce its usable life and cause other performance issues. While there’s no universal current rating for every battery, each battery manufacturer will spec the particular battery’s preferred initial charge amperage in the instructions.
In addition to charging current, your battery manufacturer will also indicate how long you should leave the battery on the charger for its initial charge. It’ll usually vary between five to 10 hours, again at a low amp rating.
***
Follow Your Battery’s Charging Instructions
While these three tips are important, consider them a supplement to your original battery manufacturer’s instructions. You should always read your particular battery’s initial changing and maintenance manual thoroughly before beginning, to ensure you’re hitting all the proper steps.
All told, it’s not difficult to prep and charge an AGM battery for the first time, it’s just critical that you follow all the instructions precisely. Doing so will ensure your battery has a long, happy service life.
Very interesting I just revived my AGM 12V 200AH Battery
Adekunie, just what did you do to “revive” your 200a hrAGM battery?
Did you add more acid?
TIA
I filled my new Yuasa battery with acid yesterday evening and left it overnight. Today I decided to check it with my multimeter and it reads 12.84 volts. I haven’t charged it. The instructions say to charge it but doesn’t 12.84 mean it’s fully charged?
You shouldn’t have left it past 2 hours with charging it , i let one come up on its own and it didn’t make 2 years, the next one i did by the book and it lasted over 5 years, i can’t answer why that is so, but take my advice and use the instructions
Hi Paul,
I did read the instructions, twice. I’m 59 and realize the importance of that. But I didn’t leave it overnight deliberately; I should have mentioned that in my post. I got distracted by something more important than my 4-whlr battery and totally forgot about it. Completely my fault and I will accept the outcome. But spilled milk at this point. I’ve contacted Yuasa and told them what I did and asked for their recommendation on what I should do from here. To charge or not to charge…….that is the question!
Thanks!
Hey Claude, sorry for the delay in response, but I’m another Paul–and the author of the original article.
…
You didn’t mention what specific battery you had, but 12.8 can still be a relatively low charge, many “12 volt” batteries actually make about 13.8 volts DC. Another thing to consider is amperage, which–without a deep dive into electrical theory–is a major facet of battery performance as well, and you won’t get that from a typical voltage reading.
…
If that was my battery? Yeah, I’d throw it on a charger at the lowest amp rate (1 to 2 amps) for the manufacturer’s suggested duration and see if it brings the voltage up to around 13.8 Vdc.
I have a 2017 Dodge tam pick up . Can the fluid level be checked in my battery. It keeps going dead over time even with the battery cables off . In cold weather it drops down to 10 volts over night . This battery is 6 years old now . Is it time to replace the battery ? Or can it be revived again .
Hey William, you didn’t mention what kind of battery you had, but assuming it’s a sealed AGM battery, then there’s not much filling you can do, even if the levels are off. If it is discharging without the cables on, then that’s a good indicator that the battery’s service life is nearing its end–and at six years, that’s a pretty good run, so you might want to consider getting a replacement.
…
We do have this article on restoring a deeply discharged battery but, again, yours seems to be nearing the end of its service life anyway. Hope this helps.
so what happens if i have leftover acid – only three cells took all the acid, the other three have a small amount that refuses to drop into battery. now i am stuck as i can not remove the acid container without spilling the unused acid. the acid level left in the three chambers is about 1/4.
Have you tried rapping the battery (or the vials) gently with the handle of a screwdriver? That might help release any air bubbles trapped inside.
…
If you’re stuck, you might be able to carefully(!) move the battery with the vials still inserted into a plastic tub–again be extra careful here as battery acid can harm skin. Then, get some baking soda and mix it with some water to form a solution–then when you remove the vials from the battery, use the baking soda/water solution to dilute and neutralize the acid as it spills into the plastic tub. Then, you can use a spray battery acid neutralizer product to clean the acid from the battery before taking it out of the tub. Then you can (again, CAREFULLY) move the neutralized acid from the plastic tub into another, easier to transport, plastic container and take the remaining acid to an approved disposal facility. In my experience, you can call your local waster facility and there’s usually one relatively close–or some auto parts stores may offer battery acid recycling as well.
…
You may have to slowly fill the battery with a separate, new container of acid. Those cells absolutely need to be filled to spec to ensure the battery will provide the correct amount of juice. You can buy new battery acid separately–including the original multi-cell packs from Yuasa–and fortunately it’s relatively cheap.
Thanks for reading–hope this helps.
Thanks for the help. I ended up leaving it overnight, taking a chance it won’t charge properly. It did, everything is fine now.