Editor’s Note: Luke Merrill is a rising star in the custom car world. His most recent project, the 1940 Chevy named Tinmama, place third in the 2019 SEMA Show’s Battle of the Builders Young Guns class and made the Top 12 overall. Luke used many parts carried by our friends at Summit Racing, including the paint he custom-mixed using Summit Racing Two-Stage Jade Green and Key Lime paint. We will post more Tinman Tech stories as fast as Luke writes them.
…
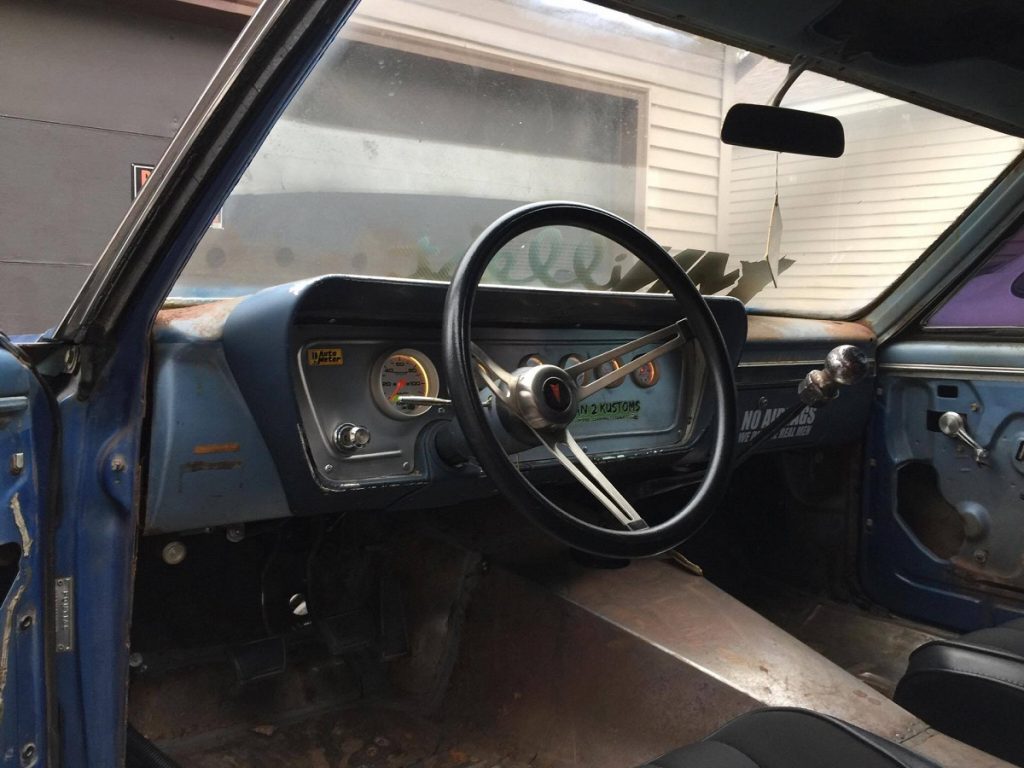
Many people ditch the original instrumentation that came in their project vehicle. They are often inaccurate, faded, have broken glass or pointers, or are missing sending units. Fortunately, there are plenty of modern, accurate gauges in a variety of styles to suit almost any vehicle project.
Another issue that comes up is how to mount those new gauges. Using the vehicle’s original gauge cluster is the most common method, but it’s also fun to make your own. In this article I will be fabricating a gauge panel for my buddy’s rat rod-inspired 1966 Pontiac Tempest with a Dodge Cummins diesel swap. I’ve broken the process down into seven simple steps anyone can follow to make their own panel.
In future articles, I will lay out additional sheetmetal techniques to help you fabricate high-quality parts. If you want to see other projects I’ve done, check out and subscribe to the Tinman 2 Kustoms YouTube channel.
Materials Needed
Steel, aluminum, or other material for the panel
Rivets, screws, or bolts to fasten the panel
Necessary Tools
Sheetmetal cutting tool like shears or a rotary tool
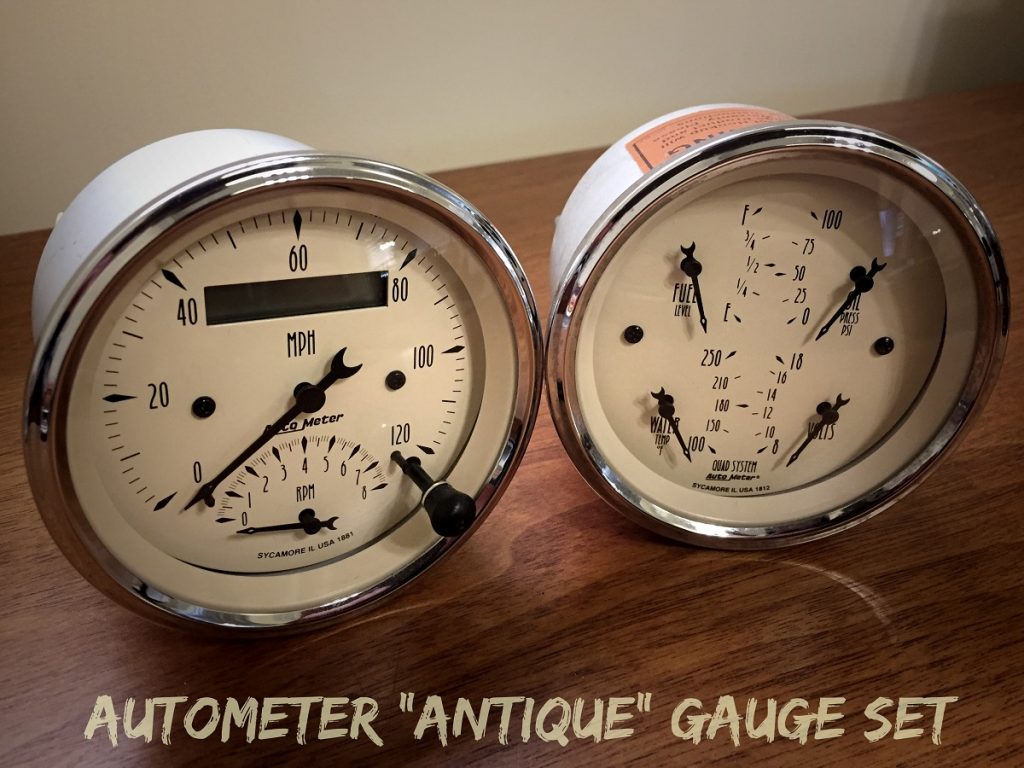
Determine what gauges you need and the gauge sizes you can fit in your cluster or panel. I recommend a speedometer and tach plus water temperature, oil pressure, fuel level, and voltmeter gauges. For the Pontiac I used AutoMeter Ultra-Lite Series gauges — a three-inch electronic speedometer, a 2 5/8-inch diesel tach, and 2 1/16-inch water temperature, oil pressure, air/fuel ratio, and boost gauges — to properly monitor the turbocharged Cummins. (Image/Luke Merrill) If you are tight on space, gauge pods with multiple gauges are a good choice. One option for a hot rod is AutoMeter’s Antique Beige Kit. It has two gauge pods — one with a speedometer and tach, the other with water temperature, oil pressure, fuel level, and voltmeter gauges. (Image/Luke Merrill)
…
Step 2
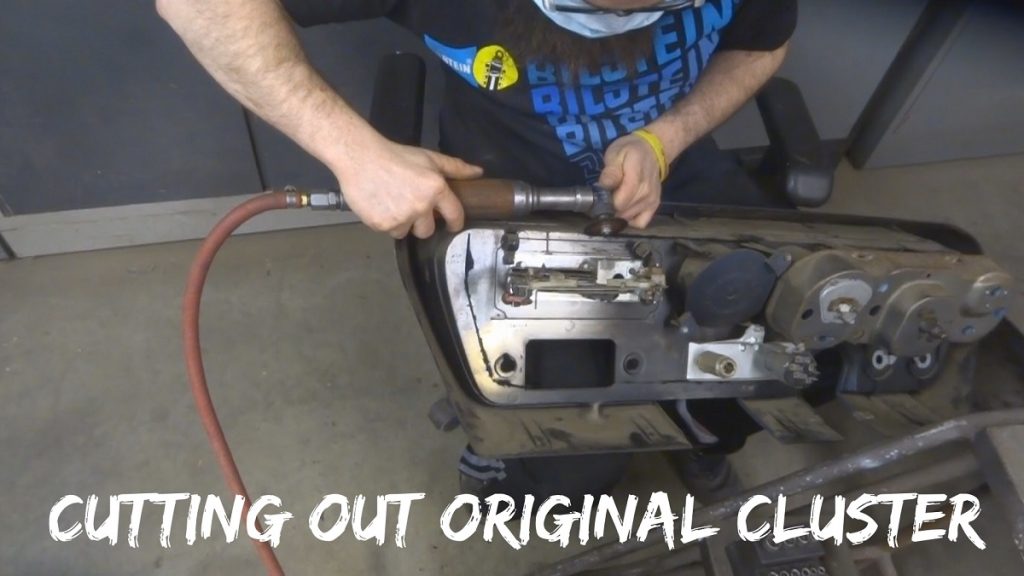
Remove the original gauge panel in the dash, noting how you will mount the new panel. I cut out most of the removable dash piece, leaving a one-inch tab around the dash for mounting the new panel. I used an air grinder with a four-inch cutoff wheel, but a rotary tool like a Dremel would also work. I prefer a grinder-style cutoff wheel because it cuts straighter. When cutting plastic with a grinder, make sure you clean off the disc after every few inches, using a piece of steel as a sacrificial grinding stone. I clean all the edges with a 120-grit flap wheel on a Milwaukee M18 grinder. (Image/Luke Merrill)
…
Step 3
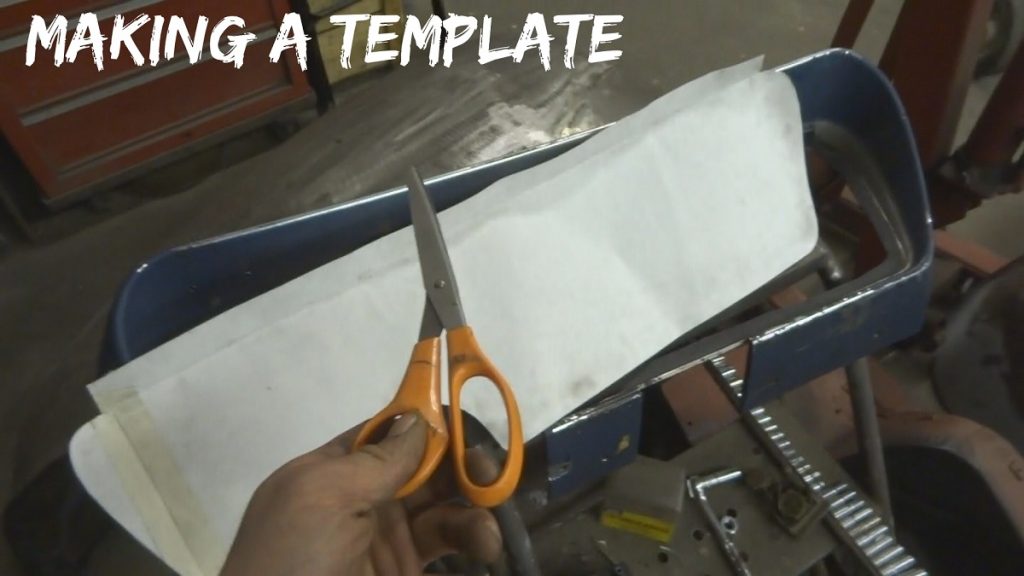
Make a pattern/template using cardboard or tagboard. I highly recommend using Cleco pins to hold the template in place when you are test-fitting it. Keep in mind that the steel or aluminum you make the panel from will not be as flexible as the template. If you have to bend the template to fit, the final panel won’t fit properly. Spending extra time on making a quality template will save you time in the long run. (Image/Luke Merrill)
…
Step 4
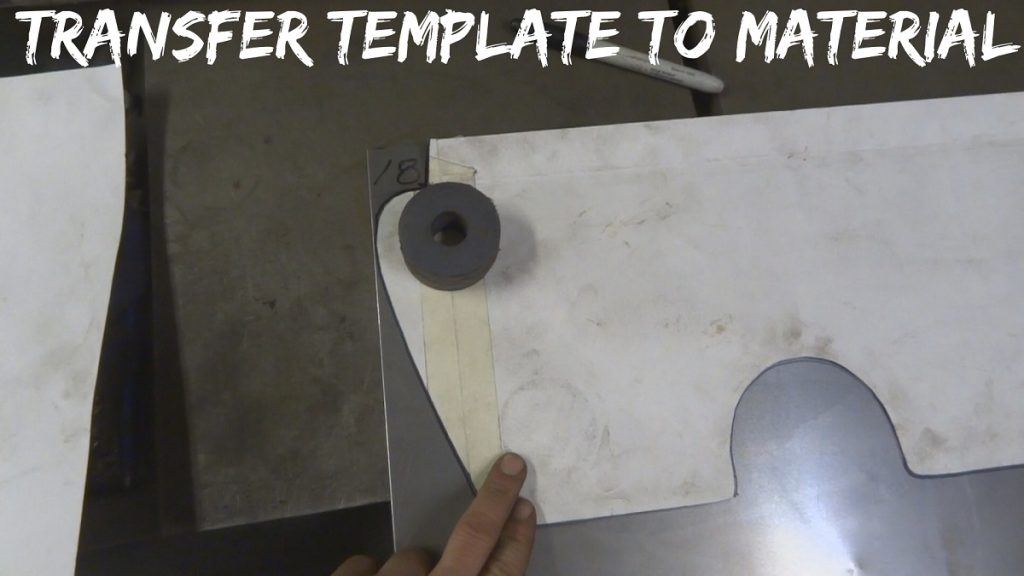
Use your template to trace onto the material you will use. A black Sharpie marker usually works the best. For this panel I used 18-gauge (.050 inch thick) cold rolled steel. I’ve also used aluminum that is anywhere from .050 to .250 inch thick depending on the size of the panel and number of gauges. I recommend cutting out the panel to “leave the line.” That lets you slowly trim it for a precise fit. It’s easier to take off more material than add material back on. (Image/Luke Merrill)
…
Step 5
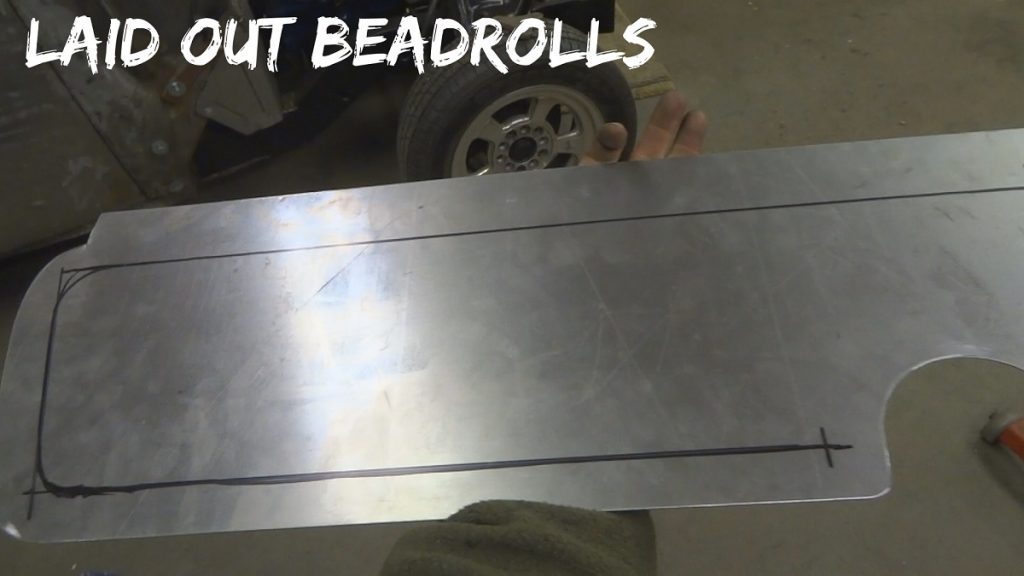
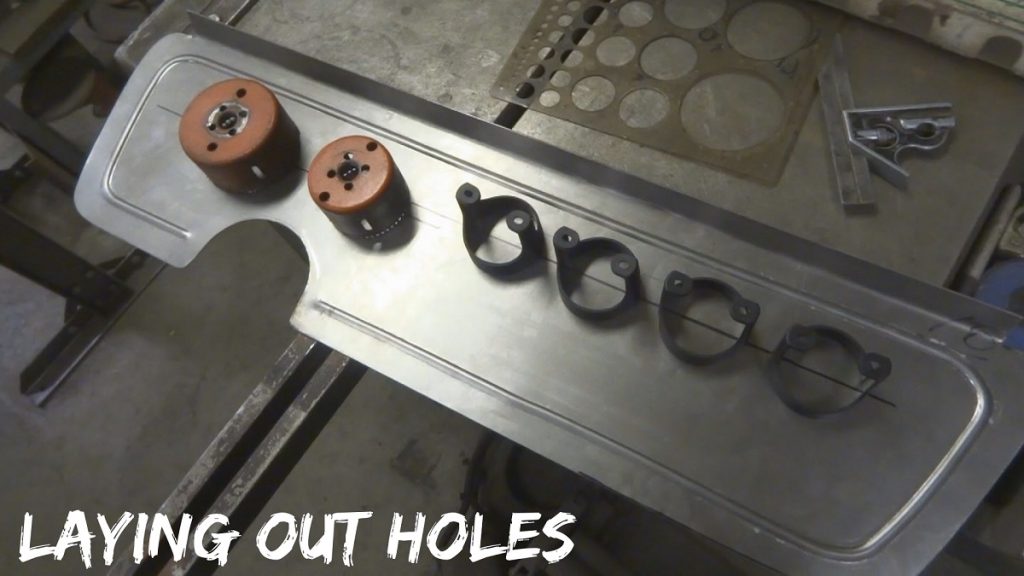
A bead roll will add strength to a gauge panel. If you plan on adding a bead roll, use a Sharpie to mark the location on the back side of the panel. If you do not use a bead roll, use thicker sheetmetal to insure the panel is strong enough. If you decide to bend a mounting flange in the panel like I did, do it AFTER bead rolling. (Image/Luke Merrill)Now it’s time to decide how to lay out the gauges, switches, indicator lights, etc. on the panel. I used appropriately-sized hole saws and gauge holders, but it will probably be easier for you to make paper templates the same size as the gauges and other parts. Make sure to leave enough room for the gauge bezels when laying out your gauge holes; if they are too close together the gauges will not fit. (Image/Luke Merrill)
…
Step 6
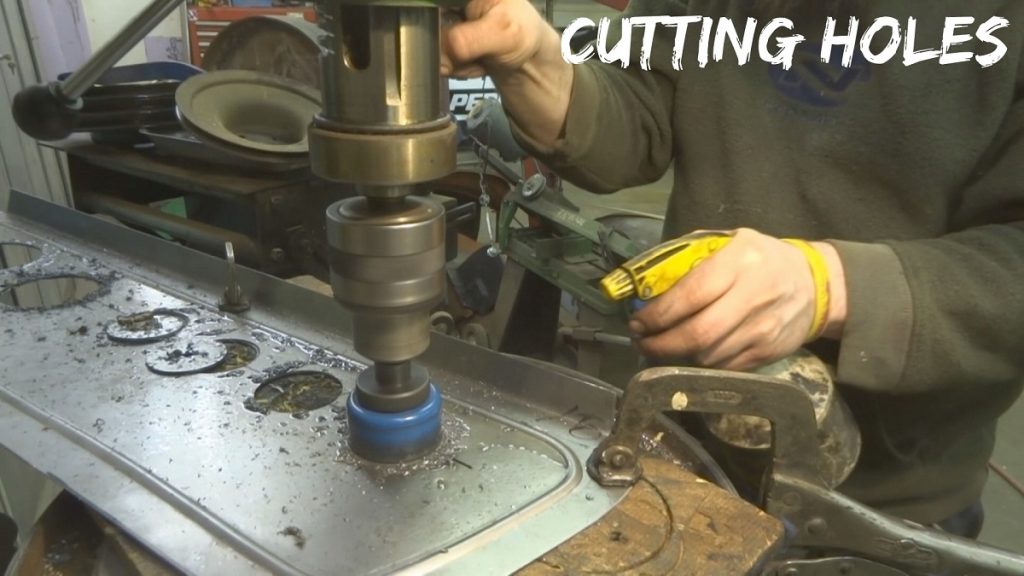
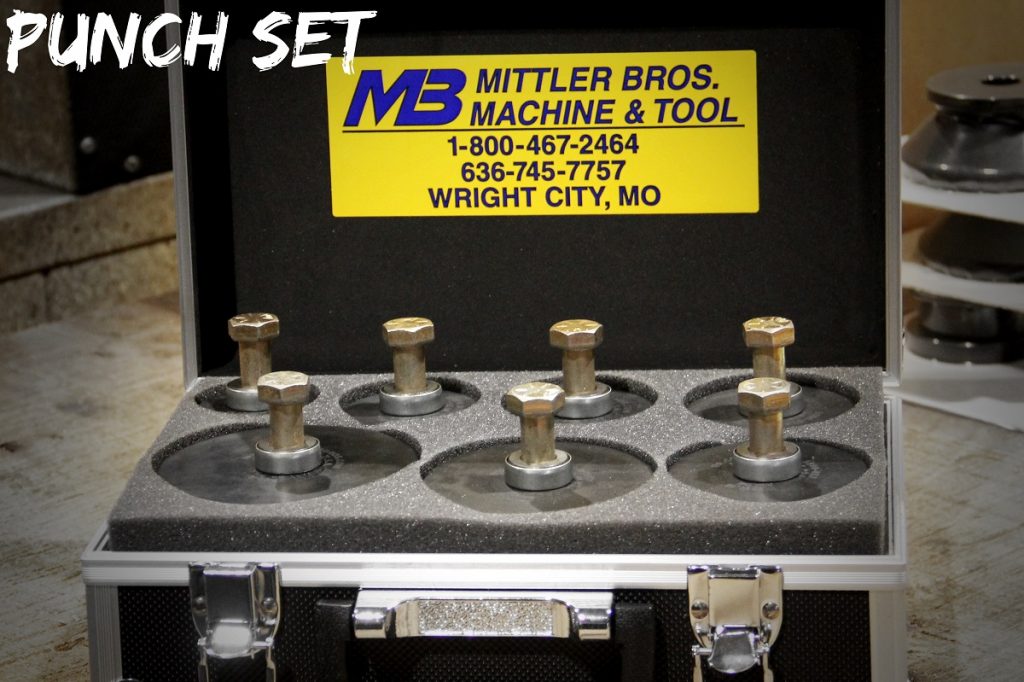
Clamp your panel securely to a flat table or bench, then cut the holes for the gauges, switches, and other items with hole saws and drill bits. I also put a one-inch piece of plywood under my panel to avoid bending the metal when cutting the holes. The panel and plywood are securely clamped to the table of my drill press. (Image/Luke Merrill)An alternative to using hole saws is a punch set like this one from Mittler Brothers. Punches are easy to use and create less mess, but are somewhat expensive. (Image/Luke Merrill)
…
Step 7
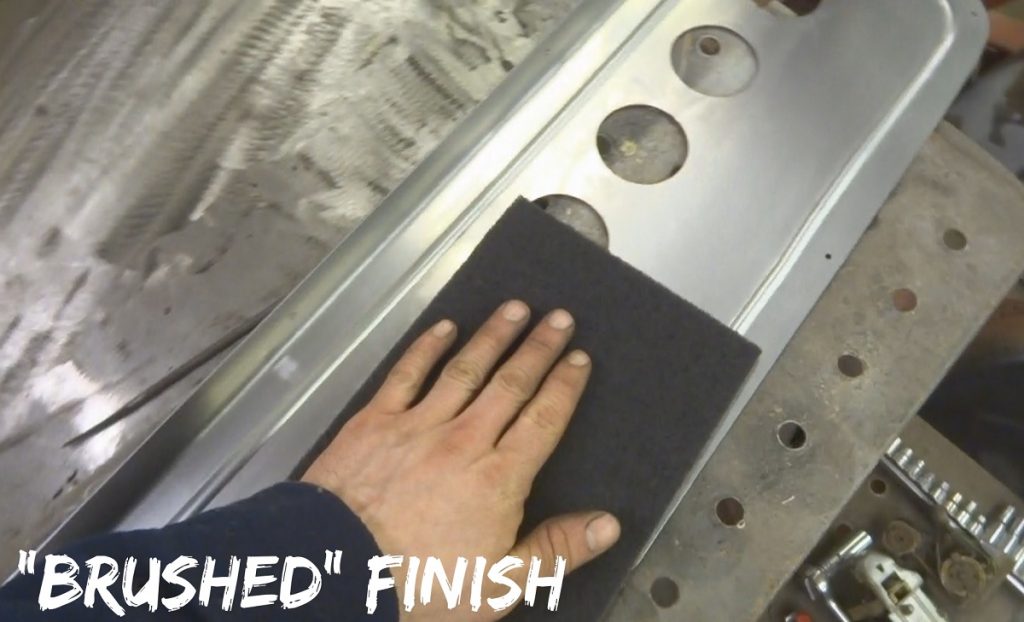
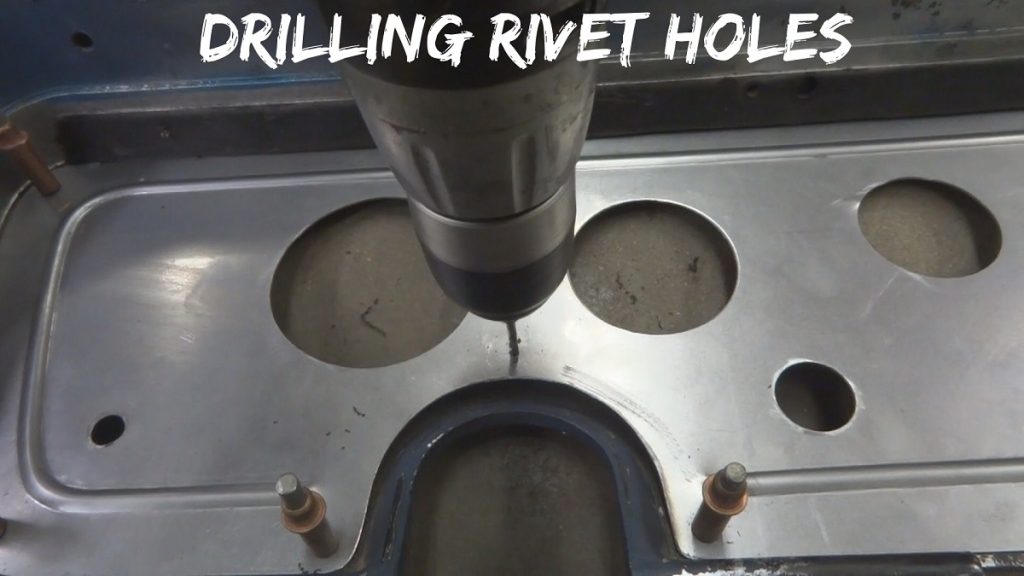
Clean up all the edges of the holes you just cut. You can leave the panel finish as-is, but I like to use scuff pads to create a nice ‘brushed’ look. Clearcoating the panel will maintain the look for a long time. The best clear finish I have found to apply directly to a bare steel surface is POR-15’s Glisten urethane clearcoat. (Image/Luke Merrill)I used rivets to mount the gauge panel to the dash. You can use screws or small bolts if you want to make your panel removable. (Image/Luke Merrill)
…
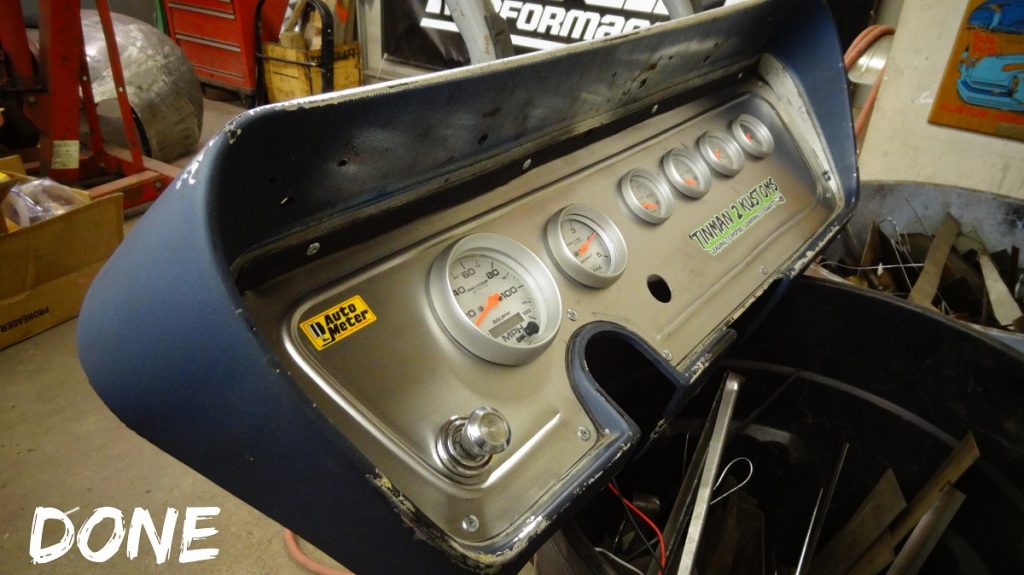
And that’s it. (Image/Luke Merrill)
…
This Tinman 2 Kustoms video shows the panel-making process in more detail:

Comments