The good people at RAM Clutches have been helping their customers properly install performance clutches for decades.
But today, we’re going to share RAM Clutches’ top tips for setting up your vehicle and yourself to experience a clutch installation fail of epic proportions. You know—just in case that’s what you’re going for.
The clutch wizards at RAM Clutches knows you may already be familiar with some of these clutch-fail best practices, but it never hurts to run through a refresher on the best ways to set yourself up for failure! (Orrr. Use this information to know what you shouldn’t do when installing a clutch.)
Courtesy of RAM Clutches, here are six things you probably don’t want to do.
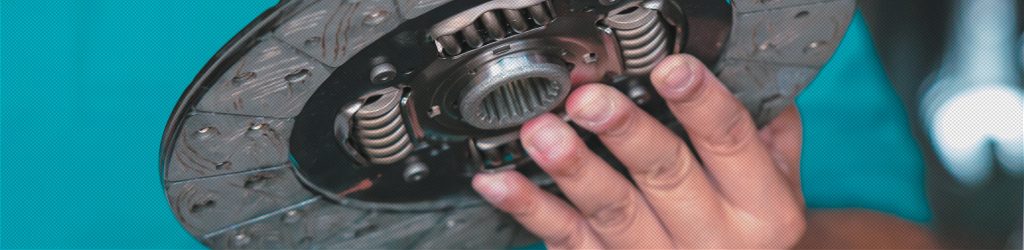
1. Installing the Clutch Disc Backward
We wonder how this is even possible, yet we receive returned discs for alleged warranty that are virtually turned inside-out bent when a customer tries to put the disc in backward.
With the flywheel installed on the engine, lay the clutch disc up on the flywheel and rotate it some. It must sit flat against the flywheel and not be contacting the flywheel bolts as you rotate it. It the disc does not sit flat, make sure you have it in correctly. Please don’t continue until you figure it out.
2. Using Power Tools to Tighten Down the Clutch Cover
This is a huge no-no and written in every instruction sheet RAM has ever provided. Tightening down the cover puts a load on the clutch cover flange since you are pulling it down against the pressure of the diaphragm or coil springs. Using power tools can cause this flange to bend which will leave the fingers uneven once the clutch is fully tightened down. This can cause extreme clutch chatter.
3. Tightening the Cover Bolts Down All the Way at One Time
Another way to damage the flange of the clutch cover is to tighten the bolts down completely in one shot instead of in a star-shaped pattern. This can damage the flange and also cause the fingers to sit unevenly. Tighten the cover bolts ONLY with hand tools, and use a star-shaped or crisscross pattern, a few turns at a time, just like torquing your wheels in place.
4. Improper Release Bearing Adjustment (Mechanical or Cable Linkage)
Setting the proper release on your clutch is very important — not only initially, but periodically going forward. A mechanical linkage should be adjusted for minimum release; that is only enough release that the clutch will disengage cleanly for shifting. This will result in a pedal lower to the floor and leave maximum free play. As the clutch disc wears, the fingers of the clutch will get taller, and if you have the bearing adjusted too close, it could ultimately unload the clutch fingers and not let the plate put its full load on the disc. This will cause undue slippage and wear.
5. Not Resurfacing the Flywheel Before Install
“The flywheel looked pretty good so we just went ahead and installed the clutch.” We can’t tell you how many times we’ve heard this. No matter how good the surface may look, if you want the new clutch to seat properly, it needs a fresh friction surface to seat against. Otherwise it would be like installing new brake pads and reusing the old rotors.
6. Changing Out Only the Clutch Disc
Obviously the clutch disc is the part of your system that will physically wear the most. Changing only the disc is setting yourself up for problems. As the clutch, disc, and flywheel wear in, the surfaces build a taper that the clutch disc will conform to. If you install only a disc, it is going to make contact on the outer edges only and will never properly seat. Ultimately this will cause premature slippage and will most likely chatter on takeoff.
I was taught…you want 1″ of freeplay at the top of the pedal…
Pretty self explanatory but? Lol
Pretty self explanatory! But lol
Any decent mechanic will know this…. and learned