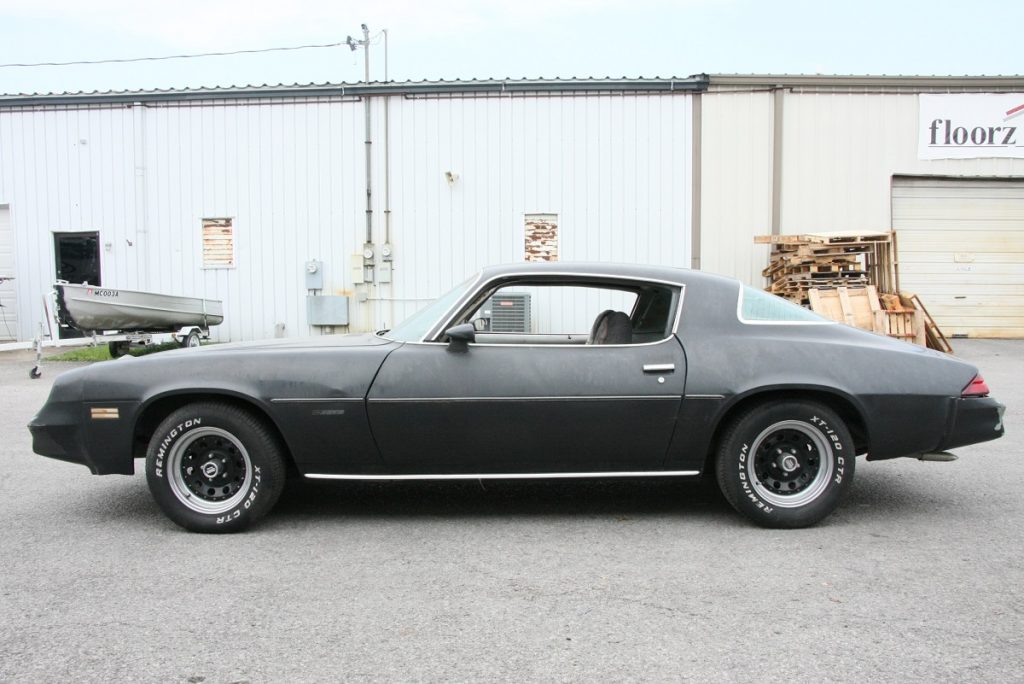
Our 1981 Camaro before the Hotchkis install had the typical squat in the rear from sagging leaf springs. (Image/Mike Petralia)
In the high-performance world,
nothing ever remains stock.
That makes it difficult for aftermarket
companies to design parts and kits that are true, easy bolt-ons for every car—where
literally nothing has to be changed or modified to make the new performance parts
fit.
The only way any company can really
design a “bolt-on” part is to make it fit the car as it originally
came from the factory, otherwise there are too many variations to cover if they
were to try to make it fit every modified vehicle.
An unwanted consequence of
engineering parts this way is that they rarely, if ever, bolt right on.
Because, nothing ever remains stock!
We wanted to test this theory, and
make our shop car look and handle better, so we decided that the suspension
would be our first upgrade.
First, we felt we really had to start
with something completely original to prove our point. And we mean totally
stock!
It was hard to find such a ride, especially since we really wanted to build a 2nd-gen Chevrolet Camaro, and almost all of them have been modified over the years. But we found one that had been unmolested since rolling off the GM assembly line in 1981. It was a factory 4-speed without T-tops. How can we be so lucky?
The car still had the factory
air-conditioning system, though it hasn’t worked in decades. With the exception
of a crappy cassette radio installed in the dash, some cheap steel wheels and
tires, and quite a few miles on the OD, this car was untouched.
We parked this perfect candidate on
our lift and began ripping off the old stock junk to be replaced with all new tubular
Hotchkis cool stuff. We replaced everything including the springs, shocks, bushings,
upper and lower control arms, and even added a rear sway bar, along with
upgrading to a substantially larger hollow front sway bar too.
All parts and pieces came from Hotchkis and we only had to order four part numbers to get everything we needed, with one minor exception (more on that later).
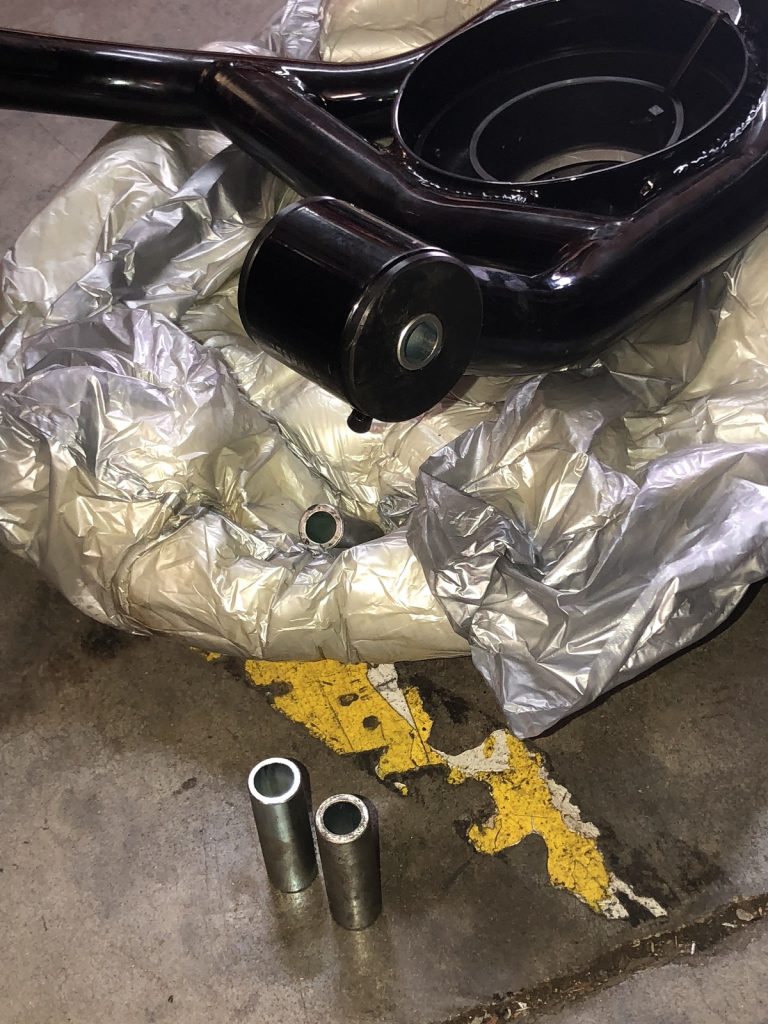
Upper Control Arms: (A-arms full tubular fabricated steel with 4130 Chromoly billet cross-shaft and Delrin bushings factory-installed)
We could have also added Hotchkis ChassisMax bars, but decided to wait on them because plans call for a 1,000-horsepower-plus big-block to be stuffed in between the fenders in its future, so we’ll wait until then to see if we can make the bars fit around its equally-big headers.
…
Getting the Height Just Right
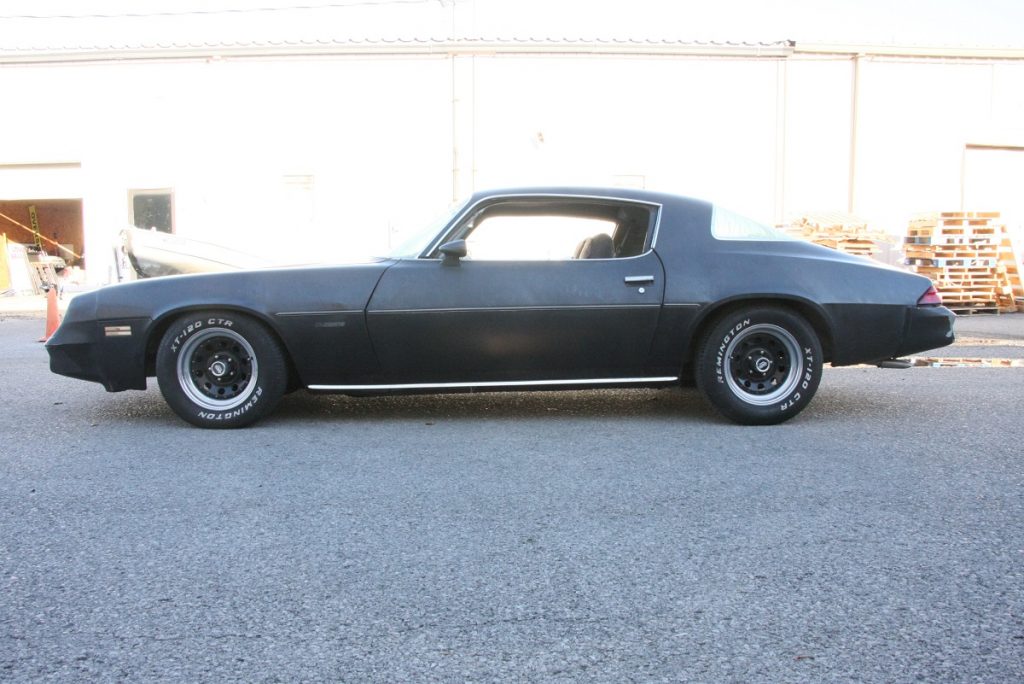
Here’s how it sat after the install with just one spring spacer up front. Looks cool, but the front fenders were literally on the tires now. Rear was okay. (Image/Mike Petralia)
Since this was not just about making
the car handle better, it’s also about giving it a much better stance and look.
And since our Camaro really is not in the best shape to drive yet, we can only
admire its beauty for now anyways.
After almost 40 years of abuse, the stock ride height was whack. Like just about every 2nd-gen Camaro, ours sat lower in the front than the back. Much to the pleasure of air shock manufacturers worldwide. We measured front fender’s height at 26-3/4-inches above the ground. Our first go’roud with the Hotchkis kit, installing just the single front coil spring spacer supplied slammed our fenders right onto the tires. Of course, our 235/60-15 tires were a higher profile than most would run with this type of suspension. But they make a great example of how much is too much when lowering a car. The first install dropped the nose down 2-3/4-inches to just 24-inches total. The tires rubbed and there was no way we could drive it like this. And since we don’t have the budget for new wheels and tires yet, something had to be done. So we installed two more Hotchkis spring spacers per side and ended up at 25-1/4-inches, (1-1/2″ lower than stock), which looks really good and gave us enough tire clearance.
The rear dropped from original height of 26.5-inches to 25.5-inches giving it a nice, raked stance that’s not to too steep and still provides enough tire clearance.
…
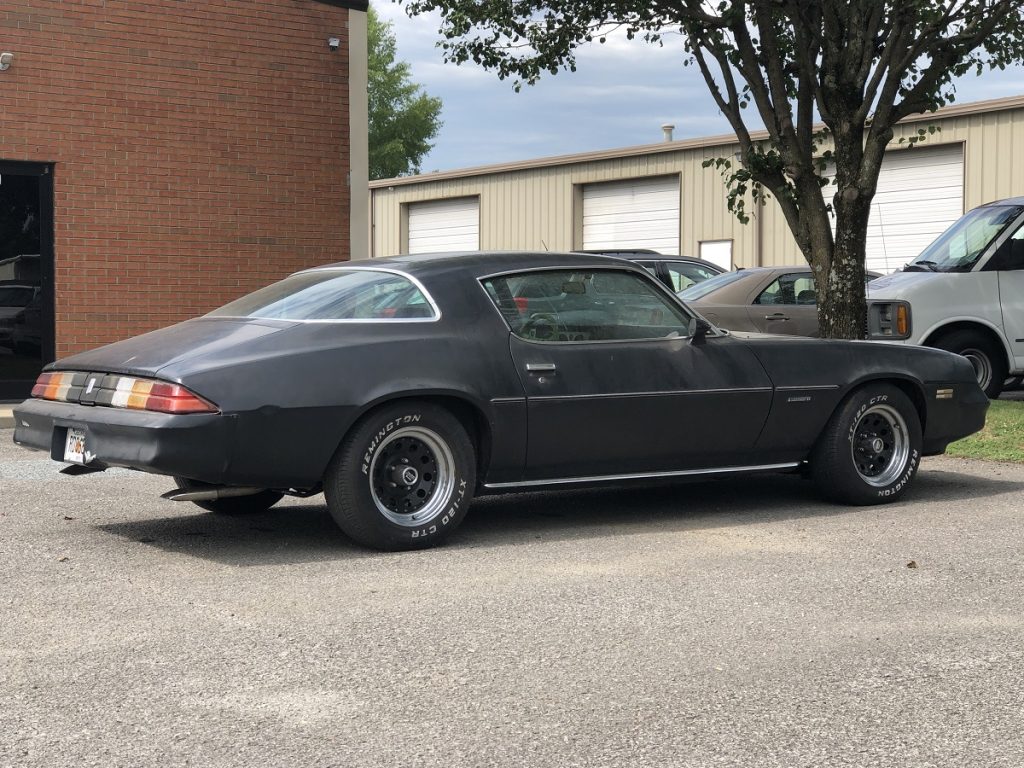
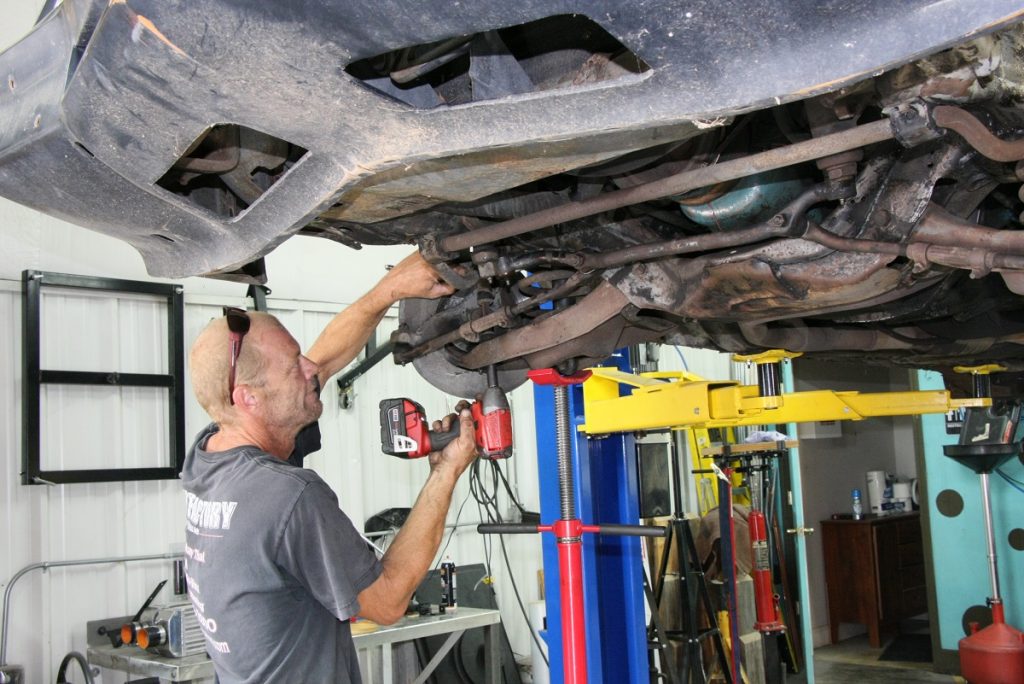
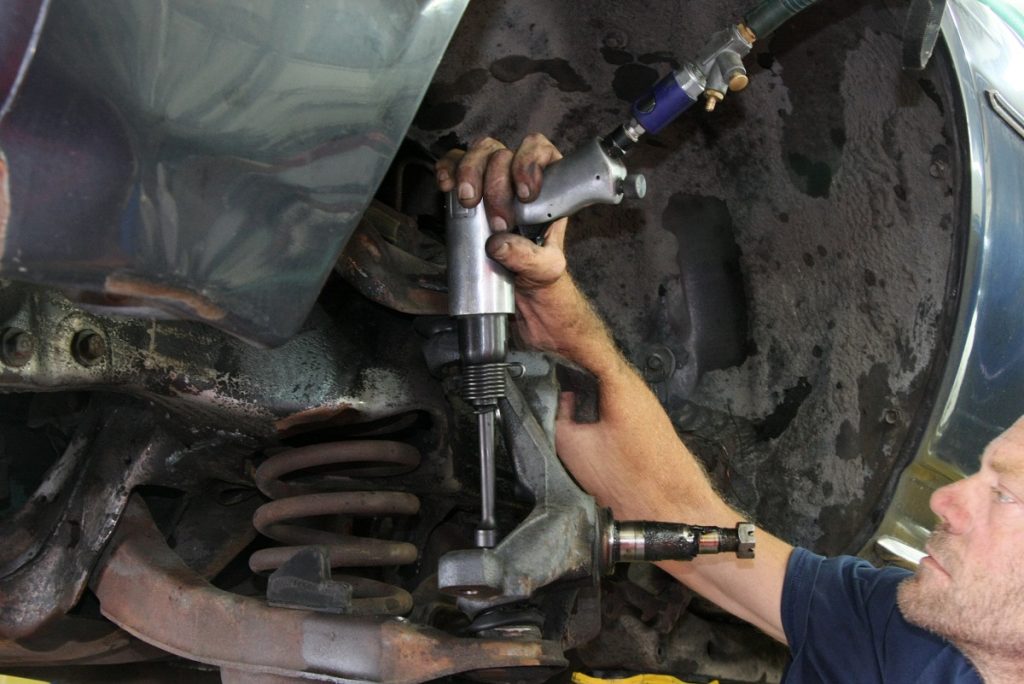
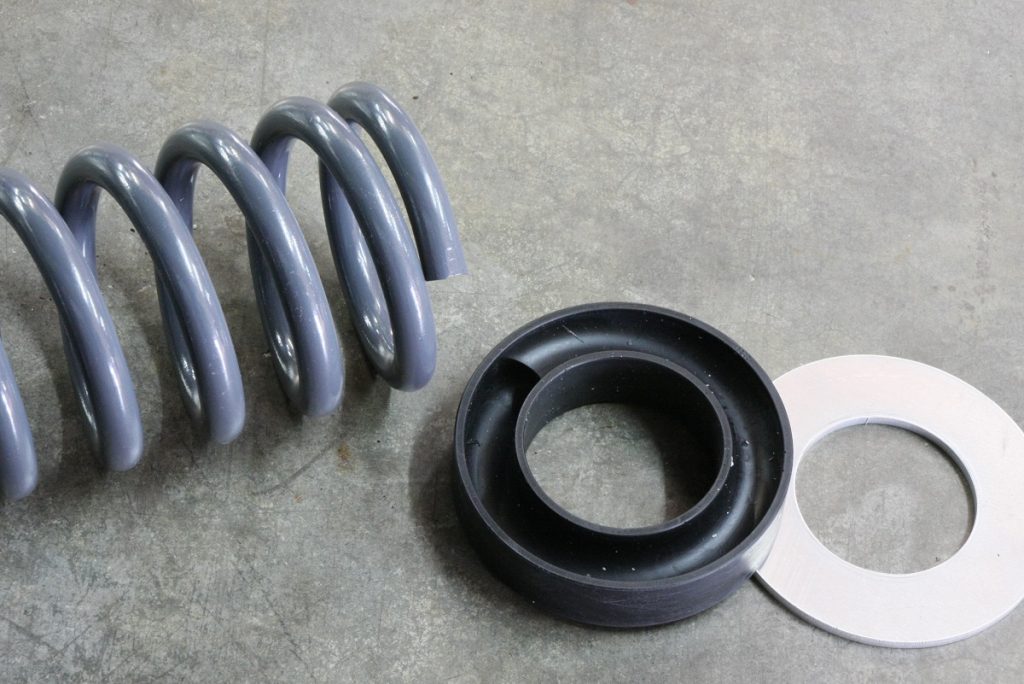
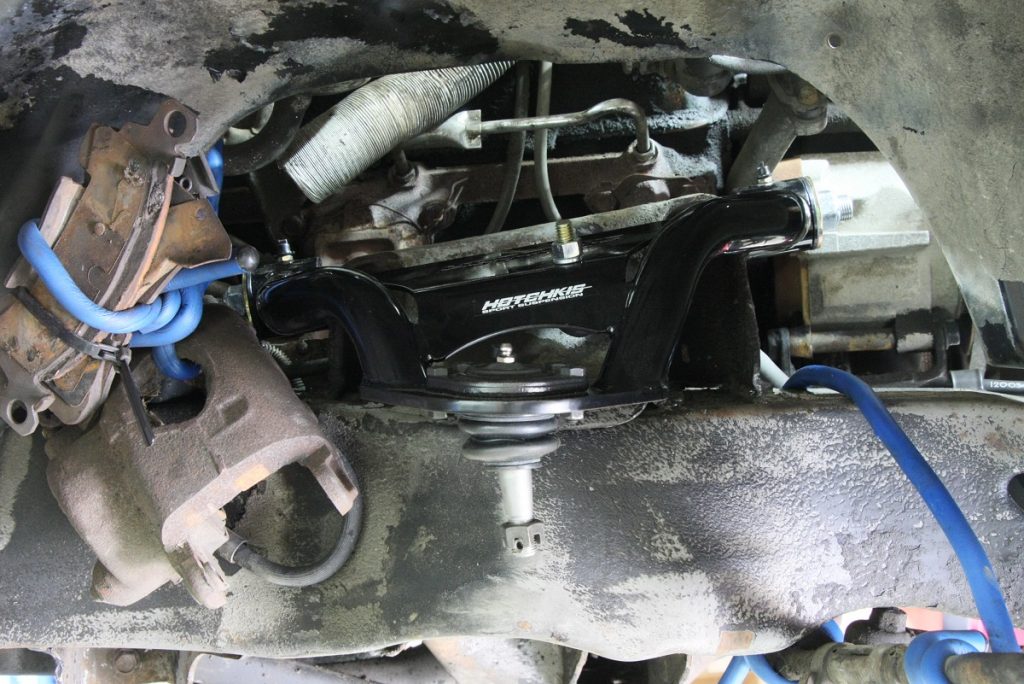
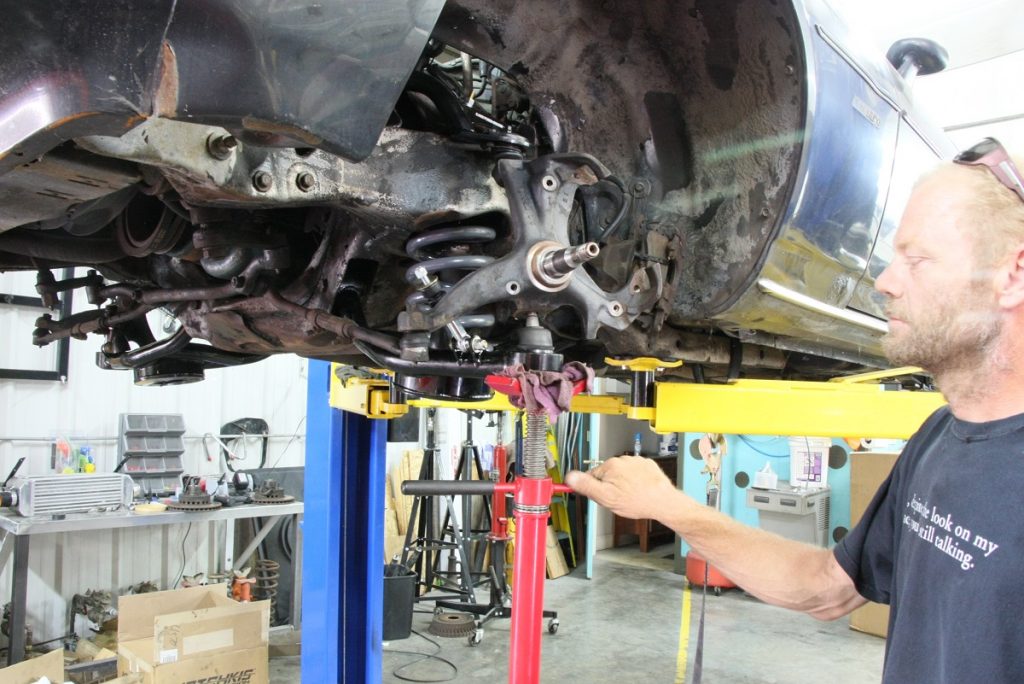
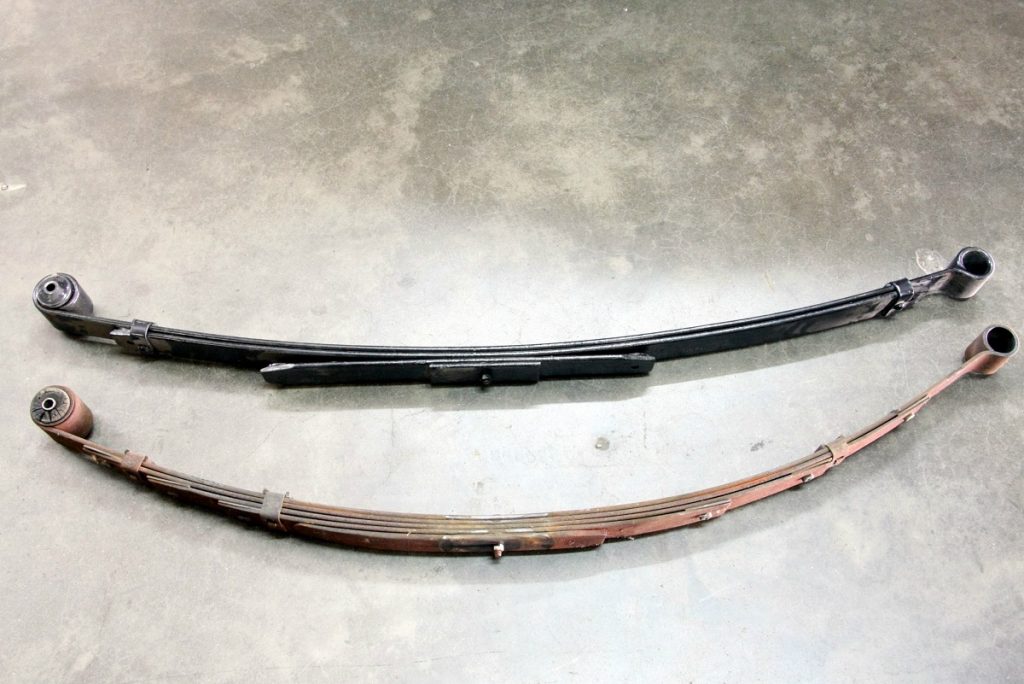
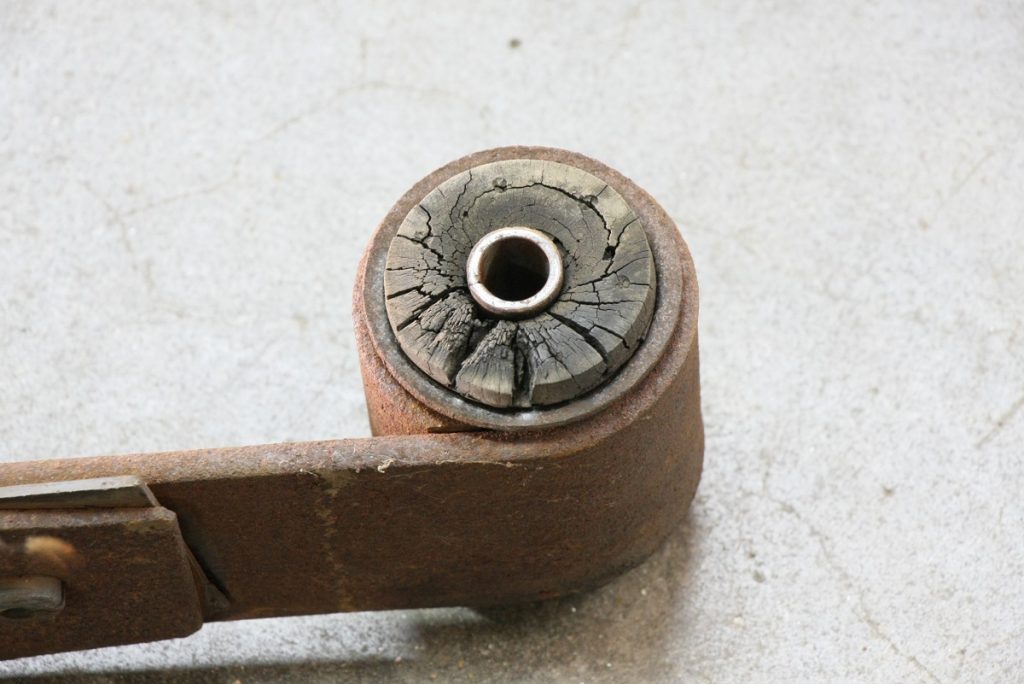
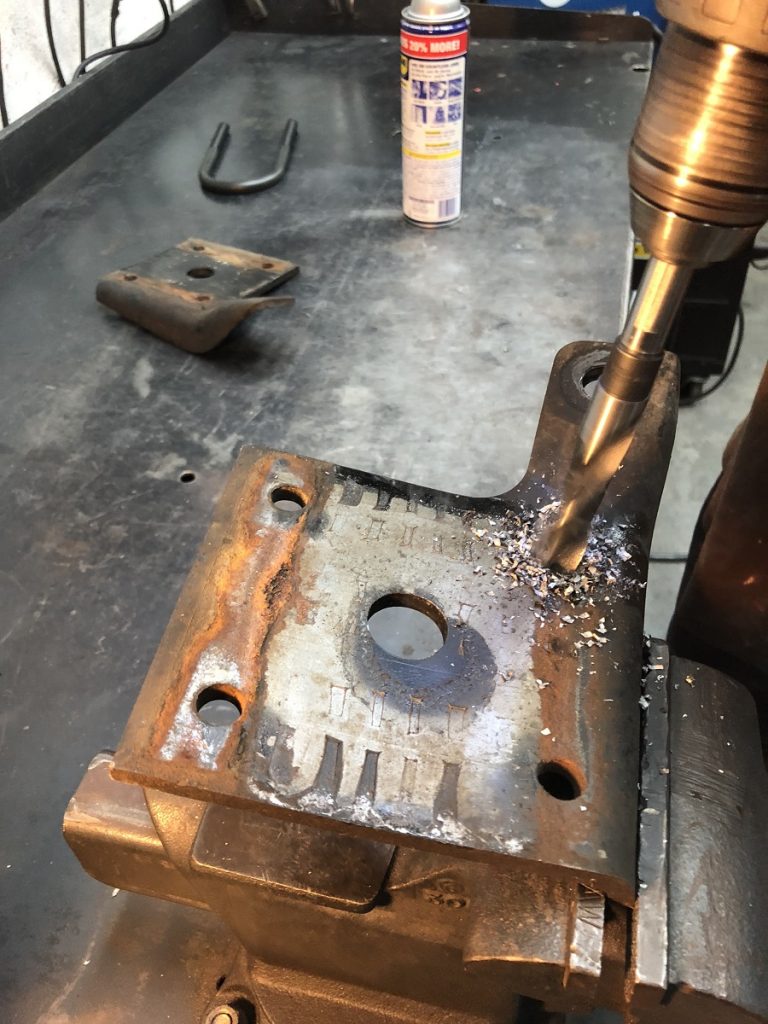
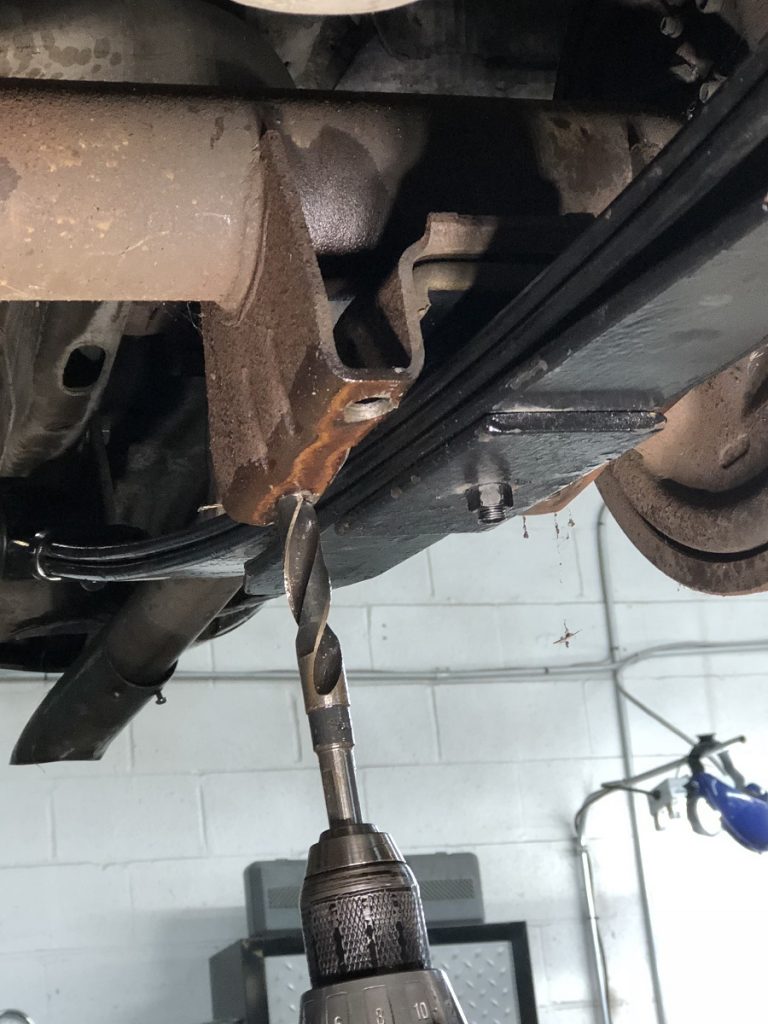
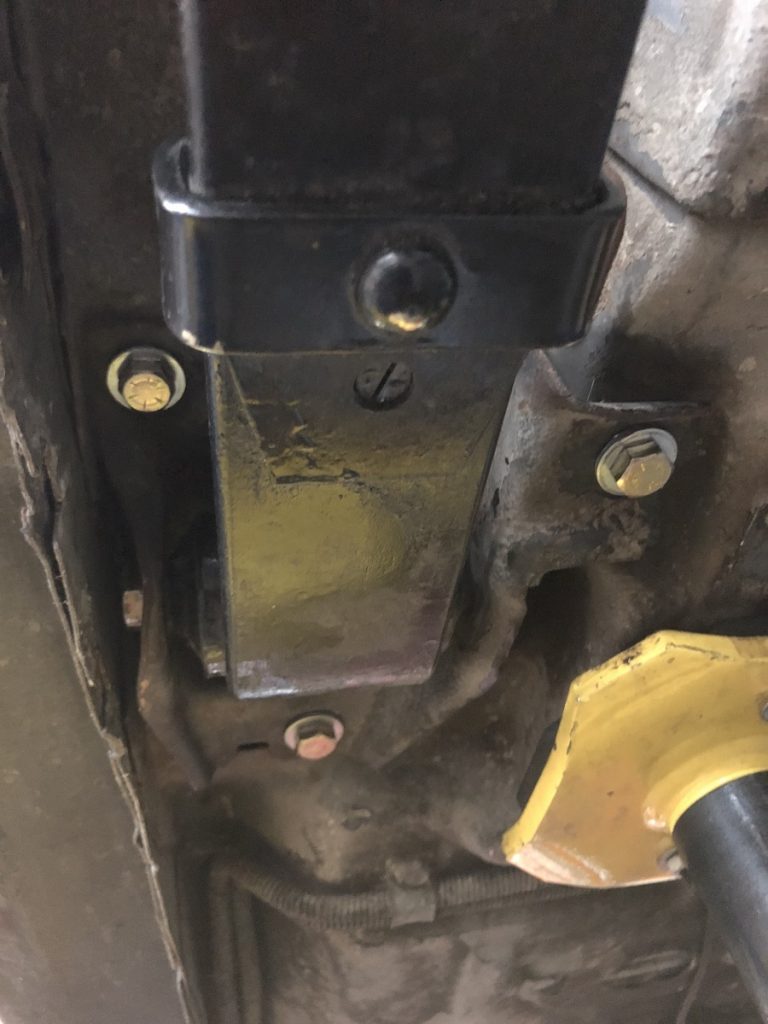
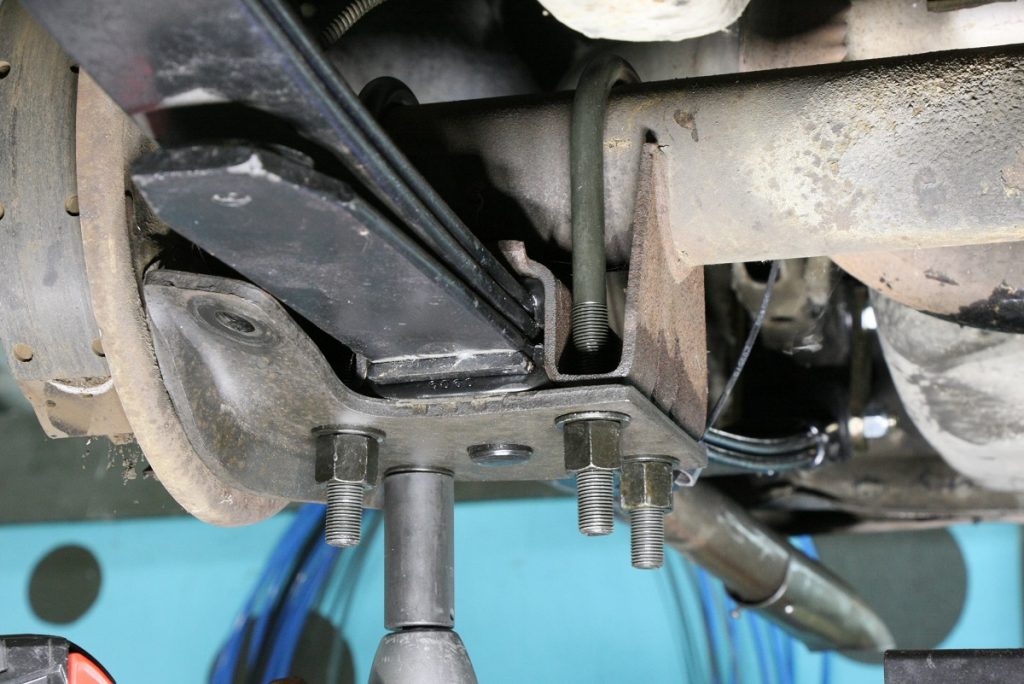
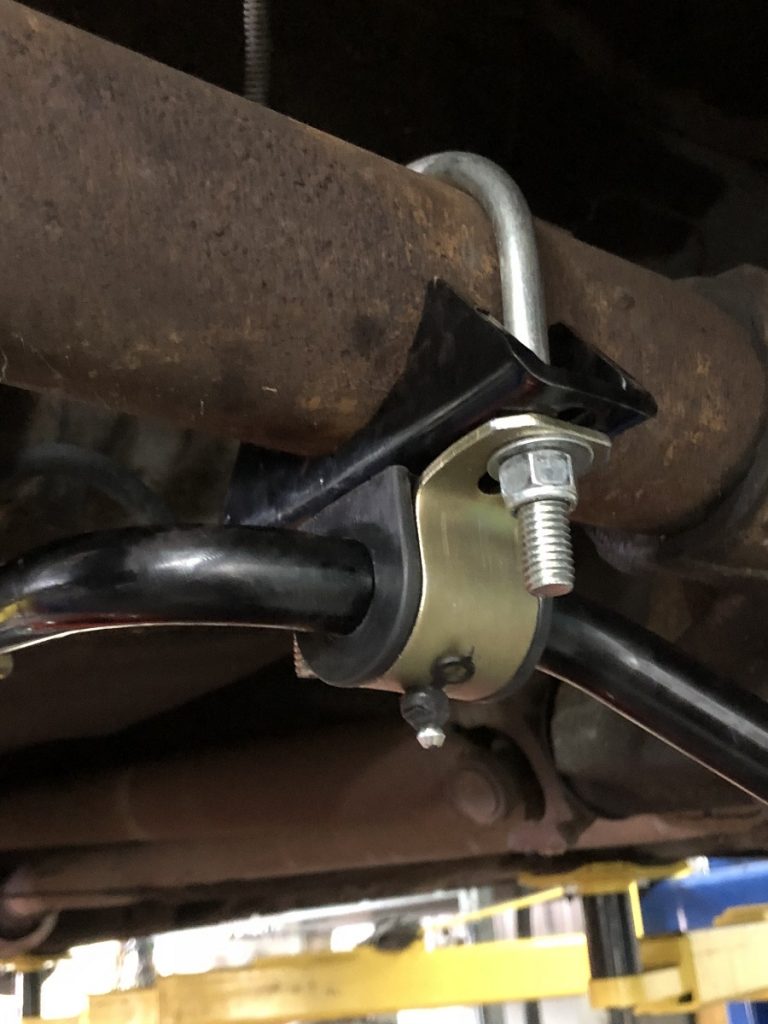
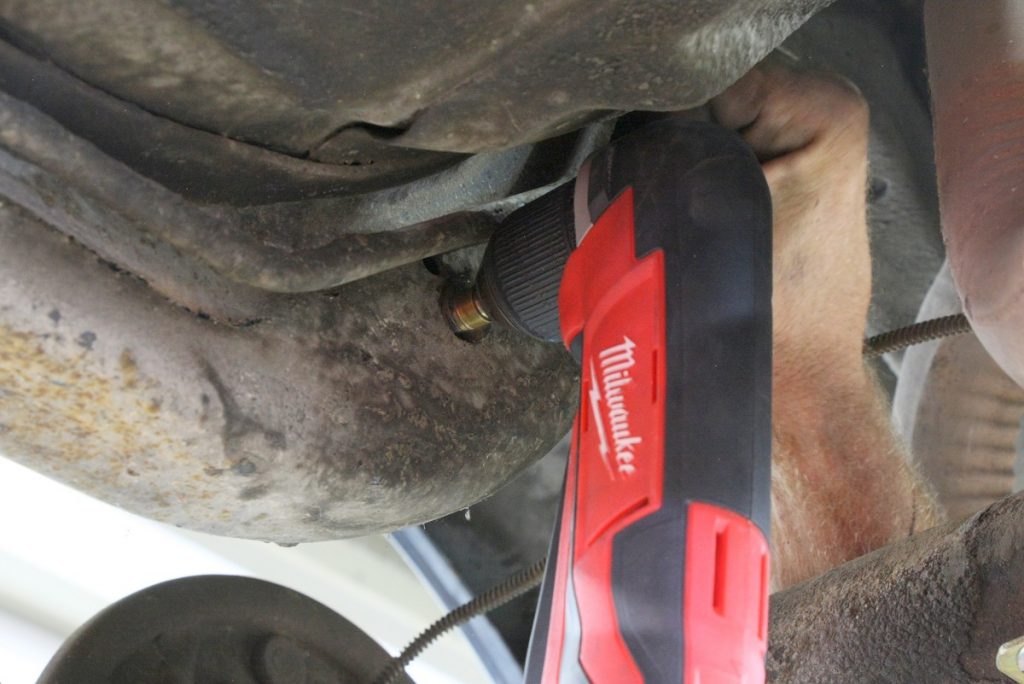
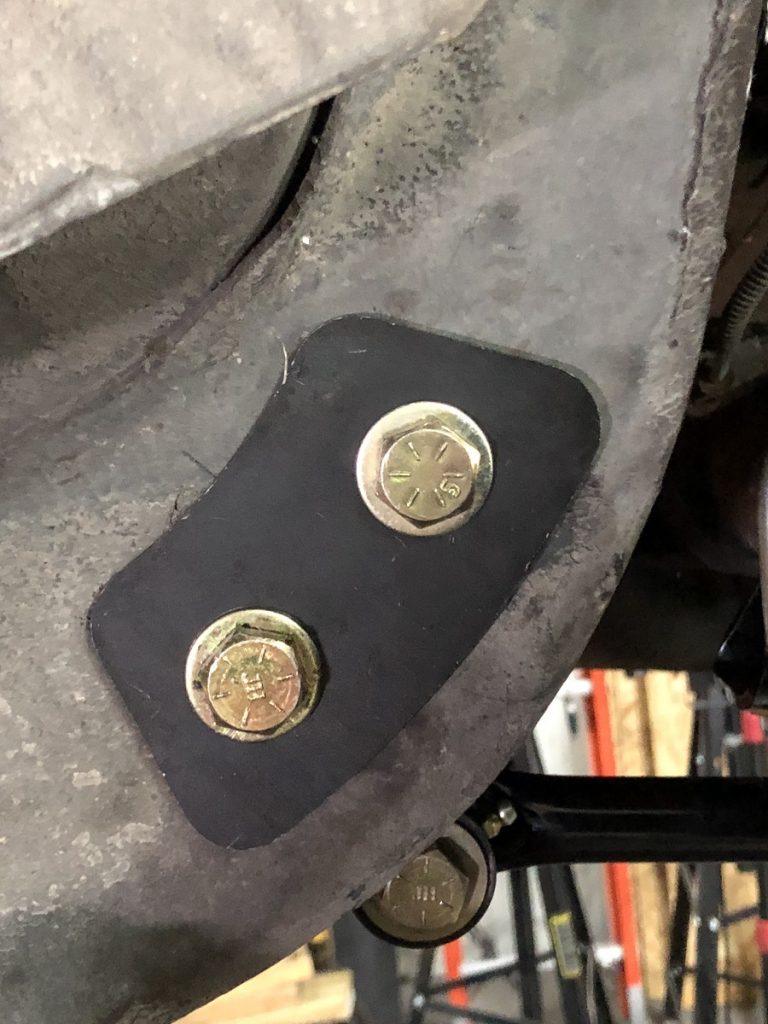
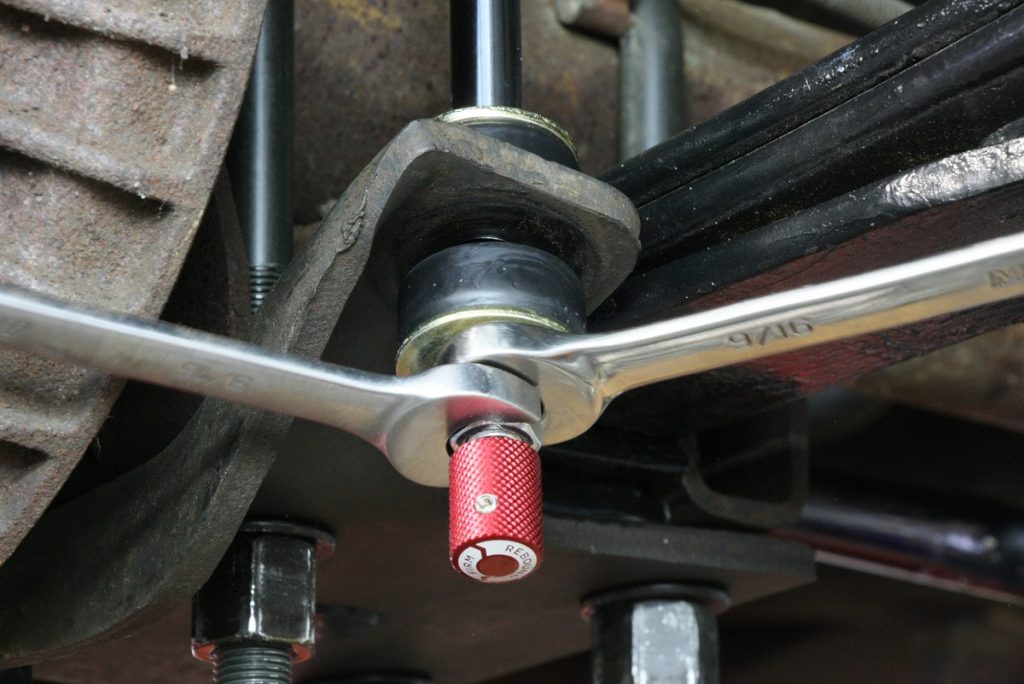
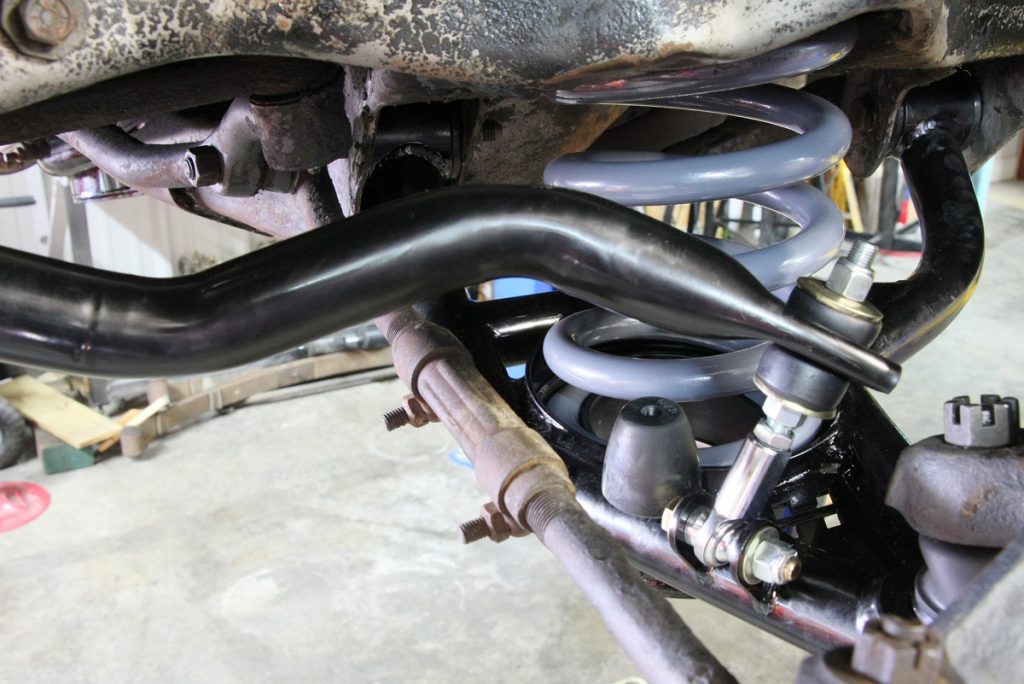
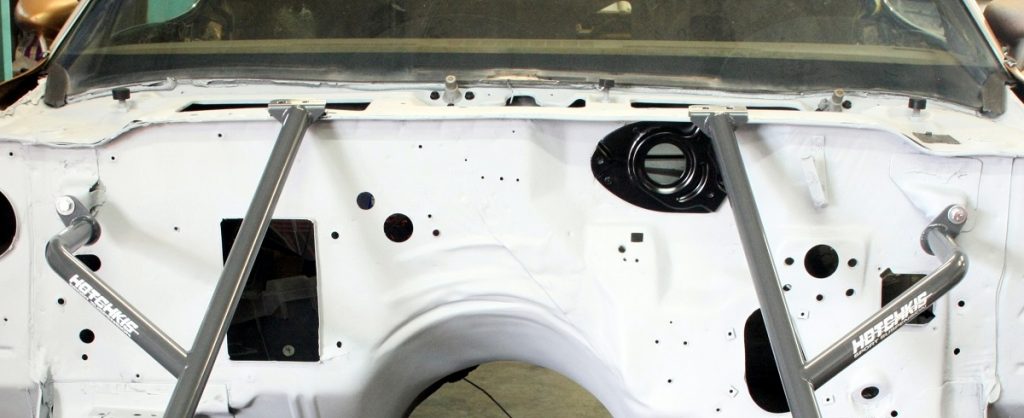
Here’s the final stance with three spring spacers up front creating enough tire clearance to drive. (Image/Mike Petralia) First step is removing the old junk. We have the benefit of a lift and power tools in our shop, but all of this work can be done on jack stands in your driveway or garage. But we really do recommend an impact gun to make this swap a lot easier. (Image/Mike Petralia)The most common way to separate ball joints from spindles at home is with a pickle fork and hammer. But since the Hotchkis kit includes new ball joints already pressed into the control arms, we didn’t need to worry about saving the old ones. Our air hammer directly on top of the old ball joint did the trick. (Image/Mike Petralia)Even with the ball joints disconnected, we still had to use an inner spring compressor and air impact gun to get the stock coils out. (Image/Mike Petralia)The new Hotchkis 600 lb./in. front coil springs, (PN 1908F), include new rubber isolator mounts and ¼-inch thick aluminum spacers to set the proper ride height. One spacer was not enough so we ended up stacking three spacers per side to get our height where we liked it, 25-1/4 inches (about 1-1/2-inch lower than our old stock springs). The new upper control arms went in very easily, even with the fully equipped, stock engine still in the car. We left out any of the alignment shims and we will let the alignment shop handle that later. (Image/Mike Petralia)The lower A-arms kit includes two different ID bushing sleeves because GM used different diameter frame mounting bolts in the past. (Image/Mike Petralia)With the Hotchkis springs in place we used a screw jack to get the new lower control arm up to the spindle. You can barely make out the 2-inch tie down strap, (behind Patrick’s forearm), we used to anchor the car to the ground because the 600-lb./in. springs lifted the car! A few of your buddies sitting on the fenders would also get the job done in your driveway. (Image/Mike Petralia)Moving to the rear, the new 4-leaf Hotchkis spring is shown on top (PN 2408C). It features a variable rate of 150-180 lb./in. Note how much flatter it is than the old sagging stock spring. It included the front poly bushing installed from the factory (left). (Image/Mike Petralia)As expected, the stock rubber leaf spring bushings were wasted. (Image/Mike Petralia)It’s difficult to see with the exhaust in place, but the Hotchkis bushings go into the upper frame mounts at the rear. The stock ones can be a real pain to get out. We had to cut and burn and beat them to death’s door until they finally surrendered. But the new ones slide in easy using the supplied lube. (Image/Mike Petralia)Not counting the rear sway bar mounts, the only fab work needed was to enlarge the rear spring shackle holes to fit the heavy-duty U-bolts Hotchkis sends in the kit. Prepare for this in advance by purchasing a 9/16-inch diameter drill bit with ½-inch reduced-shank. Also known as a “Silver & Deming” drill bit. (Image/Mike Petralia)The upper holes in the axle bracket also needed the enlargement treatment. Be sure to use plenty of oil when drilling. The bit will cut a lot faster, and last a lot longer. (Image/Mike Petralia)The factory leaf spring body mounts can sometimes get pretty trashed and need to be replaced. Ours were okay and we just swapped the mounting hardware for new G8 bolts. (Image/Mike Petralia)When bolting up the new springs it’s important to thread each nut on equally, going in a circular pattern so you don’t side-load the parts while you crush the included upper and lower spring pads. Go a few turns at a time on each one. Repeat until the lower bracket contacts the upper in this case and tighten ’em like they’re head studs. (Image/Mike Petralia)Next mount the sway bar to the rear-end axle tubes using the hardware supplied. (Image/Mike Petralia)Hotchkis uses a factory brake-line clamp hole to indicate where to start drilling for the rear sway bar brackets. This was really the most difficult part of this whole swap because you have to drill four ¾-inch diameter holes in the frame in very cramped spaces. We could only fit a right-angle drill with a short step-bit in there. The drill really didn’t have enough torque for the job. But with patience, we got through. (Image/Mike Petralia)The outer holes only required a ½-inch bit and use the Hotchkis inner frame bracket as a dill guide. They are backed up by a steel plate on the outside of the frame (shown). (Image/Mike Petralia)The adjustable rear APS shocks are made exclusively for Hotchkis by Fox Racing. The same company that makes Baja 1000 shocks. They bolt right in place of the stock units. The red knob is the shock dampening adjuster. We’re double-nutting it to be sure it won’t come loose since we don’t want to over-tighten and crush the shock bushing. (Image/Mike Petralia)The 1-3/8-inch hollow front sway bar, end links, and lower A-arm bump stops, finish off the front end install. The sway bar links feature rods ends on the bottom, and poly bushings up top for the best compromise between handling, comfort, and adjustability. You can see we still need to come back and torque the front ball joints down and install the cotter pins to lock them in place. (Image/Mike Petralia)Hotchkis Chassis Max Handle Bars (PN 20103) fit 1970-81 Camaros. They help to stiffen the front subframe by triangulating it into the firewall at three different mounting points. One point uses a stock fender bolt on each side to locate the bar. The highest mounting point requires two holes be drilled into the cowl overhang at the top of the firewall, (we left those bolts out for this picture). The lower mount anchors at the A-arm cross-shaft stud on either side of the engine. We’re showing them mounted on this bare Camaro because they were too hard to see under the hood of our dirty old Camaro. It’s important to note that Chassis Max bars will not fit cars with OE upper A-arms. And they also will not fit Pontiac models. Hotchkis also has Chassis Max bars to fit 1967-69 Camaro and 1968-74 Nova (PN 20101). (Image/Mike Petralia)
Mike Petralia is a veteran engine and car builder, and long-time contributor to automotive publications. After joining Horsepower TV in 2006, he opened Hardcore Horsepower LLC, building cars and engines for magazines and customers.


Comments