
Special parts often require special tools.
For example, something like an adjustable crescent wrench has no place when it comes to setting valve lash! Which is no secret to anyone reading these pages, we’re sure.
Good examples of high-quality specialty parts and appropriate tools are those manufactured by Jesel. In some cases, you’ll need certain tools to ensure proper (and painless) installation, and in other cases, you’ll need the tools for general maintenance required for the parts in question. Sure, there might be “work-arounds,” but as most of you know, getting the right tool for the job can certainly make life easier in the garage or at the track.
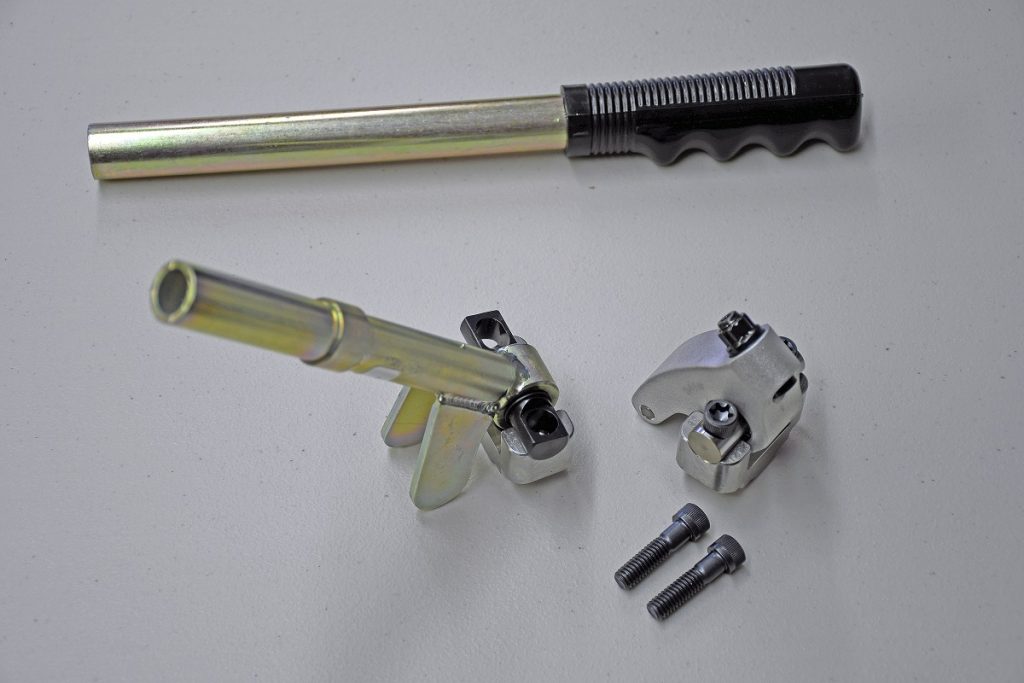
Pushrod Length Checking Tool
One of those “getting it right” tools is Jesel’s pushrod length checking tool.
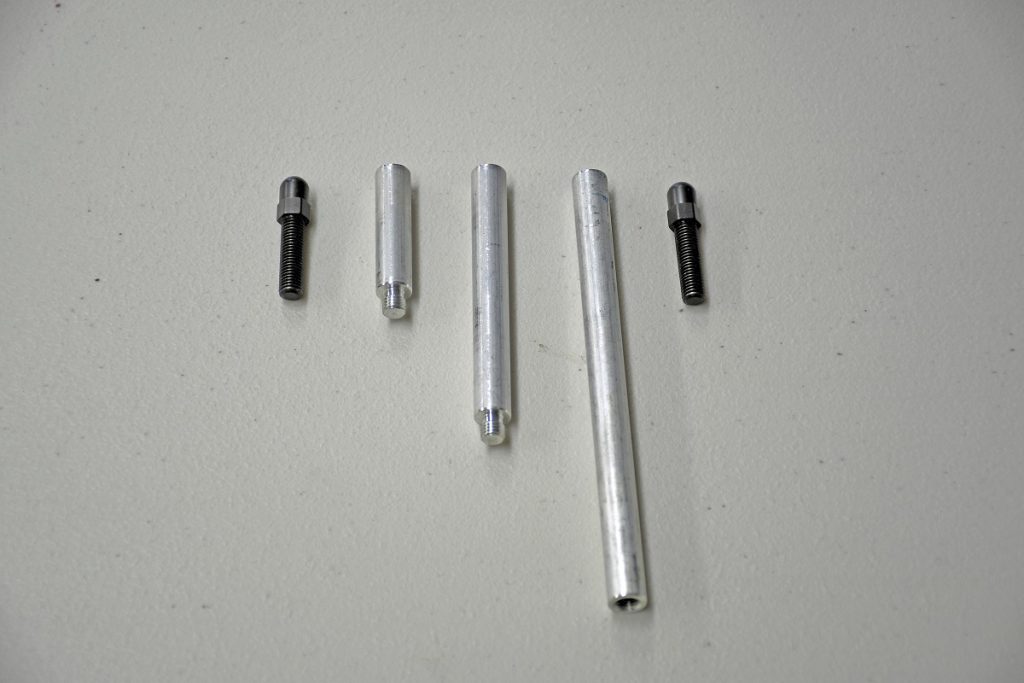
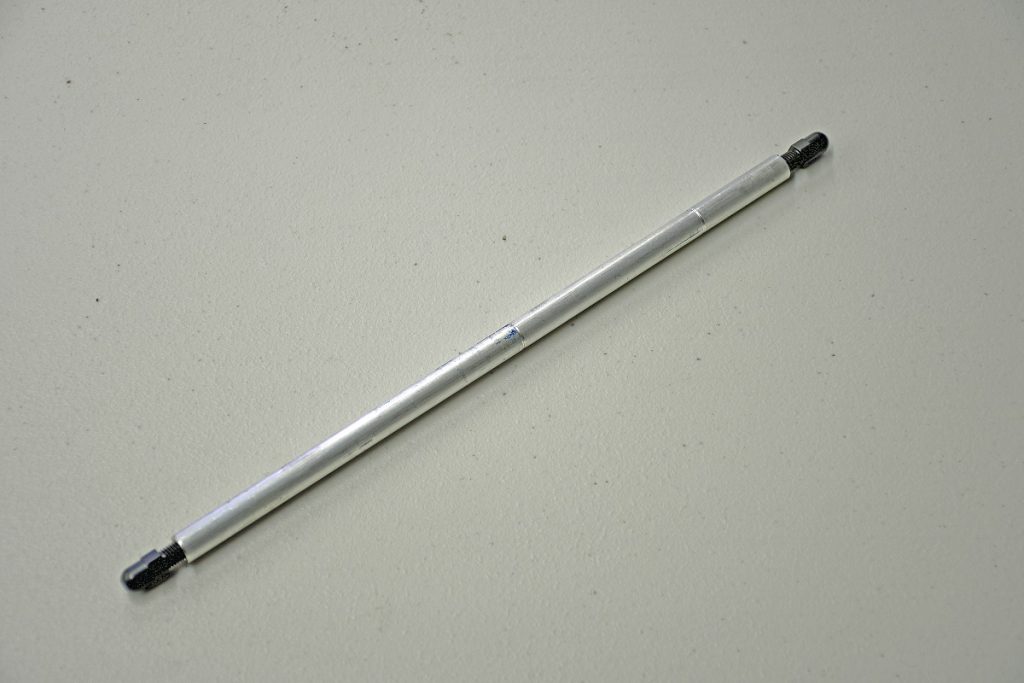
The basic body of the tool consists of three pieces of aluminum tubing. The tubing pieces measure 5 inches, 3 inches, and 1.5 inches in length.
On two pieces of tubing, one end is male and the other is female. On the third piece, both ends are female.
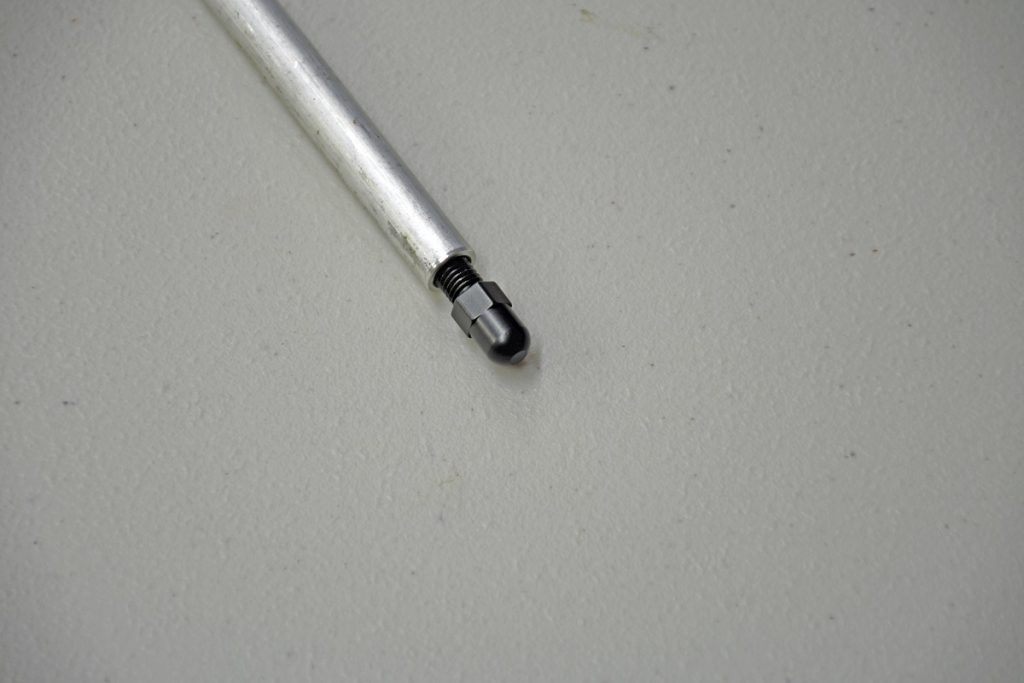
Each end is threaded (obviously). The outer ends accept a screw-in pushrod ball end. There is no oil hole, however there is a machined flat spot in the center of the ball ends that is approximately 0.140-inches in diameter to simulate the oil hole. In total, the tool is adjustable from 6 to 12 inches.
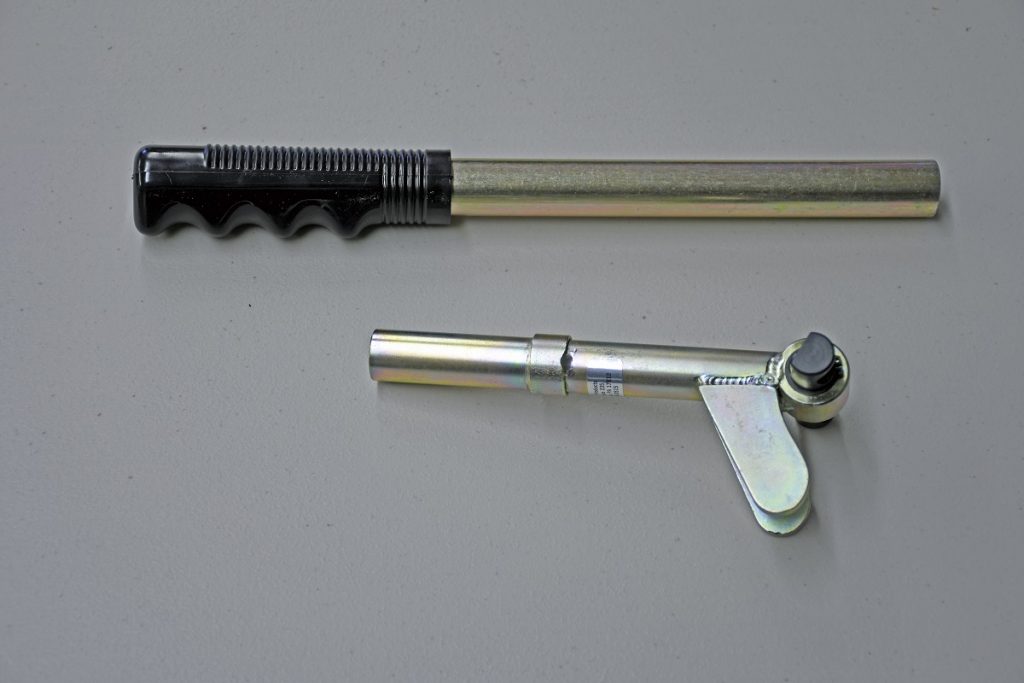
In operation, first make sure the lifter is on the base circle of the cam (opposite full lift).
Install the checking pushrod ensuring it is inside the cup of the lifter. Install the rocker pair. Snug the center bolt on the rocker pair. Next, adjust the end of the pushrod until you reach zero lash.
At this point, back off the adjustable pushrod nut until you obtain the lash (for the cam) you’re looking for. Next, unbolt the rocker pair and remove the adjustable pushrod. Using a long caliper, measure the pushrod. That measurement will tell you what pushrod length is required for your engine combination.
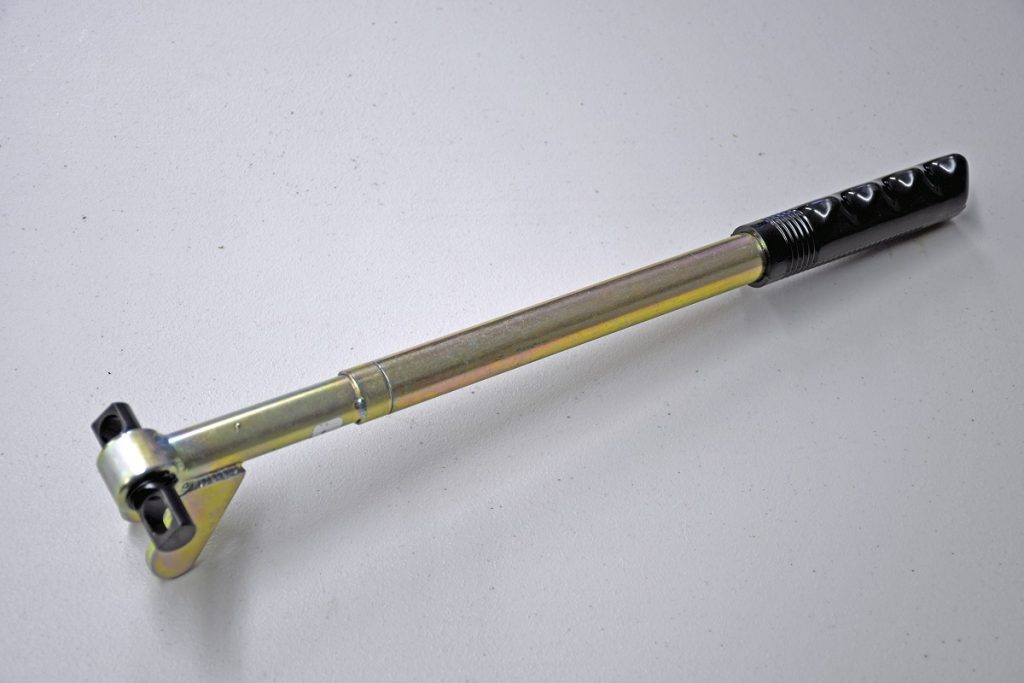
Valve Spring Removal/Installation Tool
When the time comes to install springs or to remove them from an on-engine cylinder head equipped with Jesel rockers, this is the tool to use. It mounts to the rocker stand where a rocker arm pair normally bolts to.
Before you go any further, be absolutely sure you have the piston at Top Dead Center and you have pressurized air going into the cylinder. If the valve drops then you’ll be forced to remove the head to retrieve the valve.
The Jesel valve spring removal tool allows you to easily compress the spring and then you can remove the keepers along with the retainer. Obviously, installation is similar. These beefy steel valve spring compressors have a gold iridate finish and the 12-inch-long handles are fitted with comfortable finger grips.
It all works to provide for solid, slip-free leverage and in return, you get quick, easy spring removal and replacement. The unique tools are available for most stand/shaft arrangements. Simply select the model designed to work with your specific shaft bolt spacing.
Sizing is based upon the bolt spacing for paired rockers.
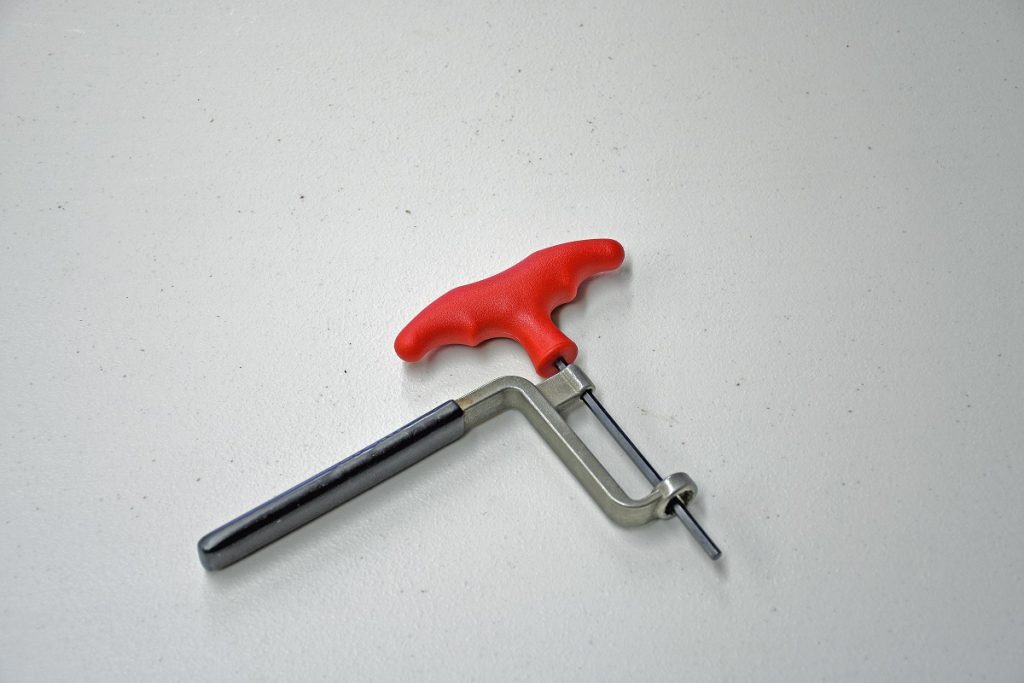
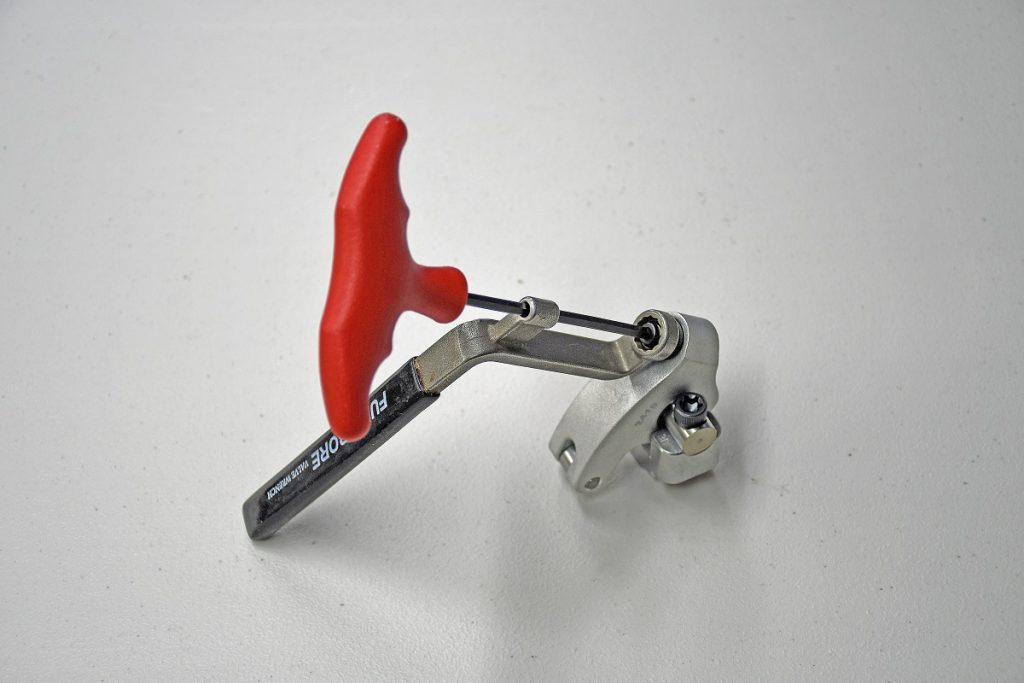
Valve Lash Tool
Although you don’t have set lash as often with a shaft rocker it is still necessary. With Jesel’s valve lash tool, the box end is used to loosen the rocker lock nut while the Allen key is used to set the adjuster (for the lash).
The way the tool is shaped, the box end is L-shaped. The T-handle Allen key passes through the tool body making it extremely easy to use. Once the lash job is complete, tighten the lock nut. Keep in mind the lock nut should be tightened no more than 25 foot-pounds. Any more than that can damage the rocker.
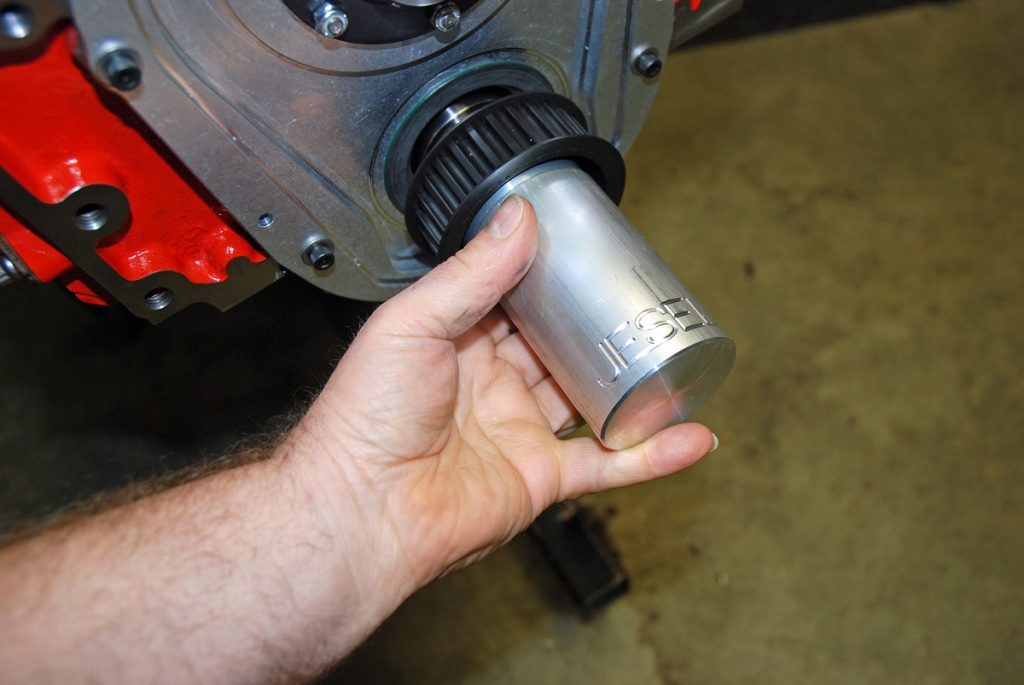
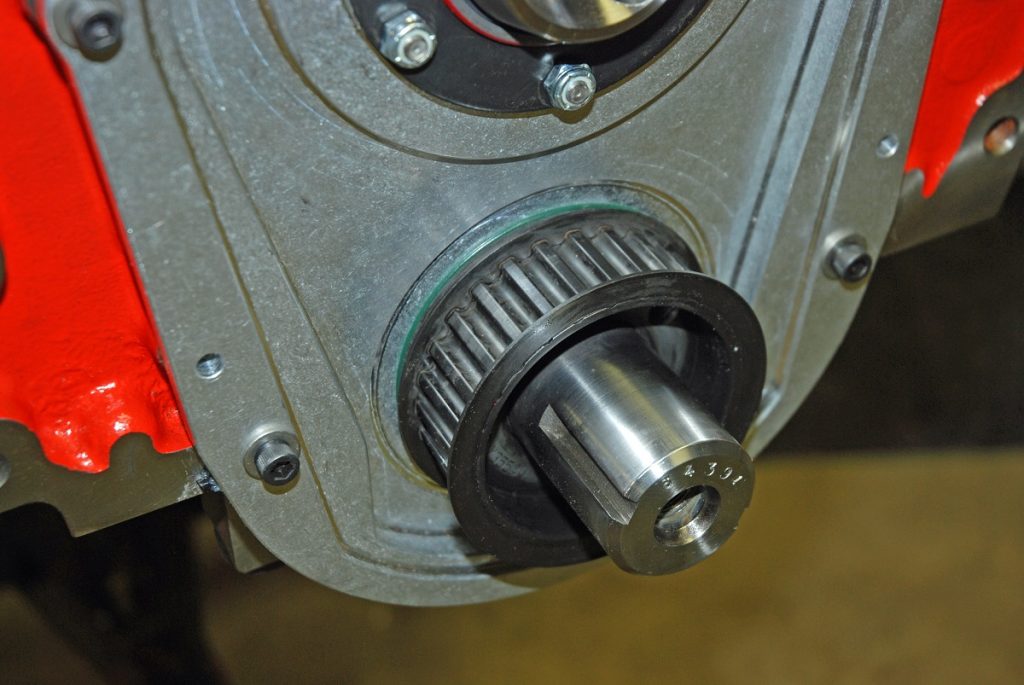
Lower Pulley Driver
This is a very simple tool, but without it, you’ll be scratching your head trying to figure out how to install the lower pulley on a Jesel belt drive setup.
Essentially, it’s an aluminum driver that slips over the crank snout and is used for installation of the lower crank pulley. Here, the bottom pulley is first slipped onto the crankshaft. Then the driver is used to drive the pulley to the point where it stops against the crankshaft. It’s a simple device and works perfectly.
FYI, I typically use a dead blow hammer for the installation process.
When all is said and done, none of these tools are super-expensive. All of them are intuitive, all work seamlessly and none will cause damage to your high-end parts. Best of all, they work so well, you’ll save time in the shop and in the pits. For a closer look, check out the accompanying photos.
I was just looking for a good spring compressor tool. Thanks
My farmer Grandpa always said…”…plan the work and work the plan..” I have carried that through all my life, and these specialty tools are obviously part of the best, optimum plan.By the way, does anyone happen to know were I can get a muffler bearing puller?