(Image/Wayne Scraba)
Working with flaring tools can be challenging (which is no secret to many of you).
Factor in the complexity of working with stainless steel for things like brake lines, and the difficulty increases manyfold. This really shows up whenever the tubing wall thickness increases.
There are usually two different wall thicknesses used for stainless steel brake hardline—0.020-inch and 0.028-inch. Sometimes you can get away with 0.020-inch wall tubing, but according to Earl’s, the standard and recommended wall thickness is 0.028-inch.
This writer has several different flaring tools. The big Rigid camlock tool we have works wonderfully with thinner wall tubing, but feed it 0.028-inch wall tubing and it definitely struggles. The other flaring tools in our roll-away don’t dig stainless steel one bit!
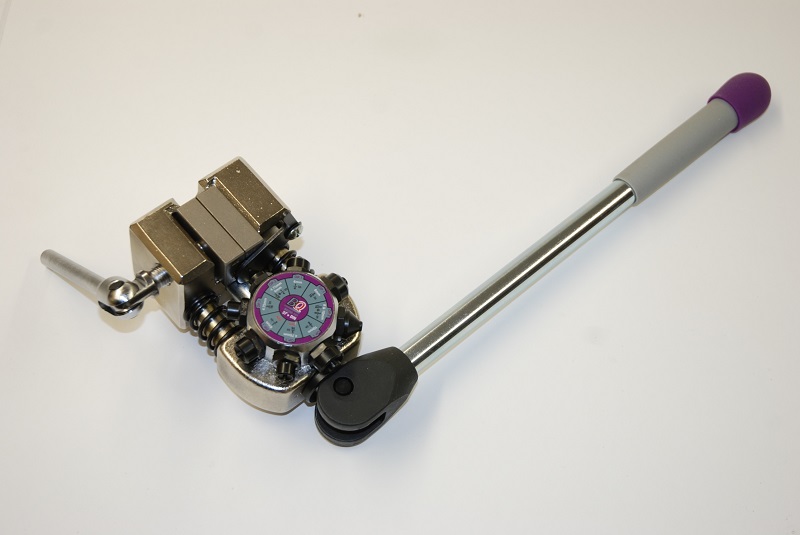
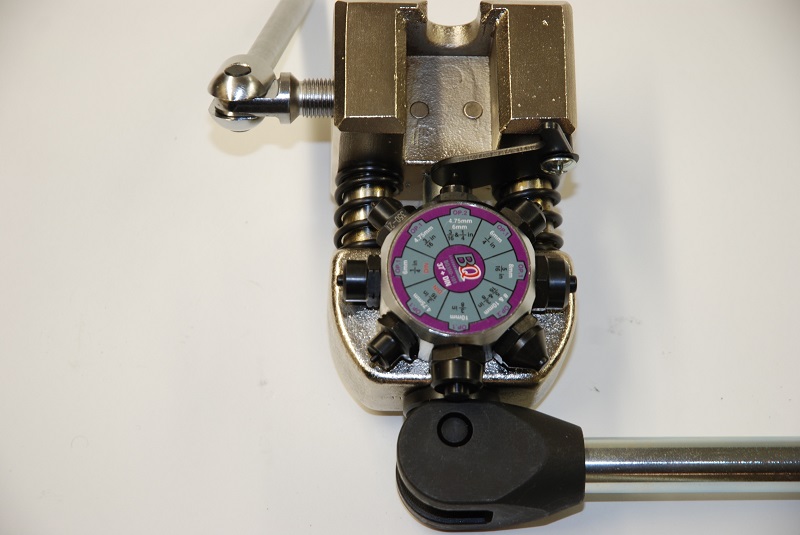
The best solution is the Earl’s Pro Flaring tool. This is an incredibly robust tool that makes flares quickly in all types of tubing, without damaging or deforming the tubing. Part of this is due to the beef in the tool. The basic body is heavy-duty cast steel and the design allows it to either mount in your shop vice or directly to a workbench with an included bracket.
Two-piece heavy duty dies for various tubing sizes and flare configurations are indexed by way of a die clamping handle which screws into the side of the tool body. The long heavy-duty main flaring punch handle snaps simply into the operating cam. The turret punch also snaps right into the turret post.
Two different turret punches are included—one for 45-degree flares and another for 37-degree flares and DIN flares.
Each of the turrets include eight different punches. In total, the tool kit includes 15 dies and two turrets. It can form 37-degree flares for 3/16-inch, 1/4-inch, 5/16-inch, 3/8-inch, and 1/2-inch tubing. It can form 45-degree flares for 3/16-inch, 1/4-inch, 5/16-inch, 3/8-inch, 4.75mm, 6mm, 8mm, and 10mm tubing. And it can form DIN flares for 3/16-inch, and 1/4-inch tubing.
When using this tool (or any other flaring tool), the first thing you should do is square-cut the end of the tubing. A high-quality tubing cutter will do that job for you. Next, lightly chamfer the outside end of the tubing cut, followed by reaming the tubing ID. Blow out any chips or debris that have made their way into the tubing. Wipe the outside of the tube clean. Apply a very small amount of anti-seize compound or hose assembly lube to the end of the tube. Slide the appropriate tube sleeves or other fittings (including metal spring guards if you’re using them) over the end of the tube prior to performing the final flare.
At this point, you can insert the tube into the selected die set but do not fully tighten the die-clamp bolt lever. Slide the setting tab over the die set hole and insert the tube until the tube is flush with the tab. Fully tighten the die-clamp bolt and then release the handle.
Select the required punch turret and push it all the way onto the turret post. Rotate the punch turret to align the required punch with the tube. Pull the large operating handle until the punch bottoms out onto the die set, then release the handle. Loosen the side die-clamp bolt handle and remove the tube from the die set. Inspect for any imperfections (more in the accompanying photos).
If you’re performing a double flare, continue by rotating the die head to one of the appropriate sized 45-degree dies lined up with the end of the flared tube. Next, move the operating handle so that punch comes in contact with the tubing. Apply sufficient force to create the inverted portion of the double flare, continuing until the handle stops. Loosen the die clamp lever and remove the split dies. Remove the finished flared tube from the dies. If the tube is tight you might have to give it a light tap with a soft hammer to release if from the dies. The flare is done.
With the Earl’s Pro Flaring tool you can quickly forget about using your old shaky flaring setups. The Earl’s tool is pretty much a flaring beast and in operation it performs both single and double flares effortlessly. It’s most defintely one heavy duty flaring tool—a piece of shop equipment that will last a lifetime. For a closer look, check out the accompanying photos:
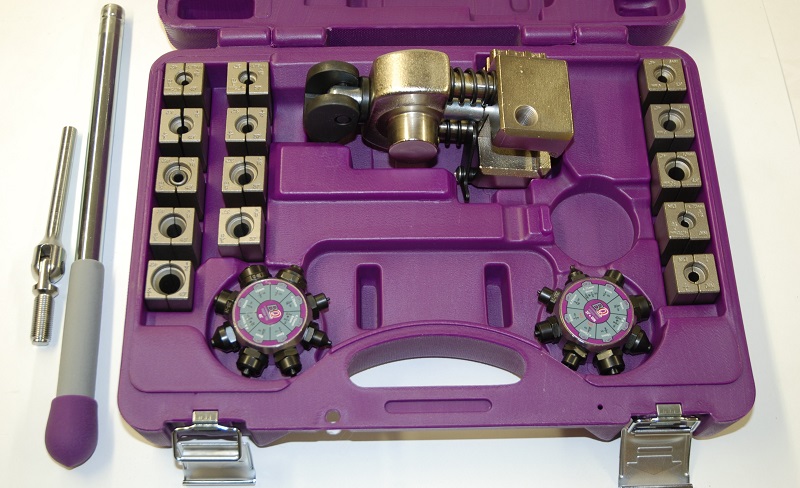
This is the complete pro flaring tool set from Earl’s. It includes dies and punches sufficient to perform single and double 37-degree and 45-degree, double 45-degree and DIN flares. (Image/Wayne Scraba)
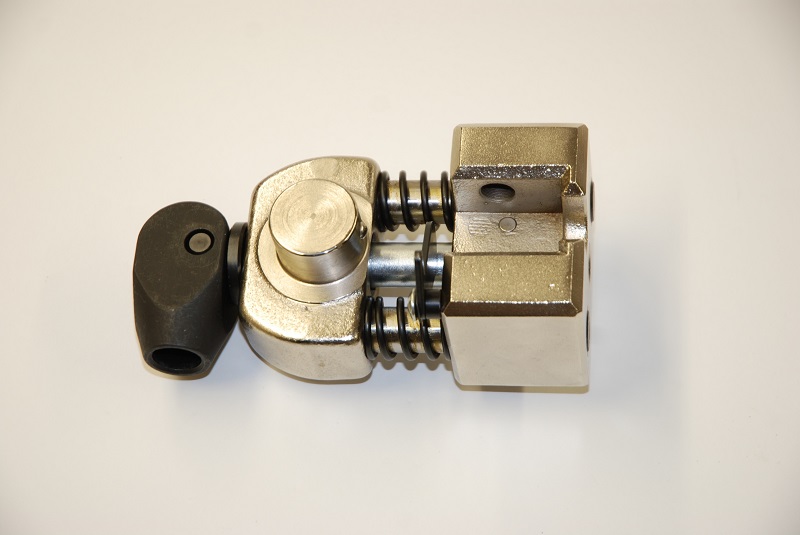
The base tool body is manufactured from a heavy steel casting. The tool is extremely robust and doesn’t flinch when easily performing flares on heavy wall stainless steel tubing. (Image/Wayne Scraba)
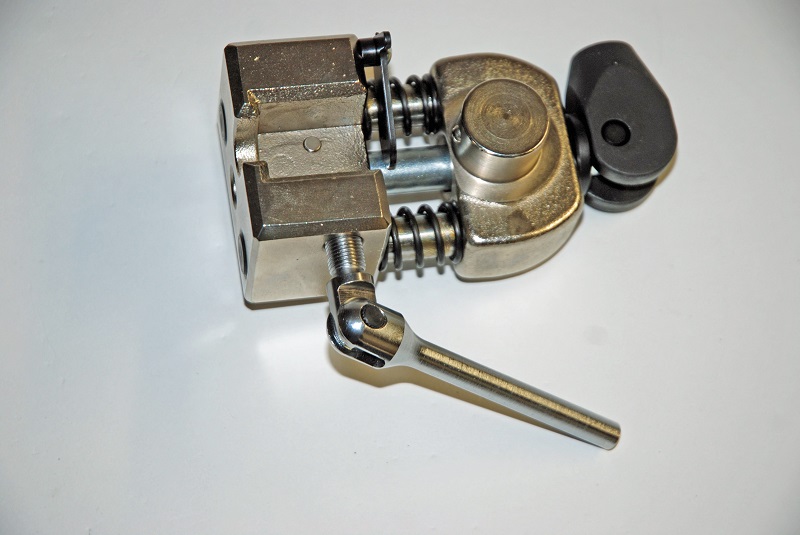
The die clamp handle installs easily on the main body of the Earl’s flaring tool. As you can see, it simple screws on. (Image/Wayne Scraba)
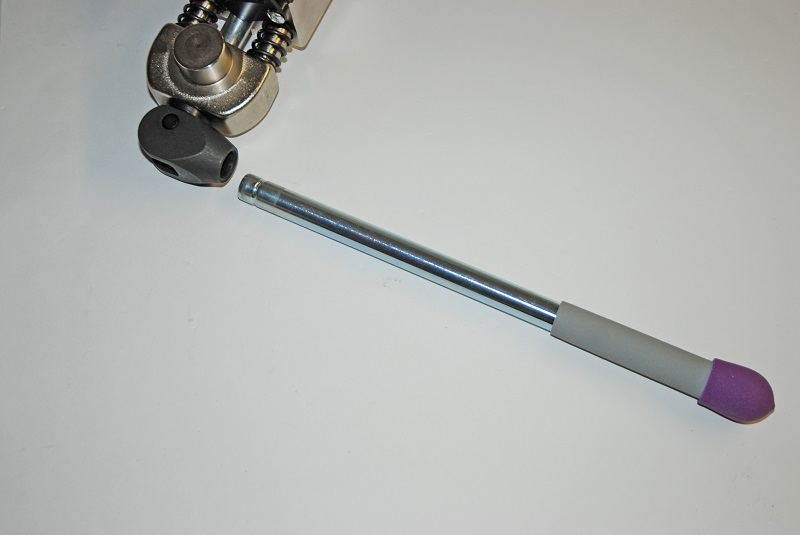
The flaring punch handle install is even easier: It simply into place. (Image/Wayne Scraba)
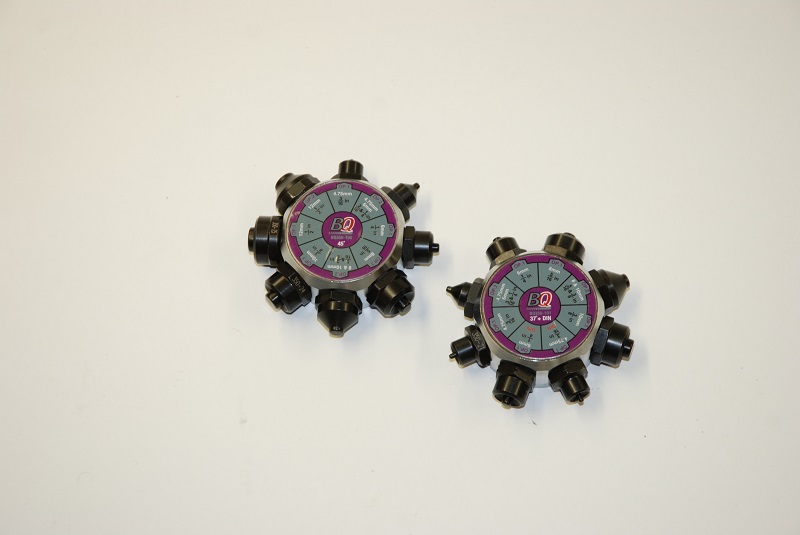
Two complete punch turrets are included with the tool. A total of 16 different punch combinations are available. Each punch screws into the respective turret, and if necessary a punch can be replaced. (Image/Wayne Scraba)
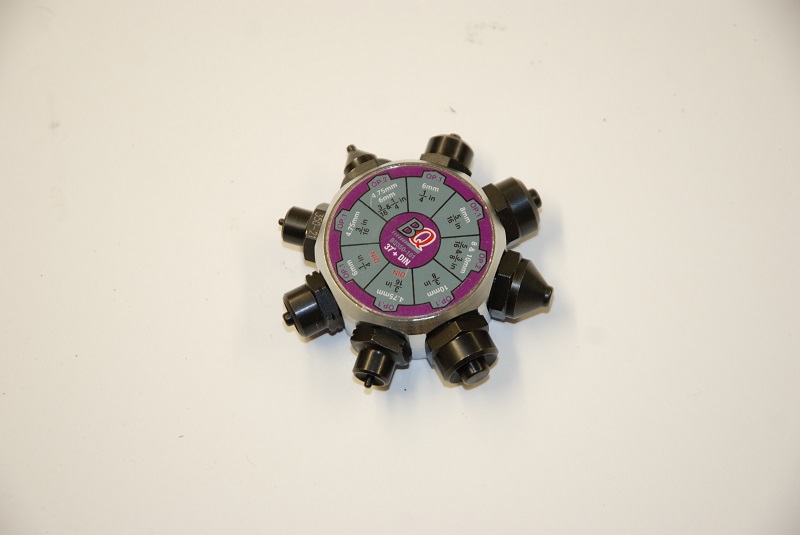
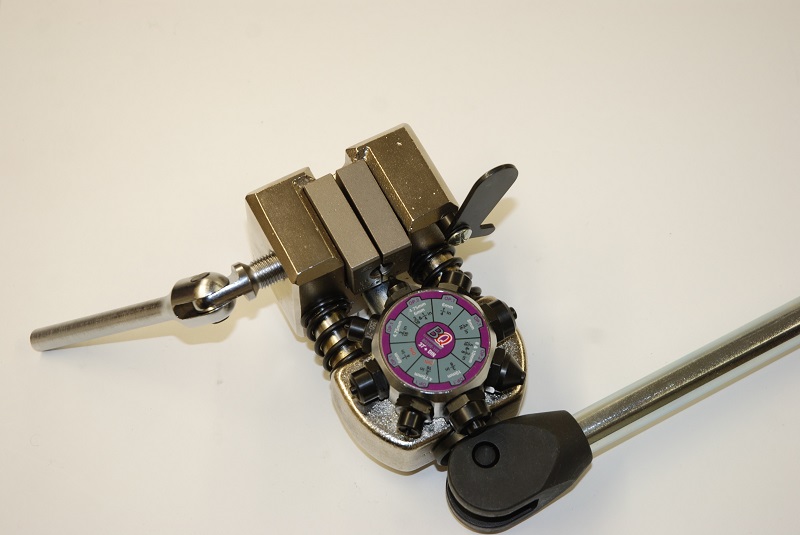
Up close you can see that this turret is setup for various 37-degree flare configurations along with DIN flares. The DIN flares are clearly marked. (Image/Wayne Scraba)
The turret simply snaps on the tool body. In operation, you can rotate the punch turret while it is installed on the tool body. This makes double flaring jobs even easier. (Image/Wayne Scraba)

Here’s a look a the complete set of dies included with the tool set. Fourteen different die sets are available. (Image/Wayne Scraba)
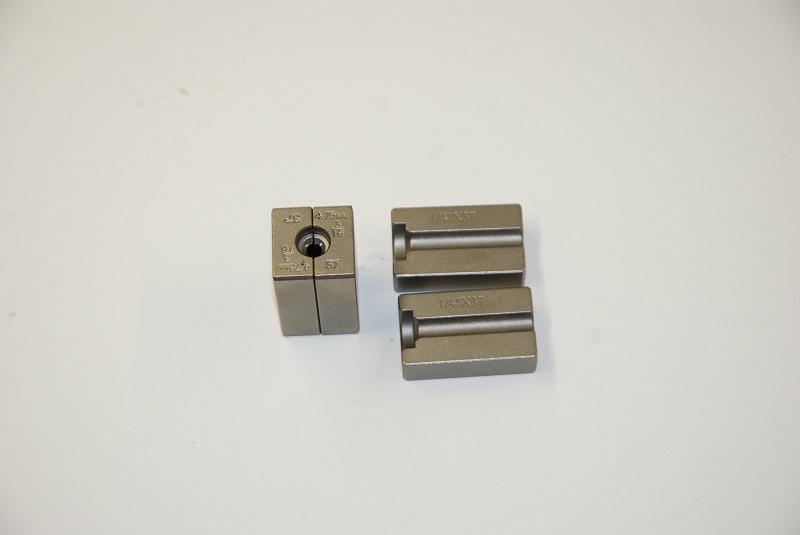
Up close you can see the dies are two-piece assemblies, which obvioiusly allows for the removal of the tubing from the die after a flare is made. Both of these dies are for 37-degree single flares. (Image/Wayne Scraba)
The dies simply slip into the tool body as shown here. (Image/Wayne Scraba)
When performing a flare, the next step is to insert a section of tubing installed through the dies. (Image/Wayne Scraba)
The die setting tab is flipped over next. Then you can move the tubing forward until it contacts the die setting tab. (Image/Wayne Scraba)
Tighten the side die clamp handle on the main tool body. This will clamp the tubing inside the die. If the tubing moves, you can use a small amount of valve lapping compound on the tube body to help it stay in place. (Image/Wayne Scraba)
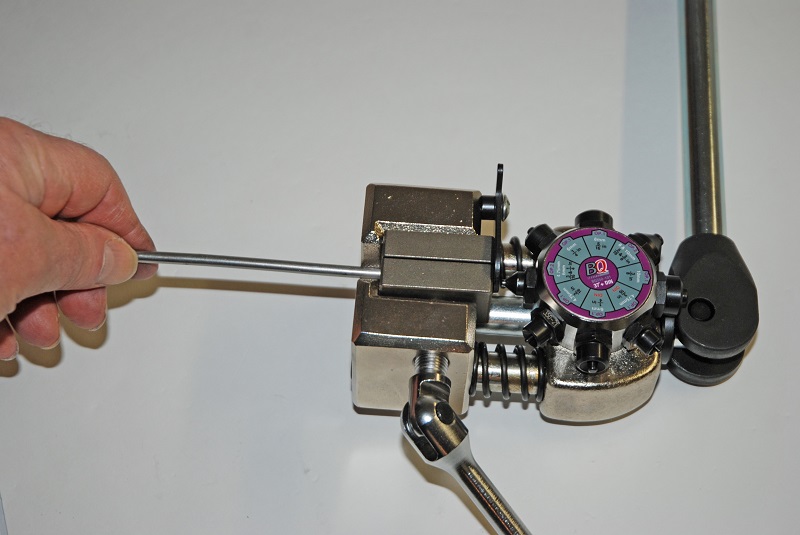
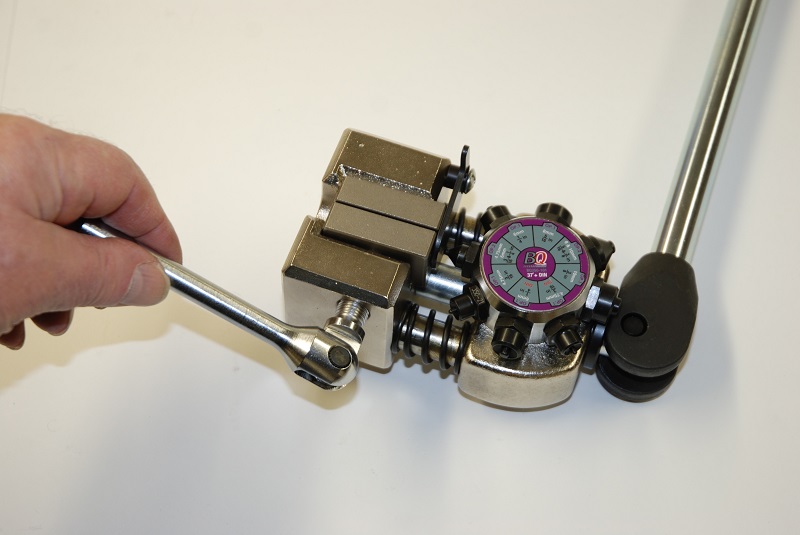
You’re ready to form the flare. Rotate the turret to the appropriate punch and simply pull the punch handle. You’ll quickly find the tool does all the work! (Image/Wayne Scraba)
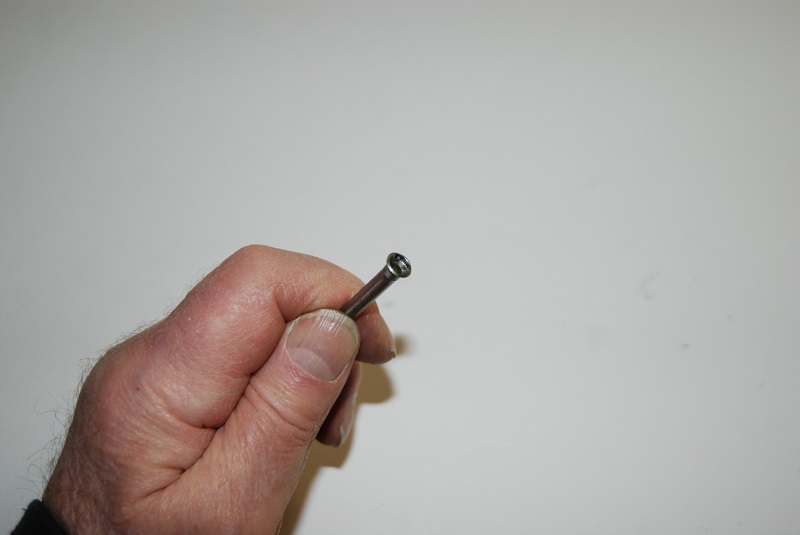
Here’s a competed flare made in stainless tubing. (Image/Wayne Scraba)
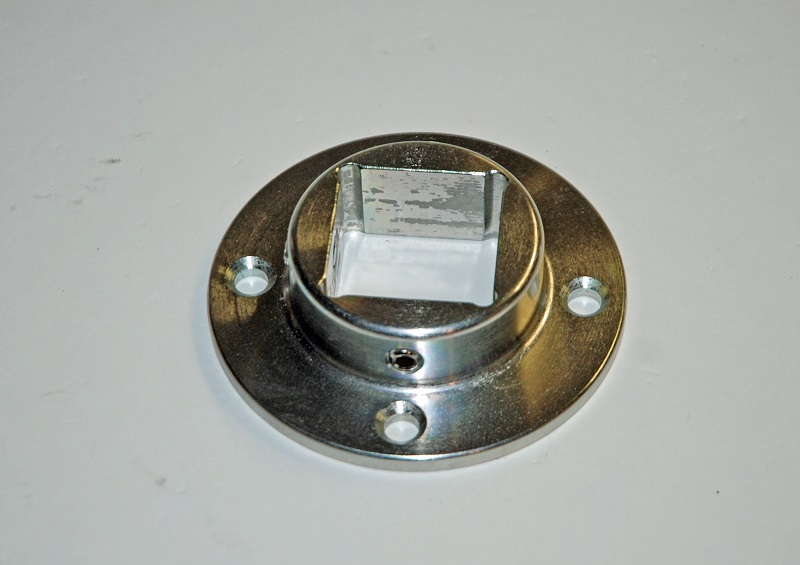
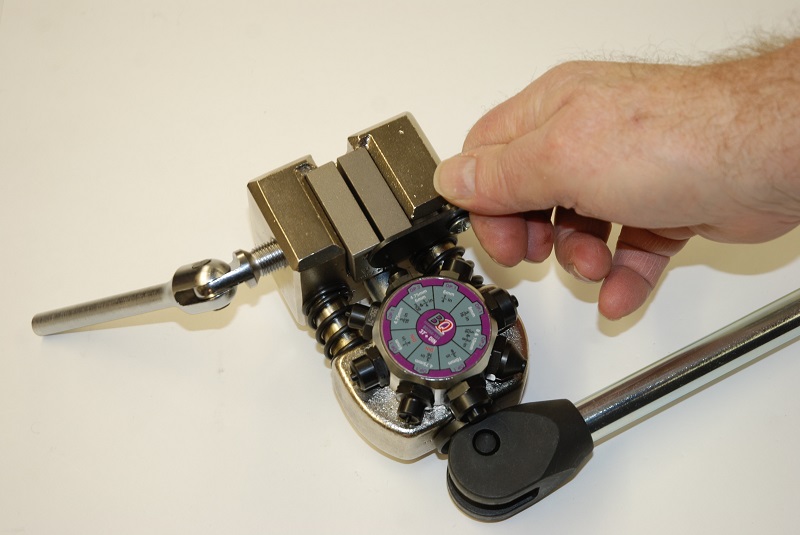
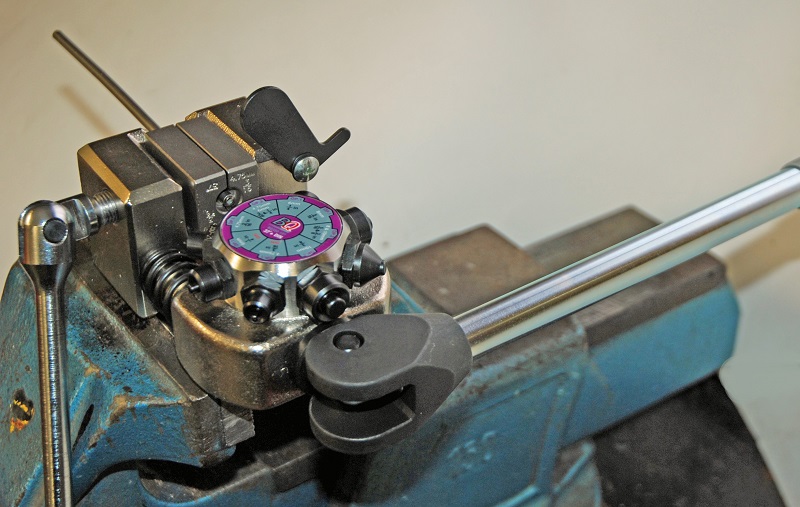
You can mount the flaring tool into a set of vise jaws (as shown above) or you can install this mount permanently on your work bench. With this setup, the Earl’s flaring tool simply snaps into place (and equally important, can be snapped out just as easily). (Image/Wayne Scraba)
Looks cool and I’m sure it works great but at 450 bucks it’s definitely not an impulse buy!
One great piece of engineering. A tribute to Earl’s dedication to perfection.