(Image/Wayne Scraba)
Separating ball joints from spindles is common when working on the front end of a car. The usual practice goes something like this: Slip a jack under the A-arm to support it (some folks will also wrap a tie-down strap around the spring and the lower A-arm as an added safety measure).
Peel out the cotter pins and unscrew the respective ball joint castle nuts.
Next, insert an appropriately sized pickle fork between the ball joint and the spindle.
Then grab the biggest hammer you have in your tool box and whack the end of the pickle fork. After a hit or two (or more), the ball joint will release from the grip of the spindle taper. You can lower the jack. The spring will safely drop down and you can repeat the process on the remaining ball joint. Repeat the process all over again for the other side of the car.
This process works okay, but there are often casualties: In most cases, the ball joint boots will be destroyed. And in some cases, you can seriously mangle a disc brake dust (water) shield if you’re not careful. There’s a hitch though: If you’re using an aftermarket ball joint that is taller than stock, the pickle fork won’t work because it’s not sufficiently thick enough to create a wedge in order to loosen the ball joint.
Yes, it is possible on some applications to release the ball joint ‘grip’ without much damage to the ball joint boot.
It’s usually done by turning the castle nut upside down and reinstalling it. Then you can beat on the ball joint with a hammer (and in some cases accompanied by a big punch) until it releases. This sometimes works, but the end result can be mangled threads on the ball joint. Plus, it usually destroys the castle nut.
An offshoot of this process is to use a material softer than the ball joint to pound it out. That means you use a piece of hard wood or aluminum between the ball joint and the hammer in an effort to protect the threads. It takes way more hits from the hammer to get this done. It doesn’t always guarantee damage-free results either.
A Better Way to Remove Ball Joints
Howe Racing has a very simple solution.
It’s their Ball Joint Separating Fork.
This tool is similar to an old (and long discontinued) General Motors’ Kent Moore tool. The inside cylinder of the spreader tool is shaped to fit over the tapered stud of most ball joints. To use the tool, first remove the cotter pins along with one castle nut. Place the tool between the upper and lower ball joint stud. Tighten up the tool and then turn the 9/16-inch hex on the tool to push the ball joint out of the spindle.
If you need to remove both ball joints from the spindle, simply stop before the ball joint is completely released from the spindle taper.
Remove the tool and reinstall a castle on the opposite end. Turn the tool around and repeat.
It’s quick and easy to use and because it never contacts the spindle itself, it doesn’t hurt the dust boots or the brake dust shield either.
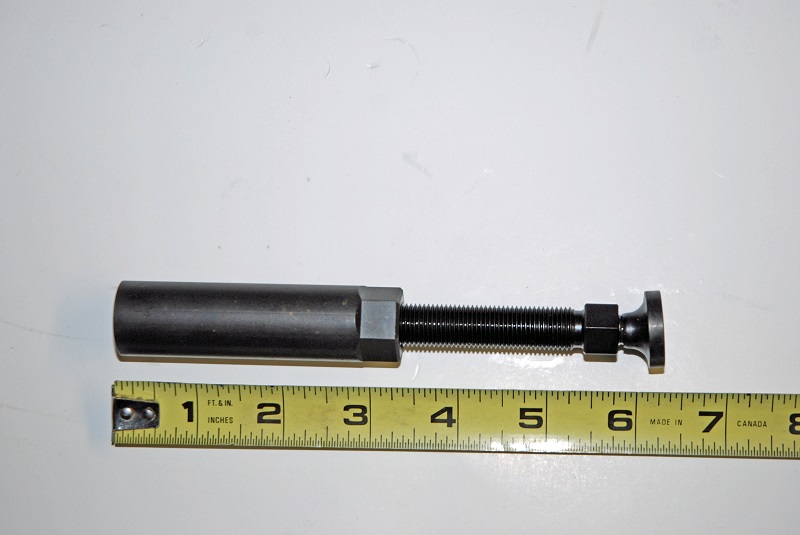
In terms of dimensions, the tool measures 6-1/4-inches fully extended.
(Image/Wayne Scraba)
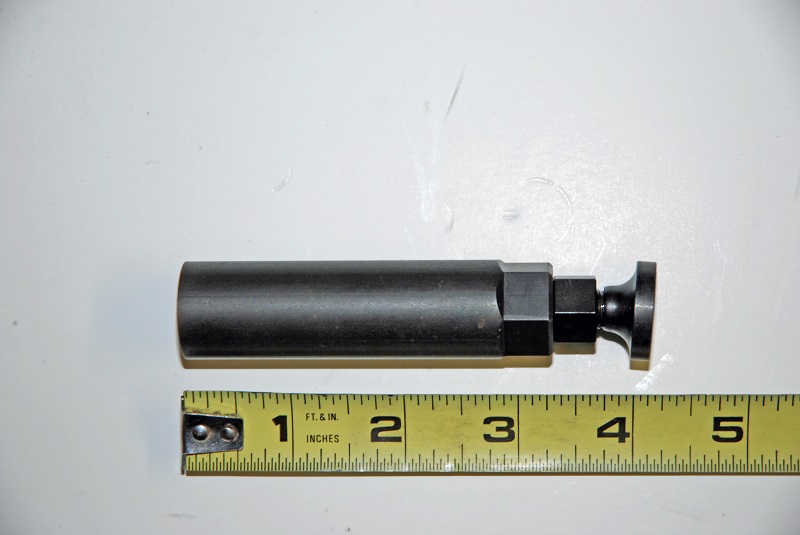
The compressed height is 4-1/8-inches.
(Image/Wayne Scraba)
Like most tools that rely on threads to get the job done, it’s a good idea to liberally lube the threads before starting.
If you do manage to tear a ball joint boot, there’s a solution (years ago, the only fix was to buy a new ball joint—boots weren’t available).
Brands like Energy Suspension, Howe Racing, Prothane, Nolathane, and others, make a wide range of replacement ball joint dust boots. They’re available in black or red. They range in price from just over $7 to $12 for a set of four.
In the end, it’s certainly easier to let threads do the work for you instead of beating up on the ball joints. It’s a quality tool for a reasonable price.

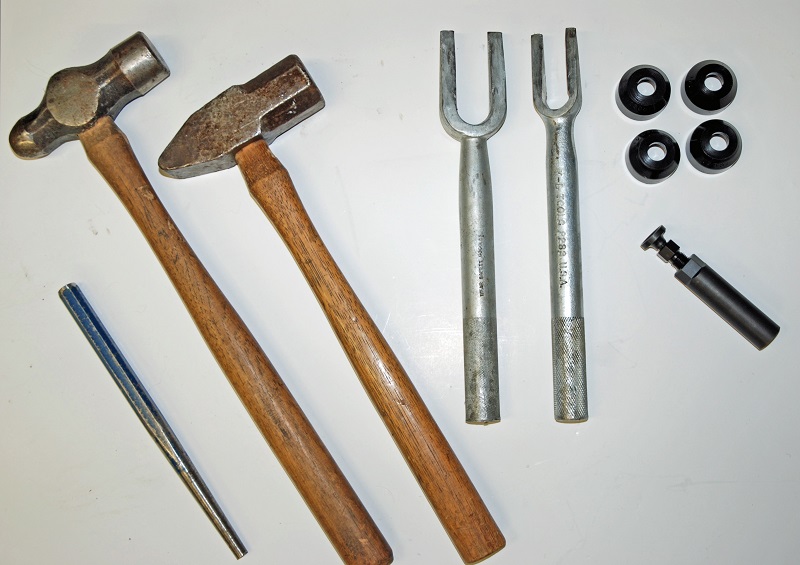
This is a look at the conventional tools of choice when it comes time to remove ball joints from spindles. Pickle forks of various sizes (and inside diameters) can be used along with a big (or really big) hammer. Sometimes a large punch will prove necessary if you’re beating out the ball joint with a hammer. (Image/Wayne Scraba)
The tool presses out the ball joint from the ID of the spindle. A 9/16 open-end wrench is used to perform the “press”. Meanwhile a ¾-inch hex is machined on the body (to insert a wrench) in order to stop it from spinning. (Image/Wayne Scraba)
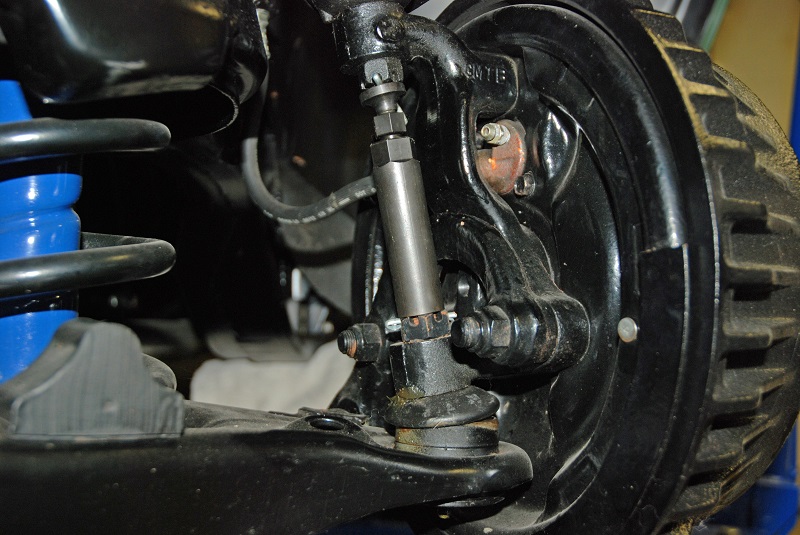
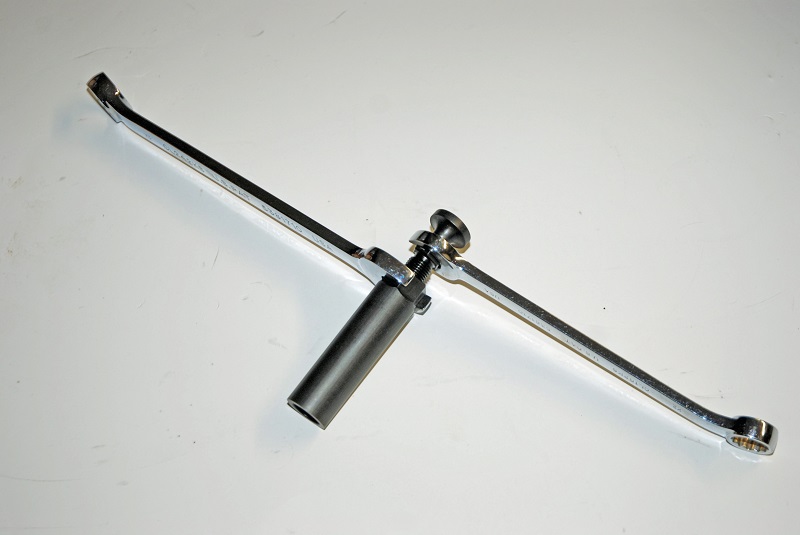
We’re not peeling out the ball joints just yet in this car and as a result, we haven’t removed the cotter keys and castle nuts, but this photo will give you an idea on how the tool works. (Image/Wayne Scraba)
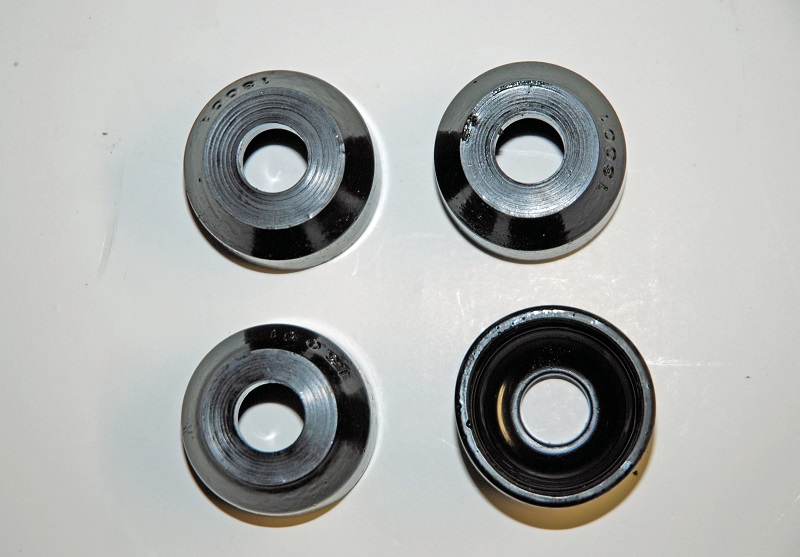
In the event you do damage the ball joint boots, replacements are now readily available. Summit Racing offers all sorts of replacement boots from several different manufacturers. These are from Energy Suspension. (Image/Wayne Scraba)
Is the tool available somewhere?
Click on the link in the article.
So you could make this out of a short piece of pipe and 2 nuts and a harden bolt .
I have learned a long time ago, don’t make what you can buy.
does this toll work on the alum a arms on the c-4 corvettes with hurting them
?