I have a 383 c.i. small-block Chevy that I recently rebuilt and installed in my ’72 El Camino. Unfortunately, it appears that the rear main seal is leaking. I’m pretty sure I installed the seal the right way, but it’s obvious from how bad the leak is that it’s going to have to be replaced. Do you have a suggestion for perhaps a better rear main seal than the stock one I put in? Thanks
J.O.
This is not an unusual problem.
There are several things you can do to minimize leaks, but those drips are an unfortunate fact of life with the original small-block Chevy. That’s why Chevy changed to the one-piece rear main seal is 1986.
The first step is to make sure that the leak is coming from the rear main seal. Just below the rear main is the large rubber gasket sealing the oil pan to the engine. This is another common leak path for the small-block. You didn’t mention if your car is a manual or an automatic. Either way, it’s a good idea to make sure that the oil pan gasket isn’t leaking.
How to Fix Oil Pan Gasket Leaks
Try this. It has worked for me in the past.
First, clean the area extremely well with brake cleaner or alcohol to remove all the oil. Then cover the entire semi-circle rubber seal with a spread of RTV sealant. Permatex’s The Right Stuff works really well. Make sure there’s coverage across the entire face of the seal by using your finger to push RTV into the seam on either side of the rubber. Allow the RTV to set up completely and then fire the engine and see if the leak stops. I use this technique on both ends of small- and big-blocks I build now to attempt to stem the oil leaks. It helps.
How to Fix Rear Main Seal Leaks
If the rear main is indeed the culprit, the best solution is to remove the engine and perform the work on an engine stand. I know there will be many guys who will immediately post that you don’t need to do this, but my experience (and that of others) reveals that working under the car reduces your chances of creating a proper seal.
My logic runs this way: Why attempt a second fix by short-cutting the first attempt that was installed on an engine stand?
Ultimately, it’s your choice. A good reason to pull the engine is that you can turn the engine upside down on the engine stand, which drains any oil remaining in the engine away from the area you’re working on. It may seem like a small point, but RTV rarely works against an oil-wet surface.
Before we get into the install procedure, this is a good time to talk about rear main seals. There are actually several different versions. I’ve always had a good working relationship with the Fel-Pro people and prefer to use their gaskets and seals, so we’re going to focus on Fel-Pro products for this discussion.
The standard Fel-Pro rear main bearing seal is PN 2900. (We’ve listed all of the parts we’ll mention at the bottom of this article). The next seal up the chain of improvements is a premium fluoroelastomer, high vacuum seal with PN 2912. This is the one we’d suggest you use. It’s brown in color but offers the best performance characteristics. It’s also the most expensive of the three.
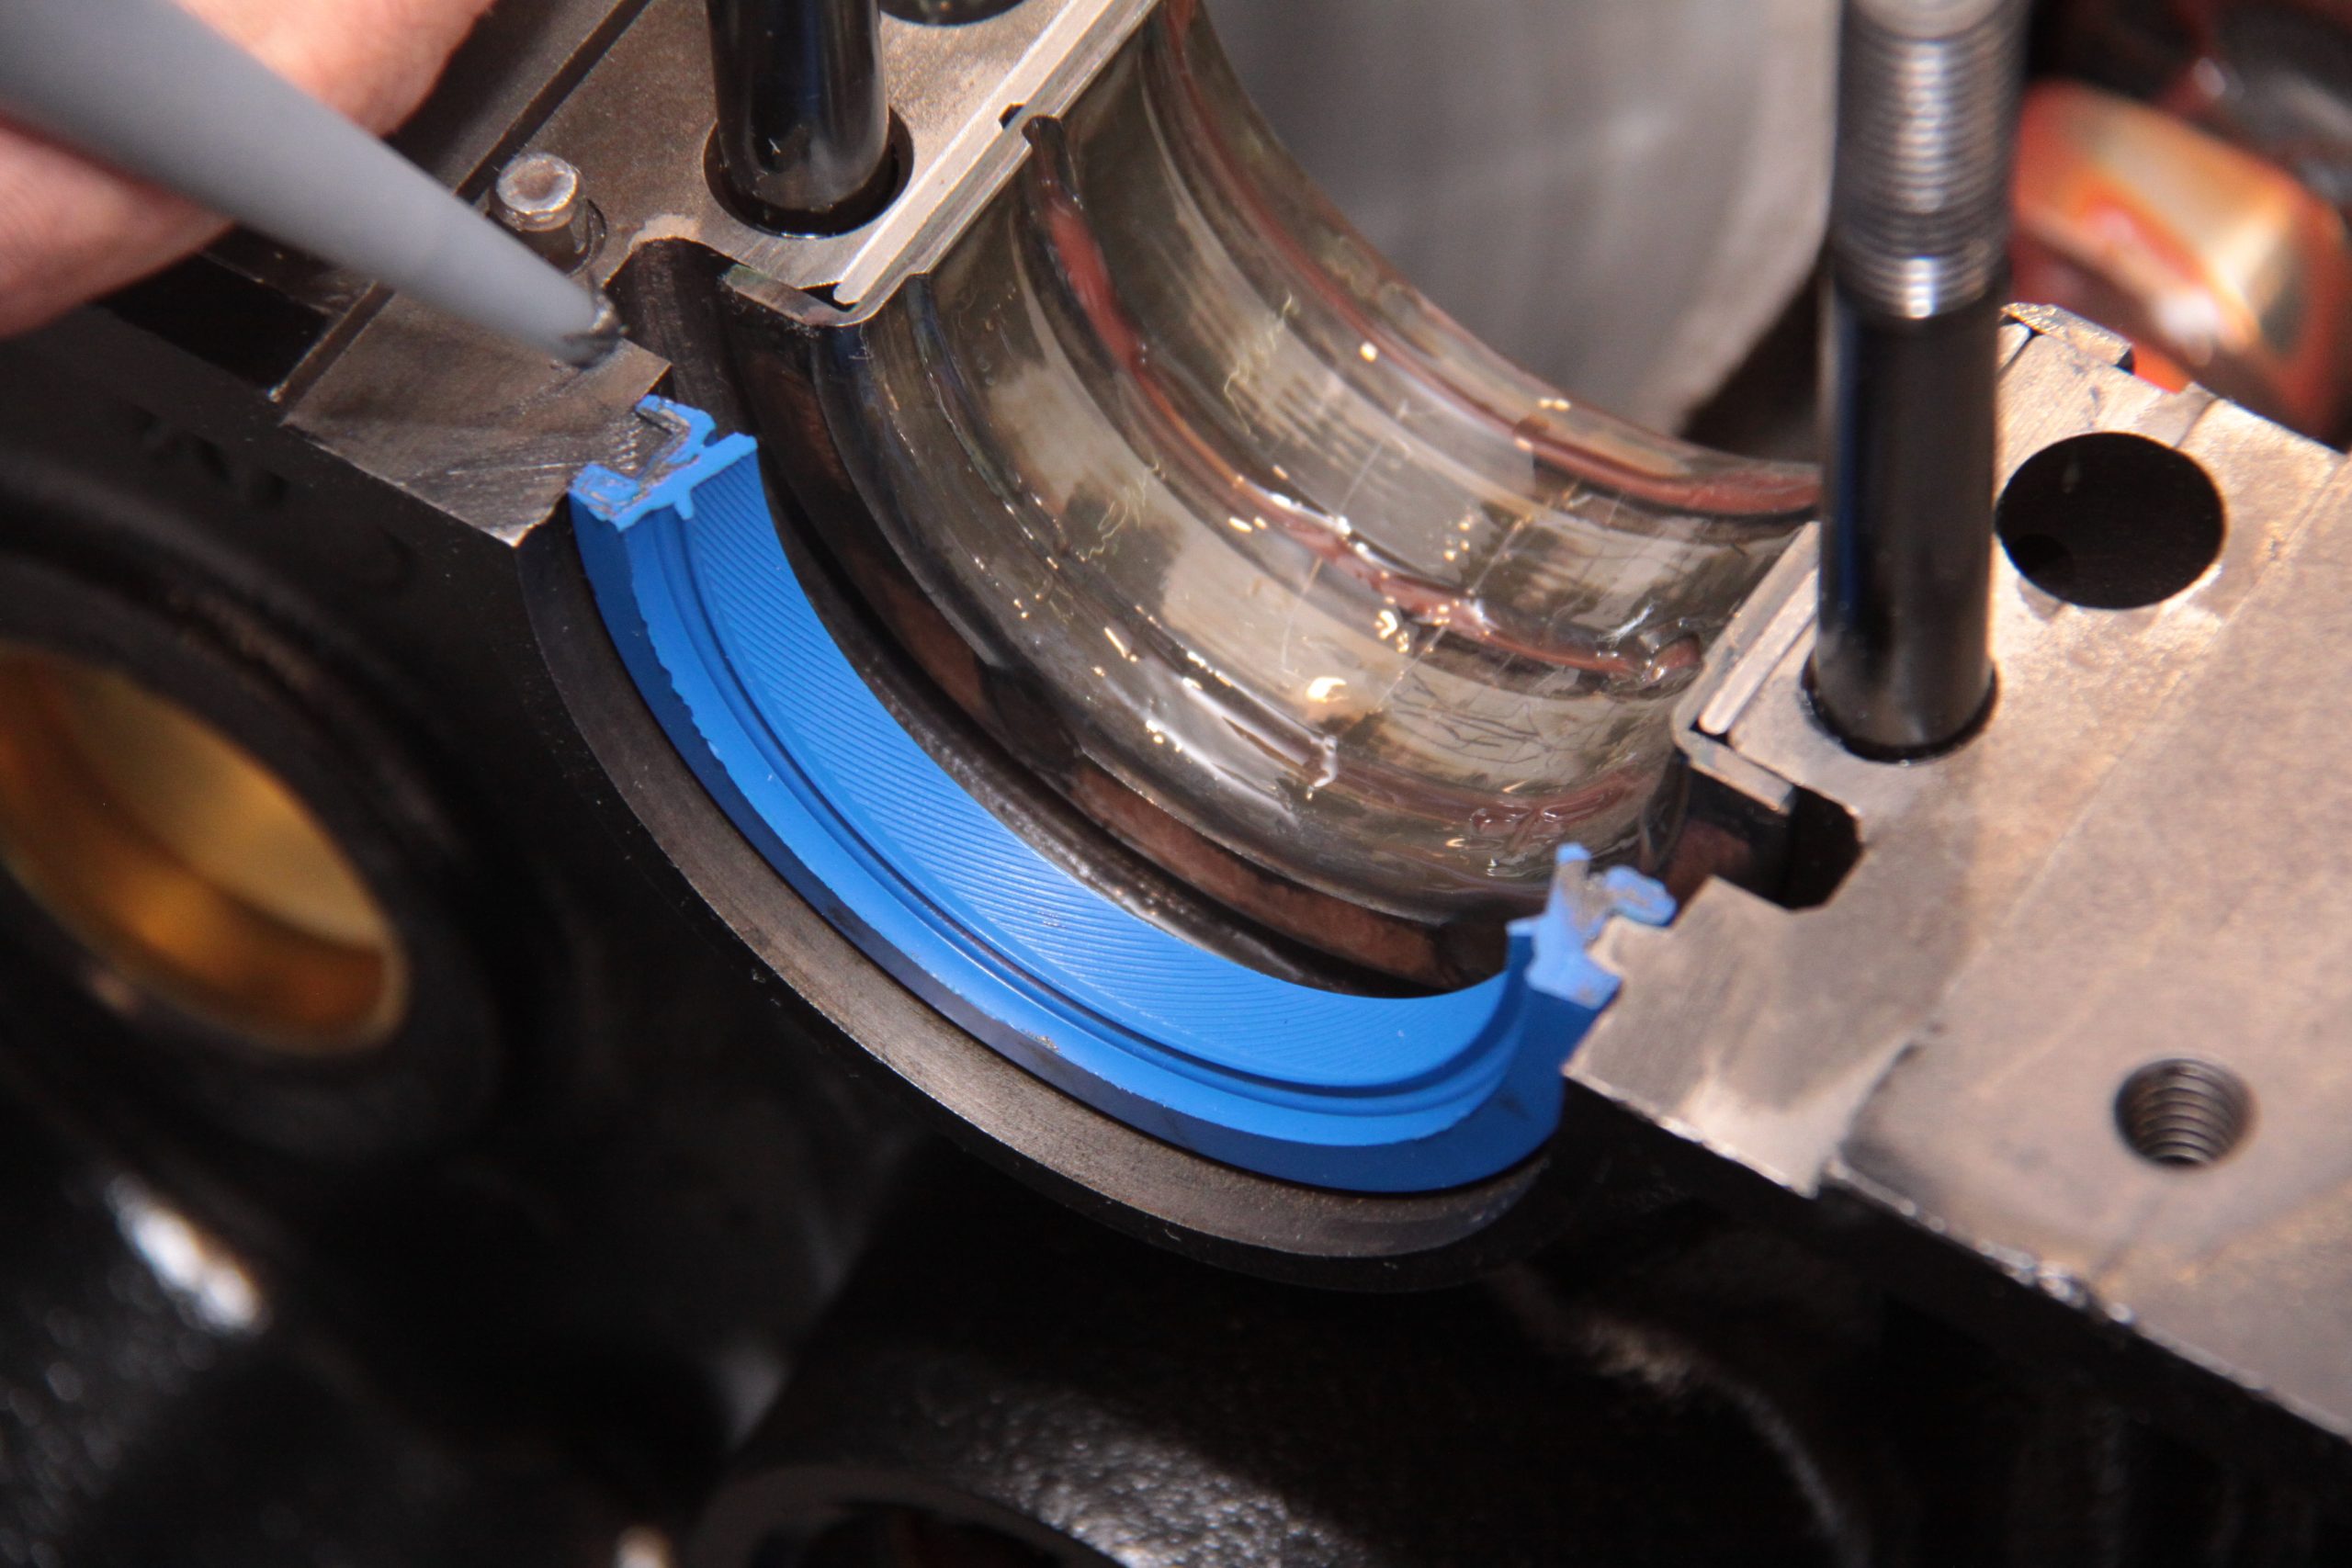
With the engine on the stand and the pan removed, it’s possible to install a new rear main seal into the block by pushing on the old seal to move it out about a third of the way. Then you can carefully push the new seal in place of the old seal. Of course, you want to double-check that the seal is installed properly. Do this by making sure the lip of the seal is aimed toward the engine (oil) side. This ensures that crankcase pressure pushes against the inside edge of the lip, which helps seal the oil in the engine.
While installing the seal, be careful to not unpeel any of the seal away from sharp edges on the block. It might be helpful to use a small file to break the sharp edge of the parting line on the block. It’s also now standard practice to offset the parting lines of the seal from the block. This puts one end of the seal deeper into the block while the opposite side protrudes. This is matched on the cap side. This offsets the parting lines of the seal and the block so they don’t line up to possibly cause a leak path.
A small dab of RTV on the ends of the seals is also a good idea along with a small amount of RTV between the main cap and the block to prevent oil from migrating between the two surfaces. Also, make sure to add a little oil to the bearing seal surface so the seal doesn’t start drying. This can damage the seal during startup.
We’ve also had good luck with the Fel-Pro one-piece oil pan gasket. We add a small dab of RTV at each corner of the block on the oil pan side and the block side of the gasket. Some of these one-piece gaskets also contain limiters in each bolt hole to prevent over-tightening. These are much easier to mount than the older four-piece oil pan gasket sets but are more expensive.
Parts List
Fel-Pro stock replacement rear main seal (BS40013)
Fel-Pro performance rear main seal – blue (2900)
Fel-Pro premium rear main seal – brown (2912)
Fel-Pro 4-pc. gasket – thin front seal, LH dip (1802)
Ive been building circle track engines for over 20 years. About 5 years ago I started having problems with the P2900 2pc SBC Rear main seal I discovered the halves of the seal are miss matched. If the seal lips are lined up,the groove for the block doesn’t ( thick side and thin side). If the outside groove is lined up the seal lips face opposite directions. Ive since bought from Summit, Competition prod, Napa and Oreiles. ALL have the same problem. I did what most people do,bought the 2912 ,problem fixed. Contacted Felpro and they say they don’t have a problem but it was installed wrong