Go to a dragstrip and you’ll see cars with beadlocks, tire screws, and what appears to be nothing holding the tire bead to the wheel rim. Some cars will run tubeless. Others will have tubes. Ponder all of the combinations, and the big picture starts to get a wee bit confusing
So what tire setup do you need for your vehicle?
It really depends upon the recommendation of the tire manufacturer along with the application. As famed chassis builder Jerry Bickel is quick to point out, tube-type tires must always have inner tubes installed to prevent leaks. Tubeless drag slicks, on the other hand, may be run with or without inner tubes. From Bickel’s vast racing experience, most racers prefer to run tubeless drag slicks without tubes in order to reduce tire mass. With less mass, there is less inertia to overcome. As a result, the tires will accelerate faster, and you’ll most likely be rewarded with a lower ET slip.
There’s always a risk of rupture when it comes to tire tubes. That means rapid air loss in the tire. Bickel cites the most common causes of inner tube rupture as:
- Wrong tube size
- Wrong tube type
- Incorrect installation
- Tire turned on rim (tears off valve stem)
- Inner tube is dry rotted
When it comes to tubes, you should only use new natural rubber racing-type tubes that are correctly sized for your slicks. Any other type of tube cannot withstand the constant flexing that comes from low inflation pressures and, of course, sidewall wrinkling.
That’s not the end of it either.
Bickel notes: “I have seen tires rip through the rim screw on a particularly hard tire-wadding launch. If the tire turns at all on the rim, the tube turns with it and pulls the valve stem off. This causes a sudden loss of air pressure. If you must install tubes, have them mounted by professionals. Many inexperienced racers have damaged inner tubes by installing them in a twisted condition or with the valve stem under tension.
“If an inner tube develops a slow leak the lost air forms a pocket between the tube and inner tire. This can cause tire balance problems and a gradual bleed down of air pressure. If you suspect this may have happened, dismount the tire and check the inner tube for leaks in a water tank or with a soapy water spray.
Bickel says he prefers to use metal valve stems over the pull-in rubber types for tubeless tires.
“A nut holds (metal valve stems) securely in place, preventing them from popping out under high centrifugal force,” Bickel said. “One drawback to tubeless tires is that they all leak slightly. Over time, air bleeds through the thin rubber sidewalls or may leak around rim screws. Some wheel rims may leak if they are made from porous aluminum or have poor welds.”
If your race car is parked for long periods of time, there’s a good chance the tires will lose pressure or “bleed down.” Some tire brands are more prone to bleed down than others, and it can become a pain to deal with flat tires. When a slick’s sidewall is left in a severely wrinkled (flat) condition for long periods of time, the damage can become permanent. The best solution is to monitor the tire pressures regularly. Or, you can simply swap to “tow tires.”
That brings us to methods of securing the tire bead to the rim. You can use tire screws, bead locks, or glue to keep the tire in place. If a slick turns on the wheel rim, balance is upset and the result is vibration. If you run tubes, it becomes even more critical. As Bickel mentioned earlier, the inner tube tends to turn with the tire. If the tire turns on the wheel rim, then the valve stem will be ripped off and cause sudden tire deflation.
Wheel Rim Screws
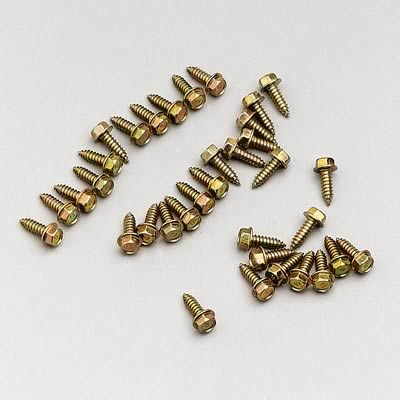
The tried and true method of physically screwing the tire bead to the wheel rim has been around for decades. These Moroso tire screws are designed specifically for the job. See the text for info.
Over the years, it’s been possible to buy drag race wheels that come pre-drilled for rim screws. If you have to drill your own holes, Bickel suggests you locate the holes symmetrically around the wheel in order to maintain balance. Bickel also staggers the alignment of the screws from side to side on the wheel rims.
According to Bickel, anywhere from eight to 16 screws on each side of the wheel is enough to get the job done. Some folks have used as many as 32 screws per side, but Bickel says this is overkill.
Bickel installs all wheel rim screws straight in (horizontal) around the perimeter of the rim flange. Jerry tells us that some racers prefer to alternate between straight and angled screws. The angled screws are threaded into the bead on the radius between the outer flange and inner rim. The figure below shows the installation of straight and angled rim screws.
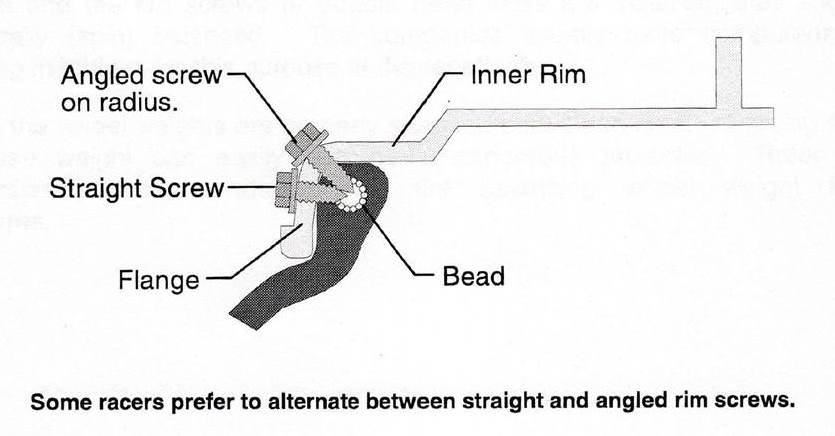
According to Bickel: “The stated purpose for the angled screws is to hold the bead against the rim lip as centrifugal force pulls outward on the tires at speeds over 200 miles-per-hour. I think this logic is questionable at best. Funny Car-type tires are generally designed to run with beadlocks, not rim screws. Over time, tire manufacturers have changed beadlock recommendations, and you should always consult with them before you select a method for your car.
“The best rim screws to use are hardened #12X3/4-inch sheet metal types. Hex-headed plated screws are easy to install and resist corrosion. Drill 5/32-inch holes through the rim, but not into the tire. Deburr all sharp edges. As they are installed, the screws cut threads into the rim so that they may be tightened without stripping the rubber. Only the ends of the screws thread into the bead of the tire. I like to apply a small dab of RTV silicone on the screw threads prior to installation to prevent leaks.
“Air the tires up to 20 psi before installing the screws. Don’t over tighten them, or you might break off the heads. After numerous tire installations, the self-tapping action of the sheet metal screws strips the holes in the rim. At this point, the wheels should be repaired or replaced.”
Beadlocks
Typically, beadlock devices are used on high horsepower cars with Funny Car tires, although they’ve come into vogue on high horsepower DOT (tire) race cars. The clamping ring on a bead lock along with the nuts and bolts increase the weight of the wheel, which in turn, increases unsprung and rotational weight. The point is beadlocks add reinforcement to the extremely soft sidewalls found on several different applications.
You’ll find beadlocks on everything from Top Fuel cars through Pro Stock on down to drag radial combinations. According to Mickey Thompson, for drag radials, when the wheel width is 2-inches wider than the tire width, you need a beadlock. The downside to beadlocks is the fact they add mass to the wheel. You can’t get away without them on something like a Fuel car, but for a lower horsepower sportsman car there are other options.
According to Mickey Thompson Tires: “Mickey Thompson recommends that wheel widths should not exceed 1-inch wider than the tread width. If you elect to use rim widths 1-2-inch wider than the tires tread width, Mickey Thompson strongly suggests increasing the number of rim screws to 16 per side or beadlocks. Beadlocks only are recommended on any wheel widths that exceed 2-inch wider than the tire tread width or if speeds exceed 200 miles-per-hour. Some Mickey Thompson tires have “Beadlocks Recommended” stamped on the sidewall of the tire.”
Mickey Thompson goes on to state: “If continued or excessive (more than ½- to 1-inch per run) wheel slip is experienced, Mickey Thompson recommends the use of “Beadlock” wheels for ET Street Radials. Bead screws are not recommended and could lead to tire failure and or damage.”
Glue
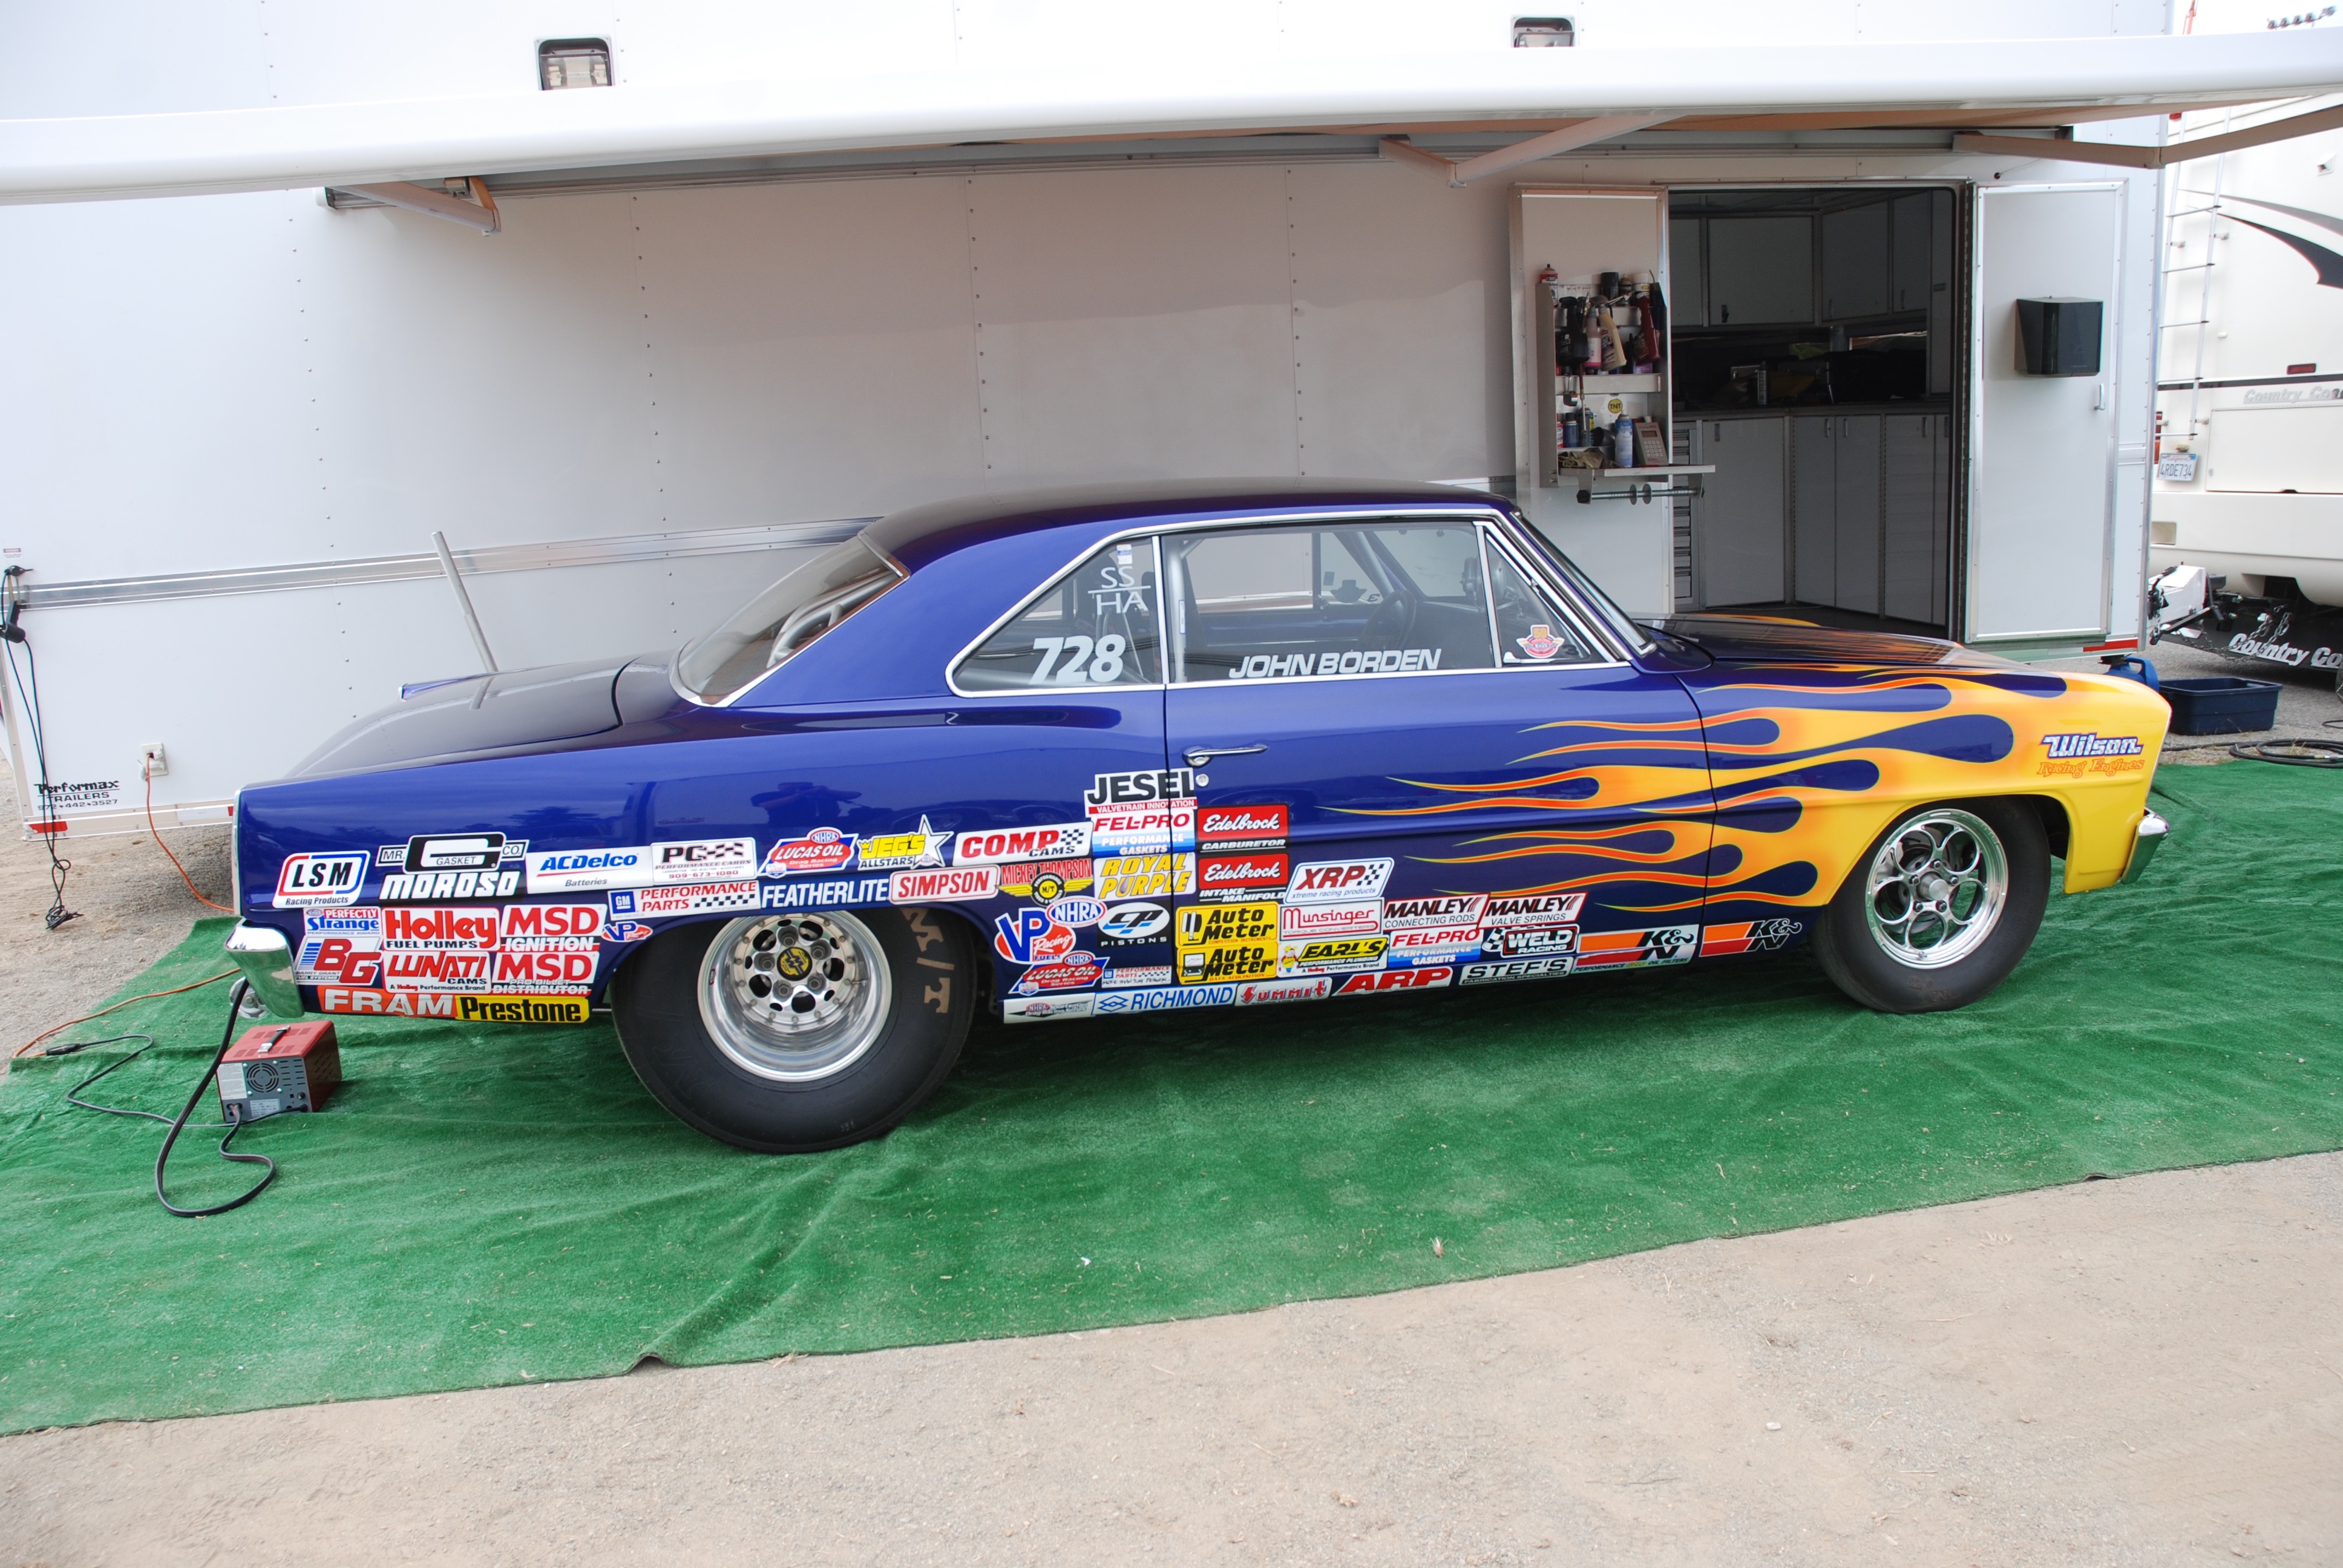
Look closely at this Super Stock car. No beadlocks. No tire screws. And it’s very competitive.
The secret is most likely in the installation.
Glue is another option that has gained in popularity. While some folks use weatherstrip adhesive, the most common glue used for this job is Permatex High Tack. The accepted way to apply it is to mount the tire on the wheel before the High Tack is applied, but don’t air it up. Next, lightly clean the rim and tire surface with acetone. The cleaner the surface, the better the bond. Apply the glue and wait for it to tack up before setting the bead on the rim. Brake cleaner will work to clean up the excess residue on the outside of the wheel and the tire.
When mounting the tire (tubeless), it’s still a good idea to apply soap to the inside of the tire to seal the sidewall.
What about tubes?
High Tack still works. But in this case, simply apply a light dust of talcom powder of the inside of the tire before installing the tube.
Finally, a tire that has been glued on the wheel rim can be dismounted just as easily as one that hasn’t been glued. While the High Tack prevents the tire from rotating on the rim, it won’t stop a tire machine from breaking the bead. When remounting, just be sure to clean up the tire and the rim (once again, acetone or brake cleaner cleans it).
Ok,1st off I wanna say awesome article! A buddy of mine and I in vocational schooI swore we had an idea for street racers we thought would make us rich and so far our idea has only gotten us laughs! Our idea was to design a tire heating system comprised of a small propane bottle,hard propane lines,2 nozzles for the flame,a couple auto igniters similar to a grill,and the various knobs and switches to control it from in the vehicles interior and along with the usual burnout,you would use this and reap the rewards of the added tire heat and traction! And so you dont over heat you could use a no contact thermometer and its digital read out mounted also on the cars dash etc! Have you ever heard of anything along these lines? Thank You!!
I have a set of 33 M/T sportsman with inner tubes. The rims are Cragar super tricks with holes already drilled for screws.They have not leaked yet,but they are on a street car. I would like to add the screws but am worried they will into the inner tube and start leaking. I bought the proper 3/4 screws from Summit. Am I worrying to much?
Great article Thanks so much
It’s interesting to learn about race tires and how it is preferred they have wheels that do not go over the wideness of the tread. I’m looking this up since my husband is interested in going into this hobby. I wonder if certain shops give advice on what car accessories beginners should use.