I’ve heard that changing cams in an LS engine is really easy, but I’ve never worked on one of these engines before and I don’t want to screw it up. Do I need any special tools to install a cam in one of these engines? I put a 5.3L truck engine in my off-road Jeep and I’m thinking it might like a little more power. Can you help me avoid the major problems?
N.S.
Jeff Smith: The good news about modern engines is that internally they are relatively easy to work on. Some of the easiest to work on are LS engines. When I was first learning to work on cars as a kid, I wondered if the engineers ever considered the poor guys working on their designs. When the LS came around, it’s obvious that the engineering team put considerable thought into the design and tried to make the engines both more efficient and easy to repair. At first this might seem counter-intuitive because in the case of the hydraulic lifters, you must remove the cylinder heads to access them. This seems like a step backward, but when it comes to cam changes the engineers were thinking ahead. All LS engines feature four sets of plastic lifter retainers that once the rocker arms and pushrods are removed, you can spin the engine over a couple of times and the lifters retract and are captured (in the Up position) by the retainers. This allows you to remove and replace the camshaft without having to remove the cylinder heads.
So let’s quickly run through a cam swap on an LS engine.
The first step is to drain the coolant from the block and remove the water pump and harmonic balancer. Next remove the valve covers and all 16 rockers and pushrods and to make spinning the engine easier, remove the spark plugs. Now spin the engine over at least three times. This will push all the lifters up into their plastic retainers. This will allow you to remove the cam without removing the lifters.
LS harmonic balancers do not have a three-bolt flange for a normal puller, but Summit Racing sells an LS-specific tool that will accomplish this task. The front timing cover is retained with eight bolts on the front of the cover and two that retain the pan to the cover. With those fasteners removed, rotate the engine until the crank and cam marks gears line up. You don’t have to remove the oil pump. Now you can remove cam bolts (or single bolt if a later model LS engine) and remove the gear and allow the chain to drape over the crank gear.
Now the cam will simply slide out with help from a long bolt or rod to use as a cam handle. Now just reverse the process to install the cam, put a little lube on all the lobes and journals and slide it in place. Now install the cam gear and make sure the cam gear mark lines up with the crank gear and secure the cam gear in place with the bolt(s). The rest of the process is just the reverse of the disassembly.
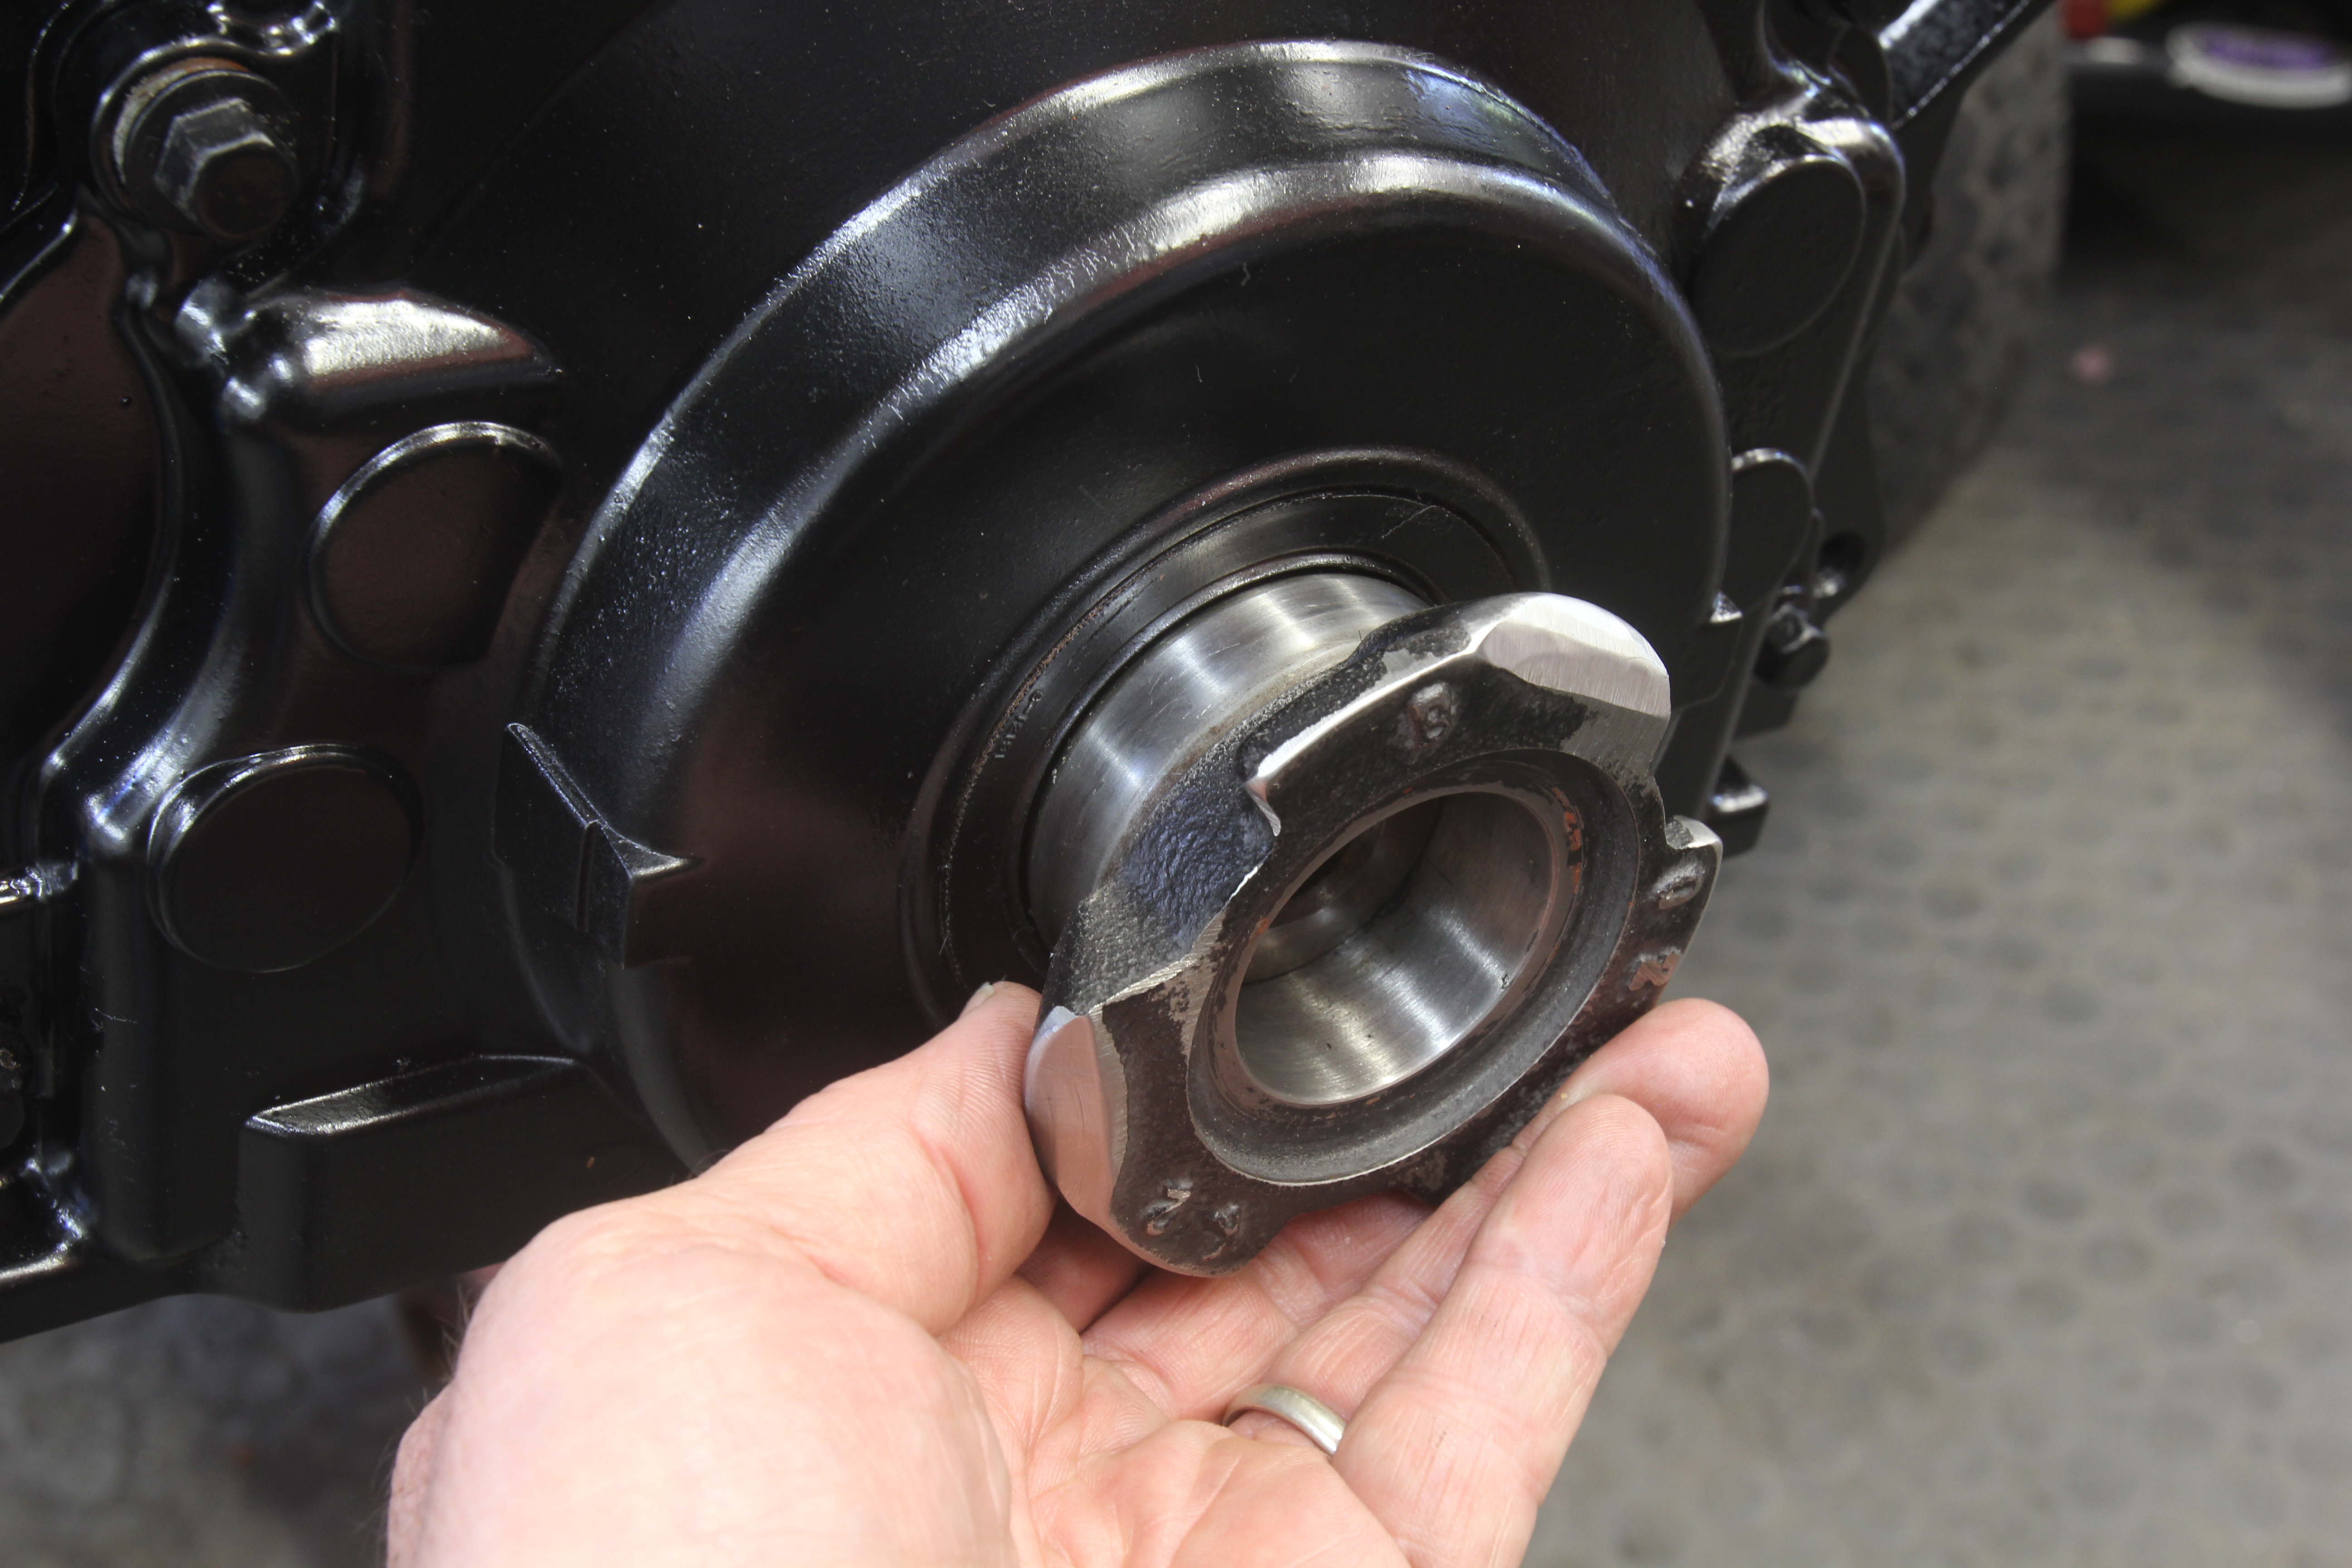
This is our home-made front timing cover seal alignment tool. We cut out the hub from a stock truck balancer and then honed the hub i.d. so it would slide over the crank snout. Leave the cover bolts loose and position the cover so the seal is centered on the hub. It’s that easy.
The only minor hiccup might be aligning the front timing cover. LS engines do not use an alignment pin for the cover so it can move in relation to the crank snout. Several companies sell alignment tools, but engine builder Kenny Duttweiler told me he uses an old ATI balancer hub he had lying around. We couldn’t afford one of those, so we cut the center hub out of a truck harmonic balancer and honed the inside with a sandpaper flapper wheel until it would slide easily over the crank snout. Then we used the outside seal surface to help center the front cover over the crank snout. We just position the front cover seal to be centered over the hub as we tighten all the front cover bolts. It works just fine. With the pan and gasket in place, that generally positions the cover vertically so all you have to do is position it side to side.
With the cover in place, all that is left is to reassemble the remainder of the exterior engine components. This includes the pushrods, lifters, and valve covers up top and the harmonic balancer and water pump on the front of the engine. It’s really not that difficult. You also don’t need new gaskets as the LS pieces can be reused, although if your engine has a lot of miles on it, new water pump and timing cover gaskets are probably a good idea.
Can you clarify one thing?
In the last paragraph you say, “With the cover in place, all that is left is to reassemble the remainder of the exterior engine components. This includes the pushrods, lifters, and valve covers up top and the harmonic balancer and water pump on the front of the engine.”
The lifters were never removed, only held in place by their retainers. How does one reassemble those? Will the pre-load from the rocker arms set them back down onto the cam and out of the retainers?
Unlike older sbc engines the preload on these engines is set through the pushrod. The rockers are torqued to 22lbs.
Yes. Just reassemble rocker arms and push rods. Lifters will fall into place where they need to be
Do not rely on the lifter trays to hold the lifters. Once you remove the cam retaining plate you need to put 2 5/16″ rods in the 2 oil holes to hold them up. My LS3 with only 10,000 miles will not hold the lifters. Drop a lifter and you will be pulling the motor.
There is more to it then just bolting it together. There is proper procedures for the LS motors that have to be followed.
just assuming that it’s more or less implied if you’re a Gearhead you should know there are varies torque specs and other things as well. Don’t really suspect he’s being misleading just assuming that his fan base knows a little bit about bending wrenches.
Jeff,
Good to see you are working as hard a before. PM me when you get time.
Jim Brink
Australian mechanics regularly charge in the neighborhood of 4000 dollars to do an LS cam swap.
Robbery!
But that’s only like $400 US dollars so no biggie.
you can’t just torque the rockers down. each rocker has to be on the base circle of the cam befor it is torqued to 22ftlbs. I thought I had posted this but I dont see it now. You can also use you balancer to line up the timing cover. you dont have to cut up a balancer to do it.
Can’t break loose nut on vvt gear on cam. Motor rotates. Left thread?? Thanks
Think I have a lifter going bad. It makes a “clicking” sound and at times a squeaking sound like the roller is not turning free at the cam end of the lifter. I wanted to run a test and see if I removed the rocker and push rod on this valve and ran the engine if the noise would go away. That means running the engine with this one exhaust valve not opening and I am not sure if that is wise. Will or could it cause damage to that cylinder like create to much pressure and damage rings?
If you have any type of clicks tap on a cylinder that’s throwing a misfire code it’s definitely a stuck or collapsed lifter especially if you have an afm engine
What about degreeing the cam? Is this just to check the grind or are there supposed to be adjustments made?
I change the cam in 2015 Chevy Silverado z71 5.3 the truck do not want to run run good ideal but u gave it a little gas it started to missing