


Not that long ago, the standard clutch linkage in a Detroit-built car was a mechanical setup consisting of a fork at the bellhousing (for the release bearing) along with a couple of shafts and bell crank (Z-bar) linkage. It was simple, and it worked. But then came the 1960s. Big horsepower and torque were in, and so were big clutch pressures. Suddenly you were dealing with clutch linkages that bent, buckled, and wore out quickly.
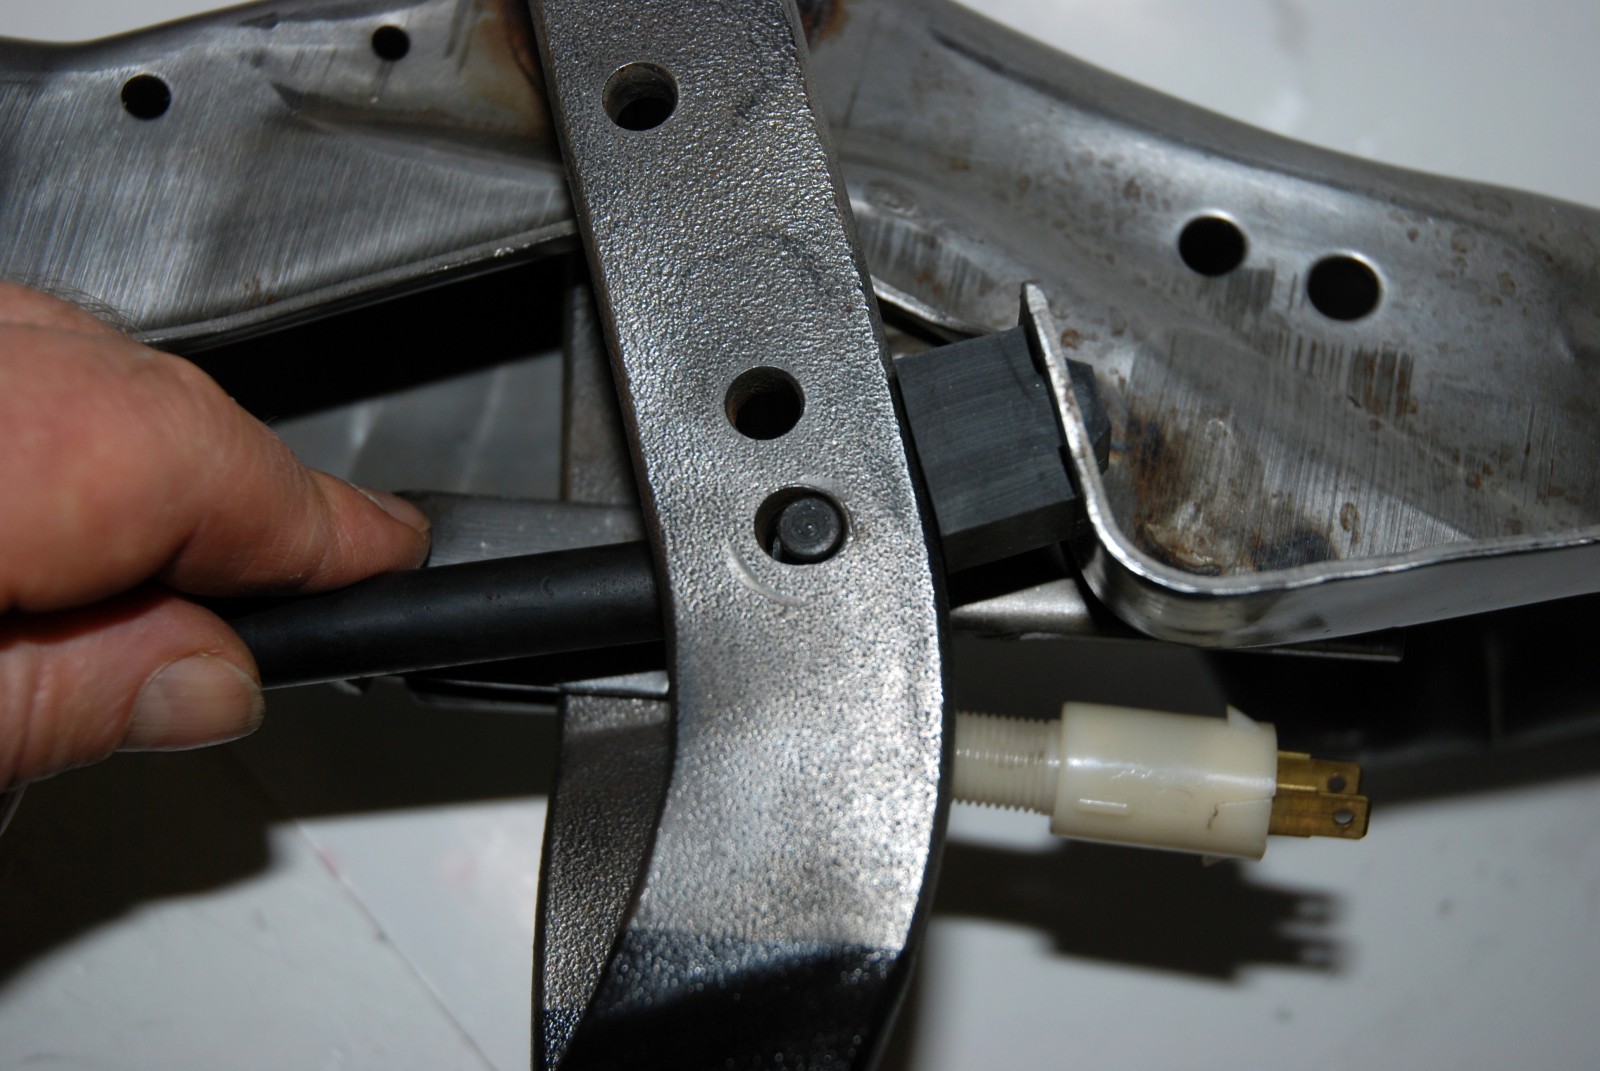
Today’s clutch assemblies don’t need that massive leg-breaking clutch pressure, but wear is still a factor with mechanical linkage. If you look closely at the clutch linkage in a pre-1980s car, you’ll discover linkage rods that are worn at the pin ends and most (if not all) of the mounting holes in the Z-bar and the pedal are out of round.
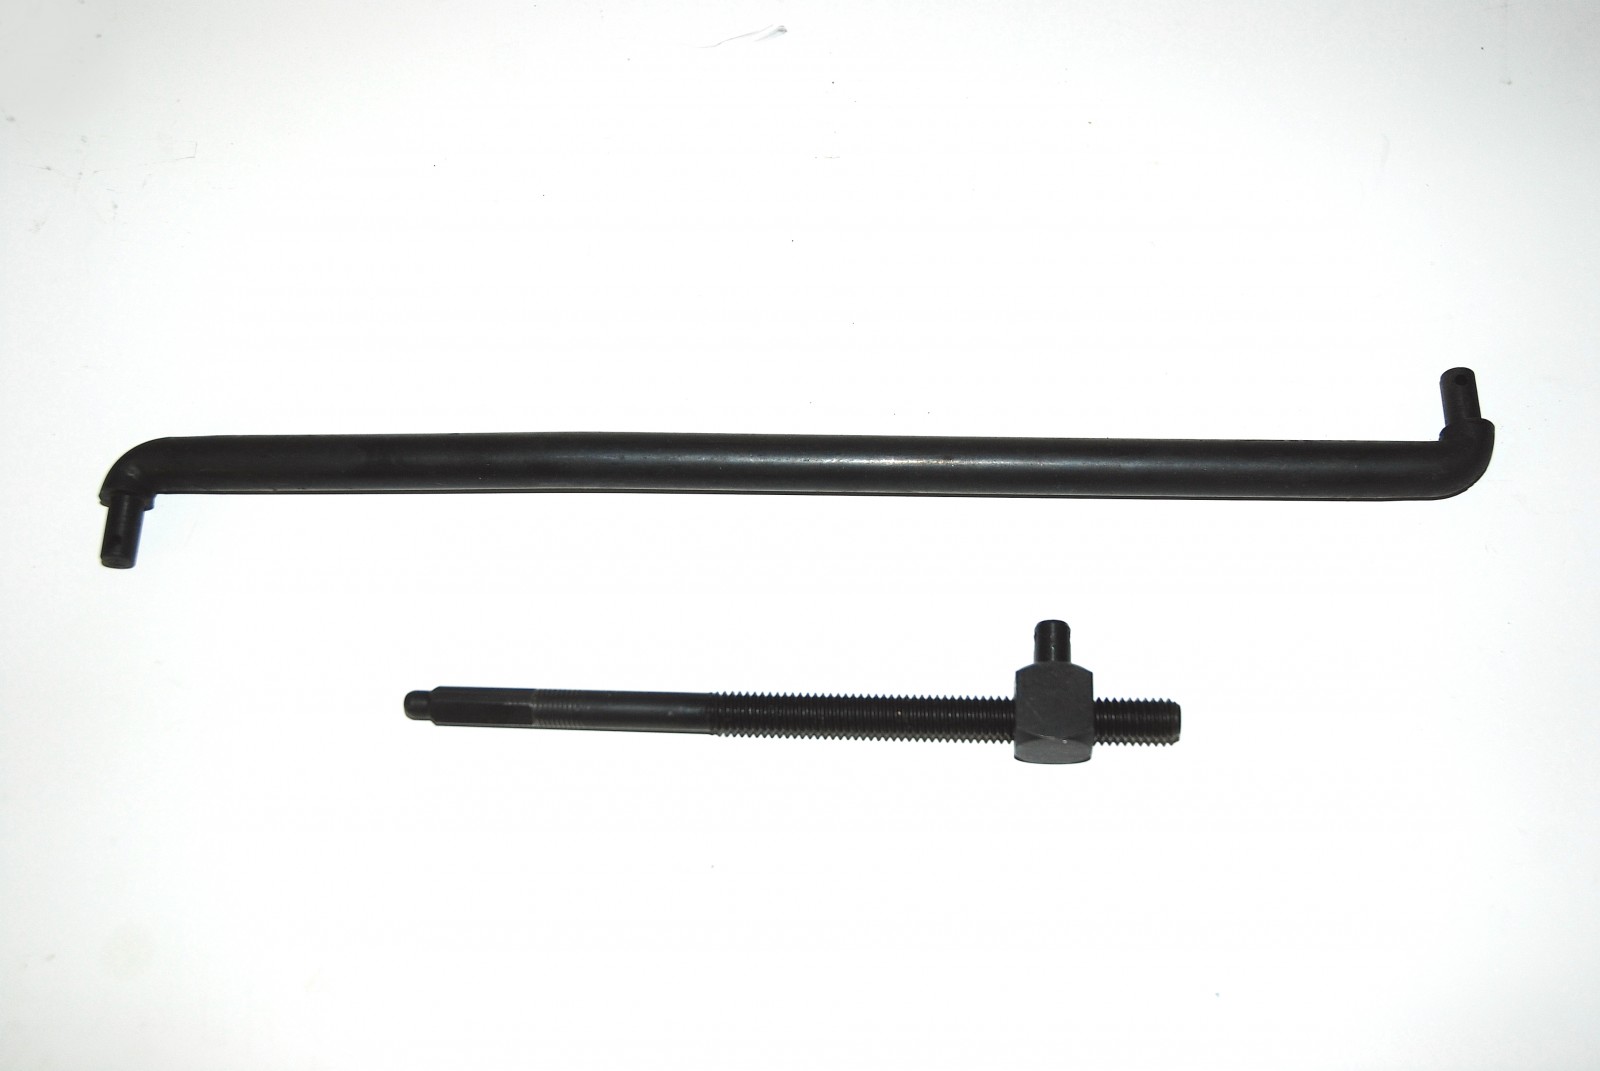
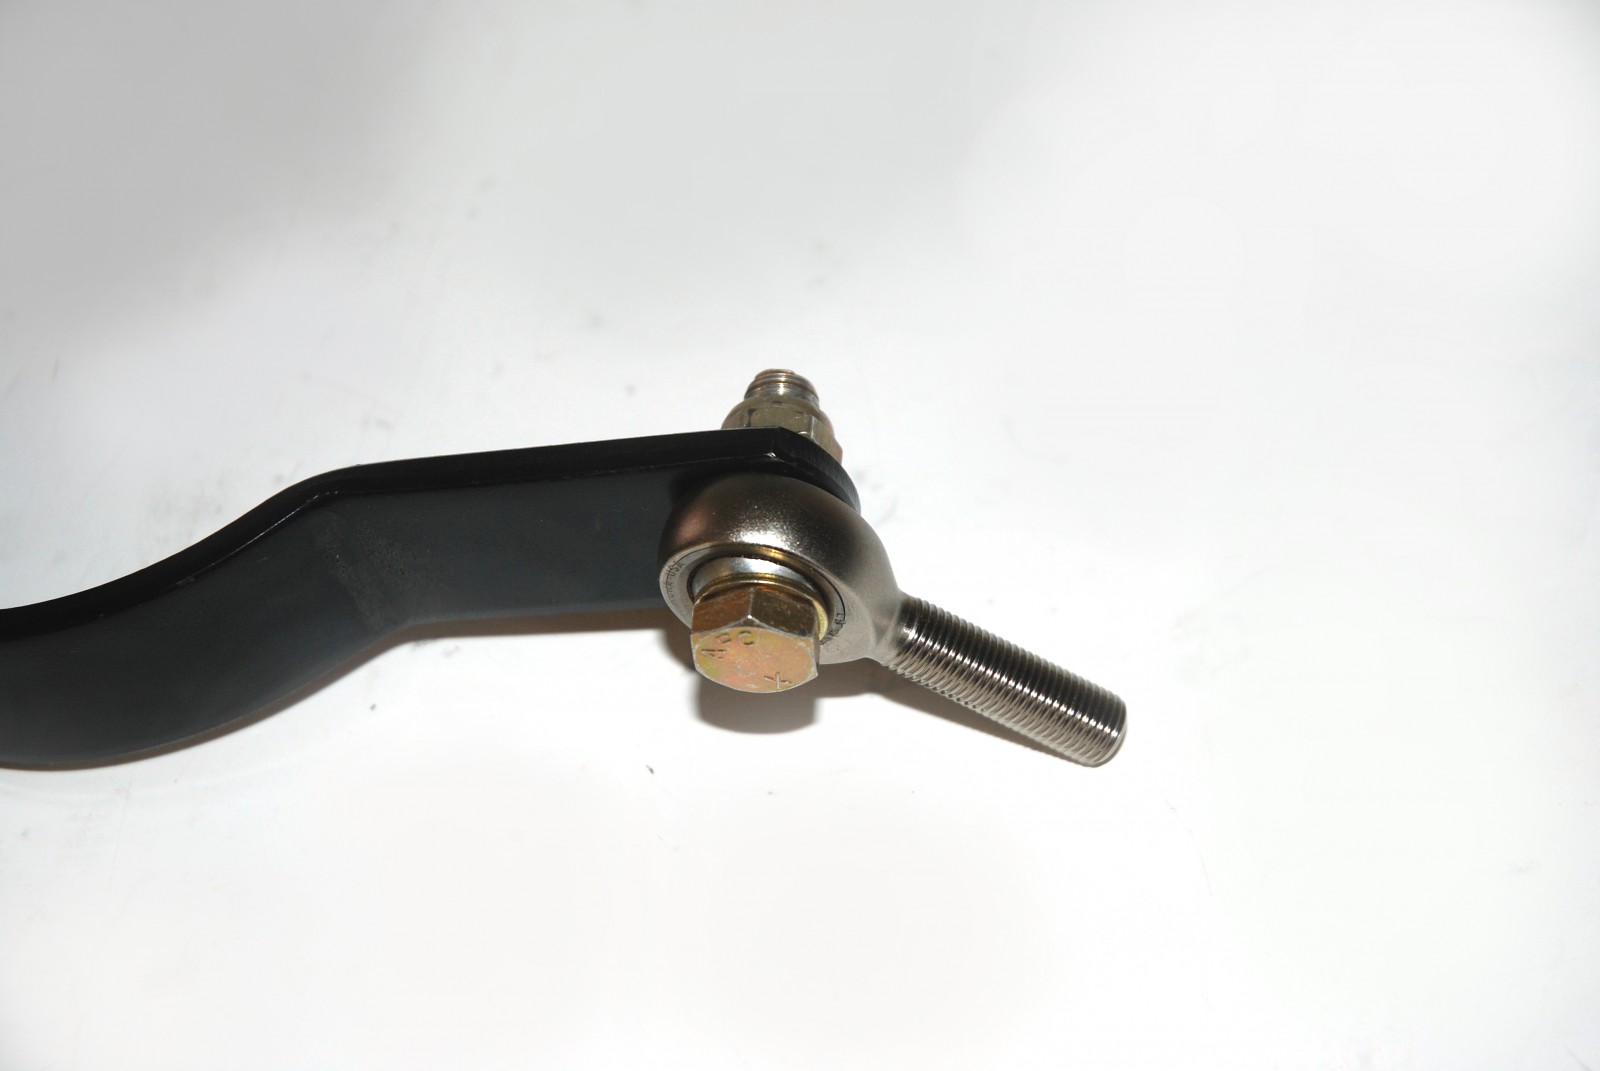
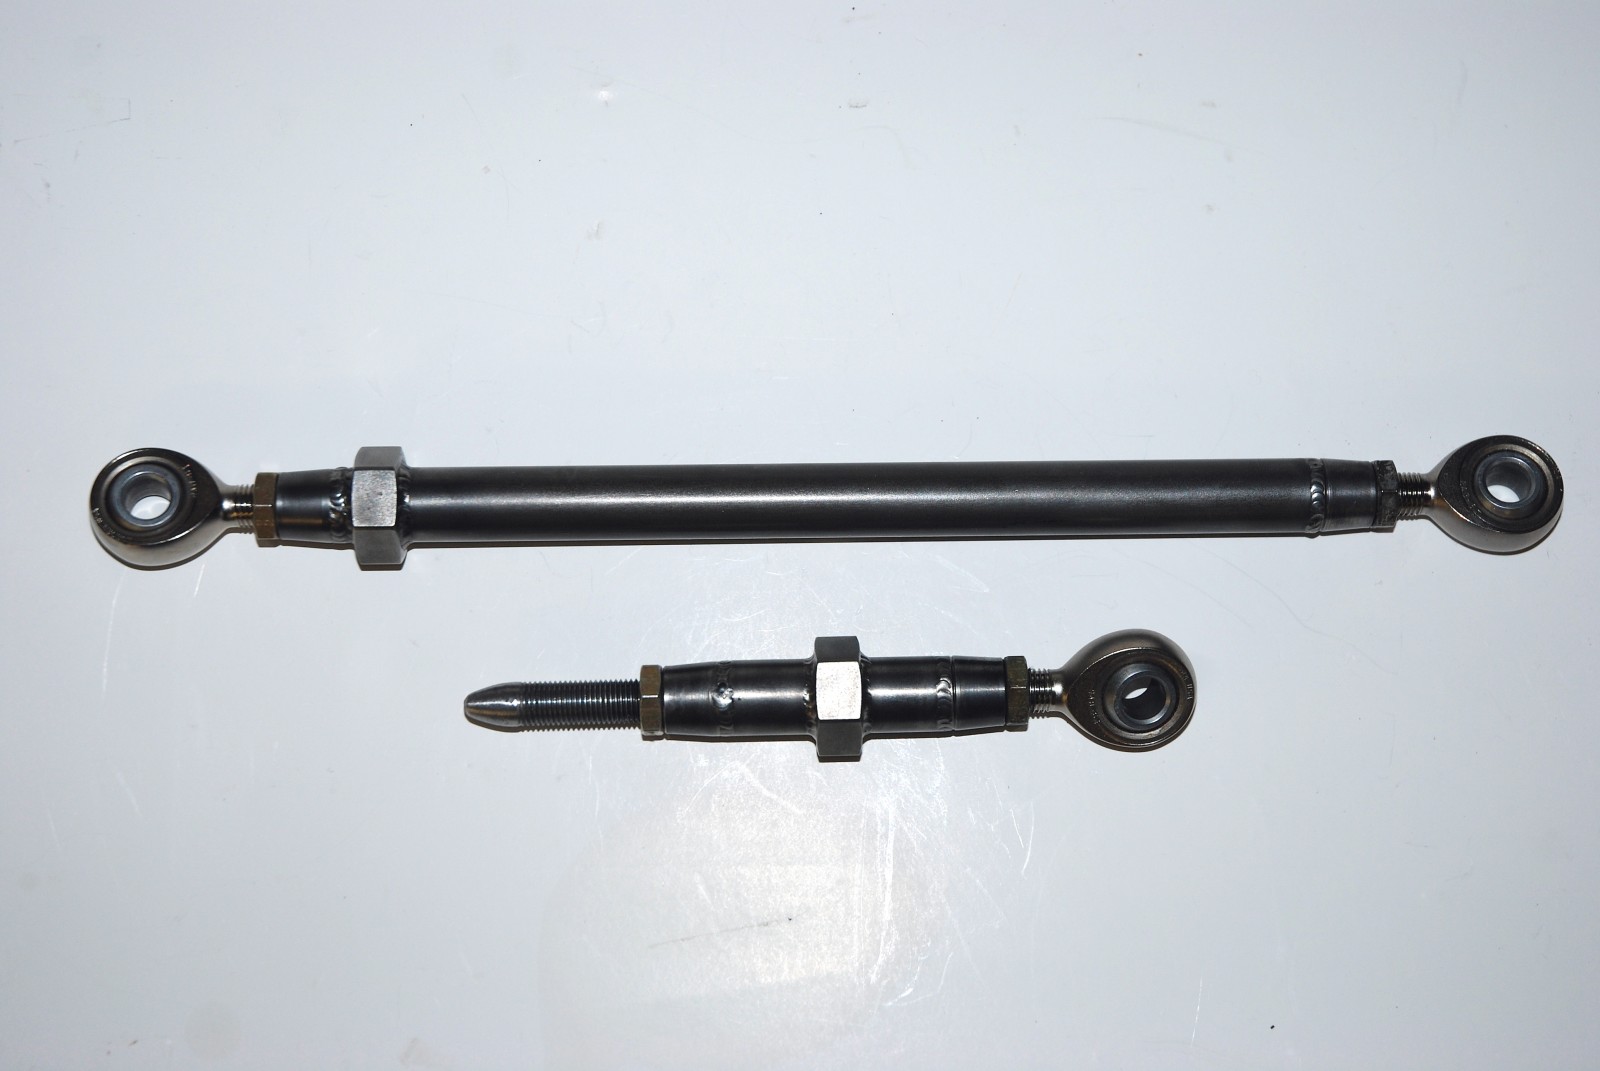
Repairing vintage mechanical linkage is easy thanks to the wide array of replacement hardware available. But if you want a slick-acting clutch linkage that works better than the OEM setup, a better option is to build a heavy-duty linkage setup incorporating rod ends and chromoly tubing.
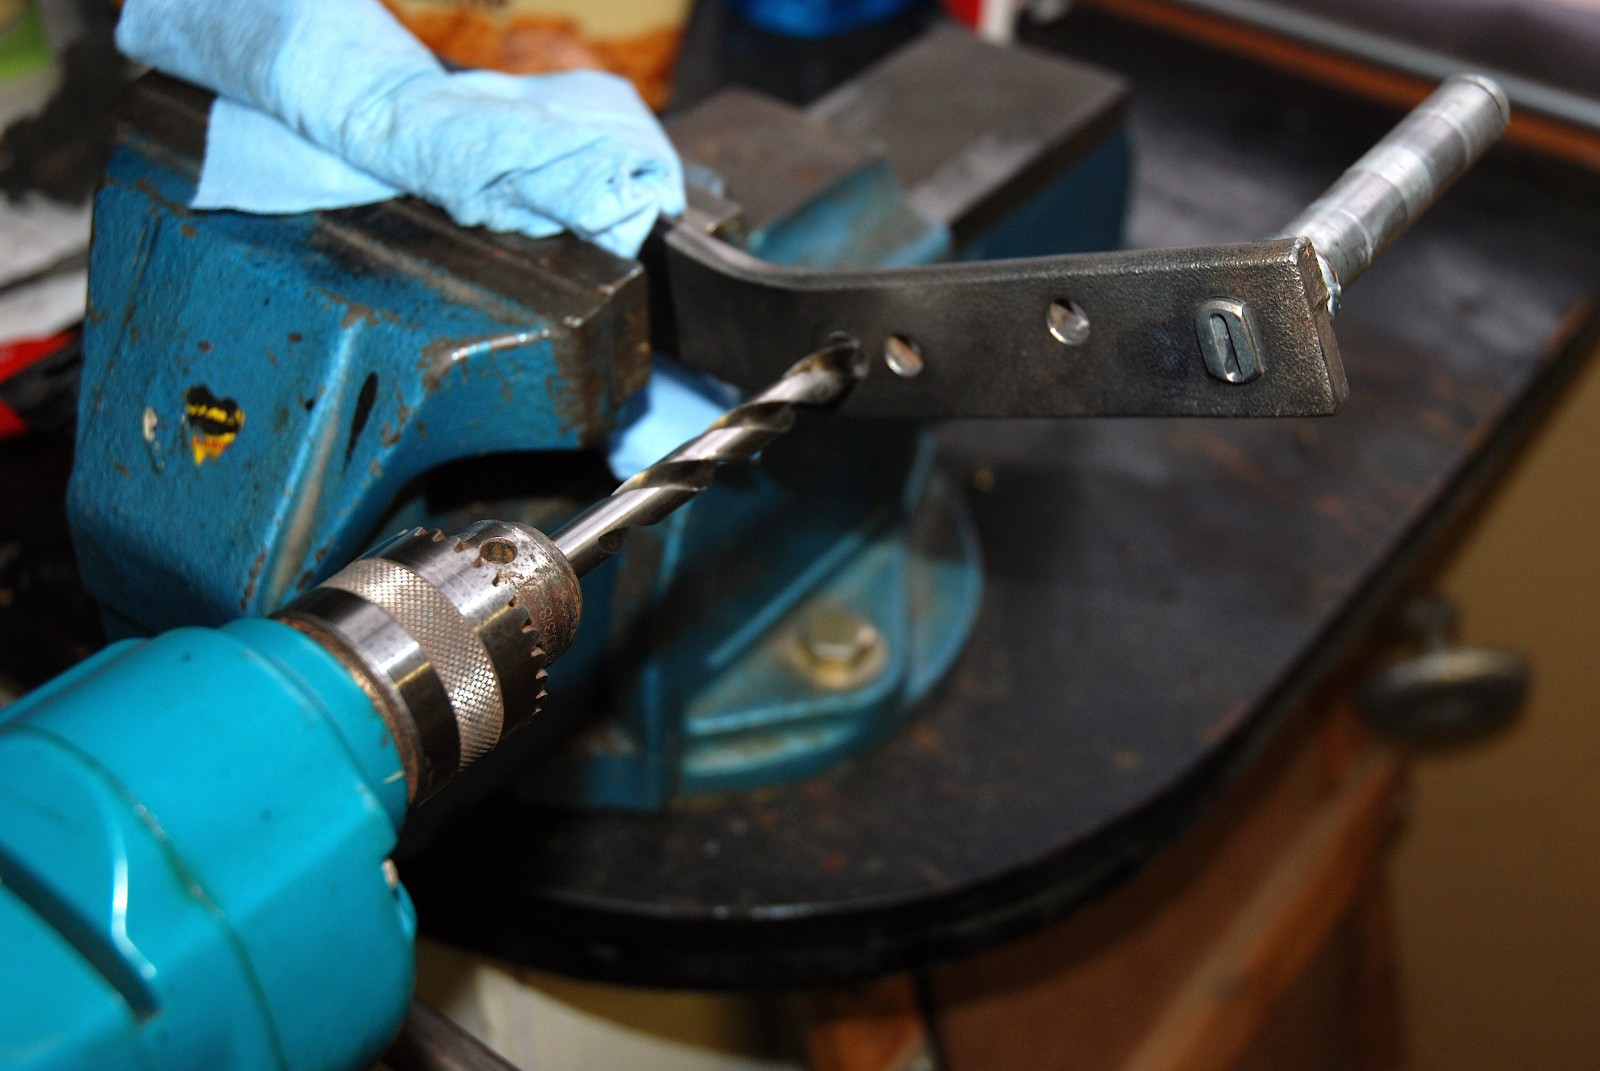
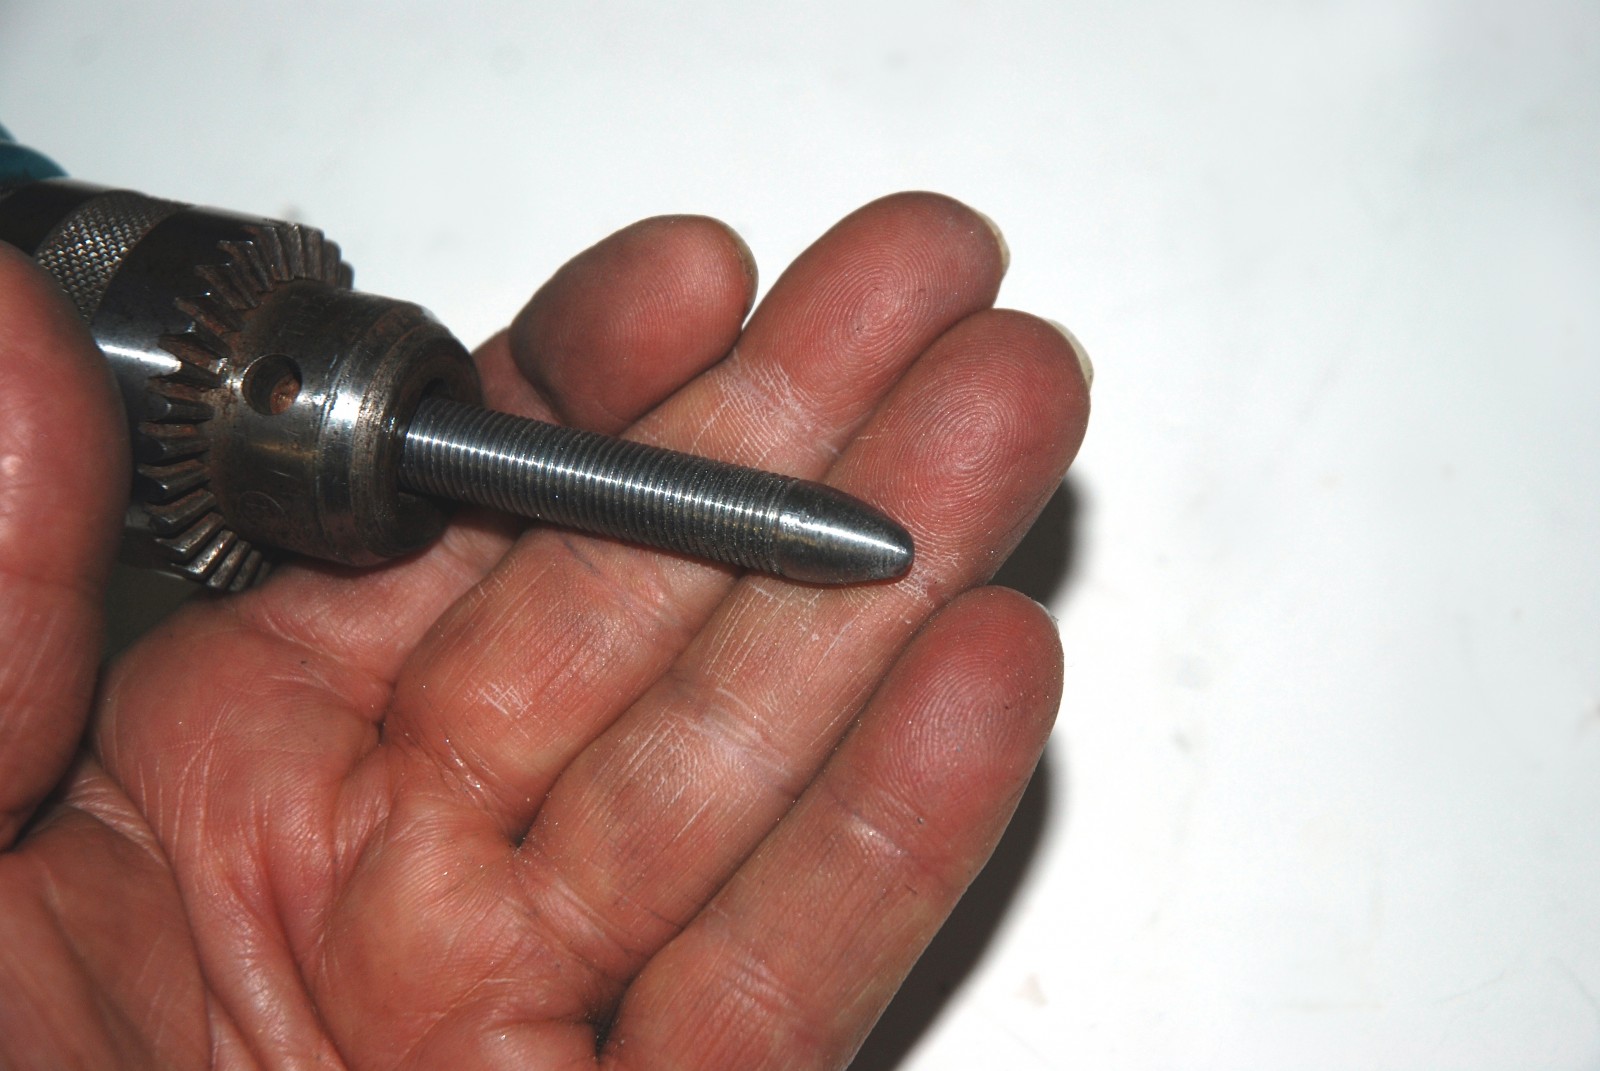
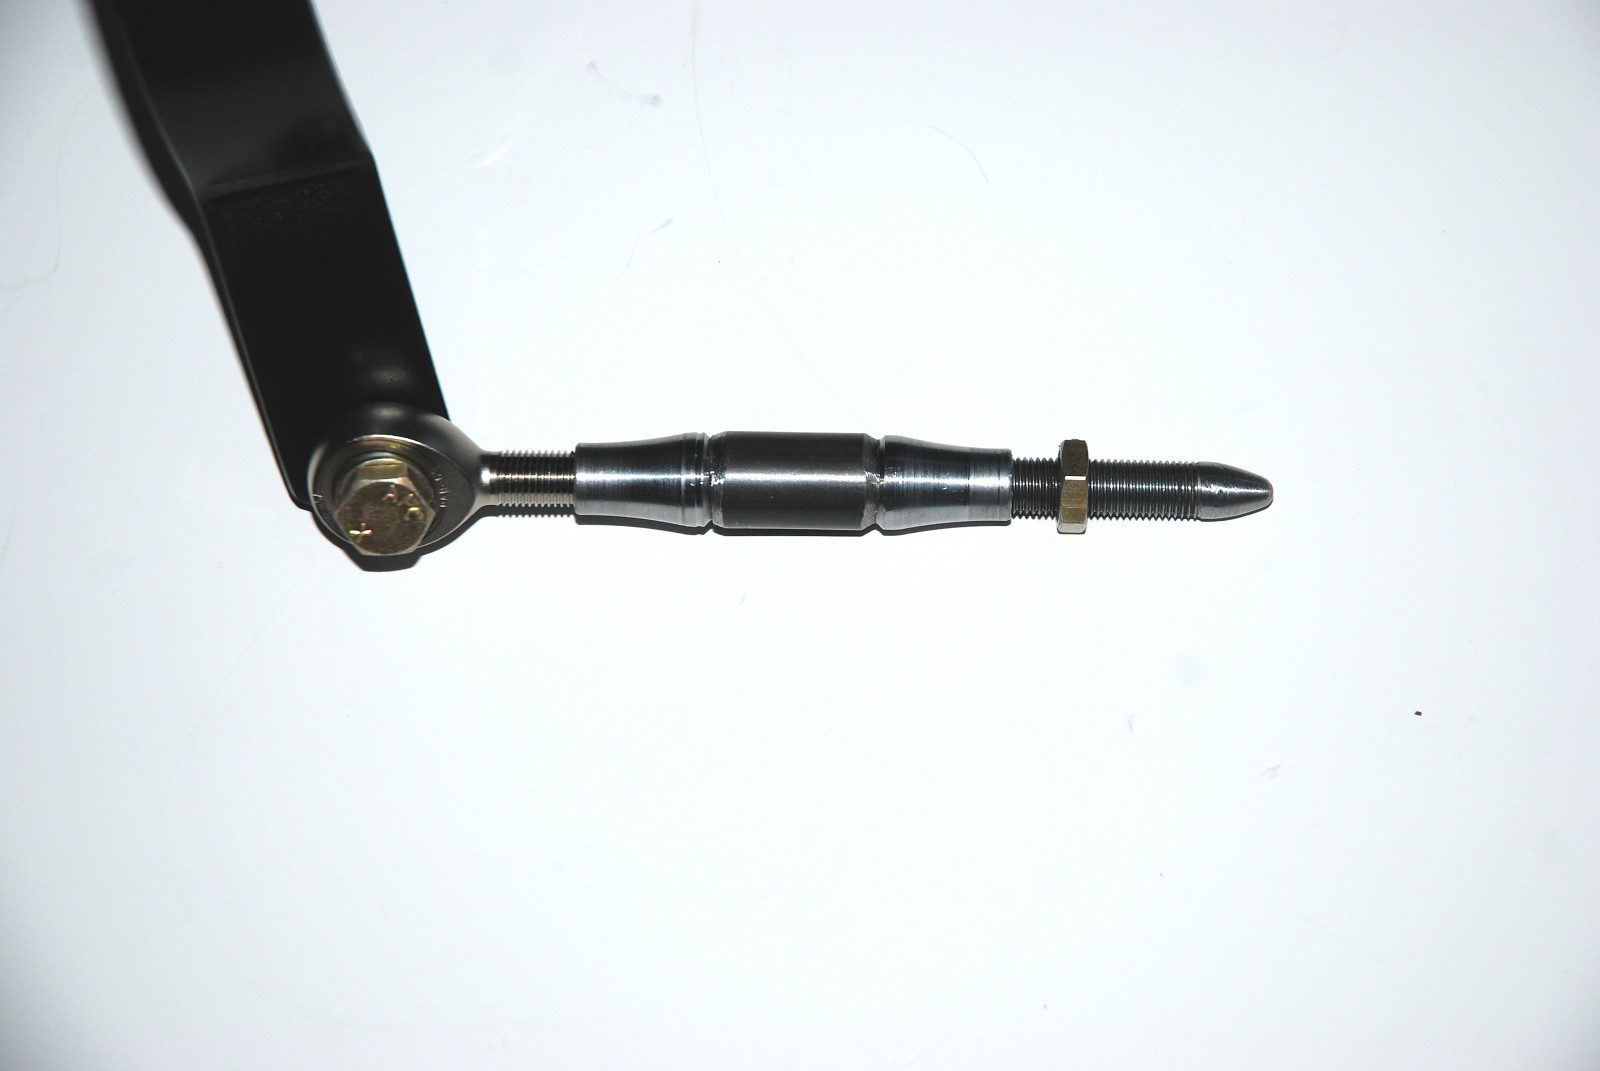
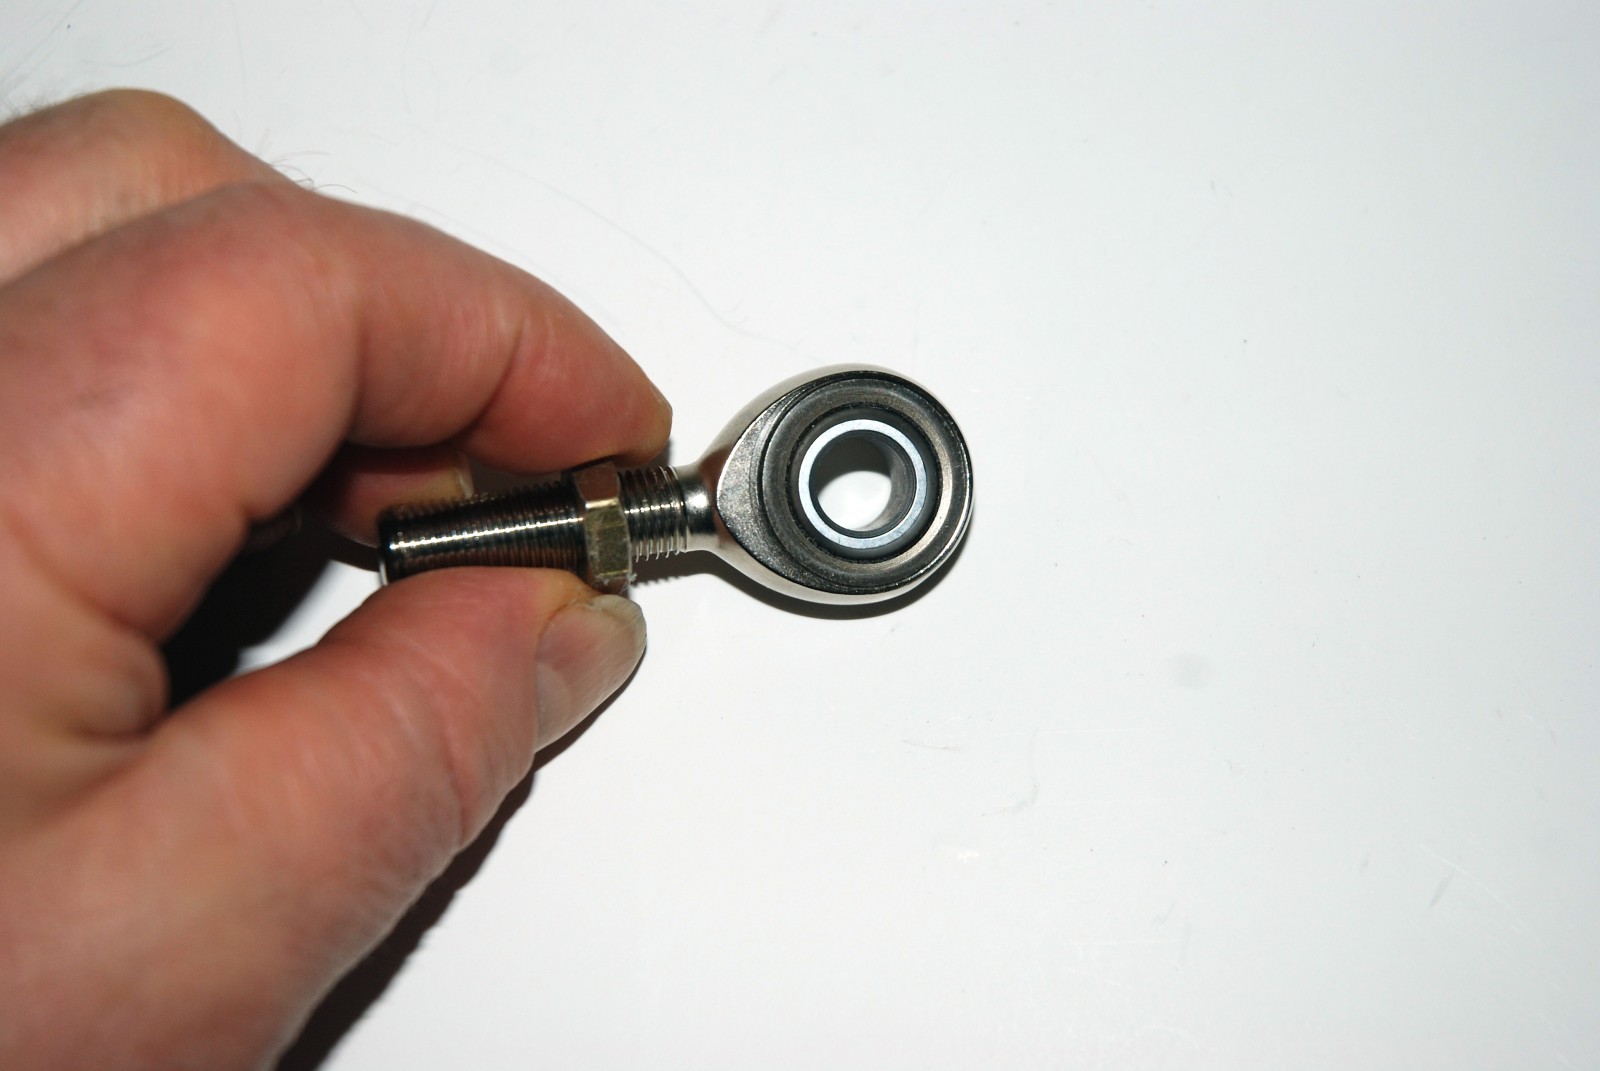
There are a couple of things to keep in mind as when building GM-style linkage. The mounting holes measure 5/16-inch in diameter when new, but are always distorted on old linkage. Building clutch linkage with 5/16-inch rod ends won’t help because those holes are still out of round. That means you should use rod ends the next size up— 3/8-inch diameter—and drill out the respective holes to 3/8-inch to eliminate the distortion problem.
Since the linkage is also used to adjust the clutch, make things easy on yourself and use left and right hand thread tubing adapters on each side of the respective linkage pieces. This way, all you have to do to adjust the clutch is back off the jam nuts on the rod ends and turn the linkage rod to tighten or loosen the respective link. When you use tubing adapters with all-right hand threads, you have to remove the bolts holding the rod ends in place, turn the linkage in or out, then button it back up and check the gap. If you’re wrong, you have to start all over again.
So how hard is it to build your own mechanical clutch linkage that can hold up to big power? Not as hard as you think—we’ll show you how to do it in the slide show above.
Parts List
Here are the parts from Summit Racing that I used to fabricate my heavy-duty mechanical clutch linkage:
- FK Rod End, 3/8 inch RH (one required)
- FK Rod Ends, 3/8 inch LH (two required)
- Summit Racing Jam Nut, 3/8-24 LH
- Summit Racing Jam Nut, 3/8-24 RH
- QA1 tube adapter, 3/8-24 RH (two required)
Other Parts Required
3/8 inch fine thread aircraft-style bolts (four required, one modified to fit clutch fork)
3/8-inch flat aircraft-style washers (six required)
3/8 inch fine aircraft lock nuts, half-inch height (three required)
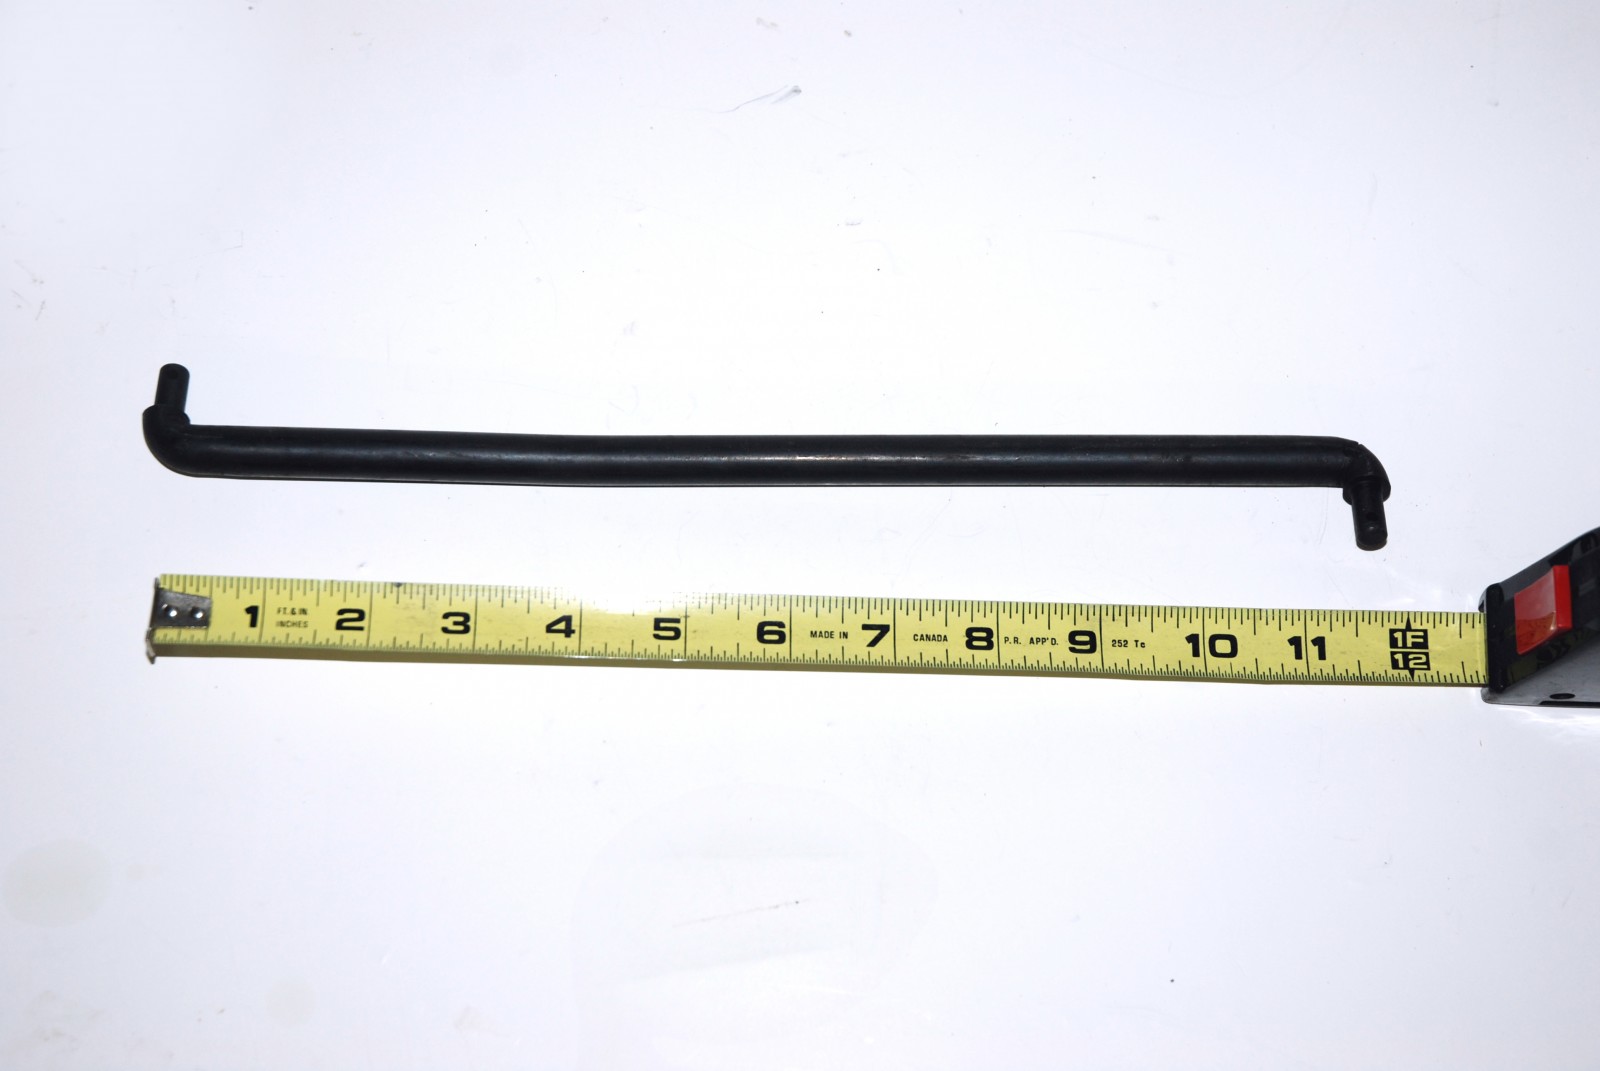
5/8-inch OD chromoly tubing, to match lengths of OE linkage pushrods
This is a great mod for the mechanical clutch linkage but you stopped one step short. You need to loose the pin style fork linkage and install a new fork that accepts a 3/8 heim joint.
http://www.speedwaymotors.com/Speedway-GM-Heavy-Duty-Clutch-Throwout-Fork,37080.html
Great article! I’m building a car right now with an old school mechanical clutch linkage so this shows up at a perfect time!
[…] in a box. This is what I would do. Or make or buy the upgraded versions with swivel rod ends How to Build Bulletproof Mechanical Clutch Linkage – OnAllCylinders Skunk Works 302DZ, M22W Muncie, GV overdrive,12-Bolt Rear 3.73 Some photos: To view links […]
Your bulletproof clutch system would be great to build if you would publish the part numbers of the FK rod ends, the jam nuts, the QA1tube adapter and other related items to the bulletproof clutch systems. I’m trying to make one for my ‘94 Jeep Wrangler with a 4.3 Vortec and a AX 15 transmission. The hydraulic system sucks and I’m stuck trying to figure out a way to make it work
Hey Malcolm, you can click on the text in the bulleted list to see the exact part numbers Wayne used–though some of those part numbers are no longer available from the manufacturer, clicking those links will take you to a page on SummitRacing.com where you’ll be able to find the exact specs on each one.
For those interested, I had the same idea as the author of this post but, theres an easier option available that can be purchased and used with no modification to the car.
When I was also looking for an adjustable option for my clutch pedal, I used a spare ride height adjuster I had laying around from my Ducati 1098. It fit like it was made to be there and they’re cheap!
Just do a web search for “Ducati 1098 ride height adjsuter” and you’re in business. The aftermarket ones are around $25-$50 bucks on amazon, ebay, etc. They come with 1/2″ ID heims on each end and use 3/8″ T-bushings inserted to downsize the hole to 3/8 ID (or you can buy a bushing to downsize it to accept a 5/16 bolt so no drilling is needed.
Personally though, I think the above is great for drag and track applications. But, it is overkill for normal street driving. Another alternative is to again using parts from a Ducati 1098, use the shift rod. If too is adjustable with heims on each end but it is slimmer, matching the diameter of the original clutch rod with a 1/4″ ID hole. Install a t bushing or collar in your zbar to accept a 1/4″ ID and you’re in business; and yes they are plenty strong enough to handle sprited driving.
Hope this helps someone.
Slight edit to my post. I forgot to mention that I removed one of the heims and used a carriage bolt with a polished head for perfect mating to the clutch fork.
So to be fair, I guess there is some modification needed. I did this modification a decade ago so I missed that detail.