If you happened to catch Part 1 of this series, then you’re up to date with what we are doing with this 1969 Pontiac Firebird, but if you’re not, let us bring you up to speed.
With a dream to get behind the wheel of a classic muscle car, your author picked up a less-than-wholesome 1969 Pontiac Firebird for just under two grand. As you might expect of a classic car selling at that price, it has a multitude of challenges that need to be addressed. But without a bucketful of funds, or even a welder, we’ll have to cut some corners on the restoration. The priority here is to get it up and running as soon as possible.
In part one, we took a long look at the car and all of the impediments to getting it on the road and looking presentable. In Round 2 of this Pontiac Prizefight, we’re attacking the front subframe and firewall with some wire brushes, screwdrivers, scrapers, and some POR-15 from Summit Racing Equipment. We’ll also be employing POR-15’s Powermesh to patch some rust holes on the firewall and cowl drop offs.
In the next installment, we’ll install new Energy Suspension polyurethane subframe bushings from Summit Racing Equipment, and we’ll move into the interior to give that the POR-15 treatment as well. We originally thought that the trunk would just get the same POR-15 with some Powermesh to fill the holes here and there, but as we have learned, there is far more Swiss cheese going on than we thought, so we may have to change direction on that repair. In the meantime, check out the photos and captions to see the progress we are making.
When last we left the Firebird, we had struggled to remove the front-end sheet metal, as every fastener had rusted permanently to the car, but we pressed on and got past the obstacles. A few more bolts and we were able to remove the front nose assembly, which quite possibly will present the biggest challenge in disassembly. It is thoroughly rusty, which is why we pulled it off from the subframe as one piece. We haven’t decided whether or not to blow it apart or just clean it up, paint it, and reinstall it. (Image/Steve Baur)
…
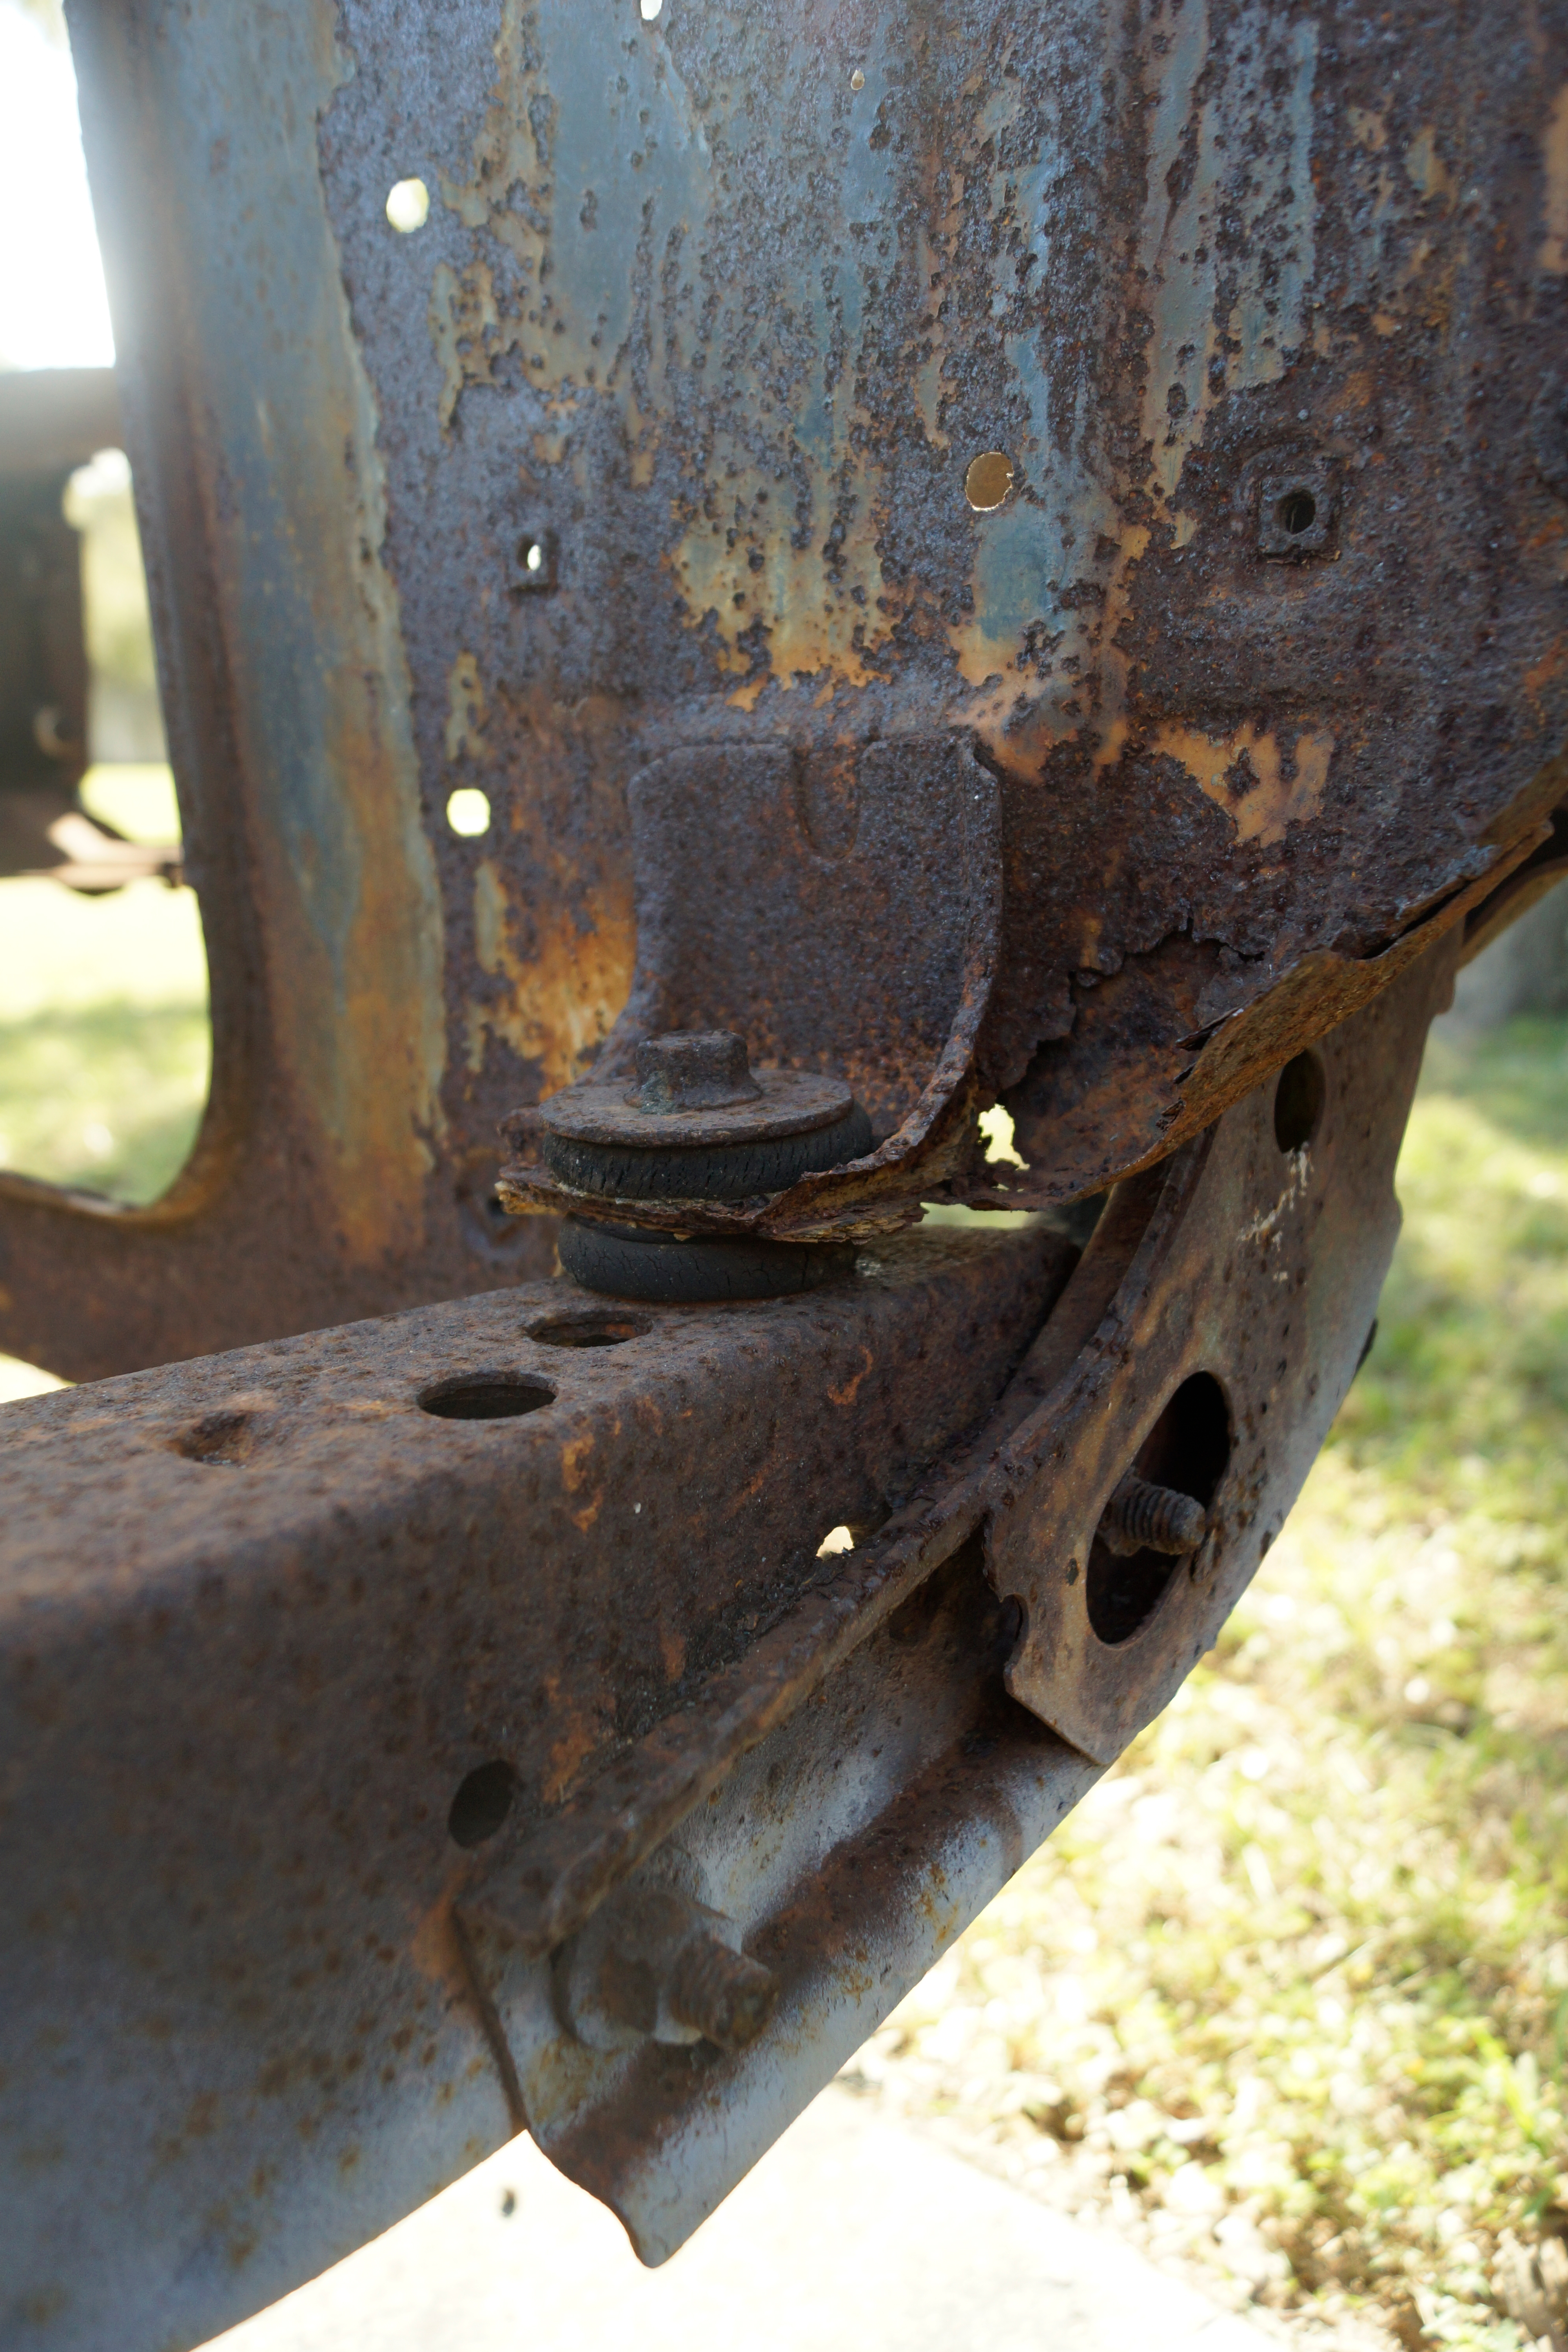
Here’s a good example of the rust we are dealing with. The subframe bracket bolts came loose rather easily, but nothing else on the nose assembly did. These bushings will get replaced as they are part of the front subframe bushing package from Energy Suspension. (Image/Steve Baur)
…
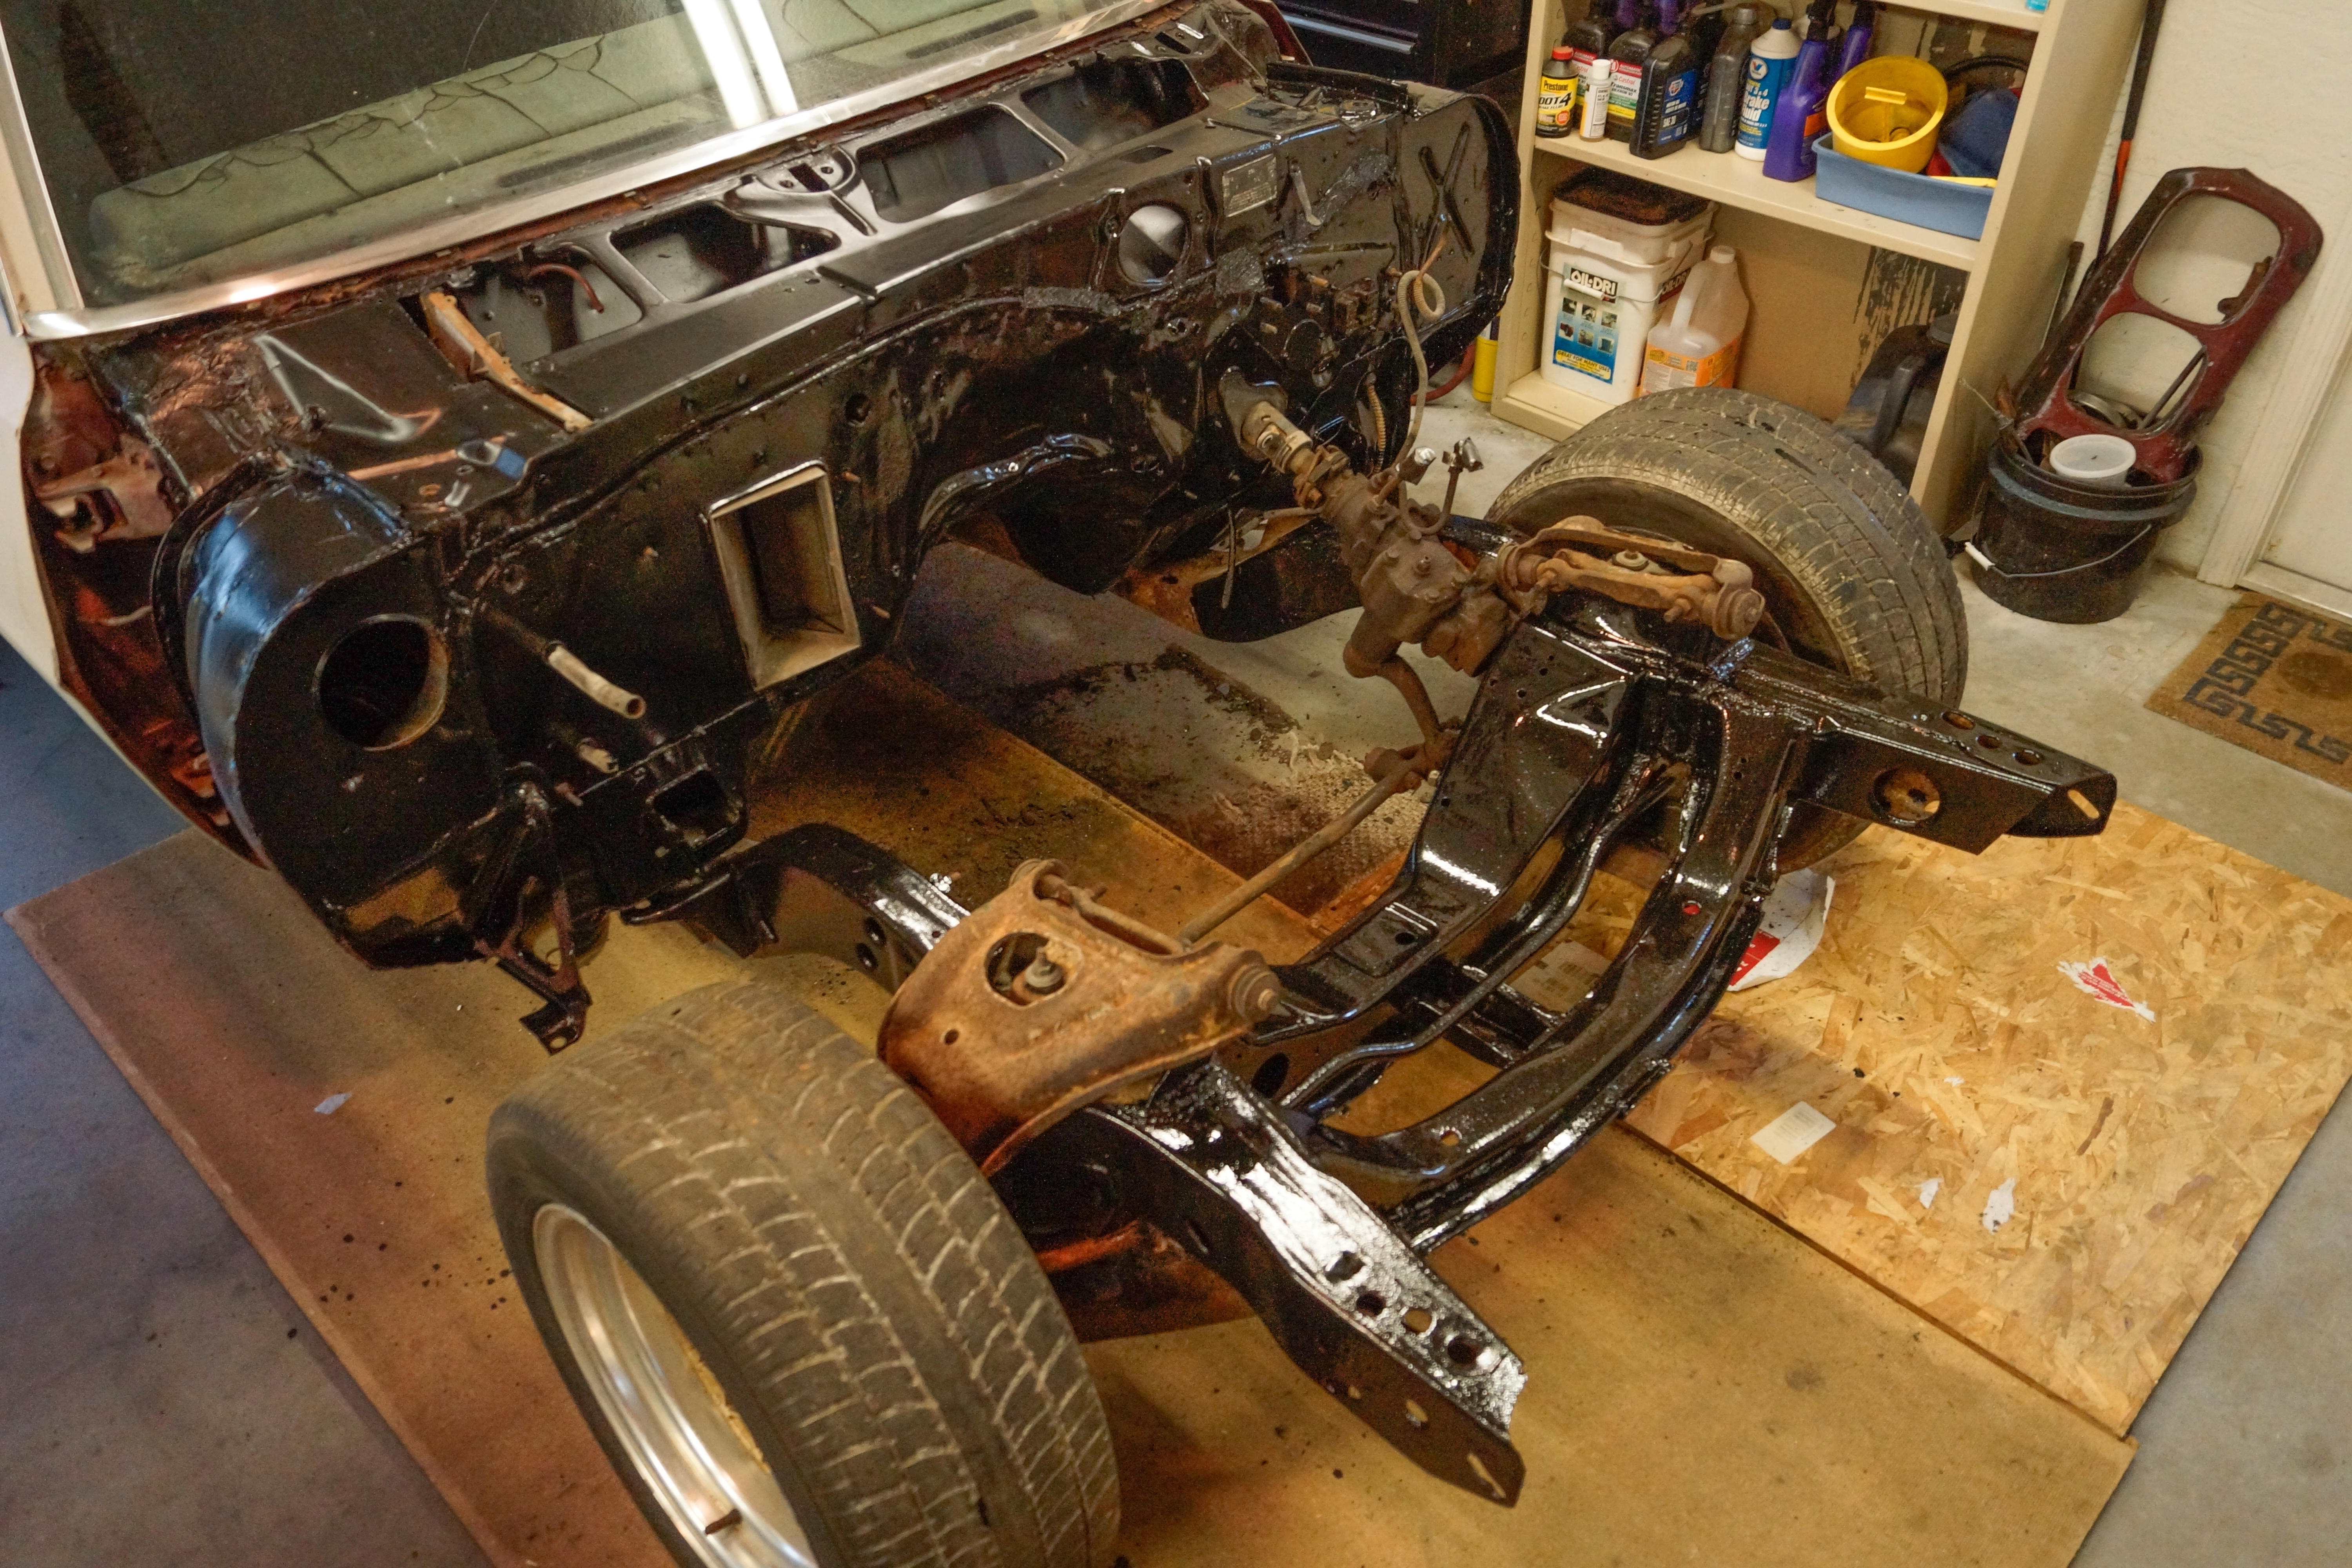
Now that looks a whole lot better than it did before. We didn’t bother to paint the control arms because we are expecting to go with some aftermarket versions when we get to the suspension portion of the build. The steering box was also left in place at this point just to keep the car mobile. It’s also in need of a rebuild or replacement, but that’s not something we’re going to tackle just yet. In Round 3, we’re going to install the new subframe bushings from Summit Racing Equipment, and move into the interior cabin to clean it up and give it a good coating of POR 15 as well. (Image/Steve Baur)
…
The POR 15 goes on rather nicely, and it was a satisfying feeling to see the rust and various paint colors disappear under one blanket of uniform black. It should also neutralize any further rust development, and its durability and toughness is long known in automotive circles. (Image/Steve Baur)
…
Lesson one in using the POR 15 was that we couldn’t quite figure out how to get into the can. Eventually we did, though, hopefully not at the cost of the material inside drying out over time. (Image/Steve Baur)
…
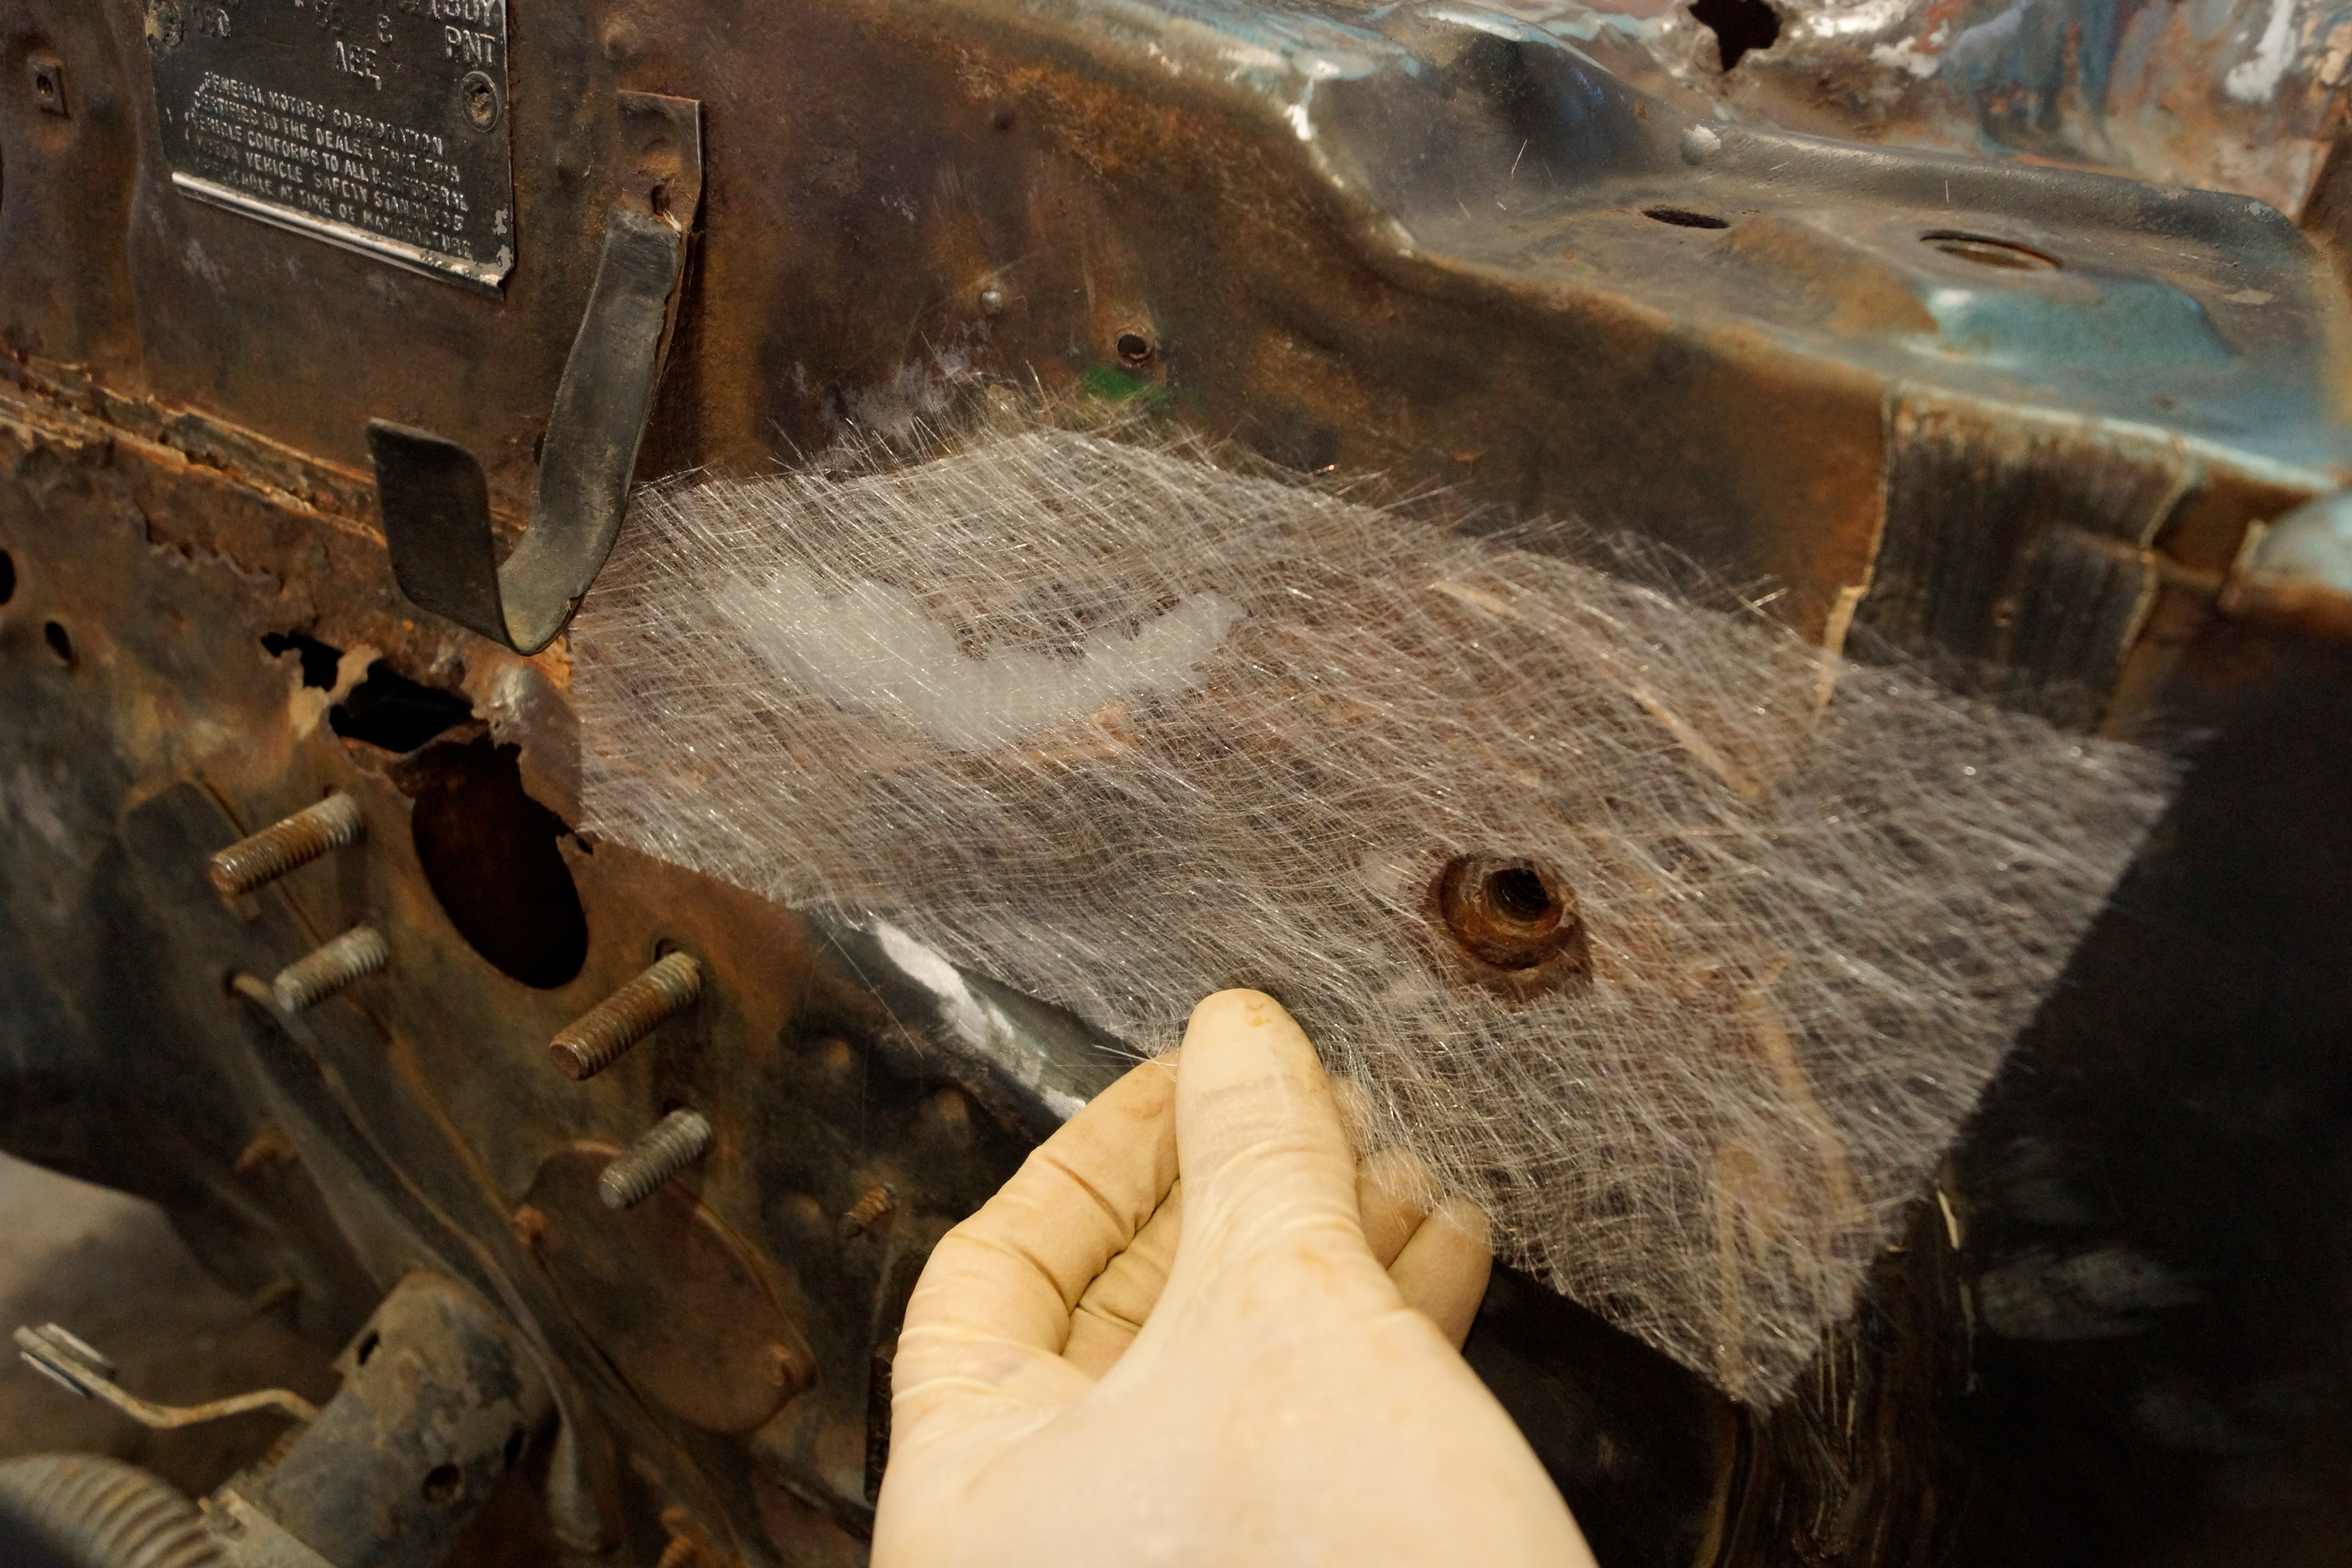
Lesson one in using POR-15’s Powermesh on the firewall showed us that we couldn’t cover a large uneven area with one piece—the seam proved especially difficult. The cloth kept popping up no matter how much POR-15 we slathered on, so we cut it down into more manageable sizes and that did the trick. Make sure to use gloves when handling Powermesh. (Image/Steve Baur)
…
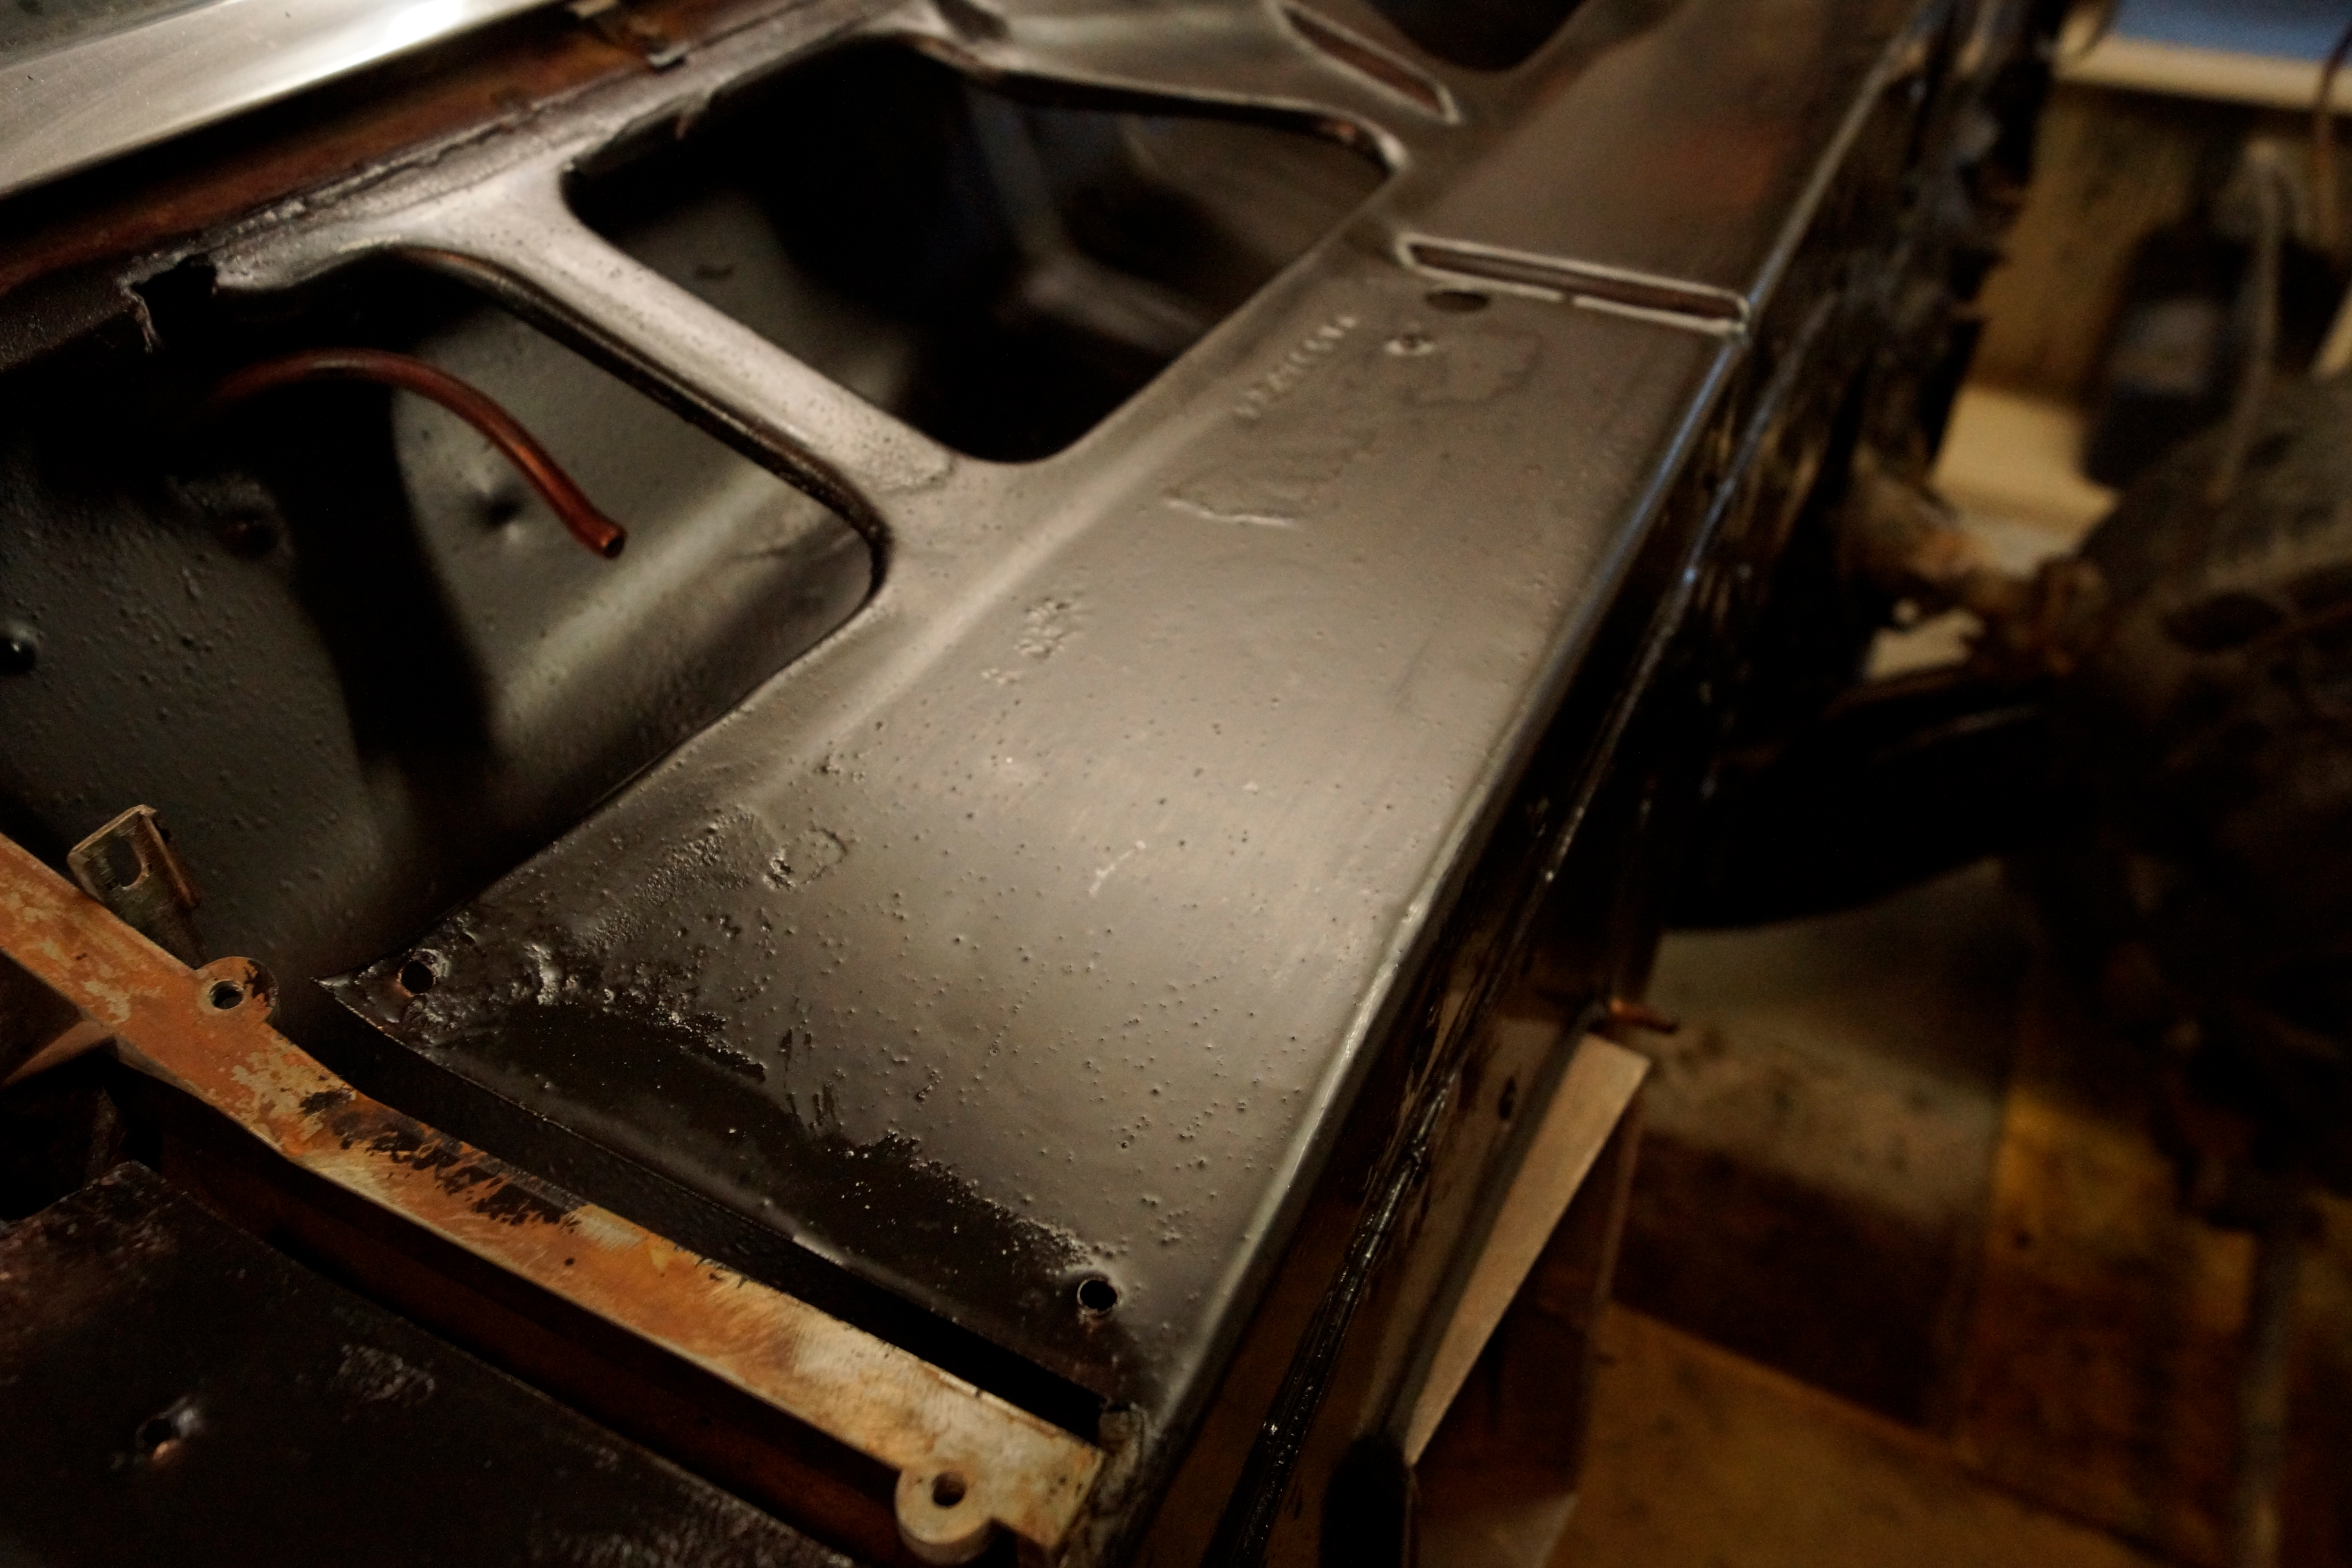
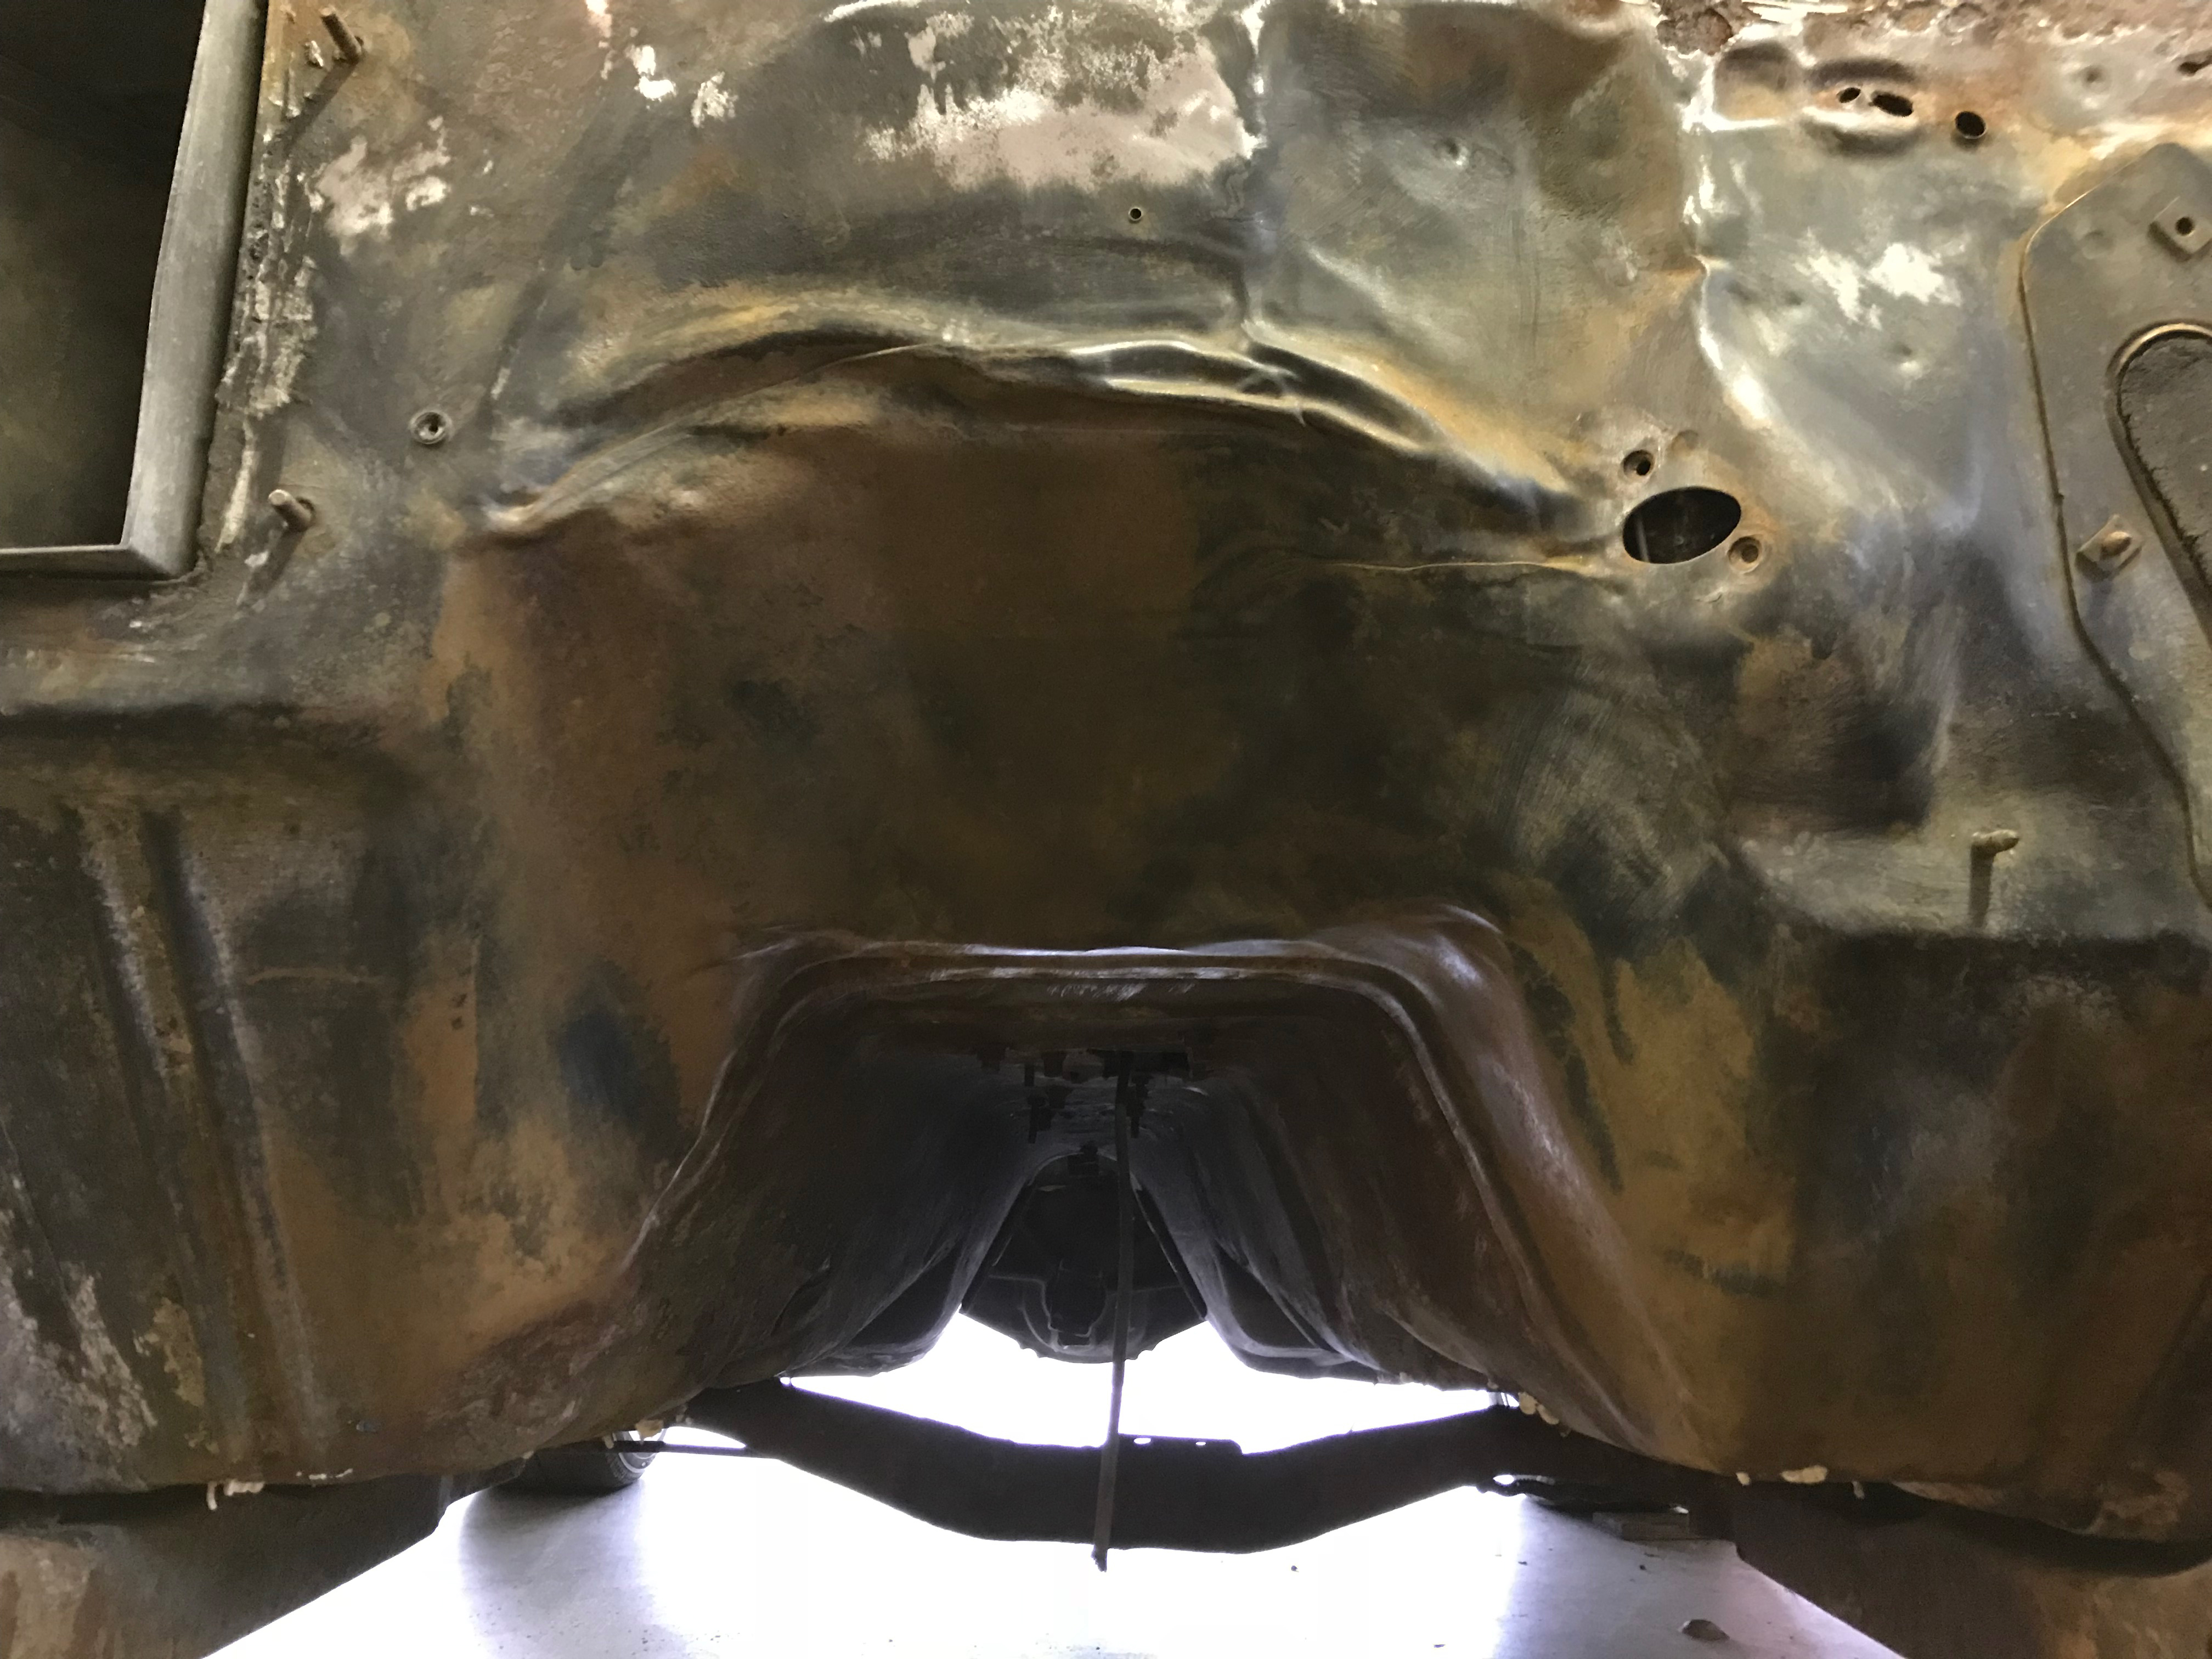
Below the firewall seem, the rest of the firewall and transmission tunnel were both solid and in good shape. It was wire-brushed, sanded and cleaned with a degreaser prior to applying the POR-15. (Image/Steve Baur)
…
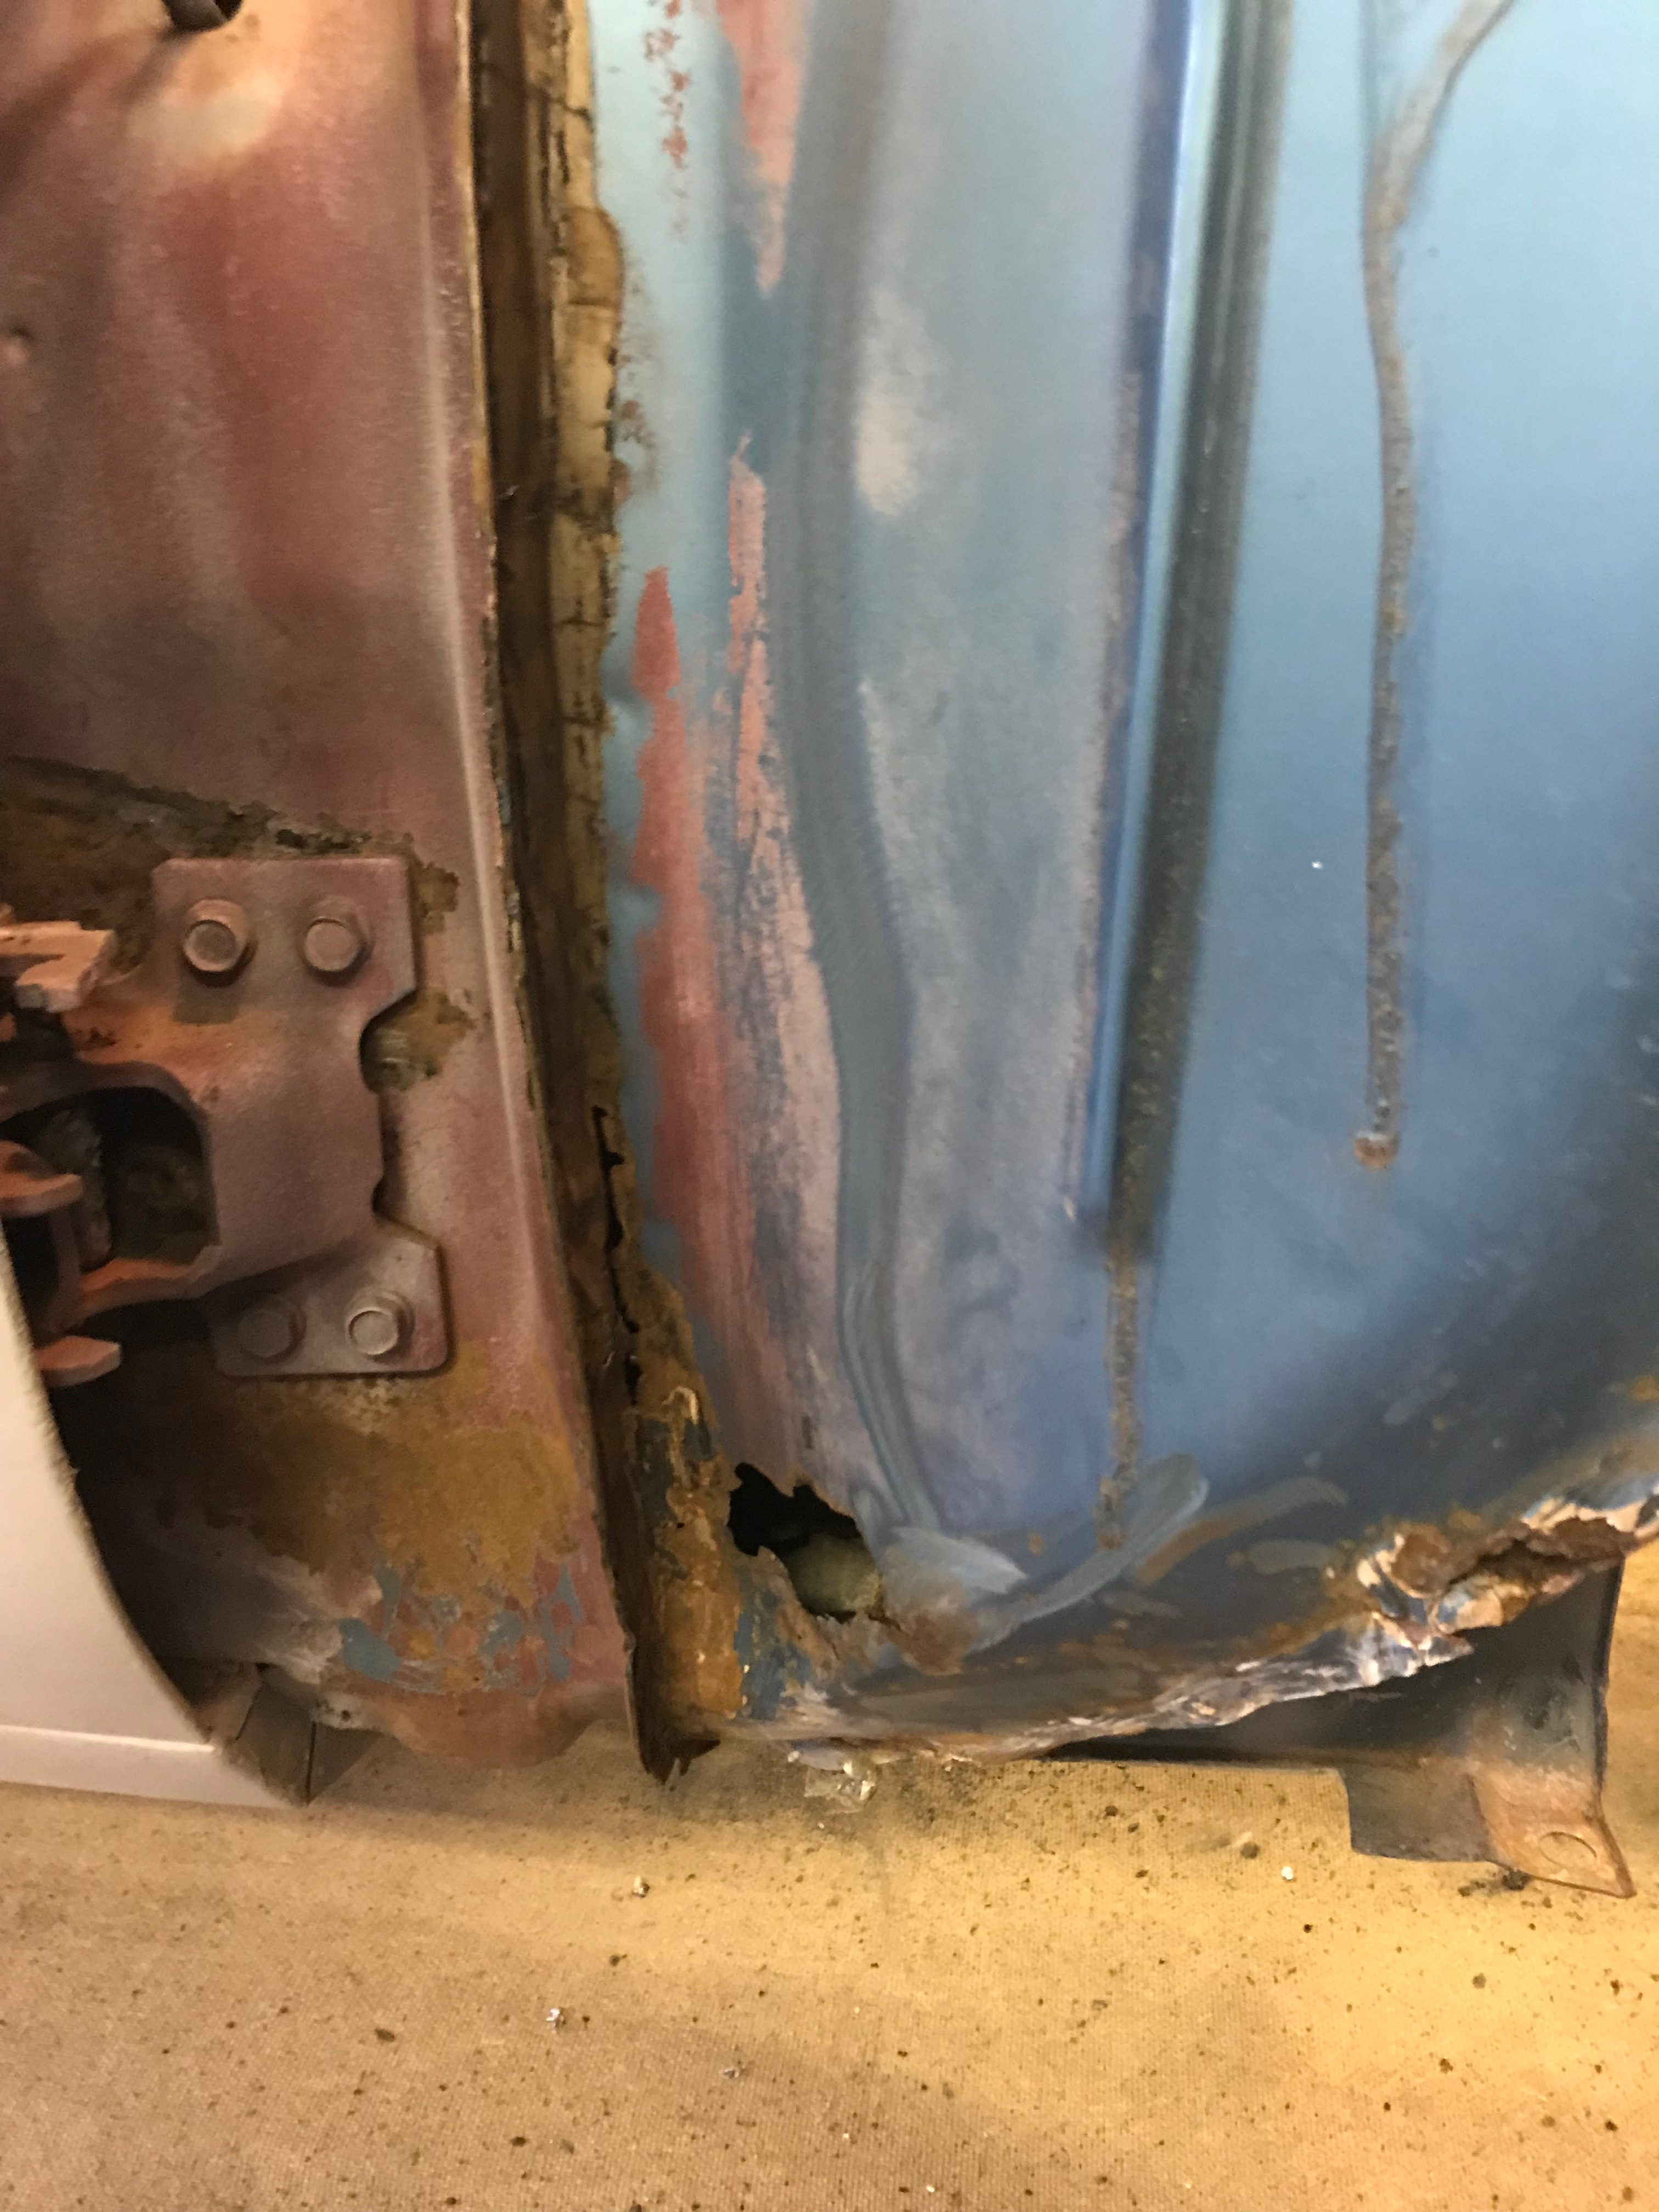
At the bottom of the cowl panel/firewall we found a hole on the side and a hole on the front side as well. We had to do a bit of vacuuming, as there was some debris inside the panel, which likely blocked the drain and caused the rusting to begin with. We covered it with the Powermesh and some POR-15. (Image/Steve Baur)
…
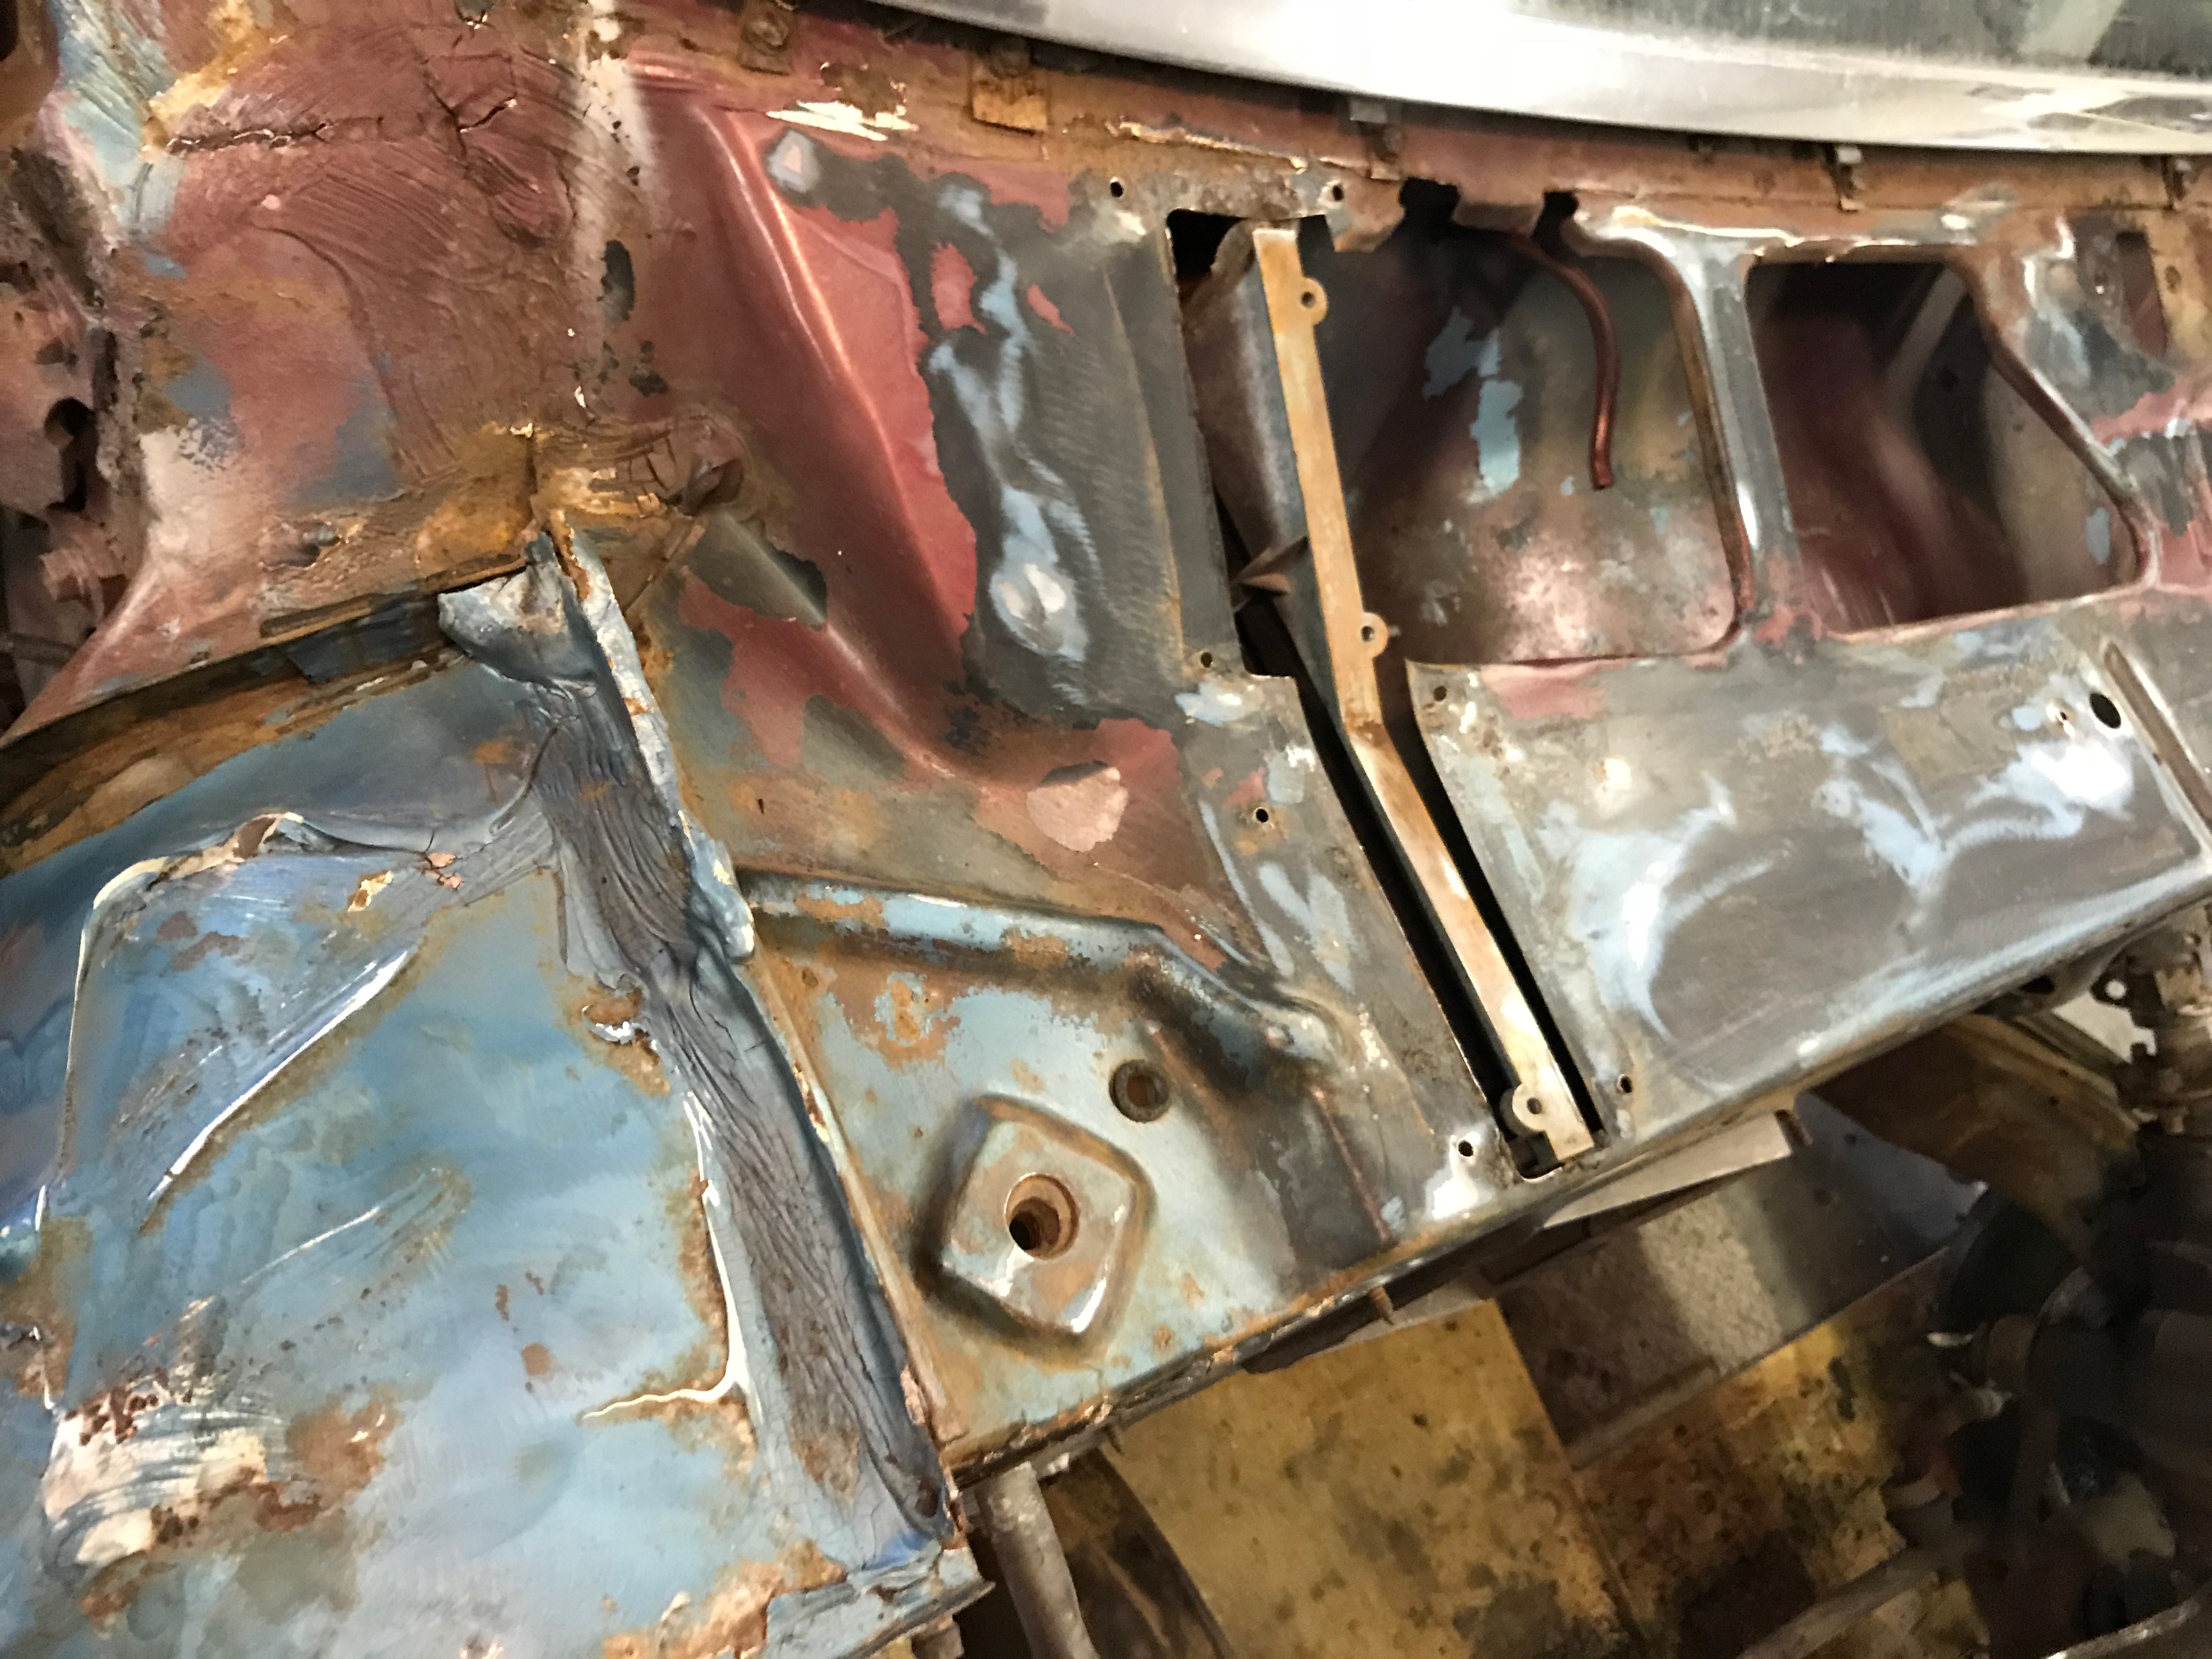
We focused our attention on the top of the cowl panel, as there were rust holes on the top and inside the channel underneath. Here you can see the original Crystal Turquoise color, along with a red that was painted over top later on. We used a combination of wire brushes, scrapers and 3M Scotch-Britepads to knock down the surface and clean up any surface rust. (Image/Steve Baur)
Steve Baur is the founder and principal of Driven Media Works, a Florida-based creative-services firm serving the automotive aftermarket. After attending the University of South Florida for journalism, Steve signed on with Muscle Mustangs & Fast Fords magazine, where he served as associate editor and, later, technical editor during his nine-year tenure. In 2010, he was promoted to the editorship of Modified Mustangs & Fords, a publication he helmed for four years before launching Driven Media Works in 2014. A lover of all things automotive, Steve has contributed to a wide range of motoring publications, including Car Craft, Truckin', Modified, Super Chevy, Race Pages, GM High Tech Performance, Fastest Street Car, and High Performance Pontiac.


Comments