There are very few hot rodders who aren’t interested in horsepower and torque. All that power is tons of fun and internal combustion, piston engines are the center of all this attention. So it makes sense that many will want to build their own engines. It has an odd romantic appeal to be able to pronounce to friends at the local car show or drag strip that “Yeah, I built that!”
Beyond the knowledge base, the biggest hurdle to be able to back up that announcement is the necessary tools. (We will assume you already have the requisite hand tools like wrenches, sockets, ratchets, breaker bars, extensions, screwdrivers, and the like.) In the arcane world of engine building, there are many specialized tools that will require a dedication to investment. The good news is that it’s not necessary to buy all the tools all at once. For the true beginner, there are a few tools that are necessary and the rest you can acquire over time.
This story will take you through the first and necessary tools you’ll need to do the job correctly and efficiently. Each engine family like Chevy, Ford, and Chrysler engines all will have their specific requirements. In this short story we can’t begin to cover all the details for all engines, so we’ll revert to the classic small block Chevy as our example engine mainly because we’ve built so many over the years that we have lots of tools we can use as examples.
Read Part 2 of this article featuring more advanced engine building tools here.
Many of the tools recommended here will be sufficiently generic to use across many different name brands. One example would be a harmonic balancer puller/installer. These tools will work on most early engines but unfortunately may not be useful with later engines like the GM LS, Gen. III Hemi, or Ford Mod motors. A result of this is that many of these tool suggestions will take different routes based on their own specific requirements.
Putting Together an Engine Builder’s Toolbox
Right from the start, you will need an engine stand. We heard a story that NHRA Pro Stock legend Bob Glidden assembled his engines on a heavy bench because he didn’t want the stress of the bellhousing bolts distorting the block. But for the rest of us mere mortal engine assemblers, a quality engine stand is a must-have item. You don’t need one of those fancy ones with the gear-driven hub (even though that’s a tool we’ve coveted for years!) but a good four or splayed-leg engine stand rated at a minimum of 1,000 pounds is a must-have item.
Few of the simple tools in our list are expensive so it should not take long to acquire most of them. If you don’t already have a torque wrench, that would be a great initial investment. The classic clicker type torque wrench has never been more affordable, so that’s certainly one that should be at the top of your list.
Later engines are using smaller, metric fasteners and many of these may require an inch-pound torque wrench. If that’s on your list, consider using a beam style torque wrench. They are generally less expensive and work very well and rarely need to be recalibrated which is something the clicker wrenches demand when used over time. One way to maintain a clicker wrench calibration is to always return the wrench to near zero after every day’s use. Leaving the setting tightened up will weaken the spring and the wrench will lose calibration.
We’ve also included a couple of homemade tools you can duplicate that will save some money if you have the fabrication skills. For example, we use an eight inch length of thick wall aluminum pipe to help drive on crankshaft gears. The soft aluminum does not damage the gear.
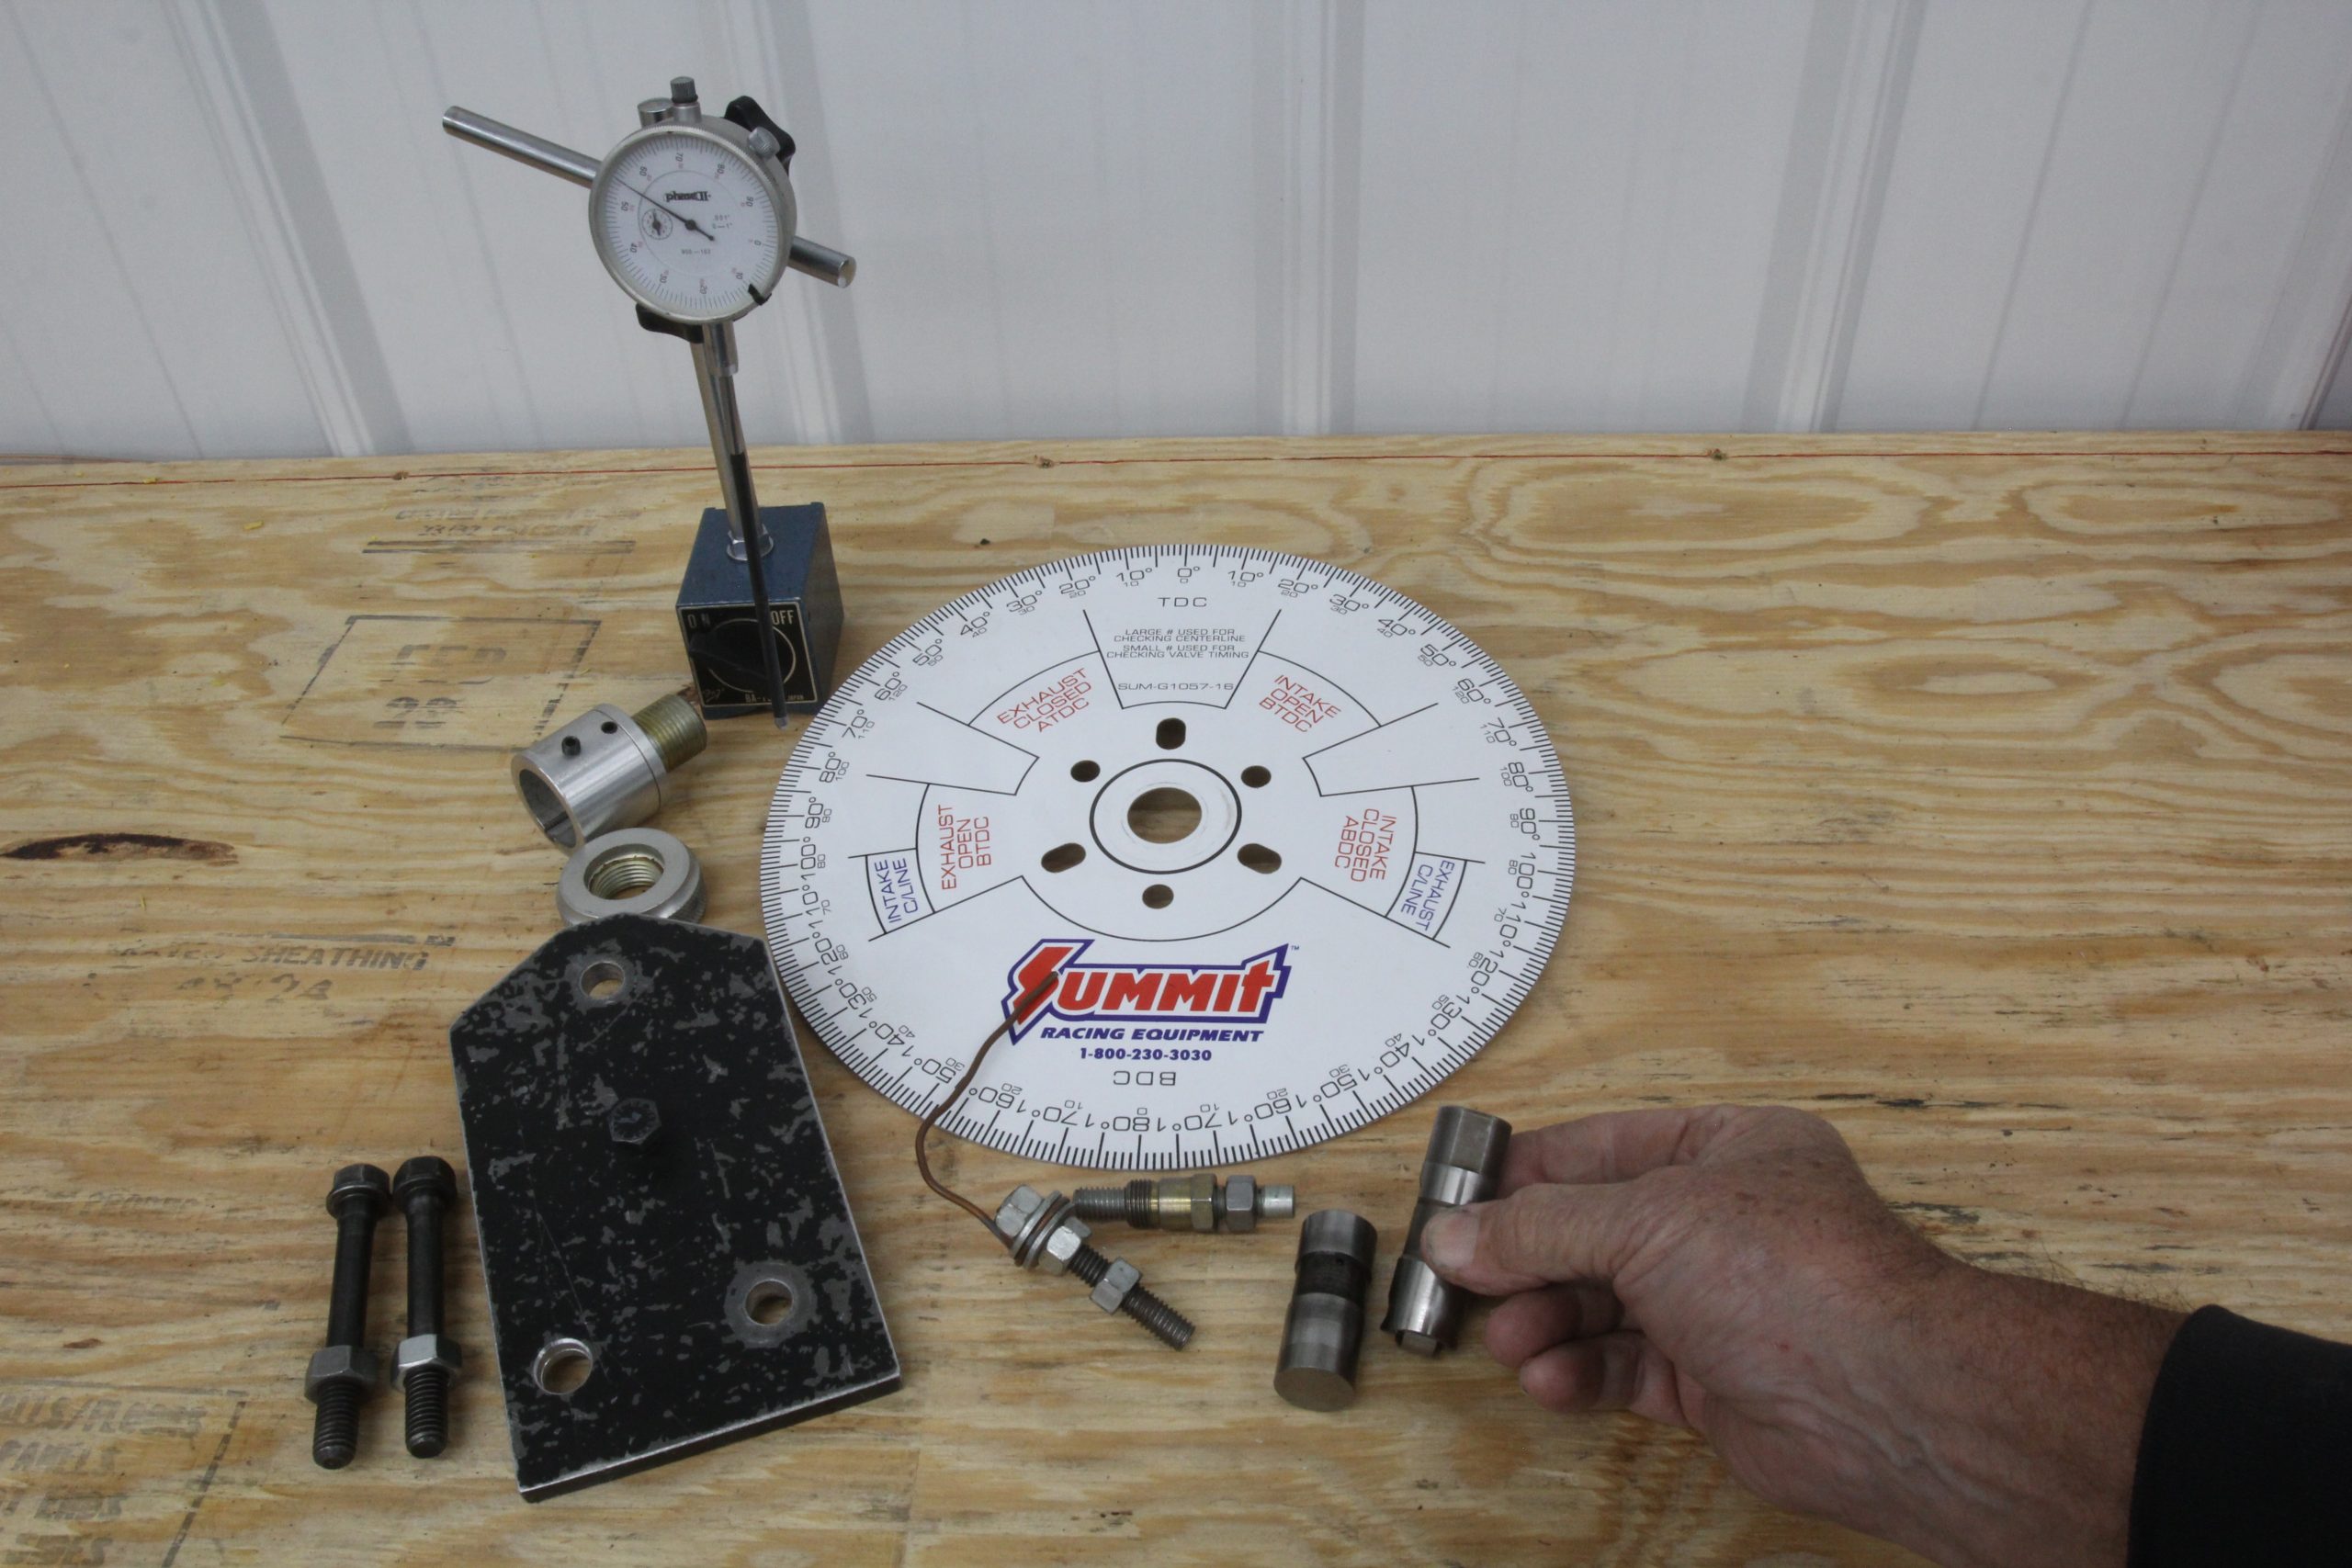
Another simple tool is a piston stop (with the head off the engine) for setting top dead center (TDC) on a degree wheel. We used a half inch thick plate of aluminum that measures roughly five by eight inches that we drilled for hold-down bolts and a center stop bolt and nut. It’s simple, effective and cheap. We built it probably 30 years ago and it is still our go-to choice piston stop for small block Chevys.
Accurate Engine Building Measurements
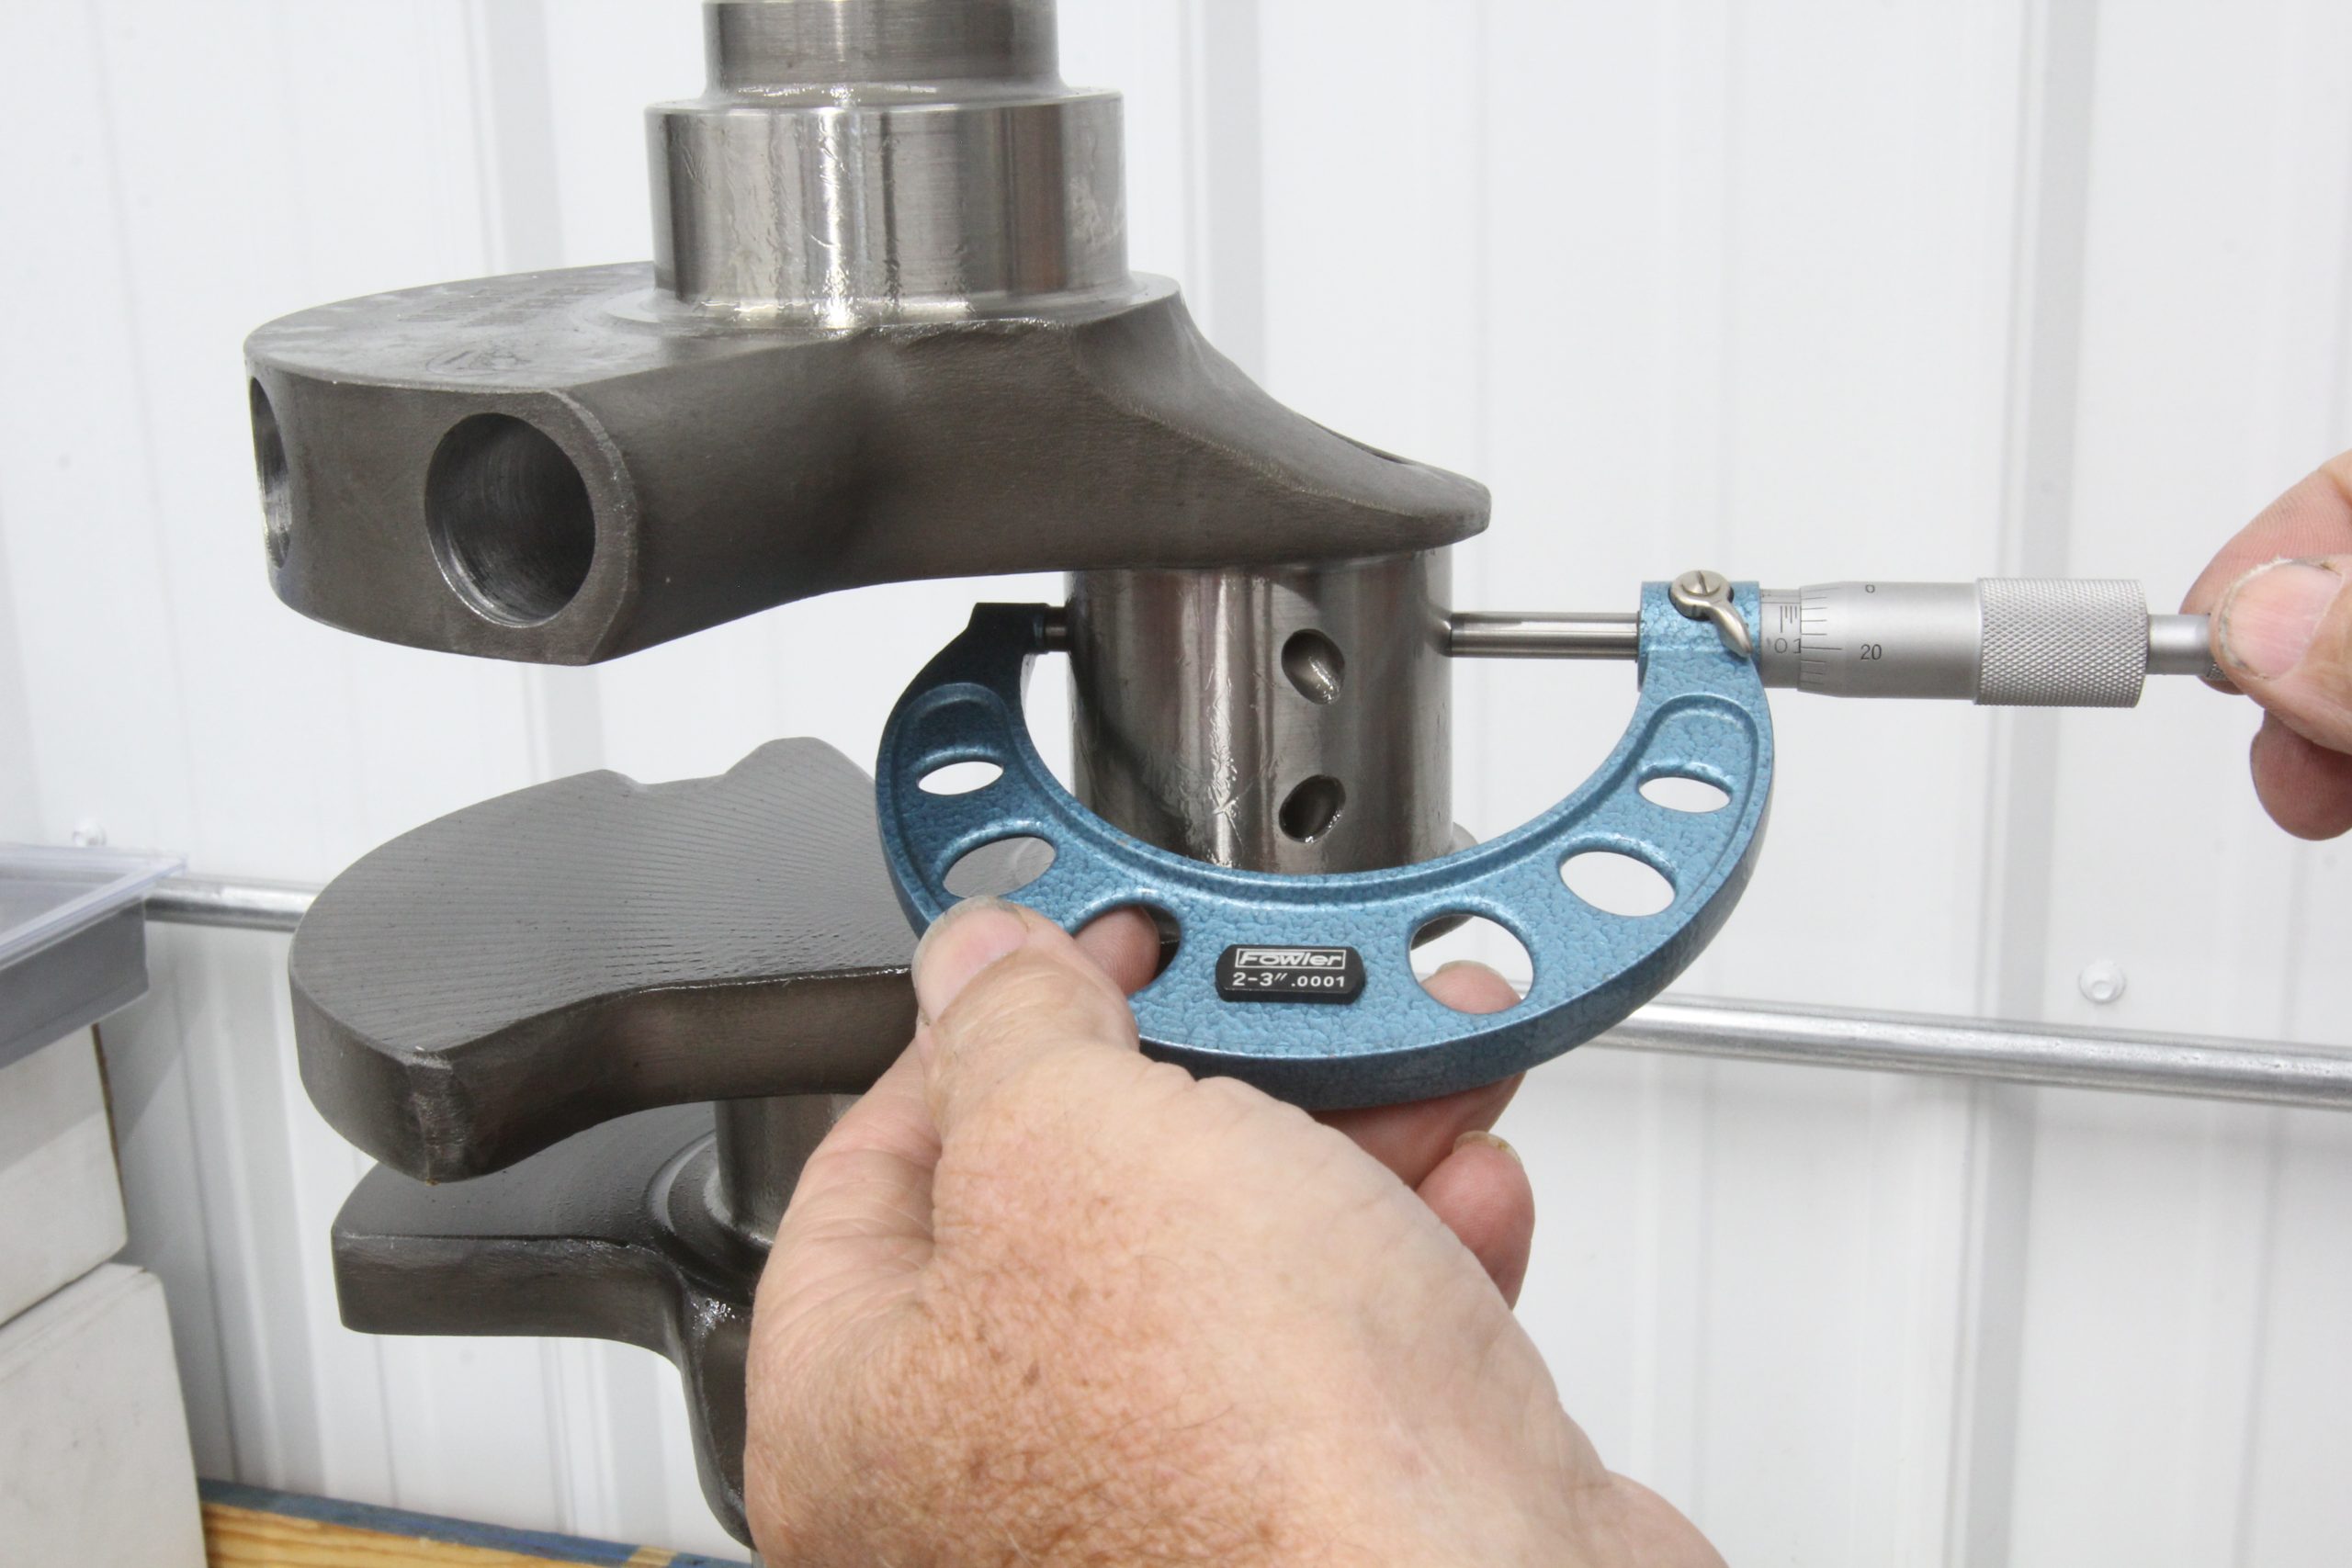
Perhaps the over-riding question in this story is how to measure bearing clearances. Online “experts” will forever tout the use of Plastigage, which is a simple wax material that is placed in between the bearing and the crank and torqued down. This flattens the material out and a scale on the side of the package indicates the clearance. We’ve tested this material and discovered it is often imprecise and not repeatable.
One additional reason not to use Plastigage is that the wax has a definite shelf life. After a period of time, the wax becomes brittle, especially if exposed to sunlight, which will affect its ability to compress consistently.
The best solution is to use precision measuring tools like micrometers and dial bore gauges. These tools are not in our Basic tool list because of their cost. But just because you don’t own the tools, does not mean you shouldn’t use them. Perhaps a friend owns these tools that you can borrow or have him perform the measurements. Another solution is to employ a local machine shop to do the measurements for you. This will come at some expense, but this is the best insurance you can buy to ensure the correct clearances.
This should not be considered a negotiable point. Why take a risk of tearing up the bearings on your newly completed engine because you took a short cut and didn’t make the effort to accurately measure the bearing clearances? The risk is way out of proportion to the reward of performing the task properly.
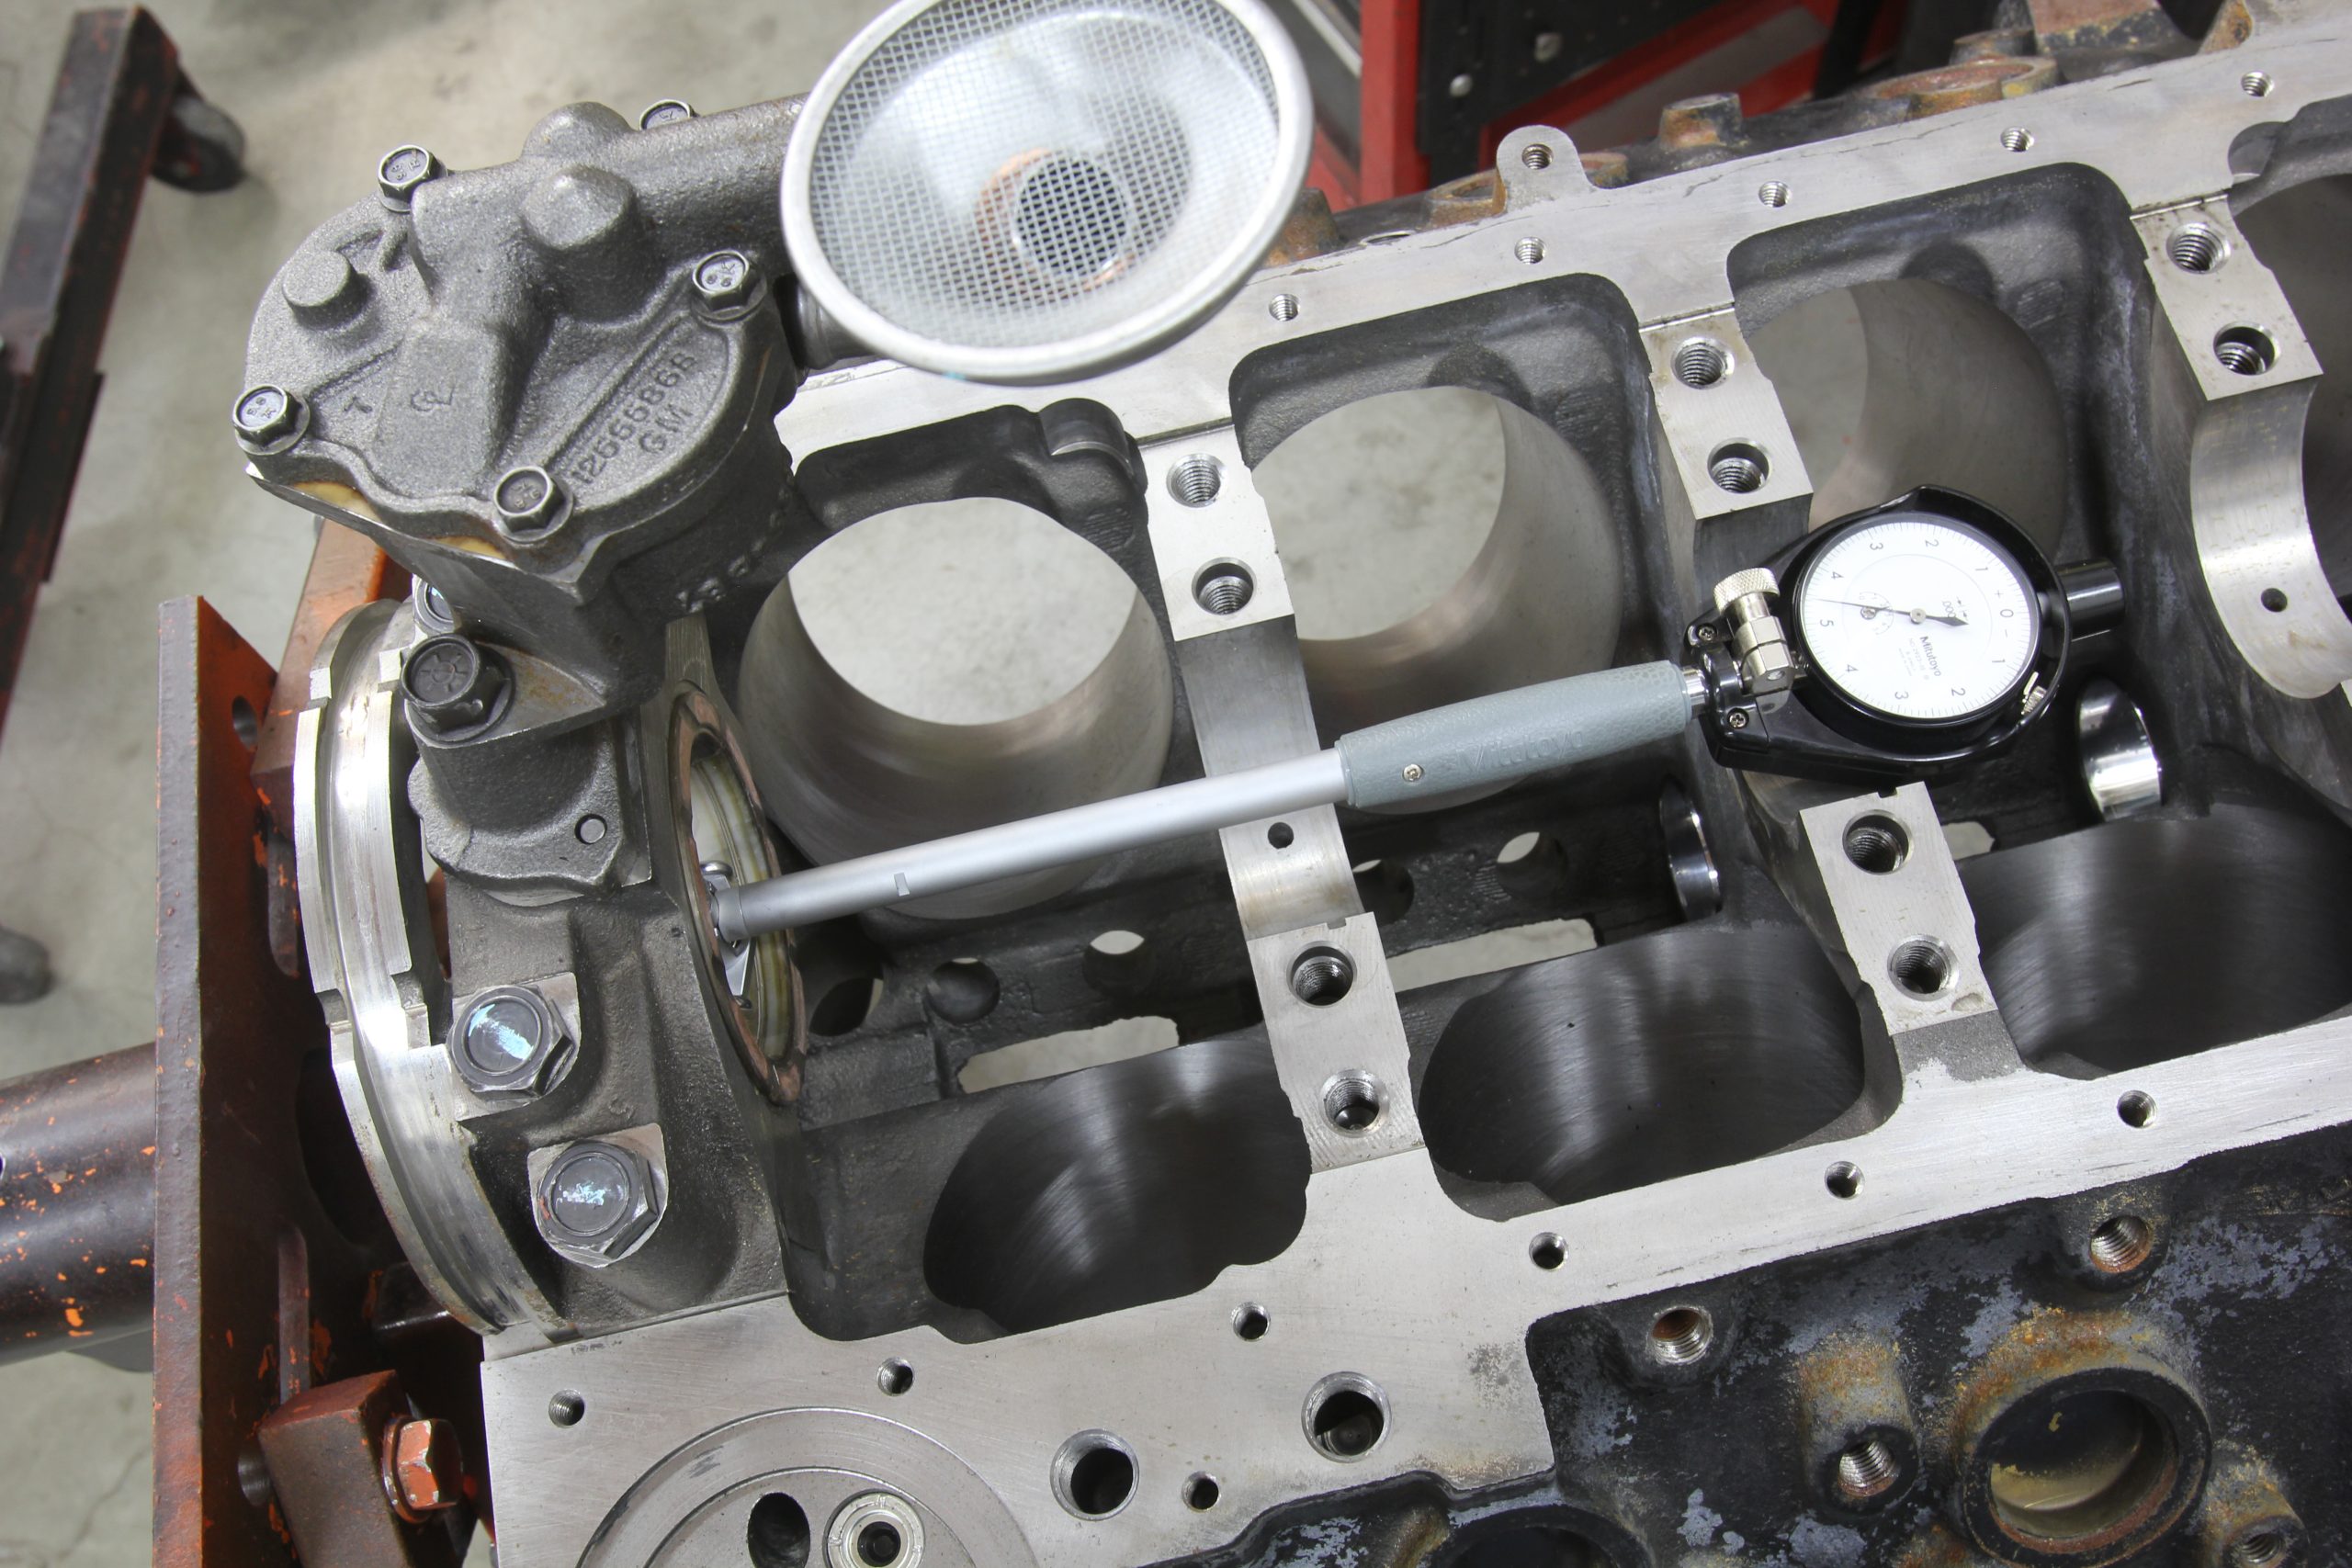
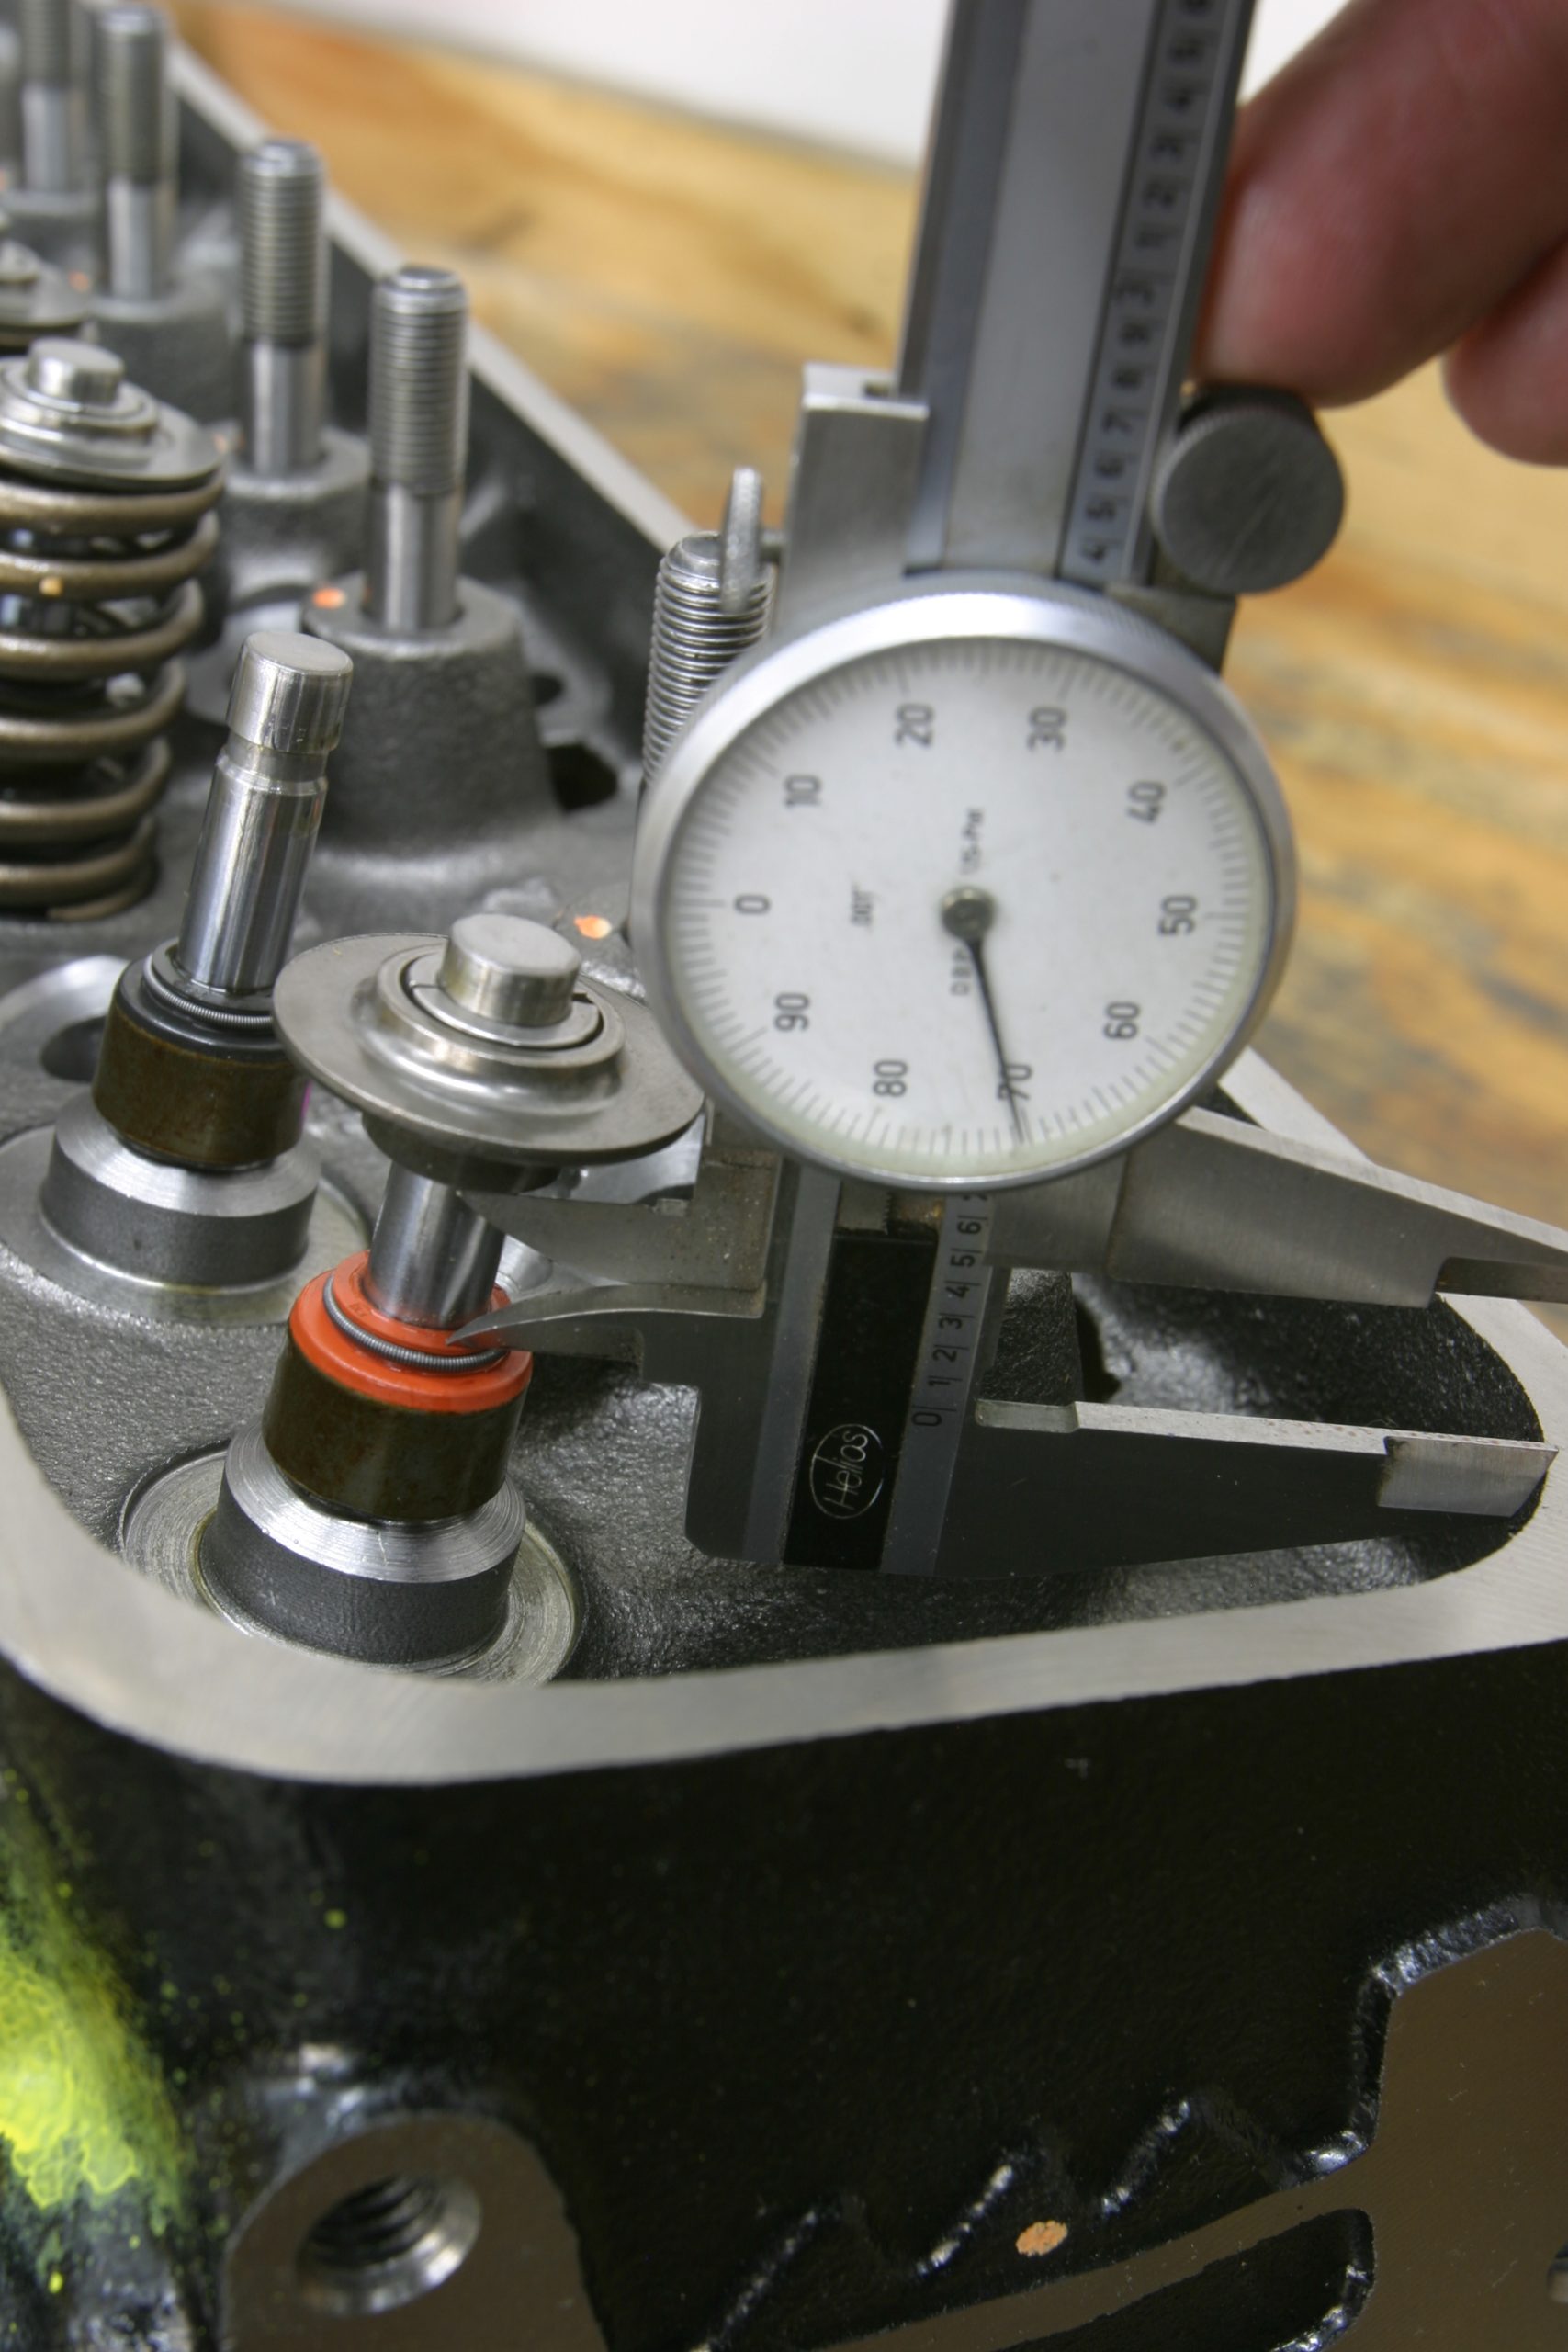
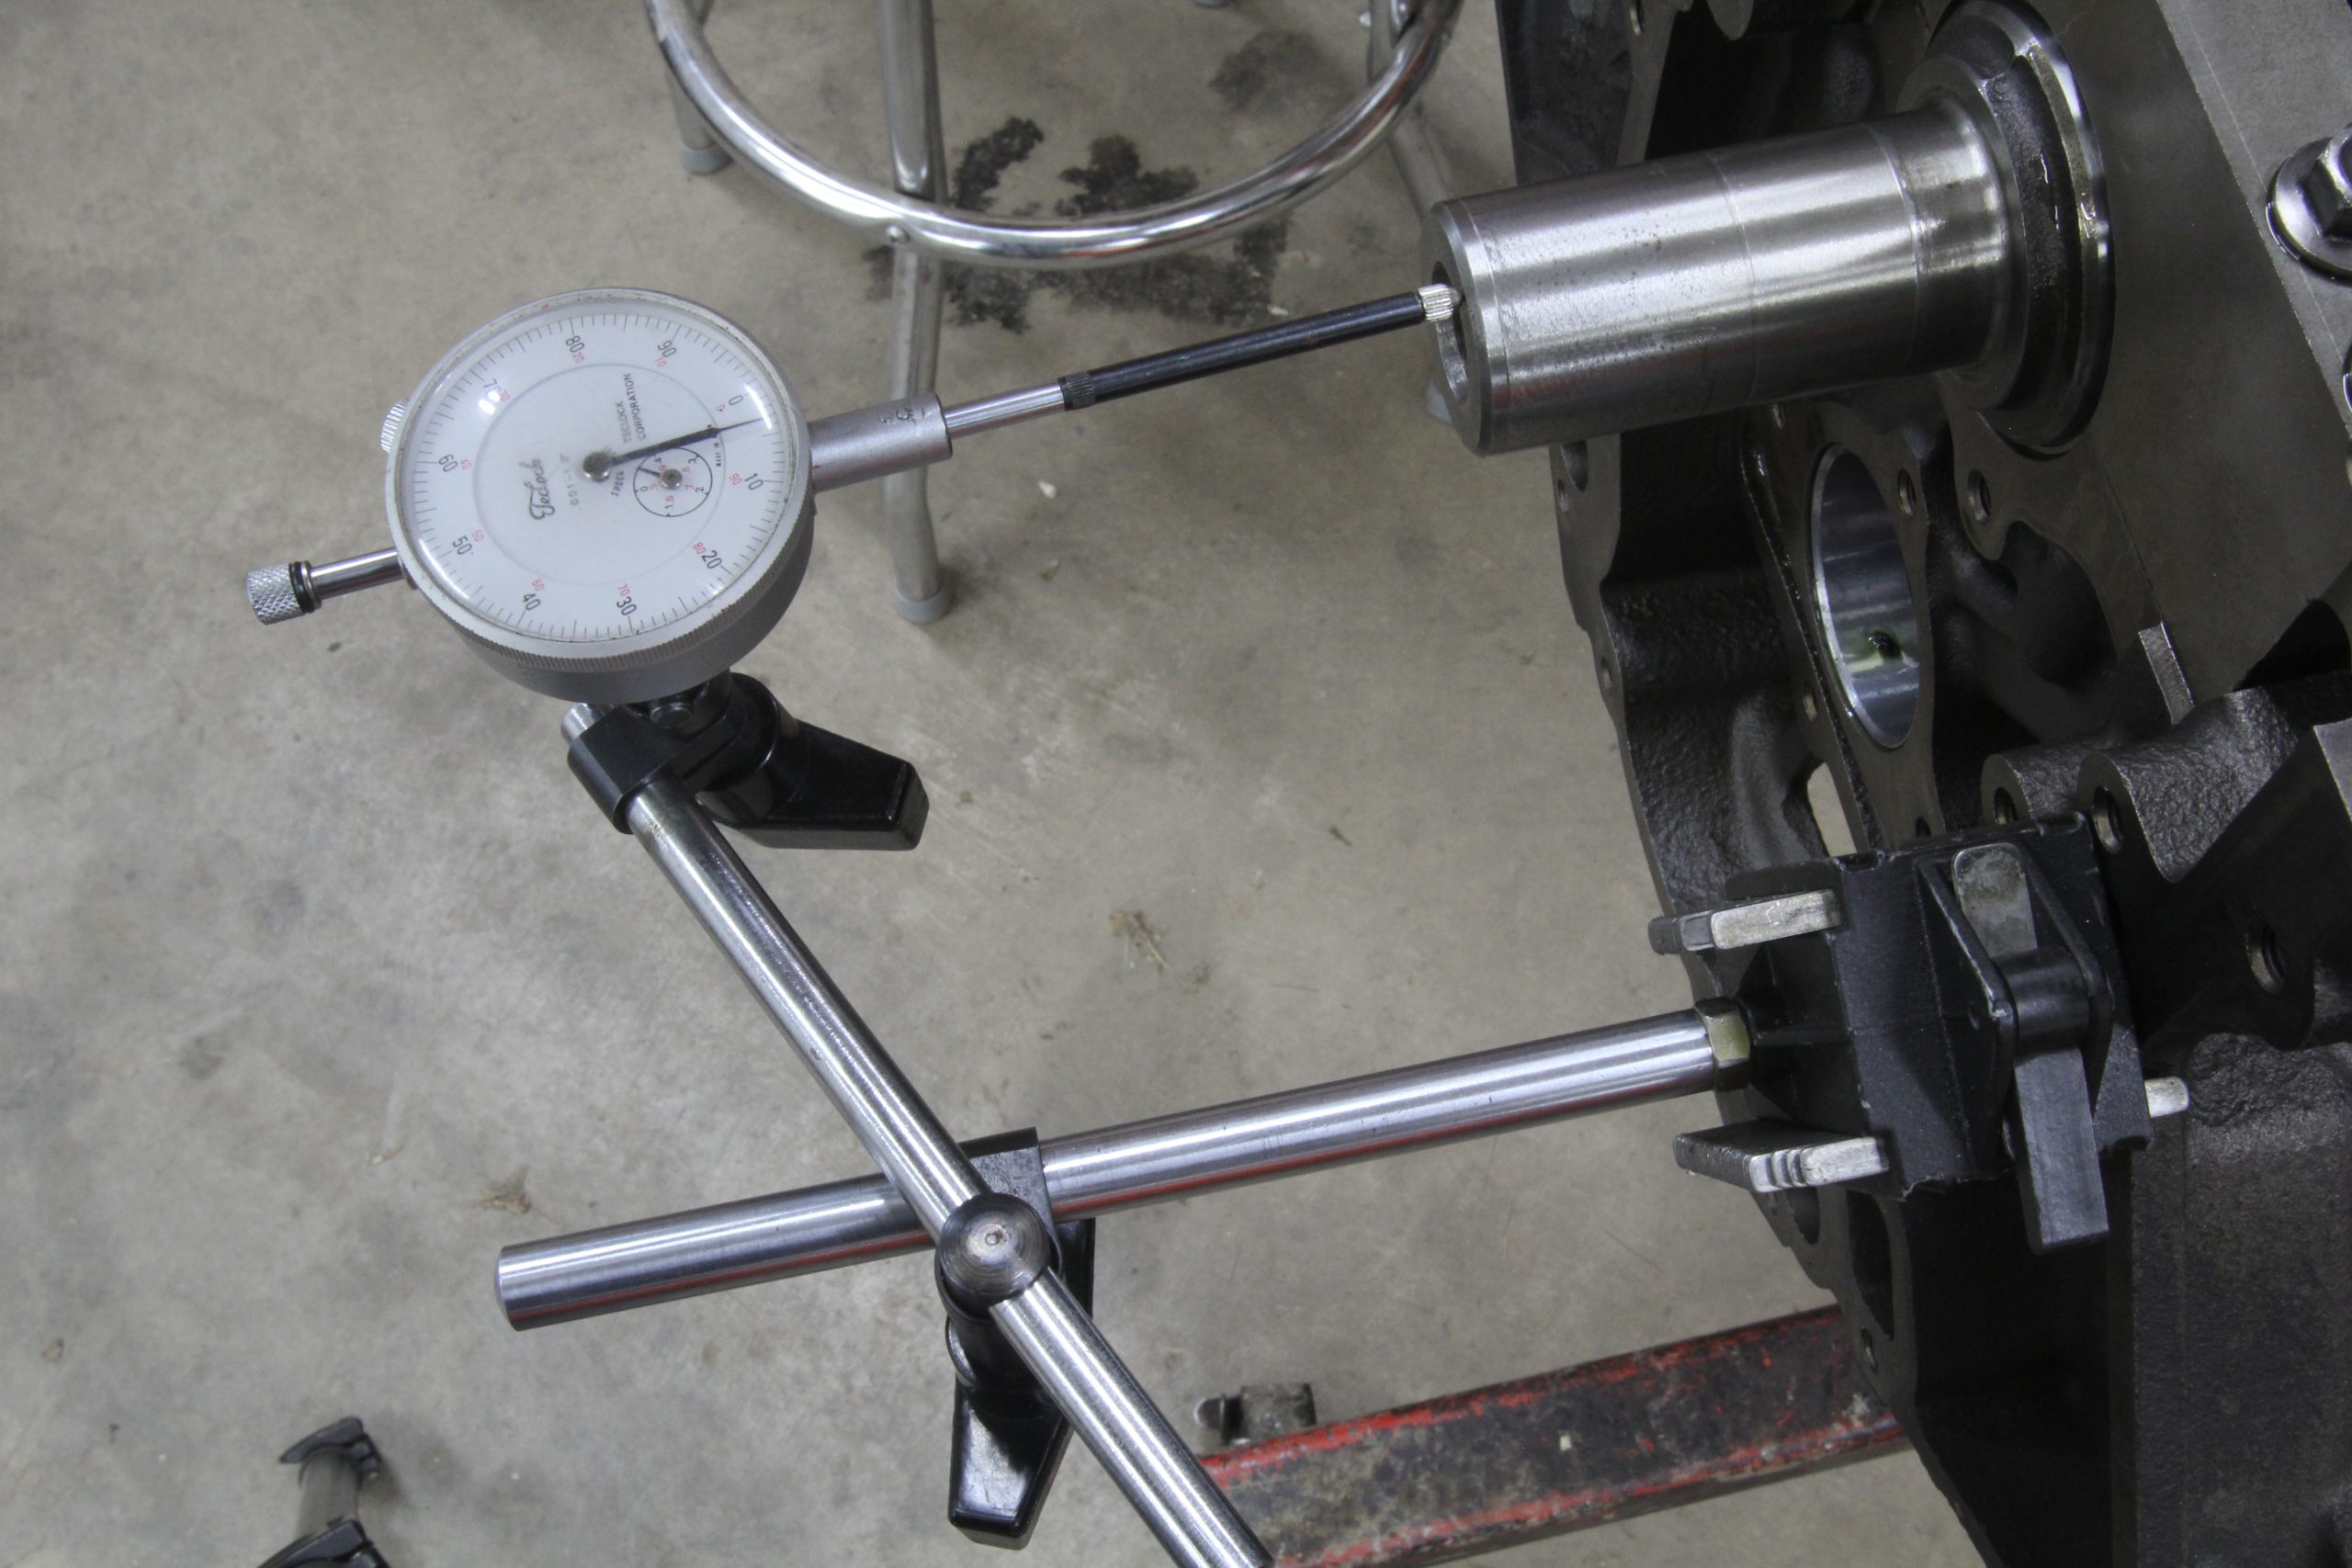
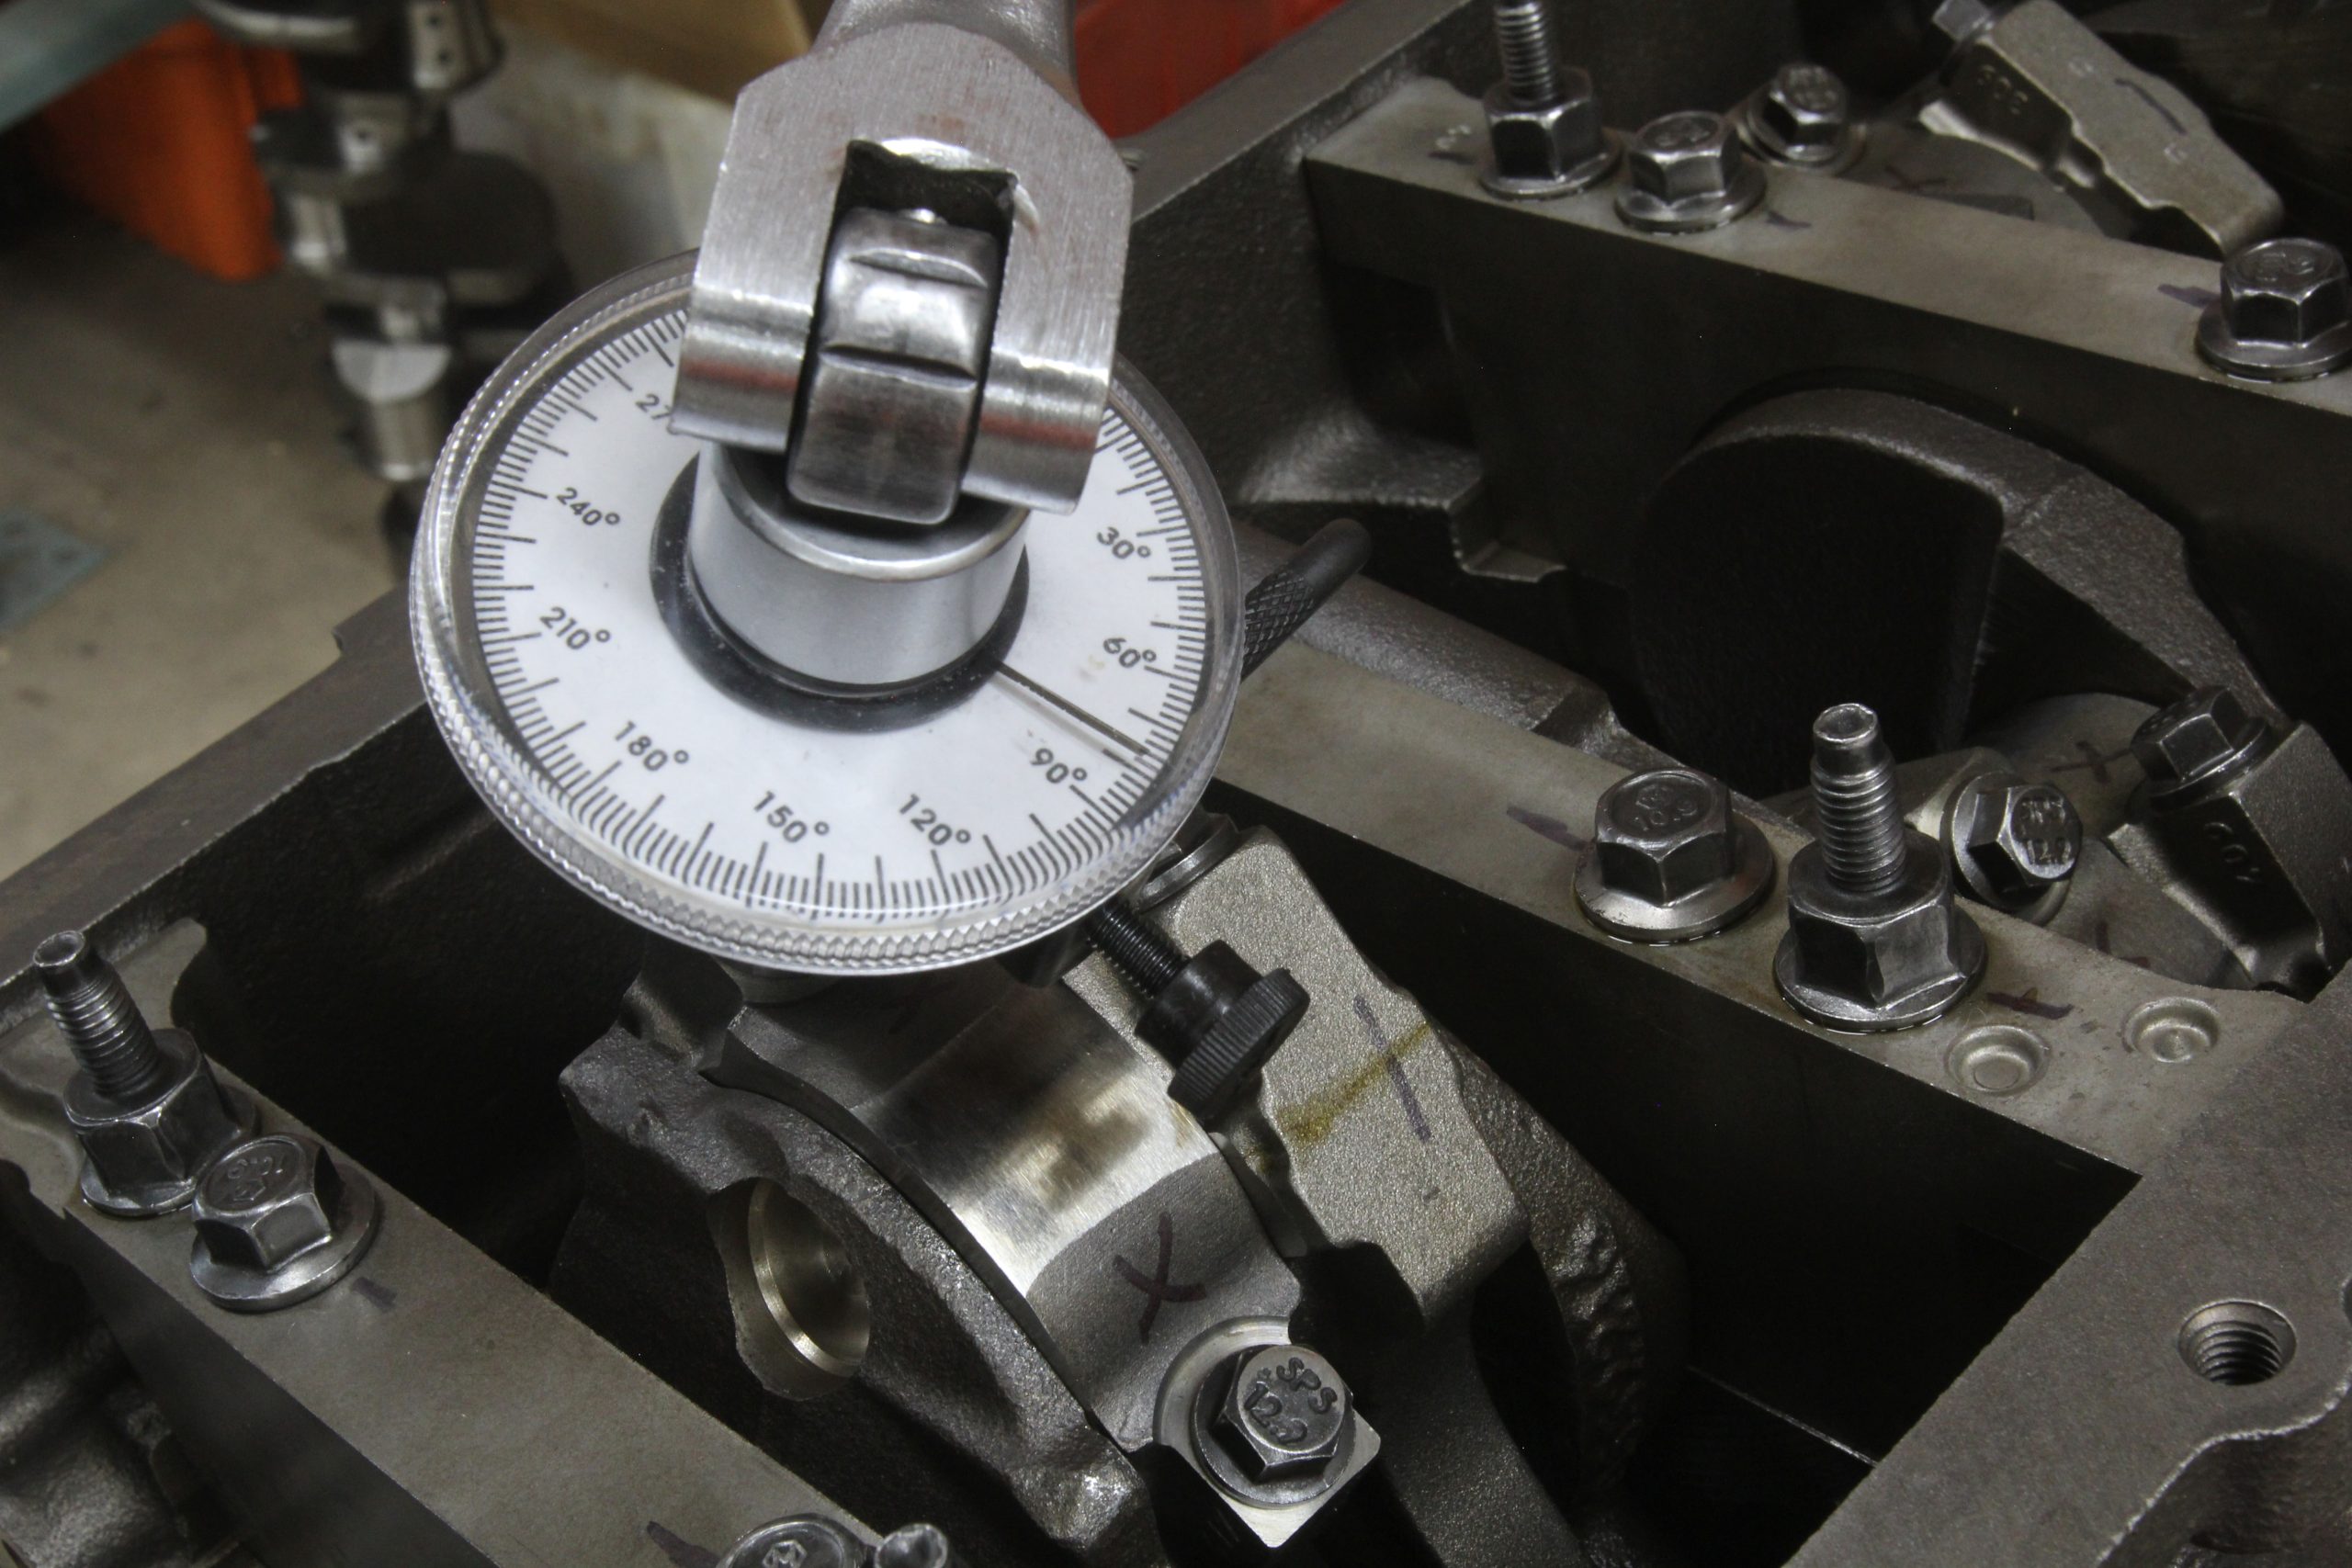
A dial indicator and magnetic base should also be another item on your “I Need That” list of engine building tools. This tool will play a part in several other critical measuring process for items like crankshaft endplay, degreeing the cam, measuring valve lift, or establishing deck height. We’ve also used it to measure camshaft endplay on engines converted to run a roller where a button is necessary to prevent excessive cam movement.
There are a ton more tools that any professional engine builder would recommend but this initial list should get you started. Engine building is fun and ultimately very rewarding when you hear that engine fire for the first time—that part never gets old.
And the right tools make this process much more enjoyable.
***
Keep scrolling to see some of these engine building tools in action, and we’ll include a series of tool lists and part numbers at the bottom of this article.
***

***
A Basic, Budget-Friendly Engine Building Tool List
- Engine stand, Summit Racing – SUM-918011
- Number stamp set, Summit Racing – SUM-900011
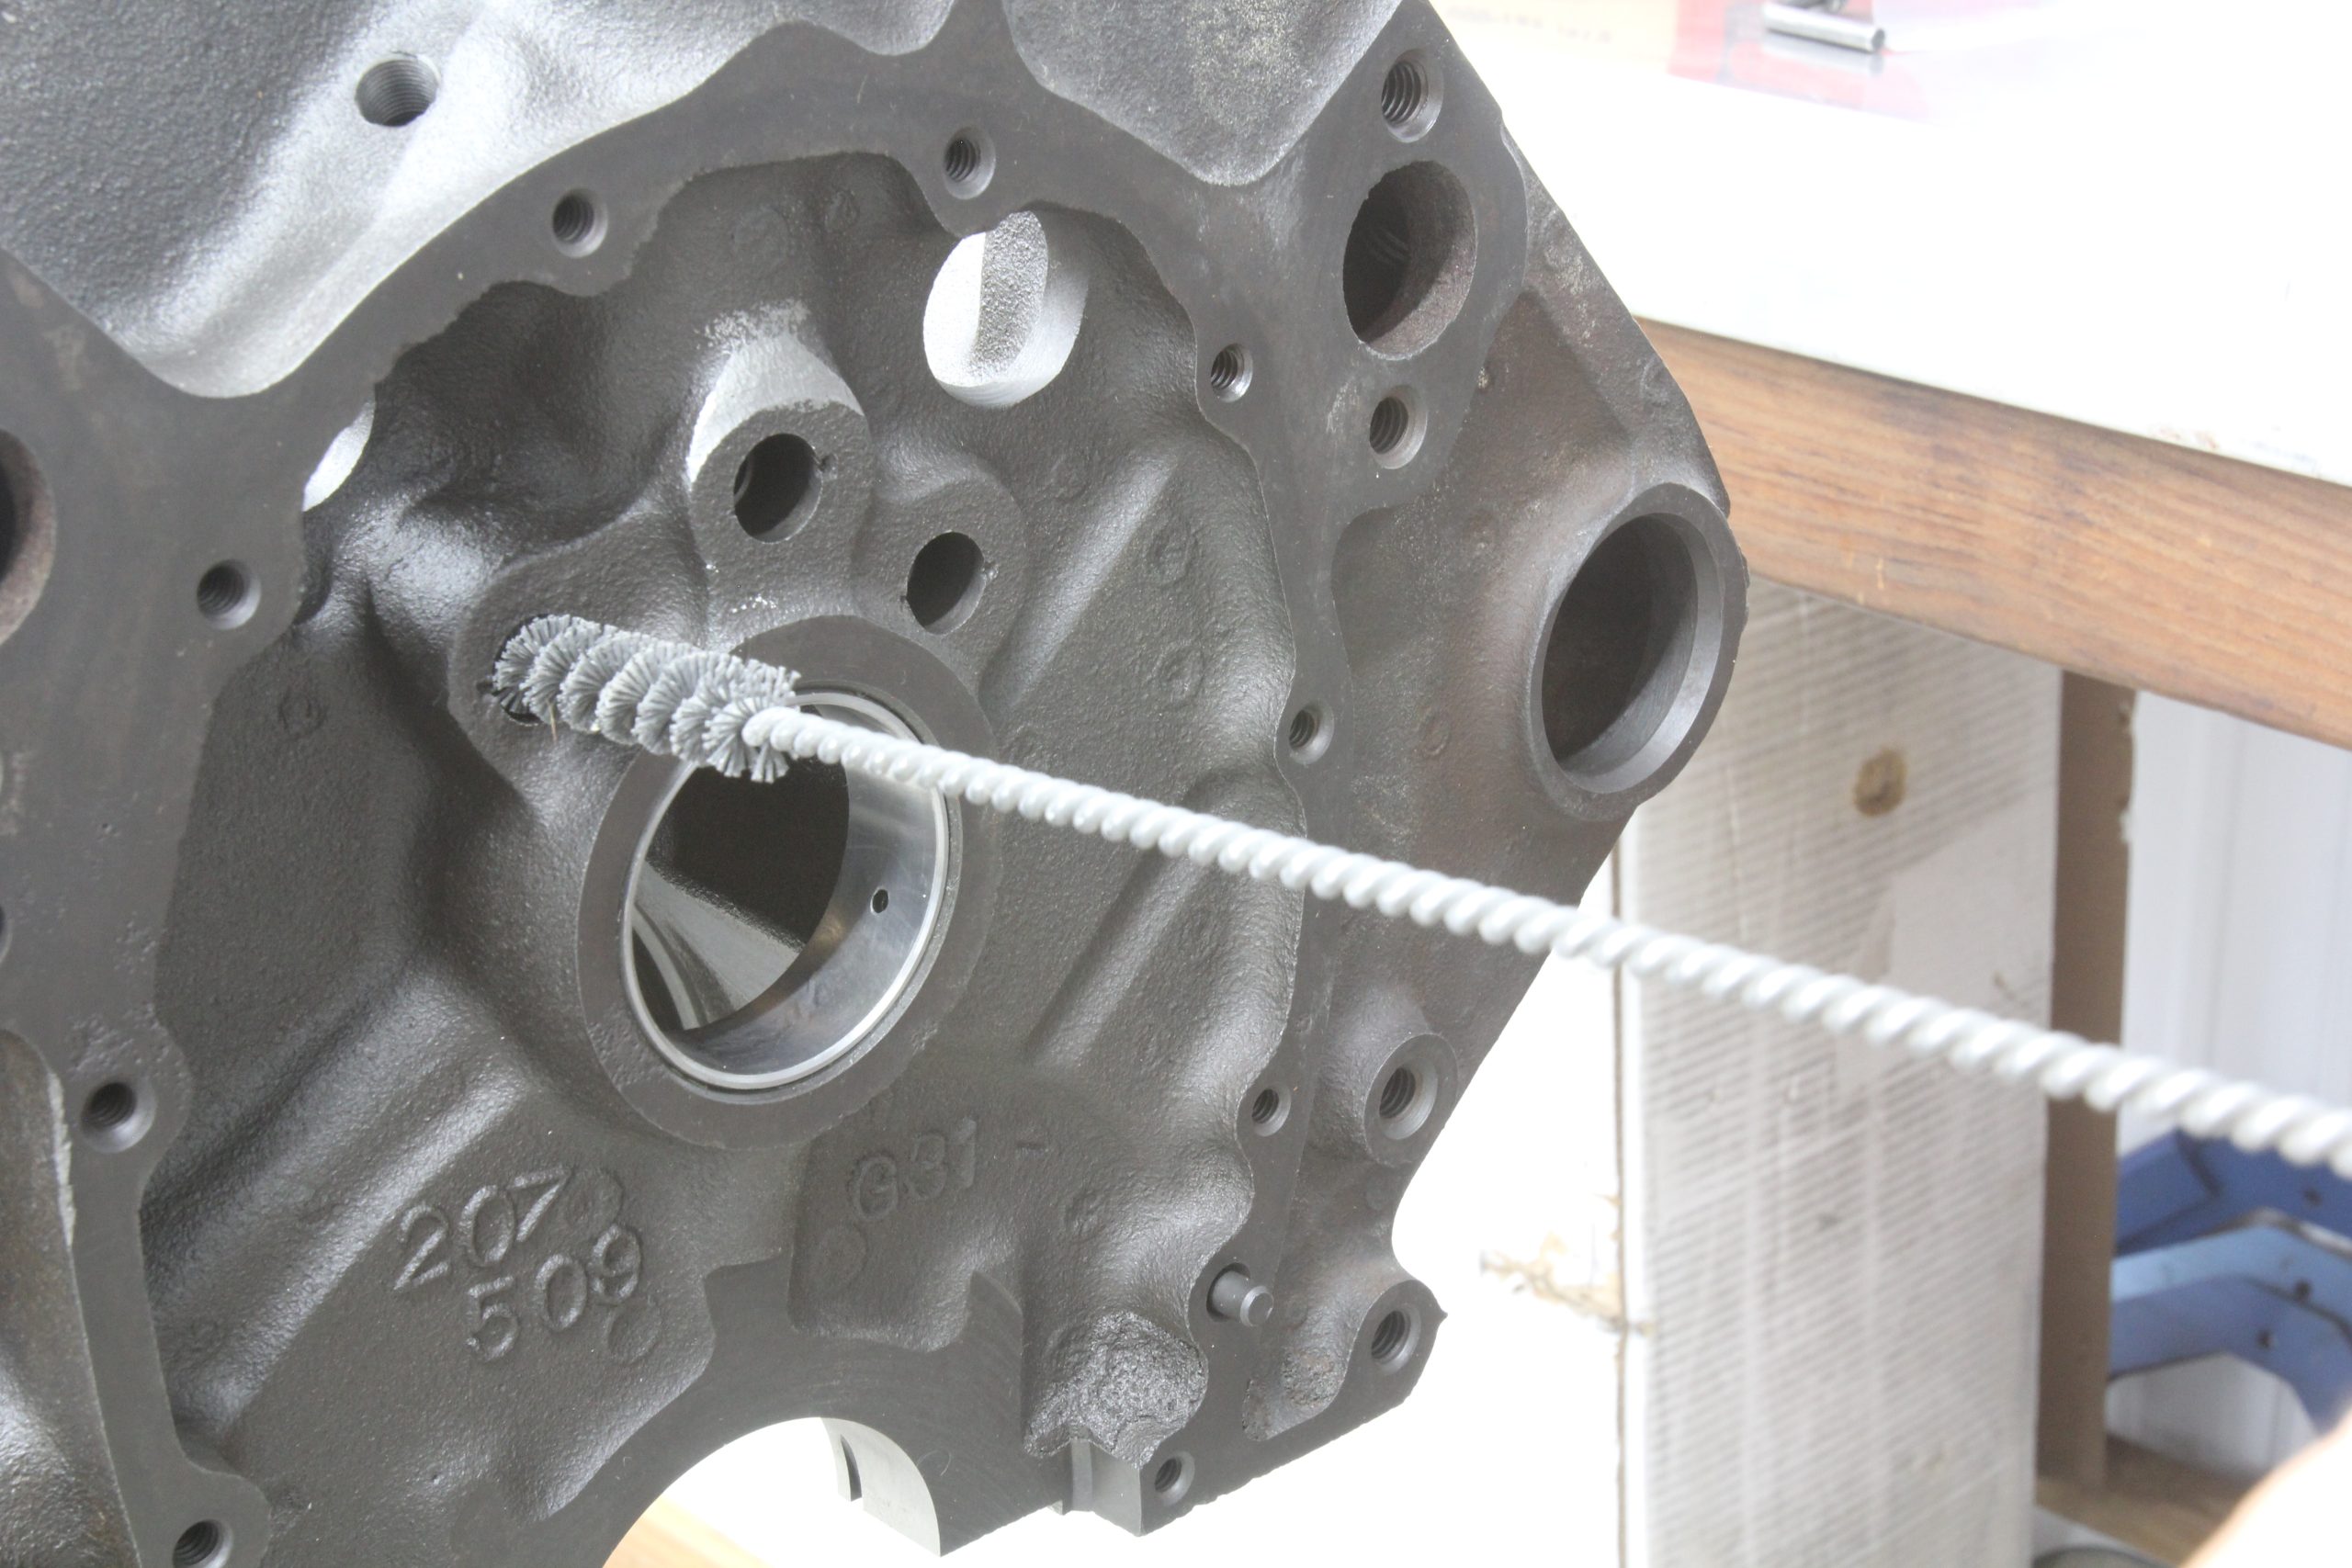
- Engine cleaning brushes, Milodon – MIL-34005
- Torque wrench, Summit Racing – SUM-907067
- Feeler gauges, Summit Racing – SUM-900212
- Gasket scraper, Summit Racing – SUM-900037
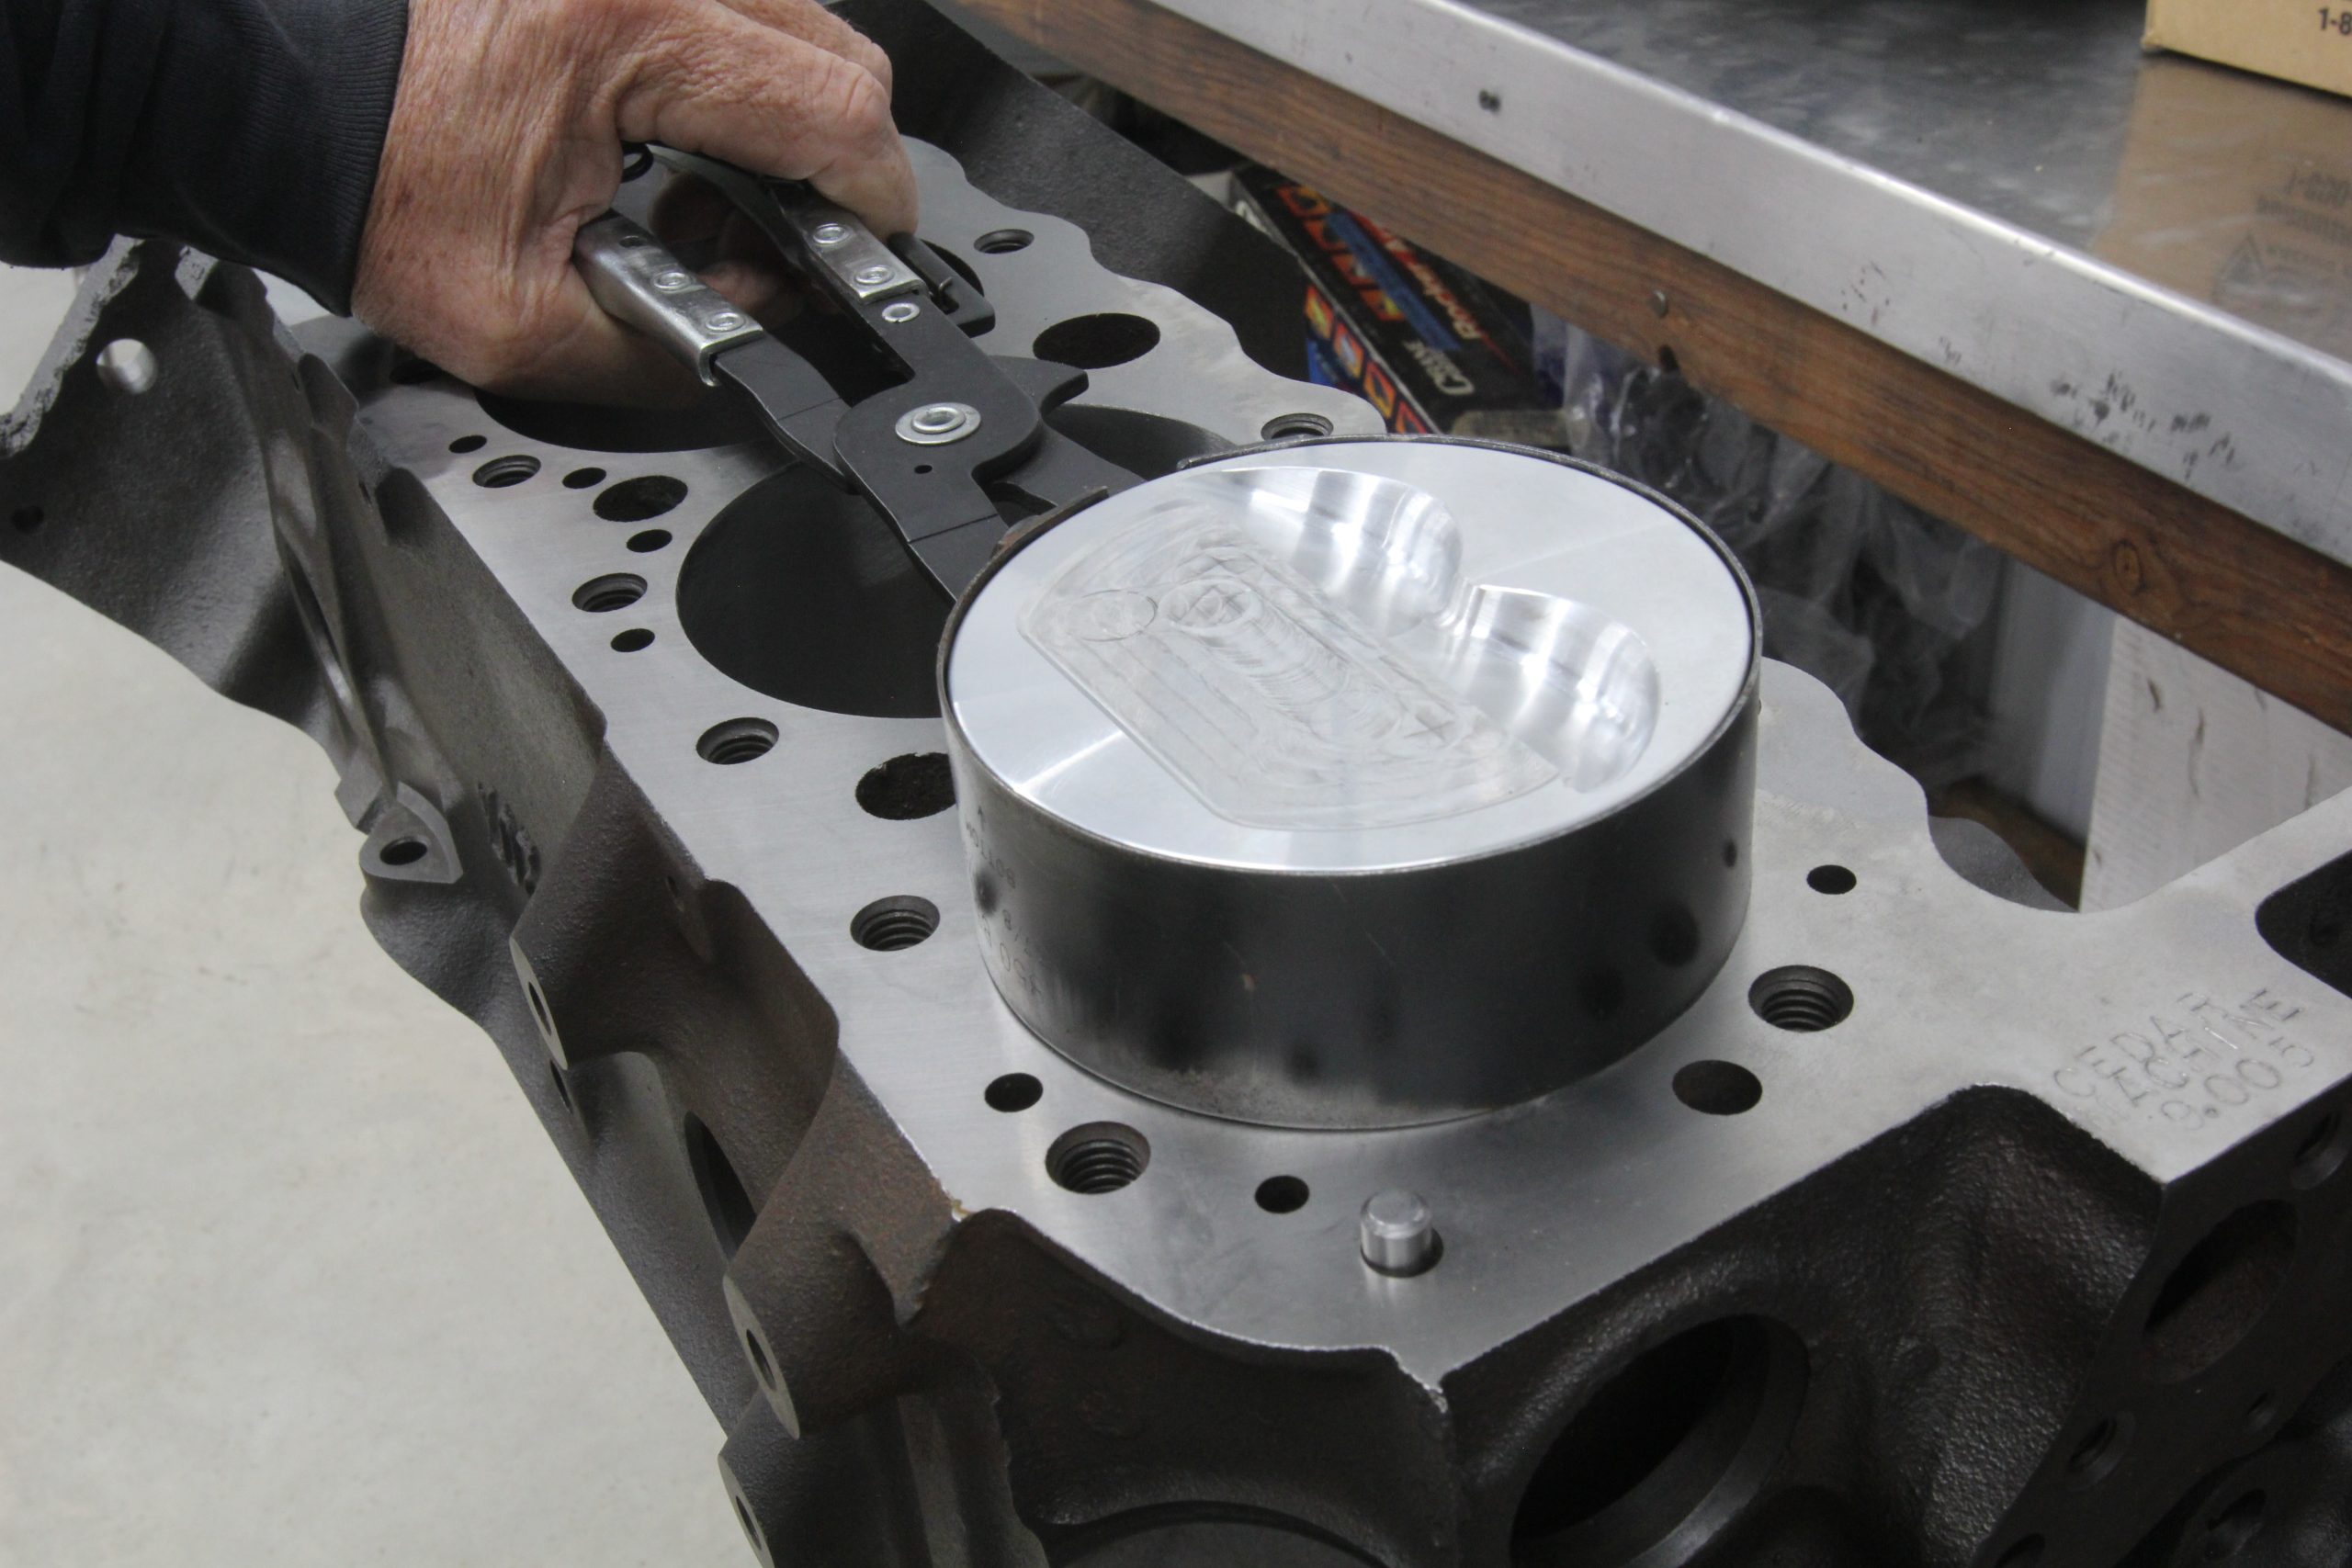
- Non-adjustable 4.030″ piston ring compressor, Summit Racing – SME-904030
- Adjustable band ring compressor, Performance Tool – WMR- W89410
- Magnetic base & dial indicator kit, Summit Racing – SUM-900016-1
- Oil pump primer, Summit Racing – SUM-901011
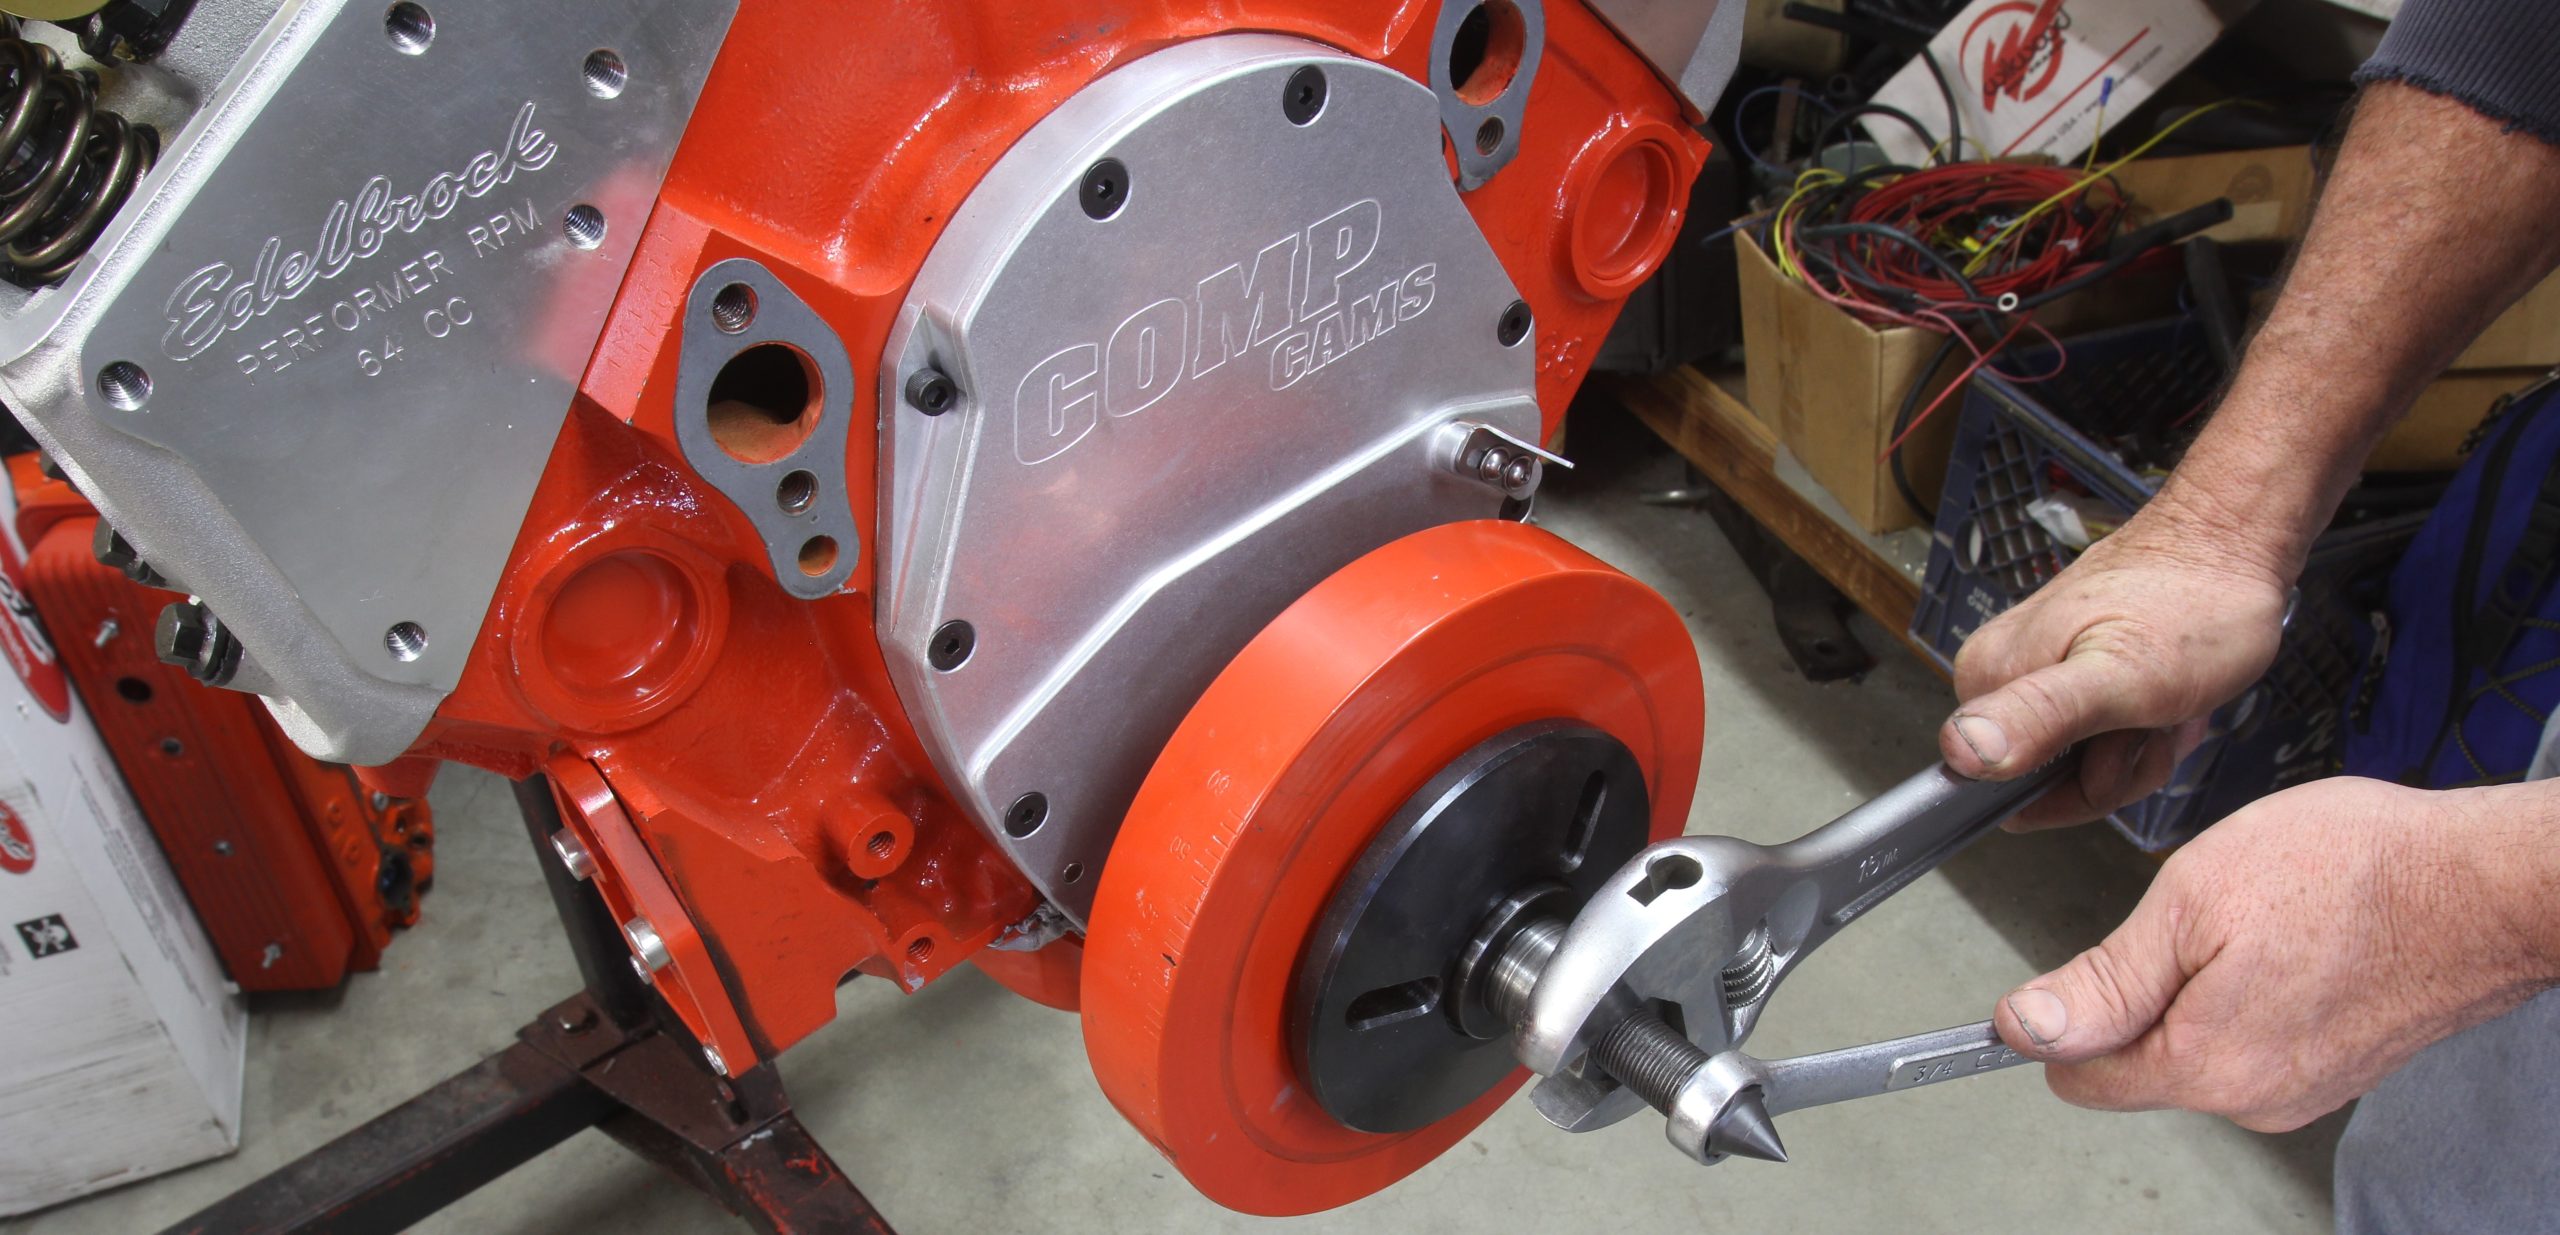
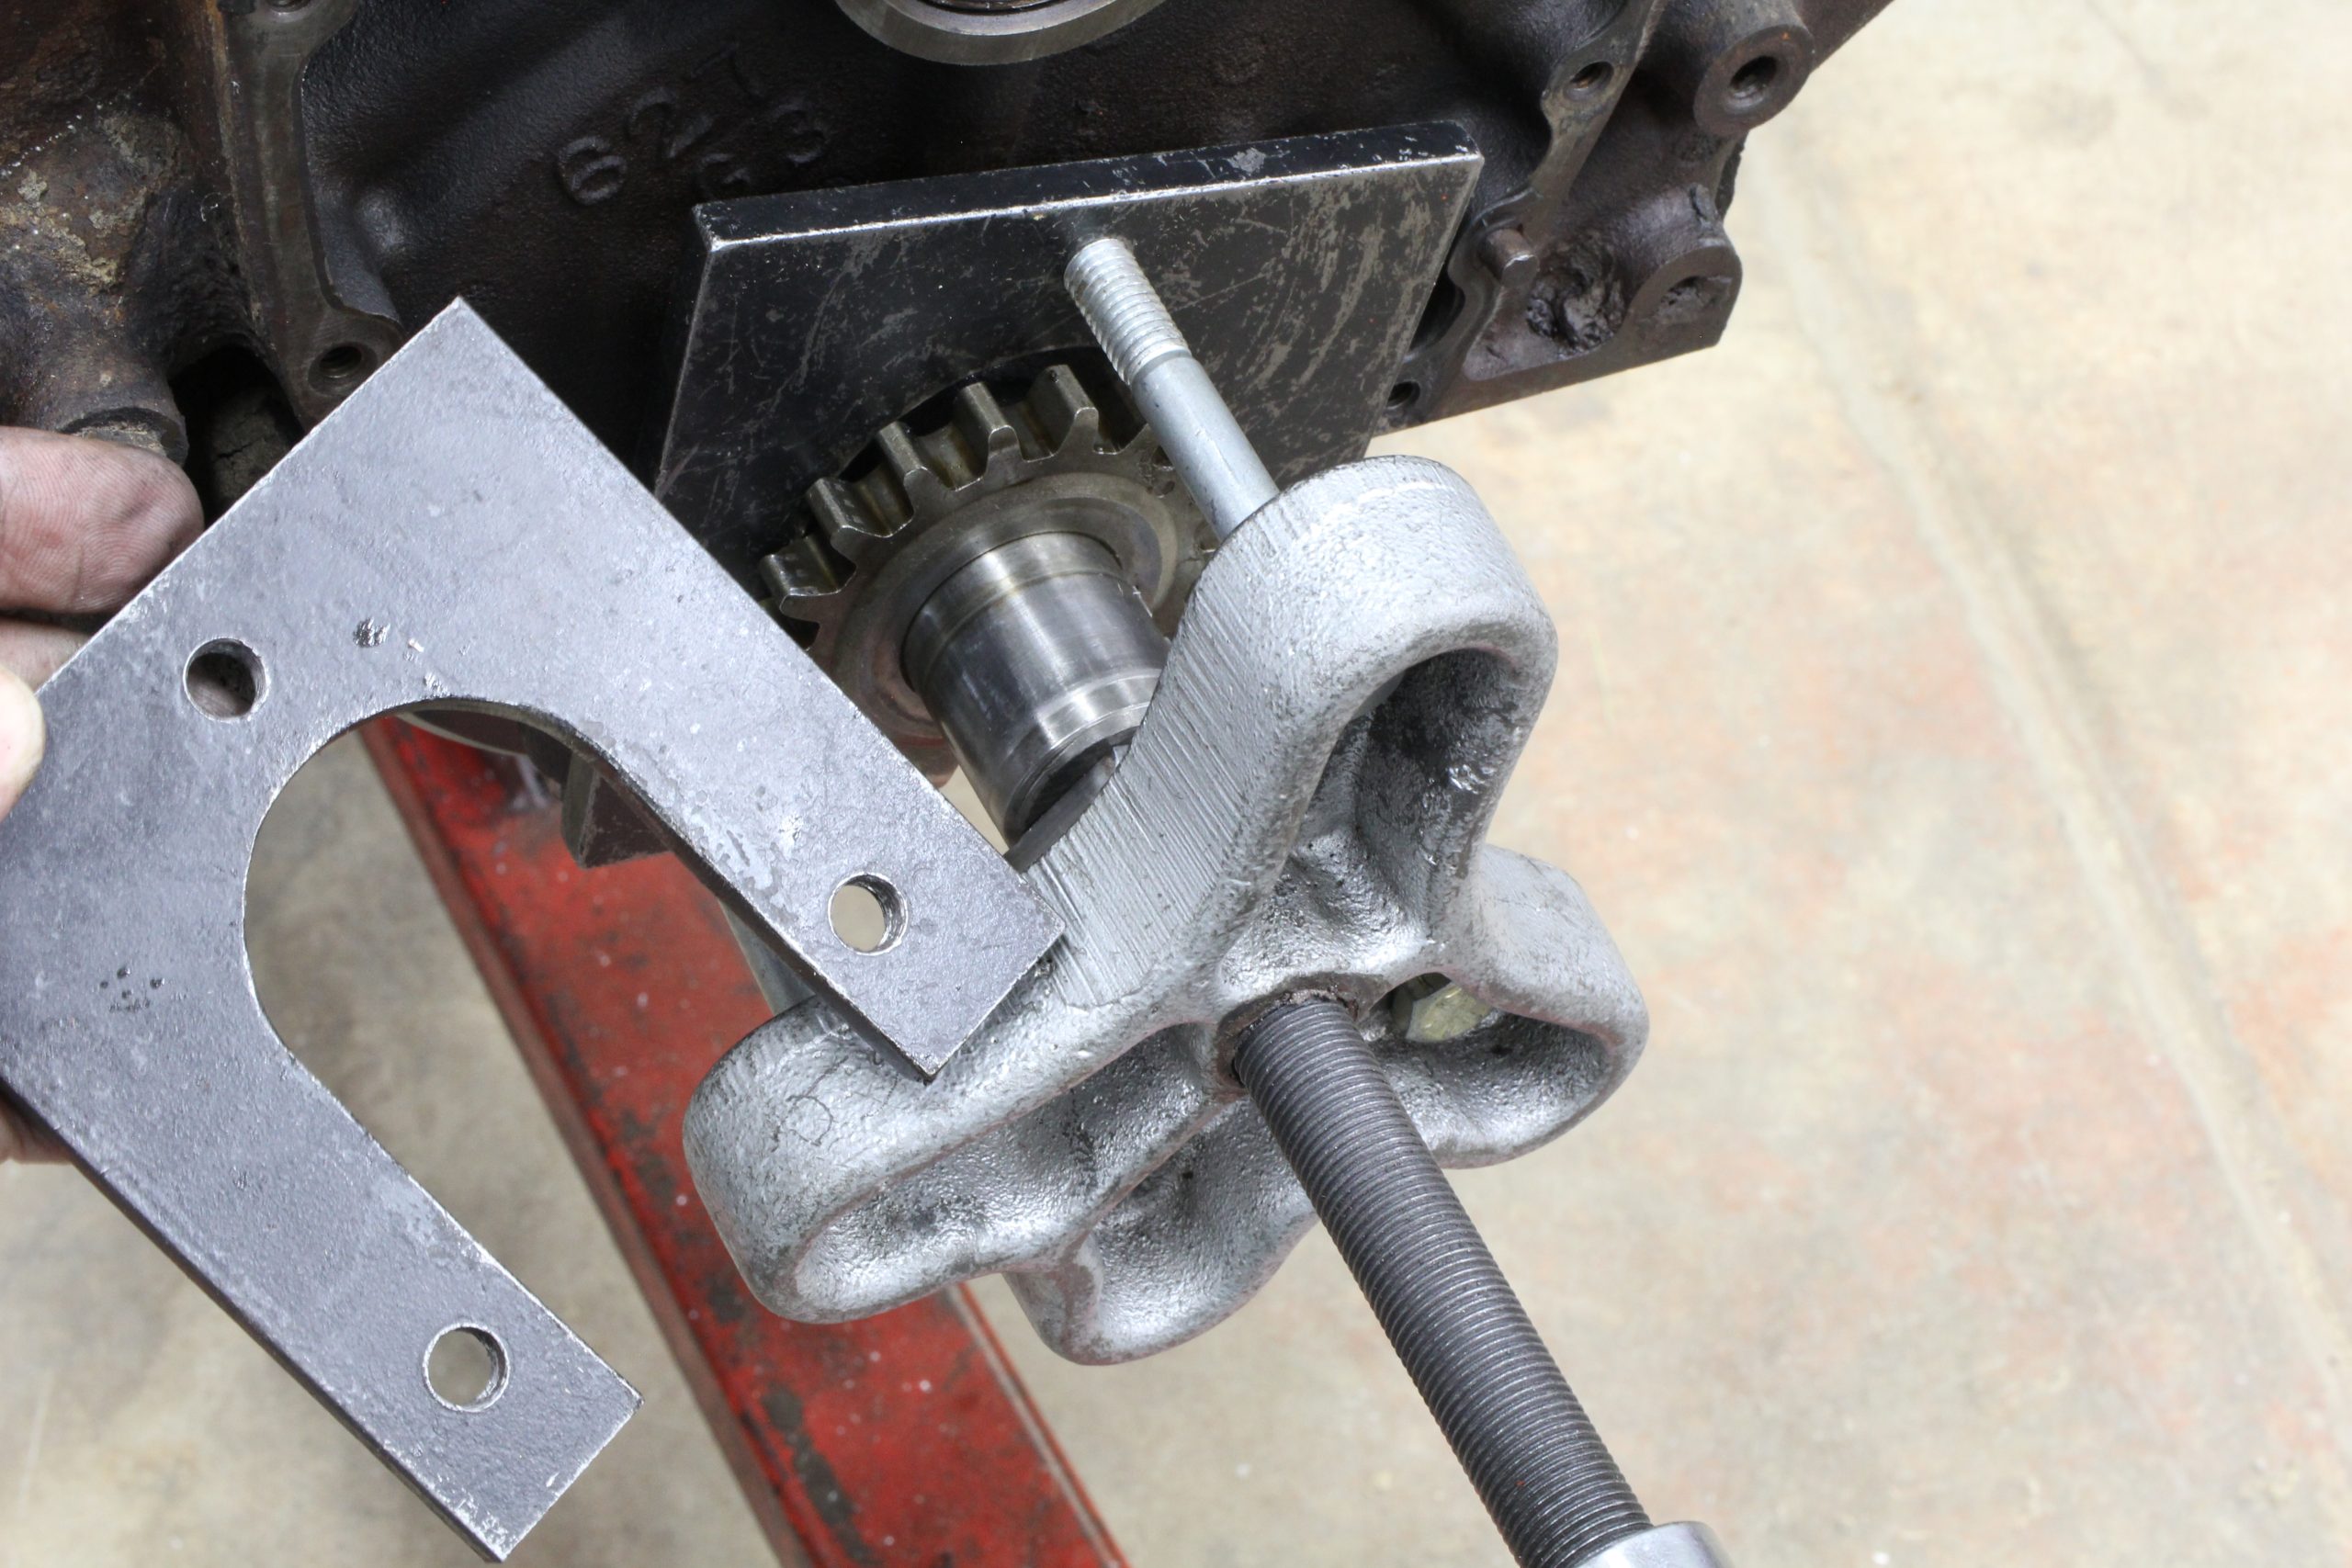
- Harmonic balancer tool, Summit Racing – SUM-G1023-1
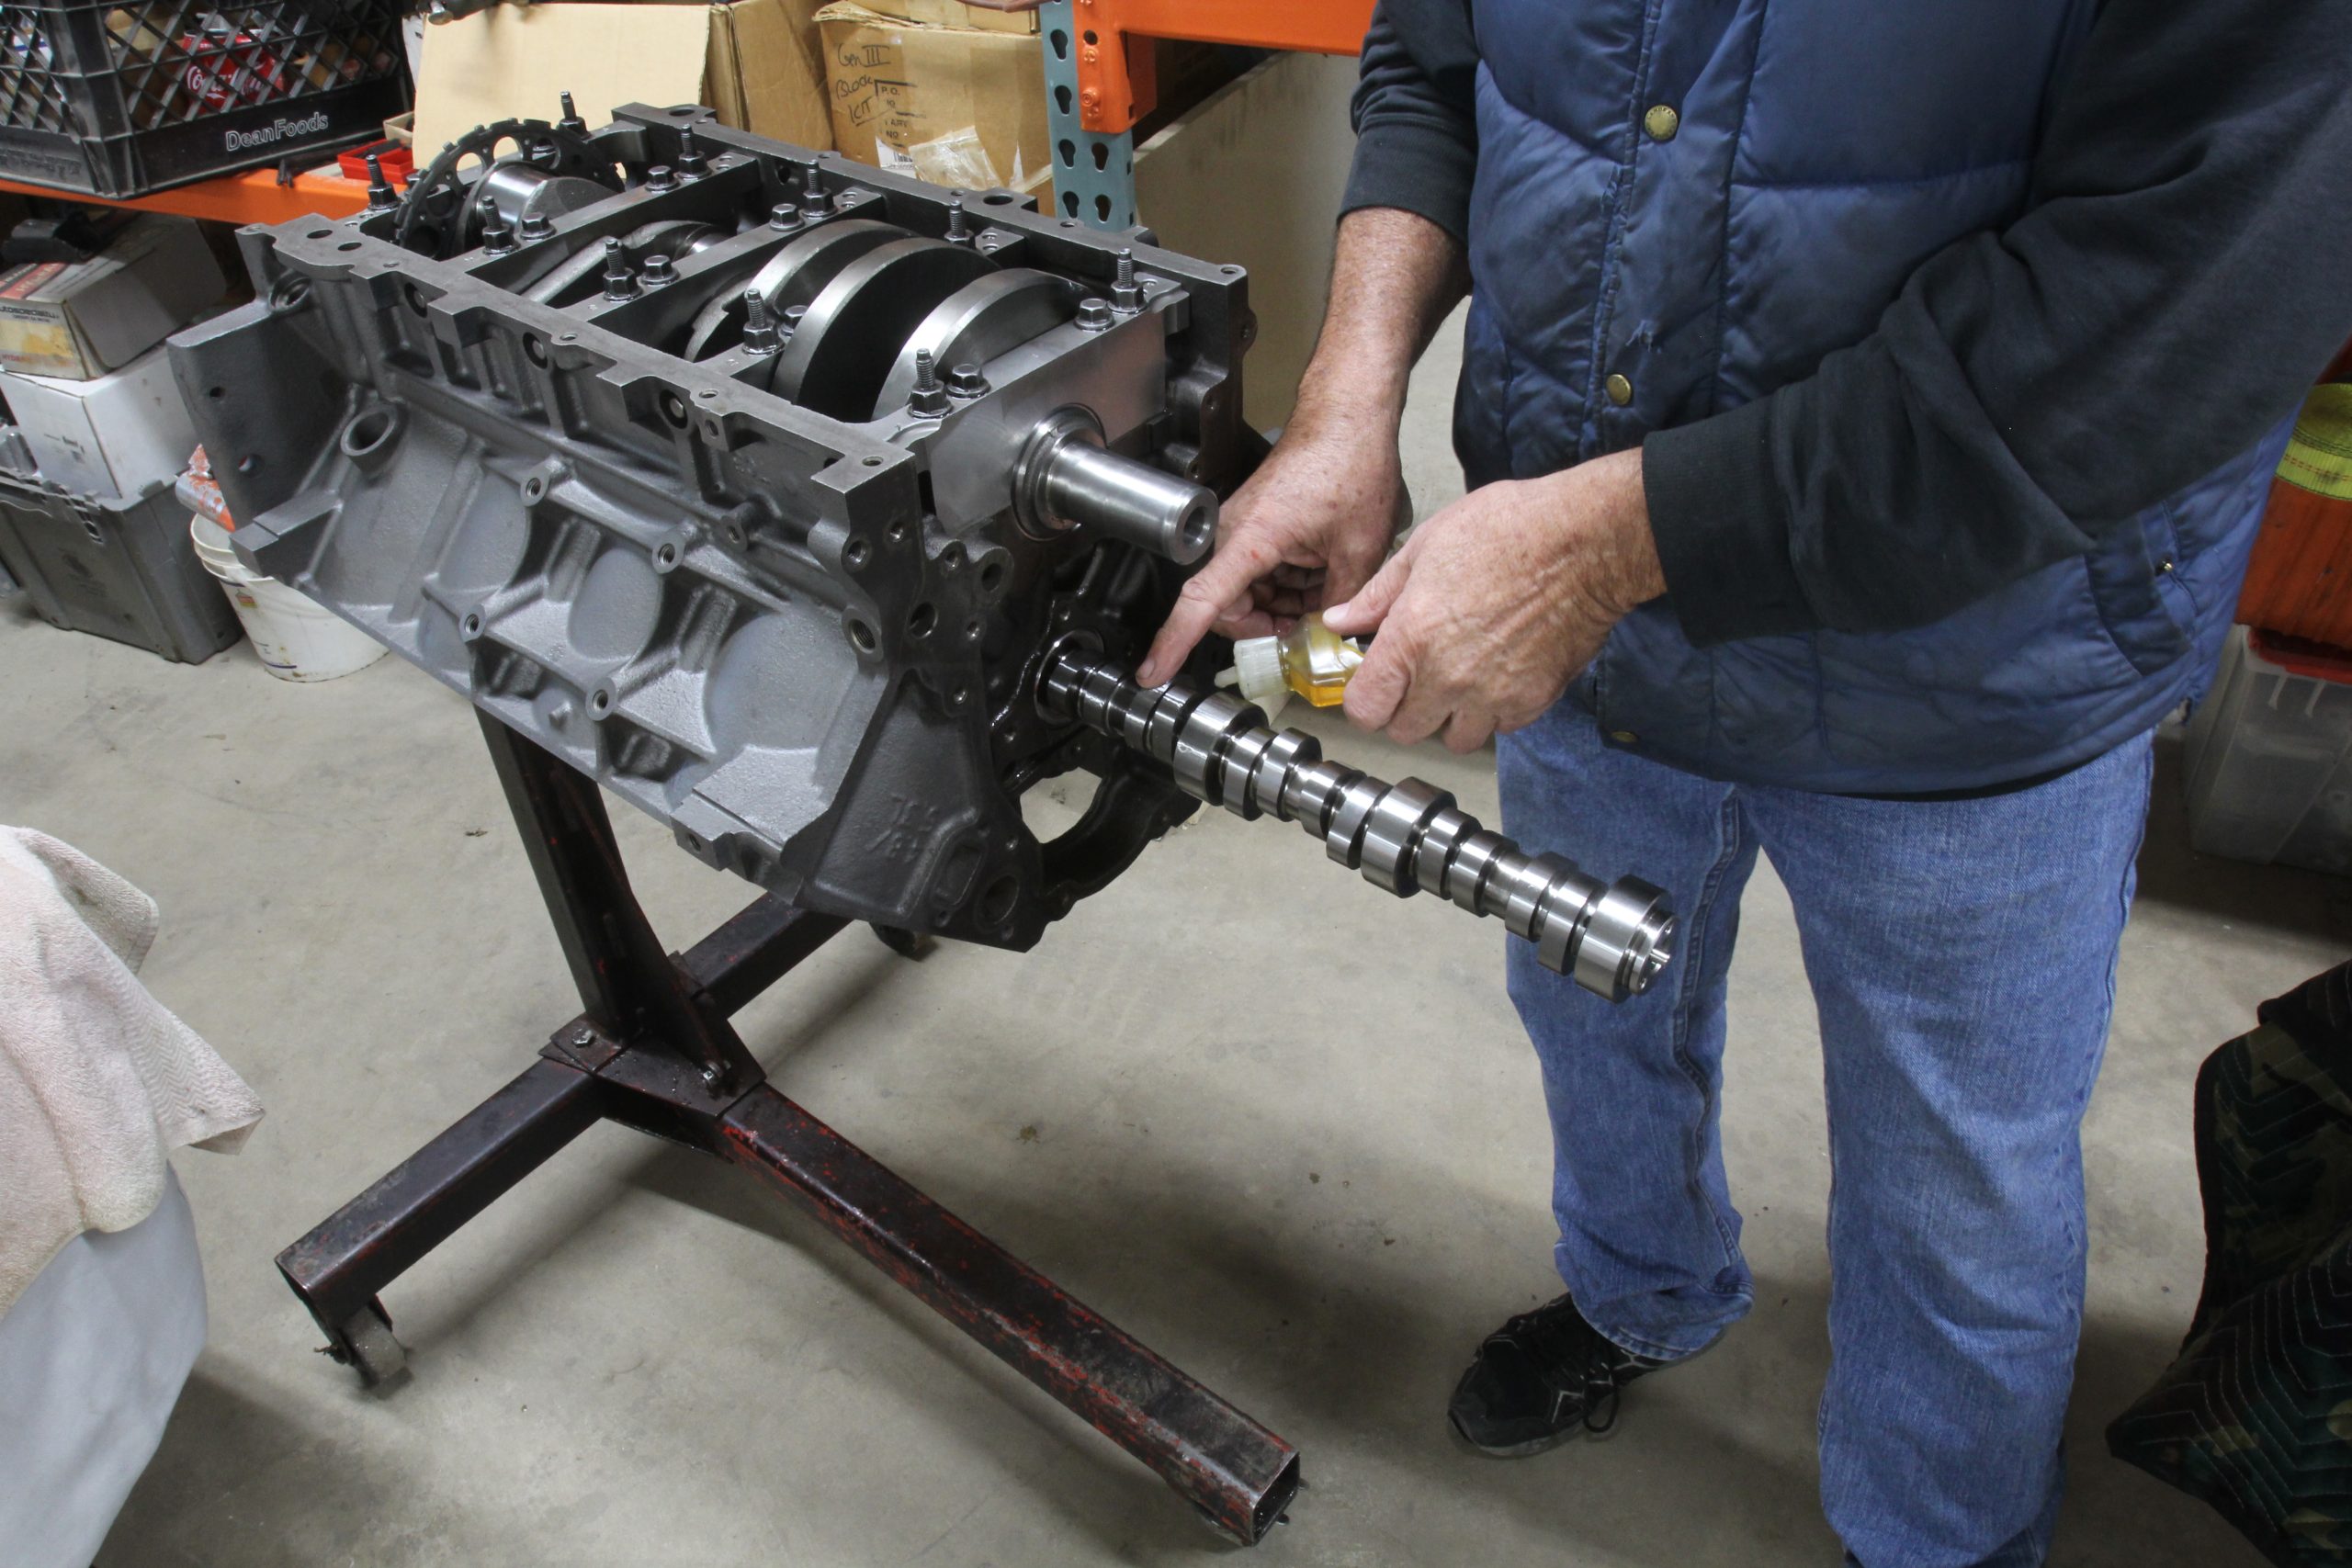
- Camshaft installation handle, Summit Racing – SUM-900134
- Dial calipers, 6”, Chicago Brand – CBI-50004N
- Rod bolt sleeves, Clevite – CLE-2800B-1
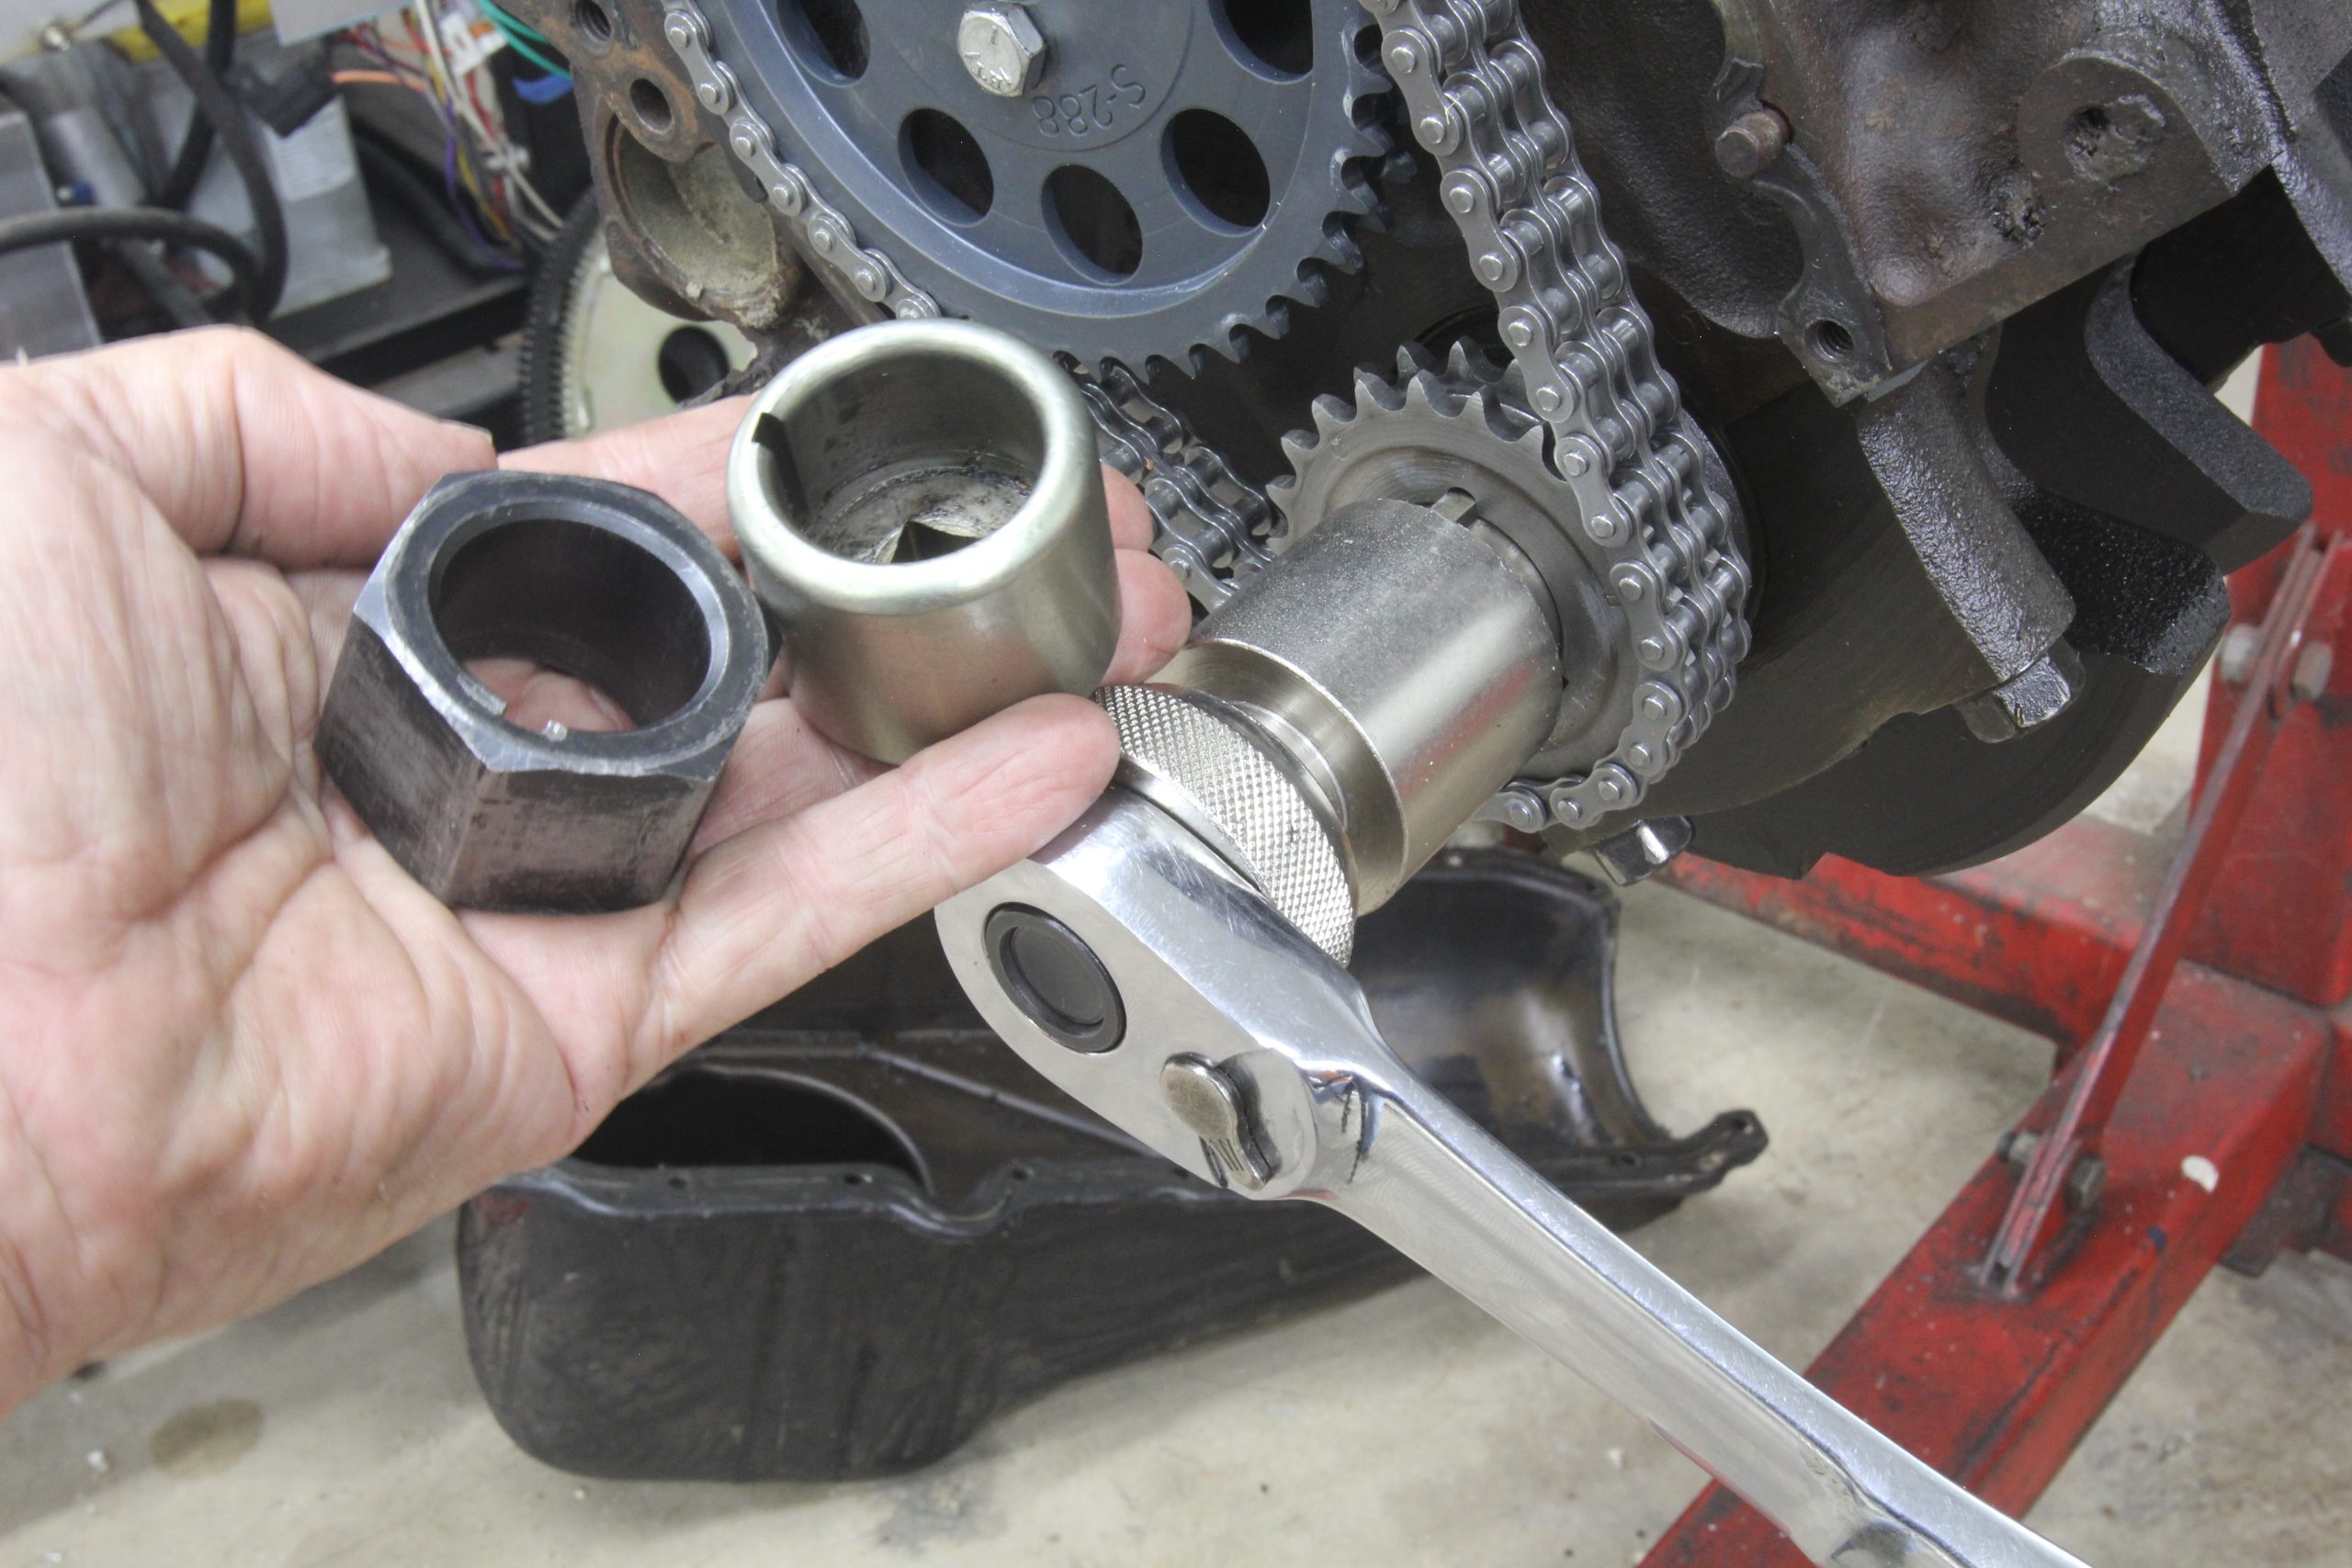
- Crank turning socket, Summit Racing – SUM-G1063
- Torque angle gauge, Performance Tool – WMR-M-205
- Camshaft degree wheel, Summit Racing – SUM-G1057-16
At the time of this article, the total price for all of these tools is less than $600, and that incudes both ring compressor options.
***
Recommended Advanced Engine Building Tool List
- Non-adjustable 4.030″ piston ring compressor, Summit Racing – SME-904030
- Adjustable band ring compressor, Performance Tool – WMR- W89410
- Camshaft degree wheel, Summit Racing – SUM-G1057-16
- Cam degreeing kit, Summit Racing – SUM-G1056-16
- Professional billet aluminum degree wheel, Proform – PRO-67490
- Piston stop with heads off, Summit Racing – SUM-900191
- Piston stop with heads on, Summit Racing – SUM-900189
- Outside micrometer set 0 to 6″, Powerhouse Products – POW-152006
- Dial bore gauge set, 0 to 6″, Summit Racing – SUM-900041-01
- Magnetic base & dial indicator kit, Summit Racing – SUM-900016-1
- Dial indicator deck height bridge, Summit Racing – SUM-900061-S
- Rod bolt stretch gauge, Summit Racing – SUM-900015
- Rod bolt stretch gauge, ARP – ARP-100-9942
- Universal manual piston ring filer, Summit Racing – SUM-906795
- Electric piston ring filer, Summit Racing – SUM-906797
- Professional ring filer, Summit Racing – SUM-970001
- Piston ring squaring tool, Summit Racing – SME-906002
- 3 jaw puller, Cal-Van Tools – CAV-952
- Connecting rod vise, Summit Racing – SUM-906790
- Piston ring install tool, Performance Tool – WMR-W80575
- Oil pump primer for Small & big block Chevy, Summit Racing – SUM-901015
- Economy cylinder Head CC burette kit, Summit Racing – SUM-980180
- 100cc cylinder head CC burette kit, Proform – PRO-66831
- Adjustable pushrod checker, Trick Flow – TFS-9501
- 7/16″ thread chaser for SBC, ARP – ARP-911-0004
Essential Engine Building Oils, Sealants & Chemicals
- Ultra Gray RTV silicone gasket maker, Permatex – PTX-82194
- Ultra-Slick engine assembly lube, Permatex – PTX-81950
- Assembly grease, Driven Racing Oil – JGR-00732
- Medium strength “Blue” threadlocker, Permatex – PTX-24210
- Thread sealant with PTFE, Permatex – PTX-80632
- High-tack gasket sealant, Permatex – PTX-80062
Comments