Not much thought is given to car horns—unless they don’t work or they sound like someone with a bad larynx.
Aside from the obvious safety concerns, car horns are also about sound—and harmony.
Do they get respect when you bump the button? Most vehicles have two horns, a high and low pitch to create a harmony and a sound that can be heard. Some older vehicles have one horn, which doesn’t get any respect.
How a Typical Electric Automotive Horn Works
Few of us understand how car horns work. They are not an air horn, like a train, semi-truck, or a fire engine. They consist of a vibrating spring steel diaphragm that cycles several hundred times a second through a die-cast megaphone horn body that trumpets the high or low pitch sound. Those who understand music have often called this combination A and C harmony—the ordinary every day horn harmony heard everywhere.
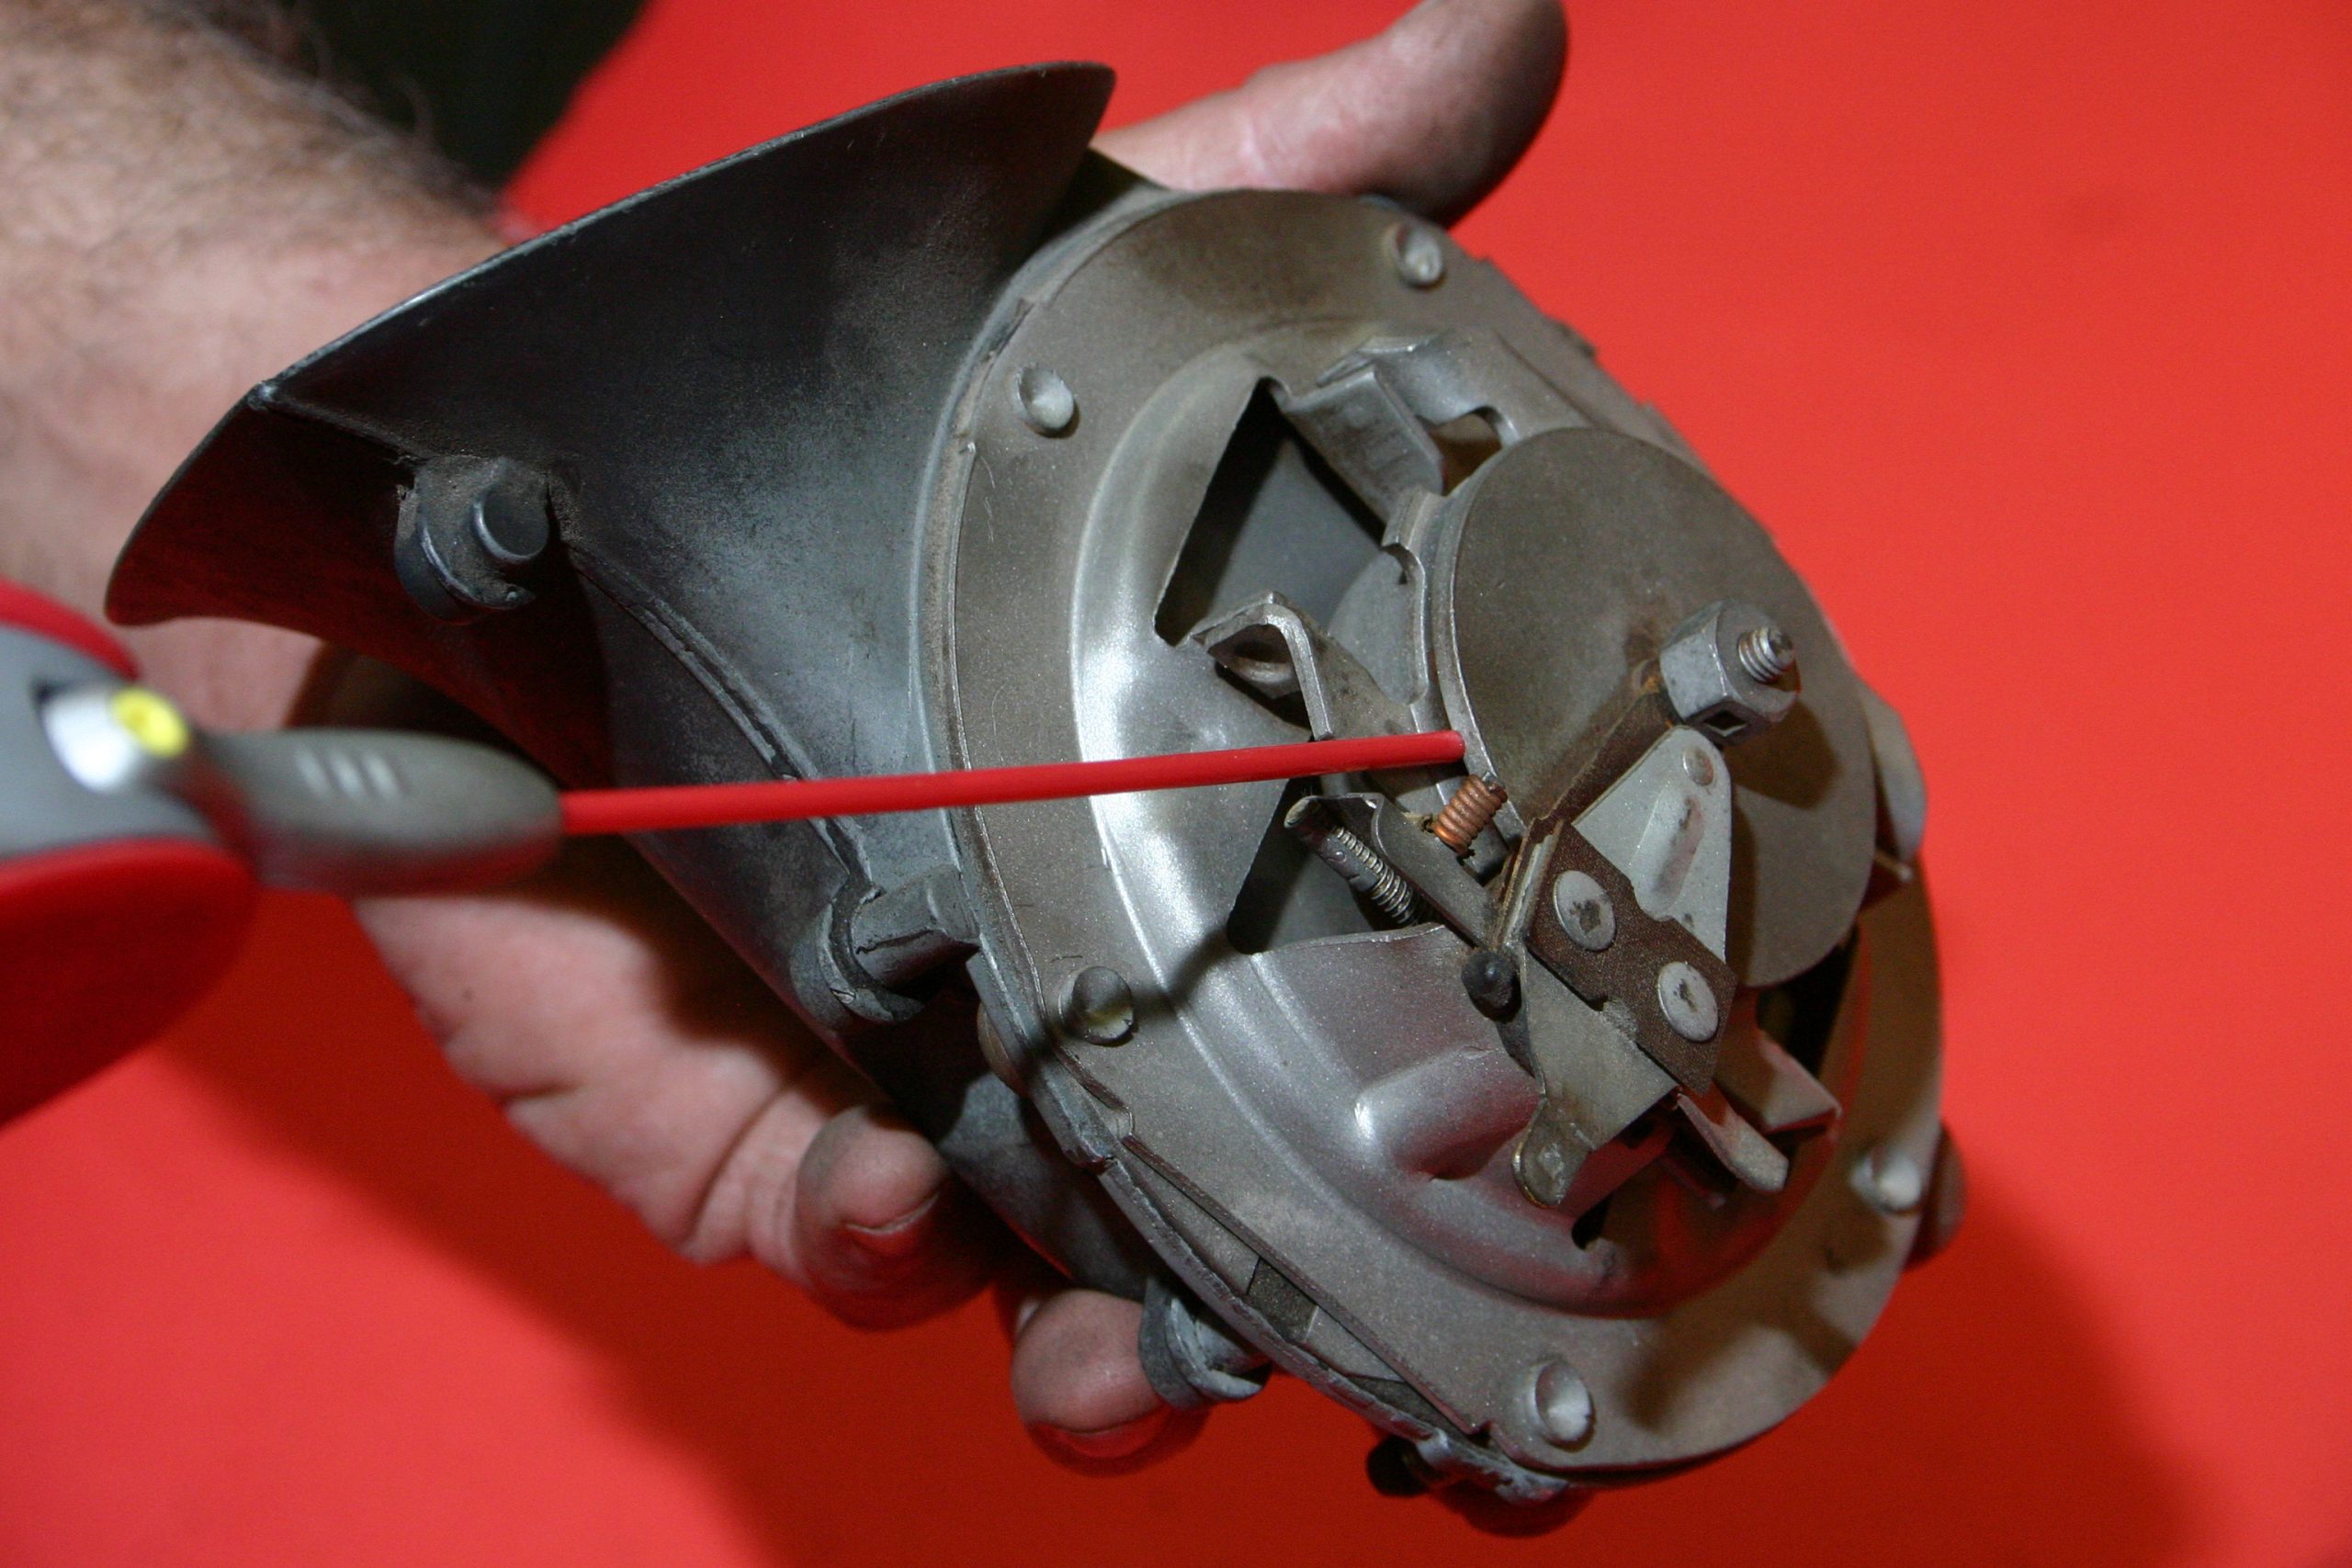
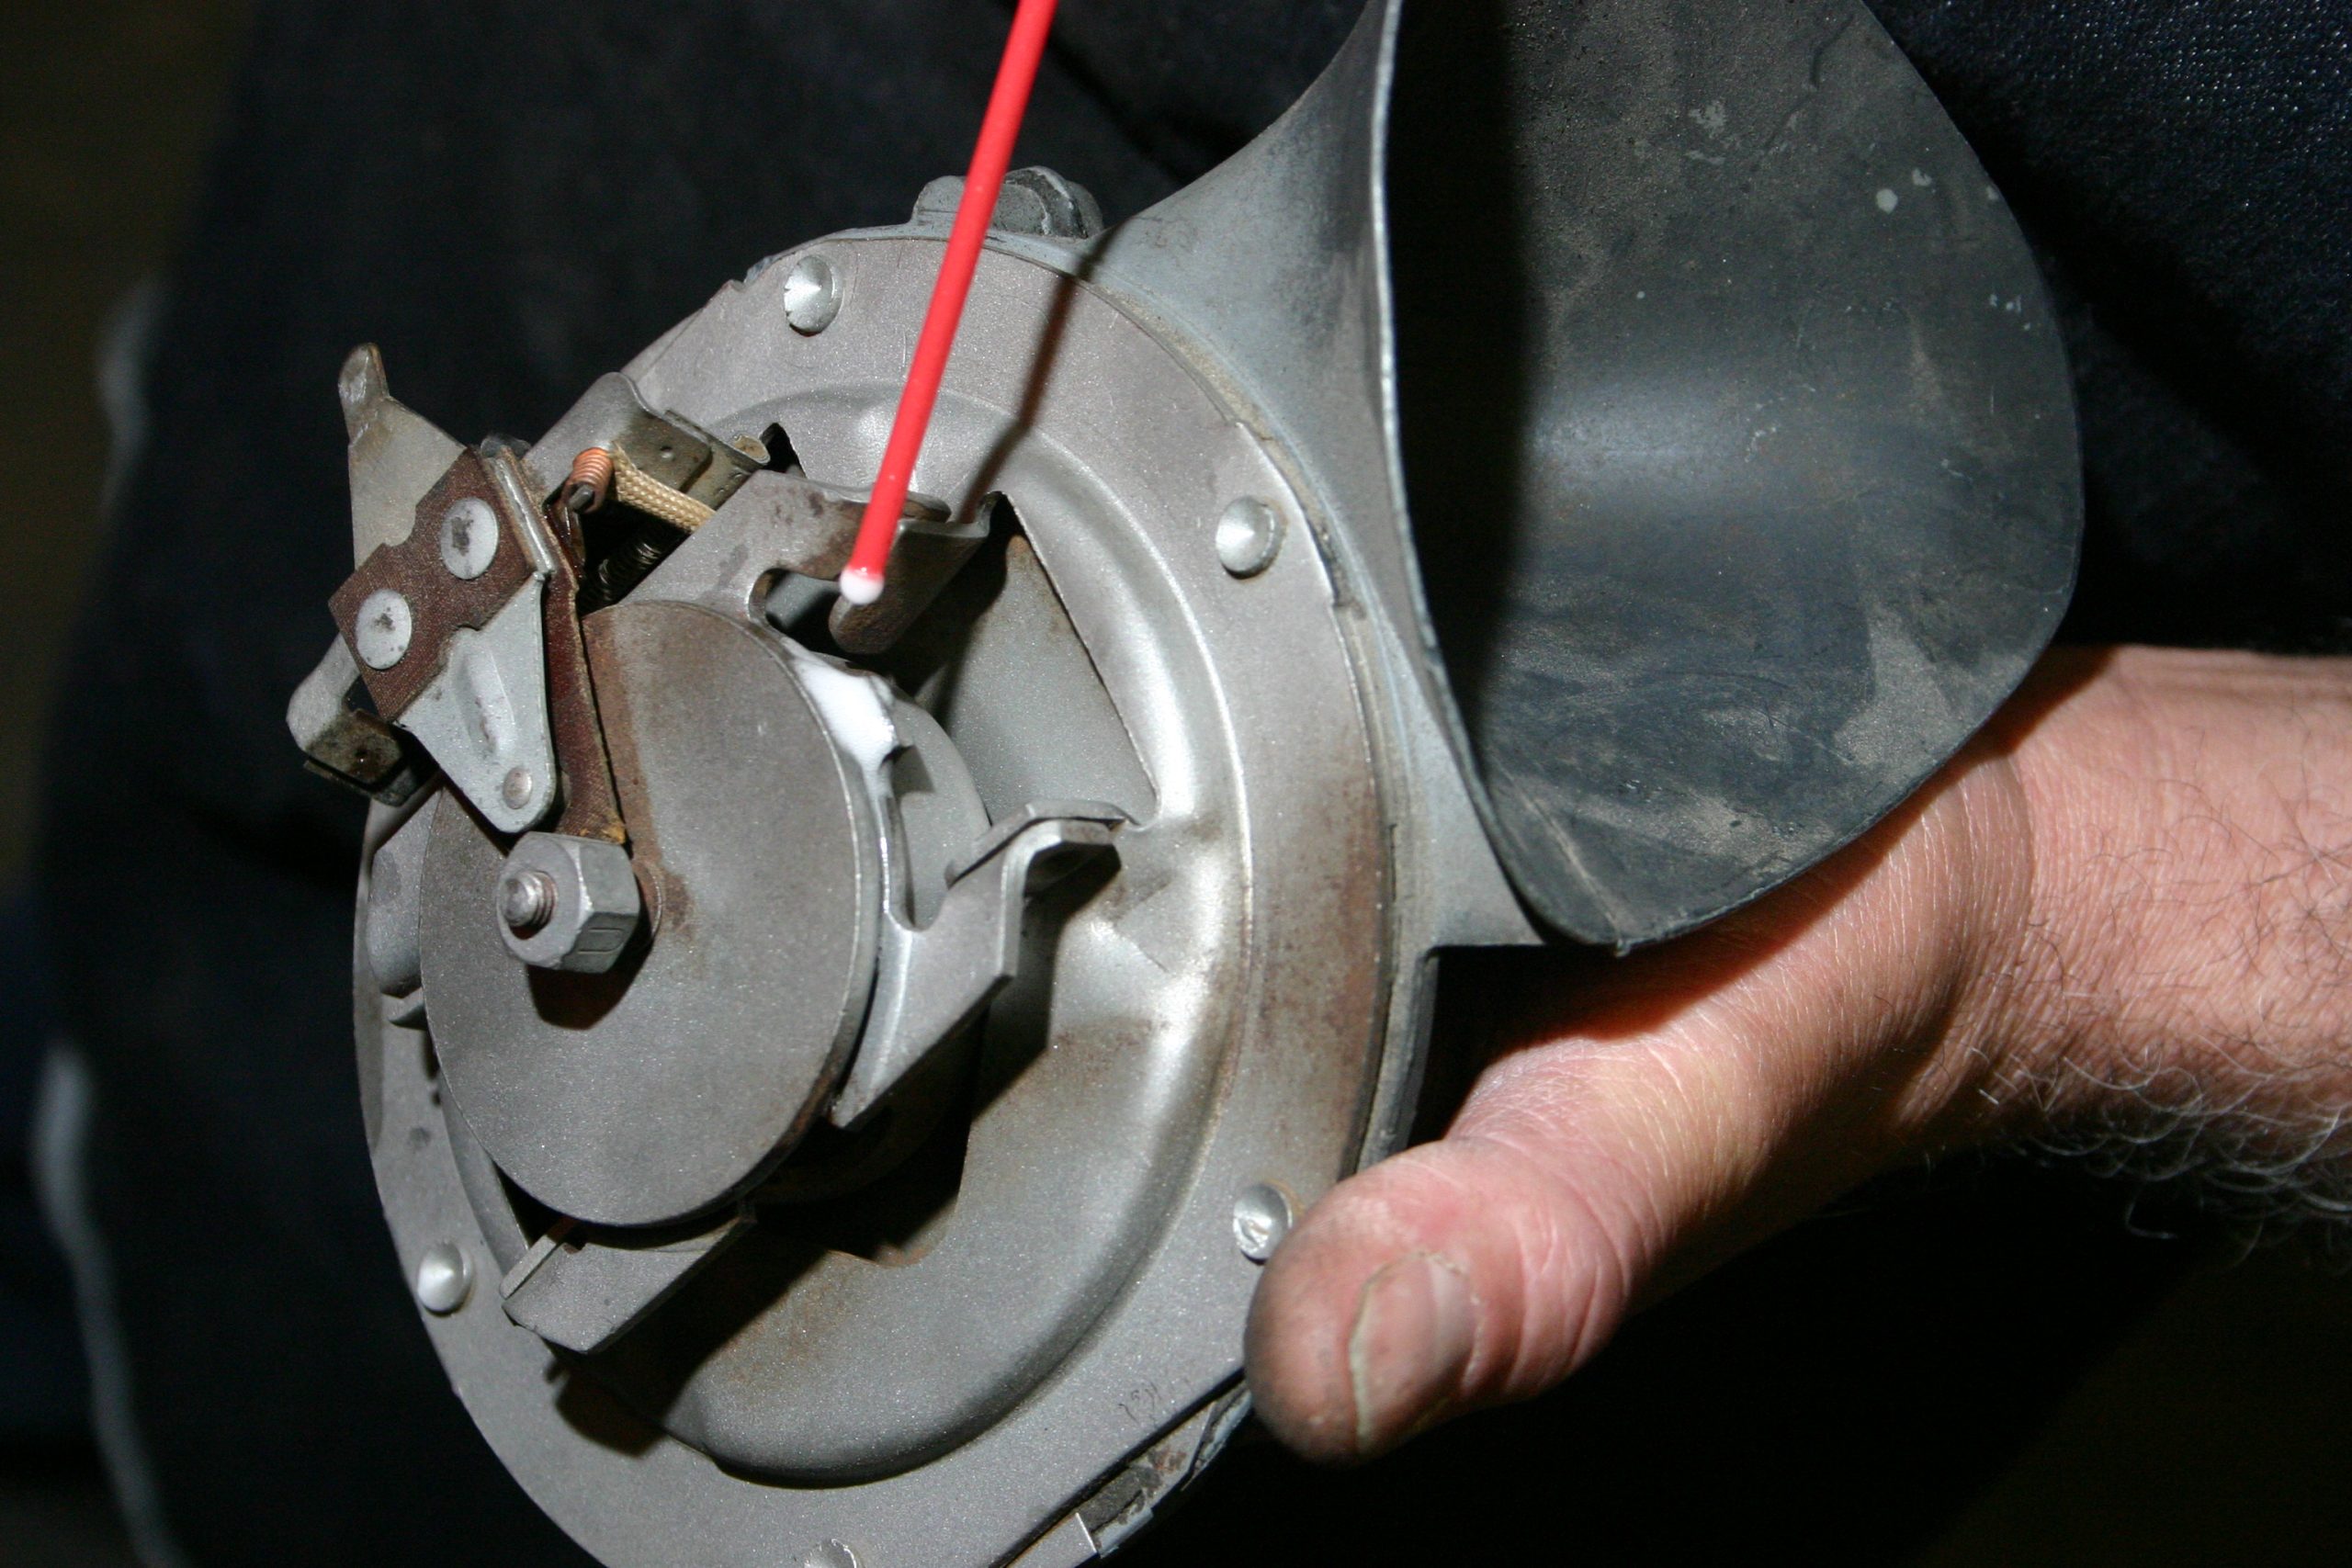
The challenging part of horn function is how to get the spring steel diaphragm to vibrate with consistency. It has to work smoothly every time. Inside the horn’s seashell-shaped body, there’s an electromagnet, contact points, and a diaphragm. While at rest, the contact points are closed, which carries electricity to the electromagnet when you hit the horn button. When you press the horn button, this activates the copper coil electromagnet, which oil cans (oscillates and vibrates) the diaphragm. This turn of events opens the contact points, de-energizing the electromagnet and relaxing the diaphragm.
When the diaphragm and electromagnet rest, contact points close, energizing the electromagnet again. This hyper action happens hundreds of times a second, causing the diaphragm to oscillate rapidly, which makes a buzzing sound we hear as the horn’s bellow. This oscillation blasts through the coiled die-cast megaphone housing, which trumpets that loud 95 decibel sound from the horn’s bell mouth.
Why Do Car Horns Stop Working?
Car horns fail for three basic reasons: contact point damage or corrosion, electromagnet coil burnout, or mechanical seizure due to corrosion. Road dust and rain get into horns and cannot escape, which causes corrosion—a horn’s greatest enemy. Deterioration abounds.
Vintage car horns require a lot of power (about eight or nine amps) and operate at high frequency. The only electrical components in your car that demand more electrical current are the starter and headlights.
Horns survive for a long time because they aren’t used often enough to wear out. Yet, they also suffer from the lack of use, which causes deterioration.
How to Fix, Repair & Restore Your Vintage Car Horn
We’d like to show you how to fix your car horns, however, they are not always a component you should service yourself because they require extensive technical know-how. That’s when you need to seek the expertise of a vintage car horn rebuilder. Several of them can be found on the web.
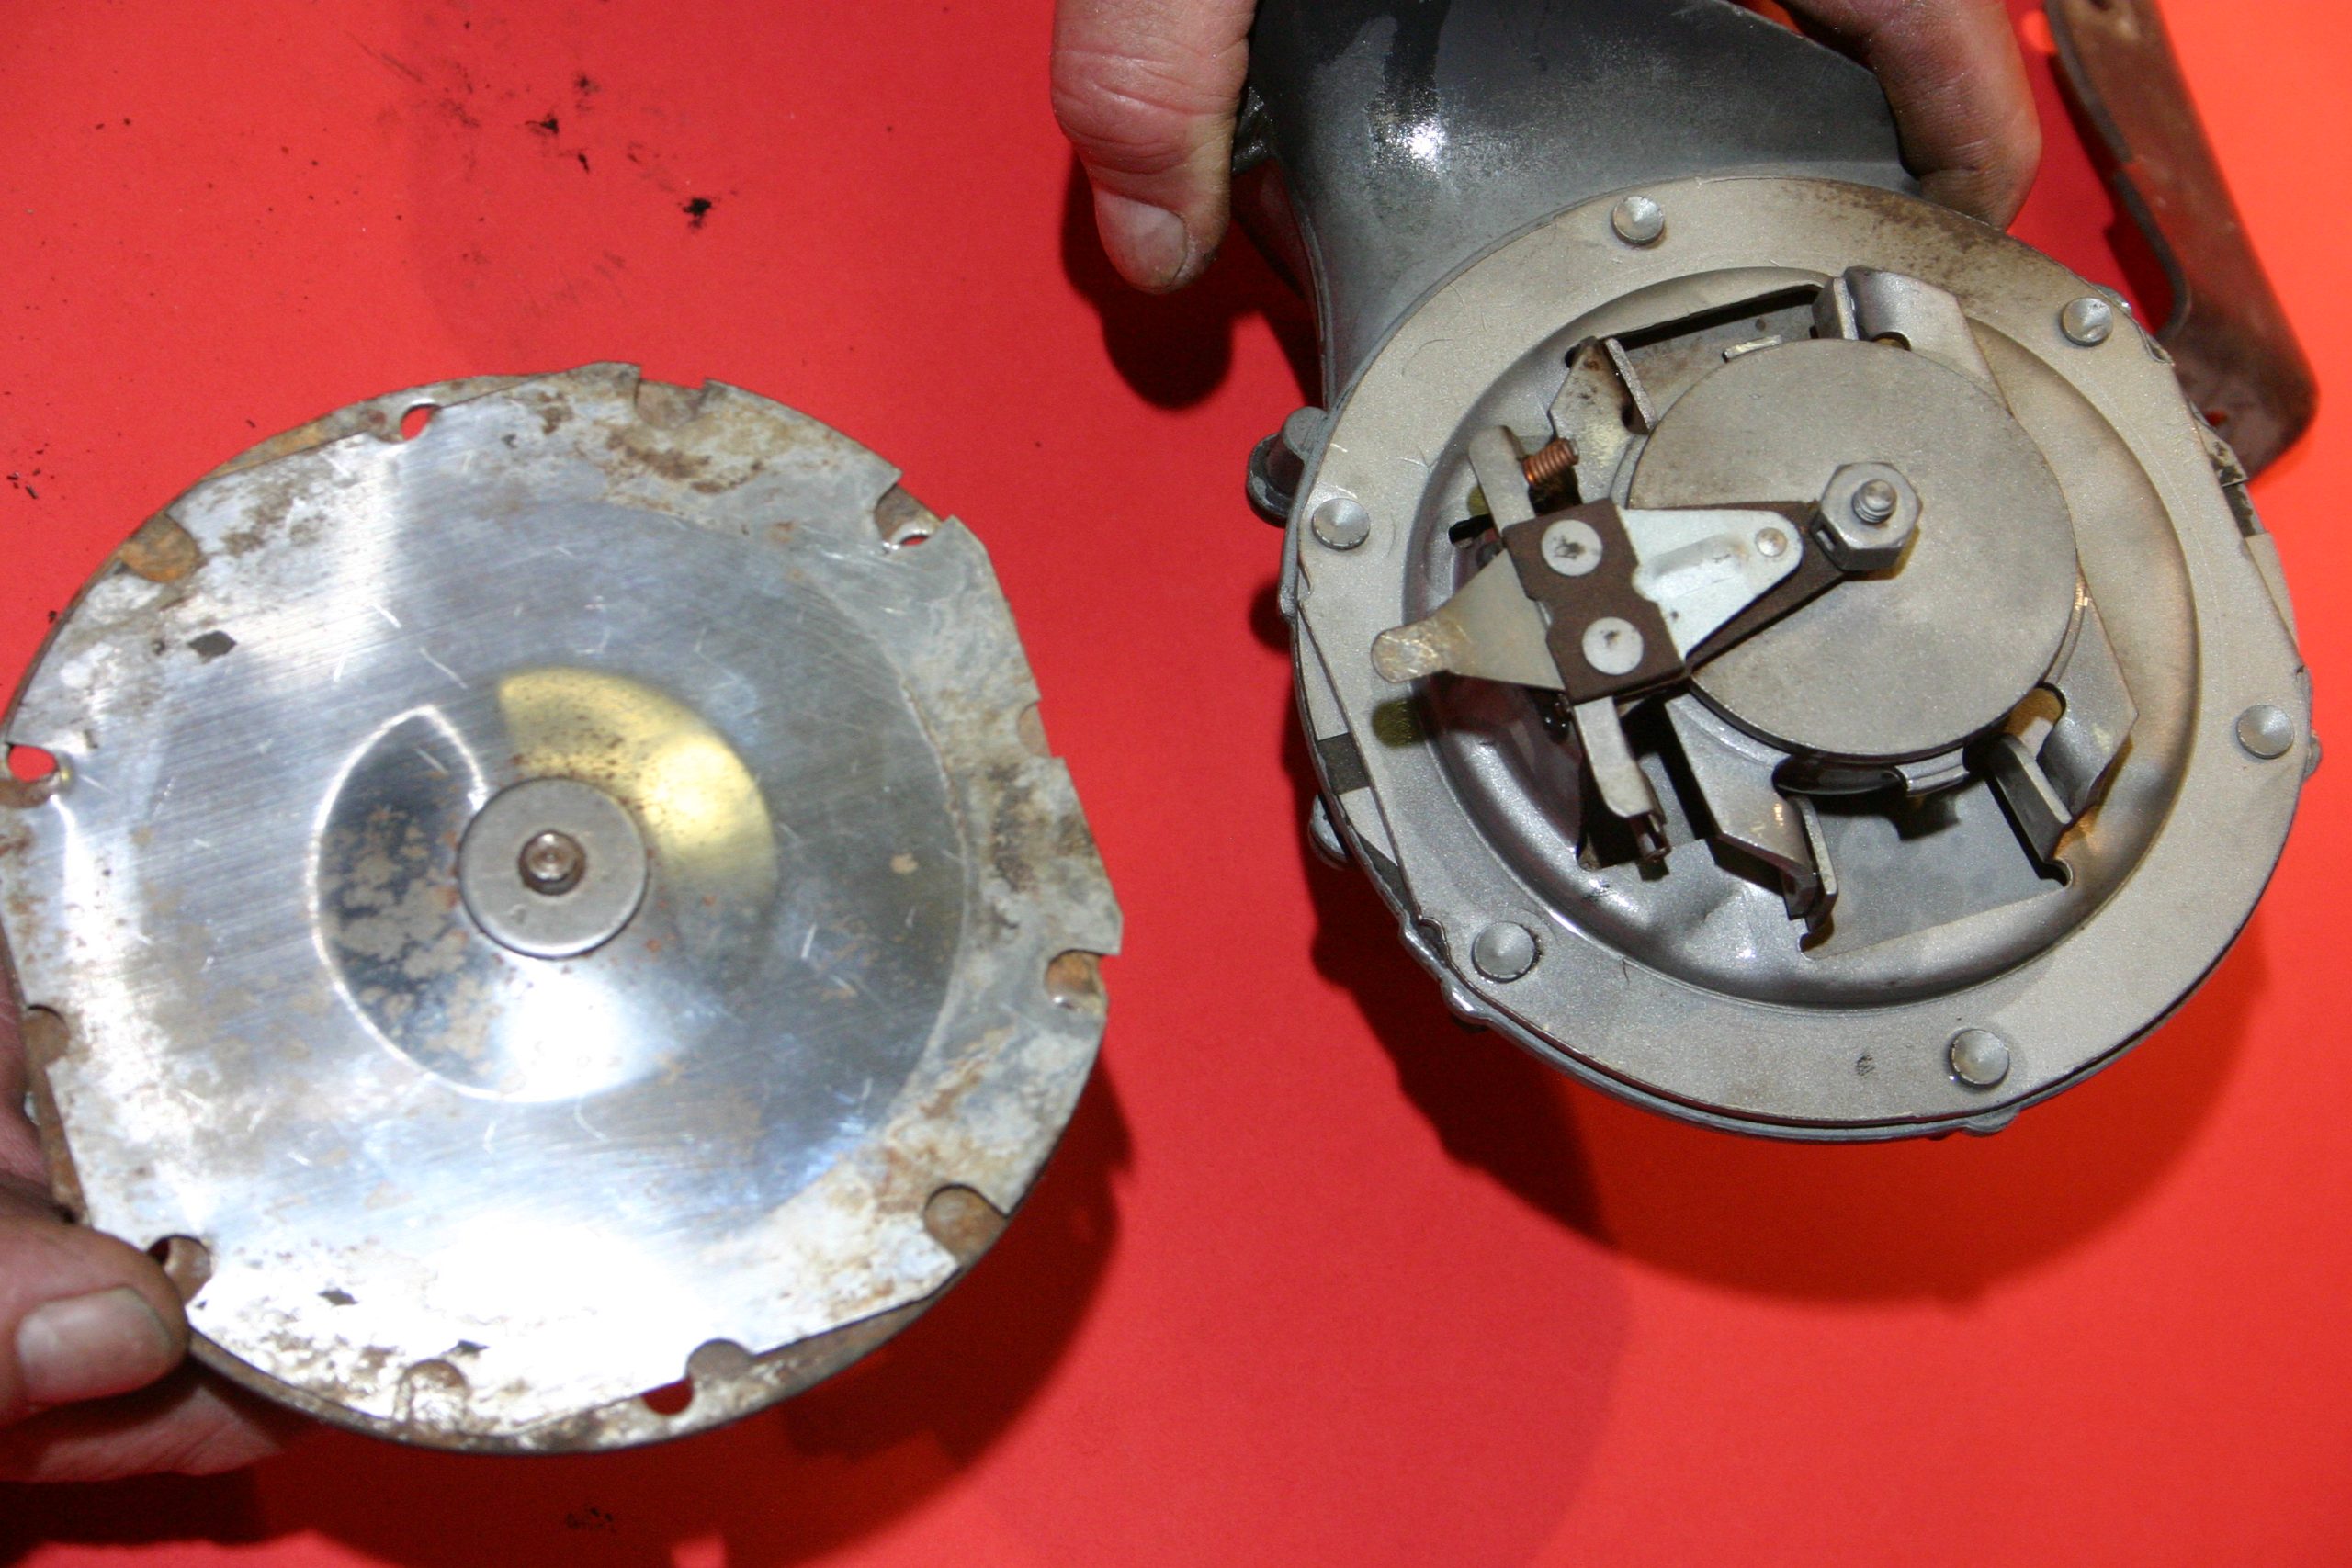
At the moment, parts are not available for the larger behemoth pre-1965 car horns like you hear in old sitcoms, which are easier to service because they have a removable cover for easy access to the electromagnet and contact points. They trumpet a triumphant harmony. The bad news is parts are not available for these older horns, which means you need to find good cores.
Another important consideration with the larger earlier horns is the horn relay, which was used only with these larger trumpeters. When these horns stop operating, check the relay first with a test light or multimeter to make sure power is getting to the horns. Keep in mind, car horns do not tolerate electrical weaknesses. They must have 12 to 14 volts and solid connections to positive power and to ground or they will not function properly.
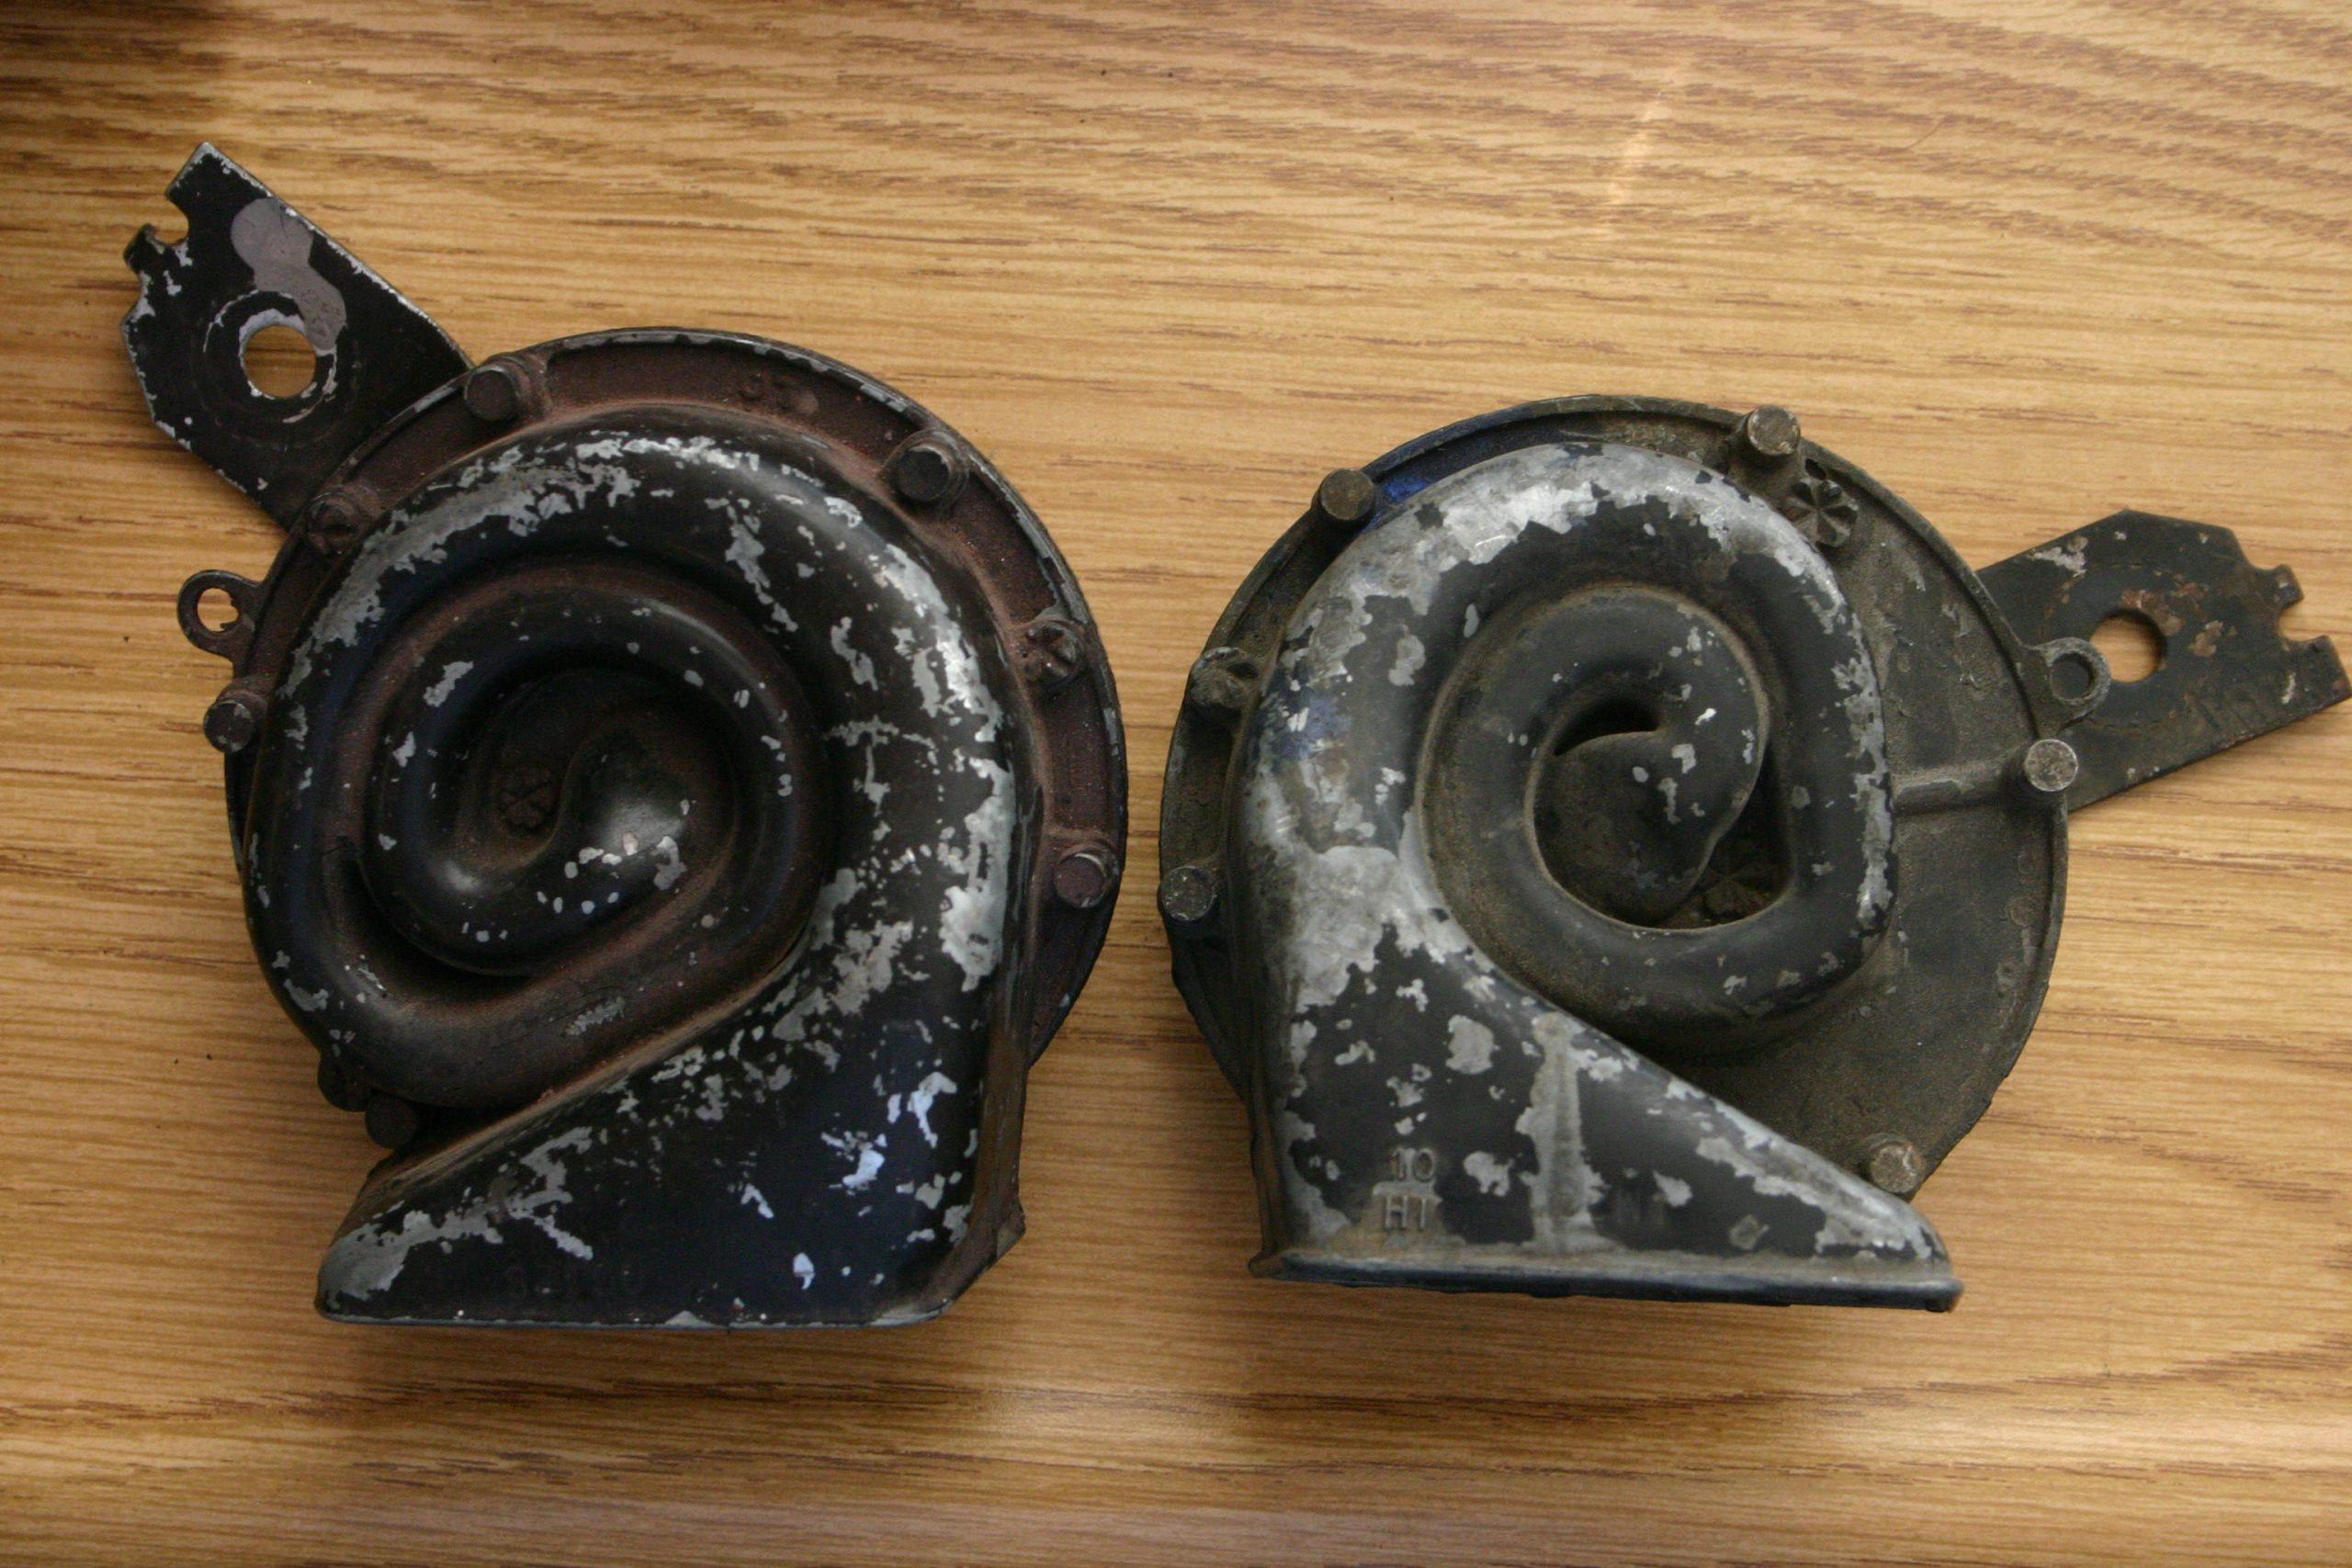
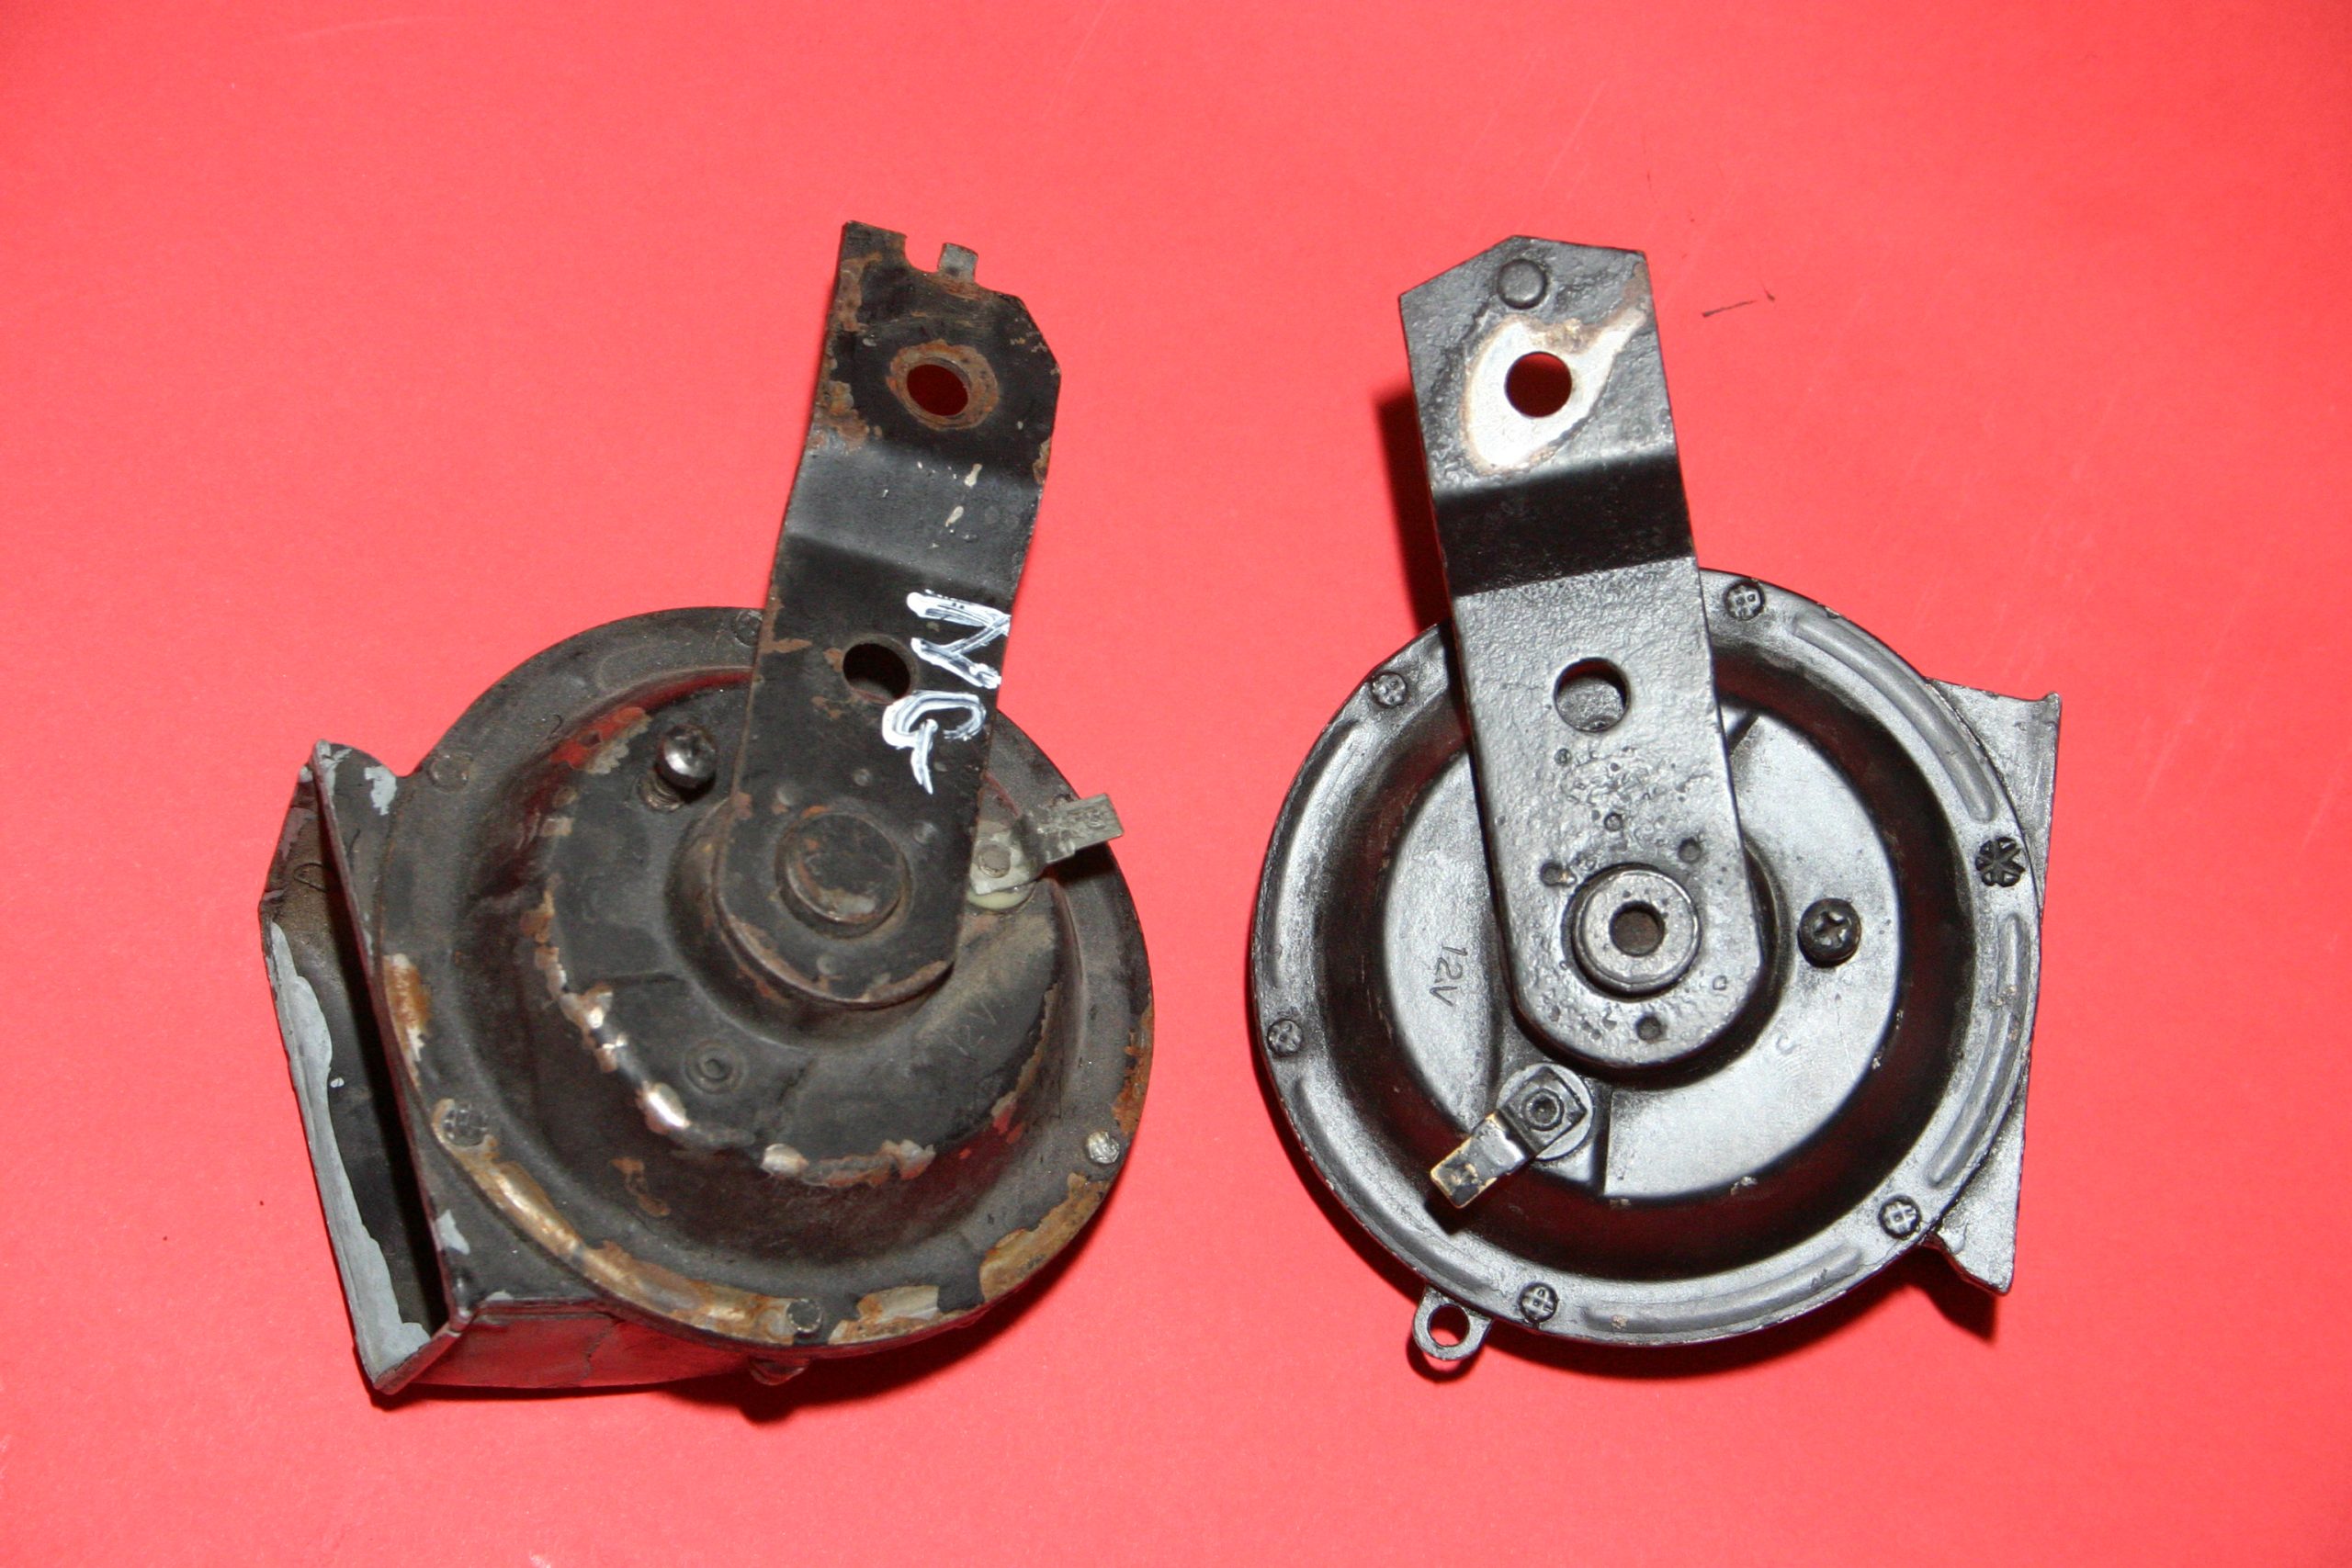
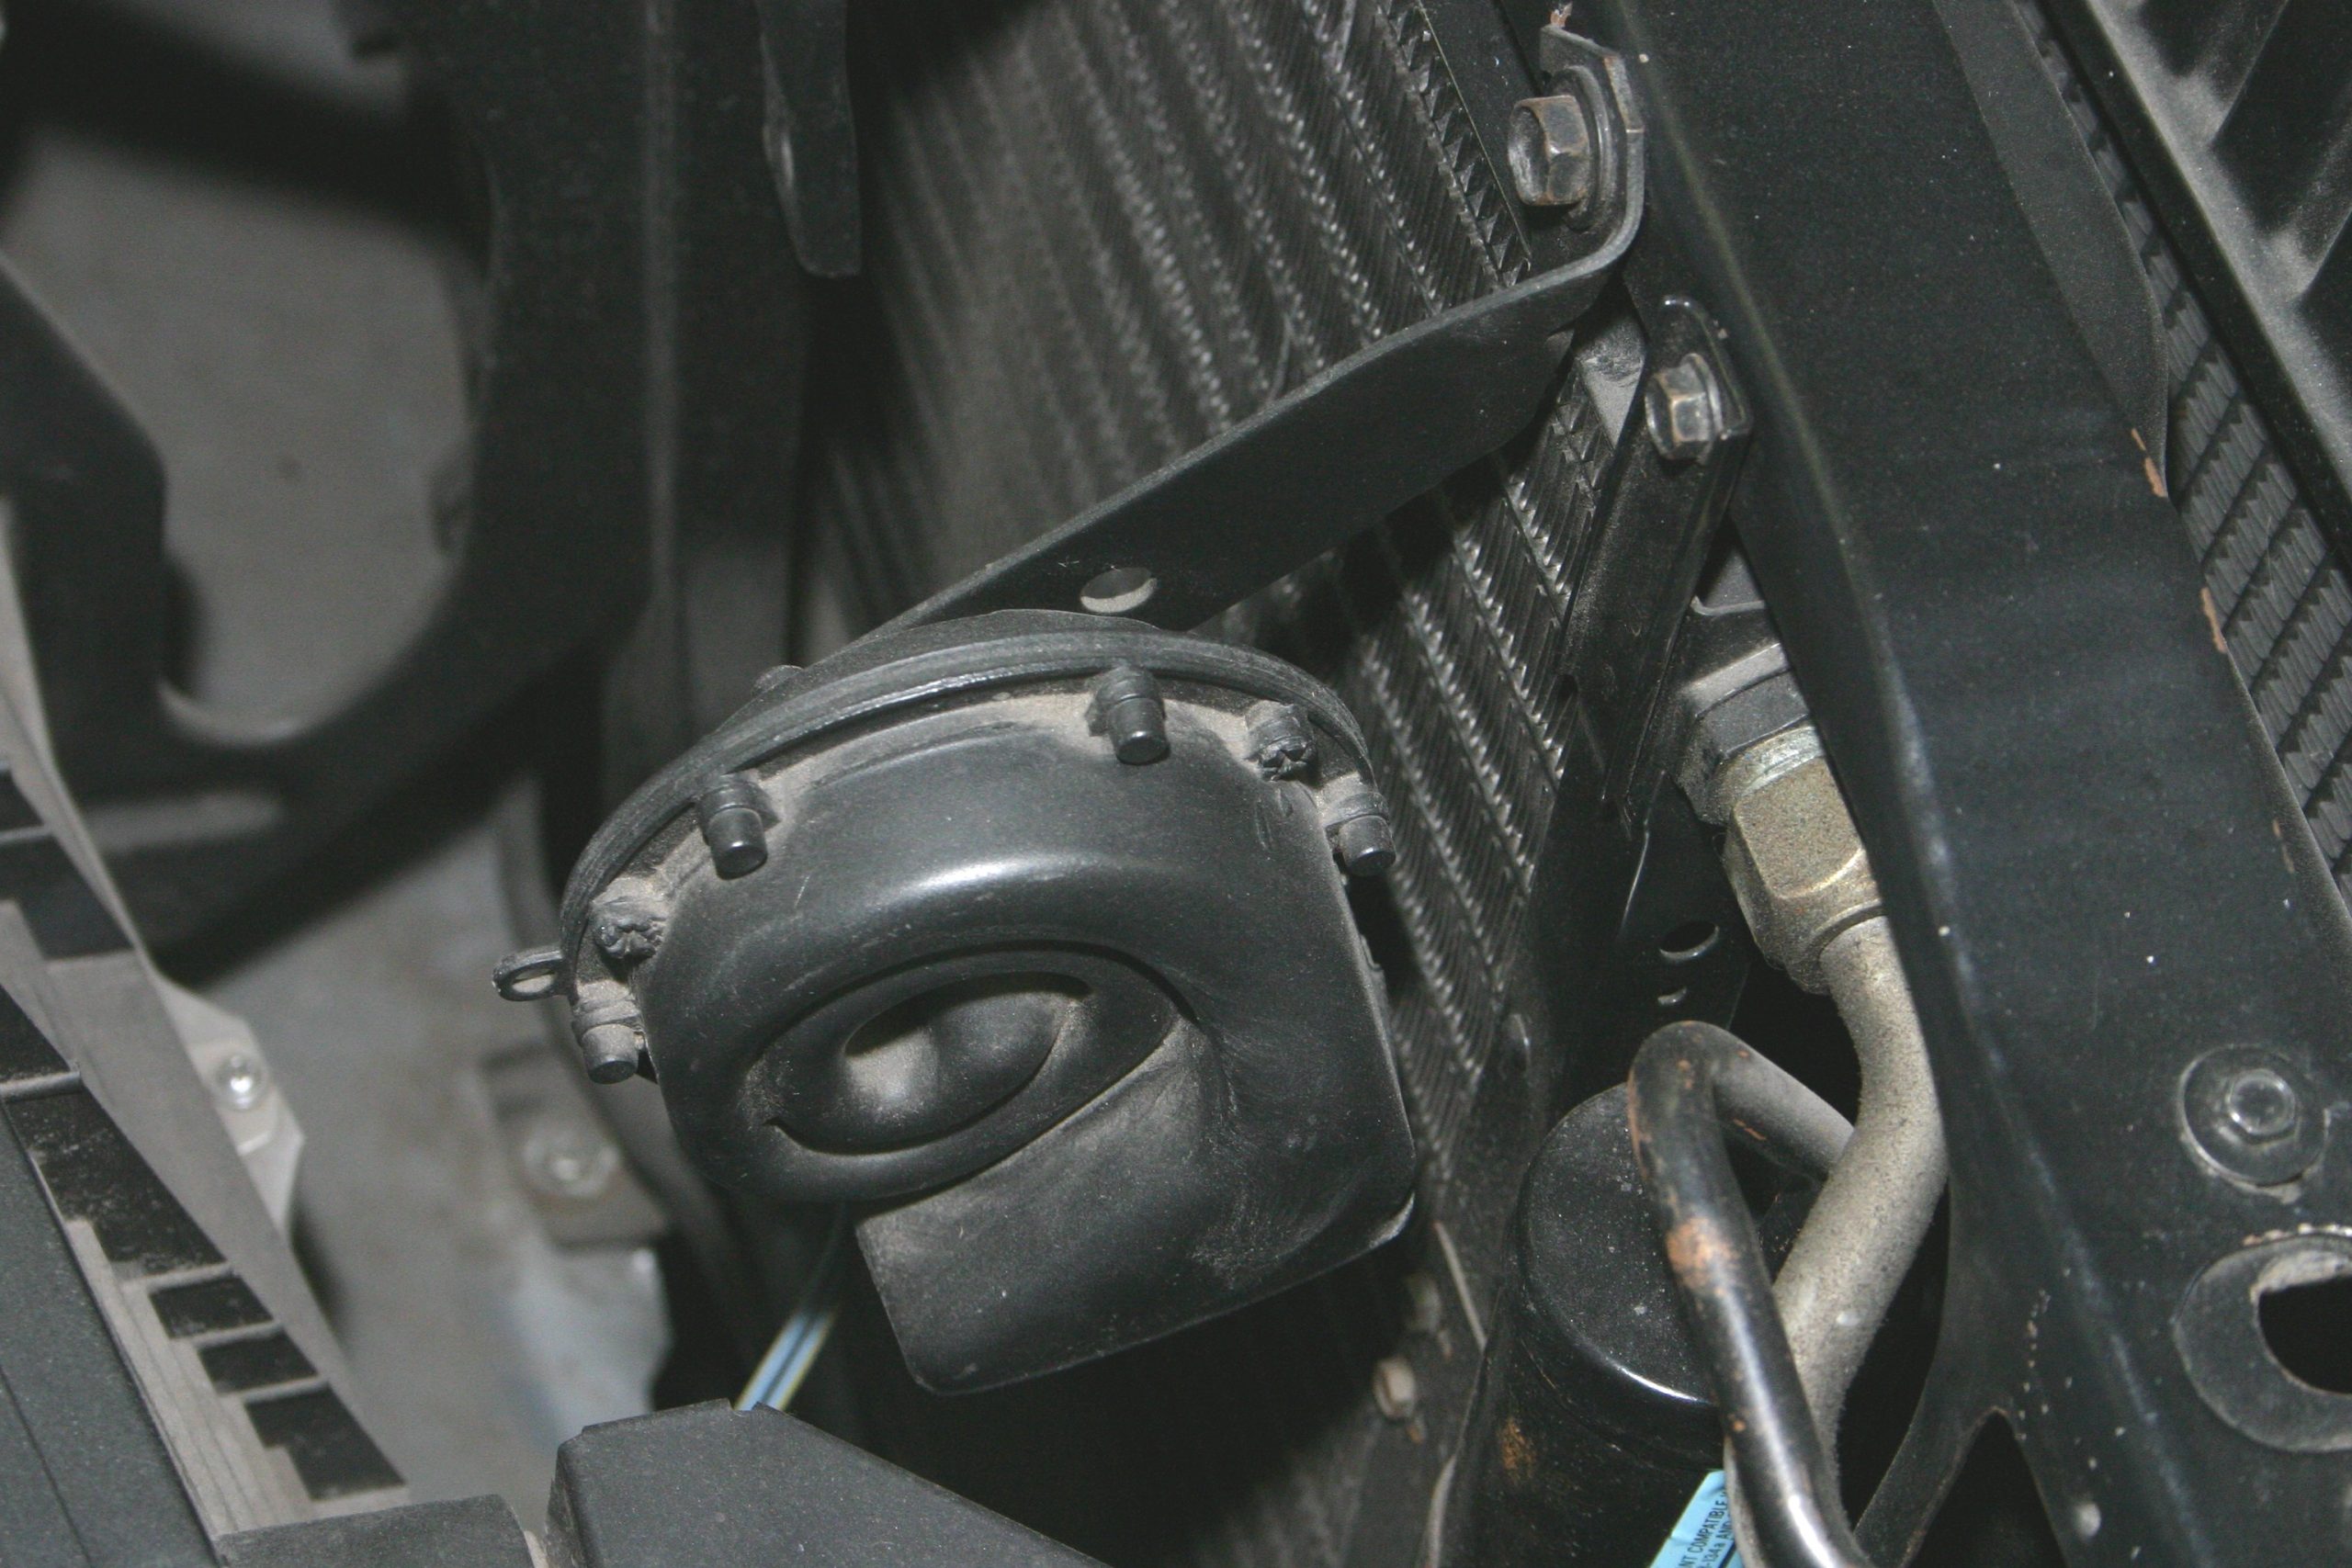
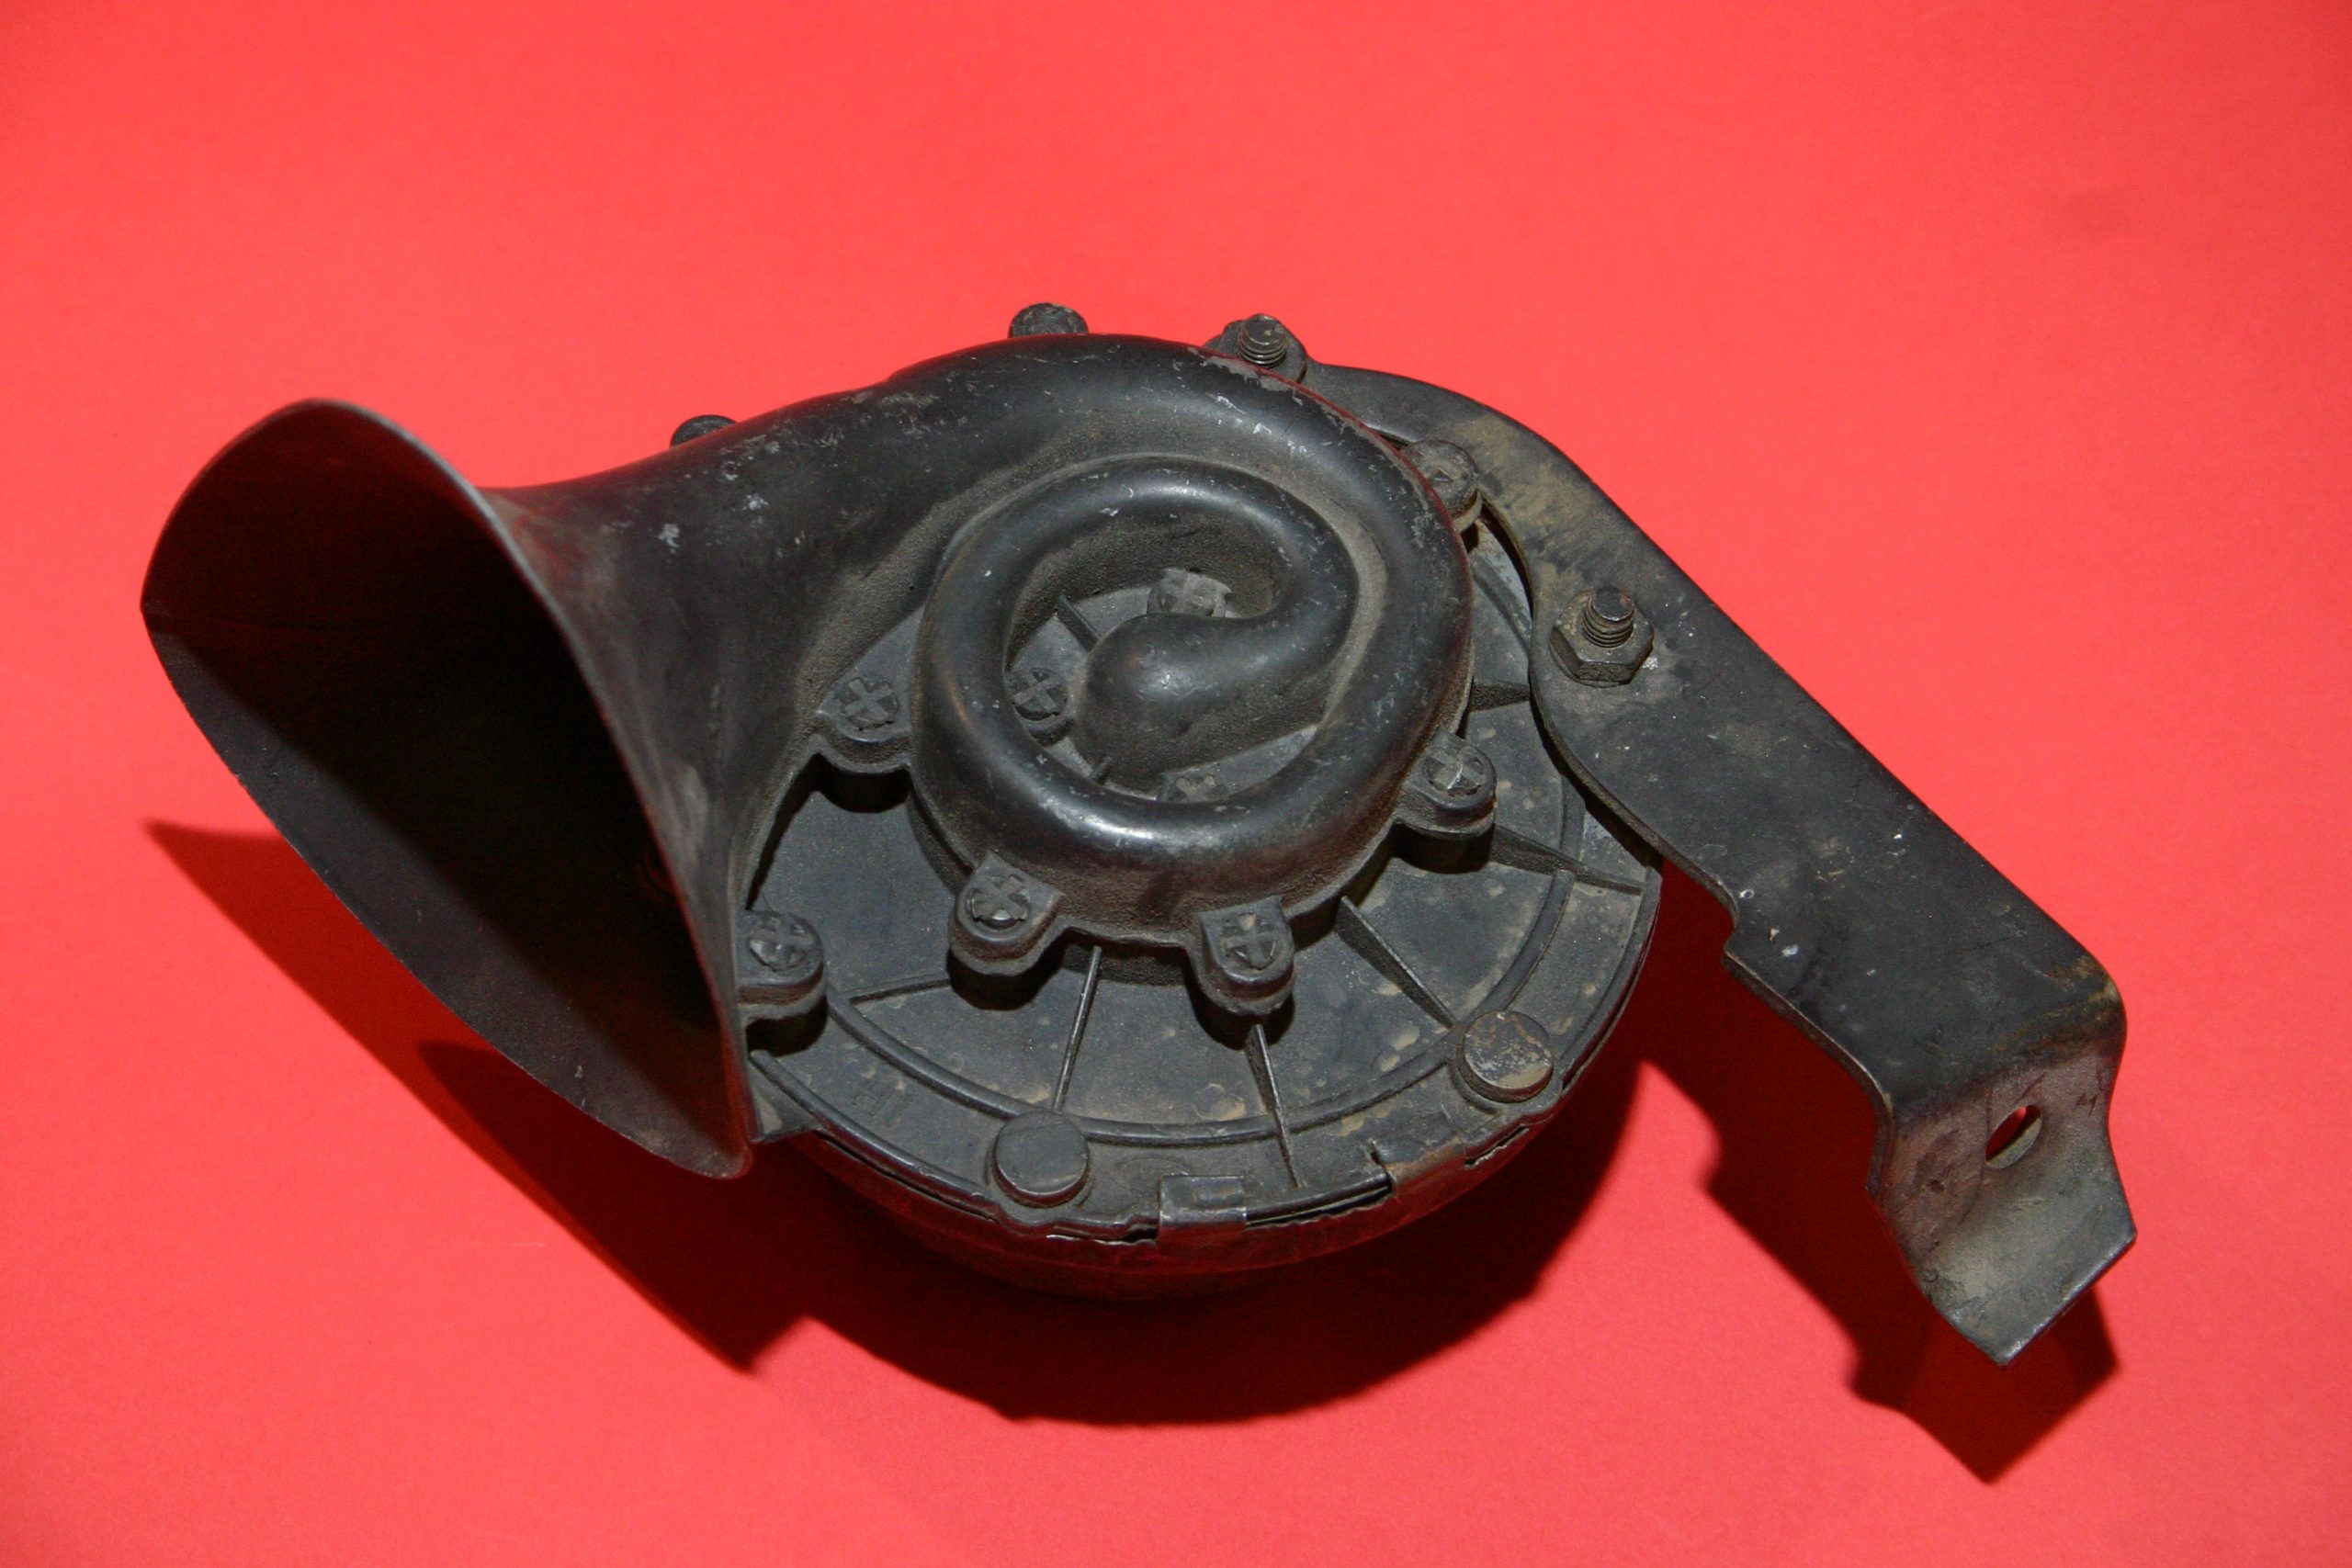
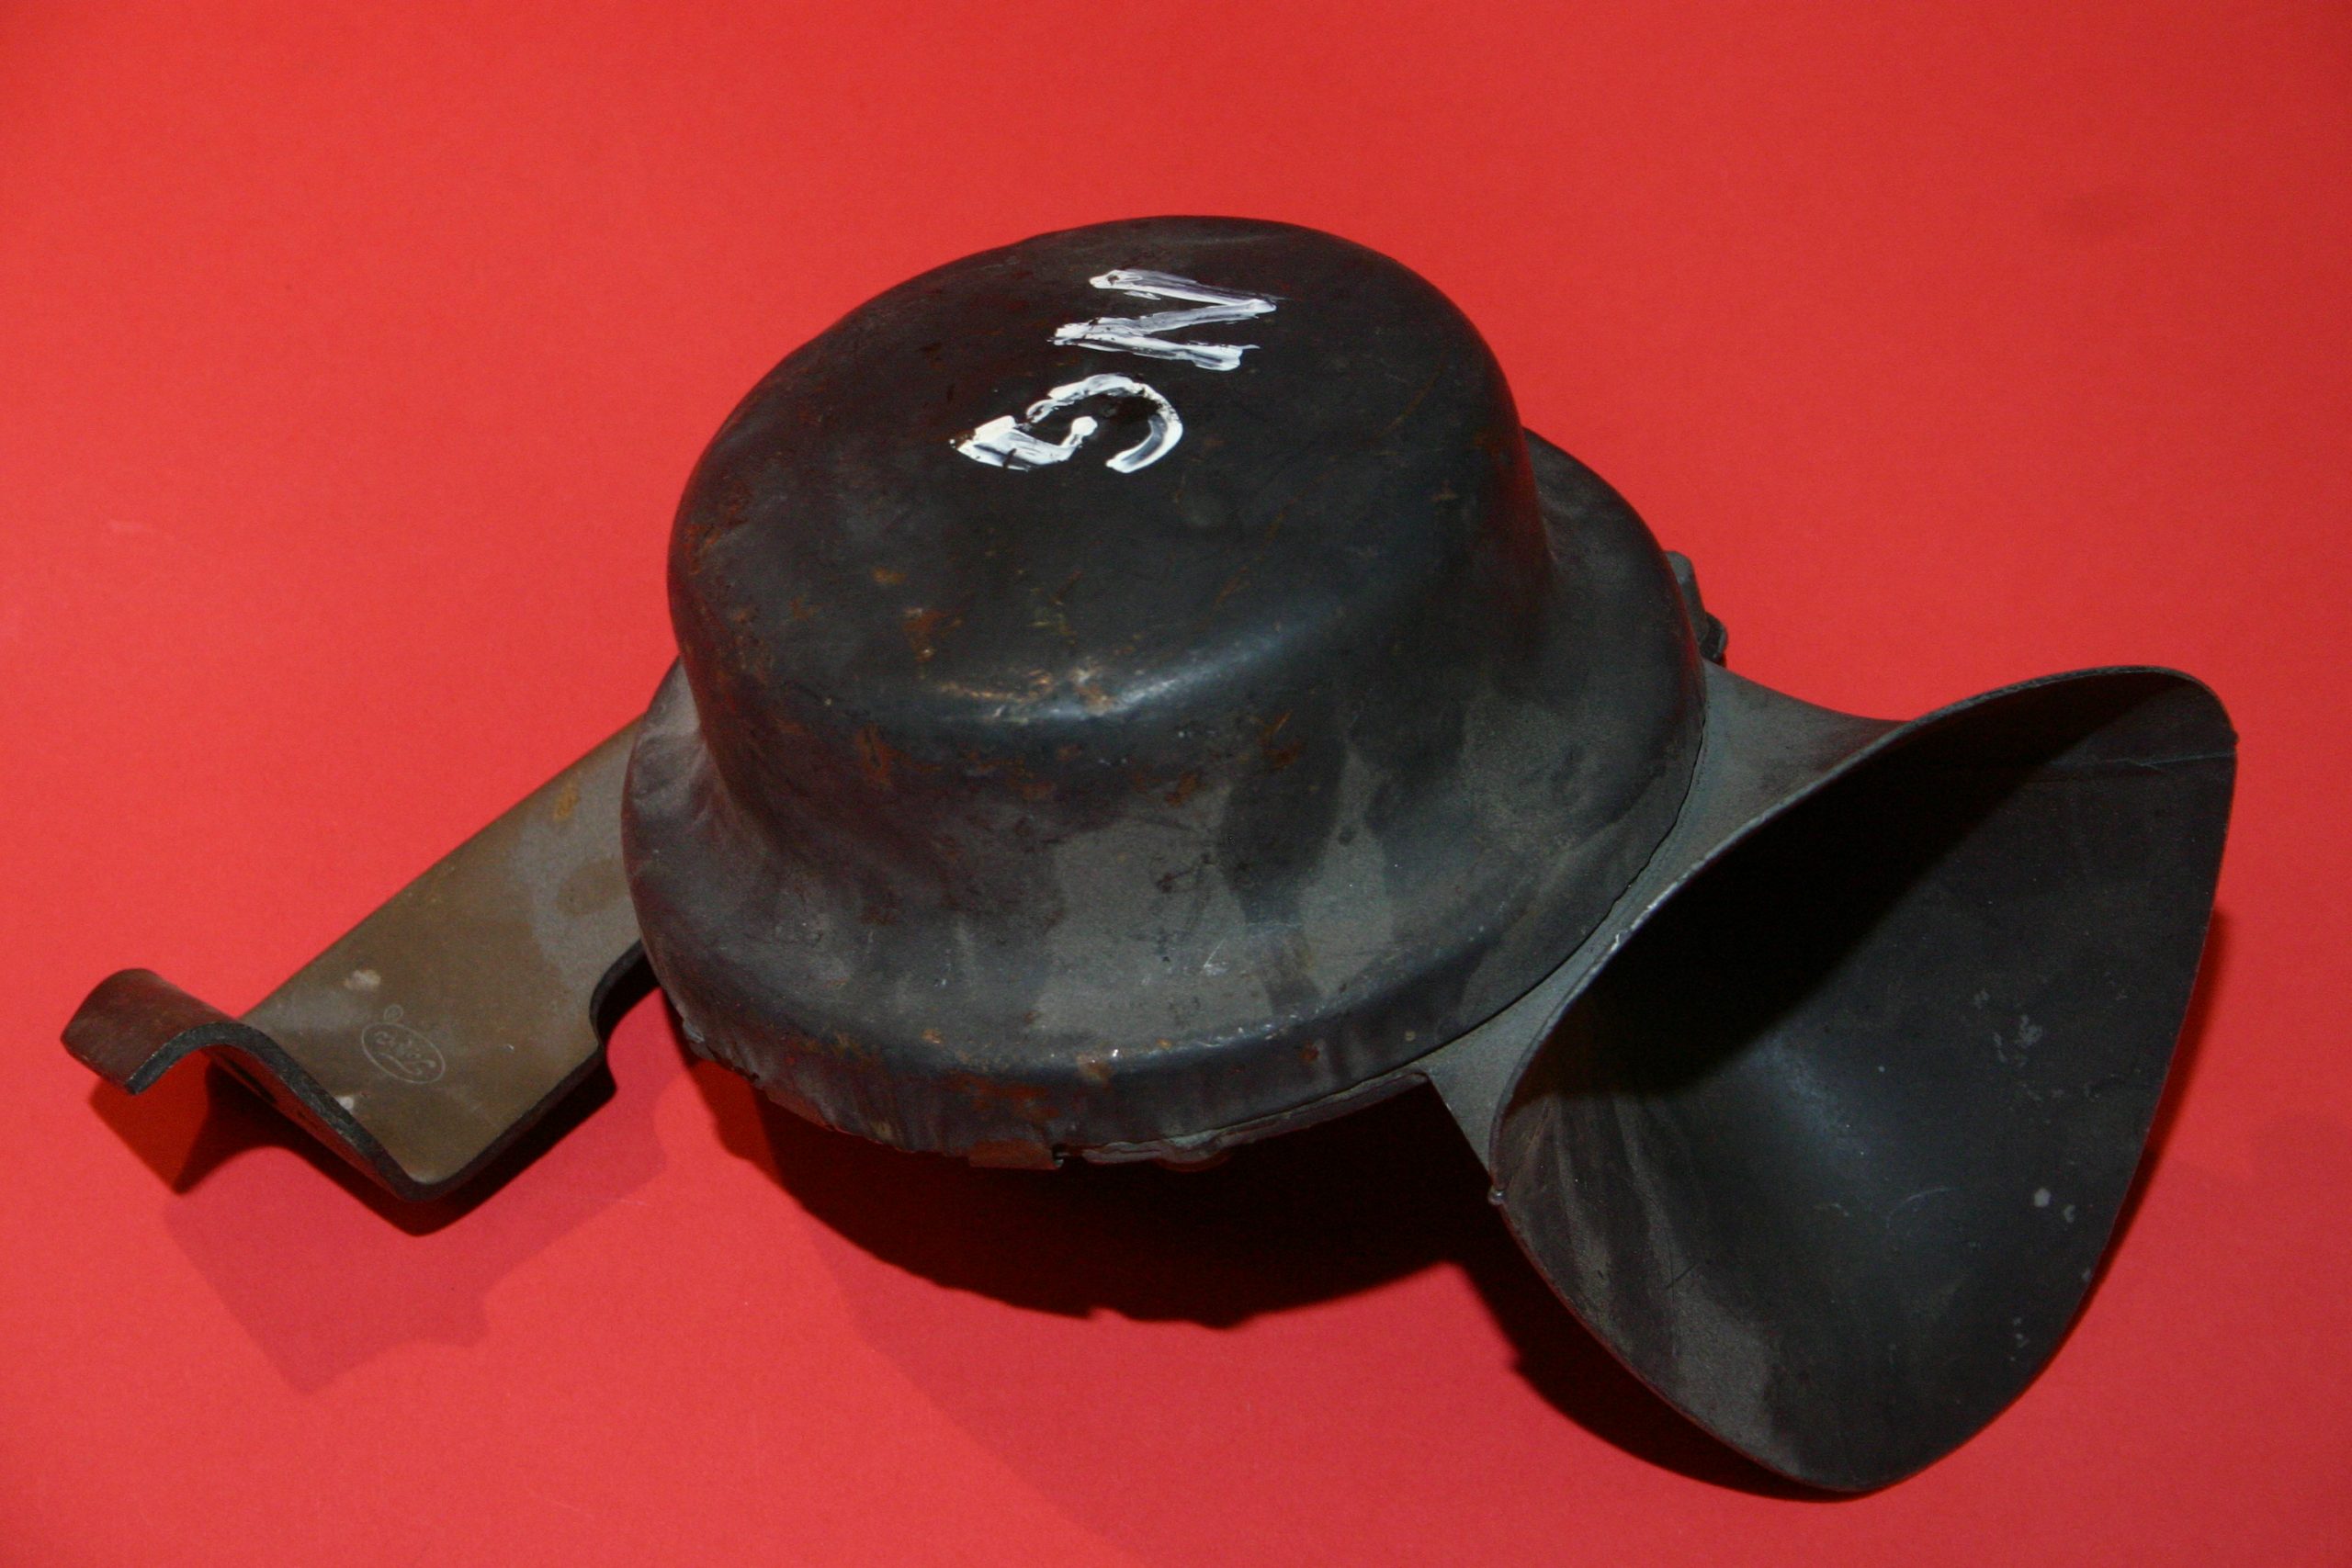
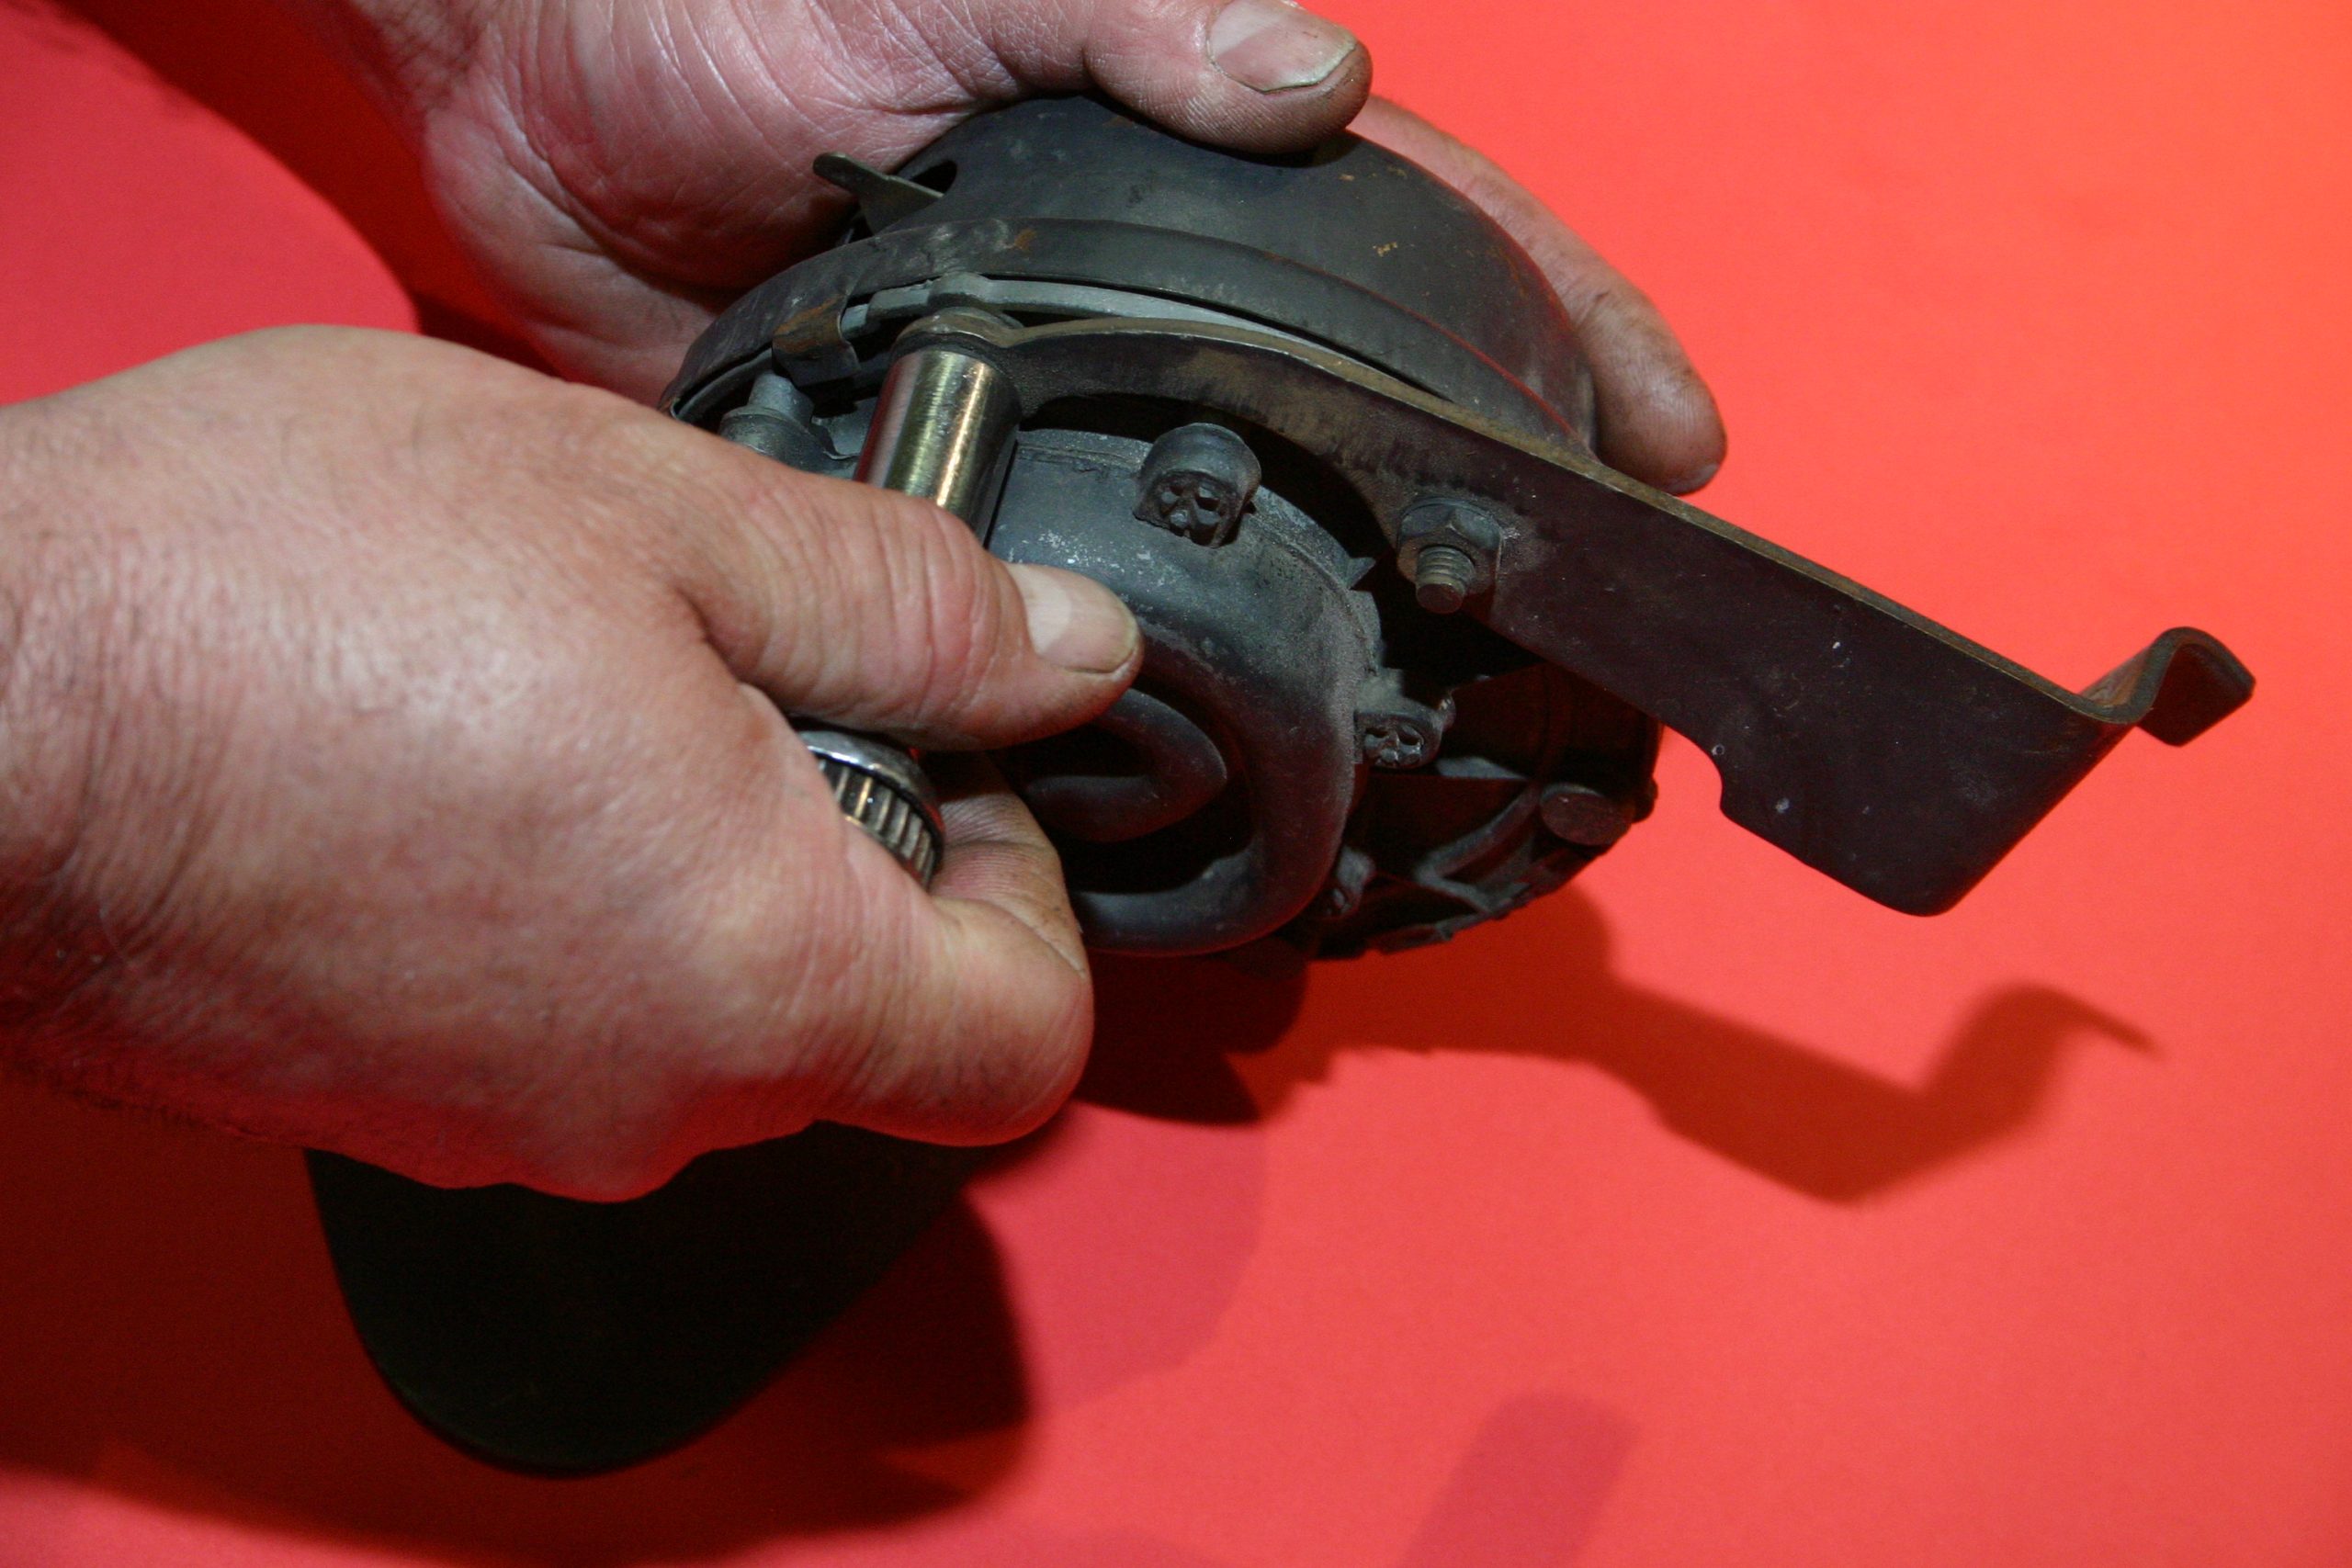
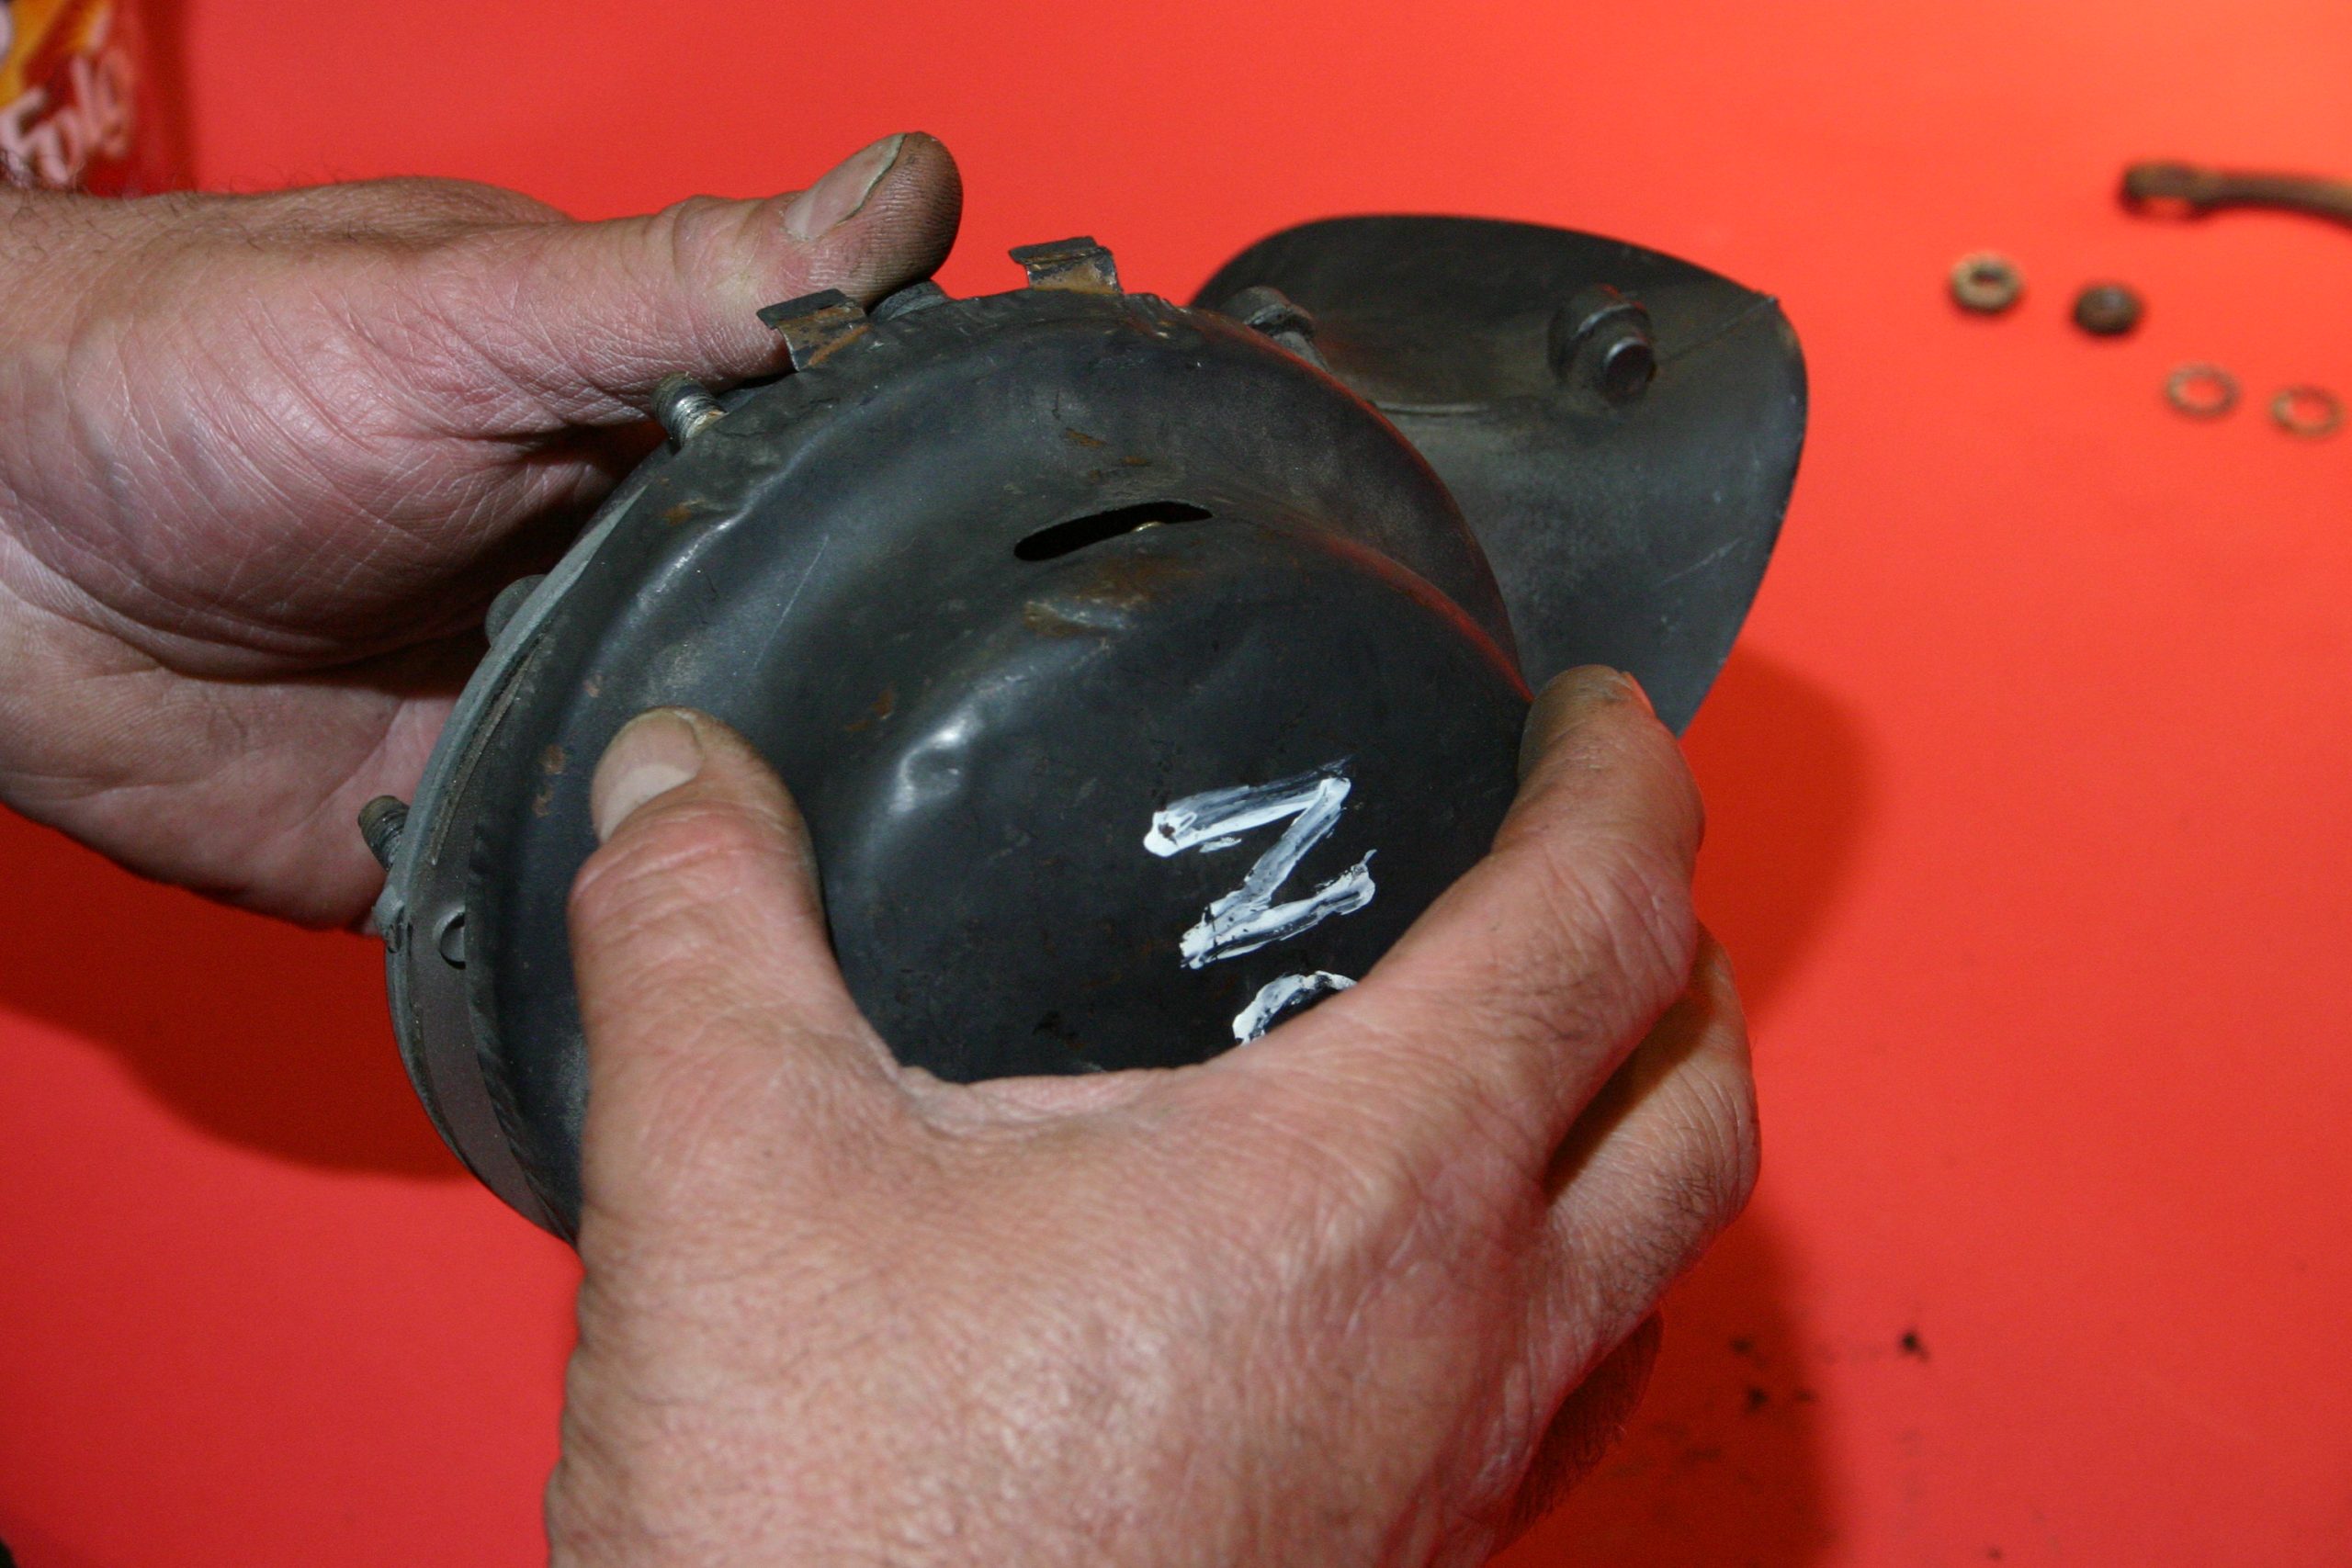
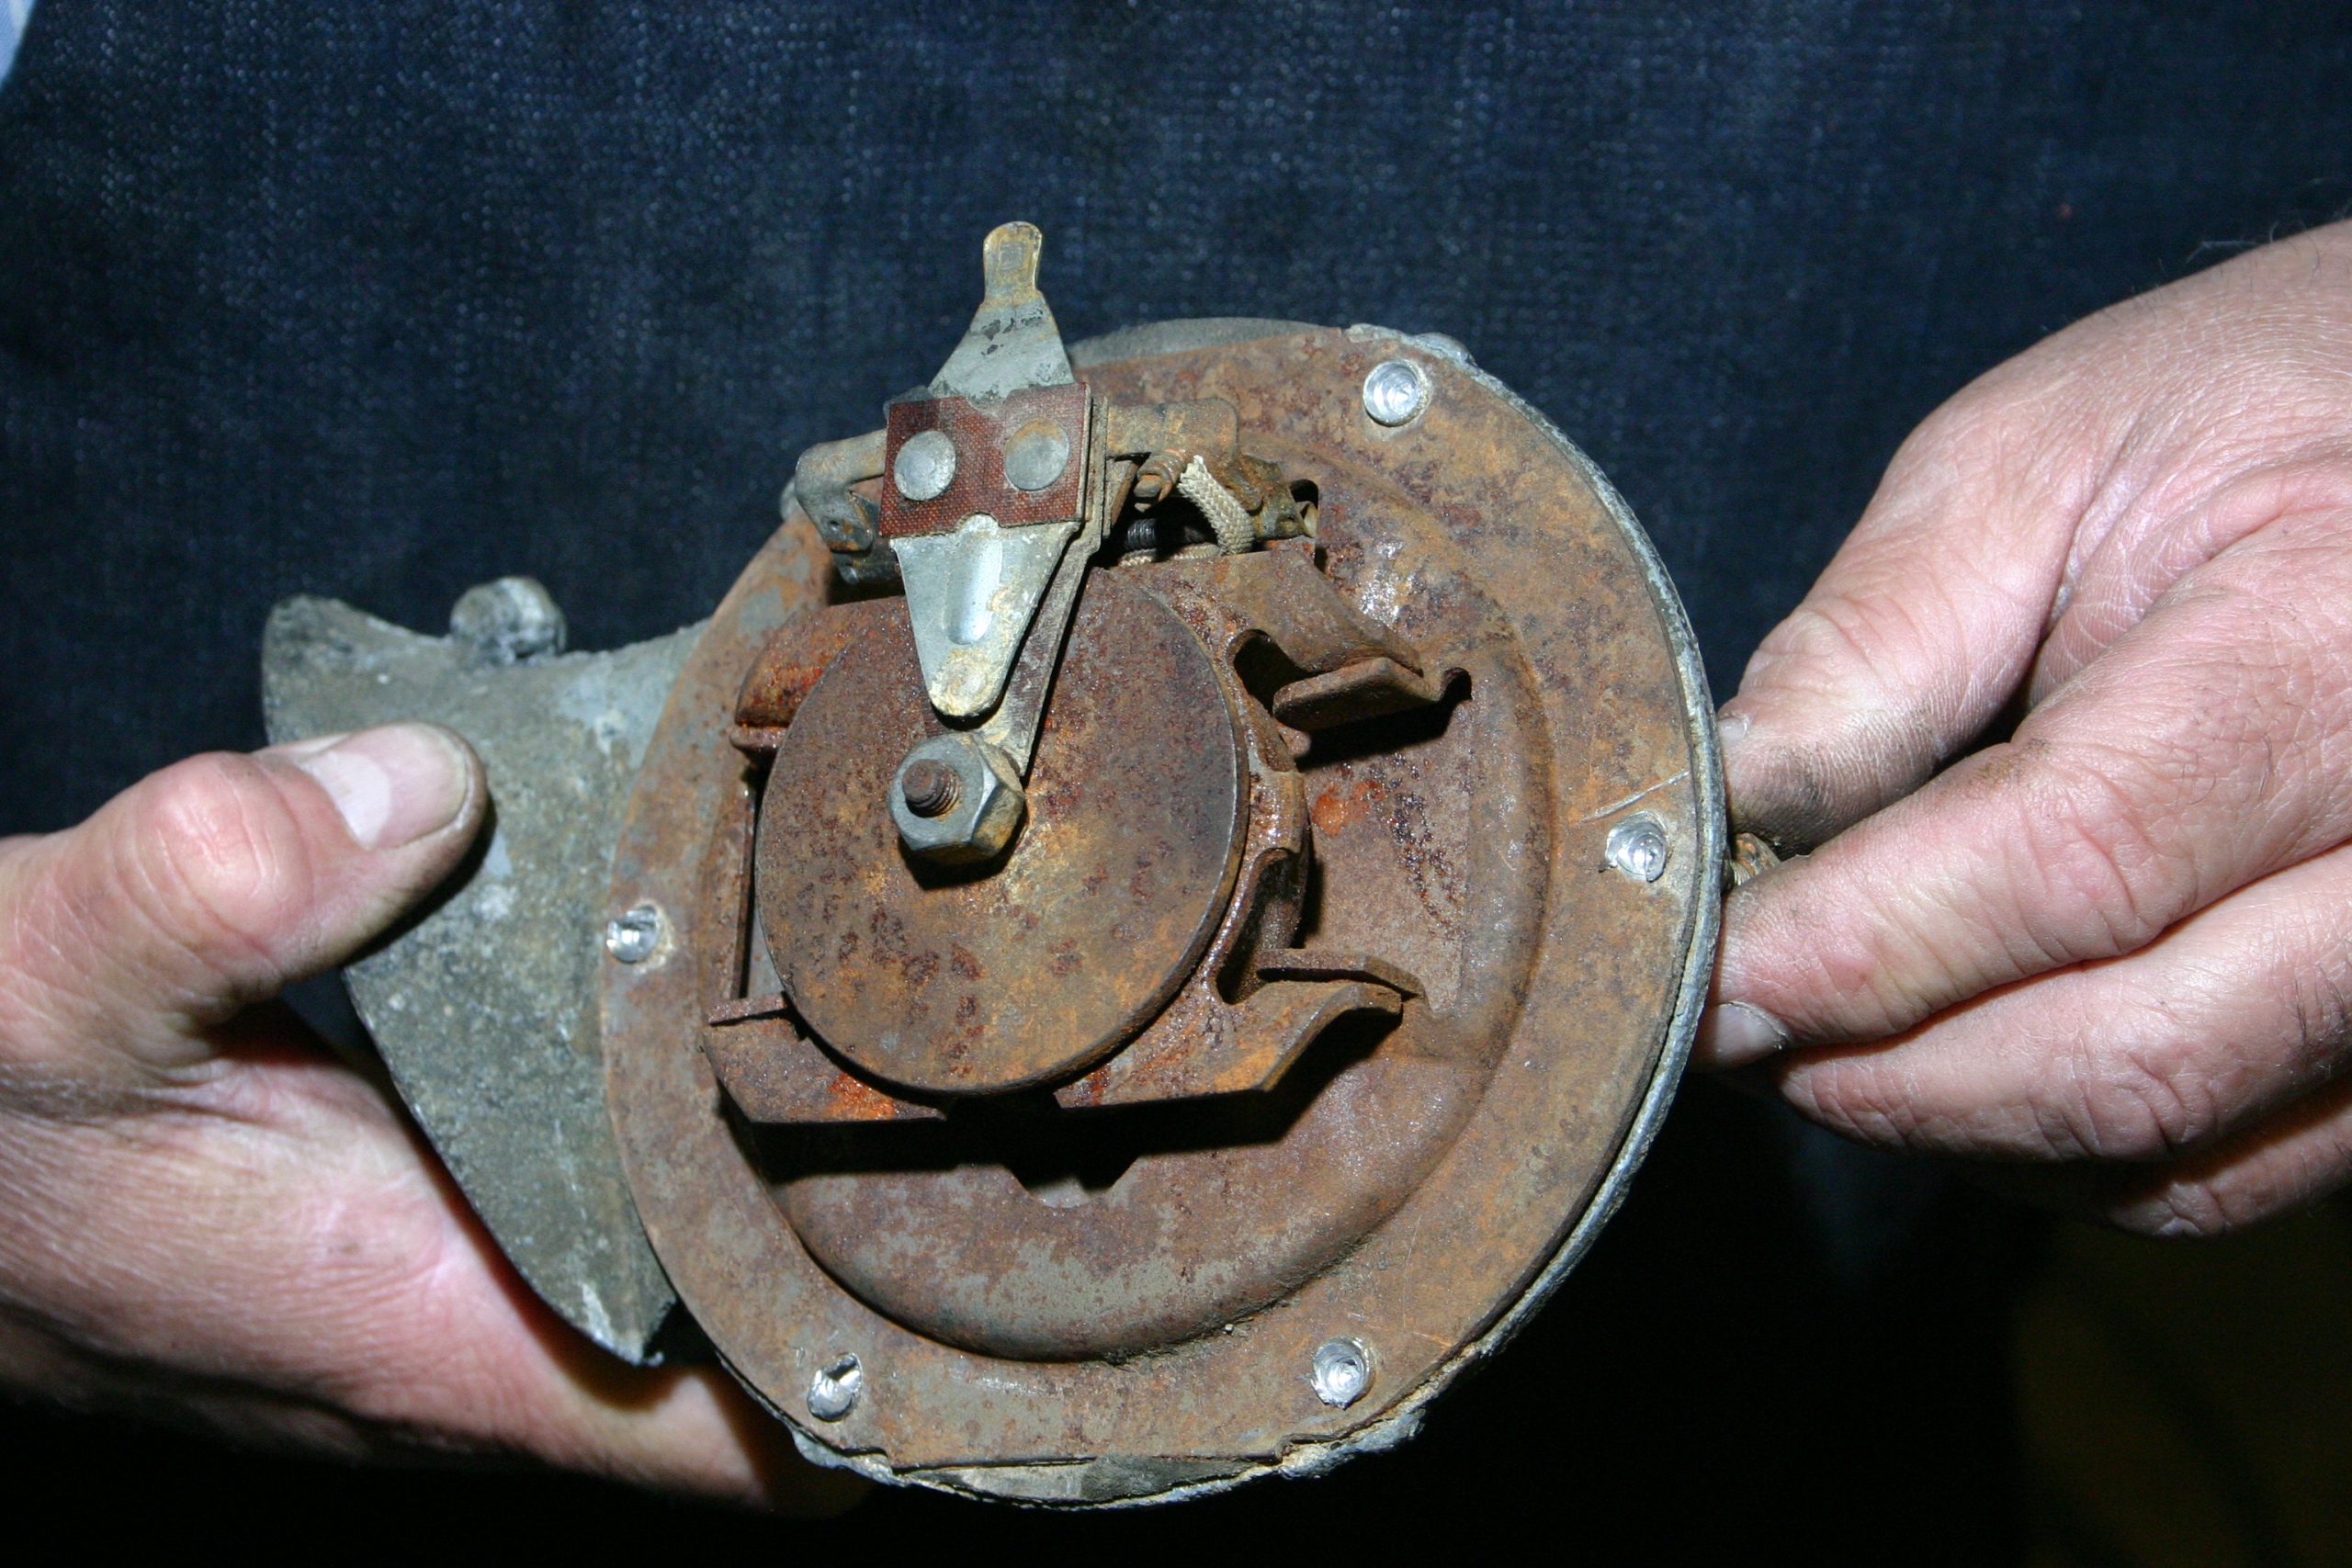
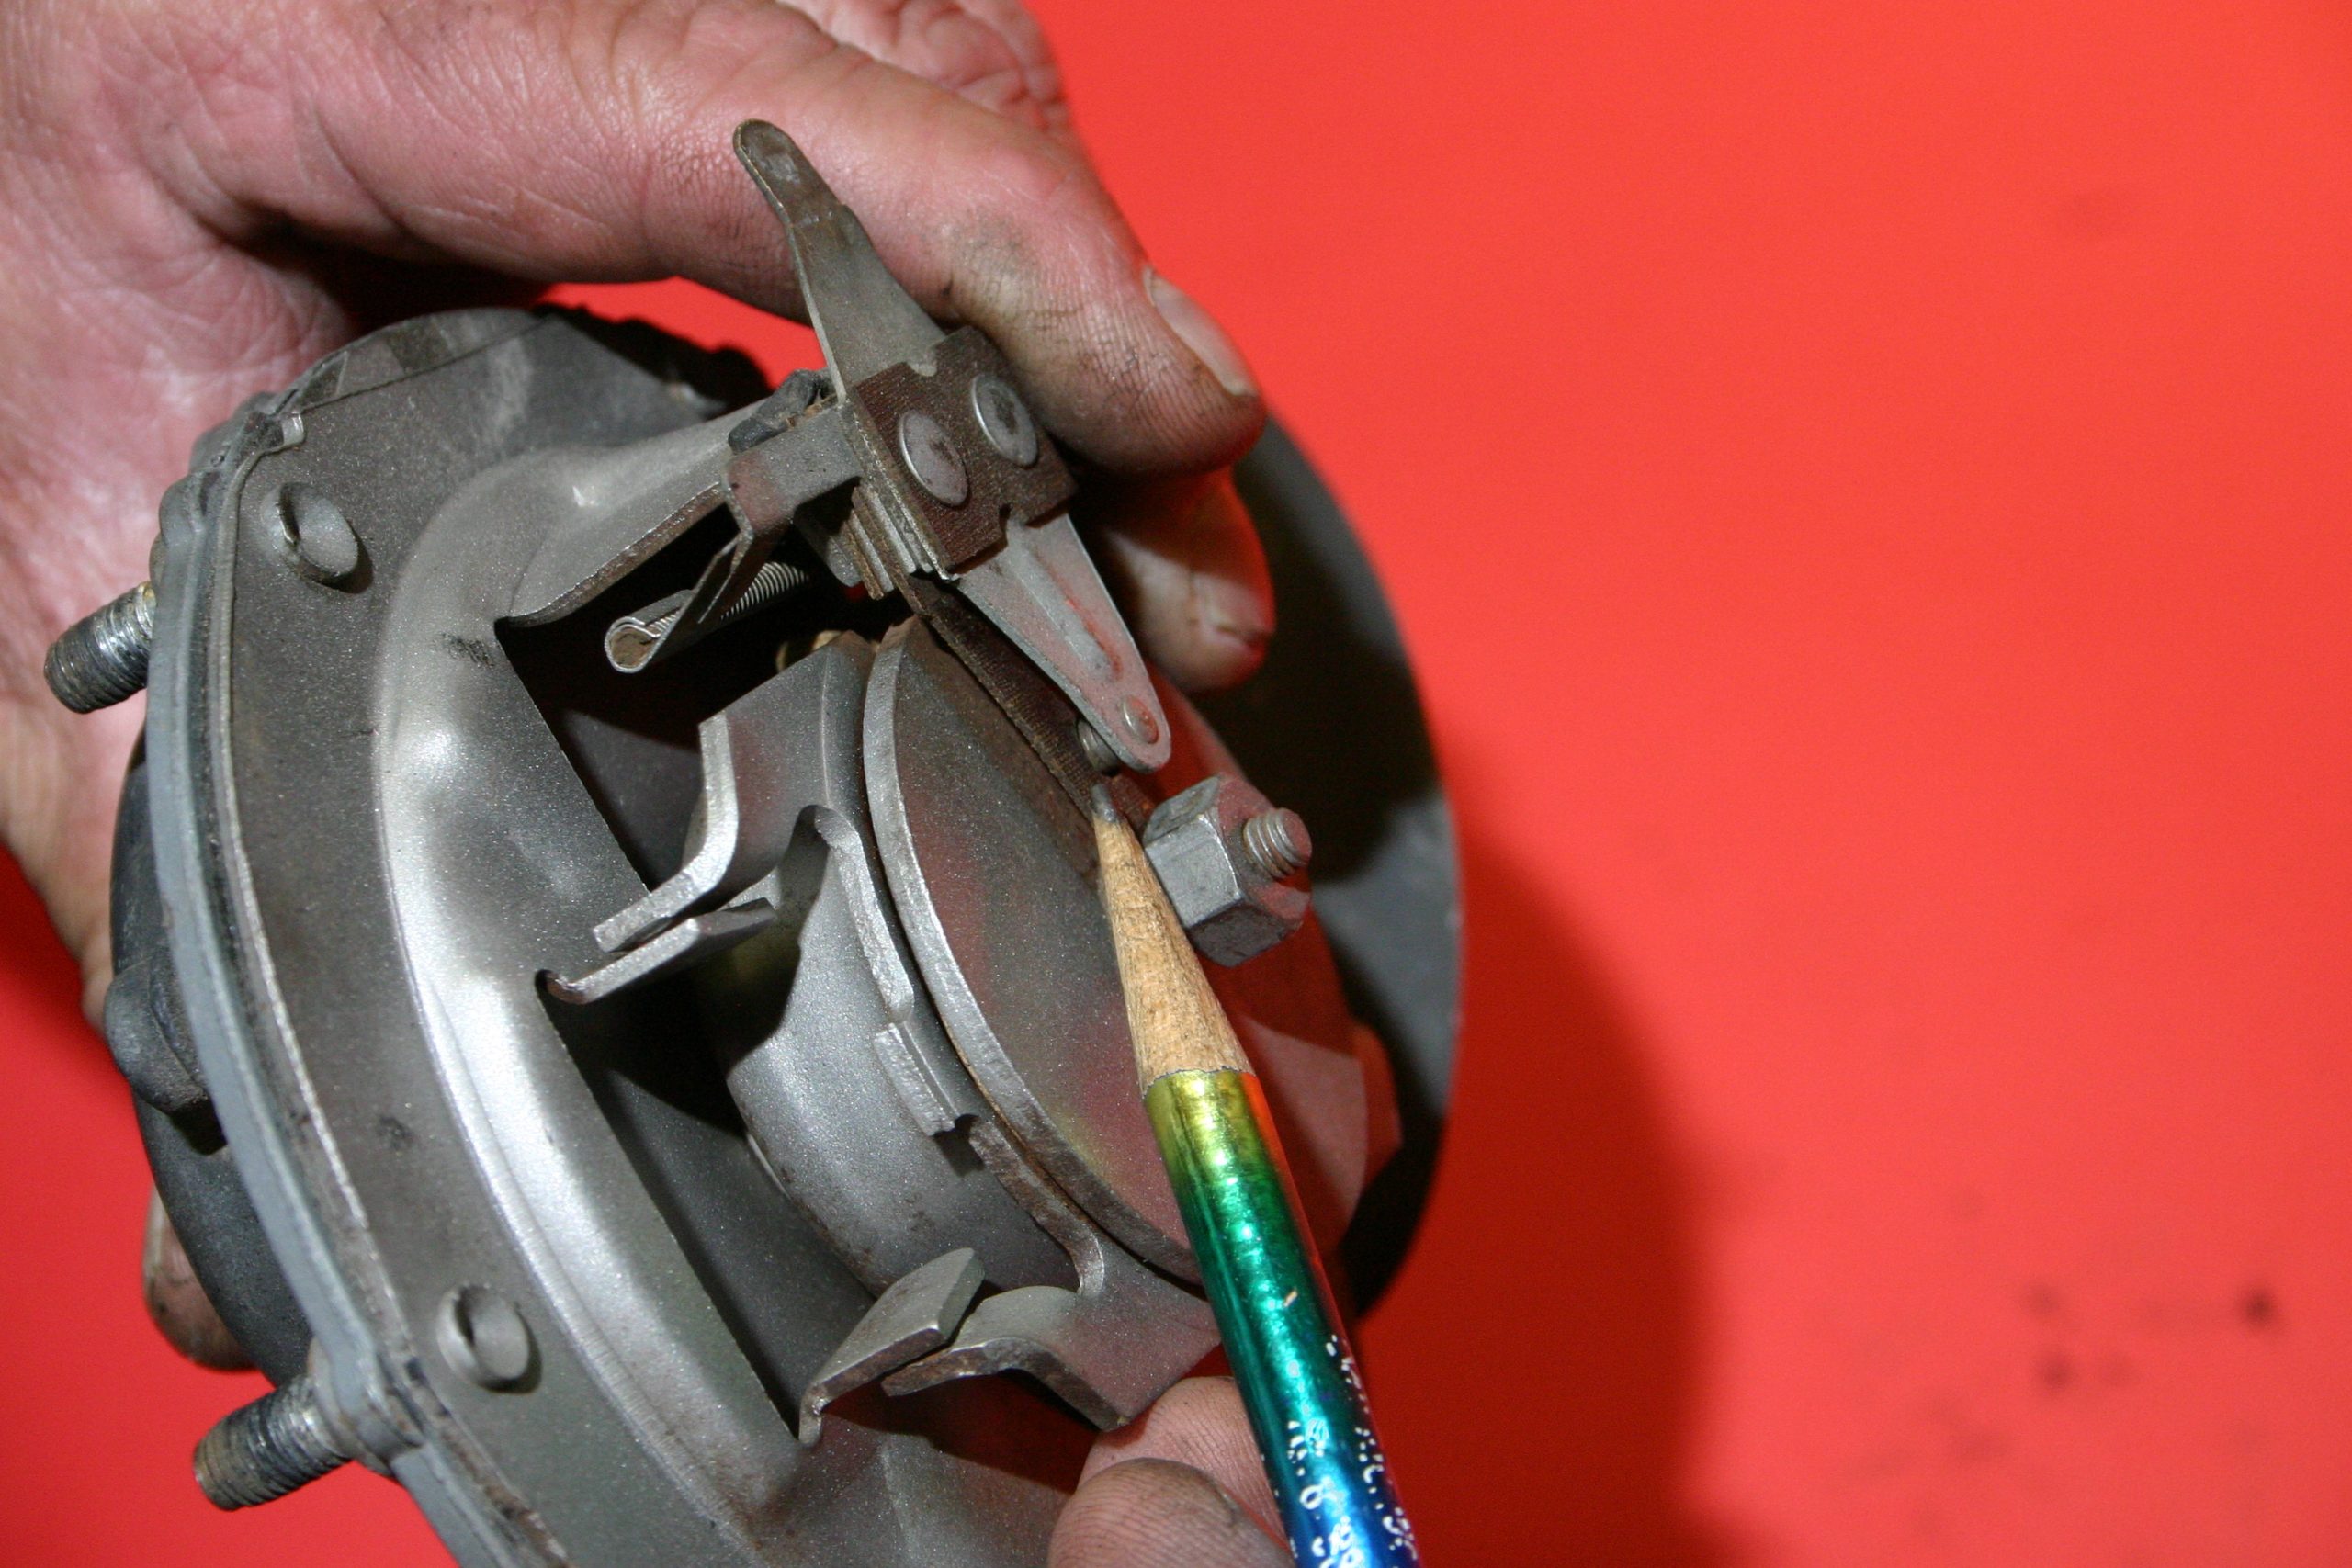
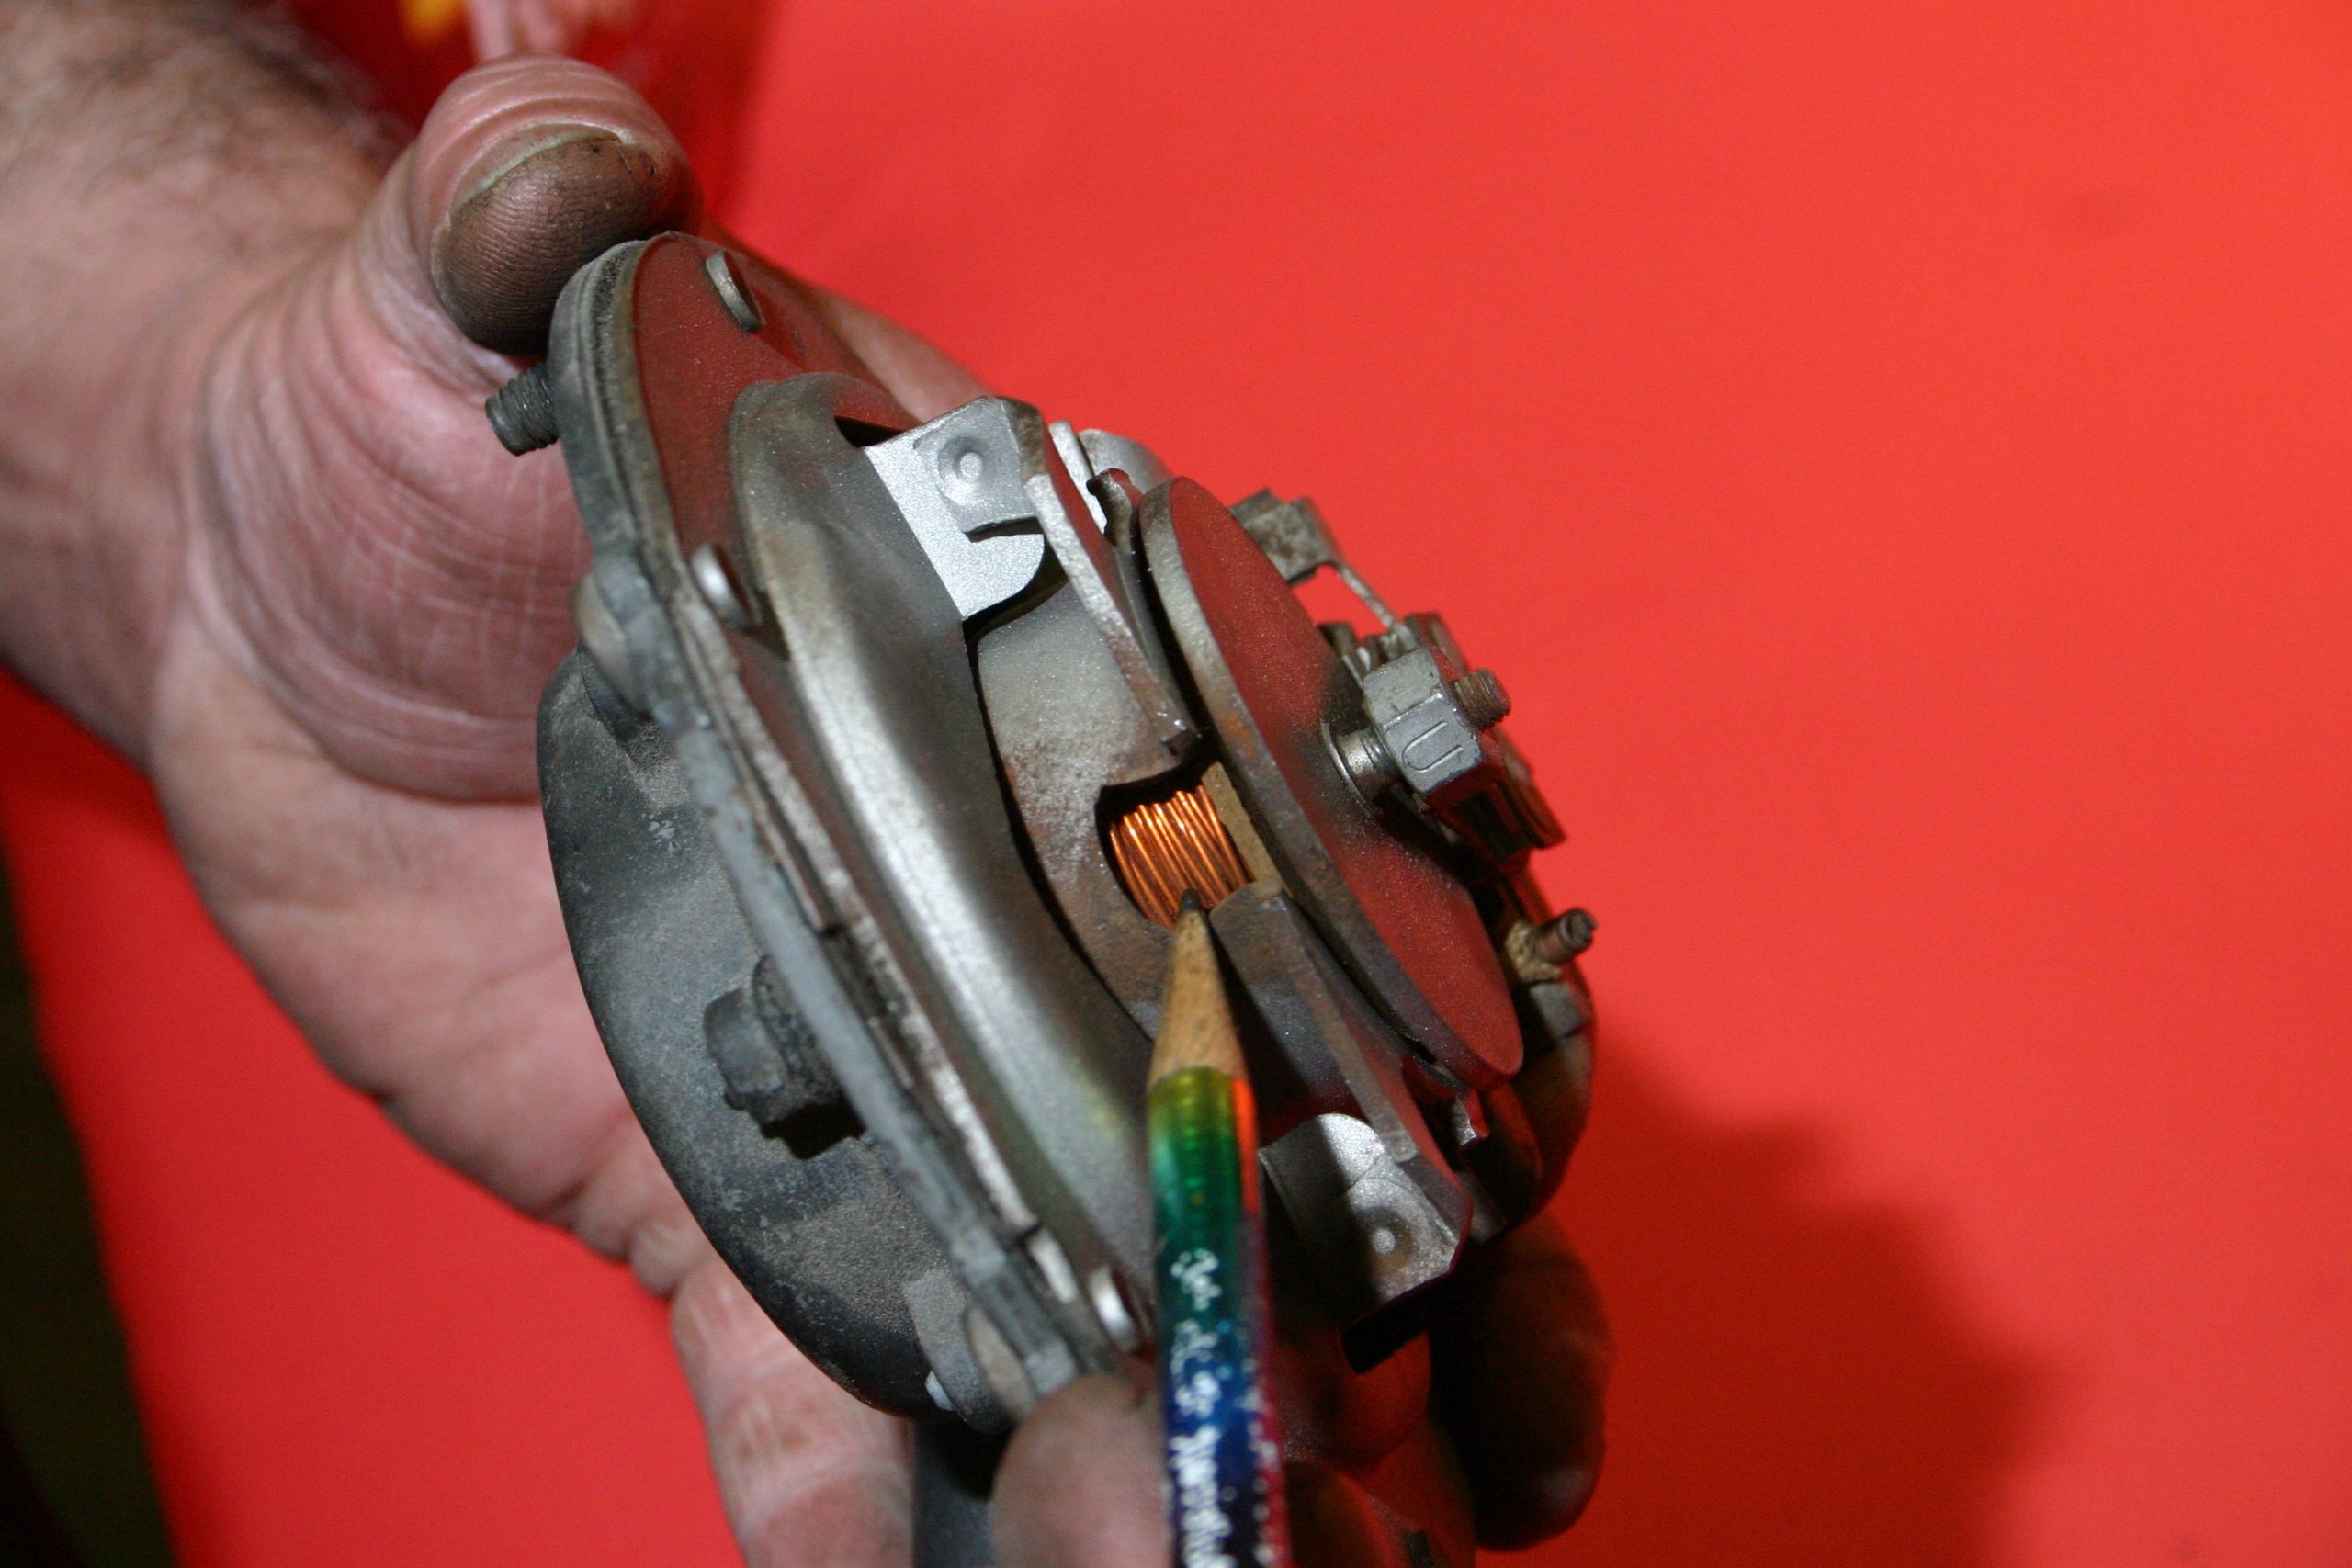
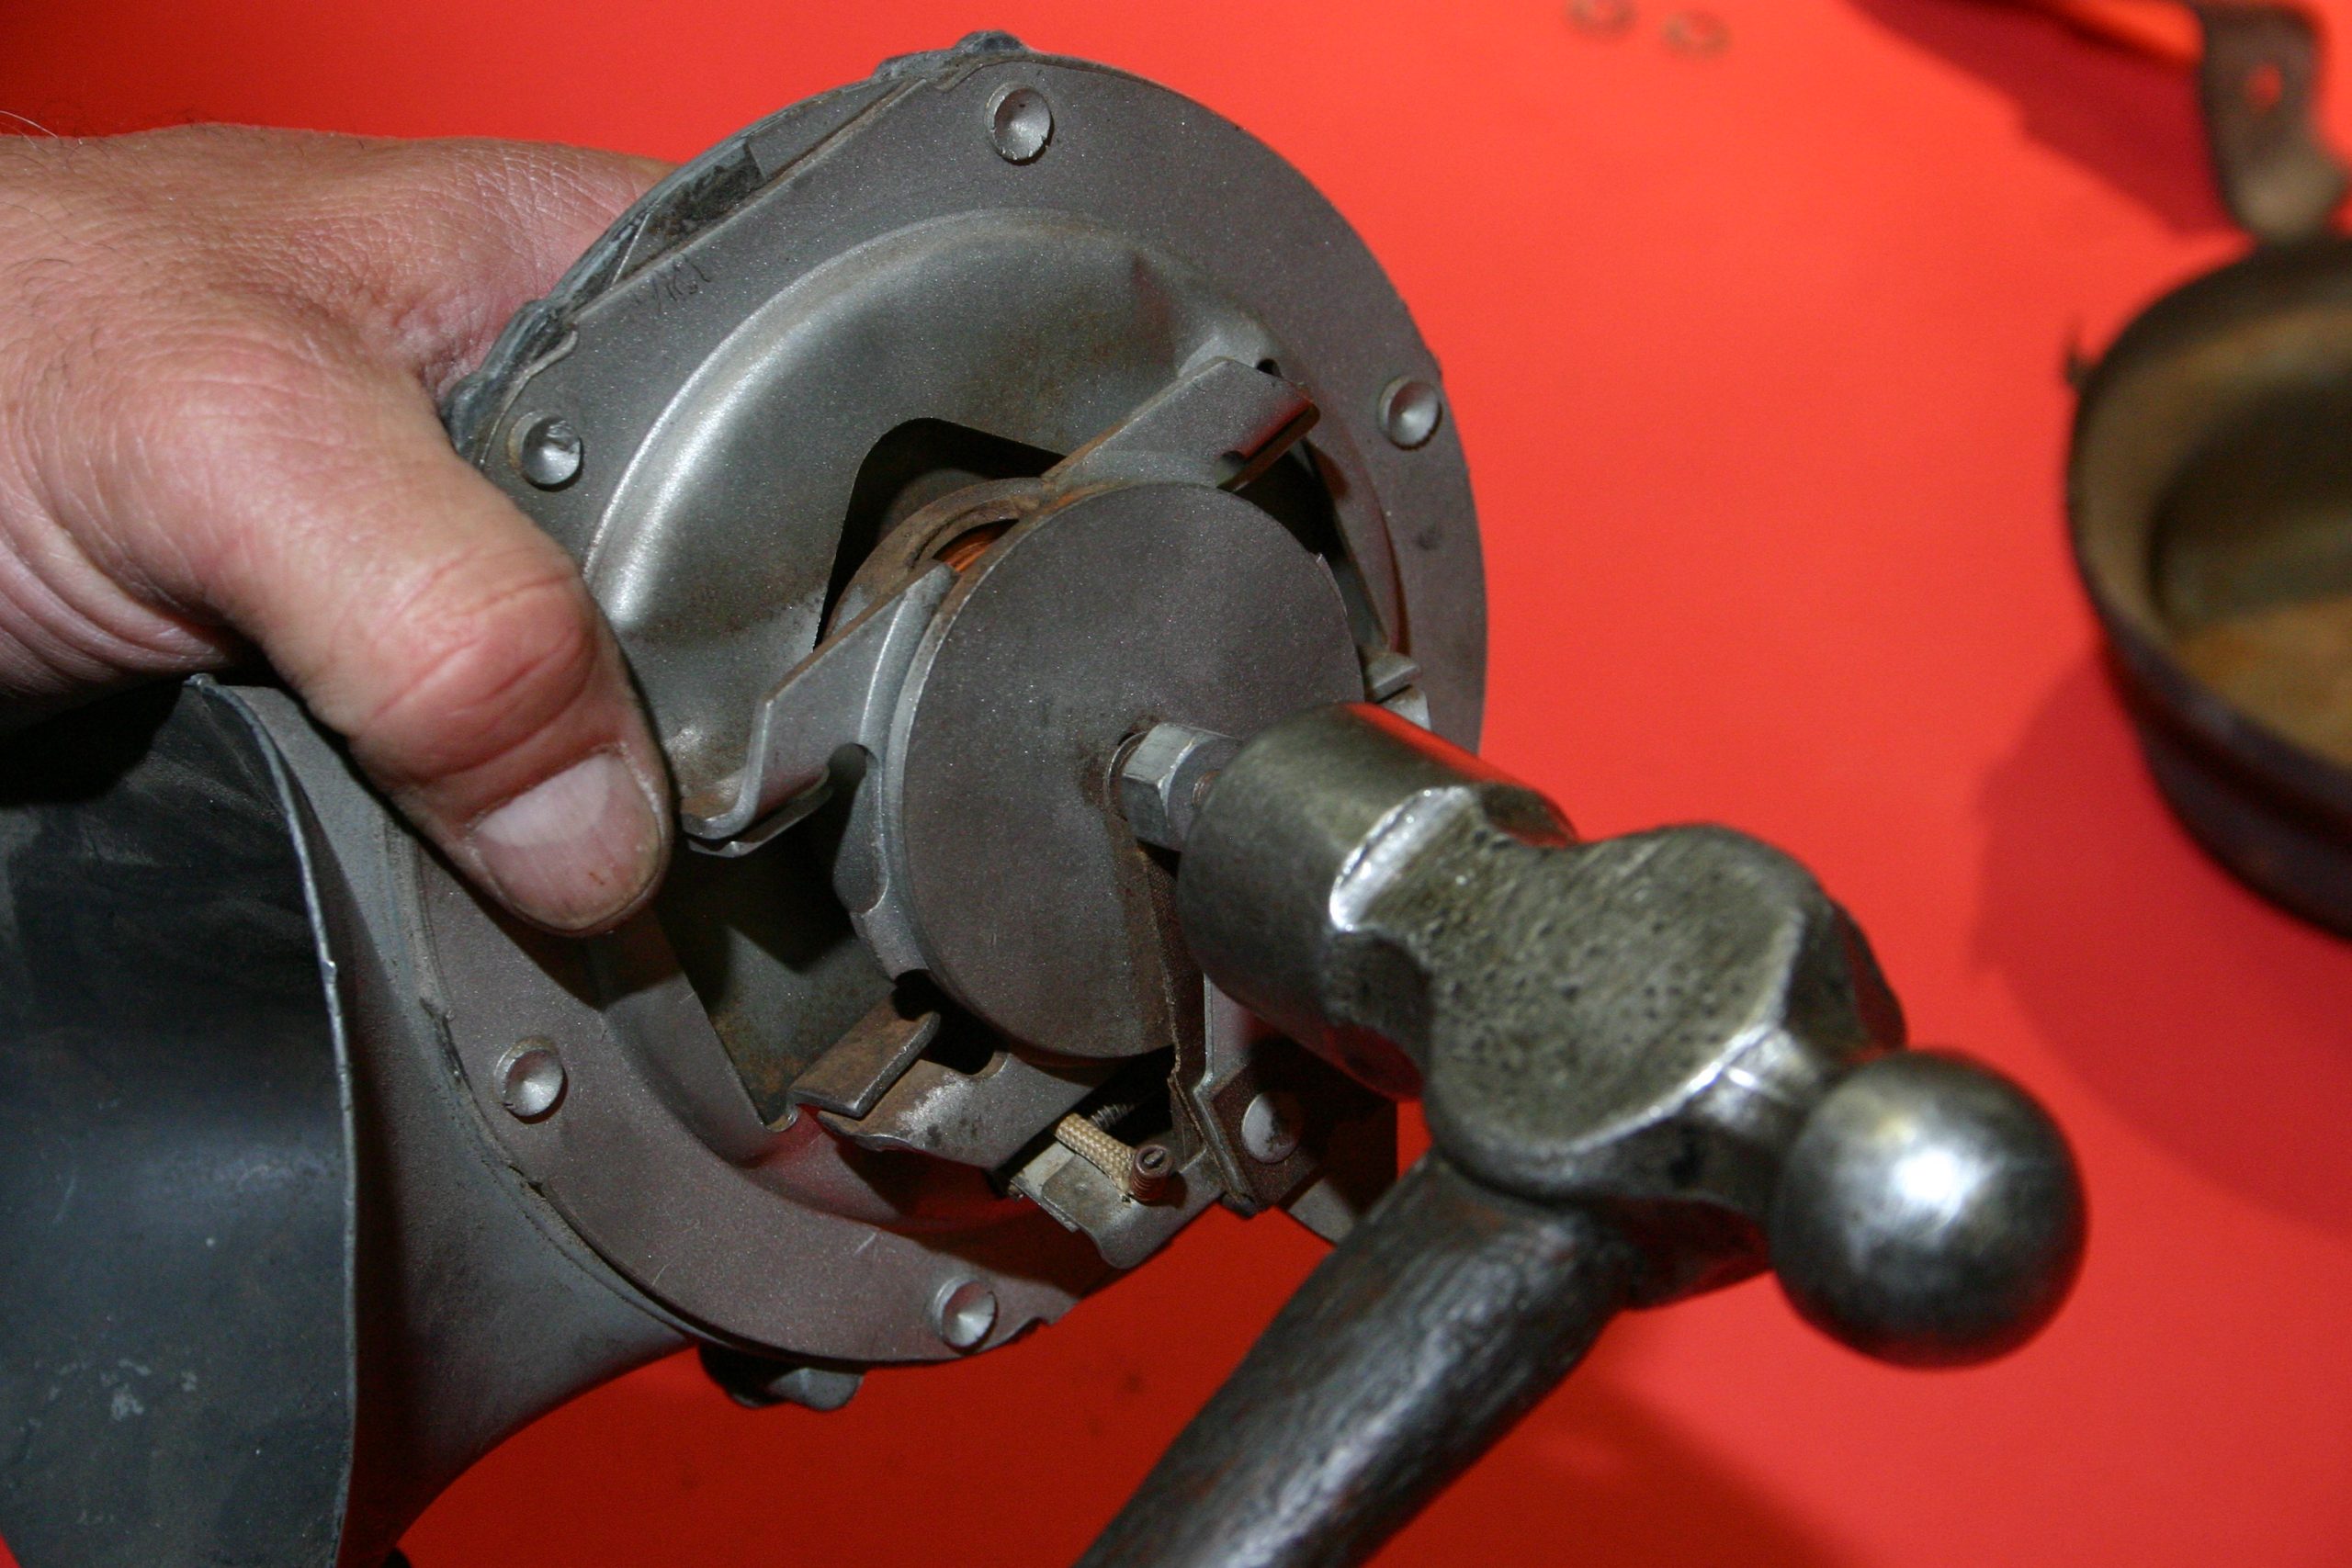
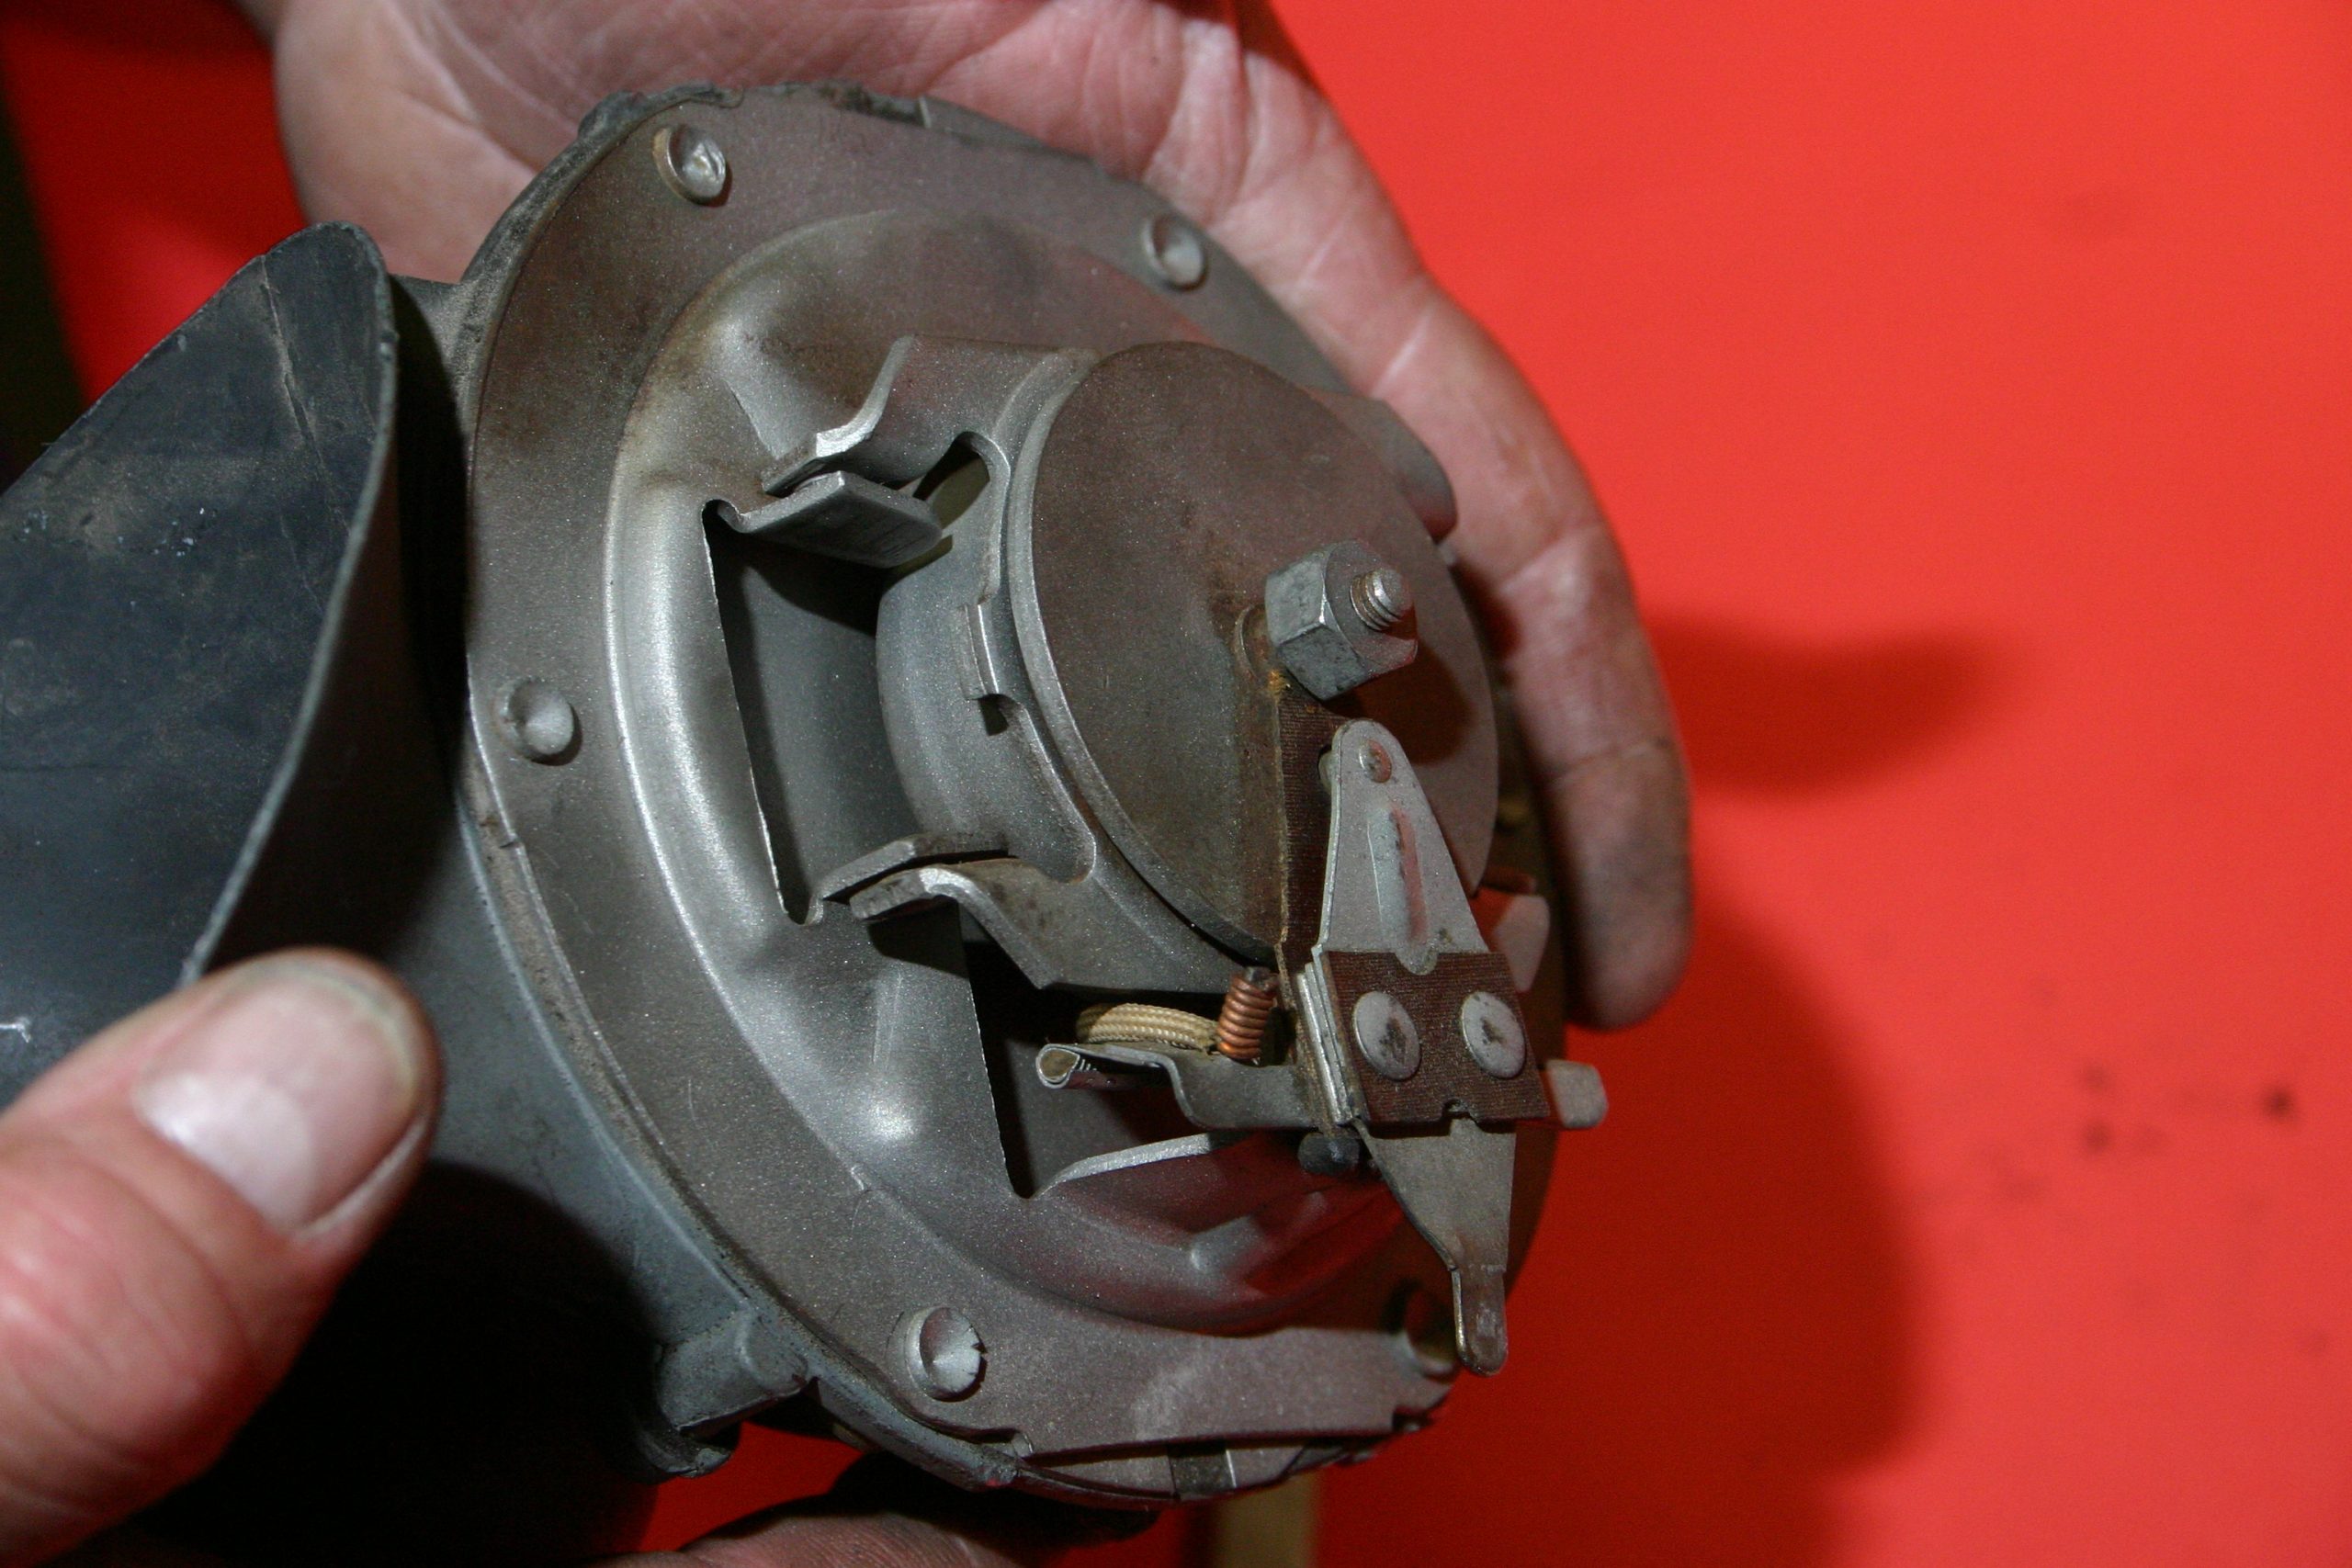
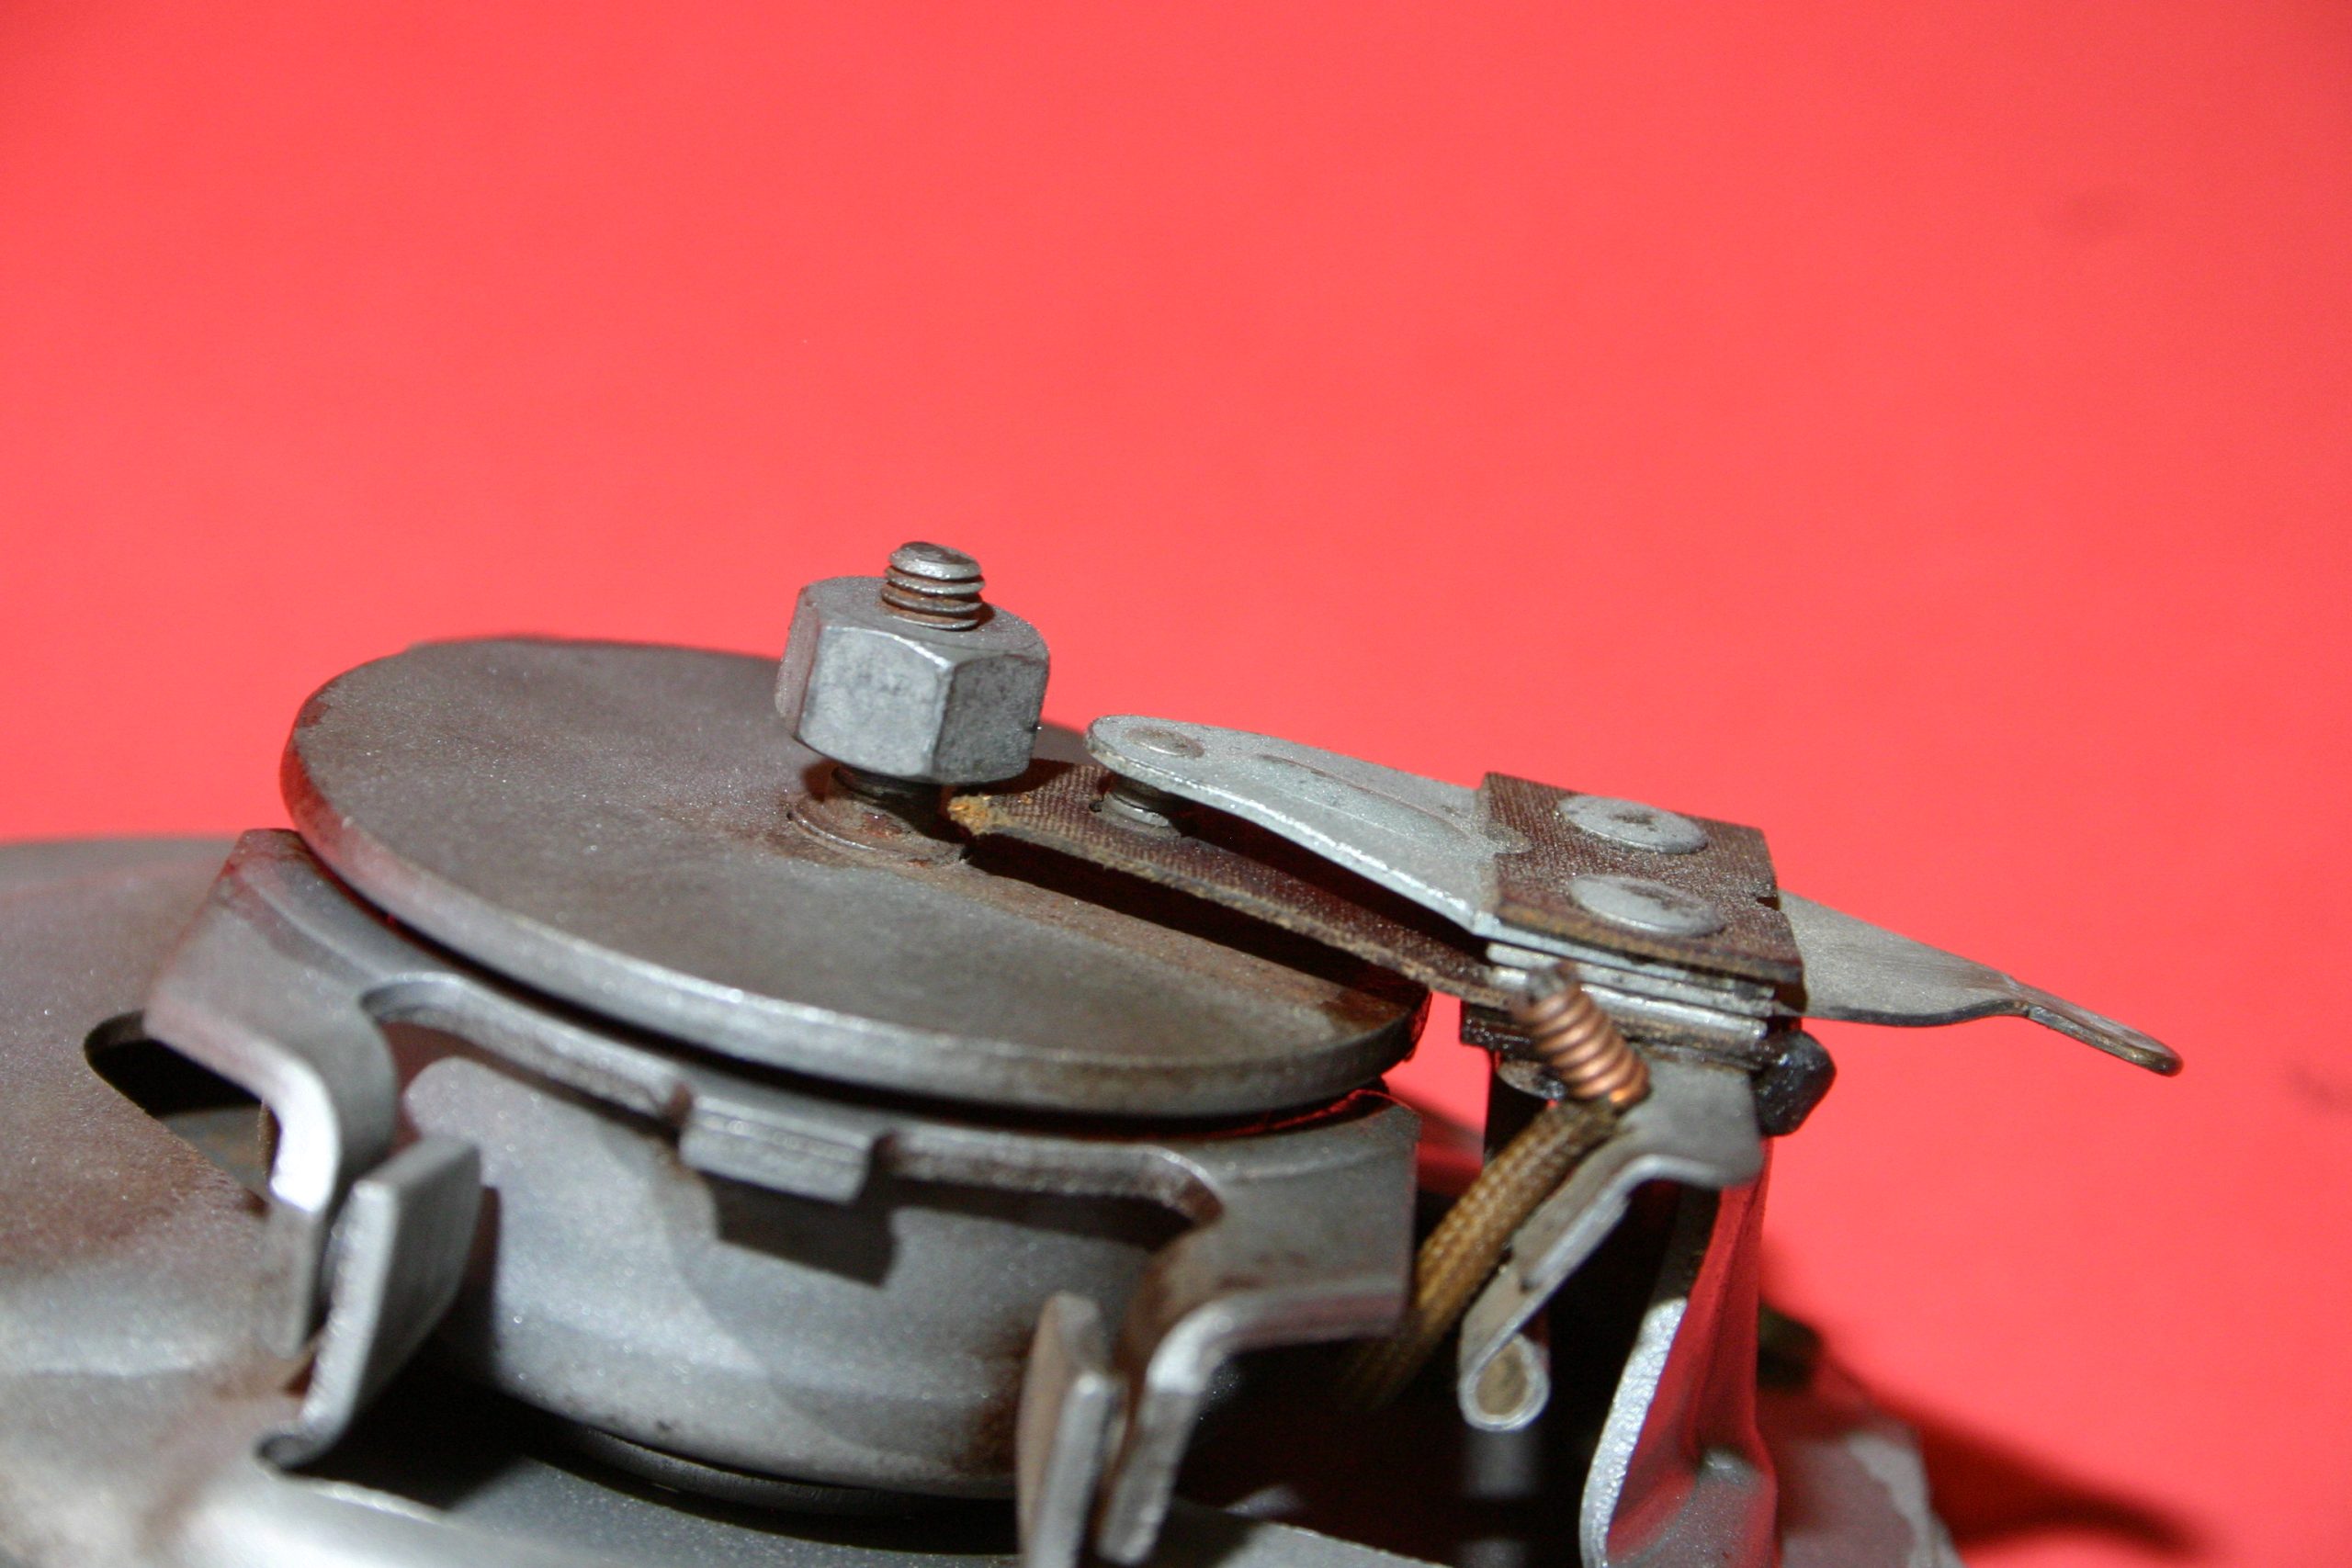
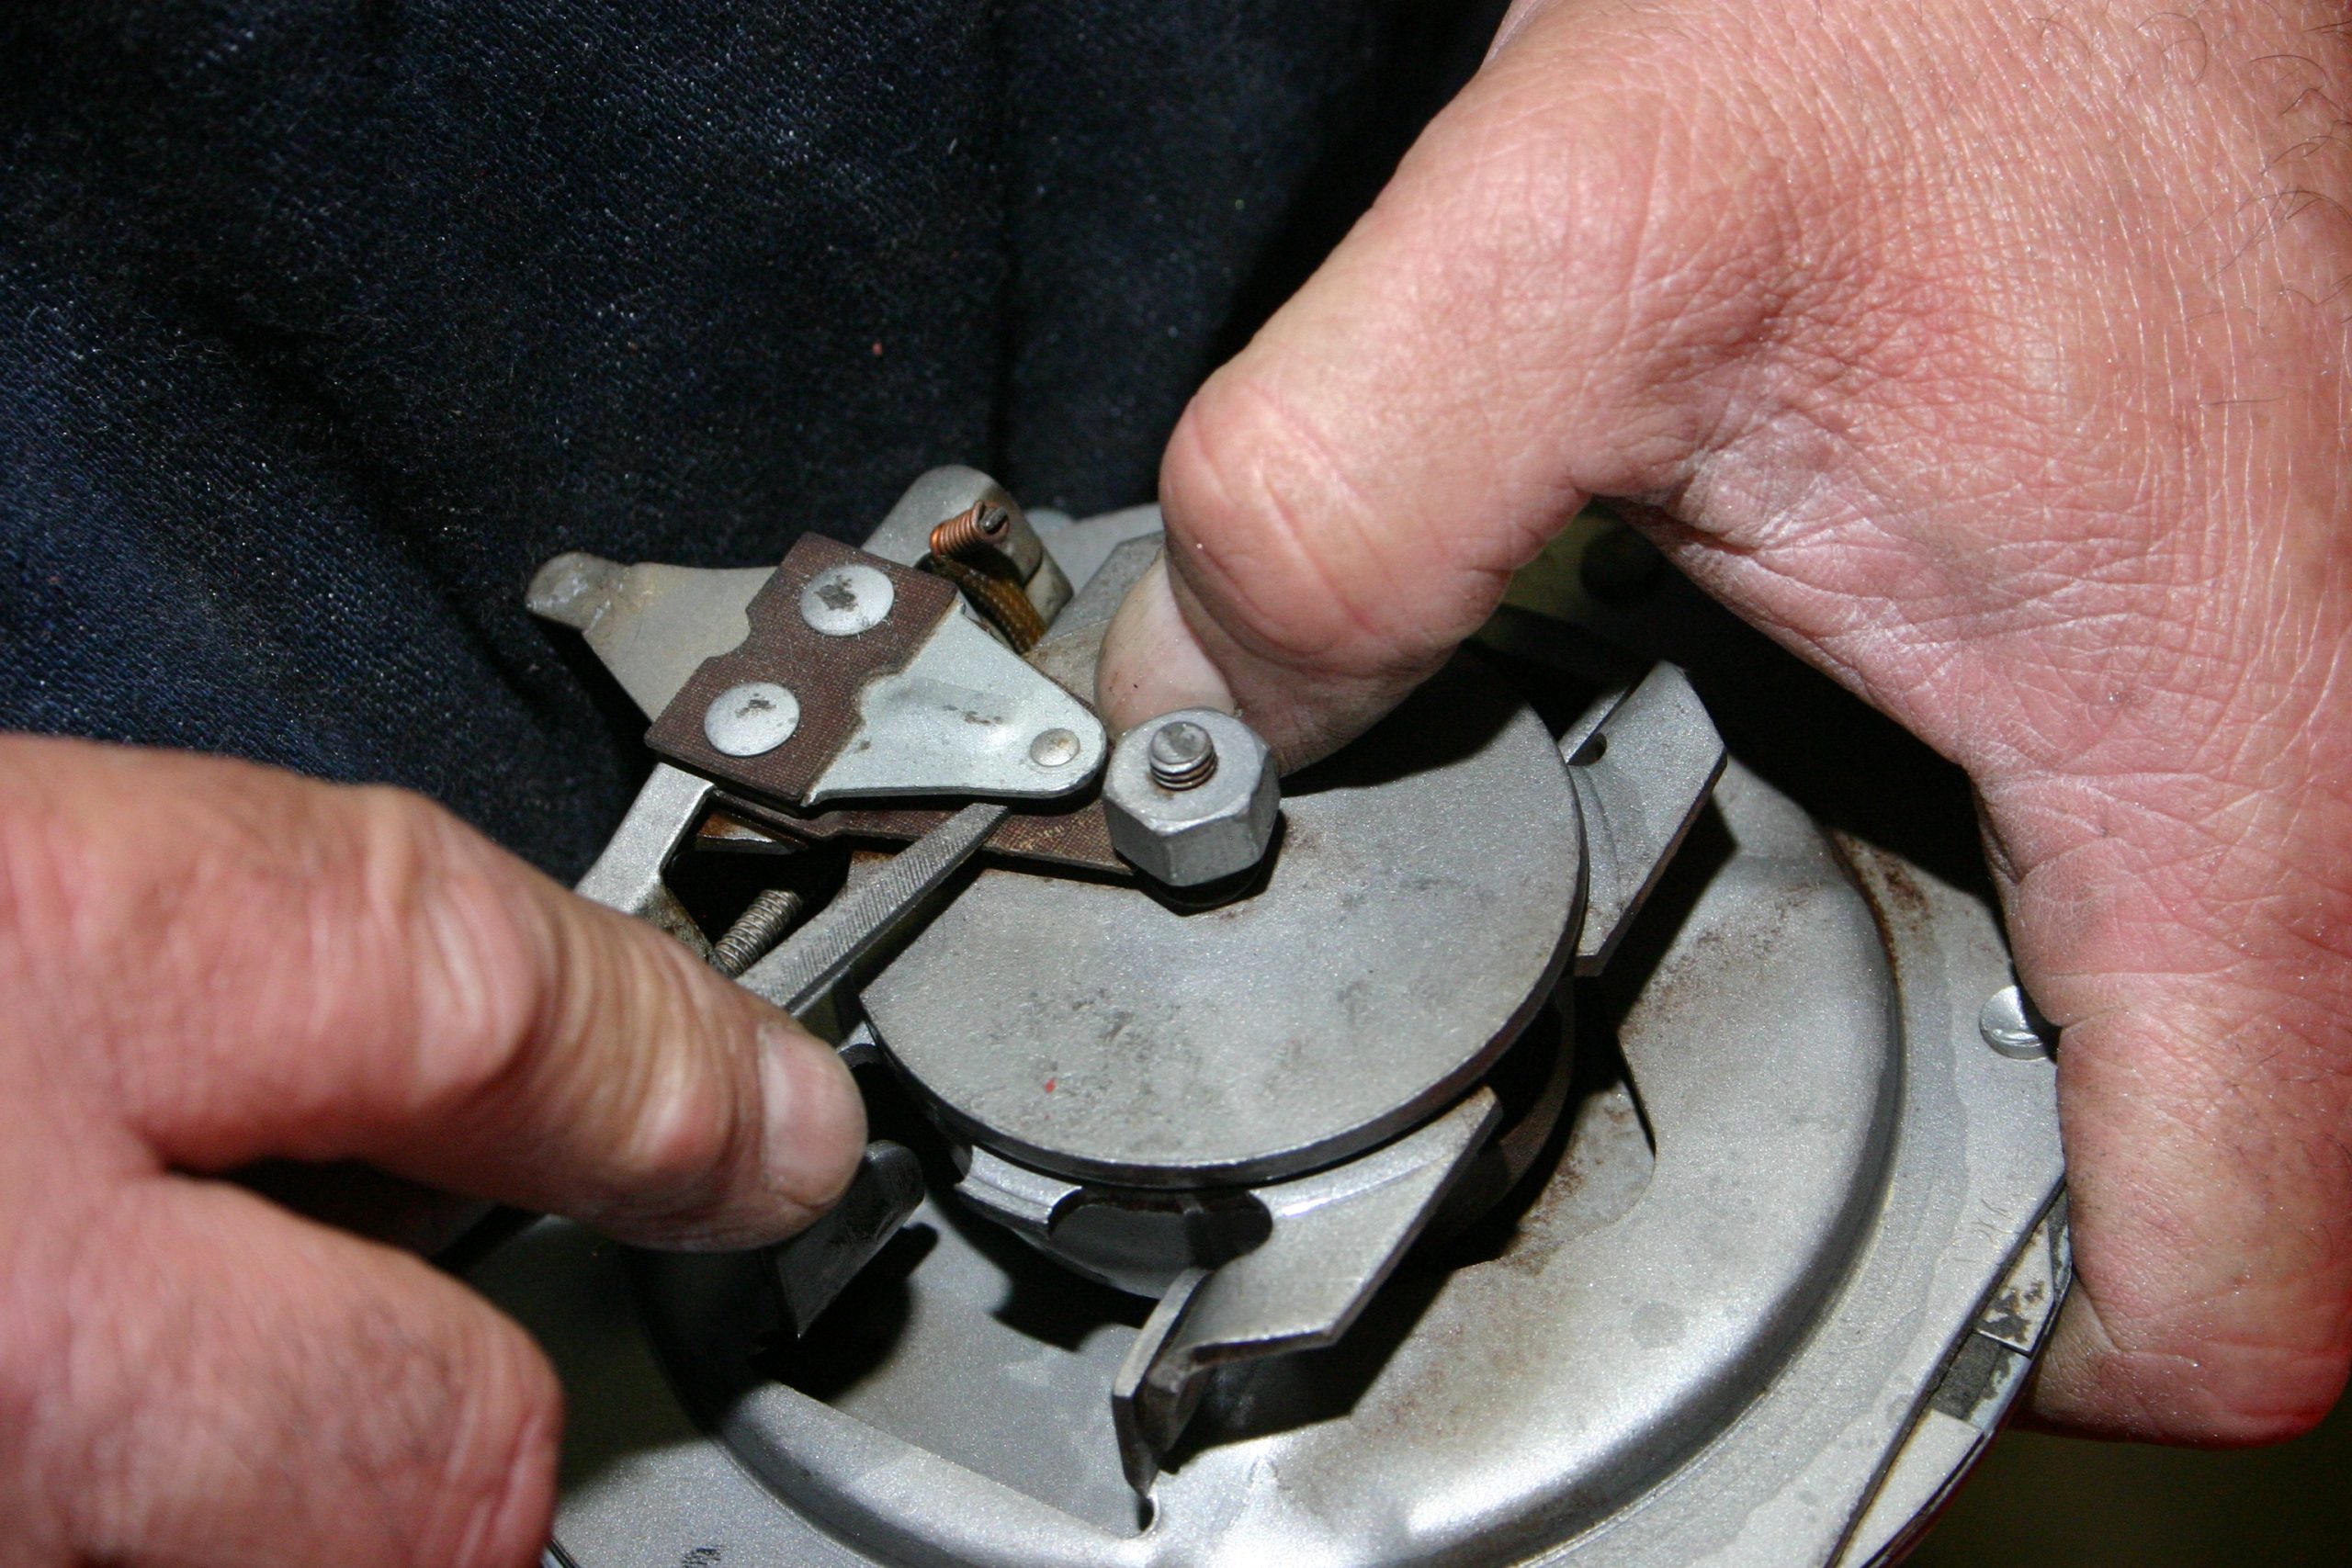
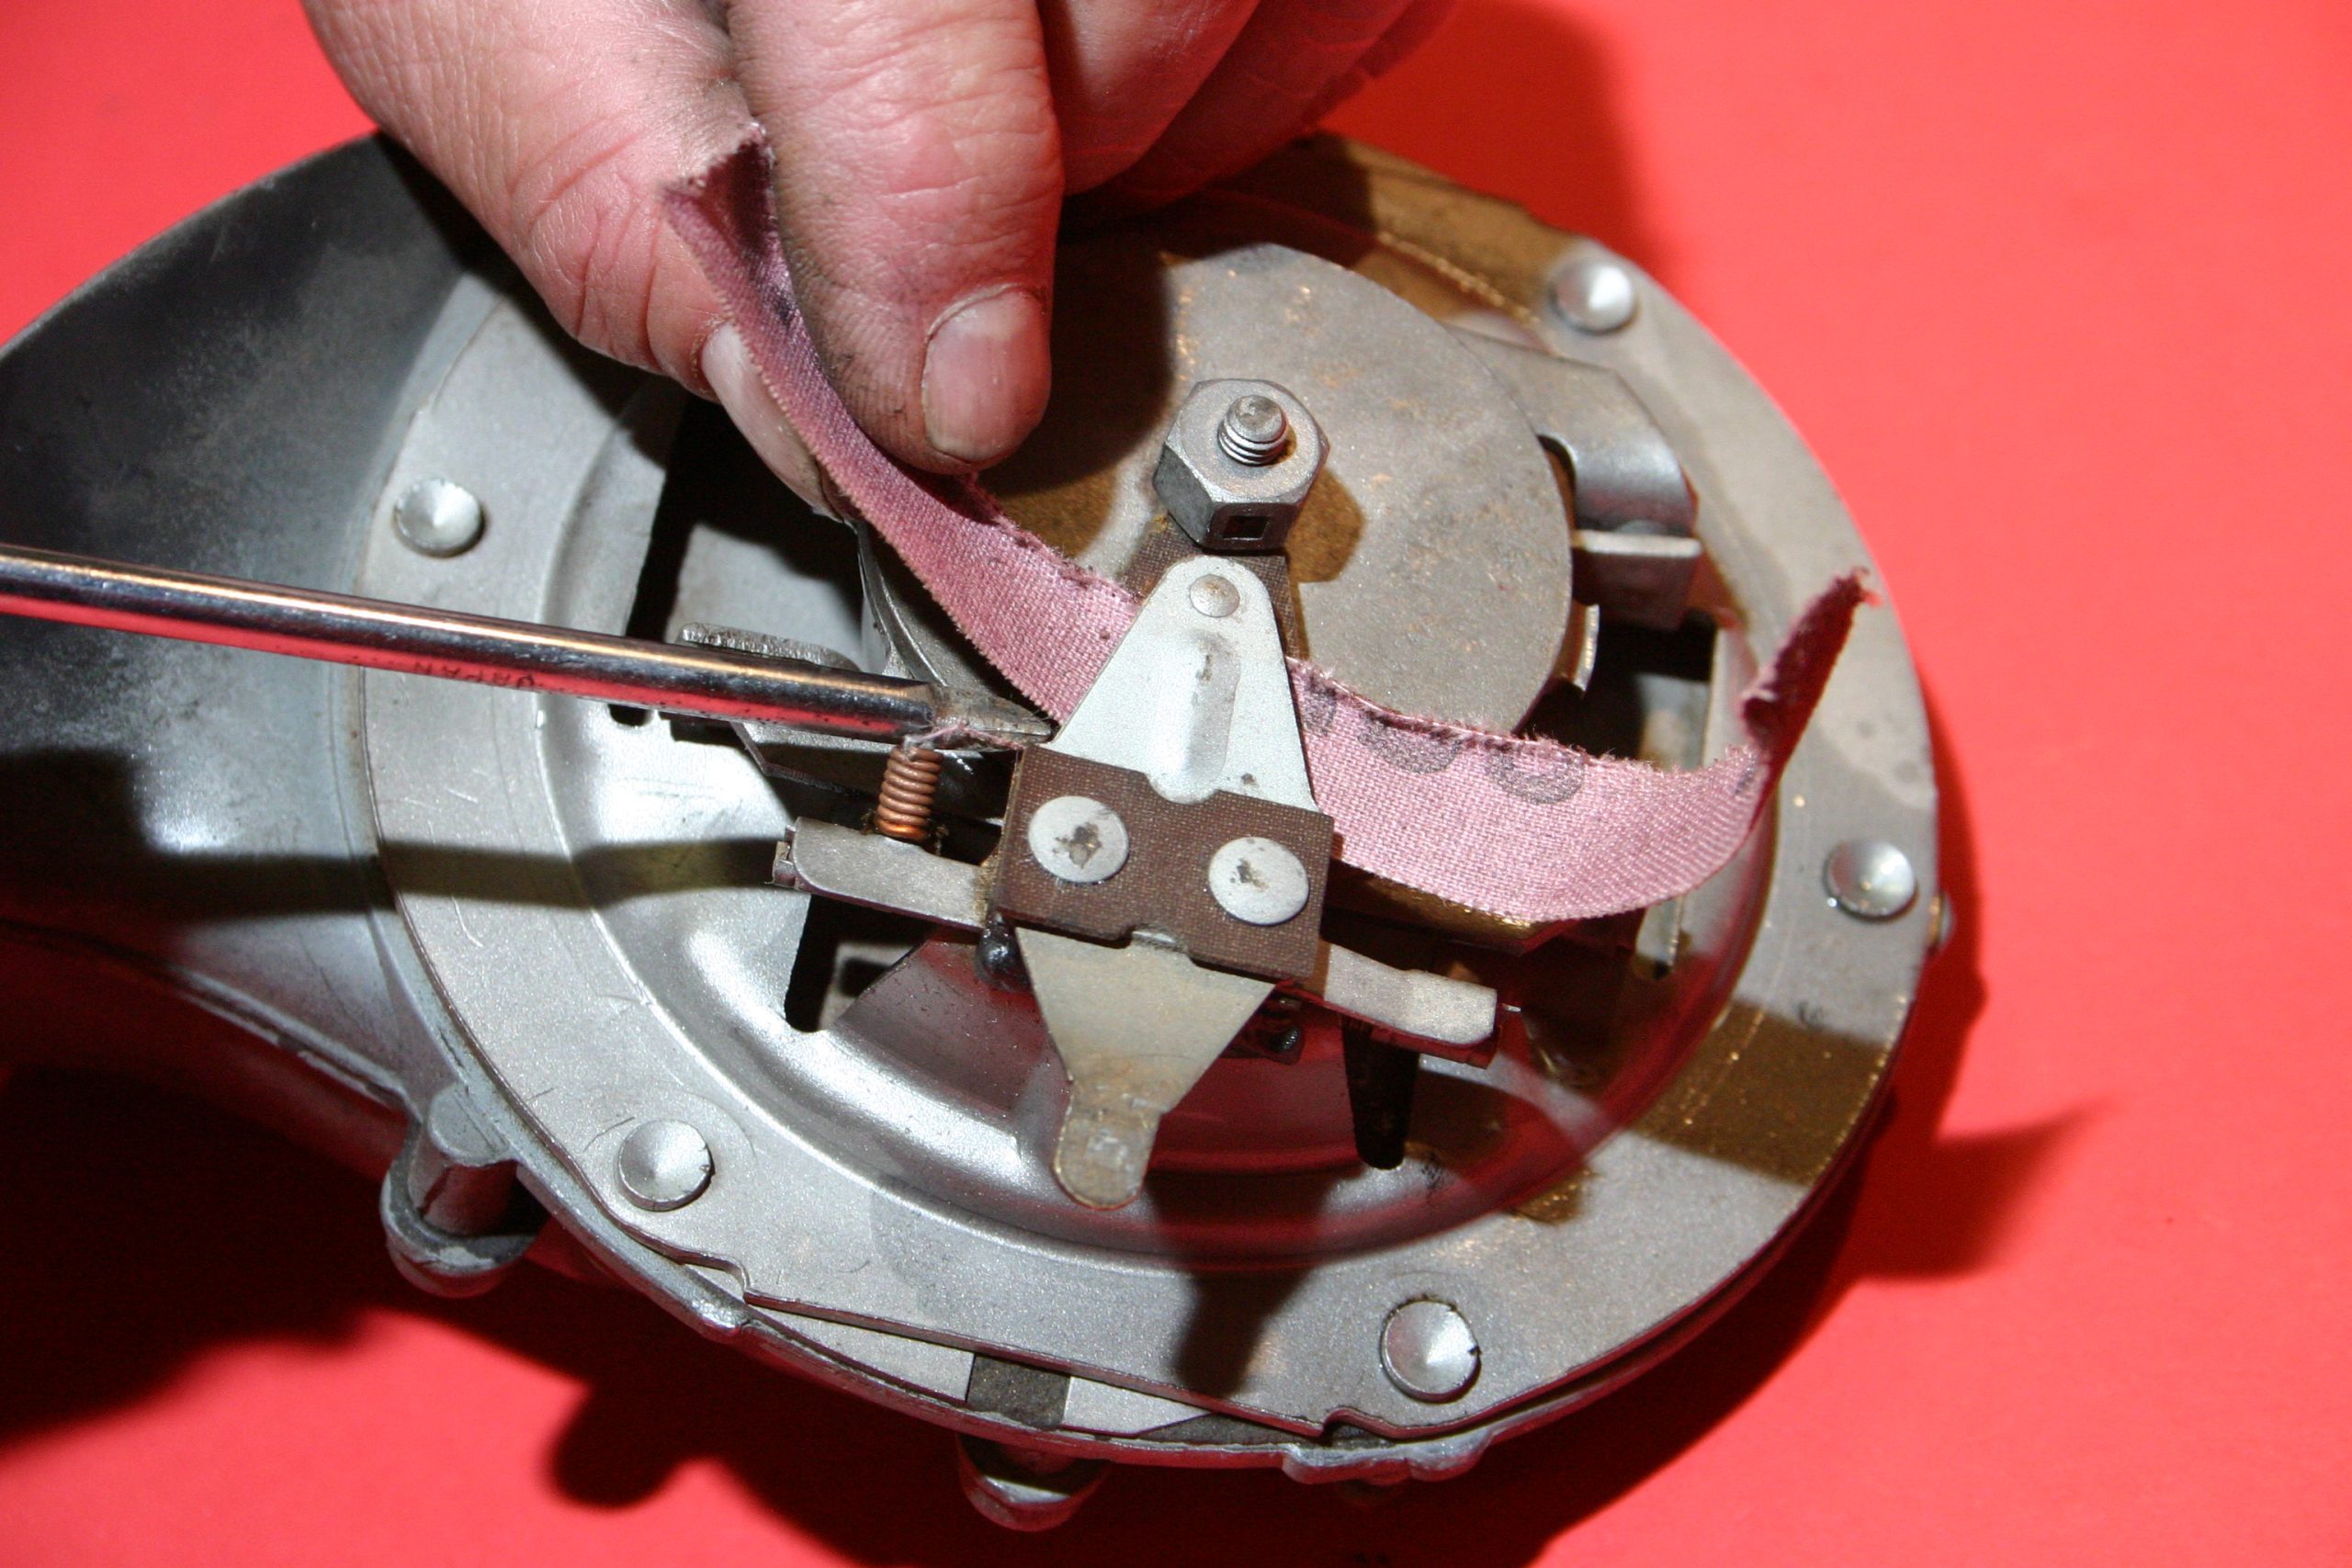
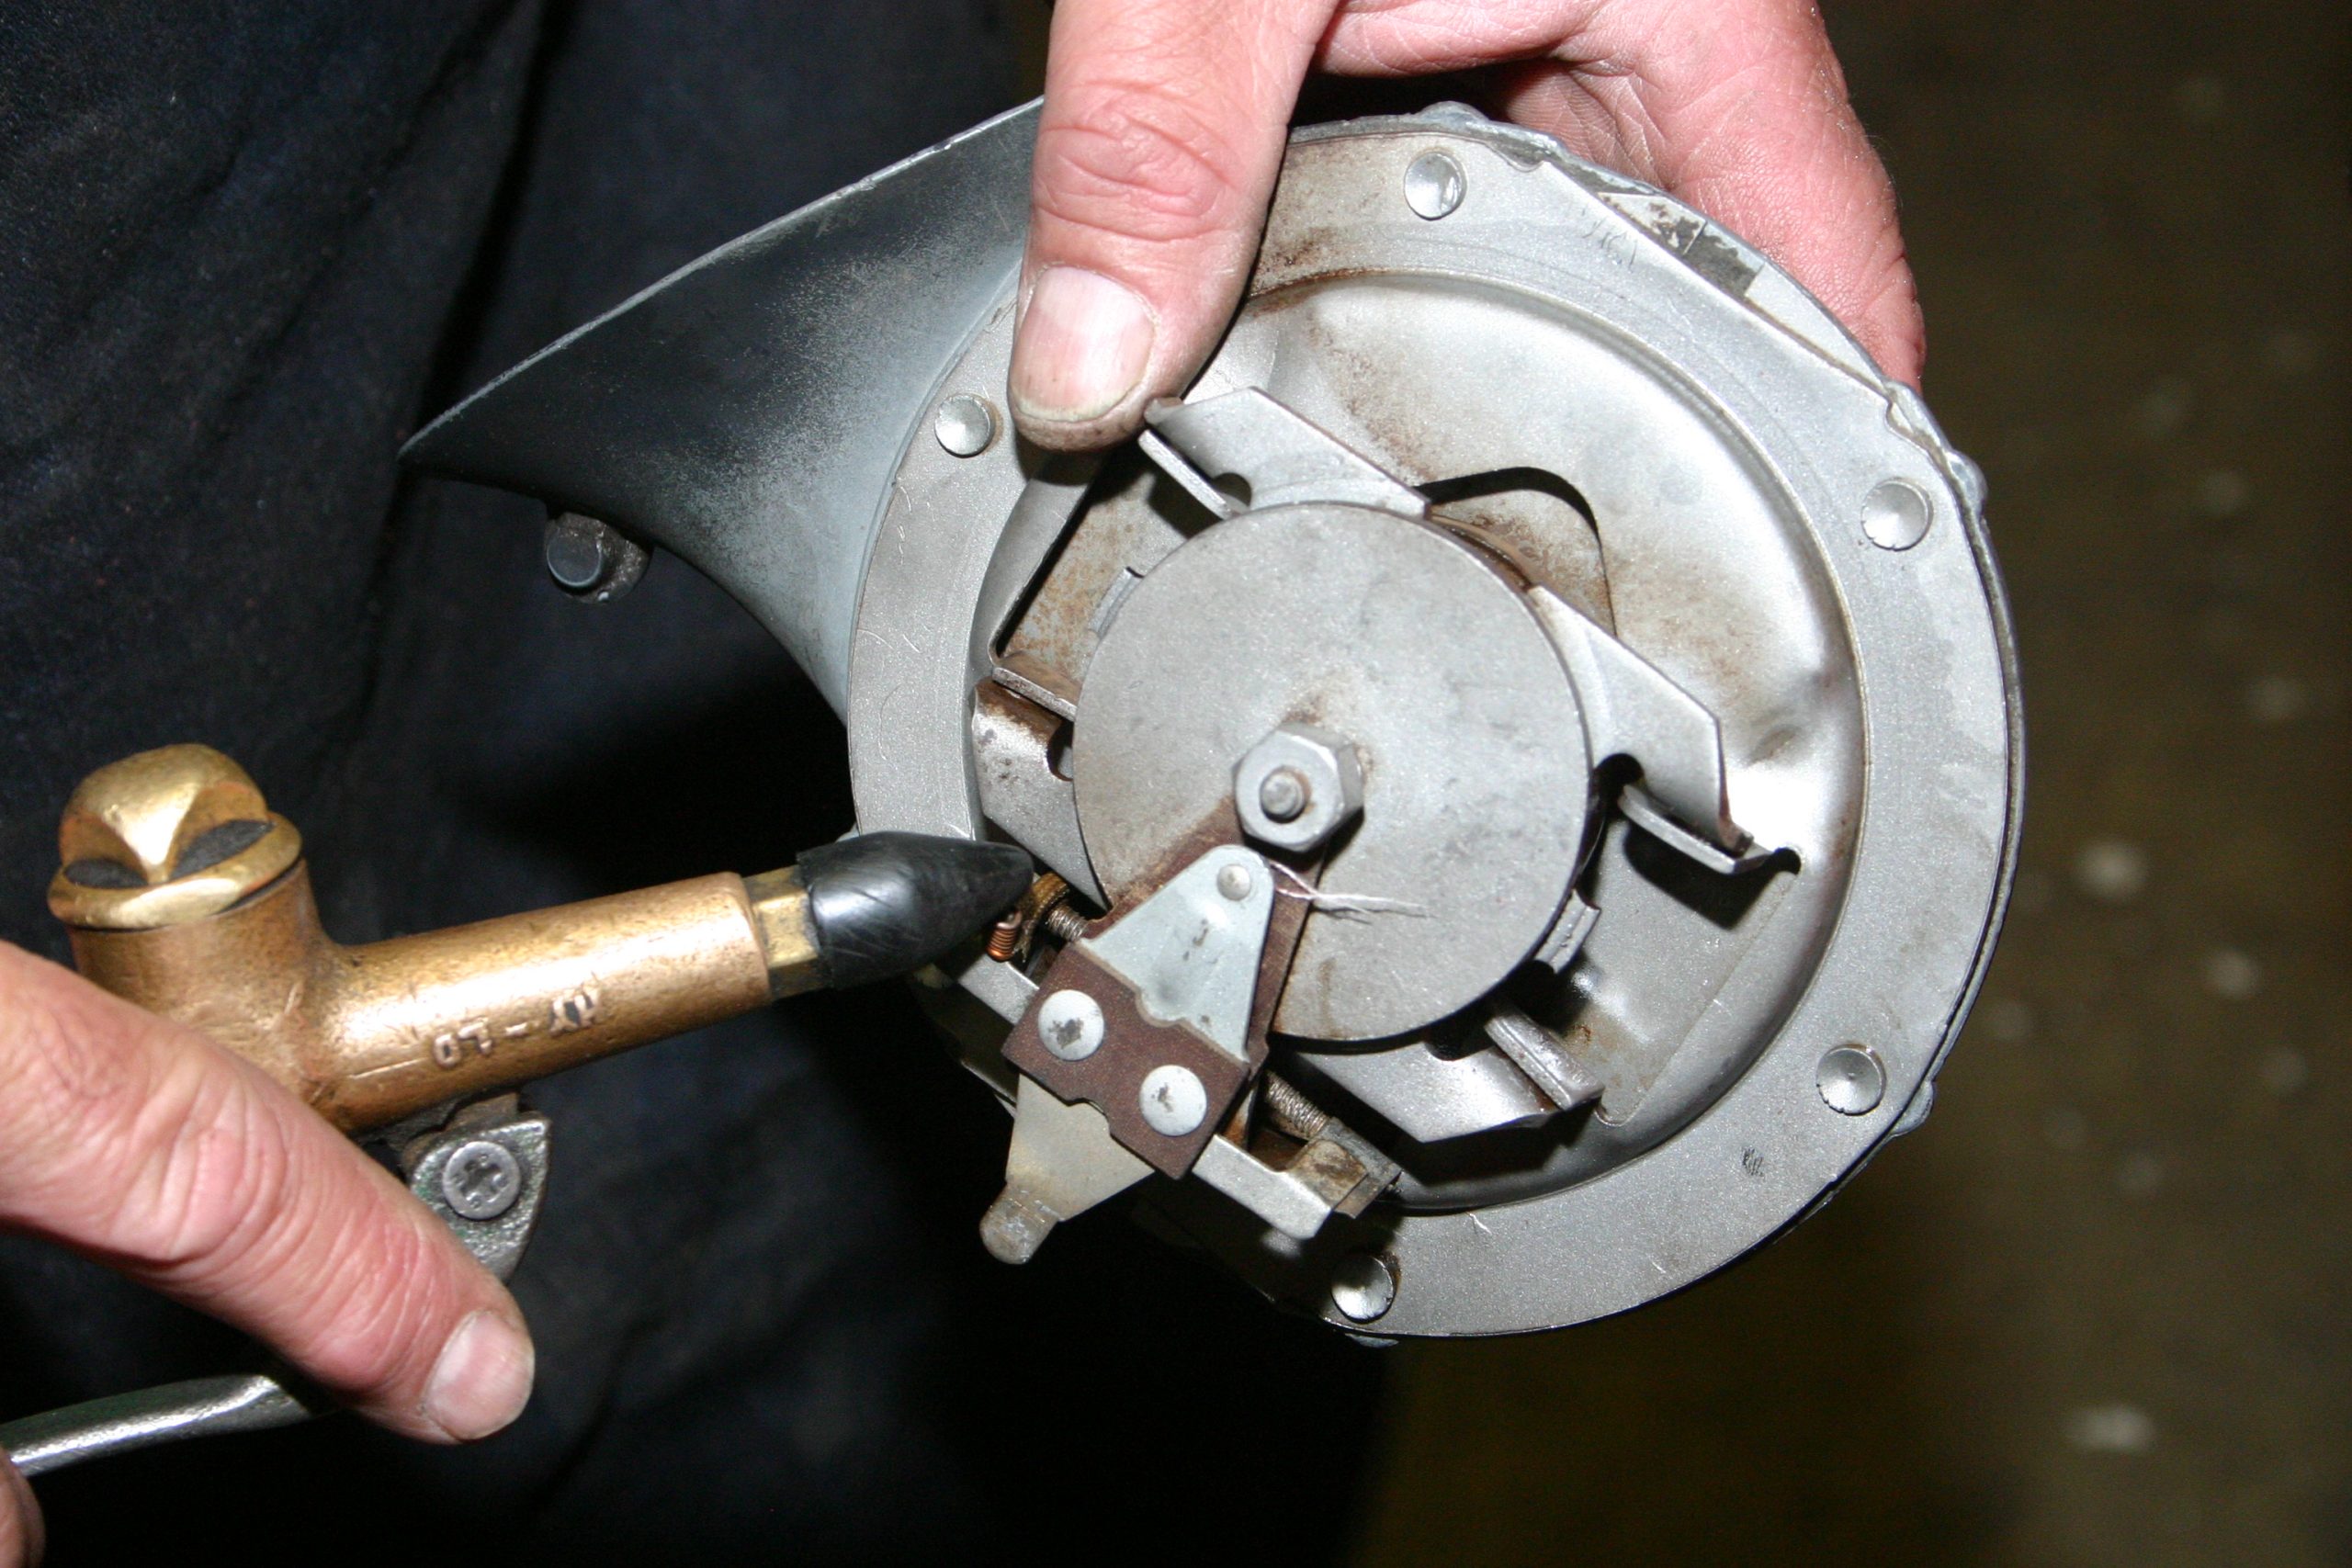
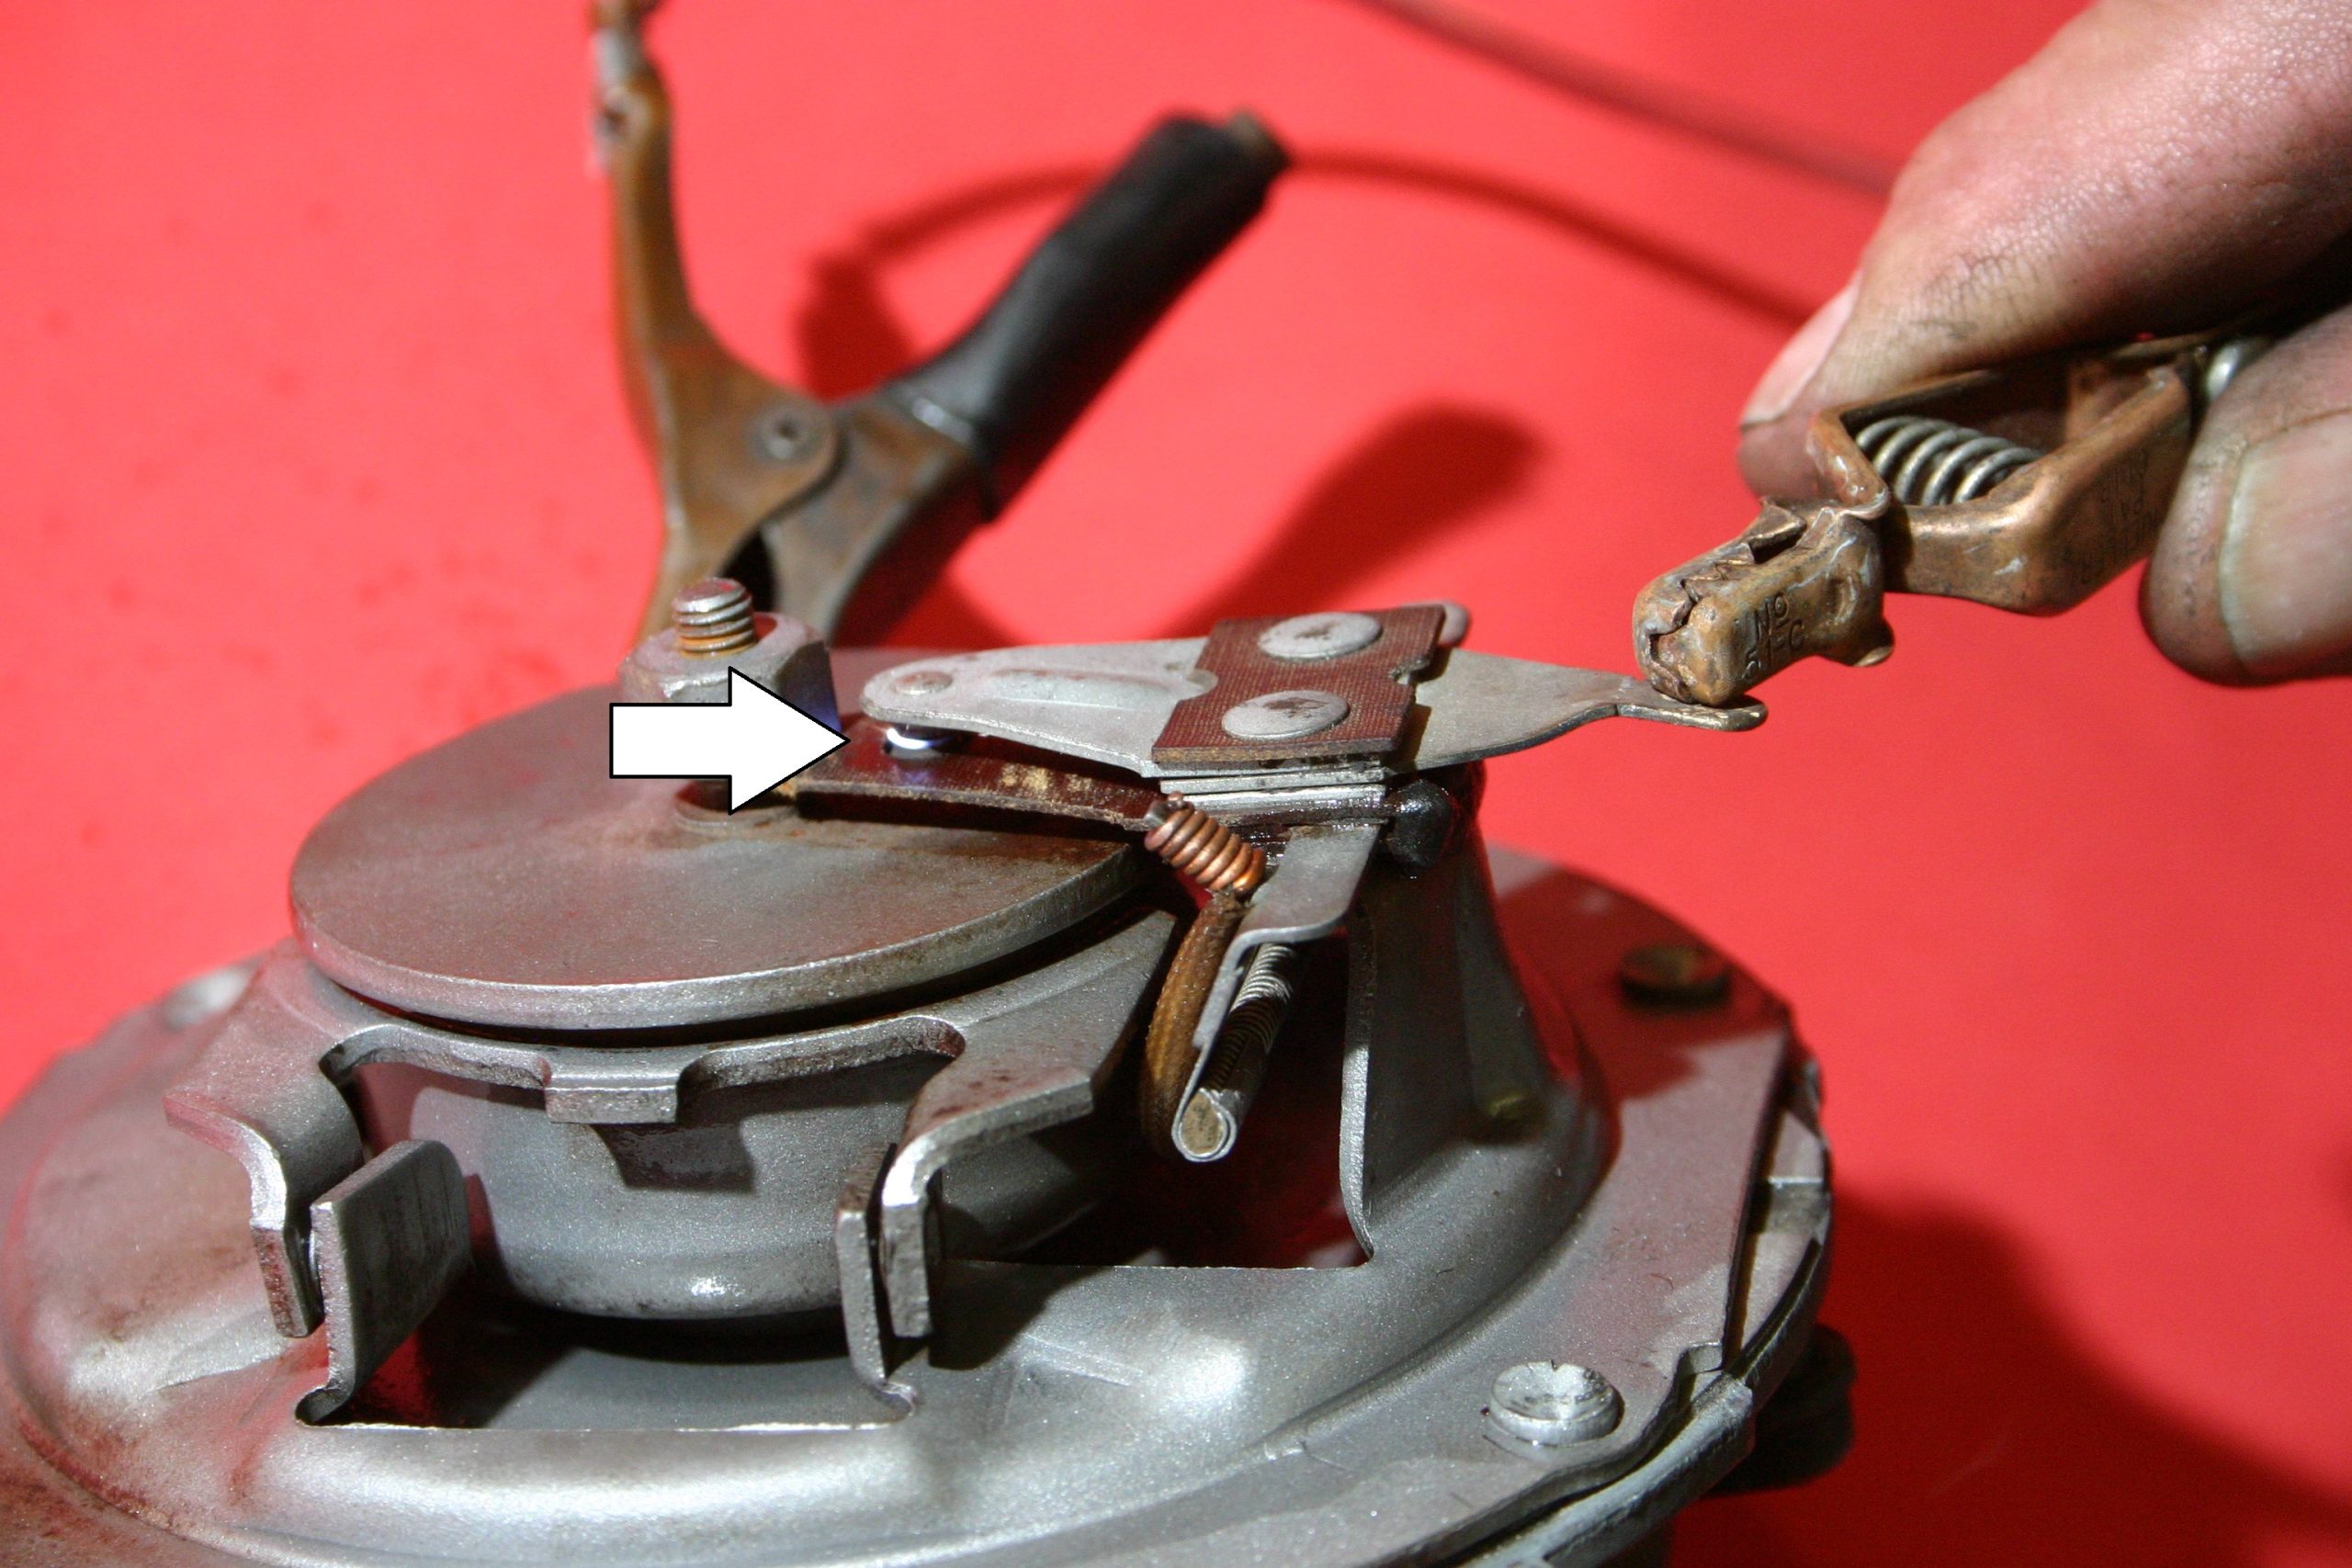
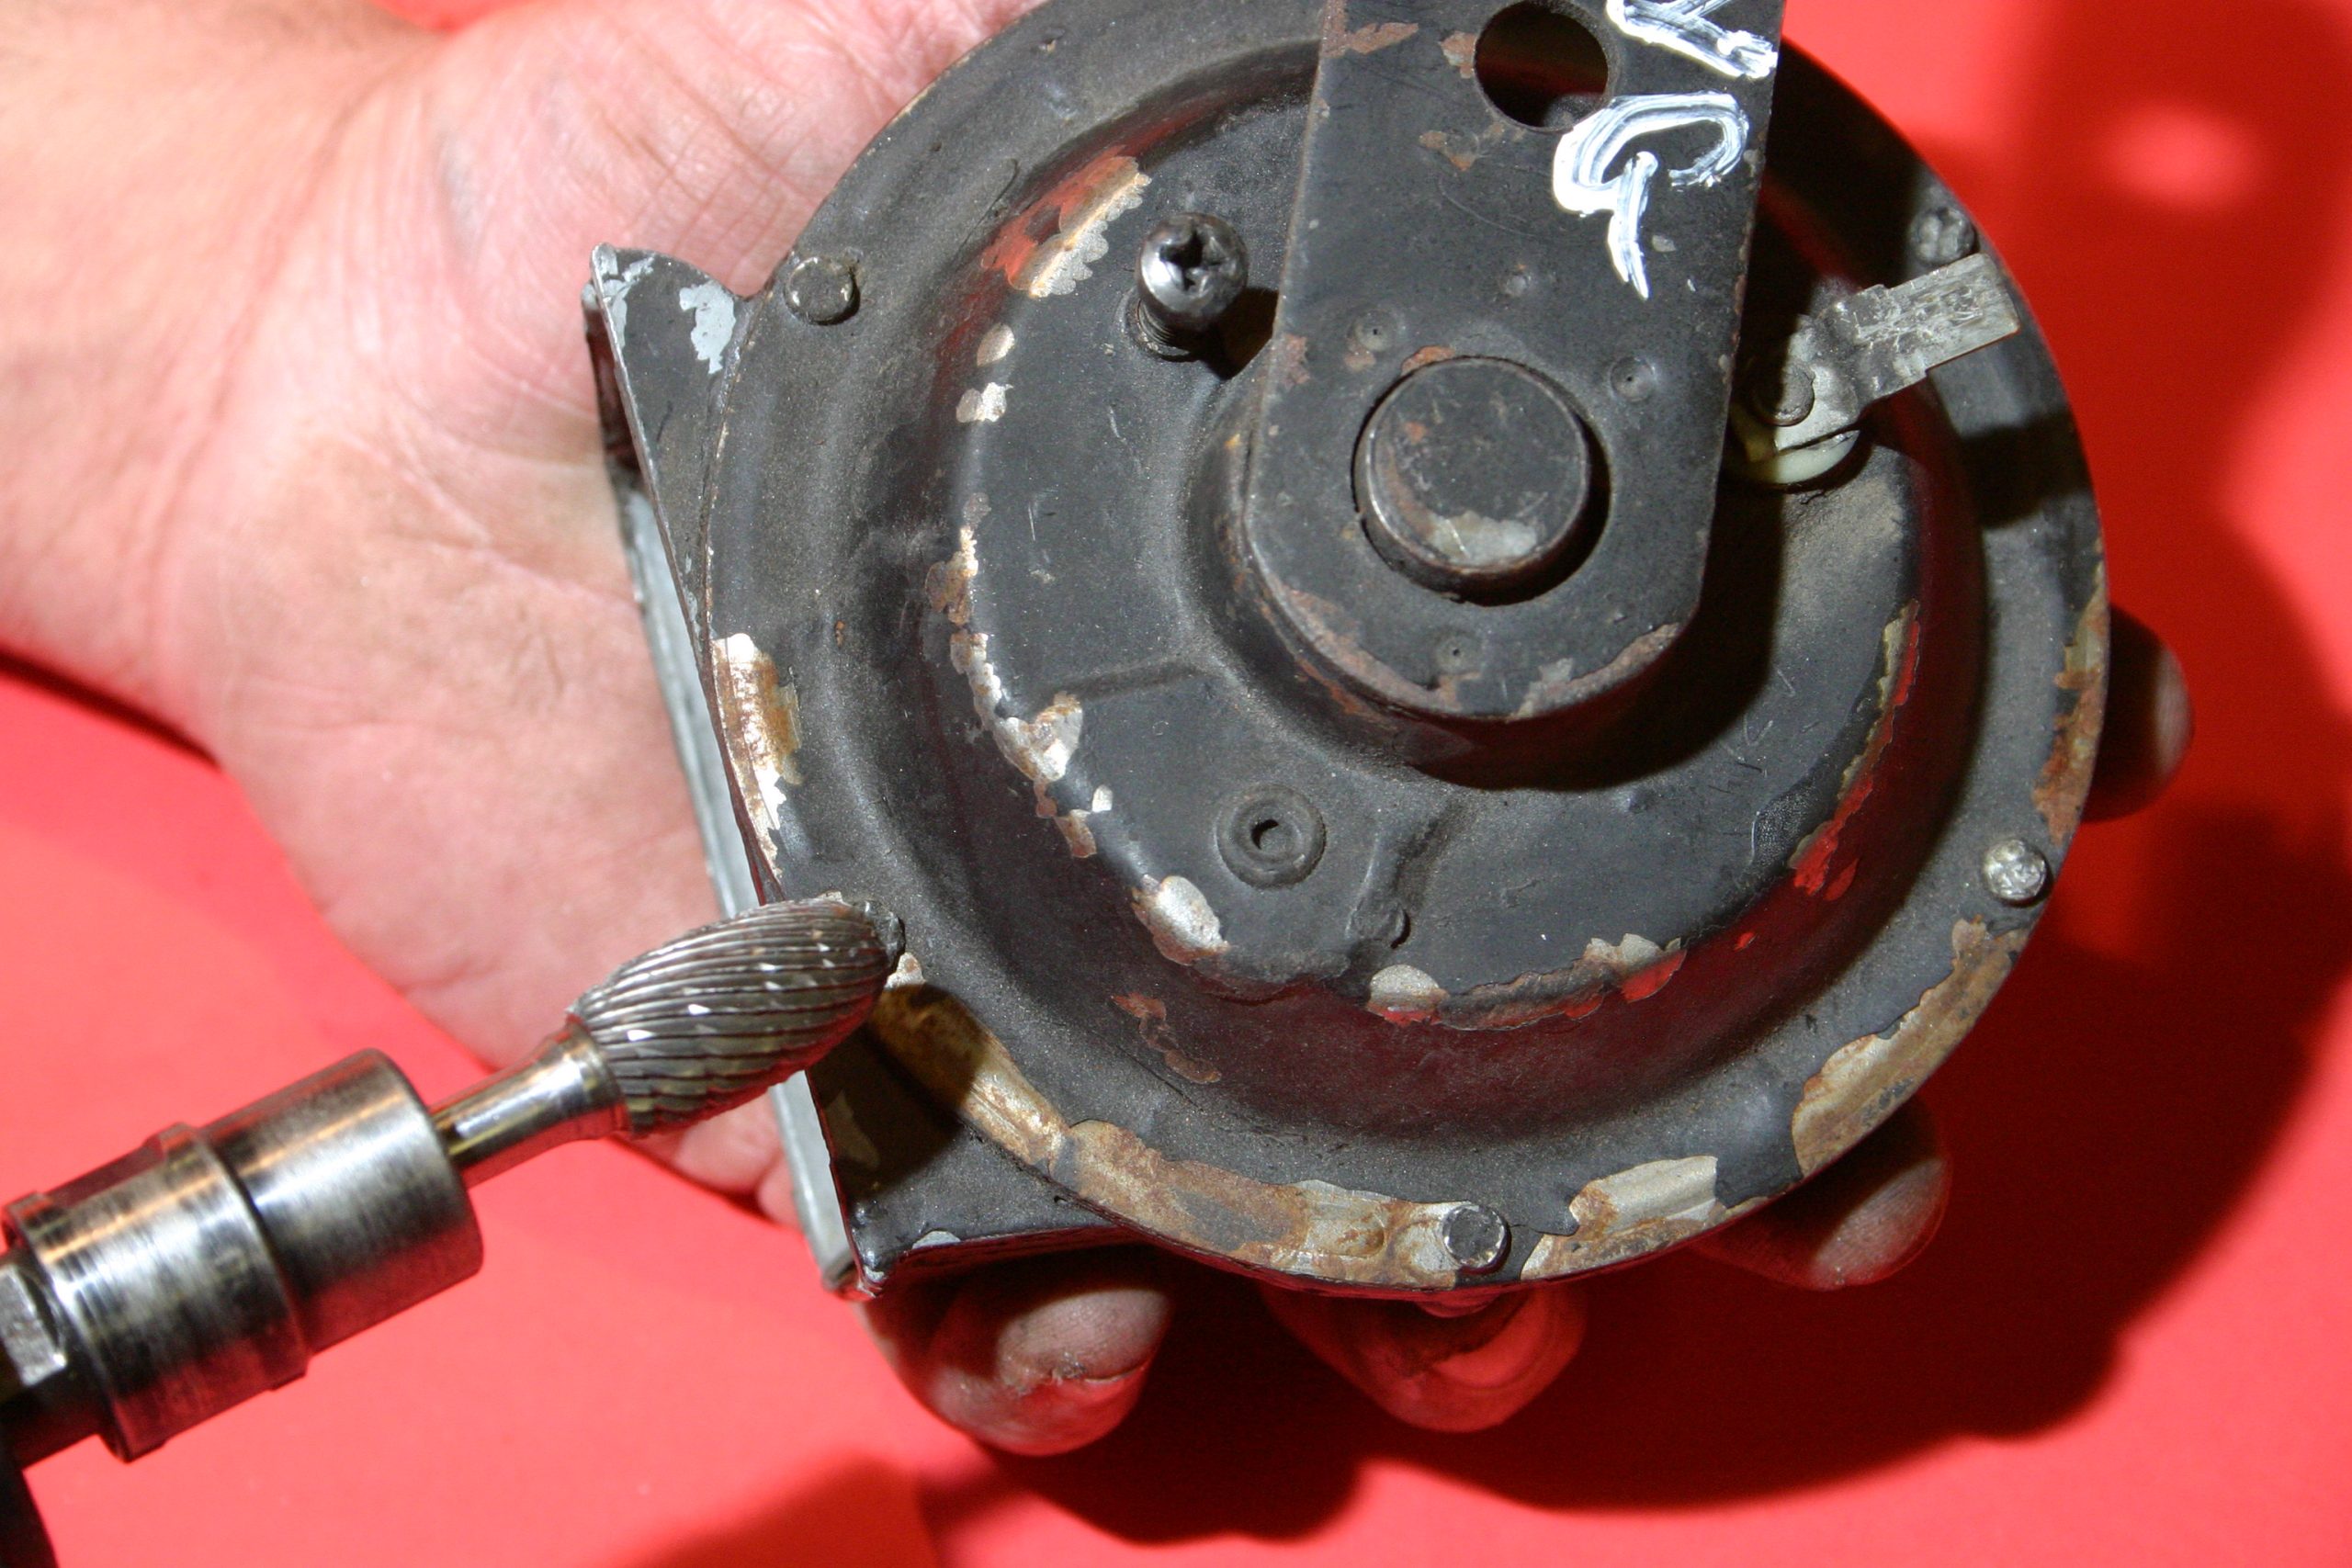
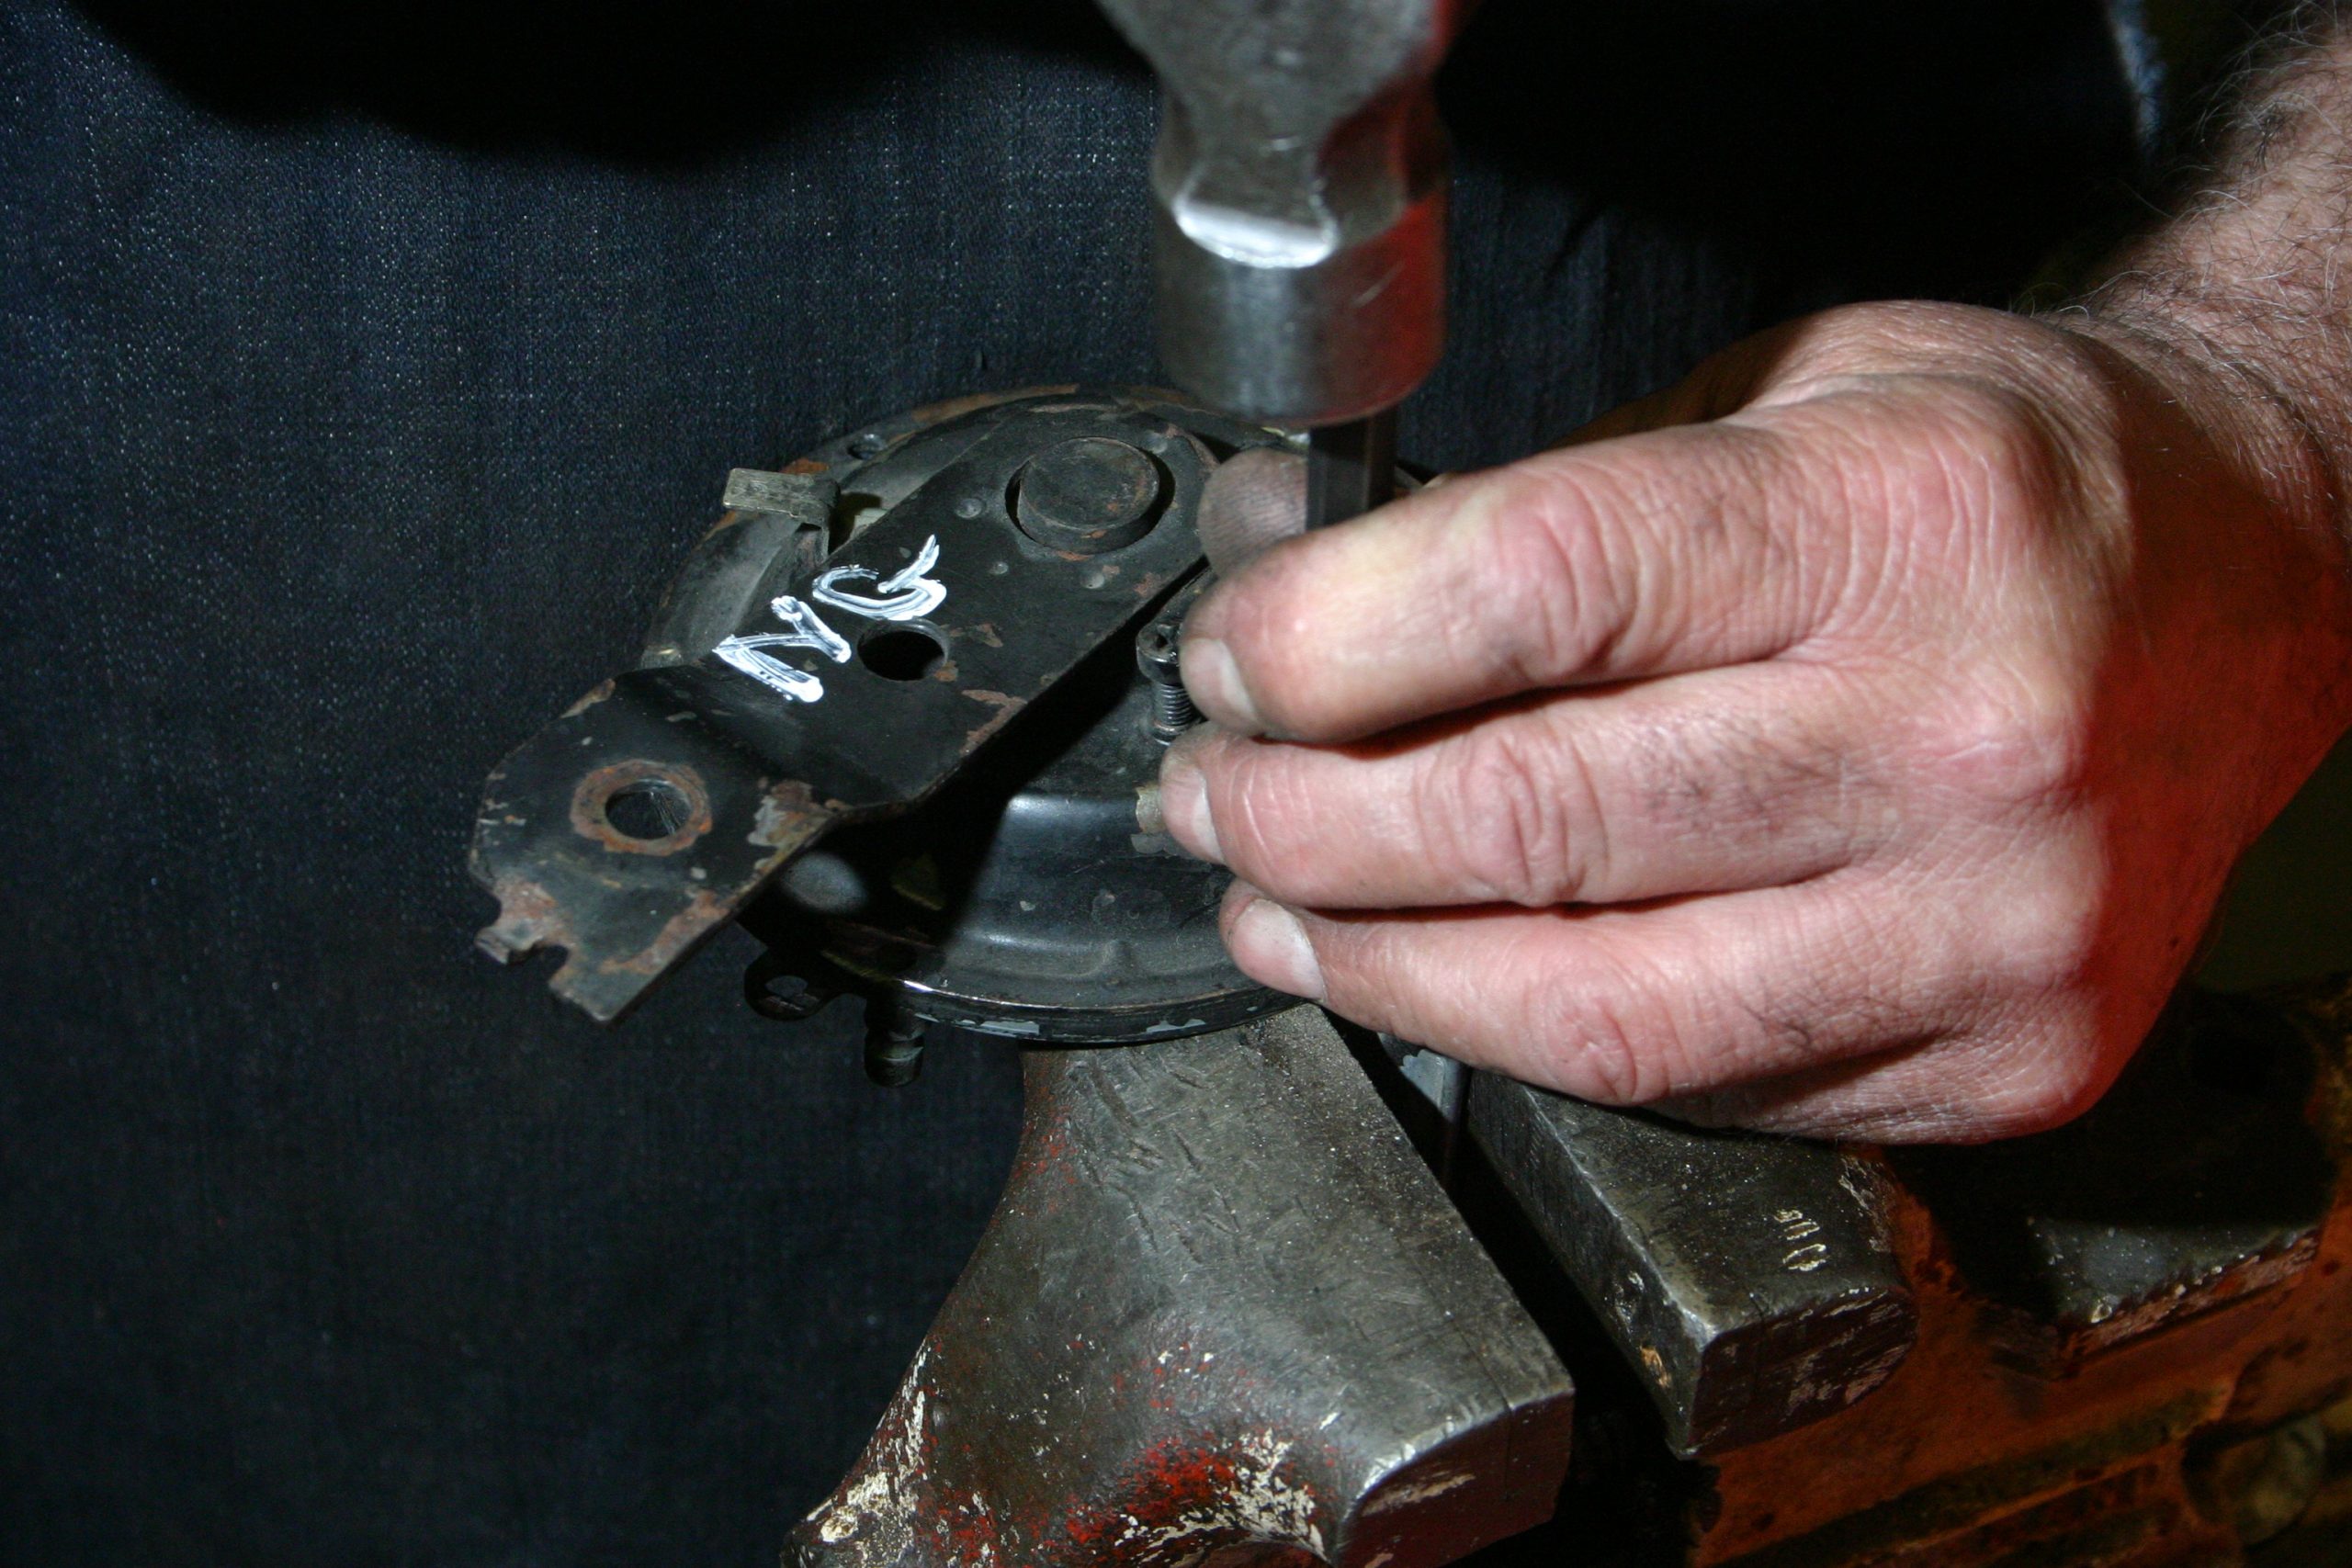
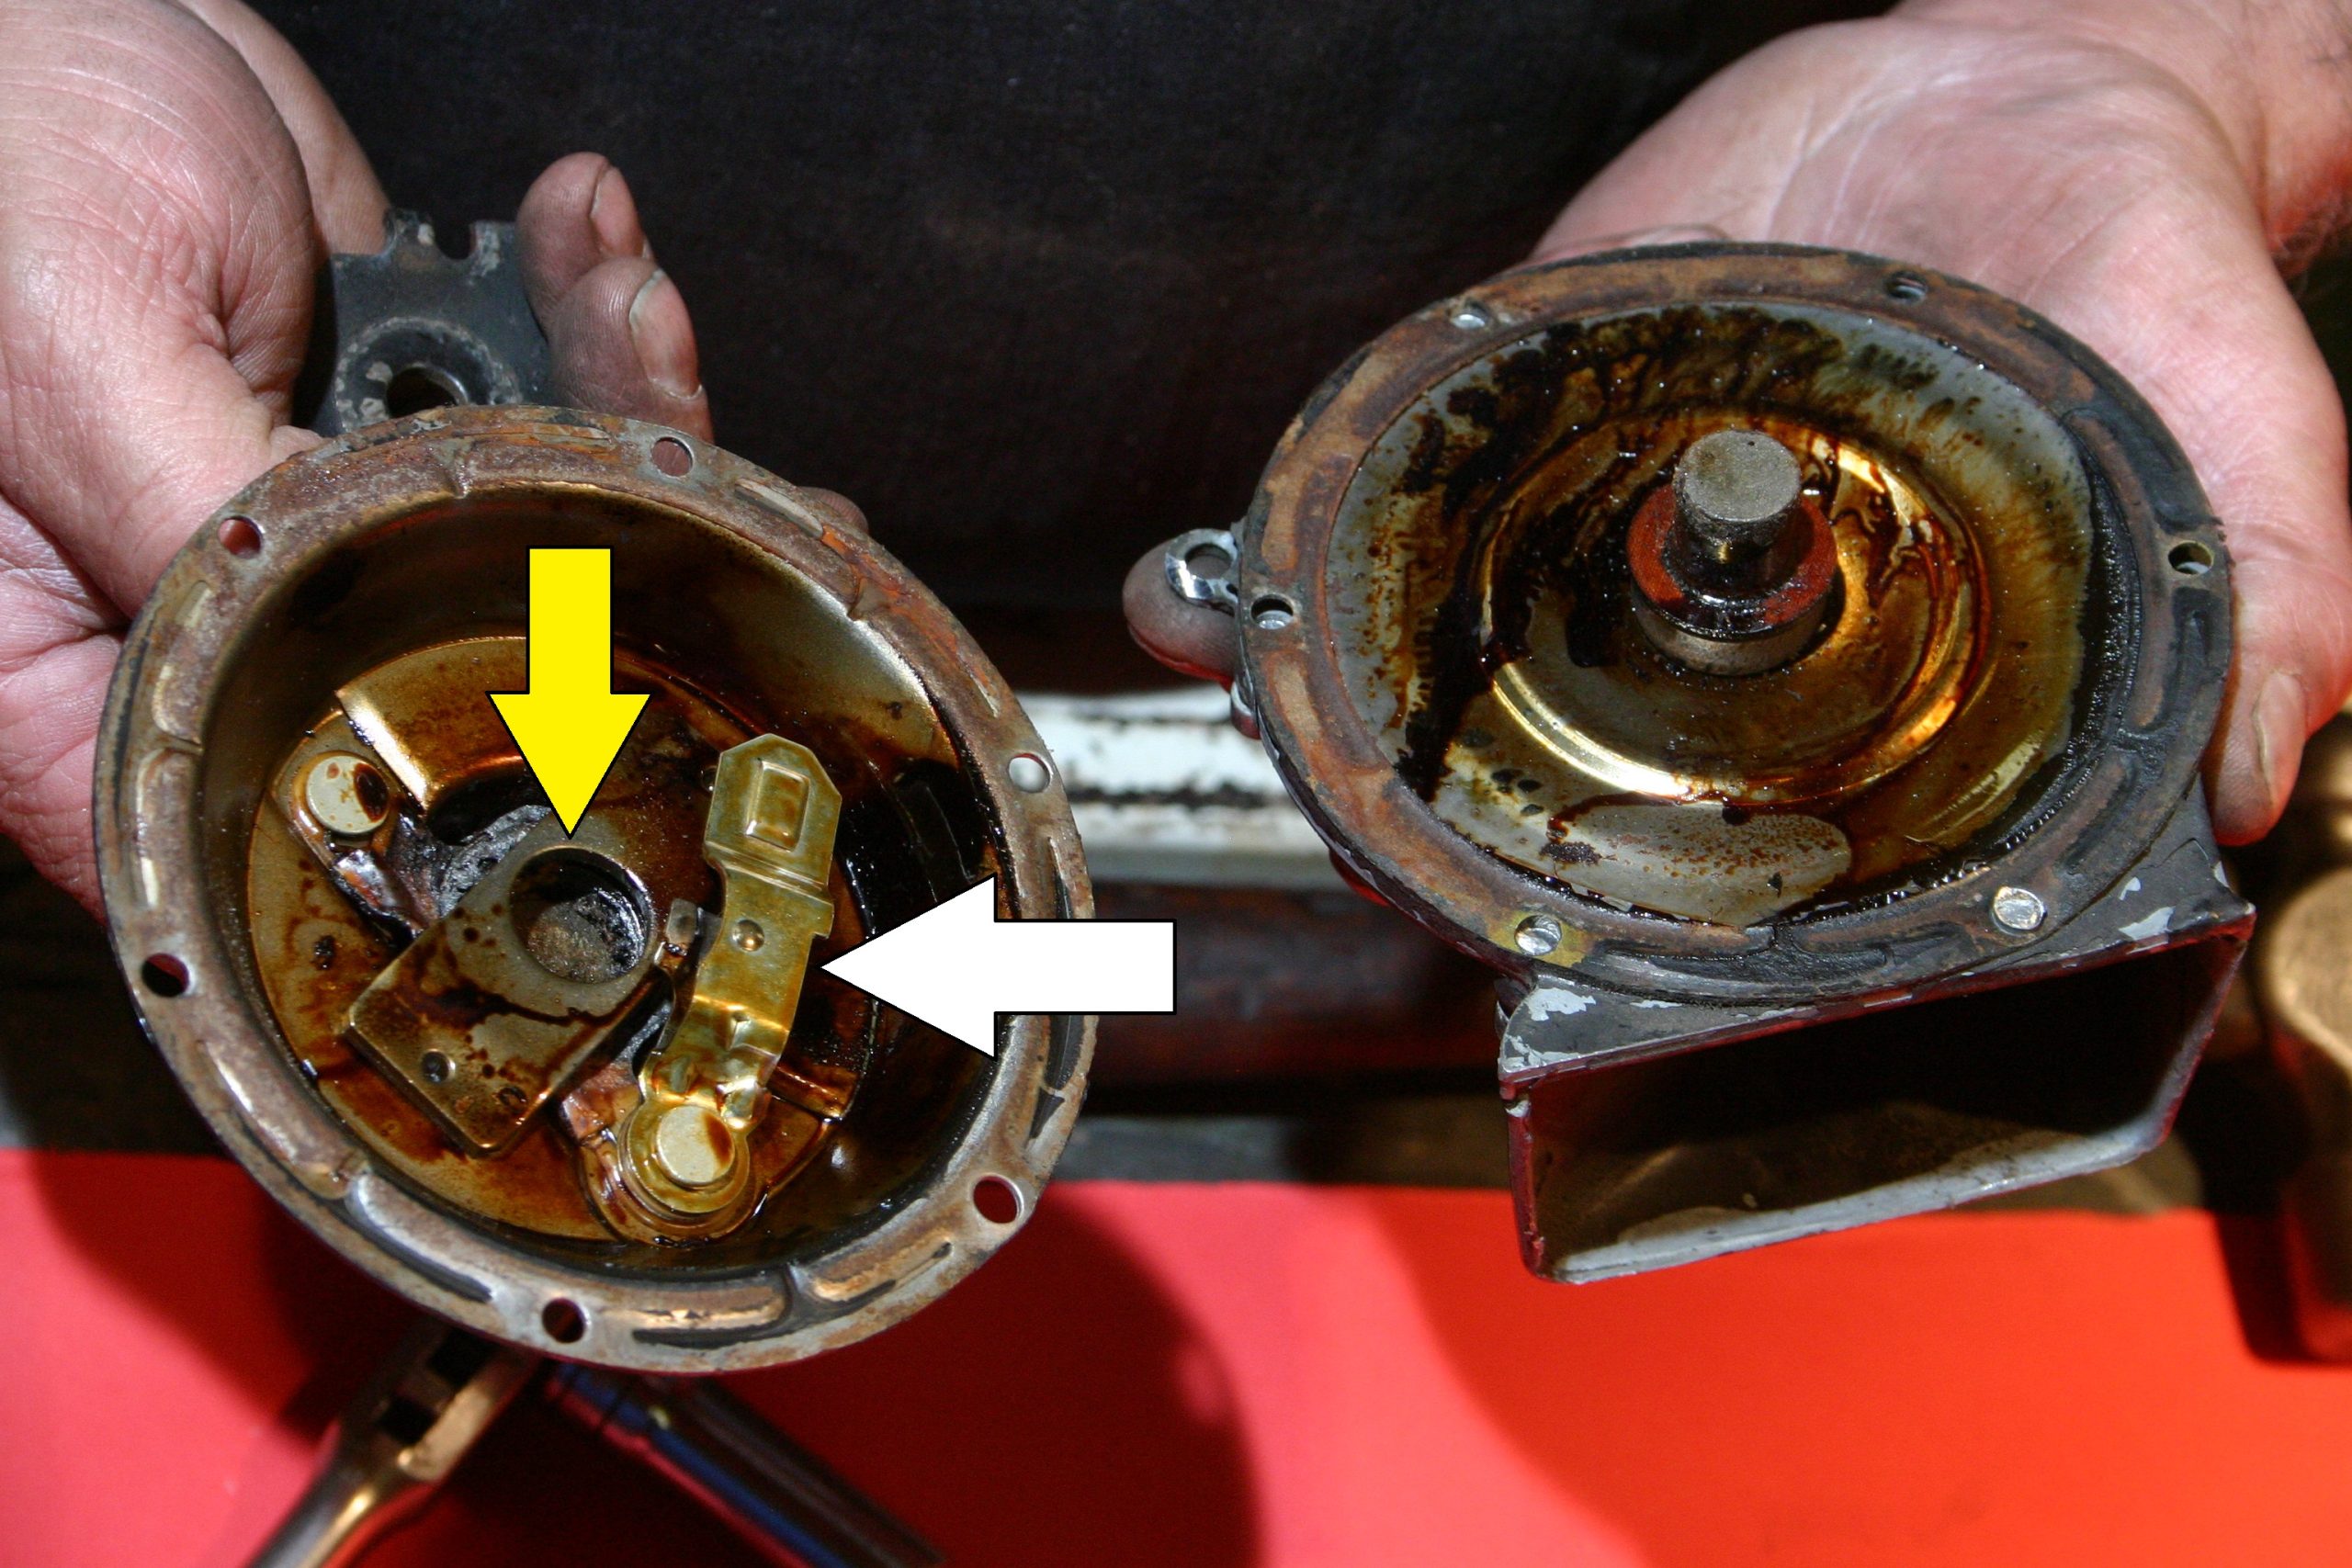
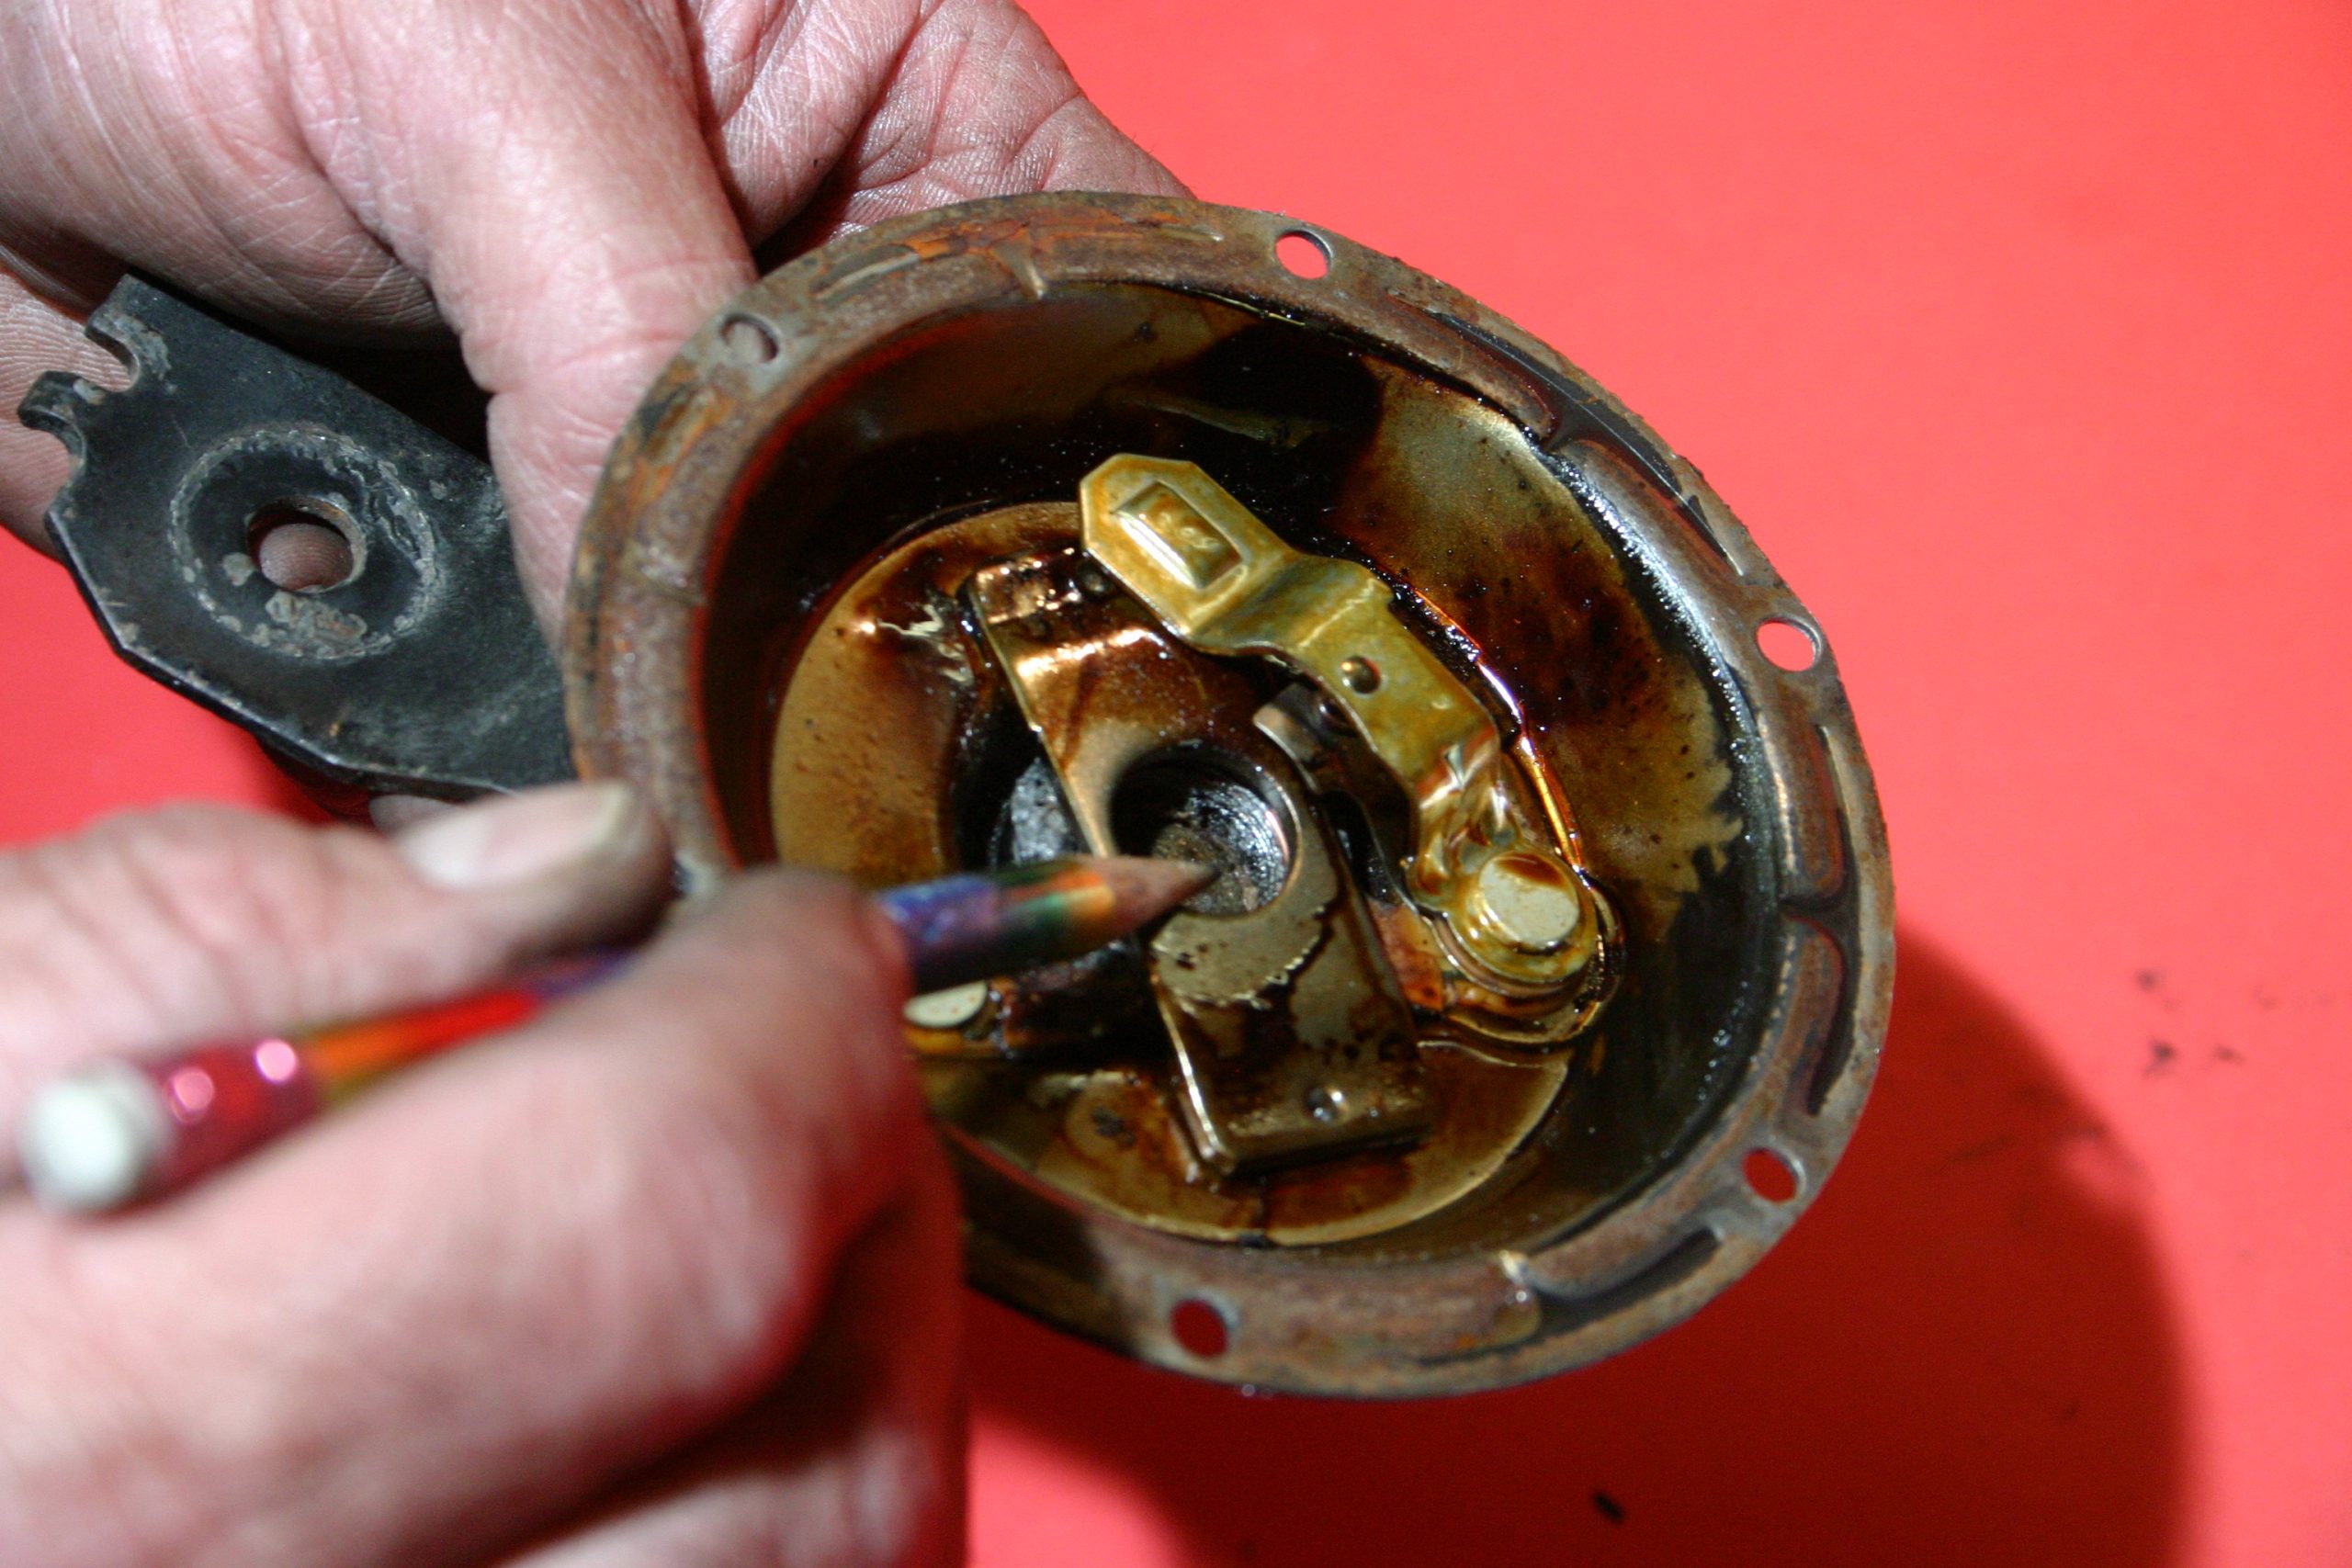
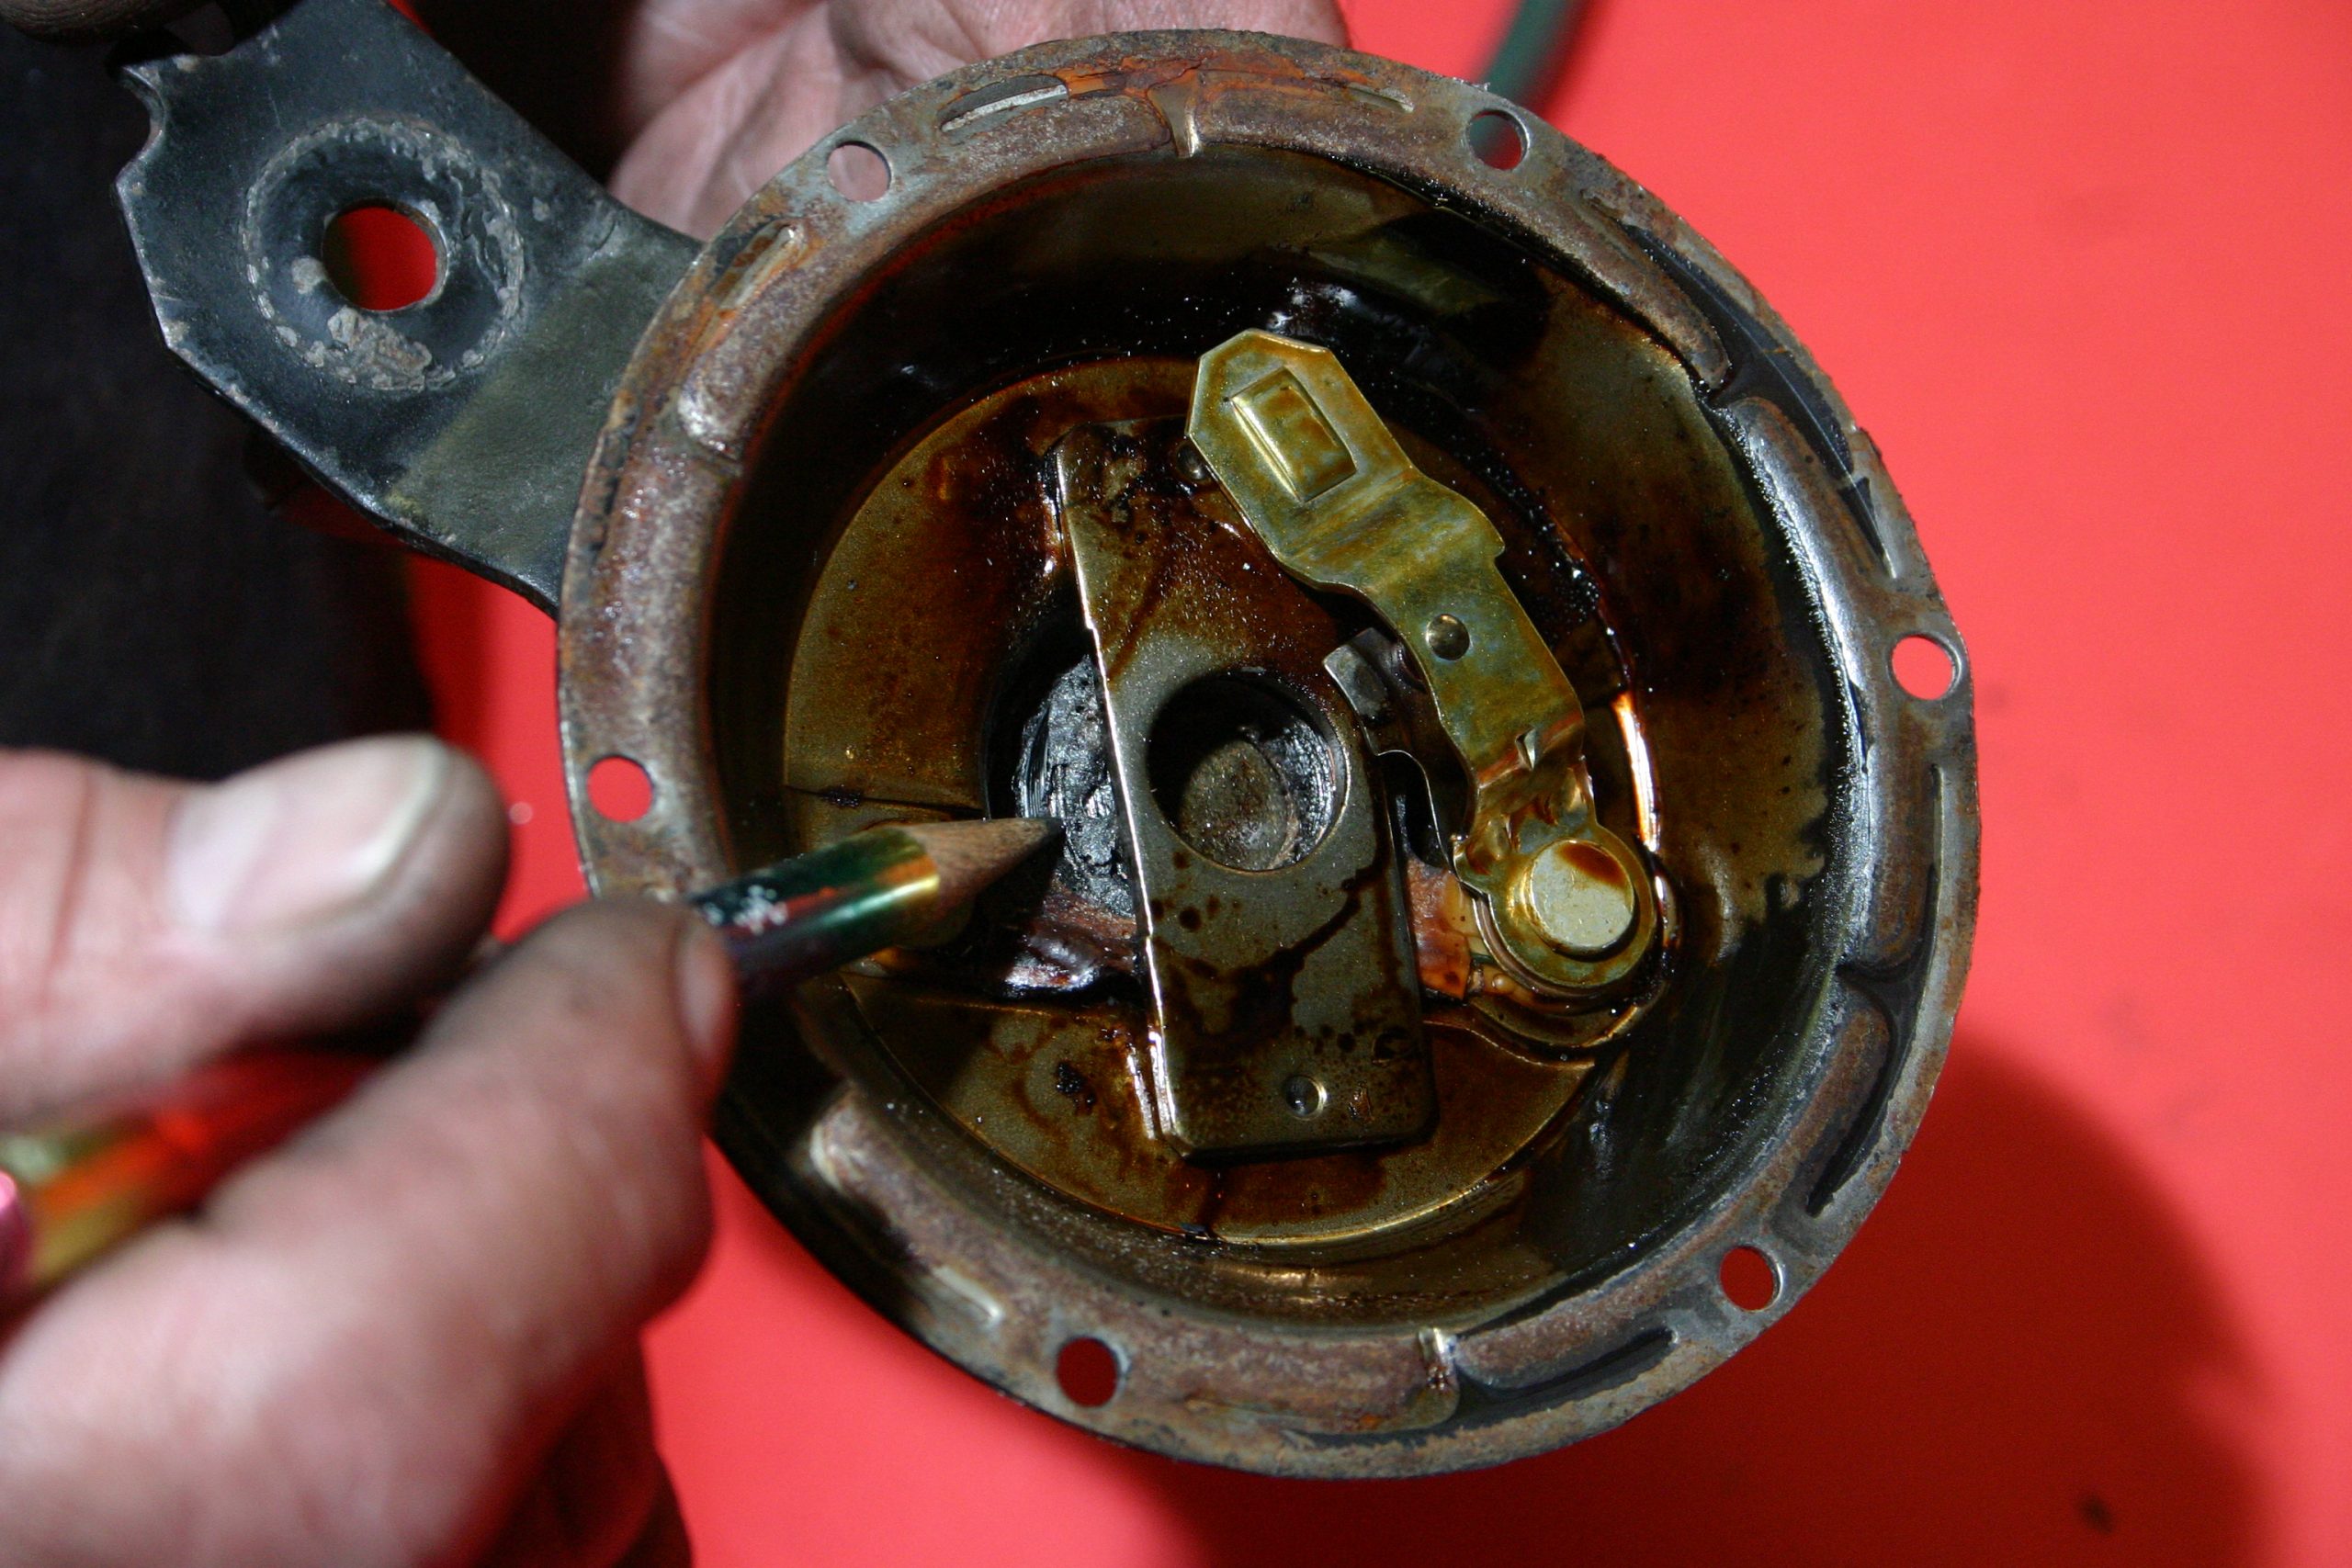
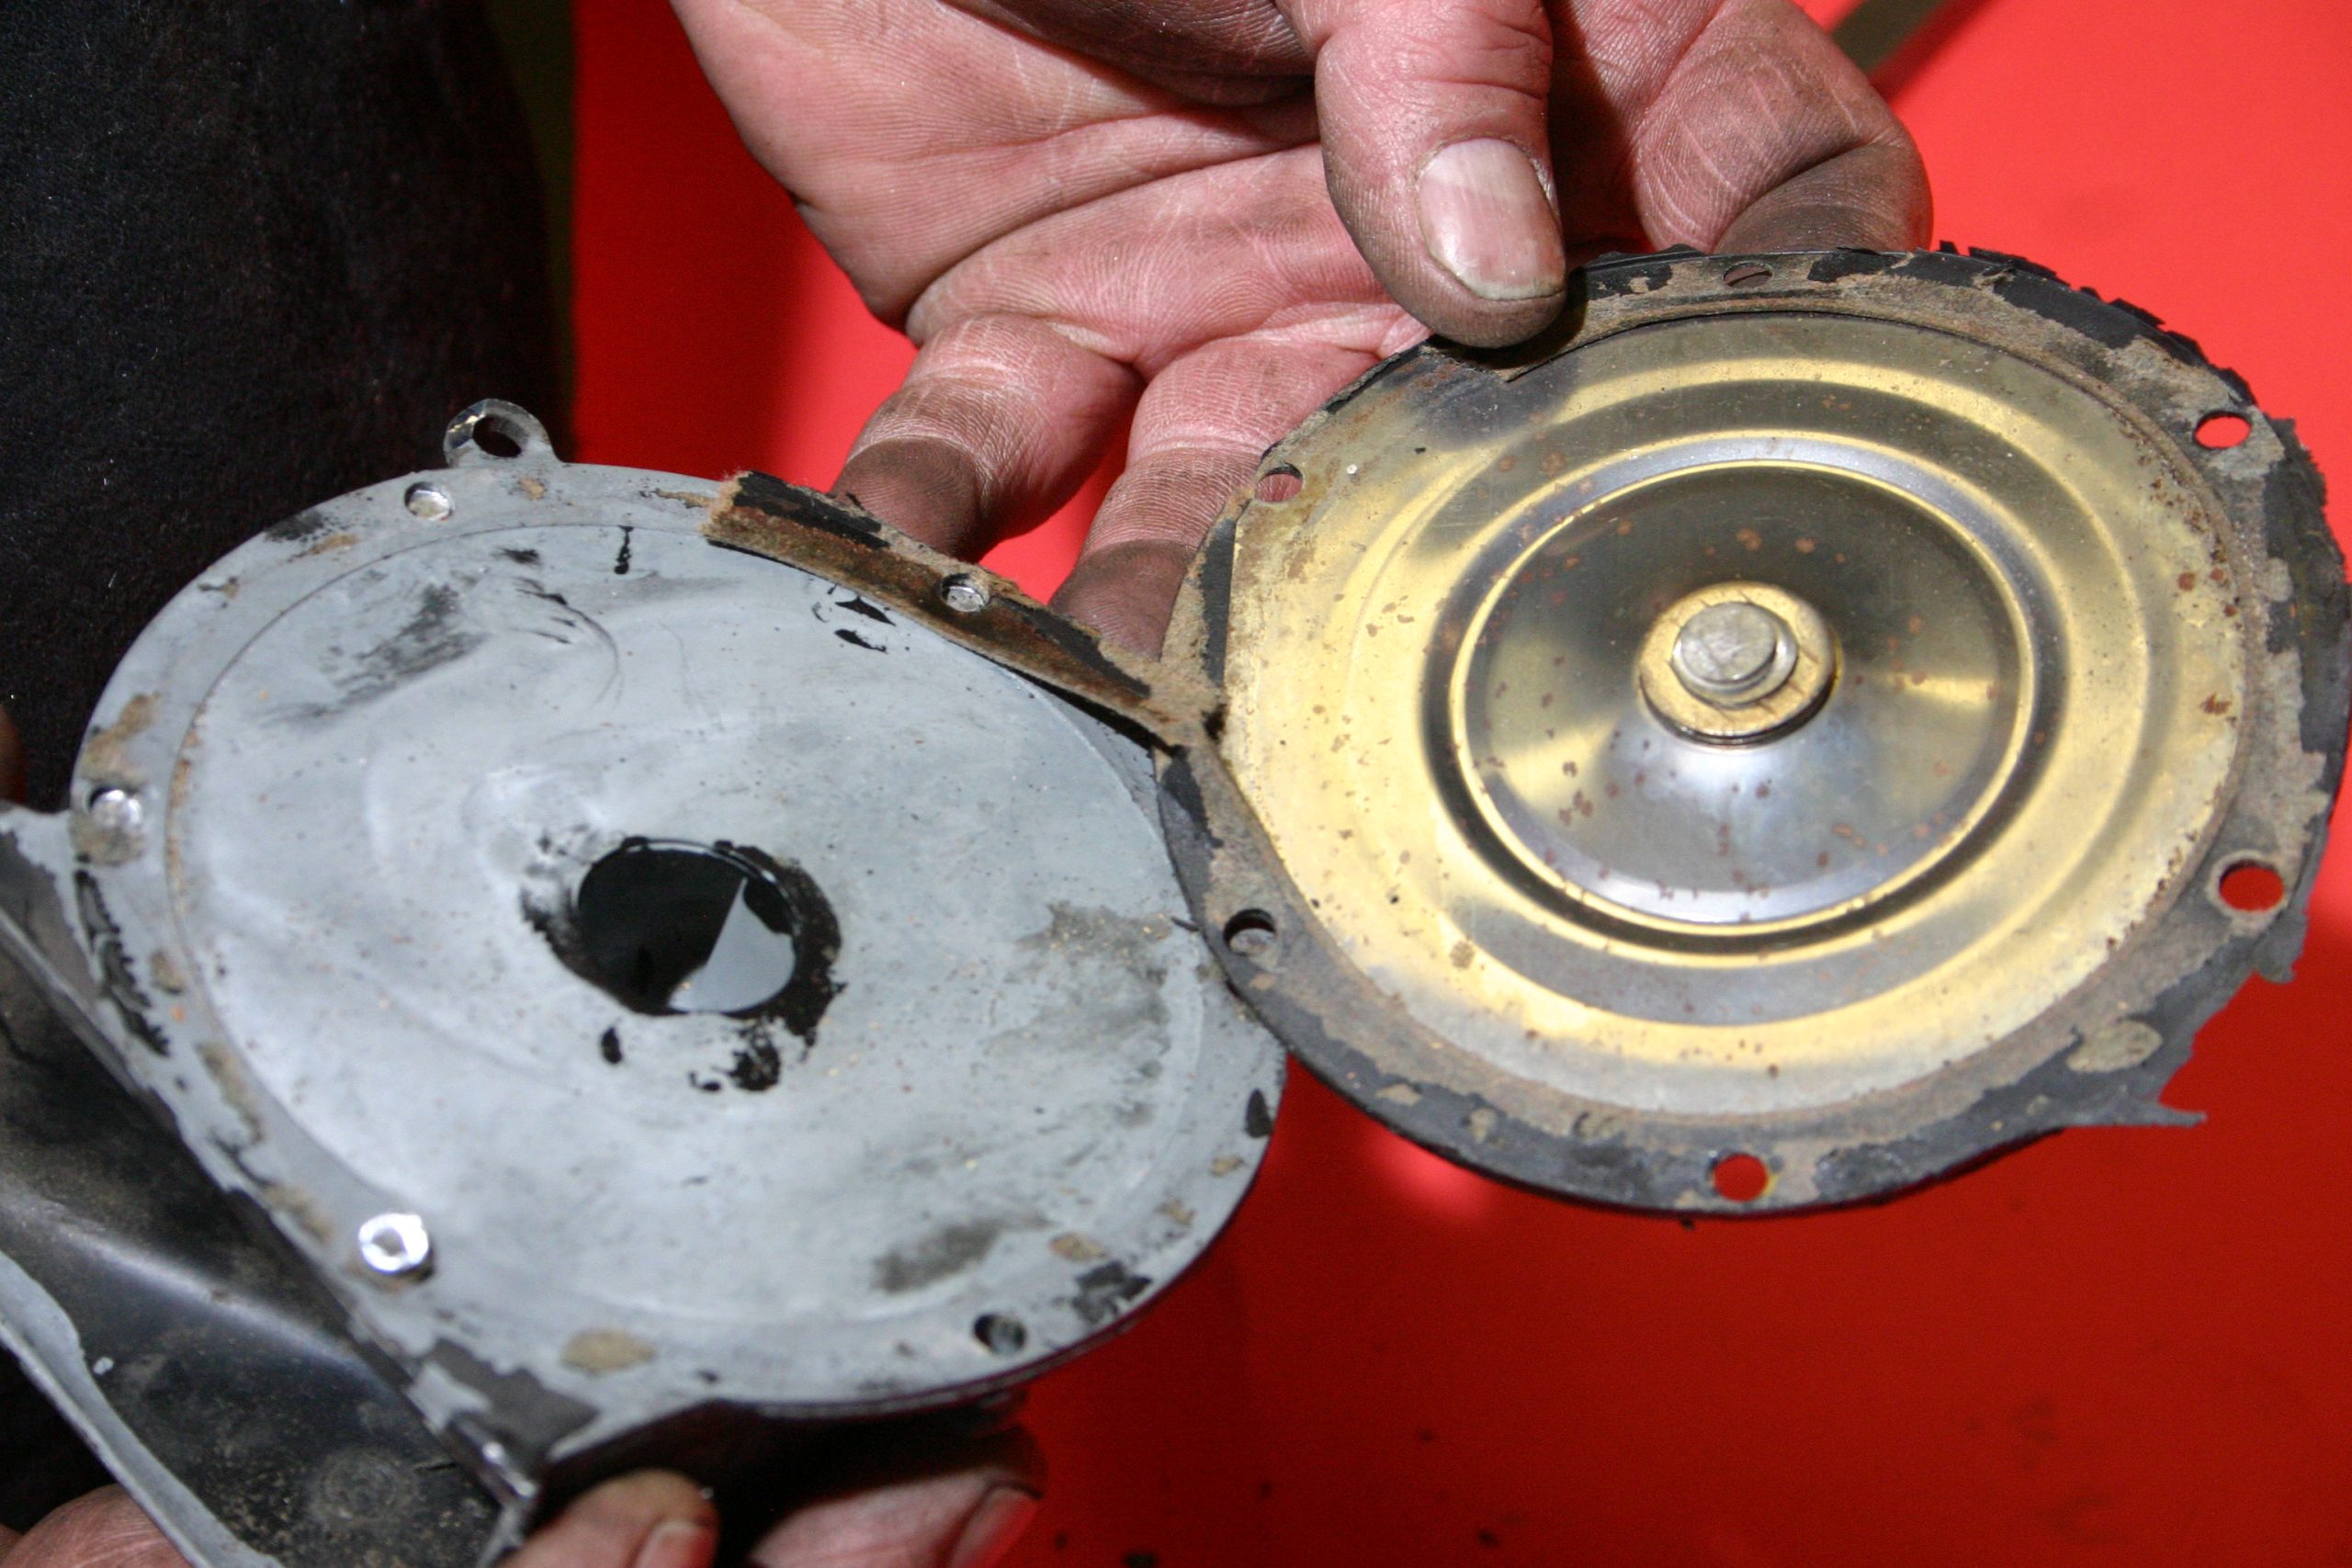
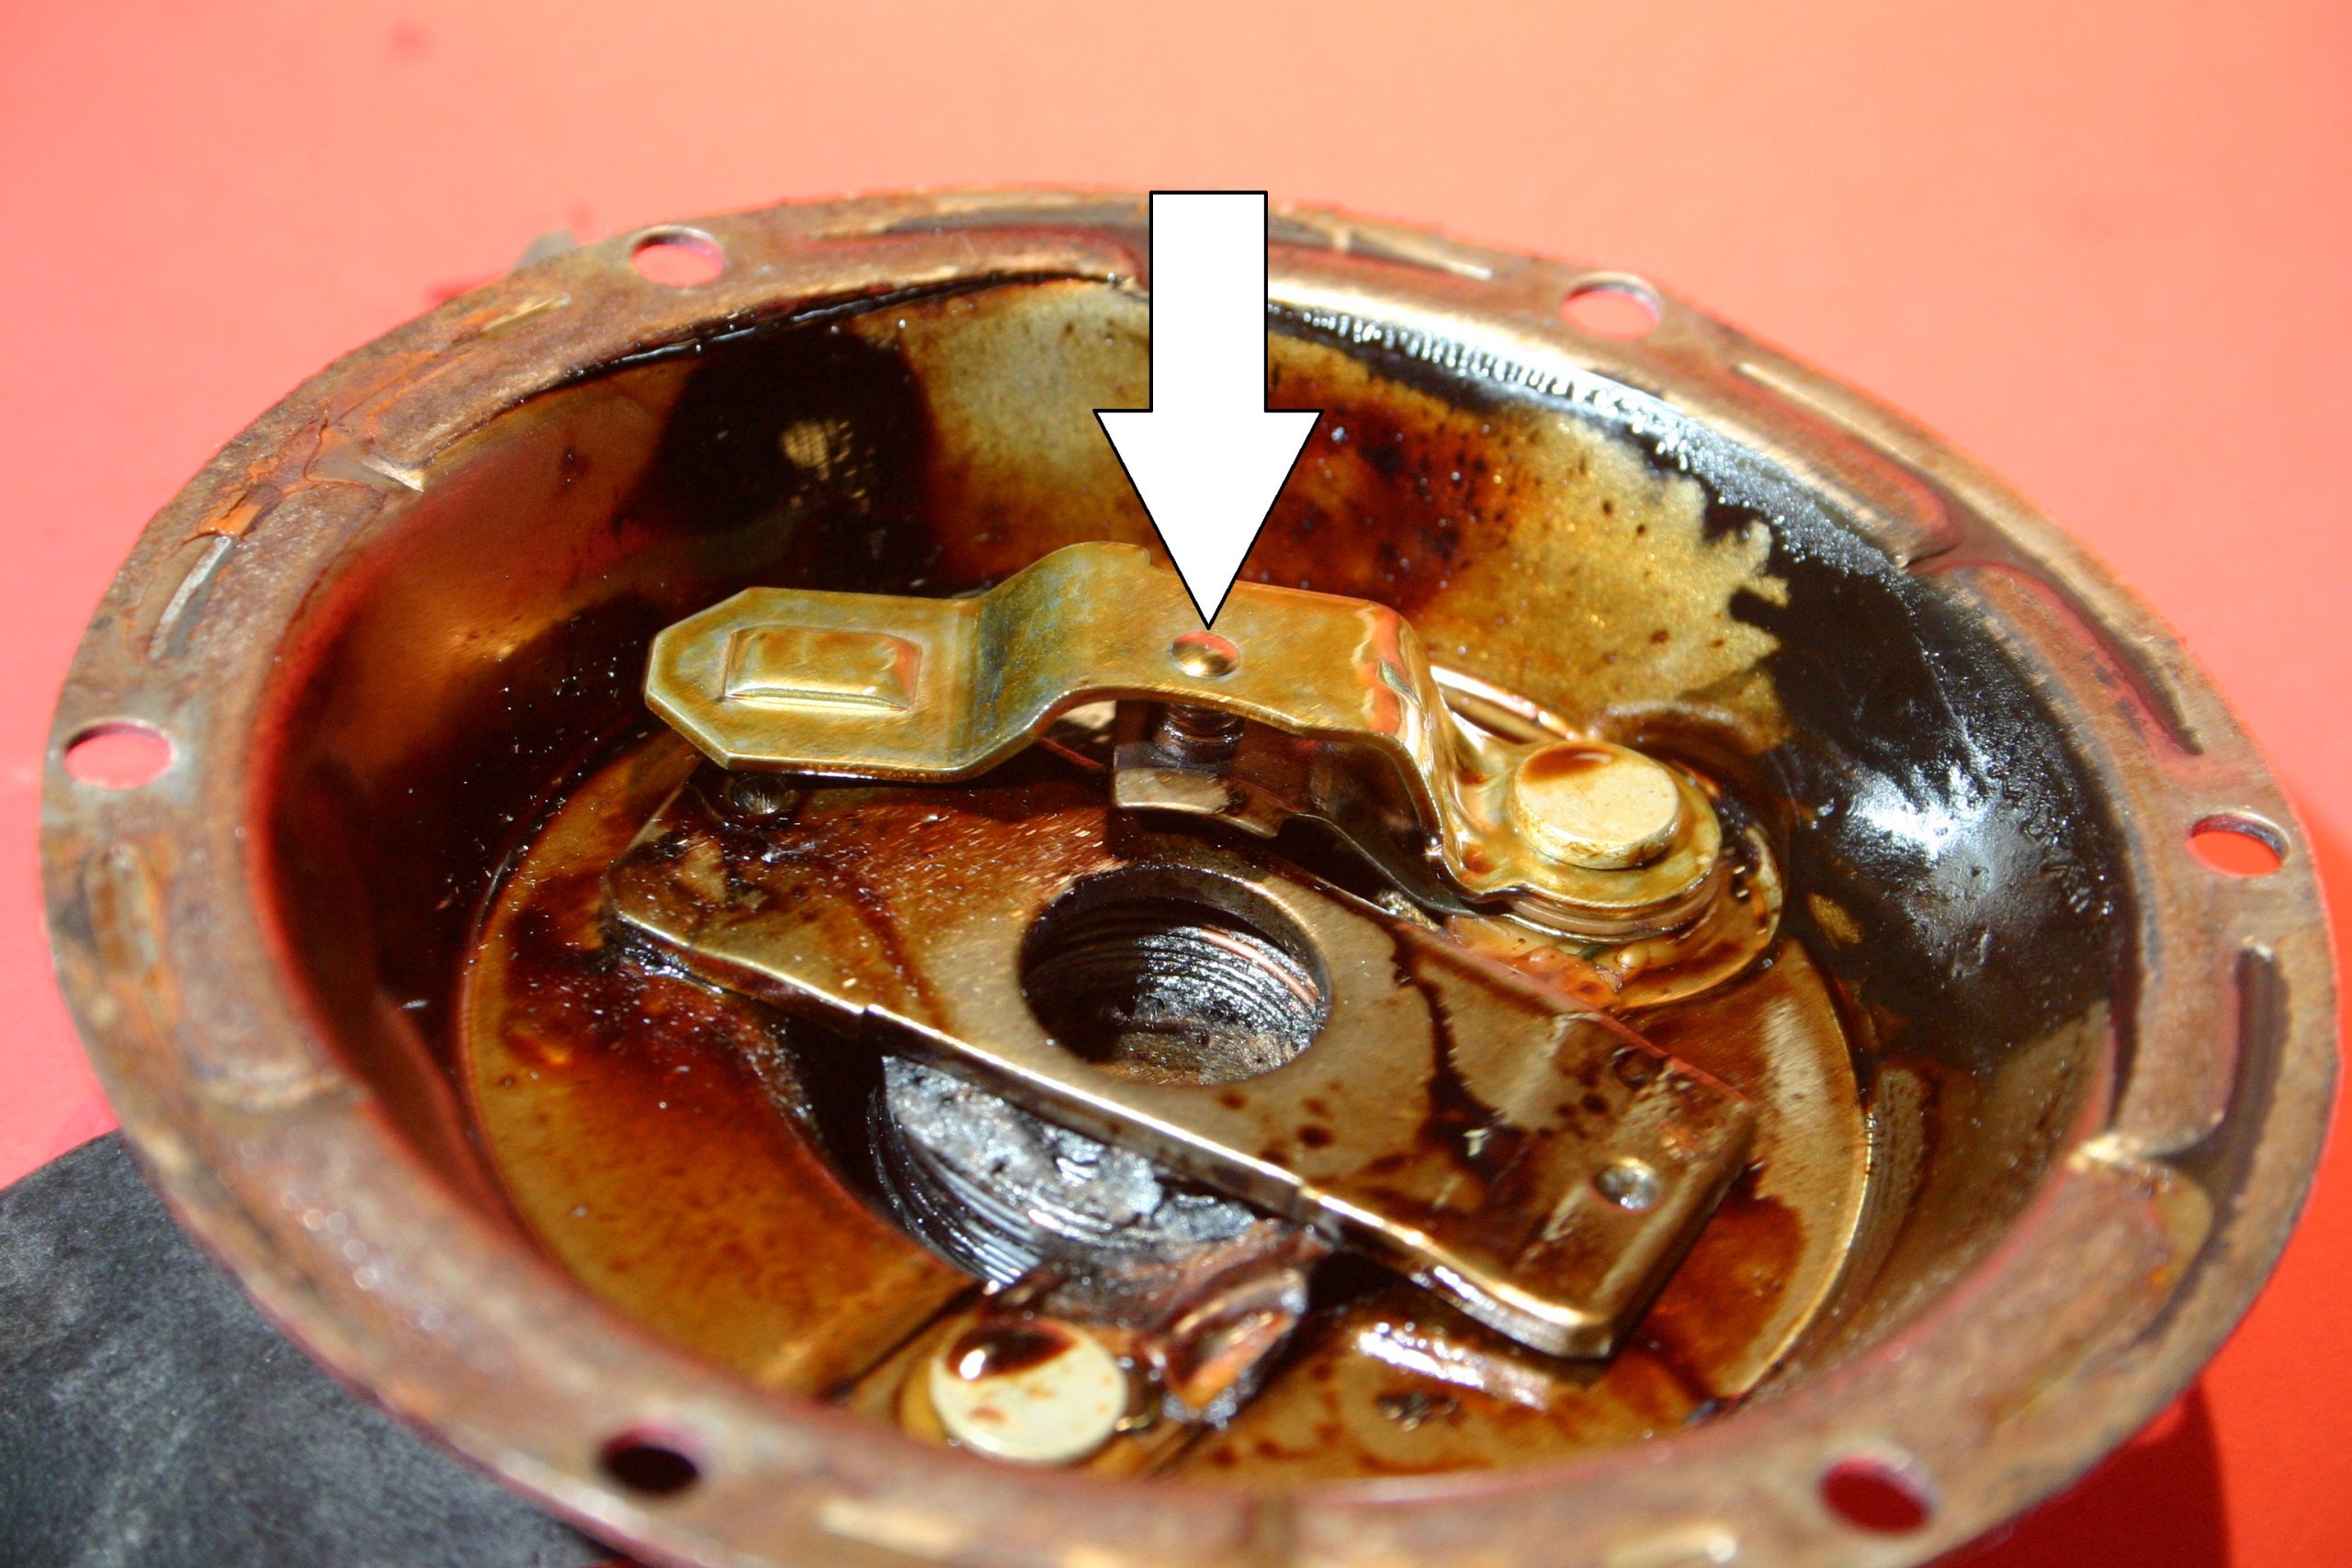
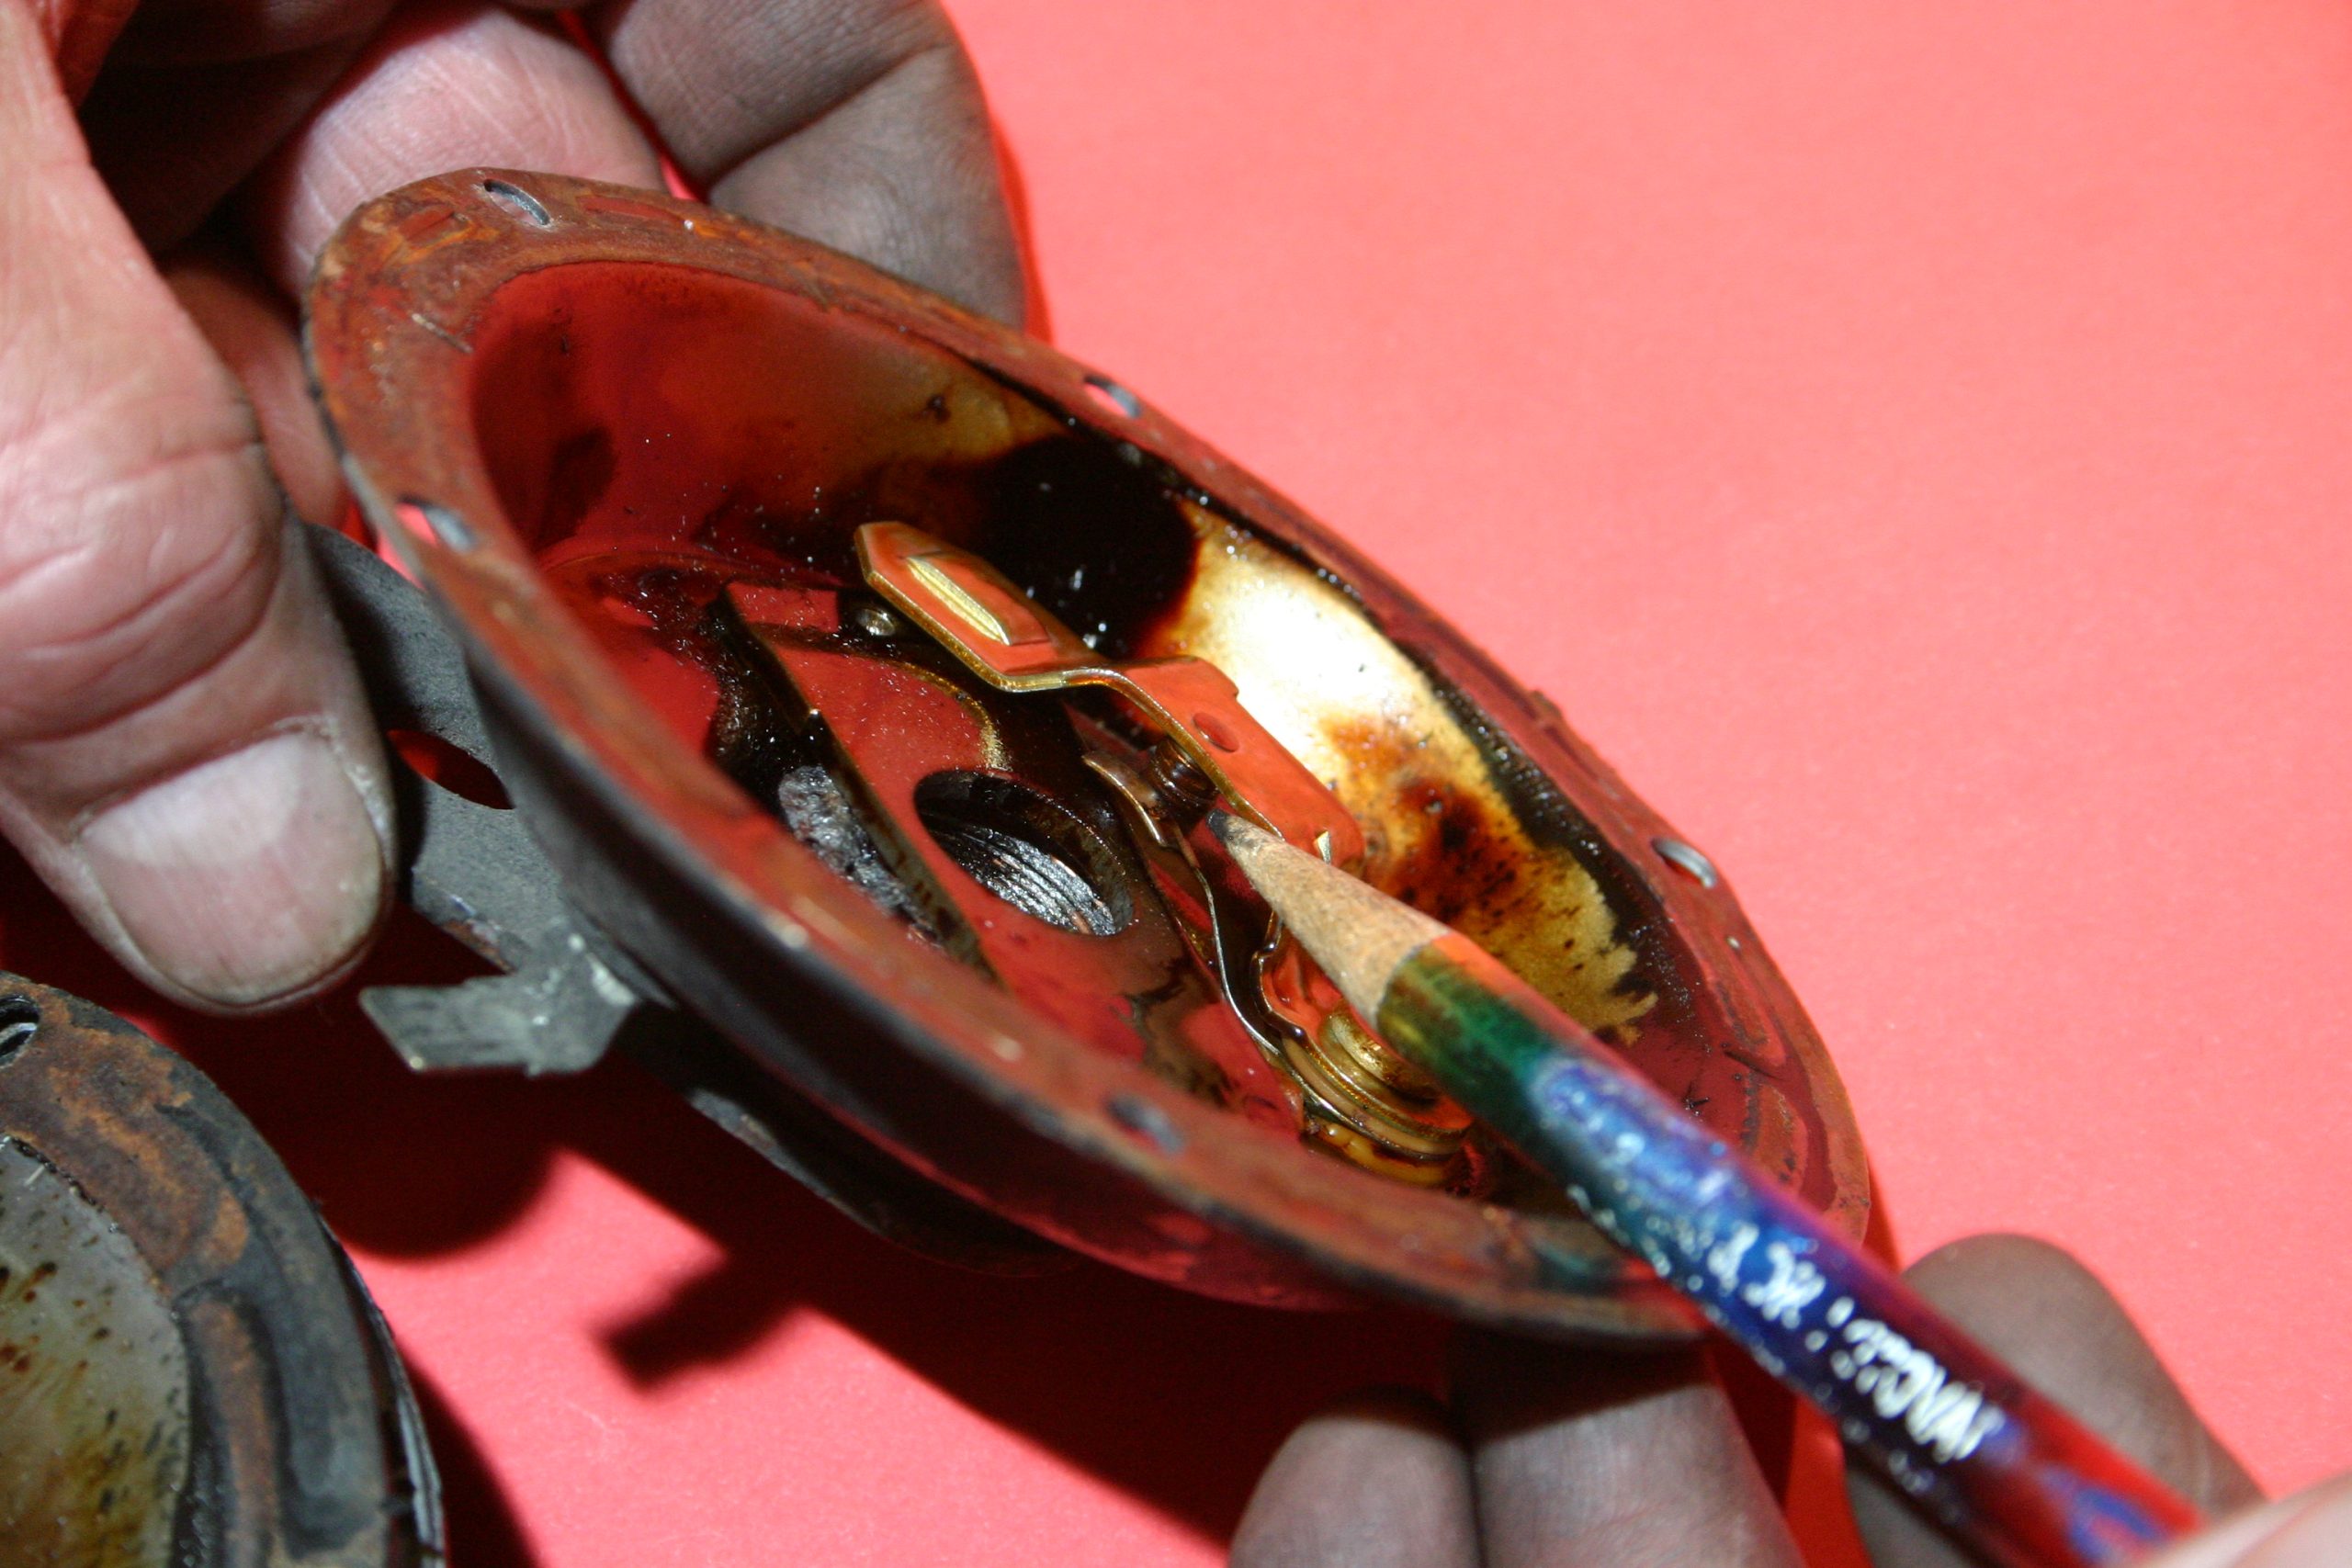
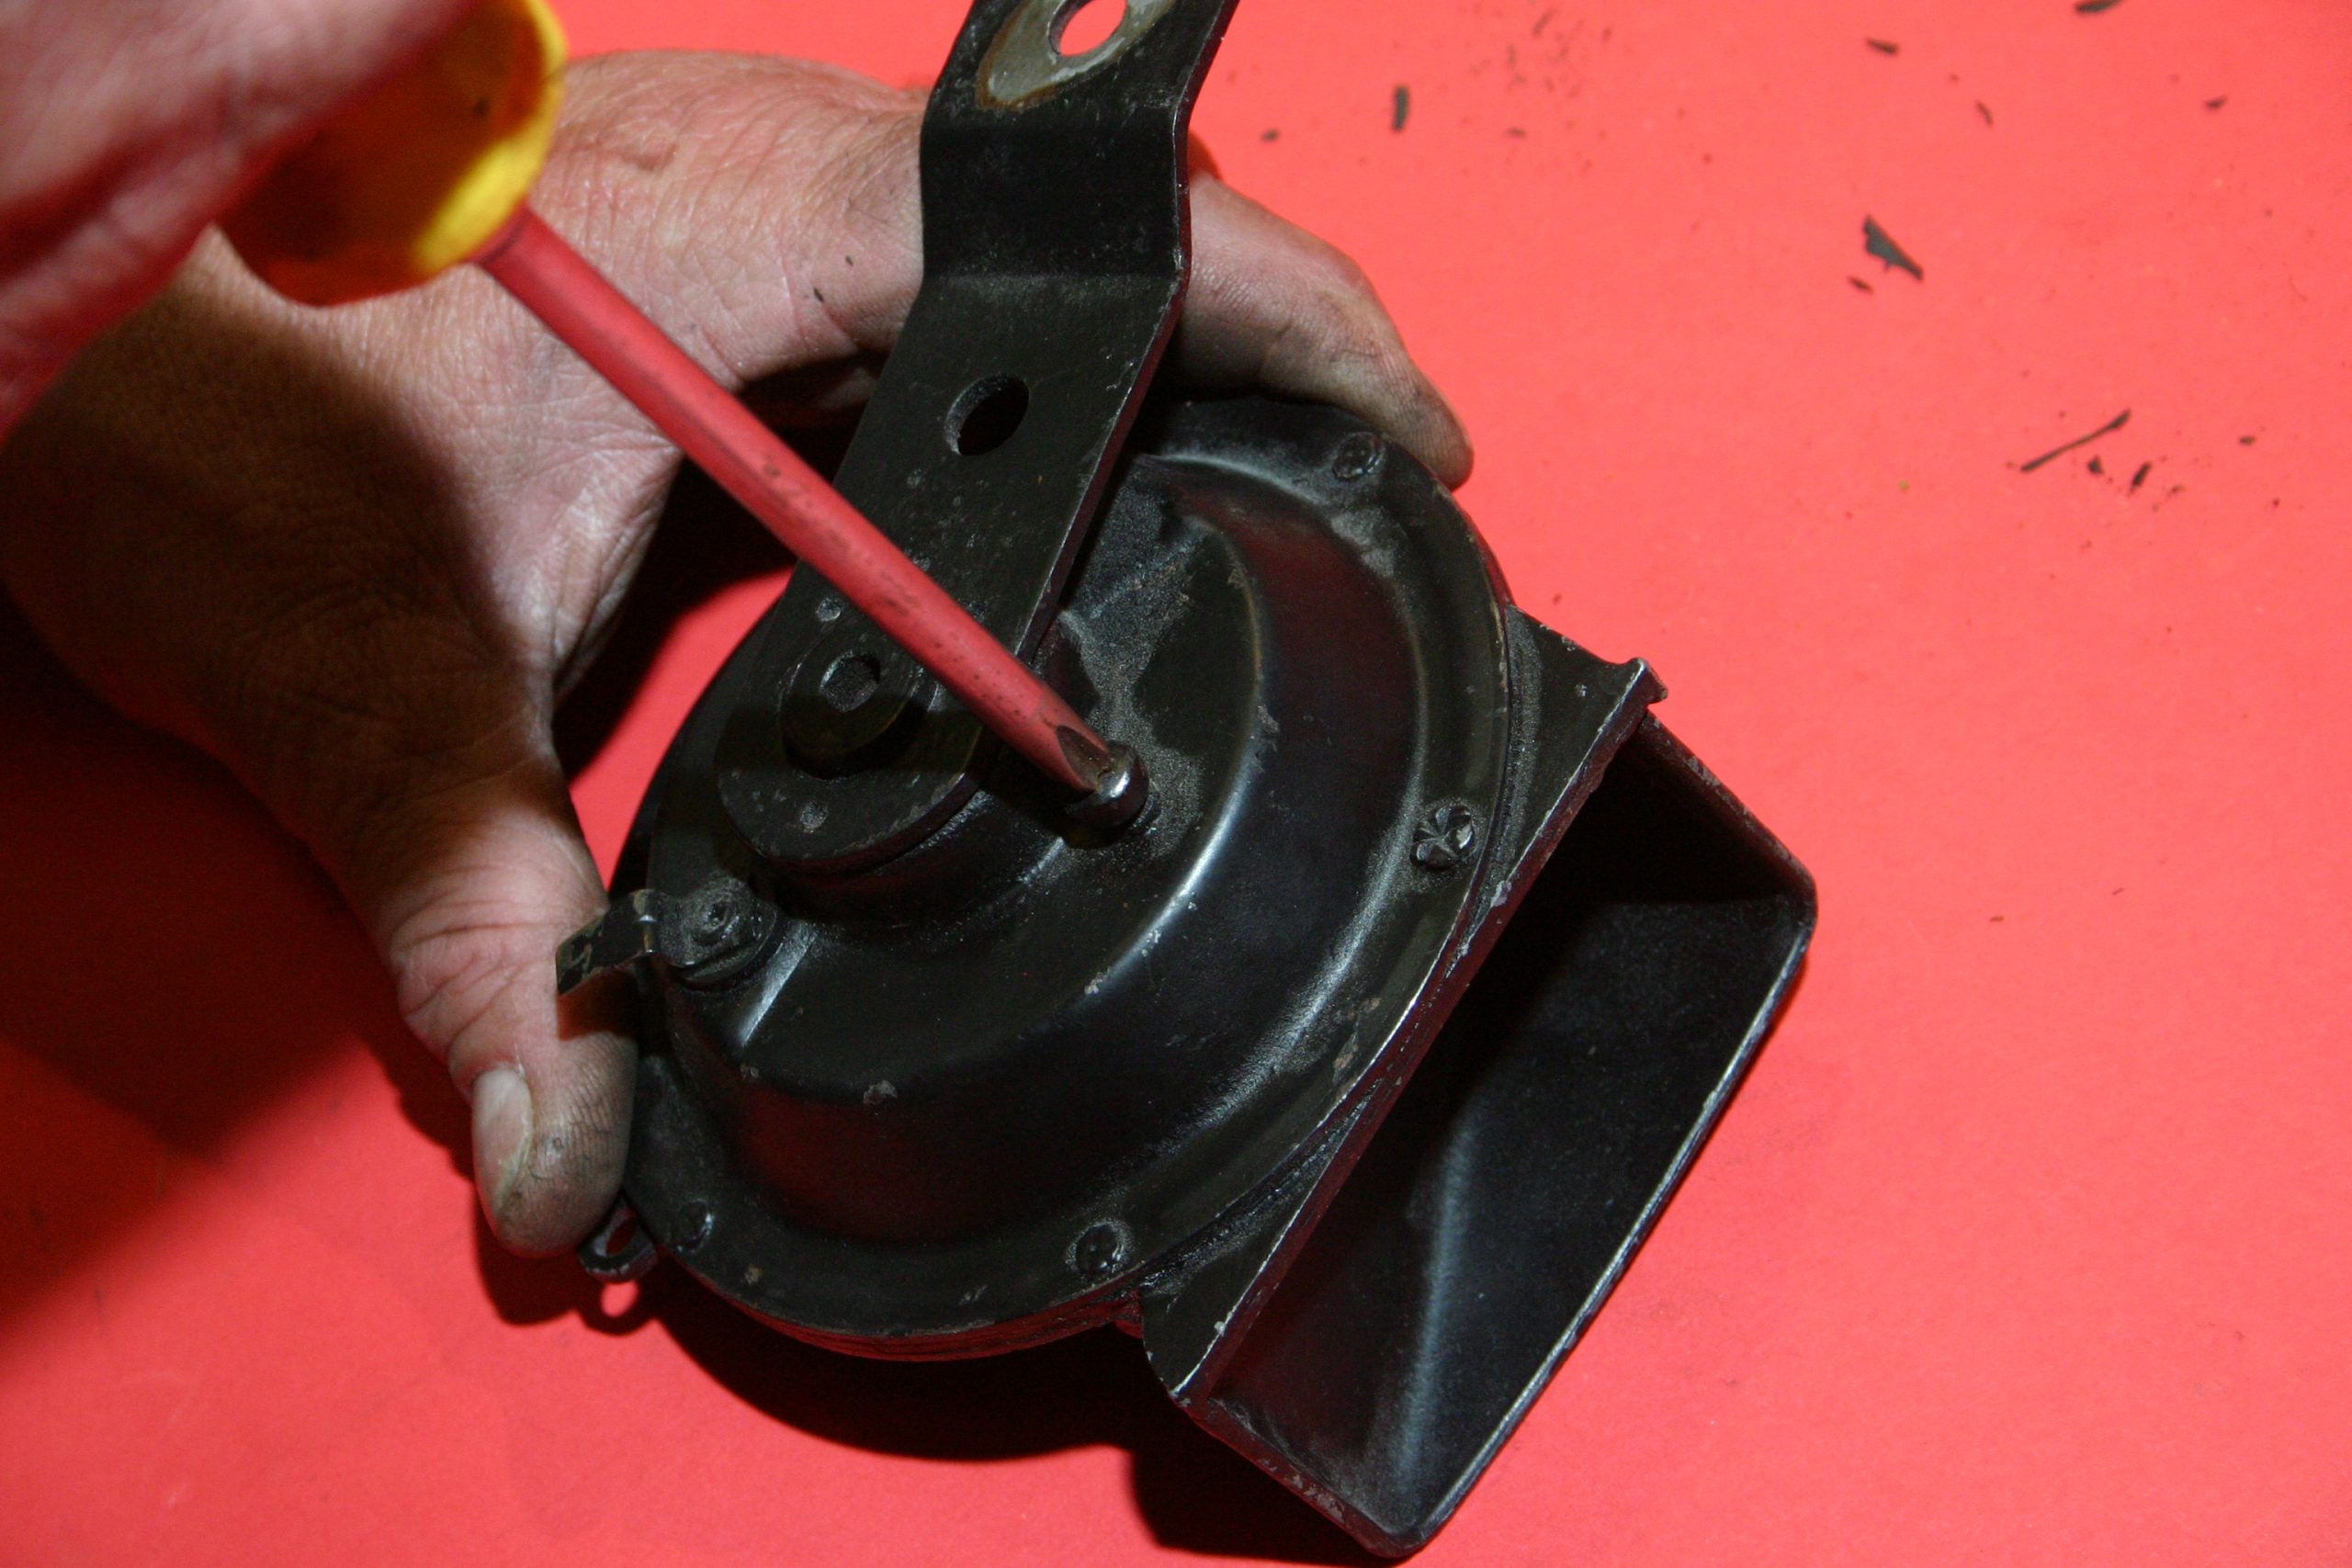
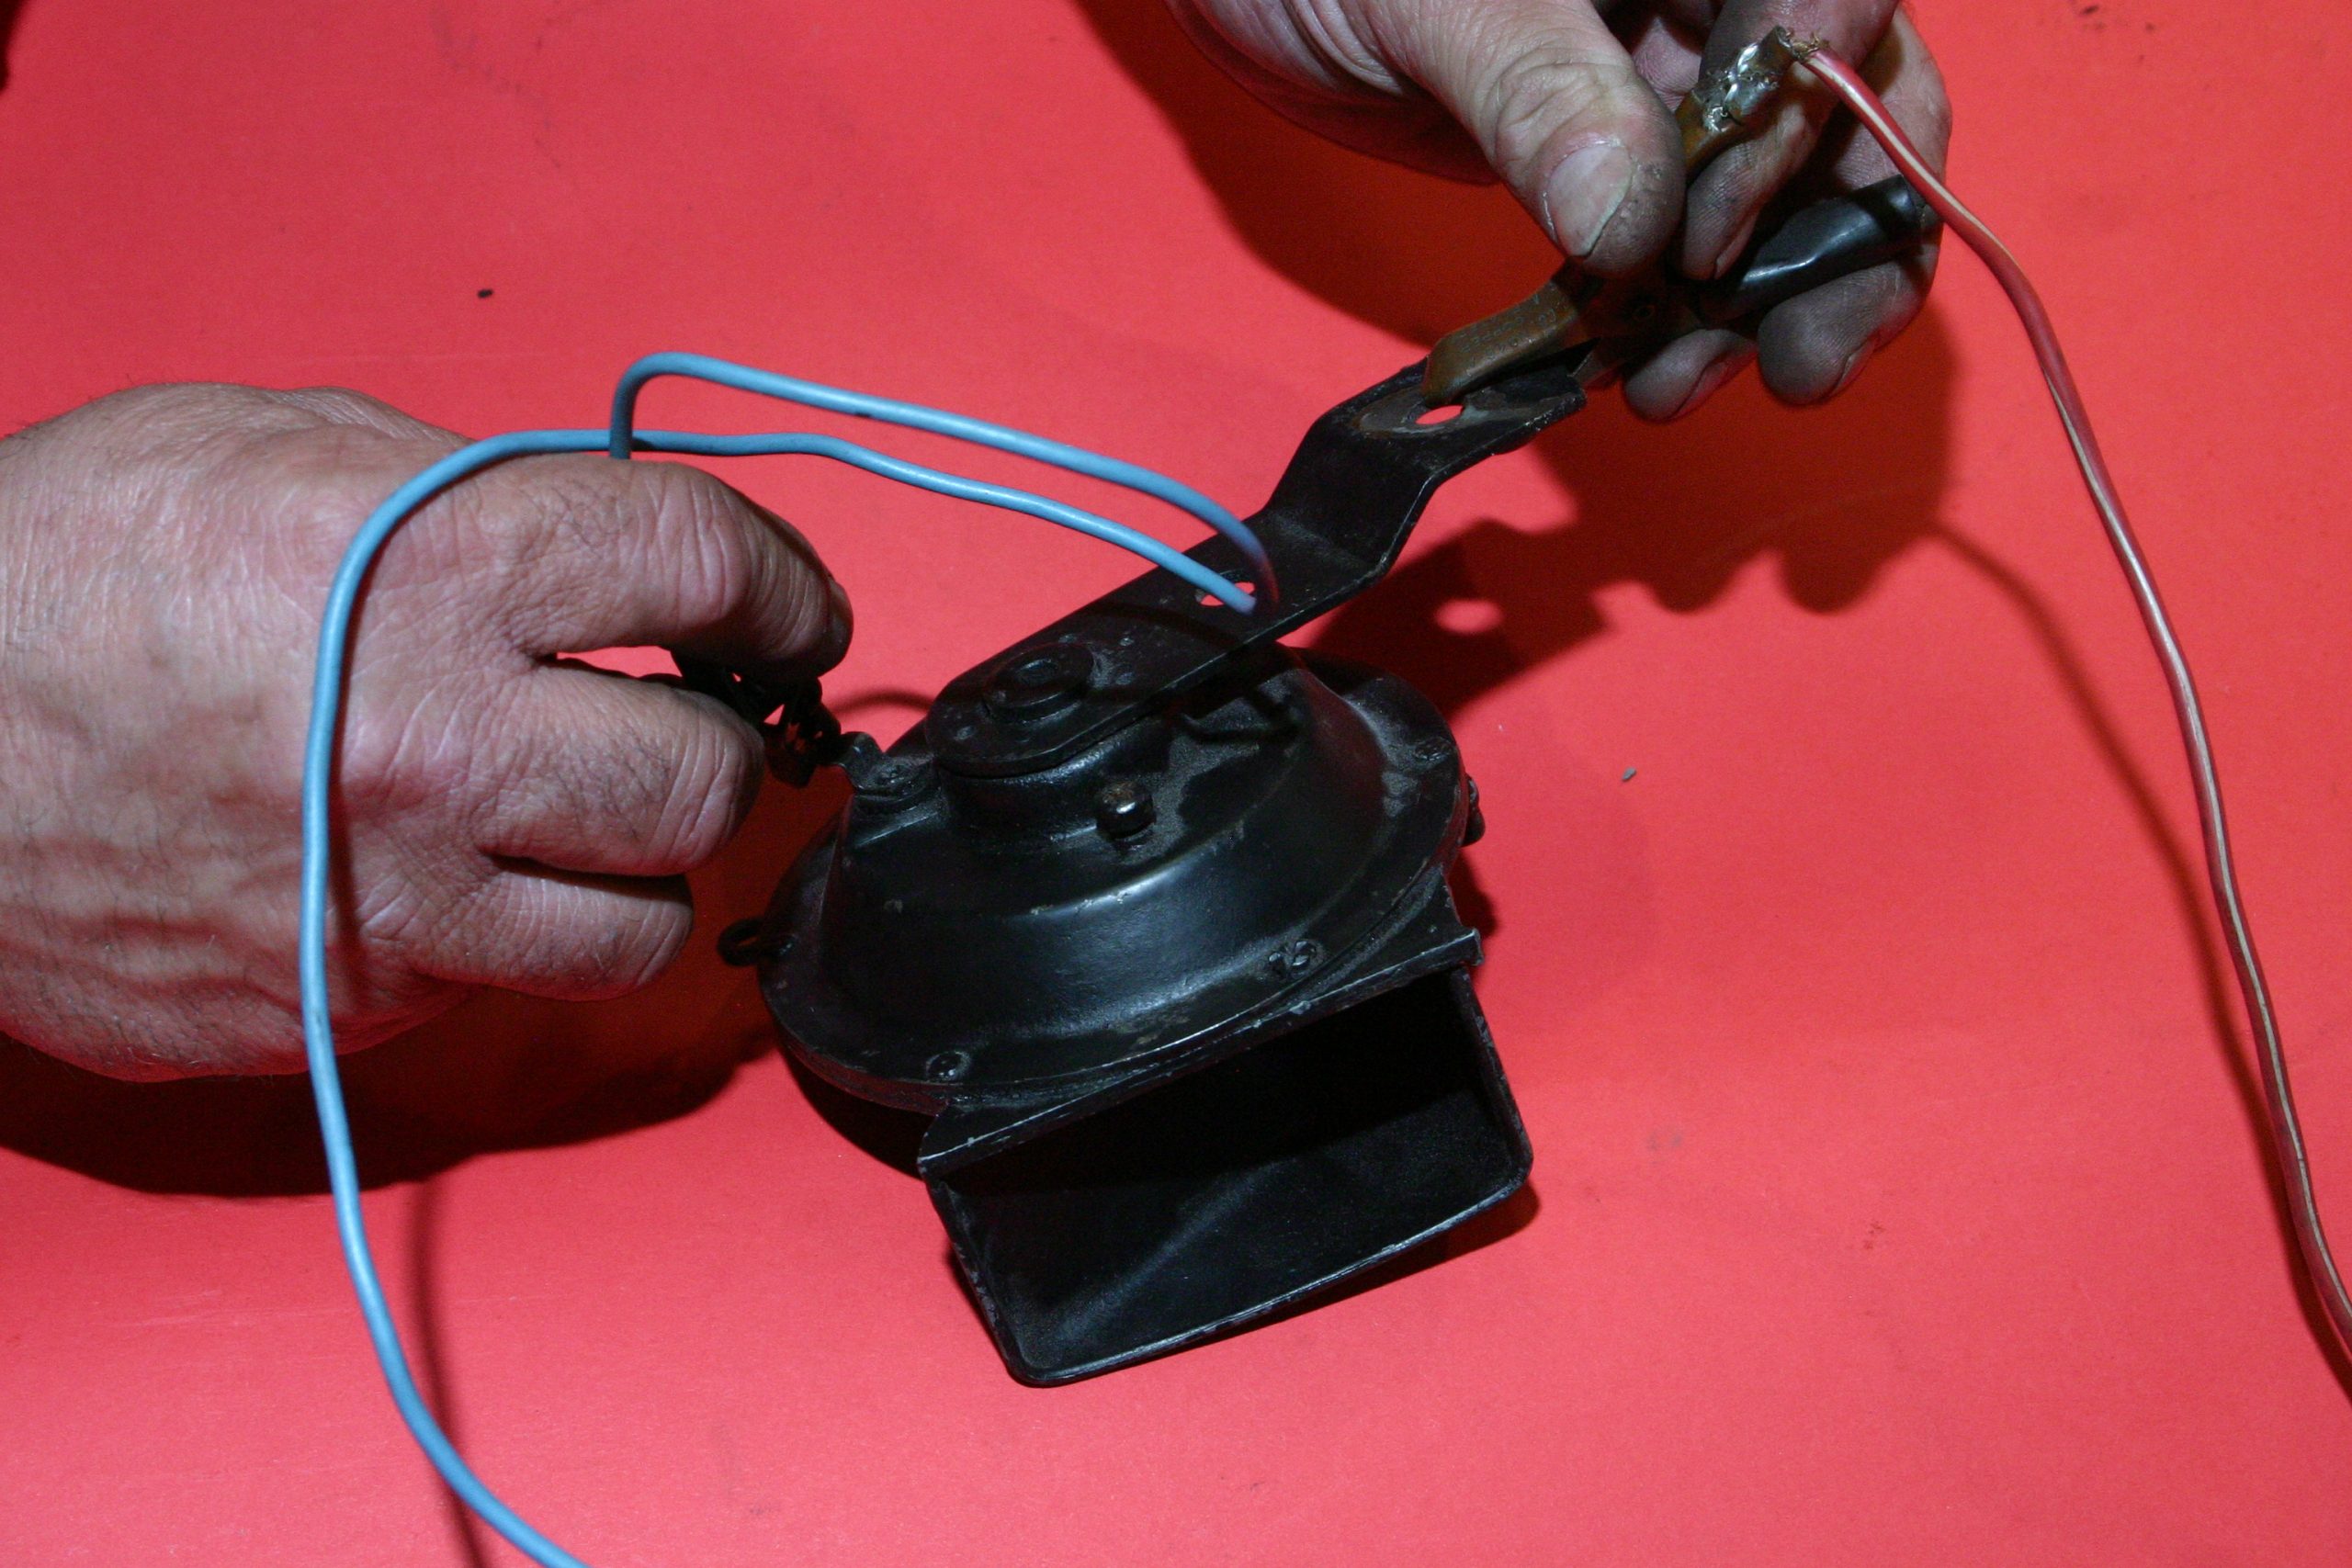
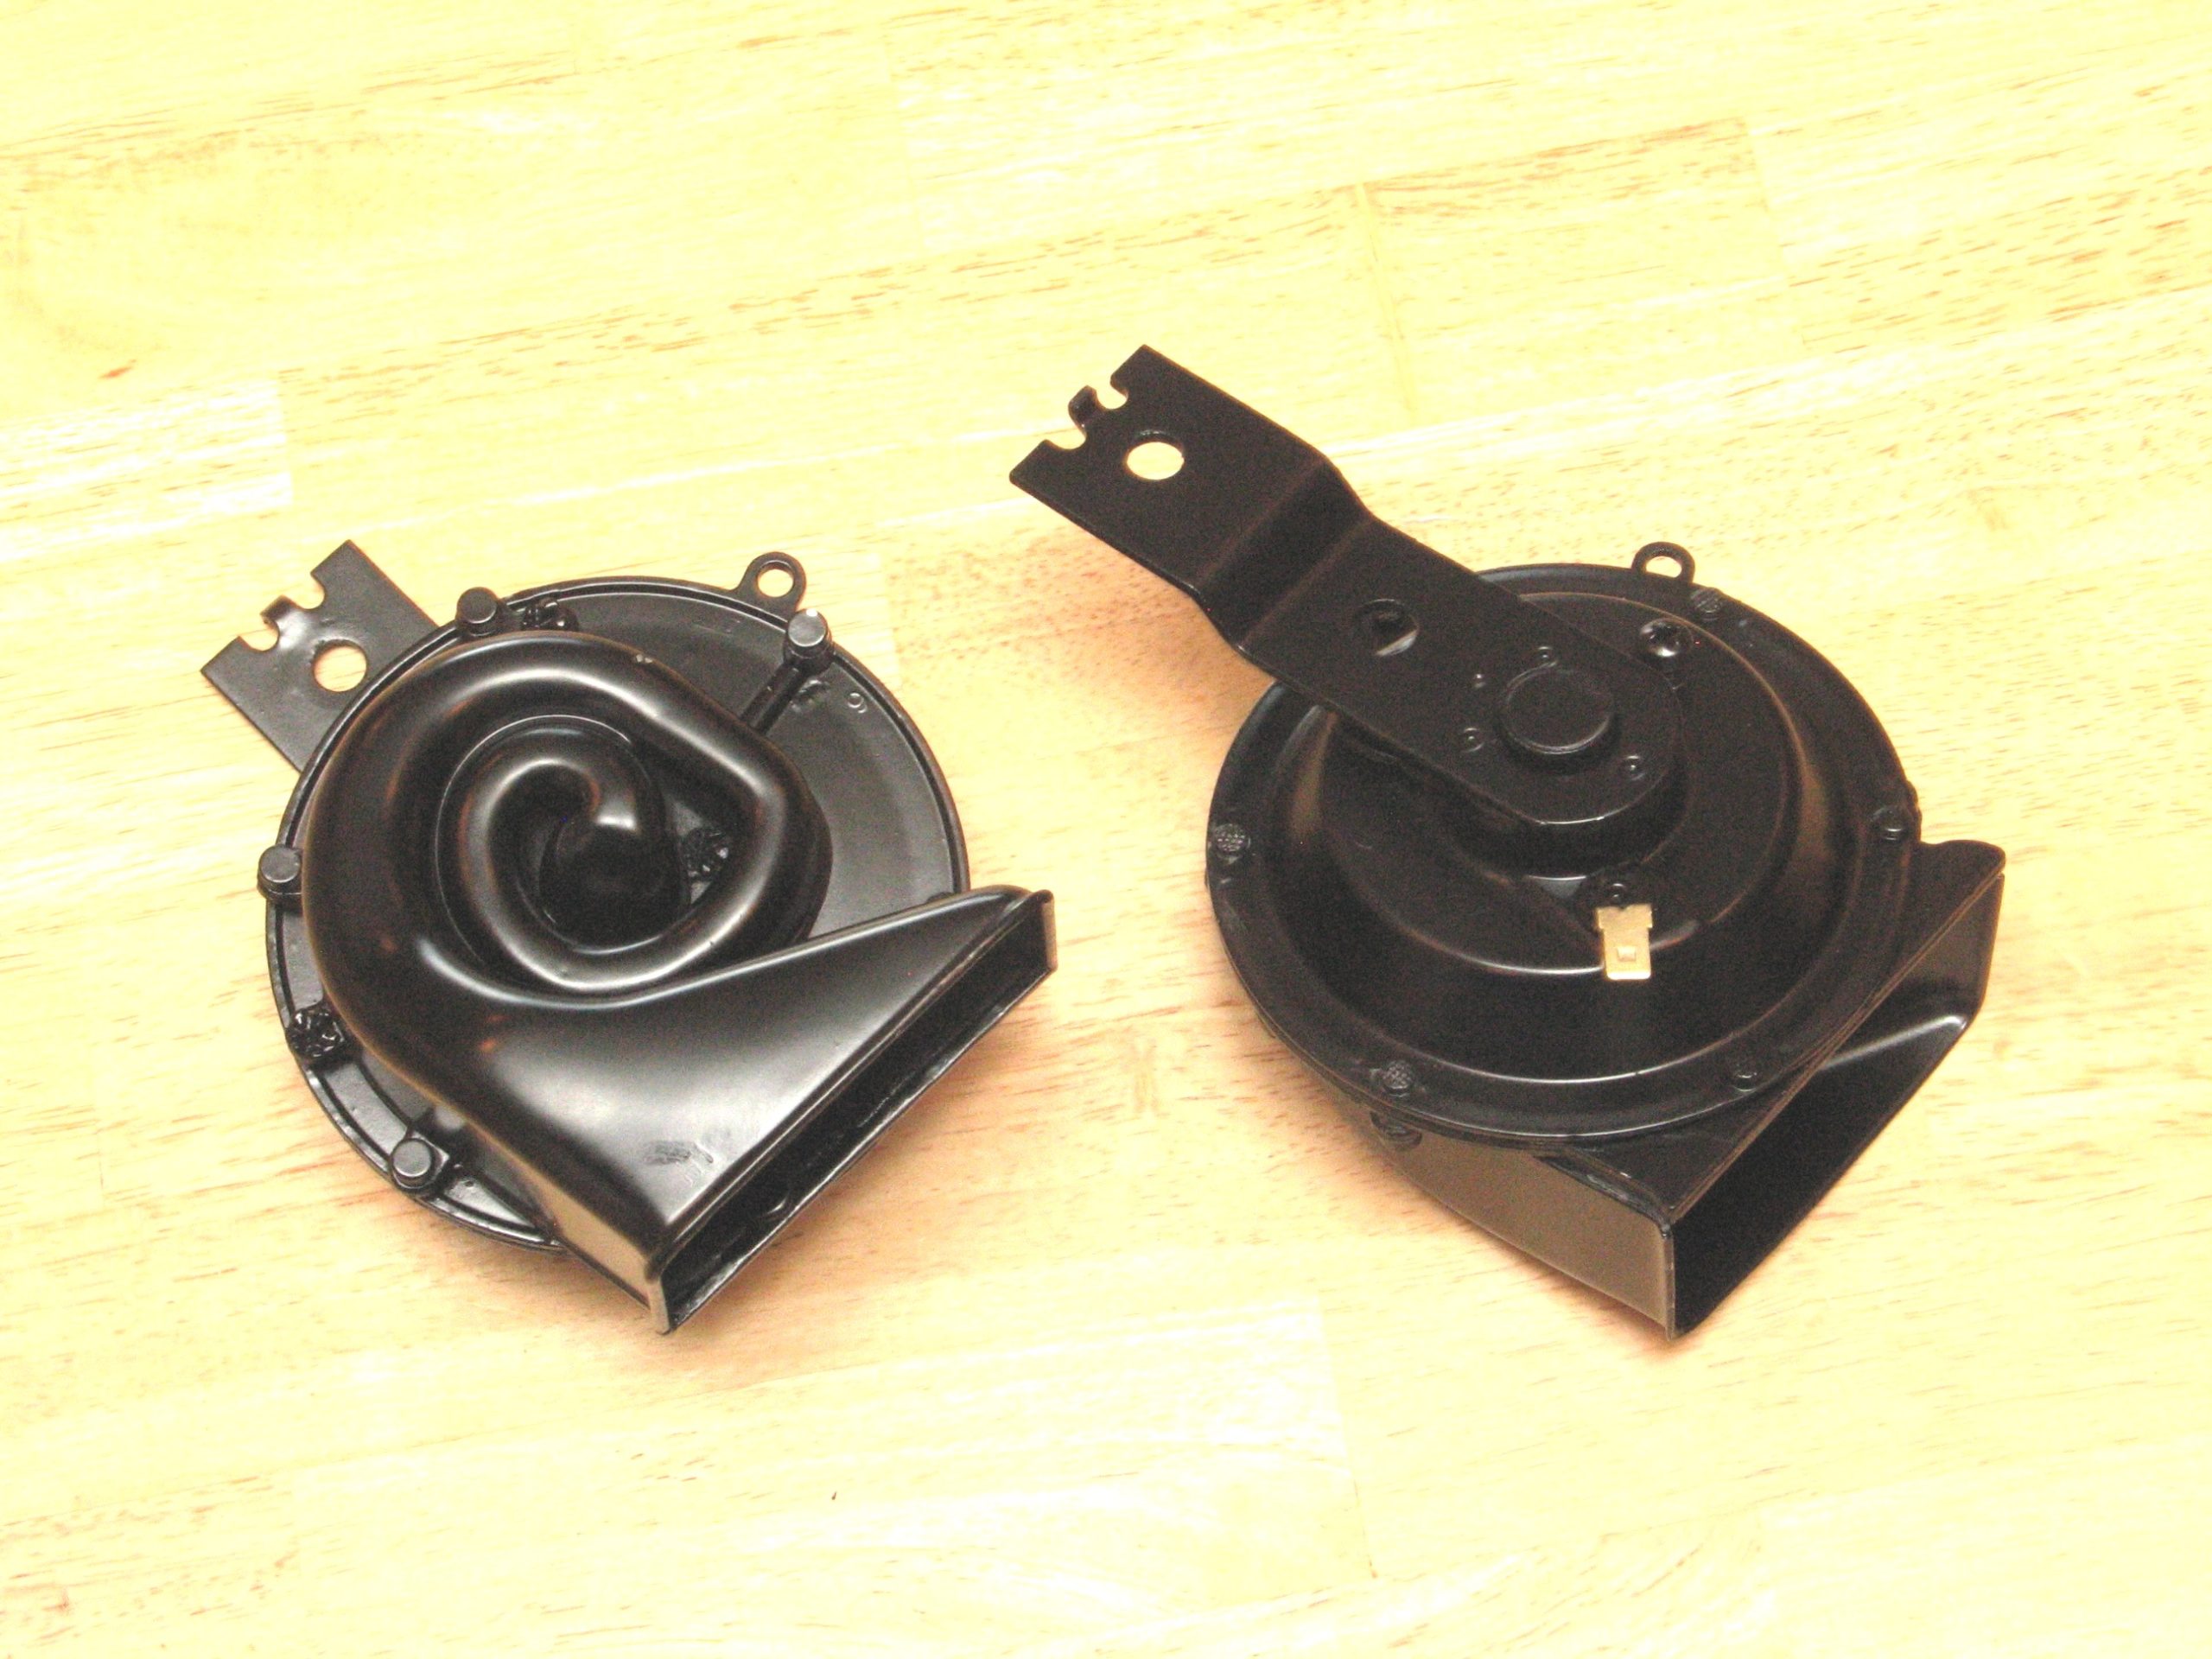
This is typical of what you will find with horns that need a little TLC. Car horns are exposed to the elements—slipstream blast, rain, road dust, corrosive elements like salt spray and dirt, and more. (Image/Jim Smart)Some horns are beyond repair, which means you will need to find good cores. (Image/Jim Smart)This is the smaller more compact post-1964 car horn you typically see whether they are Autolite or Delco—they are pretty much the same. (Image/Jim Smart)You will find both horn manufacturers used on AMC classic cars and some combinations on Chrysler products. Chrysler and Ford typically had the same electrical system suppliers. GM had its own Delco Division. (Image/Jim Smart)These huge beasts were common from the 1940s through the early 1960s. The good news is they make a lot of noise. The downside is the absence of parts for servicing. You’re going to need good usable cores both for parts and whole. (Image/Jim Smart)Ford, as one example, used these horns on generator-equipped models prior to 1965. (Image/Jim Smart)These large early horns have removable covers, which makes access easy. (Image/Jim Smart)As long as you have good cores, these horns can be serviced in your home garage. (Image/Jim Smart)A cursory look at one of these rusty behemoths reveals why car horns stop working. There are moving parts inside that have seized up from rust. (Image/Jim Smart)These contact points have to be clean in order to energize the coil. Think of them like you would ignition points, which are an on/off switch. (Image/Jim Smart)This is the electromagnet coil, which is copper wound. It is something of a powerful super magnet that pulls a lot of amps when you jab the horn. (Image/Jim Smart)A good whack with a hammer will break things loose in order to get the horn working. Just don’t overdo it. This point of impact is the adjustment nut/stud. Protect this stud. (Image/Jim Smart)Horns operate on a principle of vibration between metal discs—which bellow through the snail-like coil tubes to the horn bell mouth. (Image/Jim Smart)To loosen things up, give it a shot of WD-40, which displaces moisture and lubricates the mechanism. (Image/Jim Smart)WD-40 ultimately evaporates, yet leaves components functional. (Image/Jim Smart)The electromagnet (right) vibrates against the steel discs on the left, which move air pulses through the horn at hundreds of times a second to make sound. (Image/Jim Smart)Here’s a closer look at the contact points, which must be hospital-clean for solid continuity and a complete circuit. These points get dirty and corroded and, as a result, stop carrying electricity—rendering the horn inoperative. (Image/Jim Smart)Contact points are initially dressed with a file. (Image/Jim Smart)After they’re properly dressed with a file, move to emery paper to finish the job. (Image/Jim Smart)Blow the horn out with compressed air. Ideally, you will use dry compressed air in a can to keep moisture out. There cannot be any debris left behind, including dust. (Image/Jim Smart)When you perform a horn test, be prepared for intense noise and arcing at the contact points. These horns pull a lot of amps when the contact point close. Carefully anchor the horn in a bench vise for security, because the vibration can be overwhelming. (Image/Jim Smart)Because the compact horns are riveted together, the rivets must be ground off to get them apart. (Image/Jim Smart)Once the old rivets are hammered out, you can use new rivets or small bolts/nuts to put the horn back together. (Image/Jim Smart)The post-1964 compact horns are simpler—scaled down in size with contact points (white arrow) and a much smaller electromagnet (yellow arrow). (Image/Jim Smart)The electromagnet can suffer burnout, which renders the horn inoperative. (Image/Jim Smart)(Image/Jim Smart)This is the disc, which vibrates at hundreds of times a second to yield the familiar “whaaaah!” we hear at the horn’s bell mouth. (Image/Jim Smart)Contact points carry electricity to the copper coil, which get us the disc oscillation (vibration). (Image/Jim Smart)These contact points can be dressed and cleaned up to get the horns working again. However, these horns are best left to the expertise of a vintage car horn rebuilder/restorer. (Image/Jim Smart)This is the horn’s voice—the diecast and steel megaphone bell mouth. (Image/Jim Smart)Horn pitch adjustment is handled at this adjustment screw. Tighten the screw (clockwise) to get a higher pitch. Loosen to get a lower pitch. But, make no mistake, high and low pitch horns are different bodies with different length tubes to control the basic high or low pitch. (Image/Jim Smart)Test the horns with the positive lead to the terminal and negative ground to the bracket. Be ready for the vibration and blast. (Image/Jim Smart)You can have your horn bodies powdercoated or paint them with a good heat-resistant satin automotive spray finish. (Image/Jim Smart)
Jim Smart is a veteran automotive journalist, technical editor, and historian with hundreds of how-to and feature articles to his credit. Jim's also an enthusiast, and has owned and restored many classic vehicles, including an impressive mix of vintage Ford Mustangs.


Comments