Something a lot of folks with street machines or drag race cars take for granted is rear end alignment. No, we’re not talking about camber and toe adjustments for an independent rear end. Instead, we’re talking about how square the rear end is in the car or truck.
Not a big deal?
It sure is. Plenty of us have followed a pickup truck or car going down the road that’s dog tracking. The big reason here (aside from the fact it could be seriously bent) is that the rear end isn’t aligned with the rest of the chassis. Imagine a drag car launching and going down track skewed. It costs precious ET and simultaneously, could be a handling bomb waiting to go off.

For cars with an adjustable four link (splayed OE four bar or ladder bar) rear suspension, it’s not that difficult to get the rear out of whack when performing the initial housing/suspension install or adjustment. But with quality rod ends on the links, you can adjust it back to square.
You may enjoy this article too: A Guide to Tuning Your Four-Link Suspension System
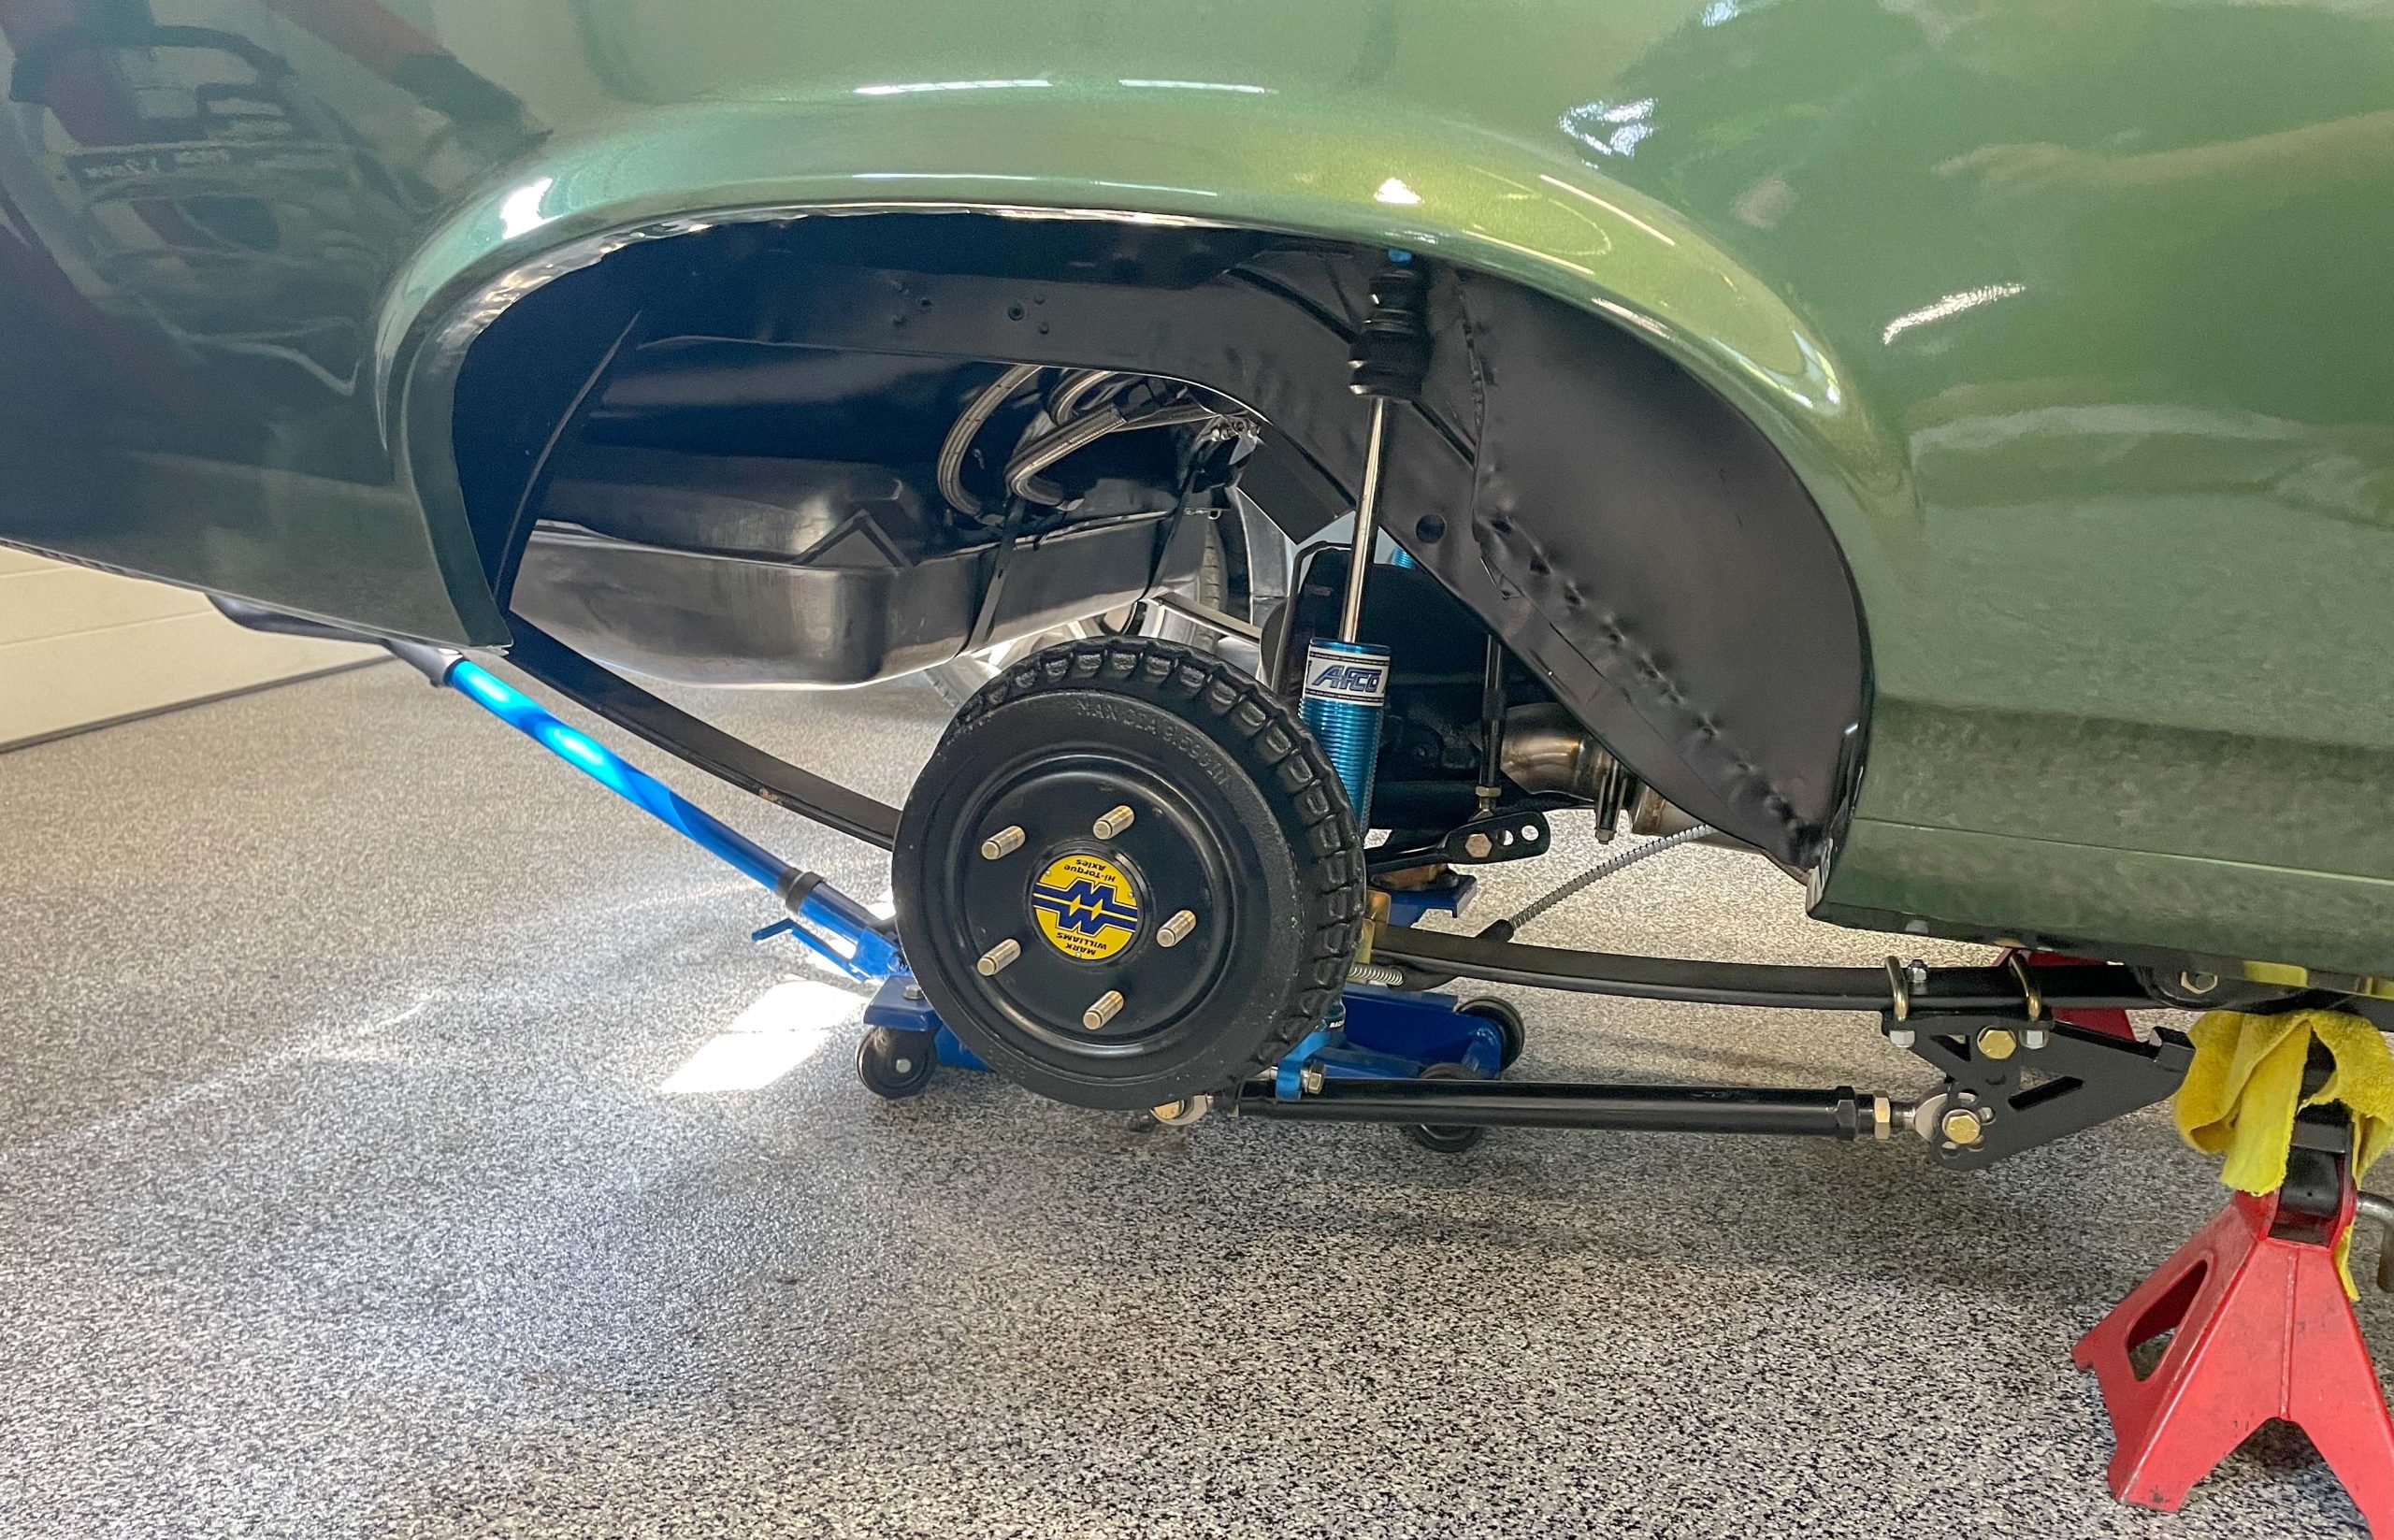
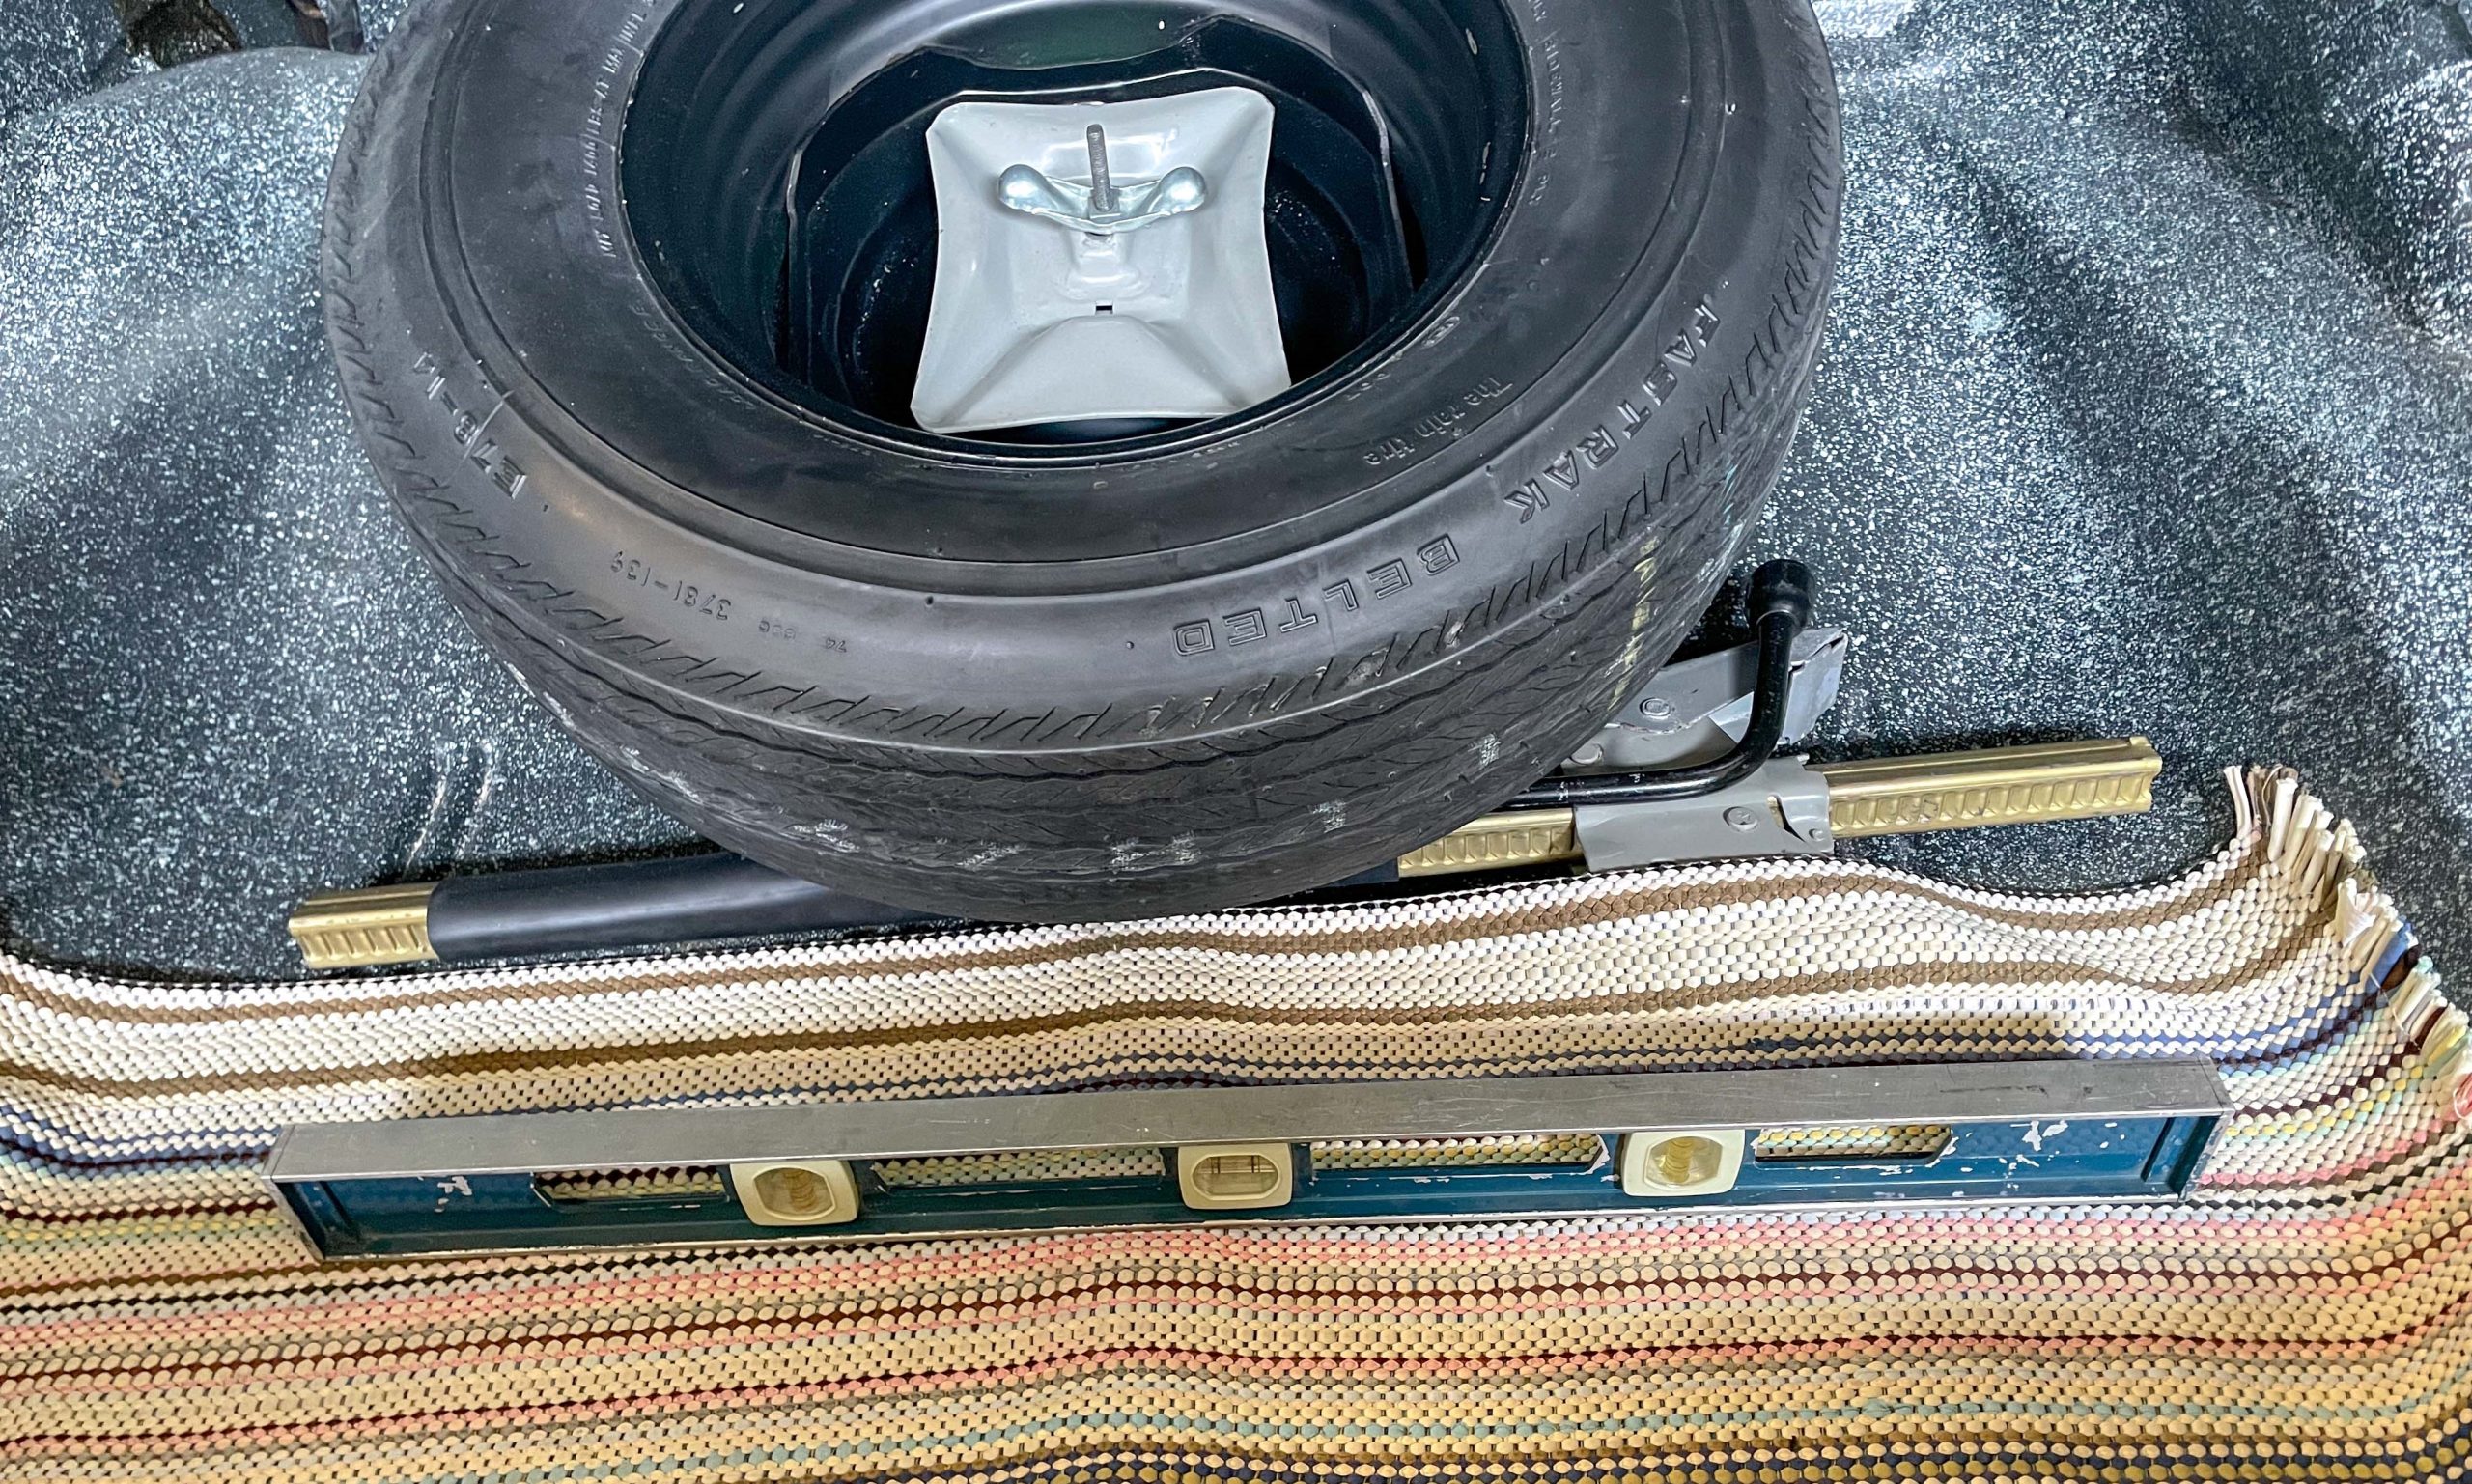
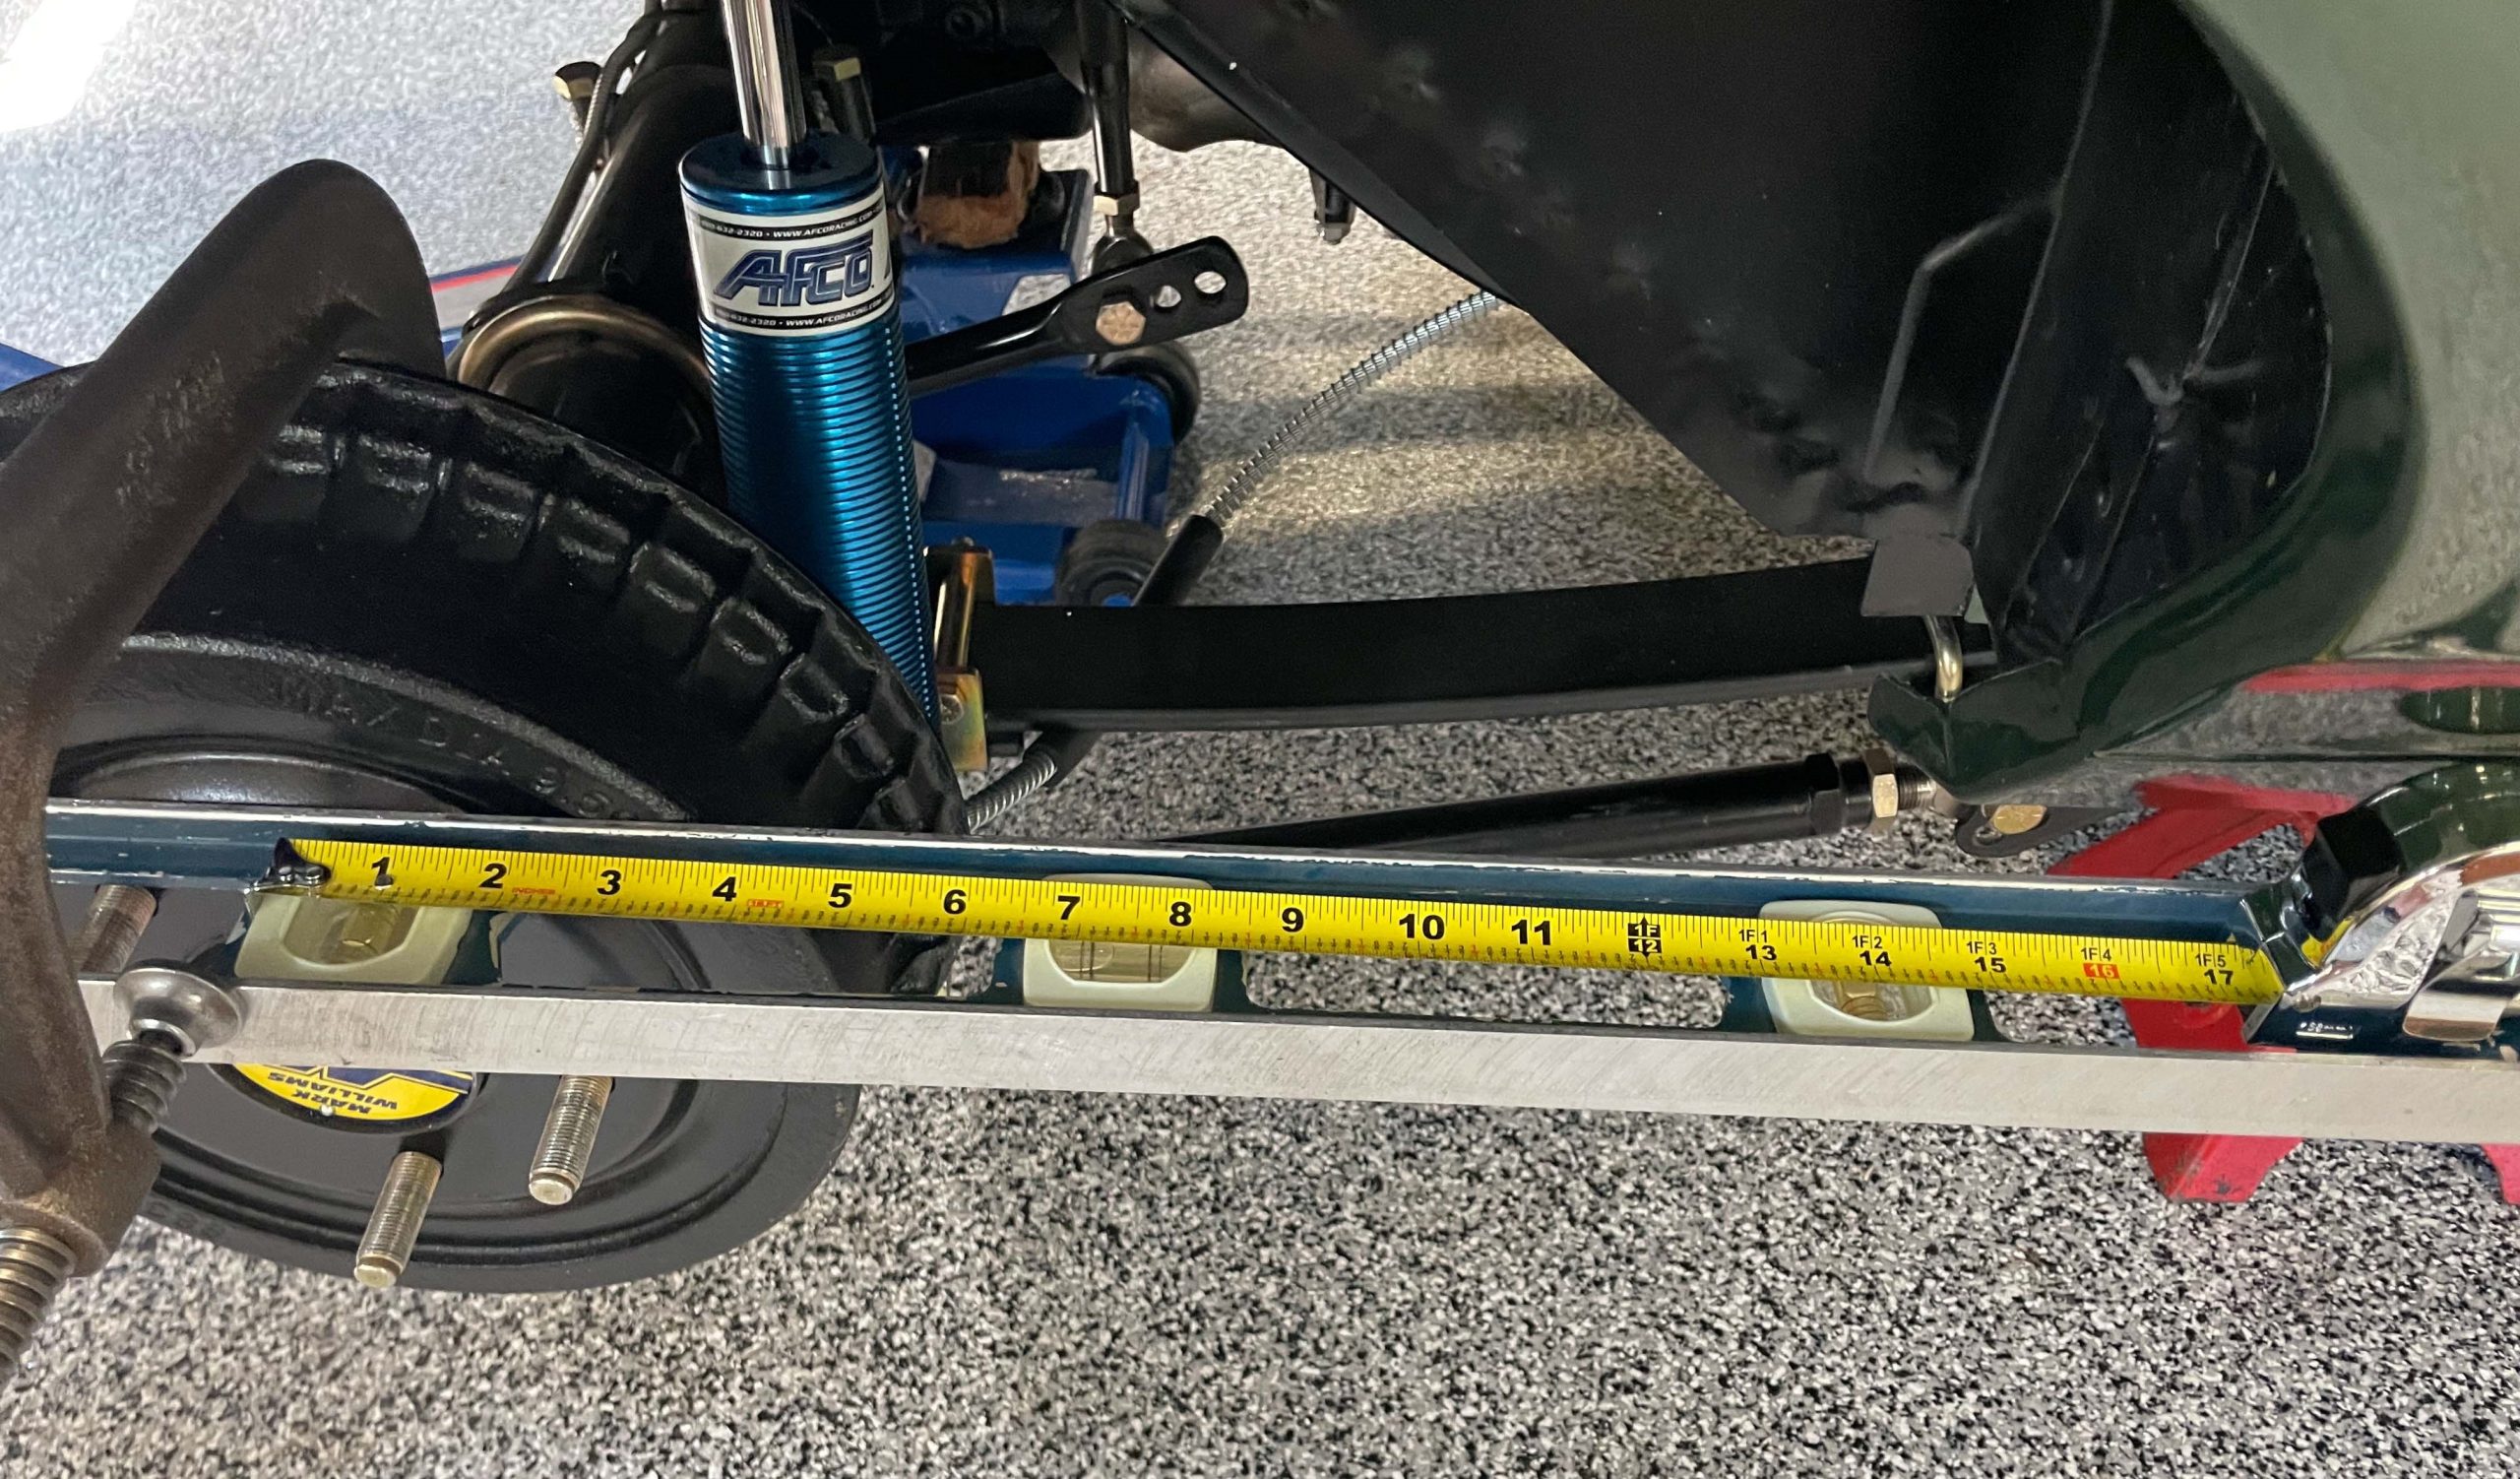
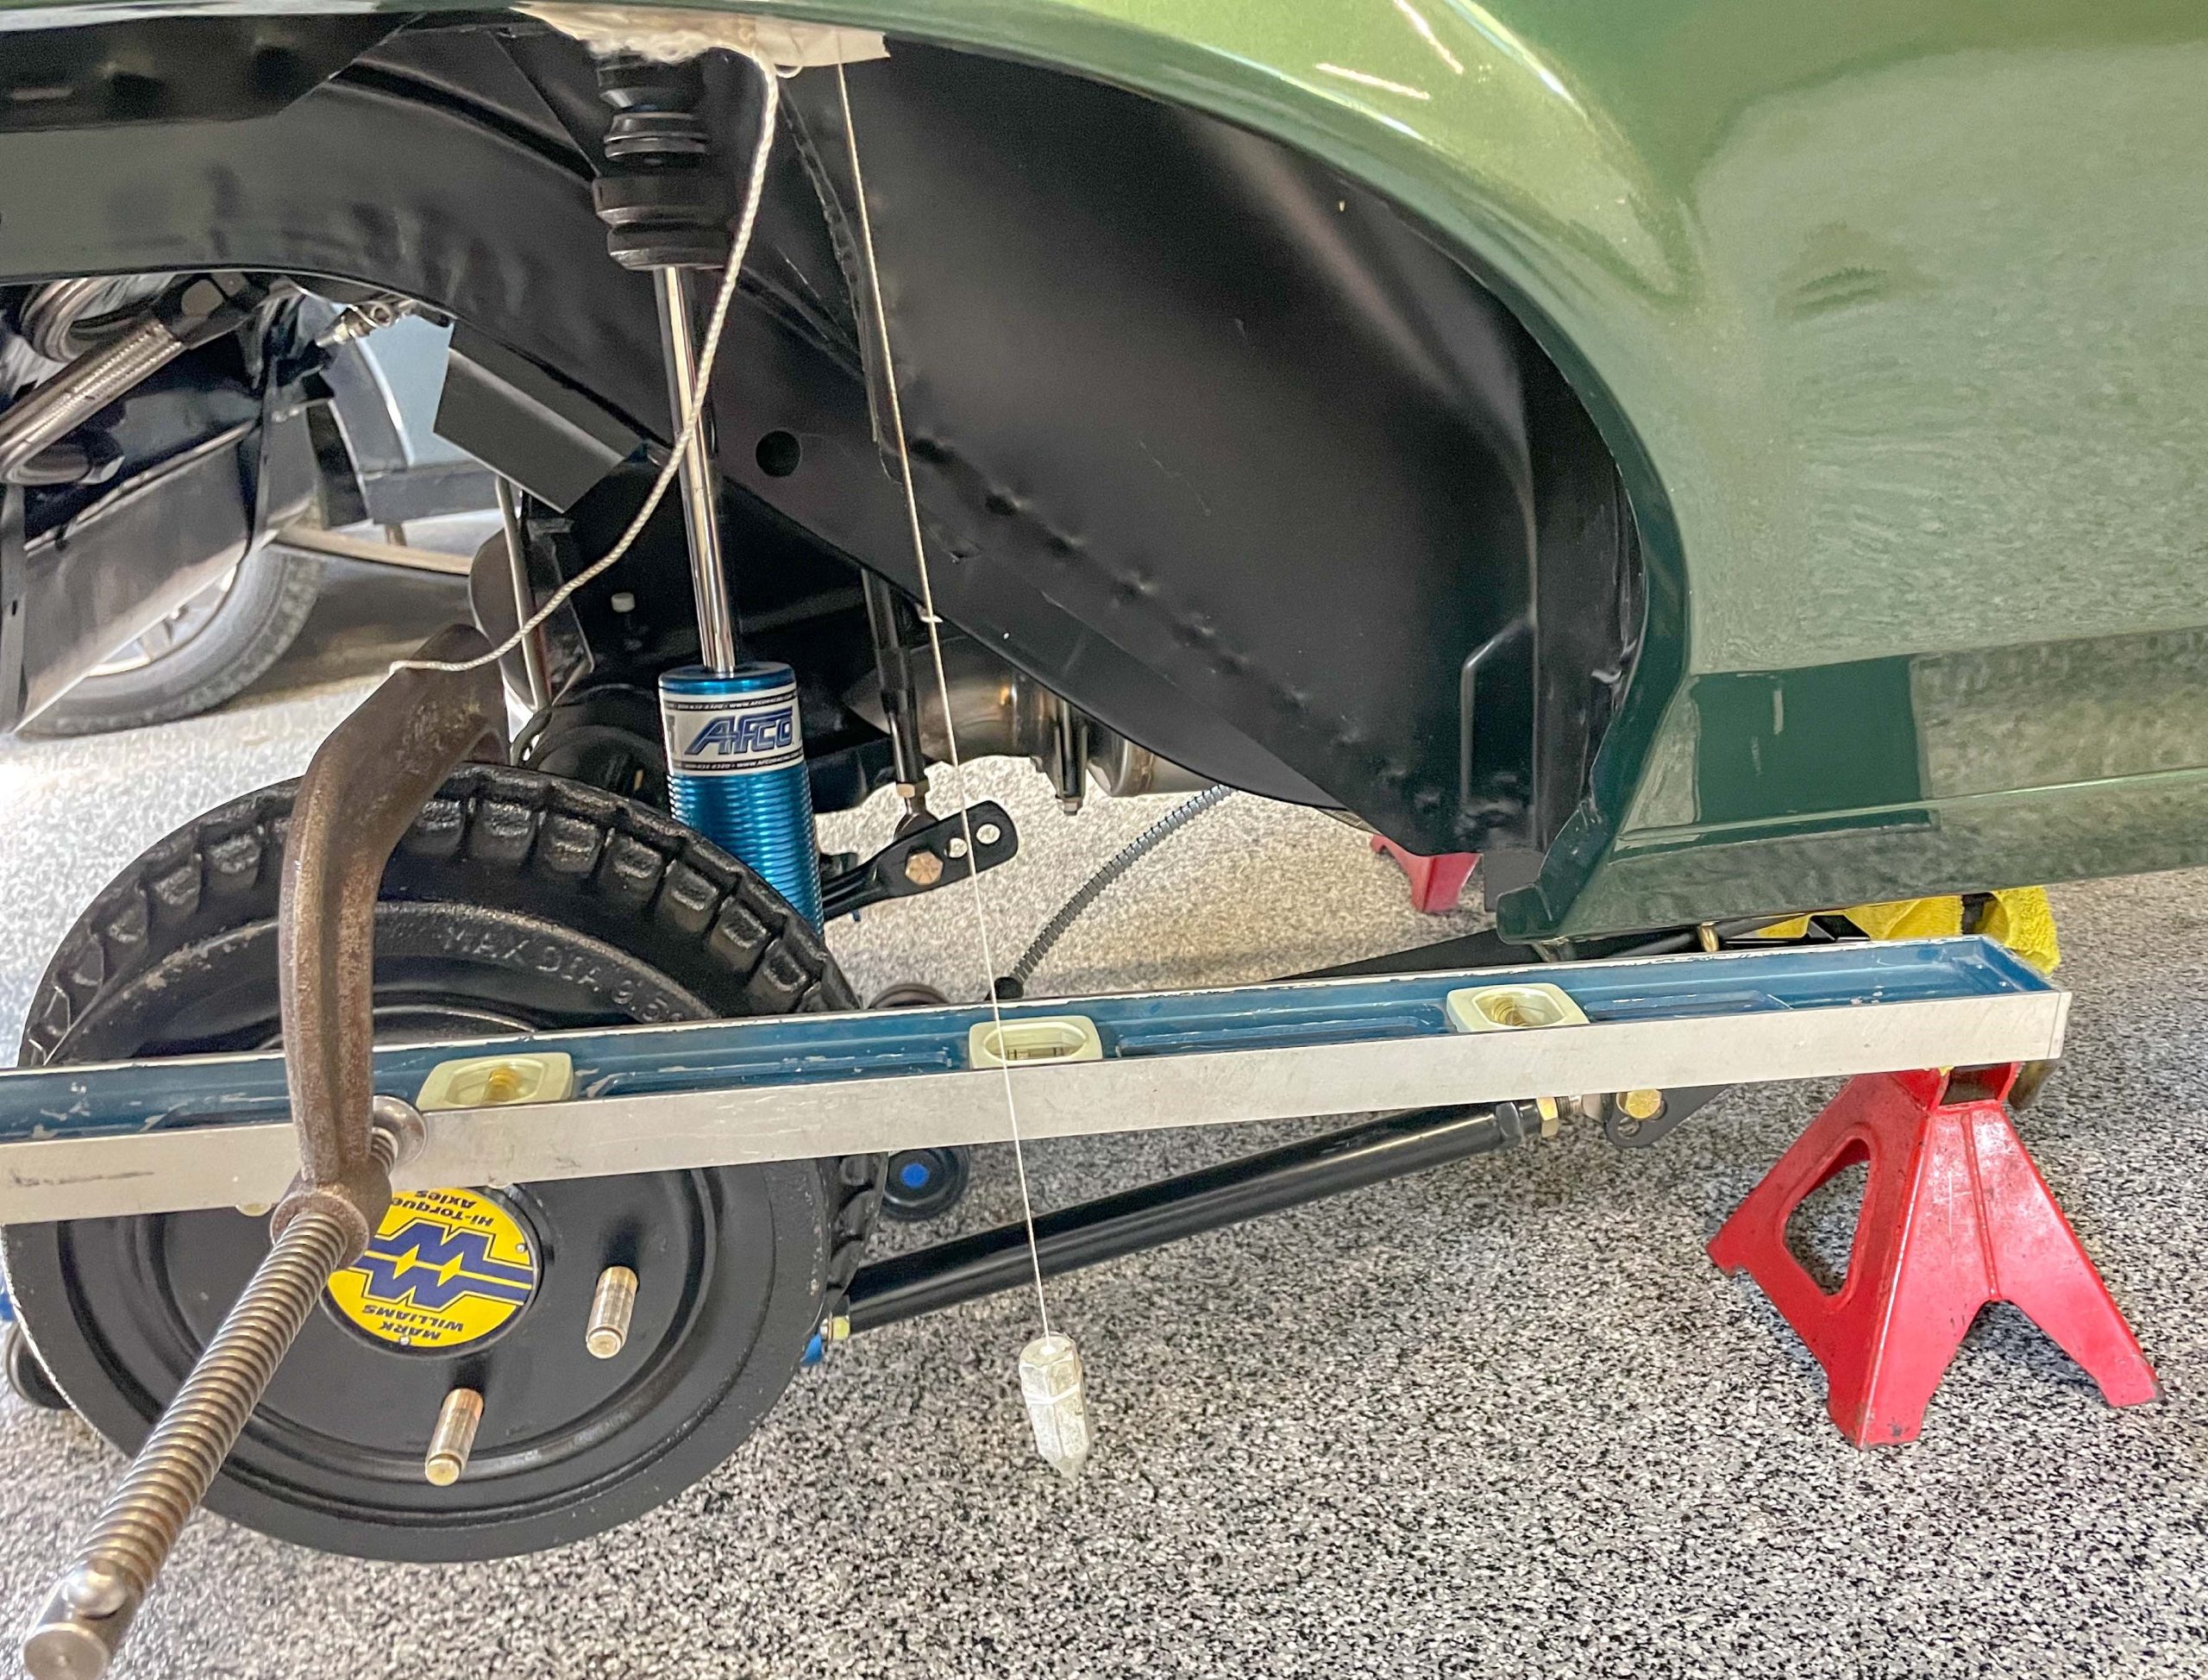
For cars with leaf springs on the back, adjustment isn’t so easy. With these applications, there is a tiny amount of front to back and side to side movement between the leaf spring pins, thanks to pin hole tolerances and shackle movement. It all adds up and it is still possible to have the housing skewed in the chassis. But with many leaf spring cars, getting the housing square side to side can be an issue, particularly if the tires are close to the edges of the wheel well.

So how do you check for it?
There are a number of ways to handle this. Some are complex. Some are pretty easy.
This is how my old, late friend, Jerry Bickel explained it, and it’s ideal for a car with a four link rear suspension arrangement. The same basic principles can be used in a car with OE-style splayed four link assemblies (GM A & G bodies; Fox Mustangs and so on). It can be adapted to work on a leaf spring setup:
Follow these steps for squaring the rear end in the chassis:
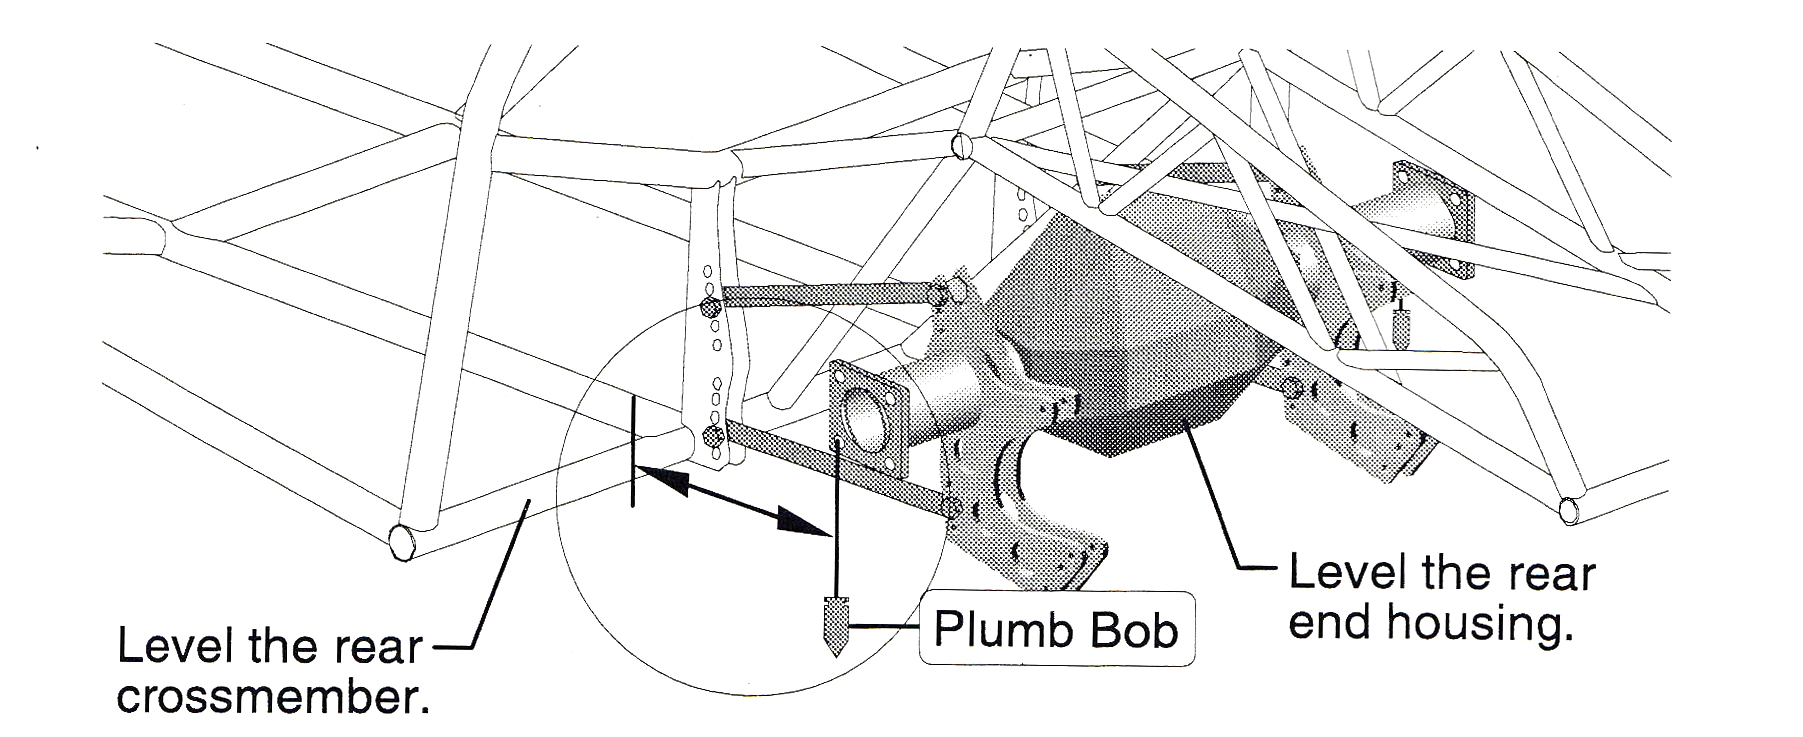
Remove all chassis pre-load by disconnecting one end of the upper rear four link bar. I prefer to remove the bar as it will be adjusted for preload later.
Disconnect one of the rear stabilizer bar end links if so equipped.
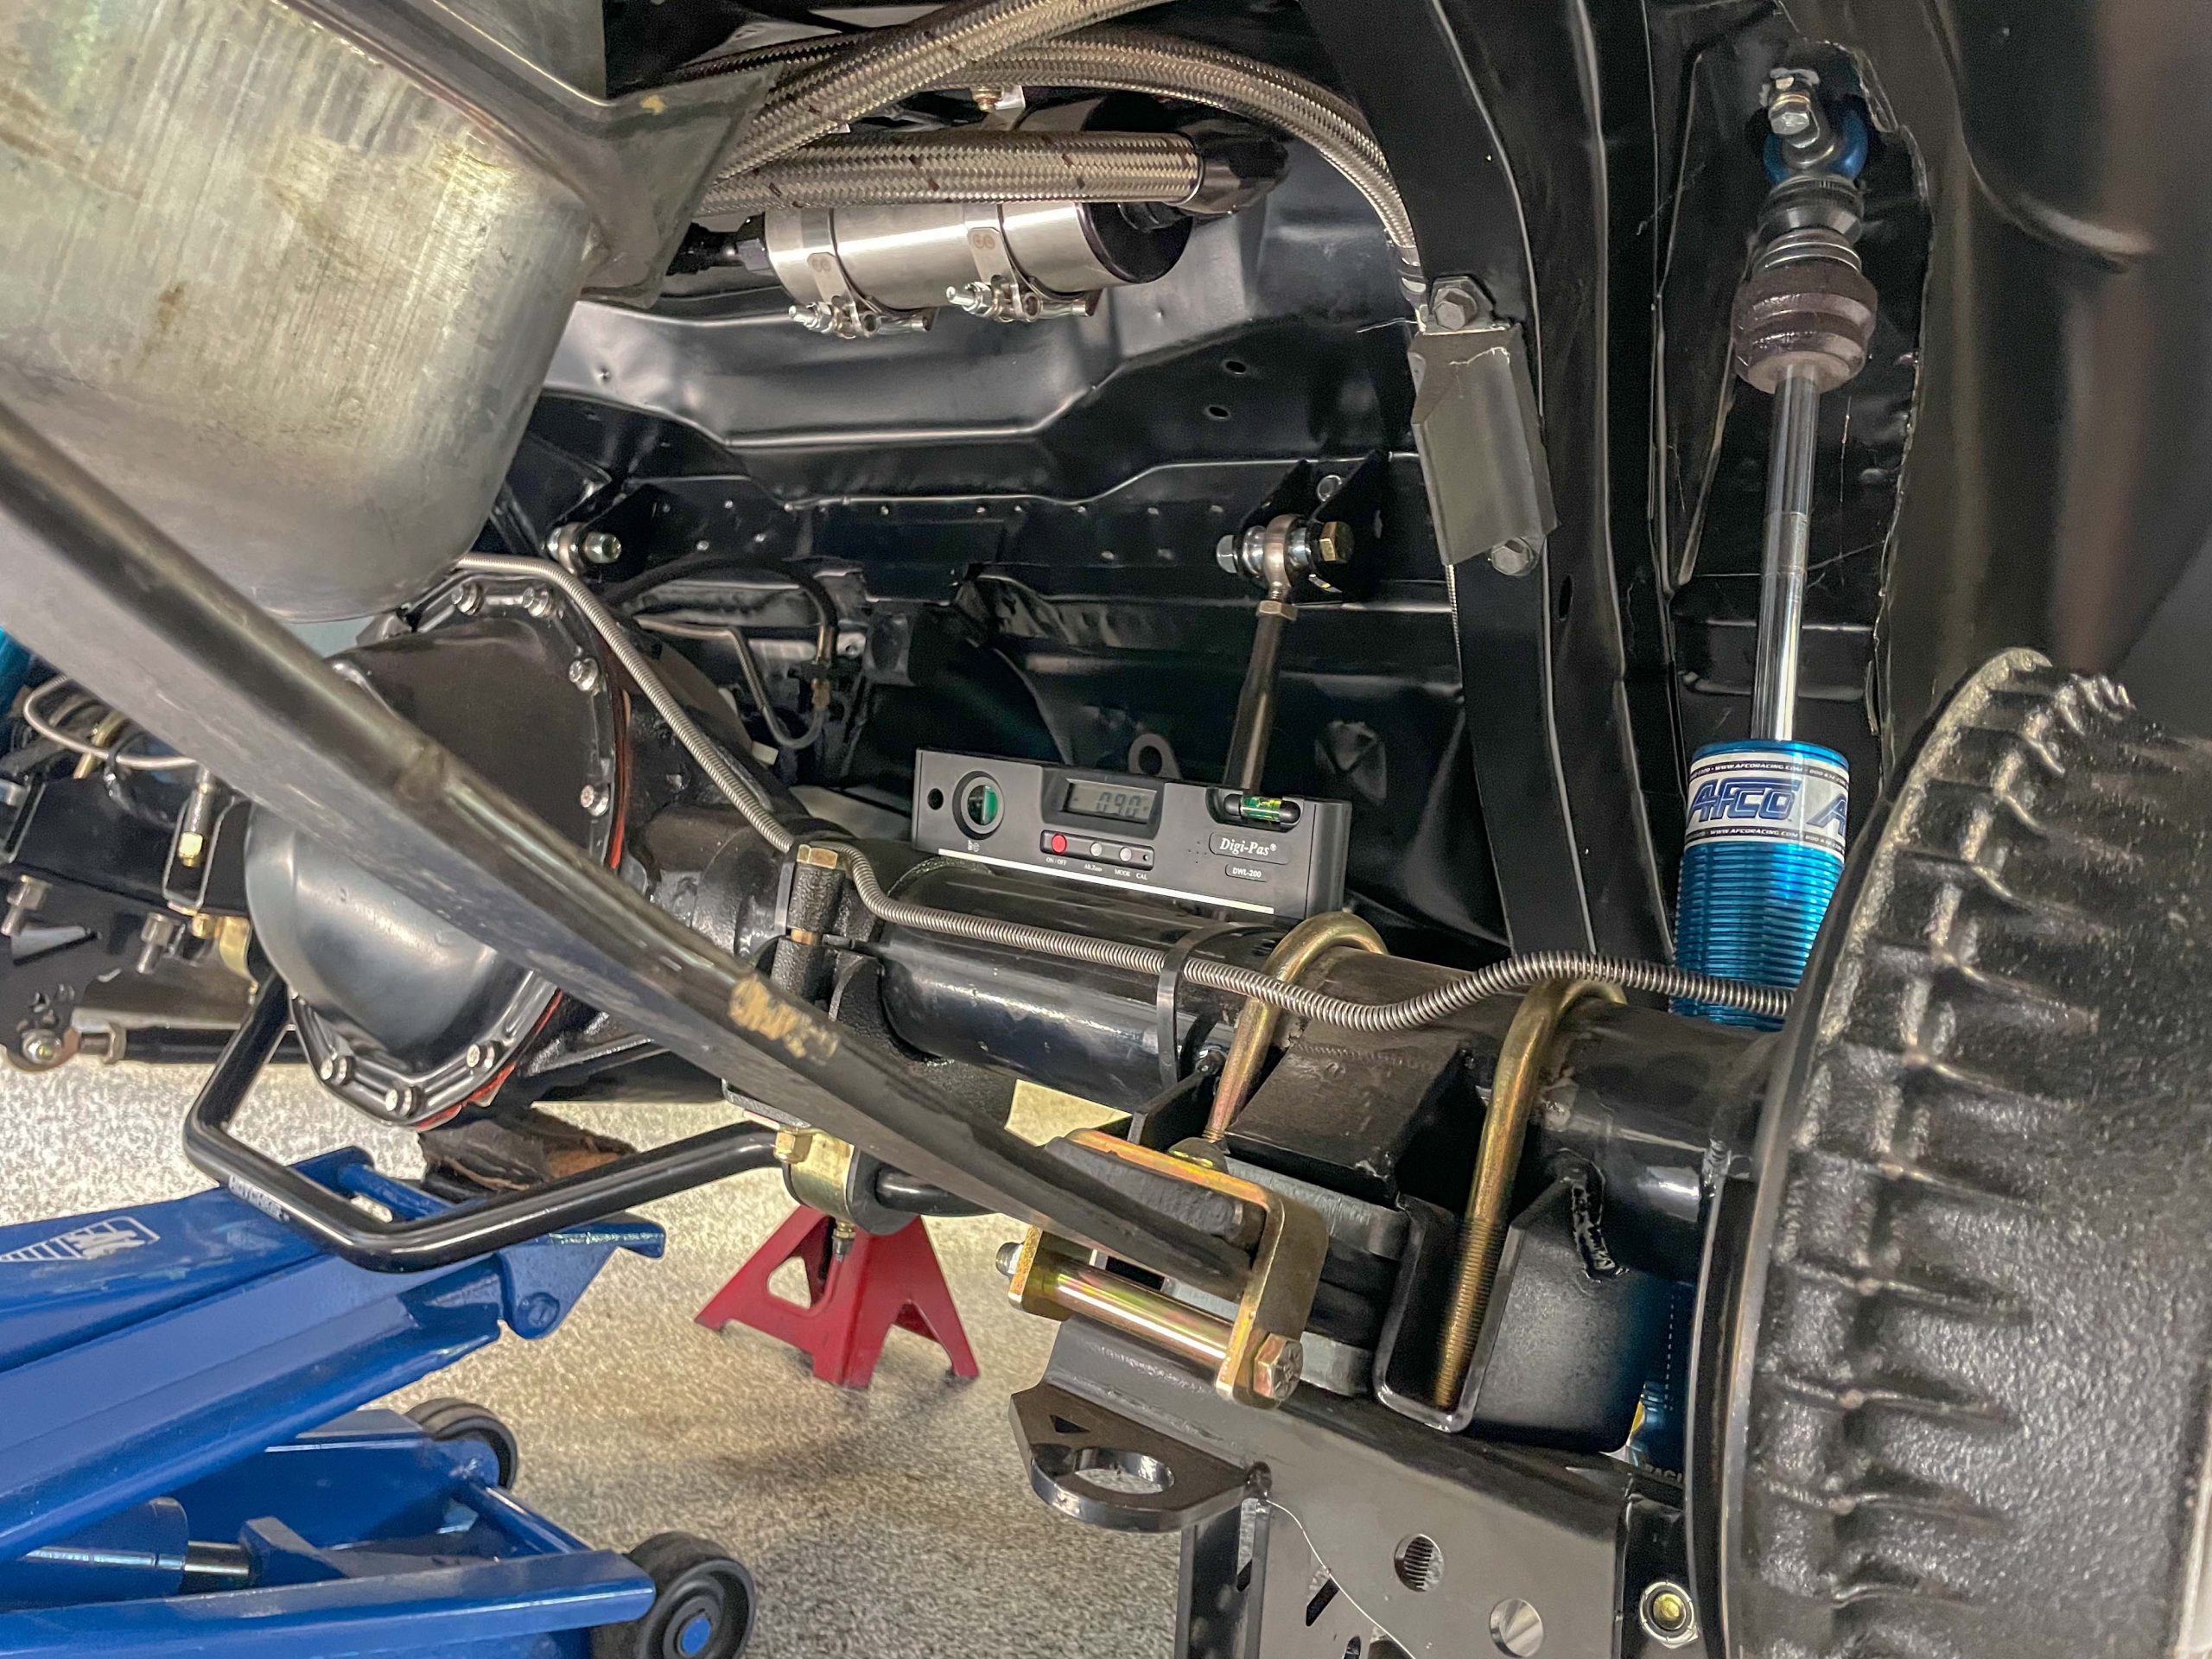
It is very important that the rear end is not hanging crooked for this measurement. Level the chassis at the rear crossmember first. Then level the rear end housing. Hang a plumb bob off the front edge of the axle flanges and measure the distance to the crossmember on both sides. Adjust the links until the measurements are exactly the same on both sides.
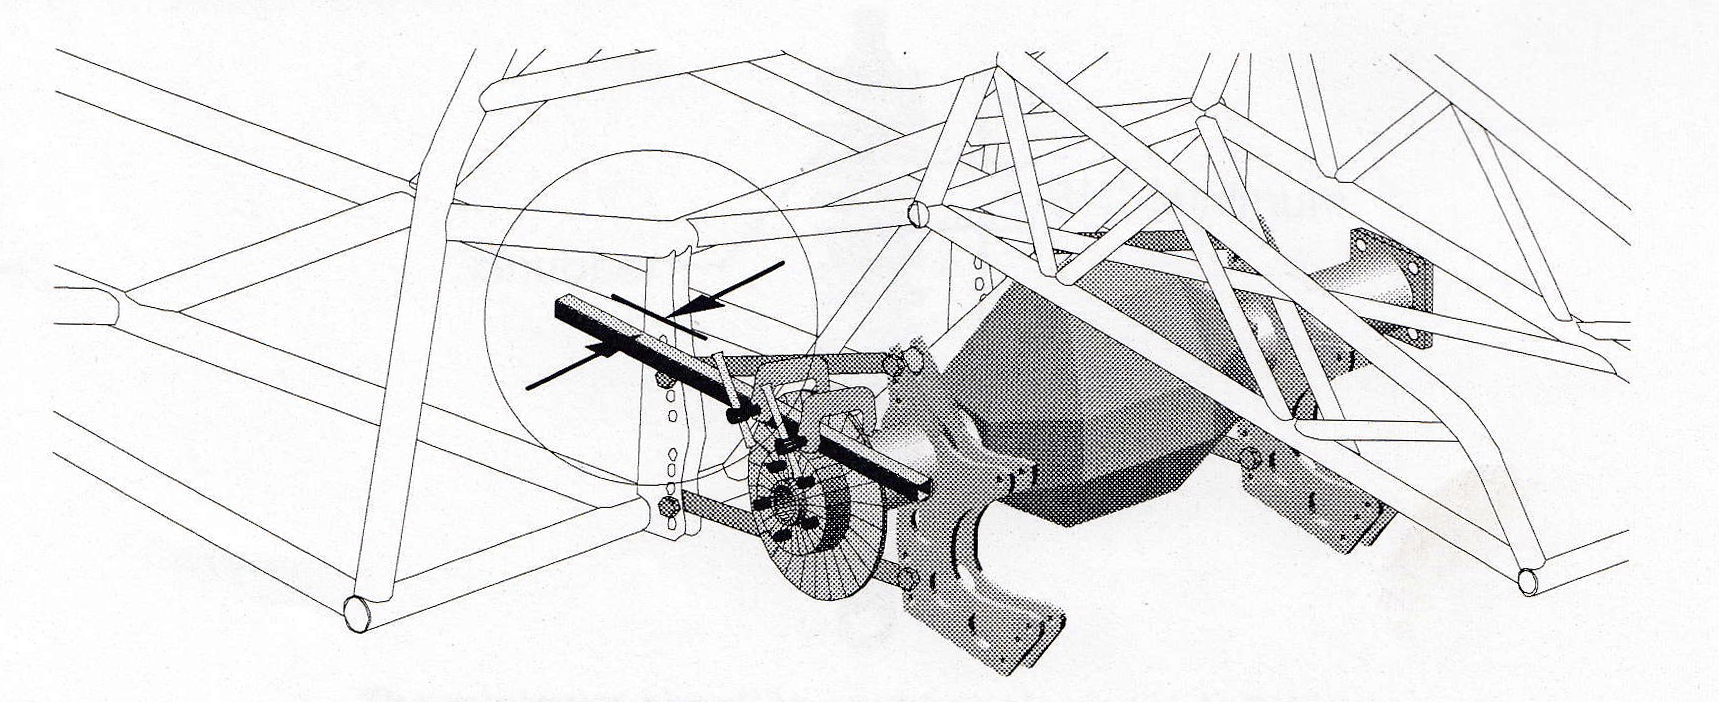
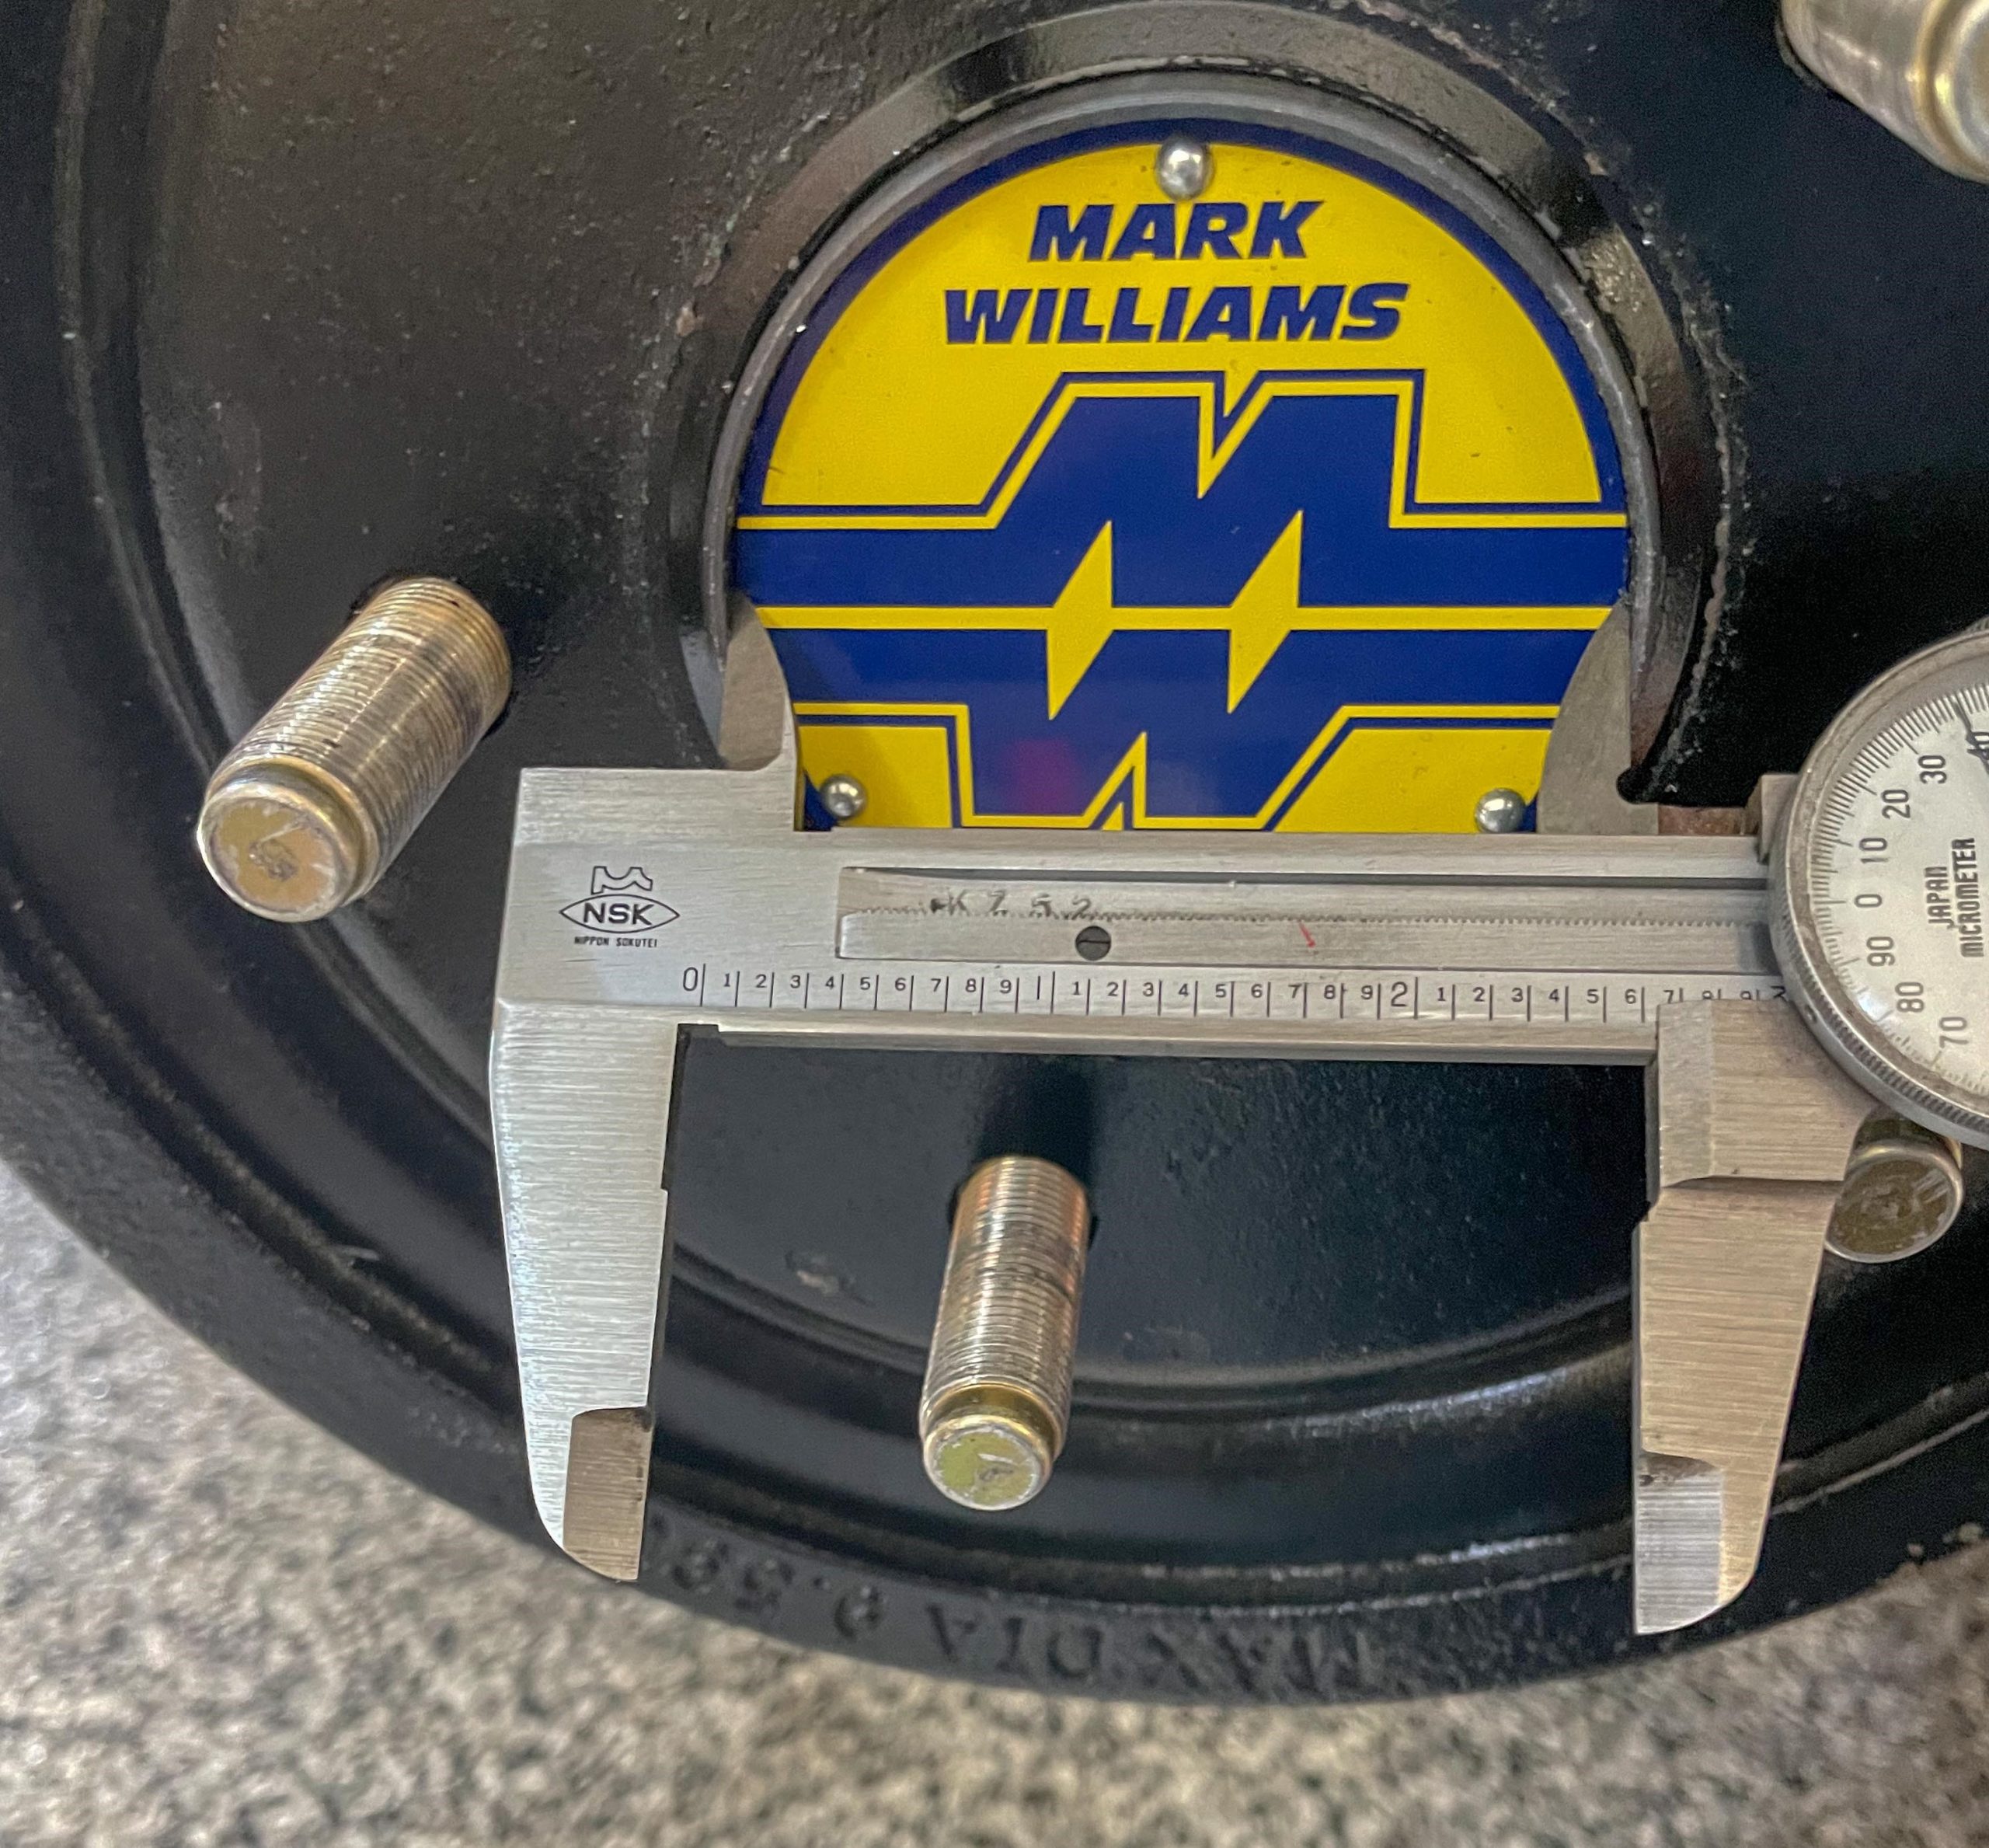
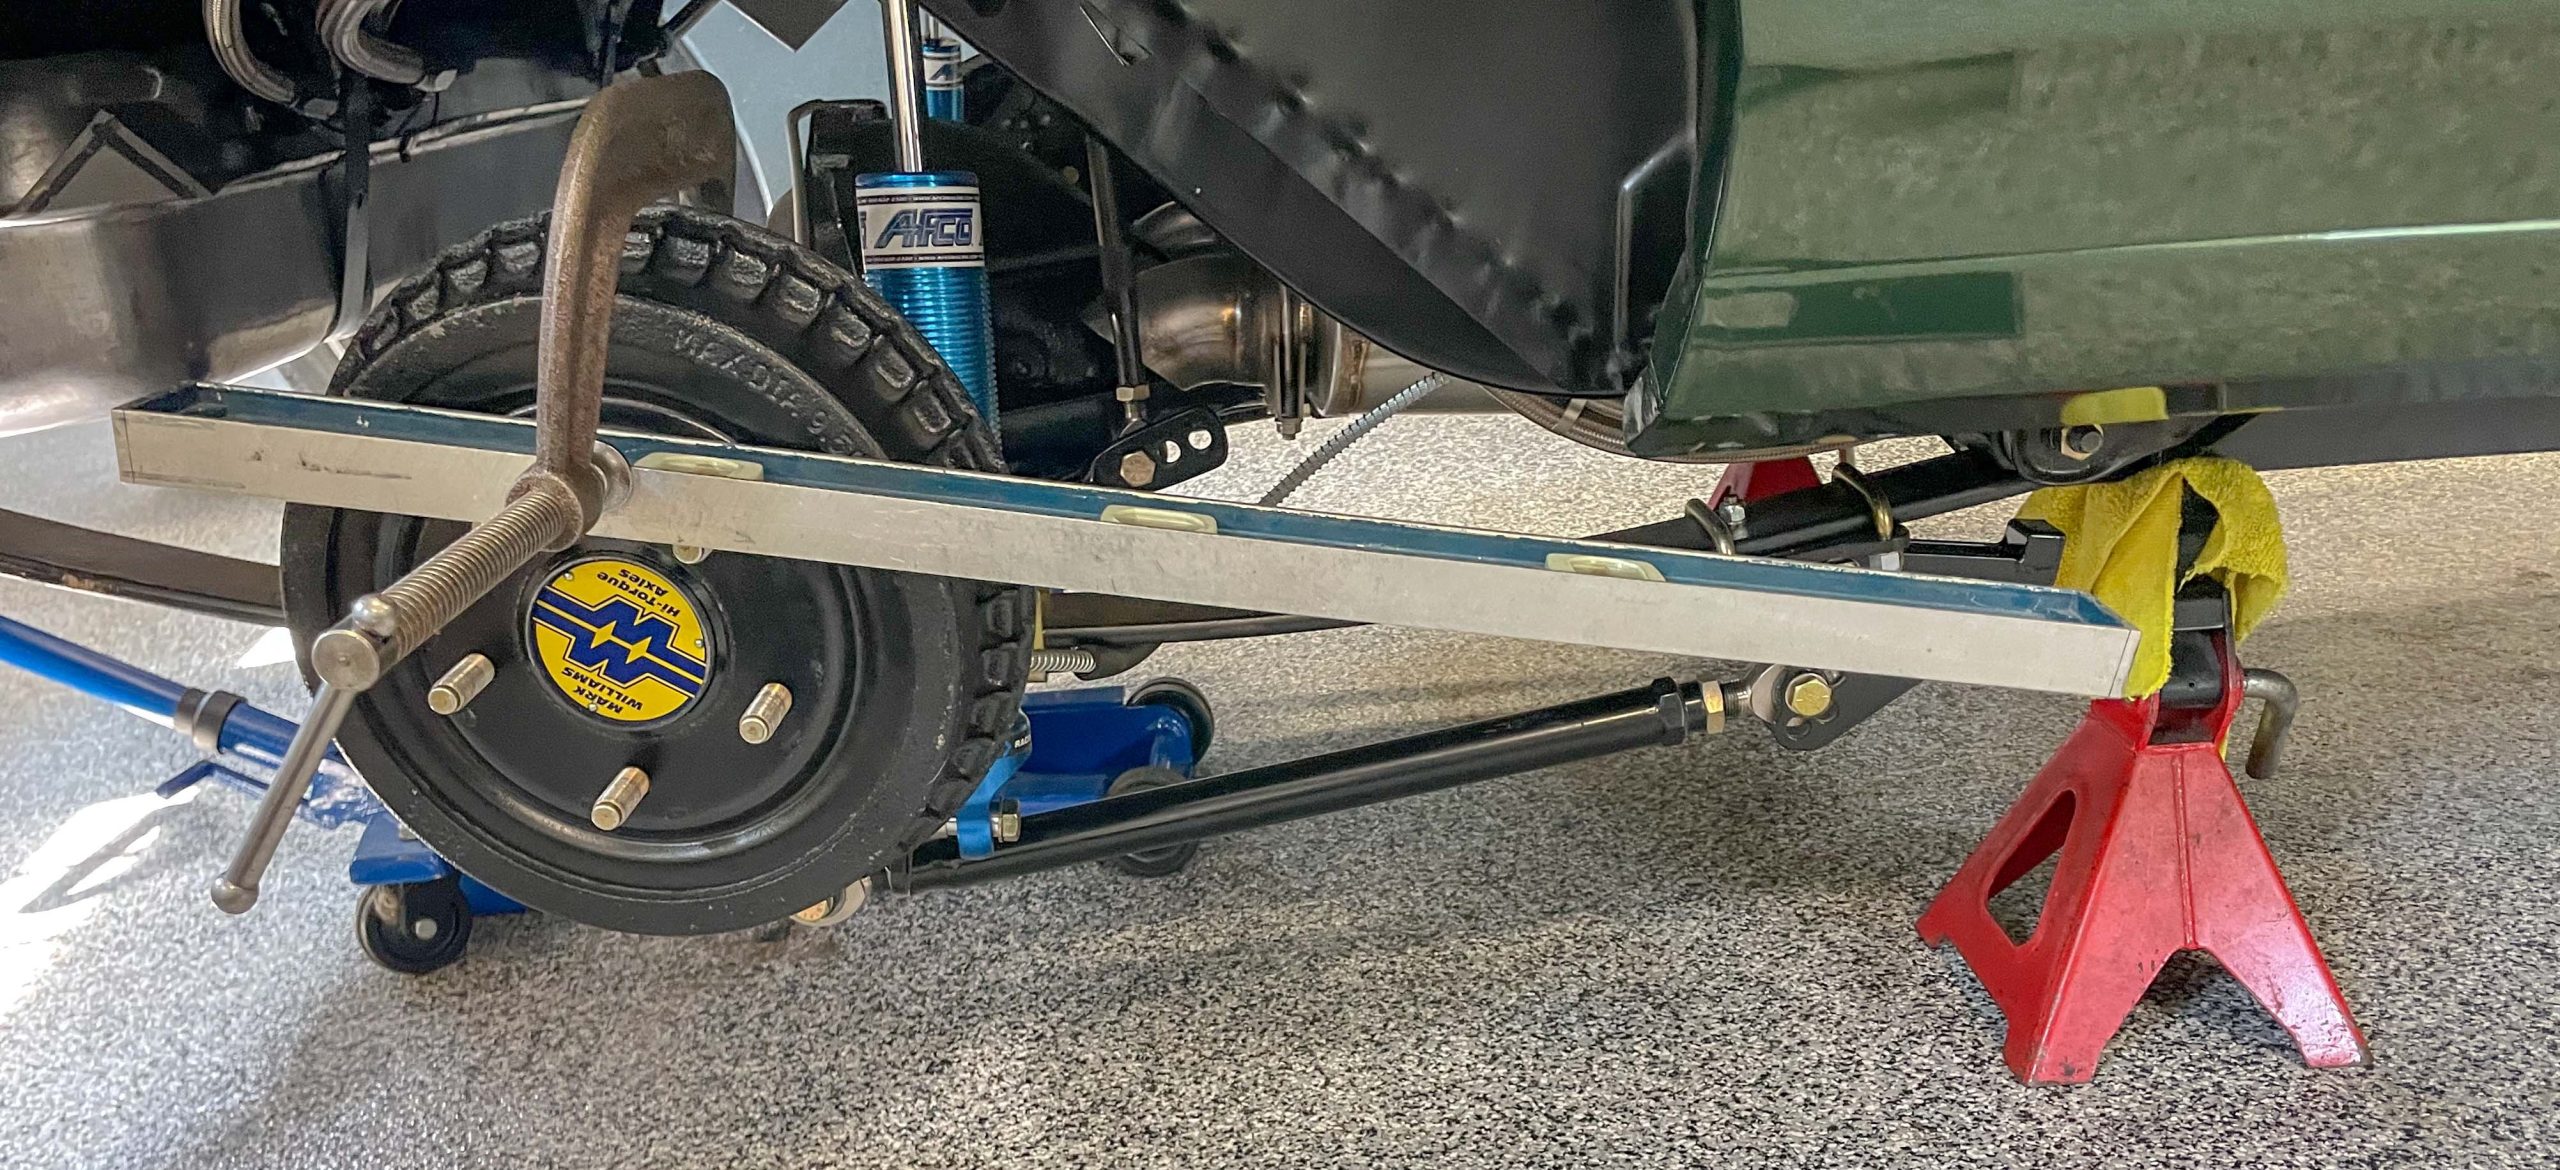
Align the rear end with the chassis centerline. You can place a straight edge against the rear brake rotor surfaces and measure to the chassis rails or four link brackets. The measurements on both sides of the car must be the same. Adjust your centering link to keep the rear end in this alignment. Recheck the plum bob to rear crossmember dimensions to be sure the rear end did not move out of square.
Jerry Bickel
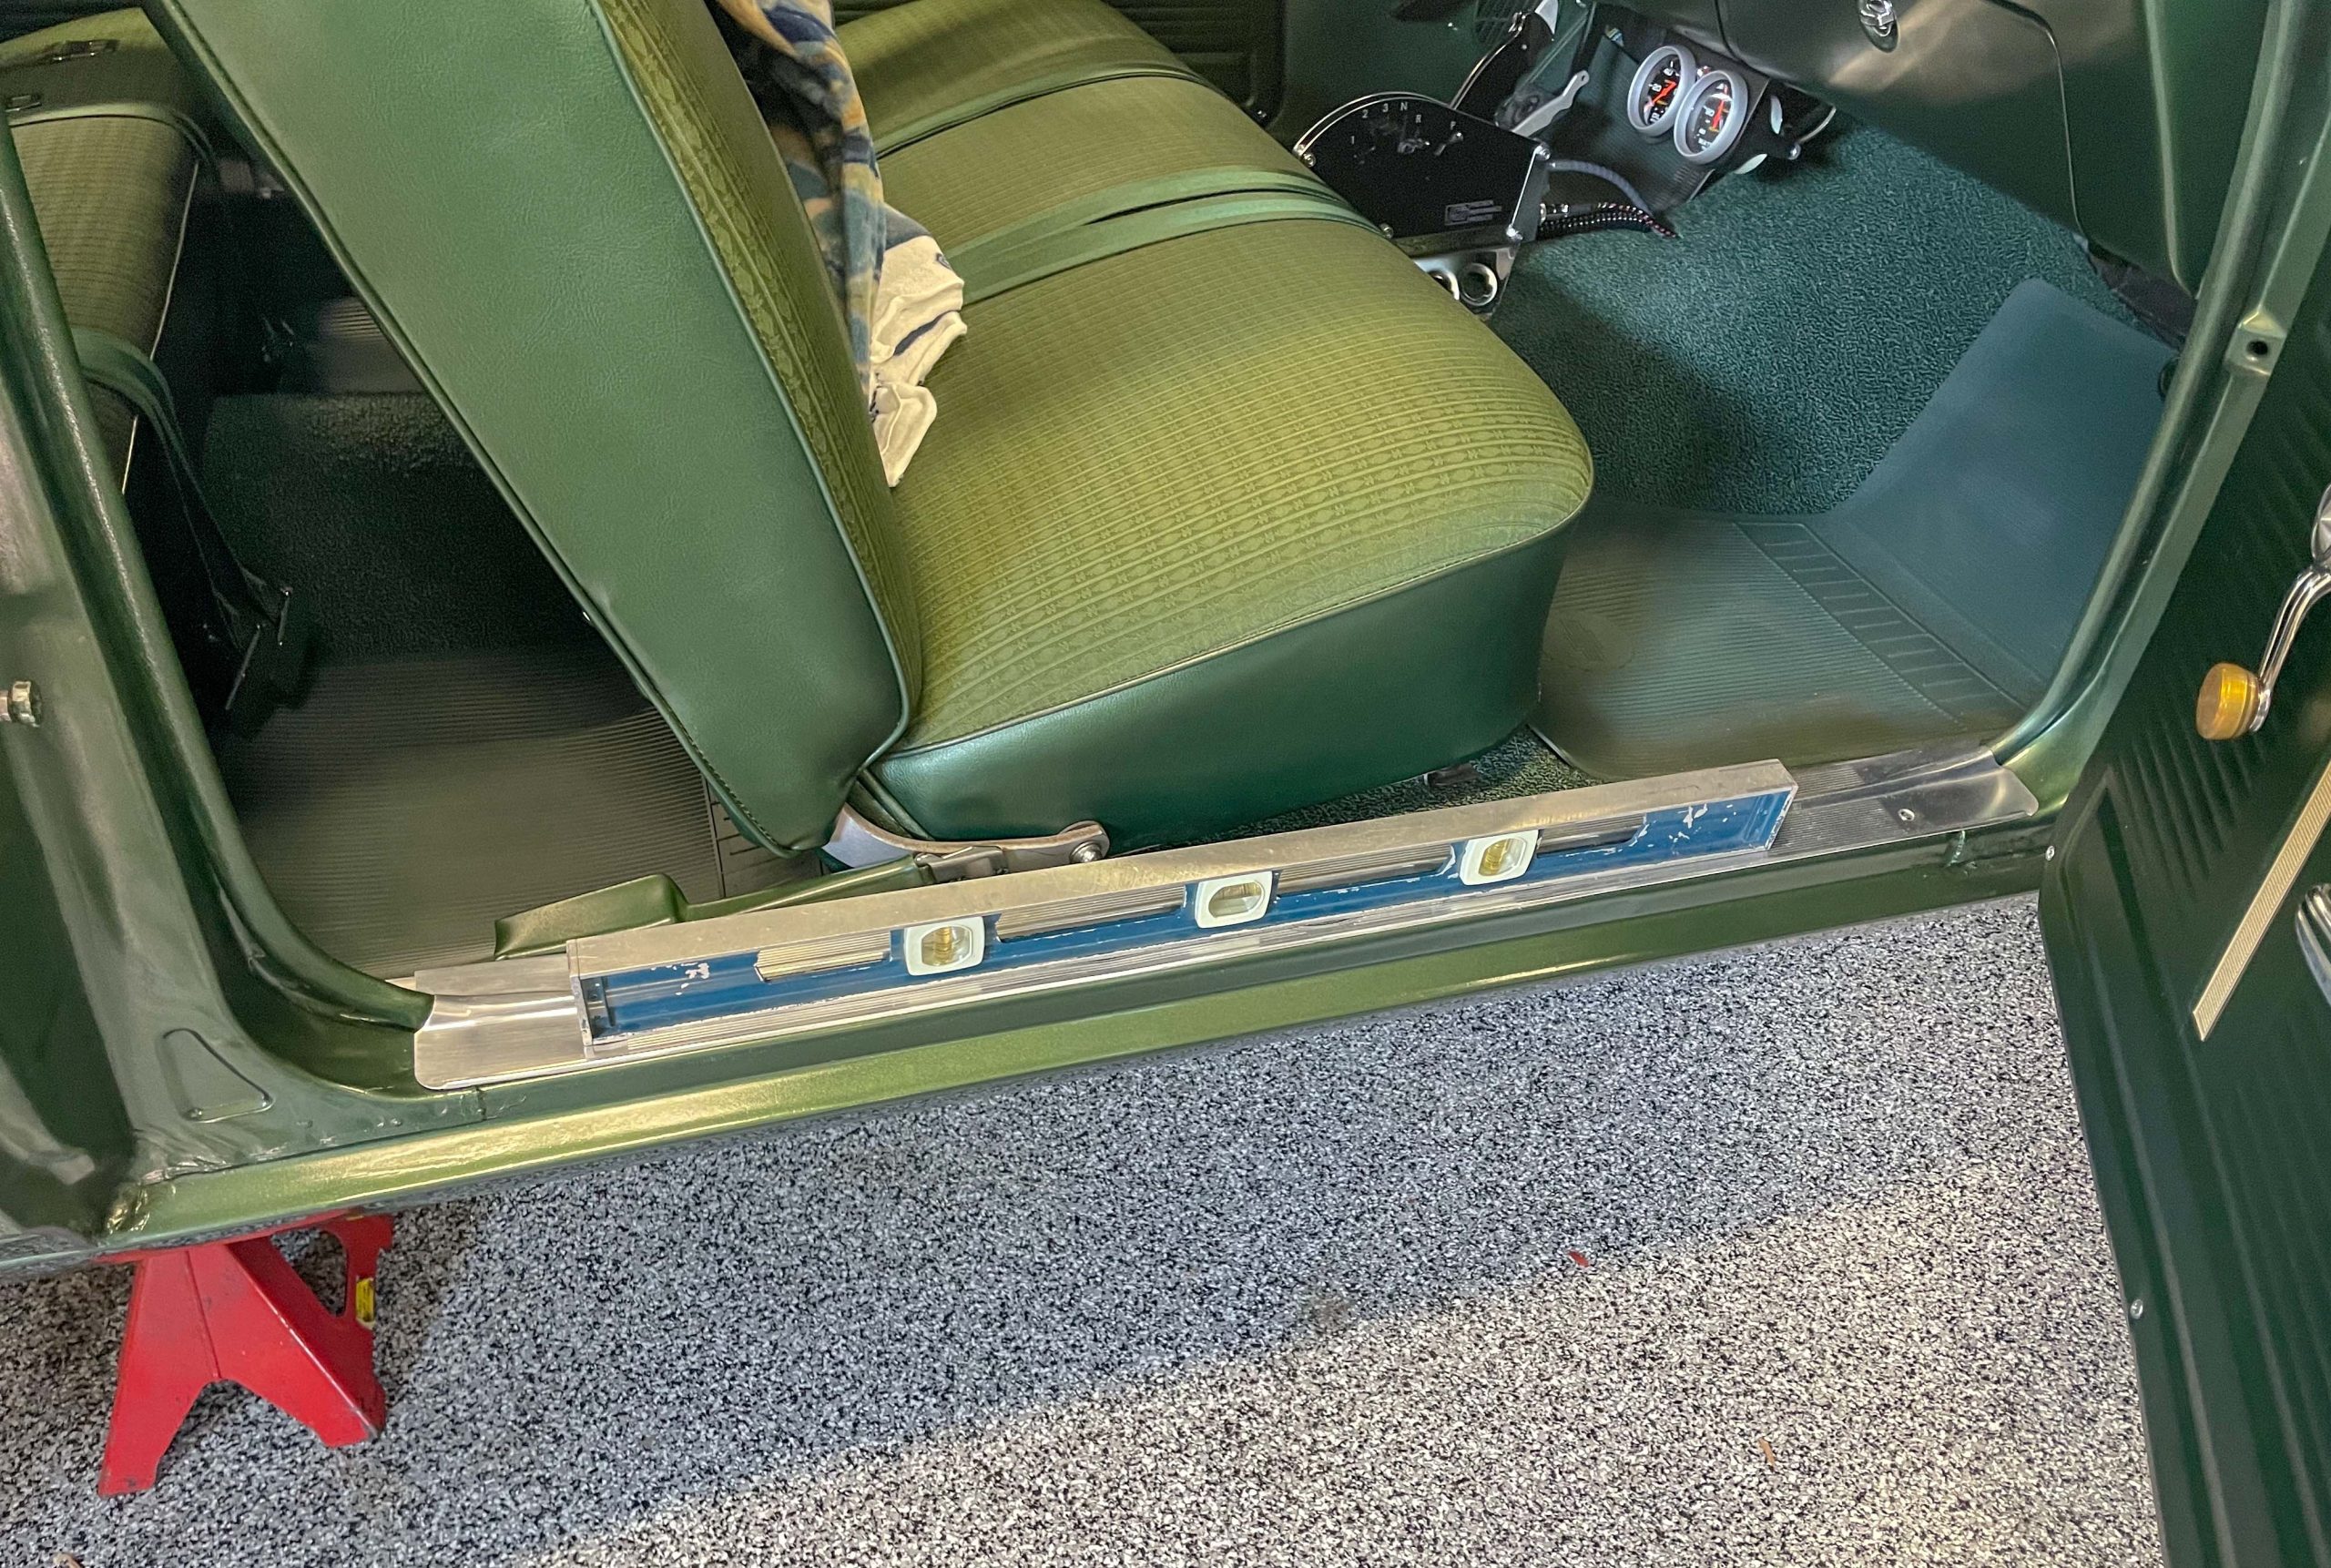
What about a leaf spring car? In the photos that follow, we’ll also show you how we used some of Jerry’s knowledge to check the rear alignment in our leaf spring Nova. Take a look:


I need to change the camber on the rear of my 2007 Volvo C70. There are no adjustments. How do I do this or where could I go to fix this. I’m eating tires on the inside