We’ve all been there at one time or another—tightening a fastener to specifications, only the specified torque is never reached. That unsettling feeling of a stripped thread. For most of us, it means taking a head or block to the machine shop for a fix.
But did you know thread repair is something you can do yourself?
Thread repair kits are a quick and easy fix for damaged bolt hole threads. You need patience and a steady hand long on accuracy and you can do this yourself. Damaged threads have to be carefully drilled out to where you have a clean straight hole—then—cutting in new threads to support the threaded insert.
This is easier than you think.
A visit to your favorite performance parts website reveals plenty of thread repair kits as well as stud/bolt/plug removal tools to remove anything broken off in the casting. We’re going to show you how to remove a seized or broken bolt/plug without inflicting damage to the casting. Then, we’re going to show you how to replace/repair damaged threads.
Dissimilar Metals and Destructive Corrosion
We often see the corrosive combination of steel and aluminum, which don’t get along because they are vastly different metals. Steel plugs and fasteners, when screwed into aluminum, suffer from dissimilar metal corrosion. They seize up and become impossible to remove.
The key to successful removal is proper installation to begin with.
Bolts, screws, and plugs should be coated with something like Permatex’s “Anti-Seize” lubricant, which is engineered for use during assembly to prevent galling, corrosion, and seizing between fasteners.
Anti-Seize works very well for spark plugs, cylinder heads, exhaust manifold bolts, and other extreme heat installations. It is also effective on dissimilar metal combinations because it keeps these metals separated. Generously coat threads and torque fasteners to the proper specifications for ease of disassembly later on. This is especially important in highly corrosive environments such as salt exposure and corrosive chemicals.
You may also coat plugs and fasteners with Teflon tape or paste as a protective barrier between dissimilar metals. Anytime you’re combining dissimilar metals, regardless of type, you are courting destructive corrosion.
Save yourself a lot of grief and protect fasteners and plugs during installation. Teflon provides sealing in places such as wet decks where coolant can wind up where you don’t want it, such as the garage floor or your engine’s oil pan. You may also use Permatex’s “The Right Stuff” on bolt and plug threads for sealing and corrosion resistance. This is especially important with screw-in rocker arm studs with holes that go directly into water jackets.
Removing Broken Bolts and Seized Plugs
Removing broken fasteners and plugs is a simple task that must be taken in baby steps beginning with a small pilot hole and gradually increasing size until what’s left is thin enough to remove without damage to the hole. It is best to begin removal with a soaking with a penetrating lubricant such as WD-40 or Liquid Wrench. If you have the luxury of time, you will want to do this over a period of days or even weeks. Keep the fastener or plug soaked with penetrating lubricant and keep trying to remove it.
When preparation does not work and you’ve drilled out the fastener or plug, apply heat with a torch to the casting around the hole and be conservative about heat. Aluminum melts around 1,300 degrees F. With heat applied, remove the fastener. If you’ve been unsuccessful at removal, drill it out to as thin as you can get it without damaging the casting. You may have to cut new threads and/or install a threaded insert to save it.
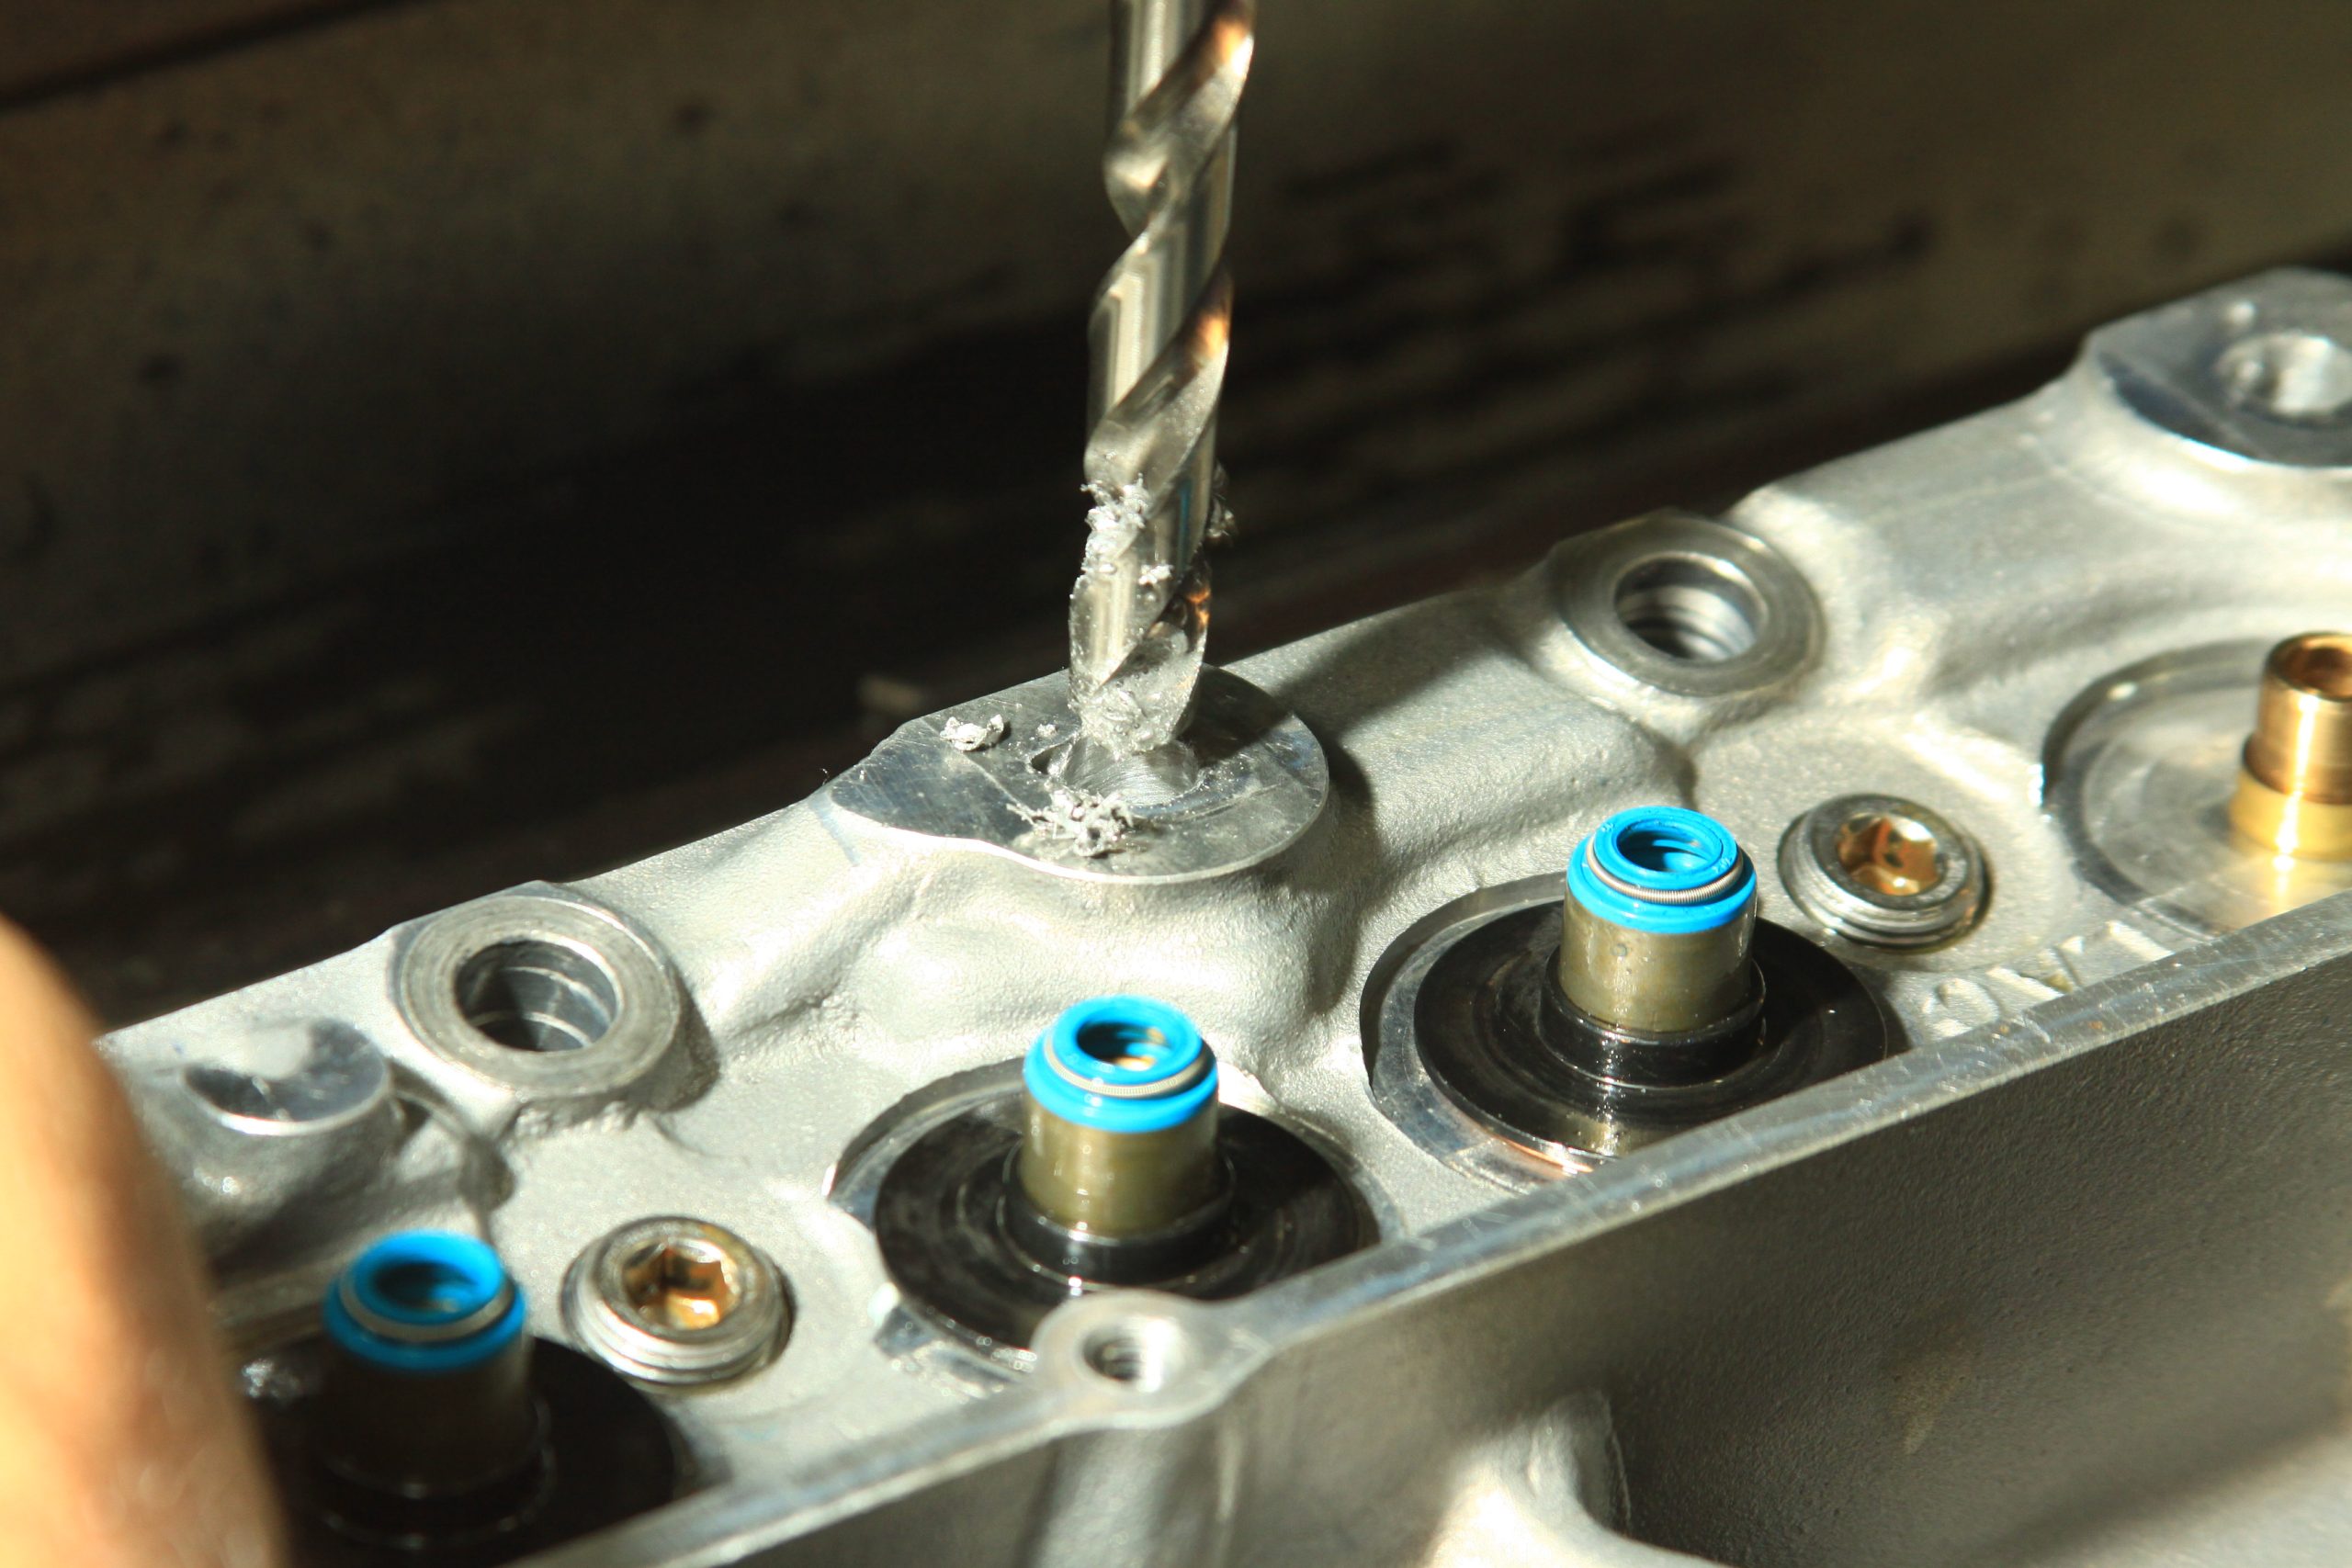
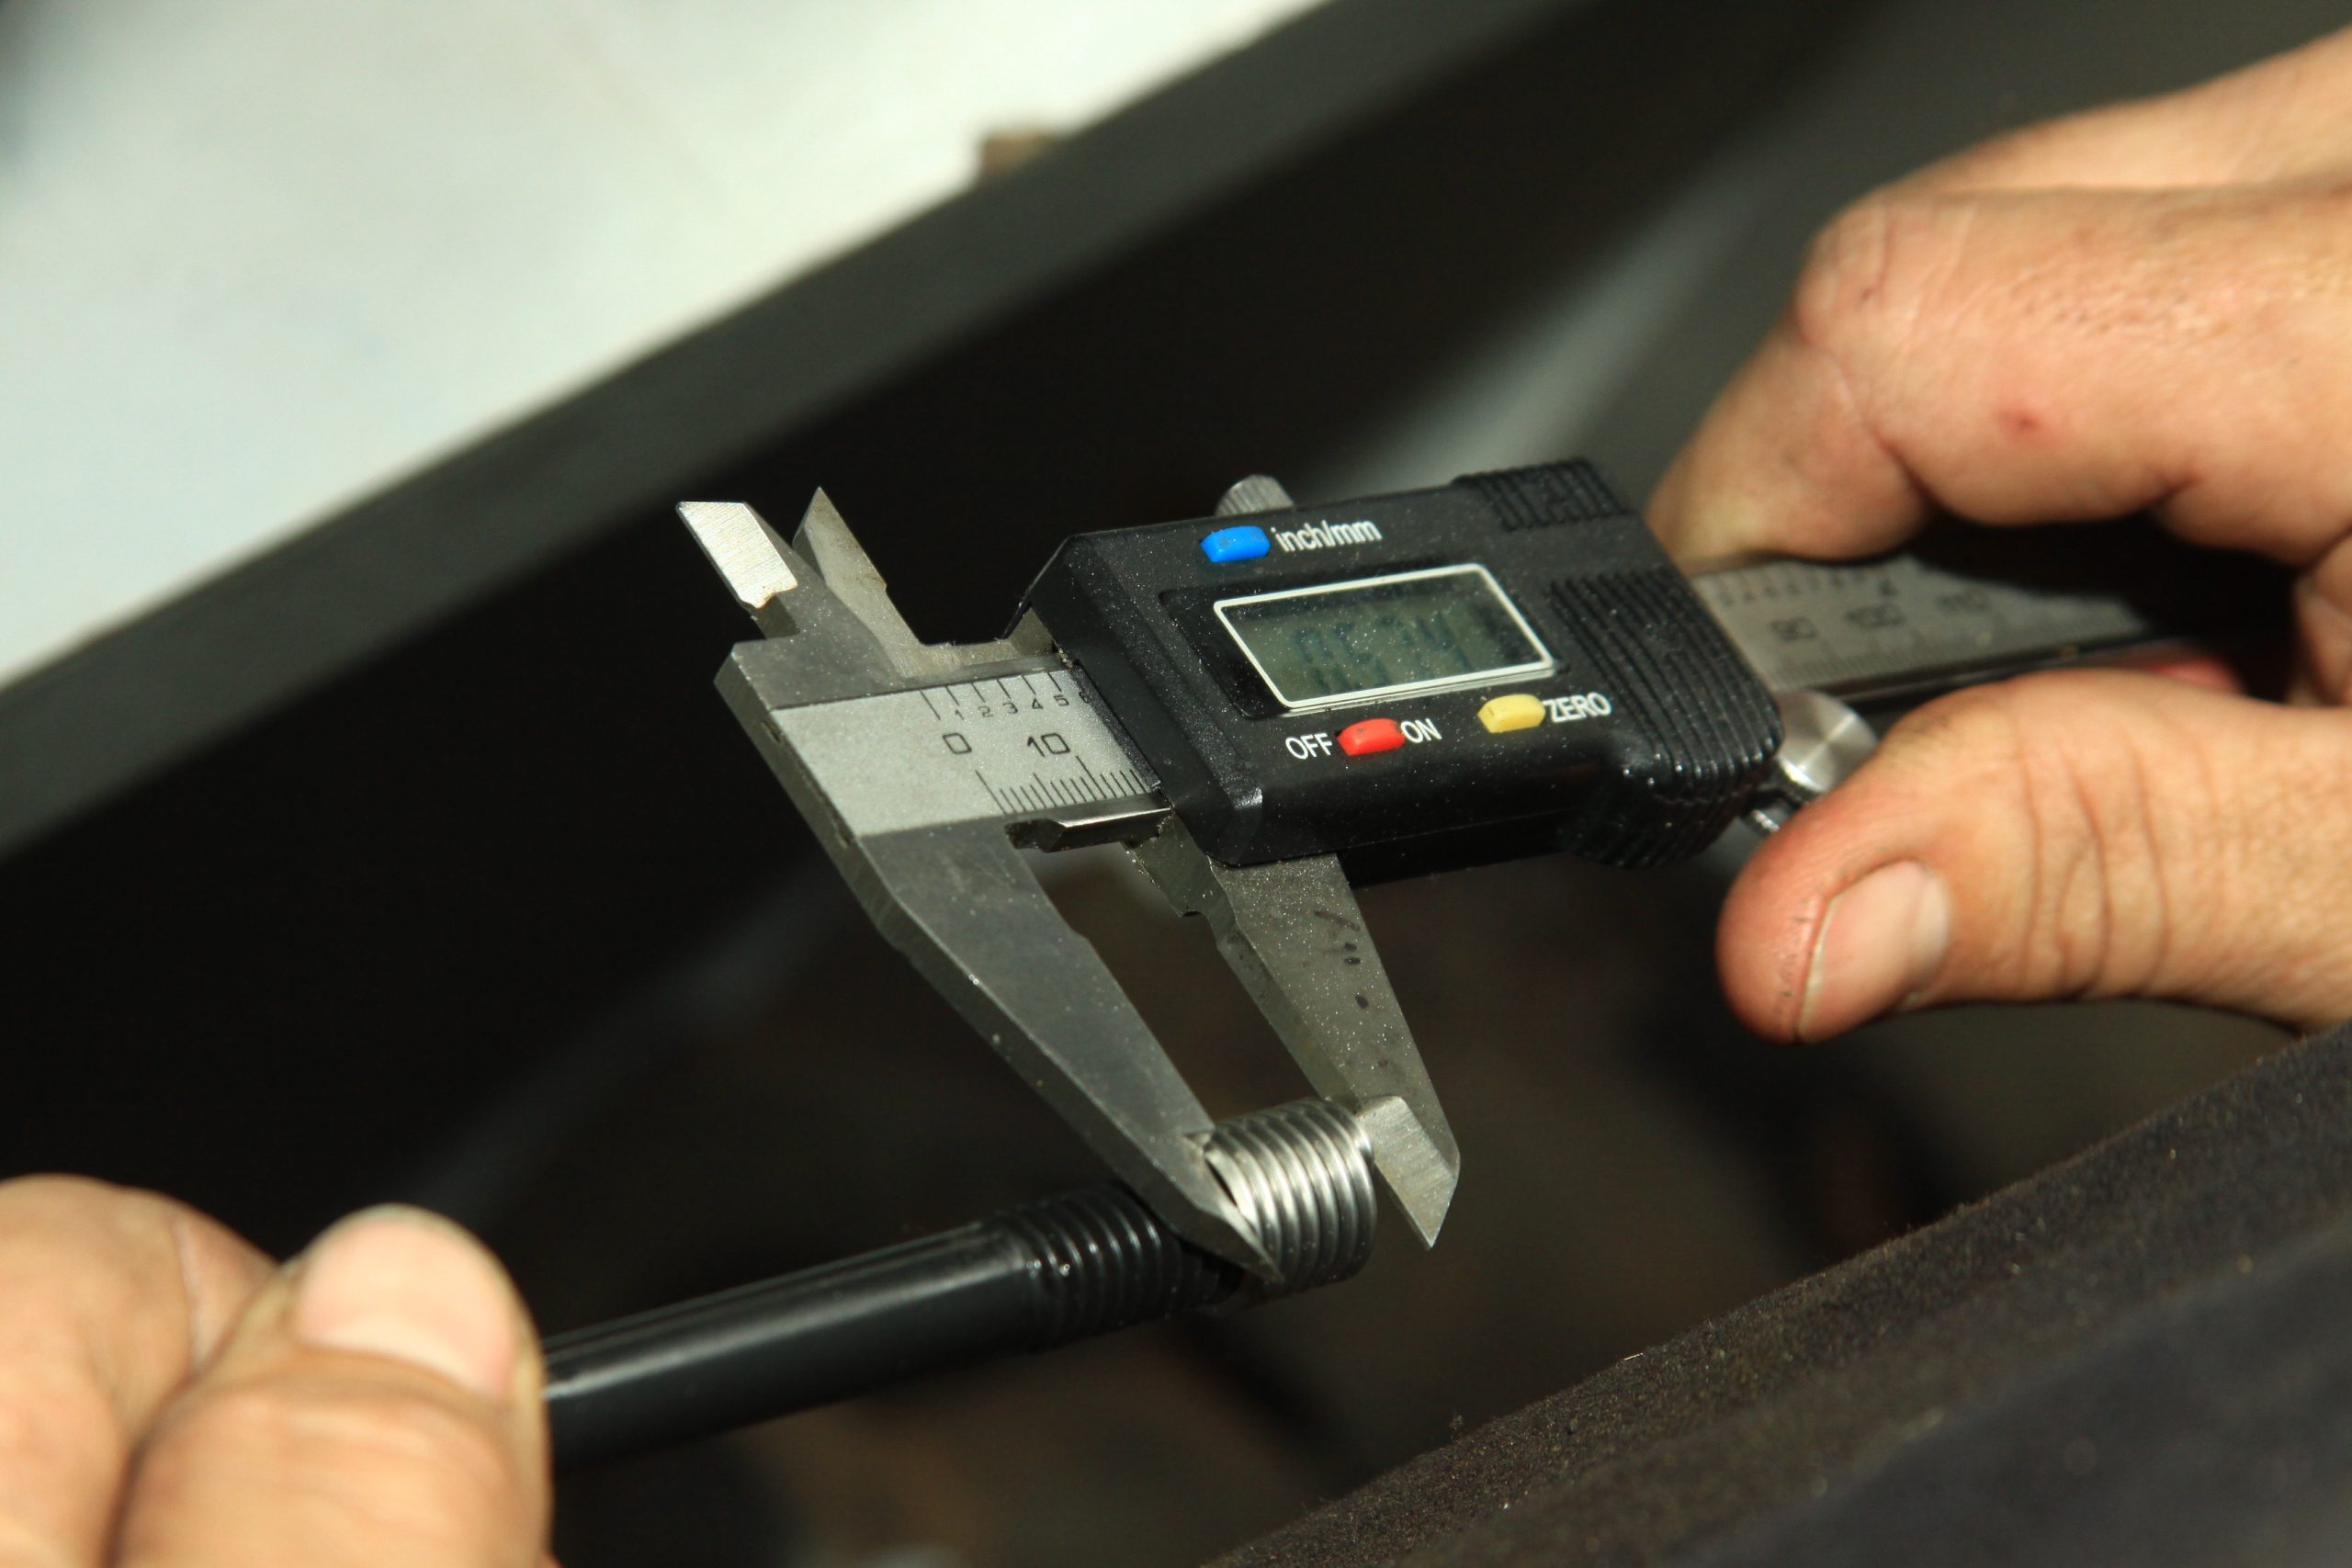
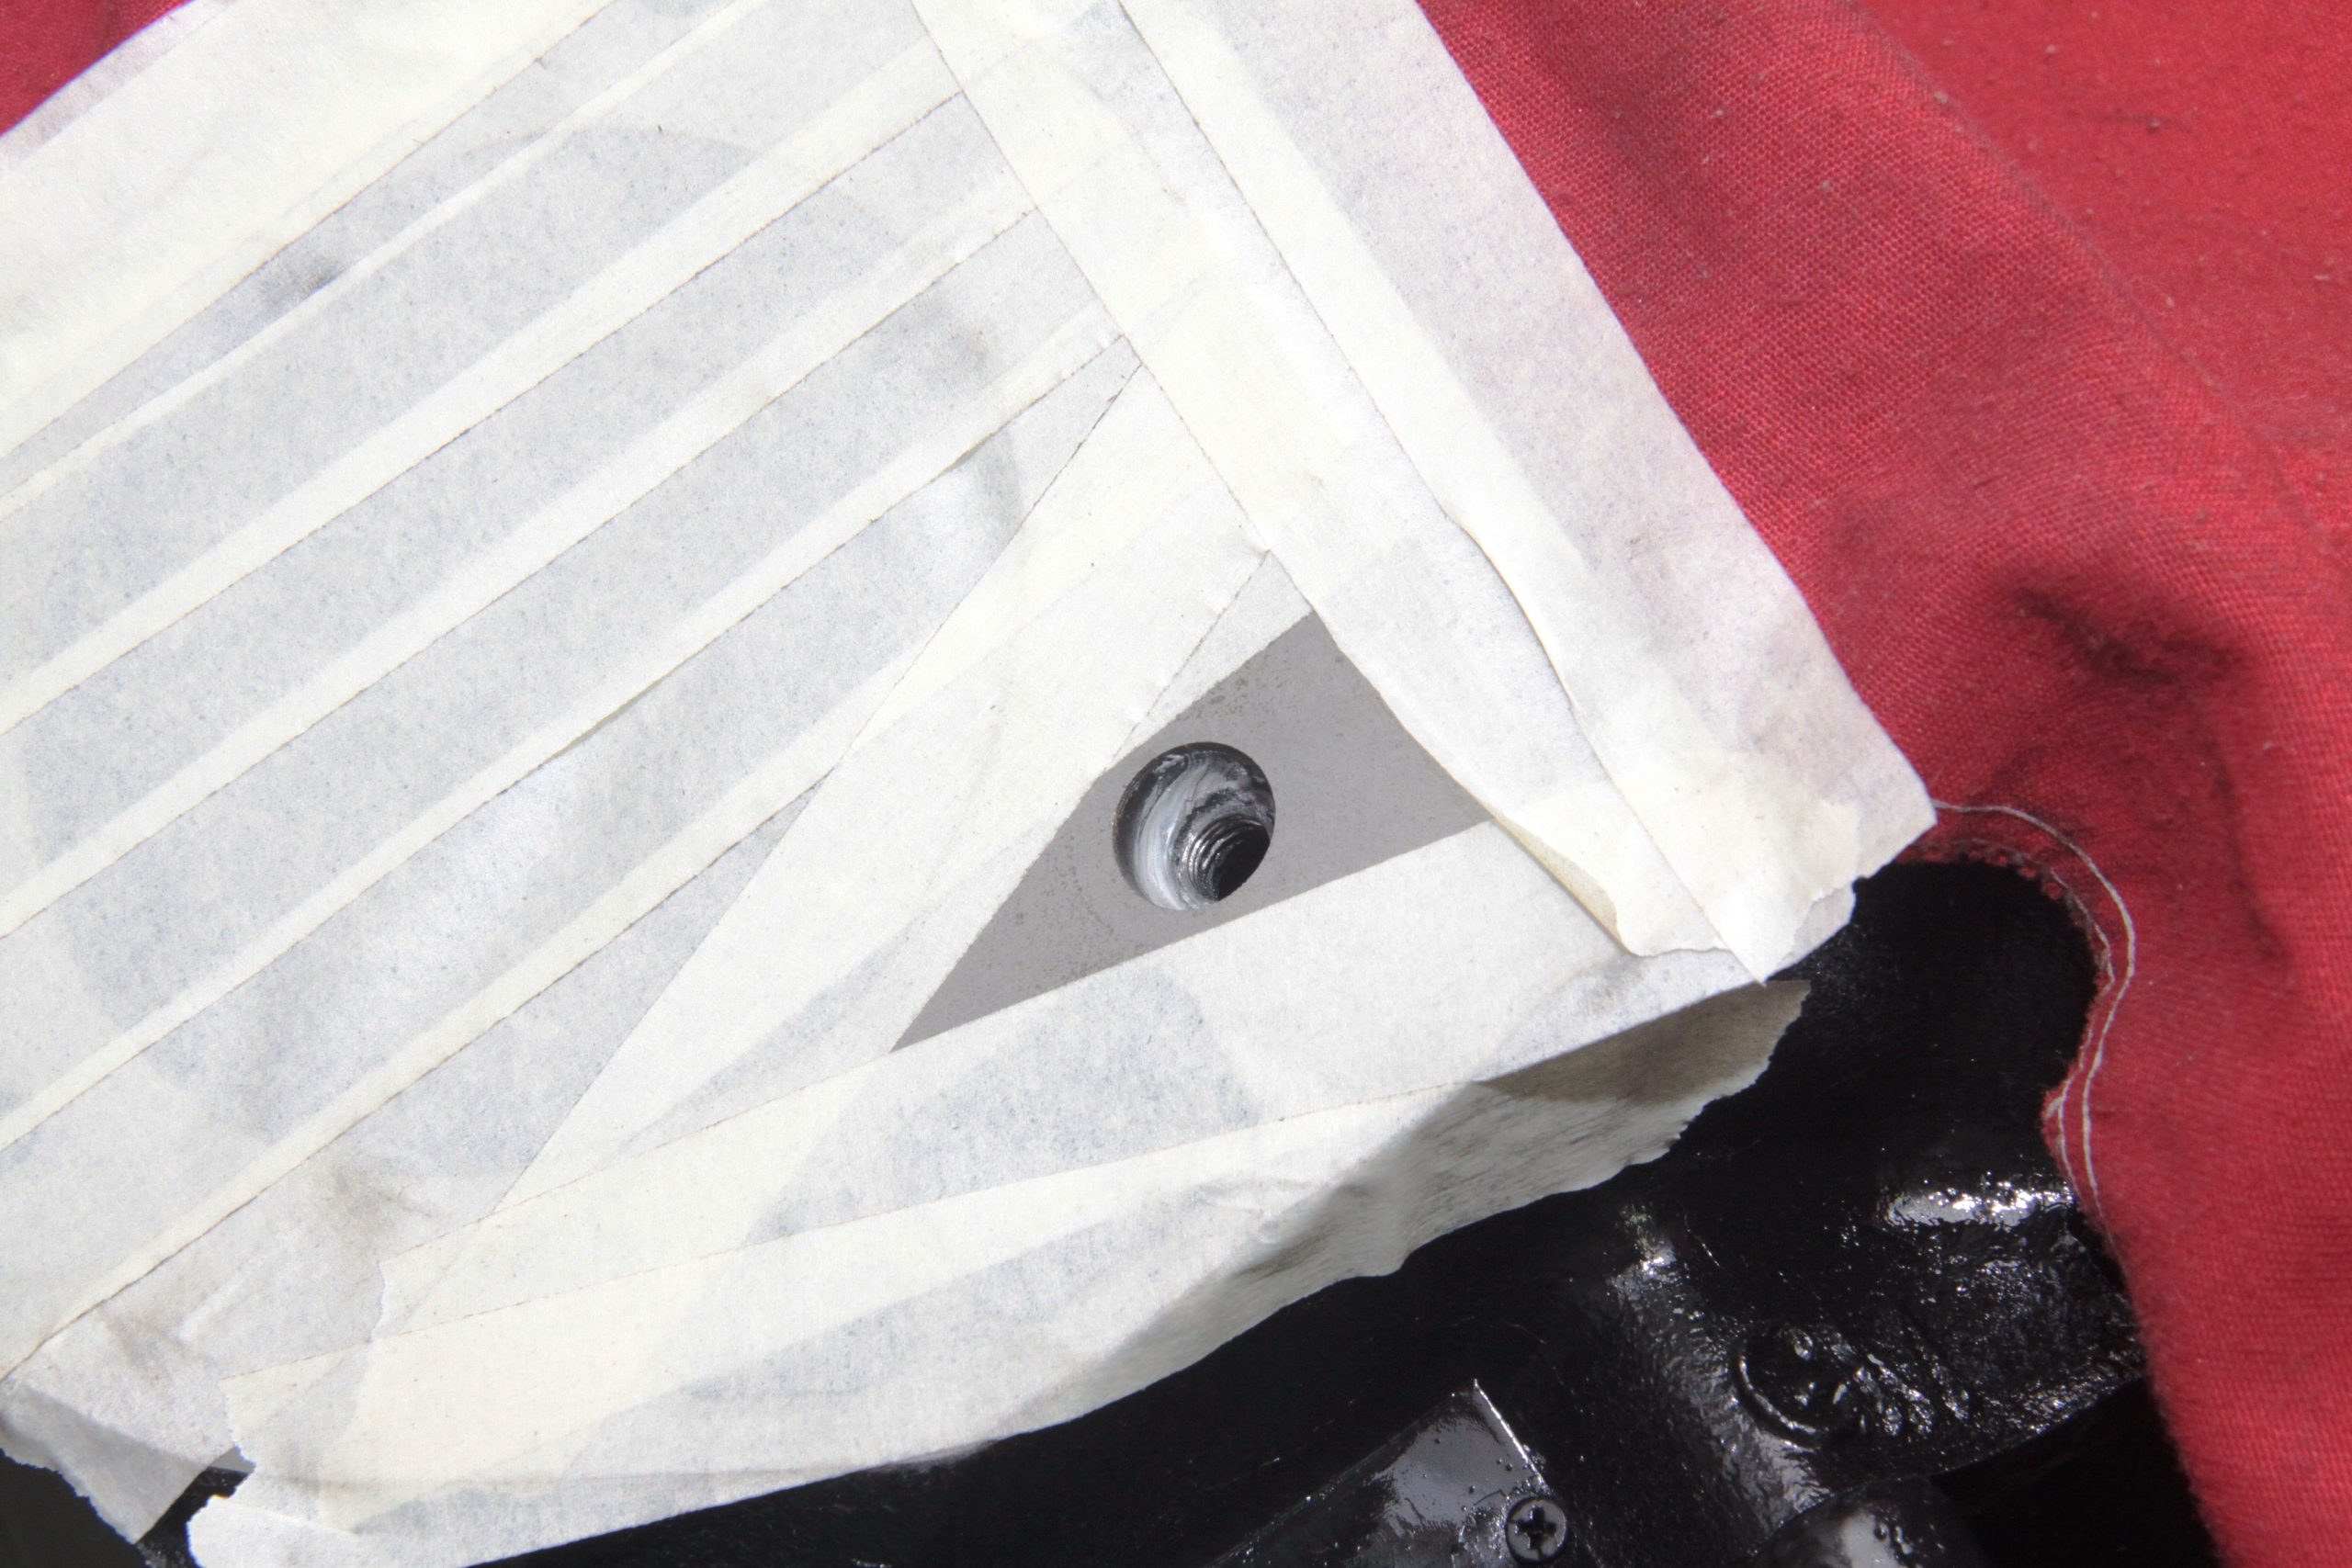
When steel and aluminum are threaded together, it is typically a formula for disaster because dissimilar metals do not get along, with corrosion being the result. Removal of the plug or bolt begins by drilling a pilot hole as a guide. (Image/Jim Smart)Gradually grow the drill bit size until you reach the outer limits of the plug or bolt. This makes extraction easier. Be careful not to drill into the casting. (Image/Jim Smart)A bolt/plug/stud remover is inserted into the plug. This doesn’t always work because dissimilar metal corrosion can seize the plug irreversibly. The two metals become one, so to speak. Soak the plug or fastener with WD-40 and allow days for it to penetrate. (Image/Jim Smart)The casting can be heated, which causes expansion to free up the plug. You must be very careful doing this because aluminum melts at roughly 1,300 degrees F. Give it enough heat to free up the plug, but not so much that you distort the casting. (Image/Jim Smart)Dry ice at the plug, in addition to heating the casting, causes the plug to contract (shrink) for removal. You may also continue drilling out the plug until the remaining plug is razor thin and can be removed. The trick is to avoid damaging the threads in the casting. (Image/Jim Smart)We’re going to show you two approaches to cutting new threads in aluminum and iron castings. With the appropriately sized drill bit in the hole, gently run the bit until all existing threads are removed. (Image/Jim Smart)The hole should be a clean cut like this—ready to be tapped for new threads. (Image/Jim Smart)The tap is run slowly through the bolt hole using a thread cutting lubricant. This process must be conducted slowly. (Image/Jim Smart)Threads have been cut and the threaded hole inspected. (Image/Jim Smart)This is a HeliCoil threaded insert, which is sized to match bolt hole depth. (Image/Jim Smart)Our HeliCoilinsert is carefully threaded into the tapped hole as shown. (Image/Jim Smart)The HeliCoil is gradually seated into the hole. (Image/Jim Smart)Clean up the threaded hole and make sure the HeliCoil insert is secure. (Image/Jim Smart)Countersink the hole as shown for ease of bolt installation. (Image/Jim Smart)In this case, we’re working with an iron block with damaged threads at Burbank Speed and Machine. Tape is applied to keep destructive debris out of the cylinder bores and water jackets. (Image/Jim Smart)A drill bit the exact size of the threaded hole is carefully applied to remove the damaged threads. Bit angle must be dead on and never at an angle. Cutting oil is applied to the hole and the bit operated at low speed. (Image/Jim Smart)The drilled-out hole is ready for clean up and tapping with new threads. (Image/Jim Smart)Make sure all debris in the hole is removed to prevent engine damage. (Image/Jim Smart)Hole depth is confirmed first before the HeliCoil is selected. (Image/Jim Smart)Cutting lube is applied to the tap in preparation for thread cutting. (Image/Jim Smart)Burbank Speed uses a steel block to ascertain tap accuracy. The tap is turned slowly to engage the iron, then, run back and forth to both cut threads and clear debris. Turn the tap and you can feel the cut. Then, slowly back it out. As you back it out, you can feel it clear debris. Clean up the hole with brake cleaner until all debris is gone. (Image/Jim Smart)This is the HeliCoil threaded insert we’re going to screw into the threaded hole. The HeliCoil will give us stronger threads than we had to begin with. (Image/Jim Smart)The HeliCoil is threaded into the block and secured. (Image/Jim Smart)The HeliCoil is secure and ready for cleanup. Vacuum out the hole to remove any debris. (Image/Jim Smart)HeliCoil is one such thread repair kit available. This is a good investment especially if you build a lot of engines, transmissions, rear ends, and other automotive components. You can buy the threaded inserts in whatever size you may need. (Image/Jim Smart)Time-Sert is a solid bushing insert for damaged threads. It is easy to use and takes minutes to apply. It is thin-walled due to synchronized external threads. This allows for installation in limited space locations. (Image/Jim Smart)
Jim Smart is a veteran automotive journalist, technical editor, and historian with hundreds of how-to and feature articles to his credit. Jim's also an enthusiast, and has owned and restored many classic vehicles, including an impressive mix of vintage Ford Mustangs.
Comments
3 responses to “Taking The Sting Out of Damaged Threads”
JIM,
I have found that a 50:50 mix of acetone & ATF is far superior WD 40 or Liquid Wrench as an aid to breaking loose stuck plugs or broken bolts or other screw fasteners with damaged heads . The highly viscous Acetone seems to wick the ATF down the threads better than other commercial products.
Also there has been a vast evolution of fastener extractor design over past vintage designs, e .g. Grabit® Pro | Bolt and Screw Extractors The Grabit Store.


Very informative.
Thank you. This article made me realize the utility of WD-40. It’s an all-around fluid to have.
JIM,
I have found that a 50:50 mix of acetone & ATF is far superior WD 40 or Liquid Wrench as an aid to breaking loose stuck plugs or broken bolts or other screw fasteners with damaged heads . The highly viscous Acetone seems to wick the ATF down the threads better than other commercial products.
Also there has been a vast evolution of fastener extractor design over past vintage designs, e .g. Grabit® Pro | Bolt and Screw Extractors The Grabit Store.
TVO (The Vintage One)