It all started during our drive to check out the Cavalcade of Customs in Cincinnati, Ohio. It was a bitterly cold day and we noticed that our vehicle’s cabin was still pretty chilly, even after a few minutes on the interstate with the HVAC fan set at its “2” speed setting. Not thinking too much about it, we turned the heater knob up to “3” and the vents started kicking out plenty of hot air.
Once we were nice and toasty, we dialed the fan speed knob back down to the “2” position, which is when we noticed the fan wasn’t blowing anything at all.
Momentarily perplexed, we turned the fan down to “1” and the fan began working at its lowest speed setting, like normal. Conversely, twisting the knob all the way to the heater’s highest “4” setting was tantamount to opening the doors to 765’s firebox.
That quick little bit of troubleshooting told us that the heater core was good and that the blower motor had power—the fan just wouldn’t work at the “2” fan speed.
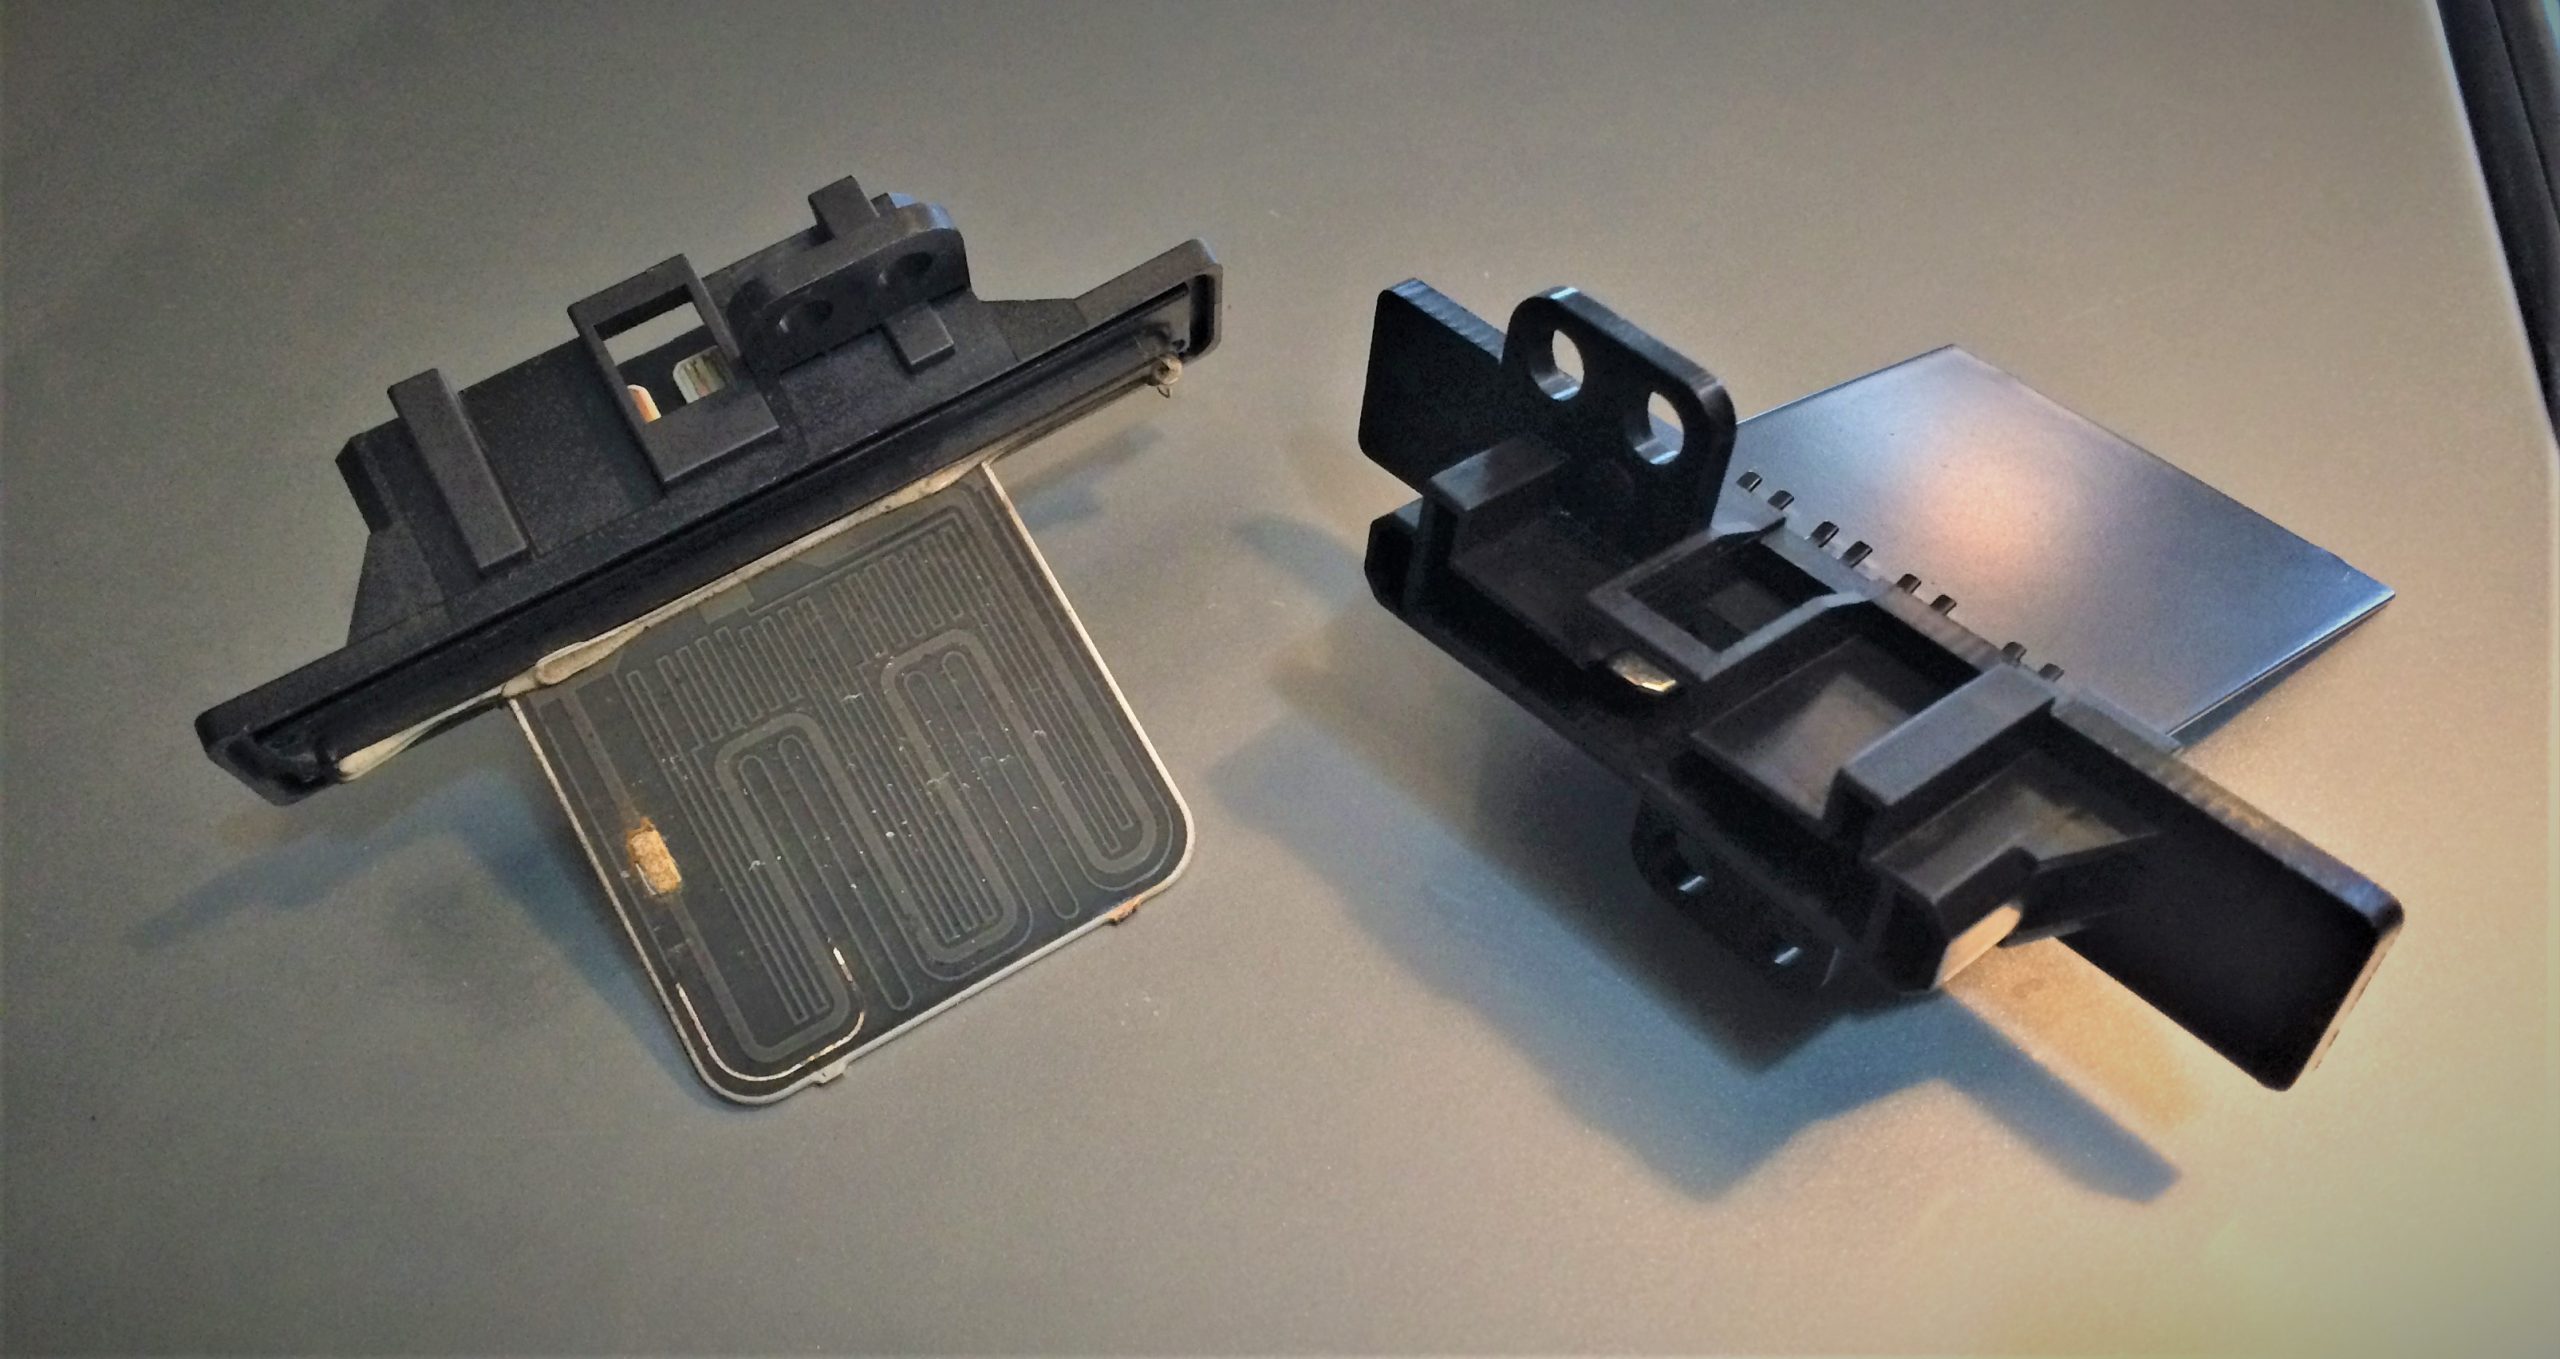
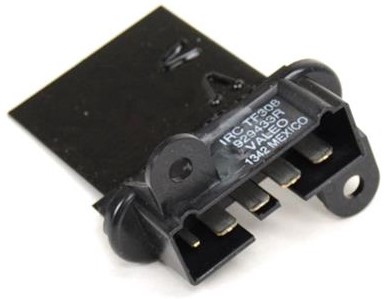
A textbook case of a bad blower motor resistor.
***
Story Summary Overview
- A blower motor resistor affects your vehicle’s HVAC fan
- It controls fan speed
- A failing blower motor resistor can knock out specific fan speed settings
- Replacement can be easy or tough, depending on its location
- They’re typically found tucked up behind the dashboard
- If you have a multimeter, you can test it before replacement
***

What is a Blower Motor Resistor?
In simple terms, a blower motor resistor is an electrical component that can block (resist) the flow of electricity (current) into the blower fan motor. This is how you’re able to alter the fan’s speed—more resistance means the fan won’t spin as fast, which results in less air (hot or cold) being circulated around the cabin. By clicking the fan speed knob from one setting to another, you’re changing the path the electricity takes through the blower motor resistor on its way to the blower motor.
That was a very basic explanation. If you really want to understand how resistors work in an electrical circuit, learning about Ohm’s Law is a great place to start.
You need a blower motor resistor here because, electrically speaking, your blower motor fan is a pretty dumb device. It’s either on or off, so controlling the flow of electricity into the blower motor is how you alter the fan’s speed. That’s where the blower motor resistor comes in—and it works great for this sort of thing.
Though it’s worth pointing out that many modern vehicles are using more advanced solutions nowadays, often relying on an electronic control module to regulate fan speed. But prior to the advent of those fancy fan speed ECMs, blower motor resistors were the way to go, and have proven trusty and reliable in automotive HVAC setups for decades.

What Are Signs of a Bad Blower Motor Resistor?
Yet while they are pretty darn dependable, like any electrical component, blower motor resistors can go kaput without much warning. Fortunately, it’s pretty easy to diagnose a failing blower motor resistor.
Here are some common signs that your vehicle’s blower motor resistor is bad:
- Loss of HVAC fan control (total or certain speeds)
- The fan only works on its highest speed setting
- No air coming from vents
- Intermittent or inconsistent fan speed
Alluding to our story above, you’ll probably first discover the problem when you notice that your vehicle’s passenger cabin isn’t cooling down or heating up like it normally would—which brings us to an important point. Since it directly contributes to airflow, a bad blower motor resistor will affect your HVAC system’s ability to both heat up AND cool down.
If your fan seems to work properly, the speed settings function, and air is moving fine, but it’s just not getting cold, then you may have a bad heater core. You can read more about those here: What is a Heater Core? Where is It Located & What Does it Do?
How to Replace a Blower Motor Resistor
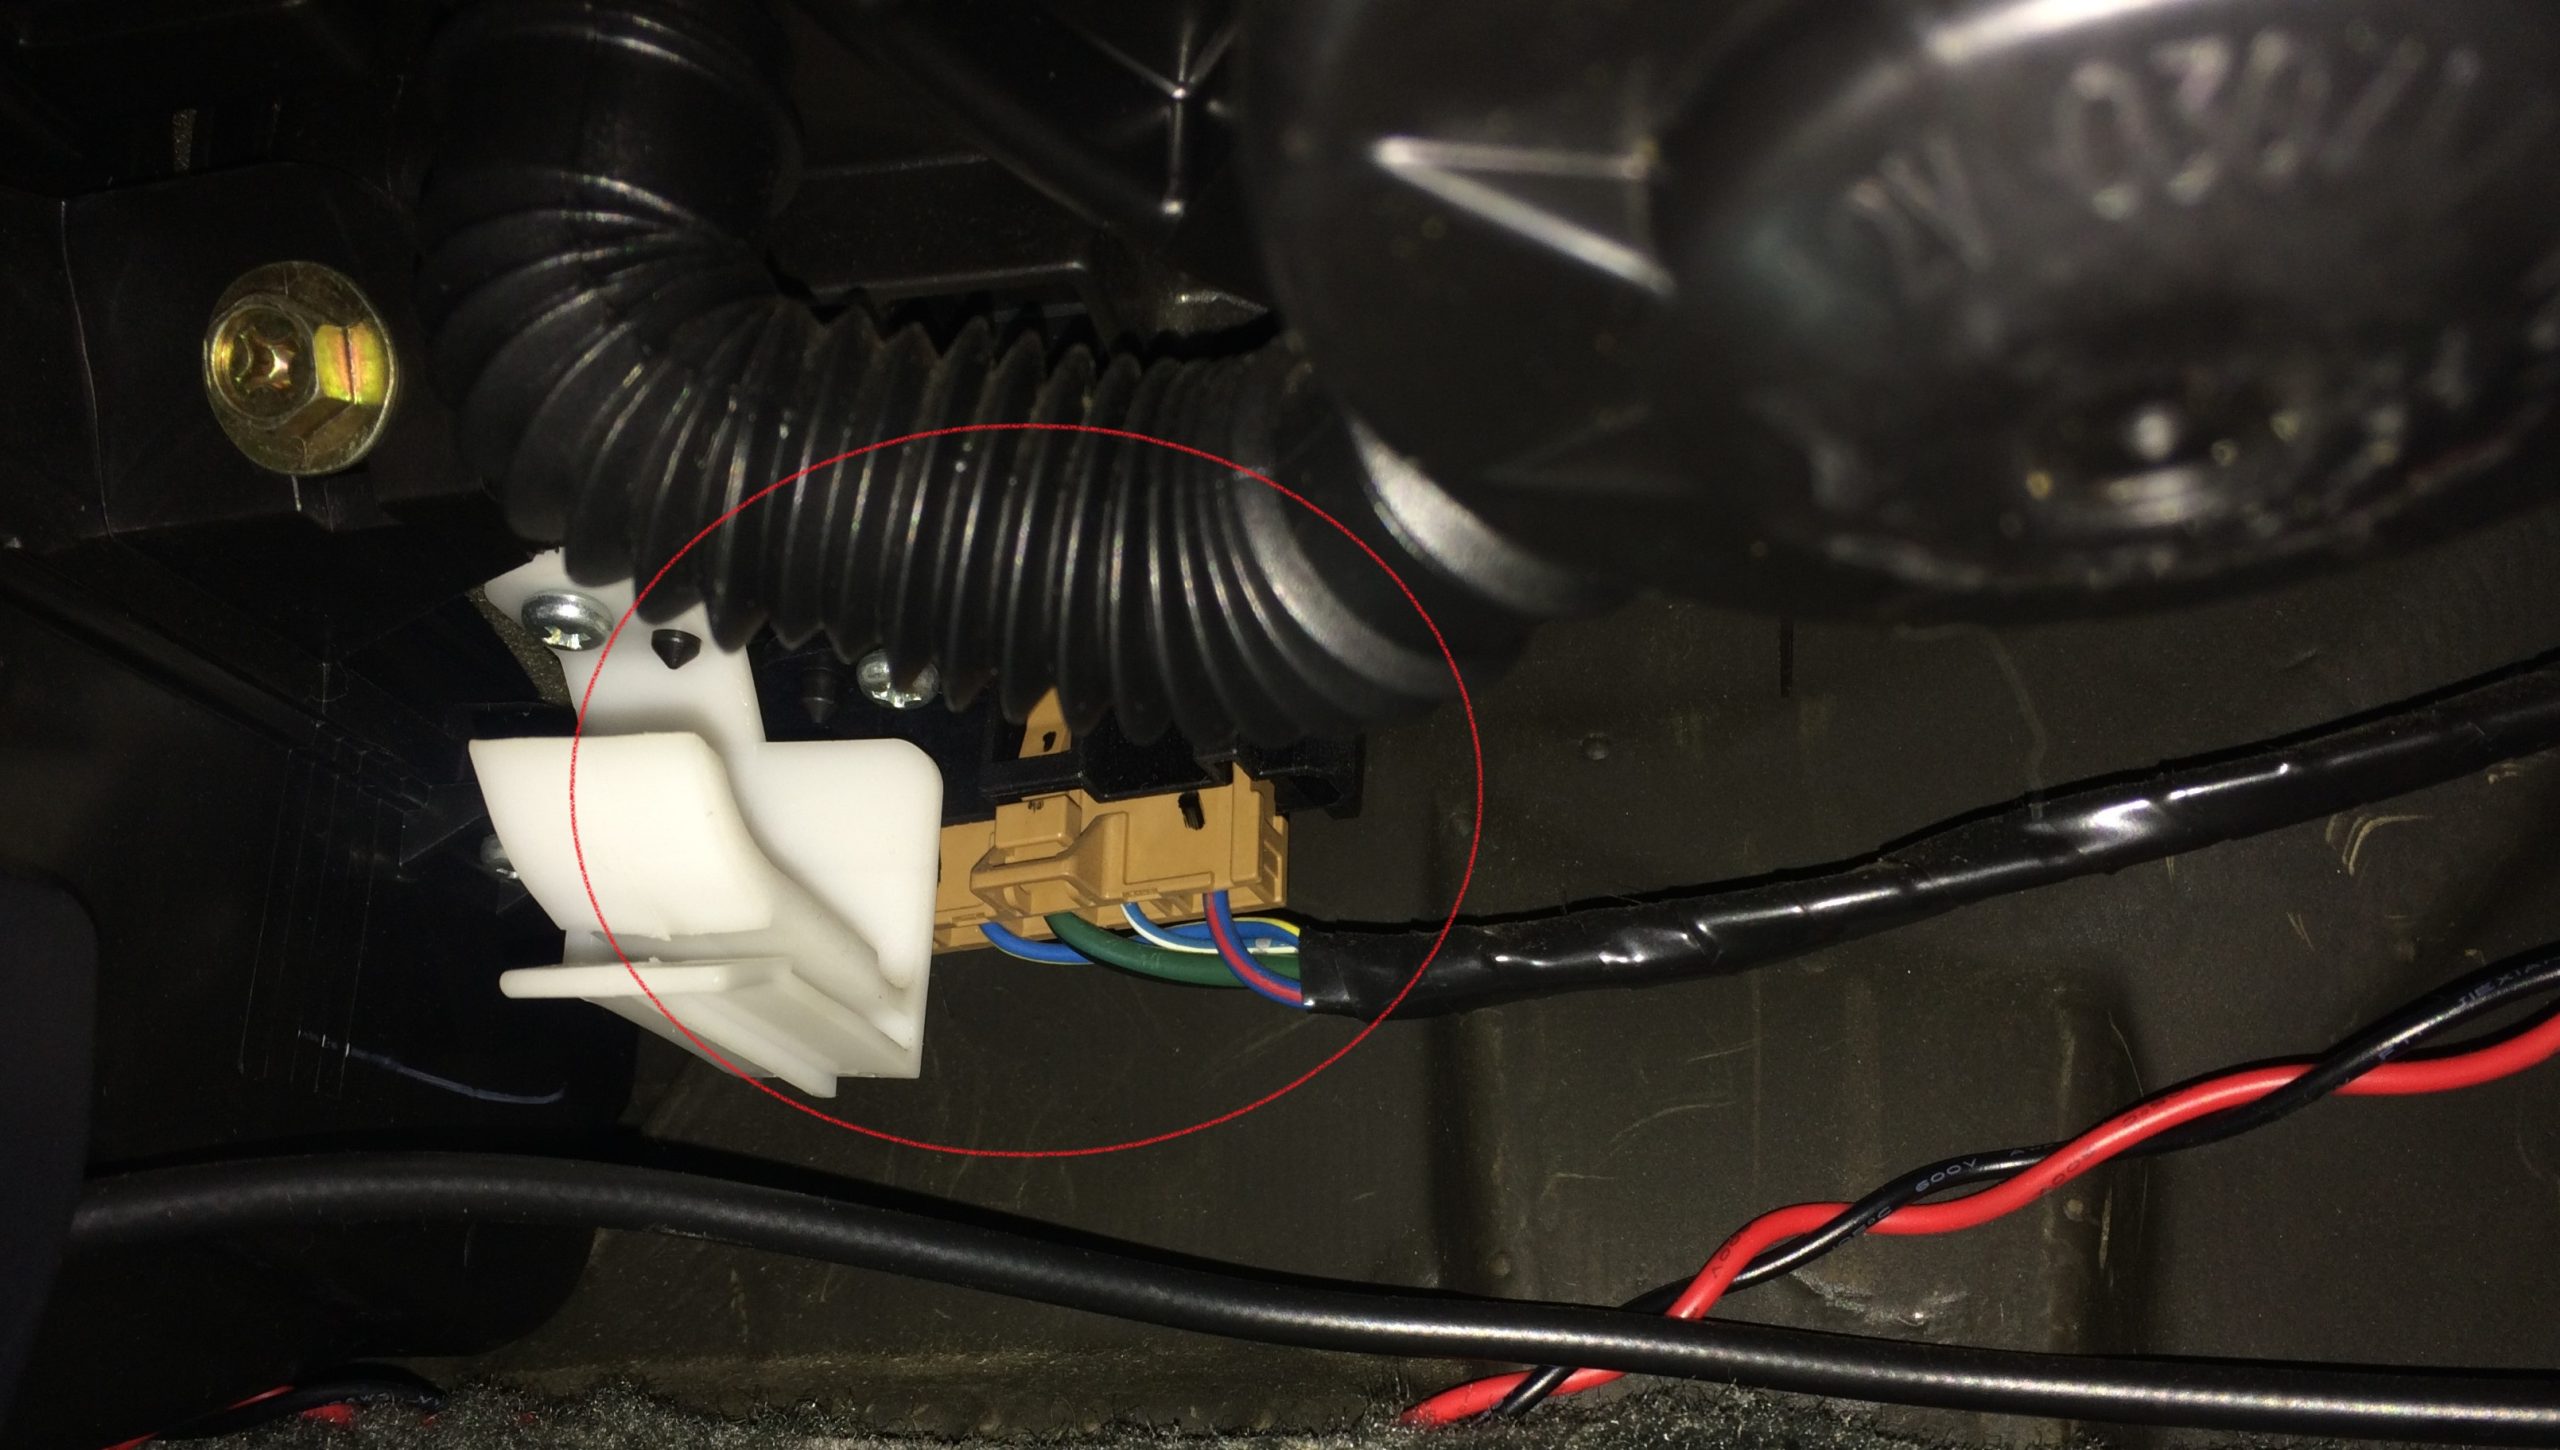
While all cars and trucks are different, replacing a blower motor resistor can be a straightforward affair. In our experience, the difficulty all depends on where the blower motor resistor is located. If it’s tucked behind a dash or tight against a firewall, you may have to remove some other parts for access. (Don’t panic: many automotive designers have enough foresight to put the blower motor resistor in an easy-to-reach spot, like behind an access panel or removable flap.)
Once you’re able to reach the thing, the actual job of replacing the blower motor resistor itself is probably going to be pretty easy. If you’ve got some basic mechanical aptitude and can plug in an Atari game cartridge, then you likely have enough know-how to get the job done.
Again, all vehicle applications differ, but we’ll walk you through the job on our 2004 Nissan Sentra test subject—it’s pretty similar to other vehicles we’ve worked on though. Check out the walkthrough below, and let us know how the job goes for you in our comments section.


Installing the new blower motor resistor is basically a reversal of the removal process. All told, it was a 20 minute, 20 dollar job for us—and while the process for your vehicle may be different, we’ve had other blower motor resistor replacements that have been similarly pleasant.


In my experience as a master mechanic with 40 plus years if the blower resistor is bad the best advice is to replace the blower motor at the same time. Or you may find yourself doit the resistor again in the near future
Thanks for reading–and you make a very good point.
…
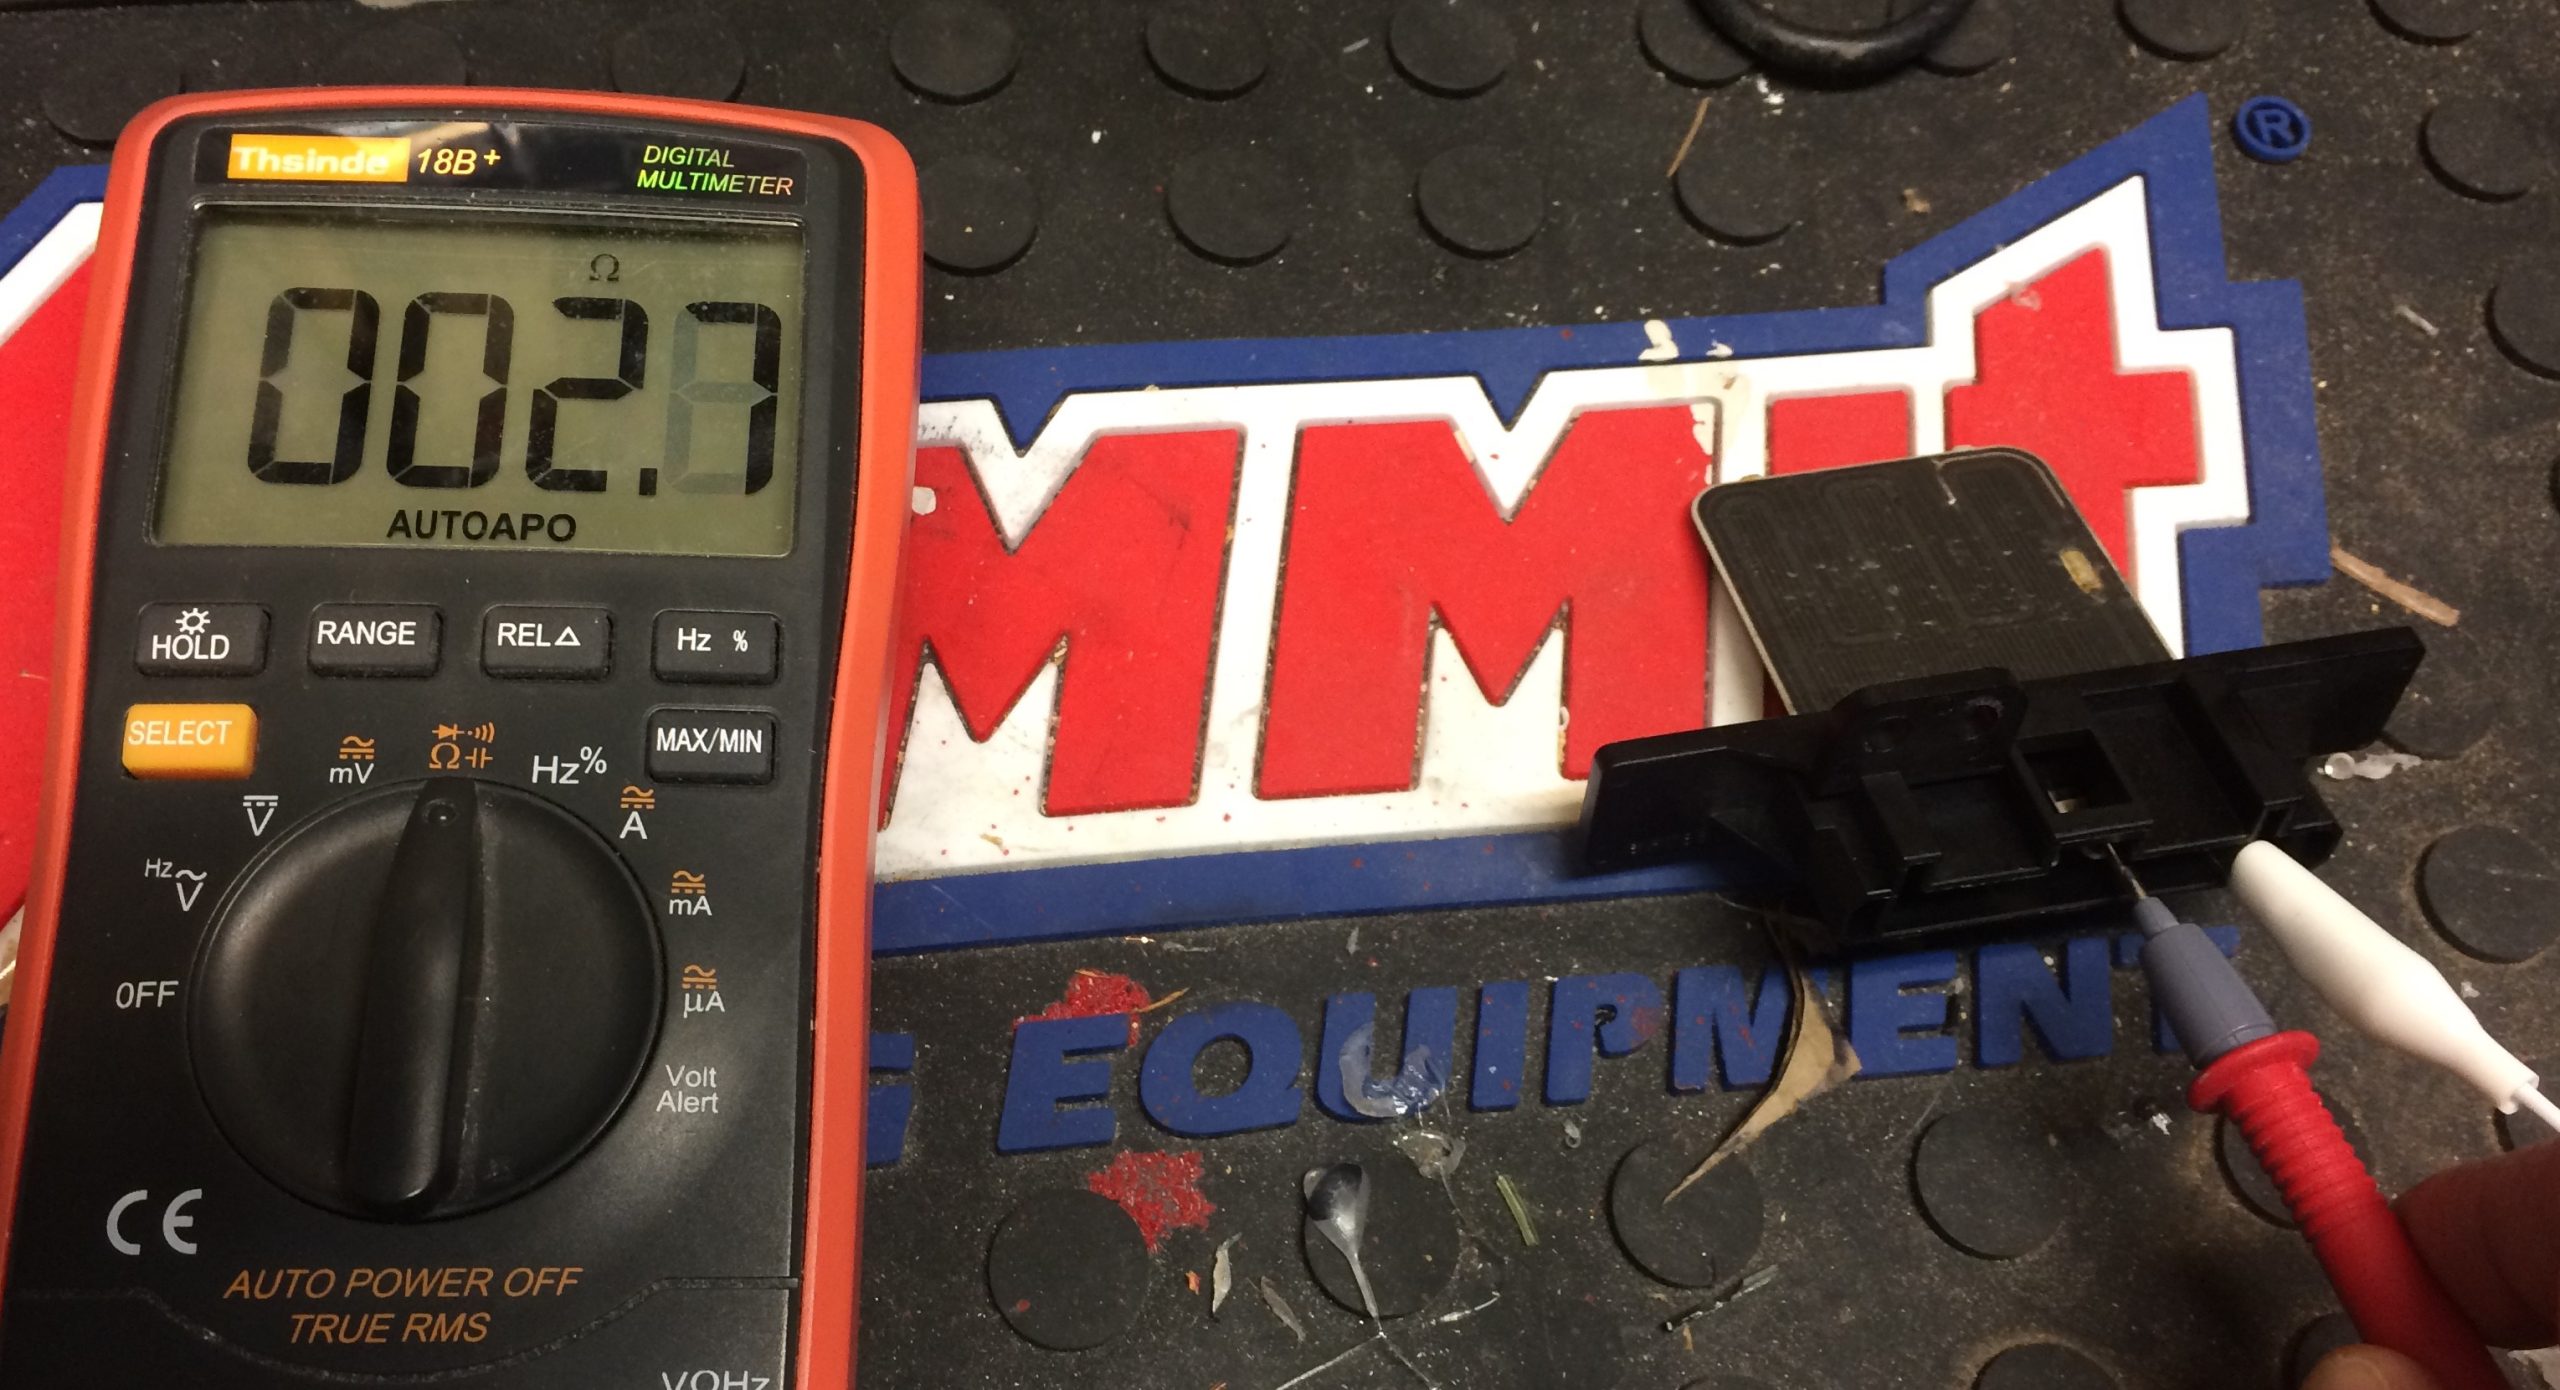
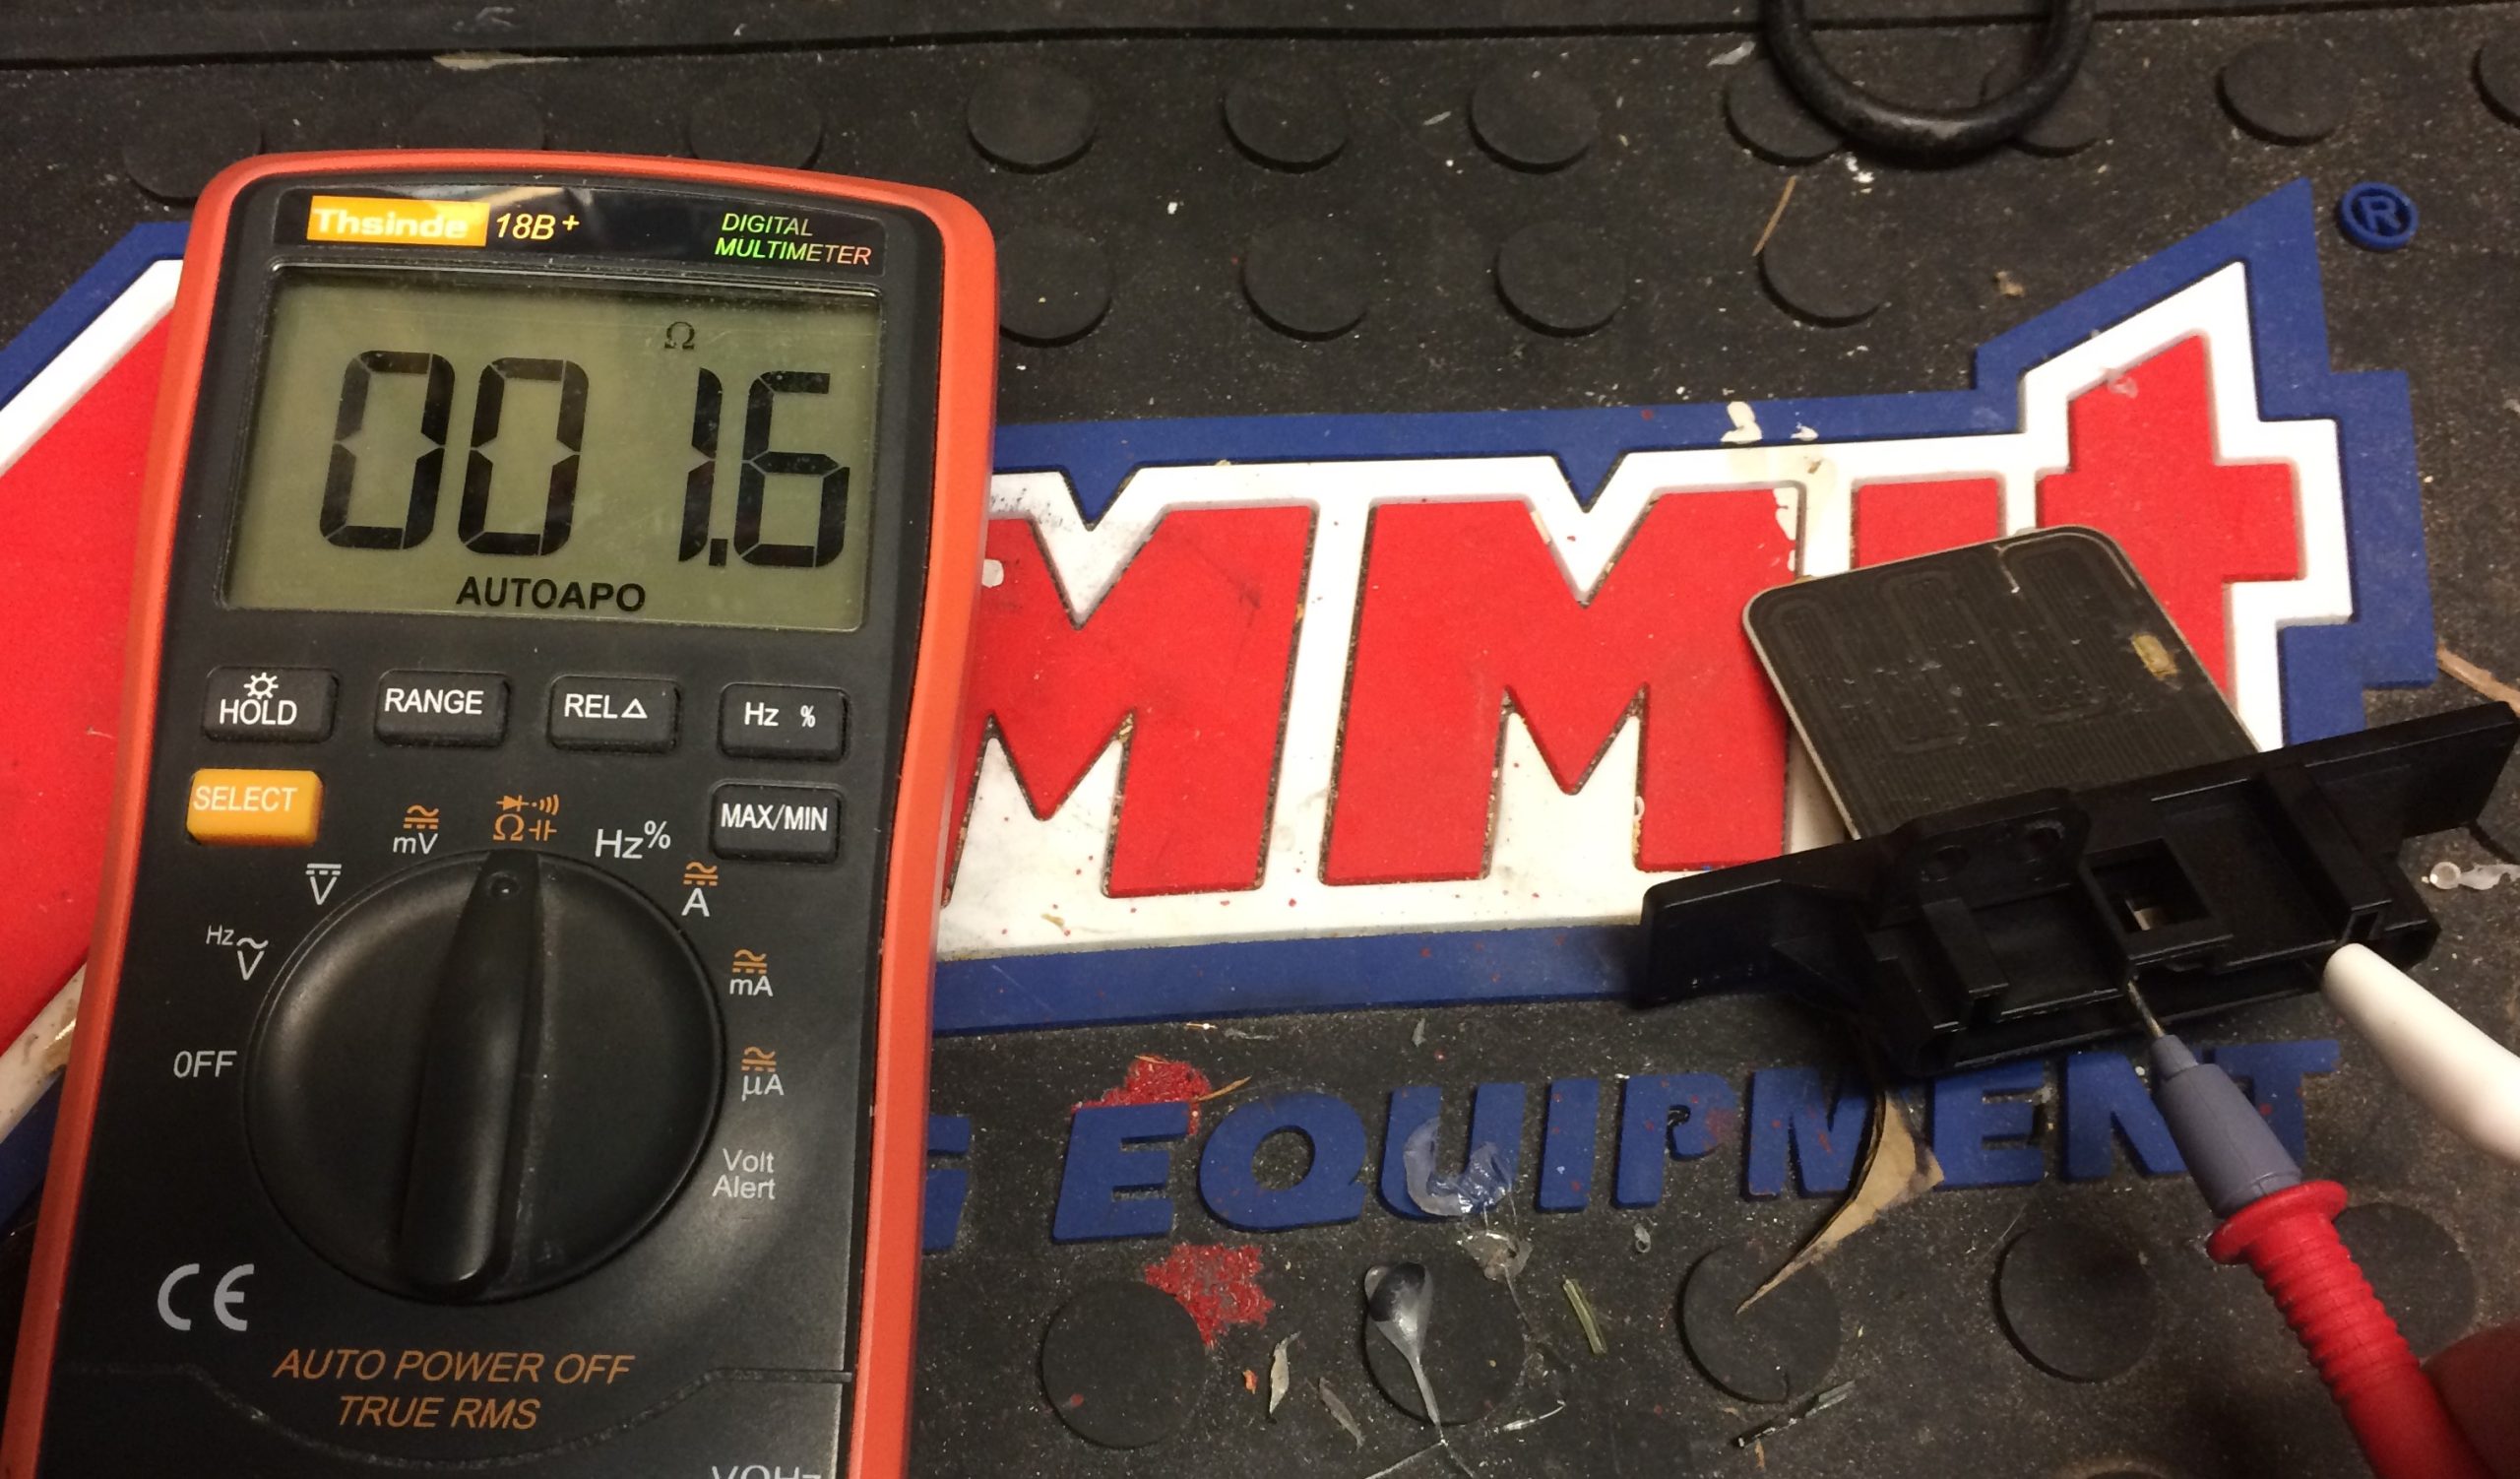
That’s often true because something like a bad motor bearing could make the blower motor work harder to move air, which can draw more current through the blower motor resistor. When this happens, the extra current may make the resistor run hotter and, particularly in the case of a PCB-type resistor like the one in the pictures above, it could lift or break the electrical leads and stop the flow of electricity entirely.
…
It’s always a good idea to inspect the blower motor if you can, paying attention to any odd noises or surging/inconsistent fan speeds. You should also check for obstructions in the vehicle’s air ducts. As our friend Kyle found out in an earlier article, a clogged air filter/ducts can wreak havoc on the blower motor too.
I have a 2018 patriot Ford 2.4 I noticed a a little puddle behind the driver seat on the floorboard. Didn’t think much of it figured my kids build something so I swept it up wrong about my day that week later I had a big puddle behind the driver seat and when I took a right turn all of a sudden and I heard it’s weird noise what sounded like little pebbles going through a pipe with water like sloshing and there was water spraying out at my feet while I’m driving. So I went and got a heater core, but before I could put it in I noticed no heat coming through any of my vents on any setting. Then it would kick on, run okay for a few minutes then slowly shut back off. I can also hear a thudding sound and it gets louder and it slows down. I just bought a blower motor resistor today. Still have the same issues except there’s no water building up anywhere and no weird sound when I turn anymore. Those two things only went on for maybe a week if not less. I’ve got two toddler boys who I have to drive around, and I’m in Ohio, which is pretty damn cold right now! I don’t really have the money to take it to a shop, so I’m kinda leaning as I’m going here!? Any advice before I keep just dumping money into it by guessing?? Thanks in advance for your time!! -April
OK, you’ve got a few issues going on here, so I’ll address them the best I can.
* It sounds like your heater core (or a hose connecting it) is bad. The heater core uses your engine coolant, so you’re running the risk of having low coolant levels in your motor, which would lead to overheating and other significant issues. My advice? Get the car to a shop asap, so you don’t run the risk of overheating.
* No coolant coming through the heater core would mean no heat. (Read this for context: What is a Heater Core?) This means running your HVAC fan isn’t going to do anything.
* If your heater core did leak, the fluid could have traveled down your ducts and is now pooling in your blower motor. The thud you hear may be the fan blades (AKA squirrel cage) beating against the pooled coolant. Changing a resistor won’t affect much here, and would probably lead to burning out another resistor. So I would not turn the fan on again until you take it to a shop.
…
Brace yourself, changing out a heater core, especially on a modern vehicle, is often a lot of work–and requires a significant amount of dash disassembly. That translates to cost.
Wish I had better news, please comment back if you have any more insight and I can try to help you diagnose it. Best of luck.
I have an 08 ram 5.7. I am having issues with the heat or ac being on for about 10 to 15 min. The the airflow through the vents slows and stops completely. Blower motor runs fine. Actuators are working and as far as I can see the air flow baffles are solid and intact. Please help
So, is the blower motor still running, even though the airflow still stops? If you can hear the blower motor slowing and acting erratically when this happens, it certainly could be the blower motor resistor (click here to see them for the 2008 Ram 1500). But if the blower fan continues to run OK despite the slow airflow, then it seems you may have an obstruction.
…
I’d start simple–have you checked your cabin air filter? And does the airflow just affect one vent? Or all of them? Start tracing the offending vents back to the blower motor to check for clogs. This article may help too.
2007 passatt Took out fan today inside heating and cooling hadn’t worked for a few months .so I just got a little curious because I could hear fan running slow really slow no other speed so I plugged it in when I took it out it ran on all four speeds but when started turng fan up to put back in it stopped working any ideas
I’m not sure if I understand the problem. So, you took the blower motor out and it worked fine on the bench? But when you plugged it back in to the factory harness it would stop? While I’m no VW expert, certainly that would point to something like a blower motor resistor or the HVAC control head unit itself.
…
Check out how I tested the blower motor resistor at the bottom of the article—you could do the same and check for any O/L readings. If anything looks awry, I checked SummitRacing.com and replacement blower motor resistors for a 2007 Passat are priced pretty reasonably—and since you’re already got the blower motor out, it’d probably be a pretty easy job to swap out the resistor while you’re under the dash.
Hi, on my 2016 Mitsubishi Outlander there is no airflow threw the car. Is there suppose to be a fuse at the sbf1 spot, because I have none and only 1 male connection for the fuse instead of 2 .
Hey Sebastien, I looked online and it seems there are two spots for “Air Conditioning Condenser Fan Motor” in a 2016 Outlander, SBF1 and SBF3. But while I’m not Mitsubishi expert, I’m thinking that refers to the fan alongside the radiator fan, specifically for the condenser module and not the cabin blower motor.
In the cabin fuse box, did you check fuse numbers 2 and 3 for the heater and defogger?
Have a 2013 Nissan Ultima heater control valve had no power check fuses replace fuse for heater blew it again found two fuses for heater fan pulled one off replaced the fuse to the module and it stayed on the fuse for the fan blower kept blowing now has power on both sides of the inlet fuse
If you’re continually blowing fuses, it could point to excessive amp draw from the blower motor, which is often the result of a clogged/jammed fan basket and/or a bad motor (worn motor bearing).
Hi
I have a mk7 fiesta s and the heater has stopped working.
It would kick in briefly then go off to the point it doesn’t come on at all now.
Any advice please and is it something we can do ourselves.
Thankyou
Lou
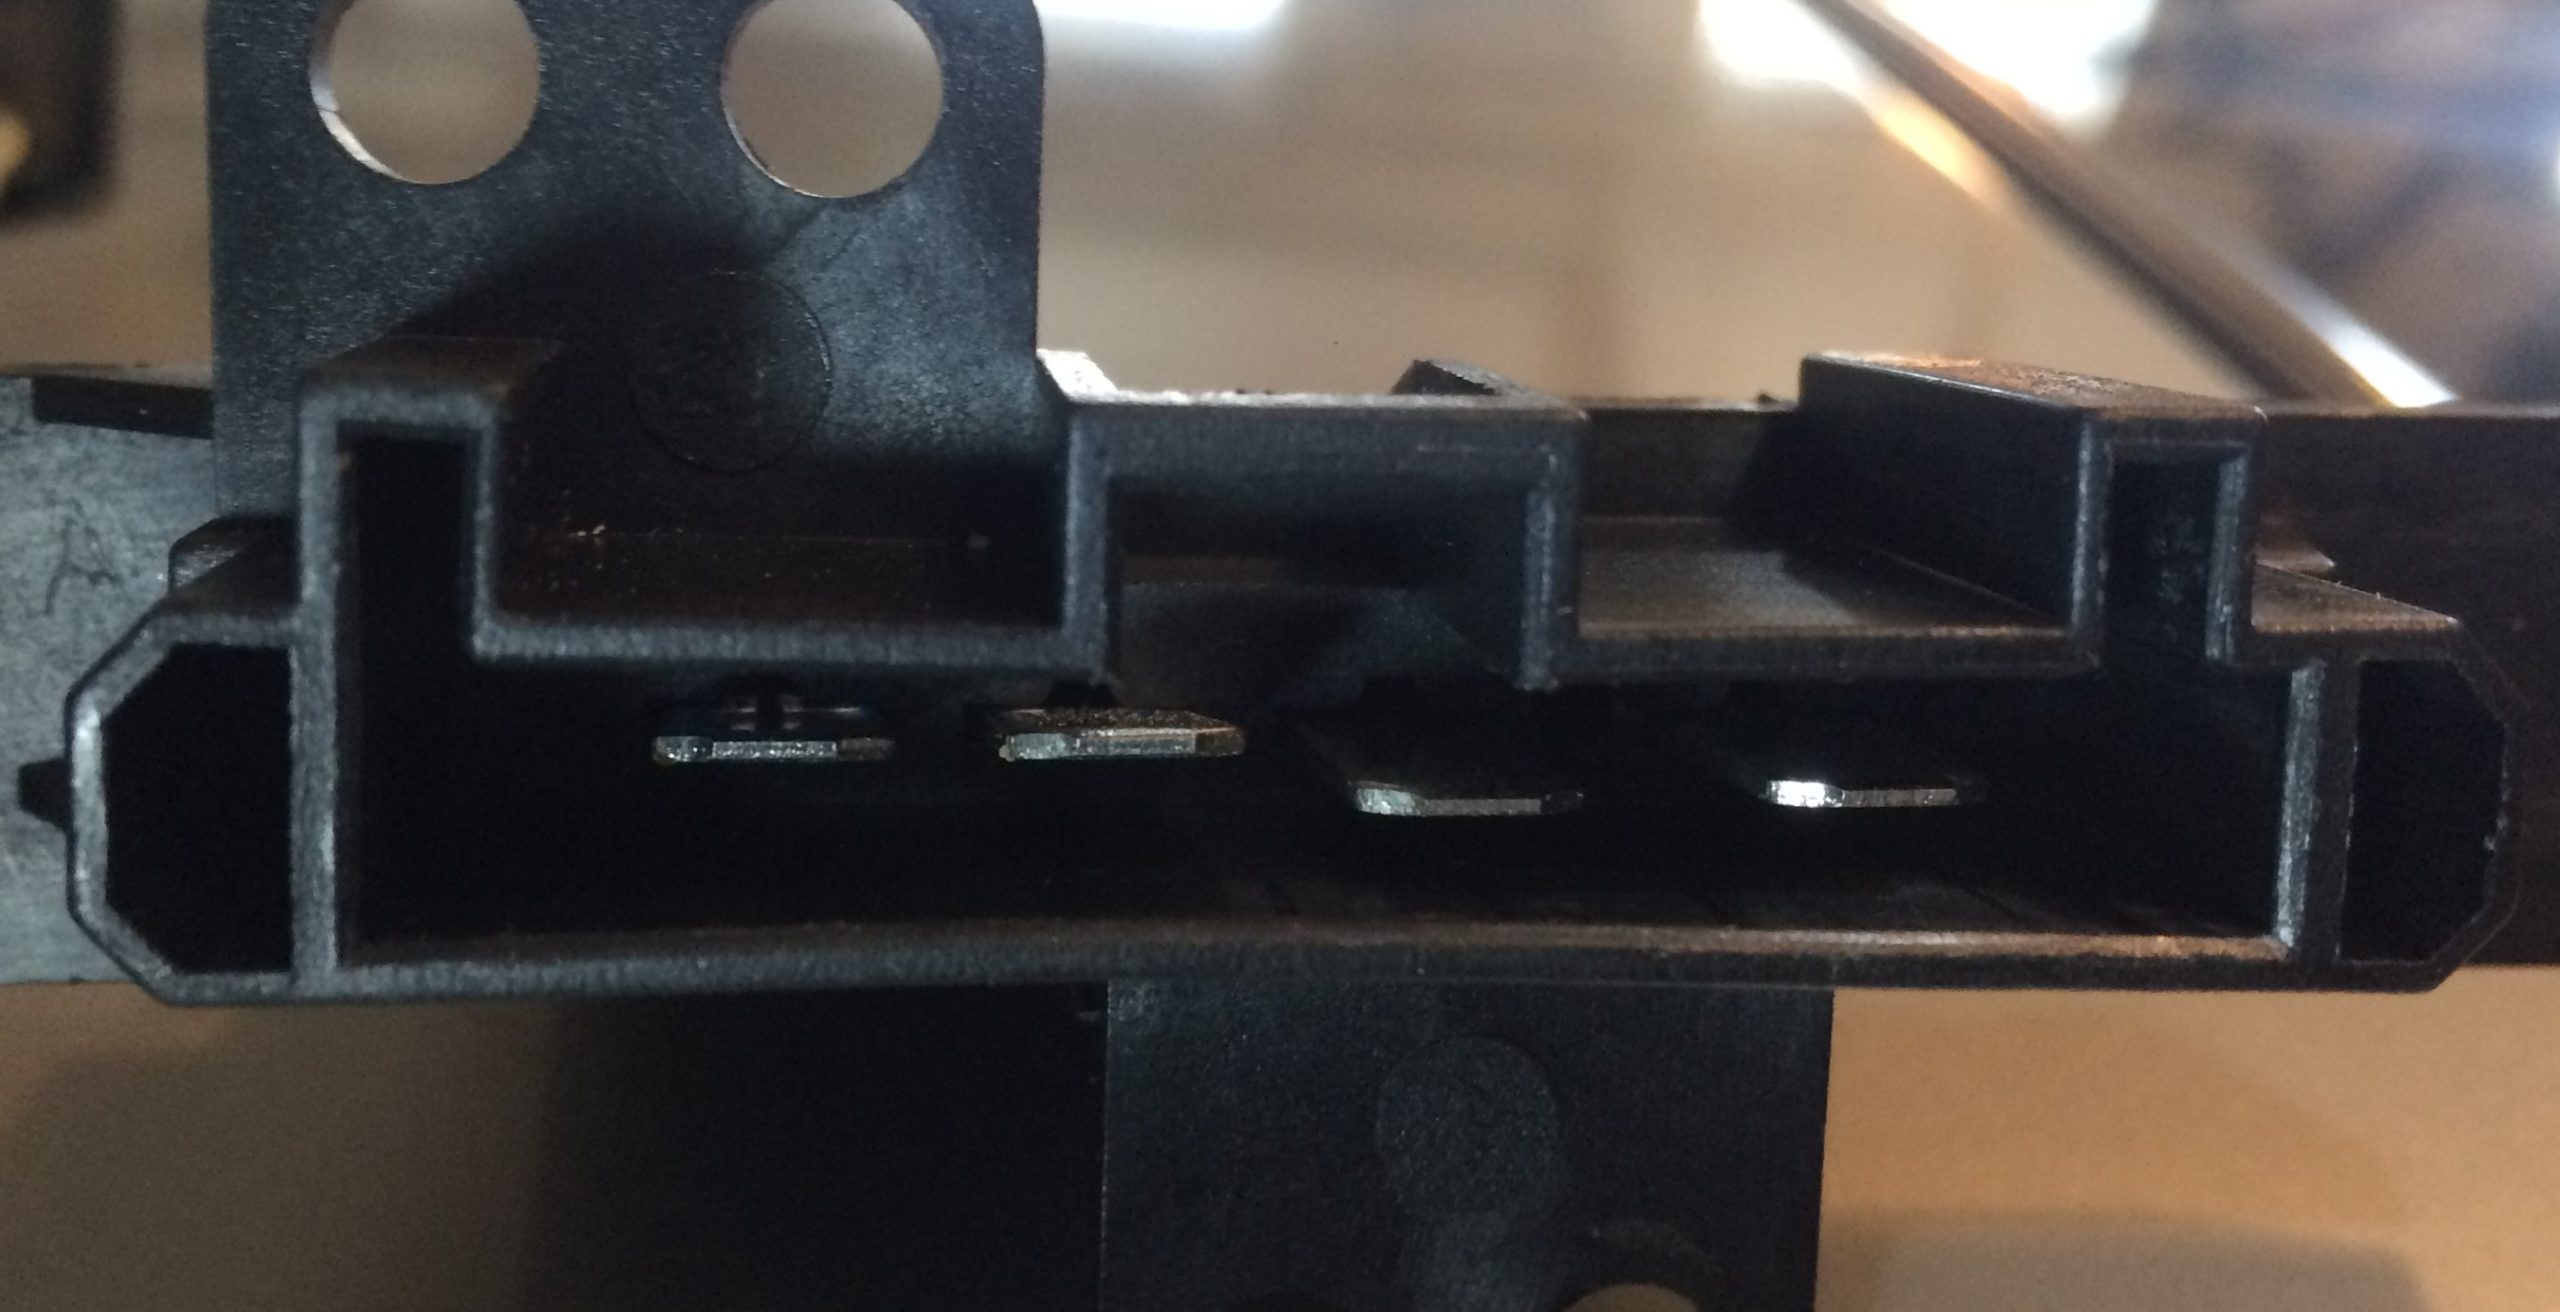
Hey Lou, that certainly sounds like it could be the blower motor resistor. If you’re handy with a multimeter tool, you can inspect/test it like I did in the photos above.
I have a 2011 ford f150 blower quit working i replaced all fuses resistor relay and blower motor still nothing i get hot/cold air coming through the vent at the windshield minimal and from the door vents any ideas why it still wont work?
You say you get a minimal amount of air through the vents…so, can you hear the blower fan working? If the blower motor is working and the volume of air is low through all the vents, it might point to an obstruction in the ducts behind the dash…or maybe something easy:
Did you replace your cabin air filter?
…
If your cabin air filter is fully clogged it would certainly impede airflow through your truck’s HVAC system. You can learn more about it here.
I have a 93 nissian d21 the blower motor blows on 1-3 settings but nothing on #4. What do you think it could be. I heard people say maybe the resistor, but isn’t the job of the resistor is for the lower speeds to resist the the voltage amount sent to the blower motor for slower speeds? Do you have any idea what’s cutting it off on high(#4)? Thanks in advance.
This is the exact problem I’m having in my 2011 Nissan Versa… I’m having trouble finding answers, as I too believe that it shouldn’t be the resistor if it works well on the 1st 3 settings… setting 4 should be free-flow without resistance, like when you test the motor on the bench… But, I’ve been surprised before…
You’re correct–but the electricity still needs a path “around” the resistor to arrive at the blower motor–perhaps there’s an issue with the connection?
That’s an interesting thought, and I’ve looked(for shorts and checked fuses), although not completely thoroughly… I’ve got the wiring diragrams from Chilton, so maybe I’ll try to run a wire bypassing the resistor…
In the event that this helps anyone here with the issues that I outlined above, the problem ended up being the 5-way (Off-1-2-3-4) is actually worn out on the 4 part of the selector… Hoping this helps someone! Good luck, all…
Hey, thanks for the follow up. Glad you got it figured out!
i have a 2016 ram 2500 Hemi 6.4 with dual zone and auto ac/heat. my ac works fine but will only run on med or high. I have zero heat, and same the blower only works on med or high speed. would the blower resister be causing this.
It certainly could–but I’m no Ram expert, so I did some quick online searching and it looks like the blower motor resistor for that era Ram is actually built into the blower motor itself, and you have to replace both as a unit. I came across this video that explained the issue pretty well and gives you a few things to check. Hope this helps.
I have a 2002 Lincoln Town Car. 4.6 V8 engine. Currently I have no air hot or cold coming out of my vents. I replaced the blower motor. Yet, I still don’t have any air coming through the vents. Is it possible for you to walk me through the possible scenarios that may prevent airflow. Video placement repairs are definitely welcomed due to the fact that I never replaced any HVAC parts on this vehicle.
Answering a few questions that can help you diagnose it:
* Have you changed your cabin air filter? A clogged air filter can hinder airflow–but I think the Town Cars from that era were outgoing Panther models anyway, so it may not have one to begin with.
***
* Can you hear the fan whirring/buzzing to indicate that the blower motor is working? If so, you likely have an obstruction in the ducts somewhere (or a clogged filter).
***
* Did you replace the blower motor resistor too? Or just the blower motor itself? A good blower motor with a completely bad resistor won’t work regardless, as its not getting power.
***
Hope this helps.
We have a 2005 Nissan Armada SE 2wd and the AC just stopped blowing any air at all no matter the setting. We replaced the blower motor but still nothing. First thought was it could be the motor blower relay. Although when we turn the AC on we hear one clicking sound and then nothing, still no airflow. I’m pretty sure the resistor is bad as it has a black burn-like mark on it so we are ordering one today but, could it be anything else? Maybe the blower motor relay also needs to be replaced? We thought that clicking sound might be the relay and that it might be good still but we are not sure. Any help would be greatly appreciated!
You can always check voltage to the connector of the blower motor, that’ll confirm that the blower motor works and/or if you have a break in continuity with a wire or connector terminal somewhere. Let us know if the new resistor helps and we’ll continue troubleshooting if need be–good luck.
Hi, I have a nissan tiida 2007 hatchback. I cranked up the heater fan to high speed and it stopped within seconds. I replaced the 3 fuses but still nothing. Is it the resistor that needs replacing? I have purchased 1 and going to replace it on my own after i get your reply.
(fingers crossed)
Do I need to disconnect the car battery first?
Kind regards
Susan
If you’ve already purchased the resistor, then sure–you won’t harm anything by replacing it. That said, is it blowing fuses every time you turn it on? It seems like your blower fan might be drawing too much current–which can be caused by a bad motor/bearing, something rolling around in the fan’s “Squirrel Cage,” or from some obstruction or clog in the ductwork. Start by checking/replacing your cabin air filter. I’m not familiar with a JDM Tiida, but you might be able to look inside the fan to check for leaves or gunk in the blower fan. Also, listen for any odd noises from the fan itself–buzzing, grinding, howling could point to a bad motor bearing or misalignment with the squirrel cage.
…
And yes, it’s recommended to disconnect the battery any time you work in/around the electrical system, just as an extra measure of precaution.
Following these instructions WILL NOT FIX THE ISSUE and may cause the waste of more time and money. The NEW PART will FAIL due to the use of dielectric grease on the pins/ electrical connectors, as suggested.
THIS WILL PREVENT ELECTRICAL CONNECTION!! Which is the problem of the failed resistor.
DO NOT USE DIELECTRIC GREASE ON ELECTRICAL CONTACTS!!!
Just a dab, or what ever excuse does not make up for the bad advice.
Hello, the suggestion to use dielectric grease around the housing receptacle was to help keep moisture out of the connectors and in some cases, help prevent any foam gasketing material from adhering to the opposite surface, which can make the whole assembly difficult to remove. Thank you for your suggestion, I’ve revised the copy in the caption to make that distinction more clear.
If it helps, we wrote an entire article on dielectric grease and alluded to some of its sealing capabilities as well, particularly handy in an automotive application where you have to consider a range of environments and intense heat cycling. You can check that out here: What is Dielectric Grease & Why (& Where) Should You Use It?
Hello.
Good cheer to all on this beautiful day!!!!!
Good luck 🙂
Hi. I have a Mini Cooper S. The heater fan has stopped working. Did get into the fan motor, tried rotating the fan, was sluggish to start with but eventually ran fine. There was resistance in moving the fan but when the blower setting was turned on, it could be moved freely. Within a week it packed in again. Got into the fan, tried rotating it but this time did not start. Same as before resistance when fan off but moved better when fan was switched on. Have got the resistor out, which heats up when the fan is on, does this mean the resistor is OK. Do not have a multimeter to check the resistor. Any ideas whether it’s the resistor or actual fan motor. Open to any suggestions. Cheers
Depending on the electrical load, a resistor will heat up—but that’s not really a good indicator if it’s working or not. I’m having trouble understanding some your explanation here, but you said the fan seemed like it was tough to get spinning? And now it’s stuck/seized completely? I’m not an expert on Minis, but I’m guessing that the fan should spin freely—if it doesn’t, that could point to a bad blower motor bearing. That would also put more strain on the electrical system, and may pop a fuse in the process.