Laying down automotive carpet in your car might not seem like that big a job.
But it’s not exactly a flop-down-and-go job either.
We were reminded of this first-hand when we installed an automotive carpet kit in a project car not that long ago. Most of today’s carpet kits are molded to help with fitment, but the transmission tunnel portion of our carpet was so large, it was impossible to make it fit properly.
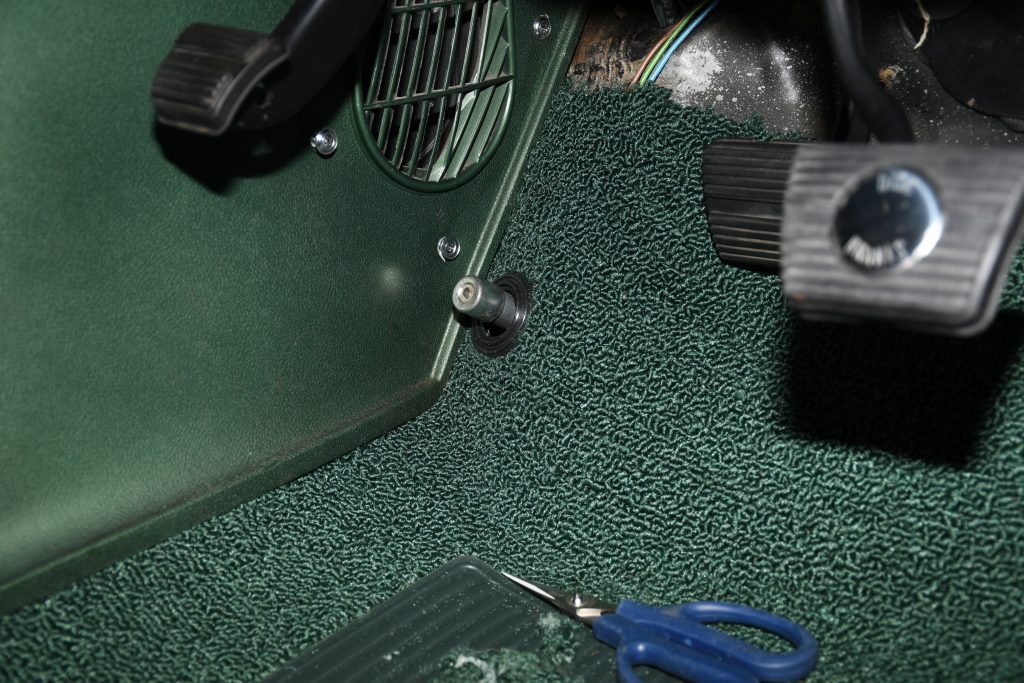
In a recent conversation with a very picky and very experienced Corvette restorer, we were told that there’s a huge difference between a carpet install job that takes a few hours and one that takes a week. Even with great quality carpet sets, such as the Auto Custom Carpet (ACC) set we used, you still have to fit and trim it for things like seat bolts, seat belts, and floor shifters. In our case, it also required installing the dimmer switch grommet, trimming the back section for the rear seat hooks in the floor pan, and trimming the edges to go under both the kick panels and the sill plates
There are many options available when purchasing a carpet set. On the Summit Racing website, there’s a drop-down menu for selecting an ACC carpet set. You must enter year, make, and model; specify two or four doors; transmission type; seat type (bucket or bench); and if you have bucket seats, with or without a console.
You can also choose from many colors, but this can be tricky because computer monitors have variations and it’s pretty much impossible to match the color exactly. Summit Racing suggests if you need an exact color match, request a sample color swatch. ACC also offers an additional carpet underlay called “mass backing.” It’s an EVA material approximately 45 mils thick that provides an additional sound and heat barrier on top of the standard underlay the carpet already has.
The standard carpet for most cars built before 1974 is nylon loop. Later model cars typically have cut pile carpeting. According to ACC, the earlier loop style carpet is composed of 100% nylon yarn tufted to a 1/8 gauge. The loop contains 20 ounces of yarn per square inch.
Once the options are sorted out, you can order your carpet kit. Follow along, and we’ll show you the installation process in our Nova.
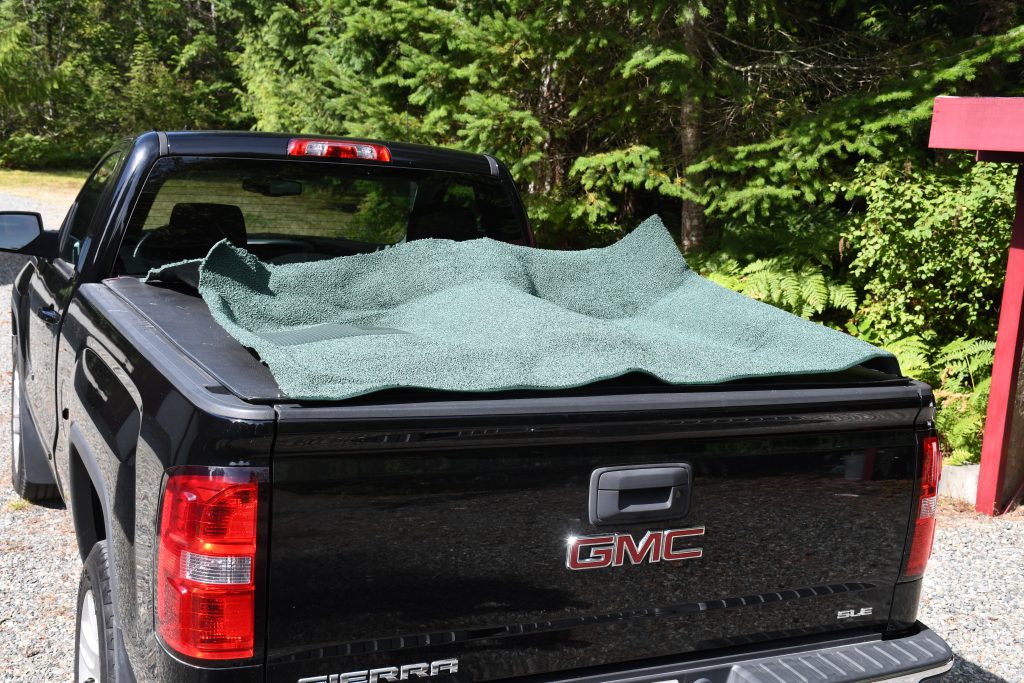
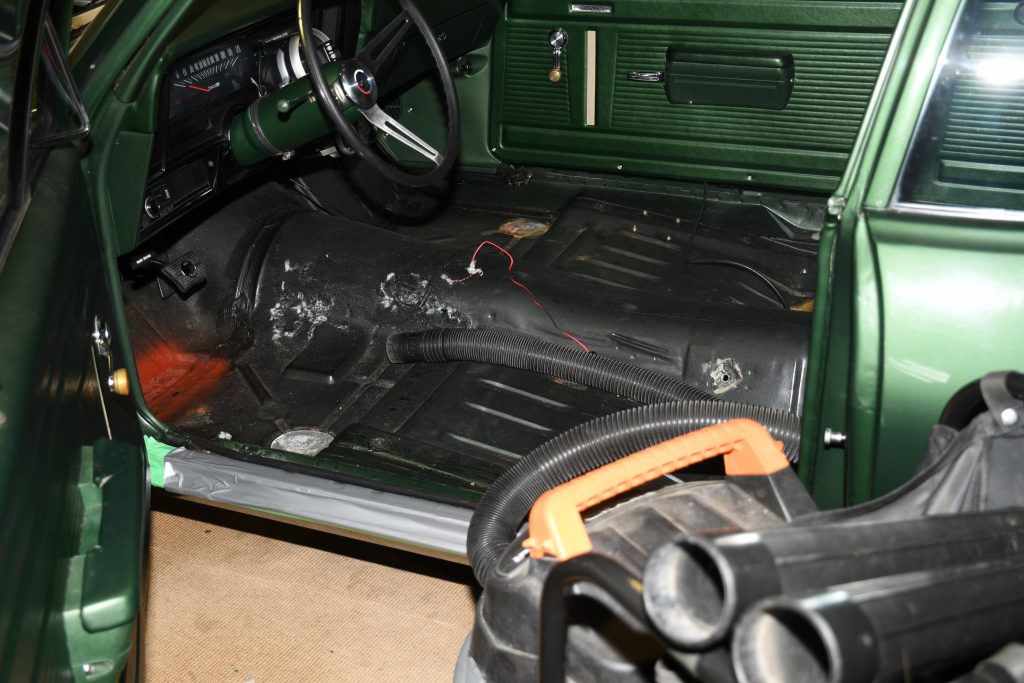
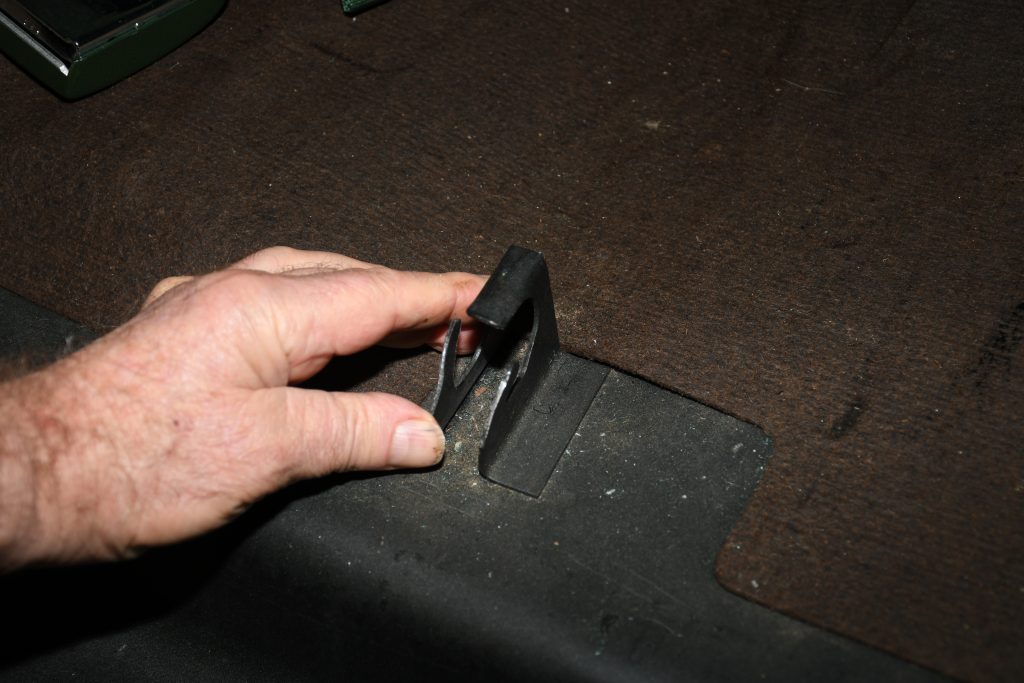
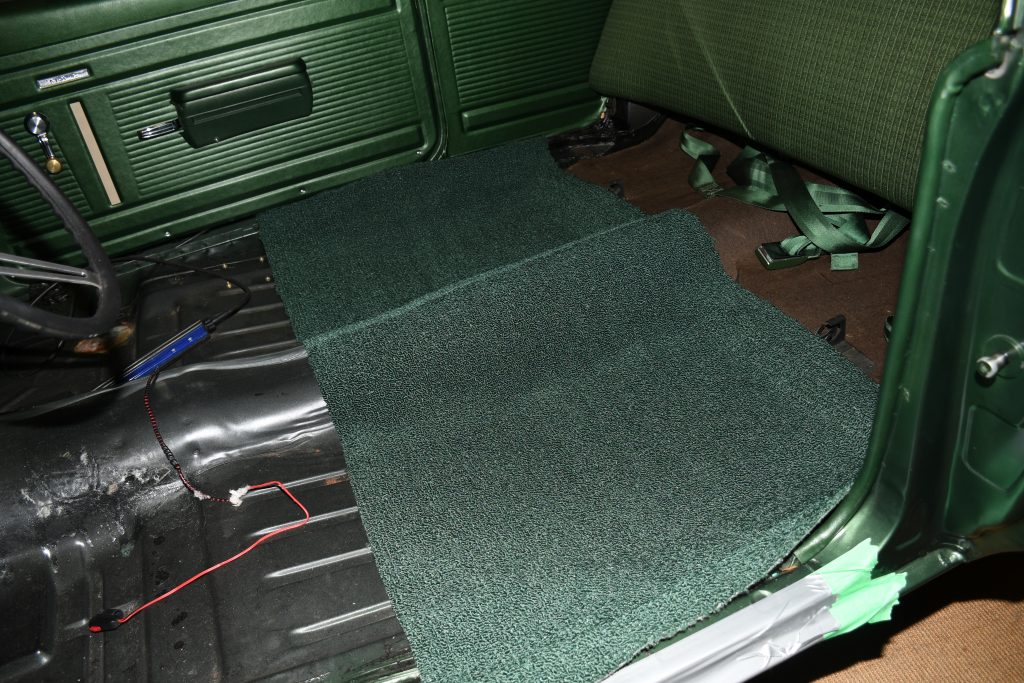
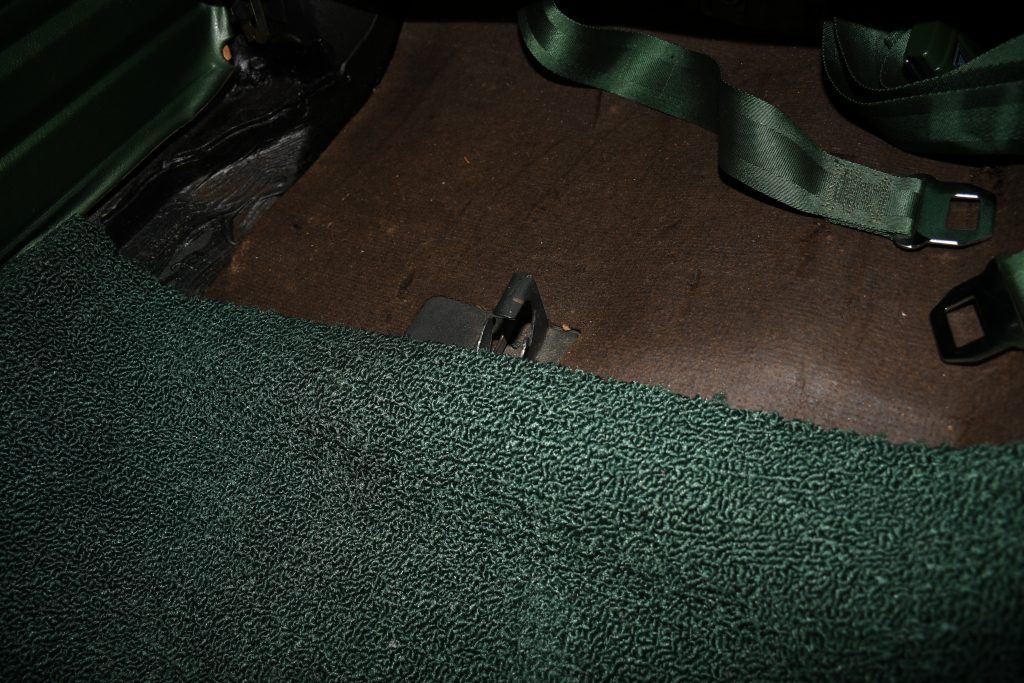
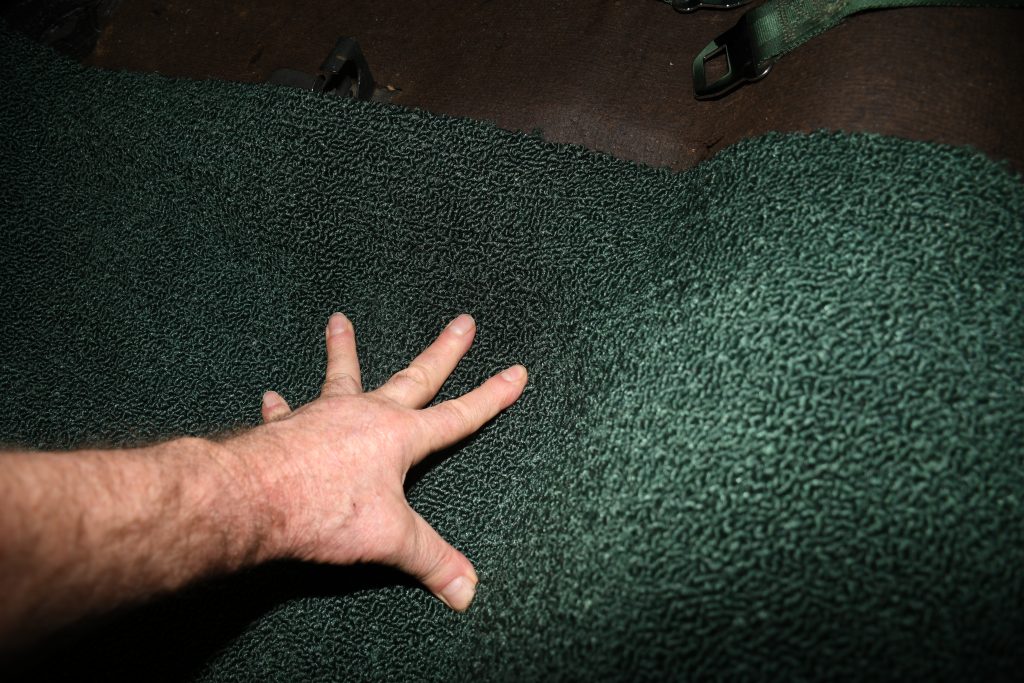
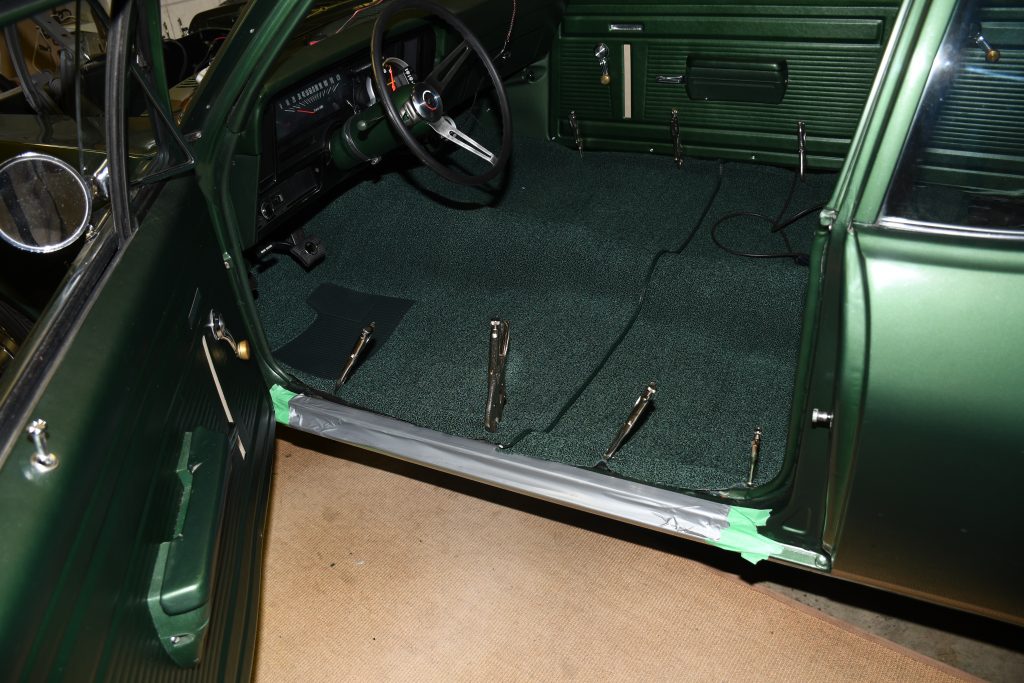
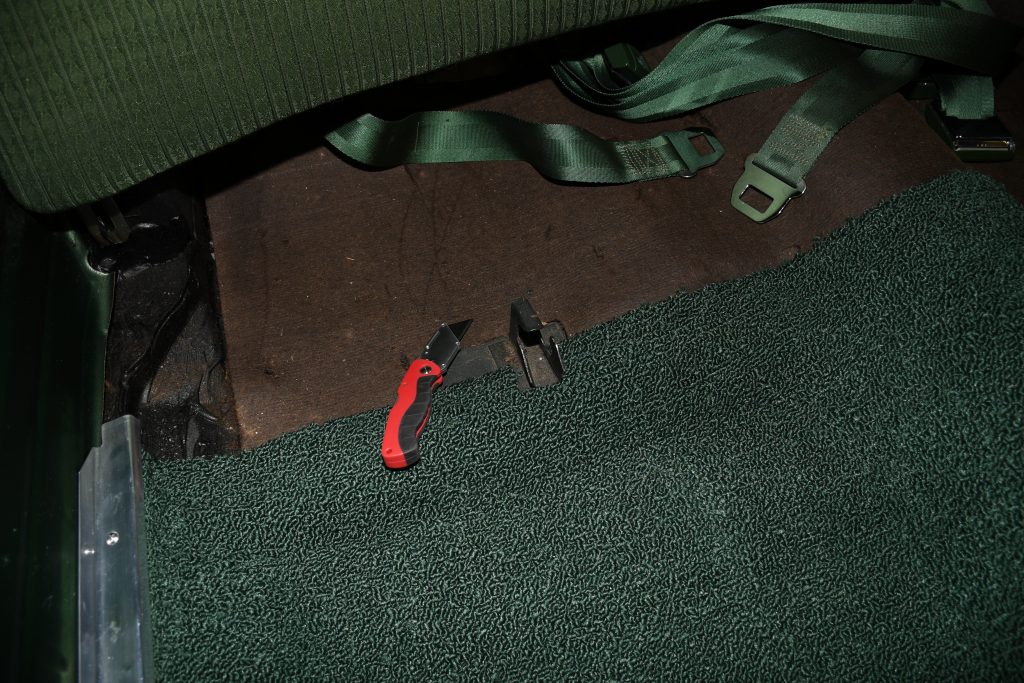
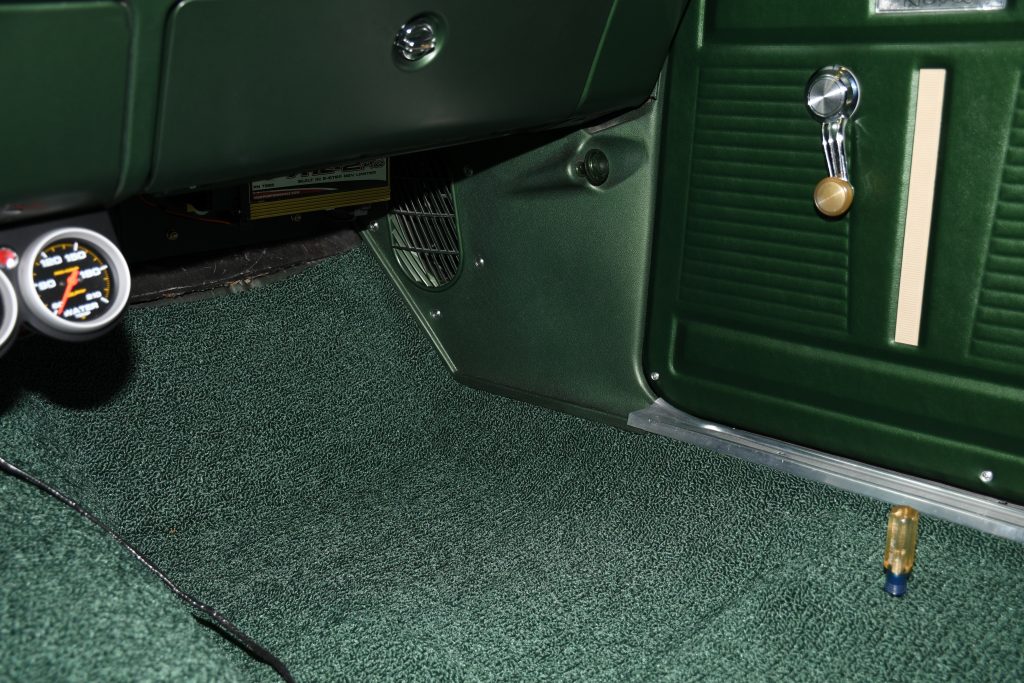
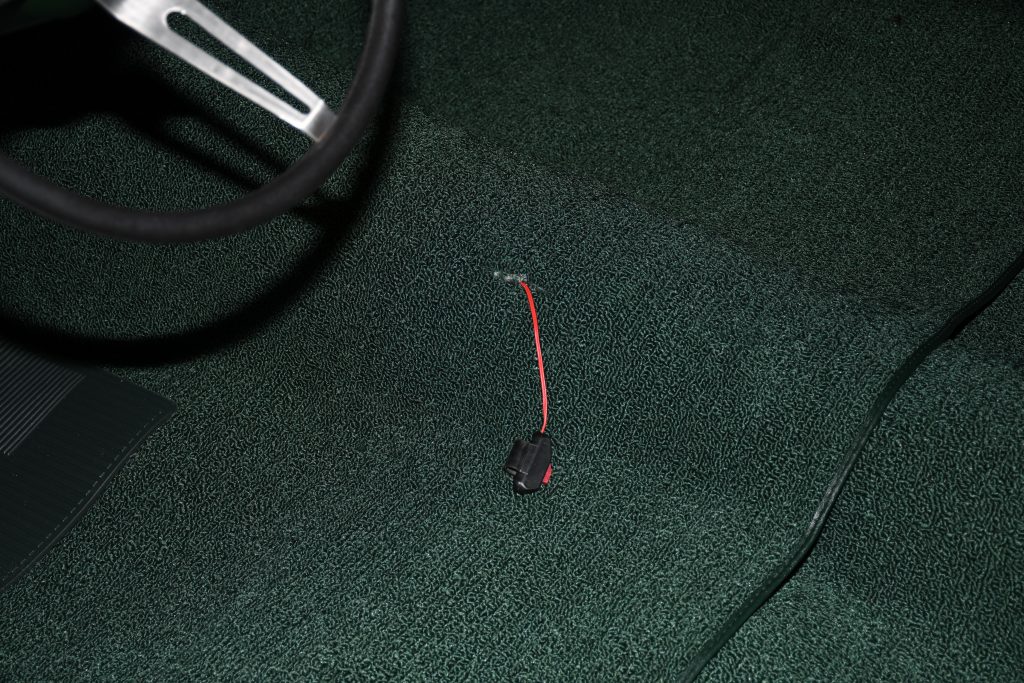
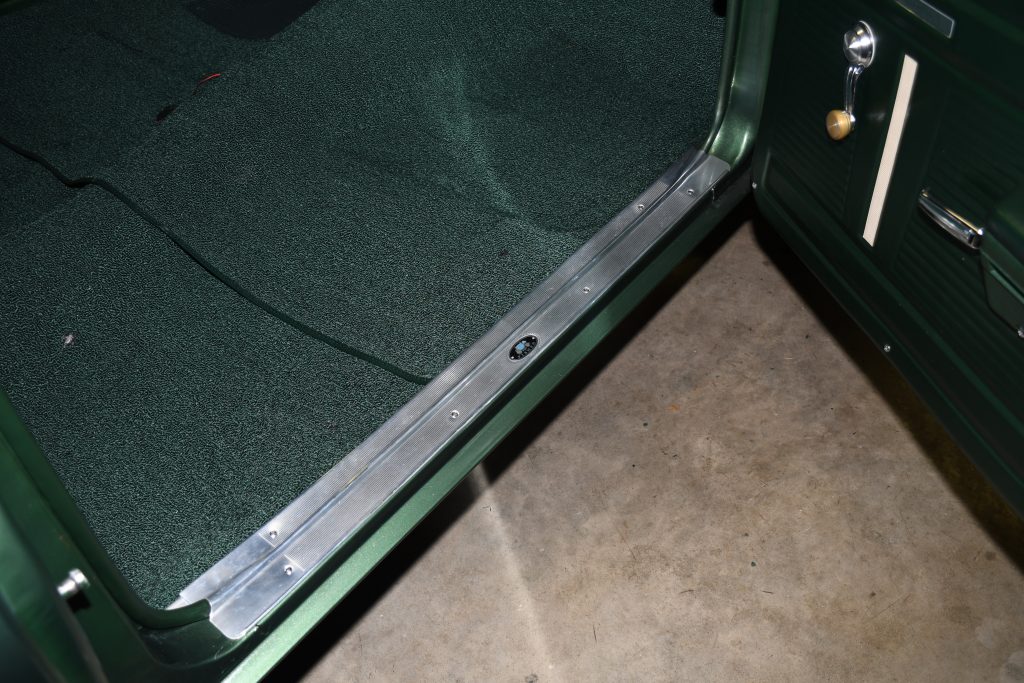
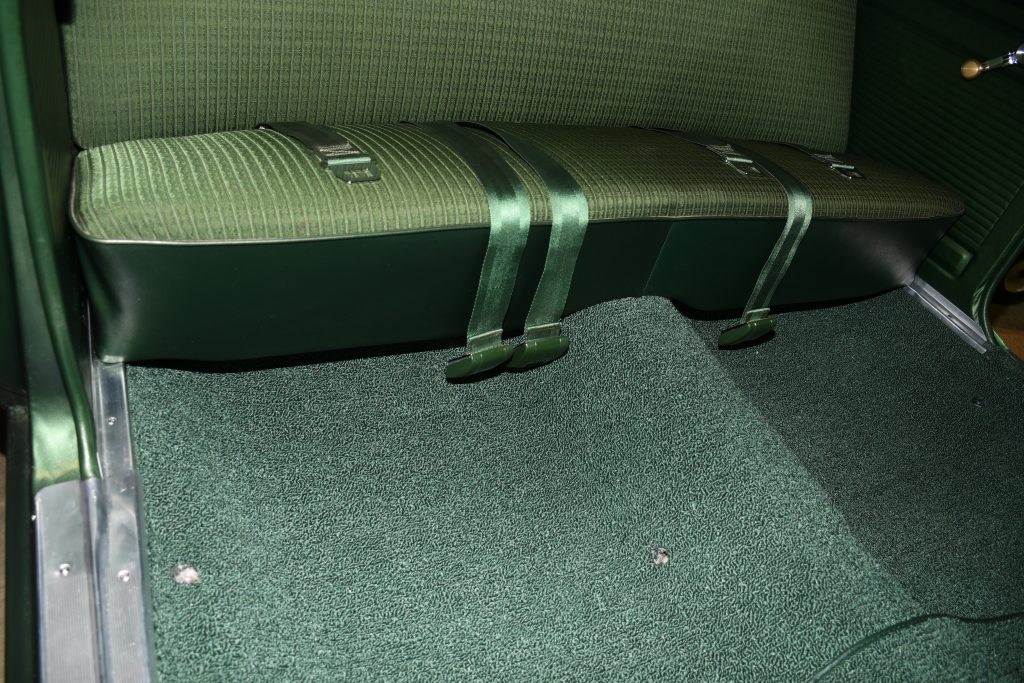
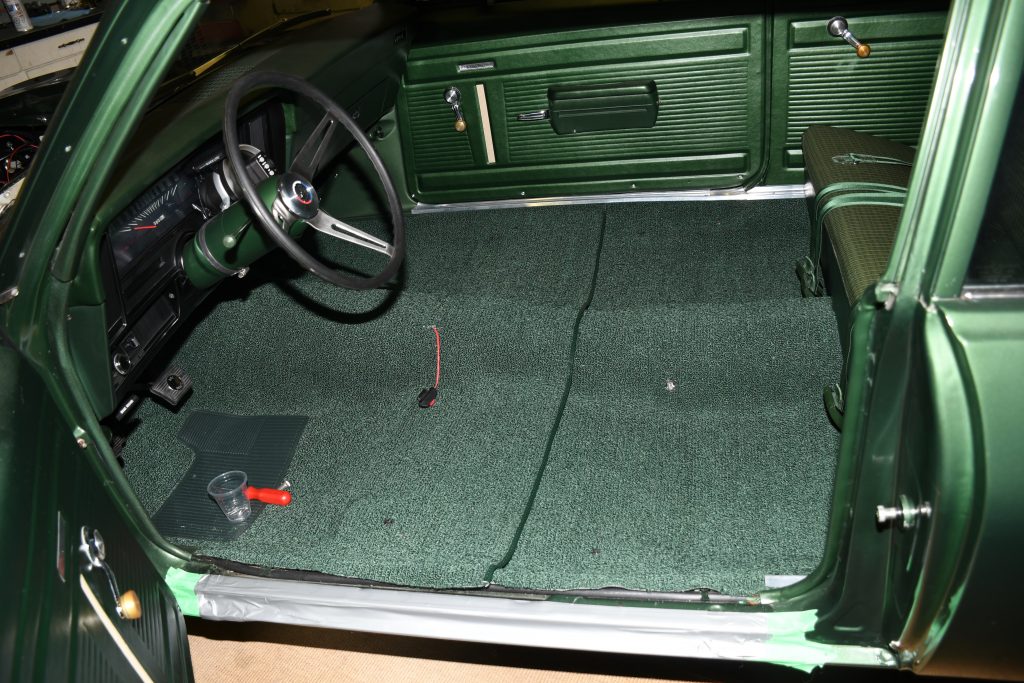
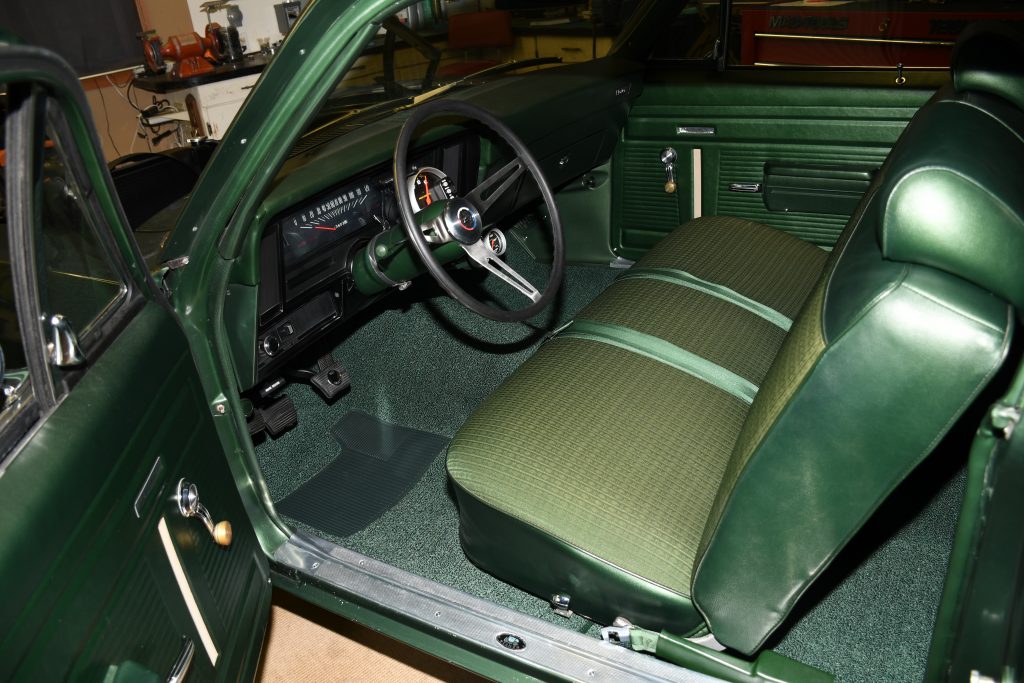
First things first—the seat belts, seats, sill plates and other accessories have to come out. Before the seat(s) are removed, we like to heavily tape the rocker panels. This way, there’s little chance the bulky seat removal process can damage the paint. Image/Wayne ScrabaWhen you receive your carpet set, it’s a really good idea to lay it out in the sun and allow it heat up. This takes out the wrinkles caused by folding it for packaging. The back of a pickup truck is the perfect place. Image/Wayne ScrabaWhile you’re waiting for the carpet to relax, you can vacuum and clean the floor pan. If you have surface rust on the floor, it’s a good idea to use Permatex Rust Treatment and/or a rust-encapsulating primer on the surface. Image/Wayne Scraba The reason the back seat must be removed is because the carpet lays beyond the floor pan seat hooks. Image/Wayne ScrabaThe front and the rear carpet sections can now be laid out for a test fit. The rear piece installs first. Typically, the front segment overlaps the rear. Image/Wayne ScrabaThe rear section of carpet will almost always extend over the rear seat hooks in the floor pan. ACC carpet sets are slightly oversize front to back and side to side. Image/Wayne ScrabaWith the carpet positioned on the floor, you can start fitting it. We prefer to begin at the tunnel and work outward from there. Because the carpet is molded, you’re basically tucking it into place. Image/Wayne ScrabaThe carpet will move as you work it from side to side and front to back. We like to lock it down with something everyone has in their tool box: Vise grips. They attach to the rail where the sill plates attach, and makes it far easier to trim the carpet. You’ll probably need four or so vise grips per side. Image/Wayne ScrabaA sharp box cutter and a pair of beefy scissors are needed to trim the excess carpet. You’ll find that the excess carpet overlaps the sill plate rail (outboard of the vise grips) can be trimmed back easily. Honestly, this area along with the area under the kick panels is where you’ll end up doing the most trimming. Remember to go slow–it’s easy enough to remove carpet but you can’t put it back. Image/Wayne ScrabaMove backward in the car and trim the rear section of carpet. You’ll have to trim for the seat hooks; work from the tunnel outward to the respective sides. Image/Wayne ScrabaThere are a lot of ways to cut the holes for things like seat and seat belt bolts. My personal preference is to use a soldering iron to burn out the holes. I use a big soldering iron for the seat belt bolt holes and a smaller one for the seat bolt holes. Image/Wayne ScrabaYou have to cut the hole for the dimmer switch grommet. To get it done, lay the carpet over the dimmer switch and mark the location. Next, slice an “X” through the carpet with the box cutter and double check the fit. Once positioned in the right spot, trim the opening with the scissors and slide the plastic grommet over the hole in the carpet. Image/Wayne ScrabaMany vintage GM vehicles were built with a plastic carpet guard that goes between the carpet and the firewall at the steering column. The carpet is installed under the carpet guard. Image/Wayne ScrabaAt this point, you can install the carpet under the kick panels. In most cars, there’s sufficient room to tuck in the carpet with a screwdriver if the kick panel screws are loosened a few turns. Image/Wayne ScrabaIf your car has a floor shifter like our Nova does, this is the time to slice the carpet for the shifter (cable or boot). If you have a line lock, you’ll have to tuck the wire under the carpet and through the opening too. Image/Wayne ScrabaNow you can reinstall the sill plates–at least the one on the passenger side. The original sill plates in our car are in nice shape so we reused them. The rear trim plates were also installed. Image/Wayne Scraba Installing the back seat is a straightforward job. Don’t forget to fish out the seat belts before snapping the seat base into place. Image/Wayne ScrabaThis is the carpet prior to installing the front seat. I kept the tape on the door sill and didn’t install the sill plate. The bench seat is bulky and there’s a chance of carving up the aluminum sill plate. It’s also a good idea to tape a big piece of thick cardboard over the door sills to prevent damage during seat installation. Image/Wayne ScrabaHere’s the finished product. As you can see, the fit of the ACC carpet is excellent. Image/Wayne Scraba
Wayne Scraba is a diehard car guy and regular contributor to OnAllCylinders. He’s owned his own speed shop, built race cars, street rods, and custom motorcycles, and restored muscle cars. He’s authored five how-to books and written over 4,500 tech articles that have appeared in sixty different high performance automotive, motorcycle and aviation magazines worldwide.
Comments
3 responses to “Interior Decorator: How to Install Automotive Carpet”
[…] Laying down automotive carpet in your car might not seem like that big a job. But it’s not exactly a flop-down-and-go job either. We were reminded of this first-hand when […] Read full article at http://www.onallcylinders.com […]


[…] Laying down automotive carpet in your car might not seem like that big a job. But it’s not exactly a flop-down-and-go job either. We were reminded of this first-hand when […] Read full article at http://www.onallcylinders.com […]
I need carpet for a 1948 plymouth business coupe. Black.
Where can I find it??
It’s a 2 door.
1950 Ford Clutch and Brake pedal,Out of the Floor
Thanks