When Ford was developing the popular 221/260/289/302 cubic-inch small block V8 known as the “90-Degree Fairlane V-8,” it was also working on a lightweight inline six for the new compact Falcon and Comet coming for 1960. At the time, Ford offered huge sixes displacing 240 and 300 cubic inches, which delivered big time torque in full-sized Fords. However, a six this size was never practical for compact and intermediate-sized Fords and Mercs.
When the 144 cubic-inch six was introduced in the 1960 Falcon and Comet, it certainly delivered fuel economy. However, it did not deliver power (85 horsepower) with a 3.500-inch bore and a 2.500-inch stroke. For 1961, Ford upped the ante with 2.940-inches of stroke to achieve 170 cubic inches and 105 horsepower. For 1963, Ford introduced the 200 cubic-inch six, also with four main bearings, 3.685-inch bores, and 3.125-inches of increased stroke for 120 horsepower. Especially cool with these early Ford sixes was the glass fuel bowl Holley carburetors, which sat right over a hot exhaust manifold.
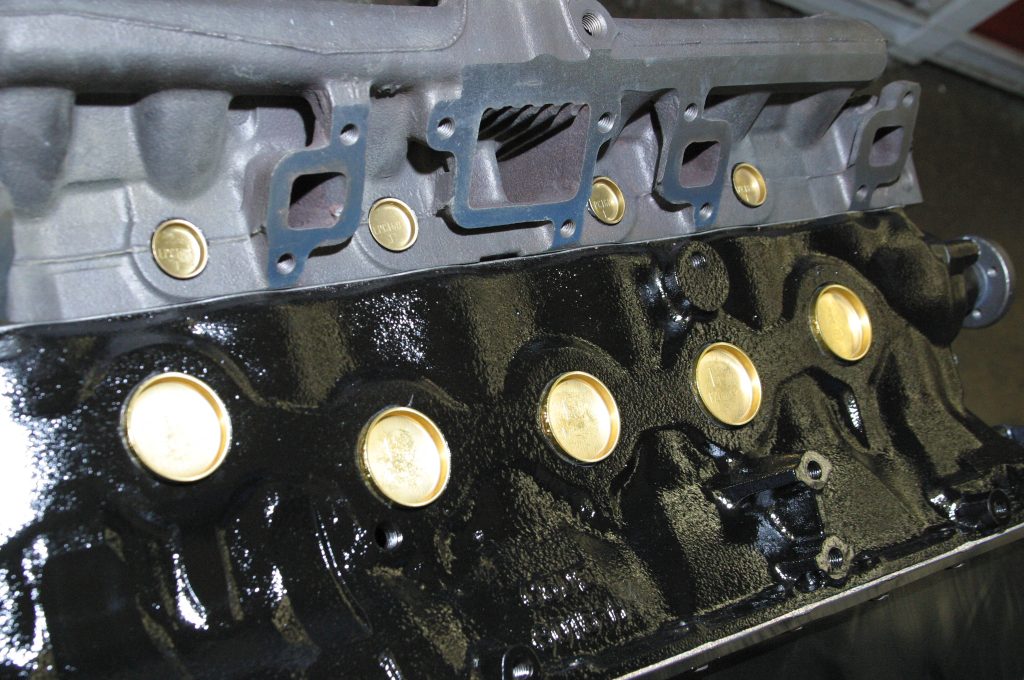
The 200 six ultimately got seven main bearings for smoothness and durability in 1965, which makes it the better variation of this engine. Unless you’re building a numbers-matching Ford classic, the seven main bearing Ford six is what you want. It can be identified by the Ford casting number, date code, and five freeze plugs.
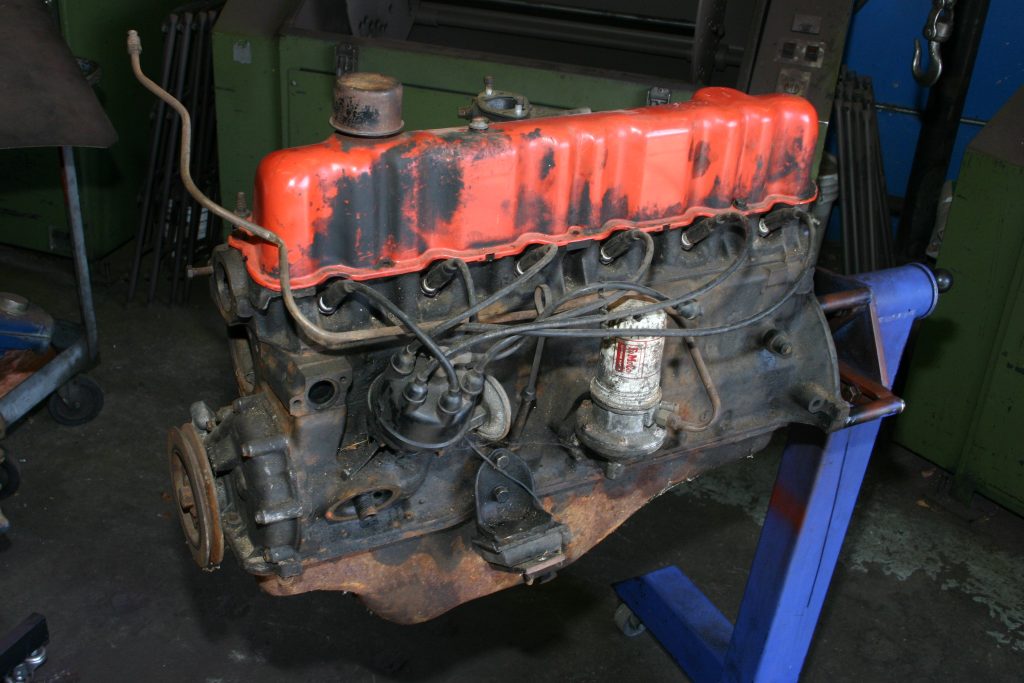
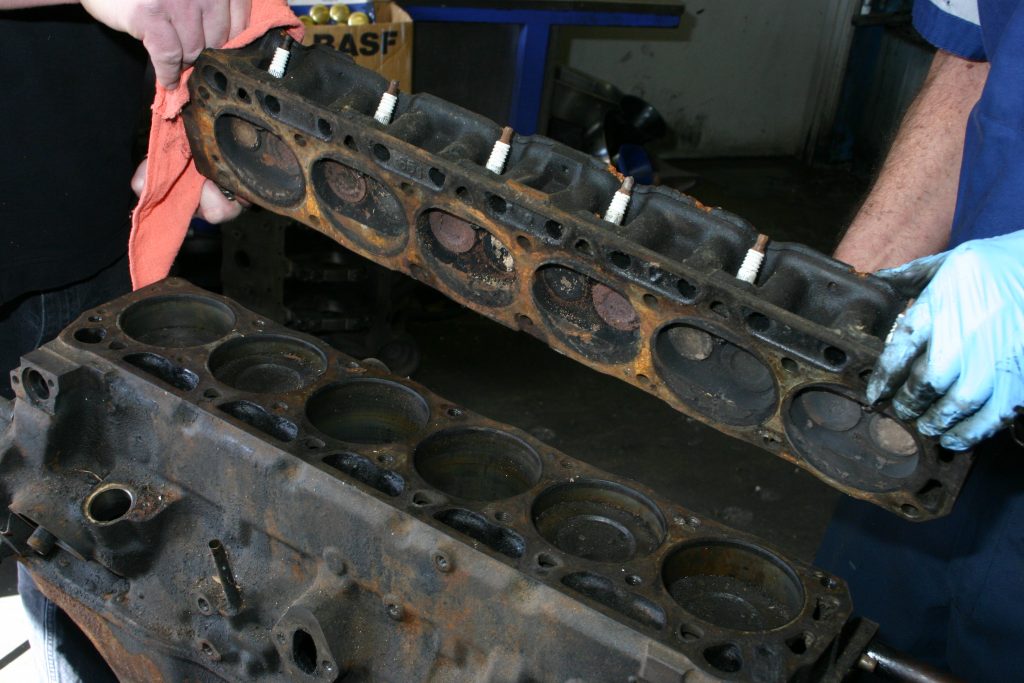
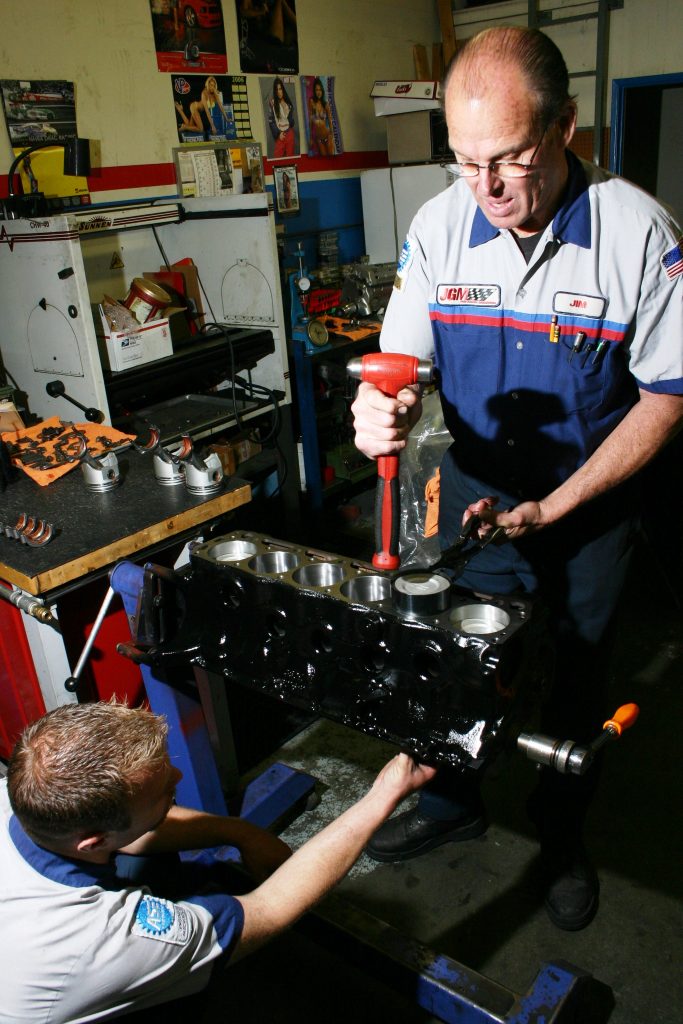
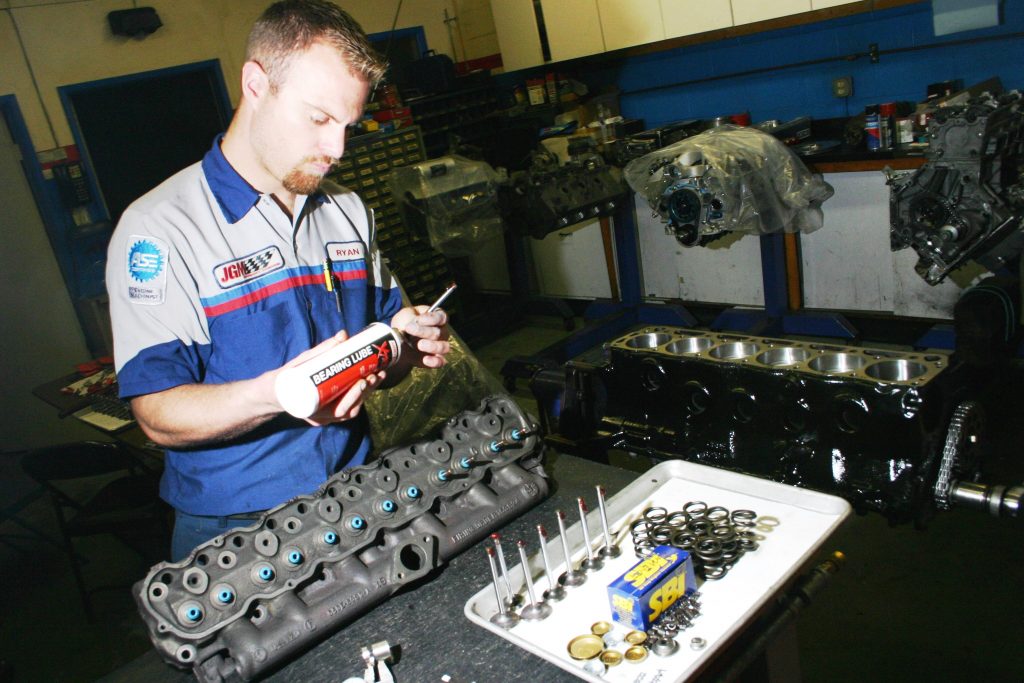
We’re working with a 1965 vintage, standard-bore Mustang six that has never been apart. What’s more, it hasn’t run since the late 1970s. We’re at JGM Performance Engineering in Valencia, California and about to rattle this thing apart. What we found tearing it apart was typical of the era in which it operated. In those days, gasoline had Tetraethyl lead for octane enhancement, which explains the sludge and carboned up combustion chambers.
Enthusiasts were alarmed when lead went away in automotive fuels in the 1980s. However, the only real concern was how critical lead was to the lubrication of exhaust valve faces and seats. When lead was banned from fuel, exhaust valves and seats eroded on vehicles driven a lot, which made a valve job necessary along with the installation of hardened steel valve seats. No big deal and easy to accomplish.
Let’s get started.
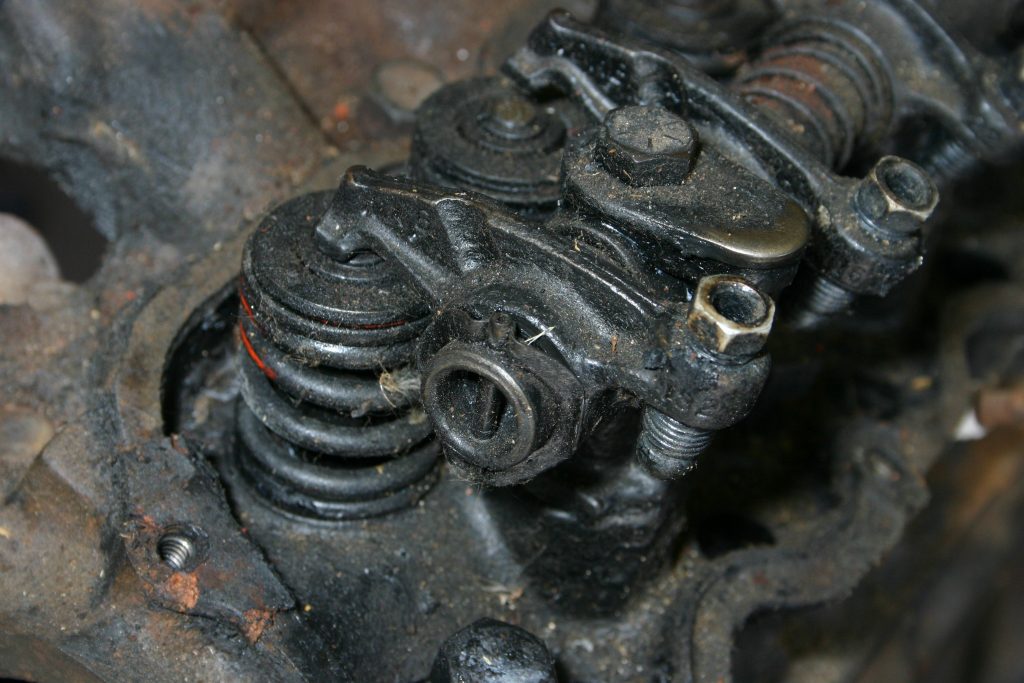
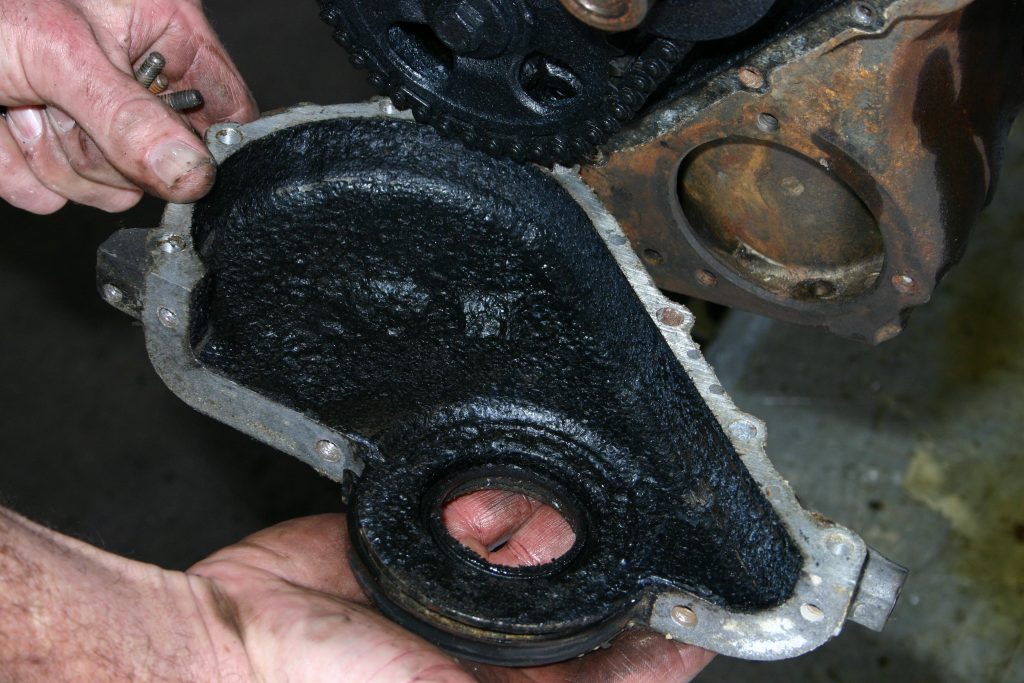
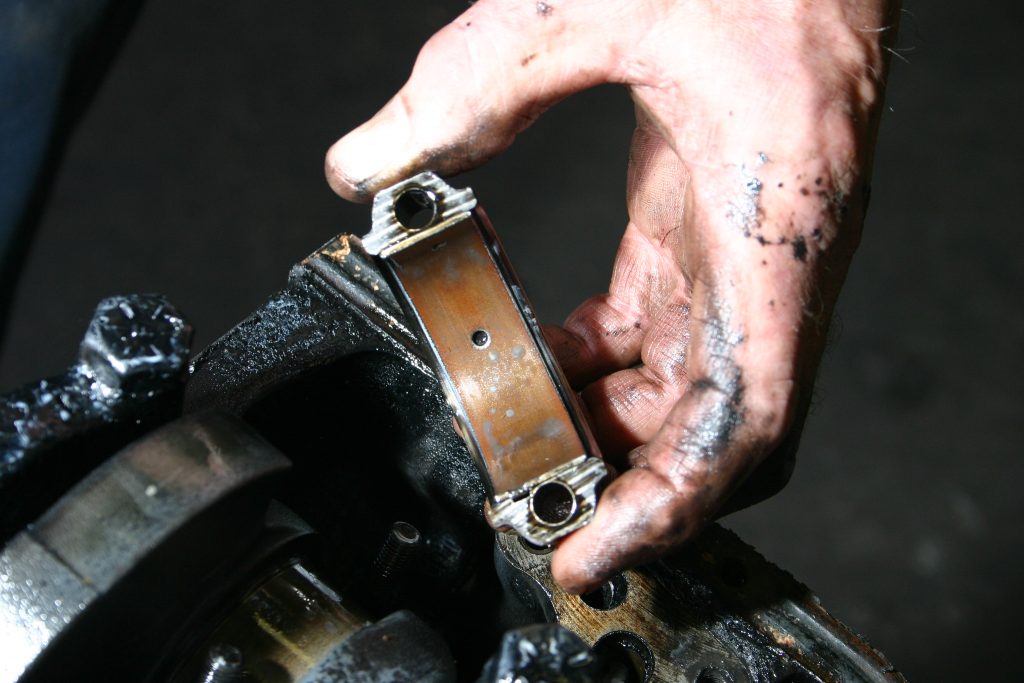
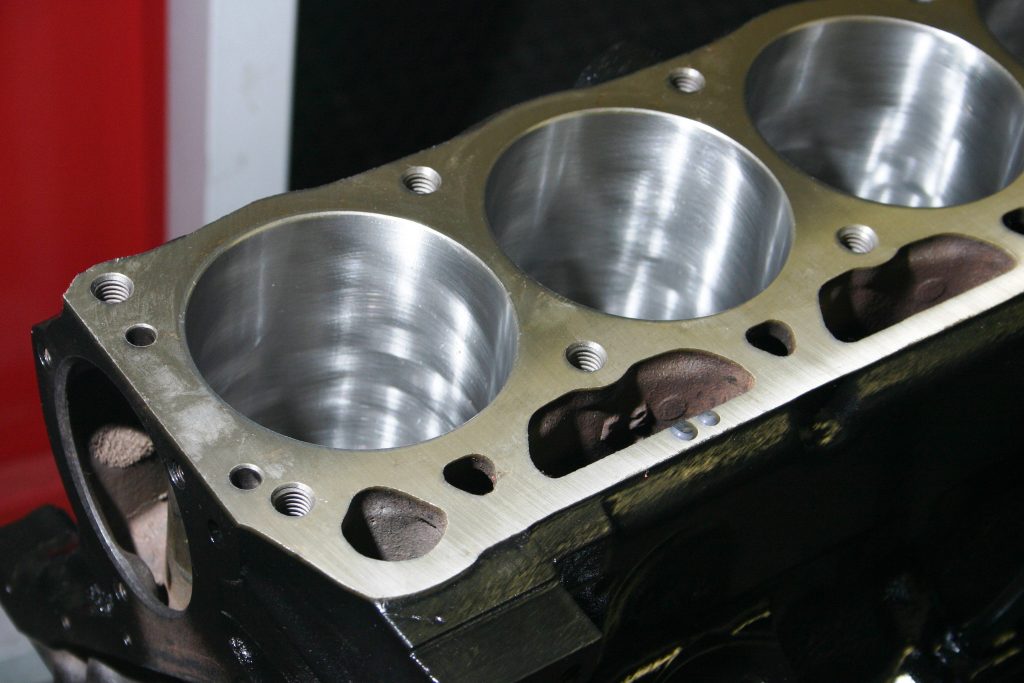
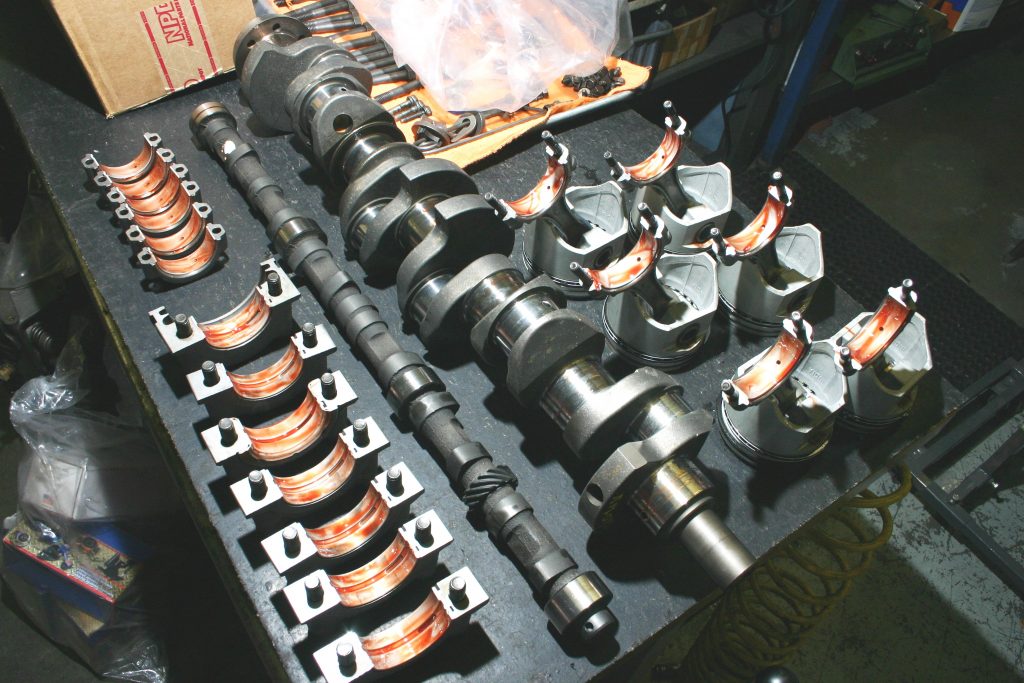
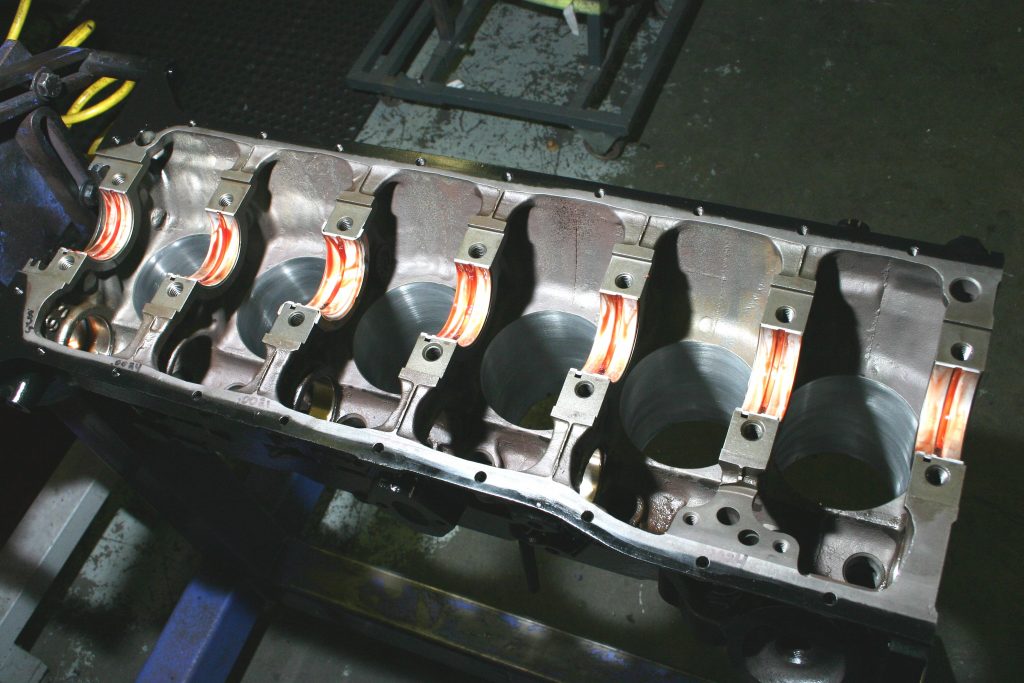
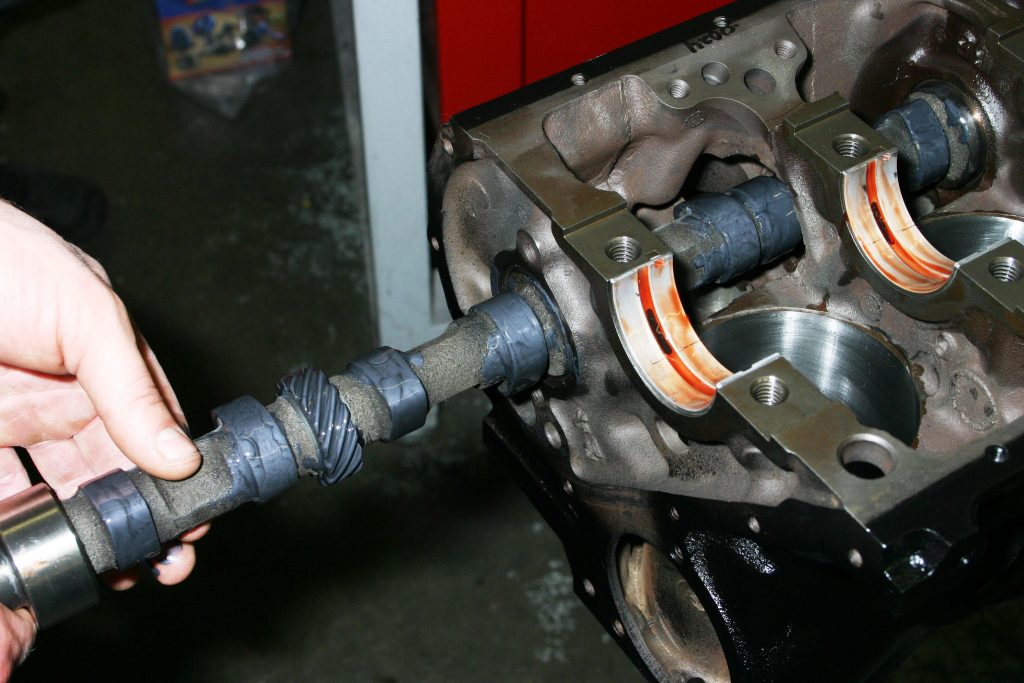
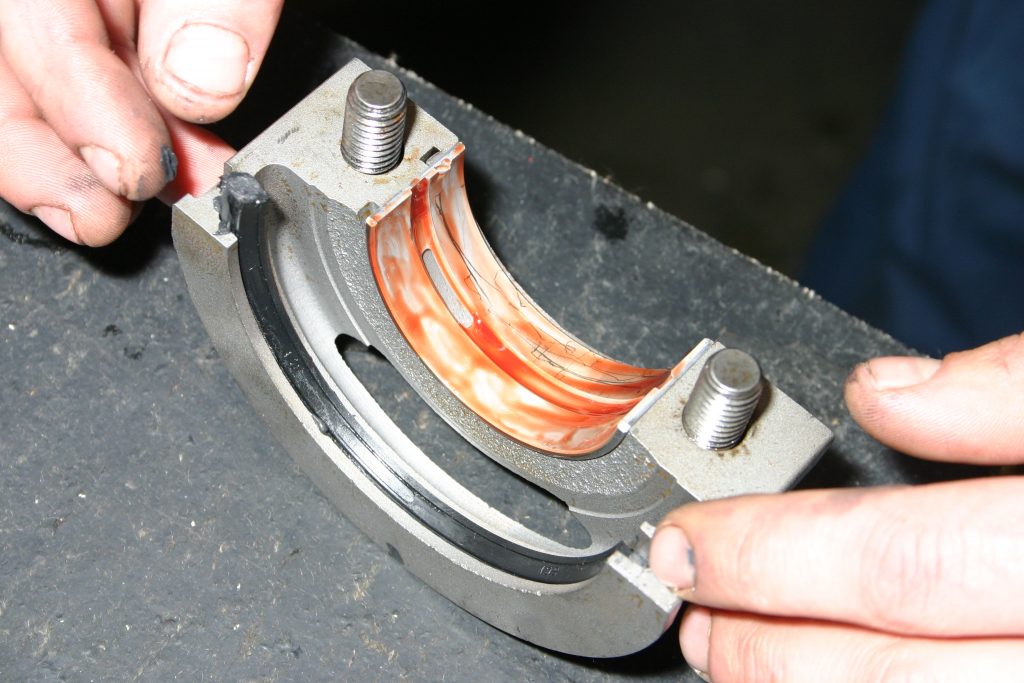
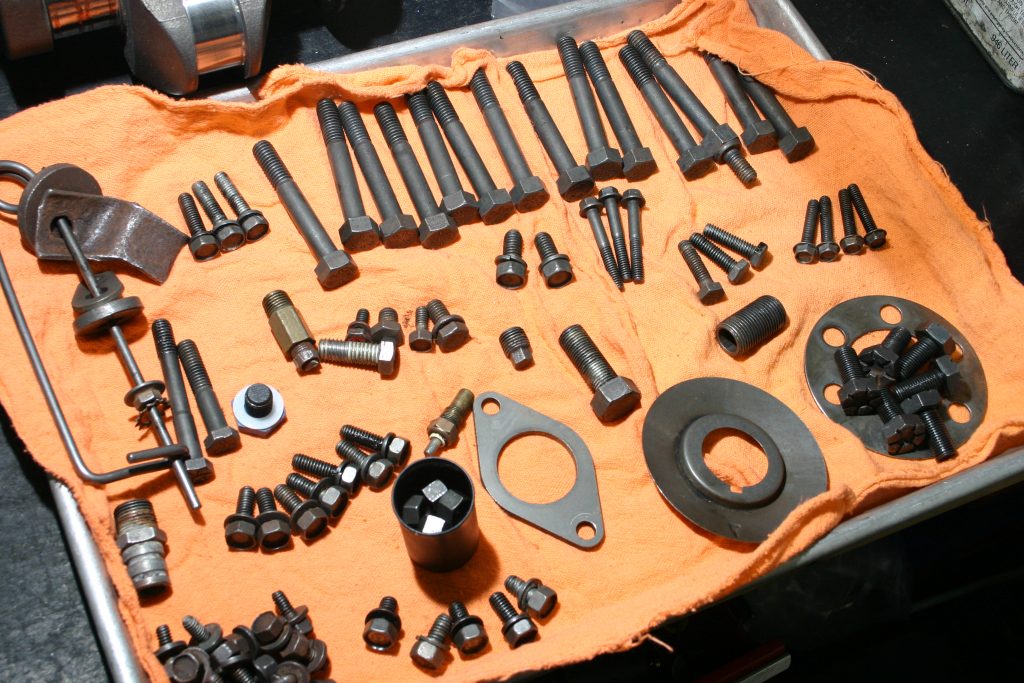
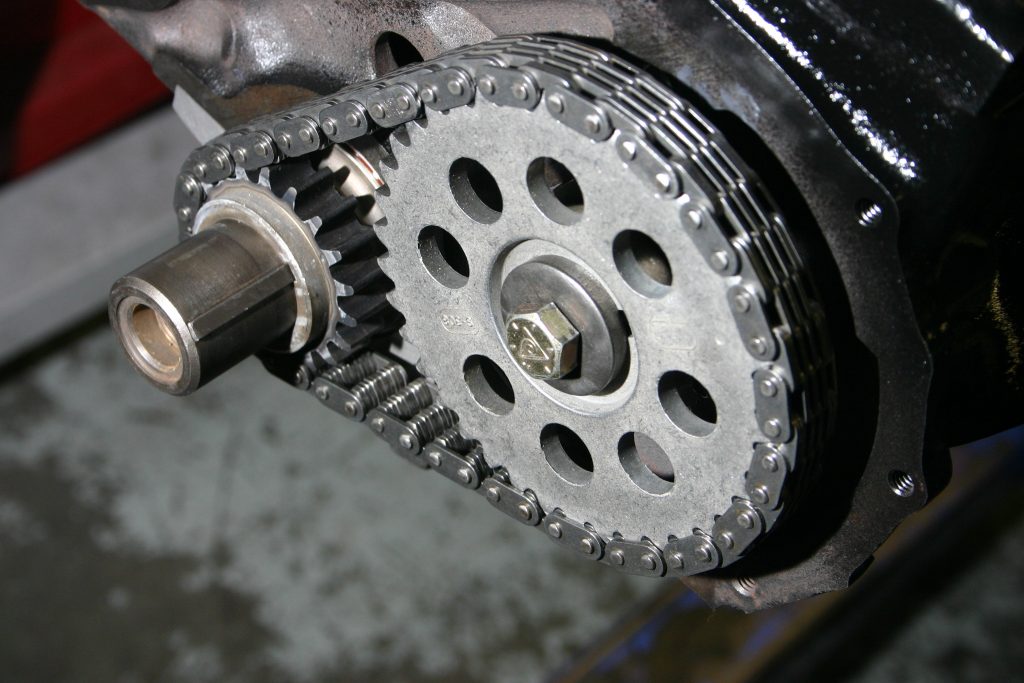
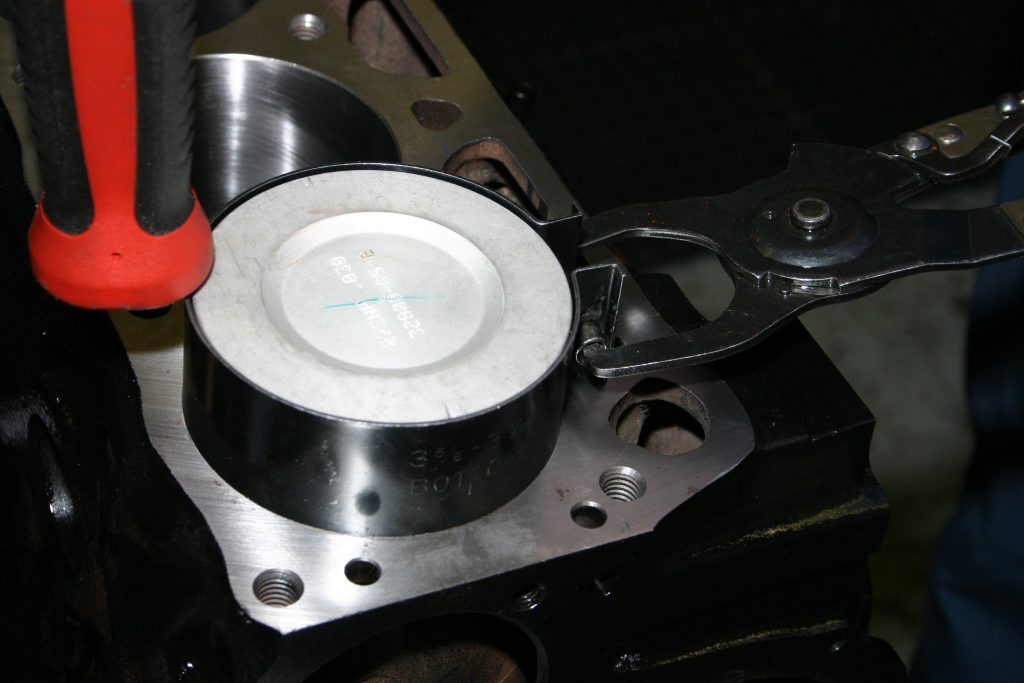
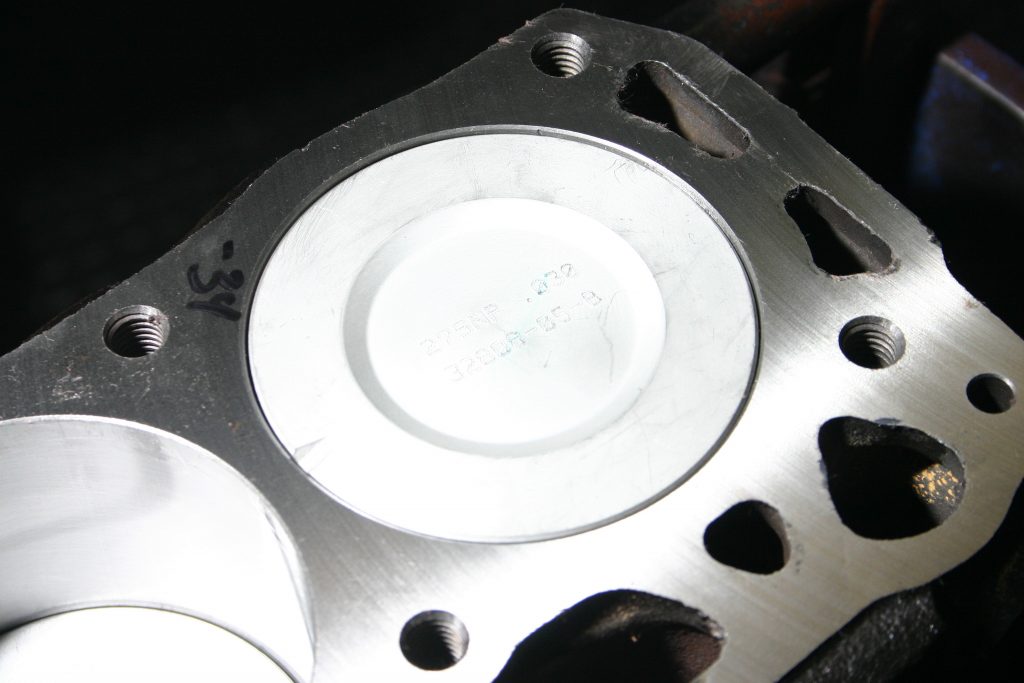
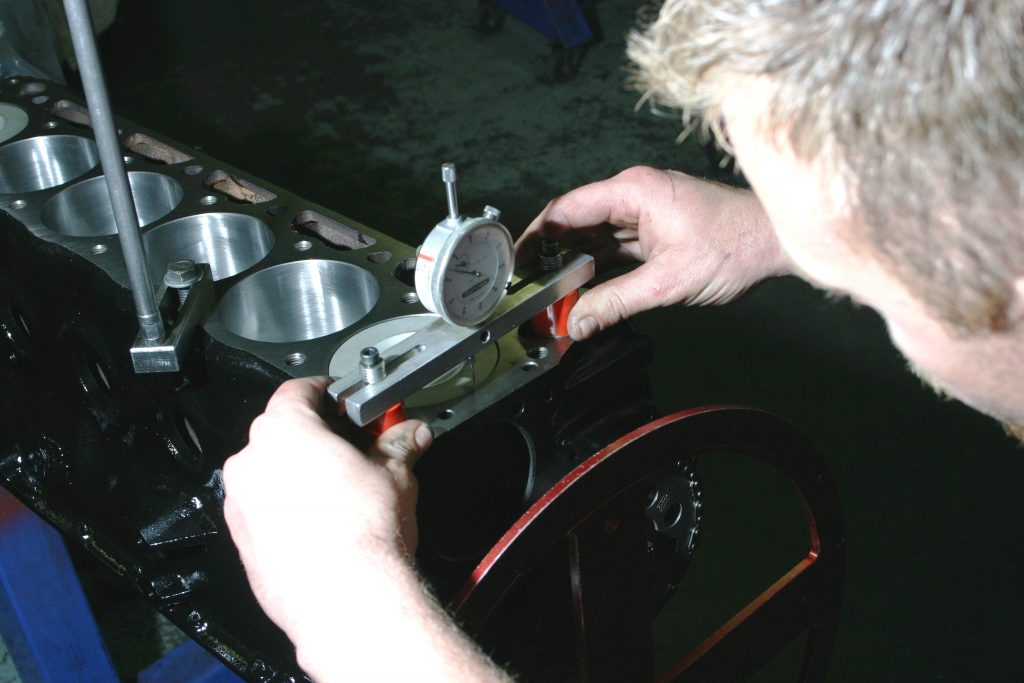
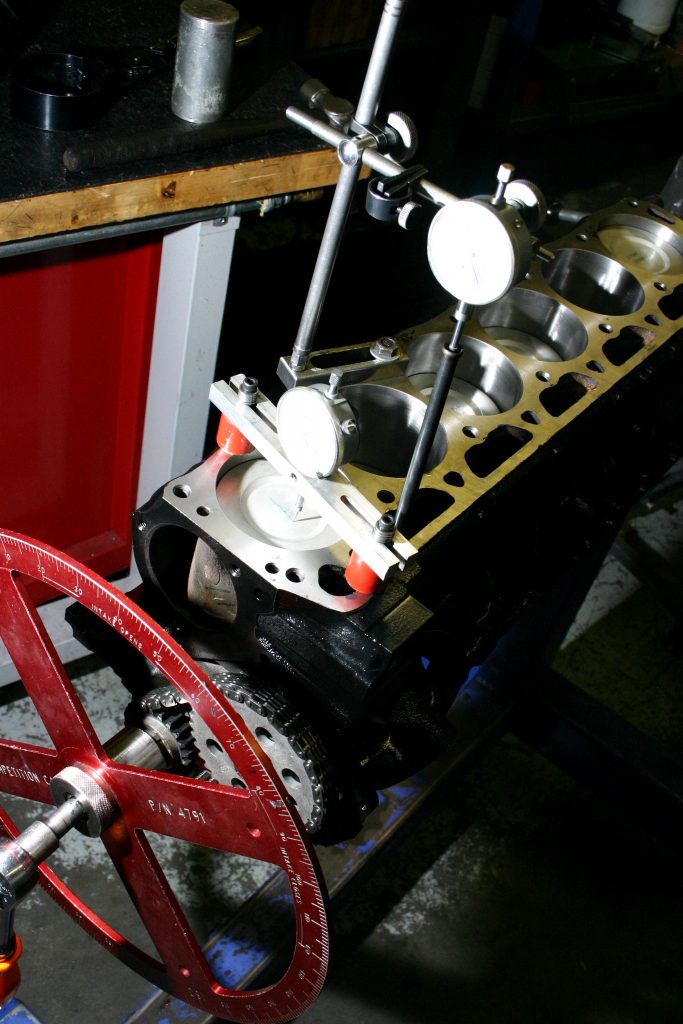
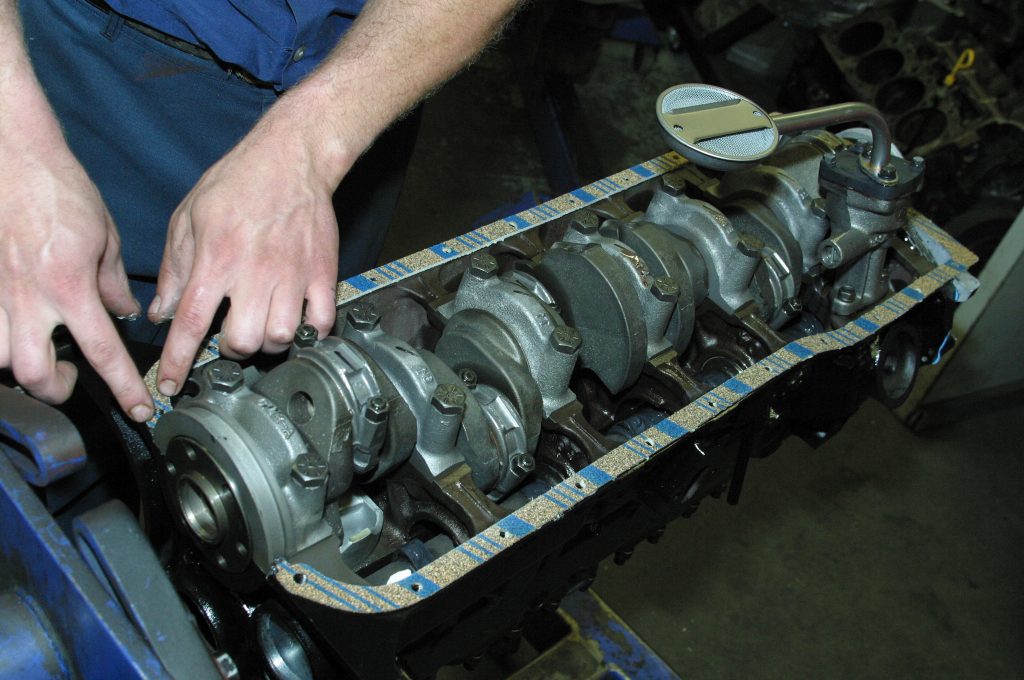
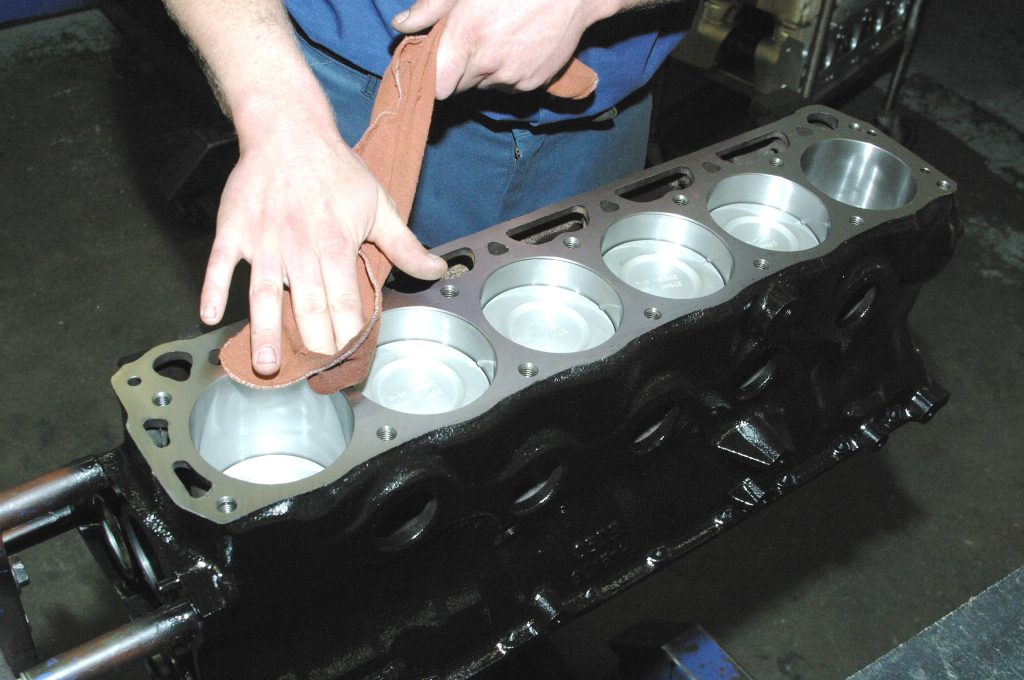
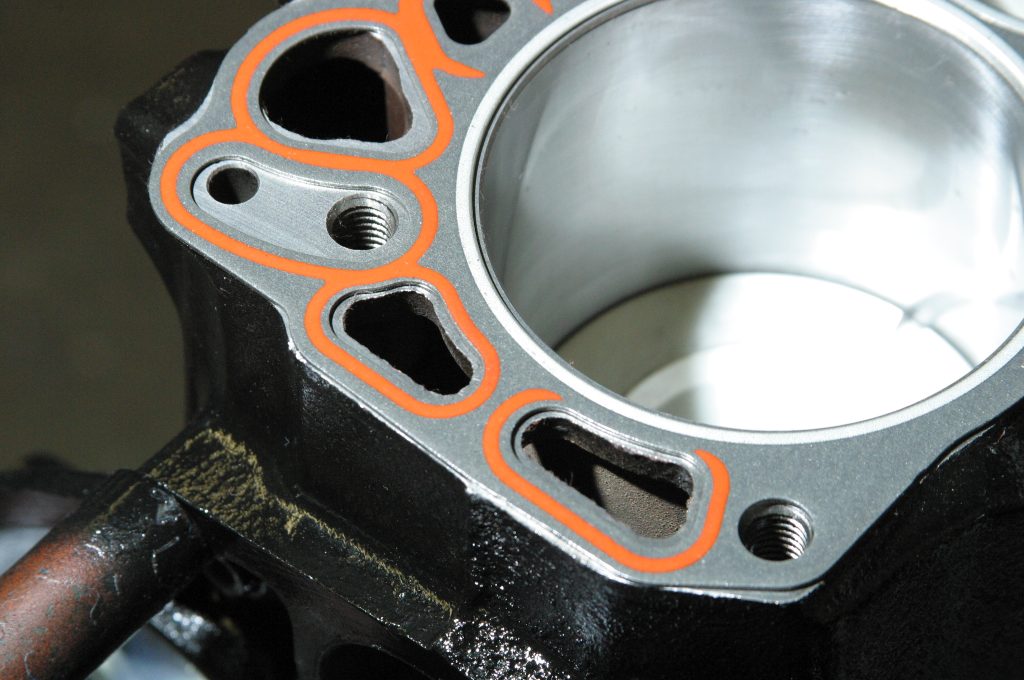
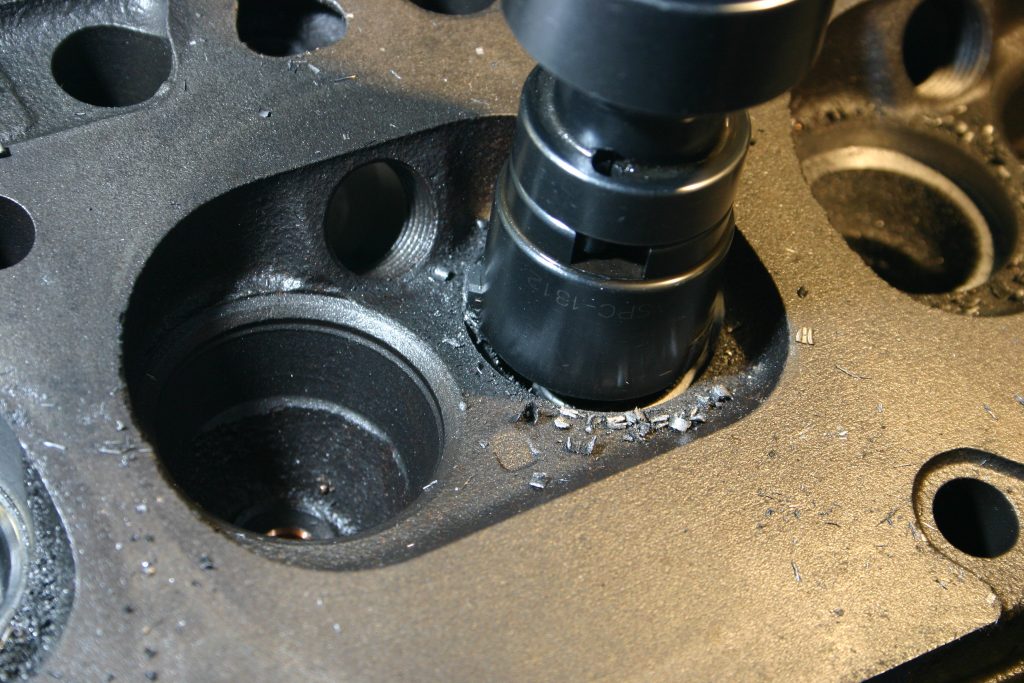
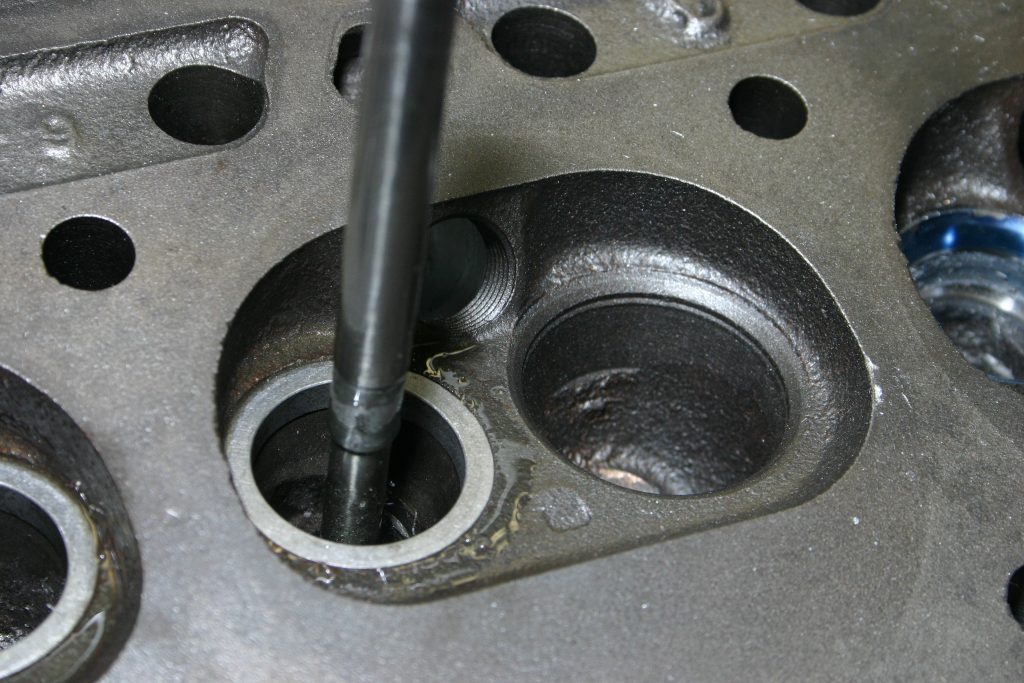
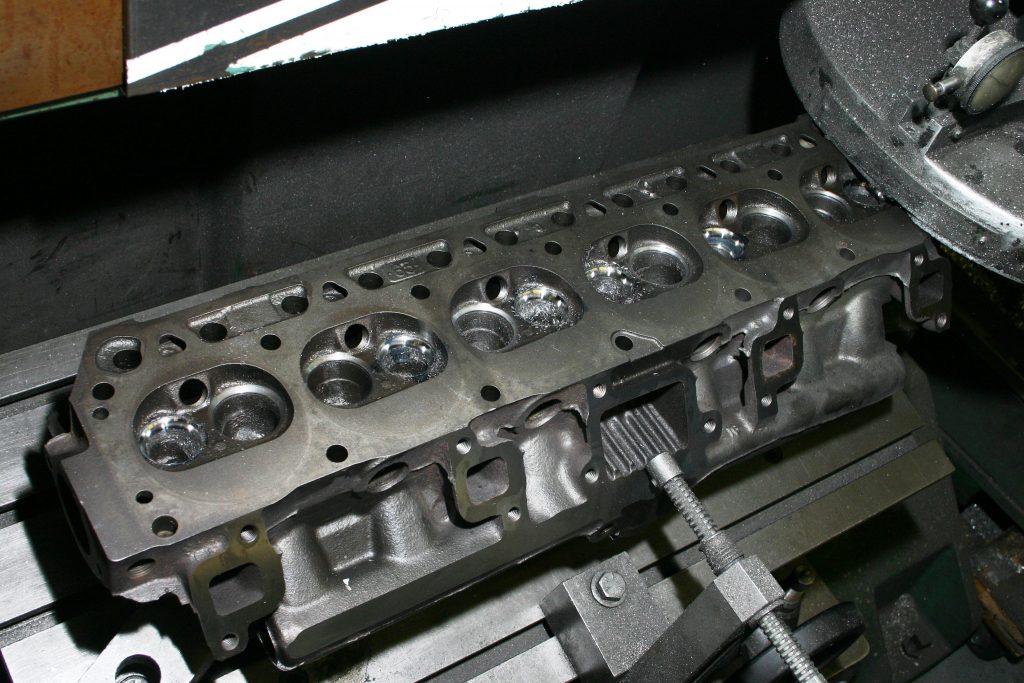
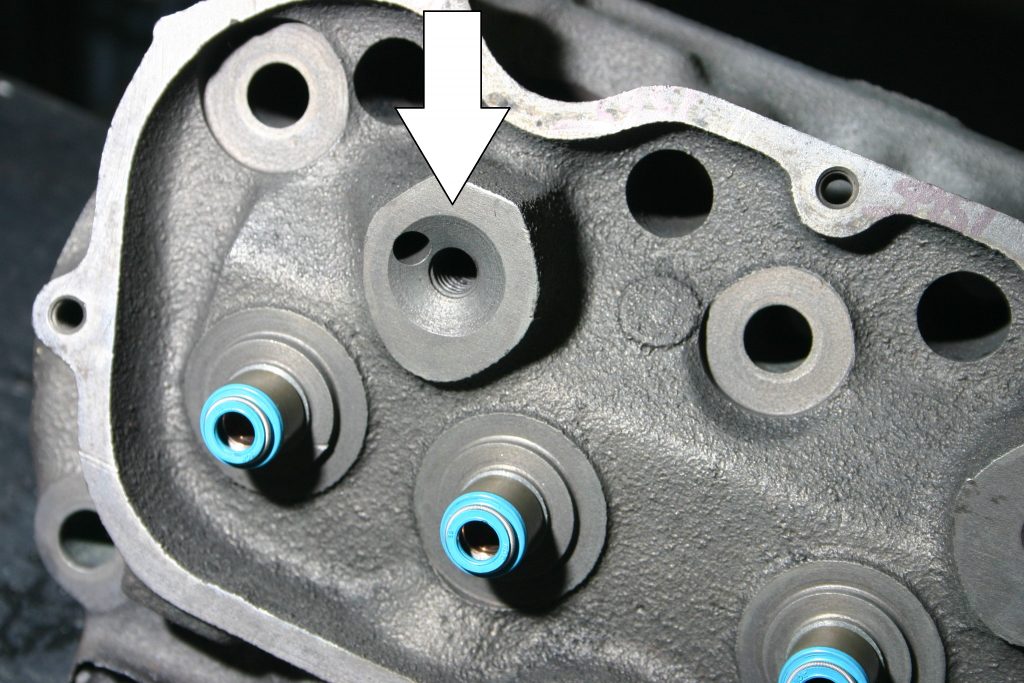
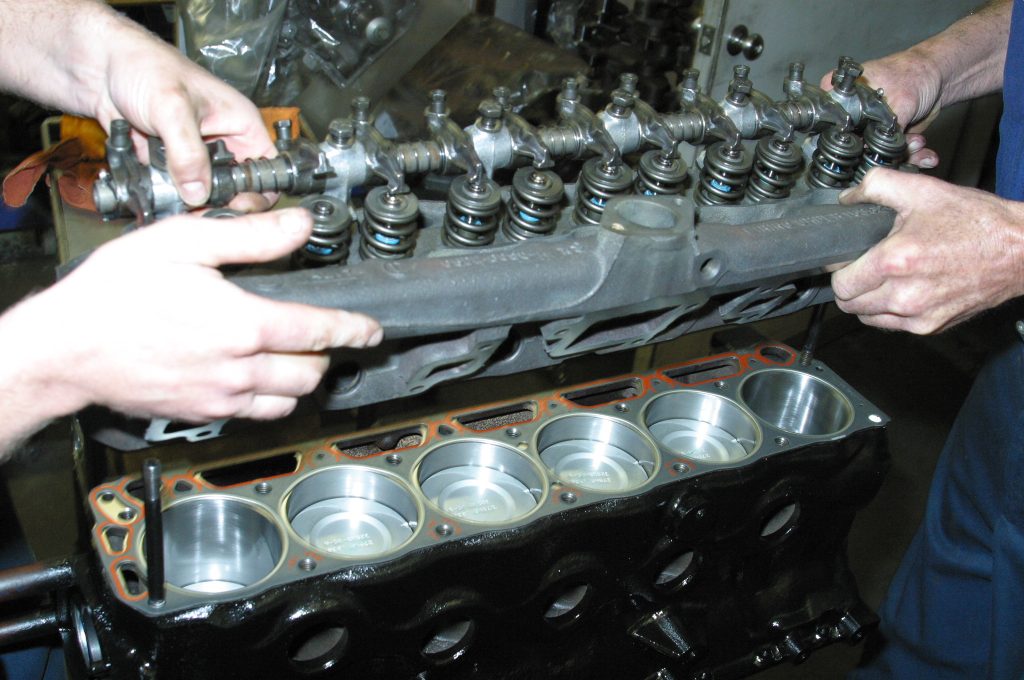
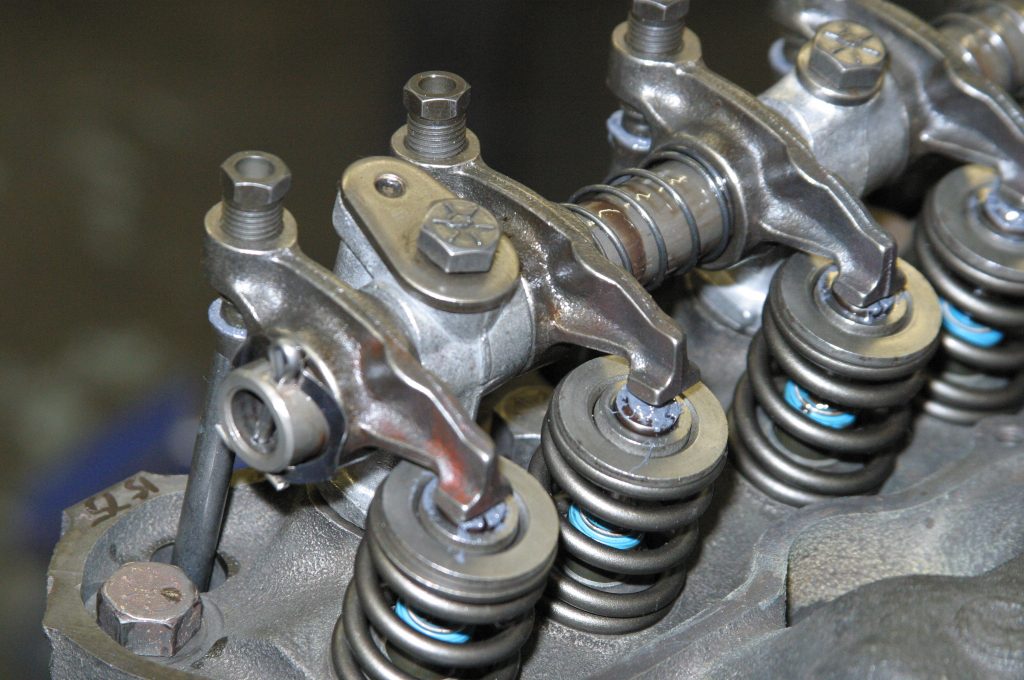
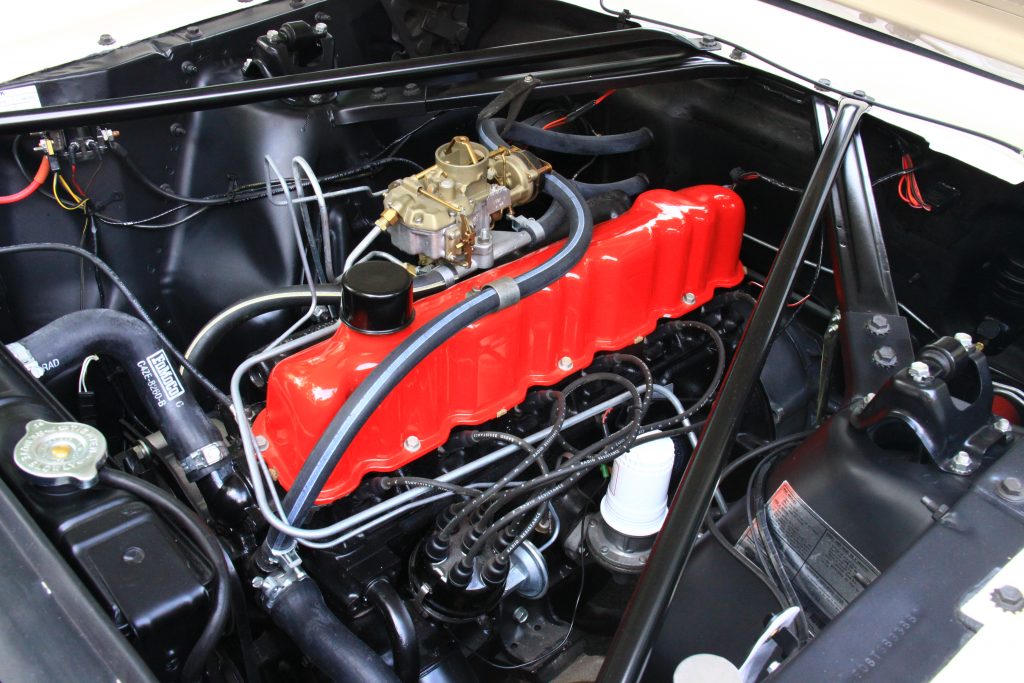
We’re working with an untouched 200ci six from one of 11 1965 Mustang convertibles displayed on Walt Disney’s Magic Skyway at the 1965 portion of the New York World’s Fair. The Wimbledon White convertible had been in storage for decades following its purchase from the original owners who bought it off the Ford Employee Resale Lot. Image/Jim SmartWe were surprised to see adjustable rocker arms on a Ford six with hydraulic lifters. We’re not completely sure if they were all this way or just some. Early 144, 170 and 200 sixes had mechanical tappets. Image/Jim Smart This thing had been sitting a long time as evidenced by the extensive rust throughout the engine. All of the castings were thermal cleaned and tumbled. Image/Jim SmartHere’s evidence of excess bearing wear in an engine that got a lot of local driving. A lot of stop and go driving and an engine that never got hot enough. Image/Jim SmartThis is the level of sludge you could expect from dated oil technology and leaded automotive fuels back in the day. Also—an engine that never really got hot on the open road. Clean synthetic engine oil and steady highway miles burn off impurities and moisture in the oil. Engines like to get good and hot, which keeps the oil cleaner. Image/Jim SmartThe block has been thermal cleaned and completely machined including decking, line honing, boring and honing along with a detailed clean-up with soap, water, and brushes. The cylinder bores were cut .025-inch oversize, then, finish-honed .005-inch. Image/Jim SmartYou can get virtually everything you’re going to need to build your 144/170/200/250ci six from Summit. Crank has been ground, rods reconditioned with new ARP bolts coupled with Speed Pro cast pistons and fresh ring packs. This is a stock Speed Pro flat tappet camshaft with new hydraulic lifters. Bearings have been dressed with Comp Cams engine assembly lube from Summit. All hardware has been inspected and is ready for a return to service. It is suggested you install new ARP cylinder head and main cap bolts. Image/Jim SmartThe best 200 block to use is the seven main bearing casting from 1965-up. The four main bearing 1963-64 block is pointless unless you’re a purist. You want durability and smoothness. Image/Jim SmartWe’ve opted for a Speed Pro stock grind flat tappet camshaft from Summit for this build. This is a stock grind right off the shelf. Cam lobes get molybdenum lube for proper break-in and work hardening. Journals get assembly lube from Summit. Roller cams get assembly lube on the lobes instead of molybdenum. Image/Jim SmartTwo-piece rear main seals tend to be chronic leakers, but not if you assembly them properly. Stagger the seal ends away from the main cap-to-block mating surfaces. Apply Permatex’s The Right Stuff to the seal ends, between the seal and cap and block, and between the main cap and block. Seal lip gets assembly lube. Image/Jim SmartTorque main caps from the center caps outward and only in one-third values. Lube all bolt threads and contact surfaces for smooth predictable torque application. By one-third values, we mean—40-45 ft/lbs, then, 55-60 ft/lbs, and finally 65-70 total. Then, go back and check final torque. Image/Jim SmartCrankshaft endplay is checked next before assembly continues. The acceptable range is .004- to -.008-inch, with a maximum of .012-inch. Excessive endplay—or not enough—can lead to engine failure. Image/Jim SmartAll hardware has been tumble-cleaned and inspected. Any marginal hardware has been replaced. Threads have been chased. Bolt holes in the block and head have been chased. It’s always a good idea to opt for ARP hardware from Summit if you’re not concerned about originality. Main caps can be studded for extraordinary strength. Rod bolts must be replaced. Always good to employ new head bolts. Image/Jim SmartA Speed Pro timing set from Summit gets valve timing events on the mark. Camshaft bolt torque is 40-45 ft/lbs with the use of a thread locker on the threads. Image/Jim SmartImage/Jim SmartSinking pistons and rods takes caution because you don’t want to tag a rod journal with the rod bolt. Rod bolts get lubed and torqued to 24-26 ft/lbs. With each piston and rod installation, turn the crank and check for freedom of movement. Image/Jim SmartPiston deck height and true top-dead-center must be checked, ideally on all six bores though you don’t have to do that. Goal here is to see how far out of the bore, or in, each piston is. Slightly out of the bore is acceptable depending upon head gasket thickness. Can’t have any more than .019-inch above the deck. Image/Jim SmartRyan Peart of JGM Performance Engineering checks true top-dead-center before dialing in cam timing events. True top-dead-center is critical to valve timing and too many of us get this wrong. You must confirm #1 piston is at true top-dead-center with the rod journal at true 12 o’clock. Image/Jim SmartValve timing events must always be checked, especially with a new camshaft. Never assume because it is new—or factory original—that it’s on the mark. We’ve seen camshafts considerably off right out of the box. Always check. Image/Jim SmartOil pumps should always be checked right out of the box. Check rotor clearances, side play, and the relief valve for freedom of movement. Then, fill the pump cavity with engine assembly lube to ensure a good wet start-up. Image/Jim SmartOil pans leaks because we get sloppy and in a hurry. Take your time and be methodical. Ensure the end seals are properly seated and secured with Permatex’s The Right Stuff. Apply a thin film of The Right Stuff between the gasket and block, but not the gasket and pan. We find builders apply too much sealer. Just a thin film will do. Image/Jim SmartBefore cylinder head installation, wipe deck and head surfaces. Ideally, you will use a tack cloth (antistatic) to catch debris. A tack cloth does a better job. Image/Jim SmartFel-Pro Print-O-Seal head gaskets from Summit do an excellent job and will outlast original copper head gaskets. Image/Jim SmartYou want to build the little Ford six for durability, which means all valves must be replaced and hardened steel exhaust valve seats installed. The original exhaust valve seat is the cast iron surface the valve contacts. That iron seat is cut out and a steel seat installed. Image/Jim SmartOnce the valve guides have been replaced or bronze lined, it’s time to install new exhaust valve seats. Image/Jim SmartThe cylinder head, like the block, is surfaced to get the deck surface true. Expect to see an increase in compression from this. Image/Jim SmartJGM uses Viton valve seals on most of its builds. The old rubber umbrella seals don’t cut the mustard anymore. Valve guides must be machined to accommodate the Viton seals. Viton seals control oil flow to the valve guides but keep excess oil out. Shaft-mounted rocker arms get their oil from this oil galley (arrow), which is the same way Ford FE Series big-blocks get valvetrain lubrication. Image/Jim SmartValve stems get assembly lube. Valve spring height and seat pressure are checked. Image/Jim SmartThe cylinder head is carefully seated in place. Hold bolts must be torque in proper order from the center out. Bolt torque is 45-55 ft/lbs, then, 55-65—and finally 65-75. Bolt threads must be lubricated prior to installation. Check final torque again. Image/Jim SmartWe were surprised to find adjustable rocker arms on a Ford six with hydraulic flat tappets. Valve adjustment is generally based on pushrod length. Image/Jim Smart This is the block you want, with seven main bearings. Seven main bearing blocks have five freeze plugs. Image/Jim SmartWhen you fire your 144/170/200/250 cubic-inch six for the first time, get the rpms up to 2500 and let it run at speed for at least 30 minutes to seat bearings and rings, and work-harden the cam lobes. Change oil at 1,000 miles and use synthetic. Image/Jim Smart
Jim Smart is a veteran automotive journalist, technical editor, and historian with hundreds of how-to and feature articles to his credit. Jim's also an enthusiast, and has owned and restored many classic vehicles, including an impressive mix of vintage Ford Mustangs.
Comments
23 responses to “How to Build a Ford Inline Six Engine for Durability and Power”
I would have opted for a mild performance camshaft if any are available. Also a dyno test would have been interesting to see if the advertised horsepower was achieved or exceeded. JMHO
[…] When Ford was developing the popular 221/260/289/302 cubic-inch small block V8 known as the “90-Degree Fairlane V-8,” it was also working on a lightweight inline six for the new compact […] Read full article at http://www.onallcylinders.com […]
cc the heads 1st, degree those cams, 3> valve jobs, do not zero deck the 4.1, pick the right cam & CR for your use/octaine, build the engine around that… https://www.youtube.com/watch?v=gg_VFXm827w
The best engine ever our 69 had the best gas mileage and power we could lay rubber for two city blocks as long as Dad didn’t catch us the 300 should still be made loved that engine on the farm now I have a 2.0l equal boost and we love it
Just purchased a 64 Ford Falcon with a 65 200 inline six. I’m just about ready to pull this engine and go over the whole thing. I wish you had mentioned the horse power after the engine was finished. I would love to have more than 1 pony per cubic inch.
Most online parts are out of stock on this engine. Vintage inlines especially with the parts I need for my build.
You never mentioned the carburetor which was typically the Autolite 1100 and the horrible log style manifold. Also the terrible exhaust that share ports. What about using 302 valve springs ? How about putting 1.75 & 1.5 intake & exhaust valves ???
Nice site. Should have seen it before I put together my 200. (65 Mustang)
I am concerned with the high compression pressure 170lbs for a non- hyped engine (standard road car). At Denver altitude, approx 12.2lbs atmospheric pressure, that calculates to close to 14/1 compression ratio.
Machinist milled head and block surfaces to flatten, his recommendation…
I have built the engine for economy, wanting to get approx 30mpg (driving at 60 mph steady pedal). I installed duel exhaust header to improve engine breathing effort…
I don’t work on enough engines (approx 1 every 15 yrs) to be familiar enough to determine if that pressure is maybe the high end of acceptable. Not interested in burning it up or exotic ignition/carburation…
The Load’O’Matic distributor which does not have mechanical advance is a big performance hindrance on pre-1968 federal emission and pre-1966 California emission 170-200 ford six cylinder engines. A cheap cure is a China made HEI distributor with the vacuum advance connected to manifold vacuum. These 5/16′ oil pump drive distributors will not fit pre-1965 Ford sixes with the 1/4″ oil pump drive. A 200 with a stock Enginetech 256 cam can be made to rev to 5,300 rpm. I can shift my C4 out low at 45, 2nd at up to 80-85 with 3.25 gears. Exhaust is 1968 manifold with 2″ outlet, 2″ pipe and offset at both ends cheap turbo muffler. Carb is a Carter BBD 2v high top 1977 or so. Head is a 1978 200 large log.
Do you have the carb spacer with heater lines flowing through it? You should, if not – get it.
Ensure the heater core is not plugged, that can reduce flow in the spacer.
Advance your timing, this will reduce exhaust temp (and improve HP.
Use non-ethanol fuel, it has a lower boiling point.
If someone upsized your fuel line, go back to stock.
You should not need insulation on yoru fuel line, but if you can’t figure out the ‘smoking gun’ then insulate the fuel lines under hood.
Good luck.
Hello! Solved the problem by installing a fuel return line using a “T” fitting just before the carburetor. Used a pre-bent fuel line back to the fuel tank for the return flow. The stock fuel pump has no issues keeping up. Hope this helps.
Fuel today has a much lower boiling point than in years past. In my area of the country (Detroit) my test indicate winter blend gasoline will boil at 117 degrees Fahrenheit. Not an issue for modern engines as the fuel is always under pressure from the in-tank fuel pump to the injectors.
After cruising at highway speeds (70 mph+) for extended periods during the summer then stopping I still get some boiling in the carburetor bowl (I have a glass bowl so it’s visible). To get it to stop boiling sooner I’ve installed an electric water pump and electric fan – both run automatically until the coolant temperature drops to a preset temperature.
I am going to try to eliminate the carburetor bowl boiling by installing a V8 radiator for a 289 conversion (it will fit because I eliminated the mechanical water pump by using an electric water pump). So when stopping after a long high-speed run I might be able to cool the fuel in the float bowl below its boiling point.
I have a 74 bronco with a 200 inline 6 with a stock YF7130… the POrebuilt it but I don’t have any specs. Looking for a carb… any help would be appreciated.
I am rebuilding a 1965 Mustang 200ci engine. It has the adjustable rocker arm studs. A couple are loose and turn easy. Do you know of a resource that sells the rocker arm adjustment studs?
1962 Ford Falcon 170 CI falcon engine that was rebuilt years ago. Engine rebuilder told me that the Harmoic Balancer need seal replacement. Getting ready to put rebuilt engine into the car. Question does the balancer damper or cover have an oil seal or is it the crankshaft front main seal? Thanks
I’m having a hard time finding timing specs for my 63′ 170 I6. Should I just purchase a timing light and check where it currently is or just mark where the distributor is set, then experiment with a little more retardation? It’s a little jerky at the lower rpm’s but comes to life at 2500 rpms. It has a stock 1 bbl. that’s been rebuilt. A new fuel pump that is regulated. Experimenting with that as well. I apologize if these questions are out of line for this forum.


I would have opted for a mild performance camshaft if any are available. Also a dyno test would have been interesting to see if the advertised horsepower was achieved or exceeded. JMHO
[…] When Ford was developing the popular 221/260/289/302 cubic-inch small block V8 known as the “90-Degree Fairlane V-8,” it was also working on a lightweight inline six for the new compact […] Read full article at http://www.onallcylinders.com […]
These engines deserve more credit than they get as viable candidates for a nice performance makeover.
Right arm, man.
cc the heads 1st, degree those cams, 3> valve jobs, do not zero deck the 4.1, pick the right cam & CR for your use/octaine, build the engine around that…
https://www.youtube.com/watch?v=gg_VFXm827w
The best engine ever our 69 had the best gas mileage and power we could lay rubber for two city blocks as long as Dad didn’t catch us the 300 should still be made loved that engine on the farm now I have a 2.0l equal boost and we love it
Just purchased a 64 Ford Falcon with a 65 200 inline six. I’m just about ready to pull this engine and go over the whole thing. I wish you had mentioned the horse power after the engine was finished. I would love to have more than 1 pony per cubic inch.
Most online parts are out of stock on this engine. Vintage inlines especially with the parts I need for my build.
Do you guys know where to get a stroker kit for a 1965 200ci 3.3l.
You never mentioned the carburetor which was typically the Autolite 1100 and the horrible log style manifold. Also the terrible exhaust that share ports. What about using 302 valve springs ? How about putting 1.75 & 1.5 intake & exhaust valves ???
Nice site. Should have seen it before I put together my 200. (65 Mustang)
I am concerned with the high compression pressure 170lbs for a non- hyped engine (standard road car). At Denver altitude, approx 12.2lbs atmospheric pressure, that calculates to close to 14/1 compression ratio.
Machinist milled head and block surfaces to flatten, his recommendation…
I have built the engine for economy, wanting to get approx 30mpg (driving at 60 mph steady pedal). I installed duel exhaust header to improve engine breathing effort…
I don’t work on enough engines (approx 1 every 15 yrs) to be familiar enough to determine if that pressure is maybe the high end of acceptable. Not interested in burning it up or exotic ignition/carburation…
Check out Clifford performance headers, cam, and adapter and 2 barrel carb.
The Load’O’Matic distributor which does not have mechanical advance is a big performance hindrance on pre-1968 federal emission and pre-1966 California emission 170-200 ford six cylinder engines. A cheap cure is a China made HEI distributor with the vacuum advance connected to manifold vacuum. These 5/16′ oil pump drive distributors will not fit pre-1965 Ford sixes with the 1/4″ oil pump drive. A 200 with a stock Enginetech 256 cam can be made to rev to 5,300 rpm. I can shift my C4 out low at 45, 2nd at up to 80-85 with 3.25 gears. Exhaust is 1968 manifold with 2″ outlet, 2″ pipe and offset at both ends cheap turbo muffler. Carb is a Carter BBD 2v high top 1977 or so. Head is a 1978 200 large log.
I’ve never found a suitable fix for the terrible vapor lock on my ‘65 200 in six. I just can’t drive it if the temp is over 80 degrees F
Do you have the carb spacer with heater lines flowing through it? You should, if not – get it.
Ensure the heater core is not plugged, that can reduce flow in the spacer.
Advance your timing, this will reduce exhaust temp (and improve HP.
Use non-ethanol fuel, it has a lower boiling point.
If someone upsized your fuel line, go back to stock.
You should not need insulation on yoru fuel line, but if you can’t figure out the ‘smoking gun’ then insulate the fuel lines under hood.
Good luck.
Hello! Solved the problem by installing a fuel return line using a “T” fitting just before the carburetor. Used a pre-bent fuel line back to the fuel tank for the return flow. The stock fuel pump has no issues keeping up. Hope this helps.
Fuel today has a much lower boiling point than in years past. In my area of the country (Detroit) my test indicate winter blend gasoline will boil at 117 degrees Fahrenheit. Not an issue for modern engines as the fuel is always under pressure from the in-tank fuel pump to the injectors.
After cruising at highway speeds (70 mph+) for extended periods during the summer then stopping I still get some boiling in the carburetor bowl (I have a glass bowl so it’s visible). To get it to stop boiling sooner I’ve installed an electric water pump and electric fan – both run automatically until the coolant temperature drops to a preset temperature.
I am going to try to eliminate the carburetor bowl boiling by installing a V8 radiator for a 289 conversion (it will fit because I eliminated the mechanical water pump by using an electric water pump). So when stopping after a long high-speed run I might be able to cool the fuel in the float bowl below its boiling point.
You can use a 240/300 distributor and gain mech advance. Use the same timing tricks used on sm block distributors
what was the camshaft specs?
need to put a 2v head on it to get it singing!
I have a 74 bronco with a 200 inline 6 with a stock YF7130… the POrebuilt it but I don’t have any specs. Looking for a carb… any help would be appreciated.
Hello,
I am rebuilding a 1965 Mustang 200ci engine. It has the adjustable rocker arm studs. A couple are loose and turn easy. Do you know of a resource that sells the rocker arm adjustment studs?
Thanks, Tom
1962 Ford Falcon 170 CI falcon engine that was rebuilt years ago. Engine rebuilder told me that the Harmoic Balancer need seal replacement. Getting ready to put rebuilt engine into the car. Question does the balancer damper or cover have an oil seal or is it the crankshaft front main seal? Thanks
I’m having a hard time finding timing specs for my 63′ 170 I6. Should I just purchase a timing light and check where it currently is or just mark where the distributor is set, then experiment with a little more retardation? It’s a little jerky at the lower rpm’s but comes to life at 2500 rpms. It has a stock 1 bbl. that’s been rebuilt. A new fuel pump that is regulated. Experimenting with that as well. I apologize if these questions are out of line for this forum.