It’s a sign of the times when late model engines with distributorless ignition systems (DIS) no longer require the services of the ubiquitous timing light. But for the remainder of the performance world that does rely on distributors, a timing light is an essential tuning device.
Over the course of decades of technical writing, we’ve discovered that not everybody understands how a timing light functions and the insights it can offer on the state of tune of your engine.
We’ll start with the basic light and then move on to the more sophisticated dial-back versions and how they function. A simple timing light is really nothing more than a stroboscope designed to flash when triggered by the spark from the engine’s Number one cylinder.
That stroboscopic flash is intended to ‘freeze’ the location of the timing mark on the harmonic balancer relative to a timing tab usually attached to the engine’s front timing chain cover.
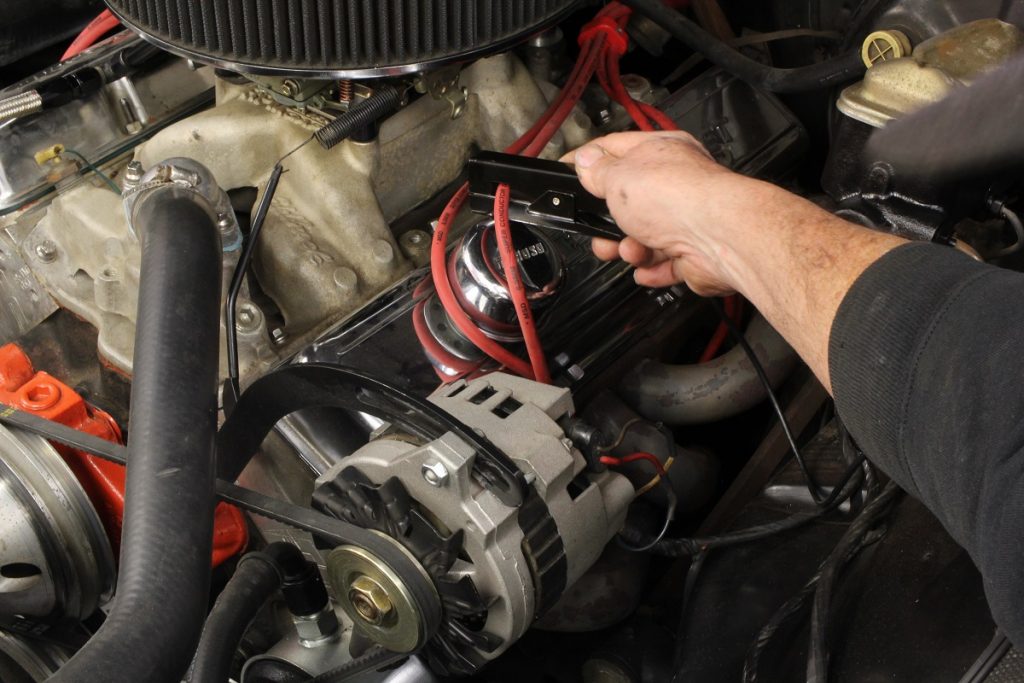
In the old days, all timing lights used a small spring that fit between the spark plug and the plug wire that was connected by a clamp to send a high-voltage trigger to the light. Your grandfather might have one of those lying around his shop. All guns today use an inductive pickup that surrounds the plug wire and picks up the electro-magnetic energy that surrounds the plug as the voltage passes through the plug wire.
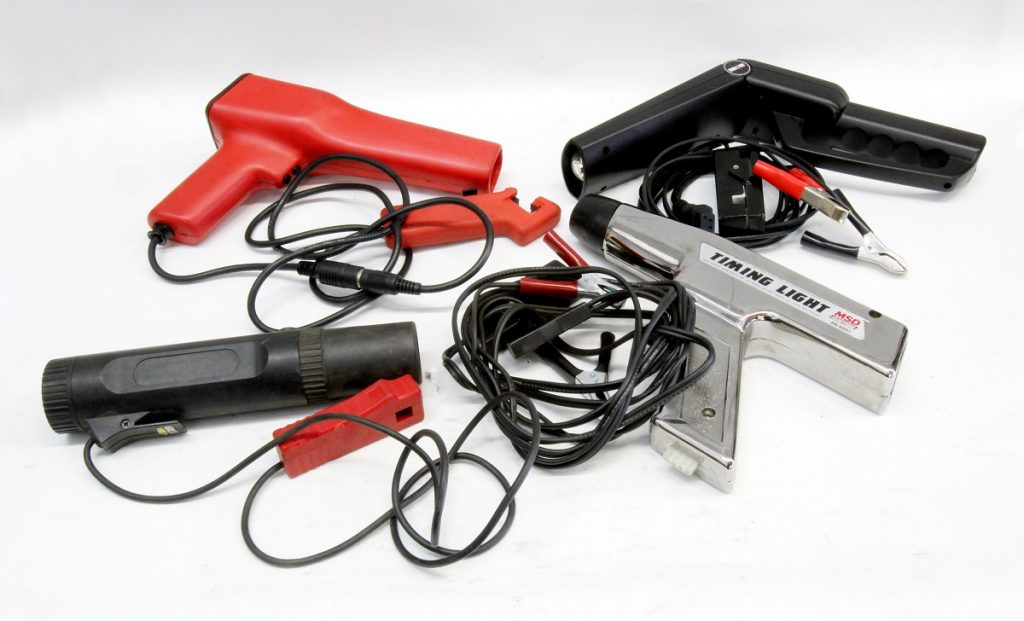
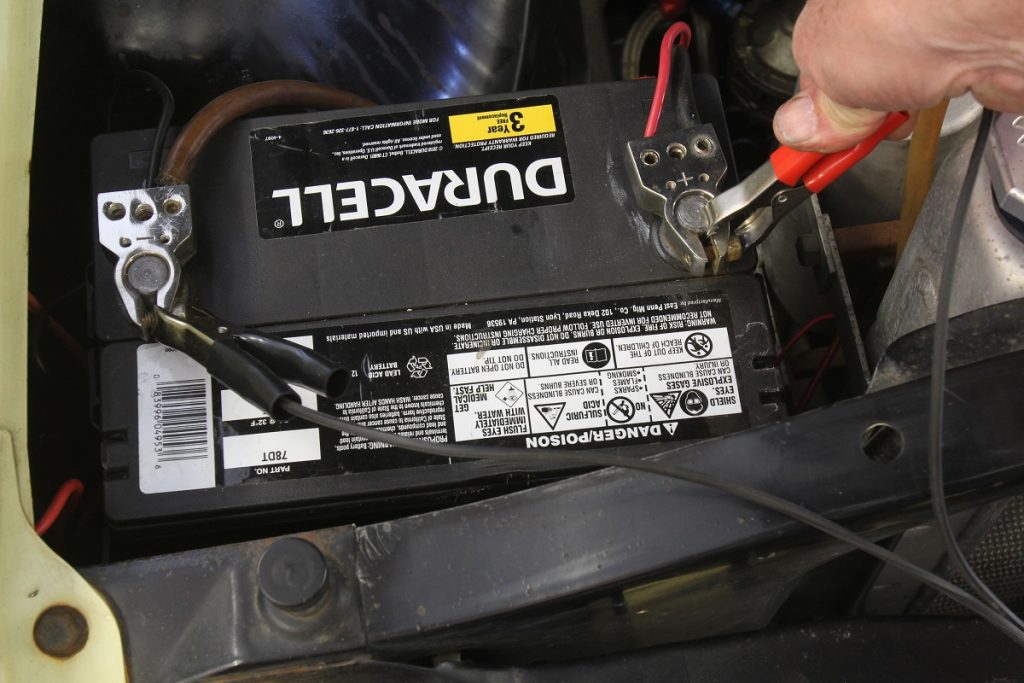
Timing lights can be described in a number of ways, so let’s go over that with a short description of each. The simplest timing lights are self-powered. These lights use batteries in the body of the light that amplifies the signal from the inductive pickup on the plug wire. The most common form of timing lights powered by a simple pair of clamps hooked to a 12-volt battery source.
The next level up from a basic timing light is what is called a dial-back light. These timing lights use electronics to delay the onset of the spark based on how much delay is dialed in on the light. Original dial-back lights used a simple dial with a timing scale.
The more sophisticated electronic dial-back lights offer a digital screen usually at the back of the gun that will display rpm and the amount of timing delayed. Upscale versions will also display battery voltage.
Before we get into how to use a dial-back light, we should run through why they are needed in the first place.
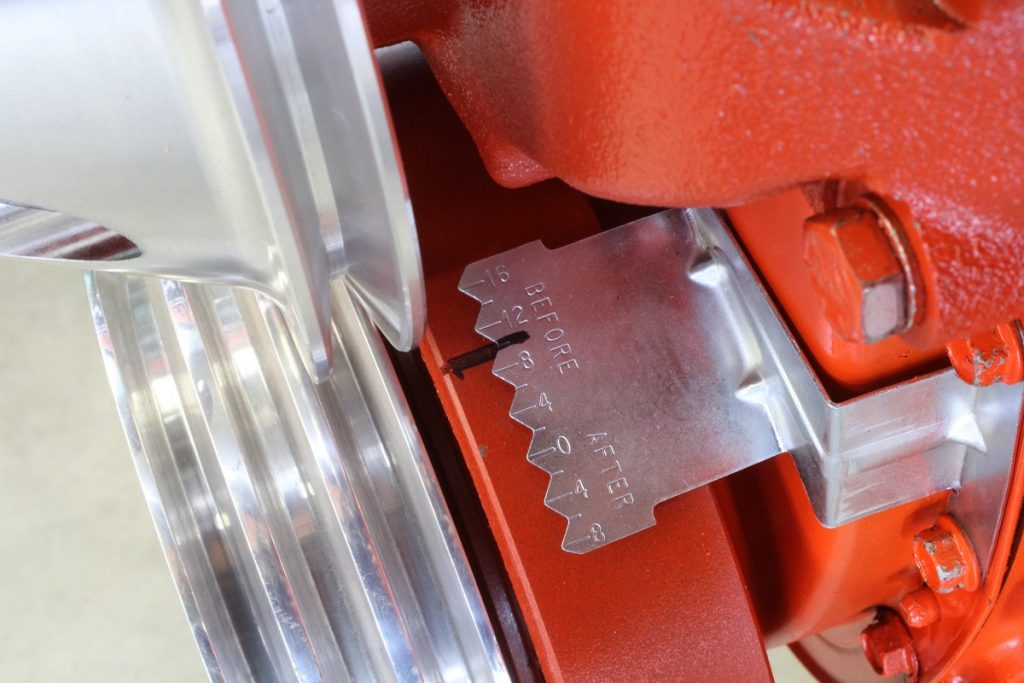
Most engines use a timing tab that is welded or bolted to the front timing chain cover. The tab will offer several hash marks indicating the number of degrees of timing before top dead center (BTDC). These tabs can also display timing after top dead center (ATDC). Sometimes the tab will be marked with a ‘B’ for before and ‘A’ for after. A does not mean advanced — in fact, ‘After’ is the exact opposite. So be aware of this.
If you want to set initial timing at something more than 10 or 12 degrees indicated on the tab using a traditional timing light, this becomes a guessing game. Plus, you may also want to know what the total mechanical advance is and at what rpm it occurs. This can be done with a degreed balancer, but these are expensive.
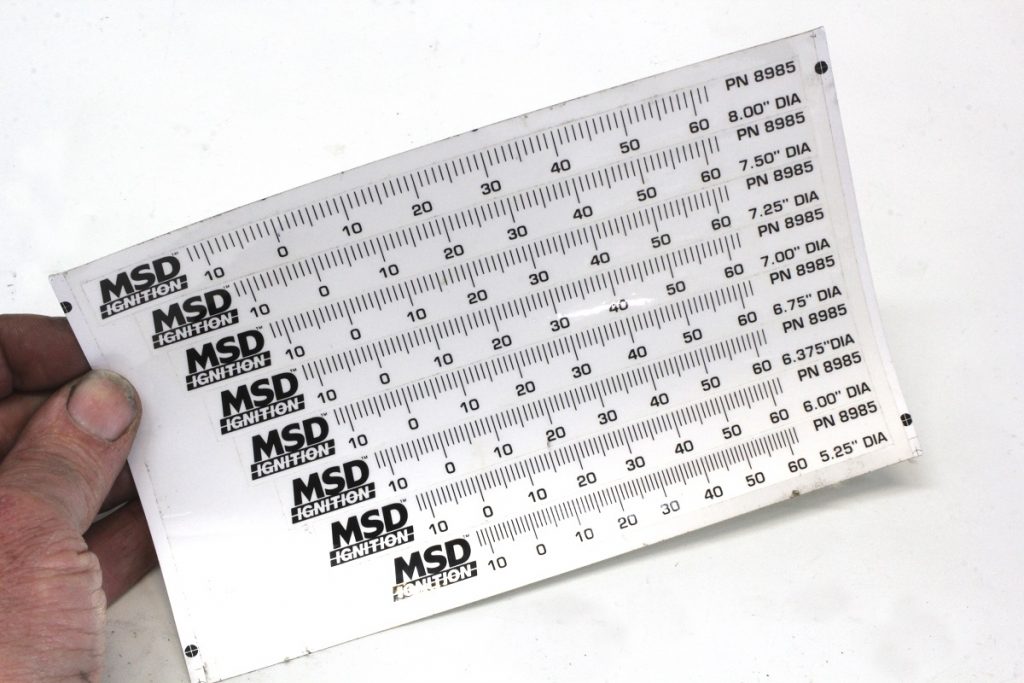
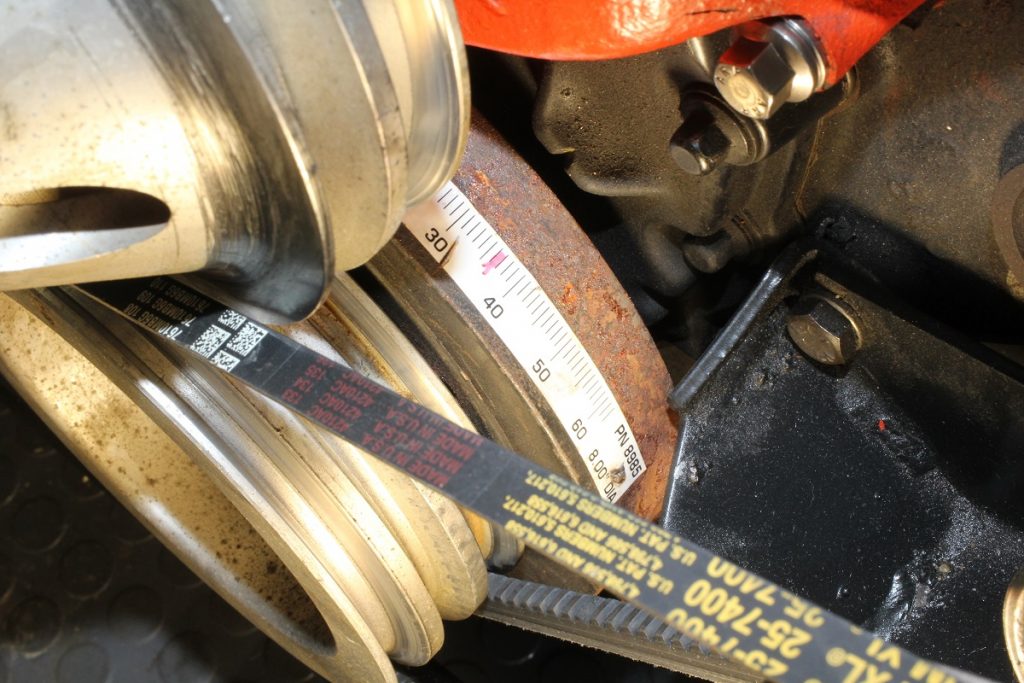
MSD offers a series of adhesive tapes for each popular balancer diameter which are accurate enough to use in lieu of a dial-back light. All you do is line up the zero mark on the timing tab with the hash mark on the timing tape to determine the timing.
As an aside, if you are in a position where you are in immediate need of a timing tape but one is not available, you can make one using a length of masking tape, a straightedge, and a dial caliper.
For example an 8-inch balancer circumference is Pi x diameter or 8 x 3.1417 = 25.12 inches.
To create two-degree marks would be 25.12 divided by 180 = 0.1396 — round that off to 0.140. Make a mark every 0.140–inch from the zero mark and you have your own backyard timing tape. Just line up the zero mark on the tape with the zero mark on the balancer and remember which way advanced timing will be positioned on the balancer so you don’t put it on backward indicating retarded timing.
A dial-back light saves all this effort. These lights are great for working on multiple engines that do not have degreed balancers or timing tapes. Most all dial-back lights are now electronic but there are a few that still employ an analog dial for the more traditional hot rodders.
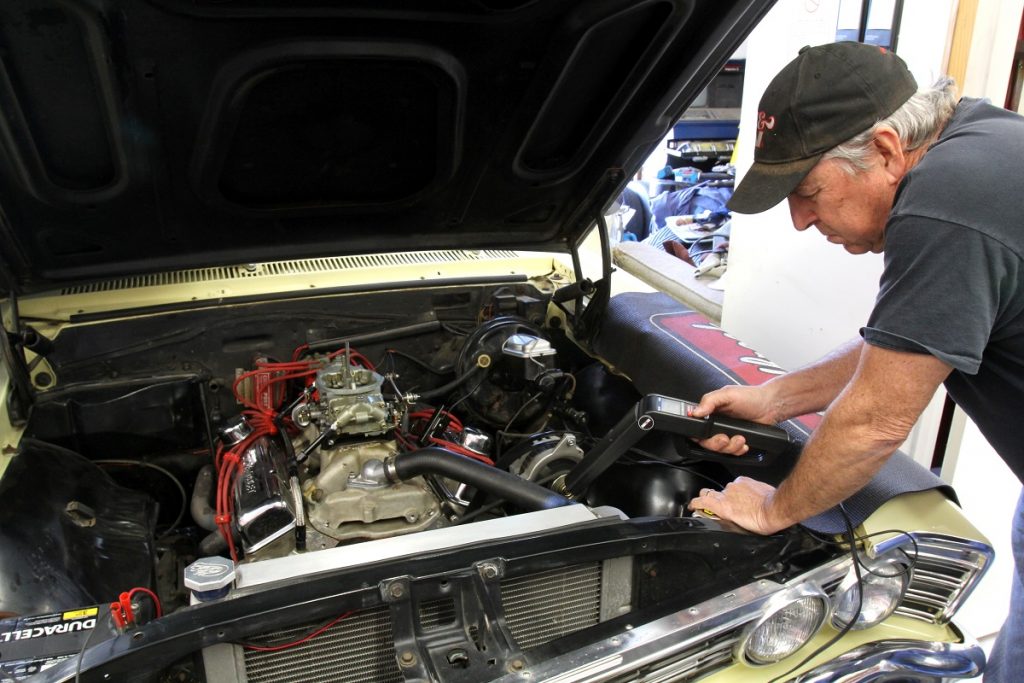
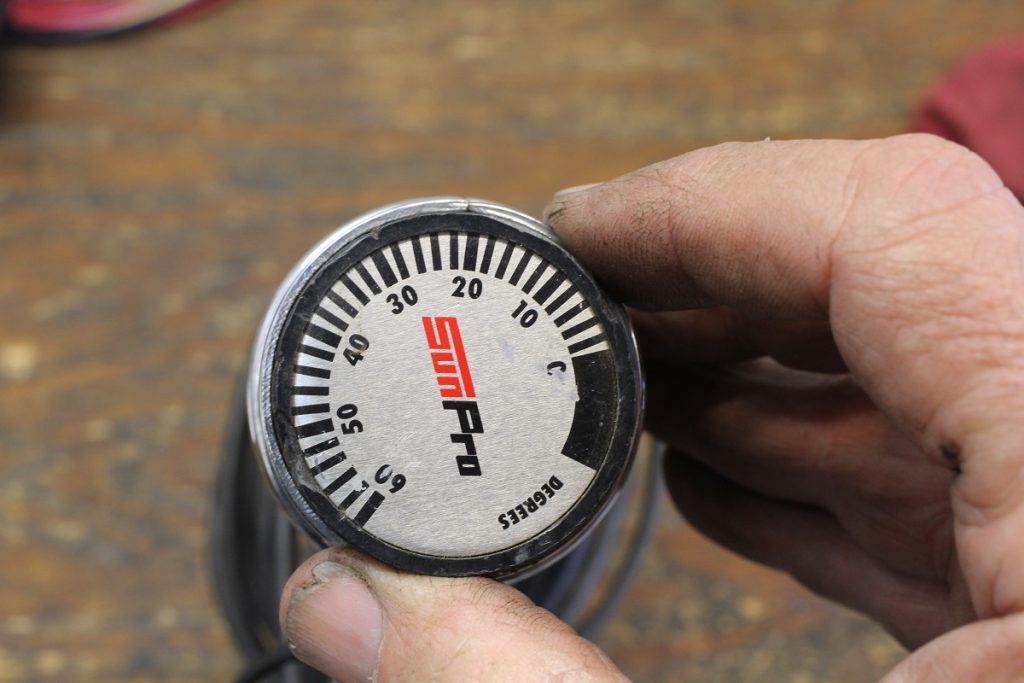
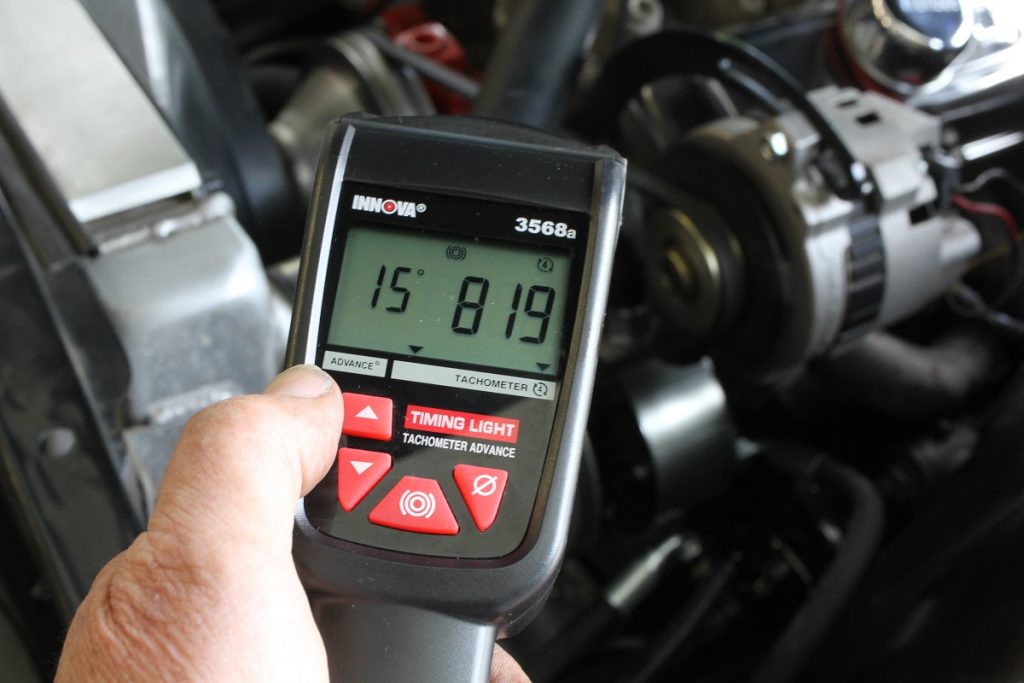
The one we’re using for this discussion is an Innova electronic dial-back light. It connects just like any other light and uses buttons to advance or retard timing. The digital display on our light will indicate amount of timing and engine rpm. The tach is a great feature that is also useful for setting idle speed. The pro version will also display battery voltage.
Dial-back lights operate by delaying the light flash by the number of degrees indicated by the dial or on the digital display.
Let’s say the engine requires 15 degrees of initial timing at idle. With the engine running, merely press the advance button on the Innova light to advance the timing until the zero mark on the harmonic balancer lines up with the zero mark on the timing tab. The amount of timing displayed on the light is the initial timing.
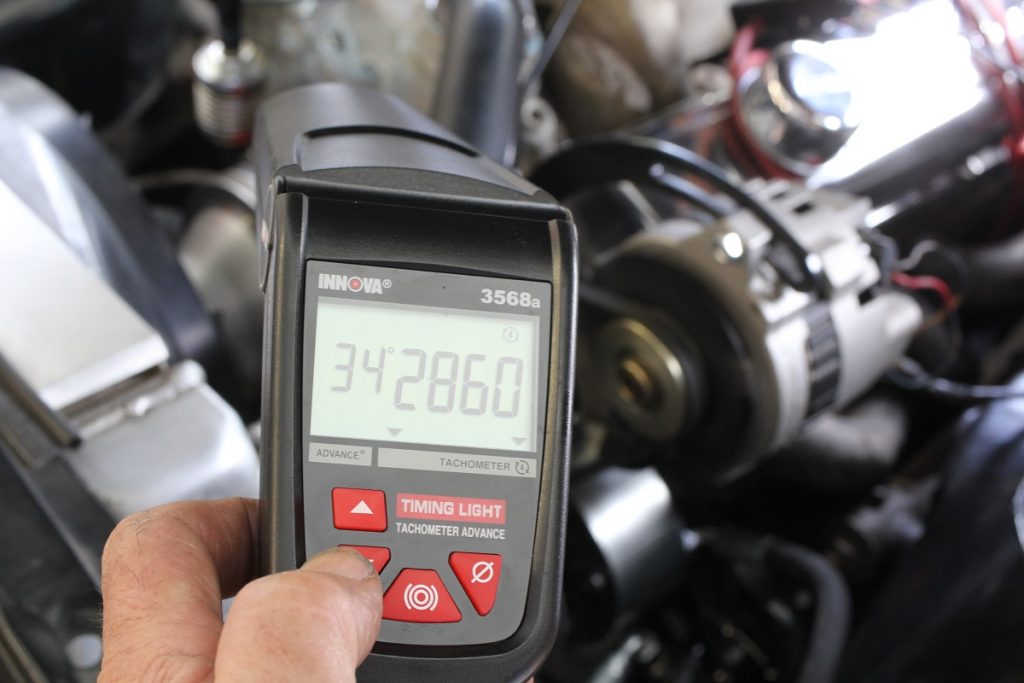
Next, if you want to check total mechanical advance, first unplug the vacuum advance canister from the carburetor. This will prevent vacuum advance from affecting the mechanical advance reading. Make sure the transmission is in Park if an automatic or Neutral if a manual transmission and the wheels are chocked. Rev the engine carefully to achieve the rpm where the timing stops advancing. Push the advance button on the dial-back light (or turn the dial) until the zero mark on the balancer lines up with the zero mark on the timing tab. You will see a number ranging from 32 to 40 degrees, which would be the total of initial plus the mechanical advance.
There are a couple of more sophisticated ways to use a timing light for more advanced ignition timing tuning, but we’ll save those for another time.
If you’re just getting started on working with older engines, a timing light is one of the first items that should be part of your basic tool collection.
[…] It’s a sign of the times when late model engines with distributorless ignition systems (DIS) no longer require the services of the ubiquitous timing light. But for the remainder of […] Read full article at http://www.onallcylinders.com […]
I am a reminder so I know a lot of this stuff.
BUT this article was a very good idea, for the young generation whith computerised cars. Maybe and hopefully, they some day meet and buy one old “real” car.
Regards
I’m an “Old Timer” and still use a timing light especially if I put a new timing chain set up ( chain gears etc) Then your 100% on. As far as the marks on the harmonic Balancer?,Bring the Engine to TDC,Mark the balancer,Start the Engine,Zero in on that mark, Turn the Distributor until the Engine evens out, take a picture with cell phone mark that position and your done.Ive seen all different ways from all types of mechanics some good:some bad! This always worked for me. THAT’S OLD SCHOOL.
Was that an “old school” cell phone ? LOL
[…] How to use a dial back timing light: https://www.onallcylinders.com/2020/07/10/how-to-use-a-dial-back-timing-light-2/ […]
[…] engine in the car is relatively easy with a dial-back timing light. We did a story on how to use a dial-back timing light as part of this Basics series that might be helpful to […]
Aamazing and well put together ……….
Alex at Motor trend
Thanks for the information
Great Instructions. Some other info would be causes of Innacurate timing issues on older cars. Like the shifting of a balancer on its rubber divider affecting timing mark accuracy,possible timing chain stretch on high mileage engines affecting cam timing and getting peak performance by recurving distributor timing advance .
Hi Jeff, I enjoyed your article. I just today received my second (replacement) Innova 3568a timing light. I’m trying to set the timing on an Austin Healey 3000 which has the battery in the trunk. Since the cables don’t reach the trunk, I’m connecting the red ‘+’ cable to the battery side of the starter solenoid and black ‘-‘ to a good ground. I am unable to employ the advance features with the light behaving just like a standard timing light. Tach works fine. I can rig extensions to the trunk if necessary. Any idea why my connections might effect advance functions? Car is negative ground. Innova tech support couldn’t explain.