Dropping a distributor into the engine is a time-honored procedure that has been around since the first engines coughed their way to life more than 100 years ago.
With the latest generation of distributor-less engines, this tribal knowledge has slipped from its “must-know” status. But if you are working on an older engine with a distributor, this is essential information.
The process is easy and it will take longer to read about than to actually perform the task, so let’s get started.
***
Story Summary Overview:
- A distributor is what sends electricity from the high voltage ignition coil to the spark plugs
- It plays an integral role in ignition timing, as it “tells” each spark plug precisely when to fire
- A distributor is adjustable, and an incorrect adjustment can cause significant engine problems
- Poor fuel economy, detonation, and general poor engine performance are all signs of incorrect timing
- Generally speaking, setting ignition timing isn’t difficult, though it does require some specialty tools
- This article shows you how to adjust the distributor to set ignition timing for a typical small block Chevy V8, though the process is similar for many other engine types.
***
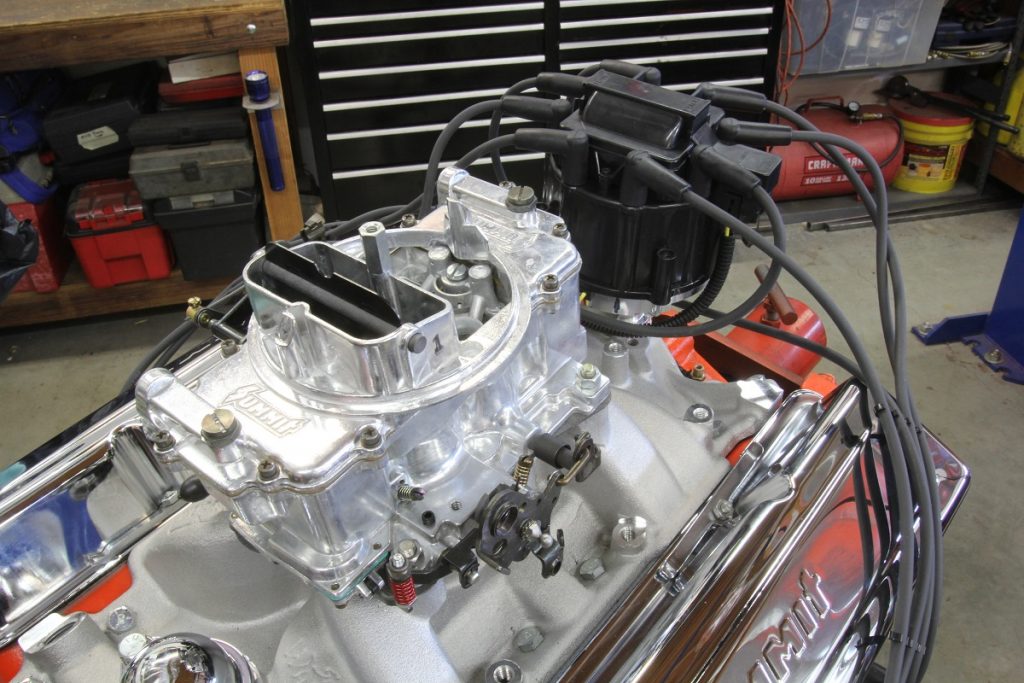
For this procedure, we will use a small-block Chevy because that was the closest engine for the photos. However, the process we’ll describe is exactly the same for any four-stroke engine.
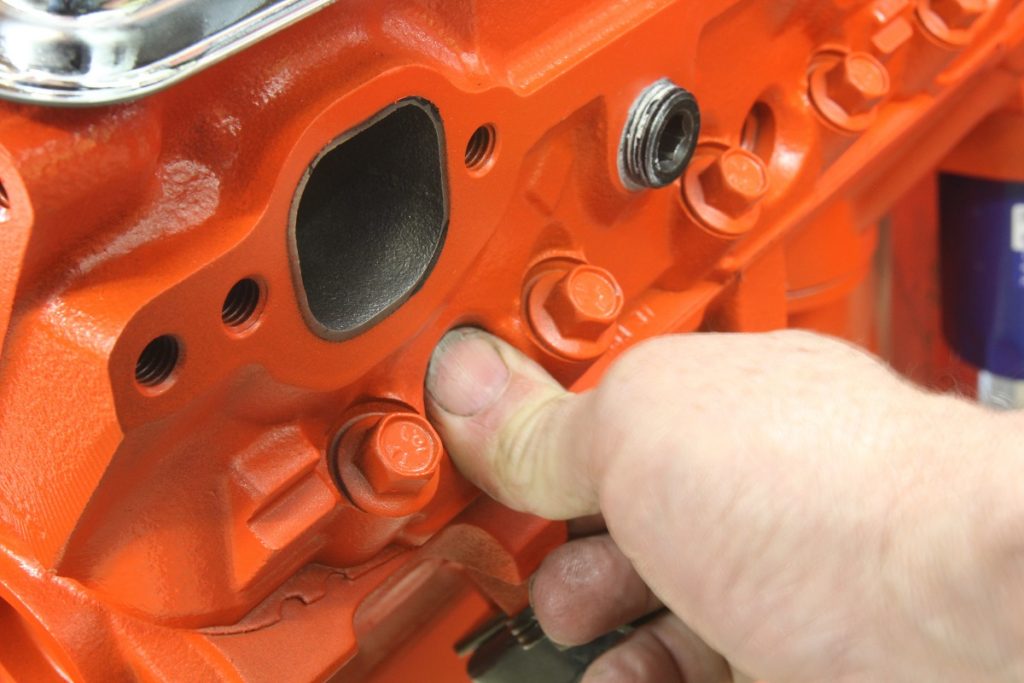
Our particular engine is a brand new Chevrolet Goodwrench crate engine on which we’ve already installed a new intake manifold.
In our case, the spark plugs were all removed, which makes turning the engine over very easy. If the engine is in the car, you can use the starter motor to crank the engine.
With the Number One spark plug removed, place your thumb over the hole while turning the engine. Once you feel compression building, look for the zero mark on the harmonic balancer to approach the timing tag. We prefer to set the initial timing for most engines at 10 degrees Before Top Dead Center (BTDC).
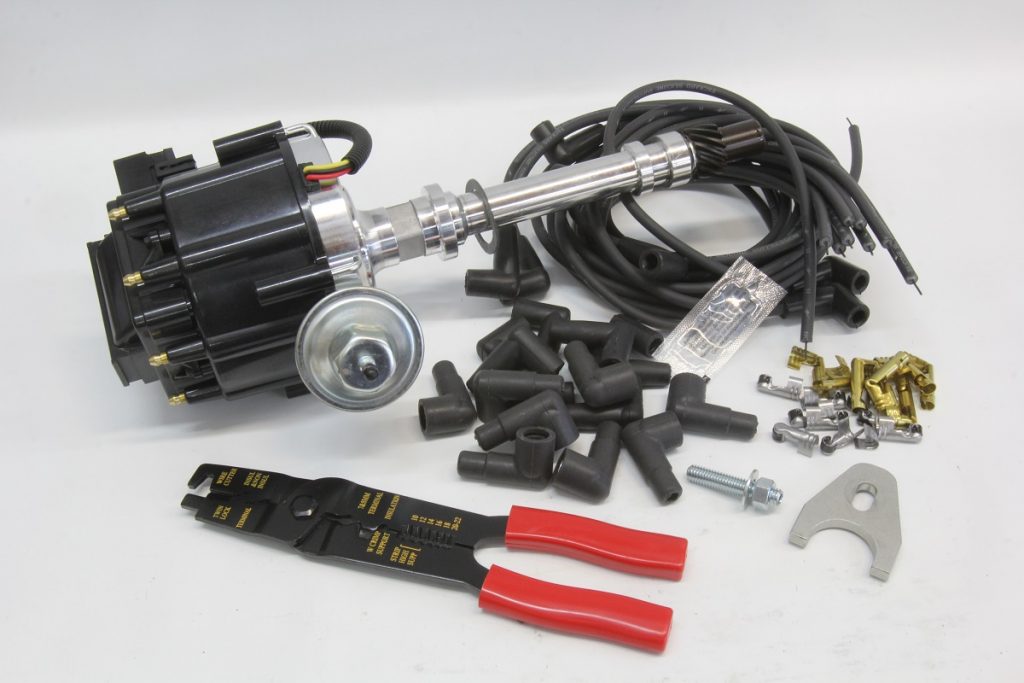
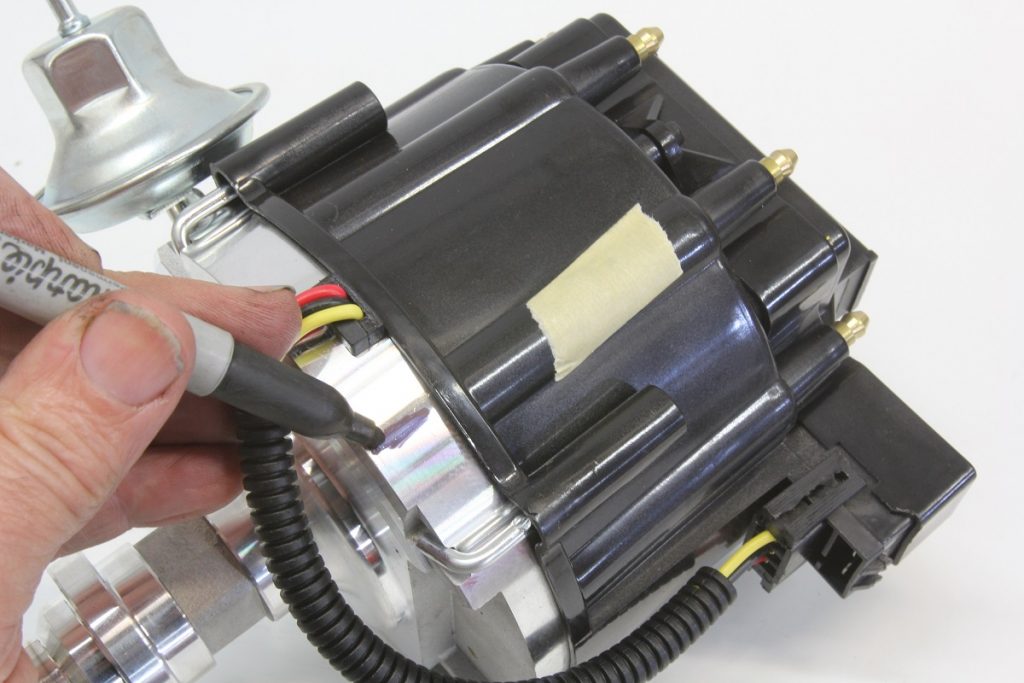
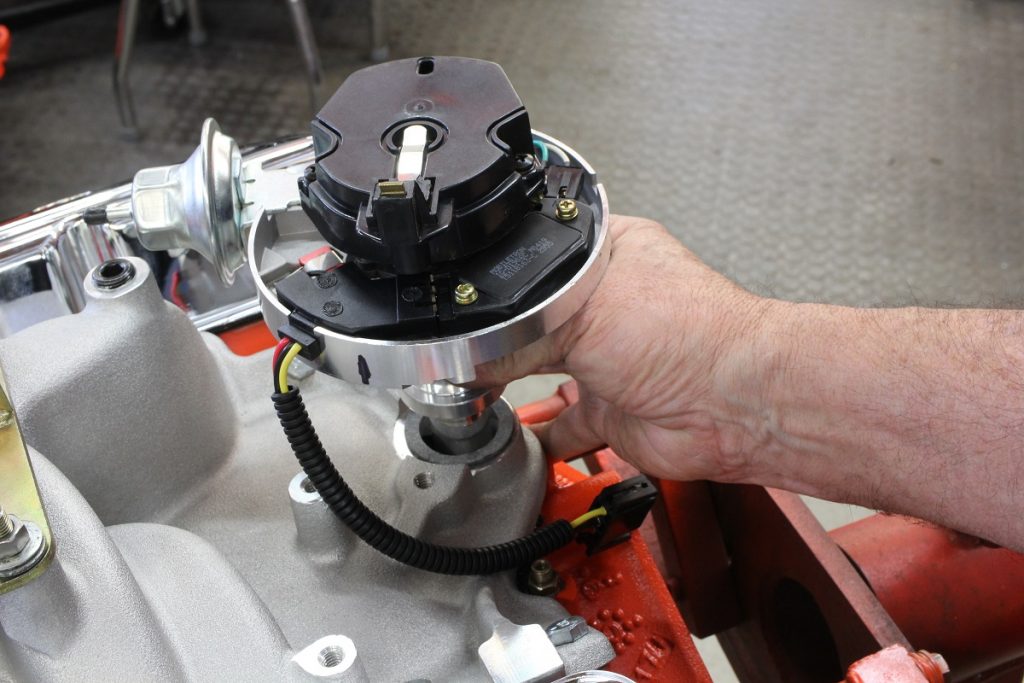
With that set, remove the cap from the distributor. We’re using a Summit HEI distributor. We use a black Sharpie to place a mark on the distributor body where we want the Number One spark plug wire to be located. This can be placed anywhere you like, but if you are a Chevrolet traditionalist, this ends up roughly at about the 5 o’clock position on the distributor as you are looking at it from the front of the engine.
Also place a mark on the corresponding Number One plug wire position on the distributor cap. We used a piece of masking tape.
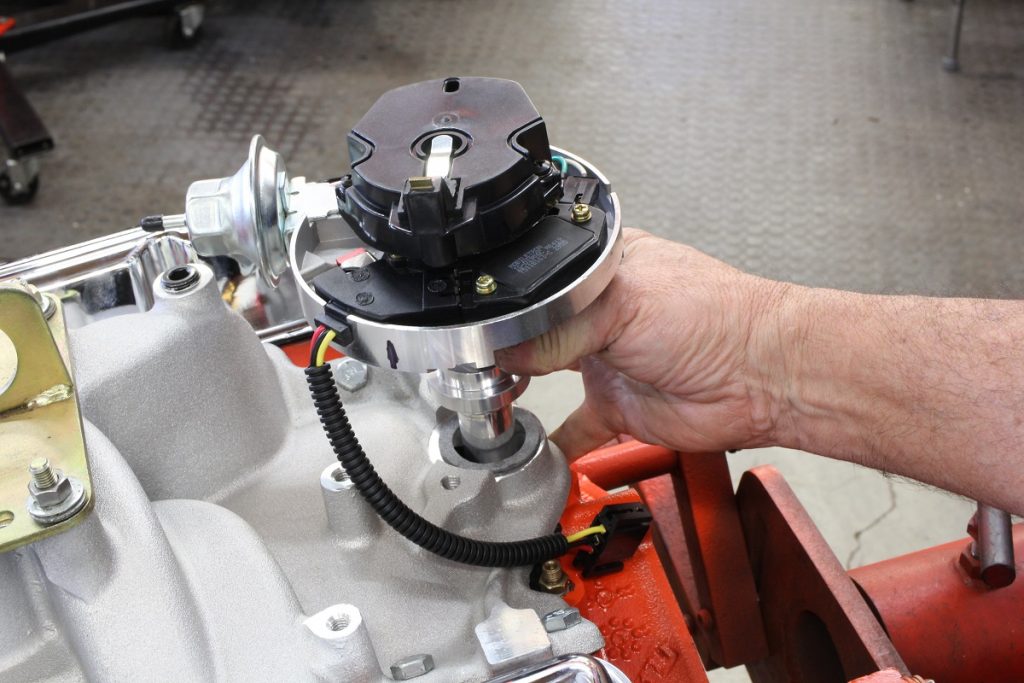
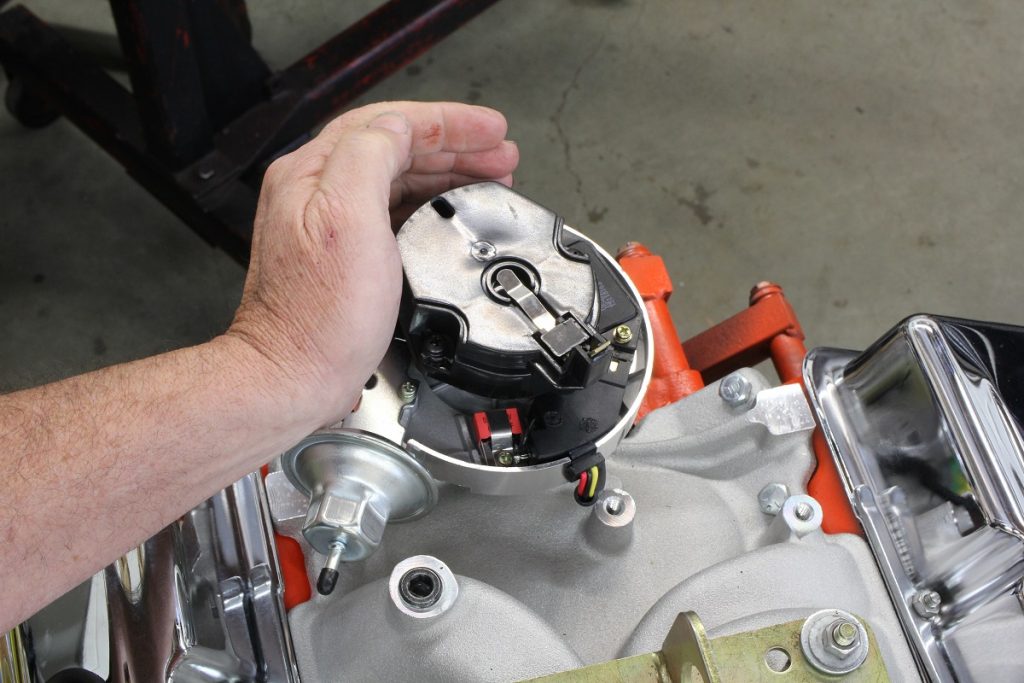
With these marks in place, drop the distributor with the gasket into the distributor hole with the rotor pointing near the Number One mark.
As the distributor drive gear engages the teeth on the camshaft, this will move the rotor slightly clockwise. Position the distributor so that the vacuum advance canister is located on the passenger side of the engine pointing roughly forward. If the rotor is not pointed close to the Number One mark, pull the distributor and re-position the rotor until it comes close.
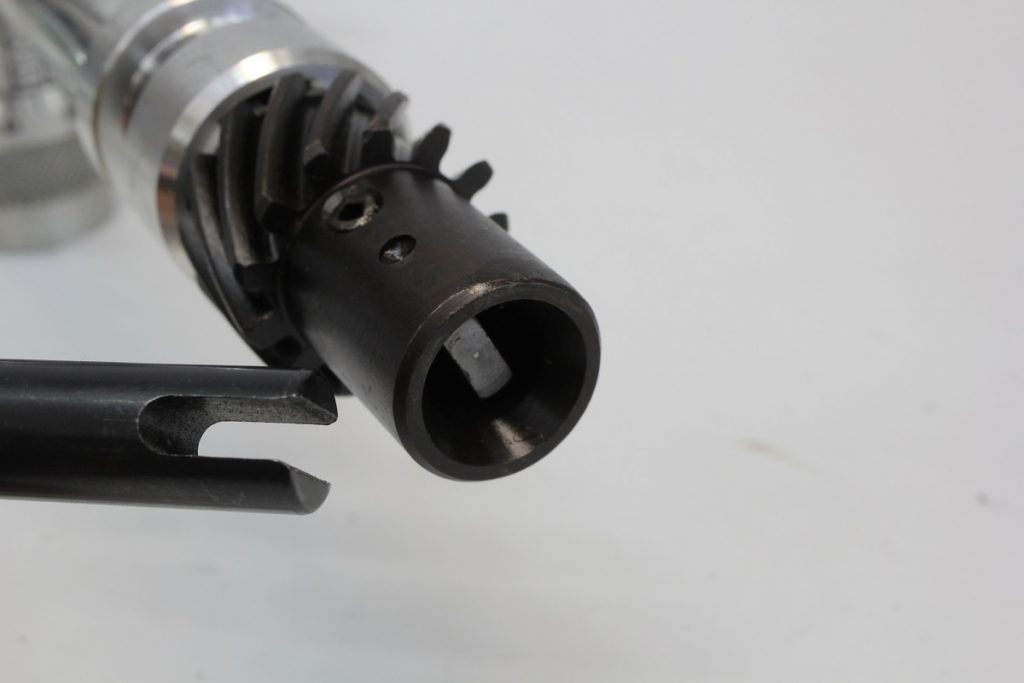
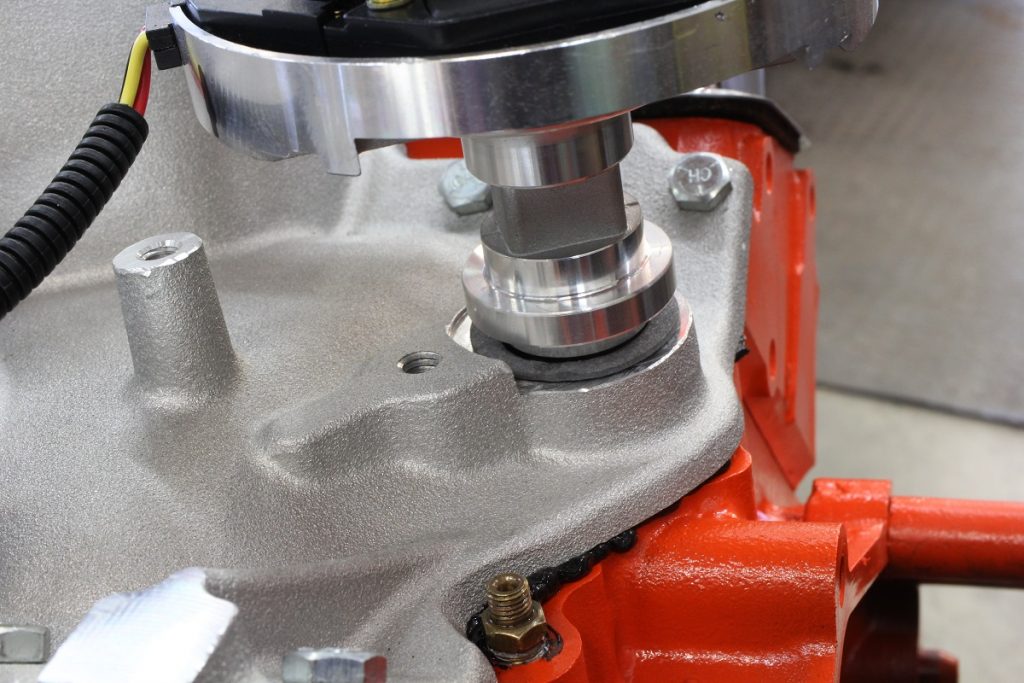
Unless you are very lucky, the distributor will not drop fully into the intake manifold. In almost all cases, the distributor will sit about 3/8 inch off of the manifold. This is normal and is caused by the oil pump drive not engaged into the drive tang in the distributor. You can remove the distributor and try to re-orient the oil pump drive slot with a long straight screwdriver, but this is somewhat difficult.
It’s easier to leave the distributor in place and then bump the engine with the starter motor while placing very light downward pressure on the distributor body. After a half rotation or so, the distributor will drop in place. Now we will need to crank the engine until again it is located at 10 degrees BTDC. With this accomplished, check to ensure the rotor is pointed near the mark on the distributor body for Number One spark plug wire. If the rotor is not pointing at Number One, you could twist the distributor body, but if it is off by more than one tooth, this will require turning the distributor body too far. Instead, you will need to remove the distributor and repeat the previous process as the rotor is not in the correct position.
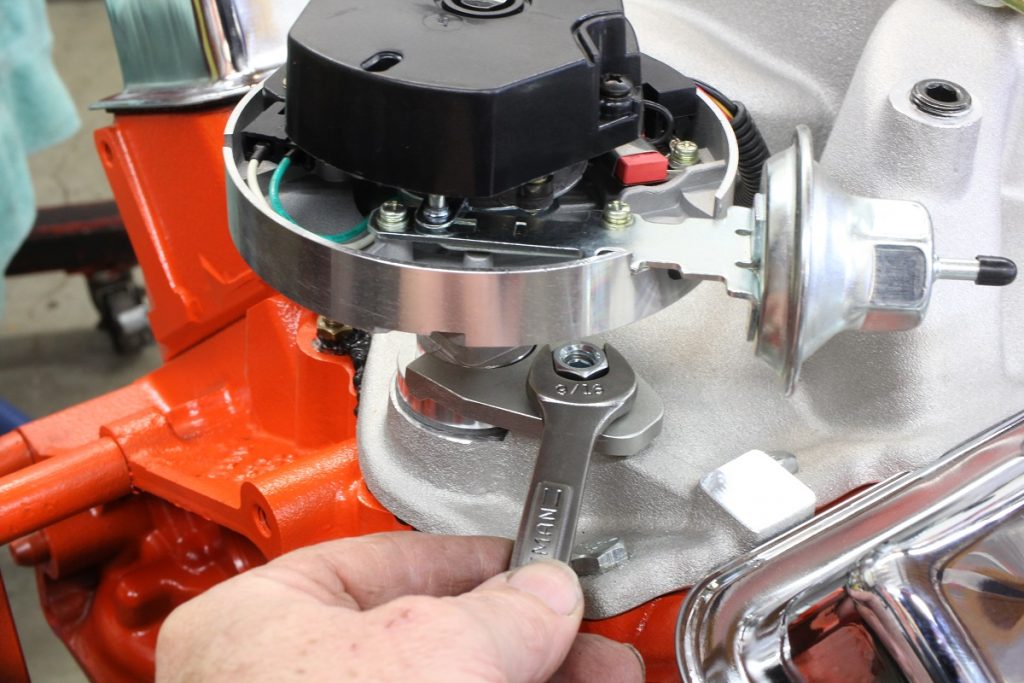
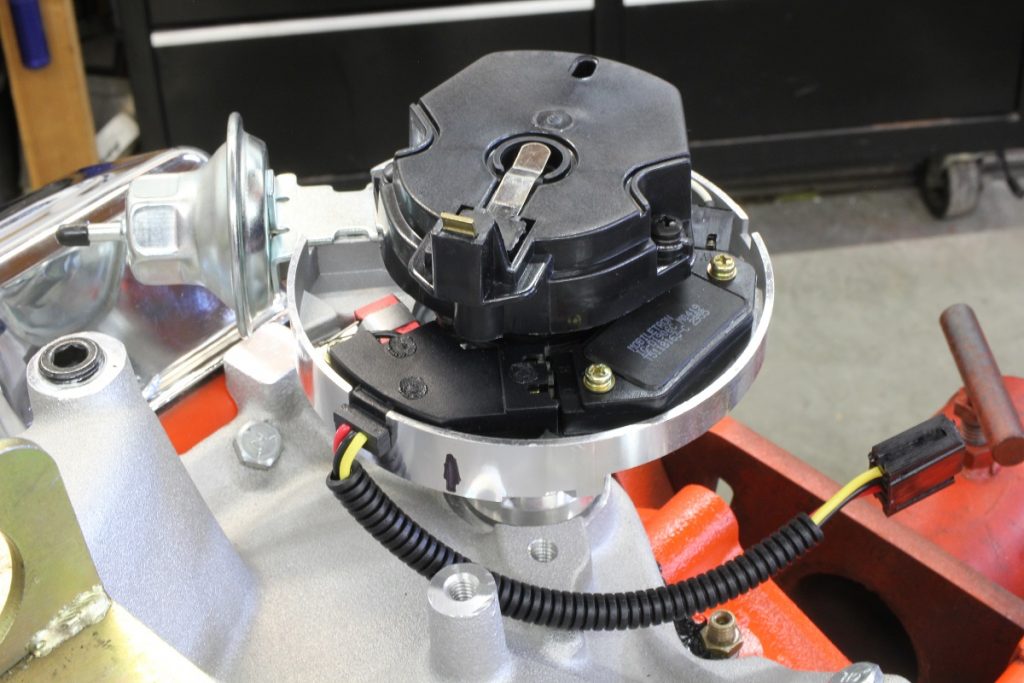
With the rotor close to the Number One position, twist the distributor body until the rotor points directly at the Number One spark plug terminal position mark on the distributor. Now install the distributor cap and cinch the distributor body down to the intake manifold with the hold-down clamp. Tighten this lightly—we may have to move it again when the engine starts.
With the distributor in place, install all of the spark plugs. Now we can connect the spark plug wires to the distributor.
Let’s assume that you’ve never done this before. Before we can place the wires in the distributor cap, the first thing we need to know is which direction the rotor turns.
For our Chevrolet engine you’ll note that the rotor turns clockwise. Small- and big-block Fords turn counter-clockwise.
…
Tech Tip: One quick way to tell on any vacuum advance style distributor is to lay your hand parallel with the vacuum advance canister and then curl your fingers inward toward the middle of the distributor body. The direction your fingers point is the direction of rotor movement. On a Chevy distributor, you would use your left hand, and on a Ford you’ll use your right hand. This is a cool little trick you can use on any distributor to determine its rotation.
…
On small- and big-block Chevy engines, the Number One cylinder is always the driver’s side front.
Chevrolet also numbers its cylinders with odd numbers on the left (driver) side and even cylinders on the right.
The left side is numbered 1-3-5-7, and the right side is 2-4-6-8.
Ford does it differently. Ford numbers its cylinders with Number One on the right front, numbered on the right side 1-2-3-4 with the left side 5-6-7-8. Other manufacturers number their cylinders differently, so you should check online if you’re not sure.
See OnAllCylinders’ firing order cheat sheet for installing the plug wires in the correct order.
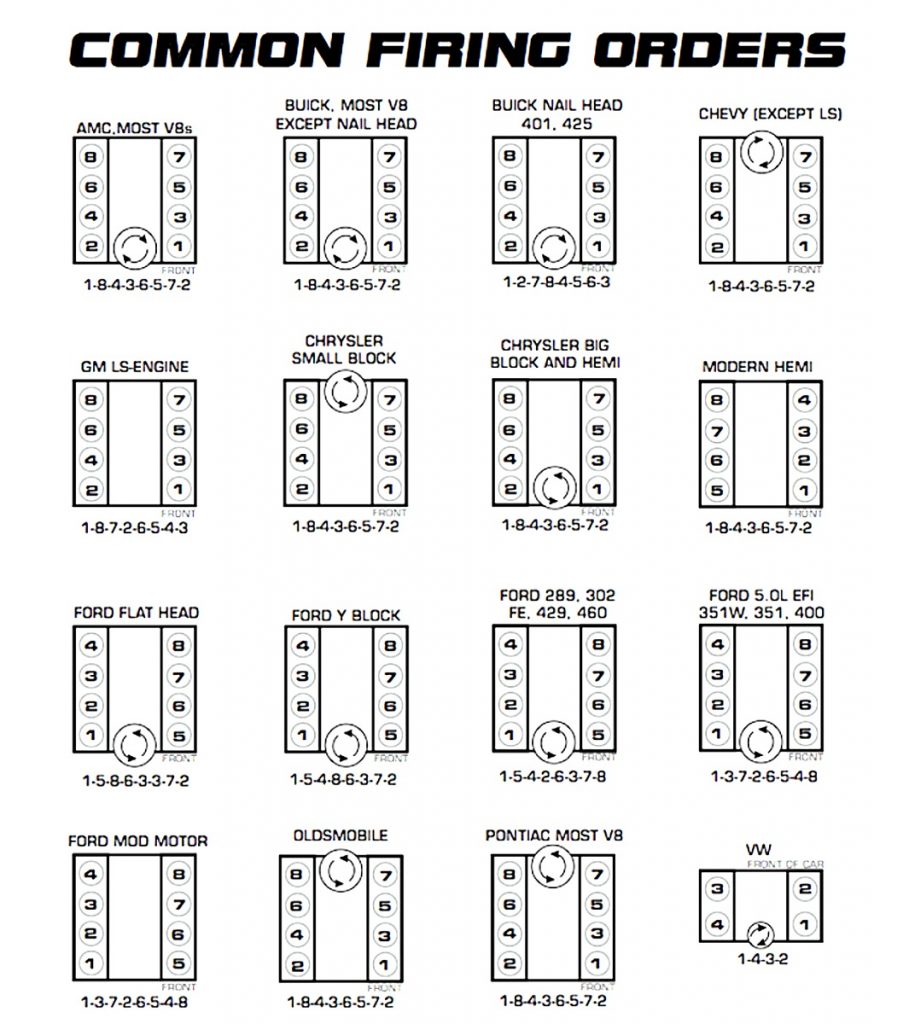
Our small-block Chevy firing order is 1-8-4-3-6-5-7-2, so that’s the order in which we will install the plug wires.
We started with Number One and worked our way around the distributor cap clockwise using a set of Summit spark plug wires. The best way to do this so you don’t get confused is to just follow the firing order installing each plug wire through the order.
Leave a little extra room with the spark plug wires to allow freedom of movement in the distributor. For Chevys, be careful to make sure 5 and 7 are installed correctly. If the wires are accidentally switched, the engine will not be happy.
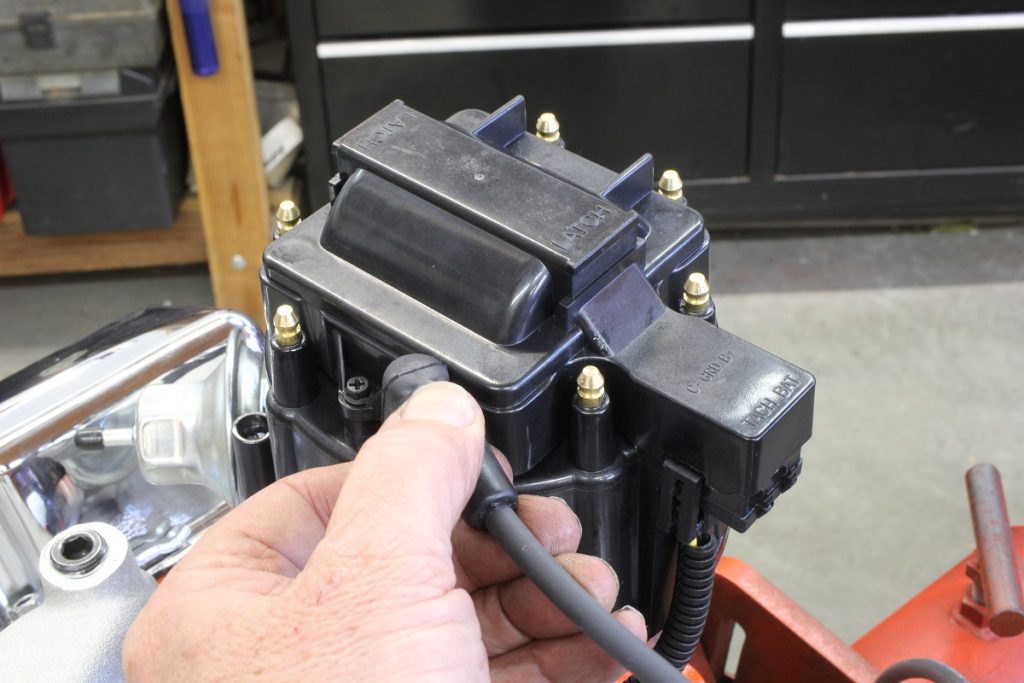
Before we try to start the engine, be sure the distributor is connected to switched power. With an HEI distributor, there is a three-wire inboard connector between the HEI module and the cap.
On the outboard side of this connector, there are two smaller individual connectors—one for power from the ignition switch (marked BATT) and the other for a tach. With those connections in place and the distributor, plugs, and wires connected, we’re almost ready to start the engine.
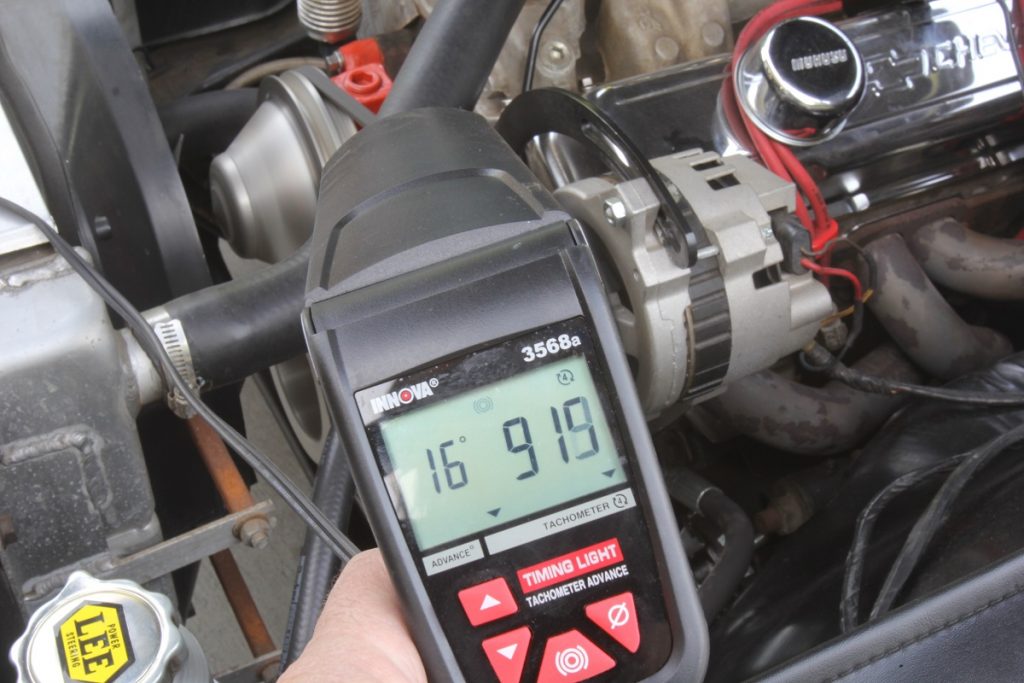
Connect a timing light to the Number One cylinder. Now we’re ready to fire the engine. Assuming the engine starts, make sure the engine is idling at proper idle speed and not on the fast-idle cam of the choke.
It’s important that the engine be idling at its warm-idle rpm. It’s likely that our static ignition timing at the crankshaft at idle may not be the desired 10 degrees BTDC.
If it must be changed, merely loosen the hold-down nut and adjust the distributor until the initial timing on the crankshaft is at the desired timing figure. Of course, you are free at this point to set the initial timing at its proper spec.
We will save the discussion about initial, mechanical, and vacuum advance for a subsequent story, but you now have the distributor set in place and the plug wires installed correctly and it’s entirely possible that the engine will run much better now with a properly timed ignition.

[…] Dropping a distributor into the engine is a time-honored procedure that has been around since the first engines coughed their way to life more than 100 years ago. With the […] Read full article at http://www.onallcylinders.com […]
What if my distributor was removed and not marked woth where number one was when pulled out. Truck ran before but needed new distributor due to other issues. How do I know if its 180 degrees out and how do I fix that? !992 chevy k1500 v8
Excellent instructions, I have been working on older cars awhile. Problem I do the exact steps u have indicated but each time the engine rotates the distributor goes out 180. Every time. I am thinking timing chain issue at this point. Any suggestions? Thank you.
U said nothing about when 2 hook up the vacuum advance
Nothing was said about hooking up the vacuum advance. He was setting initial timing. Pictures indicate the vacuum advance was capped off.
nice, this will come in handy when I put my AMC 360 back together, especially that firing order chart.
When approaching TDC on the compression stroke pressure will be felt in the spark plug hole. 180 out the air is being pushed out the exhaust valve and therefore the will not be the pressure there is on compression.
After replacing the distributor cap and pin, ICM, plugs, wires, coolant temp sensor, oil pressure switch, the motor runs fine in park. But acceleration up any incline, it looses power. Need the correct position of ICM wire plugs on distributor cap.
[…] not sure how to perform all these steps, we’ve written a complete step-by-step article on how to install a distributor and set timing here. With the distributor in place, we hooked up a set of spark plug wires and a new set of Autolite […]
Ford flat head firing order has a type-o
Yep, No.4 isn’t going to fire
Otherwise a great article thanks, with the advent of the LS, timing the dissy is going to become a lost art
Great article!!
[…] that the engine will start on the first couple of rotations. We’ve written a story that details how to install the distributor correctly the first time. The emphasis here is to avoid long cranking sessions on the starter motor that […]
I have and 1984 Chevy short box two tanks Texas truck and all
Thanks for helping me remember this procedure. I am about to fire my 350 up soon.
Great explanation of a complicated job !
[…] while installing a distributor and/or adjusting engine timing is a relatively easy and straightforward process, one step can be a little […]
thanks for the help .
going to buy a 350 that is said to be rebuilt..will use this info to check if timing mark aligns as i put my finger on number one hole ..ty
valuable information..thanks so much
valuable information.thanks so much
Thanks for your help you’ve given me a chance to work on this project of course I would be lost without you.
Is it the same setup for a tuned port intake
I can’t get this thing to fire and about to just dump gas on it and say buy buy.
Is this the correct part number for a 85 c4 distributor part # 84_1869 this is the one I am trying to use, and can’t get the car to fire off.
Very well-said ! Great instructions and I love it that you use correct grammar and spelling and oh, basic writing skills that seem to be missing from most any article on the internet today. What a refreshing and informative read. Thank you. I have replaced many distributors in my life but that was 40+ years ago, so I wanted a refresher course.
It appears that my number 1 is not the other side of the distributer cap on the compression stroke, but my motor is in a ski boat , the motor has always been running like this from the day my mechanic installed the short motor, i have had the dizzy checked electrically and having trouble re aligning the dizzy, can’t seem to get number 1 exactly where it was without back-firing
please help.
I realize that most people using this site are more interested in American iron, but the diagram showing the aircooled VW firing order is labeled incorrectly. Cylinders 1 and 2 are on the right side of the engine with #1 towards the front of the car (not towards the rear as the diagram shows).
Does a distributor #1 spark terminal have to point at the #1 cylinder? Can I rotate the #1 terminal 180 degrees offset as long as the firing order remains the same? The reason for this is that I have a dual quad, air cooled, Edelbrock intake manifold and an HEI distributor, if placed in the normal position I can not rotate the distributor to adjust the timing, but if rotated 180 degrees from normal position I can use the distributor and have ample timing adjustment room. Can I do this??
Yes. This is known as “clocking”. The actual position of number one on the distributor is irrelevant as long as the rotor button is pointing to number one wire when the number one cylinder is at TDC on the compression stroke. FYI, somewhere around 1960, GM changed the clocking position on their 283 SB motor to account for just a similar situation with the vacuum advance on the side of the distributor.
Just went through this process last week. Wish I had seen this beforehand. Very simple straightforward instructions. Also nice to reinforce I did it correctly.
Good job Jeff!
The article was informative, but the diagram for the Buick nailhead is totally wrong. The distributor is located at the rear and #1 cylinder is on the front right side of the engine. The firing order is 1-2-7-8-4-5-6-3 as indicated. The right side cylinder order is 1-3-5-7 and the left 2-4-6-8. Thank you for the otherwise excellent article.
Nice grammar and concise writing! Having done this fifteen times in the last two weeks, but neglecting to remove plugs and also not spinning engine to TDC a second time to check rotor is aligned on #1. The reason I had to check it 15 times is because the well I’m the block that dizzy goes into is wowed out, and dizzy has a lot of side play when installed, and won’t time correctly. This is a Ford 5.0
.Any suggestions on how to eliminate that side play? A shim, maybe?
Wish you could give the same info on a 1985 TFI ford truck sbf 5.0