Decades ago when I was a kid, I needed to remove the front springs on my car.
A previous owner had “adjusted” the ride height by heating the coils with a torch. My plan was to replace them with a new set of trick springs from Moroso.
Since I didn’t have a large tool collection, I borrowed what turned out to be a well-used compressor from a guy who worked at the local machine shop. That spring compressor came complete with shaky threads.
During the remove-and-replace process, I effectively launched a “loaded” coil spring right out of the garage door, down the driveway, all the way out onto the street when those shaky threads failed.
That little explosion changed my perspective on spring compressors (and their use) forever.
Of course, you can’t argue with the fact a well-rolled thread can exhibit considerable clamping force. That was evident to me when the threads bombed!
But to keep those threads happy, it’s a really (I mean, really) good idea to keep them well lubricated with oil during use. Today, I use AN hose assembly oil on the threads because it’s heavy and tenacious.
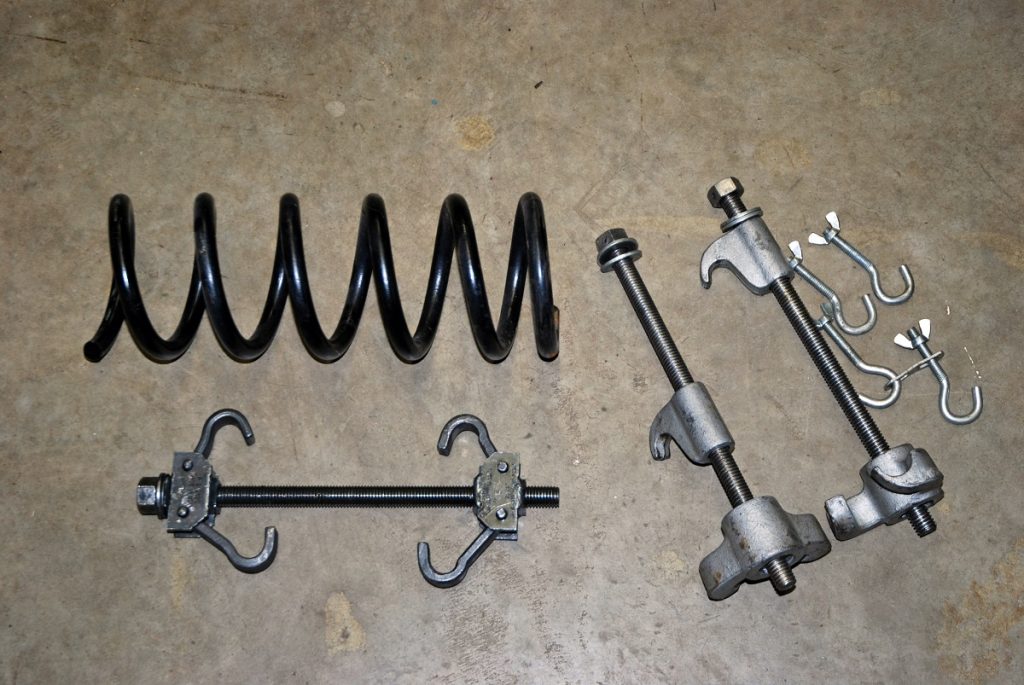
The type of coil spring compressor you should use depends upon which type of front suspension your car has.
Some spring compressors hook up inside of the coil spring (conventional spring) while others hook up on the outside of the spring (MacPherson strut or similar arrangements).
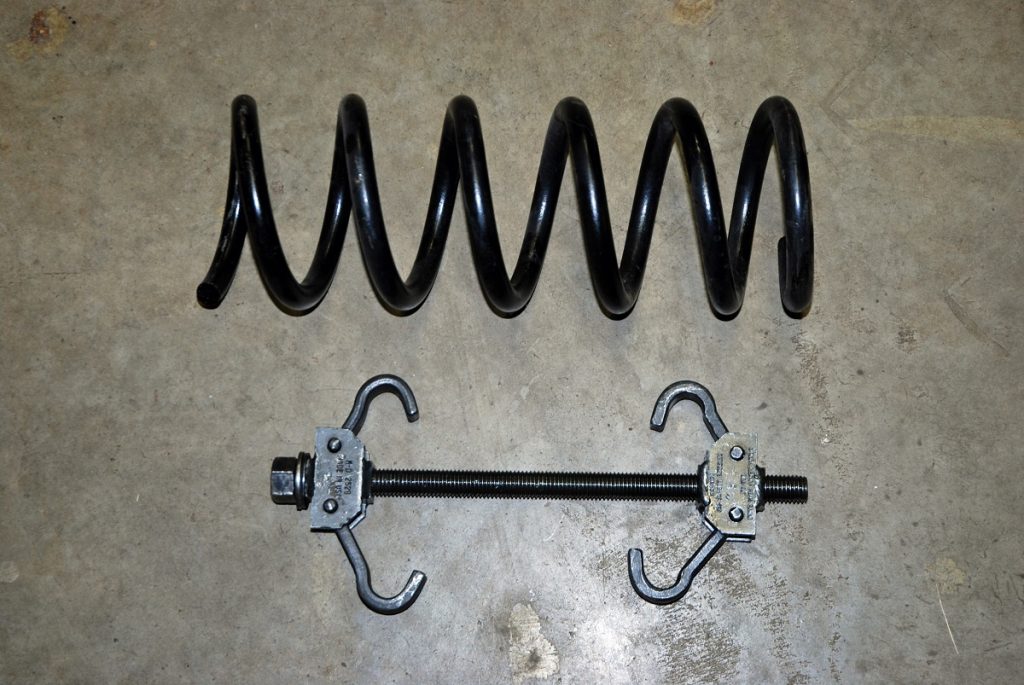
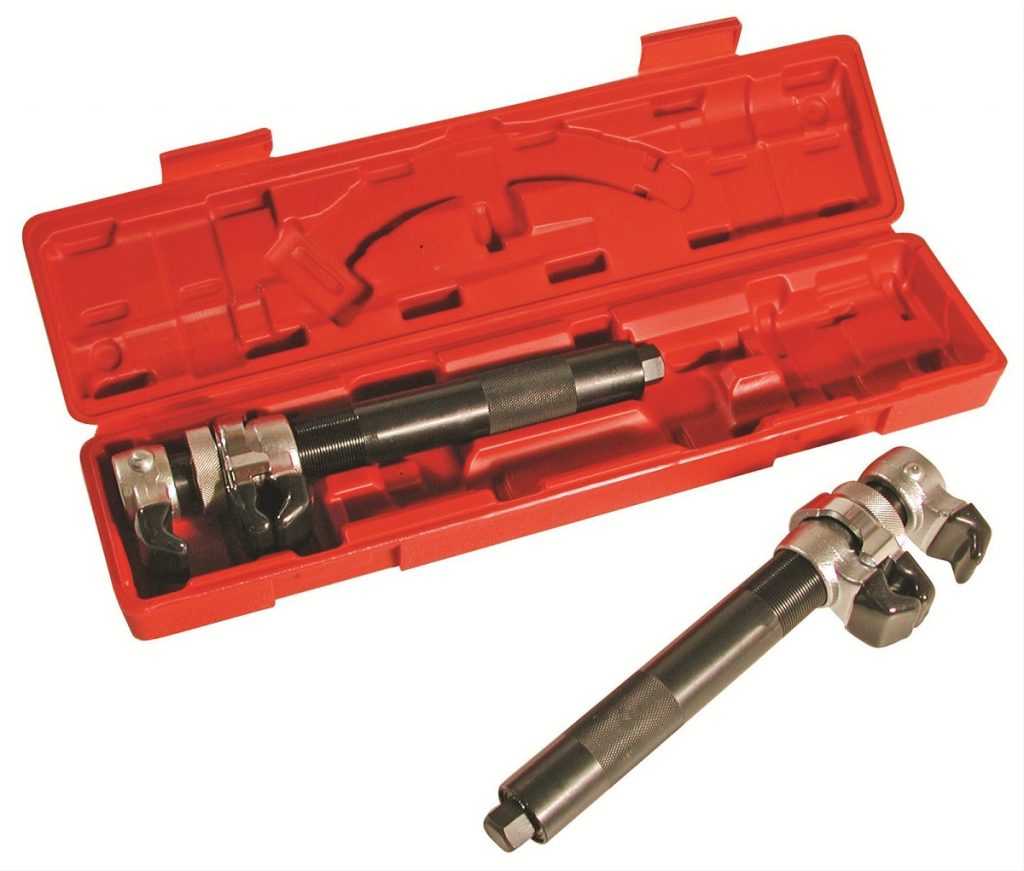
The type that work inside a spring are usually based upon a single large-diameter threaded rod (often, an ACME thread). They have one threaded hook setup and one that floats adjacent to the nut on the threaded rod. This allows you to draw a spring together out of the car and insert it. Or, in the case of many vintage cars, you can use only the threaded segment.
In operation, you run the threaded shaft through the top shock absorber opening and assemble the threaded hook segment on the spring coils. Then it’s a matter of tightening up the compressor by turning the nut on the end (which is conveniently located upstairs at the shock absorber opening in the frame). While it’s tempting to tighten the works with a ½-inch impact wrench, the spring compressor manufacturers recommend that you do not.
That’s because doing so can kill the threads. Here it will only take a very few minutes to crank a ½-inch ratchet to get the spring compressed (this is when the heavy oil on the threads helps immensely).
As a caveat here, the layout of the inner spring compressor will influence how it’s used.
Some are too bulky to allow for the simple operation mentioned above.
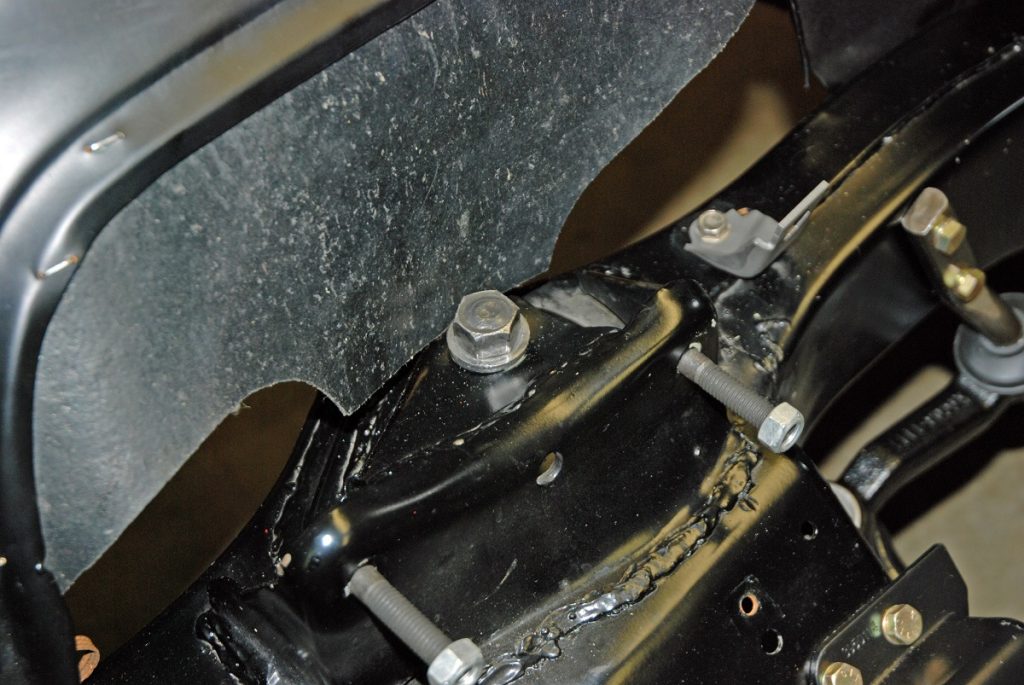
In some cars, the shock opening is too small to allow the spring compressor rod to fit through, in which case you’ll have to access the spring through the bottom. This means you have to reach it through the shock absorber hole in the lower control arm.
It’s not as easy as accessing it through the top, but it still works. This process will take longer plus you’ll need more height (lift the car higher) to allow room for the compressor rod to fit through the lower A-arm.
Because of my past experience, I always make it a practice to either place a floor jack under the lower A-arm while a spring is installed or removed, eliminating the possibility of a spring flying out if the compressor threads give up the ghost with the ball joints released. Another option is to use a chain or cargo tie-down wrapped around the spring to secure it while you’re working the spring compressor.
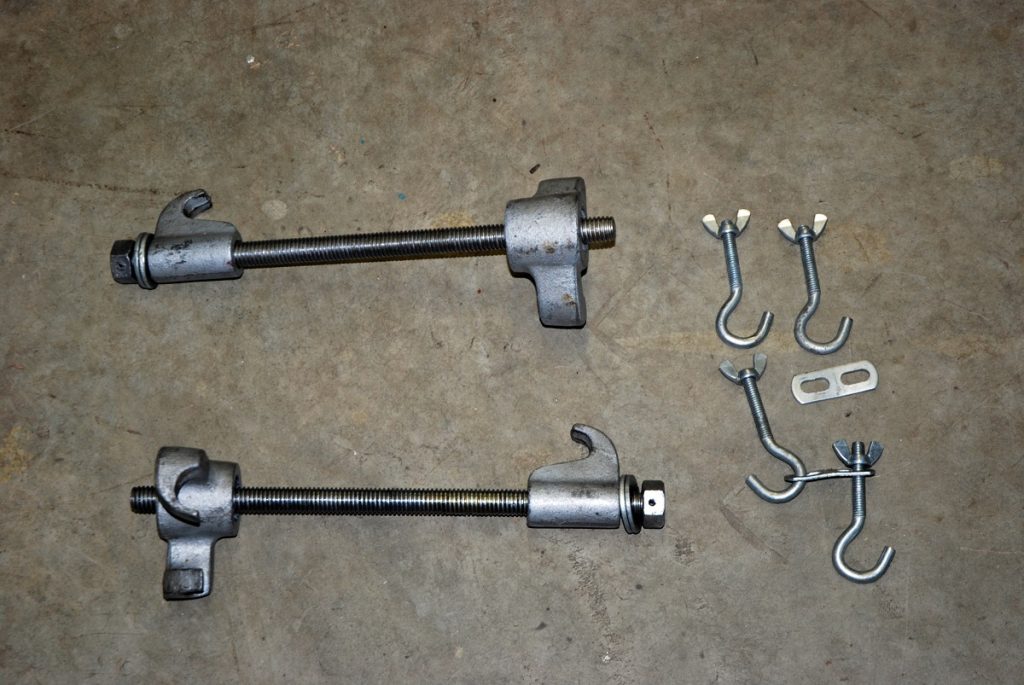
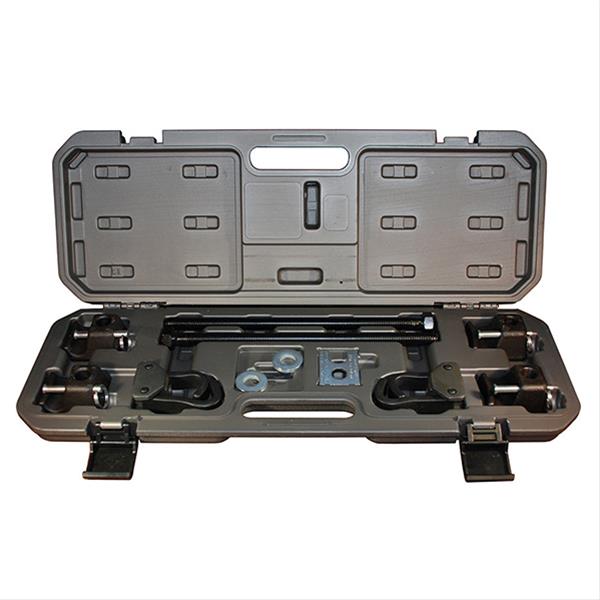
With a MacPherson strut, it’s not possible to compress the springs from the inside. That’s why the spring compressors for struts are typically based upon dual large-diameter threaded rods along with two hooks on each side.
As expected, you place the assembly on each side of the strut and simultaneously tighten both rods (or a little at a time on each side). This in turn allows the strut coil to compress. (Note: a cargo strap or chain is a good safety measure here too!)
Summit Racing offers a wide range of spring compressors to fit almost any budget or any application—right on up to the huge springs fitted to some off-road pickup trucks. In the accompanying photos we’ll show you several examples. Check them out.
And please, don’t try to use a spring compressor with shaky threads. It’s not worth it!
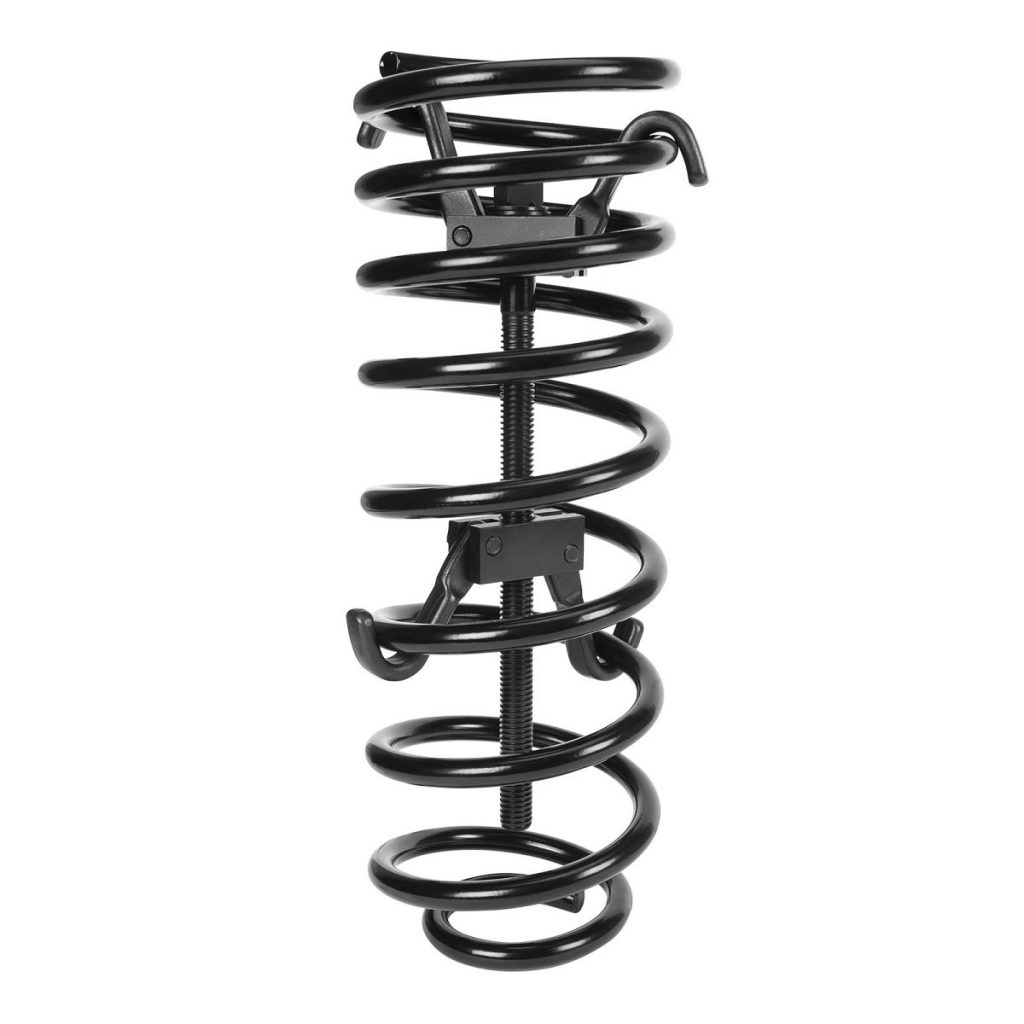
This is an SPC spring compressor (part number 40260) sold by Summit Racing. This tool is perfect for installing big heavy and long springs often fitted to off road trucks. It has a whopping 6,000-pound maximum working load rating, so it can handle pretty much anything. (Image/Summit Racing)
Great article. I never heard of put lubricant on the threads but it makes a lot of since.
[…] Intro to suspension coil spring compressor tools: https://www.onallcylinders.com/2019/09/20/tech-tips-intro-to-suspension-coil-spring-compressor-tools… […]
You made my day! I was trying to compress the front spring of my 67 Chevelle using the two hooks. No way to work this way. I inserted the theaded rod thru the shock absorber hole, like you said, and after a little effort the threaded hook grabbed the coil. Thanks from Brazil.
please send the full design and fabrication of this tool
I’ve been told that you should never use the Macpherson strut type on a conventional spring. I’m looking to buy a compressor for my 67 nova rebuild, but want to consider future versatility. What are your thoughts?
Hey Jon, the trouble some folks have with using the Macpherson type spring compressor on a traditional spring is that it is bulky when installed, and the threaded shafts can extend out far beyond the spring end, which often makes them difficult to use when you’re working in and around the vehicle’s wheel well.
…
Macpherson compressors are really handy though, and work great when assembling coilovers off the vehicle. I used a set in an earlier article. Click here then scroll down to se them installed on a spring and you’ll see what I mean.